Category: Fish Recipes

  • Couscous with Shrimp: Easy Mediterranean Recipe to Savor Today!

    Couscous with Shrimp: Easy Mediterranean Recipe to Savor Today!

    Couscous with Shrimp: Easy Mediterranean Recipe to Savor Today!

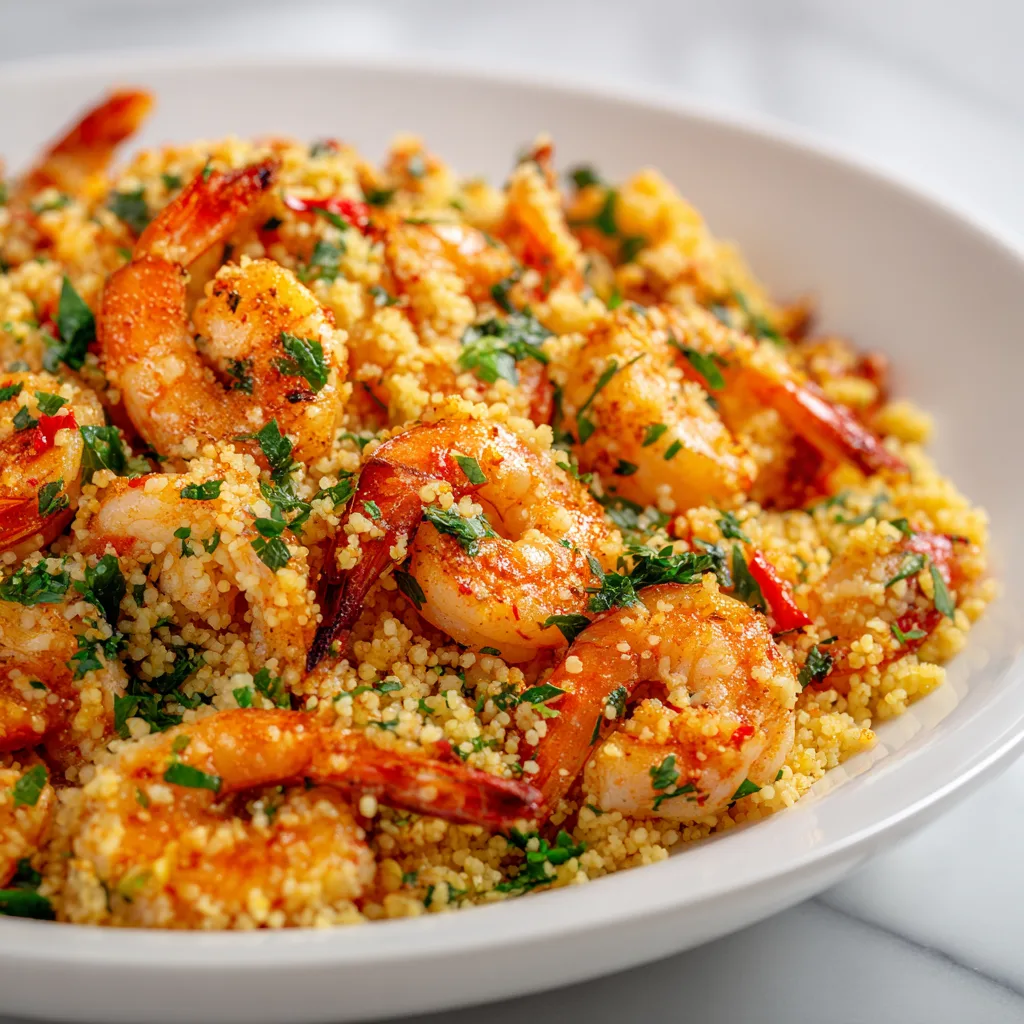
    Couscous with Shrimp Easy Mediterranean Recipe has completely transformed my weeknight dinner routine! The first time I made this dish, the aroma of garlic and lemon zest dancing through my kitchen transported me straight to a seaside café in Greece. There’s something magical about how quickly this meal comes together—fluffy couscous soaking up Mediterranean flavors while plump shrimp turn perfectly pink. When life gets hectic, I turn to this recipe for a taste of coastal bliss without the plane ticket. Trust me, your kitchen will become your favorite vacation spot with this simple yet impressive dish.

    Recipe

    Why You’ll Love This Couscous with Shrimp Easy Mediterranean Recipe

    Quick & Nutritious Weeknight Solution

    This dish is a true time-saving miracle that doesn’t sacrifice nutrition or flavor. On those evenings when I’m exhausted but still craving something special, I can have this on the table in under 25 minutes. The protein-packed shrimp pairs beautifully with vitamin-rich vegetables, creating a balanced meal that feels indulgent. I love how the pearl couscous creates a satisfying texture that soaks up the zesty lemon-herb dressing. The Mediterranean flavor profile delivers big impact with minimal effort—exactly what we all need after a long day!

    Impressive Yet Effortless Entertaining Option

    Whenever I host impromptu gatherings, this Couscous with Shrimp Easy Mediterranean Recipe is my secret weapon. There’s something about the vibrant colors and enticing aromas that makes guests think I spent hours in the kitchen. The truth? I was probably relaxing with a glass of wine while it came together! Serve it family-style in a beautiful bowl with fresh herbs scattered on top, and watch everyone’s eyes widen. What I appreciate most is how this dish feels special enough for company but doesn’t leave me stressed or chained to the stove.

    Essential Tips & Tricks

    Perfecting Your Shrimp Technique

    The key to this recipe is not overcooking the shrimp—they should be just pink and tender. I learned this the hard way after serving rubber-like shrimp to my in-laws (mortifying!). Now I always pat them dry before cooking to ensure a beautiful sear rather than steaming them. Watch carefully—they need only 1-2 minutes per side depending on size. For maximum flavor, marinate them briefly in olive oil, minced garlic, and lemon zest while you prep other ingredients. This small step makes a remarkable difference in the final dish’s taste profile.

    Elevating Your Couscous Game

    Pearl couscous (also called Israeli couscous) creates the most luxurious texture in this Mediterranean dish. The trick is toasting it in a dry pan for 2-3 minutes before adding liquid—this develops a nutty flavor that elevates the entire meal. Always use broth instead of water for cooking; I prefer vegetable or seafood broth for this recipe. For perfect fluffy results, avoid lifting the lid while it simmers. Once cooked, fluff with a fork and let it rest uncovered for 5 minutes to allow excess moisture to evaporate.

    Serving Ideas & Creative Variations

    Mediterranean-Inspired Accompaniments

    Create a complete feast by serving this dish with simple sides that complement its coastal flavors. A classic Greek salad with cucumber, tomato, feta, and kalamata olives makes the perfect fresh counterpoint. Warm pita bread brushed with olive oil and sprinkled with za’atar is ideal for scooping up every last morsel. For a showstopping presentation, serve in a large, shallow bowl garnished with lemon wedges, fresh mint, and a drizzle of high-quality olive oil. The bright colors and enticing aromas will transport everyone to a seaside taverna!

    Seasonal Adaptations Worth Trying

    This recipe functions beautifully as a flexible template that evolves with the seasons. In summer, I fold in blistered cherry tomatoes and fresh corn kernels for sweet pops of flavor. Fall calls for roasted butternut squash cubes and toasted pine nuts. For a heartier winter version, try adding sautéed kale and crispy chickpeas for extra texture. Vegetarian guests? Simply omit the shrimp and add grilled halloumi cheese or white beans. The Mediterranean flavor profile works wonderfully with whatever produce is at its peak.

    Storage & Troubleshooting Guide

    Proper Storage for Maximum Freshness

    For optimal results, store any leftover Couscous with Shrimp Easy Mediterranean Recipe in an airtight container in the refrigerator for up to two days. The flavors actually develop beautifully overnight, making this dish excellent for meal prep. However, I recommend keeping the fresh herbs separate and adding them just before serving to maintain their bright flavor and color. When reheating, add a small splash of broth or water to revive the couscous, and warm gently over medium-low heat. Microwaving works in a pinch, but the stovetop method preserves the texture better.

    Solving Common Recipe Challenges

    If your couscous turns out too mushy, you likely added too much liquid or overcooked it. The perfect ratio is 1:1.25 couscous to liquid. Timing matters too—pearl couscous needs exactly 8-10 minutes to reach ideal tenderness. For shrimp that seems tough or rubbery, remember that residual heat continues cooking them even after removal from the pan. I always transfer them to a plate slightly before they look done. Bland flavor? Don’t skimp on the fresh herbs, lemon zest, or quality olive oil—these ingredients are essential for authentic Mediterranean character.

    Frequently Asked Questions

    Can I make this Couscous with Shrimp Easy Mediterranean Recipe ahead of time?

    Yes! Prepare the couscous and vegetables up to a day ahead, but cook the shrimp just before serving. Reheat the couscous mixture gently with a splash of broth, then add the freshly cooked shrimp and herbs.

    What’s the best shrimp size to use?

    Medium shrimp (31-35 count per pound) work best. They cook quickly while remaining tender and pair perfectly with the pearl couscous texture. Large shrimp can also work but may need an extra minute of cooking time.

    Can I substitute regular couscous for pearl couscous?

    Absolutely. Regular couscous cooks even faster (5 minutes) but has a different texture. Simply pour boiling broth over it, cover, and let stand until absorbed. The flavor profile remains deliciously Mediterranean.

    Is this recipe suitable for meal prep?

    Yes! Store in portioned containers for up to 2 days. The flavors actually improve overnight, though the texture is best the first day. Reheat gently with a splash of water.

    What wine pairs well with this Mediterranean shrimp dish?

    A crisp, dry white wine complements this dish beautifully. Try a Greek Assyrtiko, Spanish Albariño, or French Sauvignon Blanc for authentic Mediterranean pairing that enhances the citrus and herb notes.

    Final Thoughts

    This Couscous with Shrimp Easy Mediterranean Recipe has become my culinary passport to sun-soaked coastal flavors, no matter the season. What I love most is how it bridges the gap between everyday cooking and special occasions with its perfect balance of simplicity and sophistication. The bright flavors, beautiful colors, and satisfying textures create a meal that nourishes both body and spirit. Whether you’re cooking for yourself after a long day or hosting friends for dinner, this Mediterranean-inspired dish delivers warmth, comfort, and a touch of coastal magic to your table.

    For more Mediterranean-inspired recipes, check out my Pinterest collection!
  • Crispy Parmesan Crusted Air Fryer Tilapia: Irresistibly Easy!

    Crispy Parmesan Crusted Air Fryer Tilapia: Irresistibly Easy!

    Crispy Parmesan Crusted Air Fryer Tilapia: Irresistibly Easy!

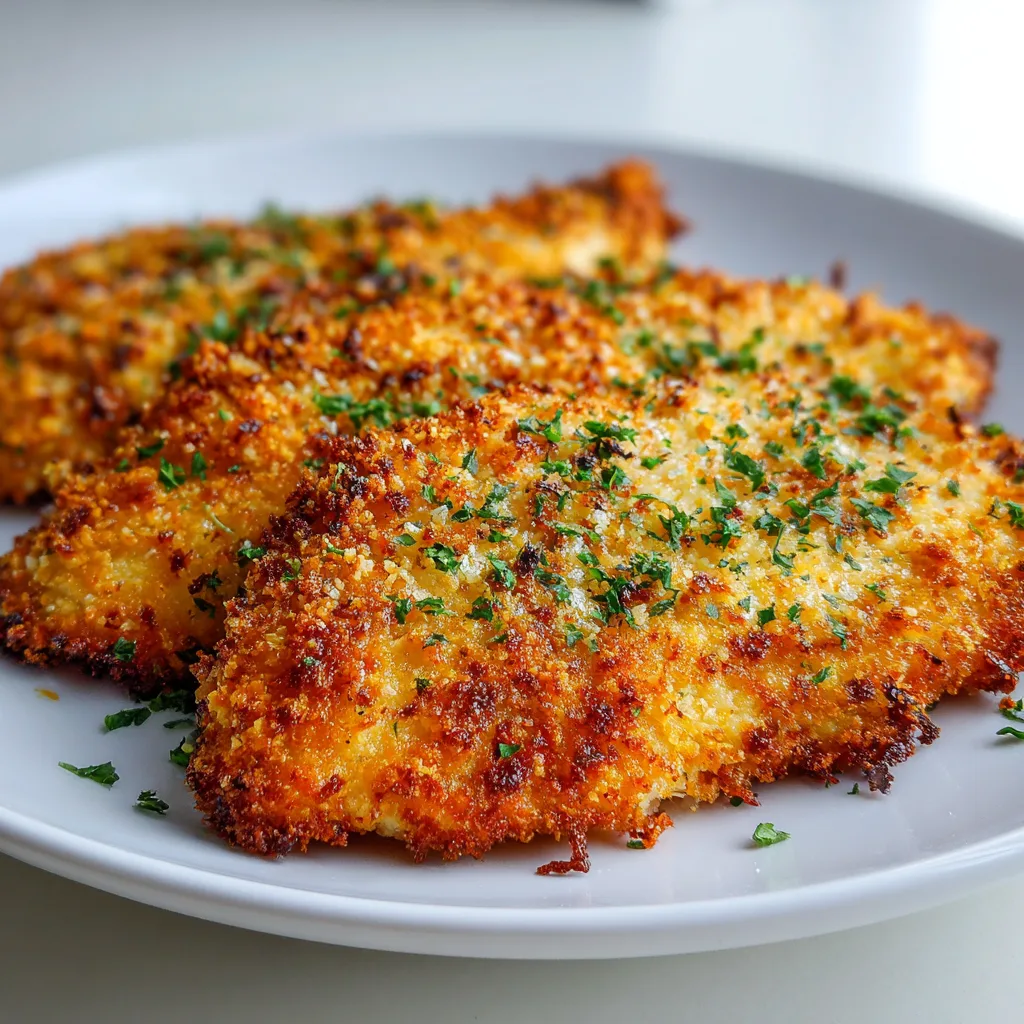
    Crispy Parmesan Crusted Air Fryer Tilapia transforms ordinary fish into a restaurant-worthy meal in just minutes! I discovered this game-changing recipe last summer when I was craving something light yet satisfying for dinner. The air fryer creates that perfect golden crust while keeping the fish tender and moist inside. There’s something magical about the combination of savory Parmesan, herbs, and the delicate flavor of tilapia. When my kitchen fills with that irresistible aroma of herbs and cheese, I know I’m about to enjoy a meal that feels indulgent but is actually quite wholesome. Let me show you how to make this family favorite that never disappoints!

    Recipe

    Why You’ll Love This Crispy Parmesan Crusted Air Fryer Tilapia

    Perfect Texture in Minutes

    The air fryer magic truly shines with this recipe! Traditional breaded fish often leaves you with either a soggy bottom or an overcooked interior. Not here! The circulating hot air creates a uniformly crispy exterior while maintaining that tender, flaky fish inside. I still remember the first time I made this—I actually gasped when I took that first bite. The contrast between the crunchy coating and the delicate fish is simply divine. Plus, it’s ready in about 10 minutes, making it perfect for those evenings when you want something impressive without spending hours in the kitchen.

    Healthier Than Traditional Frying

    One thing I absolutely adore about this recipe is how it delivers that satisfying fried food experience without the heavy oil. Using just a light spray of olive oil, you get all the crispiness with a fraction of the calories. The Parmesan cheese adds richness and flavor while creating that golden crust we all crave. My husband, who typically reaches for seconds of anything fried, couldn’t believe this was made with minimal oil. It’s become our go-to for satisfying those comfort food cravings without the guilt that sometimes follows traditional fried meals.

    Essential Tips & Tricks

    Perfecting Your Parmesan Crust

    The secret to an extraordinary Parmesan crust lies in the preparation. I’ve found that grating your own Parmesan makes a world of difference—pre-grated cheese often contains anti-caking agents that can inhibit proper melting and browning. For the ultimate crisp factor, mix your Parmesan with panko breadcrumbs in a 2:1 ratio. Another game-changer? Adding a teaspoon of lemon zest to the mixture, which brightens the entire dish. Remember to press the coating firmly onto the fish to ensure it adheres properly. This technique creates that crispy, golden finish that makes this dish so special.

    Avoiding Common Air Fryer Mistakes

    The key to success with air fryer tilapia is proper spacing and temperature management. Never overcrowd your air fryer basket—the fish needs room for the hot air to circulate. I learned this the hard way when I tried to cook four fillets at once! Always preheat your air fryer for 3-5 minutes to ensure even cooking. Another tip: spritz your coated tilapia with olive oil just before cooking, which helps achieve that golden-brown perfection. If your air fryer runs hot, reduce the temperature by 25°F. These small adjustments make the difference between good and absolutely mouthwatering results.

    Serving Ideas & Creative Variations

    Perfect Pairings for a Complete Meal

    This Crispy Parmesan Crusted Air Fryer Tilapia shines as the star of the meal, but the right sides elevate it to dinner party status. My favorite pairing is a bright citrus salad with arugula, orange segments, and a light vinaigrette—the acidity cuts through the richness beautifully. For a heartier option, roasted garlic potatoes or a simple lemon orzo complement the fish without overwhelming it. A dollop of homemade tartar sauce with capers and fresh dill takes this dish to another level. For a special touch, serve with a chilled glass of Pinot Grigio and watch your guests reach for seconds of this impressive yet simple creation.

    Exciting Flavor Variations

    The beauty of this recipe lies in its versatility. While the classic Parmesan crust is divine, don’t be afraid to experiment! For a Mediterranean twist, add chopped olives, sun-dried tomatoes, and oregano to your coating mixture. Craving something spicy? Incorporate a teaspoon of cajun seasoning or chipotle powder into your breadcrumbs. My personal favorite variation includes finely chopped fresh herbs—dill, parsley, and chives—mixed into the Parmesan coating. For a tropical take, try adding toasted coconut flakes and a hint of lime zest. Each variation keeps this dish exciting and new, even when it’s in regular rotation.

    Storage & Troubleshooting Guide

    Proper Storage for Leftovers

    While this Crispy Parmesan Crusted Air Fryer Tilapia is best enjoyed fresh from the fryer, proper storage can maintain much of its delightful texture. Allow any leftovers to cool completely before refrigerating to prevent condensation from making the crust soggy. Store in an airtight container lined with paper towels to absorb excess moisture. Leftovers will keep for up to 2 days in the refrigerator. When reheating, avoid the microwave which will leave you with a disappointing soggy crust. Instead, place the fish in your air fryer at 350°F for 3-4 minutes. This revives that crispy exterior while gently warming the fish without drying it out.

    Troubleshooting Common Issues

    Even experienced cooks occasionally encounter challenges with crispy coatings. If your Parmesan crust isn’t as golden as you’d like, try patting the tilapia completely dry before coating—excess moisture is often the culprit. If the coating falls off during cooking, ensure you’re using the right sequence: flour first (which acts as glue), then egg wash, then the Parmesan mixture. For tilapia that’s cooking unevenly, check that your fillets are similar in thickness. You can gently flatten thicker parts with your palm before coating. If your air fryer has hot spots, rotate the basket halfway through cooking for more consistent results.

    Frequently Asked Questions

    Can I use frozen tilapia for Crispy Parmesan Crusted Air Fryer Tilapia?

    Yes, but thaw it completely first and pat it very dry with paper towels. Excess moisture will prevent your coating from crisping properly and may cause steaming instead of air frying.

    How do I know when the fish is done?

    Tilapia is done when it flakes easily with a fork and reaches an internal temperature of 145°F. For a 4-ounce fillet, this typically takes 8-10 minutes at 380°F.

    Can I make this recipe gluten-free?

    Absolutely! Substitute regular breadcrumbs with gluten-free panko and ensure your Parmesan cheese doesn’t contain any gluten additives. The results are equally delicious.

    What’s the best way to prevent the coating from falling off?

    Ensure your fish is completely dry, dredge in flour first, then egg wash, and finally press firmly into the Parmesan mixture. Let it rest for 5 minutes before air frying.

    Can I make this without an air fryer?

    Yes! Bake in a preheated oven at 425°F for 12-15 minutes on a parchment-lined baking sheet. While not quite as crispy, it’s still delicious.

    Final Thoughts

    This Crispy Parmesan Crusted Air Fryer Tilapia has revolutionized weeknight dinners at my house. There’s something deeply satisfying about transforming simple ingredients into a meal that feels special enough for company yet easy enough for busy evenings. The combination of that golden, crunchy crust with tender fish creates a textural symphony that keeps everyone coming back for more. I hope you’ll give this recipe a try and experience the joy of creating restaurant-quality fish at home with minimal effort. Don’t forget to check out more delicious recipes on Pinterest for endless inspiration!

  • Authentic Greek Shrimp Saganaki: Irresistible Flavor Explosion!

    Authentic Greek Shrimp Saganaki: Irresistible Flavor Explosion!

    Authentic Greek Shrimp Saganaki: Irresistible Flavor Explosion!

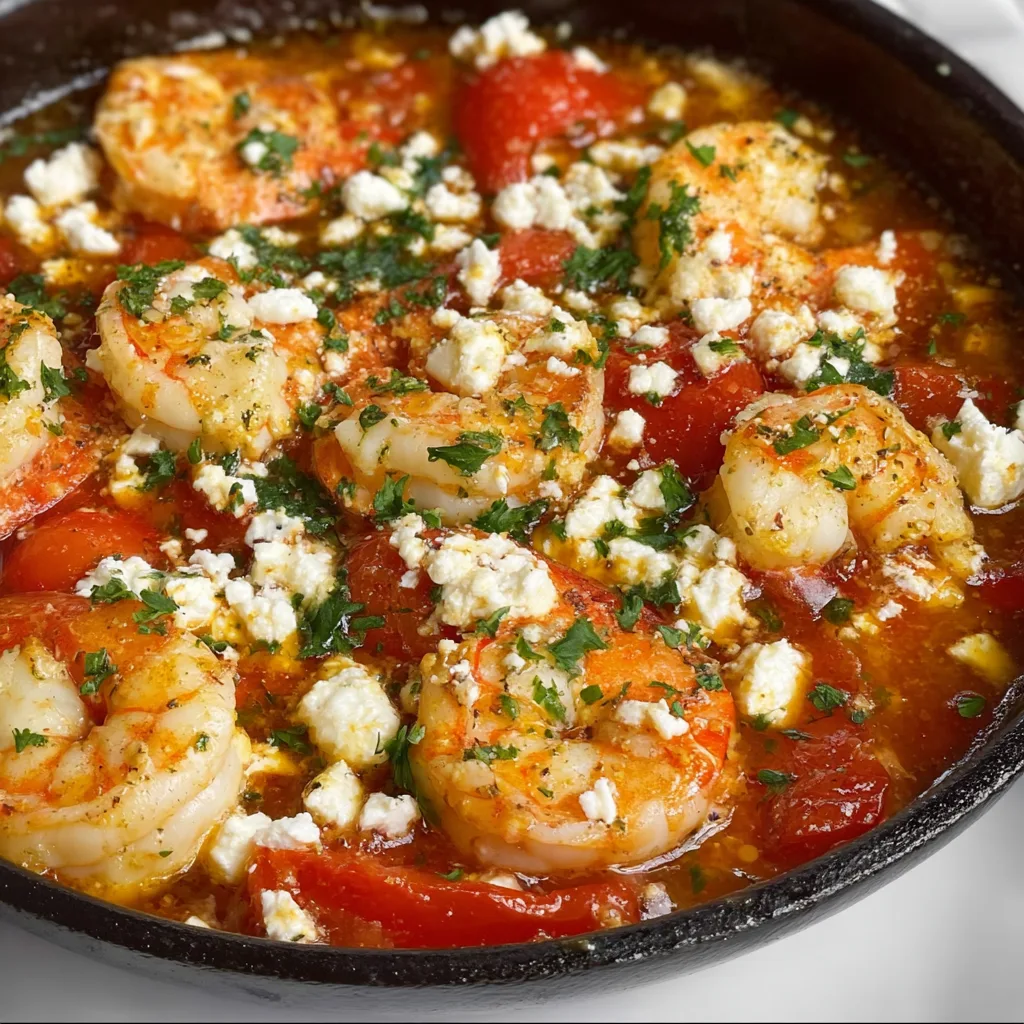
    Authentic Greek Shrimp Saganaki brings the sun-soaked flavors of the Mediterranean right to your dinner table. The first time I made this dish, the intoxicating aroma of garlic, tomatoes, and fresh herbs transported me straight to a seaside taverna in Santorini. There’s something magical about the way the plump shrimp simmers in that vibrant tomato sauce, mingling with the briny feta that melts just enough to create creamy pockets throughout. If you’re craving a taste of Greece that’s both impressive and approachable, this classic dish delivers coastal comfort in every bite. It’s become my go-to when I want to transform ordinary weeknight dinners into something special.

    Recipe

    Why You’ll Love This Authentic Greek Shrimp Saganaki

    A Perfect Balance of Flavors and Textures

    The beauty of Authentic Greek Shrimp Saganaki lies in its harmonious blend of bright acidity and rich depth. The tomatoes provide a sweet-tart foundation while the shrimp offers that perfect oceanic sweetness. I adore how the feta cheese doesn’t completely melt but instead softens just enough to create pockets of creamy saltiness throughout the dish. The oregano and dill add that distinctive Greek profile that makes this dish instantly recognizable. When you take that first bite with all components together—juicy shrimp, tangy sauce, and creamy cheese—it’s a symphony of Mediterranean flavors that feels both comforting and sophisticated.

    Quick Yet Impressive Enough for Any Occasion

    What makes this dish a regular in my rotation is how it manages to be both weeknight-friendly yet dinner-party worthy. In just about 30 minutes, you can create something that looks and tastes like it took hours. I’ve served this on busy Tuesdays when time was tight and for Saturday dinner parties where I wanted something special without being chained to the stove. The vibrant red sauce studded with pink shrimp and white feta creates a visual impact that always draws compliments. Plus, it’s naturally gluten-free and can be adapted for various dietary needs without losing its authentic character.

    Essential Tips & Tricks

    Selecting and Preparing the Perfect Shrimp

    For truly authentic results, choose large or jumbo shrimp (16-20 count per pound) with shells removed but tails left on for presentation. I’ve learned through many iterations that slightly undercooked shrimp works best since they’ll continue cooking in the hot sauce. Pat them completely dry before adding to the pan—this ensures proper searing rather than steaming. The difference in texture is remarkable! For maximum flavor, marinate the shrimp briefly in a splash of ouzo (or white wine) with minced garlic and a pinch of salt while you prepare the sauce. This small step elevates the dish from good to memorable.

    Creating the Ultimate Tomato Sauce Base

    The heart of this dish is the aromatic tomato sauce that develops incredible depth in just minutes. Start with good quality olive oil and build layers of flavor—sautéing onions until translucent before adding garlic prevents burning. Use ripe summer tomatoes when in season, but high-quality canned San Marzano tomatoes work beautifully year-round. A splash of white wine deglazes the pan and adds complexity. Don’t rush this stage—allowing the sauce to reduce slightly concentrates the flavors and creates the perfect consistency to cradle those succulent shrimp and feta chunks.

    Serving Ideas & Creative Variations

    Traditional and Modern Accompaniments

    Serve your Authentic Greek Shrimp Saganaki straight from the skillet for dramatic effect, accompanied by crusty bread for sauce-sopping—an essential part of the experience! For a complete meal, pair with a simple Greek salad dressed with good olive oil and a squeeze of lemon. I sometimes add a side of lemon-herb rice or roasted potatoes with oregano to make it more substantial. For a contemporary twist that still honors tradition, try serving it over creamy polenta or alongside crispy roasted Brussels sprouts for textural contrast. The versatility of this dish means it works equally well as a shared appetizer or main course.

    Regional Variations Worth Exploring

    While the classic recipe is perfect as is, exploring regional Greek variations adds exciting dimensions to this beloved dish. In some island versions, a splash of ouzo adds subtle anise notes that complement the seafood beautifully. Northern Greek interpretations might include a pinch of cinnamon and allspice for warmth. For a spicier kick inspired by the Peloponnese region, add a small amount of boukovo (Greek red pepper flakes). I’ve experimented with adding capers and olives for a more complex brine flavor, while some coastal areas include a mix of seafood like mussels and small fish alongside the shrimp.

    Storage & Troubleshooting Guide

    Proper Storage and Reheating Methods

    Authentic Greek Shrimp Saganaki is best enjoyed immediately, but leftovers can be stored in an airtight container for up to two days in the refrigerator. The feta will continue to break down, creating a creamier sauce—many of my friends actually prefer it this way! When reheating, do so gently over low heat, adding a splash of water if the sauce has thickened too much. I recommend removing the shrimp first and adding them back in the final minute to prevent overcooking. For meal prep, consider making just the tomato base ahead of time, then adding the shrimp and feta fresh when you’re ready to serve.

    Solving Common Saganaki Challenges

    The most common issue with this dish is overcooked shrimp that become tough and rubbery. Remember that shrimp continue cooking in the hot sauce even after removing from heat. If your sauce seems too watery, simmer uncovered for a few extra minutes before adding the shrimp. For sauce that’s too thick, add a splash of fish stock or white wine. If your feta is melting too quickly and disappearing into the sauce, try adding it in larger chunks or reducing the heat before incorporating it. Finally, if you find the flavor lacks depth, a teaspoon of honey balances acidity while a squeeze of lemon brightens the entire dish.

    Frequently Asked Questions

    What is authentic Greek Shrimp Saganaki?

    Authentic Greek Shrimp Saganaki is a traditional Mediterranean dish where shrimp are cooked in a rich tomato sauce with garlic, herbs, and topped with crumbled feta cheese. It’s typically finished under a broiler or in a hot oven until bubbly.

    Can I make this dish ahead of time?

    Yes! Prepare the tomato sauce base up to 2 days ahead, then reheat and add the shrimp and feta just before serving. This actually allows the flavors to develop more deeply.

    What type of feta cheese works best?

    Traditional Greek feta made from sheep’s milk provides the most authentic flavor and texture. Look for blocks packed in brine rather than pre-crumbled varieties for the best melting properties.

    Is there a substitute for ouzo in this recipe?

    Absolutely. While ouzo adds authentic anise notes, you can substitute with dry white wine, a splash of Pernod, or simply omit it entirely and add a squeeze of lemon instead.

    What’s the best pan to use for Shrimp Saganaki?

    A wide, shallow skillet with slightly raised sides works best—cast iron is ideal. It conducts heat evenly and can go from stovetop to oven for the final melting of the feta.

    Final Thoughts

    Authentic Greek Shrimp Saganaki embodies everything I love about Mediterranean cooking—it’s unfussy yet sophisticated, quick yet deeply flavorful, and tells a story with every bite. There’s something almost magical about how a handful of simple ingredients transforms into something so spectacularly satisfying. Whether you’re cooking for a special someone or treating yourself to a taste of the Greek isles, this dish delivers sunshine in a skillet. I hope it brings as much joy to your table as it has to mine! Don’t forget to check out more Mediterranean-inspired recipes on Pinterest for your next culinary adventure.

  • Authentic Cajun Crawfish Étouffée: Irresistible, Flavor-Packed Delight!

    Authentic Cajun Crawfish Étouffée: Irresistible, Flavor-Packed Delight!

    Authentic Cajun Crawfish Étouffée: Irresistible, Flavor-Packed Delight!

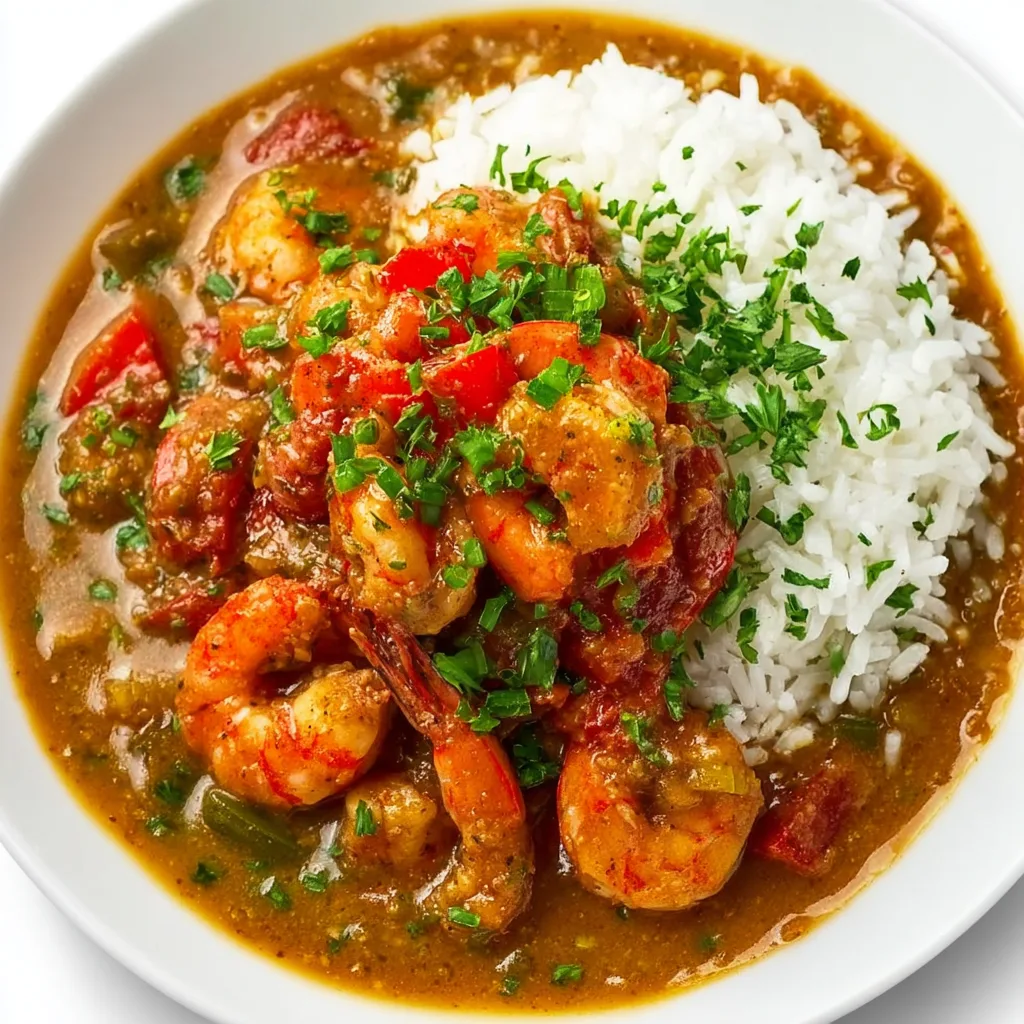
    Authentic Cajun Crawfish Étouffée has been my absolute obsession since that unforgettable trip to New Orleans where I first tasted this rich, saucy treasure. The way those plump crawfish tails swim in that velvety roux-based sauce, speckled with the “holy trinity” of Cajun cooking—bell peppers, onions, and celery—creates pure magic on your taste buds. There’s something deeply comforting about how the complex flavors develop slowly, like all the best stories from Louisiana. If you’re craving a dish that’s both soulful and sophisticated, this traditional Cajun masterpiece delivers warmth in every spoonful.

    Recipe

    Why You’ll Love This Authentic Cajun Crawfish Étouffée

    A True Taste of Louisiana

    The beauty of authentic étouffée lies in its perfect balance of flavors. Unlike some Americanized versions that go heavy on the heat, real Cajun étouffée celebrates the delicate sweetness of crawfish with just enough spice to make things interesting. I remember sitting at a weathered wooden table in a tiny Cajun restaurant, watching my spoon glide through that brick-red sauce, releasing the aroma of fresh herbs and seafood. The first bite transported me—buttery, rich, with that distinctive depth that only comes from a properly made roux. You’ll love how each component harmonizes rather than competes.

    Impressive Yet Approachable

    Don’t let the fancy French name intimidate you! While étouffée (which means “smothered”) sounds sophisticated, it’s essentially comfort food at heart. The technique is straightforward—make a roux, add the trinity, incorporate stock and crawfish, then let everything simmer to perfection. I was surprised how manageable the process was when I first attempted it in my own kitchen. The recipe follows a logical progression that even novice cooks can master. Plus, there’s something incredibly satisfying about watching guests’ eyes light up when you casually mention you’ve made crawfish étouffée from scratch!

    Essential Tips & Tricks

    Mastering the Roux

    The foundation of étouffée is undoubtedly the roux—equal parts fat and flour cooked until it reaches the perfect color. For authentic Cajun crawfish étouffée, you’re aiming for a peanut butter to copper penny shade—not as dark as gumbo but well beyond blonde. I learned the hard way that patience is essential here! Keep the heat medium-low and stir constantly. The moment I smell that nutty aroma wafting through my kitchen, I know I’m on the right track. Remember, a properly made roux takes time (about 15-20 minutes), but it’s where all that incredible depth of flavor develops.

    Sourcing Quality Ingredients

    Nothing elevates your étouffée like fresh crawfish tails. While frozen work in a pinch, freshly cooked and peeled tails have an incomparable sweetness. If crawfish aren’t available, shrimp make a delicious substitute—just like in this Shrimp Newburg Recipe. For authentic flavor, seek out real Cajun seasonings rather than generic “Cajun” blends that often contain mostly salt and paprika. The holy trinity vegetables should be diced uniformly for even cooking. And don’t forget fresh thyme and bay leaves—these aromatics might seem minor, but they’re crucial for that authentic Louisiana profile.

    Serving Ideas & Creative Variations

    Classic Pairings

    Traditionally, Authentic Cajun Crawfish Étouffée is served over a bed of fluffy white rice that soaks up all that glorious sauce. I love using long-grain rice cooked just until tender—slightly firmer than you might normally prepare it. For a complete experience, add a side of crusty French bread for sopping up every last drop (because trust me, you won’t want to waste any). A simple side salad with vinaigrette provides a welcome brightness against the rich étouffée. For special occasions, I start with a small cup of Creamy Cauliflower Carrot Soup as a light appetizer before the main event.

    Modern Twists

    While I’m a purist at heart, there are some delicious variations worth exploring. Try serving étouffée over creamy grits instead of rice for a delightful textural contrast. For a fusion approach, use the étouffée as a topping for baked potatoes or folded into an omelet for an extraordinary brunch. Some creative cooks even use it as a sauce for pasta—particularly angel hair or linguine. If you’re watching carbs, cauliflower rice makes a surprisingly good base. For gatherings, mini phyllo cups filled with a spoonful of étouffée make elegant appetizers that disappear in seconds!

    Storage & Troubleshooting Guide

    Proper Storage Methods

    Étouffée actually improves with time as the flavors meld together, making it perfect for make-ahead meals. Store leftovers in airtight containers in the refrigerator for up to 3 days. For freezing, I recommend portioning the étouffée into individual servings without rice (add fresh rice when reheating). Cool completely before freezing and use within 2 months for best quality. When reheating, do so gently over low heat, adding a splash of stock or water if needed to maintain that silky consistency. The texture of the crawfish may change slightly after freezing, but the flavor remains delicious.

    Common Issues & Solutions

    The most frequent problem with étouffée is a broken sauce, where the fat separates from the other ingredients. This typically happens when reheating too quickly or at too high a temperature. The fix is simple: remove from heat and whisk vigorously until recombined, then continue heating gently. If your sauce is too thick, gradually add warm stock until you reach the desired consistency. Too thin? Make a small amount of roux in a separate pan and whisk it in. If you accidentally oversalted, a squeeze of lemon juice can help balance the flavors without diluting that rich taste.

    Frequently Asked Questions

    What exactly is Authentic Cajun Crawfish Étouffée?

    Authentic Cajun Crawfish Étouffée is a traditional Louisiana dish featuring crawfish tails smothered in a rich, roux-based sauce made with the “holy trinity” (onions, bell peppers, celery), seasoned with Cajun spices, and typically served over rice.

    Can I use shrimp instead of crawfish?

    Absolutely! Shrimp étouffée is delicious and more accessible when crawfish aren’t available. Use the same amount of peeled, deveined shrimp and reduce the cooking time slightly as shrimp cook faster than crawfish.

    What’s the difference between étouffée and gumbo?

    Étouffée is thicker and creamier than gumbo, uses a lighter roux, and typically features one main protein (usually crawfish). Gumbo has a darker roux, thinner consistency, often contains multiple proteins, and includes okra or filé powder.

    How spicy is traditional étouffée?

    Traditional Cajun étouffée has a moderate heat level that complements rather than overwhelms the delicate crawfish flavor. You can easily adjust the cayenne pepper to suit your preference.

    Can étouffée be made ahead for a party?

    Yes! Étouffée actually improves after a day in the refrigerator as flavors meld. Make it up to two days ahead, store refrigerated, and gently reheat before serving. Prepare fresh rice just before guests arrive.

    Final Thoughts

    There’s something magical about serving Authentic Cajun Crawfish Étouffée that transforms an ordinary dinner into a celebration. The rich history behind this dish connects us to generations of Cajun cooks who perfected these techniques through centuries of tradition. Whether you’re making it for a special occasion or simply craving something deeply satisfying, this étouffée delivers an experience that’s both comforting and exciting. I hope you’ll try this recipe and create your own memories around the table, savoring each flavorful bite. For more delicious inspirations, follow my collection on Pinterest.

  • Easy Salmon Tartlets Recipe: Irresistibly Tasty & Quick to Make

    Easy Salmon Tartlets Recipe: Irresistibly Tasty & Quick to Make

    Easy Salmon Tartlets Recipe: Irresistibly Tasty & Quick to Make

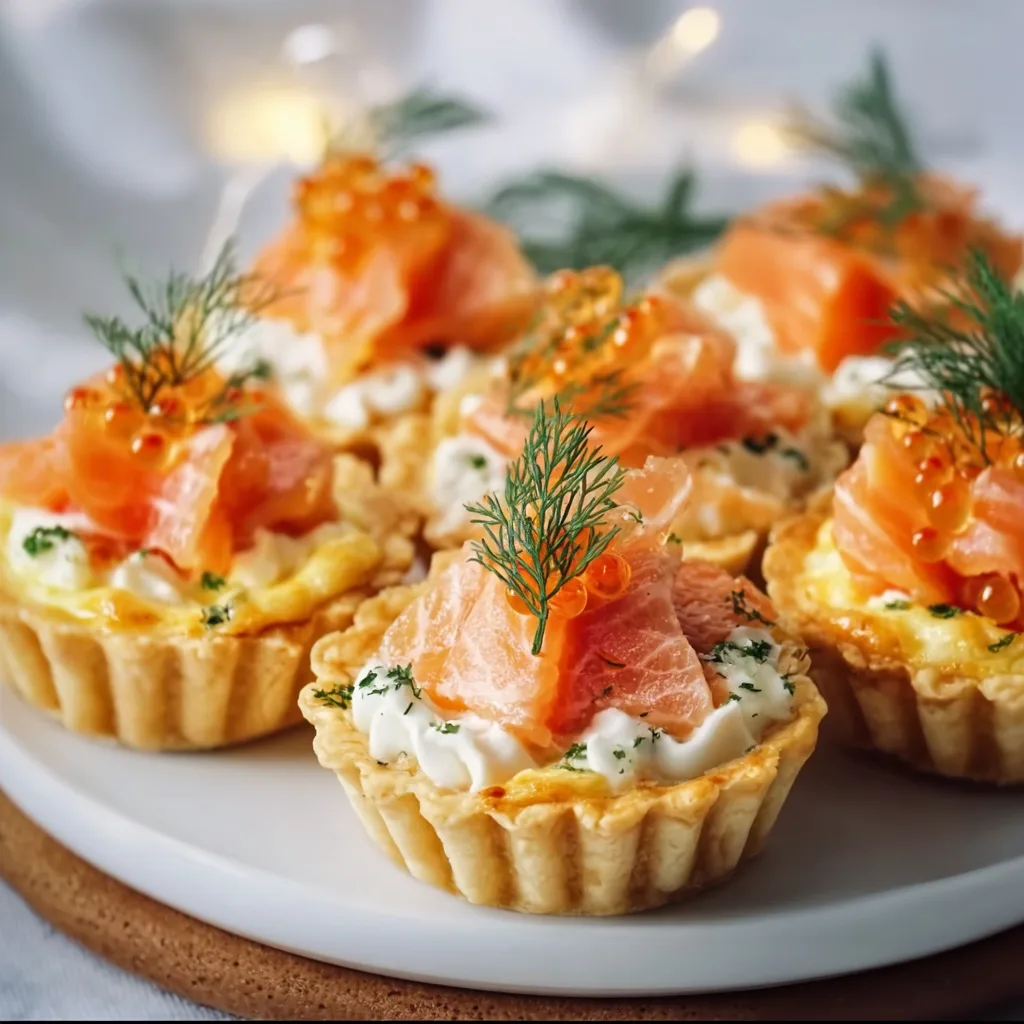
    These Easy Salmon Tartlets have completely transformed my appetizer game! Buttery, flaky shells cradle a creamy salmon filling that balances rich flavors with bright herbs and zesty lemon. I first made these for my sister’s housewarming party last spring, and they disappeared within minutes—leaving everyone asking for the recipe! The beauty lies in their elegant appearance that belies how simple they are to prepare. With store-bought tart shells and just a handful of ingredients, you can create these impressive bites that work equally well for casual gatherings or special occasions.

    Recipe

    Why You’ll Love These Easy Salmon Tartlets

    Perfect Balance of Flavors and Textures

    The magic of these tartlets happens when creamy filling meets crisp pastry. Each bite delivers a delightful contrast—buttery pastry shells shatter delicately against the velvety salmon mixture. I love how the richness of the salmon and cream cheese gets brightened by fresh dill and a squeeze of lemon juice. The flavor profile is sophisticated without being complicated, making these little bites feel special even though they require minimal effort. My neighbor described them as “restaurant-quality appetizers that don’t need a restaurant kitchen.”

    Make-Ahead Convenience for Stress-Free Entertaining

    Nothing makes me happier than appetizers I can prepare in advance! These tartlets are entertaining heroes because you can make the filling up to 24 hours ahead and store it in the refrigerator. When guests arrive, simply pipe or spoon the mixture into pre-baked shells, garnish, and serve. This flexibility means less last-minute kitchen stress and more time enjoying your company. I’ve found this particularly helpful during holiday gatherings when oven space becomes precious real estate.

    Essential Tips & Tricks

    Mastering the Perfect Filling Consistency

    The secret to these tartlets is achieving that silky-smooth texture in your filling. Make sure your cream cheese is properly softened—I leave mine out for at least an hour before mixing. When combining ingredients, use a food processor for the smoothest results. If you notice your mixture seems too thick, add a touch of heavy cream one teaspoon at a time until it reaches a pipeable consistency. For extra flavor depth, I sometimes fold in a teaspoon of capers for little bursts of briny goodness.

    Preventing Soggy Pastry Shells

    Nothing ruins these tartlets faster than soggy bottoms! To ensure crisp shells, pre-bake your pastry cases until golden and completely cooked through. Let them cool fully before filling. If making ahead, store unfilled shells in an airtight container with parchment paper between layers. Another trick I swear by: brush the inside of each shell with a thin layer of beaten egg white and return to the oven for 2 minutes. This creates a moisture barrier between the filling and pastry, keeping everything perfectly crisp until serving time.

    Serving Ideas & Creative Variations

    Elegant Presentation Techniques

    Elevate these tartlets with thoughtful garnishes that add both visual appeal and flavor complexity. My go-to finishing touches include tiny dill sprigs, paper-thin cucumber ribbons, or small capers. For special occasions, add a tiny dollop of caviar or salmon roe on top—the pop of color and briny flavor takes these to another level. Arrange tartlets on a white platter scattered with fresh herbs, or serve them on a wooden board alongside lemon wedges for an effortlessly elegant presentation that always impresses guests.

    Flavor Variations to Keep Things Interesting

    While the classic version is divine, these tartlets welcome creative adaptations! Try swapping fresh herbs to change the profile—substitute dill with tarragon for a French twist or cilantro and lime for Southwestern flair. For a smokier version, use hot-smoked salmon instead of poached or canned. My sister-in-law makes a fantastic variation with a thin layer of avocado purée beneath the salmon mixture. For heat lovers, add a tiny pinch of cayenne or a few drops of hot sauce to the filling—the gentle warmth complements the rich salmon beautifully.

    Storage & Troubleshooting Guide

    Proper Storage for Maximum Freshness

    To maintain optimal texture, store assembled tartlets in the refrigerator for up to 8 hours before serving. Place them in a single layer in an airtight container with small gaps between each tartlet to prevent sticking. For longer storage, keep the shells and filling separate—shells in an airtight container at room temperature and filling refrigerated for up to 2 days. I learned this the hard way after preparing everything 24 hours ahead once, only to find slightly softened shells by serving time!

    Quick Fixes for Common Issues

    Even experienced cooks encounter challenges! If your filling turns out too runny, refrigerate it for 30 minutes to firm up, or add more cream cheese in small amounts. For filling that’s too stiff, incorporate a splash of heavy cream or a touch more lemon juice. If your shells crack during baking, don’t panic—the filling will hide minor imperfections. For major cracks, make a quick paste of flour and water to “glue” pieces back together, then return to the oven for 2-3 minutes to set before cooling and filling.

    Frequently Asked Questions

    Can I use canned salmon for these Easy Salmon Tartlets?

    Absolutely! Drain canned salmon well and remove any skin or bones. Premium canned salmon works beautifully and saves significant prep time compared to cooking fresh salmon.

    How far in advance can I make these tartlets?

    You can prepare the filling up to 2 days ahead and store it refrigerated. The shells can be baked 1 day ahead. Assemble tartlets up to 8 hours before serving for best texture.

    Can I freeze these tartlets?

    I don’t recommend freezing assembled tartlets as the texture suffers. However, you can freeze unfilled pastry shells for up to 1 month, and thaw before filling.

    What can I substitute for cream cheese?

    Mascarpone makes a luxurious substitute. For a lighter option, try Greek yogurt mixed with a small amount of mayonnaise, though the filling will be slightly less firm.

    Are these tartlets suitable for a buffet setting?

    Yes! These tartlets hold their shape well at room temperature for 2-3 hours, making them perfect for buffets. Place them on a chilled serving platter for longer events.

    Final Thoughts

    These Easy Salmon Tartlets have become my signature appetizer for good reason—they strike that perfect balance between impressive and achievable. The combination of buttery pastry and creamy salmon filling creates bite-sized morsels that disappear quickly at any gathering. I love watching guests’ expressions as they taste these for the first time, often followed by requests for the recipe! Whether you’re hosting a holiday celebration or casual get-together, these tartlets bring a touch of elegance without hours of work. Find more inspiration for your next gathering on my Pinterest board.

  • Crab Stuffed Shrimp That Will Blow Your Taste Buds Away!

    Crab Stuffed Shrimp That Will Blow Your Taste Buds Away!

    Crab Stuffed Shrimp That Will Blow Your Taste Buds Away!

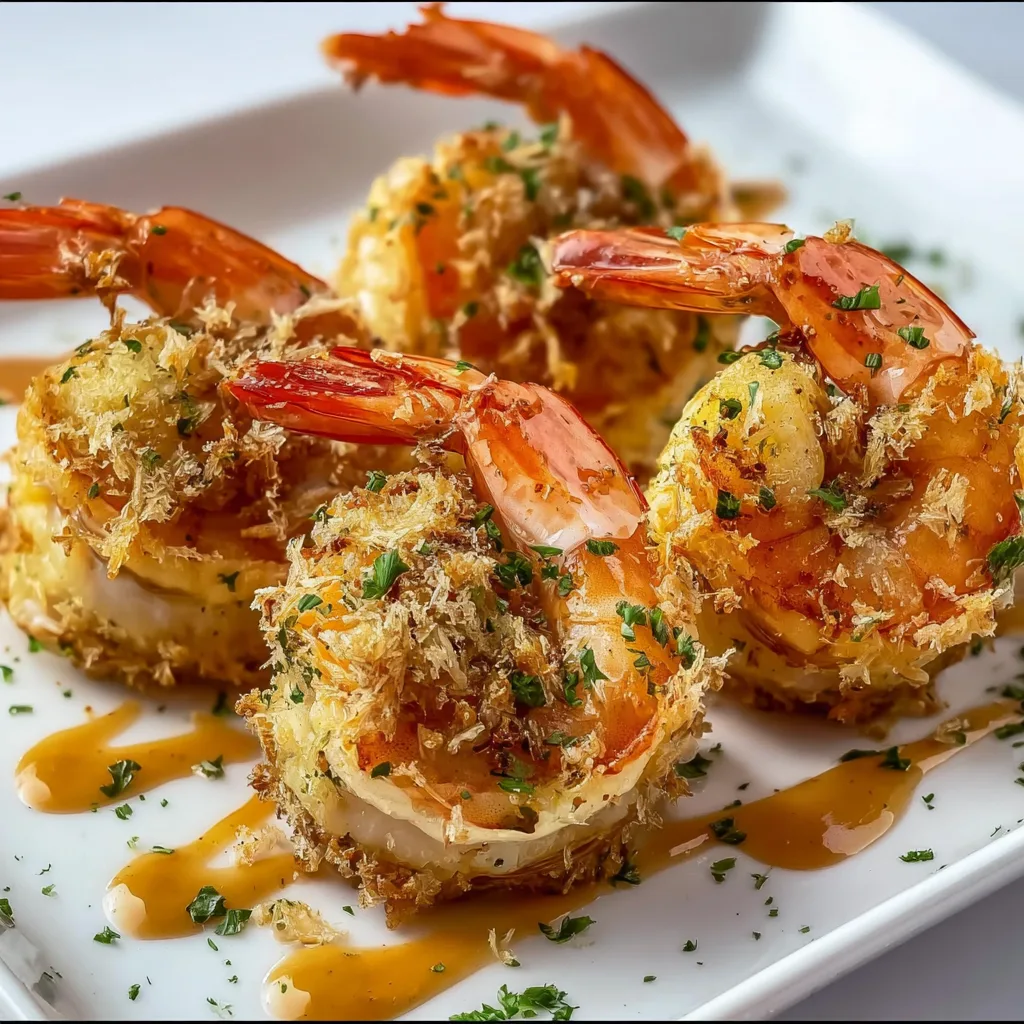
    Crab Stuffed Shrimp combines two beloved seafood treasures into one spectacular appetizer that never fails to impress. The first time I served these at a dinner party, my guests literally gasped when I brought out the platter! There’s something magical about tender jumbo shrimp embracing a delicate crab filling, all topped with a buttery crumb mixture that turns golden and crispy under the broiler. If you’re looking for an elegant seafood dish that delivers major wow-factor without hours in the kitchen, this crab-filled delicacy is your answer.

    Recipe

    Why You’ll Love This Crab Stuffed Shrimp

    Restaurant-Quality Results at Home

    Trust me when I say these stuffed shrimp will rival anything you’d order at a high-end seafood restaurant. The sweet, succulent shrimp paired with lump crabmeat creates a luxurious mouthfeel that feels special occasion-worthy. Yet the preparation is surprisingly straightforward! I love watching friends’ faces light up with that “you made these?” expression. The contrast between the tender shrimp and the slightly crispy, herb-infused topping creates a textural experience that keeps everyone reaching for seconds.

    Perfect for Any Occasion

    Whether you’re hosting an intimate dinner party or preparing a romantic date night meal, these Crab Stuffed Shrimp fit the bill perfectly. I’ve served them as elegant appetizers at holiday gatherings and as the star protein for summer dinner parties on the deck. They cook quickly enough for a special weeknight dinner but feel indulgent enough for celebrations. The presentation alone—those beautiful curved shrimp cradling golden crab filling—elevates any table setting and makes guests feel truly pampered.

    Essential Tips & Tricks

    Selecting the Best Ingredients

    The secret to exceptional Crab Stuffed Shrimp starts at the seafood counter. Look for jumbo or colossal shrimp (16-20 count per pound) with shells that are firm and translucent, never slimy. For the crab, lump crabmeat offers the perfect balance of flavor and texture, though jumbo lump works beautifully if you’re splurging. Fresh is ideal, but quality pasteurized crabmeat from the refrigerated section works wonderfully too. Just avoid canned varieties, which lack the sweet, delicate flavor that makes this dish special. Fresh ingredients truly make all the difference.

    Perfecting the Butterfly Technique

    Properly butterflying your shrimp creates the perfect cradle for your crab filling. With a sharp knife, cut along the outer curve (the back) of each peeled shrimp, slicing about three-quarters of the way through—never completely in half. When you open the shrimp, it should lie flat with the two sides still connected, resembling a butterfly. I learned through trial and error to leave the tails on—they provide a convenient handle for dipping and add visual appeal to the finished dish. Pat the shrimp dry before filling to ensure the stuffing adheres properly.

    Serving Ideas & Creative Variations

    Perfect Pairings for a Complete Meal

    These Crab Stuffed Shrimp deserve accompanying sides that complement without overwhelming. I love serving them atop a bed of lemon butter pasta or with roasted asparagus drizzled with olive oil and sea salt. For a lighter approach, pair with a crisp fennel and citrus salad that cuts through the richness. Rice pilaf or crusty bread for soaking up the delicious juices works beautifully too. For wine pairings, a chilled Sauvignon Blanc or unoaked Chardonnay enhances the seafood flavors without overpowering the delicate crab.

    Creative Twists on the Classic

    While the traditional recipe is divine, don’t be afraid to experiment! Add a Cajun kick by incorporating blackened seasoning into your breadcrumb mixture. For an Asian-inspired variation, mix some ginger, scallions, and a touch of sesame oil into the crab filling. Mediterranean lovers might enjoy adding feta cheese, diced roasted red peppers, and oregano. During summer months, I sometimes add corn kernels and diced bell pepper to the stuffing for a seasonal twist. The versatility of this dish means you can adapt it to complement almost any cuisine.

    Storage & Troubleshooting Guide

    Make-Ahead and Storage Solutions

    These Crab Stuffed Shrimp can be prepped several hours ahead, making entertaining stress-free. Prepare the stuffed shrimp, cover tightly with plastic wrap, and refrigerate for up to 4 hours before baking. For leftovers (though there rarely are any!), store in an airtight container in the refrigerator for up to 2 days. Reheat gently in a 300°F oven for about 10 minutes to avoid toughening the shrimp. I don’t recommend freezing the prepared dish, as both shrimp and crab can become watery and lose their delicate texture when thawed.

    Solving Common Preparation Challenges

    If your crab stuffing seems too wet and doesn’t hold together, add additional panko breadcrumbs one tablespoon at a time until you reach the right consistency. Conversely, if the mixture is too dry, a small amount of mayonnaise or melted butter helps bind ingredients. To prevent overcooking (the most common pitfall), watch carefully during the final broiling stage—the topping should be golden brown, but the shrimp underneath should remain tender and juicy. If your broiler runs hot, position the rack in the middle of the oven instead of the top.

    Frequently Asked Questions

    Can I use imitation crab for Crab Stuffed Shrimp?

    While imitation crab will work in a pinch, it lacks the sweet, delicate flavor of real crab. If budget is a concern, use a smaller amount of real crab mixed with finely diced bell pepper to extend the filling.

    What’s the best way to tell when the shrimp are perfectly cooked?

    Perfectly cooked shrimp turn opaque pink with a slight C-shape. If they curl into a tight O-shape, they’re overcooked. Look for the flesh to be just firm and no longer translucent.

    Can I prepare Crab Stuffed Shrimp on the grill?

    Absolutely! Place the stuffed shrimp on foil or in a grill-safe dish and cook over medium heat with the lid closed for 8-10 minutes, until the shrimp are pink and filling is hot.

    What can I substitute if someone has a shellfish allergy?

    For a shellfish-free version, try stuffing large portobello mushroom caps with the same filling (minus the crab), or use the stuffing in halved bell peppers for a colorful alternative.

    How do I prevent my Crab Stuffed Shrimp from becoming rubbery?

    Don’t overcook! Shrimp cook extremely quickly. Bake just until the shrimp turn pink and opaque, usually 10-12 minutes at 375°F, then broil briefly to brown the topping.

    Final Thoughts

    Crab Stuffed Shrimp delivers that perfect balance of impressive presentation and approachable preparation that makes home cooking so rewarding. Every time I serve this dish, I’m reminded how the simplest ingredients—when treated with care—can create truly memorable moments around the table. The sweet tenderness of the shrimp paired with the rich crab filling creates a flavor harmony that’s simply irresistible. I hope this recipe brings as much joy to your table as it has to mine! For more seafood inspiration, visit our Pinterest board dedicated to ocean treasures.

  • Creamy Garlic Shrimp Over Mashed Potatoes – Irresistibly Delicious!

    Creamy Garlic Shrimp Over Mashed Potatoes – Irresistibly Delicious!

    Creamy Garlic Shrimp Over Mashed Potatoes – Irresistibly Delicious!

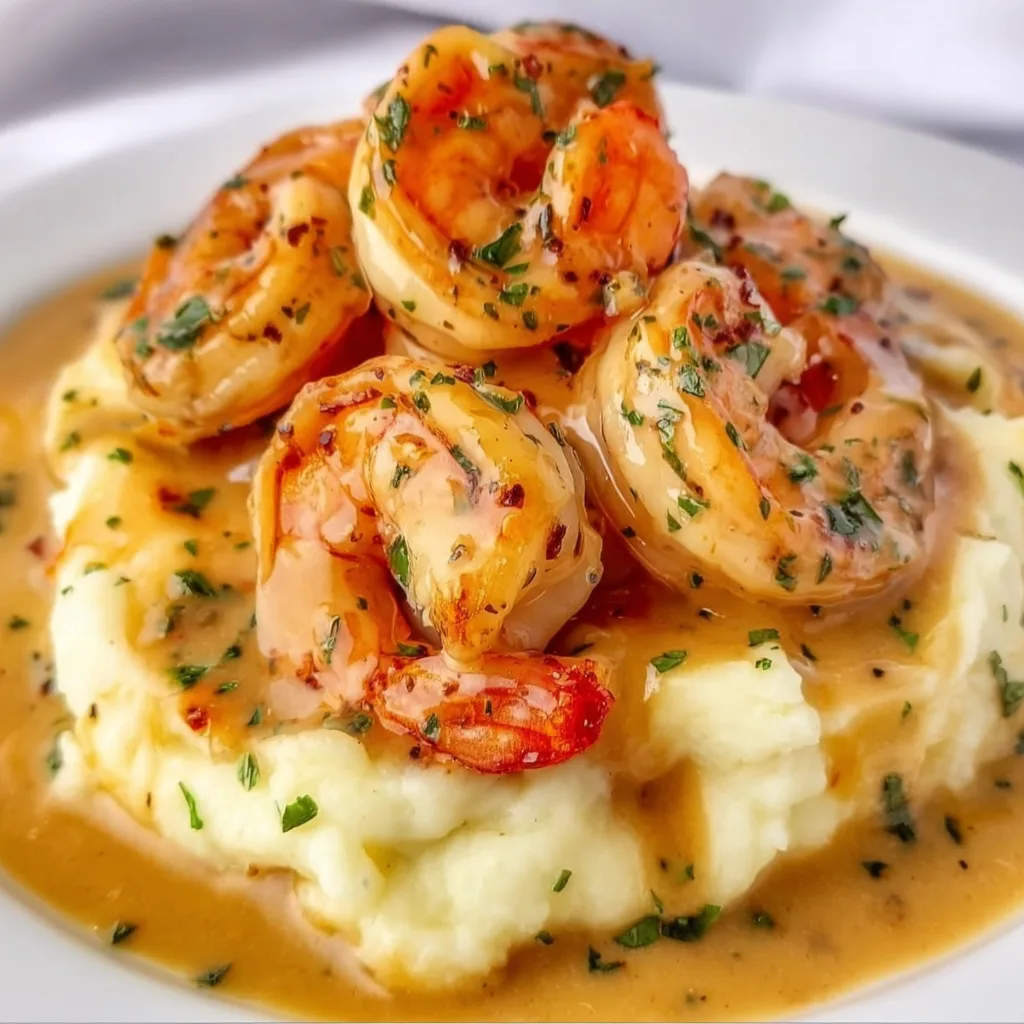
    Creamy Garlic Shrimp Over Mashed Potatoes is the ultimate comfort food that feels both indulgent and homey at the same time. The first time I made this dish, my kitchen filled with the intoxicating aroma of garlic and butter, and I knew I’d stumbled upon something special. There’s something magical about plump, succulent shrimp swimming in a velvety garlic sauce, all nestled on a cloud of creamy mashed potatoes. It’s the kind of meal that makes everyone at the table fall silent for those first few bites – you know, that wonderful quiet that happens when food is just too good for words. Let me show you how to create this showstopper dish that’s actually simpler than it looks!

    Recipe

    Why You’ll Love This Creamy Garlic Shrimp Over Mashed Potatoes

    Perfect Balance of Flavors and Textures

    This dish hits all the right notes – creamy, garlicky, and savory with just the right amount of brightness from fresh herbs and lemon. The contrast between the silky mashed potatoes and the slight snap of perfectly cooked shrimp creates a textural masterpiece. I love how the garlic-infused cream sauce seeps into the potatoes, creating these little pockets of flavor that burst with each bite. It’s comfort food elevated to restaurant quality, but without the fussy techniques or hard-to-find ingredients. My husband always says this dish makes an ordinary Tuesday feel like date night!

    Quick Yet Impressive Dinner Solution

    When you need to get dinner on the table in under 30 minutes but still want something that feels special, this creamy garlic shrimp delivers every time. I’ve served it for last-minute dinner guests who thought I’d spent hours in the kitchen! The beauty lies in its simplicity – while the potatoes boil, you can prepare the shrimp and sauce, meaning everything comes together almost simultaneously. It’s become my secret weapon for those evenings when I want to serve something that looks like I put in way more effort than I actually did.

    Essential Tips & Tricks

    Perfecting Your Shrimp

    The key to exceptional garlic shrimp is avoiding overcooking. Shrimp need just 1-2 minutes per side until they turn pink and opaque – any longer and they’ll become rubbery. I learned this the hard way during a dinner party when I got distracted chatting! Another game-changer: pat your shrimp completely dry before cooking to ensure they sear rather than steam. For maximum flavor, leave the tails on during cooking (they release wonderful flavor into the sauce), but feel free to remove them before serving for easier eating. Your guests will appreciate not having to fish out tails while trying to enjoy their meal!

    Creating the Creamiest Mashed Potatoes

    For truly cloud-like mashed potatoes, Yukon Gold potatoes are your best friend – they have the perfect starch content for creamy results without becoming gluey. Start potatoes in cold water (never hot!) and add a generous pinch of salt to the cooking water. After draining, return them to the hot pot for 30 seconds to evaporate excess moisture before adding butter and warmed cream. This technique, which I learned from my grandmother, makes all the difference in texture. For an even more luxurious base for your shrimp, try my Indian Potato Masala for a flavorful twist on the classic.

    Serving Ideas & Creative Variations

    Elegant Presentation Options

    Transform this homey comfort dish into a dinner-party worthy presentation with a few simple touches. Serve individual portions in shallow bowls or on warmed plates with the shrimp artfully arranged over the potatoes. A light sprinkle of microgreens, a drizzle of high-quality olive oil, or a few paper-thin lemon slices adds visual appeal. I once served this at a holiday gathering in scallop shells I found at a flea market – everyone thought it was the most elegant seafood dish they’d ever seen! Remember that people eat with their eyes first, so taking an extra minute for presentation elevates the entire experience.

    Flavor Variations To Try

    While the classic version is divine, don’t be afraid to experiment with flavor profiles. Add a Mediterranean twist with sun-dried tomatoes, kalamata olives, and crumbled feta. For a touch of heat, incorporate red pepper flakes or a dash of cayenne. My personal favorite variation includes a splash of white wine and fresh tarragon for a French-inspired take. You could also transform this into a surf-and-turf experience by adding small pieces of seared steak alongside the shrimp, similar to my Garlic Butter Steak Bites and Shrimp recipe that’s always a crowd-pleaser.

    Storage & Troubleshooting Guide

    Proper Storage and Reheating

    While this dish is best enjoyed fresh, leftovers can be salvaged with proper technique. Store the shrimp and sauce separately from the mashed potatoes in airtight containers for up to 2 days. When reheating, warm the potatoes with a splash of milk or cream over low heat, stirring frequently. For the shrimp, reheat gently in a skillet over medium-low heat just until warmed through – about 2 minutes. Microwaving is convenient but risks overcooking the shrimp, so if you must use this method, do so at 50% power in short bursts, checking frequently.

    Fixing Common Issues

    If your sauce breaks or appears curdled, don’t panic! Lower the heat immediately and whisk in 1-2 tablespoons of cold cream. For sauce that’s too thick, gradually add warm chicken broth until you reach your desired consistency. If your mashed potatoes turned out gluey, transform them by adding a beaten egg, some cheese, and herbs, then baking as potato cakes – a delicious save! And if you accidentally overcooked your shrimp, chop them into smaller pieces and fold into the sauce, which helps mask the rubbery texture while preserving the flavor.

    Frequently Asked Questions

    Can I make Creamy Garlic Shrimp Over Mashed Potatoes ahead of time?

    Prepare the components separately up to 24 hours ahead. Make the mashed potatoes and refrigerate, then reheat with extra cream. Cook the shrimp and sauce just before serving for the best texture and flavor.

    What’s the best type of shrimp to use for this recipe?

    Large or jumbo shrimp (16-20 count per pound) work best. They provide the perfect bite and cook quickly without becoming tough. Fresh is ideal, but good-quality frozen shrimp, properly thawed, works wonderfully too.

    Can I substitute the heavy cream for a lighter option?

    Half-and-half can work in a pinch, but the sauce won’t be as rich. For a lighter version, use 2% milk mixed with 1 tablespoon of cornstarch to help thicken the sauce.

    What side dishes pair well with this meal?

    A simple green salad with lemon vinaigrette provides nice contrast. Roasted asparagus or steamed broccoli also complement the richness of the dish perfectly.

    How do I know when the shrimp are perfectly cooked?

    Shrimp are done when they turn pink, opaque, and form a loose “C” shape. If they curl into a tight “O” shape, they’re overcooked. The entire cooking process takes only 3-4 minutes.

    Final Thoughts

    Creamy Garlic Shrimp Over Mashed Potatoes has become my go-to dish whenever I want to create a memorable meal without spending hours in the kitchen. There’s something about the combination of tender shrimp, velvety sauce, and fluffy potatoes that feels like a warm hug on a plate. I hope you’ll try this recipe and experience the simple joy of watching loved ones’ faces light up with that first delicious bite. For more inspiration, check out my other comfort food recipes on Pinterest where I’m always sharing new favorites!

  • Easy Sushi Bake Casserole Recipe: Irresistibly Delicious & Simple!

    Easy Sushi Bake Casserole Recipe: Irresistibly Delicious & Simple!

    Easy Sushi Bake Casserole Recipe: Irresistibly Delicious & Simple!

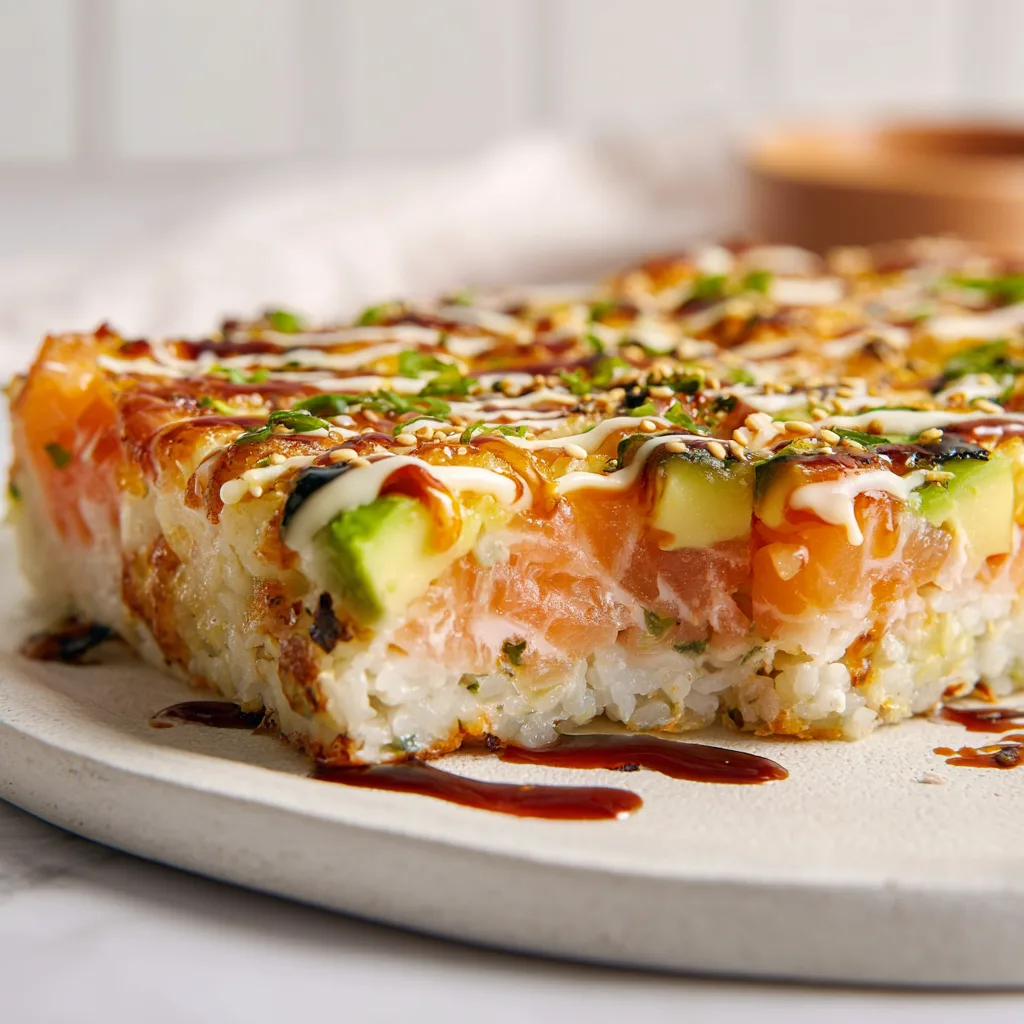
    This Easy Sushi Bake Casserole transforms traditional sushi into a comforting, shareable dish that’s perfect for busy weeknights. Imagine all those delicious sushi flavors layered into a bubbling hot casserole—creamy spicy mayo, savory seafood, and perfectly seasoned rice, all topped with a golden, crispy finish. I discovered this game-changer last summer when hosting friends and needed something impressive without the fuss of rolling individual sushi. The collective “mmms” around my dining table confirmed this would become a regular in my recipe rotation. If you love poke bowls but want something heartier, this casserole delivers all that umami goodness with half the effort.

    Recipe

    Why You’ll Love This Easy Sushi Bake Casserole

    No Rolling Required

    The most intimidating part of making sushi at home is definitely the rolling technique—getting that perfect, tight cylinder without ingredients spilling everywhere. With this sushi bake casserole, you can forget all those frustrations! Simply layer your ingredients in a baking dish, pop it in the oven, and let the heat work its magic. I still remember my first attempt at traditional sushi rolls—rice stuck to every surface of my kitchen except the nori. This casserole method eliminates that mess while delivering those same umami flavors we all crave from Japanese restaurants.

    Customizable for Everyone

    One of my favorite things about this dish is how easily it adapts to different dietary needs and preferences. Vegetarian? Skip the seafood and load up on avocado, cucumber, and mango for a refreshing twist. Pescatarian friends will appreciate the classic crab and shrimp combination, while meat lovers might enjoy adding some teriyaki chicken. When my sister (who’s allergic to shellfish) visited last month, I made a salmon version that she couldn’t stop raving about. The versatility means everyone gets to enjoy their perfect version of sushi without compromise—a true crowd-pleaser!

    Essential Tips & Tricks

    Rice Preparation Matters

    The foundation of any good sushi dish—including this casserole—is properly cooked and seasoned rice. I recommend using short-grain Japanese rice or sushi rice for its sticky texture that holds together beautifully. After cooking, gently fold in rice vinegar, sugar, and salt while the rice is still warm. Allow it to cool slightly before assembling your casserole. I learned this the hard way when I once rushed and used hot rice—it made the mayo layer melt completely! That perfect vinegared rice base creates the authentic sushi flavor that makes this dish truly special.

    Layering Technique

    Think of building this casserole like constructing the perfect sushi roll, just in horizontal layers instead of a cylinder. Start with your seasoned rice pressed firmly into the bottom of your baking dish. Next, add a thin layer of spicy mayo (Kewpie mayo mixed with sriracha is my go-to). Then arrange your seafood mixture evenly across the surface. For the best texture contrast, save some crunchy elements like crispy tempura bits or tobiko for sprinkling on top after baking. This methodical layering ensures every bite contains the perfect balance of flavors and textures.

    Serving Ideas & Creative Variations

    Family-Style Presentation

    There’s something magical about placing a bubbling sushi bake in the center of your dining table and watching everyone eagerly scoop portions onto their plates. I serve mine with seaweed sheets on the side, allowing guests to make mini hand rolls if desired. Small bowls of soy sauce, pickled ginger, and wasabi complete the spread. Last Christmas, I surprised my family with this instead of our traditional ham dinner, and the empty casserole dish spoke volumes! For an extra special touch, provide cucumber slices as an alternative to seaweed for a refreshing crunch.

    Fusion Twists

    Don’t be afraid to experiment with non-traditional ingredients that complement the Japanese flavor profile. My recent obsession is a Korean-inspired version with kimchi and bulgogi beef that delivers an incredible depth of flavor. For a tropical twist, try adding diced mango and a drizzle of sweet chili sauce. The Mexican-fusion variation with avocado, jalapeño, and cilantro has become my Thursday night specialty. These creative adaptations keep the dish exciting even if you make it regularly. Remember, the best recipes evolve through playful experimentation!

    Storage & Troubleshooting Guide

    Proper Refrigeration

    This Easy Sushi Bake Casserole stores beautifully in the refrigerator for up to three days when properly covered. Use an airtight container or tightly wrap your baking dish with plastic wrap to prevent it from absorbing other food odors. The flavors actually meld and develop overnight, making day-two leftovers sometimes even better than the original! I often make a double batch on Sunday specifically for weekday lunches. When reheating, cover with foil and warm in a 300°F oven just until heated through—about 15 minutes. Microwave reheating works in a pinch, but the texture isn’t quite as good.

    Preventing Common Issues

    The most frequent challenge with sushi bakes is moisture balance—too dry and it loses that luscious mouthfeel, too wet and it becomes soggy. If your casserole seems dry during assembly, add a thin layer of spicy mayo between components. Conversely, if using very moist ingredients like cucumber or fresh mango, place them on top after baking rather than mixing them in. Another tip: if your rice layer seems too dense or gummy, you likely pressed it too firmly into the pan. Use gentle pressure when creating your base layer, just enough to ensure it holds together without compacting it into concrete!

    Frequently Asked Questions

    What exactly is an Easy Sushi Bake Casserole?

    It’s a deconstructed sushi roll baked in casserole form with layers of seasoned rice, seafood, and creamy sauces. Think of it as sushi’s cozy, shareable cousin that requires no rolling skills!

    Can I make this ahead of time?

    Absolutely! Assemble up to 24 hours ahead, cover and refrigerate. Add 5-7 minutes to the baking time if cooking straight from the refrigerator.

    What fish is safest to use in this recipe?

    For raw fish applications, use sushi-grade salmon or tuna from reputable sources. For easier options, imitation crab, cooked shrimp, or smoked salmon work beautifully.

    How spicy is this dish?

    The spice level is completely customizable. Adjust the sriracha in your spicy mayo mixture—start with less and add more to taste.

    Can I make a vegetarian version of this Easy Sushi Bake Casserole?

    Definitely! Substitute the seafood with avocado, cucumber, mango, roasted mushrooms, and pickled vegetables for a delicious plant-based alternative.

    Final Thoughts

    This Easy Sushi Bake Casserole has become my secret weapon for impressing guests without spending hours in the kitchen. There’s something deeply satisfying about transforming a traditionally meticulous dish into something so approachable yet equally delicious. The way the crispy edges contrast with the creamy center creates an irresistible texture that keeps everyone coming back for seconds. Whether you’re a sushi enthusiast or complete novice, this recipe bridges the gap between restaurant-quality flavors and home cooking simplicity. Don’t forget to check out more inspired Asian-fusion recipes on Pinterest!