Category: Fish Recipes

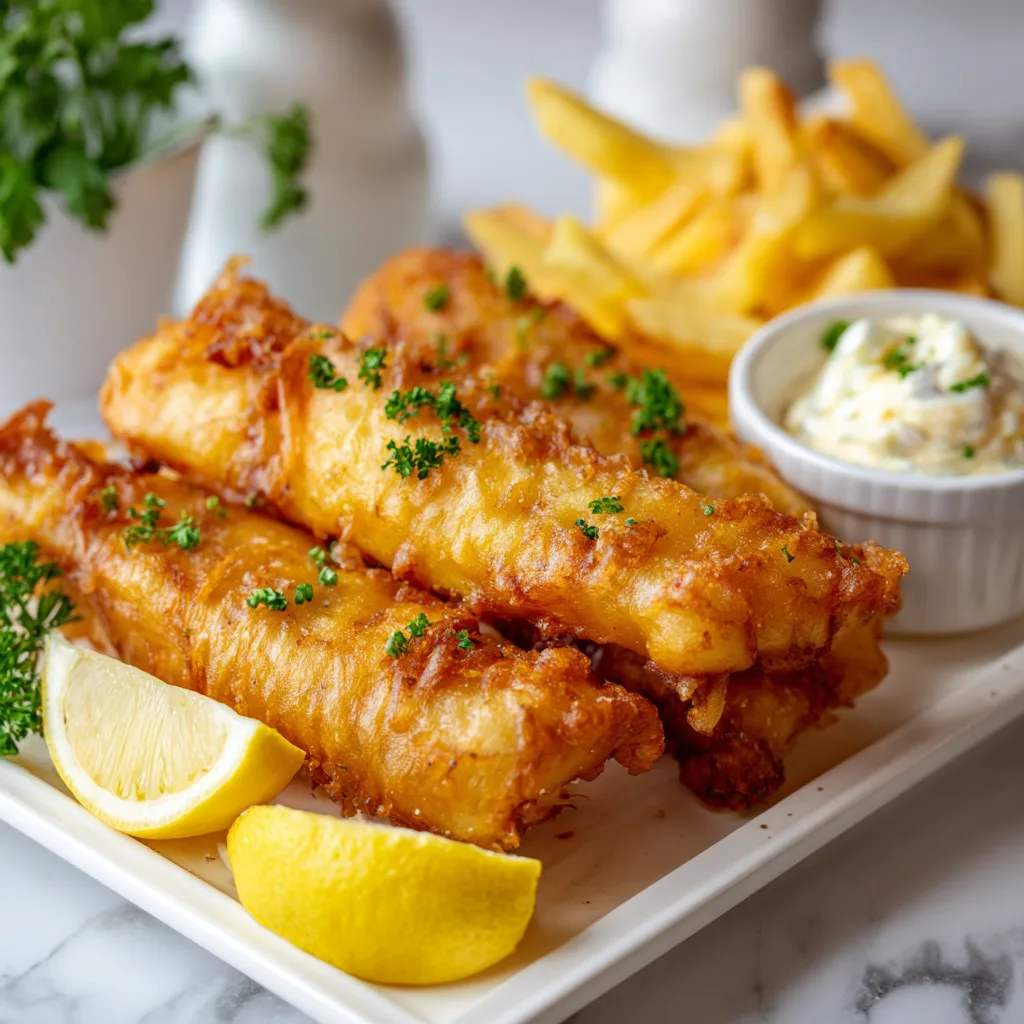
  • Classic British Fish & Chips: Crispy, Golden, Irresistible Delight!

    Classic British Fish & Chips: Crispy, Golden, Irresistible Delight!

    Classic British Fish & Chips: Crispy, Golden, Irresistible Delight!

    Classic British Fish & Chips brings the taste of seaside holidays right to your kitchen. There’s something magical about that first bite through crispy, golden batter into tender, flaky white fish. As a child, I remember unwrapping newspaper parcels on Brighton Beach, the vinegar-soaked chips steaming in the cool sea breeze. That distinctive combination of crispy exterior and pillowy interior creates an irresistible comfort food that’s stood the test of time. Today, I’m sharing my perfected recipe that captures that authentic British chippy experience. Grab your deep fryer—we’re about to embark on a deliciously nostalgic journey!

    Recipe

    Why You’ll Love This Classic British Fish & Chips

    The Perfect Batter Secret

    The soul of exceptional fish and chips lies in the batter consistency. I’ve tested dozens of variations, and the magic happens with cold beer and self-rising flour. The carbonation creates those beautiful air pockets that make the coating light yet crispy. For authentic results, keep everything ice cold until the moment it hits the hot oil. I always rest my batter 15 minutes before using—this allows the gluten to relax, preventing that heavy, chewy texture that ruins good fish. The transformation from pale batter to golden perfection is truly one of cooking’s most satisfying moments.

    Double-Fried Chips Technique

    Traditional British chips require a double-frying method that creates that distinctive texture—crispy outside, fluffy inside. Start with starchy potatoes like Russets or Maris Pipers, cut them thicker than American fries (about 1/2 inch), and soak them in cold water to remove excess starch. The first fry at a lower temperature (325°F) essentially poaches the potatoes, while the second at higher heat (375°F) delivers that golden crunch. I learned this technique from a third-generation chip shop owner in Whitby, and it’s absolutely transformative. The difference between single and double-fried chips is immediately noticeable.

    Essential Tips & Tricks

    Oil Temperature Control

    Maintaining proper oil temperature is critical for fish and chips success. Too cool, and your food absorbs oil, becoming greasy; too hot, and the exterior burns before the interior cooks. I recommend using a deep-fry thermometer and aiming for 350-375°F for fish and the second chip fry. Between batches, allow the oil to return to temperature before adding more food. Working in small batches prevents dramatic temperature drops. My favorite oils are peanut or vegetable, which have high smoke points and neutral flavors. Never fill your pot more than halfway with oil to prevent dangerous overflow.

    Authentic Seasoning Approach

    The traditional British seasoning approach is beautifully simple—malt vinegar and sea salt are your best friends here. Sprinkle salt immediately after removing from the fryer when the surface is still slightly moist so it adheres properly. For an authentic touch, serve with lemon wedges, homemade tartar sauce, and mushy peas. I keep a small spray bottle filled with malt vinegar for even distribution without sogginess. While Americans often reach for ketchup, true British fish and chips enthusiasts consider this almost sacrilegious—though I won’t judge if that’s your preference!

    Serving Ideas & Creative Variations

    Classic Accompaniments

    Serving fish and chips with the right sides elevates the entire experience. Mushy peas made with fresh or frozen peas, butter, and mint create that authentic chippy experience. Homemade tartar sauce with capers, cornichons, and fresh herbs offers the perfect tangy counterpoint to the rich fish. I always warm my serving plates slightly to keep everything hot longer. For presentation, try newspaper-lined baskets or parchment paper cones for that takeaway feel. My family’s favorite Friday tradition involves setting up a “chip shop” buffet with various vinegars, sauces, and crispy shrimp toast on the side for a complete seafood feast.

    Modern Twists & Variations

    While traditionalists might raise eyebrows, these creative variations can breathe new life into this classic dish. Try beer-battering different fish—haddock offers a sweeter flavor than cod, while halibut provides firmer texture. For a lighter option, use sparkling water instead of beer and add tempura-style seasonings. Experiment with chip alternatives like sweet potato, parsnip, or even zucchini fries for variety. My personal favorite twist is adding crushed salt and vinegar chips into the batter for extra flavor and crunch. For special occasions, serve with homemade curry sauce or garlic aioli for dipping—surprisingly delicious with the traditional fish.

    Storage & Troubleshooting Guide

    Proper Storage Methods

    While fish and chips are best enjoyed immediately, proper storage techniques can help preserve leftovers. If storing, separate the fish from the chips to prevent sogginess, and cool completely before refrigerating in airtight containers for up to 2 days. For reheating, avoid the microwave which ruins the texture. Instead, use an oven preheated to 350°F for 10-15 minutes until crispy and heated through. The air fryer works brilliantly too—just 3-4 minutes at 370°F. I’ve found that freezing battered fish works surprisingly well; freeze pieces separately on a baking sheet before transferring to freezer bags for up to 1 month.

    Common Problems & Solutions

    Even experienced cooks encounter troubleshooting challenges with fish and chips. If your batter slides off, ensure your fish is completely dry before coating and consider dusting with flour first. For soggy batter, check your oil temperature—it’s likely too low. Greasy results usually indicate the oil wasn’t hot enough or has degraded from overuse. If chips turn out limp, you’ve likely overcrowded the fryer—work in smaller batches. I once saved an entire dinner party when my batter wouldn’t crisp by adding a tablespoon of cornstarch to the remaining mixture, which instantly improved the texture and saved the meal.

    Frequently Asked Questions

    What’s the best fish for authentic British fish and chips?

    Traditional British fish and chips typically uses cod or haddock. Cod offers a mild, clean taste with large flakes, while haddock has a slightly sweeter flavor with firmer texture. Both work beautifully when fresh and sustainably sourced.

    Can I make fish and chips without a deep fryer?

    Absolutely! Use a heavy-bottomed Dutch oven with a thermometer. Fill it no more than halfway with oil, maintain proper temperature, and work in small batches. This method produces results just as delicious as dedicated fryers.

    How do I keep my Classic British Fish & Chips crispy until serving?

    Place fried pieces on a wire rack over a baking sheet in a 200°F oven. This maintains crispiness without continuing to cook the food. Avoid covering with foil, which traps steam and creates sogginess.

    What’s the secret to non-greasy fish and chips?

    The key is proper oil temperature (350-375°F), not overcrowding the fryer, and briefly draining on paper towels after frying. Using fresh oil and cold batter ingredients also significantly reduces greasiness.

    Can I prepare components of fish and chips ahead of time?

    You can cut and soak potatoes up to 24 hours ahead (refrigerated in water) and mix dry batter ingredients. However, only add wet ingredients right before cooking, and never coat fish until you’re ready to fry.

    Final Thoughts

    Classic British Fish & Chips represents comfort food at its finest—simple ingredients transformed through technique into something truly special. The combination of crispy, golden fish with perfectly double-fried chips creates a meal that transcends its humble origins. Whether you’re recreating holiday memories or experiencing this British staple for the first time, the joy of breaking through that crunchy exterior to the steaming fish beneath is unmatched. I hope this recipe brings a little bit of seaside magic to your table. Don’t forget to check out more comfort food classics on Pinterest for inspiration on your culinary journey!
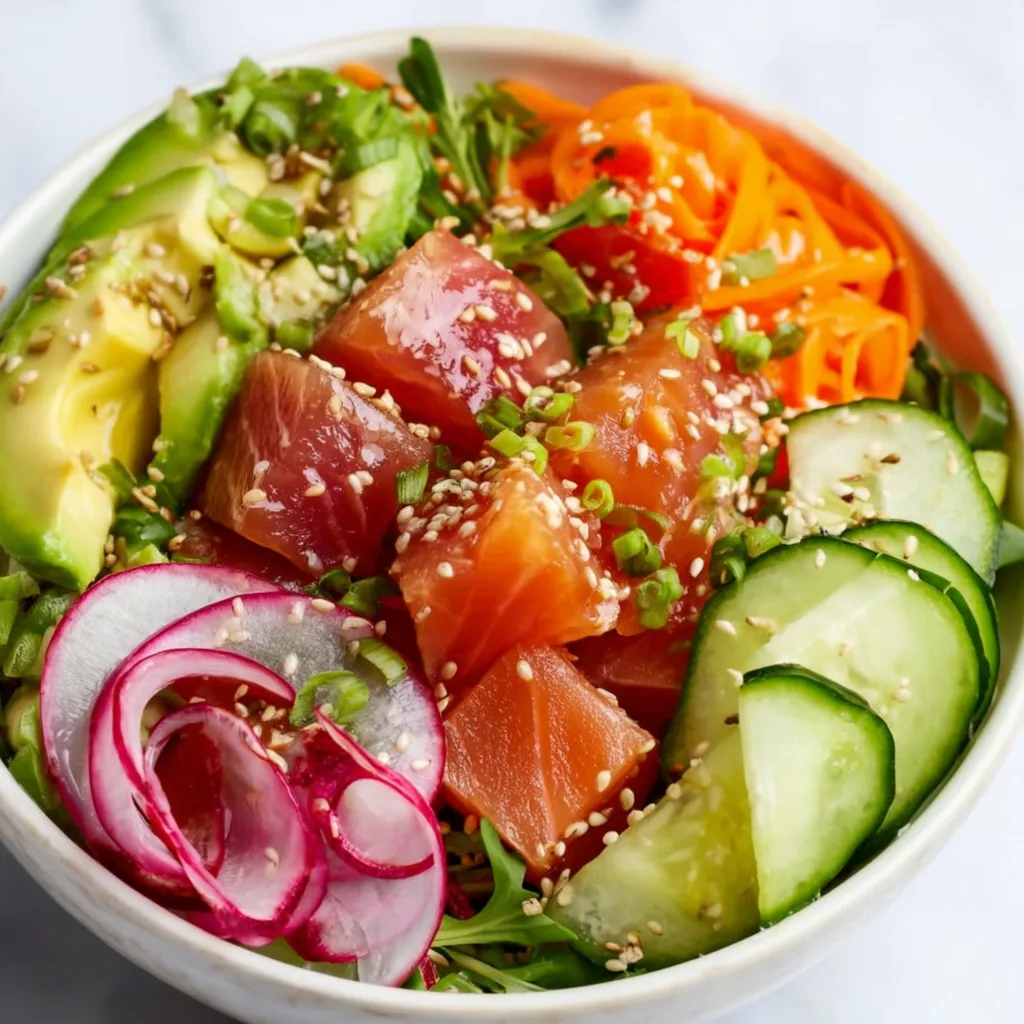
  • Poke Bowl Salad: Fresh, Flavorful & Irresistibly Healthy Boost!

    Poke Bowl Salad: Fresh, Flavorful & Irresistibly Healthy Boost!

    Poke Bowl Salad: Fresh, Flavorful & Irresistibly Healthy Boost!

    Poke Bowl Salad brings the vibrant flavors of Hawaii right to your kitchen with minimal effort and maximum satisfaction. I’ll never forget the first time I tasted a proper poke bowl during my coastal vacation – that perfect combination of fresh fish, crunchy vegetables, and umami-rich sauces had me instantly hooked. There’s something magical about how these colorful bowls balance textures and flavors so perfectly. Today I’m sharing my favorite version that’s become a weekly staple in my home, especially during warmer months when I crave something light yet satisfying. This recipe is endlessly customizable, making it perfect for family dinners where everyone can build their own creation.

    Recipe

    Why You’ll Love This Poke Bowl Salad

    A Nutritional Powerhouse

    This Poke Bowl Salad isn’t just a feast for your eyes – it’s packed with nutrient-dense ingredients that make it as good for your body as it is for your taste buds. The combination of omega-rich salmon or tuna, fiber-filled vegetables, and whole grain rice creates a perfectly balanced meal. I love how it delivers complete nutrition without feeling heavy afterward. The protein from the fish keeps you satisfied for hours, while the rainbow of vegetables provides essential vitamins and antioxidants. Plus, there’s something deeply satisfying about eating something so vibrant and colorful – it just feels like you’re doing something wonderful for your body.

    Quick and Customizable

    One of my favorite things about this Poke Bowl Salad is how incredibly versatile it is. You can easily adapt it to whatever you have on hand or to suit specific dietary needs. No fresh fish available? Use cooked shrimp or even tofu for a vegetarian version. The base can be switched from rice to quinoa, cauliflower rice, or even zucchini noodles for a lower-carb option. I’ve made this on busy weeknights in under 20 minutes, and it never disappoints. The preparation is mostly just chopping and assembling, making it perfect for those evenings when you want something impressive without spending hours in the kitchen.

    Essential Tips & Tricks

    Selecting and Preparing the Fish

    The star of any Poke Bowl Salad is undoubtedly the fish, so selecting sushi-grade quality is essential if you’re using it raw. Visit a trusted fishmonger or specialty store and don’t be shy about asking for fish that’s specifically safe for raw consumption. If raw fish isn’t your preference, quickly seared tuna or salmon works beautifully too. I always make sure to cut the fish into uniform cubes (about ½-inch) for even marinating and the perfect bite. Let it sit in your marinade for at least 15 minutes, but no more than 2 hours, to allow the flavors to penetrate without “cooking” the fish too much in the acidic ingredients.

    Balancing Flavors and Textures

    The magic of a perfect Poke Bowl Salad lies in the harmonious balance of flavors and textures. Aim for something crunchy (like cucumber, radish, or wonton strips), something creamy (avocado or a drizzle of spicy mayo), something tangy (pickled ginger or a squeeze of lime), and something with umami (soy sauce or seaweed). This creates a multi-dimensional experience in every bite. I learned this trick from a Hawaiian chef who explained that traditional poke is all about contrast. Don’t forget to add a sprinkle of toasted sesame seeds for that perfect finishing touch that adds both texture and a nutty flavor.

    Serving Ideas & Creative Variations

    Family-Style Poke Bar

    Transform dinner into an interactive experience by setting up a DIY poke bar. I did this for my sister’s birthday, and it was a huge hit! Prepare all the components separately and arrange them in individual bowls. Include cooked rice, diced raw fish (and perhaps some cooked options), sliced vegetables, various toppings, and an assortment of sauces. Everyone can build their own custom bowl exactly to their liking. This approach is especially perfect for entertaining guests with different dietary preferences or when you’re not sure what everyone likes. Plus, it makes for a colorful, Instagram-worthy spread that’s sure to impress.

    Seasonal Adaptations

    One of the joys of making Poke Bowl Salad regularly is adapting it to showcase seasonal produce. In summer, I load up on juicy mango, sweet corn, and garden-fresh cucumbers. Fall brings opportunities for roasted sweet potato cubes, edamame, and thinly sliced apples. Winter calls for heartier additions like roasted Brussels sprouts or quick-pickled red cabbage. The versatility of this dish means you’ll never get bored, and you can incorporate whatever looks freshest at your farmers market. This approach not only keeps the recipe exciting year-round but also ensures you’re getting the most nutritious, flavorful ingredients at their peak.

    Storage & Troubleshooting Guide

    Proper Storage Techniques

    When it comes to storing Poke Bowl Salad components, separate storage is the key to maintaining freshness. I learned this the hard way after combining everything for leftovers only to find soggy vegetables the next day! Store the marinated fish in an airtight container for no more than 24 hours in the coldest part of your refrigerator. Keep rice, vegetables, and toppings in separate containers. Avocado should be prepared fresh when ready to eat, as it browns quickly. If you’re meal prepping, consider keeping the dressing separate until serving time. This approach preserves the distinct textures and prevents the entire dish from becoming a mushy mess.

    Troubleshooting Common Issues

    Even experienced cooks occasionally encounter challenges with Poke Bowl Salad. If your rice is too sticky, try rinsing it thoroughly before cooking and cooling it completely before assembly. For fish that’s too salty, balance it with additional cucumber or avocado in your bowl. If your marinade tastes too acidic, add a touch of honey or maple syrup to round out the flavors. Soggy vegetables can ruin the experience – solve this by patting water-rich vegetables like cucumber dry before adding them to your bowl. If you’re concerned about the fish quality or simply prefer cooked options, quickly searing the outside of tuna or salmon provides both safety and delicious flavor.

    Frequently Asked Questions

    Is it safe to eat raw fish in a Poke Bowl Salad?

    When using proper sushi-grade fish purchased from a reputable source and handled correctly, raw fish is safe for most people. Always keep it refrigerated and consume within 24 hours. Those with compromised immune systems should opt for cooked alternatives.

    Can I make a vegetarian Poke Bowl Salad?

    Absolutely! Substitute the fish with marinated tofu, tempeh, or even watermelon (which mimics tuna’s texture surprisingly well). Focus on umami-rich ingredients like seaweed, mushrooms, and avocado to create a satisfying vegetarian version.

    How far in advance can I prepare a Poke Bowl Salad?

    You can prepare most components up to 24 hours ahead. Marinate fish no more than 2 hours before serving, and add delicate ingredients like avocado just before eating for the freshest experience.

    What’s the best rice to use for a traditional Poke Bowl Salad?

    Short-grain Japanese rice or sushi rice works best for authentic poke bowls. Their sticky texture helps hold together while eating. For a healthier option, brown rice or cauliflower rice make excellent alternatives.

    How do I ensure my Poke Bowl Salad has balanced flavors?

    Include elements from each flavor profile: something salty (soy sauce), something sweet (mango), something acidic (lime juice), something spicy (sriracha), and something rich (avocado). This creates a perfectly balanced Poke Bowl Salad experience.

    Final Thoughts

    This Poke Bowl Salad has become more than just a recipe in my kitchen – it’s a celebration of fresh, vibrant ingredients that never fails to brighten my day. What I love most is watching friends and family customize their bowls, discovering new flavor combinations with each creation. The beauty lies in its adaptability while maintaining that core Hawaiian-inspired essence. Whether you’re looking for a light lunch, impressive dinner, or meal-prep solution, this Poke Bowl Salad delivers on all fronts. I’d love to see your creations on Pinterest – tag me and share your favorite combinations!

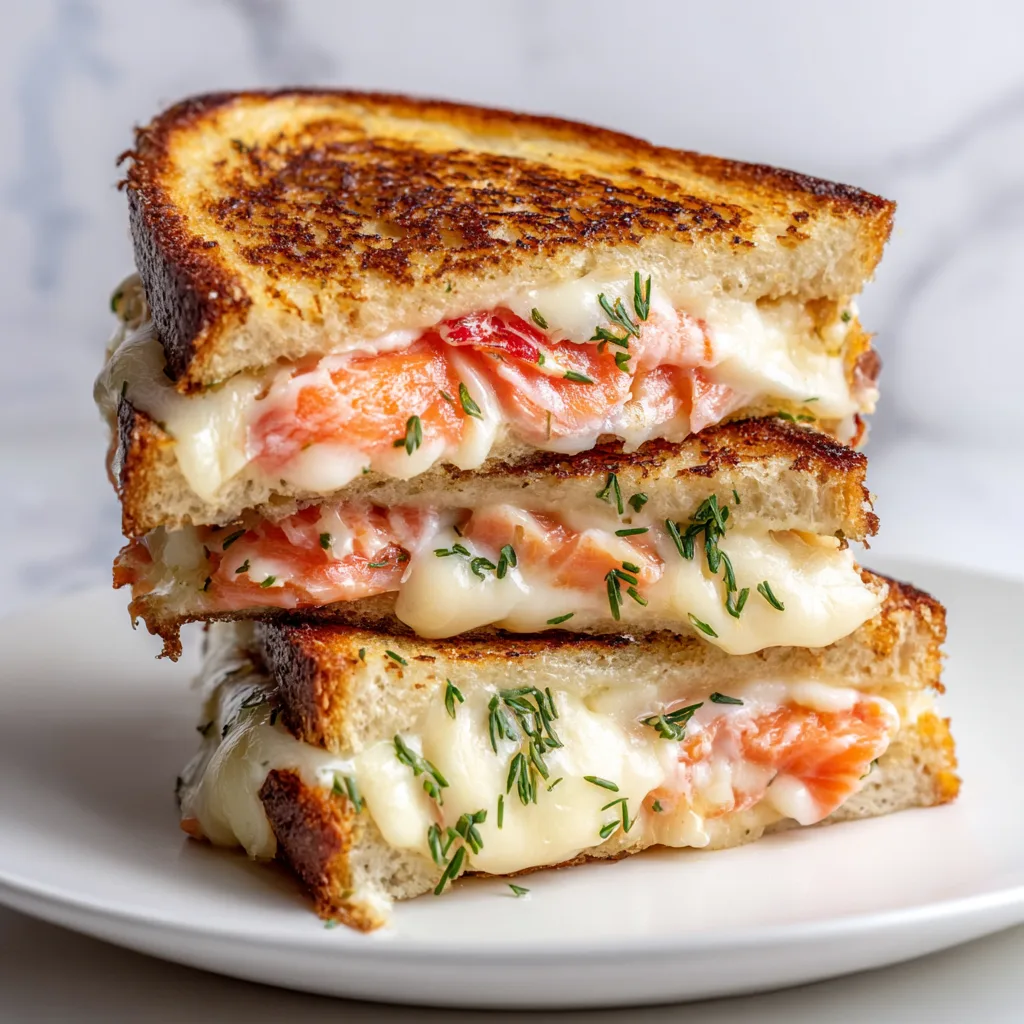
  • Smoked Salmon Grilled Cheese: Irresistible Crunch & Creamy Delight!

    Smoked Salmon Grilled Cheese: Irresistible Crunch & Creamy Delight!

    Smoked Salmon Grilled Cheese: Irresistible Crunch & Creamy Delight!

    Smoked Salmon Grilled Cheese transforms the humble sandwich into a gourmet experience that’s both elegant and comforting. I discovered this luxurious twist on a rainy afternoon when nothing in my pantry seemed appealing—until I spotted cream cheese and that precious package of smoked salmon. The buttery, golden-brown exterior gives way to a creamy center where tangy cream cheese meets smoky salmon in perfect harmony. What I love most is how this sandwich straddles the line between everyday comfort food and sophisticated fare. It’s perfect for those days when you crave something special but don’t want to spend hours in the kitchen. Check out my Italian Chopped Salad for the perfect accompaniment!

    Recipe

    Why You’ll Love This Smoked Salmon Grilled Cheese

    The Perfect Balance of Flavors

    There’s something magical about the way the rich smokiness of the salmon cuts through the creamy cheese. Each bite offers layers of flavor—tangy cream cheese, delicate salmon, sharp cheddar, and subtle hints of dill and capers if you’re feeling adventurous. I’ve found that adding a thin slice of red onion creates a pleasant sharpness that balances the richness. The textural contrast is equally satisfying: crispy, buttered bread against the melty interior creates that delightful mouthfeel we all crave from a perfect grilled cheese. It’s comfort food elevated to new heights.

    Quick and Impressive

    What I adore about this sandwich is how it transforms simple ingredients into something that feels special enough for company. It takes just 10 minutes from start to finish but tastes like something you’d order at a trendy bistro. I’ve served these at impromptu brunches and watched guests’ eyes widen with that first bite. The beautiful pink salmon peeking through the golden bread makes for an Instagram-worthy presentation without any fussy techniques. It’s my go-to when I want to impress someone with minimal effort—perfect for those days when you want something a bit luxurious without the luxury of time.

    Essential Tips & Tricks

    Choosing the Right Ingredients

    The quality of ingredients makes all the difference in this simple sandwich. Look for cold-smoked salmon rather than hot-smoked for that silky texture and delicate flavor. For cheese, I recommend a combination of cream cheese and a good melting cheese like Gruyère or white cheddar. The bread matters tremendously—sourdough or rye provide the perfect sturdy base with flavor that complements the salmon. Remember to bring cream cheese to room temperature for easier spreading. Fresh herbs like dill or chives add brightness, while capers introduce little bursts of briny flavor that cut through the richness beautifully.

    Perfecting Your Technique

    The secret to a perfect smoked salmon grilled cheese lies in the low and slow approach. Too high heat will burn the bread before the inside melts properly. I spread a thin layer of softened butter on the outside of each bread slice rather than melting it in the pan—this ensures even browning. Press down gently with a spatula as it cooks, but don’t flatten completely; you want some height to your sandwich. For the ultimate upgrade, try adding a thin layer of Garlic Butter Parmesan Knots filling to your bread before assembling—the garlic butter creates an incredible flavor foundation.

    Serving Ideas & Creative Variations

    Perfect Pairings

    This elevated sandwich deserves thoughtful accompaniments. I love serving smoked salmon grilled cheese with a light cucumber salad dressed simply with lemon and dill—the crispness cuts through the richness beautifully. A small bowl of tomato soup makes for a classic pairing with an upscale twist. For brunch, add a poached egg on top and let that golden yolk create an instant sauce. When entertaining, I slice these into small triangles and serve alongside Crispy Crab Cake Bites with Lemon Dill Sauce for an impressive seafood-themed appetizer spread that always earns compliments.

    Creative Twists

    Don’t be afraid to experiment with this versatile sandwich! My favorite variation includes thinly sliced green apple for a sweet-tart crunch that plays beautifully against the smoky salmon. For a Scandinavian-inspired version, try adding a thin layer of lingonberry jam—the sweet-tart flavor creates an incredible contrast. Substitute bagel slices for bread and add capers for a deconstructed lox bagel experience. For a lighter option, use whipped goat cheese instead of cream cheese. When I’m feeling indulgent, I add thin slices of avocado for extra creaminess. Each variation maintains the essence while creating a completely new experience.

    Storage & Troubleshooting Guide

    Making Ahead and Storage

    While smoked salmon grilled cheese is best enjoyed fresh off the pan, there are ways to prep components ahead. I often mix cream cheese with herbs and seasonings a day in advance—this actually improves the flavor as everything melds together. For parties, assemble sandwiches without cooking, wrap tightly in plastic, and refrigerate for up to 4 hours before grilling. Leftover cooked sandwiches can be wrapped and refrigerated, then reheated in a dry skillet over medium-low heat for 2-3 minutes per side. The texture won’t be quite as perfect, but the flavors remain delicious.

    Solving Common Problems

    If your sandwich is browning too quickly before the cheese melts, you’re likely using heat that’s too high. Lower the temperature and be patient—perfect grilled cheese requires gentle heat. If your sandwich feels too rich or heavy, try adding acid: lemon zest, pickled red onions, or a few capers create balance. Soggy bread often results from salmon that’s too wet; pat it dry with paper towels before assembling. If cream cheese squishes out during cooking, chill the assembled sandwich for 10 minutes before grilling to firm everything up. Remember that less is more with fillings—overstuffing leads to structural problems!

    Frequently Asked Questions

    Can I use other types of fish for this grilled cheese?

    Absolutely! Try hot-smoked trout, flaked poached salmon, or even canned tuna mixed with a bit of mayo. Each creates a different flavor profile while maintaining the seafood-cheese harmony that makes this sandwich special.

    What’s the best bread for smoked salmon grilled cheese?

    Sourdough is my top choice for its sturdy structure and tangy flavor. Rye pairs beautifully with salmon’s smokiness, while brioche adds richness. Avoid very soft breads that might collapse under the weight of fillings.

    Can I make a smoked salmon grilled cheese without dairy?

    Yes! Use dairy-free cream cheese and a good melting plant-based cheese. The salmon’s rich flavor ensures the sandwich remains delicious even without traditional dairy components.

    How do I prevent my sandwich from becoming too greasy?

    Use good quality cheese that melts without releasing excessive oil. Butter only the outside of the bread lightly, and cook over medium-low heat. Blotting excess oil from smoked salmon before assembling also helps.

    What herbs work best with smoked salmon grilled cheese?

    Dill is the classic pairing that enhances salmon’s flavor. Chives add mild onion notes, while fresh thyme brings earthy complexity. A combination of herbs creates the most interesting flavor profile.

    Final Thoughts

    The Smoked Salmon Grilled Cheese represents everything I love about cooking—transforming familiar ingredients into something that feels special without complicated techniques. It’s a reminder that luxury in food often comes from thoughtful combinations rather than expensive components. The contrast of textures, the harmony of flavors, and that beautiful golden exterior make this sandwich a true standout in my recipe collection. Whether you’re serving it for a solo lunch or as part of an elegant brunch spread, it delivers comfort and sophistication in equal measure. Find more inspiration for your next culinary adventure on Pinterest!

  • Shrimp Newburg Recipe: Creamy, Decadent, and Irresistibly Easy!

    Shrimp Newburg Recipe: Creamy, Decadent, and Irresistibly Easy!

    Shrimp Newburg Recipe: Creamy, Decadent, and Irresistibly Easy!

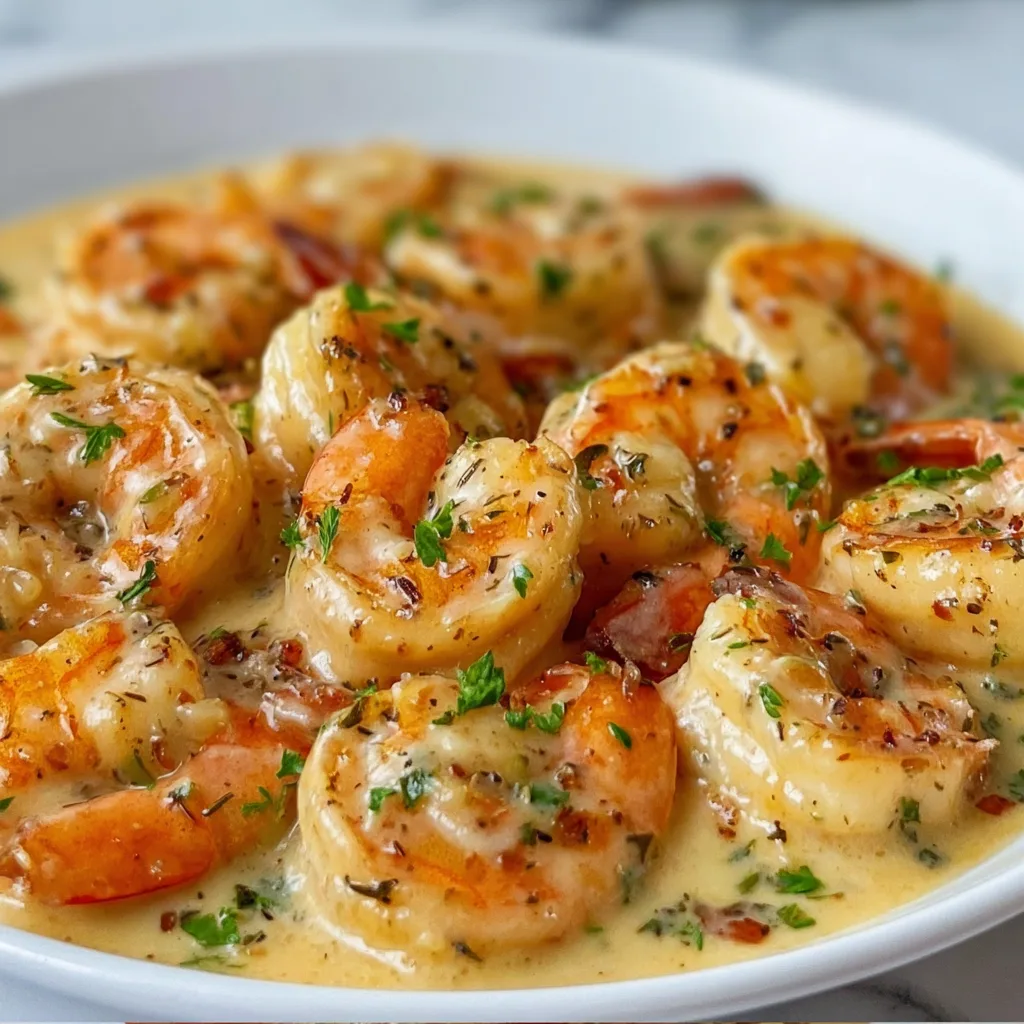
    Shrimp Newburg is one of those classic dishes that manages to be both elegantly sophisticated and comforting at the same time. The first time I made this rich, creamy creation, I was transported back to my grandmother’s dining room where special occasions always meant something decadent on the table. The tender shrimp bathed in a velvety cognac-kissed sauce creates a luxurious meal that feels like a warm hug on a plate. Whether you’re planning a romantic dinner or simply want to elevate your weeknight cooking, this Shrimp Newburg recipe promises restaurant-quality results with surprisingly little effort.

    Recipe

    Why You’ll Love This Shrimp Newburg Recipe

    Perfect Balance of Flavors and Textures

    There’s something magical about the way the sweet, tender shrimp mingles with the rich, buttery sauce in this recipe. The delicate seafood flavor shines through while being complemented by the warm notes of cognac or sherry. I love how the sauce coats each shrimp perfectly, creating little pockets of flavor with every bite. The slight tanginess from the lemon juice brightens everything up, preventing the dish from becoming too heavy. It’s this perfect balance that makes Shrimp Newburg so addictive – sophisticated enough for special occasions but comforting enough to make you close your eyes with each delicious forkful.

    Quick Yet Impressive Results

    Despite its fancy reputation, Shrimp Newburg comes together in about 30 minutes from start to finish. This makes it my go-to when I need something impressive but don’t have hours to spend in the kitchen. The sauce thickens beautifully as it simmers, transforming before your eyes into that signature velvety consistency. I still remember the first time I served this to guests – they couldn’t believe I’d whipped it up so quickly! The combination of minimal prep work and maximum flavor impact makes this recipe a true kitchen hero when you want to impress without stress. Your dinner guests will think you spent hours crafting this luxurious dish.

    Essential Tips & Tricks

    Selecting and Preparing the Shrimp

    The foundation of an exceptional Shrimp Newburg starts with high-quality shrimp. I recommend using large or jumbo shrimp (16-20 count per pound) for the best texture and presentation. Fresh is wonderful if you have access, but don’t hesitate to use frozen shrimp that’s been properly thawed. The key is ensuring they’re deveined and peeled, leaving just the tails on for a prettier presentation if desired. When cooking the shrimp, remember that they’ll continue cooking in the sauce, so it’s better to slightly undercook them in the initial sauté. Pink with just a hint of translucence is perfect – they should have just curled into a loose C-shape.

    Creating the Perfect Sauce Consistency

    The signature velvety texture of Shrimp Newburg sauce requires a bit of attention but is simple to master. Start with a proper roux by cooking the flour and butter until it smells slightly nutty but hasn’t browned. When adding your liquid ingredients, pour slowly while whisking constantly to prevent lumps from forming. If your sauce seems too thick, add a tablespoon of cream or stock at a time until you reach the desired consistency. For a silkier finish, temper your egg yolks by adding a small amount of the hot sauce to them before incorporating them back into the pan. This prevents curdling and creates that luxurious mouthfeel that makes Shrimp Newburg so special.

    Serving Ideas & Creative Variations

    Classic and Modern Serving Suggestions

    Traditionally, Shrimp Newburg is served over buttery toast points or puff pastry shells for an elegant presentation. For a more substantial meal, spoon it over perfectly cooked rice or angel hair pasta that will catch all that luscious sauce. One of my favorite ways to serve it is nestled in a bed of creamy mashed potatoes with a sprinkle of fresh chives – the contrast between the silky sauce and fluffy potatoes is divine! For a low-carb option, consider serving over cauliflower rice or alongside roasted asparagus. Whatever base you choose, a simple green salad with a light vinaigrette makes the perfect accompaniment to balance the richness of this spectacular dish.

    Exciting Flavor Twists and Additions

    While the classic recipe is perfection, I love experimenting with flavor variations that put a personal spin on this timeless dish. Adding a pinch of smoked paprika or cayenne pepper brings a subtle heat that complements the sweetness of the shrimp beautifully. For a Mediterranean twist, stir in some sun-dried tomatoes and a handful of baby spinach just before serving. Seafood lovers might appreciate a mixed version with lobster or scallops alongside the shrimp – I tried this for a holiday dinner and it was a showstopper! You can also incorporate crispy bacon bits for a smoky contrast or add sautéed mushrooms for an earthy dimension that pairs wonderfully with the rich sauce.

    Storage & Troubleshooting Guide

    Proper Storage and Reheating Methods

    Shrimp Newburg is best enjoyed fresh, but leftovers can be stored in an airtight container in the refrigerator for up to 2 days. When reheating, do so gently over low heat to prevent the sauce from breaking and the shrimp from becoming tough. I recommend adding a splash of cream or milk when reheating to revitalize the sauce’s silky texture. For the best results, warm the sauce separately until it’s just heated through, then add the shrimp for the final minute to avoid overcooking. Unfortunately, Shrimp Newburg doesn’t freeze well due to the cream-based sauce, which can separate upon thawing, and the texture of the shrimp may become compromised.

    Common Issues and How to Fix Them

    Even experienced cooks occasionally encounter challenges with Shrimp Newburg. If your sauce breaks or curdles, don’t panic! Try removing it from heat and whisking in a tablespoon of cold cream or a small pat of softened butter. For a sauce that’s too thin, create a slurry with a teaspoon of cornstarch and cold water, then whisk it in while the sauce simmers. Conversely, if your sauce is too thick, gradually add warm stock or cream until you reach the desired consistency. Overcooked shrimp can become rubbery – if this happens, consider chopping them and incorporating them into a creamy pasta dish where the sauce will help mask the texture.

    Remember that patience is key – gentle heat and constant attention yield the best results.

    Frequently Asked Questions

    What exactly is Shrimp Newburg?

    Shrimp Newburg is a rich American seafood dish consisting of shrimp in a creamy sauce made with butter, egg yolks, cream, and sherry or cognac. It originated in the late 1800s and is traditionally served over toast points, puff pastry, or rice.

    Can I make Shrimp Newburg ahead of time?

    You can prepare the sauce up to 24 hours ahead, but I recommend cooking the shrimp just before serving. Reheat the sauce gently, then add freshly cooked shrimp to maintain their tender texture and prevent overcooking.

    What can I substitute for the alcohol in Shrimp Newburg recipe?

    For a non-alcoholic version, substitute the sherry or cognac with seafood stock mixed with a tablespoon of lemon juice and a teaspoon of vanilla extract. This maintains the depth of flavor without using alcohol.

    How can I tell when the shrimp are perfectly cooked?

    Perfectly cooked shrimp turn pink, opaque, and curl into a loose C-shape. If they curl into a tight O-shape, they’re overcooked. They should feel firm but still have a slight bounce when pressed.

    What sides pair well with this dish?

    Light, fresh sides balance Shrimp Newburg’s richness best. Consider steamed asparagus, a simple green salad, roasted Brussels sprouts, or garlic green beans. For starches, rice, crusty bread, or pasta work beautifully.

    Final Thoughts

    This Shrimp Newburg recipe transforms simple ingredients into something truly special – a dish that feels like celebration on a plate. I hope you’ll embrace both the classic preparation and the creative variations to make this recipe your own. There’s something deeply satisfying about mastering a timeless dish like this, watching as humble shrimp transform into an elegant meal worthy of your most cherished gatherings. Whether for a romantic dinner, holiday feast, or simply because you deserve something extraordinary, Shrimp Newburg delivers comfort and luxury in equal measure. Find more seafood inspirations on our Pinterest board and keep creating beautiful meals!

  • Ginger Soy Glazed Salmon That’ll WOW Your Taste Buds!

    Ginger Soy Glazed Salmon That’ll WOW Your Taste Buds!

    Ginger Soy Glazed Salmon That’ll WOW Your Taste Buds!

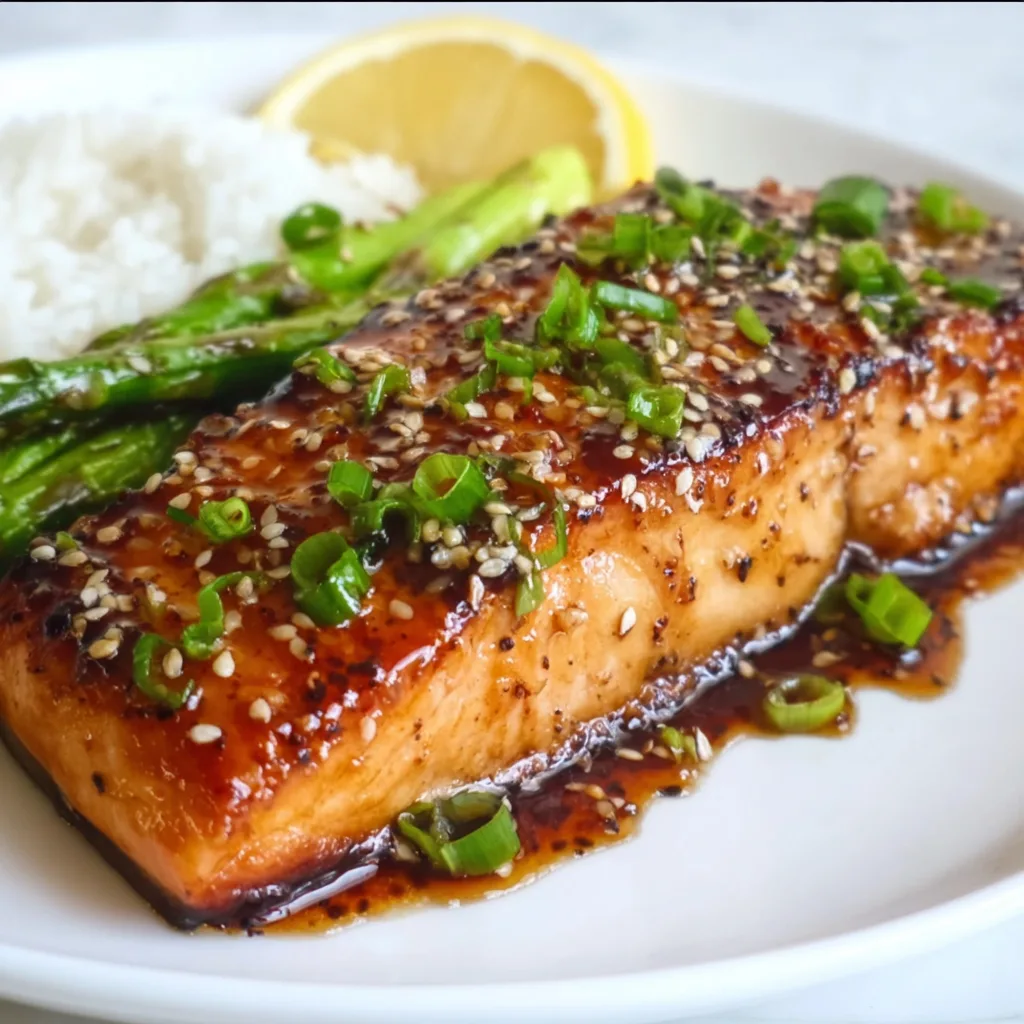
    Ginger Soy Glazed Salmon is one of those dishes that makes weeknight cooking feel like a special occasion. The first time I made this recipe, the aroma of ginger and garlic filled my kitchen, instantly transporting me to my favorite Asian restaurant. There’s something magical about how the sweet-savory glaze caramelizes on the salmon, creating a dish that’s both impressive and incredibly simple. If you’re looking for a dinner that delivers restaurant-quality flavor with minimal effort, this recipe is about to become your new favorite.

    Recipe

    Why You’ll Love This Ginger Soy Glazed Salmon

    Perfect Balance of Flavors

    The magic of this Ginger Soy Glazed Salmon lies in its perfect harmony of flavors. The salty umami from the soy sauce balances beautifully with honey’s natural sweetness, while fresh ginger adds that distinctive zingy warmth that makes your taste buds dance. I love how the garlic deepens everything, creating layers of flavor that seem far more complex than the simple ingredients list suggests. The first time my husband tasted this, he actually closed his eyes and said, “This is better than any restaurant salmon.” That moment of pure satisfaction is exactly why I keep coming back to this recipe.

    Quick and Foolproof Preparation

    Even on my busiest days, I can have this Ginger Soy Glazed Salmon on the table in under 30 minutes. The beauty is in its simplicity – just whisk the glaze ingredients, pour over the salmon, and let the oven do the work. What I appreciate most is how forgiving this recipe is for beginners. The glaze creates a protective coating that helps prevent the salmon from drying out, making it nearly impossible to overcook. Last Tuesday, I got distracted by a phone call and left it in a few minutes longer than planned, yet it still emerged perfectly tender and flavorful.

    Essential Tips & Tricks

    Selecting the Perfect Salmon

    Choosing the right salmon makes all the difference in this recipe. Look for center-cut fillets with vibrant color and firm texture. I prefer wild-caught salmon for its richer flavor, but farm-raised works beautifully too. The thickness matters – aim for pieces that are about 1-1.5 inches thick at their deepest point for even cooking. I learned this lesson the hard way when I used thin tail pieces that overcooked while the thicker portions were perfect. For the freshest flavor, give your salmon a gentle sniff – it should smell clean and oceanic, never fishy or ammonia-like.

    Mastering the Glaze Consistency

    The secret to an exceptional Ginger Soy Glazed Salmon is getting that glaze consistency just right. You want it thick enough to cling to the salmon but not so thick that it won’t penetrate the fish. I find that simmering the glaze for 3-4 minutes creates the perfect sticky-sweet coating that caramelizes beautifully. For an extra layer of flavor, reserve some of the glaze before marinating and brush it on during the last few minutes of cooking. This technique creates that gorgeous lacquered finish that makes this dish look like it came from a high-end restaurant.

    Serving Ideas & Creative Variations

    Perfect Pairings for a Complete Meal

    This Ginger Soy Glazed Salmon deserves accompaniments that complement its bold flavors without overwhelming them. My go-to side is fluffy jasmine rice that soaks up every drop of that precious glaze. For vegetables, steamed bok choy or sesame-roasted broccoli provide the perfect contrast in both texture and flavor. When entertaining, I love serving this with a quick cucumber salad dressed with rice vinegar and sesame oil – the cool crispness balances the rich salmon beautifully. For a special touch, sprinkle everything with toasted sesame seeds and thinly sliced green onions just before serving.

    Exciting Flavor Variations

    While the classic ginger-soy combination is perfection, this recipe welcomes creative twists. For a spicy kick, add a tablespoon of sriracha or a teaspoon of gochujang to the glaze. When I’m craving something citrusy, I’ll add orange zest and a splash of fresh juice to brighten everything up. For a tropical variation that my family adores, try incorporating a tablespoon of pineapple juice and a sprinkle of toasted coconut flakes on top. For an elegant dinner party version, finish with a drizzle of wasabi cream – it adds a sophisticated heat that guests always rave about.

    Storage & Troubleshooting Guide

    Proper Storage for Leftovers

    Leftover Ginger Soy Glazed Salmon can be just as delicious the next day if stored properly. Allow the salmon to cool completely before refrigerating in an airtight container for up to 2 days. I prefer reheating gently in a 275°F oven just until warmed through – about 10 minutes – to preserve the moisture. Microwaving works in a pinch, but use 50% power in short bursts to prevent that dreaded rubbery texture. For a completely different experience, try enjoying leftover salmon chilled on a salad with some of the reserved glaze thinned with a bit of rice vinegar as dressing.

    Solving Common Cooking Challenges

    If your salmon isn’t caramelizing properly, your oven temperature might be too low or the glaze might need more sugar content. Ensure your oven is fully preheated and consider positioning the salmon on the upper third rack for better browning. If the glaze is burning before the salmon is cooked through, cover loosely with foil for part of the cooking time. For those times when your salmon releases too much liquid during cooking (diluting that beautiful glaze), try patting the fillets extra dry before glazing and letting them sit at room temperature for 10-15 minutes before baking.

    Frequently Asked Questions

    Can I make Ginger Soy Glazed Salmon ahead of time?

    You can prepare the glaze up to 3 days ahead and store it refrigerated. For best results, glaze the salmon just before cooking, though you can prep the salmon and glaze it up to 2 hours before baking.

    Is this recipe gluten-free?

    Not as written, but it’s easily adaptable by substituting tamari or coconut aminos for the soy sauce. Double-check that your honey is pure and not blended with other ingredients.

    Can I grill this salmon instead of baking it?

    Absolutely! Grill over medium-high heat for 4-5 minutes per side, basting with additional glaze. Use a fish basket or foil packet if you’re concerned about sticking.

    What’s the best way to tell when the salmon is perfectly cooked?

    The salmon is done when it flakes easily with a fork but still maintains some translucency in the center. For medium-rare, aim for an internal temperature of 125°F.

    Can I use frozen salmon for Ginger Soy Glazed Salmon?

    Yes, but thaw it completely in the refrigerator overnight and pat it very dry before applying the glaze. Frozen-then-thawed salmon may release more moisture during cooking.

    Final Thoughts

    This Ginger Soy Glazed Salmon has become my reliable hero for everything from quick weeknight dinners to impressive entertaining. There’s something magical about how such a simple preparation can transform ordinary salmon into something truly extraordinary. The combination of sweet, salty, and zingy flavors creates a dish that feels both comforting and special. Whether you’re cooking for yourself or hosting friends, this recipe delivers that perfect balance of effort to reward. I hope this becomes a beloved staple in your kitchen too! Find more delicious inspiration on Pinterest.

  • Shrimp Orzo in Lemon Garlic Sauce | Irresistibly Zesty & Quick!

    Shrimp Orzo in Lemon Garlic Sauce | Irresistibly Zesty & Quick!

    Shrimp Orzo in Lemon Garlic Sauce | Irresistibly Zesty & Quick!

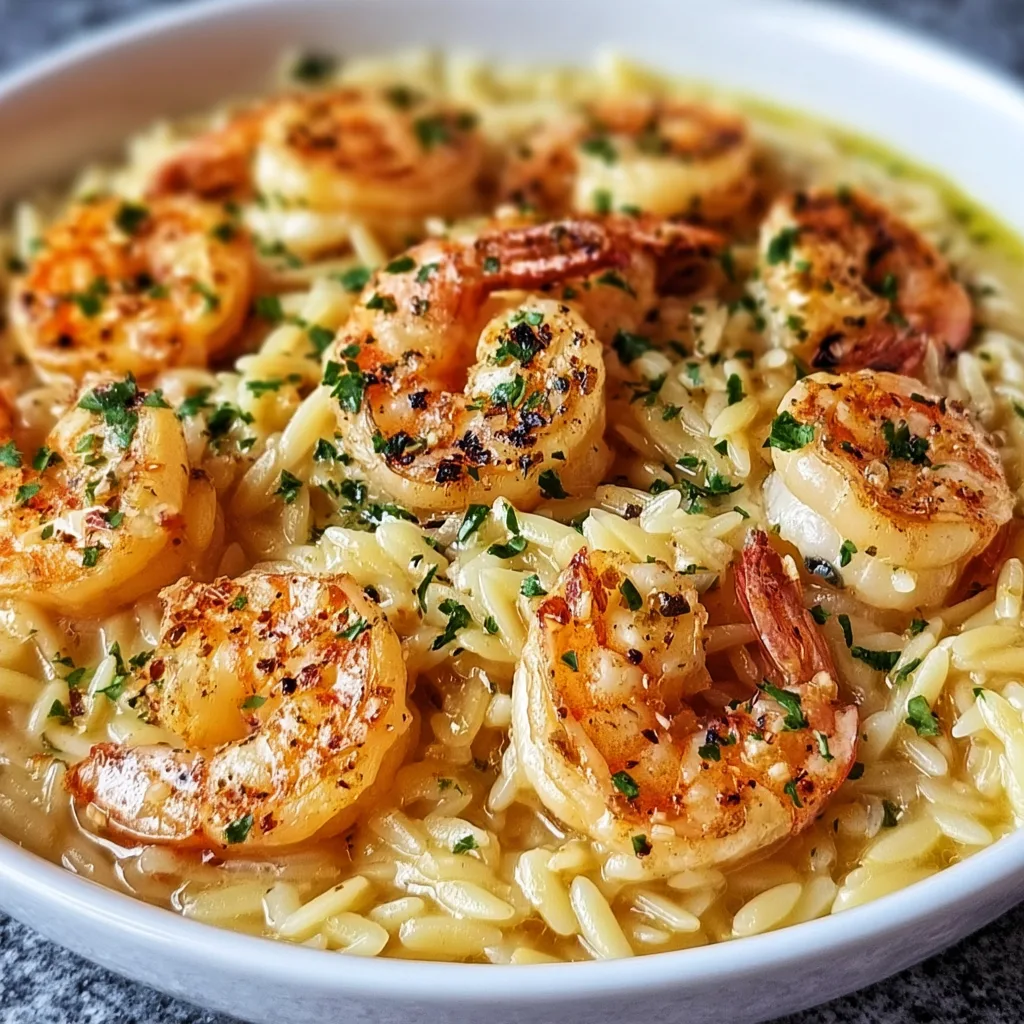
    Shrimp Orzo in Lemon Garlic Sauce is the perfect balance of comfort and sophistication that I’m absolutely obsessed with lately. Picture this: plump, juicy shrimp nestled among tender orzo pasta, all bathed in a silky lemon garlic sauce that hits every perfect note – bright, creamy, and utterly craveable. I first created this dish on a rainy Sunday when I needed something that felt special but didn’t require hours in the kitchen. The way the sauce clings to each piece of orzo makes every bite a little moment of joy. Trust me, this is about to become your new weeknight favorite that feels anything but ordinary. Let me show you how to make magic happen in just one pan.

    Recipe

    Recipe

    Why You’ll Love This Shrimp Orzo in Lemon Garlic Sauce

    Perfect Balance of Flavors

    There’s something almost magical about the combination of zesty lemon and aromatic garlic in this dish. The brightness cuts through the richness, creating this perfect harmony that dances on your tongue. I love how the lemon juice adds that perfect zing without overwhelming the delicate sweetness of the shrimp. The garlic infuses the entire dish with a warm, inviting aroma that fills your kitchen and makes everyone ask “what smells so amazing?” It’s the kind of dish that feels sophisticated enough for company but simple enough for a Tuesday night when you need something comforting after a long day.

    One-Pan Simplicity

    As someone who values both flavor and efficiency, I’m all about one-pan wonders that deliver maximum impact with minimal cleanup. This shrimp orzo comes together in just one skillet, where each ingredient builds upon the last, creating layers of flavor that taste like you’ve been cooking all day. The orzo absorbs all those gorgeous flavors as it cooks directly in the sauce, becoming plump and tender. I’ve found this method actually creates a creamier texture than boiling the pasta separately. Plus, on busy nights, knowing I’ll only have one pan to wash makes me much more likely to cook something delicious rather than ordering takeout.

    Essential Tips & Tricks

    Perfecting Your Shrimp

    The key to restaurant-quality shrimp is avoiding overcooking at all costs! I always pat my shrimp completely dry with paper towels before seasoning – this ensures they get that beautiful golden sear rather than steaming. Cook them just until they turn pink and opaque (about 2 minutes per side), then remove them from the pan while you prepare the sauce and orzo. This two-stage cooking method prevents rubbery, tough shrimp. Remember that they’ll continue cooking slightly when added back to the hot pasta, so it’s better to undercook them initially. The perfect shrimp should have a slight C shape – if they curl into tight O shapes, they’re overcooked.

    Creating a Silky Sauce

    The velvety texture of this sauce comes from a few simple techniques that make all the difference. Start by deglazing the pan with a splash of white wine to release those flavorful browned bits from cooking the shrimp. When adding lemon juice, incorporate the zest too – it contains the aromatic oils that give depth beyond just acidity. For extra creaminess without heaviness, try stirring in a tablespoon of cream cheese or a splash of half-and-half in the final minute of cooking. My favorite trick is adding a knob of cold butter right at the end with the heat off – this creates a glossy, restaurant-worthy finish that elevates the entire dish.

    Serving Ideas & Creative Variations

    Perfect Pairings

    This shrimp orzo deserves to be the star of your table, but a few simple sides can complete the meal beautifully. I love serving it with a crisp side salad dressed with just olive oil and lemon to echo the flavors in the main dish. For a heartier option, some garlic bread is perfect for soaking up every last drop of that incredible sauce. When entertaining, I start with a light appetizer like marinated olives or a small cheese plate. This dish pairs wonderfully with a chilled Pinot Grigio or Sauvignon Blanc that complements the citrus notes. For a non-alcoholic option, sparkling water with a squeeze of lemon and sprig of basil is refreshingly perfect.

    Exciting Twists

    Don’t be afraid to make this recipe your own with some creative variations! For a Mediterranean twist, add halved cherry tomatoes, crumbled feta, and fresh dill in the last few minutes of cooking. Seafood lovers can turn this into a mixed seafood delight by adding scallops, mussels, or pieces of firm white fish alongside the shrimp. For a touch of heat, red pepper flakes or a dash of cayenne wake up all the flavors. When I’m craving extra vegetables, I fold in fresh spinach or asparagus pieces right at the end until just wilted. For a heartier version perfect for cooler months, try adding roasted cherry tomatoes and Italian sausage for a delicious twist.

    Storage & Troubleshooting Guide

    Proper Storage

    This shrimp orzo makes fantastic leftovers when stored properly. Transfer any remaining portions to an airtight container and refrigerate for up to 2 days. The flavors actually continue to develop overnight, making next-day lunch something to look forward to! When reheating, add a splash of chicken broth or water to loosen the sauce, as the orzo will continue absorbing liquid. I prefer gentle reheating in a covered skillet over medium-low heat rather than the microwave, which can make the shrimp tough. If you’re meal prepping, consider keeping the cooked shrimp separate and adding them only during reheating to prevent them from becoming overcooked.

    Common Issues Solved

    If your sauce seems too thin or watery, don’t worry – simply simmer uncovered for a few extra minutes to reduce and thicken. Conversely, if it’s too thick, add small amounts of broth until you reach your desired consistency. For orzo that’s undercooked or too firm, add ¼ cup more liquid and continue cooking, checking every 2 minutes until perfect. If your shrimp release too much liquid and dilute the flavor, increase seasoning and add a squeeze of fresh lemon to brighten everything back up. Remember that the sauce will thicken as it cools, so it’s better to err on the slightly thinner side when serving. Trust your taste buds – they’re your best guide!

    Frequently Asked Questions

    Can I use frozen shrimp for this Shrimp Orzo in Lemon Garlic Sauce?

    Absolutely! Thaw completely and pat very dry before cooking. I actually keep frozen shrimp on hand specifically for quick meals like this when I don’t have time to shop for fresh.

    What can I substitute for orzo pasta?

    Any small pasta works beautifully – try small shells, ditalini, or even Israeli couscous. Adjust cooking time according to package directions since they may differ slightly from orzo.

    Is this dish spicy?

    Not as written, but it’s easy to add heat! Red pepper flakes, cayenne pepper, or a dash of hot sauce can be added to taste for those who enjoy some spice.

    Can I make this dairy-free?

    Yes! Skip the butter and Parmesan, using olive oil instead. For creaminess, try coconut cream or a splash of your favorite plant-based cream alternative.

    How do I prevent the orzo from sticking to the pan?

    Stir frequently, especially during the first few minutes of cooking. Using a non-stick pan or well-seasoned cast iron skillet also helps prevent sticking issues.

    Final Thoughts

    This Shrimp Orzo in Lemon Garlic Sauce has become my go-to dish when I want to impress without stress. There’s something about the combination of tender shrimp, perfectly cooked orzo, and that bright, velvety sauce that feels like a warm hug at the end of a long day. I hope you’ll give this recipe a try and make it your own – it’s flexible enough to adapt to what you have on hand while still delivering that restaurant-quality experience right at your kitchen table. Don’t forget to check out more seafood inspiration on my Pinterest boards for your next cooking adventure!

  • Bang Bang Salmon: Mouthwatering Flavor Explosion You Can’t Miss!

    Bang Bang Salmon: Mouthwatering Flavor Explosion You Can’t Miss!

    Bang Bang Salmon: Mouthwatering Flavor Explosion You Can't Miss!

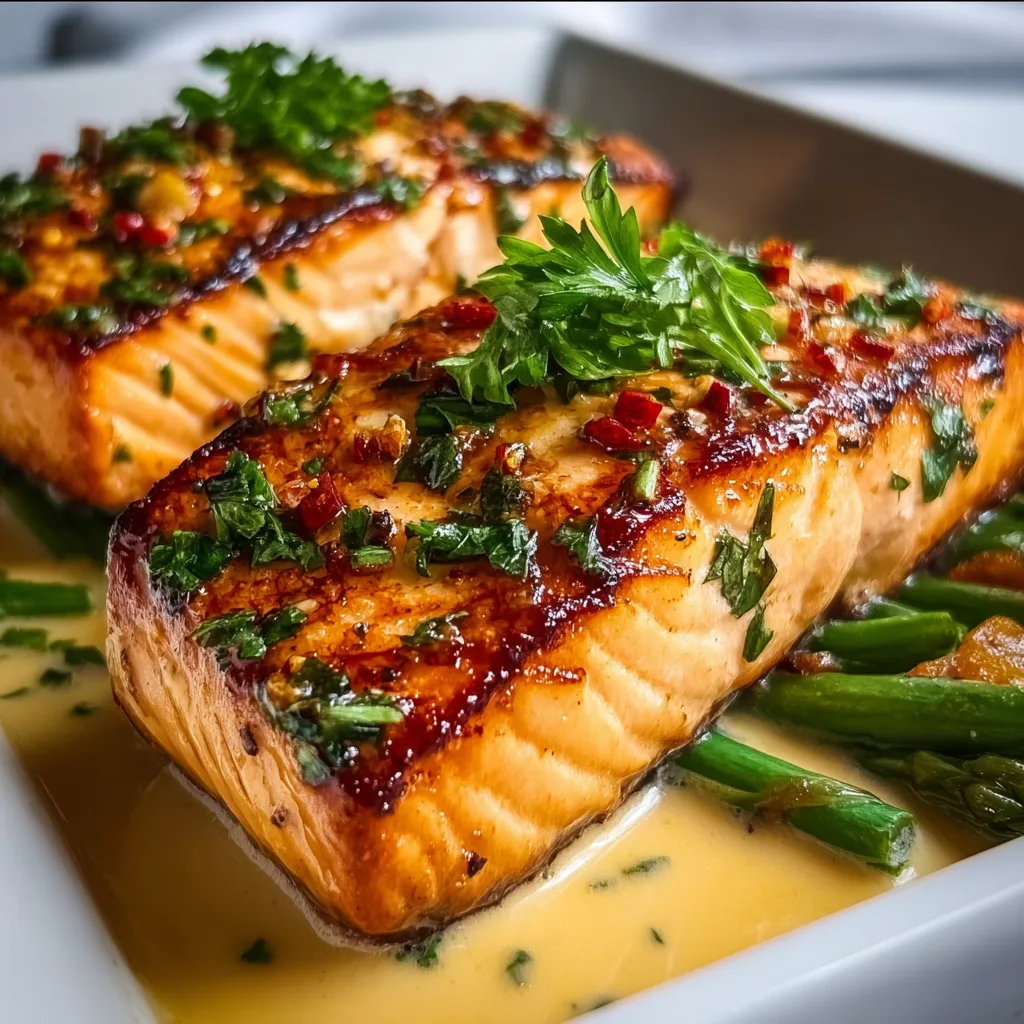
    Bang Bang Salmon brings together tender salmon fillets with a creamy, sweet-spicy sauce that’s absolutely irresistible. Every time I make this dish, the kitchen fills with a tantalizing aroma that draws everyone in like a magnet. The combination of crispy-edged salmon and that signature bang bang sauce—with its perfect balance of heat and sweetness—creates a restaurant-quality meal that’s surprisingly simple to prepare. I first tried making this after a busy week when I needed something special but quick, and it’s been in my regular rotation ever since. Ready in under 30 minutes, this Bang Bang Salmon will become your new favorite weeknight dinner sensation.

    Recipe

    Why You’ll Love This Bang Bang Salmon

    Perfect Balance of Flavors and Textures

    The magic of Bang Bang Salmon lies in its incredible contrast of textures and flavors. The salmon develops a beautiful golden crust while staying moist and tender inside—a perfect canvas for the creamy, spicy-sweet sauce. Each bite delivers a harmonious blend of rich salmon, creamy mayo, the subtle sweetness of honey, and that signature kick from sriracha. I love how the sauce clings to the fish, creating little pockets of flavor that burst with each bite. The slight tang from the lime juice brightens everything up, making each mouthful a perfect balance of indulgence and freshness.

    Quick and Impressive Dinner Solution

    When you need a showstopper meal but don’t have hours to spend in the kitchen, Bang Bang Salmon comes to the rescue. It takes just 25 minutes from start to finish, yet looks and tastes like something from a high-end restaurant. I’ve served this to last-minute dinner guests who couldn’t believe it wasn’t a complicated recipe. The sauce comes together in seconds while the salmon cooks, making this perfect for busy weeknights when you want something special without the fuss. Plus, it’s naturally gluten-free and can be adjusted to suit different heat preferences.

    Essential Tips & Tricks

    Selecting and Preparing the Perfect Salmon

    Choosing the right salmon is the foundation of success for this recipe. Look for center-cut salmon fillets of even thickness (about 1-1.5 inches) to ensure they cook evenly. I prefer skin-on fillets as they help protect the delicate flesh during cooking, though you can easily eat around the skin later. Pat the salmon completely dry before seasoning—this is crucial for achieving that beautiful sear. Season with salt and pepper just before cooking, not in advance, as salt draws out moisture. For the best flavor, bring salmon to room temperature for 15 minutes before cooking to promote even heat distribution.

    Mastering the Bang Bang Sauce

    The signature sauce is what transforms this dish, so getting it right matters! For the perfect consistency, combine mayo, sweet chili sauce, sriracha, and honey in a small bowl, whisking until completely smooth. Adjust the sriracha to your heat preference—start with less if you’re sensitive to spice. The sauce can be made up to 3 days ahead and stored in the refrigerator, which actually allows the flavors to meld beautifully. For an extra layer of flavor, add a teaspoon of roasted garlic to the sauce. Don’t forget that final squeeze of fresh lime juice just before serving—it brightens everything up wonderfully.

    Serving Ideas & Creative Variations

    Complementary Side Dishes

    Bang Bang Salmon pairs beautifully with light, fresh sides that balance its rich flavors. My favorite combination is steamed jasmine rice with thinly sliced cucumbers dressed simply with rice vinegar and sesame seeds. The cool crunch against the warm salmon creates a delightful contrast. Roasted broccoli or asparagus with a light drizzle of sesame oil makes another excellent accompaniment. For a complete Asian-inspired meal, serve with crispy garlic rice and quick-pickled vegetables. On warmer evenings, I love serving this salmon over a bed of mixed greens with avocado for a substantial salad that feels like a treat.

    Exciting Flavor Twists

    While the classic Bang Bang Salmon is perfect as is, there are several delicious variations worth trying. For a tropical twist, add a tablespoon of finely diced pineapple to the sauce—the sweet-tangy notes complement the spice beautifully. Coconut lovers can replace half the mayo with coconut cream for a subtle island flavor. For an extra umami dimension, add a teaspoon of miso paste to the sauce mixture. If you enjoy herbs, finishing the dish with fresh cilantro, Thai basil, or mint adds a wonderful aromatic element. For special occasions, I sometimes add a tablespoon of tobiko (flying fish roe) on top for a stunning presentation and delightful pop.

    Storage & Troubleshooting Guide

    Proper Storage and Reheating

    Leftover Bang Bang Salmon will keep well when properly stored in an airtight container in the refrigerator for up to 2 days. I recommend storing the salmon and any remaining sauce separately to prevent the fish from becoming soggy. When reheating, do so gently to avoid drying out the salmon. The microwave works in a pinch (30-second intervals at 50% power), but for best results, reheat in a covered skillet over low heat with a splash of water to create steam. Cold leftover salmon is also delicious flaked over a salad or wrapped in lettuce leaves with avocado for a light lunch option.

    Solving Common Challenges

    The most common issue with Bang Bang Salmon is sauce separation or salmon that sticks to the pan. If your sauce looks broken or thin, whisk in an additional teaspoon of mayo to re-emulsify it. For salmon that sticks, ensure your pan is properly preheated before adding oil, and don’t try to flip the fish too early—it will release naturally when ready. If your sauce is too spicy, balance it with an extra drizzle of honey and a dollop of mayo. For salmon that’s not crispy enough, try patting it extremely dry and using a cast iron skillet for better heat retention.

    Frequently Asked Questions

    What exactly is Bang Bang Salmon?

    Bang Bang Salmon features salmon fillets topped with a creamy, sweet-spicy sauce made from mayo, sweet chili sauce, and sriracha. The dish gets its name from the popular “bang bang” sauce that delivers a perfect balance of heat and sweetness.

    Can I make Bang Bang Salmon ahead of time?

    You can prepare the sauce up to 3 days ahead and store it in the refrigerator. The salmon itself is best cooked just before serving, though leftovers can be enjoyed cold in salads.

    What can I substitute for sriracha in the sauce?

    Any hot sauce works well, though the flavor profile will change slightly. Gochujang (Korean chili paste) makes an excellent substitute with a deeper, more complex heat.

    Is Bang Bang Salmon spicy?

    The spice level is completely customizable. Start with less sriracha for a milder version, or add more for extra heat. The sweet chili sauce and mayo help balance the spiciness.

    Can I use frozen salmon for this recipe?

    Yes, but thaw it completely in the refrigerator overnight and pat it very dry before cooking. Frozen-then-thawed salmon releases more moisture, so extra drying time is important.

    Final Thoughts

    Bang Bang Salmon transforms an everyday protein into a memorable meal that feels special without requiring complicated techniques. I love how this dish bridges the gap between quick weeknight cooking and impressive entertaining with minimal effort. The vibrant flavors and beautiful presentation make it a recipe I return to again and again. Whether you’re cooking for yourself, your family, or guests, this Bang Bang Salmon delivers maximum flavor impact with minimum kitchen stress. Try it once, and I guarantee it will earn a permanent spot in your recipe collection.

    For more delicious salmon recipes and cooking inspiration, visit our Pinterest page.

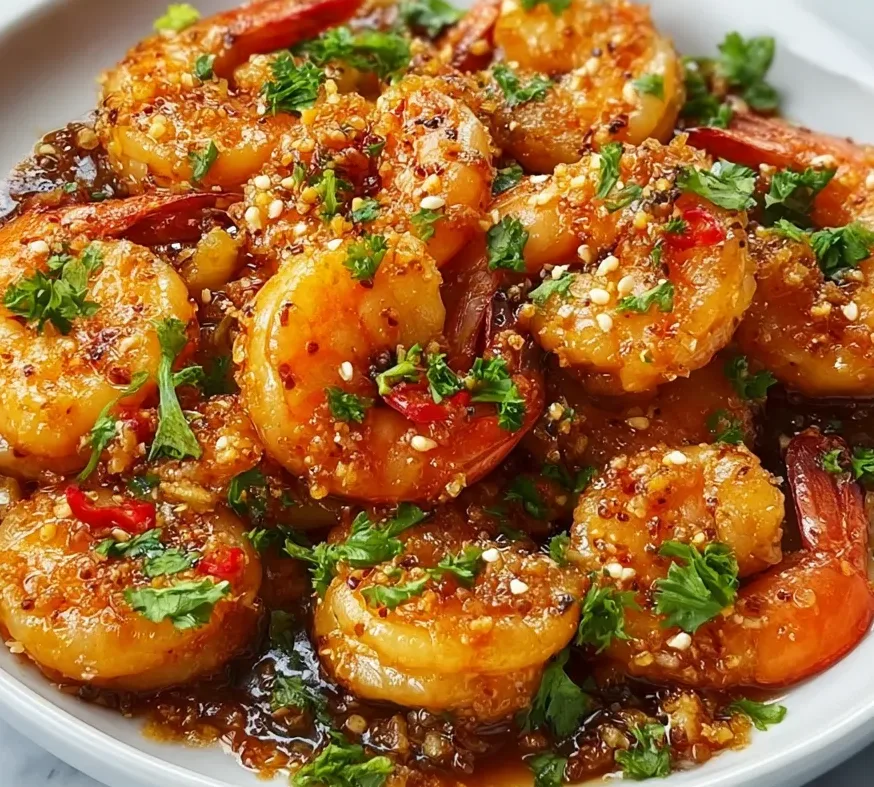
  • Asian Garlic Shrimp Recipe That Will Blow Your Mind!

    Asian Garlic Shrimp Recipe That Will Blow Your Mind!

    Asian Garlic Shrimp Recipe That Will Blow Your Mind! 😍✨

    Asian Garlic Shrimp has become my absolute go-to weeknight dinner when I’m craving something quick yet impressive. The first time I made this dish, the intoxicating aroma of sizzling garlic and ginger filled my kitchen, instantly transporting me to my favorite seaside restaurant in Thailand. There’s something magical about how the plump shrimp soak up that sweet-savory sauce, creating the perfect umami bomb in every bite. Ready in just 15 minutes but tasting like you spent hours in the kitchen, this Asian-inspired seafood dish delivers maximum flavor with minimal effort.

    Recipe

    Why You’ll Love This Asian Garlic Shrimp

    Quick Yet Restaurant-Quality

    If you’re anything like me, you want dinner to feel special without spending hours at the stove. This Asian Garlic Shrimp hits that sweet spot perfectly. The caramelized sauce comes together in minutes but tastes like it’s been simmering for hours. I’ve served this at impromptu dinner parties and watched guests’ eyes widen with that first bite. The secret is getting your pan screaming hot before adding the shrimp—this creates that beautiful sear that restaurants achieve. Plus, shrimp cook in literally 2-3 minutes per side, making this possibly the fastest protein you can prepare when hunger strikes.

    Pantry-Friendly Ingredients

    What I adore about this recipe is how it relies on staple ingredients that I always keep on hand. Soy sauce, honey, garlic, and ginger form the foundation of that irresistible sauce. One evening when I was craving something special but couldn’t face a grocery run, I discovered these simple ingredients could create something extraordinary. The sauce strikes that perfect balance of sweet, salty, and umami that makes your taste buds dance. Even if you need to substitute frozen shrimp (just thaw them properly), you can still achieve spectacular results with ingredients already living in your kitchen.

    Essential Tips & Tricks

    Perfecting Your Shrimp

    The difference between good shrimp and mind-blowing shrimp comes down to a few simple techniques. First, pat those shrimp completely dry before cooking—moisture is the enemy of that beautiful caramelization we’re after. I learned this the hard way after wondering why restaurant shrimp always had that perfect sear. Second, don’t overcrowd your pan! Work in batches if needed, giving each shrimp enough space to sizzle properly. Finally, remove your shrimp the moment they turn pink and opaque—about 2 minutes per side. They’ll continue cooking slightly off-heat, and overcooked shrimp become rubbery disappointments.

    Mastering The Sauce

    The sauce is where the magic happens in this Asian Garlic Shrimp. Start by toasting your minced garlic and ginger until fragrant—this releases their essential oils and deepens the flavor profile. When adding your liquid ingredients, let them reduce until syrupy before returning the shrimp to the pan. A little cornstarch slurry (just 1 teaspoon cornstarch mixed with 1 tablespoon water) will help thicken things up beautifully. For an extra dimension, finish with a splash of rice vinegar and a drizzle of sesame oil right at the end—these finishing touches elevate the entire dish with minimal effort.

    Serving Ideas & Creative Variations

    Perfect Pairings

    Asian Garlic Shrimp pairs beautifully with so many sides, making it incredibly versatile. My personal favorite is serving it over fluffy jasmine rice that soaks up all that glorious sauce—I’ve literally caught myself scraping the last bits from the bowl! For a lighter option, try it with steamed bok choy or broccoli. When I’m feeling fancy, I serve it in lettuce cups topped with julienned carrots and cucumber for a refreshing crunch. For a complete meal experience, consider pairing with these delicious roasted tomato salsa appetizers for a fusion-inspired dinner party.

    Exciting Twists

    Don’t be afraid to make this Asian Garlic Shrimp recipe your own! Add a spicy kick with sriracha or red pepper flakes—I started doing this after a friend suggested it, and now I can’t imagine the dish without that gentle heat. For a tropical twist, try adding diced pineapple or mango during the last minute of cooking; the sweetness creates an amazing counterpoint to the savory garlic. You can also experiment with proteins—this sauce works beautifully with chicken, tofu, or even salmon. My husband prefers it with sliced beef, which cooks just as quickly and absorbs the flavors wonderfully.

    Storage & Troubleshooting Guide

    Proper Storage

    While Asian Garlic Shrimp is best enjoyed fresh from the pan, leftovers can still be delicious when stored properly. Transfer cooled leftovers to an airtight container and refrigerate for up to 2 days. I’ve found that separating the shrimp from any extra sauce helps prevent them from becoming soggy. When reheating, do so gently in a skillet over medium-low heat just until warmed through—about 2 minutes. Microwaving is convenient but can make the shrimp rubbery, so if you must use the microwave, cover with a damp paper towel and heat in 30-second intervals, checking frequently.

    Common Fixes

    Even experienced cooks encounter challenges sometimes! If your sauce is too thin, a simple cornstarch slurry will thicken it right up. Conversely, if it’s too thick, a splash of chicken broth or water will bring it to the perfect consistency. If you accidentally oversalt (we’ve all been there), a drizzle of honey or a squeeze of fresh lime juice can balance things out beautifully. And if your shrimp turned out rubbery, remember for next time: they need just 2 minutes per side at most. The residual heat continues cooking them even after you’ve removed them from the pan.

    Frequently Asked Questions

    Can I use frozen shrimp for Asian Garlic Shrimp?

    Absolutely! Just thaw them completely and pat them very dry before cooking. I often keep frozen shrimp on hand specifically for this recipe when sudden cravings hit.

    How do I know when the shrimp are perfectly cooked?

    Look for them to turn pink and opaque, with a slight C-shape. Overcooked shrimp curl into tight O-shapes and become rubbery.

    Can I make this dish ahead of time?

    While best fresh, you can prepare the sauce in advance and cook the shrimp just before serving. This cuts prep time down to just 5 minutes.

    What’s the best substitute for rice wine?

    Dry sherry works beautifully, or use a mixture of 1 tablespoon rice vinegar with 1 teaspoon sugar to approximate the flavor profile.

    Is this recipe gluten-free?

    Not traditionally, but you can easily substitute tamari or coconut aminos for the soy sauce to make a delicious gluten-free Asian Garlic Shrimp.

    Final Thoughts

    This Asian Garlic Shrimp has saved countless weeknight dinners at my house while still feeling special enough for company. There’s something deeply satisfying about creating such bold, complex flavors in so little time. The way the garlic caramelizes, the sauce clings to each succulent shrimp, and that first aromatic bite hits your senses—it’s pure culinary magic. Whether you’re cooking for one or hosting friends, this recipe proves that extraordinary meals don’t require extraordinary effort. Find more inspiration for your next meal at Pinterest.