Category: Fish Recipes

  • Baja Fish Tacos with Avocado Crema: Irresistibly Fresh & Zesty!

    Baja Fish Tacos with Avocado Crema: Irresistibly Fresh & Zesty!

    Baja Fish Tacos with Avocado Crema: Irresistibly Fresh & Zesty!

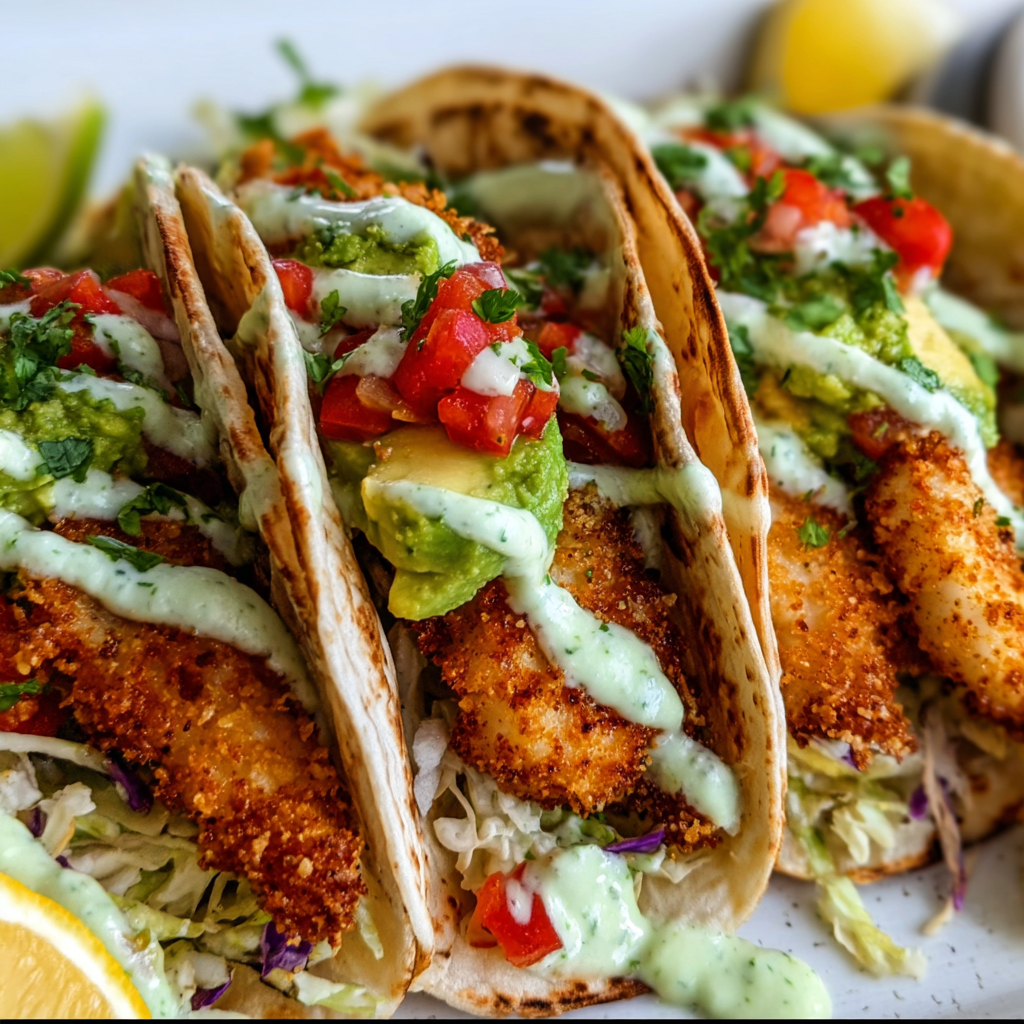
    Baja Fish Tacos with Avocado Crema became an obsession in my house the moment I first brought them to the table. I didn’t expect this recipe to cause such a frenzy, but my husband declared them “better than any restaurant” on the very first bite! That immediate, intense reaction solidified their spot as a weekly craving. The combination of crispy fish, vibrant slaw, and that dreamy avocado crema is truly irresistible, transforming a simple meal into an unforgettable culinary experience. You’ll find yourself reaching for this recipe again and again, trust me.

    Recipe

    Why You’ll Love This Baja Fish Tacos with Avocado Crema

    Irresistibly Flavorful & Fresh

    These Baja Fish Tacos with Avocado Crema are a symphony of textures and tastes, designed to excite your palate. The flaky, perfectly seasoned fish provides a satisfying crunch, while the bright, zesty cabbage slaw adds a refreshing counterpoint. But the real star? That incredibly creamy, cool avocado crema that ties everything together with a luxurious finish. Each bite is an explosion of fresh, vibrant flavors that will transport you straight to the sunny coasts of Baja California. This is seriously addictive.

    Quick & Easy Weeknight Meal

    Don’t let the gourmet taste fool you; these fish tacos are surprisingly simple to whip up, making them perfect for a busy weeknight. Most of the prep can be done in advance, like chopping the cabbage or blending the crema, drastically cutting down on cooking time. The fish cooks quickly, ensuring a delicious and satisfying meal without hours in the kitchen. It’s a fantastic way to bring exciting flavors into your home with minimal effort, proving that incredible food doesn’t have to be complicated.

    Essential Tips & Tricks

    Perfecting Your Fish Fillets

    Achieving perfectly crispy, flaky fish for your Baja Fish Tacos is key. Start by patting your chosen white fish fillets (like cod or tilapia) thoroughly dry with paper towels; this ensures a crispier exterior. A light dredge in seasoned flour or cornstarch before frying creates that desirable golden crust. Don’t overcrowd the pan, as this lowers the oil temperature and steams the fish instead of frying it. Cook in batches for optimal crispness and a wonderfully tender interior.

    Crafting the Creamiest Avocado Crema

    The avocado crema is the heart and soul of these Baja Fish Tacos with Avocado Crema. For the silkiest texture, use ripe avocados – they should yield slightly to gentle pressure. Combine them with Greek yogurt or sour cream for tang, a squeeze of fresh lime juice for brightness, and a handful of fresh cilantro. A little pinch of salt and a touch of garlic powder enhance the flavors beautifully. Blend until completely smooth, adding a tablespoon of water if needed to reach your desired consistency. Everyone will ask you for this recipe!

    Serving Ideas & Variations

    Creative Topping Combinations

    While the classic cabbage slaw is fantastic, don’t be afraid to get creative with your toppings for these Baja Fish Tacos. Consider a vibrant pico de gallo for extra freshness, or a sprinkle of crumbled cotija cheese for a salty, creamy kick. Sliced radishes add a peppery crunch, while a drizzle of hot sauce can introduce a delightful heat. You could even try a quick pickled red onion for a tangy contrast. The possibilities are endless for customizing your perfect taco experience.

    Beyond the Tortilla

    If you’re looking to switch things up, these Baja Fish Tacos with Avocado Crema fillings are incredibly versatile. Transform them into a delicious fish taco bowl by serving the crispy fish and all the toppings over a bed of cilantro lime rice or quinoa. For a lighter option, use large lettuce cups as your “tortillas.” You could also chop everything up and make a vibrant fish taco salad, tossing it with extra greens. This is better than takeout, truly! For another fantastic meal, check out our Grilled Chicken Orzo Salad with Avocado.

    Storage & Troubleshooting

    Keeping Your Tacos Fresh

    To maximize freshness, it’s best to store the components of your Baja Fish Tacos separately. Keep the cooked fish in an airtight container in the refrigerator for up to 2-3 days, and the avocado crema in a separate sealed container for 1-2 days (the lime juice helps prevent browning). The cabbage slaw will stay crisp for a day or two. Reheat fish gently in a pan or oven to restore some crispness. Assembled tacos are best enjoyed immediately to avoid soggy tortillas.

    Common Issues & Quick Fixes

    Sometimes things don’t go exactly as planned, but don’t worry! If your fish isn’t crispy enough, ensure your oil is hot enough and you’re not overcrowding the pan. For an avocado crema that’s too thick, simply add a splash more water or lime juice until it reaches your desired consistency. If the crema is browning, stir in more lime juice to reactivate its anti-oxidant properties. A small adjustment can often save the day and get you back to delicious tacos.

    Frequently Asked Questions

    What kind of fish is best for Baja Fish Tacos?

    Firm, white-fleshed fish like cod, tilapia, mahi-mahi, or halibut are excellent choices. They hold up well to frying or grilling and flake beautifully, soaking up all the delicious seasonings.

    Can I bake or grill the fish instead of frying?

    Absolutely! For a healthier option, you can bake the seasoned fish at 400°F (200°C) for 12-15 minutes or grill it over medium-high heat for 3-4 minutes per side until cooked through and flaky.

    How do I prevent the avocado crema from browning?

    The key is plenty of fresh lime juice. Its acidity helps to prevent oxidation. Store the crema in an airtight container with plastic wrap pressed directly onto the surface to minimize air exposure.

    Can I make the slaw ahead of time?

    Yes, you can prepare the cabbage slaw up to a day in advance. Keep the dressing separate and toss it with the cabbage right before serving to maintain maximum crunch and freshness.

    Are Baja Fish Tacos with Avocado Crema spicy?

    Traditionally, they have a mild spice from chili powder in the fish seasoning, but the creamy avocado crema balances any heat. You can adjust the spice level by adding more or less chili, or a dash of hot sauce.

    Final Thoughts

    Making these Baja Fish Tacos with Avocado Crema at home is an absolute game-changer. The vibrant flavors, the perfect crunch of the fish, and that unbelievably smooth, tangy crema create a culinary experience that’s both exciting and deeply satisfying. It’s the kind of meal that brings smiles to faces and happy sighs around the dinner table. Trust me, once you master this recipe, it will become a cherished staple in your cooking repertoire, a testament to how simple ingredients can create extraordinary dishes. Don’t forget to share your taco creations on Pinterest! Follow me on Pinterest.
  • Creamy Herb Rice with Garlic Butter Shrimp: Irresistibly Delicious!

    Creamy Herb Rice with Garlic Butter Shrimp: Irresistibly Delicious!

    Creamy Herb Rice with Garlic Butter Shrimp: Irresistibly Delicious!

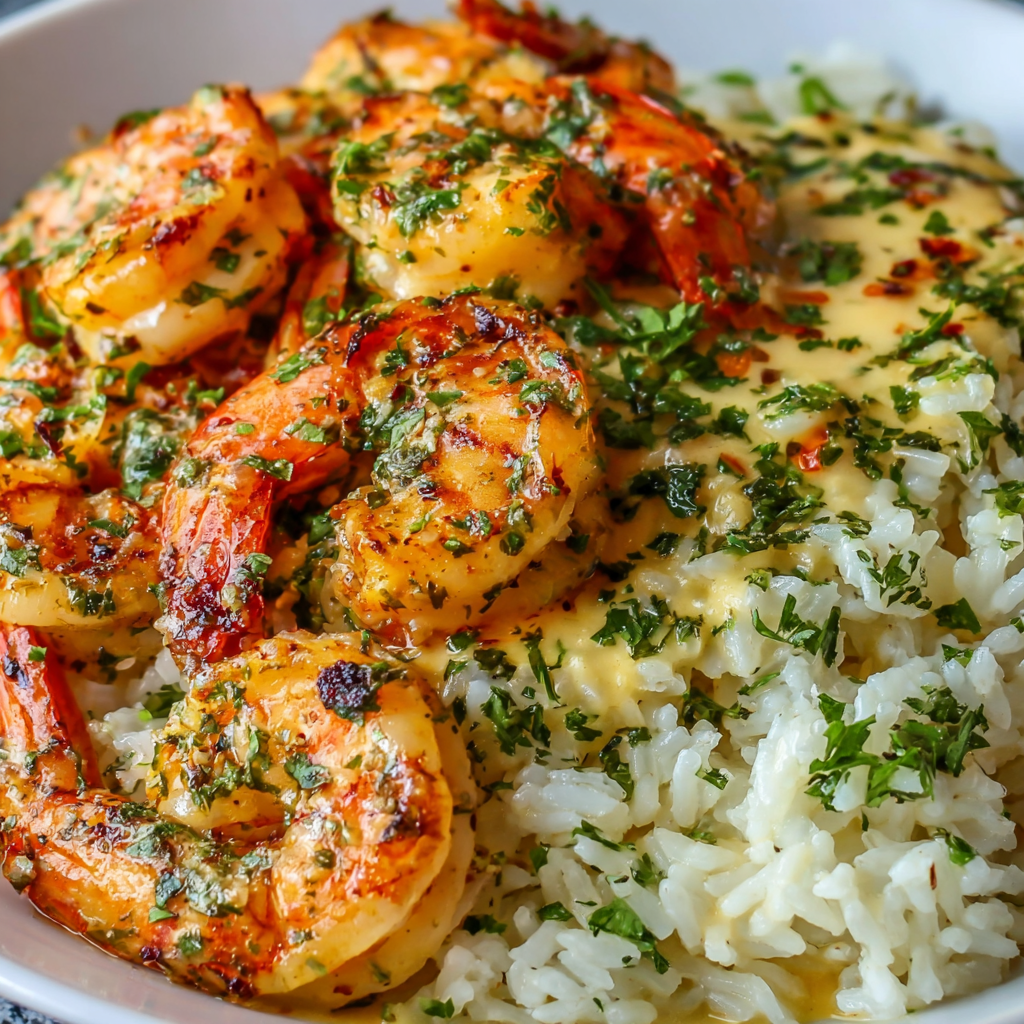
    The first time I made Creamy Herb Rice with Garlic Butter Shrimp, the aroma filled my kitchen like a warm hug. There’s something magical about the way butter and garlic dance together in the pan, creating that irresistible scent that draws everyone to the table. This dish combines tender rice infused with fresh herbs and velvety cream, topped with succulent shrimp sautéed in a garlicky butter sauce that practically melts in your mouth. Perfect for busy weeknights when you crave something special but don’t have hours to spend in the kitchen.

    Recipe

    Why You’ll Love This Creamy Herb Rice with Garlic Butter Shrimp

    A Complete Meal in One Dish

    This recipe hits all the right notes – creamy comfort balanced with bright herbs and protein-packed shrimp. I love how the starchy rice releases its starches to create that restaurant-quality creaminess without heavy cream (though I won’t judge if you add some!). The garlic butter shrimp cook in minutes, making this a practical weeknight solution when you’re craving something that feels fancy. My husband always does that little eyebrow raise when he smells this cooking—the universal signal that dinner’s going to be good.

    Quick Yet Impressive Results

    What makes this dish special is how it transforms simple ingredients into something that looks and tastes like you spent hours in the kitchen. The visual appeal alone—plump pink shrimp nestled on herb-flecked rice—makes it worthy of company, but it’s easy enough for a Tuesday night. I’ve made this countless times when friends drop by unexpectedly, and the “wow” factor never fails. The best part? You’ll spend just about 30 minutes active cooking time, making this the perfect recipe for busy days when you still want to put something special on the table.

    Essential Tips & Tricks

    Perfecting the Rice Base

    The foundation of this dish is perfectly cooked rice with just the right amount of creaminess. I’ve found that rinsing the rice thoroughly before cooking removes excess starch that can make your dish gummy. For the herbs, fresh is best, but don’t stress if you only have dried—just use about one-third the amount. My secret ingredient? A splash of white wine added to the rice as it toasts adds incredible depth. The aroma that rises from the pan when the wine hits the hot rice is absolutely intoxicating. Check out my Italian Chicken Gnocchi Soup for another comforting recipe with similar flavor notes.

    Shrimp Cooking Secrets

    The key to perfectly cooked shrimp is to watch them closely—they transform from raw to perfect to rubbery in minutes. I always pat my shrimp completely dry before adding them to the hot butter; this ensures they sear rather than steam. The garlic should be added only in the last 30 seconds before the shrimp finish cooking to prevent burning. That momentary sizzle when garlic hits the hot butter is one of my favorite kitchen sounds! For extra flavor, save those shrimp shells and make a quick stock by simmering them while your rice cooks. Strain and use this liquid as part of your cooking liquid for the rice.

    Serving Ideas & Creative Variations

    Complementary Side Dishes

    This Creamy Herb Rice with Garlic Butter Shrimp pairs beautifully with simple sides that won’t compete with its rich flavors. A crisp green salad with a light vinaigrette cuts through the creaminess perfectly. I love serving this with roasted asparagus or broccolini that I pop in the oven while finishing the rice. The slight bitterness of these greens complements the richness of the dish. For a complete seafood feast, check out my Broiled Halibut with Parmesan Butter Topping which would make an impressive multi-course meal for special occasions.

    Exciting Flavor Twists

    Don’t be afraid to make this recipe your own with creative variations. For a Mediterranean twist, add sun-dried tomatoes, olives, and crumbled feta on top. Lemon zest brightens everything beautifully—I sometimes add the zest of a whole lemon when I’m craving something extra vibrant. For a spicy kick, stir in a teaspoon of cajun seasoning or red pepper flakes. My family loves when I add crispy pancetta or bacon bits as a garnish. The smoky, salty crunch against the creamy rice creates an irresistible texture contrast that elevates the entire dish.

    Storage & Troubleshooting Guide

    Proper Storage Methods

    This dish keeps remarkably well when stored properly. Transfer leftovers to an airtight container within two hours of cooking and refrigerate for up to three days. I recommend storing the rice and shrimp separately if possible—this prevents the shrimp from becoming overcooked when reheating. For freezing, the rice base freezes beautifully for up to two months, but I find the texture of shrimp suffers in the freezer. My solution is to freeze just the rice portion and cook fresh shrimp when reheating. The convenience of having the rice ready makes this a fantastic meal prep option.

    Fixing Common Issues

    If your rice turns out too wet, don’t panic! Simply uncover and cook over low heat for a few additional minutes, stirring occasionally. For rice that’s too dry, add a splash of warm broth or cream and gently fold it in. If your garlic burns (we’ve all been there), remove the pan from heat immediately, transfer the shrimp to a clean pan, and start the garlic butter again. The most common shrimp issue is overcooking—they should form a “C” shape when done, not a tight “O” which indicates they’ve gone too far. Remember that carryover cooking continues even after removing from heat.

    Frequently Asked Questions

    Can I use frozen shrimp for this Creamy Herb Rice with Garlic Butter Shrimp?

    Absolutely! Thaw completely and pat dry before cooking. I often keep frozen shrimp on hand specifically for this recipe, making it perfect for last-minute dinner plans.

    What herbs work best in this recipe?

    Parsley, chives, and dill are my favorites. Tarragon adds a lovely anise note, while basil and cilantro work well for different flavor profiles. Use what you have and enjoy!

    Can I make this with brown rice instead?

    Yes, but adjust cooking time (45-50 minutes) and liquid amount (add extra ¼ cup). The nuttier flavor of brown rice creates a delicious variation with added fiber.

    How can I make this dairy-free?

    Substitute olive oil for butter and coconut cream for heavy cream. The flavor profile shifts slightly, but it remains delicious with a tropical undertone.

    Is there a way to make this spicy?

    Add red pepper flakes to the garlic butter or stir in a teaspoon of your favorite hot sauce at the end. Cajun seasoning on the shrimp also creates wonderful heat.

    Final Thoughts

    This Creamy Herb Rice with Garlic Butter Shrimp has become my go-to recipe when I want to impress without stress. There’s something deeply satisfying about creating a dish that looks and tastes complex but comes together with minimal effort. The combination of creamy rice, aromatic herbs, and garlicky shrimp creates a symphony of flavors that feels like a warm hug on a plate. I’d love to see your version if you make it—tag me on Pinterest with your creations!

  • Quick Tilapia in Roasted Pepper Sauce – Irresistibly Easy & Delicious!

    Quick Tilapia in Roasted Pepper Sauce – Irresistibly Easy & Delicious!

    Quick Tilapia in Roasted Pepper Sauce – Irresistibly Easy & Delicious!

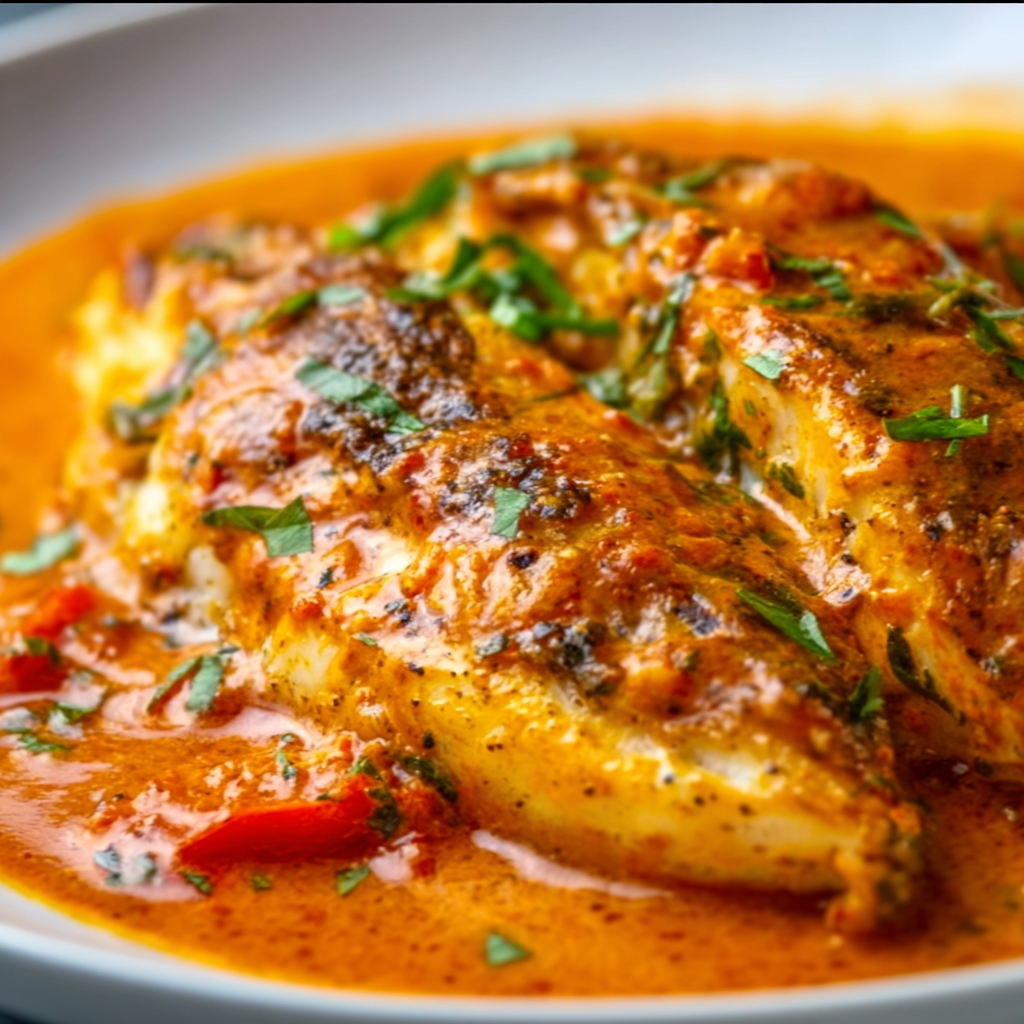
    Quick Tilapia in Roasted Pepper Sauce has become my weeknight dinner superhero! On those evenings when I’m racing against the clock but refuse to compromise on flavor, this 20-minute wonder delivers restaurant-quality results with minimal effort. The silky roasted pepper sauce transforms ordinary tilapia fillets into something truly special—rich, vibrant, and utterly comforting. I first created this recipe during a particularly chaotic week when my sister visited unexpectedly. The look on her face after that first bite? Pure amazement that something so delicious could come together so quickly! Visit Recipes Darleen for more quick dinner inspirations that never sacrifice flavor.

    Recipe

    Why You’ll Love This Quick Tilapia in Roasted Pepper Sauce

    Perfect Balance of Simplicity and Flavor

    This Quick Tilapia in Roasted Pepper Sauce strikes that elusive balance between effortless preparation and impressive results. The fillets cook in just 4 minutes per side, while the velvety sauce comes together with jarred roasted peppers (my favorite time-saving hack). The natural sweetness of the peppers creates a beautiful counterpoint to the mild fish, while a touch of cream adds luxurious richness. I love how the sauce clings to each bite, infusing the delicate fish with layers of smoky-sweet flavor that taste like you spent hours in the kitchen.

    Weeknight-Friendly Nutrition

    What I adore most about this Quick Tilapia in Roasted Pepper Sauce is how it delivers complete nutrition without demanding hours of your evening. Tilapia provides lean protein that keeps you satisfied, while the roasted peppers add vibrant color and a boost of vitamins A and C. The entire dish comes in under 300 calories per serving, making it perfect for busy weeknights when you want something nourishing but light. I’ve served this countless times after hectic workdays, and it always leaves me feeling energized rather than weighed down.

    Essential Tips & Tricks

    Perfecting Your Fish Texture

    The secret to restaurant-quality tilapia lies in proper preparation and cooking technique. First, thoroughly pat the fillets dry with paper towels—this ensures a beautiful sear rather than a soggy steam. Season generously with salt and pepper on both sides right before cooking. Heat your pan until it’s properly hot (a water droplet should dance across the surface) before adding oil, then resist the urge to move the fish for at least 3 minutes. That golden crust developing? That’s pure flavor! I learned this technique after years of fish-cooking disappointments, and it’s been game-changing.

    Sauce Secrets for Maximum Flavor

    The roasted pepper sauce is where this dish truly shines, and a few simple techniques elevate it from good to absolutely magnificent. Use high-quality jarred peppers packed in water rather than oil for cleaner flavor, and don’t skip the brief sauté of garlic before adding them—those 30 seconds develop crucial depth. When blending, add cream while the machine runs for the silkiest texture. For an extra flavor boost, try my Italian Chicken Gnocchi Soup technique of adding a pinch of smoked paprika to enhance the peppers’ natural smokiness.

    Serving Ideas & Creative Variations

    Perfect Pairings for a Complete Meal

    This Quick Tilapia in Roasted Pepper Sauce pairs beautifully with simple sides that complement without competing. My go-to combination includes fluffy couscous (ready in 5 minutes!) and quickly sautéed asparagus with lemon. The couscous eagerly soaks up the extra sauce while the asparagus adds a fresh, green counterpoint. For a heartier option, try serving over creamy polenta or alongside roasted baby potatoes. When entertaining, I arrange the fillets over a bed of wilted spinach for an elegant presentation that still takes minimal effort.

    Exciting Flavor Variations

    While the classic version is divine, this versatile recipe welcomes creative adaptations. Try a Mediterranean twist by adding chopped kalamata olives, capers, and fresh herbs to the sauce. For heat lovers, incorporate a minced jalapeño or a dash of red pepper flakes. You can even swap the tilapia for other mild white fish like cod or sole with excellent results. For a complete flavor departure, check out my Broiled Halibut with Parmesan Butter Topping for another quick fish dinner with a totally different flavor profile.

    Storage & Troubleshooting Guide

    Proper Storage for Leftovers

    While this Quick Tilapia in Roasted Pepper Sauce is best enjoyed fresh, leftovers can be carefully stored for the next day. Allow everything to cool completely, then store the fish and sauce separately in airtight containers in the refrigerator for up to 2 days. When reheating, do so gently—microwave at 50% power in short intervals or warm in a covered skillet over low heat with a splash of water to maintain moisture. The sauce may separate slightly; a quick whisk while warming will bring it back together beautifully.

    Solving Common Cooking Challenges

    Even experienced cooks encounter occasional challenges with fish dishes. If your fillets are sticking to the pan, your heat was likely too low or the pan wasn’t properly preheated. For the perfect sear, ensure your oil is shimmering before adding fish. If your sauce turns out too thick, simply thin with a tablespoon of water or broth. Too thin? Simmer uncovered for a few extra minutes. And if you notice any small bones while eating, kitchen tweezers are your friend for quick removal—I keep a pair dedicated to cooking in my utensil drawer.

    Frequently Asked Questions

    Can I make Quick Tilapia in Roasted Pepper Sauce ahead of time?

    For best results, cook the fish just before serving. However, you can prepare the roasted pepper sauce up to 3 days ahead and refrigerate it in an airtight container. Simply reheat the sauce while cooking fresh fish.

    What can I substitute for tilapia?

    Any mild white fish works beautifully—try cod, sole, flounder, or snapper. Adjust cooking time slightly based on thickness (about 4 minutes per half-inch of thickness).

    Is this recipe gluten-free?

    Yes! This Quick Tilapia in Roasted Pepper Sauce is naturally gluten-free as written, making it perfect for those with gluten sensitivities or celiac disease.

    Can I use fresh roasted peppers instead of jarred?

    Absolutely! Roast 2-3 fresh bell peppers until charred, then peel, seed and proceed with the recipe. This adds about 25 minutes to your prep time but enhances the smoky flavor.

    How do I know when the fish is perfectly cooked?

    Tilapia is done when it flakes easily with a fork and has turned opaque. For precision, the internal temperature should reach 145°F (63°C).

    Final Thoughts

    This Quick Tilapia in Roasted Pepper Sauce has saved countless evenings in my kitchen, proving that impressive, nutritious meals don’t require hours of preparation. The vibrant sauce transforms simple fish into something truly special—a dish that feels like self-care even on the busiest days. I hope this recipe brings the same joy to your table that it has to mine. For more inspiration, follow me on Pinterest where I’m always sharing new quick dinner ideas. Here’s to delicious meals that respect your time without compromising on flavor!

  • Broiled Halibut with Parmesan Butter – Irresistibly Delicious!

    Broiled Halibut with Parmesan Butter – Irresistibly Delicious!

    Broiled Halibut with Parmesan Butter – Irresistibly Delicious!

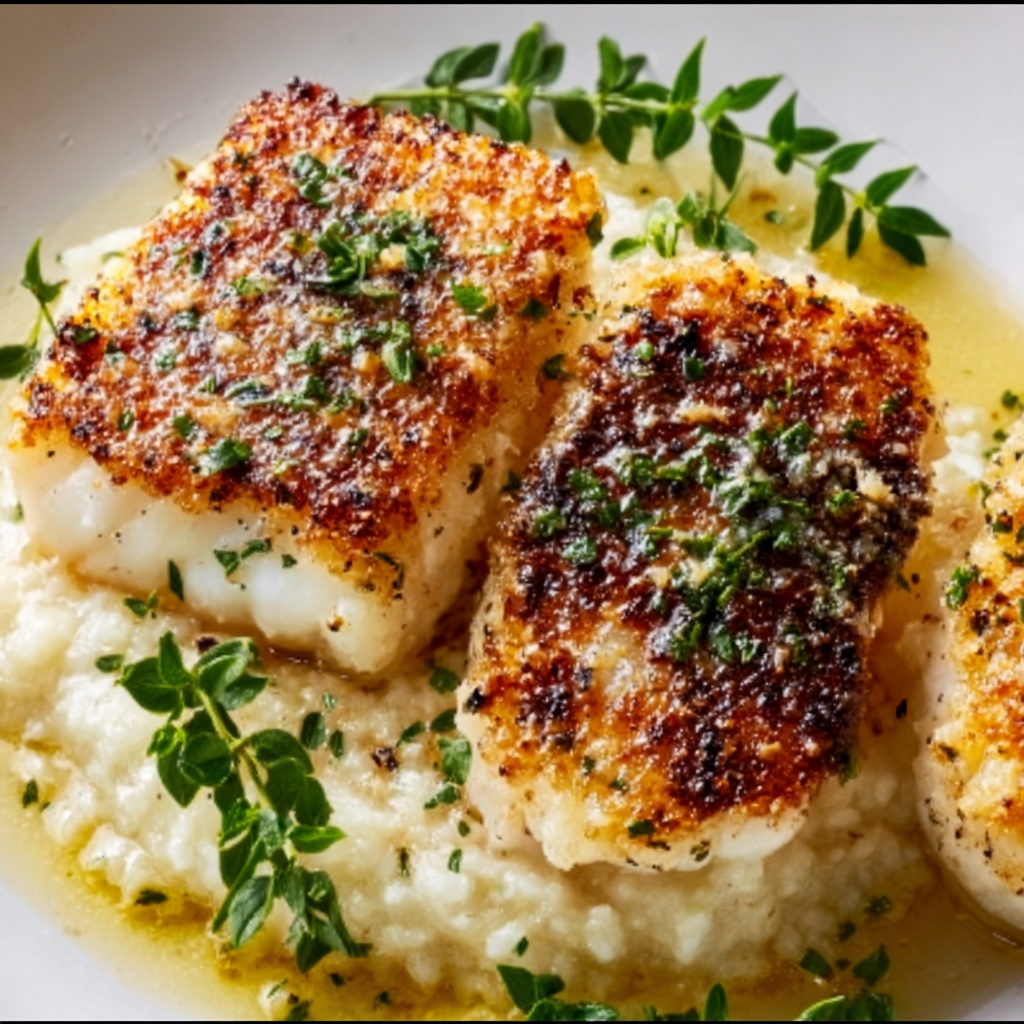
    Broiled Halibut with Parmesan Butter Topping is one of those dishes that feels like a special occasion meal but comes together so effortlessly you’ll wonder why you don’t make it more often. The first time I prepared this for my family, the kitchen filled with that intoxicating aroma of butter, garlic, and herbs that made everyone drift in asking, “What smells so amazing?” The delicate halibut fillets develop a gorgeous golden crust under the broiler while staying moist and tender inside. It’s my go-to recipe when I want to impress without spending hours in the kitchen—perfect for both weeknight dinners and special gatherings at Recipes Darleen.

    Recipe

    Why You’ll Love This Broiled Halibut with Parmesan Butter Topping

    A Restaurant-Quality Dish Made Simple

    This broiled halibut transforms an ordinary dinner into something truly special. The Parmesan butter topping creates a golden, slightly crispy crust that seals in moisture while infusing the fish with rich flavor. I love how the garlic and herbs bloom in the warm butter, releasing their aromatic oils that perfume the entire kitchen. The best part? It takes just minutes under the broiler, making this an achievable luxury even on busy weeknights. When my sister first tried this recipe, she couldn’t believe it wasn’t from an upscale seafood restaurant!

    Nutritious Yet Indulgent

    Halibut is a nutritional powerhouse that feels like an indulgence. Each tender fillet packs impressive protein while remaining low in calories and rich in omega-3 fatty acids. The Parmesan butter topping adds just enough decadence without overwhelming the delicate fish. I appreciate how this dish satisfies my craving for something special while still aligning with healthier eating goals. My husband, who typically reaches for seconds of everything, always comments on how surprisingly filling a single portion is—proof that quality ingredients don’t need quantity to satisfy.

    Essential Tips & Tricks

    Selecting and Preparing Perfect Halibut

    Choosing the right halibut is crucial for this recipe’s success. Look for firm, white fillets with a clean ocean scent—never fishy. I prefer center-cut pieces of equal thickness (about 1-1.5 inches) for even cooking. Pat the fillets completely dry with paper towels before seasoning; this ensures the butter topping adheres properly and helps achieve that beautiful golden crust. Room temperature fish cooks more evenly, so let your halibut sit out for 15 minutes before broiling. This small step made a remarkable difference when I served this at my last dinner party alongside Low Carb Italian Grinder Salad.

    Mastering the Broiling Technique

    The broiler is your secret weapon for restaurant-quality fish at home. Position your oven rack 4-6 inches from the heat source and preheat the broiler for at least 5 minutes before cooking. Watch the halibut carefully—it cooks quickly! I learned this the hard way when I stepped away to answer a phone call and returned to slightly overdone fish. The perfect broiled halibut has a golden, bubbling topping and flakes easily with a fork while remaining moist inside. For even browning, rotate the baking sheet halfway through cooking if your broiler has hot spots.

    Serving Ideas & Creative Variations

    Elegant Pairings for Any Occasion

    This broiled halibut shines as the centerpiece of any meal, from casual weeknights to special celebrations. I love serving it atop a bed of lemon-infused quinoa or alongside roasted asparagus drizzled with olive oil. For a complete dinner that impresses, pair with a crisp white wine and crusty bread for soaking up the delicious butter sauce. When hosting friends recently, I created a Mediterranean-inspired spread with this halibut as the star, accompanied by Authentic Pico de Gallo and a simple arugula salad dressed with lemon and olive oil.

    Flavor Twists to Keep It Exciting

    While the classic Parmesan butter topping is divine, don’t be afraid to experiment with variations. Try adding fresh herbs like dill or tarragon for a bright, seasonal twist. For a Mediterranean flair, incorporate sun-dried tomatoes and olives into the butter mixture. My family goes wild for the spicy version with a pinch of red pepper flakes and a drizzle of honey for sweet heat. When citrus is in season, I’ll add orange or grapefruit zest to the topping—the slight bitterness balances beautifully with the rich butter and sweet halibut.

    Storage & Troubleshooting Guide

    Proper Storage for Leftover Fish

    Properly stored leftover halibut can make a delicious next-day meal. Allow the fish to cool completely before transferring to an airtight container. Refrigerate for up to two days—any longer and the quality significantly diminishes. To reheat, avoid the microwave which can make fish rubbery. Instead, place in a 275°F oven, covered with foil, just until warmed through. I’ve found that leftover halibut makes an incredible addition to salads or grain bowls without reheating at all. For a quick lunch, I flake the cold fish over mixed greens with a squeeze of lemon.

    Solving Common Cooking Challenges

    If your halibut turns out dry, you’ve likely overcooked it. Remember that fish continues cooking after removal from heat—I always take mine out when it’s just shy of done. For perfectly moist halibut, look for the moment when the fish begins to flake but still has a slight translucence at its center. If your topping isn’t browning properly, try patting the fish extra dry before applying the butter mixture, or move your oven rack closer to the broiler. Too much moisture from the fish can prevent that beautiful golden crust from forming.

    Frequently Asked Questions

    Can I use frozen halibut for this Broiled Halibut with Parmesan Butter Topping?

    Yes, but thaw it completely in the refrigerator overnight and pat very dry before cooking. Frozen fish often releases more moisture, so you may need to broil it slightly longer for the same golden finish.

    What’s the best way to tell when halibut is done?

    Perfectly cooked halibut flakes easily with a fork but remains moist. The internal temperature should reach 130-135°F. It will appear opaque but still have a slight translucence in the center.

    Can I make the Parmesan butter topping ahead of time?

    Absolutely! Prepare the butter mixture up to three days in advance and store refrigerated. Bring to room temperature before spreading on the fish to ensure even melting and browning.

    What can I substitute for halibut?

    Cod, sea bass, or grouper work beautifully with this topping. Adjust cooking time based on thickness—thinner fillets will cook more quickly than halibut’s substantial texture.

    How do I prevent the fish from sticking to the pan?

    Line your baking sheet with parchment paper or lightly oil a broiler-safe dish. For extra insurance, let the cold pan come to room temperature before adding the fish.

    Final Thoughts

    This Broiled Halibut with Parmesan Butter Topping has become my signature dish for good reason—it strikes that perfect balance between impressive and achievable. The contrast of the delicate fish with its rich, golden topping creates a sensory experience that makes dinner feel special. I hope this recipe brings as much joy to your table as it has to mine. For more seafood inspiration, follow me on Pinterest where I’m always sharing new favorites and creative twists on classics.

  • Grilled Shrimp Bowl with Avocado Corn Salsa – Creamy, Fresh & Irresistible!

    Grilled Shrimp Bowl with Avocado Corn Salsa – Creamy, Fresh & Irresistible!

    Grilled Shrimp Bowl with Avocado Corn Salsa – Creamy, Fresh & Irresistible!

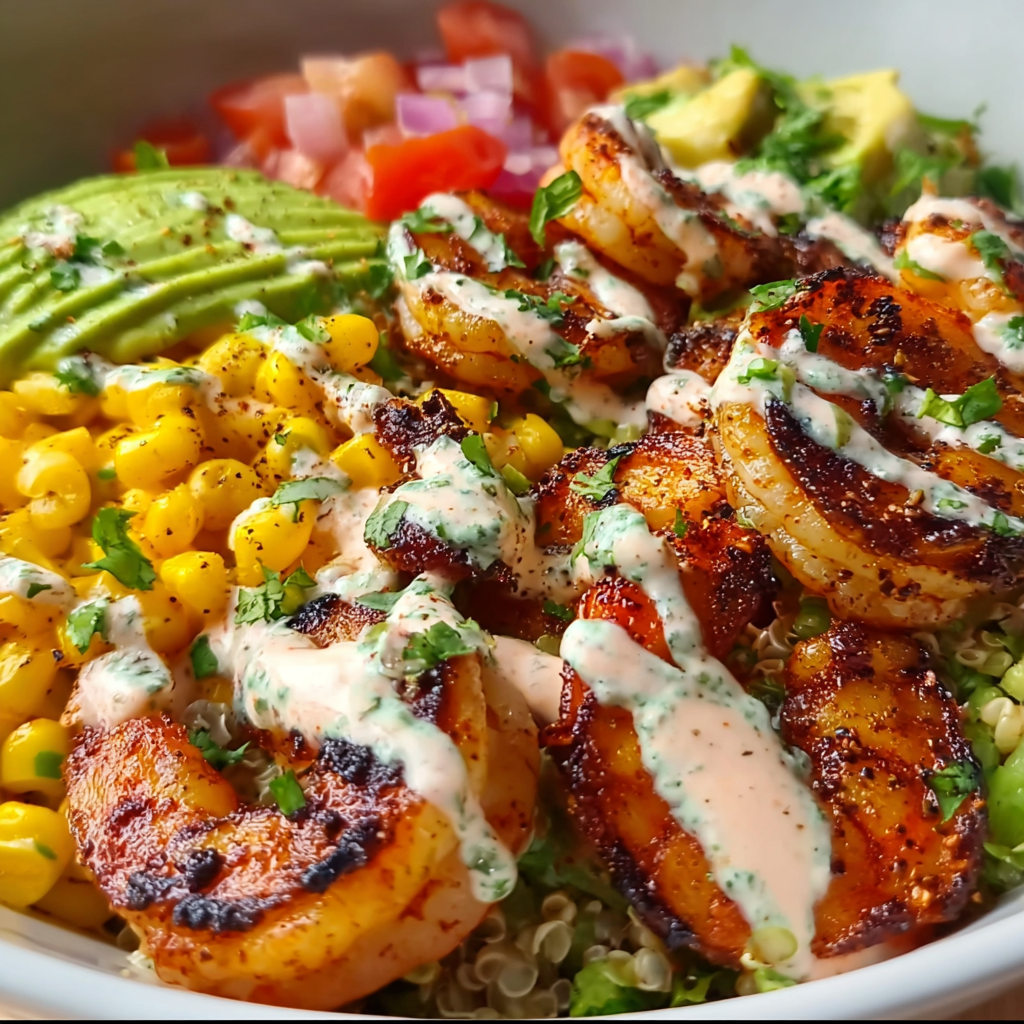
    This Grilled Shrimp Bowl with Avocado Corn Salsa Creamy Sauce is summer in a bowl! The first time I made this, my kitchen windows were wide open, letting in that perfect evening breeze while the smell of lime and cilantro filled the air. There’s something magical about the combination of charred shrimp against cool, creamy avocado salsa that makes dinner feel like a little celebration. I’ve tested this recipe countless times (my family never complains!), and it’s become our go-to for those nights when we want something that feels special without hours of work.

    Recipe

    Why You’ll Love This Grilled Shrimp Bowl with Avocado Corn Salsa Creamy Sauce

    Perfect Balance of Flavors and Textures

    This bowl is a symphony of contrasts that somehow work in perfect harmony. The smoky grilled shrimp brings that irresistible char flavor while the avocado corn salsa adds freshness and a buttery richness. Each bite offers something different – the slight crunch from the corn, the creaminess of avocado, and the tender bite of perfectly cooked shrimp. I love how the sauce ties everything together, adding just enough tanginess and creaminess without overwhelming the delicate flavors of the seafood. It’s like each component was designed to complement the others.

    Quick and Impressive Weeknight Option

    What initially drew me to this recipe was how it transforms simple ingredients into something that feels restaurant-worthy in under 30 minutes. The prep-to-plate time is minimal, yet guests always think I’ve spent hours in the kitchen. I keep most ingredients on hand during summer months, making this my secret weapon for last-minute dinner invitations. The components can be prepped ahead of time, so when hunger strikes, you’re just a quick grill session away from dinner. Perfect for those evenings when you want something special without the fuss.

    Essential Tips & Tricks

    Mastering the Shrimp

    The key to exceptional shrimp is not overcooking them. I learned this lesson the hard way after serving rubbery shrimp one too many times! Aim for just 2-3 minutes per side until they turn pink and opaque. Marinating them briefly (15-30 minutes max) in olive oil, lime juice, and garlic infuses flavor without starting to “cook” the shrimp in the acid. For extra flavor, I thread them on soaked wooden skewers before grilling – this prevents spinning and ensures even cooking. Remember that shrimp continue cooking after removal from heat, so it’s better to undercook slightly than overdo it.

    Elevating Your Avocado Corn Salsa

    The salsa is where this dish truly shines, reminiscent of the vibrant flavors in my authentic pico de gallo. For the best texture, use fresh corn cut straight from the cob whenever possible – the sweetness is unmatched! If using frozen, quickly char it in a hot skillet to develop flavor. Choose avocados that yield slightly to pressure but aren’t mushy. I like to prepare the salsa base (everything except avocado) up to a day ahead, adding the avocado just before serving to prevent browning. The lime juice helps, but nothing beats last-minute avocado addition for that perfect texture.

    Serving Ideas & Creative Variations

    Build-Your-Own Bowl Bar

    Transform this into an interactive dining experience by setting up a DIY bowl station! I did this for my sister’s birthday dinner and it was a massive hit. Arrange base options like cilantro-lime rice, quinoa, cauliflower rice, or even Mexican street corn salad as a foundation. Offer the grilled shrimp, avocado corn salsa, and sauce alongside additional toppings like black beans, queso fresco, pickled red onions, and hot sauce. This approach is perfect for accommodating different dietary needs while creating a fun, communal dining experience that everyone loves.

    Seasonal Adaptations

    One of my favorite things about this recipe is how easily it adapts to what’s available. In late summer, I add heirloom tomatoes and grilled peaches to the salsa for unexpected sweetness. Fall versions work beautifully with roasted sweet potato cubes and a hint of maple in the sauce. Winter adaptations might include roasted butternut squash and pomegranate seeds. The sauce can shift seasonally too – add chipotle for smokiness, extra cilantro for brightness, or even a touch of mango puree for tropical sweetness. The core elements remain, but the seasonal tweaks keep it exciting year-round.

    Storage & Troubleshooting Guide

    Proper Storage Techniques

    For maximum freshness, store each component separately in airtight containers. The grilled shrimp will keep for up to 3 days in the refrigerator, though they’re best enjoyed within 24 hours. The salsa (minus avocado) can be refrigerated for 2 days – just add fresh avocado when ready to serve. The creamy sauce stays good for about 5 days and actually improves in flavor overnight as ingredients meld. I don’t recommend freezing any components as the textures significantly change upon thawing – the shrimp become rubbery and the vegetables in the salsa turn mushy.

    Fixing Common Issues

    If your shrimp turn out tough, they’re likely overcooked. Next time, reduce cooking time and remove them from heat while still slightly translucent in the center – they’ll finish cooking from residual heat. For watery salsa, drain corn thoroughly and salt your tomatoes in advance to draw out excess moisture. If your sauce breaks or seems too thin, whisk in a teaspoon of Greek yogurt or mayonnaise to re-emulsify. Bland flavor is easily fixed with an extra squeeze of lime, pinch of salt, or dash of hot sauce. Remember that cold temperatures dull flavors, so season a bit more aggressively if serving chilled.

    Frequently Asked Questions

    Can I make this Grilled Shrimp Bowl with Avocado Corn Salsa Creamy Sauce ahead of time?

    Yes! Prep the salsa (without avocado), sauce, and marinate shrimp up to 24 hours ahead. Add avocado and grill shrimp just before serving for the freshest results.

    What can I substitute for shrimp if I have allergies?

    Grilled chicken, salmon, or tofu work beautifully. For plant-based options, try marinated grilled portobello mushrooms or crispy chickpeas seasoned with the same spices.

    Is this recipe gluten-free?

    Yes, all components are naturally gluten-free, but always check individual ingredient labels, especially for pre-made seasonings or sauces that might contain hidden gluten.

    How spicy is this dish?

    The base recipe is mild, but you can adjust heat by adding jalapeños to the salsa or cayenne/hot sauce to the creamy sauce according to your preference.

    Can I use frozen corn instead of fresh?

    Absolutely! Thaw completely and pat dry before using. For extra flavor, quickly char the corn in a hot skillet to replicate that fresh-off-the-cob sweetness.

    Final Thoughts

    This Grilled Shrimp Bowl with Avocado Corn Salsa Creamy Sauce has become my signature summer dish for good reason. There’s something about the combination of perfectly grilled shrimp, fresh vegetables, and that creamy sauce that creates pure magic in a bowl. I love seeing friends’ faces light up with that first bite – it’s the kind of recipe that creates memories around the table. For more delicious inspiration, check out my Pinterest board where I’m always adding new seasonal favorites!

  • Low-Carb Tuscan Bake Shrimp: Irresistibly Delicious & Easy!

    Low-Carb Tuscan Bake Shrimp: Irresistibly Delicious & Easy!

    Low-Carb Tuscan Bake Shrimp: Irresistibly Delicious & Easy!

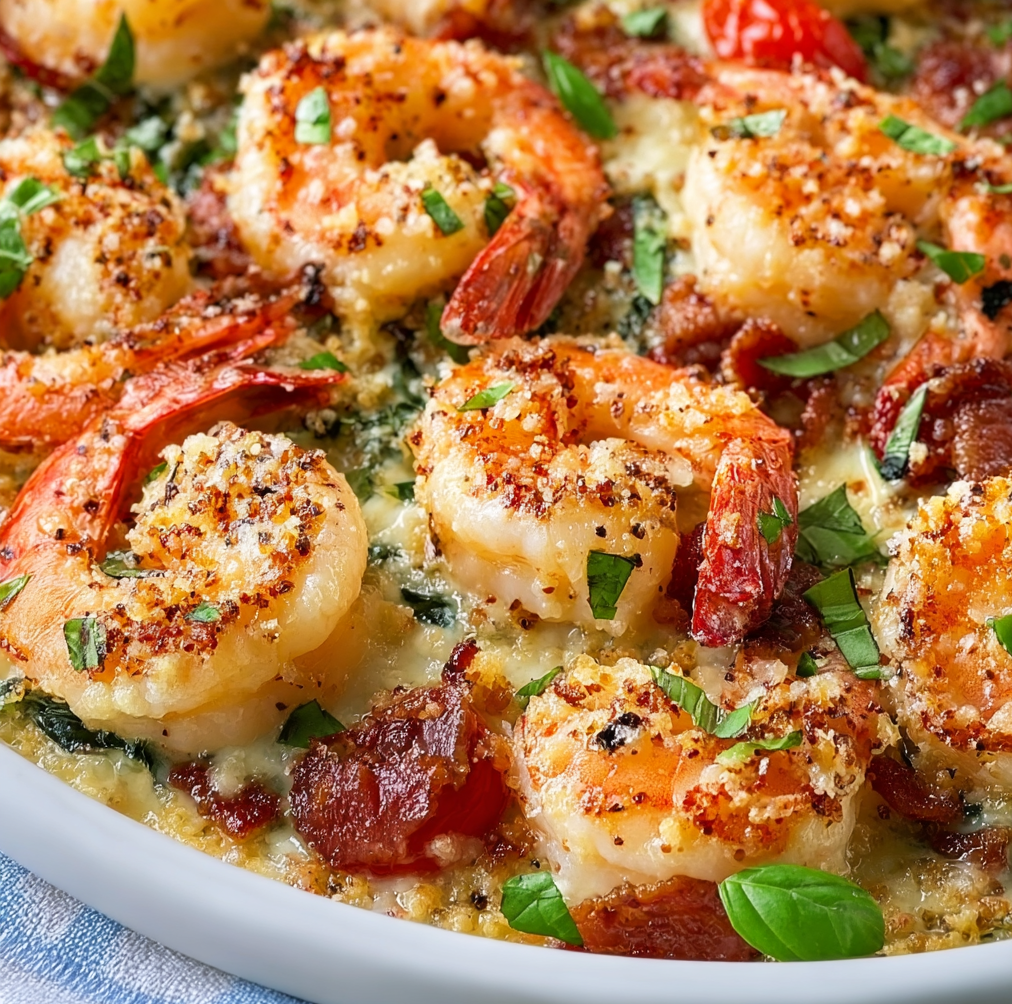
    The aroma of garlic-infused butter and fresh herbs wafting through my kitchen never fails to transport me to the Italian countryside. This Low-Carb Tuscan Bake Shrimp recipe has become my go-to for those evenings when I crave something indulgent yet want to stay mindful of my carb intake. I discovered this gem during a rainy weekend when I was determined to recreate my favorite restaurant dish without the heavy pasta base. The result? A creamy, satisfying meal that’s become a staple in my dinner rotation. Let me share this Mediterranean-inspired delight that combines succulent shrimp with a velvety sauce that’ll make you forget you’re eating low-carb!

    Recipe

    Why You’ll Love This Low-Carb Tuscan Bake Shrimp

    Perfect Balance of Flavors and Nutrition

    This dish delivers a flavor explosion while keeping carbs in check. The combination of plump shrimp, sun-dried tomatoes, and spinach creates a perfect balance of protein and vegetables. What makes this truly special is how the garlic-infused cream sauce brings everything together without the need for pasta or rice. I love how the natural sweetness of the shrimp complements the slight tanginess of the sun-dried tomatoes, creating layers of flavor that make each bite more exciting than the last. It’s a guilt-free indulgence that satisfies my Italian food cravings.

    Quick and Simple Preparation

    Even on my busiest weeknights, this dish remains in my rotation because it’s surprisingly time-efficient. From start to finish, you’ll spend just about 30 minutes in the kitchen, with most of that being hands-off baking time. The prep work is minimal—just chopping a few ingredients and making a quick sauce. I remember making this for unexpected dinner guests who arrived an hour early, and I still managed to serve a restaurant-quality meal without breaking a sweat. It’s the perfect recipe for those nights when you want something impressive without spending hours in the kitchen.

    Essential Tips & Tricks

    Selecting and Preparing the Shrimp

    The quality of shrimp makes all the difference in this dish. I prefer wild-caught shrimp for their superior flavor and texture. Size matters too—I recommend large or jumbo shrimp (16-20 count per pound) as they stand up better to baking without becoming rubbery. Always devein and remove shells completely, but leave the tails on if you prefer a more elegant presentation. Pat them dry thoroughly before cooking to ensure they sear properly rather than steam. This simple step was a game-changer for me, resulting in perfectly cooked, succulent shrimp every time instead of the watery results I used to get.

    Creating the Perfect Tuscan Sauce

    The creamy base is what transforms this from ordinary to extraordinary. Start with quality butter and olive oil, then build flavor with properly minced garlic (never from a jar for this recipe!). When adding cream, keep the heat medium-low to prevent curdling. For an authentic Tuscan flavor, use fresh herbs whenever possible—especially basil and oregano. If you’re watching calories, you can substitute half the heavy cream with chicken broth thickened with a touch of cornstarch, similar to my approach in this low-carb Italian grinder salad. Remember to taste and adjust seasonings before adding the shrimp back in—this ensures balanced flavors throughout.

    Serving Ideas & Creative Variations

    Complementary Side Dishes

    While this dish shines on its own, pairing it with the right sides elevates the experience. My favorite low-carb companions include roasted cauliflower rice seasoned with Italian herbs or spiralized zucchini noodles lightly sautéed in olive oil. For a refreshing contrast, serve alongside a simple arugula salad dressed with lemon juice and olive oil. The peppery notes cut through the richness beautifully. When I’m entertaining guests who aren’t counting carbs, I’ll offer crusty bread for soaking up that incredible sauce. For a complete Mediterranean experience, consider serving with this vibrant Mediterranean lentil salad that complements the flavors perfectly.

    Exciting Recipe Variations

    This versatile base recipe welcomes creative adaptations to keep things interesting. For a spicier kick, add crushed red pepper flakes or a diced jalapeño to the sauce. Seafood lovers can transform this into a mixed seafood bake by incorporating scallops or chunks of firm white fish. For a meatier version, add Italian sausage or pancetta for depth and texture. Vegetable variations work beautifully too—try adding artichoke hearts, roasted red peppers, or sautéed mushrooms. My personal favorite twist is adding a splash of white wine to the sauce and finishing with a squeeze of lemon juice for brightness.

    Storage & Troubleshooting Guide

    Proper Storage and Reheating

    This dish maintains its quality remarkably well when stored properly. Refrigerate leftovers in an airtight container within two hours of cooking, where they’ll keep for up to three days. For reheating, avoid the microwave which can make the shrimp tough. Instead, gently warm in a covered skillet over low heat, adding a splash of cream or broth if the sauce has thickened too much. For meal prep purposes, you can prepare the sauce ahead of time and refrigerate separately, then add fresh shrimp when ready to bake. Freezing isn’t recommended as the cream sauce can separate and the shrimp texture suffers.

    Fixing Common Issues

    If your sauce breaks or appears curdled, don’t panic! Lower the heat immediately and whisk in a tablespoon of cold cream. For a sauce that’s too thin, create a quick thickening agent by mixing a teaspoon of cornstarch with cold water and stirring it in. Conversely, if your sauce is too thick, thin it with a splash of chicken broth. Overcooked shrimp? Unfortunately, there’s no perfect fix, but incorporating them into the sauce thoroughly can help mask the rubbery texture. If your dish lacks flavor, brighten it with lemon zest, a splash of white wine, or additional fresh herbs.

    Frequently Asked Questions

    Can I make Low-Carb Tuscan Bake Shrimp ahead of time?

    You can prepare the sauce up to 24 hours ahead and store in the refrigerator. Add the raw shrimp just before baking for best results. This saves time while ensuring the shrimp maintain their perfect texture.

    What’s the best cheese to use in this recipe?

    Freshly grated Parmesan provides the authentic Tuscan flavor, but Pecorino Romano offers a sharper taste. Avoid pre-shredded varieties which contain anti-caking agents that prevent proper melting.

    Can I substitute the heavy cream with something lighter?

    Yes, you can use half-and-half or a mixture of milk and Greek yogurt. The sauce won’t be as rich, but you’ll save on calories while maintaining a creamy texture.

    How do I know when the shrimp are perfectly cooked?

    Shrimp are done when they form a “C” shape and turn opaque pink throughout—usually 5-7 minutes when baking. If they curl into a tight “O” shape, they’re overcooked.

    What makes this Tuscan Bake Shrimp recipe low-carb?

    This dish achieves its low-carb status by eliminating traditional pasta or rice bases and focusing on protein-rich shrimp and vegetables. The creamy sauce provides satisfaction without the need for starchy components.

    Final Thoughts

    This Low-Carb Tuscan Bake Shrimp has become more than just a recipe in my kitchen—it’s a reminder that eating well doesn’t mean sacrificing flavor or comfort. The rich, creamy sauce paired with perfectly cooked shrimp creates a restaurant-quality experience that fits beautifully into a carb-conscious lifestyle. I love sharing this dish with friends who can never believe it’s actually low-carb! For more delicious recipes like this one, follow me on Pinterest where I’m always posting new low-carb inspirations.

  • Chili Lime Shrimp Ceviche: Irresistibly Tangy & Fresh Delight!

    Chili Lime Shrimp Ceviche: Irresistibly Tangy & Fresh Delight!

    Chili Lime Shrimp Ceviche: Irresistibly Tangy & Fresh Delight!

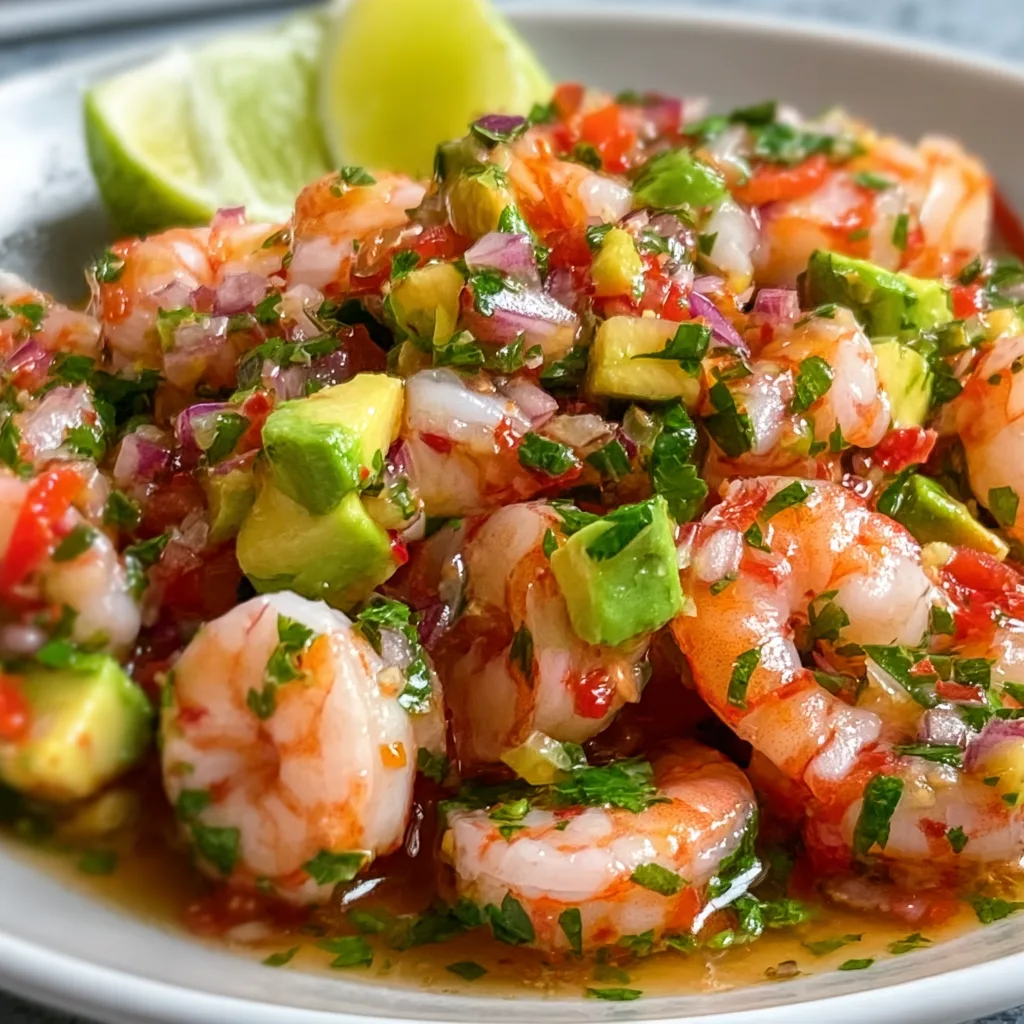
    Chili Lime Shrimp Ceviche brings the perfect balance of zesty citrus, gentle heat, and oceanic freshness to your table in one vibrant dish. I discovered this recipe during a coastal vacation where the tang of lime and subtle kick of chili transformed the day’s catch into something magical. There’s something deeply satisfying about watching raw shrimp “cook” in citrus juices, turning from translucent to perfectly opaque. The first time I served this at a summer gathering, friends couldn’t believe I’d made it myself! This no-cook wonder combines simplicity with impressive presentation, making it perfect for both casual weeknight dinners and elegant entertaining. Let me show you how to create this refreshing delight that tastes like vacation in every bite.

    Recipe

    Why You’ll Love This Chili Lime Shrimp Ceviche

    Perfect Balance of Flavors

    The magic of Chili Lime Shrimp Ceviche lies in its harmonious flavor profile. The bright acidity from fresh lime juice “cooks” the shrimp while infusing it with citrusy goodness. Meanwhile, the chili brings just enough heat to wake up your taste buds without overwhelming them. I love how the sweetness of the shrimp shines through, complemented by crisp cucumber, juicy tomato, and herbaceous cilantro. The hint of garlic and splash of orange juice add depth that makes each bite interesting. This dish proves that sometimes the simplest combinations create the most memorable flavors.

    Quick Preparation, Impressive Results

    Despite its restaurant-worthy presentation, this ceviche requires minimal effort. Simply chop, mix, and let the citrus work its magic! I often prepare it in the morning before work, allowing the flavors to meld in the refrigerator throughout the day. When dinner rolls around, I have a gourmet appetizer ready to go with zero cooking time. The vibrant colors create an Instagram-worthy dish that looks like you spent hours in the kitchen. It’s my go-to recipe when I want to impress guests without breaking a sweat in the kitchen.

    Essential Tips & Tricks

    Selecting and Preparing the Shrimp

    Start with the freshest shrimp possible—this is non-negotiable for ceviche. I prefer medium-sized (21-25 count) shrimp for the perfect bite-size pieces. Always purchase shrimp that’s been previously frozen, as this kills potential parasites. Devein thoroughly and remove all shells before marinating. Slice each shrimp in half lengthwise for maximum citrus penetration. The lime juice needs to fully “cook” the shrimp, transforming it from translucent to opaque and slightly firm to the touch. This typically takes 20-30 minutes, but never more than 4 hours to prevent rubbery texture.

    Balancing Acidity and Heat

    The key to perfect Chili Lime Shrimp Ceviche lies in balancing the citrus marinade with heat elements. I recommend starting with 3/4 cup fresh-squeezed lime juice (about 6-8 limes) and 2 tablespoons orange juice for sweetness. For the chili component, finely dice 1-2 jalapeños (removing seeds for milder heat) or substitute with 1-2 teaspoons of crushed red pepper flakes. Taste and adjust as you go—everyone’s preference for acidity and spice differs. If your ceviche tastes too tart, add a teaspoon of honey or a bit more orange juice. For a creamier variation, incorporate diced avocado just before serving.

    Serving Ideas & Creative Variations

    Presentation Options

    Elevate your Chili Lime Shrimp Ceviche with thoughtful presentation. My favorite method is serving it in martini glasses for an elegant appetizer that showcases the vibrant colors. For casual gatherings, hollow out small watermelons or pineapples to create edible serving bowls with tropical flair. Individual serving spoons arranged on a platter make perfect bite-sized portions for cocktail parties. Don’t forget the garnishes—a sprinkle of microgreens, thinly sliced radishes, or a few edible flowers add visual impact. Always chill your serving dishes beforehand to keep the ceviche refreshingly cool throughout your meal.

    Fusion Variations

    While traditional ceviche is delicious, experimenting with fusion elements creates exciting new flavor profiles. Try adding diced mango or pineapple for tropical sweetness that beautifully complements the chili and lime. For an Asian-inspired twist, incorporate ginger, a splash of sesame oil, and black sesame seeds. Mediterranean flavors work surprisingly well—try adding diced olives, capers, and a sprinkle of feta cheese. For a heartier version, mix in cooked quinoa or rice for a complete meal. My latest obsession is adding pomegranate seeds for unexpected bursts of sweetness and gorgeous ruby-red color contrast.

    Storage & Troubleshooting Guide

    Proper Storage Techniques

    Chili Lime Shrimp Ceviche is best enjoyed fresh, ideally within 24 hours of preparation. Store leftovers in an airtight glass container—never use metal, as the acidic lime juice can react with it. Keep refrigerated at 40°F or below at all times. I recommend placing the container on a bed of ice in the refrigerator for optimal freshness. If serving at a party, nest your serving bowl in a larger bowl filled with ice to maintain safe temperature. Remember that the lime juice continues to “cook” the shrimp, so texture may change slightly during storage. For food safety, never leave ceviche at room temperature for more than 2 hours.

    Common Issues and Solutions

    Even experienced cooks encounter challenges with ceviche. If your shrimp remains translucent after marinating, it needs more time in the lime juice—give it another 15-20 minutes. Conversely, rubbery shrimp indicates over-marination; next time, reduce the acid contact time. Too watery? Drain excess liquid before serving or add more finely diced vegetables to absorb moisture. If flavors seem flat, brighten with additional lime zest, a pinch of salt, or a dash of hot sauce. Bitter taste usually means you’ve included too much pith from the citrus—use a microplane for zesting to avoid this issue.

    Frequently Asked Questions

    Is Chili Lime Shrimp Ceviche safe to eat?

    Yes, when prepared properly. The citric acid in lime juice denatures proteins in the shrimp (similar to cooking with heat). Always use previously frozen shrimp to eliminate parasite risk, and keep chilled below 40°F.

    Can I make this ceviche ahead of time?

    You can prepare components ahead of time, but I recommend marinating the shrimp no more than 4 hours before serving for optimal texture and flavor.

    What can I substitute for cilantro?

    Fresh parsley or a combination of mint and basil make excellent alternatives if you dislike cilantro. Adjust quantities to taste as these herbs have different potency levels.

    Can I use frozen shrimp?

    Absolutely! Thaw completely in the refrigerator overnight, then pat dry thoroughly before proceeding with the recipe to prevent excess water diluting your flavors.

    How spicy is Chili Lime Shrimp Ceviche?

    The spice level is customizable. For mild ceviche, remove all seeds from chilies. For medium heat, leave some seeds. For spicy ceviche, include all seeds or add hot sauce to taste.

    Final Thoughts

    Chili Lime Shrimp Ceviche represents everything I love about summer cooking—vibrant flavors, minimal effort, and ingredients that shine in their natural state. There’s something magical about transforming simple ingredients into a dish that feels both refreshing and sophisticated. Whether you’re serving it as an appetizer at your next gathering or enjoying it as a light meal on a warm evening, this ceviche delivers a perfect balance of zesty, spicy, and fresh elements. I hope you’ll experience the same joy I feel when watching friends take their first bite and seeing their eyes light up with surprise and delight. Enjoy exploring this versatile recipe and making it your own!

    Check out more delicious seafood recipes on our Pinterest board.

  • Mahi Mahi with Mango Lime Butter: Irresistibly Zesty & Fresh!

    Mahi Mahi with Mango Lime Butter: Irresistibly Zesty & Fresh!

    Mahi Mahi with Mango Lime Butter: Irresistibly Zesty & Fresh!

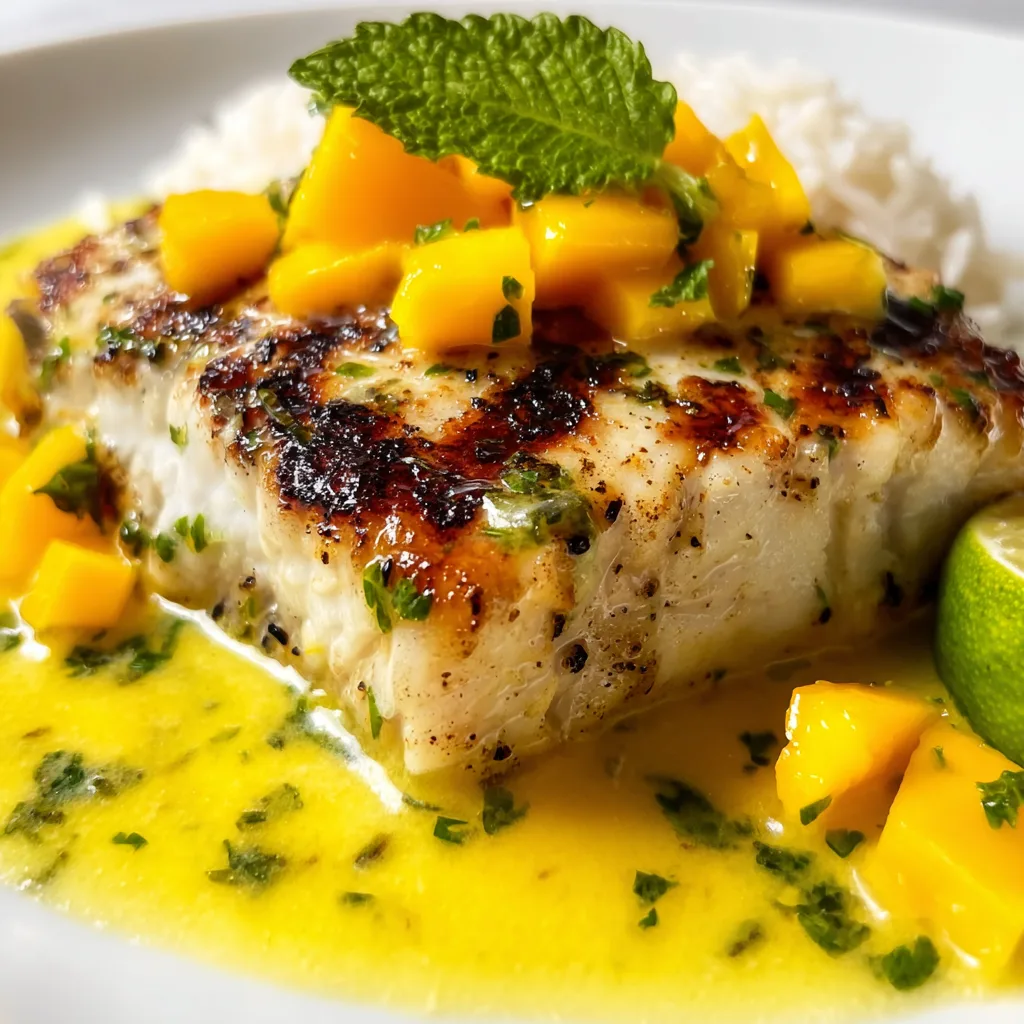
    Mahi Mahi with Mango Lime Butter is one of those magical dishes that transports you straight to a beachside restaurant with just one bite. I discovered this recipe during a coastal vacation where the chef combined buttery, flaky fish with tropical fruit in a way that made me swoon. The bright citrus notes paired with sweet mango create this incredible sauce that elevates the mild fish to something extraordinary. Trust me when I say this dish will become your new favorite way to enjoy seafood at home—restaurant quality with surprisingly little effort!

    Recipe

    Why You’ll Love This Mahi Mahi with Mango Lime Butter

    Perfect Balance of Flavors

    There’s something absolutely magical about the combination of buttery mahi mahi and tropical mango. The fish itself has this wonderful mild flavor that absorbs whatever you pair it with, making it the perfect canvas for the sweet-tart mango lime butter. I love how the lime zest adds this bright pop that cuts through the richness. The first time I made this for my family, my husband (who typically reaches for the hot sauce with fish) actually put his phone down mid-meal—that’s when I knew this recipe was special!

    Quick and Impressive Dinner Option

    This dish looks like you spent hours in the kitchen, but it’s our little secret that it comes together in under 30 minutes! The mango lime butter can be made ahead of time, which means when dinner rush hits, you’re just a quick sear away from an impressive meal. I keep portions of the butter in my freezer for those nights when I need something special without the fuss. It’s become my go-to for last-minute dinner guests when I want to seem effortlessly fancy without breaking a sweat.

    Essential Tips & Tricks

    Selecting and Preparing the Fish

    Always look for mahi mahi fillets that have firm flesh and a clean ocean smell—nothing fishy! I prefer fillets that are about 1-inch thick for the perfect cooking time. Pat them completely dry before seasoning; this is non-negotiable if you want that beautiful golden crust. Season generously with salt and pepper right before cooking, not minutes before. I learned this the hard way when I pre-seasoned too early once and ended up with fish that released too much moisture during cooking. For even more flavor, try a quick 15-minute marinade with olive oil and lime juice.

    Perfecting the Mango Lime Butter

    The secret to extraordinary mango lime butter is using perfectly ripe mangoes—they should give slightly when gently pressed. I dice mine into tiny cubes for better distribution throughout the butter. Let your butter come to room temperature before mixing; cold butter just doesn’t incorporate as smoothly. For extra zing, add a tiny pinch of cayenne pepper—it won’t make it spicy but will enhance all the other flavors. This butter is also incredible on grilled chicken or even spread on warm bread, so consider making a double batch!

    Serving Ideas & Creative Variations

    Complementary Side Dishes

    Mahi mahi with mango lime butter pairs beautifully with sides that complement its tropical flair. I love serving it with coconut rice that soaks up all that delicious butter sauce—just replace half the water with coconut milk when cooking your rice. Grilled asparagus or a simple arugula salad with avocado provides the perfect fresh contrast. For a complete tropical experience, add some crispy garlic parmesan green beans with a squeeze of lime. When entertaining, I arrange everything on a large platter with extra lime wedges and fresh cilantro for guests to add as they please.

    Exciting Recipe Variations

    While the classic version is divine, don’t be afraid to play with this flexible recipe! Try blackening the mahi mahi with Cajun seasoning for a spicier kick that still works beautifully with the sweet mango butter. For a Southeast Asian twist, add a teaspoon of green curry paste and some finely chopped lemongrass to the butter mixture. You can also substitute the mango with pineapple or papaya depending on what’s in season. I’ve even made this with other firm white fish like halibut or sea bass when mahi mahi wasn’t available, and it’s always delicious.

    Storage & Troubleshooting Guide

    Proper Storage Techniques

    Fish dishes are best enjoyed fresh, but if you have leftovers, store them properly to maintain quality. Place cooled mahi mahi in an airtight container and refrigerate for up to 2 days. Store extra mango lime butter separately in the refrigerator for up to a week, or freeze it in an ice cube tray for up to 3 months. When reheating the fish, do it gently in a covered skillet with a splash of water to create steam, or use a microwave at 50% power with a damp paper towel covering the fish to prevent it from drying out.

    Troubleshooting Common Issues

    If your mahi mahi turns out tough, you’ve likely overcooked it. Remember that fish continues cooking for a minute or two after removing from heat. For perfectly tender results, cook just until it flakes easily with a fork but still looks slightly translucent in the center. If your mango butter separates or looks curdled, it probably means the mango was too juicy. Fix this by adding a bit more softened butter and a sprinkle of cornstarch to stabilize it. If the butter melts too quickly on the hot fish, try freezing butter pats for 10 minutes before serving.

    Frequently Asked Questions

    How do I know when Mahi Mahi with Mango Lime Butter is perfectly cooked?

    Mahi mahi is done when it flakes easily with a fork but still looks moist. It should reach an internal temperature of 137°F and have an opaque appearance. The entire process usually takes 3-4 minutes per side for a 1-inch thick fillet.

    Can I make the mango lime butter ahead of time?

    Absolutely! The butter can be made up to 3 days ahead and refrigerated. You can also form it into a log using plastic wrap, freeze it, and slice off medallions as needed for up to 3 months.

    What’s the best way to select fresh mahi mahi?

    Look for firm flesh with a clean ocean scent. Fresh mahi mahi should have a pinkish-tan color without any browning. If buying frozen, ensure there’s no freezer burn or excessive ice crystals.

    Can I substitute another fish if mahi mahi isn’t available?

    Yes! Halibut, sea bass, or even salmon work well with this recipe. Just adjust cooking times accordingly—thinner fillets will cook faster than thick mahi mahi steaks.

    What wine pairs well with this dish?

    A crisp Sauvignon Blanc or unoaked Chardonnay complements the tropical flavors perfectly. For something different, try a dry Riesling which balances the richness of the butter sauce.

    Final Thoughts

    This Mahi Mahi with Mango Lime Butter has become one of my signature dishes for both weeknight dinners and special occasions. There’s something so satisfying about creating a restaurant-quality meal that celebrates simple, quality ingredients with minimal fuss. The vibrant colors and flavors make it feel like a vacation on a plate, even on the dreariest winter evening. I hope you’ll try this recipe and experience the little moment of joy that comes with that first perfect bite. For more seafood inspiration, check out my Pinterest board where I’m always adding new favorites!