Category: Fish Recipes

  • Baked Lobster Tails with Garlic Butter – Irresistibly Easy & Delicious!

    Baked Lobster Tails with Garlic Butter – Irresistibly Easy & Delicious!

    Baked Lobster Tails with Garlic Butter – Irresistibly Easy & Delicious!

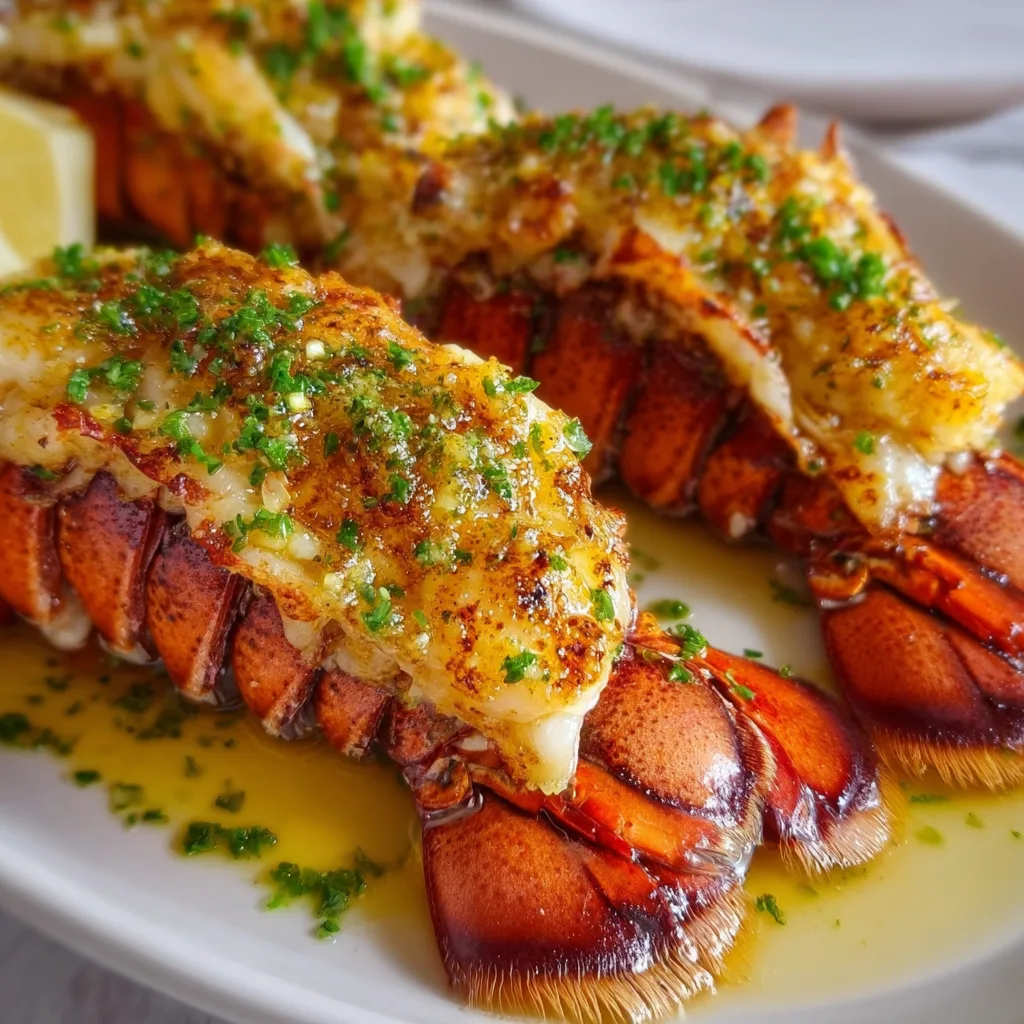
    Baked lobster tails with garlic butter are the ultimate indulgence that transforms any dinner into a special occasion. The first time I made these at home, I was shocked at how simple yet impressive they were! The sweet, tender lobster meat bathed in rich, melted garlic butter creates a combination that’s absolutely heavenly. Even better, this restaurant-worthy dish comes together in just about 15 minutes of active cooking time. If you’re looking to create a memorable meal without spending hours in the kitchen, this recipe belongs in your collection like my fluffy twice baked potatoes.

    Recipe

    Why You’ll Love These Baked Lobster Tails with Garlic Butter

    Impressive Yet Simple

    There’s something magical about serving lobster tails that instantly elevates any meal. What most people don’t realize is how incredibly easy they are to prepare! With just a few quality ingredients and about 20 minutes total, you’ll create a dish that looks like it came from a five-star restaurant. The butterflied presentation makes for a stunning visual impact when the bright white meat contrasts against the vibrant red shells. I still remember my husband’s face the first time I served these—pure amazement that something so elegant came from our own kitchen!

    Rich, Buttery Flavor

    The star of this dish is undoubtedly the garlic butter sauce that bathes every bite in decadence. The combination of sweet lobster meat and savory garlic butter creates a flavor profile that’s simply irresistible. I use high-quality butter and fresh garlic for the best results, with a hint of lemon juice to cut through the richness. The butter melts into every crevice of the tender lobster meat as it bakes, creating an experience that’s both luxurious and comforting. One bite and you’ll understand why lobster has maintained its reputation as a premium dining experience.

    Essential Tips & Tricks

    Selecting and Preparing Lobster Tails

    Choosing the right lobster tails is crucial for this recipe. Look for cold water tails (like Maine or Canadian) when possible, as they typically have sweeter, more tender meat than warm water varieties. Fresh tails should have a clean ocean smell and firm, translucent meat. When preparing, use sharp kitchen shears to cut through the top shell, then gently lift the meat to rest on top—this is called butterflying and creates that restaurant-style presentation. Don’t remove the meat completely! Keeping it attached at the tail end ensures even cooking and makes for a beautiful presentation similar to my garlic butter cod bites.

    Perfect Cooking Technique

    The secret to perfectly baked lobster tails is avoiding overcooking. As a general rule, bake for about 1 minute per ounce of lobster tail at 425°F. The meat should turn from translucent to opaque white with no translucent parts, but still remain moist and tender. I always use an instant-read thermometer to check for an internal temperature of 140-145°F. For even cooking, place the tails on a baking sheet with space between them. Brushing the garlic butter mixture both before and halfway through baking ensures maximum flavor infusion and prevents the delicate meat from drying out.

    Serving Ideas & Creative Variations

    Perfect Pairings

    Baked lobster tails with garlic butter deserve accompaniments that complement without overshadowing their delicate flavor. I love serving them with a simple risotto or pilaf that can soak up the extra garlic butter sauce—pure heaven! For a complete meal, add roasted asparagus or a crisp green salad with a light vinaigrette. If you’re creating a romantic dinner, a glass of chilled Chardonnay or Champagne makes the perfect beverage pairing. For a more casual approach, these lobster tails also pair beautifully with my dutch oven no knead crusty bread for soaking up every last drop of that amazing butter sauce.

    Flavor Variations

    While classic garlic butter is divine, don’t be afraid to experiment with different flavor profiles! For a Cajun twist, add paprika, cayenne, and dried oregano to your butter mixture. Herb lovers can incorporate fresh chopped parsley, chives, or dill. For an Asian-inspired version, try adding ginger, a touch of soy sauce, and a drizzle of sesame oil to the butter. My personal favorite variation includes a tablespoon of white wine in the butter sauce and a sprinkle of fresh tarragon. The slight anise flavor of the tarragon creates an unexpected but delightful complement to the sweet lobster meat.

    Storage & Troubleshooting Guide

    Proper Storage

    Lobster tails are best enjoyed immediately after cooking, but if you have leftovers, proper storage is key. Allow any remaining tails to cool completely, then refrigerate in an airtight container for up to 2 days. When reheating, do so gently—either in a low oven (300°F) covered with foil, or in short intervals in the microwave at 50% power. I recommend making a fresh batch of garlic butter for serving with reheated lobster, as this helps restore moisture and flavor. If you’re planning ahead, you can prepare the garlic butter mixture up to 3 days in advance and keep it refrigerated until needed.

    Common Issues and Solutions

    Even experienced cooks sometimes encounter challenges with lobster tails. If your lobster meat is tough or rubbery, it’s likely overcooked—next time, reduce your cooking time or oven temperature. For shells that are difficult to cut, try using kitchen shears instead of a knife, or partially thaw frozen tails before cutting. If the meat sticks to the shell during eating, you may need to cook it slightly longer next time. Another common issue is watery lobster—this usually happens with previously frozen tails that weren’t properly thawed and patted dry. Always thaw frozen tails overnight in the refrigerator and pat them thoroughly dry before preparing.

    Frequently Asked Questions

    How do I know when baked lobster tails with garlic butter are done cooking?

    Properly cooked lobster meat turns from translucent to opaque white with no translucent areas. The internal temperature should reach 140-145°F, and the meat should be firm but still tender when pierced with a fork.

    Can I use frozen lobster tails for this recipe?

    Absolutely! Thaw frozen tails overnight in the refrigerator for best results. Pat them completely dry before butterflying and cooking to prevent watery results and ensure proper browning.

    What’s the best way to butterfly a lobster tail?

    Use kitchen shears to cut through the top shell (not the underside) lengthwise, then gently pry the shell open and lift the meat to rest on top while keeping it attached at the tail end.

    How much lobster should I serve per person?

    For a main course, plan on one 6-8 oz tail per person. For appetizers or as part of a surf and turf meal, smaller 4-5 oz tails work perfectly.

    Can I prepare baked lobster tails ahead of time?

    You can butterfly the tails and prepare the garlic butter mixture up to 24 hours ahead, but for best results, bake them just before serving. Lobster is at its most tender immediately after cooking.

    Final Thoughts

    Baked lobster tails with garlic butter represent one of those rare culinary treasures that delivers maximum impact with minimal effort. There’s something truly special about the combination of sweet, tender lobster meat and rich, aromatic garlic butter that creates an unforgettable dining experience. Whether you’re celebrating a special occasion or simply treating yourself to something extraordinary, this dish never disappoints. I encourage you to try this recipe and discover just how accessible luxury can be in your own kitchen. Find more inspiration for your next special meal on my Pinterest page!
  • One Pot Shrimp and Sausage Jambalaya You’ll Crave Tonight!

    One Pot Shrimp and Sausage Jambalaya You’ll Crave Tonight!

    One Pot Shrimp and Sausage Jambalaya You’ll Crave Tonight!

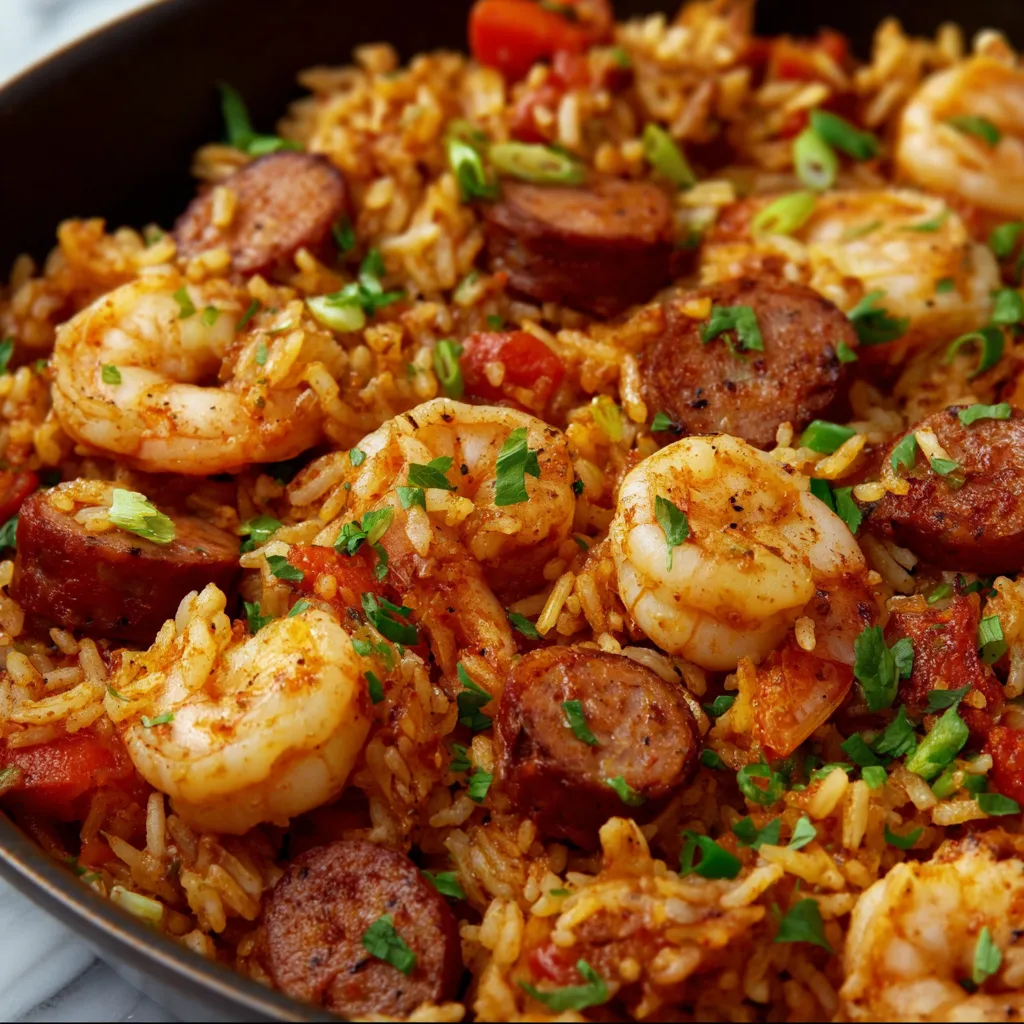
    One Pot Shrimp and Sausage Jambalaya brings the heart of New Orleans straight to your dinner table with minimal fuss and maximum flavor. The first time I made this dish, the rich aroma of Cajun spices filled my kitchen, instantly transporting me to the vibrant streets of Louisiana. There’s something magical about watching rice soak up that tomato-based broth, gradually transforming into a colorful medley studded with plump shrimp and smoky sausage. This comforting one-pot wonder strikes the perfect balance between convenience and authentic flavor—making it my go-to when I’m craving something hearty and satisfying.

    Recipe

    Why You’ll Love This One Pot Shrimp and Sausage Jambalaya

    A Complete Meal in One Pot

    You know those evenings when you’re craving something deeply satisfying but the thought of washing multiple pots and pans makes you reach for the takeout menu? This jambalaya recipe is your solution. Everything—from the initial sautéing of the “holy trinity” (onions, bell peppers, and celery) to the final simmer with shrimp—happens in a single pot. The flavors build and meld together, creating layers of complexity that belie how simple the cooking process actually is. I love how the rice absorbs all those savory juices, making each grain burst with Cajun goodness.

    Ready in Under an Hour

    Despite its rich, developed flavor profile, this jambalaya doesn’t demand hours of your time. From prep to table in about 45 minutes, it’s perfect for weeknight dinners when you want something impressive without the time investment. The key is the sequence—sautéing aromatics first to release their flavors, then adding the sausage to render its smoky goodness, followed by the rice to toast slightly before introducing the liquid. Finally, the shrimp goes in just minutes before serving, ensuring they remain perfectly tender rather than overcooked and rubbery.

    Essential Tips & Tricks

    Selecting the Right Ingredients

    The soul of jambalaya lies in its ingredients. Choose andouille sausage for authentic flavor—its smoky, slightly spicy profile is traditional to Cajun cooking. If unavailable, smoked kielbasa makes a decent substitute. For shrimp, opt for large (21-25 count) and buy them peeled and deveined to save time. The freshness matters more than size. Rice selection is crucial too—long-grain white rice works best as it maintains its structure without becoming mushy. Avoid instant rice at all costs! Finally, don’t skip the Cajun seasoning—it provides that characteristic heat and depth.

    Mastering the Cooking Technique

    Achieving the perfect jambalaya texture requires attention to a few details. First, toast the rice for 1-2 minutes before adding liquid—this develops nutty flavors and helps maintain grain integrity. Second, resist the urge to stir constantly. Once you’ve added the broth, give it just one good stir, then reduce heat and cover. Let it do its thing! Lifting the lid releases steam and disrupts cooking. Finally, add shrimp only in the last 5 minutes of cooking. They need minimal time to turn pink and opaque. Overcooking makes them tough and rubbery—the most common mistake in seafood jambalaya.

    Serving Ideas & Creative Variations

    Complementary Side Dishes

    While jambalaya stands proudly as a complete meal, a few thoughtful sides can elevate your dining experience. A simple side of crusty French bread is perfect for sopping up the flavorful sauce—I always warm mine slightly in the oven first. A crisp green salad with a light vinaigrette provides refreshing contrast to the rich, spicy main dish. For a truly authentic touch, serve with a side of simple collard greens or cornbread. When I’m hosting guests, I like to start with a small cup of gumbo as an appetizer for a complete New Orleans-inspired feast.

    Delicious Jambalaya Variations

    The beauty of jambalaya lies in its adaptability. For a heartier version, add cubed chicken thighs when you cook the sausage. For a vegetarian twist, omit the meats and double up on bell peppers, add mushrooms, and use vegetable broth instead. Seafood lovers can enhance the oceanic flavors by adding scallops or chunks of firm white fish alongside the shrimp. Spice levels are entirely customizable—add extra cayenne for heat seekers or dial it back for sensitive palates. My personal favorite variation includes a handful of okra added with the rice, providing both flavor and a slight thickening to the final dish.

    Storage & Troubleshooting Guide

    Proper Storage and Reheating

    Jambalaya actually improves with time as flavors continue to meld, making it perfect for meal prep. Store leftovers in airtight containers in the refrigerator for up to 3 days. When reheating, add a splash of chicken broth or water to restore moisture, as the rice will have absorbed most of the liquid. Microwave on medium power, stirring halfway through, or gently reheat on the stovetop. For freezing, portion into freezer-safe containers and store for up to 2 months. Thaw overnight in the refrigerator before reheating. I find the texture of shrimp can change slightly after freezing, but the flavor remains delicious.

    Fixing Common Jambalaya Problems

    Even experienced cooks occasionally encounter jambalaya issues. If your rice is still crunchy when the liquid has been absorbed, add ¼ cup more broth, cover, and cook an additional 5 minutes. For too-soupy jambalaya, remove the lid and simmer uncovered until excess liquid evaporates. If your dish lacks flavor, don’t just add more Cajun seasoning—enhance with a splash of Worcestershire sauce or hot sauce, which adds depth without overwhelming. And if you’ve accidentally overcooked your shrimp to rubbery disappointment, quickly pick them out, sauté fresh ones separately, and fold them in just before serving.

    Frequently Asked Questions

    Can I make One Pot Shrimp and Sausage Jambalaya ahead of time?

    Yes! Prepare everything except the shrimp, refrigerate, then reheat and add fresh shrimp 5 minutes before serving for the best texture and flavor.

    What’s the difference between jambalaya and gumbo?

    Jambalaya is a rice-based dish where rice cooks directly in the flavorful liquid, while gumbo is a stew typically served over separately cooked rice.

    Can I use frozen shrimp?

    Absolutely! Thaw completely first, pat dry with paper towels to remove excess moisture, and add during the last 5 minutes of cooking.

    Is jambalaya supposed to be spicy?

    Traditional jambalaya has a moderate kick, but you can easily adjust the heat level by increasing or decreasing the Cajun seasoning and cayenne pepper.

    What type of pot works best for One Pot Shrimp and Sausage Jambalaya?

    A heavy-bottomed Dutch oven or deep skillet with a tight-fitting lid works best for even heat distribution and proper steam retention.

    Final Thoughts

    This One Pot Shrimp and Sausage Jambalaya captures the essence of Louisiana cooking—bold flavors, comforting textures, and the beautiful simplicity of a meal that brings people together. There’s something deeply satisfying about creating such a flavorful, complete dish in just one pot. Whether you’re cooking for a weeknight family dinner or entertaining friends, this jambalaya delivers both convenience and that wonderful “made with love” quality that keeps everyone coming back for more. Find more of my favorite comfort food recipes on Pinterest.

  • Garlic Butter Cod Bites with Creamy Lemon Herb Dip – Irresistible!

    Garlic Butter Cod Bites with Creamy Lemon Herb Dip – Irresistible!

    Garlic Butter Cod Bites with Creamy Lemon Herb Dip - Irresistible!

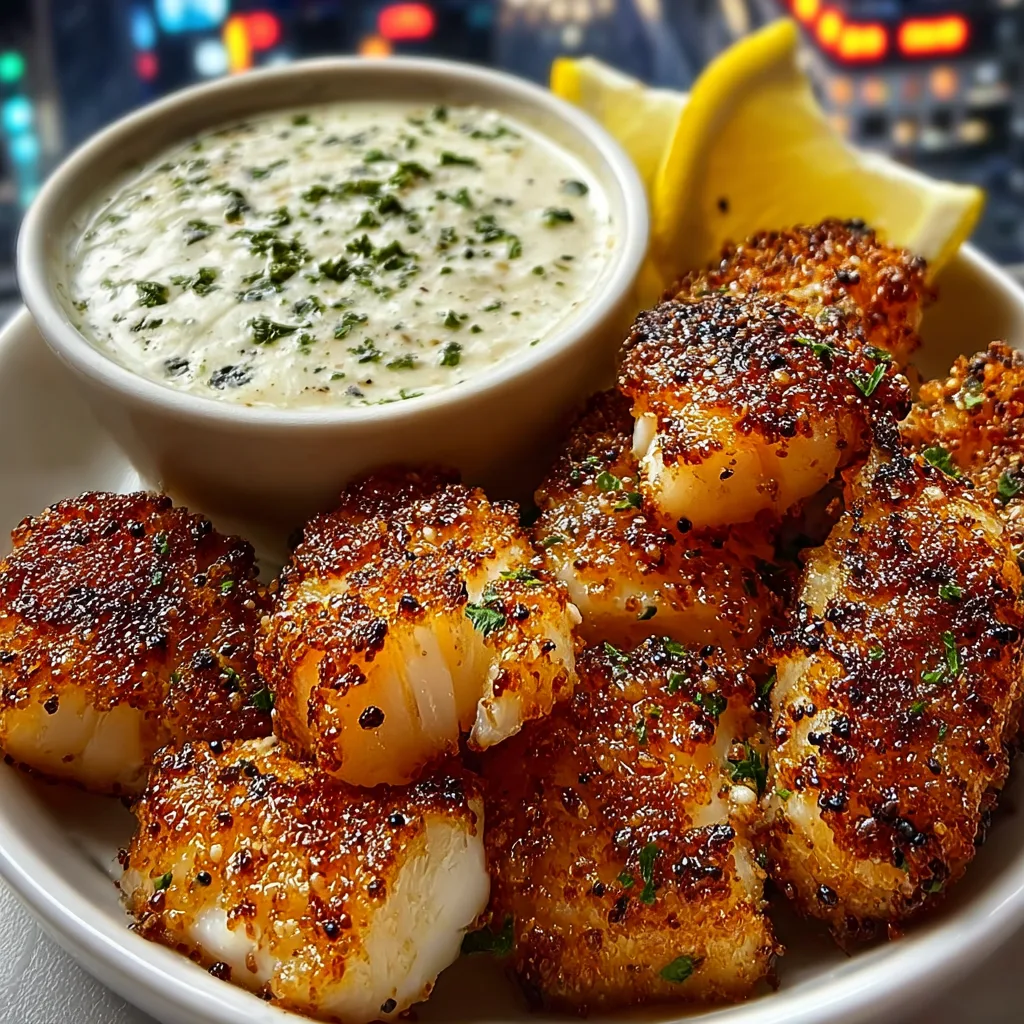
    Garlic Butter Cod Bites with Creamy Lemon Herb Dip are what I call my “little pockets of ocean magic.” The first time I made these for a dinner party, my kitchen filled with the most intoxicating aroma of butter and garlic that had everyone hovering near the stove. These tender, flaky cod bites get a luxurious bath in a garlicky butter sauce before being paired with a bright, creamy dip that cuts through the richness perfectly. Trust me when I say this appetizer disappears faster than you can say “seconds, please!” Check out my other seafood recipes for more ocean-inspired delights.

    Recipe

    Why You’ll Love This Garlic Butter Cod Bites with Creamy Lemon Herb Dip

    Perfect Texture Combination

    The magic of these garlic butter cod bites lies in their contrasting textures. The exterior develops a beautiful golden crust while the inside remains incredibly tender and flaky. I still remember my neighbor Sarah’s wide-eyed expression when she bit into one—”How is it both crispy AND melt-in-your-mouth?” she gasped. The secret is patting the cod completely dry before cooking and using a hot pan to achieve that perfect sear. When paired with the silky creamy lemon herb dip, each bite becomes an experience of complementary textures.

    Quick Yet Impressive

    What I adore about this recipe is how it transforms simple ingredients into something that looks and tastes restaurant-worthy in under 30 minutes. On those evenings when unexpected guests drop by, these cod bites have saved me countless times! The garlic-infused butter does most of the flavor work, while the fresh herbs in the dip brighten everything up. Even my cooking-averse husband can pull this off when I’m running late. It’s the perfect balance of elegant and effortless—ideal for both weeknight dinners and special occasions.

    Essential Tips & Tricks

    Selecting and Preparing the Cod

    Choosing the right cod makes all the difference in this recipe. Look for firm, white fillets with a clean ocean scent—nothing fishy! I learned this the hard way after a disappointing batch made with less-than-fresh fish. For best results, cut your cod into uniform 1½-inch cubes so they cook evenly. Always pat the pieces thoroughly dry with paper towels before seasoning—this is non-negotiable if you want that gorgeous golden crust! The moisture is the enemy of crispiness. Season generously with salt and pepper just before cooking, not too far in advance.

    Perfecting the Garlic Butter Sauce

    The garlic butter sauce is the soul of this dish! I discovered that browning the butter slightly before adding the garlic creates a nutty depth that elevates everything. Use fresh garlic cloves and mince them yourself—the pre-minced stuff just doesn’t compare in flavor. Add a tiny pinch of red pepper flakes for subtle heat that won’t overwhelm. When cooking, watch the garlic carefully; it should become fragrant and golden but never brown or burnt, which happens quickly! A splash of lemon juice at the end brightens the entire dish and cuts through the richness beautifully.

    Serving Ideas & Creative Variations

    Elegant Presentation Options

    Transform these humble cod bites into a showstopping appetizer with thoughtful presentation. I love serving them on a large wooden board with small bowls of the creamy dip nestled between clusters of cod. Garnish with fresh herbs, lemon wedges, and a sprinkle of flaky sea salt for that professional touch. For dinner parties, try serving individual portions in small glasses or ceramic spoons for an elegant one-bite experience. Add colorful vegetable sides like roasted cherry tomatoes or asparagus tips to create a feast for the eyes. The vibrant colors against the golden cod bites are absolutely gorgeous.

    Flavor Adaptations

    While the classic recipe is divine, don’t be afraid to play with flavors! My Mediterranean version with oregano and olives always gets rave reviews. Simply add chopped Kalamatas and fresh oregano to the butter sauce. For an Asian-inspired twist, swap the herbs in the dip for ginger, lime, and a touch of honey. You can also try a Cajun variation with blackened seasoning and a remoulade-style dip. When I’m feeling indulgent, I add a tablespoon of crispy pancetta bits to the sauce—the salty crunch against the tender cod is simply magical!

    Storage & Troubleshooting Guide

    Proper Storage Techniques

    These garlic butter cod bites are best enjoyed fresh, but sometimes leftovers are inevitable. Store them in an airtight container in the refrigerator for up to 2 days. The creamy dip can be kept separately for up to 3 days. When reheating, avoid the microwave which will make the cod rubbery. Instead, warm them gently in a skillet over medium-low heat with a touch of butter. For the dip, let it come to room temperature before serving again, and whisk in a splash of lemon juice to refresh the flavors. If planning ahead, you can prepare the dip a day in advance—it actually tastes even better after the flavors meld overnight.

    Common Pitfalls and Solutions

    The most common issue with cod bites is overcooking, which leaves them tough and dry. Remember that cod continues cooking after removal from heat, so take them off when they’re just opaque throughout. If your cod sticks to the pan, your pan probably wasn’t hot enough before adding the fish. Ensure it’s properly preheated next time. For a sauce that breaks or separates, lower your heat immediately and whisk in a teaspoon of cold butter to re-emulsify. If your dip is too thick, thin it with a splash of milk or cream. Too thin? Add more Greek yogurt or let it chill longer in the refrigerator to firm up.

    Frequently Asked Questions

    Can I use frozen cod for this recipe?

    Yes, but thaw it completely and pat it very dry before cooking. Frozen cod often releases more moisture, so you might need to work in smaller batches to avoid steaming rather than searing the fish.

    What’s the best substitute for cod in this garlic butter recipe?

    Haddock, halibut, or pollock work wonderfully as substitutes. Look for any firm white fish with a mild flavor profile that can stand up to the rich garlic butter sauce.

    How can I make Garlic Butter Cod Bites with Creamy Lemon Herb Dip ahead for a party?

    Prepare the lemon herb dip up to 24 hours ahead. For the cod, cut and season it in advance, but cook it no more than 30 minutes before serving for the best texture and flavor.

    Can I make this recipe dairy-free?

    Absolutely! Use olive oil or a plant-based butter alternative, and create the creamy dip with dairy-free yogurt or soaked and blended cashews for a similar texture.

    What wine pairs best with this appetizer?

    A crisp Sauvignon Blanc or unoaked Chardonnay complements the buttery cod and creamy dip beautifully. For red wine lovers, a light Pinot Noir works surprisingly well.

    Final Thoughts

    These Garlic Butter Cod Bites with Creamy Lemon Herb Dip have become my go-to recipe when I want to impress without stress. There’s something magical about transforming simple ingredients into something so luxurious yet approachable. I’ve served these at casual Friday gatherings and fancy holiday parties alike, always to rave reviews. The combination of tender cod, rich garlic butter, and bright herbaceous dip creates a perfect harmony that keeps everyone coming back for more. Be sure to check out more seafood inspiration on my Pinterest board for your next gathering!

  • Coconut Curry Salmon That’ll Blow Your Taste Buds Away!

    Coconut Curry Salmon That’ll Blow Your Taste Buds Away!

    Coconut Curry Salmon That’ll Blow Your Taste Buds Away!

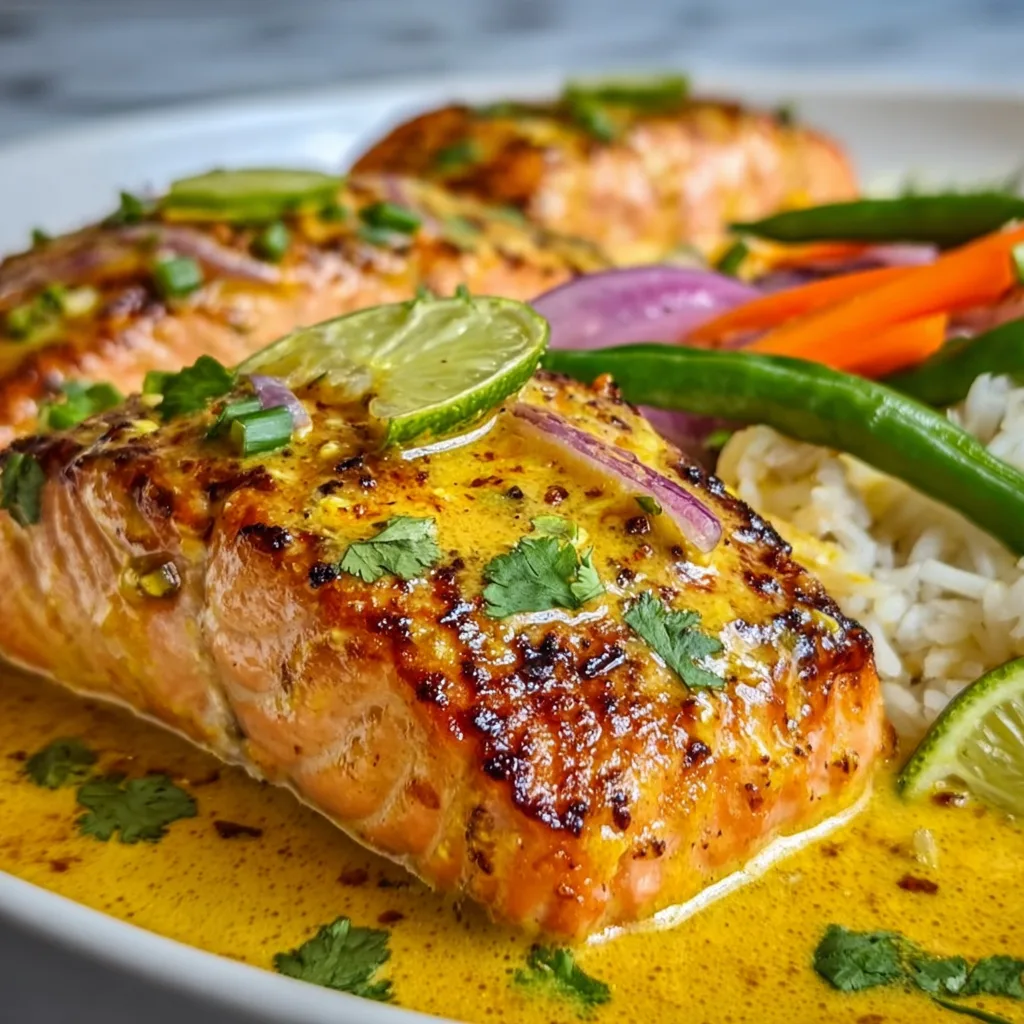
    Coconut Curry Salmon has become my absolute go-to for those evenings when I want something that feels fancy but doesn’t require hours in the kitchen. The first time I made this dish, the aroma of simmering coconut milk and curry spices filled my apartment, and my neighbor actually knocked on my door to ask what that heavenly smell was! The rich, velvety sauce paired with tender salmon creates a meal that’s both comforting and elegant. I love how the natural sweetness of the coconut balances perfectly with the gentle heat of curry, creating a dish that’s sophisticated yet incredibly simple to prepare. If you’re looking for more seafood inspiration, my Crispy Parmesan Crusted Air Fryer Tilapia is another quick favorite.

    Recipe

    Why You’ll Love This Coconut Curry Salmon

    Perfect Balance of Flavors

    The magic of this Coconut Curry Salmon lies in its perfect flavor harmony. The natural richness of salmon creates an ideal canvas for the creamy coconut and aromatic curry. I’ve found that using full-fat coconut milk makes all the difference—it creates that silky texture that coats each bite of fish beautifully. The first time I served this to my sister (who claims to dislike curry), she was shocked by how the flavors melded together without any single note overpowering the others. The subtle sweetness from the coconut balances the warming spices, making this dish approachable even for those who typically shy away from curry.

    Quick Yet Impressive

    What I adore most about this Coconut Curry Salmon is how it transforms a weeknight dinner into something that feels restaurant-worthy in under 30 minutes. Last month when my in-laws dropped by unexpectedly, I whipped this up while we chatted, and they were genuinely impressed. The vibrant yellow sauce creates a stunning presentation against the pink salmon, especially when garnished with fresh herbs and a squeeze of lime. It’s become my secret weapon for those nights when I want something that feels special without the fuss. The hands-on time is minimal, yet the results are consistently spectacular—exactly what I need after a long day.

    Essential Tips & Tricks

    Selecting and Preparing Your Salmon

    Choosing the right salmon is your first step toward curry perfection. I prefer wild-caught salmon fillets with the skin on—they tend to stay moister during cooking. Look for pieces that are uniform in thickness (about 1-1.5 inches) to ensure even cooking. Before cooking, I always pat my salmon dry with paper towels, which helps the seasoning stick and creates better browning. Season the flesh side with salt and pepper right before cooking, not too far in advance. I learned this the hard way after once salting too early and ending up with salmon that had released too much moisture before hitting the pan.

    Creating the Perfect Curry Base

    The curry foundation is where all the magic happens! Start by sautéing finely diced onions until translucent before adding minced garlic and ginger. This aromatic base is crucial—don’t rush this step! When adding curry powder or paste, I briefly toast it in the pan for 30-45 seconds until fragrant, which blooms the spices and deepens their flavor. For the coconut milk, I recommend using full-fat varieties for the richest texture. If you’re looking for other ways to use these ingredients, my Creamy Coconut Curry Prawn Spaghetti uses a similar technique with equally delicious results. Remember to simmer the sauce briefly before adding the salmon—this develops flavor without reducing it too much.

    Serving Ideas & Creative Variations

    Perfect Pairings

    Coconut Curry Salmon shines brightest when served with the right accompaniments. My go-to is fluffy jasmine rice which soaks up that glorious sauce—I always make extra sauce just for this reason! For a lighter option, cauliflower rice works beautifully. I love adding a side of quick-pickled cucumbers for brightness and crunch; just thinly slice cucumbers and marinate them in rice vinegar, a pinch of sugar, and salt for 15 minutes while preparing the main dish. Fresh herbs like cilantro, Thai basil, or mint scattered over the top add a pop of color and freshness that elevates the entire presentation.

    Exciting Flavor Twists

    Don’t be afraid to make this Coconut Curry Salmon recipe your own with some creative variations! Adding a tablespoon of Thai red curry paste instead of powder creates a different flavor profile with more depth and heat. For a sweeter version, try stirring in a teaspoon of mango chutney or a handful of diced pineapple to the sauce. When I’m craving extra vegetables, I toss in handfuls of baby spinach or snow peas during the last few minutes of cooking. For special occasions, I’ve even added a few Crispy Shrimp Toast pieces on the side for an impressive Asian-inspired feast that always gets rave reviews from my dinner guests.

    Storage & Troubleshooting Guide

    Proper Storage Solutions

    Leftover Coconut Curry Salmon can be just as delicious the next day if stored properly. Allow the dish to cool completely before transferring to an airtight container. It will keep in the refrigerator for up to 2 days—though in my house, it rarely lasts that long! When reheating, do so gently over low heat to prevent the salmon from becoming tough. I’ve found that adding a splash of coconut milk during reheating helps restore the creamy texture of the sauce. For meal prep, you can actually prepare the curry sauce up to 3 days ahead and store it separately, then simply cook fresh salmon when you’re ready to serve.

    Common Issues & Solutions

    If your Coconut Curry Salmon sauce has split or curdled, don’t panic! This usually happens when the sauce is heated too quickly or at too high a temperature. To fix it, remove from heat immediately and whisk in 1-2 tablespoons of room temperature coconut milk. Another common issue is overcooked salmon—it should be just opaque in the center. I use the rule of 10 minutes cooking time per inch of thickness as my guide. If your sauce is too thin, simmer it for a few minutes before adding the salmon. Too thick? Add a splash of coconut milk or chicken broth to reach your desired consistency.

    Frequently Asked Questions

    Can I use frozen salmon for Coconut Curry Salmon?

    Yes! Thaw completely in the refrigerator overnight, then pat very dry with paper towels before cooking to remove excess moisture. This prevents the sauce from becoming watery.

    What can I substitute for coconut milk?

    Heavy cream works as a non-coconut alternative, though the flavor will be different. For a lighter option, try cashew cream or a blend of yogurt and milk for tanginess.

    How spicy is this curry dish?

    The recipe as written is mild to medium. Adjust the heat by varying the amount of curry powder or adding red pepper flakes to taste.

    Can I make this dish ahead for a dinner party?

    Prepare the curry sauce up to 24 hours ahead and refrigerate. Cook the salmon fresh just before serving for the best texture and flavor.

    Is Coconut Curry Salmon healthy?

    Absolutely! It’s rich in omega-3 fatty acids from the salmon and contains anti-inflammatory properties from the curry spices. Use light coconut milk to reduce calories if desired.

    Final Thoughts

    This Coconut Curry Salmon has become more than just a recipe in my kitchen—it’s my reliable companion for both quiet weeknights and special gatherings. The way the creamy coconut sauce envelops each tender piece of salmon creates something truly magical that belies how simple it is to prepare. I hope this dish brings the same comfort and joy to your table as it has to mine. Don’t forget to check out more inspiration on Pinterest where I’m always sharing my latest creations and variations on classics like this coconut curry salmon.

  • Air Fryer Bang Bang Shrimp: Crispy, Spicy & Irresistible Recipe!

    Air Fryer Bang Bang Shrimp: Crispy, Spicy & Irresistible Recipe!

    Air Fryer Bang Bang Shrimp: Crispy, Spicy & Irresistible Recipe!

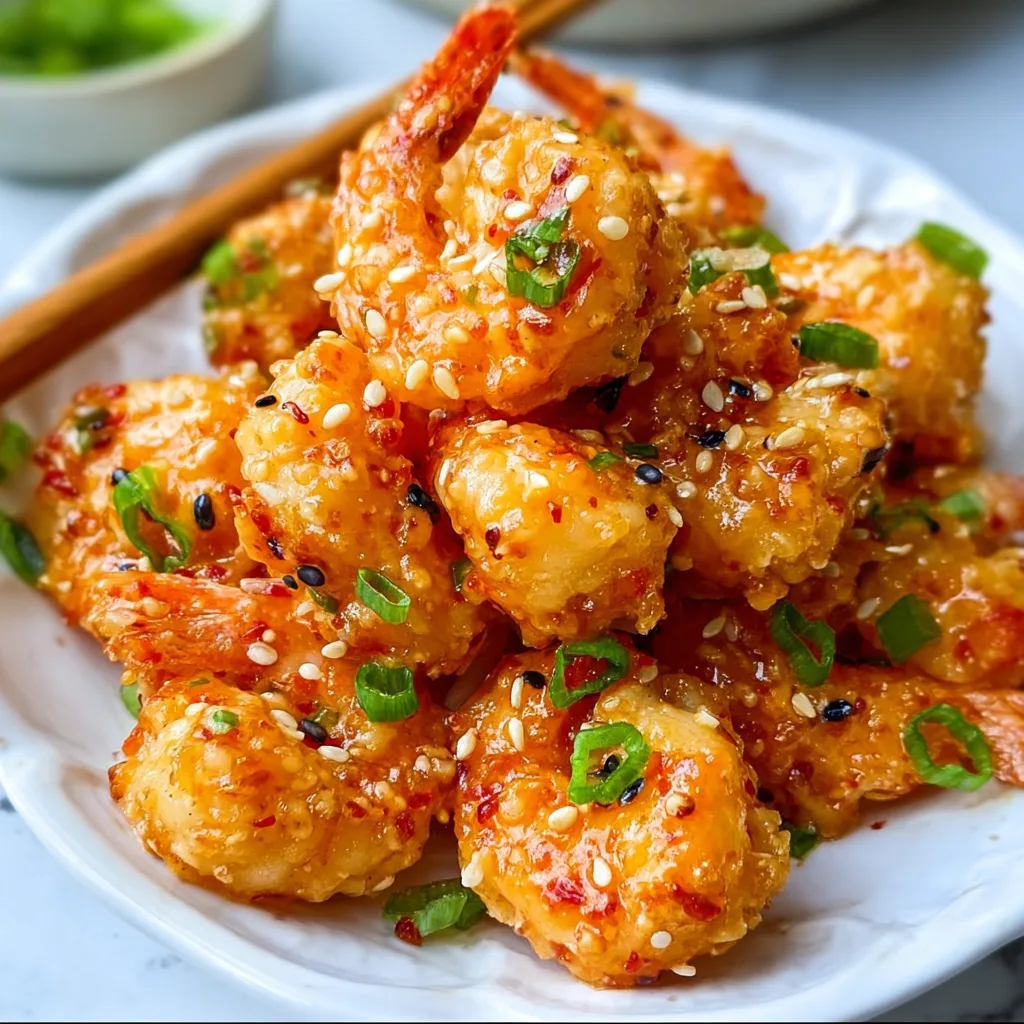
    Air Fryer Bang Bang Shrimp brings restaurant-quality appetizers right to your kitchen with minimal effort and maximum flavor. The first time I made these crispy, sauce-coated bites, my family gathered around the air fryer like moths to a flame, snatching them up before they could even cool! That perfect combination of crunchy coating and spicy-sweet sauce creates an irresistible texture that’s impossible to resist. What I love most is how the air fryer gives these shrimp that golden exterior without the mess of deep frying. If you enjoy seafood with a kick, you’ll find these bang bang shrimp just as addictive as I do!

    Recipe

    Why You’ll Love This Air Fryer Bang Bang Shrimp

    Quick & Healthier Than Takeout

    There’s something magical about creating restaurant favorites at home, and these air fryer bang bang shrimp deliver that satisfaction in just minutes. The air fryer cuts cooking time to a mere 6-8 minutes while using significantly less oil than traditional methods. I was shocked at how crispy and golden the shrimp turned out the first time—almost identical to my favorite restaurant version! The breading gets that perfect crunch while the shrimp inside stays juicy and tender. Plus, you can control the ingredients, adjusting spice levels and reducing sodium to suit your family’s preferences.

    Perfect Texture Every Time

    The real secret to exceptional air fryer bang bang shrimp lies in the contrasting textures. The outside develops that satisfying crackly crunch while the shrimp maintains its natural bounce and tenderness. I’ve found that a quick spritz of oil on the breaded shrimp before air frying makes all the difference. The coating adheres perfectly and develops that gorgeous golden color we all crave. When tossed in the creamy, spicy-sweet sauce, each bite delivers the perfect balance—crisp exterior, succulent shrimp, and a sauce that clings to every curve. It’s a textural masterpiece that keeps everyone coming back for more.

    Essential Tips & Tricks

    Prep & Breading Success

    Achieving perfect air fryer bang bang shrimp starts with proper preparation. Always pat your shrimp dry with paper towels before breading—this ensures the coating sticks properly instead of sliding off. I learned this the hard way after a disappointing first attempt! For the breading, I prefer a simple three-step process: flour, egg wash, then panko mixed with a pinch of salt and paprika. The key is to gently press the panko onto each shrimp to help it adhere. Work in batches and keep one hand for wet ingredients and one for dry to prevent the dreaded “breading fingers” that can make the process messy.

    Air Fryer Techniques

    The secret to crispy air fryer bang bang shrimp is all about temperature and spacing. Preheat your air fryer to 400°F for at least 3 minutes—this immediate heat creates that perfect crust. Arrange the shrimp in a single layer with small spaces between each piece, allowing hot air to circulate freely. Overcrowding leads to steaming rather than crisping! I typically cook them for 3-4 minutes, then flip and cook for another 2-3 minutes until golden. A light spray of oil halfway through adds extra crispiness. Remember that different air fryer models vary slightly, so watch your first batch carefully to nail the perfect timing.

    Serving Ideas & Creative Variations

    Appetizer & Main Dish Options

    These air fryer bang bang shrimp transition effortlessly from appetizer to main course with just a few tweaks. For appetizers, serve them on a platter with extra sauce on the side and toothpicks for easy grabbing. I love setting them out with lime wedges and fresh cilantro sprigs for a pop of color. To transform them into a meal, serve over jasmine rice or creamy mashed potatoes with steamed vegetables on the side. My family’s favorite weekend option is bang bang shrimp tacos—just add the crispy shrimp to warm tortillas with slaw, avocado, and an extra drizzle of sauce for a quick but impressive dinner.

    Flavor Twists & Sauce Variations

    While the classic bang bang sauce (mayonnaise, sweet chili sauce, and sriracha) is undeniably delicious, experimenting with flavors takes these shrimp to new heights. For a Thai-inspired version, add a tablespoon of peanut butter and lime juice to the sauce. When I’m serving guests who prefer milder flavors, I substitute the sriracha with honey for a sweet-only profile that children particularly enjoy. For a tangy twist, fold in a tablespoon of pickle juice or rice vinegar. My personal favorite variation includes a teaspoon of toasted sesame oil and orange zest for depth. Don’t forget to garnish creatively—toasted sesame seeds, sliced green onions, or crushed peanuts add wonderful texture.

    Storage & Troubleshooting Guide

    Keeping Leftovers Crispy

    Maintaining the crispiness of air fryer bang bang shrimp when storing leftovers requires strategic planning. Always let the shrimp cool completely before refrigerating, and store the sauce separately in an airtight container. This prevents the breading from becoming soggy overnight. Refrigerate the shrimp in a single layer on a plate covered loosely with plastic wrap rather than piling them in a container. When reheating, the air fryer works wonders—just 2-3 minutes at 375°F brings back that delightful crunch. I’ve found that adding the sauce only after reheating preserves the texture best. Leftover shrimp remain good for up to two days, though they’re rarely around that long in my house!

    Fixing Common Problems

    Even experienced cooks occasionally encounter challenges with air fryer bang bang shrimp. If your coating isn’t sticking properly, try chilling the breaded shrimp for 15 minutes before cooking—this solidifies the layers and improves adhesion. For shrimp that aren’t crisping up, check that you’re not overcrowding the basket and consider increasing the temperature by 15 degrees. If your sauce is too thin, whisk in additional mayonnaise; if too thick, thin with a splash of water or lime juice. When working with frozen shrimp, ensure they’re completely thawed and thoroughly dried before breading. I’ve learned that a little patience during preparation prevents most common issues.

    Frequently Asked Questions

    Can I make air fryer bang bang shrimp ahead of time?

    Yes! Bread the shrimp up to 4 hours ahead and refrigerate uncovered. Cook just before serving and toss with sauce at the last minute for maximum crispiness.

    What size shrimp works best for this recipe?

    Large or jumbo shrimp (16-20 count per pound) work best. They provide the perfect bite-size portion and won’t overcook in the air fryer.

    Can I use frozen shrimp for air fryer bang bang shrimp?

    Absolutely! Thaw completely, pat very dry with paper towels, and proceed with the recipe. Frozen shrimp often come pre-deveined, saving prep time.

    How do I make the bang bang sauce less spicy?

    Reduce or eliminate the sriracha and increase the sweet chili sauce. Adding a tablespoon of honey helps balance heat while enhancing sweetness.

    What can I substitute for panko breadcrumbs?

    Regular breadcrumbs work but won’t be as crispy. For gluten-free options, try crushed rice cereal, crushed pork rinds, or gluten-free breadcrumbs.

    Final Thoughts

    Air fryer bang bang shrimp has become my go-to recipe when I want to impress without spending hours in the kitchen. There’s something magical about the contrast between the crispy exterior, tender shrimp, and that creamy, spicy-sweet sauce that keeps everyone coming back for more. I’ve served these at everything from casual family dinners to fancy gatherings, and they disappear within minutes every single time. Whether you’re new to air frying or a seasoned pro, this recipe delivers restaurant-quality results with minimal effort. Don’t forget to check out more delicious recipes on our Pinterest page for endless inspiration!

  • Teriyaki Salmon Recipe That Will Make Your Tastebuds Dance!

    Teriyaki Salmon Recipe That Will Make Your Tastebuds Dance!

    Teriyaki Salmon Recipe That Will Make Your Tastebuds Dance!

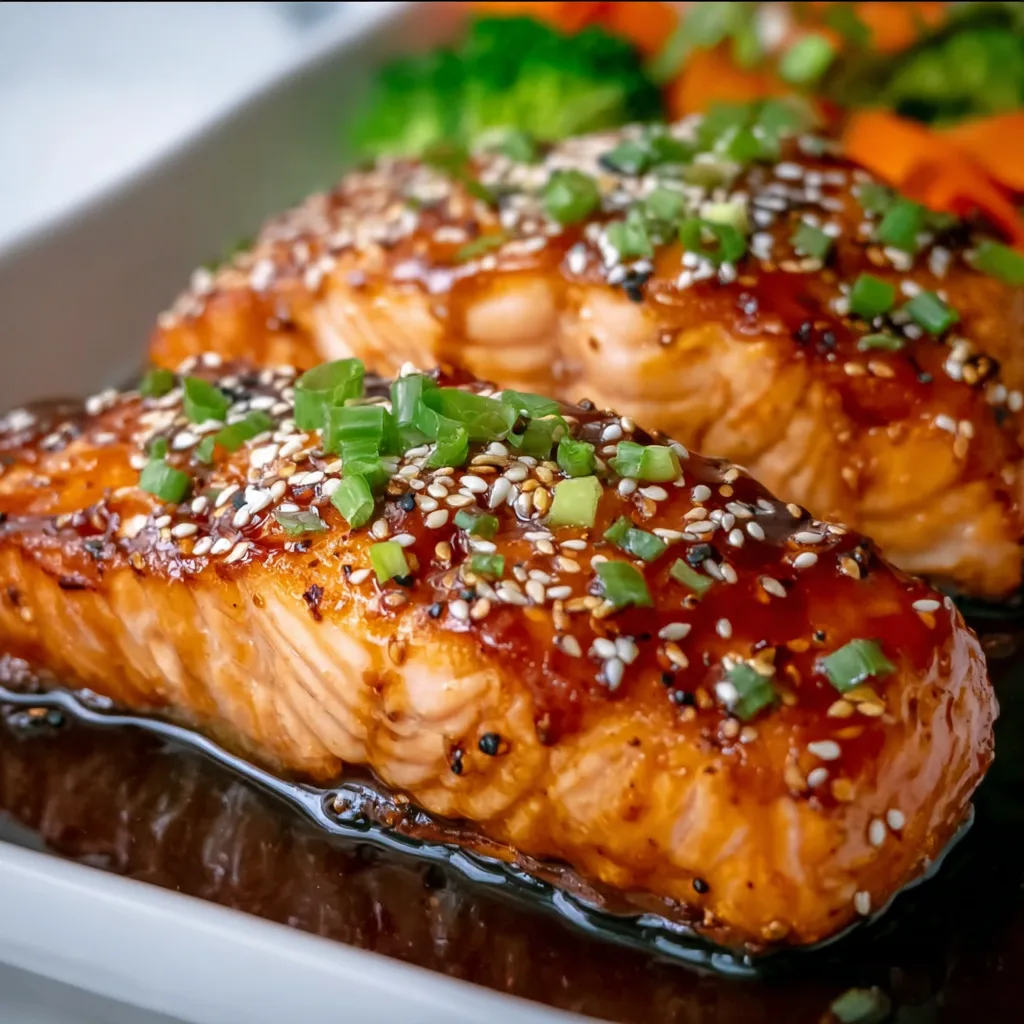
    Teriyaki salmon brings that perfect balance of sweet, savory, and umami flavors that makes weeknight dinners feel special without the fuss. I discovered this recipe during my Pacific Northwest trip where fresh salmon practically jumps onto your plate! The glossy, caramelized glaze creates a beautiful lacquer that seals in all the moisture, making each bite absolutely melt in your mouth. What I love most is how this dish transforms ordinary dinner tables into something that feels restaurant-worthy in just about 20 minutes. If you’ve been looking for a foolproof way to cook salmon that impresses, this teriyaki version will become your new go-to.

    Recipe

    Why You’ll Love This Teriyaki Salmon

    Perfect Balance of Flavors

    The magic of teriyaki salmon lies in its perfect harmony of sweet and savory elements. The brown sugar and honey create a caramelized exterior that balances beautifully against the salty soy sauce. I still remember the first time I nailed this recipe—my kitchen filled with that intoxicating aroma of ginger, garlic, and caramelizing sugar. The natural richness of the salmon pairs wonderfully with these bold Asian flavors, creating something truly greater than the sum of its parts. Even my seafood-skeptical nephew cleaned his plate and asked for seconds!

    Quick Yet Impressive

    What makes this teriyaki salmon a weeknight hero is how it delivers maximum flavor with minimal effort. The entire dish comes together in about 20 minutes, yet tastes like something that simmered all day. I love how the sauce reduces quickly to a glossy glaze that clings to each piece of salmon. It’s become my secret weapon for last-minute dinner guests—they always think I’ve spent hours in the kitchen! The visual appeal of that shiny, caramelized coating sprinkled with sesame seeds and green onions makes it look like it came from a high-end Japanese restaurant.

    Essential Tips & Tricks

    Selecting the Perfect Salmon

    Choosing the right salmon is the foundation of this dish. Look for center-cut fillets with bright color and firm texture. I prefer wild-caught salmon when available—it has a richer flavor that stands up beautifully to the bold teriyaki sauce. Skin-on pieces work best as they help keep the fish moist during cooking and prevent it from falling apart. When I’m feeling fancy, I’ll splurge on sockeye for its vibrant red color and intense flavor, but Atlantic salmon works wonderfully too. Just make sure your fillets are similar in thickness for even cooking.

    Mastering the Glaze

    The secret to restaurant-quality teriyaki salmon is all in the glaze consistency. Start with room temperature salmon and pat it completely dry before cooking—this ensures proper caramelization. For the sauce, let it reduce until it coats the back of a spoon but remove it from heat before it becomes too thick, as it will continue to thicken as it cools. I learned the hard way that overcooking the sauce leads to a sticky mess! For an extra flavor boost, try marinating the salmon for 30 minutes before cooking, though it’s still delicious without this step.

    Serving Ideas & Creative Variations

    Perfect Pairings

    Teriyaki salmon shines brightest when paired with the right sides. Fluffy jasmine rice absorbs all that delicious sauce and provides a neutral backdrop for the flavorful fish. I love serving it with quick-pickled cucumbers for a refreshing crunch that cuts through the richness. Steamed broccoli or asparagus adds beautiful color and nutritional balance to the plate. For a complete meal that always impresses, try serving with a simple miso soup starter and some roasted vegetables tossed with sesame oil for a cohesive flavor profile that will transport you straight to Tokyo.

    Exciting Twists

    Don’t be afraid to put your own spin on classic teriyaki salmon. Try adding a spicy kick with sriracha or red pepper flakes in the sauce. For a citrusy brightness, incorporate orange or yuzu juice into your glaze. One of my favorite variations includes a tablespoon of miso paste for extra umami depth. During summer months, I love throwing the marinated salmon on the grill for a smoky char that complements the sweet glaze. For a party-friendly option, cut salmon into bite-sized pieces, skewer them after glazing, and serve as elegant appetizers with a drizzle of extra sauce.

    Storage & Troubleshooting Guide

    Proper Storage Solutions

    Leftover teriyaki salmon can be just as delicious the next day if stored properly. Allow the salmon to cool completely before refrigerating in an airtight container for up to 3 days. I like to store the extra sauce separately to prevent the fish from becoming soggy. For meal prep, you can freeze uncooked marinated salmon for up to 3 months—just thaw overnight in the refrigerator before cooking. When reheating, do so gently in a covered skillet with a splash of water to create steam, or microwave at 50% power to keep the salmon from drying out or developing that unpleasant fishy smell.

    Common Pitfalls & Solutions

    Even experienced cooks encounter challenges with teriyaki salmon. If your sauce is too thin, try adding a cornstarch slurry (1 teaspoon cornstarch mixed with 1 tablespoon water) to thicken it. For sauce that’s too thick, whisk in a little water or mirin. If your salmon sticks to the pan, next time ensure your pan is properly preheated and oiled before adding the fish. Skin-side down first creates a natural release. Overcooked, dry salmon is a common issue—remember that salmon continues cooking after removal from heat, so take it off when it reaches 125°F internal temperature for perfect doneness.

    Frequently Asked Questions

    Can I use frozen salmon for teriyaki salmon?

    Yes! Thaw completely in the refrigerator overnight and pat thoroughly dry before cooking. The extra moisture in frozen salmon can prevent proper caramelization if not properly dried.

    How do I know when my teriyaki salmon is cooked perfectly?

    Salmon is done when it reaches 125-130°F internal temperature and flakes easily with a fork. It should be slightly translucent in the center for optimal moisture.

    Can I make teriyaki salmon in the air fryer?

    Absolutely! Cook at 380°F for 7-9 minutes depending on thickness. Brush with teriyaki sauce before and halfway through cooking for best results.

    What can I substitute for mirin in teriyaki sauce?

    Use dry white wine with a teaspoon of sugar, or rice vinegar with a bit more honey. Apple juice mixed with a splash of vinegar works in a pinch too.

    Is homemade teriyaki sauce better than store-bought for teriyaki salmon?

    Homemade teriyaki sauce offers fresher flavor and customizable sweetness/saltiness. It takes just 5 minutes to make and lacks the preservatives found in bottled versions.

    Final Thoughts

    This teriyaki salmon recipe has become my reliable standby for everything from quick weeknight meals to impressive dinner parties. The beautiful balance of sweet and savory flavors, paired with that gorgeous glazed finish, makes it a dish that satisfies both the palate and the eye. I encourage you to make this recipe your own—adjust the sweetness, experiment with sides, or try different cooking methods. Whatever your approach, the fundamentals of perfect teriyaki salmon will serve you well for countless delicious meals. Don’t forget to check out more seafood inspiration on Pinterest!

  • Creamy Crab Casserole Recipe That Will Wow Your Taste Buds!

    Creamy Crab Casserole Recipe That Will Wow Your Taste Buds!

    Creamy Crab Casserole Recipe That Will Wow Your Taste Buds!

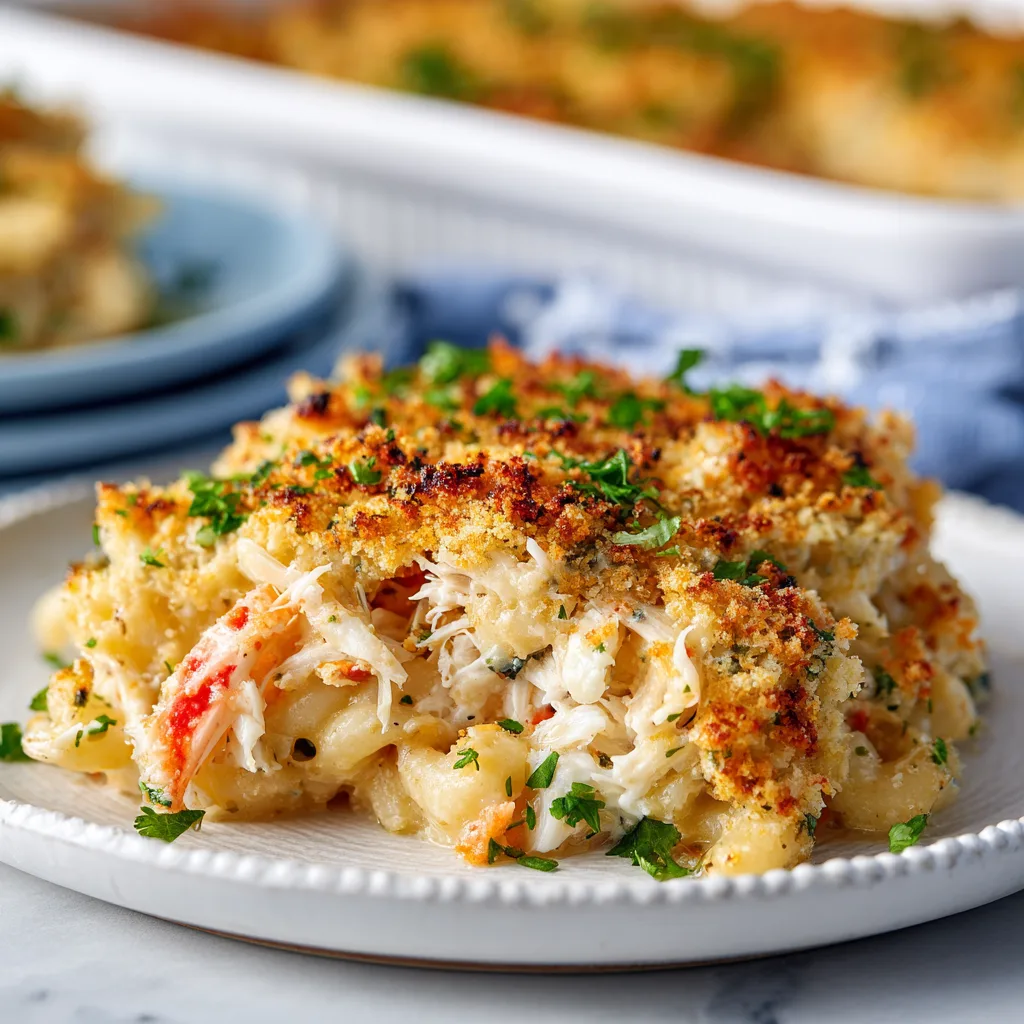
    This creamy crab casserole is the ultimate comfort food that transforms sweet, delicate crabmeat into a velvety, indulgent dish that’s both impressive and surprisingly simple to make. I discovered this recipe during a beach vacation when our neighbor brought over her family’s treasured dish. One bite and I was instantly transported—the creamy texture, the subtle sweetness of the crab, and that golden, buttery topping that cracks perfectly under your fork. It’s become my go-to for everything from holiday gatherings to cozy Sunday dinners when I want something that feels special without hours in the kitchen.

    Recipe

    Why You’ll Love This Creamy Crab Casserole

    Perfect Balance of Flavors and Textures

    This casserole delivers the perfect harmony between rich creaminess and delicate crab. The sweetness of the crabmeat shines through without being overwhelmed by the other ingredients. I love how the cream cheese and mayonnaise create this velvety base that coats each morsel of crab, while the panko breadcrumb topping adds that essential textural contrast with its golden crunch. When you take that first bite, you get this wonderful temperature contrast too—the hot, bubbling interior against the crispy top. It’s that magical combination that makes you close your eyes and savor every forkful.

    Elegant Yet Effortless Entertaining

    Nothing says special occasion quite like crab, but this casserole makes it weeknight accessible. I’ve served this at dinner parties where guests assumed I’d spent hours in the kitchen, when really, it took just minutes of active prep time. The beauty lies in its simplicity—mix, pour, bake, and wow! You can even assemble it earlier in the day and bake just before serving. Last Christmas Eve, I prepared this while simultaneously wrapping last-minute gifts, and it still turned out perfectly. It’s that reliable showstopper that never fails to impress.

    Essential Tips & Tricks

    Selecting and Preparing the Crab

    The star ingredient deserves your attention. While fresh lump crabmeat is divine, good-quality canned crab works beautifully too. I always drain it thoroughly and gently pick through to remove any shell fragments. Pat it dry with paper towels to prevent a watery casserole—this makes all the difference in the final texture. For the best flavor profile, use lump crabmeat rather than claw meat if your budget allows. The larger chunks maintain their integrity through baking and give you those heavenly bites of pure crab that make this dish so special.

    Achieving the Perfect Creamy Base

    The secret to that silky-smooth consistency lies in room temperature ingredients. Cold cream cheese will leave you with unwelcome lumps, no matter how vigorously you mix. I let mine sit out for at least 30 minutes before starting. For extra richness, fold in a splash of heavy cream or sour cream. And don’t skimp on seasoning—Old Bay is traditional, but I sometimes add a pinch of cajun spice for extra dimension. Taste before adding the crab to ensure your base is perfectly seasoned.

    Serving Ideas & Creative Variations

    Complementary Side Dishes

    This casserole pairs beautifully with light, fresh sides that balance its richness. I love serving it with a simple lemon-dressed arugula salad—the peppery greens and bright citrus cut through the creaminess perfectly. For a more substantial meal, roasted asparagus or haricots verts add color and texture. A crusty baguette is non-negotiable for scooping up every last bit of that luscious sauce. During summer, I’ll add a side of chilled cucumber salad for a refreshing contrast that makes the meal feel complete without overwhelming the delicate crab flavor.

    Exciting Flavor Twists

    While the classic version is heavenly, I love experimenting with variations. For a Mediterranean twist, add artichoke hearts, a sprinkle of feta, and fresh dill. A touch of Dijon mustard and tarragon brings French elegance. For heat lovers, fold in diced jalapeños or a dash of hot sauce—the spice plays wonderfully against the sweet crab. My personal favorite variation includes a thin layer of spinach at the bottom, which adds color and a subtle earthiness. During the holidays, I sometimes add a splash of sherry to the cream mixture for sophisticated depth.

    Storage & Troubleshooting Guide

    Proper Storage and Reheating

    To maintain the quality and safety of leftover crab casserole, refrigerate within two hours of serving. Store in an airtight container for up to three days—any longer and the texture begins to suffer. When reheating, avoid the microwave which can make it rubbery. Instead, cover with foil and warm in a 325°F oven until just heated through, about 15-20 minutes. To restore some of that crispy topping, remove the foil for the final few minutes. For best results, I sometimes add a fresh sprinkle of panko and a drizzle of butter before reheating.

    Fixing Common Issues

    If your casserole turns out too watery, there are a few likely culprits. Undrained crab is often the main offender—next time, pat it thoroughly dry before mixing. For an already-prepared watery casserole, remove from the oven, carefully pour off excess liquid, then return to bake uncovered to reduce moisture. If it’s too dry, gently fold in a little more mayonnaise or cream cheese thinned with a splash of cream. For a pale topping that won’t brown, try a quick pass under the broiler—just watch it closely to prevent burning.

    Frequently Asked Questions

    Can I use imitation crab for this creamy crab casserole?

    While real crab offers superior flavor, imitation crab can work in a pinch. The texture and taste will differ, but it’s still delicious and more budget-friendly. Just chop it into smaller pieces for better integration with the creamy sauce.

    Is this recipe keto-friendly?

    Not as written, but you can adapt it! Replace breadcrumbs with crushed pork rinds, use full-fat dairy, and ensure any seasonings are sugar-free. The natural sweetness of crab works beautifully with this lifestyle.

    Can I make this casserole ahead of time?

    Absolutely! Assemble up to 24 hours ahead and refrigerate covered. Add the topping just before baking, and add 5-10 minutes to the baking time if coming straight from the refrigerator.

    What’s the best cheese to use in crab casserole?

    Mild cheeses like Monterey Jack or Gruyère complement crab without overpowering it. Sharp cheddar can work too, but use it sparingly. Avoid strongly flavored cheeses that might mask the delicate crab.

    How do I know when the casserole is done?

    Look for bubbling around the edges, a golden-brown top, and an internal temperature of 165°F. The casserole should be set but still have a slight jiggle in the center when gently shaken.

    Final Thoughts

    This creamy crab casserole has earned its place as one of my signature dishes—the one friends request by name when they’re coming over. There’s something magical about transforming simple ingredients into something that feels so luxurious. The way the kitchen fills with that buttery, seaside aroma as it bakes never fails to make my mouth water. Whether you’re cooking to impress or simply craving something special, this casserole delivers that perfect balance of comfort and elegance that makes a meal memorable. Don’t forget to visit our Pinterest for more seafood inspiration!

  • Bang Bang Shrimp Tacos: Irresistibly Spicy & Crispy Delight!

    Bang Bang Shrimp Tacos: Irresistibly Spicy & Crispy Delight!

    Bang Bang Shrimp Tacos: Irresistibly Spicy & Crispy Delight!

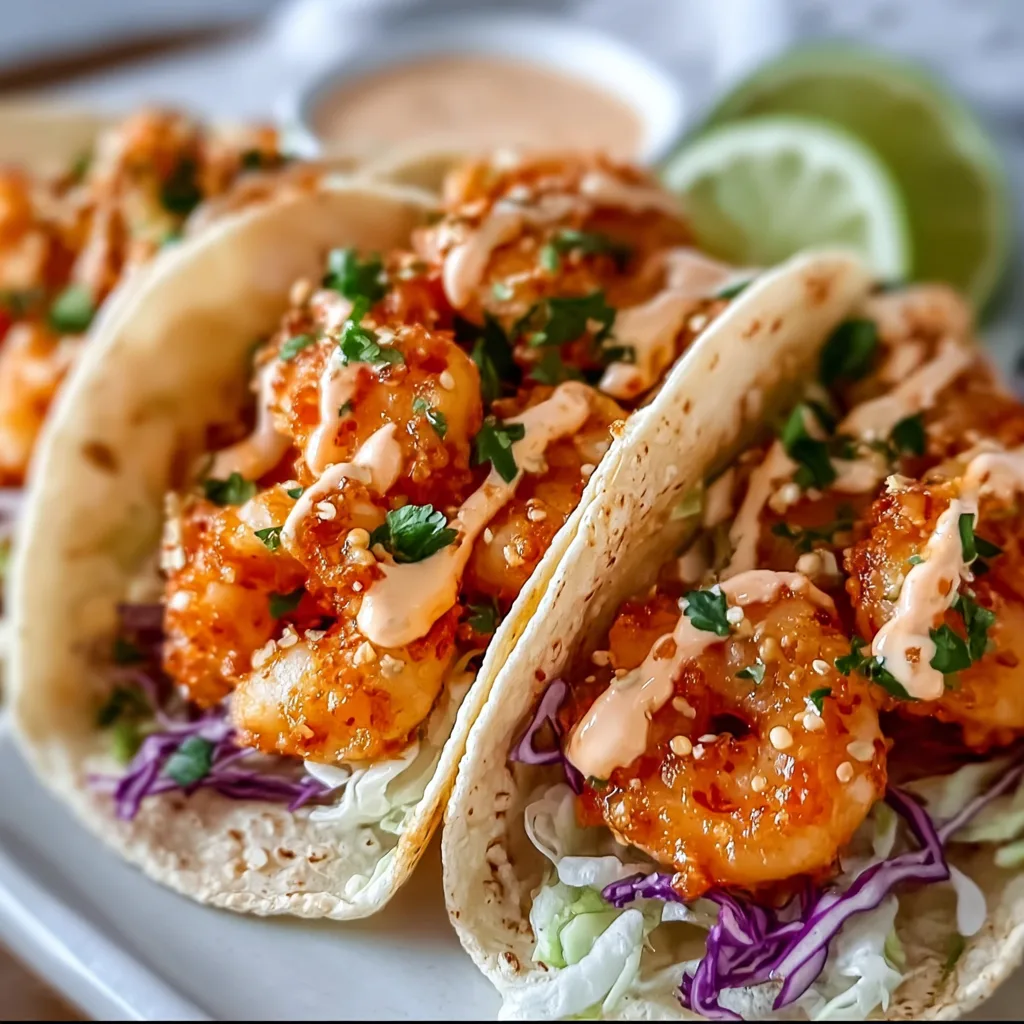
    Bang bang shrimp tacos bring the perfect combination of crispy, spicy, and creamy all wrapped in a soft tortilla. I discovered this recipe during a beach vacation when a tiny seaside shack changed my taco standards forever. The first bite sent waves of tangy heat and sweet creaminess across my taste buds, and I knew I had to recreate this magic at home. These tacos feature perfectly seasoned shrimp with that signature bang bang sauce that’s creamy, sweet, and carries just enough heat to make your lips tingle without overwhelming your palate. Ready in under 30 minutes, they’re perfect for busy weeknights or casual entertaining.

    Recipe

    Why You’ll Love These Bang Bang Shrimp Tacos

    Perfect Balance of Flavors and Textures

    The magic of these tacos lies in their incredible textural contrast. The shrimp develop a delicate crispness on the outside while remaining tender and juicy inside. Each bite delivers a symphony of sensations – the soft tortilla, crunchy cabbage slaw, and that velvety bang bang sauce that ties everything together. I love how the sauce provides a perfect balance of sweet, spicy, and tangy notes that dance across your palate. When you add a squeeze of fresh lime, it brightens everything and cuts through the richness, creating that “just one more bite” experience that keeps you coming back.

    Quick and Impressive Meal Solution

    These tacos are my go-to when I need to impress without stress. The entire dish comes together in about 25 minutes from start to finish, making it perfect for those evenings when you want something special but don’t have hours to spend in the kitchen. The bang bang sauce can be prepared ahead of time, and the shrimp cook in mere minutes. I’ve served these at last-minute dinner gatherings and watched guests’ eyes widen with that first bite. They never guess how simple they were to make! The visual appeal alone – with the pink shrimp, white sauce, and colorful garnishes – makes them look like they came from a restaurant.

    Essential Tips & Tricks

    Perfecting the Shrimp

    The key to exceptional bang bang shrimp tacos is not overcooking the shrimp. They should be just opaque and form a loose “C” shape when properly cooked – if they curl into a tight “O,” they’ve gone too far. I always pat my shrimp completely dry before seasoning, which helps them get that perfect light sear rather than steaming. For maximum flavor penetration, let them sit with the seasoning for about 10 minutes before cooking. A cast-iron skillet gives the best results, but any heavy-bottomed pan works well. Remember that shrimp cook in a flash – usually 2-3 minutes per side is all you need!

    Mastering the Bang Bang Sauce

    The signature sauce is what transforms these from ordinary shrimp tacos into something crave-worthy. The base should be equal parts mayonnaise and sweet chili sauce, with sriracha added to your heat preference. For extra dimension, I add a splash of rice vinegar and a tiny drizzle of honey. The key technique is to reserve half of your sauce for drizzling at the end – this gives you both the flavor-infused shrimp and that fresh, creamy finishing touch. For an extra-special touch, try making your sauce a day ahead to let the flavors meld, similar to how I prepare the sauce for my crispy hot honey feta chicken.

    Serving Ideas & Creative Variations

    Perfect Pairings and Sides

    These bang bang shrimp tacos shine brightest with simple, complementary sides. My favorite pairing is cilantro-lime rice – the bright, zesty notes perfectly balance the creamy richness of the tacos. A simple black bean salad with corn, red onion, and a light vinaigrette adds wonderful texture and makes the meal more substantial. For drinks, nothing beats a classic margarita or a cucumber-jalapeño agua fresca for non-alcoholic options. If you’re hosting a casual gathering, set up a DIY taco bar with all the fixings and let guests build their own. This approach works beautifully alongside other crowd-pleasers like my bang bang salmon for a seafood feast.

    Creative Twists on the Classic

    Don’t be afraid to put your personal spin on these tacos! One of my favorite variations uses grilled shrimp instead of fried for a lighter option that’s perfect for summer. You can also swap the traditional cabbage slaw for a mango-avocado salsa that adds a tropical sweetness. For a fusion twist, try adding Korean gochujang to the bang bang sauce for a deeper, more complex heat. Lettuce wraps make a great low-carb alternative to tortillas, and the filling works beautifully in a rice bowl format too. For special occasions, I’ve even used lobster instead of shrimp – pricier but absolutely divine for celebrations.

    Storage & Troubleshooting Guide

    Proper Storage for Leftovers

    To maintain the quality of your bang bang shrimp tacos, proper storage is essential. Store each component separately – keep the cooked shrimp in an airtight container in the refrigerator for up to 2 days, and the sauce in its own container for up to 5 days. The assembled tacos don’t store well as the tortillas become soggy, so I recommend only assembling what you’ll eat immediately. When reheating the shrimp, use a skillet over medium heat just until warmed through – microwaving will make them tough. For meal prep, you can prepare all components ahead and store them separately, assembling fresh tacos as needed.

    Troubleshooting Common Issues

    If your bang bang sauce is too thin, add more mayonnaise a tablespoon at a time until you reach your desired consistency. Too thick? A splash of water or lime juice will thin it perfectly. If your shrimp turned out rubbery, they were likely overcooked – next time, remove them from the heat when they’re just barely opaque. For soggy tacos, try double-layering your tortillas or briefly toasting them before assembly. If your sauce lacks punch, brighten it with fresh lime juice or increase the sriracha. And if the overall flavor seems flat, a pinch of salt often works wonders to wake up all the other flavors.

    Frequently Asked Questions

    What exactly is bang bang sauce?

    Bang bang sauce is a creamy, sweet-spicy condiment made with mayonnaise, sweet chili sauce, and sriracha. It originated in Chinese-American cuisine and gets its name from the contrasting flavors that “bang” together on your palate.

    Can I make these bang bang shrimp tacos ahead of time?

    Prepare components separately up to a day ahead – cook shrimp, make sauce, and prep toppings. Store refrigerated in separate containers. Assemble just before serving to maintain optimal texture and prevent soggy tacos.

    What’s the best way to warm tortillas for these tacos?

    For authentic flavor, warm tortillas directly over a gas flame for 10-15 seconds per side until lightly charred. Alternatively, heat in a dry skillet or wrap in damp paper towels and microwave for 30 seconds.

    Can I use frozen shrimp for this recipe?

    Absolutely! Thaw frozen shrimp overnight in the refrigerator or under cold running water. Pat them completely dry before seasoning to ensure they sear properly rather than steam.

    What can I substitute for mayonnaise in the bang bang sauce?

    Greek yogurt makes an excellent substitute for a lighter version. You may need to add a touch of honey to balance the tanginess. For dairy-free options, try avocado-based mayonnaise or silken tofu blended with olive oil.

    Final Thoughts

    These bang bang shrimp tacos have become my signature dish for good reason – they deliver restaurant-quality flavor with home-kitchen simplicity. The combination of crispy shrimp, creamy-spicy sauce, and fresh toppings creates a taco experience that’s truly memorable. What I love most is how versatile they are, perfect for everything from Tuesday night dinner to weekend entertaining. Don’t be surprised if friends start requesting your “famous” bang bang shrimp tacos once you’ve served them! For more delicious recipes, check out my Pinterest collection where I’m always adding new inspiration.