Category: Fish Recipes

  • Crispy Shrimp Toast Recipe: Irresistible Crunch You’ll Love!

    Crispy Shrimp Toast Recipe: Irresistible Crunch You’ll Love!

    Crispy Shrimp Toast Recipe: Irresistible Crunch You’ll Love!

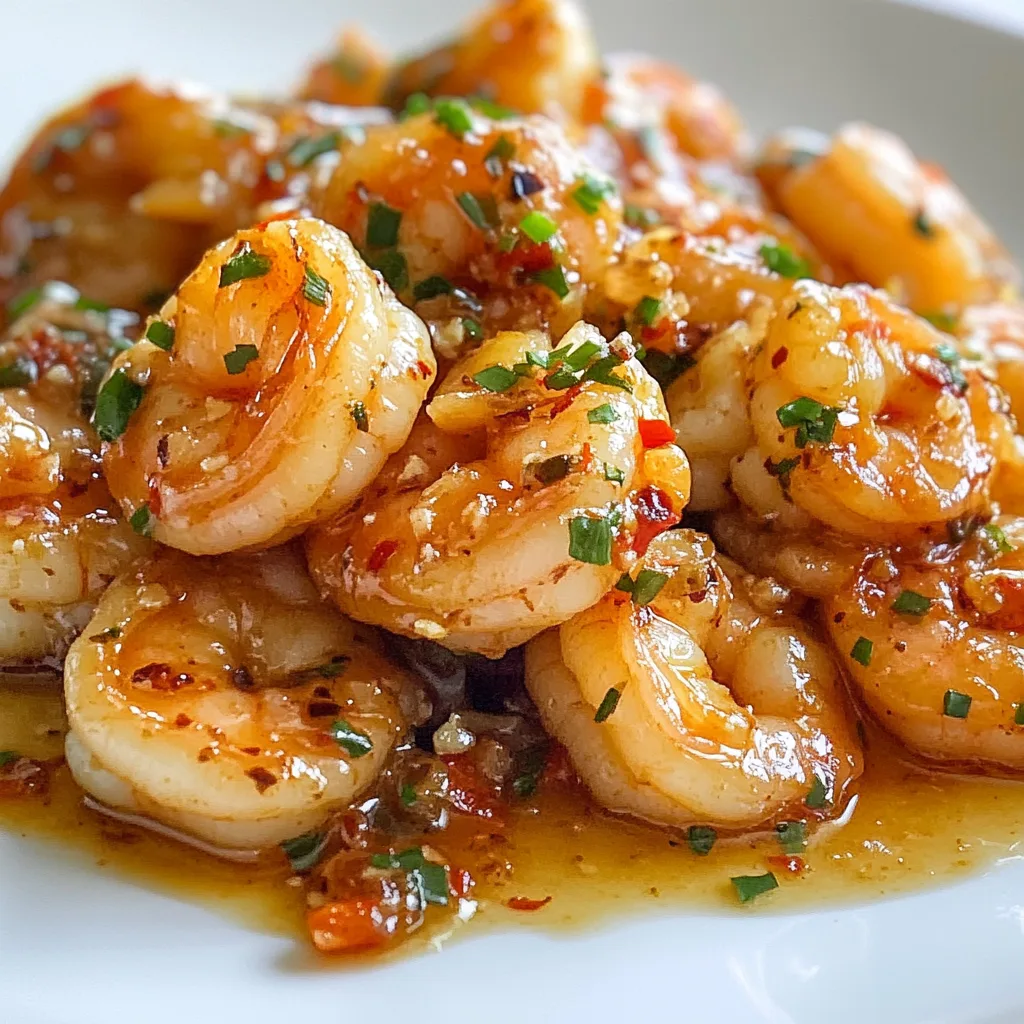
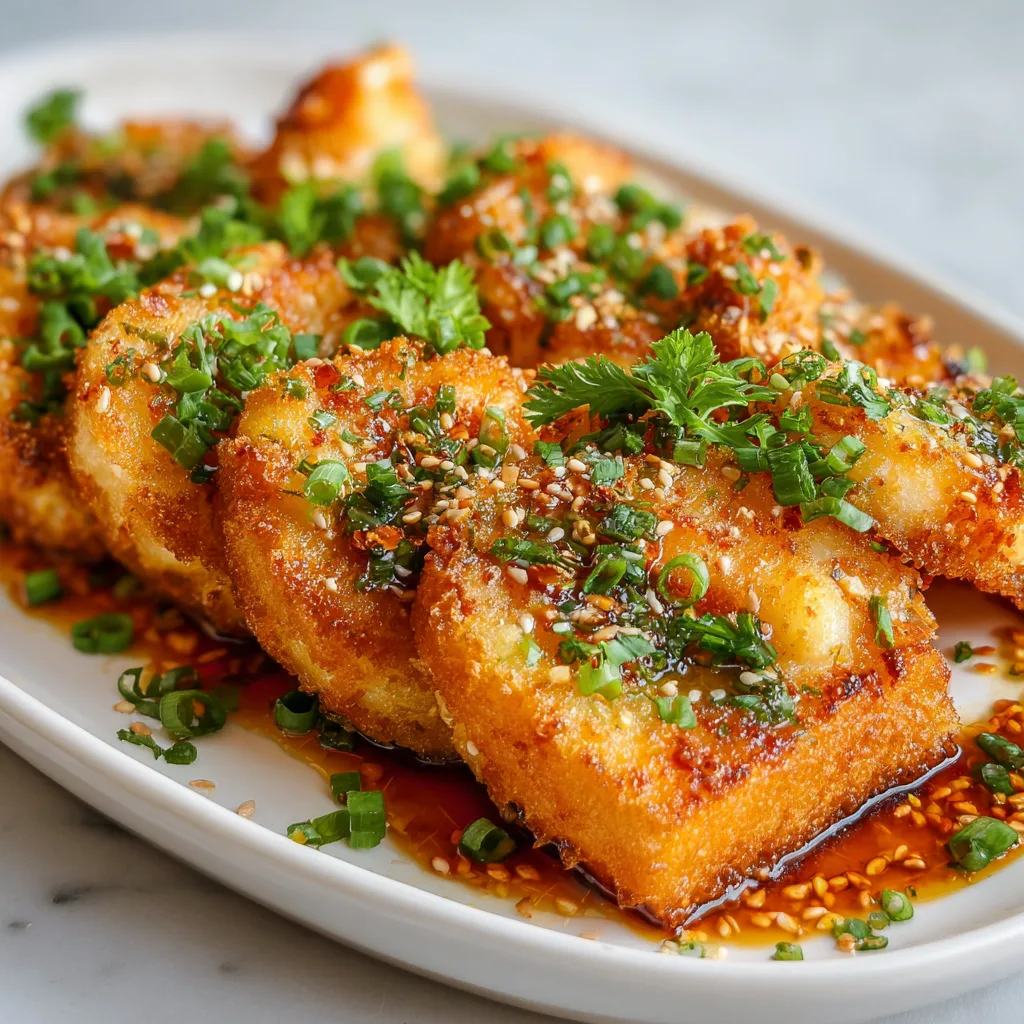
    Crispy Shrimp Toast has been my go-to appetizer whenever I want to impress without stressing in the kitchen. The first time I made these golden triangles of joy, the satisfying crunch followed by the savory shrimp mixture had my dinner guests begging for the recipe. There’s something magical about the contrast between the crispy exterior and the tender, flavorful shrimp paste. Perfect for gatherings or a special treat for yourself, this dish brings restaurant-quality dim sum right to your home. If you enjoy seafood appetizers, you might also love my Honey Garlic Shrimp for another quick crowd-pleaser.

    Recipe

    Why You’ll Love This Crispy Shrimp Toast

    Perfect Texture Combination

    The textural contrast in shrimp toast is what makes it utterly irresistible. The bread base transforms into this perfectly crispy vehicle for the bouncy, tender shrimp mixture on top. I still remember the first time my spatula broke through that golden crust – the satisfying crackle was music to my ears! The exterior gets this beautiful caramelized crunch while the interior of the shrimp mixture stays moist and flavorful. It’s this perfect harmony that makes you reach for “just one more piece” until the plate is mysteriously empty.

    Quick Yet Impressive

    Despite looking like something that took hours to prepare, crispy shrimp toast comes together in under 30 minutes of active time. The wow-to-effort ratio is off the charts! I’ve served these at last-minute gatherings when I had precious little time to prepare, and guests assumed I’d been cooking all day. The secret is in the preparation – a quick whirl in the food processor transforms simple ingredients into something special. You can even prepare the shrimp mixture a day ahead, making this the perfect appetizer when you need something impressive without the stress.

    Essential Tips & Tricks

    Choosing the Right Bread

    The foundation of exceptional shrimp toast is choosing the right bread. I’ve learned through trial and error that white sandwich bread with a tight crumb works best – nothing too artisanal or full of holes. Remove the crusts for that classic look and even cooking. Day-old bread actually performs better than fresh, as it has less moisture and crisps up more effectively. For extra crispiness, I lightly toast the bread before adding the shrimp mixture – this creates a moisture barrier that keeps the toast crisp even after the topping is added.

    Perfecting the Shrimp Mixture

    The key to a flavorful shrimp mixture is balancing texture and seasoning. I always use fresh shrimp when possible, as frozen and thawed shrimp can release too much moisture. Pulse rather than purée – you want some texture remaining, not a completely smooth paste. Adding a bit of egg white helps bind everything together, while a touch of cornstarch creates that bouncy texture reminiscent of traditional dim sum. Don’t skimp on the aromatics – ginger, garlic, and green onions create that authentic flavor profile that makes these irresistible.

    Serving Ideas & Creative Variations

    Dipping Sauces That Elevate

    The right dipping sauce can transform good shrimp toast into an unforgettable experience. My go-to is a simple sweet chili sauce, but I love to offer options. A tangy soy-ginger sauce with a splash of rice vinegar complements the richness of the shrimp. For something creamy, try a sriracha mayo or wasabi aioli that adds heat without overwhelming. I once served these with a mango-chili dipping sauce that had guests literally licking their fingers! Arrange your sauces in small ramekins alongside the toast and watch them disappear. The right sauce pairing makes all the difference.

    Global Flavor Adaptations

    While traditional shrimp toast has Cantonese roots, I love creating fusion versions that borrow flavors from around the world. Try adding chopped lemongrass, lime zest, and cilantro for a Thai-inspired variation. For a Mediterranean twist, mix in sun-dried tomatoes, basil, and a touch of feta. My family goes crazy for my Mexican-inspired version with roasted tomato salsa mixed into the shrimp paste and topped with a tiny dollop of avocado crema after frying. These adaptations keep the concept fresh and exciting every time you make it.

    Storage & Troubleshooting Guide

    Make-Ahead and Freezing Options

    Crispy shrimp toast works surprisingly well as a make-ahead appetizer. The shrimp mixture can be prepared up to 24 hours in advance and kept refrigerated. You can even assemble the toast (spread mixture on bread) and freeze them uncooked for up to a month. Freeze them flat on a baking sheet first, then transfer to a freezer bag once solid. When ready to cook, no need to thaw – just add an extra minute or two to the cooking time. I’ve done this for holiday parties, and nobody could tell they weren’t made from scratch that day!

    Troubleshooting Common Issues

    The most common issue with shrimp toast is soggy results instead of crispy perfection. If your oil isn’t hot enough (350°F is ideal), the bread absorbs too much oil and becomes greasy rather than crispy. Another culprit is overcrowding the pan – always fry in batches, giving each piece plenty of space. If your shrimp mixture is sliding off during cooking, try chilling the assembled toasts for 15 minutes before frying to help everything adhere. For pale toast that lacks that golden color, check that your oil is fresh – old oil doesn’t heat as effectively and can impact both color and flavor.

    Frequently Asked Questions

    What’s the best type of shrimp to use for crispy shrimp toast?

    Medium to large raw shrimp (16-20 count) work best. They provide good flavor and texture. Always peel and devein them completely before processing.

    Can I bake crispy shrimp toast instead of frying?

    Yes! Brush both sides with oil and bake at 425°F for 5-7 minutes per side until golden and crispy. The texture will be slightly different but still delicious.

    How do I keep my shrimp toast crispy for a party?

    Keep them warm in a 200°F oven on a wire rack over a baking sheet. This maintains crispiness without steaming, perfect for up to 30 minutes before serving.

    What can I serve with shrimp toast for a complete meal?

    Pair with a light cucumber salad, steamed dumplings, or hot and sour soup for an Asian-inspired meal. They also complement noodle dishes beautifully.

    Why is my crispy shrimp toast turning out greasy?

    Your oil temperature is likely too low. Use a thermometer to maintain 350°F, and don’t overcrowd the pan. Drain well on paper towels immediately after frying.

    Final Thoughts

    Crispy Shrimp Toast brings together simple ingredients to create something truly special – the kind of appetizer that creates memories around the table. I love how this dish bridges the gap between casual and elegant, making it perfect for everything from game day to New Year’s Eve. The crispy exterior giving way to that flavorful shrimp mixture never fails to bring smiles. I hope you’ll try these in your kitchen and experience the joy of serving something that looks impressive but comes together with surprising ease. Find more inspiration for your next gathering on my Pinterest boards.
  • Baked Lemon Garlic Tilapia: Irresistibly Zesty & Easy Dinner Winner

    Baked Lemon Garlic Tilapia: Irresistibly Zesty & Easy Dinner Winner

    Baked Lemon Garlic Tilapia: Irresistibly Zesty & Easy Dinner Winner

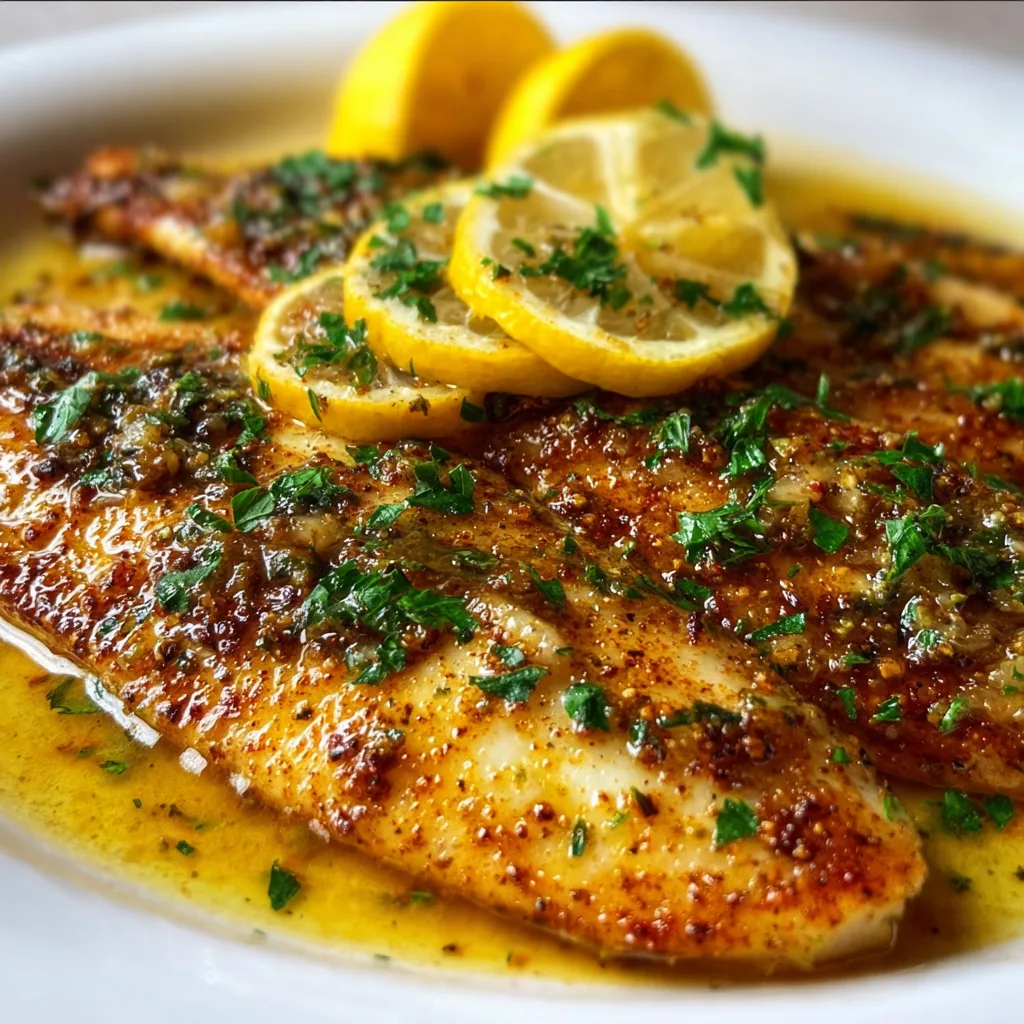
    Baked Lemon Garlic Tilapia has become my absolute go-to dinner for those evenings when I want something impressive without the fuss. The first time I made this dish, the aroma of garlic and lemon filled my kitchen, and I knew I’d found a winner. There’s something magical about how the bright citrus cuts through the delicate fish, creating a perfect balance that feels both indulgent and light. If you’re looking for a simple yet elegant seafood recipe that comes together in under 30 minutes, this one deserves a spot in your regular rotation.

    Recipe

    Why You’ll Love This Baked Lemon Garlic Tilapia

    Perfect for Busy Weeknights

    This dish has saved me countless times when I’m racing against the clock but still want something nutritious and delicious. Tilapia fillets bake in just 12-15 minutes, meaning you can have dinner on the table faster than delivery would arrive. I love how the preparation is so straightforward—just season, add your lemon and garlic, and pop it in the oven. On particularly hectic evenings, I’ll prep the seasoning mix in the morning, so when I get home, it’s truly a matter of minutes before the heavenly aroma fills the kitchen. The minimal cleanup is just the cherry on top!

    A Nutritional Powerhouse

    Beyond its incredible flavor, this Baked Lemon Garlic Tilapia delivers serious health benefits. Tilapia is naturally low in calories but high in protein, making it perfect for anyone watching their waistline while still wanting to feel satisfied. The addition of heart-healthy olive oil and antioxidant-rich garlic transforms this from just a tasty meal into a nutritional powerhouse. I’ve found this dish particularly appealing when I’m trying to incorporate more lean protein into my diet without sacrificing flavor. Plus, it’s naturally gluten-free, making it an inclusive option when entertaining guests with dietary restrictions.

    Essential Tips & Tricks

    Selecting the Perfect Tilapia

    Finding the freshest tilapia makes all the difference in this recipe. When I’m at the seafood counter, I always look for clear, bright eyes and firm flesh that springs back when touched. The fillets should have a mild, clean scent—nothing fishy! If fresh isn’t available, don’t hesitate to use frozen; just thaw it properly in the refrigerator overnight. I’ve discovered that wild-caught tilapia often has a better flavor profile than farm-raised, though either works beautifully in this recipe. For the most consistent results, try to select fillets of similar thickness so they’ll cook evenly and be ready at the same time.

    Mastering the Lemon Garlic Flavor

    The magic of this dish lies in the perfect balance of lemon and garlic. I learned through trial and error that slicing the lemon thinly allows its oils to infuse the fish without overwhelming it with acidity. For the garlic, I prefer mincing it fresh rather than using pre-packaged options—the flavor difference is remarkable! A little trick I’ve discovered: let the minced garlic sit in the olive oil for about 10 minutes before using it to allow the flavors to bloom. For an extra dimension, try adding a touch of white wine to the baking dish—it creates a light sauce that’s absolutely divine.

    Serving Ideas & Creative Variations

    Complementary Side Dishes

    This Baked Lemon Garlic Tilapia pairs beautifully with vegetables that can cook at the same temperature. I often toss asparagus or cherry tomatoes with olive oil and herbs, then arrange them around the fish for the last 10 minutes of baking—one-pan dinner success! For a heartier meal, Parmesan Garlic Rice creates a delicious foundation that soaks up the lemony juices. On summer evenings, I serve this with a crisp cucumber and avocado salad dressed simply with lemon juice and olive oil. The refreshing contrast against the warm, flaky fish creates a dining experience that feels restaurant-worthy but requires minimal effort.

    Global Flavor Adaptations

    While the classic lemon-garlic combination is timeless, this recipe serves as a wonderful canvas for experimentation. For a Mediterranean twist, I sometimes add kalamata olives, capers, and a sprinkle of feta cheese during the last few minutes of baking. When I’m craving something with Asian flair, I substitute lime for lemon and add ginger, a splash of soy sauce, and a drizzle of sesame oil. My family particularly loves when I take it in a Cajun direction with a light dusting of blackening spice and a few slices of jalapeño. The versatility of tilapia means it plays well with flavors from virtually any cuisine.

    Storage & Troubleshooting Guide

    Proper Storage Solutions

    Leftover Baked Lemon Garlic Tilapia can be safely refrigerated for up to three days when stored in an airtight container. I find glass containers work best for preserving the delicate flavor without picking up refrigerator odors. To reheat, I avoid the microwave which can make the fish rubbery. Instead, I place it in a 275°F oven, covered with foil and a splash of water for moisture, until just warmed through—usually about 10 minutes. If you’re meal prepping, this dish works surprisingly well; just slightly undercook the fish initially so it doesn’t become overcooked when reheated. The lemon flavor actually intensifies beautifully overnight!

    Fixing Common Issues

    Even experienced cooks occasionally encounter challenges with fish. If your tilapia turns out too dry, it was likely overcooked—next time, check it earlier or use a meat thermometer (145°F is perfect). For too much acidity, balance it by serving with a side that has a touch of sweetness or creaminess. If the garlic burns and becomes bitter, try adding it halfway through the cooking process instead of at the beginning. Sometimes tilapia can release excess moisture during baking, making the dish watery; to prevent this, pat the fillets very dry before seasoning and consider salting them 30 minutes before cooking to draw out moisture.

    Frequently Asked Questions

    Can I use another type of fish for this Baked Lemon Garlic Tilapia recipe?

    Absolutely! Cod, sole, or halibut work wonderfully with these flavors. Just adjust cooking time based on thickness—thicker fillets need a few extra minutes.

    How do I know when the tilapia is fully cooked?

    The fish should flake easily with a fork and appear opaque throughout. For precision, use a thermometer to reach 145°F in the thickest part.

    Can I prepare this dish ahead of time?

    You can prepare the seasoning and slice the lemon in advance, but I recommend baking right before serving for the best texture and flavor.

    Is tilapia high in mercury?

    Tilapia is considered a low-mercury fish, making it a safe choice for regular consumption and appropriate for most family members.

    What’s the best way to prevent the fish from sticking to the pan?

    Line your baking dish with parchment paper or give it a light coating of olive oil spray before adding the fish.

    Final Thoughts

    This Baked Lemon Garlic Tilapia has become more than just a recipe in my household—it’s a reliable friend that delivers on flavor, nutrition, and simplicity every single time. The bright, clean flavors make it appealing to even reluctant seafood eaters, while its versatility means it never gets boring. I love how it can transform from an everyday family dinner to an impressive entertaining option with just a few garnishes. Don’t forget to check out more seafood inspiration on Pinterest for creative ways to enjoy this dish!

  • Creamy Crab and Shrimp Bisque: Irresistibly Rich & Comforting Soup

    Creamy Crab and Shrimp Bisque: Irresistibly Rich & Comforting Soup

    Creamy Crab and Shrimp Bisque: Irresistibly Rich & Comforting Soup

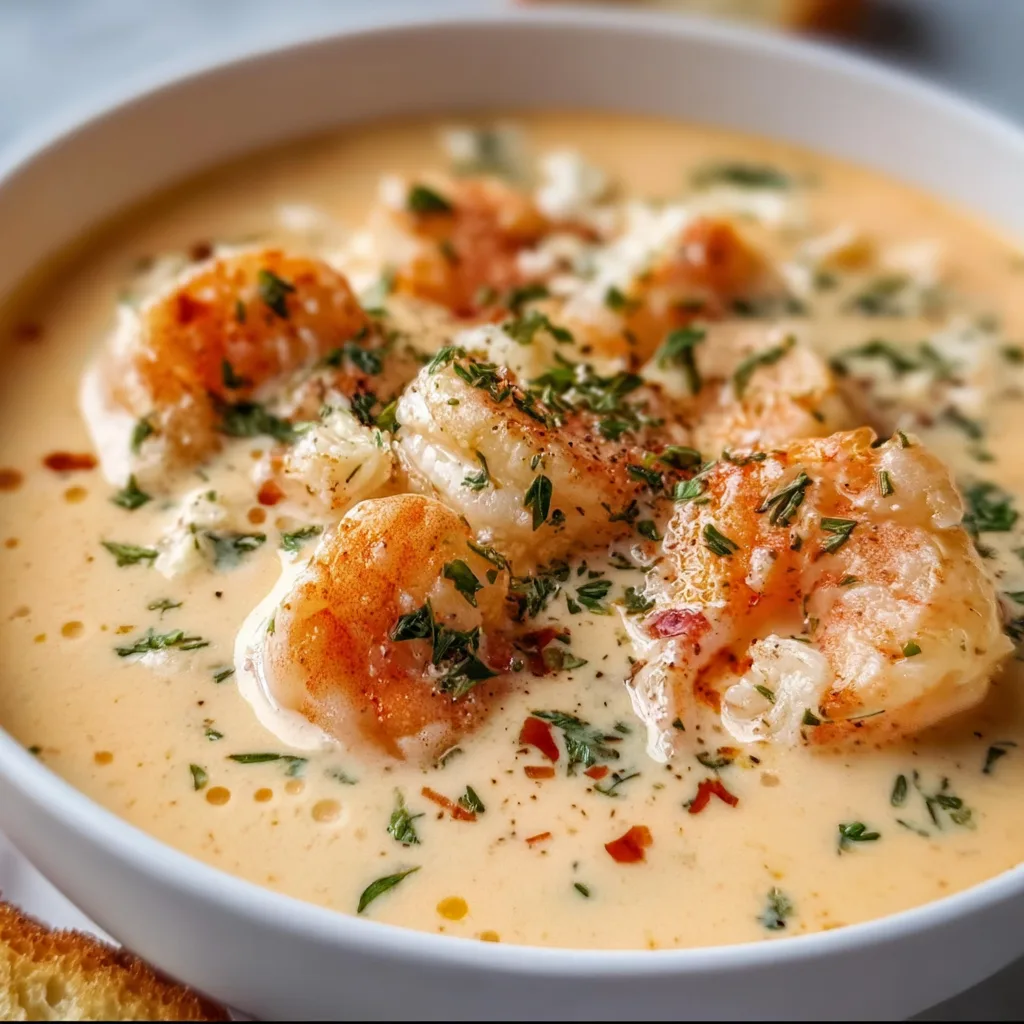
    Creamy Crab and Shrimp Bisque is the ultimate comfort food that wraps you in a warm, velvety hug on chilly evenings. The first time I made this luxurious bisque, the aroma of seafood and herbs filled my kitchen, transporting me straight to a seaside bistro. There’s something magical about the way the sweet crab meat and tender shrimp mingle with the rich, creamy broth that makes this dish truly special. I promise this recipe will become your new favorite way to treat yourself and impress guests with minimal effort but maximum flavor.

    Recipe

    Why You’ll Love This Creamy Crab and Shrimp Bisque

    Restaurant-Quality Flavor at Home

    This bisque delivers a restaurant-worthy experience without the hefty price tag. The secret lies in building layers of flavor—sautéing aromatic vegetables until fragrant, deglazing with a splash of sherry, and simmering everything with seafood stock before blending to silky perfection. I love how the sweet crab and shrimp shine through without being overwhelmed by the cream. The subtle hint of brandy or cognac adds that special something that makes guests wonder what your secret ingredient might be. It’s sophisticated yet surprisingly simple.

    Perfect for Any Occasion

    Whether you’re planning an intimate dinner for two or hosting a holiday gathering, this Creamy Crab and Shrimp Bisque fits the bill perfectly. It’s elegantly versatile enough to serve as a stunning starter in small cups or as the main event in larger bowls with crusty bread. I’ve served this at Christmas Eve dinners and casual Sunday suppers alike, always to rave reviews. The bisque can be made ahead and gently reheated, making it ideal for entertaining when you want to enjoy your guests instead of being stuck in the kitchen.

    Essential Tips & Tricks

    Selecting the Best Seafood

    The quality of your seafood makes all the difference in this bisque. I recommend using lump crab meat rather than claw meat for its sweeter flavor and more substantial texture. When selecting shrimp, look for wild-caught varieties when possible—they have a more pronounced flavor than farm-raised. If using frozen shrimp, thaw them completely and pat dry before adding to the bisque. Save those shells! Simmering them in your stock adds incredible depth. For a budget-friendly option, check out my Mexican Corn Chicken Soup which uses similar techniques.

    Perfecting the Texture

    Achieving that silky-smooth consistency is what elevates a good bisque to a great one. I use an immersion blender for convenience, but a traditional blender works too—just be careful with the hot liquid and blend in batches. For the ultimate velvety texture, strain the bisque through a fine-mesh sieve after blending. This extra step removes any fibrous bits from the vegetables. Add the cream gradually while the soup is off the heat to prevent curdling, and always save some seafood to add at the end for those delicious chunks in each spoonful.

    Serving Ideas & Creative Variations

    Elegant Garnishing Techniques

    The final presentation takes this bisque from delicious to Instagram-worthy. I love finishing each bowl with a small mound of fresh crab meat in the center, a light drizzle of good olive oil, and a sprinkle of minced chives or microgreens. For special occasions, a single butter-poached shrimp perched on the edge of the bowl makes a dramatic statement. A tiny swirl of cream and a dusting of smoked paprika adds beautiful color contrast. Serve in warmed bowls to keep the bisque hot longer—a trick I learned from my grandmother that makes all the difference.

    Exciting Flavor Variations

    While the classic recipe is divine, don’t be afraid to experiment with flavor profiles. Adding a tablespoon of curry powder creates an unexpected but delightful Indian-inspired version. For a Southwestern twist, stir in roasted corn kernels and a dash of chipotle powder. Lobster can be substituted for or added to the crab and shrimp for an even more luxurious bisque. For a lighter option similar in technique, my New England Clam Chowder offers another seafood comfort classic that’s worth trying when you’re in the mood for something different.

    Storage & Troubleshooting Guide

    Proper Storage Techniques

    This bisque keeps beautifully when stored properly. Refrigerate leftovers in an airtight container for up to 3 days—the flavor actually improves overnight as the ingredients meld together. For longer storage, freeze the base without the cream or seafood for up to 2 months. When ready to serve, thaw overnight in the refrigerator, then gently reheat on the stovetop, adding fresh cream and seafood during the last few minutes. Never bring the soup to a rolling boil after adding cream, as this can cause separation. Instead, heat it slowly until just steaming.

    Fixing Common Issues

    If your bisque is too thin, simmer it uncovered for a few more minutes to reduce and concentrate the flavors. Conversely, if it’s too thick, thin it with a little extra seafood stock or even a splash of white wine. Should the bisque break or look grainy, whisk in a tablespoon of cold cream off the heat. For a bisque that lacks depth, try adding a teaspoon of tomato paste or a splash of fish sauce—both are secret weapons for boosting umami. And remember, seasoning should be adjusted at the end, as the saltiness of seafood varies greatly.

    Frequently Asked Questions

    Can I make Creamy Crab and Shrimp Bisque ahead of time?

    Yes! Make the base a day ahead, then reheat gently and add the cream and seafood just before serving for the freshest flavor and texture.

    What can I substitute for sherry in this recipe?

    White wine works well, or use equal parts apple cider vinegar and chicken broth. For non-alcoholic options, try seafood stock with a splash of lemon juice.

    How can I make this bisque dairy-free?

    Replace heavy cream with full-fat coconut milk and butter with olive oil. The flavor profile will change slightly but remains delicious with a tropical note.

    What’s the difference between bisque and chowder?

    Bisques are smooth, cream-based soups traditionally made with shellfish, while chowders are chunky with visible pieces of seafood, vegetables, and often potatoes.

    Is it possible to use imitation crab in this Creamy Crab and Shrimp Bisque?

    While real crab meat provides the best flavor, imitation crab can work in a pinch. Mix it with real shrimp to maintain some authentic seafood flavor.

    Final Thoughts

    This Creamy Crab and Shrimp Bisque is more than just a recipe—it’s an experience to be savored. The rich, velvety texture paired with sweet seafood creates a moment of pure indulgence that’s worth every minute spent preparing it. I find myself making this bisque whenever I need a bit of comfort with a touch of luxury. Whether it’s for a special celebration or simply because you deserve something wonderful, this bisque delivers on all fronts. For more delicious recipes, follow me on Pinterest.

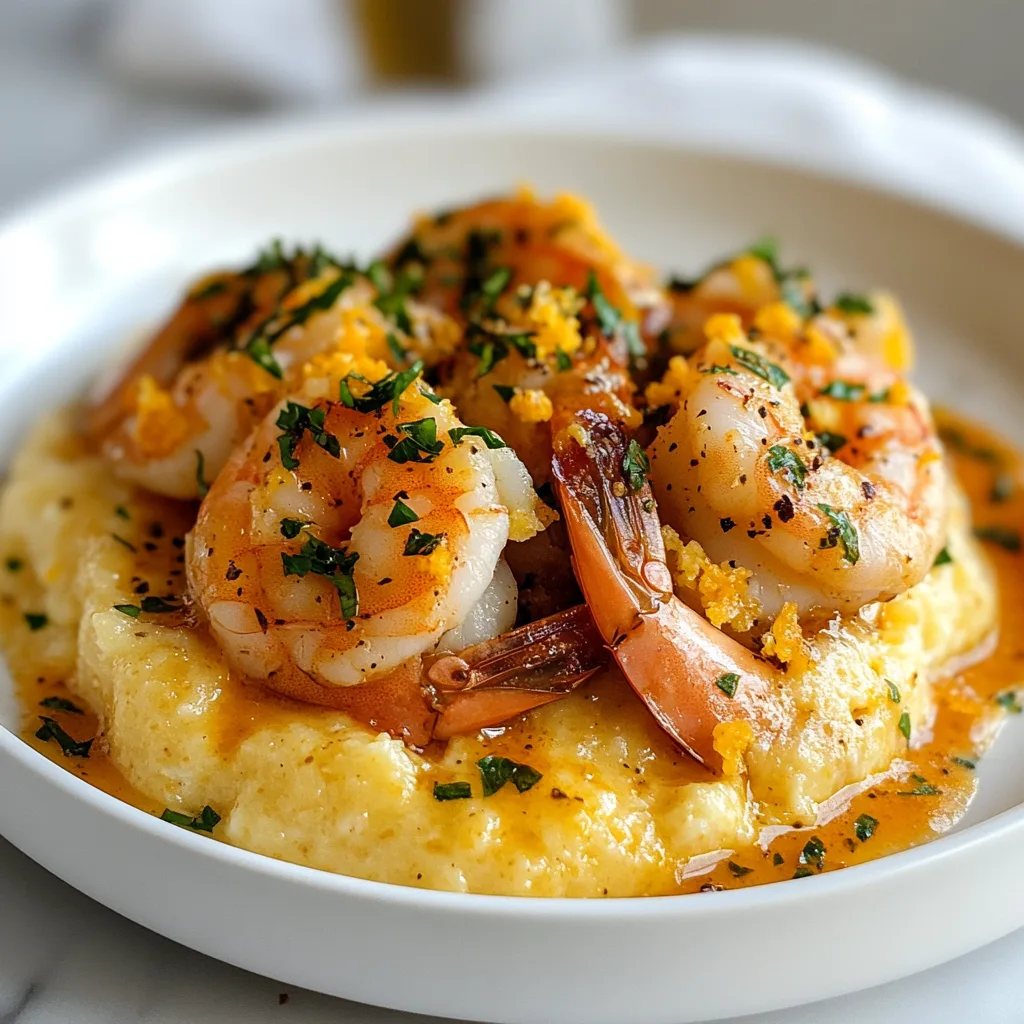
  • Shrimp & Creamy Cheddar Grits: Irresistible Comfort Food Bliss!

    Shrimp & Creamy Cheddar Grits: Irresistible Comfort Food Bliss!

    Shrimp & Creamy Cheddar Grits: Irresistible Comfort Food Bliss!

    Shrimp & Creamy Cheddar Grits is the ultimate Southern comfort dish that warms both body and soul. I’ll never forget serving this creamy, cheesy goodness at my first dinner party in my tiny apartment – it was the dish everyone raved about for months! There’s something magical about plump, juicy shrimp nestled on a bed of velvety grits that just speaks to the heart. The combination of sharp cheddar melting into stone-ground grits creates a luxurious base that pairs perfectly with seasoned shrimp. Let me walk you through creating this beloved classic that’s both impressive enough for company and cozy enough for a weeknight dinner.

    Recipe

    Why You’ll Love This Shrimp & Creamy Cheddar Grits

    Perfect Balance of Flavors & Textures

    This dish delivers the most satisfying contrast between creamy grits and tender shrimp. The stone-ground grits slowly simmer until they transform into a velvety canvas that soaks up butter and sharp cheddar like a dream. Meanwhile, the shrimp provides that perfect bite and subtle sweetness that complements the rich, cheesy base. I love how the seasoned shrimp creates little pockets of flavor against the smooth grits. It’s that magical combination of textures – creamy, tender, and slightly firm – that makes each bite a perfect harmony of Southern comfort. The dish manages to feel both luxurious and homey at the same time.

    Quick Yet Impressive Meal

    Don’t let the gourmet reputation fool you – Shrimp & Creamy Cheddar Grits comes together in under 30 minutes! This makes it perfect for those nights when you want something special without hours in the kitchen. The grits simmer while you quickly sauté the shrimp, meaning dinner is ready before hunger turns to hangry. I’ve served this at last-minute dinner gatherings and watched guests’ eyes widen with delight, never suspecting how simple it was to prepare. The dish carries that wonderful illusion of being much more labor-intensive than it actually is, which makes it my secret weapon for entertaining or date nights at home.

    Essential Tips & Tricks

    Perfecting Your Grits

    The foundation of exceptional Shrimp & Creamy Cheddar Grits lies in properly cooked grits. Always start with stone-ground grits rather than instant for authentic texture and flavor. The key is a slow simmer with plenty of stirring – this prevents lumps and develops that silky consistency we’re after. I learned the hard way that patience pays off here! Add your butter and cheese only after the grits have fully cooked, then fold them in gently until melted. For extra creaminess, try a splash of heavy cream in the final minutes. The result should be smooth grits that hold their shape on a spoon without being stiff or runny.

    Shrimp Cooking Secrets

    The biggest mistake with shrimp is overcooking, which turns them rubbery faster than you can say “y’all.” For perfectly tender shrimp in your Creamy Cheddar Grits, cook them just until they turn pink and curl into a loose C-shape – about 2 minutes per side. I like to season mine with a blend of cajun spices for that authentic Southern kick. Pat your shrimp dry before cooking to ensure a nice sear rather than steaming them. And here’s my secret weapon – finish with a squeeze of fresh lemon juice right before serving to brighten all those rich flavors and cut through the creaminess of the dish.

    Serving Ideas & Creative Variations

    Perfect Pairings & Garnishes

    Elevate your Shrimp & Creamy Cheddar Grits with thoughtful garnishes that add color and flavor. A sprinkle of sliced green onions or fresh chopped parsley brings a pop of color and freshness. For extra Southern flair, crumbled bacon adds smoky crunch that contrasts beautifully with the creamy base. I love serving this alongside simple Kickin’ Collard Greens for a complete Southern experience. The slight bitterness of the greens perfectly balances the richness of the grits. For brunch, add a poached egg on top and watch the yolk create an instant sauce that takes this dish to new heights. Don’t forget warm crusty bread for sopping up every last bit!

    Regional & Seasonal Twists

    Transform this classic into something uniquely yours with regional inspirations. For a New Orleans twist, add andouille sausage and holy trinity (bell peppers, onions, and celery) to your shrimp. During summer months, I love folding fresh corn kernels into the grits for sweet pops of flavor and texture. For a fall version, try roasted butternut squash cubes and crispy sage leaves as a garnish. Coastal variations might include fresh crab meat or even lobster for special occasions. You can even go international by adding a Thai-inspired coconut milk base to the grits and topping with curry-spiced shrimp. The versatility of this dish means it can evolve with the seasons while keeping its soulful essence.

    Storage & Troubleshooting Guide

    Make-Ahead & Leftovers Strategy

    While Shrimp & Creamy Cheddar Grits is best enjoyed fresh, you can store components separately for convenience. Refrigerate cooked grits for up to 3 days in an airtight container – they will solidify, but don’t worry! To revive, warm slowly on the stovetop with a splash of milk or cream while whisking until creamy again. I recommend cooking shrimp fresh when possible, but leftover shrimp can be stored separately and gently reheated. For meal prep, prepare the grits base ahead and refrigerate, then quickly cook fresh shrimp just before serving. This approach gives you that just-made quality without the last-minute rush.

    Fixing Common Challenges

    Even experienced cooks encounter issues with grits occasionally. If your grits are too thick, simply whisk in warm milk, broth, or water until you reach your desired consistency. For grits that are too thin, continue cooking uncovered while stirring frequently to evaporate excess liquid. If you notice lumpy grits, don’t panic! Remove from heat and beat vigorously with a whisk, or blend briefly with an immersion blender. For overcooked, rubbery shrimp, chop them and incorporate into a creamy sauce to mask the texture. And if your cheese sauce breaks or becomes grainy, a splash of lemon juice or cream while whisking over low heat can help reunite the ingredients.

    Frequently Asked Questions

    What’s the difference between grits and polenta?

    Grits are typically made from white corn while polenta comes from yellow corn. Grits usually have a softer, creamier texture, while polenta is often firmer. In Shrimp & Creamy Cheddar Grits, the traditional choice is stone-ground grits for authentic Southern flavor.

    Can I make this dish ahead for a dinner party?

    Yes! Prepare the grits up to 2 days ahead and refrigerate. Reheat with extra liquid while stirring constantly. Cook the shrimp just before serving for the best texture and flavor.

    What’s the best cheese for Shrimp & Creamy Cheddar Grits?

    Sharp cheddar provides the classic flavor, but experiment with combinations! Try mixing in smoked gouda for depth, pepper jack for heat, or a touch of cream cheese for extra richness.

    Can I make this dish gluten-free?

    Most grits are naturally gluten-free, but always check packaging for cross-contamination warnings. Ensure any seasonings or broths used are also certified gluten-free for a safe meal.

    What can I substitute for shrimp if someone has a seafood allergy?

    Andouille sausage, smoked chicken, or roasted mushrooms make excellent alternatives that maintain the dish’s Southern character while accommodating dietary restrictions.

    Final Thoughts

    Shrimp & Creamy Cheddar Grits embodies the heart of Southern hospitality – simple ingredients transformed into something truly special. There’s a reason this dish has stood the test of time, bringing comfort to countless tables across generations. I hope you’ll try this recipe and experience the magic of perfectly creamy grits topped with succulent shrimp. It might just become your new go-to for both weeknight dinners and special occasions. For more Southern-inspired recipes, visit our Pinterest board where comfort food is always in season!

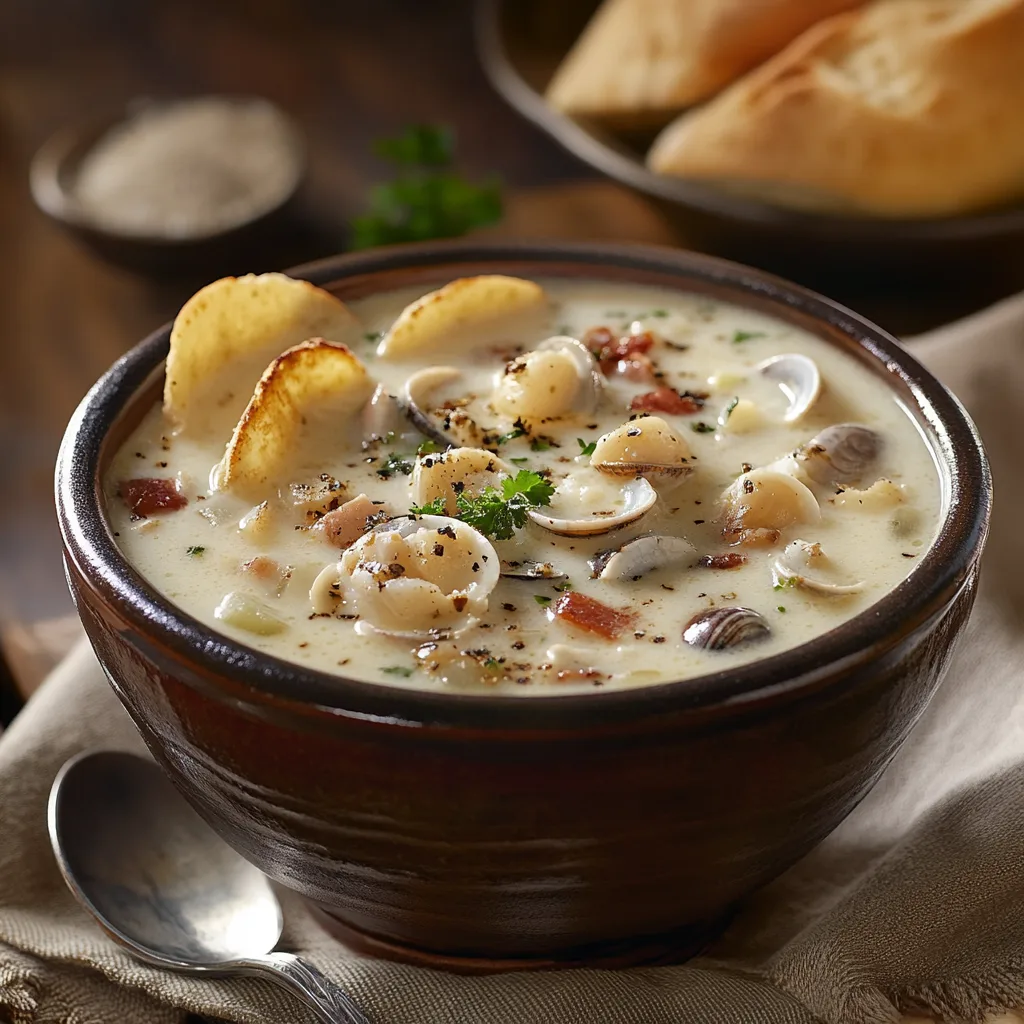
  • New England Clam Chowder Recipe: Creamy, Cozy, and Irresistible!

    New England Clam Chowder Recipe: Creamy, Cozy, and Irresistible!

    New England Clam Chowder Recipe: Creamy, Cozy, and Irresistible!

    There’s something magical about a steaming bowl of New England Clam Chowder that feels like a warm hug on a chilly day. I discovered this creamy coastal treasure during a weekend trip to Boston, where the scent of fresh seafood and rich broth wafted through a tiny harborside restaurant. The first spoonful—velvety, studded with tender clams and potatoes—transported me instantly. This classic American soup balances simplicity with incredible depth, making it perfect for both casual family dinners and impressive entertaining. Let me share my favorite version that captures all the authentic flavors you’d find along the New England coast.

    Recipe

    Why You’ll Love This New England Clam Chowder

    The Perfect Balance of Flavors and Textures

    This New England Clam Chowder delivers incredible depth without complicated techniques. The briny sweetness of fresh clams mingles with smoky bacon and earthy potatoes, creating layers of flavor that develop with each spoonful. I love how the creamy base coats your spoon while chunks of potato and tender clams provide satisfying texture. Unlike some restaurant versions that rely on excessive thickeners, this homemade approach lets the natural ingredients shine through. The gentle hint of thyme and bay leaf elevates everything without overwhelming the delicate seafood essence.

    A Surprisingly Simple Comfort Food

    Don’t let its restaurant-quality reputation fool you—this New England Clam Chowder comes together with surprising ease. Even on my busiest weeknights, I can have this chowder simmering away in under 15 minutes of prep time. The ingredients are straightforward pantry and refrigerator staples, with the exception of fresh clams (though canned work beautifully too). What I particularly appreciate is how this recipe scales effortlessly, making it perfect for feeding just myself or a hungry crowd. The hands-off simmering time gives me space to prepare a simple side like my Creamy Cowboy Soup.

    Essential Tips & Tricks

    Selecting and Preparing Your Clams

    The foundation of exceptional New England Clam Chowder begins with the clams themselves. Fresh clams should smell briny but never fishy, with tightly closed shells (or ones that close when gently tapped). I prefer littlenecks or cherrystones for their tender texture and sweet flavor. To clean fresh clams, soak them in cold water with a tablespoon of salt for 20 minutes—this encourages them to expel any sand. If using fresh clams seems daunting, high-quality canned clams make a fantastic substitute. Just be sure to reserve their juice—that liquid gold contains concentrated clam flavor that enriches your chowder beautifully.

    Creating the Perfect Creamy Base

    The signature velvety texture of authentic New England Clam Chowder comes from a careful balance. Start by rendering bacon slowly to release its smoky fat—this becomes the flavor foundation. When adding flour to make the roux, cook it just until it smells slightly nutty but hasn’t browned. This prevents a pasty taste while ensuring proper thickening power. For the dairy component, I find equal parts heavy cream and whole milk create the ideal richness without becoming too heavy. Add the dairy gradually while whisking to prevent curdling, and never allow the chowder to boil once the cream has been added—a gentle simmer preserves that silky smoothness.

    Serving Ideas & Creative Variations

    Perfect Pairings to Complete Your Meal

    New England Clam Chowder shines brightest when served with thoughtfully chosen accompaniments. My absolute favorite pairing is a basket of warm sourdough bread with salted butter—the tangy bread is perfect for dipping into that creamy broth. For a complete seafood feast, consider serving smaller portions as a starter before my Maple Glazed Sheet Pan Salmon. A simple side salad with vinaigrette provides welcome brightness against the chowder’s richness. For serving, I love using shallow, wide bowls that showcase the chowder’s beautiful ingredients while allowing it to cool to the perfect eating temperature.

    Delicious Twists on the Classic Recipe

    While traditional New England Clam Chowder is perfect as is, I occasionally enjoy these creative variations. For a luxurious upgrade, add chunks of lobster meat or lump crab in the final minutes of cooking. When corn is in season, I love adding fresh kernels for sweet pops of texture and color. For a smoky-spicy twist, replace regular bacon with chorizo and add a pinch of smoked paprika. If you’re watching calories, you can substitute half the cream with unsweetened almond milk—you’ll maintain creaminess while lightening the overall richness. These small adaptations respect the chowder’s essence while letting you customize to your taste preferences.

    Storage & Troubleshooting Guide

    Proper Storage and Reheating Methods

    New England Clam Chowder actually improves overnight as flavors meld, making it perfect for make-ahead meals. Store cooled chowder in airtight containers in the refrigerator for up to 3 days. When reheating, do so gently over medium-low heat, stirring occasionally to prevent scorching. You’ll likely need to add a splash of milk or cream as the chowder thickens considerably when chilled. For longer storage, freeze the chowder without the dairy components, then add fresh cream and milk when reheating. This prevents the unpleasant texture changes that can happen when dairy products freeze and thaw.

    Fixing Common Chowder Challenges

    Even experienced cooks occasionally encounter issues with New England Clam Chowder. If your chowder seems too thin, create a small amount of slurry (equal parts cornstarch and cold water) and whisk it in while the soup simmers. Conversely, if it’s too thick, gradually add warm milk or clam juice until reaching your desired consistency. Should your chowder break or appear slightly curdled, transfer a cup to a blender with a tablespoon of cold butter, blend until smooth, then whisk back into the pot. For clams that seem rubbery, they were likely overcooked—next time, add them later in the process or reduce your cooking time.

    Frequently Asked Questions

    Can I make New England Clam Chowder ahead of time?

    Absolutely! It actually tastes better the next day. Store in the refrigerator for up to 3 days and reheat gently, adding a splash of cream if needed to maintain the creamy consistency.

    What’s the difference between New England and Manhattan clam chowder?

    New England Clam Chowder has a cream base, while Manhattan uses tomatoes for a red broth. New England is typically thicker and richer, while Manhattan has a more acidic, brighter flavor profile.

    Can I use frozen clams instead of fresh?

    Yes! Thawed frozen clams work well, especially when fresh aren’t available. Just be sure to include their juice for authentic flavor, and adjust your cooking time slightly as they may need less time to heat through.

    What’s the best potato variety for chowder?

    Yukon Gold potatoes are ideal because they hold their shape while still becoming tender. Their buttery flavor and waxy texture prevent them from dissolving into the chowder while cooking.

    How can I make my New England Clam Chowder thicker?

    For a thicker chowder, make a slurry with 1 tablespoon cornstarch and 2 tablespoons cold water. Whisk into the simmering chowder and cook for 2-3 minutes until it reaches your desired thickness.

    Final Thoughts

    This New England Clam Chowder recipe balances traditional techniques with accessible ingredients to create something truly special. I find myself returning to it throughout the year—not just on chilly evenings but whenever I crave that perfect combination of comfort and elegance. There’s something deeply satisfying about ladling steaming chowder into bowls for family and friends, watching their expressions as they take that first creamy, clam-studded spoonful. For more seafood inspiration, visit our Pinterest collection where I’ve gathered my favorite coastal recipes!

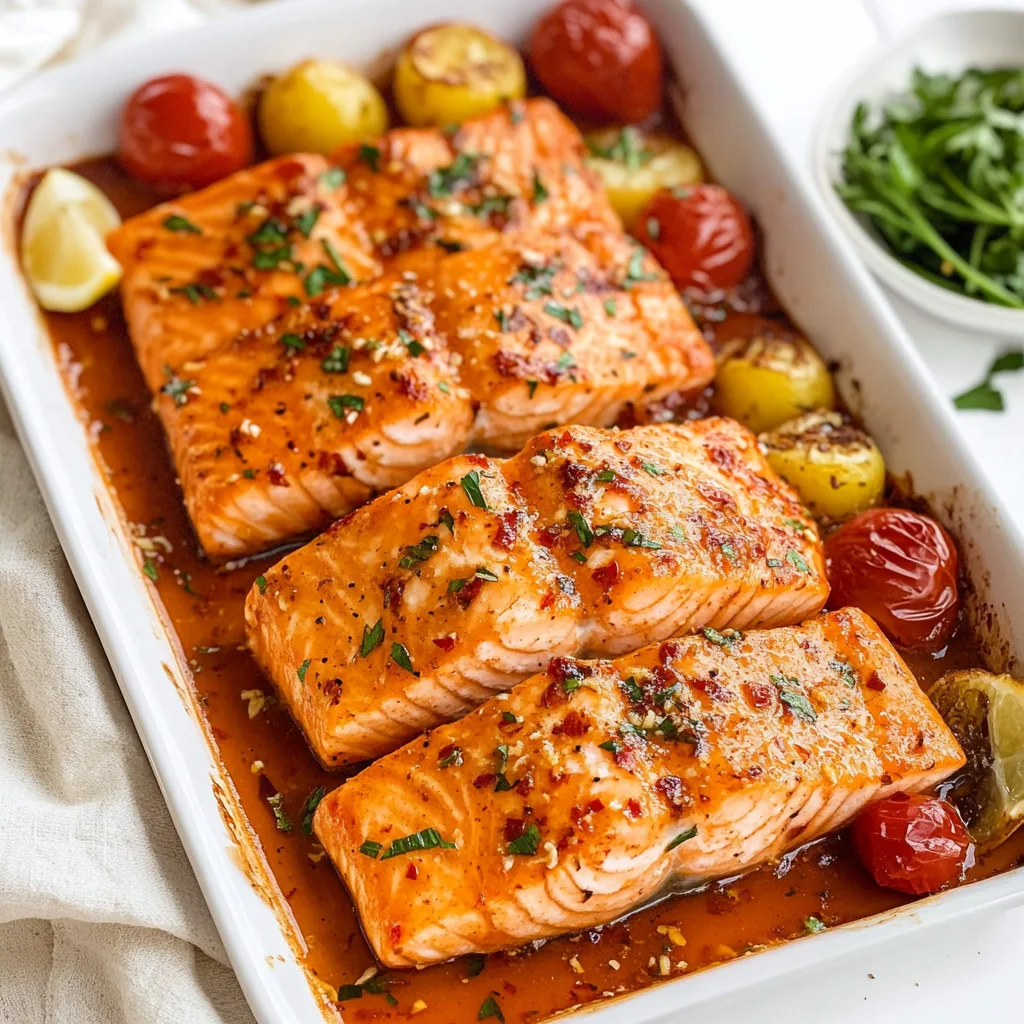
  • Maple Glazed Sheet Pan Salmon – Irresistibly Sweet & Juicy!

    Maple Glazed Sheet Pan Salmon – Irresistibly Sweet & Juicy!

    Maple Glazed Sheet Pan Salmon – Irresistibly Sweet & Juicy!

    The aroma of sweet maple mingling with savory salmon is pure kitchen magic, friends. This maple glazed sheet pan salmon recipe has become my weeknight superhero – ready in under 30 minutes with minimal cleanup! I discovered this gem last winter when my sister visited and we needed something impressive but effortless. The way the maple glaze caramelizes on the edges of the salmon creates this irresistible sticky-sweet exterior while keeping the fish perfectly tender inside. Trust me, once you try this easy approach to salmon, you’ll wonder why you ever made dinner any other way.

    Recipe

    Why You’ll Love This MAPLE GLAZED SHEET PAN SALMON

    Perfect Balance of Flavors & Textures

    The magic of maple isn’t just in its sweetness—it’s how it transforms when caramelized. When that rich amber syrup meets the natural fattiness of salmon, something extraordinary happens. The edges get slightly crispy while the center stays meltingly tender. I love how the natural oils in the salmon prevent it from drying out, creating that perfect flaky texture we all crave. The slight tang from Dijon mustard cuts through the sweetness, creating a balanced bite that dances on your tongue with every mouthful.

    Ultimate Time-Saving Solution

    On those nights when I’m juggling deadlines and hungry family members, this maple glazed sheet pan salmon saves the day. The hands-off cooking means I can toss everything onto one pan, slide it into the oven, and focus on other things while dinner practically makes itself. No constant stirring or monitoring required! And the cleanup? Just one pan to wash. The quick prep time (under 10 minutes!) makes this ideal for those evenings when takeout seems tempting, but you still want something nourishing and homemade.

    Essential Tips & Tricks

    Selecting & Preparing Your Salmon

    Always look for salmon fillets of even thickness to ensure they cook uniformly. I prefer center-cut pieces with the skin on—it creates a natural barrier between the delicate fish and the hot sheet pan. Before cooking, pat the salmon completely dry with paper towels; this crucial step allows the maple glaze to adhere properly instead of sliding off. For the freshest flavor, bring your salmon to room temperature for about 15 minutes before cooking, which helps it cook more evenly. When arranging on the pan, leave a little space between fillets for heat circulation, just like with these blackened shrimp.

    Perfecting Your Maple Glaze

    The glaze consistency makes all the difference in this recipe. Pure maple syrup (not pancake syrup!) provides the authentic flavor foundation. When whisking your glaze ingredients, make sure the Dijon mustard fully incorporates—no streaks! For an extra layer of flavor, add a splash of bourbon or a teaspoon of soy sauce. Apply the glaze in two stages: first before baking, then a second brushing about 5 minutes before finishing. This double-glazing technique creates that gorgeous lacquered finish that makes everyone reach for seconds.

    Serving Ideas & Creative Variations

    Complementary Side Dishes

    This maple glazed sheet pan salmon pairs beautifully with roasted vegetables that can cook alongside on the same pan—think asparagus, Brussels sprouts, or sweet potatoes. The vegetables absorb some of that maple goodness, creating a cohesive meal. For a complete dinner, add a simple grain like quinoa or wild rice to soak up the extra glaze. I love serving this with a bright, acidic side salad with citrus segments and avocado to balance the richness. For a special occasion, consider starting with honey garlic shrimp as an appetizer before presenting this showstopper salmon.

    Exciting Flavor Twists

    While the classic maple glaze is divine, don’t be afraid to experiment! Add Asian-inspired notes by incorporating ginger, sesame oil, and a dash of sriracha for heat. For a Mediterranean twist, mix in lemon zest, fresh dill, and capers to brighten the maple base. My personal favorite variation includes a tablespoon of miso paste whisked into the glaze, creating an umami-rich coating that’s absolutely addictive. During summer, try adding minced fresh herbs from your garden—rosemary and thyme stand up beautifully to the bold maple flavor.

    Storage & Troubleshooting Guide

    Proper Storage & Reheating

    Leftover maple glazed sheet pan salmon stays fresh in an airtight container in the refrigerator for up to 3 days. When reheating, avoid the microwave which can make salmon rubbery. Instead, gently warm it in a 275°F oven until just heated through (about 10 minutes). Cold leftover salmon also makes incredible salads and grain bowls! For meal prep, you can mix the glaze up to 3 days ahead and store separately. I’ve found that freezing cooked salmon changes its texture, so I recommend enjoying it fresh or within those first few days.

    Common Issues & Solutions

    If your salmon turns out dry, you’ve likely overcooked it. Remember that salmon continues cooking slightly after removing from the oven. For perfect doneness, look for an internal temperature of 125°F for medium-rare or 145°F for well-done. If your glaze burns before the salmon is cooked through, position your oven rack lower or tent the pan with foil. For glaze that won’t stick, ensure your salmon is completely dry before applying, and consider scoring the flesh lightly with a knife to help the glaze penetrate. Always line your sheet pan with parchment for easy release.

    Frequently Asked Questions

    Can I use frozen salmon for maple glazed sheet pan salmon?

    Yes, but thaw completely in the refrigerator overnight and pat very dry before glazing. The texture may be slightly different than fresh salmon, but still delicious.

    How do I know when my maple glazed salmon is perfectly cooked?

    The salmon should flake easily with a fork but still maintain some translucency in the center. For precision, use a thermometer to reach 125-130°F for medium doneness.

    Can I make this recipe without maple syrup?

    Honey makes a good substitute, though you’ll lose the distinctive maple flavor. Brown sugar mixed with a little water can work in a pinch.

    What’s the best type of salmon to use for this recipe?

    Sockeye or king salmon work beautifully because their natural richness complements the maple glaze. Farm-raised Atlantic salmon is also reliable and widely available.

    Can I add vegetables to cook alongside my maple glazed sheet pan salmon?

    Absolutely! Choose quick-cooking vegetables like asparagus or broccoli to add during the last 10 minutes, or give heartier vegetables a head start before adding the salmon.

    Final Thoughts

    This maple glazed sheet pan salmon has earned its place in my regular rotation for good reason. It transforms ordinary weeknight dinners into something special while remaining blissfully simple. The sweet-savory balance makes it appealing even to folks who typically shy away from seafood. I love watching guests’ eyes light up when they take that first bite—the moment when the caramelized maple meets the tender salmon is pure culinary joy. Don’t forget to check out more delicious recipes on Pinterest for endless inspiration!

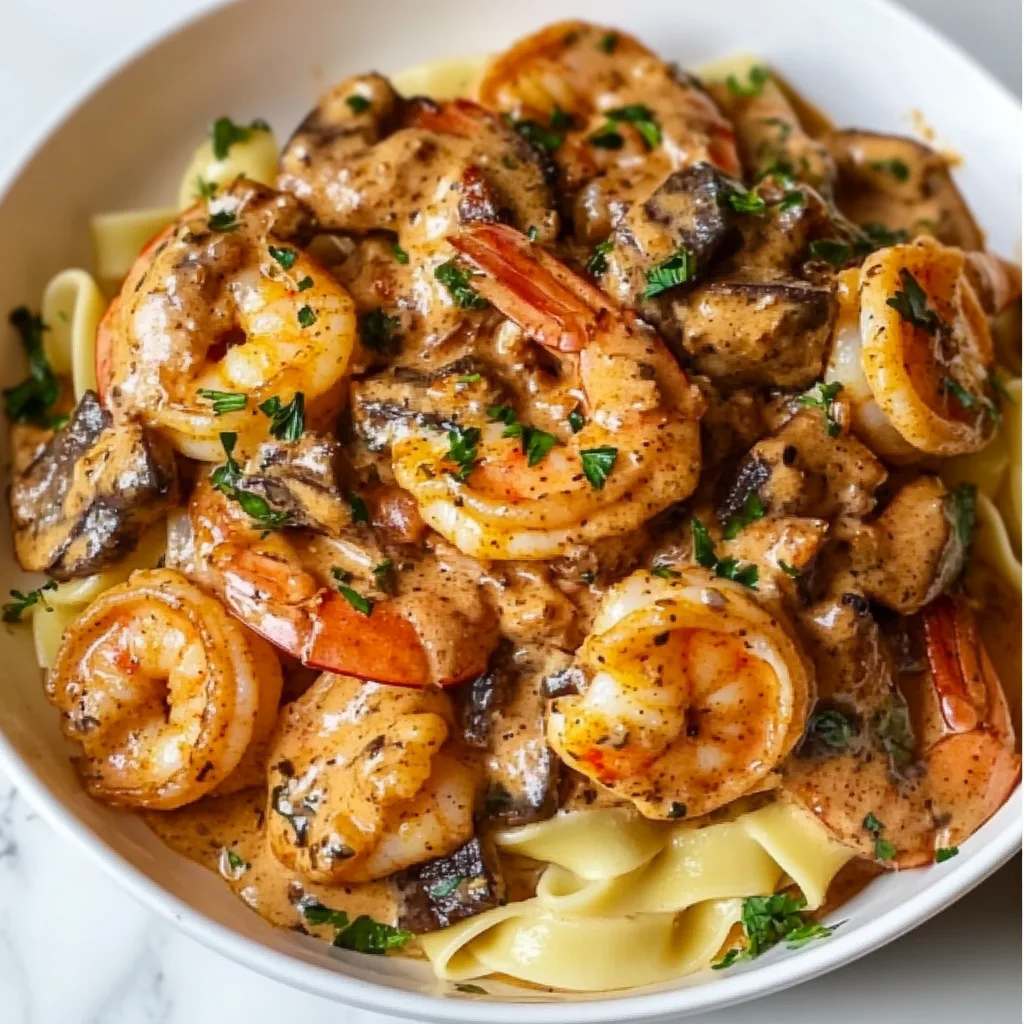
  • Blackened Shrimp Stroganoff: Creamy, Spicy & Irresistible Flavor!

    Blackened Shrimp Stroganoff: Creamy, Spicy & Irresistible Flavor!

    Blackened Shrimp Stroganoff: Creamy, Spicy & Irresistible Flavor!

    Blackened Shrimp Stroganoff is a dish that completely transformed my weeknight dinner routine. The first time I made it, the aroma of cajun spices filled my kitchen, and I knew I had discovered something special. This isn’t your grandmother’s stroganoff – it’s a bold, modern twist that pairs perfectly seared blackened shrimp with a creamy, tangy sauce that clings beautifully to tender egg noodles. When the winter chill hits, this cozy comfort food becomes my go-to recipe that never fails to impress both family and unexpected dinner guests.

    Recipe

    Why You’ll Love This Blackened Shrimp Stroganoff

    A Perfect Balance of Flavors

    The magic of blackened shrimp stroganoff lies in its perfect flavor harmony. The smoky, spicy coating on the shrimp creates this incredible contrast against the rich, creamy sauce. I still remember the first time my husband tasted it – his eyes widened with that “where has this been all my life?” expression. The tanginess from the sour cream cuts through the richness, while mushrooms add an earthy depth that makes every bite complex yet comforting. It’s like wrapping yourself in a warm blanket on a cold evening – deeply satisfying in a way that basic pasta dishes simply can’t match.

    Quick Yet Impressive Results

    What I adore most about this blackened shrimp stroganoff is how it delivers restaurant-quality results in just about 30 minutes. On those hectic weeknights when I’m juggling deadlines and homework help, I can still put this impressive dish on the table without breaking a sweat. The shrimp cooks in minutes, developing that gorgeous blackened crust while staying perfectly tender inside. Meanwhile, the sauce comes together in the same pan, absorbing all those flavorful bits. It’s become my secret weapon for those “I have nothing planned” evenings that somehow transform into memorable meals.

    Essential Tips & Tricks

    Perfecting the Blackening Technique

    The key to outstanding blackened shrimp stroganoff lies in mastering the blackening technique. I learned this the hard way – you want your pan screaming hot before adding the seasoned shrimp. Cast iron works beautifully here, creating that characteristic dark crust without burning the spices. Pat your shrimp completely dry before coating with spices, as moisture prevents proper blackening. And resist the urge to overcrowd the pan! Work in batches if needed, giving each shrimp enough space to develop that perfect crust. The slight char that forms is culinary gold, creating complex flavors that elevate the entire dish.

    Creating the Creamiest Sauce

    The soul of any stroganoff is its sauce, and this blackened shrimp version demands a perfectly velvety texture. The secret? Temper your sour cream by stirring in a few tablespoons of the hot broth mixture before adding it to the pan. This prevents curdling and ensures silky smoothness. Another game-changer is adding a splash of Worcestershire sauce – it provides that umami depth that makes people ask for your recipe. Let the sauce simmer gently until it coats the back of a spoon, but never boil it after adding sour cream, or you’ll lose that luxurious creaminess.

    Serving Ideas & Creative Variations

    Beyond Basic Noodles

    While traditional egg noodles are the classic pairing for blackened shrimp stroganoff, don’t be afraid to explore alternatives. I’ve served this over creamy polenta on special occasions, creating an elegant presentation that guests still talk about. Cauliflower rice makes a lighter, low-carb option that soaks up the sauce beautifully. For something unexpected, try spooning it over crispy potato pancakes – the textural contrast is divine! My personal favorite for casual gatherings is serving it with toasted sourdough bread for dipping into that luscious sauce. Each variation brings a different dimension to the dish.

    Customizing Your Spice Blend

    The beauty of blackened shrimp stroganoff is how easily it adapts to different flavor profiles through the spice blend. My standard mix includes paprika, thyme, oregano, garlic powder, onion powder, cayenne, salt and pepper. But I love experimenting! For a Cajun-inspired version, increase the cayenne and add file powder. Create a Mediterranean twist with smoked paprika, oregano and lemon zest. For heat-lovers in my family, I’ll incorporate chipotle powder for smoky spice. Keep notes on your favorite combinations – this simple customization transforms the entire dish and keeps it exciting every time you make it.

    Storage & Troubleshooting Guide

    Proper Storage Solutions

    Blackened shrimp stroganoff requires thoughtful storage to maintain its quality. I’ve found that separating components works best – store the sauce and shrimp in one airtight container and noodles in another to prevent them from absorbing all the liquid. Properly stored, it keeps in the refrigerator for 2-3 days. For freezing, I recommend only freezing the sauce (without the sour cream) and shrimp, then adding fresh dairy when reheating. When you’re ready to enjoy leftovers, reheat gently on the stovetop with a splash of broth to restore the creamy texture.

    Fixing Common Issues

    Even experienced cooks encounter challenges with blackened shrimp stroganoff, but most have simple quick fixes. If your sauce breaks or curdles, whisk in a tablespoon of cornstarch slurry over low heat until smooth. Overcooked, rubbery shrimp? Next time, remove them after blackening and add back only in the final minute of cooking. For a sauce that’s too thin, simmer uncovered a few extra minutes; too thick, add a splash of broth. If your blackening spices burn rather than caramelize, your heat was likely too high – next time, try medium-high instead of high heat.

    Frequently Asked Questions

    What makes shrimp “blackened” in blackened shrimp stroganoff?

    Blackening refers to coating shrimp with spices and cooking at high heat until a dark crust forms. This technique creates complex, smoky flavors without burning the seafood. The dark crust contains caramelized spices that infuse the entire dish.

    Can I make this recipe ahead of time?

    Yes! Prepare the sauce and blacken the shrimp up to a day ahead, storing separately. Reheat the sauce gently, add the shrimp during the last minute, and serve over freshly cooked noodles for best results.

    What can I substitute for sour cream?

    Greek yogurt makes an excellent substitute with added protein. Coconut cream works for dairy-free versions, though it adds a subtle sweetness. In a pinch, cream cheese thinned with a little milk creates a rich alternative.

    How spicy is this dish?

    The spice level is customizable! Adjust cayenne pepper to your preference. My family version uses ¼ teaspoon for mild warmth that even kids enjoy, but heat-lovers can double or triple this amount.

    Can I use frozen shrimp?

    Absolutely! Thaw completely and pat thoroughly dry before seasoning. Frozen shrimp work perfectly when properly dried, though fresh may develop a slightly better crust during the blackening process.

    Final Thoughts

    Blackened Shrimp Stroganoff has become more than just a recipe in my household – it’s a reliable favorite that bridges the gap between everyday cooking and special occasions. There’s something magical about how the bold, spicy exterior of the shrimp complements the creamy, comforting sauce. I hope you’ll explore this delicious twist on a classic and make it your own. For more seafood inspiration, browse my collection of shrimp recipes and discover your next family favorite. This blackened shrimp stroganoff might just become your new signature dish!

  • Honey Garlic Shrimp Recipe That Will WOW Your Taste Buds Fast!

    Honey Garlic Shrimp Recipe That Will WOW Your Taste Buds Fast!

    Honey Garlic Shrimp Recipe That Will WOW Your Taste Buds Fast!

    Honey garlic shrimp is that magical dish where minimal effort delivers maximum flavor. The first time I made this recipe, the aroma of sizzling garlic and honey filled my tiny apartment, and I knew I’d struck culinary gold. There’s something deeply satisfying about watching plump shrimp curl and turn pink as they bathe in that sticky-sweet sauce. Perfect for busy weeknights when you want something that feels special without the fuss. The balance of sweet honey, punchy garlic, and a hint of heat creates a dish that’s impossible to resist—just like those crispy crab and shrimp queso taquitos I’m also obsessed with!

    Recipe

    Why You’ll Love This Honey Garlic Shrimp

    Quick Yet Impressive

    This honey garlic shrimp comes together in just 15 minutes from start to finish, making it perfect for those evenings when you’re tempted to order takeout. The sauce caramelizes beautifully, creating these irresistible sticky bits that cling to each shrimp. I’ve served this to last-minute dinner guests who thought I’d been cooking all afternoon! The combination of speed and wow-factor makes this recipe a true lifesaver when you want something that looks and tastes like you put in far more effort than you actually did.

    Perfect Balance of Flavors

    The sweet-savory harmony in this dish is what makes it truly special. The honey provides a natural sweetness that caramelizes slightly when cooked, while the garlic adds that aromatic punch we all crave. I add just enough red pepper flakes to give a gentle warming sensation without overwhelming the delicate shrimp. My husband, who typically reaches for the hot sauce with everything, actually enjoys this dish exactly as is—a minor miracle in our household! The sauce hits all the right notes: sweet, savory, slightly spicy, and utterly craveable.

    Essential Tips & Tricks

    Selecting and Preparing Shrimp

    Always start with the freshest shrimp possible. I prefer large or jumbo shrimp (16-20 count per pound) for this recipe as they stand up better to the bold sauce. If using frozen shrimp (which I often do), thaw them completely and pat them thoroughly dry before cooking. This crucial step ensures they sear rather than steam, giving you that perfect caramelization. Leave the tails on for presentation if serving guests, but for family meals, I remove them all for easier eating. The difference in flavor between shell-on and shell-off cooking is minimal here since the sauce is so flavorful.

    Perfecting the Sauce

    The key to an exceptional honey garlic shrimp is getting that sauce consistency just right. I always mix my sauce ingredients in a small bowl before adding to the pan—this prevents the honey from burning while you’re still measuring other ingredients. Let the sauce reduce until it coats the back of a spoon but remove it from heat before it becomes too thick (it will continue thickening as it cools). For an extra dimension, try adding a tablespoon of rice vinegar or a squeeze of fresh lime juice to cut through the sweetness. This bright acidity balances everything beautifully, similar to my garlic chicken wraps that use the same principle.

    Serving Ideas & Creative Variations

    Pairing Suggestions

    Honey garlic shrimp pairs beautifully with fluffy jasmine rice that soaks up all that glorious sauce—I always make extra sauce just for this reason! For a lower-carb option, try serving over cauliflower rice or alongside a crisp Asian slaw. When I’m feeling fancy, I serve this with black rice for a dramatic presentation that always impresses guests. The dish also works wonderfully alongside simple steamed vegetables like broccoli or bok choy. For a complete meal that comes together quickly, consider serving alongside spicy cajun chicken pasta for a surf and turf situation that’s sure to please everyone.

    Creative Twists

    Don’t be afraid to make this honey garlic shrimp recipe your own! Add a tablespoon of grated ginger for a warming dimension that complements the garlic beautifully. For a citrusy twist, stir in some orange zest and a splash of orange juice during the last minute of cooking. When I’m craving something more substantial, I sometimes add thinly sliced bell peppers and snow peas to the pan after the shrimp have cooked halfway. Another fantastic variation is adding a tablespoon of sriracha for extra heat or a spoonful of hoisin sauce for deeper umami notes.

    Storage & Troubleshooting Guide

    Proper Storage

    While honey garlic shrimp is best enjoyed immediately after cooking, leftovers can be stored in an airtight container in the refrigerator for up to two days. The sauce tends to thicken considerably when chilled, so when reheating, add a splash of water or chicken broth to loosen it up. I avoid freezing this dish as the texture of the shrimp changes significantly upon thawing and reheating. If you know you’ll have leftovers, consider setting aside some of the uncooked shrimp and fresh sauce ingredients to make a new batch later rather than reheating.

    Common Issues and Fixes

    The most common problem with honey garlic shrimp is sauce that’s too thick or burnt. If your sauce is thickening too quickly, immediately add a tablespoon of water and reduce the heat. For sauce that’s too thin, mix 1/2 teaspoon of cornstarch with 1 tablespoon of cold water and stir it into the sauce. If your shrimp are turning out rubbery, you’re likely overcooking them—remember that shrimp cook extremely quickly, usually 1-2 minutes per side depending on size. They’re done as soon as they turn pink and opaque.

    Frequently Asked Questions

    Can I use frozen shrimp for honey garlic shrimp?

    Absolutely! Thaw them completely in the refrigerator overnight or under cold running water, then pat thoroughly dry with paper towels before cooking for best results.

    How do I know when the shrimp are perfectly cooked?

    Shrimp cook quickly and are done when they turn pink, opaque, and curl into a loose “C” shape. If they curl into a tight “O,” they’re overcooked.

    Can I make this honey garlic shrimp recipe ahead of time?

    While best fresh, you can prepare the sauce up to 3 days ahead and store in the refrigerator. Cook the shrimp just before serving for optimal texture.

    What’s the best substitute for honey in this recipe?

    Maple syrup makes an excellent substitute, offering a slightly different but equally delicious flavor profile. Brown sugar mixed with a bit of water also works in a pinch.

    Is honey garlic shrimp gluten-free?

    It can be! Just ensure you’re using tamari instead of regular soy sauce, and double-check that your other ingredients don’t contain hidden gluten.

    Final Thoughts

    This honey garlic shrimp recipe has become my reliable star performer—whether for last-minute dinner guests or satisfying weeknight cravings. The magic lies in its perfect balance of sweet, savory, and umami flavors that make each bite memorable. I love how it transforms simple ingredients into something that feels special enough for company yet easy enough for everyday cooking. Don’t forget to check out more delicious recipes on our Pinterest page where we share new honey garlic shrimp variations and other seafood favorites regularly!