Category: Fish Recipes

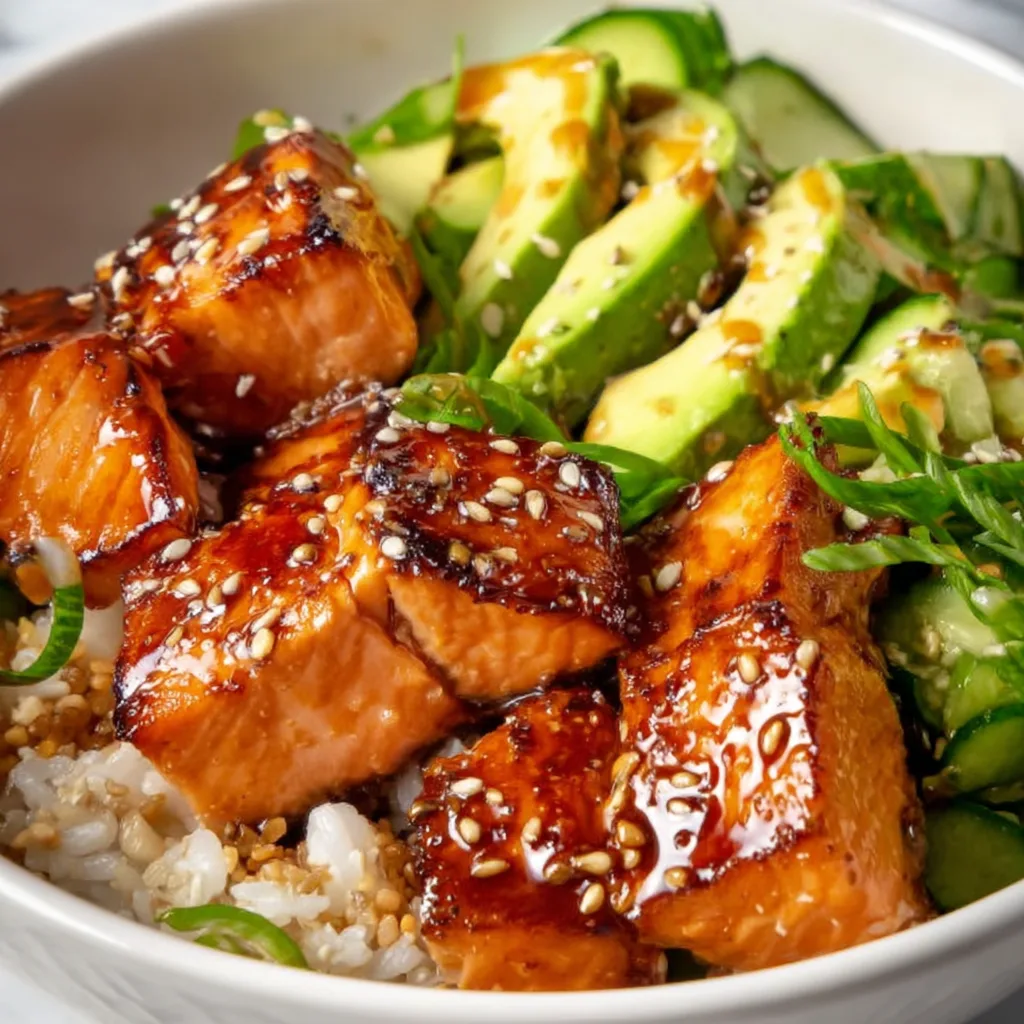
  • Honey Glazed Salmon Bowl: Irresistible Flavor Explosion You’ll Crave!

    Honey Glazed Salmon Bowl: Irresistible Flavor Explosion You’ll Crave!

    Honey Glazed Salmon Bowl: Irresistible Flavor Explosion You’ll Crave!

    My Honey Glazed Salmon Bowl has become my weeknight savior—quick enough for busy evenings yet impressive enough for weekend gatherings. The perfect balance of sweet honey glaze and savory salmon creates a bowl that’s both nourishing and indulgent. I discovered this recipe during a rainy Seattle weekend when I craved something comforting yet healthy. The way the glaze caramelizes on the edges of the salmon creates little bites of heaven that pair beautifully with fluffy rice and crisp vegetables. This bowl combines protein, whole grains, and veggies in one satisfying meal that’s sure to become your new favorite.

    Recipe

    Why You’ll Love This Honey Glazed Salmon Bowl

    Perfect Balance of Flavors and Textures

    The magic of this Honey Glazed Salmon Bowl lies in its harmonious combination of tastes and textures. The caramelized honey glaze creates a sweet-savory coating that contrasts beautifully with the buttery salmon beneath. I love how the glaze forms a slightly crispy exterior while keeping the fish perfectly moist inside. The fluffy rice soaks up all those delicious juices, while crisp vegetables add freshness and crunch. It’s a sensory experience that satisfies on every level—the slight stickiness of the honey, the tender flake of the salmon, and the vibrant pops of color from the vegetables create a bowl that’s as beautiful as it is delicious.

    Quick and Nutritious Weeknight Solution

    On those evenings when cooking feels like a chore, this Honey Glazed Salmon Bowl comes to the rescue. It takes just 25 minutes from start to finish, yet delivers restaurant-quality results. The protein-rich salmon provides omega-3 fatty acids that support heart and brain health, while the rainbow of vegetables delivers essential vitamins and antioxidants. I’ve served this to friends who swear they don’t like fish, only to watch them scrape their bowls clean! It’s become my secret weapon for those nights when I want something that feels special without hours in the kitchen—a true win-win for busy weeknights when nutrition often takes a backseat.

    Essential Tips & Tricks

    Perfecting the Honey Glaze

    The key to an irresistible Honey Glazed Salmon Bowl starts with mastering that sticky-sweet coating. I’ve found that using high-quality honey makes a noticeable difference—raw, local varieties add depth of flavor that processed versions can’t match. Whisk your honey with a touch of soy sauce, minced garlic, and a squeeze of fresh lemon to create complexity. The trick is applying the glaze in two stages: brush half before cooking to infuse flavor, then add the remainder during the final minutes to create that gorgeous caramelized finish. This prevents burning while ensuring maximum flavor penetration. The glaze should bubble and thicken slightly, turning a beautiful amber color.

    Achieving Perfectly Cooked Salmon

    Nothing ruins a Honey Glazed Salmon Bowl faster than overcooked fish. The secret is cooking salmon to medium doneness (about 125°F internal temperature) for that melt-in-your-mouth texture. I start with room-temperature fillets and pat them completely dry before seasoning—this ensures even cooking and helps the glaze adhere properly. Watch for the color change: the salmon should transform from translucent to opaque pink, but still maintain a slightly darker center. Let it rest for 3-5 minutes after cooking to allow the juices to redistribute. This technique works beautifully for other fish dishes too, like this Garlic Butter Steak Bites and Shrimp recipe that uses similar timing principles.

    Serving Ideas & Creative Variations

    Building the Perfect Bowl Base

    Creating a memorable Honey Glazed Salmon Bowl starts with a thoughtful foundation. Instead of plain white rice, I often use coconut jasmine rice cooked with a bay leaf for subtle aromatic notes. For a lower-carb option, cauliflower rice or quinoa work beautifully. Layer your base with quick-pickled vegetables (cucumber, radish, and carrot soaked in rice vinegar for 15 minutes) to add brightness that cuts through the richness of the salmon. I like to include something crunchy—toasted sesame seeds, crispy fried shallots, or even crushed wasabi peas. The contrast between the warm salmon, room-temperature rice, and cool vegetables creates a dynamic eating experience that keeps each bite interesting.

    Global Flavor Inspirations

    One reason I never tire of my Honey Glazed Salmon Bowl is how easily it adapts to different flavor profiles. For a Japanese-inspired version, add a drizzle of spicy mayo, avocado slices, and cucumber, reminiscent of my favorite Easy Sushi Bake Casserole. Going Mediterranean? Swap the honey glaze for a lemon-dill mixture and serve with tzatziki, olives, and cherry tomatoes. For Thai flavors, incorporate lime, cilantro, and a touch of red curry paste into your glaze, then top with crushed peanuts and mango slices. The salmon provides a versatile canvas that works with countless global ingredients, making this bowl concept endlessly customizable for whatever flavors you’re craving.

    Storage & Troubleshooting Guide

    Meal Prep Strategies

    Honey Glazed Salmon Bowls make excellent meal prep options with a few strategic adjustments. I recommend preparing components separately—cook the salmon slightly less than you normally would (about 80% done) since it will continue cooking when reheated. Store the glaze in a separate container and drizzle it over just before serving to maintain that fresh-made taste. Keep vegetables raw and pack them separately to preserve their crunch. Glass containers work best for maintaining freshness without transferring flavors. This approach gives you 2-3 days of delicious lunches that taste nearly as good as freshly made, with the salmon reheating beautifully without developing that unpleasant fishy taste that can plague leftover seafood.

    Fixing Common Issues

    Even experienced cooks encounter challenges with Honey Glazed Salmon Bowls. If your glaze burns too quickly, the heat is likely too high—next time, cook at a medium temperature and watch carefully. For glaze that won’t thicken, try adding a teaspoon of cornstarch slurry or reducing it separately before applying. If your salmon turns out dry, it’s overcooked; aim for less time and remember it continues cooking after removal from heat. Soggy vegetables usually mean they’ve been cooked too long or stored improperly—blanch them briefly then plunge into ice water to maintain crispness.

    And if flavors seem flat, a final squeeze of fresh citrus or sprinkle of flaky sea salt just before serving works wonders to brighten the entire dish.

    Frequently Asked Questions

    Can I use frozen salmon for Honey Glazed Salmon Bowls?

    Yes! Thaw completely in the refrigerator overnight, then pat very dry with paper towels before cooking. This removes excess moisture that would prevent proper caramelization of the honey glaze.

    What’s the best rice for these bowls?

    Jasmine or short-grain rice works beautifully, absorbing the flavors while maintaining distinct texture. For a healthier option, try brown rice or quinoa, adjusting cooking times accordingly.

    How can I make this recipe dairy-free?

    The Honey Glazed Salmon Bowl is naturally dairy-free! Just ensure any additional sauces you add don’t contain hidden dairy ingredients like cream or butter.

    Can I prepare components ahead for a dinner party?

    Absolutely! Prepare the rice and vegetables up to 24 hours ahead. Make the glaze and store separately. Cook the salmon just before serving for the freshest results.

    What vegetables pair best with honey glazed salmon?

    Crisp vegetables with slight bitterness balance the sweet glaze beautifully—try bok choy, asparagus, snap peas, or broccoli. Avocado adds creaminess that complements the caramelized edges.

    Final Thoughts

    This Honey Glazed Salmon Bowl has become more than just a recipe in my kitchen—it’s a reliable friend that shows up whether I need quick nourishment or want to impress dinner guests. The beauty lies in its adaptability and the way it combines simplicity with truly satisfying flavors. I hope you’ll make this bowl your own, experimenting with seasonal vegetables and different grains to create countless variations. There’s something magical about that moment when the honey glaze bubbles and caramelizes, promising a meal that nurtures both body and soul. Find more inspiration for your kitchen adventures on our Pinterest page!
  • Tasty Coconut Curry Baked Cod Recipe That Wow Your Tastebuds!

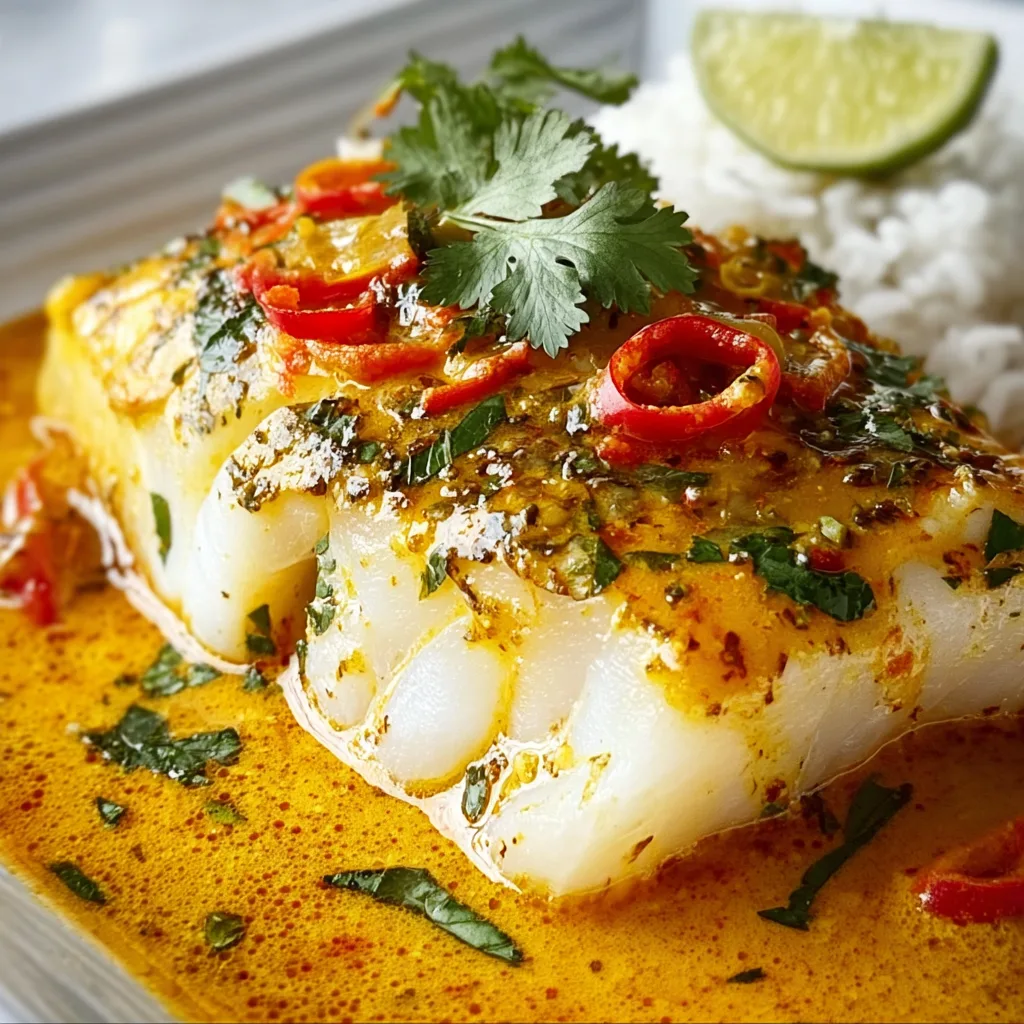
    Tasty Coconut Curry Baked Cod Recipe That Wow Your Tastebuds!

    Tasty Coconut Curry Baked Cod Recipe That Wow Your Tastebuds!

    Tasty Coconut Curry Baked Cod is the ultimate weeknight dinner miracle that’s transformed my family’s seafood routine. The first time I made this dish, my kitchen filled with the most intoxicating aroma of toasted spices and creamy coconut that had everyone wandering in asking “what smells so amazing?” The delicate cod fillets become infused with warm curry flavors while baking to perfect tenderness in just minutes. It’s the ideal balance of exotic flavor and simple preparation that makes this dish special enough for guests but easy enough for busy evenings. I’ve perfected this recipe through countless iterations, and I’m thrilled to share my secrets with you!

    Recipe

    Why You’ll Love This Tasty Coconut Curry Baked Cod

    Perfect Balance of Flavors and Textures

    This dish delivers an incredible depth of flavor that feels like it should take hours to develop, but it doesn’t! The coconut milk creates a velvety sauce that bathes the cod in richness while the curry spices bloom beautifully in the oven. I love how the fish stays incredibly tender and flakes at the slightest touch of your fork. The natural sweetness of the cod pairs perfectly with the subtle heat from the curry, creating a harmony that’s both comforting and exciting. My husband, who once claimed to dislike fish, now requests this dish weekly—it’s that transformative.

    Quick and Impressive Results

    One of my favorite things about this Tasty Coconut Curry Baked Cod is how it delivers restaurant-quality results with minimal effort. From start to finish, you’ll spend less than 30 minutes actively preparing this dish, making it perfect for those evenings when you want something special but simple. I’ve served this to dinner guests who couldn’t believe I hadn’t spent hours in the kitchen. The vibrant colors alone make for a stunning presentation—the golden curry sauce against the white fish, perhaps scattered with bright herbs. It’s the definition of low-effort, high-reward cooking.

    Essential Tips & Tricks

    Selecting and Preparing the Perfect Cod

    The foundation of this dish is quality cod, so don’t skimp here! Look for fillets that are firm and translucent with a mild, ocean-fresh scent. I prefer thicker cuts (about 1½ inches) as they’re more forgiving during baking. Pat the fish thoroughly dry before seasoning—this is crucial for proper browning and flavor absorption. Last week, I discovered that a quick 10-minute salt brine (1 tablespoon salt in 2 cups cold water) before patting dry makes the cod even more tender and flavorful. Just be sure to adjust your seasoning afterward since the fish will absorb some salt.

    Creating the Ultimate Curry Sauce

    The magic of this dish lies in its sauce! For the most vibrant flavor, toast your curry powder in a dry pan for 30 seconds before incorporating it into the coconut mixture—this awakens the spices beautifully. I like to balance the coconut milk with a splash of lime juice for brightness and a teaspoon of honey for subtle sweetness. For texture contrast, consider adding finely diced bell peppers or zucchini to the sauce before pouring over the fish. If you enjoy garlic herb chicken with creamy mash, you’ll appreciate how this sauce similarly transforms a simple protein into something spectacular.

    Serving Ideas & Creative Variations

    Perfect Pairings for a Complete Meal

    This Tasty Coconut Curry Baked Cod shines brightest when paired with complementary sides that soak up that incredible sauce. Fluffy jasmine rice or coconut rice makes the perfect base, but don’t overlook cauliflower rice for a lighter option. For vegetables, I love serving this with quick-sautéed sugar snap peas or steamed broccoli tossed with a bit of sesame oil. A simple cucumber salad with rice vinegar provides a refreshing contrast to the rich curry. When entertaining, I arrange everything on a large platter, family-style, which always creates an impressive presentation that invites everyone to dive in.

    Exciting Flavor Adaptations

    While the classic version is divine, this recipe welcomes creative adaptations! For a Thai-inspired version, add a tablespoon of red curry paste and fresh lemongrass to the coconut mixture. A South Indian variation could include mustard seeds, curry leaves, and a pinch of asafoetida. For heat lovers, incorporate a diced jalapeño or a teaspoon of sambal oelek. You can even swap the cod for other firm white fish like halibut or sea bass with excellent results. If you enjoy fusion flavors like in my shrimp lobster biscuit pot pie, try adding a tablespoon of miso paste to the sauce for umami depth.

    Storage & Troubleshooting Guide

    Proper Storage and Reheating

    Fish dishes can be tricky to store, but this Tasty Coconut Curry Baked Cod holds up surprisingly well. Allow leftovers to cool completely before transferring to an airtight container. They’ll keep in the refrigerator for up to 2 days—beyond that, the texture begins to suffer. When reheating, gentle methods work best: either microwave at 50% power in short intervals or warm gently in a covered skillet with a splash of water or coconut milk to revive the sauce. I’ve found that separating the fish from the sauce before storage and recombining when reheating yields the best results, preserving the fish’s delicate texture.

    Solving Common Challenges

    If your cod turns out tough, it’s likely overcooked. Fish continues cooking even after removal from heat, so take it out when it’s just shy of flaking easily—it should reach 145°F internally. If your sauce separates or looks curdled, whisk in a teaspoon of cornstarch dissolved in cold water while gently heating. Too runny? Simmer the sauce separately for a few minutes to reduce. For bland results, brighten with fresh lime juice, a pinch of salt, or a drizzle of fish sauce. Remember that different curry powders vary dramatically in potency and flavor profile, so adjust quantities to suit your specific blend.

    Frequently Asked Questions

    Can I make Tasty Coconut Curry Baked Cod ahead of time?

    You can prepare the curry sauce up to 2 days ahead and store it refrigerated. When ready to serve, simply pour over the seasoned cod and bake fresh. This saves time while ensuring the fish maintains its perfect texture.

    What’s the best type of coconut milk to use?

    Full-fat canned coconut milk provides the richest, creamiest results. Light coconut milk works but produces a thinner sauce. Avoid refrigerated coconut milk beverages as they’re too diluted for this recipe.

    Can I use frozen cod fillets?

    Yes! Thaw completely in the refrigerator overnight and pat thoroughly dry before proceeding. You may need to extend baking time by 2-3 minutes for previously frozen fish.

    How can I make this recipe dairy-free?

    Good news! This recipe is naturally dairy-free as written. The creaminess comes entirely from coconut milk, making it perfect for those avoiding dairy products.

    What sides pair best with this dish?

    Rice absorbs the delicious sauce beautifully. Also consider naan bread, roasted vegetables, or a simple cucumber salad for freshness and contrast.

    Final Thoughts

    This Tasty Coconut Curry Baked Cod has become my go-to for impressing guests without stressing myself out in the kitchen. The combination of silky coconut, aromatic curry, and tender fish creates a dish that feels special yet comes together with remarkable ease. I find myself returning to it whenever I need a dinner that’s both comforting and slightly adventurous. Find more inspiration for your next seafood feast on our Pinterest board. Whether you’re a seafood enthusiast or just beginning to explore cooking with fish, this recipe promises to deliver satisfaction with every flavorful bite.

  • Crispy Salmon Croquettes: Irresistibly Crunchy & Easy to Make!

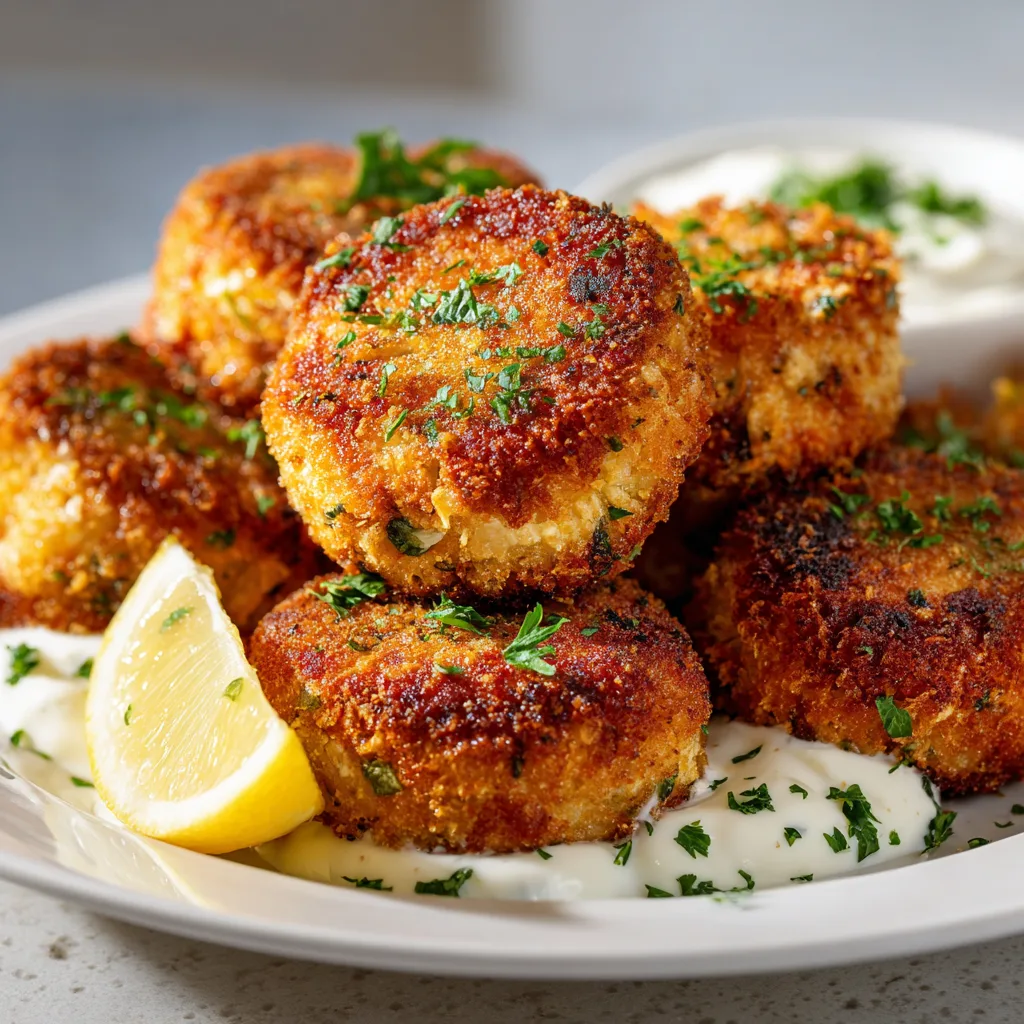
    Crispy Salmon Croquettes: Irresistibly Crunchy & Easy to Make!

    Crispy Salmon Croquettes: Irresistibly Crunchy & Easy to Make!

    Crispy Salmon Croquettes have been my secret weapon for dinner parties where I want to impress without spending hours in the kitchen. These golden-brown patties blend flaky salmon with herbs and spices, creating the perfect balance of crispy exterior and tender interior. The first time I made these, my kitchen filled with an irresistible aroma that drew my family in before I could even call them for dinner. Whether you’re looking for a quick weeknight meal or an elegant appetizer, these salmon croquettes deliver restaurant-quality flavor with minimal effort. I’ve perfected this recipe over countless Friday night dinners, and I’m thrilled to share it with you today.

    Recipe

    Why You’ll Love These Crispy Salmon Croquettes

    Perfect Texture Combination

    The magical contrast between the golden-brown crust and the tender salmon interior creates an irresistible bite every time. I’ve found that panko breadcrumbs make all the difference—they create that distinctive crunch that makes these croquettes so addictive. The interior stays moist and flavorful, with bits of fresh herbs and a hint of lemon zest that brightens everything up. When you take that first bite and hear the subtle crackle of the crust giving way to the flaky salmon center, it’s a sensory experience that never gets old. My daughter calls them “fancy fish nuggets,” and honestly, she’s not wrong!

    Quick and Budget-Friendly

    What I adore about these salmon croquettes is how they transform simple ingredients into something spectacular. Using canned salmon keeps the cost down while still delivering impressive flavor and nutrition. On busy weeknights when I’m tempted to order takeout, I remember I can have these on the table in about 30 minutes. The prep is straightforward—mix, form, and pan-fry—no complicated techniques required. Plus, they’re incredibly versatile, working equally well as a main dish or appetizer. I’ve even made mini versions for brunch that disappeared faster than the mimosas!

    Essential Tips & Tricks

    Perfecting the Mixture

    The secret to cohesive croquettes that don’t fall apart lies in the binding ingredients. I always drain the salmon thoroughly and pat it dry with paper towels before mixing. Too much moisture is the enemy of a good croquette! Adding just the right amount of mayonnaise (about 2-3 tablespoons per pound of salmon) creates the perfect binding agent. Let the mixture rest in the refrigerator for at least 15 minutes before forming the patties—this gives the breadcrumbs time to absorb moisture and helps everything hold together beautifully when cooking. Trust me, this small step makes a world of difference.

    Achieving the Golden Crust

    For that enviable golden-brown exterior, maintain your oil at the perfect temperature—around 350°F. Too hot, and they’ll burn before cooking through; too cool, and they’ll absorb oil and become greasy. I use a heavy-bottomed skillet with about 1/4 inch of oil, which creates the ideal environment for crisping. The key is patience—resist the urge to flip them too early! Give each side 3-4 minutes of uninterrupted cooking time. You’ll know they’re ready to flip when the edges turn a deep golden color, similar to the beautiful crust on my Crispy Zucchini Rings with Creamy Dip.

    Serving Ideas & Creative Variations

    Perfect Pairings

    These versatile croquettes shine alongside both simple and sophisticated accompaniments. My family’s favorite weeknight combo includes a crisp green salad and lemon wedges for squeezing. For dinner parties, I elevate the presentation with a dollop of dill-spiked Greek yogurt or a quick homemade remoulade sauce. The tanginess cuts through the richness perfectly! Roasted asparagus or a light cucumber salad makes an excellent side that won’t overshadow your star attraction. When I’m feeling particularly indulgent, I serve them alongside creamy mashed potatoes, similar to my Garlic Herb Chicken with Creamy Mash.

    Flavor Twists

    Don’t be afraid to experiment with different flavor profiles to keep this recipe exciting. My Mediterranean variation includes feta cheese, chopped olives, and oregano—it transports us to Greece with every bite! For an Asian-inspired twist, I mix in ginger, scallions, and a touch of sesame oil, then serve with a soy-ginger dipping sauce. Cajun spices with bell peppers create a New Orleans flair that’s absolutely delicious. Sometimes I substitute half the salmon with crabmeat for a surf-and-surf approach that elevates these croquettes to special-occasion status. The possibilities are endless!

    Storage & Troubleshooting Guide

    Making Ahead & Storing

    These croquettes are perfect for meal prepping because they store beautifully. After cooking, let them cool completely before refrigerating in an airtight container—they’ll keep for up to 3 days. To reheat, avoid the microwave which makes them soggy. Instead, place them on a baking sheet in a 350°F oven for 10 minutes to restore their crispy exterior. You can also freeze the uncooked patties for up to 3 months! Just place them on a parchment-lined baking sheet, freeze until solid, then transfer to a freezer bag. Cook them straight from frozen, adding about 2 minutes to the cooking time per side.

    Fixing Common Issues

    If your croquettes are falling apart during cooking, the mixture might be too wet. Add more breadcrumbs, one tablespoon at a time, until it holds together when formed. Too dry and crumbly? Add a touch more mayonnaise or an extra egg. For croquettes that aren’t browning properly, your oil likely isn’t hot enough—test by dropping a breadcrumb in; it should sizzle immediately. If they’re browning too quickly but staying raw inside, your heat is too high. Lower it and continue cooking at a gentler temperature. Remember that patience is key—rushing the cooking process almost always leads to disappointing results.

    Frequently Asked Questions

    Can I use fresh salmon instead of canned for these crispy salmon croquettes?

    Absolutely! Cook and flake about 1 pound of fresh salmon, removing any skin and bones. Let it cool completely before mixing with other ingredients for an even more luxurious flavor profile.

    How do I know when the croquettes are cooked through?

    They should be golden-brown on both sides and reach an internal temperature of 145°F. If you don’t have a thermometer, check that the center is hot and no longer appears raw or translucent.

    Can I bake these instead of frying?

    Yes! Arrange them on a parchment-lined baking sheet, spray with cooking oil, and bake at 425°F for about 15 minutes, flipping halfway. They won’t be quite as crispy but still delicious.

    What can I use if I don’t have panko breadcrumbs?

    Regular breadcrumbs work fine, though the texture will be slightly different. For a gluten-free option, crushed cornflakes or gluten-free breadcrumbs make excellent substitutes.

    How can I make these spicier?

    Add diced jalapeños, a dash of hot sauce, or cayenne pepper to the mixture. For an extra kick, incorporate a spicy aioli into your binding ingredients.

    Final Thoughts

    These Crispy Salmon Croquettes have become a cornerstone in my recipe collection—beloved by both family and friends for their perfect texture and adaptable nature. What I love most is how they transform an ordinary weeknight into something special without complicated techniques or hard-to-find ingredients. They remind me that good cooking doesn’t have to be fussy to be impressive. I hope you’ll make these croquettes part of your own culinary repertoire and discover your favorite ways to enjoy them. Don’t forget to check out more seafood inspirations on Pinterest for your next kitchen adventure!

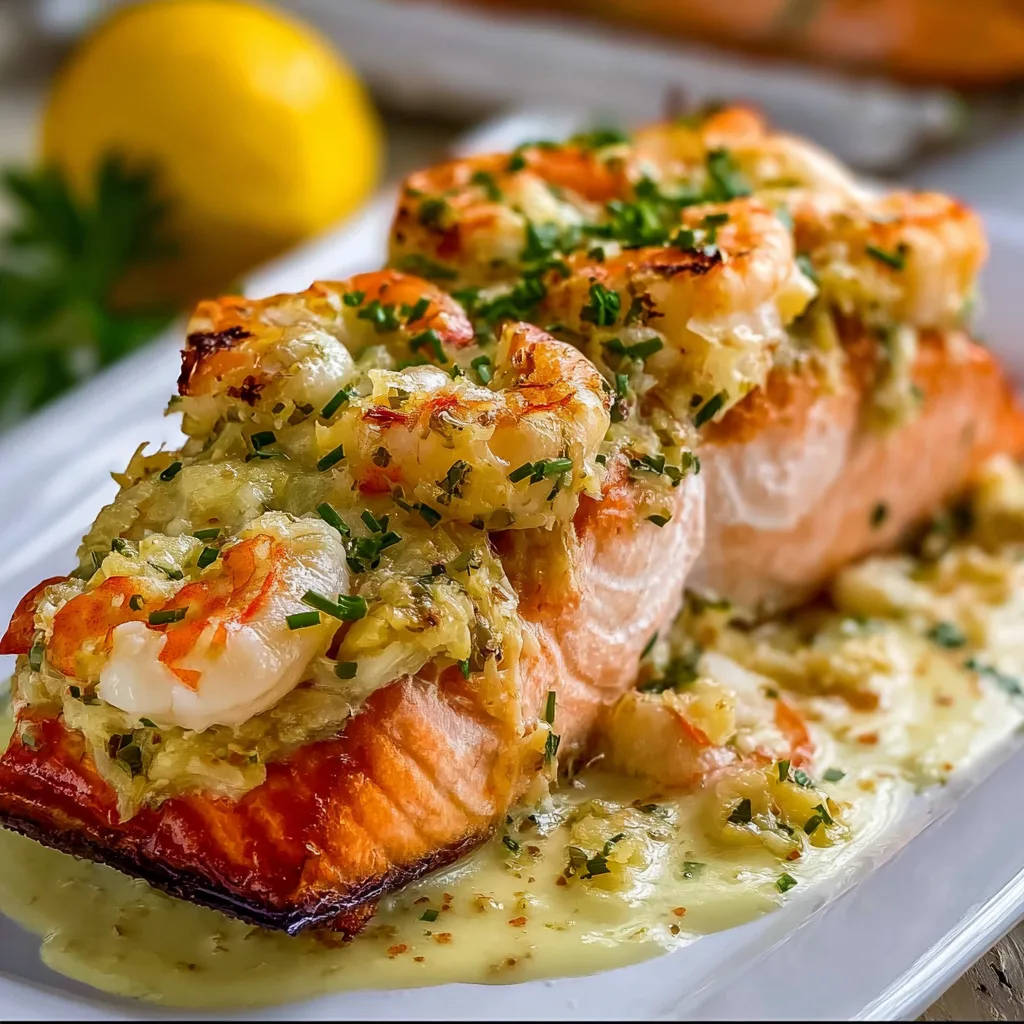
  • Crab And Shrimp Stuffed Salmon Recipe That Will Wow Your Tastebuds!

    Crab And Shrimp Stuffed Salmon Recipe That Will Wow Your Tastebuds!

    Crab And Shrimp Stuffed Salmon Recipe That Will Wow Your Tastebuds!

    Crab and Shrimp Stuffed Salmon is truly one of those special occasion dishes that feels like a restaurant masterpiece but can absolutely be made in your own kitchen! I discovered this luxurious seafood trio years ago when planning a surprise anniversary dinner for my husband. The way the buttery crab and tender shrimp nestle into perfectly cooked salmon creates a symphony of flavors that’s both elegant and comforting. If you’re looking for a show-stopping seafood dish that will have everyone asking for seconds, this recipe is your new best friend! For more delicious seafood inspirations, check out my Shrimp Lobster Biscuit Pot Pie.

    Recipe

    Why You’ll Love This Crab And Shrimp Stuffed Salmon

    A Perfect Special Occasion Dish

    There’s something magical about cutting into a perfectly cooked salmon fillet and watching the creamy crab and shrimp filling spill out. The contrasting textures – flaky salmon, tender shrimp, and luscious crab – create a sensory experience that feels incredibly special. I love serving this for birthdays, anniversaries, or when I simply want to remind my family how much they mean to me. The presentation alone makes everyone feel pampered, yet it’s surprisingly straightforward to prepare. The rich seafood medley delivers a restaurant-quality experience without the restaurant prices!

    Balanced Flavors and Nutritional Benefits

    This dish strikes that perfect balance between indulgent and nourishing. Salmon provides those essential omega-3 fatty acids that are so good for heart and brain health, while the seafood stuffing adds protein without excessive calories. I love how the subtle sweetness of the crab and shrimp complements the rich salmon without overwhelming it. The herbs and lemon brighten everything up, cutting through the richness with their fresh, vibrant notes. When my daughter first tried this dish, she said it tasted like “ocean magic” – and honestly, I couldn’t have described it better myself!

    Essential Tips & Tricks

    Selecting the Perfect Ingredients

    Starting with high-quality seafood makes all the difference in this recipe. Look for center-cut salmon fillets that are at least 1-inch thick – they’re easier to stuff and cook more evenly. For the crab, I prefer lump crabmeat for its sweet flavor and substantial texture, though claw meat works well too if you’re watching your budget. When selecting shrimp, opt for medium-sized ones (41-50 count) that are already peeled and deveined to save prep time. I once made this with frozen seafood that I hadn’t properly thawed and drained – the excess moisture made the filling watery. Learn from my mistake and pat everything dry before mixing!

    Mastering the Stuffing Technique

    Creating the perfect pocket in your salmon is the key to stuffing success. Use a sharp knife to make a horizontal cut along the thickest part of the fillet, being careful not to slice all the way through. Think of it like creating a little envelope that opens on just one side. For the filling, avoid overmixing which can break down the delicate crab meat. Gently fold the ingredients together just until combined, then chill the mixture for 15-20 minutes before stuffing – this helps it hold together better. If you’re looking for another delicious stuffed dish, try my Spinach Stuffed Chicken for a change of pace!

    Serving Ideas & Creative Variations

    Perfect Pairings for a Complete Meal

    This Crab and Shrimp Stuffed Salmon deserves equally impressive side dishes to create a memorable dining experience. I love serving it with roasted asparagus or green beans that have been tossed with a little olive oil, salt, and lemon zest. For a starch, wild rice pilaf or creamy risotto makes an elegant base that soaks up any extra sauce beautifully. A light citrus salad with segments of grapefruit and orange provides a refreshing contrast to the rich seafood. Last Valentine’s Day, I paired this with a glass of chilled Pinot Grigio and roasted garlic mashed potatoes – my husband still talks about that meal!

    Exciting Flavor Variations

    While the classic version is divine, don’t be afraid to play with flavor profiles to make this recipe your own! For a Mediterranean twist, incorporate sun-dried tomatoes, feta, and fresh dill into the stuffing. Craving something with a kick? Add minced jalapeño, lime zest, and cilantro for a Southwestern flair. For an Asian-inspired version, mix in some ginger, scallions, and a touch of sesame oil. You might also enjoy my Blackened Steak Shrimp Alfredo which offers another delicious seafood option with bold flavors that will wow your dinner guests.

    Storage & Troubleshooting Guide

    Proper Storage and Reheating

    Seafood requires careful handling when it comes to leftovers and reheating. If you have extra stuffed salmon, cool it completely before transferring to an airtight container. It will keep in the refrigerator for up to 2 days, but I don’t recommend freezing as the texture of both the salmon and the delicate filling will suffer. When reheating, do so gently – cover with foil and warm in a 275°F oven just until heated through (about 10-15 minutes). Microwaving is a last resort as it can make the salmon rubbery and cause the filling to separate. I’ve found that leftover stuffed salmon is also delicious cold, flaked over a salad with a light vinaigrette!

    Troubleshooting Common Issues

    Even experienced cooks encounter challenges! If your filling is too wet or runny, try adding a tablespoon or two of panko breadcrumbs to absorb excess moisture. For salmon that’s cooking too quickly on the outside while remaining raw in the center, lower your oven temperature and tent the fish with foil. If the stuffing keeps falling out during cooking, try securing the pocket with toothpicks (just remember to remove them before serving!). One time my filling leaked out completely – I quickly transformed the disaster into a “deconstructed” version by serving the salmon over the seafood mixture. No one knew it wasn’t intentional, and it tasted just as wonderful!

    Frequently Asked Questions

    Can I make Crab and Shrimp Stuffed Salmon ahead of time?

    Yes! Prepare and stuff the salmon up to 24 hours ahead, cover tightly with plastic wrap, and refrigerate. Remove from the fridge 20 minutes before cooking to take the chill off for more even baking.

    What’s the best type of salmon to use for stuffing?

    Atlantic or king salmon work best due to their thickness and higher fat content, which keeps the fish moist during cooking. Wild sockeye can work but requires more careful cooking to prevent drying out.

    Can I use imitation crab meat instead of real crab?

    While possible, I don’t recommend it. Real crab provides superior flavor and texture. If budget is a concern, use a smaller amount of real crab supplemented with extra shrimp.

    How do I know when my stuffed salmon is perfectly cooked?

    The salmon should be opaque and flake easily with a fork, reaching an internal temperature of 145°F. The stuffing should be hot throughout and the top should be lightly golden.

    Can I grill Crab and Shrimp Stuffed Salmon instead of baking it?

    Absolutely! Use a well-oiled grill over medium heat, and cook with the lid closed. Place on foil or a cedar plank to prevent the delicate stuffed salmon from falling apart.

    Final Thoughts

    This Crab and Shrimp Stuffed Salmon has become my go-to recipe whenever I want to create a truly special meal that feels like a celebration. There’s something magical about the way these three seafood treasures come together – the rich salmon, sweet crab, and tender shrimp create a dish that’s greater than the sum of its parts. Whether you’re cooking for a romantic dinner, hosting friends, or simply treating yourself to something extraordinary, this recipe delivers restaurant-quality results with home-cooked love. Don’t forget to check out more delicious recipes on Pinterest!

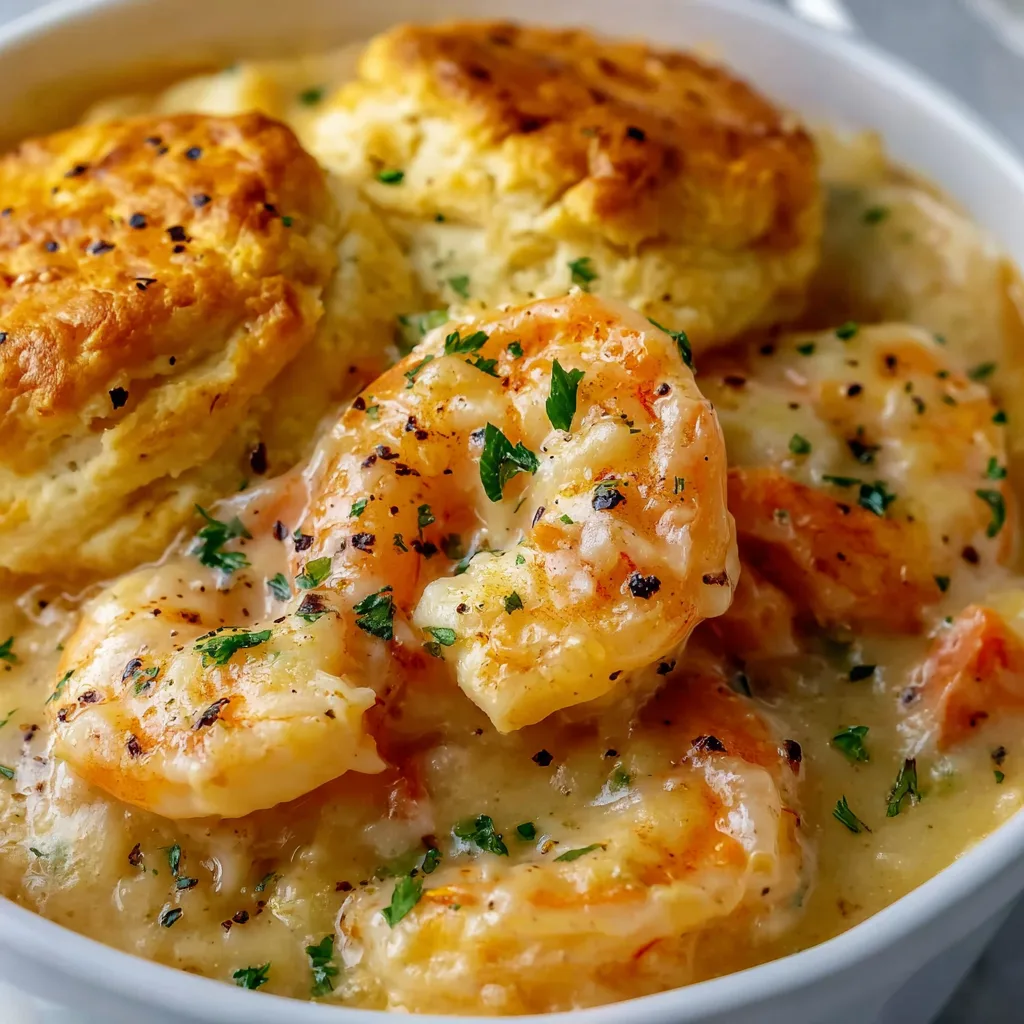
  • Shrimp Lobster Biscuit Pot Pie: Irresistible Comfort Food Bliss!

    Shrimp Lobster Biscuit Pot Pie: Irresistible Comfort Food Bliss!

    Shrimp Lobster Biscuit Pot Pie: Irresistible Comfort Food Bliss!

    Shrimp Lobster Biscuit Pot Pie combines two of the ocean’s most beloved treasures into one comforting, flaky-topped masterpiece. I discovered this recipe during a rainy weekend at my beach cottage when I craved something that captured both luxury and comfort. The velvety sauce, tender seafood, and buttery biscuit topping create a sensory symphony that’s impossible to resist. Each bite delivers the perfect balance of rich lobster, succulent shrimp, and savory vegetables beneath a golden crown of biscuits. If you’re looking to impress dinner guests or simply treat yourself to something special, this seafood pot pie delivers restaurant-quality flavors with homemade warmth. Check out my other comfort food recipes for more cozy inspiration!

    Recipe

    Why You’ll Love This Shrimp Lobster Biscuit Pot Pie

    The Perfect Balance of Luxury and Comfort

    There’s something magical about transforming premium ingredients into soul-warming comfort food. The combination of sweet lobster meat and plump shrimp creates a luxurious base that feels special, while the creamy sauce and fluffy biscuits bring the familiar comfort we all crave. I love how this dish bridges the gap between elegant dining and homestyle cooking. My husband always says this dish is what would happen if a fancy seafood restaurant and your grandmother’s kitchen had a delicious baby. The velvety sauce, infused with herbs and a hint of sherry, elevates the seafood while keeping everything approachable and utterly satisfying.

    Make-Ahead Friendly for Entertaining

    One of the greatest advantages of this Shrimp Lobster Biscuit Pot Pie is how entertaining-friendly it is. You can prepare the filling up to two days ahead and store it in the refrigerator. The biscuit topping can be mixed, shaped, and refrigerated separately. When guests arrive, simply pour the filling into your baking dish, top with the biscuits, and bake until golden and bubbly. I’ve served this at countless dinner parties, and it never fails to impress. The dramatic moment when you bring it to the table, steam rising from the golden biscuits, creates an instant wow factor that sets the tone for a memorable meal.

    Essential Tips & Tricks

    Perfecting Your Seafood Selection

    The star ingredients in this pot pie deserve careful attention. Look for wild-caught shrimp when possible, and remove both the shell and that dark vein along the back (the digestive tract). For the lobster, pre-cooked tails make this recipe more approachable, but fresh lobster meat will elevate it further. If you’re splurging, ask your fishmonger to steam whole lobsters and extract the meat for you. The sweet knuckle and claw meat are particularly delicious in this dish. I’ve found that a combination of both shrimp and lobster creates the perfect flavor balance, but you could adjust the ratio based on availability and budget.

    Creating the Ultimate Creamy Sauce

    The sauce is the silky foundation that brings everything together in your Shrimp Lobster Biscuit Pot Pie. Start with a roux made from equal parts butter and flour, cooking just until it smells nutty but hasn’t browned. Slowly whisk in warm stock and cream for a lump-free sauce. A splash of sherry or white wine adds complexity, while fresh herbs provide aromatic depth. Season carefully—seafood brings natural saltiness, so taste as you go. For extra richness, I sometimes stir in a spoonful of mascarpone cheese at the end. Remember that the sauce will thicken further as it bakes, so aim for a consistency slightly thinner than you want in the final dish.

    Serving Ideas & Creative Variations

    Perfect Pairings for a Complete Meal

    This Shrimp Lobster Biscuit Pot Pie stands beautifully on its own, but thoughtful sides can create a memorable dining experience. I love serving it with a crisp green salad dressed simply with lemon vinaigrette to cut through the richness. Roasted asparagus or haricots verts also provide a welcome contrast in texture and color. For wine pairings, a buttery Chardonnay or crisp Sauvignon Blanc complements the seafood perfectly. If you’re hosting a special occasion dinner, consider starting with a light appetizer like cucumber canapés or a small cup of chilled corn soup to set the stage without filling guests before the main attraction.

    Seasonal and Dietary Adaptations

    The versatility of this Shrimp Lobster Biscuit Pot Pie makes it perfect for creative customization. In summer, add fresh corn and cherry tomatoes for seasonal brightness. Fall calls for mushrooms and perhaps a touch of thyme. For dietary needs, the biscuit topping can be made gluten-free using a quality cup-for-cup flour blend, while the sauce works beautifully with lactose-free milk or even full-fat coconut milk for a dairy-free option with tropical notes. Pescatarians will love this as-is, but for those avoiding shellfish, a version with chunks of firm white fish and scallops makes a delicious alternative that maintains the spirit of the dish.

    Storage & Troubleshooting Guide

    Proper Storage for Leftovers

    Storing Shrimp Lobster Biscuit Pot Pie requires attention to food safety and texture preservation. Refrigerate leftovers within two hours of cooking, transferring them to shallow airtight containers to cool quickly. Properly stored, the pot pie will keep for 2-3 days in the refrigerator. For reheating, cover with foil and warm in a 325°F oven until the center reaches 165°F—this gentle approach prevents the seafood from becoming rubbery. The microwave works in a pinch, but use 50% power and stir halfway through. I don’t recommend freezing this dish, as the creamy sauce can separate and the seafood texture suffers, but the filling can be frozen before adding the biscuit topping.

    Troubleshooting Common Issues

    Even experienced cooks encounter challenges with Shrimp Lobster Biscuit Pot Pie. If your sauce seems too thin after baking, it likely needs more reduction time on the stovetop before assembly. Conversely, if it’s too thick, a splash of warm stock or cream will adjust the consistency. Biscuits not rising properly? Check your baking powder’s freshness and ensure you’re using cold butter and handling the dough minimally. For biscuits that brown too quickly before the filling bubbles, simply tent with foil partway through baking. And if your seafood turns rubbery, it’s likely overcooked—next time, fold it into the hot (but not boiling) sauce just before assembling, allowing the oven’s heat to finish the cooking process.

    Frequently Asked Questions

    Can I make Shrimp Lobster Biscuit Pot Pie ahead of time?

    Yes! Prepare the filling up to two days ahead and refrigerate. Make and shape the biscuit dough separately, keeping it chilled. Assemble and bake just before serving for the freshest result.

    What can I substitute for lobster if it’s unavailable?

    Crabmeat makes an excellent substitute, offering similar sweetness. Scallops (quartered if large) also work well. For budget options, additional shrimp or even chunks of firm white fish provide delicious alternatives.

    How do I prevent my biscuits from getting soggy?

    Ensure your filling isn’t too wet before topping with biscuits. The filling should be hot when adding biscuits, and bake immediately at a high temperature (425°F) to create a barrier between the dough and filling.

    Can I make this recipe in individual ramekins?

    Absolutely! Divide the filling among oven-safe ramekins and top each with 1-2 smaller biscuits. Reduce baking time by about 5-7 minutes, watching for golden-brown biscuits and bubbly filling.

    Why did my sauce break or curdle?

    Sauces break when heated too quickly or boiled after adding cream. Stabilize by whisking a tablespoon of cornstarch with cold cream before adding to the hot mixture, and never let the sauce boil vigorously.

    Final Thoughts

    This Shrimp Lobster Biscuit Pot Pie has become my go-to recipe when I want to create something truly special without spending hours in the kitchen. The combination of tender seafood, velvety sauce, and flaky biscuits creates a memorable dining experience that feels both indulgent and comforting. I love watching faces light up with that first bite—the moment when the fork breaks through the golden biscuit into the creamy treasure below. Whether for a holiday gathering, dinner party, or simply because you deserve something extraordinary, this seafood pot pie delivers every time. Find more inspiration on Pinterest and make this your next kitchen adventure!

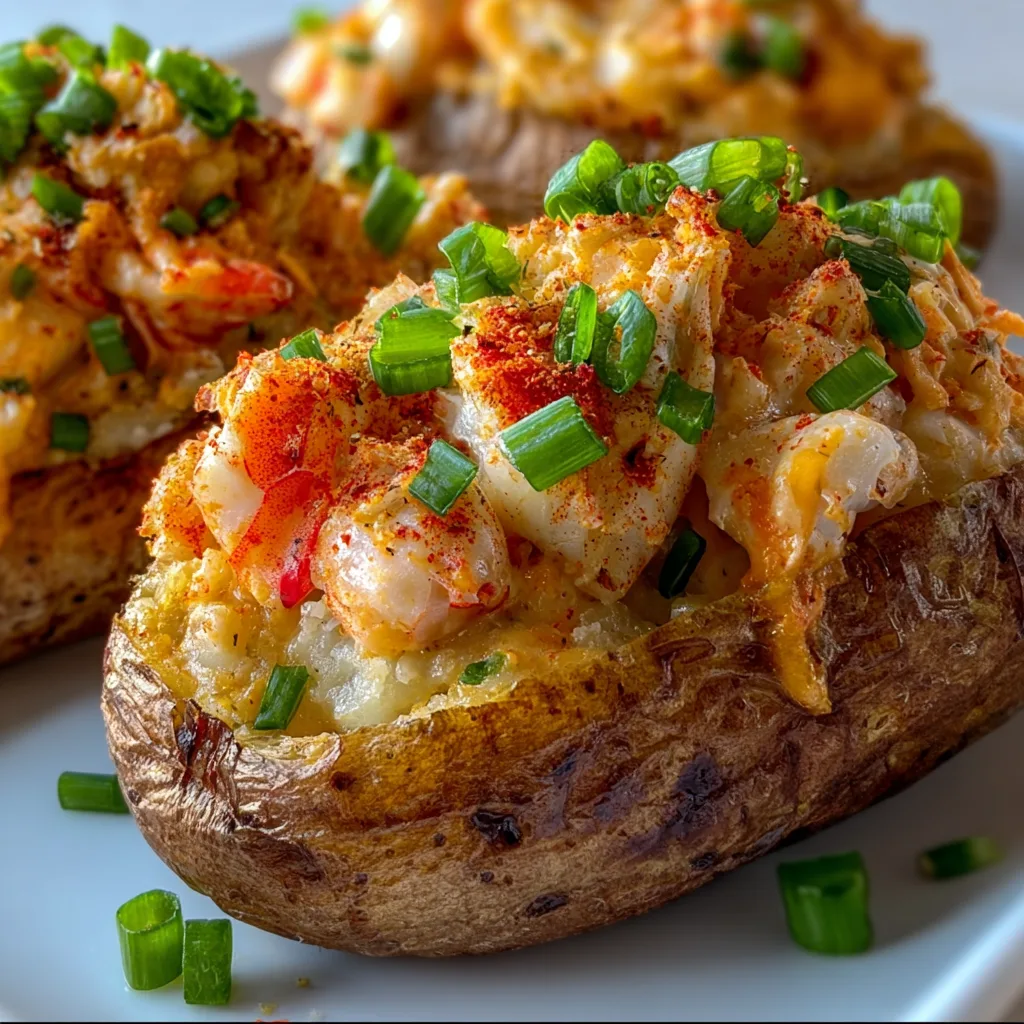
  • Loaded Cajun Seafood Stuffed Potatoes That Will Blow Your Mind!

    Loaded Cajun Seafood Stuffed Potatoes That Will Blow Your Mind!

    Loaded Cajun Seafood Stuffed Potatoes That Will Blow Your Mind!

    Loaded Cajun Seafood Stuffed Potatoes combine the hearty comfort of baked potatoes with the vibrant flavors of Louisiana seafood boil. The first time I made these for a family gathering, my kitchen filled with that unmistakable aroma of Cajun spices that instantly transports you to New Orleans. There’s something magical about cutting into a perfectly baked potato and discovering a treasure trove of succulent shrimp, sweet crab meat, and tender crawfish all swimming in a spicy, buttery sauce. If you love the bold flavors of creamy garlic shrimp over mashed potatoes, you’ll adore this elevated seafood-stuffed version.

    Recipe

    Why You’ll Love This Loaded Cajun Seafood Stuffed Potatoes

    Perfect Balance of Flavors and Textures

    The beauty of these stuffed potatoes lies in their perfect contrast of textures—crispy potato skins giving way to fluffy interiors topped with succulent seafood. Each bite delivers a symphony of flavors: the earthy potato, sweet crab, plump shrimp, and that signature Cajun kick. I’ve carefully balanced the spice level to provide warmth without overwhelming the delicate seafood. The melted butter sauce infused with garlic, paprika, and cayenne creates a luxurious coating that seeps into the potato, transforming an ordinary spud into something truly extraordinary that’ll have everyone at the table reaching for seconds.

    Impressive Yet Approachable

    Don’t let the fancy appearance fool you—these loaded potatoes are surprisingly simple to prepare! Even when I’m short on time but craving something special, this recipe delivers restaurant-quality results without the fuss. The components can be prepped ahead, making it perfect for entertaining or weeknight dinners when you want to elevate your meal. I love watching guests’ faces light up when these arrive at the table—they never believe how straightforward they were to make. The combination of everyday ingredients with special seafood creates a dish that feels indulgent yet completely doable for home cooks of any skill level.

    Essential Tips & Tricks

    Selecting and Preparing the Perfect Potatoes

    Start with russet potatoes for their fluffy texture and sturdy skins that crisp up beautifully. I like to rub them with olive oil and a sprinkle of coarse salt before baking—this simple step creates that irresistible crispy exterior. For truly exceptional results, bake potatoes directly on the oven rack rather than on a baking sheet. This allows heat to circulate evenly, resulting in perfectly cooked potatoes every time. The fork test is your best friend here—when a fork slides easily into the center, they’re done. Allow them to cool slightly before handling to prevent burning your fingers while scooping out the centers.

    Seafood Selection and Seasoning Secrets

    The seafood trinity of shrimp, crab, and crawfish creates the most authentic Cajun experience, but don’t stress if you can’t find all three. Even using just shrimp delivers delicious results! When selecting seafood, fresh is ideal, but high-quality frozen works wonderfully too—just thaw completely and pat dry before cooking. The key to flavor lies in my special Cajun butter sauce: melted butter infused with garlic, paprika, cayenne, thyme, and a splash of lemon juice. For an extra dimension of flavor, try adding a tablespoon of authentic Cajun crawfish etouffee sauce to your seafood mixture—it’s a game-changer!

    Serving Ideas & Creative Variations

    Perfect Pairings and Presentation

    These loaded potatoes make a stunning centerpiece for any meal. I love serving them with a crisp side salad dressed with lemon vinaigrette to balance the richness. For presentation, sprinkle with fresh chives, parsley, or green onions for a pop of color against the golden potatoes and pink seafood. A dollop of sour cream on top adds a cool contrast to the spicy filling. For a complete feast, pair with crusty bread for soaking up any extra sauce and a light vegetable side like crispy garlic air fryer broccoli for textural contrast that complements without competing with your showstopping potatoes.

    Creative Twists on the Classic

    While the traditional version is divine, don’t be afraid to put your own spin on these stuffed potatoes. For a lighter option, substitute sweet potatoes for russets—their natural sweetness pairs beautifully with the seafood. Experiment with different cheese toppings: pepper jack adds heat, while smoked gouda brings a wonderful depth. For a deconstructed approach, try making twice-baked potato skins and topping them with the seafood mixture for perfect party appetizers. You can even transform leftovers into an incredible breakfast by topping with a fried egg—the runny yolk creates a luscious sauce that takes this dish to new heights.

    Storage & Troubleshooting Guide

    Proper Storage and Reheating Methods

    These seafood potatoes are best enjoyed fresh, but leftovers can be stored properly for the next day. Place cooled potatoes in an airtight container and refrigerate for up to 2 days. When reheating, avoid the microwave which can make the potatoes gummy and the seafood rubbery. Instead, place them in a 325°F oven, covered with foil, for 15-20 minutes until heated through. The gentle heat preserves the texture of both potato and seafood. For meal prep, you can bake and hollow out the potatoes ahead of time, storing them separately from the prepared seafood mixture, then assemble and heat just before serving.

    Troubleshooting Common Issues

    If your potatoes aren’t crisping up properly, the culprit is often excess moisture. Be sure to thoroughly pat dry the potatoes before oiling and baking. For potatoes that crack too much during baking, try pricking them with a fork before cooking to allow steam to escape evenly. If your seafood filling turns out watery, the seafood likely wasn’t dried well enough after thawing. Always pat seafood completely dry and consider sautéing briefly to remove excess moisture before mixing with other ingredients. For spice balance, remember you can always add more heat with hot sauce at the table, but you can’t take it away—start conservatively with the cayenne if you’re unsure.

    Frequently Asked Questions

    Can I make Loaded Cajun Seafood Stuffed Potatoes ahead of time?

    Yes! Bake and hollow out potatoes up to 2 days ahead. Prepare seafood filling the day of serving. Store separately in the refrigerator, then assemble and bake for 15-20 minutes before serving.

    What’s the best potato variety to use?

    Russet potatoes are ideal due to their starchy, fluffy texture and sturdy skins that crisp beautifully. Their neutral flavor also perfectly complements the bold Cajun seafood filling.

    Can I substitute other seafood in this recipe?

    Absolutely! While shrimp, crab, and crawfish create authentic Cajun flavor, you can use any combination or single seafood. Lobster makes a luxurious substitution, and white fish works well too.

    How spicy is this dish?

    The recipe provides moderate heat that most people enjoy. Adjust cayenne pepper to taste—start with less if you’re sensitive to spice or add more for true Cajun fire.

    Can I freeze leftover stuffed potatoes?

    I don’t recommend freezing the assembled potatoes as the texture suffers significantly. However, you can freeze the seafood filling separately for up to one month in an airtight container.

    Final Thoughts

    These Loaded Cajun Seafood Stuffed Potatoes represent the perfect marriage of comfort food and culinary adventure. They’ve become my go-to when I want to impress without spending hours in the kitchen. The combination of crispy potato, fluffy interior, and that rich, spicy seafood filling creates a memorable dish that bridges everyday cooking with special occasion worthy results. I hope they bring the same joy to your table as they have to mine! For more delicious seafood inspirations, check out my Pinterest collection where I’m always adding new flavor combinations and cooking techniques.

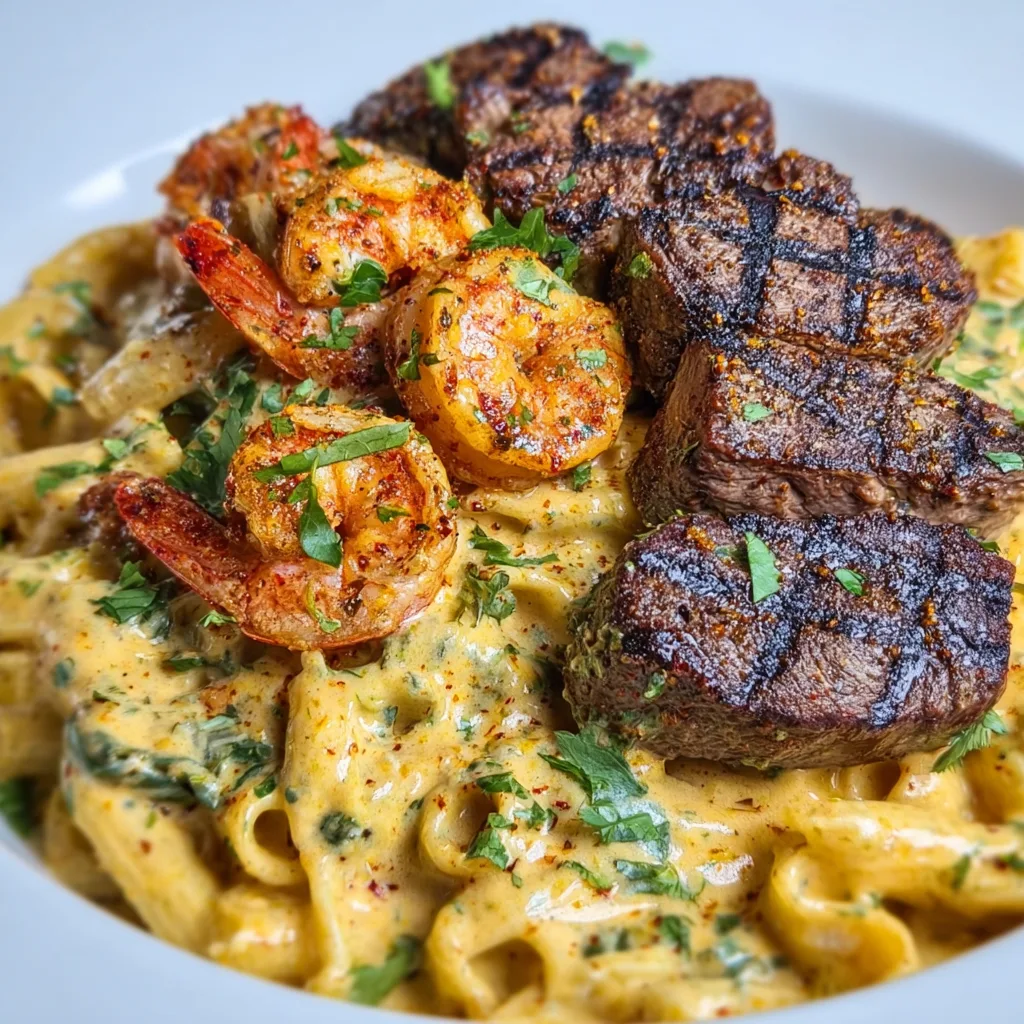
  • Blackened Steak Shrimp Alfredo: Irresistible Flavor Explosion!

    Blackened Steak Shrimp Alfredo: Irresistible Flavor Explosion!

    Blackened Steak Shrimp Alfredo: Irresistible Flavor Explosion!

    Blackened Steak Shrimp Alfredo brings together the bold, spicy crust of perfectly seasoned steak, tender jumbo shrimp, and a velvety homemade alfredo sauce that will make your taste buds dance. I discovered this recipe during a dinner party disaster when my planned menu fell apart, forcing me to improvise with what I had on hand. The resulting dish was so incredible that my guests still request it years later! This surf-and-turf pasta creation combines smoky blackened spices with creamy richness for a restaurant-quality meal you can easily make at home. Ready to impress your family or dinner guests with minimal effort? Let’s dive in!

    Recipe

    Why You’ll Love This Blackened Steak Shrimp Alfredo

    Perfect Balance of Flavors and Textures

    There’s something magical about the way the char-grilled steak contrasts with the delicate sweetness of shrimp. The blackening seasoning creates a spicy, aromatic crust that infuses every bite with flavor without overwhelming the dish. Meanwhile, the alfredo sauce provides a creamy counterbalance that ties everything together. I love how the tender steak and plump shrimp nestle between al dente fettuccine, creating textural heaven in every forkful. And don’t get me started on that moment when the sauce clings perfectly to each strand of pasta – it’s the little details that make this dish absolutely crave-worthy!

    Impressive Yet Surprisingly Simple

    Despite its fancy restaurant appearance, this dish is remarkably straightforward to prepare. The blackening technique creates incredible flavor with minimal effort – just a hot pan, good seasoning, and proper timing. I remember the first time I made this for my in-laws; my mother-in-law couldn’t believe I’d whipped it up in under 45 minutes! The alfredo sauce comes together while your pasta cooks, and the proteins cook quickly, making this doable even on busy weeknights. Plus, the dramatic presentation of sliced blackened steak and pink shrimp atop creamy pasta creates that “wow factor” that makes everyone think you spent hours in the kitchen.

    Essential Tips & Tricks

    Mastering the Blackening Technique

    For perfect blackened steak, start with room temperature meat and pat it completely dry before applying seasoning – moisture is the enemy of a good crust! Press the blackening spices firmly into both sides of the steak, then cook in a screaming hot cast iron skillet with just a touch of oil. You’re looking for that distinctive dark crust without burning the spices. For the shrimp, use a lighter touch with both seasoning and cooking time – they need just 1-2 minutes per side until opaque and slightly firm. I learned this the hard way after overcooking expensive jumbo shrimp during a dinner date with my husband.

    Trust your instincts and remember: you can always cook proteins longer, but you can’t un-cook them!

    Creating Silky Smooth Alfredo Sauce

    The secret to perfect alfredo is temperature control and patience. Start by melting butter over medium-low heat, then whisk in minced garlic until fragrant but not browned. Gradually add heavy cream, warming it slowly to prevent separation. The key moment comes when adding the cheese – remove the pan from heat first, then sprinkle in freshly grated Parmesan (pre-shredded won’t melt properly) in small batches, stirring constantly. If your sauce seems too thick, add a splash of starchy pasta water – it’s liquid gold for adjusting consistency. Season with just a pinch of nutmeg to enhance the creamy flavor without announcing its presence.

    Serving Ideas & Creative Variations

    Perfect Pairings and Presentation

    Serve your Blackened Steak Shrimp Alfredo with a bright, acidic side to balance the richness – a simple arugula salad with lemon vinaigrette or roasted Brussels sprouts with balsamic pecans work beautifully. For presentation, I like to slice the steak thinly against the grain and arrange it alongside the shrimp atop the sauced pasta, then garnish with fresh herbs and a crack of black pepper. A shallow, wide bowl shows off the components while keeping everything warm. Don’t forget crusty garlic bread for sopping up every last drop of that incredible sauce! For special occasions, serve with a glass of unoaked Chardonnay or light Pinot Noir.

    Exciting Flavor Twists

    While the classic version is divine, don’t be afraid to experiment! Try a Cajun-inspired variation by adding andouille sausage along with the steak and shrimp, plus a dash of hot sauce in the alfredo. For a lighter version, substitute half the cream with chicken broth and add sautéed spinach or sun-dried tomatoes. I recently made a Mediterranean twist with lemon zest, capers, and fresh basil stirred into the sauce – it brightened everything beautifully! Seafood lovers might enjoy swapping the steak for scallops or adding lump crab meat. The pasta itself is customizable too – penne holds sauce in its ridges, while linguine creates an elegant presentation.

    Storage & Troubleshooting Guide

    Proper Storage and Reheating

    Store leftover Blackened Steak Shrimp Alfredo in an airtight container in the refrigerator for up to 3 days. The trick to successful reheating is low, gentle heat and a splash of cream or milk to revive the sauce. I prefer using a skillet over medium-low heat rather than the microwave, stirring frequently until just warmed through. This prevents the sauce from breaking and the seafood from overcooking. For meal prep, consider keeping the components separate – store the cooked pasta, sauce, and proteins individually, then combine when reheating. Freezing isn’t ideal for cream-based pasta dishes, but if necessary, freeze only the blackened proteins for up to 1 month.

    Troubleshooting Common Issues

    If your alfredo sauce breaks or appears grainy, don’t panic! Lower the heat immediately and whisk in a tablespoon of cold cream or cream cheese to re-emulsify. For sauce that’s too thick, add warm pasta water a tablespoon at a time until you reach desired consistency. If your blackening spices are burning rather than forming a crust, your pan is likely too hot – wipe it clean, lower the heat slightly, and try again. Rubbery shrimp usually means they’re overcooked; next time, remove them from heat when they’re just barely opaque. If your steak is tough, remember to slice thinly against the grain and consider using a more tender cut like ribeye or New York strip.

    Frequently Asked Questions

    What’s the best cut of steak for Blackened Steak Shrimp Alfredo?

    Ribeye and New York strip offer the perfect balance of tenderness and flavor. Filet mignon works beautifully but is pricier. Sirloin can work if sliced thinly. Look for steaks about 1-inch thick with good marbling.

    Can I make this dish ahead of time?

    Prepare components separately up to 24 hours ahead. Cook the pasta al dente, make the sauce, and season the proteins. Store refrigerated, then reheat the sauce gently, cook proteins fresh, and combine just before serving.

    Is there a lighter version of the alfredo sauce?

    Yes! Replace half the cream with chicken broth and reduce the butter by half. Use part-skim mozzarella with the Parmesan. The sauce won’t be as rich but still delicious.

    What blackening spices should I use?

    Make your own with paprika, garlic powder, onion powder, thyme, oregano, cayenne, salt and pepper. Adjust heat level by varying the cayenne. Commercial Cajun or blackening seasonings also work well.

    How do I prevent my shrimp from overcooking in Blackened Steak Shrimp Alfredo?

    Cook shrimp separately from steak, using medium-high heat for just 1-2 minutes per side until pink and opaque. Remove immediately from heat and add to the pasta last minute.

    Final Thoughts

    Blackened Steak Shrimp Alfredo represents the perfect marriage of land and sea, spice and cream, sophistication and comfort. It’s become my go-to dish when I want to create something special without spending hours in the kitchen. The contrast between the bold, spicy crust of the steak, the sweet tenderness of the shrimp, and the silky richness of homemade alfredo sauce creates a truly memorable meal. Don’t forget to check out more delicious pasta inspirations on our Pinterest board! I hope this recipe brings as much joy to your table as it has to mine.

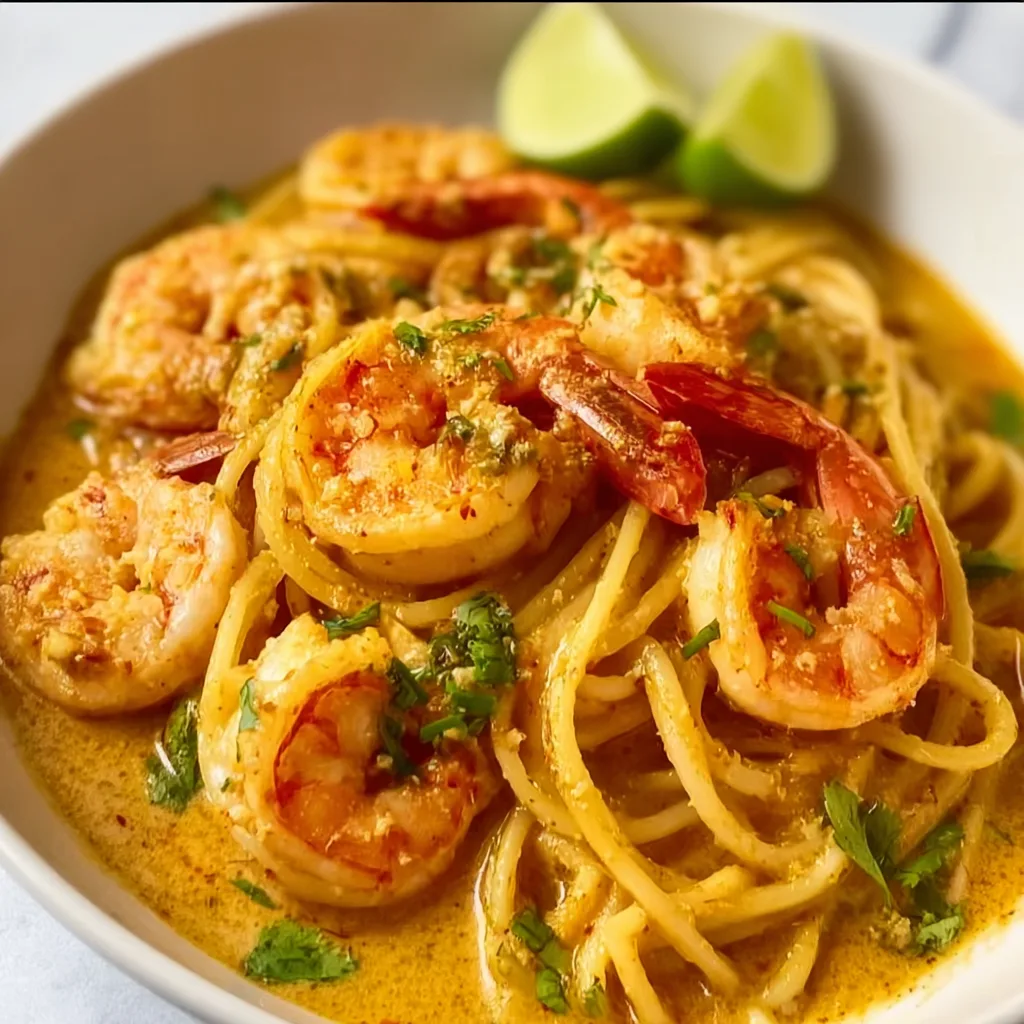
  • Creamy Coconut Curry Prawn Spaghetti Recipe That’ll Wow You!

    Creamy Coconut Curry Prawn Spaghetti Recipe That’ll Wow You!

    Creamy Coconut Curry Prawn Spaghetti Recipe That’ll Wow You!

    Creamy Coconut Curry Prawn Spaghetti Recipe has become my absolute go-to for those evenings when I crave something luxurious yet surprisingly simple. The first time I made this dish, the aroma of simmering coconut milk and curry spices filled my kitchen, instantly transporting me to a beachside restaurant in Thailand. There’s something magical about how the silky coconut sauce clings to each strand of pasta while plump prawns provide bursts of sweetness. This 30-minute wonder strikes the perfect balance between creamy comfort and exotic flair that’ll have everyone at your table reaching for seconds. Ready to transform your weeknight dinner routine? Let’s dive in!

    Recipe

    Why You’ll Love This Creamy Coconut Curry Prawn Spaghetti Recipe

    Perfect Balance of Flavors

    This Creamy Coconut Curry Prawn Spaghetti Recipe delivers that rare harmony where every element sings. The rich coconut milk creates a velvety base that’s both indulgent and light, while curry paste adds depth without overwhelming heat. I love how the natural sweetness of the prawns plays against the aromatic spices, creating layers of flavor that unfold with each bite. What makes this dish truly special is how it manages to feel both familiar and exotic simultaneously—comforting like your favorite pasta but with an adventurous twist that breaks the weeknight dinner monotony.

    Quick Yet Impressive Results

    Don’t you adore recipes that seem fancy but come together in minutes? This Creamy Coconut Curry Prawn Spaghetti Recipe is exactly that kind of culinary magic trick. The sauce develops incredible depth of flavor in just 15 minutes, making it perfect for busy weeknights when you’re craving something special. I’ve served this to last-minute dinner guests who were convinced I’d been cooking all day! The vibrant colors alone—pink prawns, green herbs, and golden curry sauce—create an Instagram-worthy presentation that belies the minimal effort required. It’s my secret weapon for turning an ordinary Tuesday into something memorable.

    Essential Tips & Tricks

    Perfecting the Prawns

    The star of this Creamy Coconut Curry Prawn Spaghetti Recipe deserves special attention. For the juiciest results, avoid overcooking your prawns—they need just 2-3 minutes until they turn pink and opaque. I like to sear them separately first, then remove them while finishing the sauce. This prevents that disappointing rubbery texture that comes from excessive heat. Another game-changing tip: pat the prawns dry before cooking to get that beautiful caramelization. The difference in flavor is remarkable! For an extra flavor boost, try marinating them in a splash of lime juice and pinch of salt for 10 minutes before cooking.

    Creating the Ultimate Coconut Sauce

    The soul of this dish lies in its luscious sauce. For the most flavorful Creamy Coconut Curry Prawn Spaghetti Recipe, always use full-fat coconut milk—the light versions simply won’t deliver that silky richness we’re after. My secret ingredient? A tablespoon of fish sauce for umami depth that makes people wonder what your secret is. Start by sautéing aromatics (garlic, ginger, and shallots) until fragrant before adding your curry paste—this blooms the spices and transforms the flavor profile. For the perfect consistency, simmer uncovered for the final few minutes, allowing the sauce to thicken and coat the spaghetti beautifully.

    Serving Ideas & Creative Variations

    Complementary Side Dishes

    The versatility of this Creamy Coconut Curry Prawn Spaghetti Recipe means it pairs wonderfully with so many sides. My personal favorite is a simple cucumber salad with rice vinegar and a touch of sugar—the cool crispness cuts through the rich sauce perfectly. For a more substantial meal, garlic naan bread makes an excellent sauce-sopping companion. When entertaining, I often serve this alongside a platter of roasted vegetables tossed with lime zest for brightness. The colorful presentation always impresses guests! For a refreshing counterpoint, consider a simple side of mango slices with a squeeze of lime and pinch of chili flakes.

    Exciting Recipe Adaptations

    While the classic version is divine, this recipe welcomes creative tweaks! For a heartier Creamy Coconut Curry Prawn Spaghetti Recipe, try adding roasted butternut squash cubes or crispy tofu for textural contrast. Vegetarians can skip the prawns entirely and load up on colorful bell peppers, snow peas, and mushrooms. I’ve even made a fusion version with a tablespoon of peanut butter and a splash of soy sauce for Thai-inspired notes. If you’re serving spice-lovers, stir in some fresh Thai chilies for heat that builds with each bite. The foundation remains deliciously adaptable for whatever ingredients you have on hand.

    Storage & Troubleshooting Guide

    Proper Storage Solutions

    This Creamy Coconut Curry Prawn Spaghetti Recipe stores surprisingly well despite its seafood component. For leftovers, cool completely before refrigerating in an airtight container for up to 2 days. The flavors actually develop beautifully overnight! When reheating, add a splash of coconut milk or water to loosen the sauce, as it tends to thicken when chilled. For meal prep, I recommend preparing the sauce separately and storing it without the prawns, then cooking fresh prawns and pasta just before serving. This maintains the perfect texture while still giving you a head start on dinner.

    Fixing Common Issues

    Even experienced cooks encounter challenges! If your sauce for the Creamy Coconut Curry Prawn Spaghetti Recipe separates or appears curdled, don’t panic. Lower the heat immediately and whisk vigorously until smooth again. For sauce that’s too thin, simmer uncovered for a few extra minutes; if too thick, add coconut milk tablespoon by tablespoon until you reach desired consistency. Bland sauce? Brighten with lime juice, fish sauce, or an extra teaspoon of curry paste. Remember that pasta continues absorbing liquid after cooking, so if making ahead, keep your sauce slightly thinner than you’d ultimately want it.

    Frequently Asked Questions

    Can I use frozen prawns for this Creamy Coconut Curry Prawn Spaghetti Recipe?

    Absolutely! Thaw them completely and pat dry before cooking. I actually keep frozen prawns on hand specifically for this recipe, making it perfect for impromptu dinner plans.

    What’s the best curry paste to use?

    Red or yellow curry paste works beautifully. Red offers more heat, while yellow provides a milder, aromatic profile. Start with 1-2 tablespoons and adjust to your taste preference.

    Can I substitute the spaghetti with other pasta?

    Certainly! Linguine works wonderfully, and rice noodles create a more authentic Southeast Asian feel. Even zucchini noodles work for a lower-carb option.

    Is there a dairy-free alternative to cream?

    The beauty of this recipe is it’s naturally dairy-free! The coconut milk provides all the creaminess you need without any heavy cream or butter.

    How can I make this recipe spicier?

    Add fresh sliced chilies, a teaspoon of chili flakes, or an extra tablespoon of curry paste. A dash of cayenne pepper works wonders for heat without altering the flavor profile.

    Final Thoughts

    This Creamy Coconut Curry Prawn Spaghetti Recipe has become my reliable escape from ordinary weeknight cooking—a little culinary vacation in a bowl. What I adore most is how it transforms simple ingredients into something that feels special enough for celebrations yet easy enough for Monday nights. The way the aromatic sauce clings to each strand of pasta, punctuated by tender prawns, creates a sensory experience that satisfies on every level. I hope this becomes a beloved addition to your recipe collection, one that brings both comfort and excitement to your table. For more inspiration, check out our Pinterest collection of seafood favorites!