Blog

  • Crispy Feta Fried Eggs That’ll Blow Your Taste Buds Away!

    Crispy Feta Fried Eggs That’ll Blow Your Taste Buds Away!

    Crispy Feta Fried Eggs That’ll Blow Your Taste Buds Away!

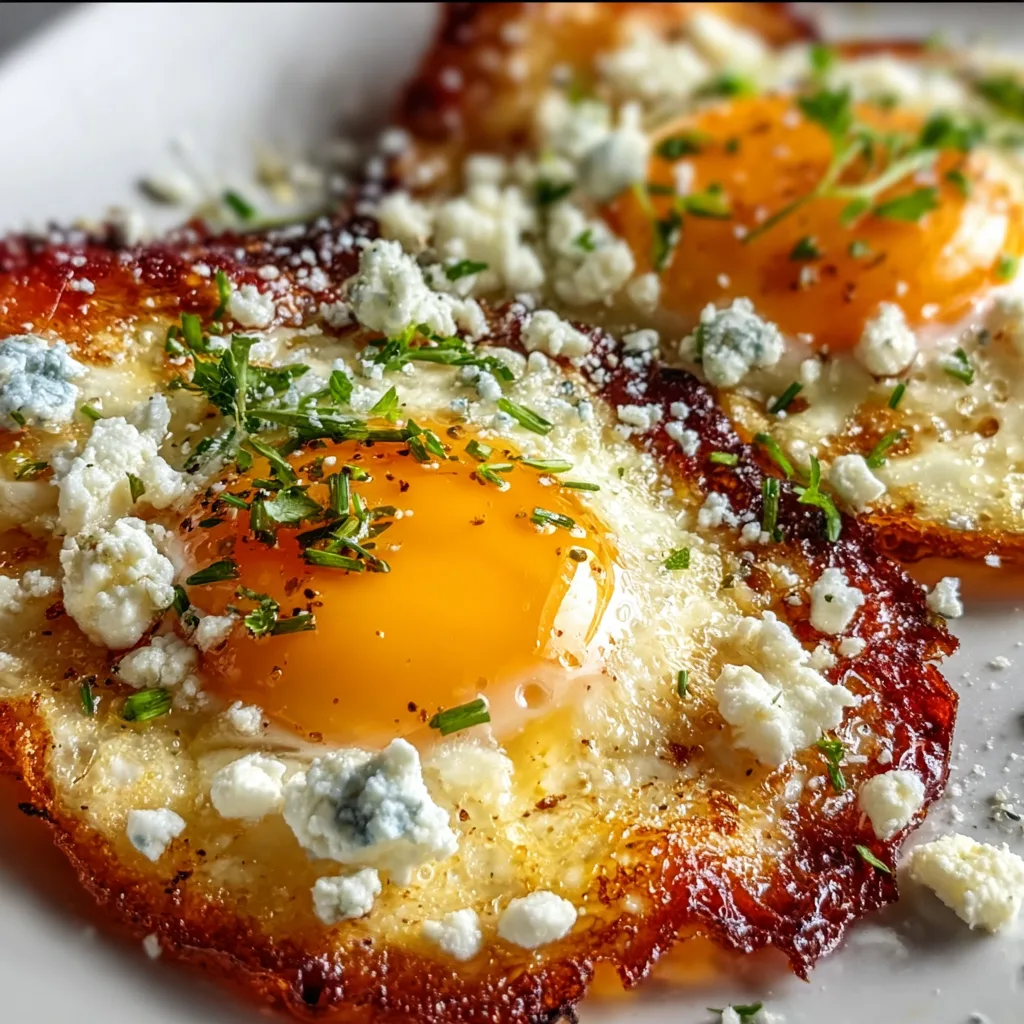
    Crispy Feta Fried Eggs are the breakfast game-changer you didn’t know you needed. Picture this: a perfectly fried egg with crispy, lacy edges nestled on a bed of salty, melty feta cheese that forms a golden crust underneath. I discovered this technique during a rainy Sunday morning when I was craving something beyond my usual breakfast egg muffins. The combination was so magical that I’ve been making these eggs at least twice a week since. It’s simple enough for busy mornings yet special enough to make any breakfast feel like a celebration.

    Recipe

    Why You’ll Love This Crispy Feta Fried Eggs

    A Perfect Balance of Textures and Flavors

    The contrasting textures in these eggs are what make them truly exceptional. The feta creates a crispy, savory foundation that adds depth to the traditionally simple fried egg. As the cheese melts and caramelizes in the hot pan, it develops these irresistible browned bits that are both chewy and crunchy. Meanwhile, the egg white sets to perfection while the yolk remains gloriously runny—ready to create that Instagram-worthy moment when you slice into it. The slight tang of the feta balances beautifully with the richness of the egg, creating a flavor profile that’s both complex and comforting.

    Quick and Impressive Breakfast Option

    These eggs take just 5 minutes to prepare but look and taste like something from a trendy brunch spot. I’ve served them to overnight guests who were genuinely impressed, thinking I’d gone to special effort. Little did they know how simple they were! The beauty lies in their versatility—dress them up with herbs and spices for weekend brunches or keep them basic for weekday fuel. They’re protein-rich and satisfying, keeping hunger at bay until lunchtime. Plus, they’re naturally low-carb if that’s your thing, making them a nutritious powerhouse that doesn’t sacrifice flavor.

    Essential Tips & Tricks

    Mastering the Perfect Feta Base

    The secret to truly exceptional crispy feta fried eggs lies in how you prepare the cheese base. Start with a non-stick pan heated to medium—not too hot or the feta will burn before the egg cooks. I prefer crumbled feta over block feta because it melts more evenly and creates those beautiful crispy edges. Sprinkle it in a thin, even layer slightly larger than your egg, and let it begin to sizzle for about 30 seconds before adding the egg. This pre-melt is crucial! If you’re feeling adventurous, try mixing your feta with a pinch of dried oregano or red pepper flakes for an extra flavor dimension.

    The Egg Technique That Makes All the Difference

    Cracking the egg directly onto the melting feta requires a gentle touch. I like to crack it into a small bowl first, then carefully slide it onto the feta—this prevents broken yolks and gives more control. Cover the pan with a lid to create steam that helps cook the top of the egg while keeping the yolk runny. The perfect timing is about 2-3 minutes covered, depending on how you like your yolks. For extra crispy edges, drizzle a few drops of water around (not on) the egg before covering, creating additional steam that helps set the whites while the feta continues to crisp up underneath like in these hot honey chicken cutlets.

    Serving Ideas & Creative Variations

    Elevate Your Breakfast Plate

    These crispy feta fried eggs deserve more than just toast (though they’re amazing on toast too!). Try serving them atop a bed of garlicky sautéed greens like spinach or kale for a nutrient boost. They’re also fantastic with roasted cherry tomatoes that burst with sweetness against the salty feta. For a heartier option, place them on smashed avocado toast with a sprinkle of everything bagel seasoning. When I’m feeling particularly indulgent, I serve them alongside crispy hash browns or roasted potatoes with fresh herbs. A simple arugula salad with lemon vinaigrette makes the perfect light accompaniment, balancing the richness of the eggs.

    Global Flavor Inspirations

    Take your crispy feta fried eggs on a world tour by incorporating different flavor profiles! For a Mediterranean twist, add a sprinkle of za’atar and serve with a side of cucumber-tomato salad. Go Mexican-inspired by adding a spoonful of pico de gallo and sliced avocado after cooking. For an Italian variation, sprinkle some fresh basil and a few pine nuts over the top, similar to my approach with spinach artichoke pizza. A Middle Eastern version with a dollop of labneh and a drizzle of pomegranate molasses is unexpectedly delicious. You can even try an Asian-inspired version with a light drizzle of soy sauce and sesame oil with sliced green onions.

    Storage & Troubleshooting Guide

    Making Ahead and Reheating Options

    While crispy feta fried eggs are best enjoyed fresh from the pan, sometimes life requires make-ahead solutions. If you need to prepare them in advance, cook them until the whites are just set but the yolk is still quite runny. Let cool slightly, then store in an airtight container in the refrigerator for up to 24 hours. To reheat, use a microwave at 50% power in 15-second intervals until just warmed through—this helps prevent the yolk from overcooking. Alternatively, place in a covered skillet over low heat for 1-2 minutes. The feta won’t be quite as crispy, but the flavor will still be delicious.

    Solving Common Cooking Challenges

    If your feta isn’t crisping properly, your pan might not be hot enough or you might be using a feta with too high moisture content. Try patting the cheese dry with paper towels before adding to the pan. For eggs that spread too much, create a tighter feta circle and make a slight depression in the center before adding the egg. If the whites aren’t setting while the feta is getting too dark, lower the heat and cover the pan completely. For broken yolks, practice the bowl-transfer method mentioned earlier. And if everything is sticking, even in a non-stick pan, add a light drizzle of olive oil to the pan before the feta.

    Frequently Asked Questions

    Can I use other types of cheese for crispy fried eggs?

    Yes! Halloumi, cotija, or even parmesan work beautifully. Each cheese creates a different flavor profile and texture, but the technique remains the same. Experiment to find your favorite!

    Are Crispy Feta Fried Eggs keto-friendly?

    Absolutely! With virtually zero carbs and a good balance of protein and fat, these eggs are perfect for keto or low-carb diets while being incredibly satisfying.

    How can I make this dish dairy-free?

    Try using a plant-based feta alternative. Several brands now make coconut or almond-based “feta” that crisps up nicely, though the melt will be slightly different.

    Can I add meat to this recipe?

    Definitely! Crisp some prosciutto or bacon in the pan first, remove it, then make your feta egg in the same pan. Crumble the meat on top before serving.

    What’s the best bread to serve with these eggs?

    Sourdough toast provides the perfect sturdy base and complementary tang. For a softer option, brioche adds wonderful richness that pairs beautifully with the salty feta.

    Final Thoughts

    Crispy Feta Fried Eggs have become my signature breakfast—the dish friends request when they visit and the one that makes ordinary mornings feel special. There’s something deeply satisfying about the contrast between the crispy, salty feta and the rich, runny yolk that elevates the humble fried egg to something truly crave-worthy. I hope you’ll give this simple technique a try and discover your own perfect variation. For more breakfast inspiration, be sure to check out my other recipes at Pinterest where I’m always sharing new ideas!
  • Ricotta Cranberry Orange Muffins: Irresistibly Zesty & Fluffy!

    Ricotta Cranberry Orange Muffins: Irresistibly Zesty & Fluffy!

    Ricotta Cranberry Orange Muffins: Irresistibly Zesty & Fluffy!

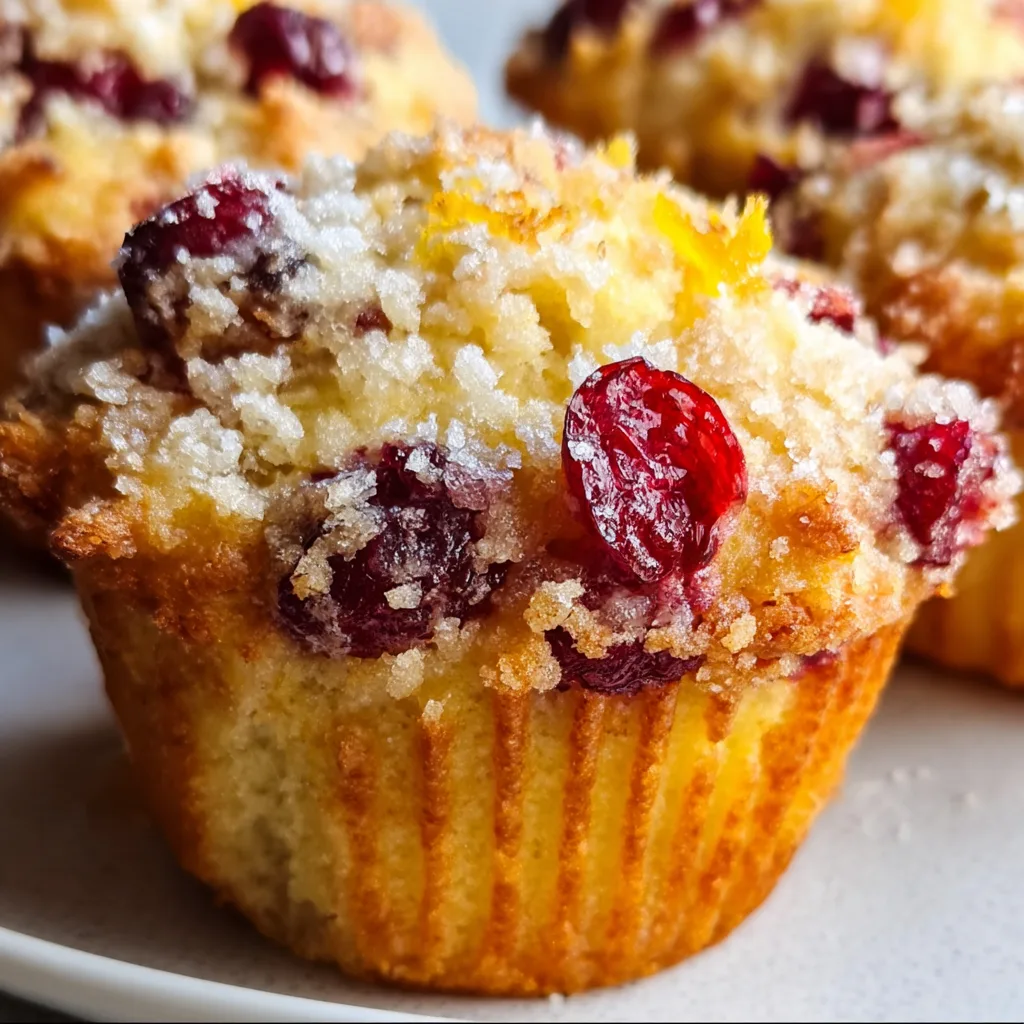
    Ricotta Cranberry Orange Muffins are the perfect balance of creamy, tart, and zesty flavors all wrapped up in a soft, tender package. Every time I bake these, my kitchen fills with the most intoxicating aroma of fresh citrus and warm spices. The first time I made these for my sister’s brunch, everyone kept asking for the recipe before they’d even finished their first bite! The creamy ricotta creates an incredibly moist texture while the cranberries add bursts of tartness that perfectly complement the bright orange notes. If you love breakfast treats that aren’t too sweet, these muffins will quickly become your new favorite.

    Recipe

    Why You’ll Love These Ricotta Cranberry Orange Muffins

    Perfect Texture & Flavor Combination

    The secret to these muffins is the ricotta cheese. Unlike other muffins that can dry out quickly, the ricotta keeps these incredibly moist for days. I still remember the first time I folded that creamy cheese into the batter—I was skeptical but amazed at how it transformed the texture. The tangy cranberries create little pockets of brightness that wake up your taste buds, while the orange zest infuses every bite with a subtle citrus perfume. What I love most is how the flavors deepen overnight, making these even better the next morning with your coffee!

    Quick & Easy Morning Solution

    These muffins take just 15 minutes to prep, which means you can have fresh-baked goodness even on busy mornings. I’ve made these countless times when unexpected guests arrive or when I need a quick breakfast I can grab on my way out the door. The simple ingredients are likely already in your pantry, except perhaps the ricotta, which I always keep on hand for impromptu baking sessions. The batter comes together in one bowl, and the muffins bake in just 22 minutes—just enough time to brew coffee and set the table for a lovely breakfast moment.

    Essential Tips & Tricks

    Mastering the Ricotta Mixture

    Don’t overmix your batter! This is the golden rule for perfect muffins. I gently fold the ricotta in with just 12-15 strokes—yes, I actually count them! You want to see little pockets of ricotta throughout the batter rather than a completely homogenous mixture. Room temperature ingredients make all the difference here. I’ve learned the hard way that cold ricotta doesn’t incorporate as beautifully and can lead to dense spots in your muffins. For the brightest flavor, don’t skip zesting your orange directly into the wet ingredients so the oils can infuse everything.

    Cranberry Preparation Secrets

    Fresh cranberries work beautifully, but frozen ones are my year-round secret weapon. There’s no need to thaw them—just toss them in a tablespoon of flour before folding into the batter to prevent sinking. For an extra flavor dimension, I sometimes macerate half the cranberries in a tablespoon of honey for 10 minutes before adding them. This creates pockets of sweet-tart contrast throughout the muffins. If you’re using dried cranberries instead, soak them in hot orange juice for 15 minutes to plump them up, similar to how I prepare them for my cherry cranberry energy bites.

    Serving Ideas & Creative Variations

    Perfect Pairings for Brunch

    These muffins are stunning on a brunch table alongside fresh fruit and yogurt. I love serving them slightly warm with a smear of salted butter or orange-infused honey butter that melts into all the nooks and crannies. For a truly special occasion, create a muffin board with different spreads—whipped maple butter, orange marmalade, and honey ricotta—letting guests customize their experience. These also pair beautifully with a mimosa or a spiced chai latte. For a heartier brunch, they complement savory dishes like my breakfast egg muffins perfectly.

    Seasonal & Dietary Adaptations

    The base recipe is incredibly versatile. In summer, I swap cranberries for blueberries or raspberries. Fall calls for diced apples with extra cinnamon. For a holiday version, I add a teaspoon of orange blossom water and a sprinkle of pistachios on top. Making these gluten-free is simple—just substitute your favorite cup-for-cup flour blend and add an extra egg for structure. For dairy-free guests, plant-based ricotta works surprisingly well, though I find it needs an extra tablespoon of oil to maintain the moisture. The orange-cranberry flavor profile shines in any variation!

    Storage & Troubleshooting Guide

    Keeping Muffins Fresh

    These ricotta muffins stay moist longer than traditional recipes, but proper storage is still key. Once completely cooled, store them in an airtight container lined with paper towels to absorb any excess moisture. At room temperature, they’ll stay perfect for 2-3 days. For longer storage, refrigerate for up to a week—just bring to room temperature before enjoying, or warm for 10 seconds in the microwave. I often make a double batch specifically for freezing. Individually wrap cooled muffins in plastic, then place in a freezer bag for up to 3 months. Thaw overnight in the refrigerator for best texture.

    Fixing Common Muffin Problems

    If your muffins didn’t rise properly, your baking powder might be old—I test mine by dropping a pinch in hot water to see if it bubbles vigorously. Dry muffins usually mean they’re overbaked or the batter was overmixed. Remember that ricotta muffins need less mixing than standard recipes! If your cranberries sank to the bottom, toss them in flour next time before adding to the batter. For pale tops, try brushing with a mixture of orange juice and sugar before baking, or sprinkle with turbinado sugar for a beautiful sparkle and crunch.

    Frequently Asked Questions

    Can I use cottage cheese instead of ricotta in these cranberry orange muffins?

    Yes! Drain it well and pulse a few times in a food processor for a smoother texture. The muffins will be slightly less rich but still deliciously moist.

    How do I know when the Ricotta Cranberry Orange Muffins are done baking?

    They’re ready when the tops are golden and a toothpick inserted in the center comes out with a few moist crumbs but no wet batter—usually 20-22 minutes.

    Can I make these muffins ahead of time for a brunch party?

    Absolutely! Bake them a day ahead—the flavors actually improve overnight. Refresh them in a 300°F oven for 5 minutes before serving.

    What’s the best way to zest an orange for this recipe?

    Use a microplane and only zest the orange part, avoiding the bitter white pith. Zest directly over your mixing bowl to capture the aromatic oils.

    Can I make mini muffins instead of regular size?

    Yes! Fill mini muffin tins 2/3 full and reduce baking time to 12-14 minutes. This recipe yields about 24 mini Ricotta Cranberry Orange Muffins.

    Final Thoughts

    These Ricotta Cranberry Orange Muffins have become my signature breakfast treat—the one friends request when they visit and family expects during holiday gatherings. The creamy ricotta creates a texture that’s unlike any other muffin, while the cranberry-orange pairing offers that perfect sweet-tart balance that keeps you coming back for just one more bite. I hope these become a beloved recipe in your home too! Don’t forget to check out more of my favorite breakfast treats on Pinterest where I’m always sharing new variations and baking tips.

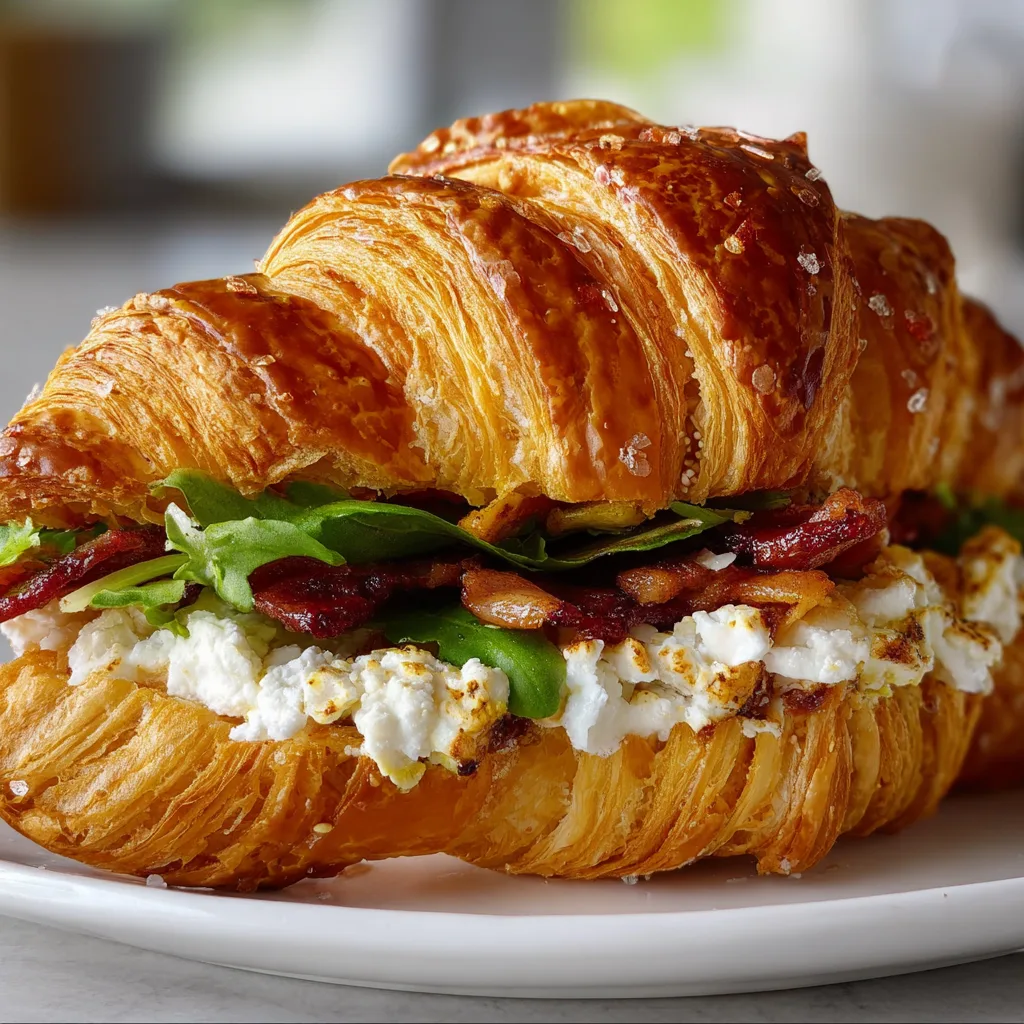
  • Apple & Goat Cheese Croissant Sandwich: Irresistibly Fresh & Flavorful Bite!

    Apple & Goat Cheese Croissant Sandwich: Irresistibly Fresh & Flavorful Bite!

    Apple & Goat Cheese Croissant Sandwich: Irresistibly Fresh & Flavorful Bite!

    This Apple & Goat Cheese Croissant Sandwich is my absolute guilty pleasure on lazy weekend mornings. There’s something magical about the way tangy goat cheese melts against sweet-tart apple slices, all nestled between flaky, buttery croissant layers. I discovered this combination last autumn when I had leftover croissants from a brunch gathering and needed something quick but special. The first bite was a revelation—creamy, crisp, sweet, and savory dancing together in perfect harmony. This isn’t just breakfast; it’s a little moment of bliss that feels both indulgent and refreshing at once.

    Recipe

    Why You’ll Love This Apple & Goat Cheese Croissant Sandwich

    A Perfect Balance of Flavors and Textures

    The beauty of this sandwich lies in its contrasting elements that somehow create harmony on your palate. The buttery, flaky croissant provides a delicate vessel for the creamy, tangy goat cheese that melts ever so slightly when pressed against the warm pastry. Crisp apple slices add a refreshing sweetness and necessary crunch, while a drizzle of honey brings everything together with its subtle floral notes. I love adding a few sprigs of fresh thyme to introduce an earthy dimension that elevates this from simple sandwich to sophisticated breakfast experience. Each bite delivers that perfect sweet-savory balance that keeps you coming back for more.

    Quick Assembly for Busy Mornings

    On those mornings when I’m rushing but still want something special, this sandwich is my go-to solution. It requires minimal prep work—just slice, spread, and assemble—making it perfect for busy weekdays or lazy weekends alike. The entire process takes less than 5 minutes, yet the result feels like something you’d order at an upscale café. I’ve made this while simultaneously brewing coffee and packing lunches, and still managed to sit down for a few minutes to savor each bite. The simplicity belies the sophisticated flavor profile, proving that sometimes the most straightforward combinations create the most memorable meals.

    Essential Tips & Tricks

    Selecting the Perfect Ingredients

    The quality of each component makes a significant difference in this seemingly simple sandwich. For croissants, look for ones that are butter-rich and flaky—day-old ones actually work beautifully as they hold up better to the fillings. For apples, I prefer Honeycrisp or Pink Lady varieties for their perfect balance of sweetness and tartness, plus their satisfying crunch. Slice them paper-thin using a mandoline if you have one. When it comes to goat cheese, splurge on a good-quality one with a creamy texture. Room temperature cheese spreads more easily and melds better with the other flavors. Fresh thyme makes a noticeable difference, but dried works in a pinch.

    Elevating Your Assembly Technique

    The way you build this sandwich affects both flavor distribution and structural integrity. Start by lightly toasting your croissant halves for 1-2 minutes—this creates a slight barrier that prevents sogginess from the apple’s moisture. Spread goat cheese generously on both halves, which acts as a delicious “glue” to hold apple slices in place. Layer apple slices in a slightly overlapping pattern for consistent flavor in each bite. A light drizzle of honey should come last, and if you’re feeling adventurous, try adding a sprinkle of crushed walnuts for extra texture and nutty depth. Pressing gently before the first bite helps meld the flavors together.

    Serving Ideas & Creative Variations

    Perfect Pairings for Any Occasion

    This versatile sandwich adapts beautifully to different settings and meal occasions. For breakfast, pair it with a bold coffee or chai tea that complements the sweet-savory profile. When serving as part of a brunch spread, slice it into smaller portions and arrange alongside fresh berries and yogurt for a balanced offering. For lunch, add a simple arugula salad with lemon vinaigrette to create a light but satisfying meal. I’ve even served these as elegant appetizers at dinner parties by cutting them into bite-sized pieces and securing with decorative toothpicks. The sandwich also pairs wonderfully with sparkling wine for special occasions or weekend brunches.

    Seasonal Twists on the Classic Combination

    The beauty of this sandwich lies in its adaptability throughout the year. In summer, try adding thinly sliced strawberries or peaches alongside the apples for a juicier, more vibrant profile. Fall calls for a sprinkle of cinnamon and nutmeg on the apples, which brings out their natural sweetness and adds warming spice notes. Winter variations benefit from a spread of fig jam beneath the goat cheese and perhaps some pear slices instead of (or alongside) the apple. Spring inspires me to add fresh herbs like mint or basil for brightness. You can also experiment with different cheese options—a mild blue cheese or creamy brie can create entirely new flavor experiences while maintaining the spirit of the original.

    Storage & Troubleshooting Guide

    Making Ahead and Proper Storage

    While this sandwich is best enjoyed fresh, there are ways to prep components ahead of time for quick assembly. Slice apples up to a day ahead and store them submerged in cold water with a squeeze of lemon juice to prevent browning. Drain and pat dry before using. The goat cheese can be mixed with herbs and honey in advance and refrigerated in an airtight container. For partially assembled sandwiches, wrap tightly in parchment paper then plastic wrap, but add the apple slices just before eating. If you must store a fully assembled sandwich, wrap it securely and refrigerate for no more than 2-3 hours to prevent the croissant from becoming soggy.

    Solving Common Sandwich Challenges

    Even simple recipes can present unexpected issues. If your croissant is too crispy and shatters when you bite it, try warming it slightly or using fresher pastry. For croissants that are too soft, a quick 2-minute toast in the oven will add necessary structural integrity. If your goat cheese is too crumbly to spread easily, mix it with a teaspoon of honey or cream to create a more spreadable consistency. Apple slices making everything too wet? Pat them dry with paper towels before assembling and place them between the cheese layers rather than directly against the croissant. For travel, wrap the sandwich in parchment paper then aluminum foil, which helps maintain temperature and structure.

    Frequently Asked Questions

    Can I make this Apple & Goat Cheese Croissant Sandwich vegan?

    Yes! Substitute the goat cheese with dairy-free cream cheese or cashew cheese spread. Add nutritional yeast for tanginess and use plant-based croissants (check ingredients as many contain butter). Agave nectar works beautifully in place of honey.

    Which apples work best for this sandwich?

    Honeycrisp, Pink Lady, and Fuji apples offer the perfect balance of sweetness, tartness, and crunch. Avoid softer varieties like McIntosh or Red Delicious, which can become mushy and release too much moisture.

    Can I serve this sandwich warm?

    Absolutely! Assemble the Apple & Goat Cheese Croissant Sandwich then warm it in a 350°F oven for 3-5 minutes. This slightly melts the cheese and warms the apples for a cozy variation, especially nice in colder months.

    How can I make this more substantial for lunch?

    Add protein by including thinly sliced prosciutto, smoked turkey, or rotisserie chicken. For vegetarian options, include avocado slices or a thin layer of hummus for added satiety.

    Can I prepare these for a party?

    Yes! Use mini croissants for bite-sized versions, or cut regular-sized sandwiches into quarters. Prepare up to 2 hours ahead, but add a squeeze of lemon to the apple slices to prevent browning.

    Final Thoughts

    This Apple & Goat Cheese Croissant Sandwich has become my signature offering when friends come over for impromptu gatherings. There’s something deeply satisfying about watching someone take their first bite and seeing their eyes light up with surprise and delight. The beauty lies in its perfect simplicity—just a few quality ingredients coming together to create something greater than the sum of their parts. I hope this sandwich brings a moment of unexpected joy to your day, whether it’s a quiet breakfast at home or the star of your next brunch gathering. Don’t forget to check out more breakfast inspiration on Pinterest for creative variations on this versatile favorite.

  • Peanut Butter Choc Chip S’mores with Brioche: Irresistibly Gooey!

    Peanut Butter Choc Chip S’mores with Brioche: Irresistibly Gooey!

    Peanut Butter Choc Chip S’mores with Brioche: Irresistibly Gooey!

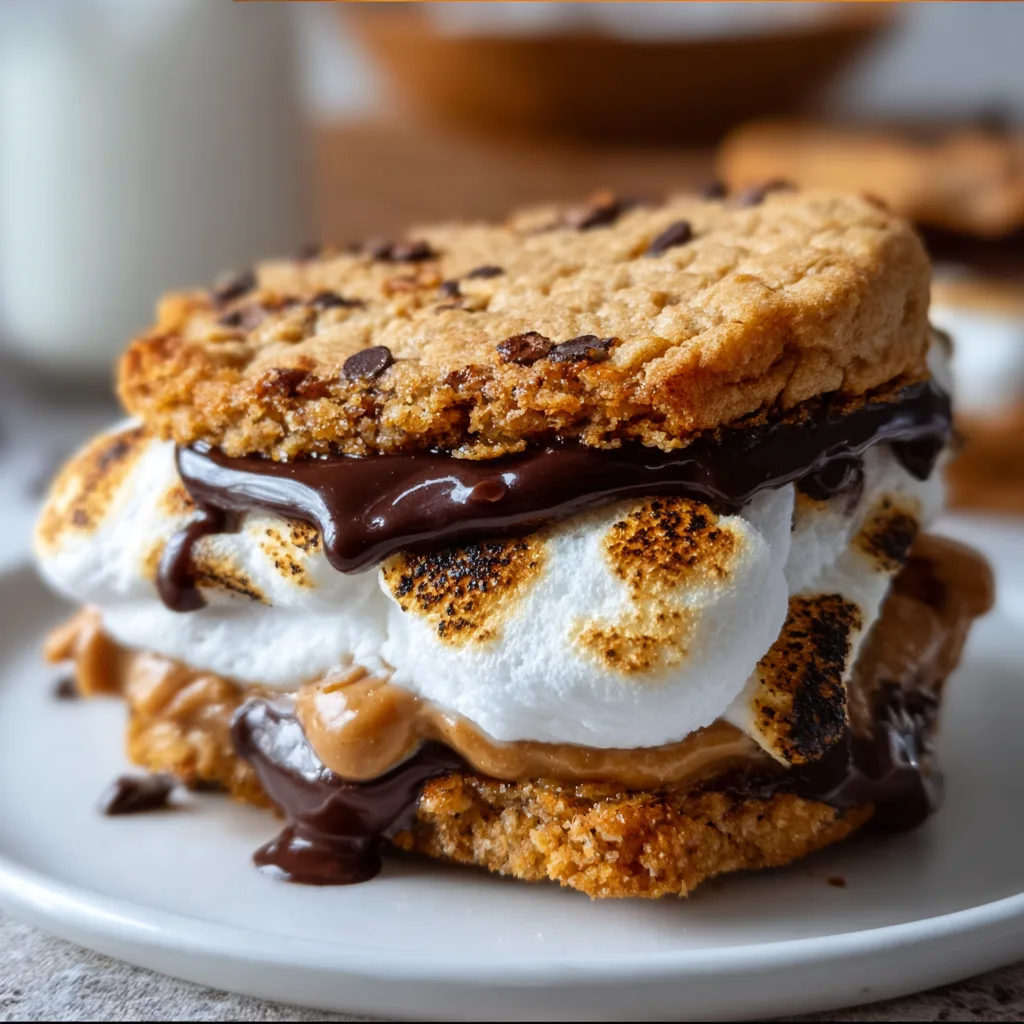
    Peanut Butter Choc Chip S’mores with Brioche is the indulgent treat you never knew you needed in your life. I stumbled upon this creation during a rainy weekend when my usual campfire s’mores craving hit, but the weather had other plans. Using buttery brioche instead of graham crackers was that lightning-bolt moment that changed everything. The way the toasted brioche cradles melty chocolate and marshmallow while adding that hint of peanut butter? Pure magic. If you’ve enjoyed my easy strawberry cake mix brownies, this is that same level of simple-yet-spectacular comfort.

    Recipe

    Why You’ll Love This Peanut Butter Choc Chip S’mores with Brioche

    A Texture Experience Like No Other

    The combination of textures in these brioche s’mores is what makes them truly special. The exterior of the brioche gets perfectly crisp when toasted, while the inside remains pillowy soft. Then comes the contrast of smooth, melty peanut butter against the gooey marshmallow and the slight snap of chocolate chips as they cool. I still remember the first time I made these for my sister – she took one bite and just closed her eyes in silent appreciation. It’s that good, friends. The buttery richness of brioche elevates this beyond any ordinary s’more experience.

    Quick Comfort Food That Feels Fancy

    What I adore about these peanut butter chocolate chip s’mores is how they straddle the line between effortless and impressive. In just 15 minutes, you can transform simple ingredients into something that feels special enough for company. The brioche adds that touch of sophistication that makes these perfect for everything from movie nights to dessert for unexpected guests. I’ve served these at book club meetings where they’ve completely stolen the show from the actual books we were supposed to discuss! The rich combination of flavors feels intentional and thoughtful, even though they’re so simple to make.

    Essential Tips & Tricks

    Choosing the Right Brioche

    Not all brioche is created equal for these s’mores. Look for a loaf with a tight crumb that you can slice to your desired thickness (I find about ¾-inch perfect). Brioche from local bakeries tends to have the best texture, but grocery store versions work well too—just avoid the super-eggy varieties that can be too delicate. The slight sweetness of brioche complements the peanut butter beautifully, creating a balanced foundation. I once tried using challah in a pinch, and while delicious, it didn’t have that same buttery magic that makes brioche the perfect choice for these indulgent s’mores.

    The Perfect Assembly Method

    The assembly order matters more than you might think! Start by lightly toasting the brioche slices, then immediately spread warm peanut butter on one side—the residual heat helps it melt slightly. Add chocolate chips while the peanut butter is still warm so they begin to soften. Toast your marshmallow separately (a kitchen torch works wonders here) until it’s golden and gooey, then transfer it quickly to the chocolate-topped side. Like my classic peanut butter lunch lady cookie bars, the warm elements help everything meld together into something greater than the sum of its parts.

    Serving Ideas & Creative Variations

    Seasonal Twists Worth Trying

    These brioche s’mores can be adapted for any season with simple tweaks. In fall, add a thin layer of apple butter between the peanut butter and chocolate chips for a harvest flavor. Summer calls for fresh berries—sliced strawberries or raspberries add a beautiful tartness. Winter holidays? Try adding a sprinkle of crushed candy canes or a drizzle of peppermint syrup. I made these last Christmas Eve with a hint of orange zest mixed into the peanut butter, and the bright citrus notes against the rich chocolate created something truly memorable that my family still talks about.

    Elegant Plating for Special Occasions

    Transform these brioche s’mores into a dessert worthy of company by thinking about presentation. Cut them into triangles and arrange them on a platter with fresh berries and mint sprigs. Or go decadent with a scoop of vanilla bean ice cream alongside, letting it melt slightly against the warm s’more. A light dusting of powdered sugar or cocoa adds a beautiful finish without overwhelming the flavors. For brunch gatherings, I’ve served these with a small glass of cold milk or espresso for dipping—the contrast of temperatures makes for an even more memorable experience. Check out my Pinterest for plating inspiration!

    Storage & Troubleshooting Guide

    Making Components Ahead

    While these s’mores are best enjoyed fresh, you can prep components ahead of time for quick assembly. Slice your brioche and store it in an airtight container for up to two days (though fresh is always better). You can also mix things up by preparing flavored peanut butter in advance—try stirring in honey, cinnamon, or even a splash of bourbon for adult versions. If you’re hosting a gathering, set up a DIY s’mores station with pre-sliced brioche, room-temperature peanut butter, and various toppings. This interactive approach has been a hit at every backyard gathering I’ve hosted!

    Fixing Common Issues

    If your brioche is browning too quickly before the fillings warm through, lower your heat and toast more gently. For marshmallows that won’t stay put, try slightly flattening them before toasting so they create more surface area to adhere to the peanut butter. If chocolate chips aren’t melting enough, sprinkle them on the brioche immediately after toasting while it’s still hot. And for those times when everything seems to squish out with each bite, let your assembled s’more rest for 2-3 minutes before cutting—this allows the melty components to set slightly for a less messy (but still deliciously gooey) experience.

    Frequently Asked Questions

    Can I use regular bread instead of brioche for these s’mores?

    While you can substitute regular bread, you’ll miss the buttery richness that makes brioche special. If substituting, choose a hearty white bread and brush with melted butter before toasting for a similar effect.

    How do I prevent my Peanut Butter Choc Chip S’mores with Brioche from becoming too messy?

    Let your assembled s’more rest for 2-3 minutes before cutting or eating. This allows the chocolate and marshmallow to set slightly while still remaining deliciously gooey.

    Can I make these ahead for a party?

    These are best made fresh, but you can prepare all components and set up a DIY station. Pre-slice brioche, have peanut butter at room temperature, and provide marshmallows and chocolate chips for guests to assemble.

    What’s the best way to toast the marshmallows without a campfire?

    A kitchen torch works perfectly. Alternatively, place marshmallows on a foil-lined baking sheet and broil for 30-60 seconds, watching carefully to prevent burning.

    Can I freeze leftover brioche s’mores?

    I don’t recommend freezing assembled s’mores as the textures will suffer. However, unused brioche freezes well—wrap tightly and thaw at room temperature when ready to use.

    Final Thoughts

    These Peanut Butter Choc Chip S’mores with Brioche have become my go-to when I need something that feels special but doesn’t require hours in the kitchen. There’s something magical about how these simple ingredients transform into something that feels like it should be much more complicated. I love seeing the look of surprise on people’s faces when they take that first bite and realize these aren’t your average s’mores. They’re proof that sometimes the most memorable treats come from small twists on familiar favorites. Give them a try—I have a feeling they might become your new signature dessert!

  • Pineapple Brown Sugar Lil’ Smokies Bites That’ll Wow Your Tastebuds!

    Pineapple Brown Sugar Lil’ Smokies Bites That’ll Wow Your Tastebuds!

    Pineapple Brown Sugar Lil’ Smokies Bites That’ll Wow Your Tastebuds!

    Pineapple Brown Sugar Mississippi Lil’ Smokies Bites are the sweet-savory party appetizer that disappears faster than you can say “seconds, please!” I discovered this recipe during a chaotic game day gathering when my usual buffalo chicken dip just wasn’t cutting it. The combination of juicy pineapple, caramelized brown sugar, and smoky little sausages creates an irresistible flavor explosion that had everyone hovering around the slow cooker. Trust me, these sticky-sweet bites will become your new go-to for potlucks, holiday gatherings, or anytime you need a crowd-pleasing finger food that takes minimal effort but delivers maximum wow-factor. Let me show you how to make these addictive little morsels!

    Recipe

    Why You’ll Love This Pineapple Brown Sugar Mississippi Lil’ Smokies Bites

    Perfect Balance of Flavors

    There’s something magical about the sweet-savory combination that makes these bites utterly addictive. The brown sugar creates a rich caramel coating that clings perfectly to each little smokie, while the pineapple juice adds a tropical tang that cuts through the richness. I love how the Mississippi-style seasoning brings a subtle kick that balances everything beautifully. My brother-in-law, who claims to hate “fruity meat dishes,” devoured half the batch before realizing there was pineapple involved! The flavors meld together during cooking, creating complex taste layers that keep everyone coming back for “just one more.”

    Effortless Crowd-Pleaser

    Let’s be honest – we all need those reliable recipes that deliver impressive results with minimal effort. These Lil’ Smokies bites practically cook themselves in your slow cooker or Instant Pot while you focus on other dishes or simply enjoy your guests. The hands-on prep takes less than 10 minutes, but the result looks and tastes like you spent hours in the kitchen. I’ve served these at everything from Super Bowl parties to holiday gatherings, and they’re always the first dish emptied. Plus, the ingredients are affordable and readily available, making this recipe perfect for feeding hungry crowds without breaking the bank.

    Essential Tips & Tricks

    Perfecting the Sauce Consistency

    The key to these irresistible bites is achieving that perfect sticky glaze that coats each little smokie. If your sauce seems too thin after cooking, remove the lid during the last 30 minutes to allow some liquid to evaporate. For an even thicker coating, try mixing 1 tablespoon of cornstarch with 2 tablespoons of cold water and stirring it into the hot mixture. I’ve found that using fresh pineapple juice rather than canned gives a brighter flavor, but both work beautifully. Don’t rush the cooking process – the longer the flavors meld together, the more complex and delicious your final dish will be. Just like with my Juicy Crockpot Lil’ Smokies, patience pays off!

    Ingredient Selection Matters

    Choosing the right ingredients makes all the difference in this simple recipe. Opt for dark brown sugar instead of light for a deeper molasses flavor that complements the smokiness of the sausages. When selecting your Lil’ Smokies, I prefer the all-beef variety for their robust flavor, but the traditional pork version works wonderfully too. For the pineapple component, fresh chunks will hold their shape better during cooking, while crushed pineapple will integrate more fully into the sauce. The Mississippi seasoning blend (typically ranch, au jus, pepperoncini) creates that distinctive tangy-savory base that makes these bites so special. Don’t skip the butter – it adds a silky richness that elevates the entire dish.

    Serving Ideas & Creative Variations

    Perfect Pairings & Presentation

    These sweet-savory bites deserve a thoughtful presentation that makes them easy for guests to enjoy. I serve mine with decorative toothpicks for easy grabbing, often arranging them around a small bowl of extra sauce for dipping. For a complete spread, pair these with something crisp and fresh like a cucumber salad or crunchy vegetable platter to balance the richness. They also complement my 7 Layer Dip beautifully for a varied appetizer spread. For a fun presentation twist, hollow out a pineapple half and use it as your serving vessel – it’s both practical and Instagram-worthy! The sweet-savory flavor profile makes these bites surprisingly versatile companions to both casual and upscale party foods.

    Exciting Flavor Twists

    While the classic recipe is perfection, I love experimenting with flavor variations that keep this recipe fresh and exciting. Try adding a tablespoon of bourbon during the last hour of cooking for a sophisticated adult version, or incorporate a teaspoon of chipotle powder for a smoky-spicy kick. For a tropical twist, mix in some mango chunks alongside the pineapple and finish with fresh cilantro. Looking for more umami? A splash of soy sauce and minced garlic transforms these into teriyaki-inspired bites. My personal favorite variation includes a handful of crispy bacon bits sprinkled over the top just before serving – the textural contrast is absolutely divine and adds another layer of smokiness.

    Storage & Troubleshooting Guide

    Proper Storage & Reheating

    These delicious bites can be enjoyed beyond the party if you know how to store them properly. Refrigerate leftovers in an airtight container for up to 3 days – the flavors actually continue to develop overnight, making them possibly even tastier the next day! When reheating, add a splash of pineapple juice or water to restore moisture, then warm gently in a saucepan over medium-low heat or microwave in 30-second intervals, stirring between each. For meal prep, you can combine all ingredients except the Lil’ Smokies in a freezer bag and store for up to 3 months. When ready to cook, thaw overnight in the refrigerator, add the sausages, and proceed with the recipe as written.

    Troubleshooting Common Issues

    Even simple recipes can sometimes present challenges, but most common problems have easy solutions. If your sauce separates or looks curdled, whisk vigorously while the mixture is hot to re-emulsify. For overly sweet results, balance with a tablespoon of apple cider vinegar or a squeeze of fresh lemon juice. If the pineapple pieces disintegrate too much during cooking, try adding half at the beginning and reserving the other half to stir in during the last 30 minutes. Burning on the bottom of the slow cooker?

    Your heat might be too high – always cook these on low rather than high, and make sure there’s enough liquid in the mixture. For party planning, remember these continue cooking if left on the “warm” setting, so adjust timing accordingly.

    Frequently Asked Questions

    Can I make Pineapple Brown Sugar Mississippi Lil’ Smokies Bites ahead of time?

    Absolutely! Prepare them up to 24 hours ahead and refrigerate. Reheat in your slow cooker on low for 1-2 hours before serving, adding a splash of pineapple juice if needed to refresh the sauce.

    What exactly makes these “Mississippi style”?

    The combination of ranch seasoning, au jus mix, and pepperoncini peppers creates that distinctive Mississippi flavor profile that’s tangy, savory, and slightly spicy – perfectly balancing the sweet pineapple and brown sugar.

    Can I use frozen pineapple instead of fresh or canned?

    Yes! Thaw frozen pineapple completely and drain excess liquid before using. The flavor is often brighter than canned and more convenient than fresh.

    How do I prevent the sauce from burning?

    Cook on low heat only, ensure there’s enough liquid in the mixture, and stir occasionally if possible. A programmable slow cooker that switches to “warm” after cooking time helps prevent burning.

    What can I substitute for Lil’ Smokies?

    Sliced kielbasa, cocktail meatballs, or even chunks of firm tofu work well with this sauce. Just adjust cooking times accordingly – meatballs need longer, while tofu needs less time.

    Final Thoughts

    These Pineapple Brown Sugar Mississippi Lil’ Smokies Bites represent everything I love about cooking – simple ingredients that transform into something extraordinary when combined thoughtfully. The sweet-savory balance makes them universally appealing, while the set-it-and-forget-it preparation means you can enjoy your own gathering instead of being stuck in the kitchen. I’ve watched these little flavor bombs create conversations, bring smiles, and disappear within minutes at countless gatherings. Whether you’re hosting a game day party, holiday celebration, or just looking for a delicious appetizer that won’t stress you out, these bites deliver every time. Happy cooking, and don’t forget to save a few for yourself!

    For more delicious appetizer ideas, check out my Pinterest board where I’m always adding new inspiration!

  • Strawberry Cinnamon Rolls That Will Melt Your Heart Instantly

    Strawberry Cinnamon Rolls That Will Melt Your Heart Instantly

    Strawberry Cinnamon Rolls That Will Melt Your Heart Instantly

    Strawberry Cinnamon Rolls bring together two of my favorite things – the comforting aroma of cinnamon and the sweet burst of fresh strawberries. The first time I made these for my family’s Sunday brunch, the kitchen filled with that intoxicating scent that just wraps you in a warm hug. There’s something magical about watching the pink-tinged filling bubble slightly as these beauties rise in the oven. If you’ve enjoyed my easy monkey bread with canned biscuits, you’ll absolutely fall in love with these strawberry-infused rolls that deliver the perfect balance of fruity brightness and cozy cinnamon warmth.

    Recipe

    Why You’ll Love These Strawberry Cinnamon Rolls

    Perfect Balance of Flavors

    The strawberry-cinnamon combination creates a flavor profile that’s both familiar and excitingly different. The tartness of strawberries cuts through the richness of the buttery dough, while the warm spice of cinnamon ties everything together. I love how the strawberries caramelize slightly during baking, creating little pockets of jammy goodness throughout each roll. The cream cheese frosting adds that final tangy note that makes these rolls absolutely irresistible. Trust me, your kitchen will smell like a gourmet bakery, and everyone will be drawn to the table!

    Surprisingly Simple Process

    Don’t let their impressive appearance fool you – these strawberry cinnamon rolls are surprisingly approachable! The dough comes together easily and is forgiving even for beginners. I’ve broken down the process into manageable steps that flow naturally. The most satisfying part? Rolling up that strawberry-cinnamon filling and watching the swirl form. My 8-year-old niece helps me with this part, and she calls it “rolling up the strawberry snail.” Even if you’ve never made homemade rolls before, this recipe gives you that perfect balance of impressive results without complicated techniques.

    Essential Tips & Tricks

    Perfecting Your Dough

    The secret to pillowy-soft rolls lies in how you handle the dough. I’ve found that letting it rise in a slightly warm spot (I use my oven with just the light on) creates the perfect environment. Don’t rush this step! When kneading, look for that smooth, elastic texture that bounces back slightly when pressed. One game-changing tip: measure your flour by weight if possible, as too much can make your rolls dense rather than fluffy. And remember, a properly risen dough should roughly double in size and feel light and airy when you gently press it.

    Strawberry Selection Matters

    For truly spectacular strawberry cinnamon rolls, choosing the right berries makes all the difference. Look for ripe but firm strawberries with vibrant color and sweet fragrance. I’ve found that macerating them briefly with a touch of sugar draws out excess moisture and concentrates their flavor. Pat them dry before adding to your filling to prevent soggy rolls! If fresh strawberries aren’t in season, good-quality freeze-dried strawberries work beautifully as an alternative. They provide intense flavor without adding unwanted moisture to your strawberry white chocolate bars or these delicious rolls.

    Serving Ideas & Creative Variations

    Perfect Pairings

    These strawberry cinnamon rolls shine as the centerpiece of any brunch spread. I love serving them alongside a savory egg dish for balance – my go-to is a simple frittata with fresh herbs. A tall glass of cold milk or a frothy cappuccino complements the sweetness perfectly. For special occasions, try adding a fruit salad with complementary flavors like peaches and blueberries. Want to really impress? Serve them slightly warm with a scoop of vanilla ice cream for an indulgent dessert that will have everyone asking for seconds!

    Exciting Flavor Twists

    While the classic version is divine, these rolls welcome creative adaptations! Try adding lemon zest to the filling for a bright citrus note, or mix in white chocolate chips for extra decadence. For a sophisticated twist, a splash of balsamic in the strawberry mixture creates amazing depth of flavor. Feeling adventurous? Swap the strawberries for blackberries or try a combination of berries for a mixed-berry version. You could even incorporate elements from my banana bread cinnamon rolls for a strawberry-banana variation that’s absolutely delightful!

    Storage & Troubleshooting Guide

    Keeping Them Fresh

    To maintain that just-baked taste, store your strawberry cinnamon rolls in an airtight container at room temperature for up to 2 days. The rolls tend to dry out quickly in the refrigerator, but if you need to store them longer, refrigerate for up to 5 days. My favorite revival trick: microwave a refrigerated roll for 15-20 seconds with a small cup of water alongside it. The steam helps restore that fresh-baked softness! For longer storage, freeze unfrosted rolls in a single layer, then transfer to a freezer bag where they’ll keep for up to 2 months.

    Troubleshooting Common Issues

    If your rolls aren’t rising properly, temperature is likely the culprit. Ensure your yeast is fresh and your rising environment is warm enough (around 75-80°F). Dough too sticky? Add flour one tablespoon at a time until it reaches that tacky-but-manageable consistency. For rolls that brown too quickly, simply tent them with foil halfway through baking. And if your strawberry filling leaks out during baking, try chopping the berries more finely and ensuring your dough is rolled tightly enough. Remember that even imperfect rolls will taste amazing – embrace the homemade charm!

    Frequently Asked Questions

    Can I make Strawberry Cinnamon Rolls ahead of time?

    Absolutely! Prepare them up to the point of the second rise, then refrigerate overnight. In the morning, let them come to room temperature for 30 minutes before baking for fresh rolls without the early wake-up.

    How do I know when my dough has risen enough?

    The dough should roughly double in size and feel light and puffy. Press it gently with your finger – if the indentation remains, it’s ready to go!

    Can I use frozen strawberries for these cinnamon rolls?

    Yes, but thaw and drain them thoroughly first, then pat dry with paper towels to remove excess moisture that could make your filling soggy.

    What’s the best frosting for strawberry cinnamon rolls?

    Classic cream cheese frosting works beautifully, but try adding a tablespoon of strawberry jam or freeze-dried strawberry powder for an extra berry punch!

    Can I make these rolls gluten-free?

    Yes! Use a 1:1 gluten-free flour blend designed for baking, but expect a slightly different texture and you may need to adjust the liquid slightly.

    Final Thoughts

    These strawberry cinnamon rolls have become my signature brunch contribution, earning rave reviews every time. There’s something magical about the way they balance familiar comfort with unexpected brightness. The pink-swirled centers never fail to bring smiles to the table, and isn’t that what sharing food is all about? I’d love to see your creations on Pinterest – tag me when you make these rolls so I can celebrate your baking success! Whether for a special occasion or just because it’s Saturday, these rolls are guaranteed to make any morning feel extraordinary.

  • Chocolate Fluff Salad Recipe: Irresistibly Creamy & Delightful!

    Chocolate Fluff Salad Recipe: Irresistibly Creamy & Delightful!

    Chocolate Fluff Salad Recipe: Irresistibly Creamy & Delightful!

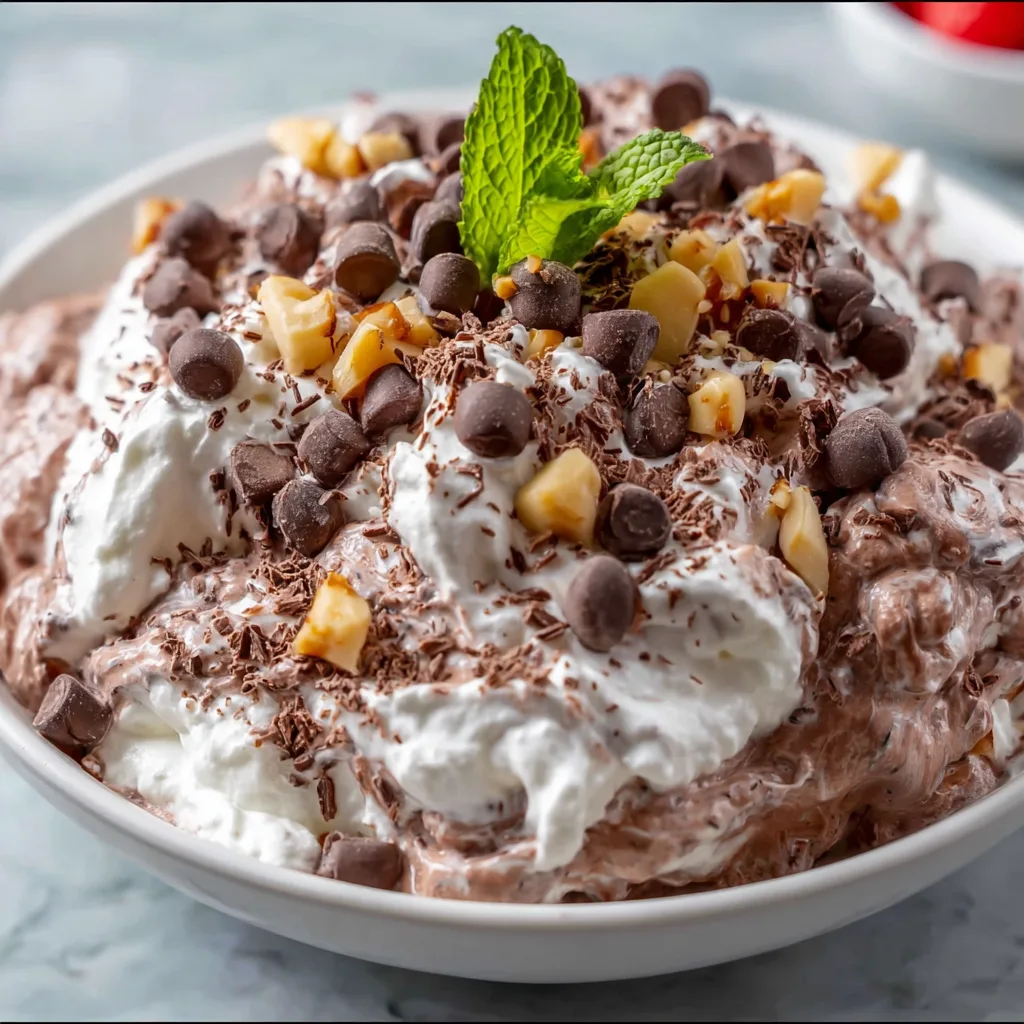
    Chocolate Fluff Salad is one of those magical desserts that transports me straight back to Sunday potlucks at my grandmother’s house. The pillowy clouds of whipped cream folding into rich chocolate pudding and marshmallows create a texture that’s simply heavenly. I’ve always loved how this nostalgic treat manages to be both light and decadent at the same time. The best part? You can whip it up in minutes with just a handful of ingredients. If you’re looking for a crowd-pleasing dessert that feels like a warm hug in a bowl, this easy recipe is exactly what you need.

    Recipe

    Why You’ll Love This Chocolate Fluff Salad

    Perfect Balance of Flavors and Textures

    The magic of Chocolate Fluff Salad lies in its incredible textural contrast. Velvety chocolate pudding creates a rich base while fluffy whipped cream lightens everything up. Each bite delivers a perfect harmony of creamy and airy elements that simply melt in your mouth. I love adding mini marshmallows for that subtle chewiness and bursts of sweetness throughout. The subtle crunch from chocolate chips or cookie pieces provides just enough textural interest to keep your taste buds engaged from the first spoonful to the last.

    Quick Prep with Big Impact

    One thing I absolutely adore about this recipe is how it delivers maximum wow factor with minimal effort. In just 15 minutes of active prep time, you can create a dessert that looks like you spent hours in the kitchen. I recently made this for my sister’s birthday gathering when I was short on time, and everyone thought I’d ordered it from a bakery! It’s perfect for those last-minute invitations or when you need a reliable dessert that won’t stress you out. Plus, it’s easily scalable for both intimate dinners and larger gatherings.

    Essential Tips & Tricks

    Achieving the Perfect Consistency

    The secret to a perfect Chocolate Fluff Salad is all about the folding technique. Rather than stirring vigorously, use a gentle folding motion to incorporate the whipped cream into your pudding mixture. This preserves those precious air bubbles for maximum fluffiness. I learned this the hard way after once rushing and ending up with a deflated dessert! For best results, chill your mixing bowl and beaters before whipping the cream, and make sure your pudding is completely set before combining. This creates that dreamy, cloud-like texture that makes this dessert so special.

    Ingredient Selection Matters

    Using high-quality ingredients truly elevates this simple dessert. I always opt for real whipping cream rather than pre-made whipped topping for a richer flavor and better texture. When selecting chocolate pudding, instant works perfectly fine, but cooking the pudding from scratch adds an incredible depth of flavor if you have the extra time. For a fun twist, try using chocolate cherry dump cake as inspiration and add some cherry pie filling to create a chocolate-covered cherry version that’s absolutely divine. The contrast of tart cherries against sweet chocolate is simply irresistible.

    Serving Ideas & Creative Variations

    Presentation Possibilities

    Transform your Chocolate Fluff Salad into a showstopping centerpiece by serving it in a clear trifle dish to showcase those beautiful layers. For individual servings, try parfait glasses with alternating layers of fluff and crushed cookies or graham crackers. I love adding a light dusting of cocoa powder or a sprinkle of chocolate shavings just before serving for that professional touch. For summer gatherings, I serve mine in hollowed-out watermelon halves for a fun presentation that always gets compliments. The contrast between the bright fruit exterior and chocolatey interior creates a visual treat.

    Flavor Twists and Add-ins

    The versatility of Chocolate Fluff Salad makes it perfect for creative variations. Try adding a tablespoon of espresso powder for a mocha version that coffee lovers will adore. Peanut butter chips or a swirl of creamy peanut butter creates a combination reminiscent of classic peanut butter lunch lady cookie bars. For a more sophisticated flavor profile, consider adding orange zest or a splash of Grand Marnier for chocolate-orange fluff. During the holidays, I love incorporating crushed peppermint candies and a drop of peppermint extract for a festive twist.

    Storage & Troubleshooting Guide

    Proper Storage for Maximum Freshness

    Chocolate Fluff Salad is best when enjoyed within 24-48 hours of preparation. Store it in an airtight container in the refrigerator to maintain that perfect fluffy texture. I recommend covering the surface directly with plastic wrap before putting the lid on to prevent a skin from forming on top. If you notice slight weeping or separation after storage, don’t worry! Simply give it a gentle fold with a rubber spatula just before serving to refresh the texture. For best presentation, add any crunchy toppings like cookie pieces right before serving.

    Fixing Common Issues

    If your Chocolate Fluff Salad turns out too runny, the most likely culprit is under-whipped cream or pudding that hasn’t set properly. To fix this, try chilling it for at least 2 hours to help it set up. For a too-thick consistency, gently fold in a small amount of additional whipped cream to lighten it up. If you notice the marshmallows becoming too soft after storage, try adding them just before serving next time. I once salvaged a too-sweet batch by folding in unsweetened whipped cream and a pinch of salt, which balanced the flavors perfectly.

    Frequently Asked Questions

    Can I make Chocolate Fluff Salad ahead of time?

    Yes! You can prepare it up to 24 hours in advance. For best results, store it in an airtight container in the refrigerator and add any crunchy toppings just before serving.

    What’s the difference between Chocolate Fluff Salad and chocolate mousse?

    Chocolate Fluff Salad typically contains marshmallows and has a lighter, more airy texture than mousse. Mousse is denser, richer, and often contains eggs for structure.

    Can I use sugar-free pudding for this recipe?

    Absolutely! Sugar-free instant pudding works perfectly in this recipe. Just be aware that the texture might be slightly different than with regular pudding.

    How do I prevent my Chocolate Fluff Salad from becoming watery?

    Ensure your pudding is completely set before folding in thoroughly whipped cream. Avoid overmixing, and keep refrigerated until serving time to maintain the perfect consistency.

    What can I substitute for mini marshmallows in Chocolate Fluff Salad?

    Try diced fruit like bananas or strawberries, chopped cookies, or crushed graham crackers. For a grown-up version, consider rum-soaked dried fruits or candied nuts.

    Final Thoughts

    Chocolate Fluff Salad is more than just a dessert—it’s a nostalgic treat that brings people together. The simplicity of preparation combined with its crowd-pleasing flavor makes it perfect for everything from casual family dinners to special celebrations. I hope you’ll try this versatile recipe and make it your own with creative add-ins that reflect your personal taste. Don’t forget to check out more delicious dessert ideas on Pinterest for inspiration! This fluffy chocolate delight might just become your new go-to dessert.

  • Crème Brûlée Macarons: Irresistibly Sweet, Crunchy Delight!

    Crème Brûlée Macarons: Irresistibly Sweet, Crunchy Delight!

    Crème Brûlée Macarons: Irresistibly Sweet, Crunchy Delight!

    Crème Brûlée Macarons – those delicate almond meringue cookies filled with silky vanilla custard and topped with a crackling caramelized sugar crust – are the ultimate fusion of two iconic French desserts. The first time I made these for my sister’s birthday, the room fell silent as everyone took their first bite. That magical moment when the crisp sugar shell shatters to reveal the creamy filling beneath is something I still dream about. If you’ve been hesitant to try making macarons, this indulgent version might just be the motivation you need to dive into the world of French patisserie.

    Recipe

    Why You’ll Love These Crème Brûlée Macarons

    A Show-Stopping Dessert Experience

    These macarons aren’t just cookies – they’re an experience that engages all your senses. The visual contrast between the delicate pastel shells and the golden brûléed tops makes them instantly Instagram-worthy. When you take that first bite, you’ll encounter multiple textures: the crisp caramelized sugar, the chewy almond shell, and the luscious vanilla bean custard filling. I’ve served these at dinner parties where guests actually gasped when I brought them to the table. They’re sophisticated enough for special occasions but approachable enough to make when you’re craving something extraordinary on a random Tuesday.

    Perfect Balance of Flavors

    What makes these macarons truly exceptional is their flavor harmony. The nutty almond shells provide the perfect backdrop for the rich vanilla custard filling, which I infuse with real vanilla beans for those beautiful flecks and intense aroma. The brûléed sugar top adds that distinctive caramel bitterness that cuts through the sweetness. It’s like enjoying the best parts of a traditional crème brûlée in a portable, bite-sized form. I find myself making these whenever I want to impress someone with my baking skills – they never fail to elicit that wide-eyed “you MADE these?” reaction that makes all the effort worthwhile.

    Essential Tips & Tricks

    Mastering the Macaron Shell

    The key to perfect macaron shells lies in the macaronage technique – that specific folding method that achieves the right batter consistency. Fold just until the batter flows like lava when lifted with a spatula, forming a ribbon that disappears back into the mass within 20-30 seconds. Undermixing leads to peaked shells, while overmixing creates flat, cracked ones. I learned this the hard way after three failed batches! Room temperature egg whites are non-negotiable, and I always age mine overnight for better stability. For these crème brûlée macarons, add a touch of vanilla powder to the shells for a cohesive flavor profile with the filling.

    Creating the Perfect Filling

    The custard filling is where the magic of crème brûlée truly shines. Use a proper custard base rather than simple buttercream for authentic flavor. I temper my egg yolks slowly while whisking constantly to prevent scrambling. The filling should be thick enough to pipe but soft enough to meld with the shells during maturation. Add a splash of good quality vanilla extract or paste for depth, and let the filled macarons rest in the refrigerator for at least 24 hours before brûléeing the tops. This resting period allows the shells to soften slightly and the flavors to meld together, creating that perfect texture contrast.

    Serving Ideas & Creative Variations

    Elegant Presentation Options

    Elevate your crème brûlée macarons with thoughtful presentation that enhances their gourmet appeal. Arrange them on a vintage cake stand or slate board with fresh berries and edible gold leaf for special occasions. For a dramatic tableside experience, brûlée the tops just before serving so guests can hear that satisfying crack of the sugar. I love serving these alongside espresso in demitasse cups – the bitter coffee perfectly complements the sweet, vanilla-forward flavors. For an extra touch, dust the serving plate with a light sprinkle of cocoa powder or crushed vanilla bean to create a beautiful backdrop.

    Seasonal and Flavor Twists

    While classic vanilla crème brûlée filling is divine, these macarons welcome creative seasonal adaptations. Try infusing the custard with unexpected flavors like lavender, earl grey tea, or orange blossom water. For fall, a maple custard with cinnamon-spiced shells creates a cozy variation. During summer, I love adding fresh berries between the filling and the top shell for a burst of brightness. My personal favorite twist is adding a thin layer of dark chocolate ganache between the shell and custard – the chocolate melts slightly from the heat of brûléeing, creating an additional flavor dimension that’s absolutely heavenly.

    Storage & Troubleshooting Guide

    Proper Storage Methods

    Storing these delicate treats properly is essential for maintaining their texture perfection. Always refrigerate filled macarons in an airtight container for 24-48 hours before serving to allow flavors to mature and shells to soften slightly. They’ll keep beautifully for up to 5 days in the refrigerator. If you plan to brûlée the tops, do so just before serving rather than in advance. For longer storage, you can freeze the assembled (but not brûléed) macarons for up to a month. I place mine in a single layer on a baking sheet to freeze solid before transferring to a container with parchment between layers.

    Common Problems and Solutions

    Even experienced bakers encounter macaron challenges, but most issues have simple fixes. Hollow shells usually indicate too high oven temperature or undermixed batter – try lowering your oven by 10°F and folding a few more strokes. If your macarons are cracking, your oven is likely too hot or you need to rest the piped shells longer before baking. For the custard filling, graininess means your sugar crystallized – next time, ensure all equipment is completely clean and free from any sugar crystals. If your brûléed tops won’t harden properly, try using superfine sugar and ensuring your kitchen torch is fully charged for maximum heat.

    Frequently Asked Questions

    Macarons are meringue-based cookies made with almond flour, egg whites, and sugar. They have a distinctive smooth top, ruffled “foot” at the base, and are typically sandwiched with filling. Their texture is crisp outside and chewy inside, unlike regular cookies.

    Can I make Crème Brûlée Macarons without a kitchen torch?

    Yes, but with limitations. You can use your oven’s broiler set to high, watching carefully for 1-2 minutes. However, a kitchen torch provides better control and more even caramelization of the sugar top.

    Why do my macaron shells have no feet?

    Macaron shells without feet typically result from insufficient resting time before baking. Allow piped macarons to rest until they form a dry skin on top (about 30-45 minutes) before baking.

    How far in advance can I make these macarons?

    You can make and fill the macarons up to 3 days in advance, keeping them refrigerated. However, always brûlée the tops just before serving for the best texture contrast.

    What’s the secret to getting that perfect crack in the Crème Brûlée Macarons’ top?

    For the perfect crack, sprinkle a thin, even layer of superfine sugar on top of each macaron. Hold the torch 2-3 inches away, moving constantly in small circles until the sugar melts and caramelizes to a golden amber color.

    Final Thoughts

    These Crème Brûlée Macarons represent the beautiful intersection of technique and creativity that makes baking so rewarding. While they require patience and precision, the result is a truly spectacular dessert that elevates any occasion. I find myself returning to this recipe whenever I want to remind myself of the joy that comes from creating something truly special in my kitchen. Don’t be intimidated – embrace the process, and soon you’ll be creating these elegant treats with confidence. Share your creations on Pinterest and join our community of macaron enthusiasts!