Blog

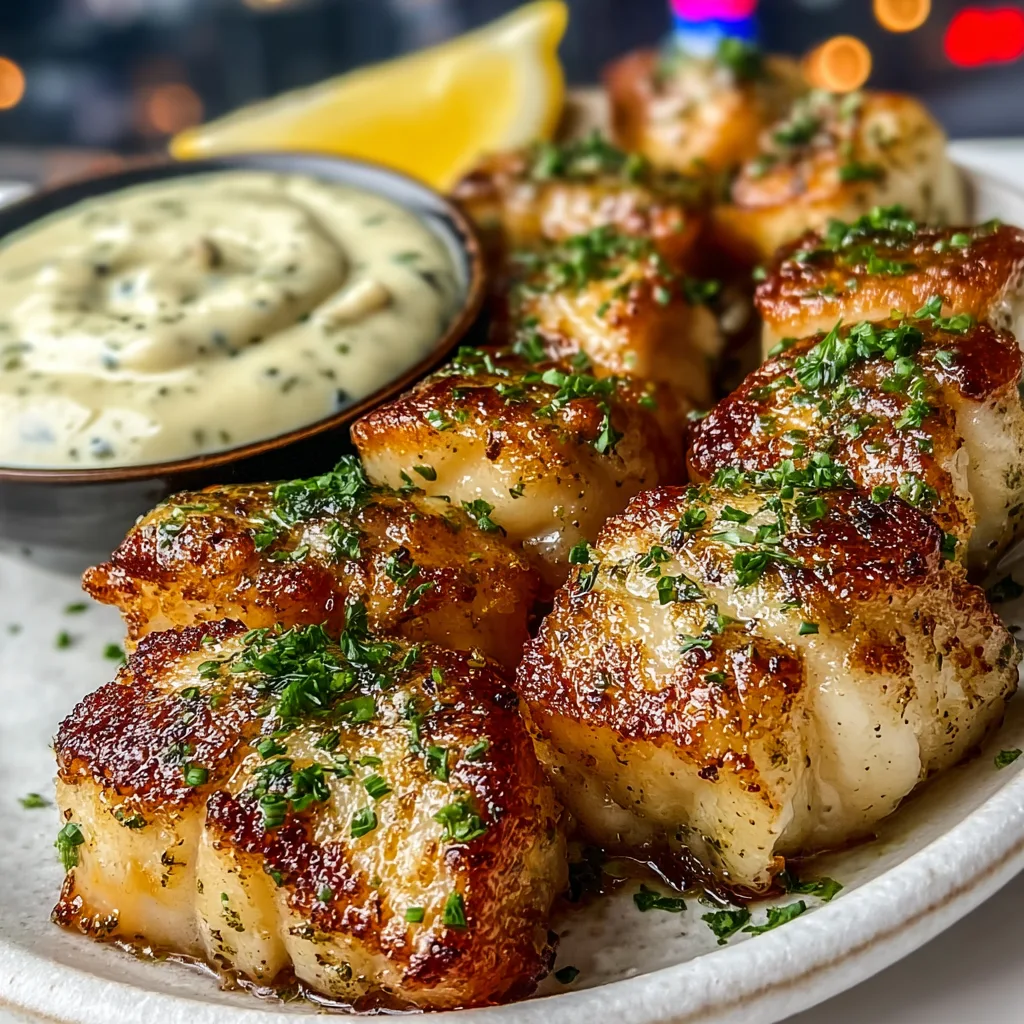
  • Lemon Butter Fish Bites with Garlic Aioli – Irresistibly Crisp & Zesty!

    Lemon Butter Fish Bites with Garlic Aioli – Irresistibly Crisp & Zesty!

    Lemon Butter Fish Bites with Garlic Aioli – Irresistibly Crisp & Zesty!

    Lemon Butter Fish Bites with Garlic Aioli are my absolute game-changer for dinner parties that need a touch of elegance without hours in the kitchen. These golden, tender morsels of fish coated in a zesty lemon butter sauce paired with creamy garlic aioli create the perfect balance of bright citrus and rich creaminess. I discovered this recipe during a coastal vacation where a tiny seafood shack served these addictive little bites that had everyone coming back for seconds. The best part? They’re surprisingly simple to make at home, requiring minimal prep but delivering maximum flavor. Trust me, these will disappear from your serving platter faster than you can say “seconds, please!”

    Recipe

    Why You’ll Love This Lemon Butter Fish Bites with Garlic Aioli

    Perfect Balance of Flavors

    There’s something magical about the combination of buttery fish with bright lemon and creamy garlic aioli. The fish itself becomes this perfect canvas that soaks up the lemon butter sauce, creating these little flavor bombs that burst in your mouth. I remember making these for my sister who “doesn’t do seafood” and watching her eyes widen with that first bite. The tanginess from the lemon cuts through the richness of the butter, while the garlic aioli adds this velvety dimension that ties everything together. It’s that perfect balance that makes these bites irresistible even to the seafood-hesitant.

    Quick and Impressive

    What I adore about these Lemon Butter Fish Bites is how they transform ordinary white fish into something that looks and tastes restaurant-worthy in under 30 minutes. Last month when my in-laws dropped by unexpectedly, I whipped these up with cod I had in the freezer, and they thought I’d been cooking all afternoon! The quick cooking time means the fish stays tender and moist, never rubbery. The golden crust from a quick pan-sear creates this beautiful contrast of textures – crispy exterior giving way to flaky, butter-infused fish. It’s the perfect recipe for busy hosts who want to impress without stress.

    Essential Tips & Tricks

    Choosing and Preparing Your Fish

    Selecting the right fish makes all the difference in this recipe. I prefer cod, haddock, or halibut for their firm texture and mild flavor that beautifully absorbs the lemon butter. When cutting your fish, aim for uniform 1-inch cubes so they cook evenly – nothing ruins these bites faster than some pieces overdone while others remain raw. Pat your fish completely dry with paper towels before seasoning; this ensures a beautiful golden sear rather than a soggy steam. I learned this the hard way during a dinner party when my fish refused to brown because I skipped this crucial step! Remember to season generously with salt and pepper before cooking.

    Perfecting the Lemon Butter Sauce

    The lemon butter sauce is where the magic happens, so don’t rush this step! Start with good quality butter (I prefer unsalted so I can control the seasoning) and let it melt slowly until it’s just beginning to foam. This creates a nuttier flavor that elevates the entire dish. When adding lemon juice, do it off the heat to prevent the sauce from breaking. For extra depth, I love adding a splash of white wine and letting it reduce slightly before returning the fish to the pan. If you’re looking for more flavor-packed seafood options, my Garlic Butter Cod Bites with Creamy Lemon Herb Dip uses a similar technique with different herbs.

    Serving Ideas & Creative Variations

    Perfect Pairings

    These Lemon Butter Fish Bites shine brightest when served with complementary sides that enhance without overwhelming. I love placing them atop a bed of lemon-infused risotto where the creamy rice catches all that buttery sauce – absolute heaven! For a lighter option, a crisp fennel and arugula salad with a simple vinaigrette provides a refreshing contrast. When entertaining, I serve these on small skewers with cherry tomatoes and olives for an easy-to-grab appetizer. The garlic aioli should be served in a separate small bowl for dipping, allowing guests to control how much creaminess they want with each bite. For a complete seafood feast, pair with my Baked Lobster Tails with Garlic Butter.

    Flavor Variations to Try

    Don’t be afraid to experiment with different flavor profiles once you’ve mastered the basic recipe. My Mediterranean variation adds capers, diced tomatoes, and fresh oregano to the lemon butter sauce for a burst of sunny flavors. For an Asian-inspired twist, try adding ginger, a splash of soy sauce, and finishing with toasted sesame seeds and sliced green onions. The garlic aioli can be customized too – stir in fresh herbs like dill or tarragon, add a pinch of saffron for color and flavor, or spice it up with a dash of cayenne or smoked paprika. During summer months, I love adding fresh corn kernels to the pan for a sweet pop that complements the fish beautifully.

    Storage & Troubleshooting Guide

    Proper Storage and Reheating

    While these Lemon Butter Fish Bites are best enjoyed fresh, you can store leftovers in an airtight container in the refrigerator for up to 2 days. The key to successful storage is keeping the fish separate from the aioli to prevent sogginess. When reheating, avoid the microwave which can make the fish rubbery. Instead, gently warm the bites in a skillet over medium-low heat with a small pat of butter until just heated through. The garlic aioli can be stored separately for up to 4 days, though you may need to whisk it briefly if it separates.

    If you’re planning to make these ahead for a party, I recommend preparing the aioli in advance but cooking the fish just before serving for optimal texture and flavor.

    Common Issues and Solutions

    The most common issue with fish bites is overcooking, which results in dry, tough pieces rather than tender, flaky bites. The secret is watching for visual cues – the fish is done when it’s opaque and flakes easily with a fork, usually in just 2-3 minutes per side. If your sauce breaks or looks greasy, whisk in a teaspoon of cold water off the heat to help it re-emulsify. For fish that won’t brown properly, check your pan temperature – it should be hot enough that the fish sizzles when it hits the surface.

    Also, avoid overcrowding the pan, which causes steaming instead of searing. Working in batches takes a few extra minutes but ensures each bite develops that perfect golden crust.

    Frequently Asked Questions

    What’s the best fish to use for Lemon Butter Fish Bites with Garlic Aioli?

    Firm white fish like cod, haddock, halibut, or mahi-mahi work best. They hold their shape when cubed and have a mild flavor that pairs beautifully with the lemon butter and garlic aioli.

    Can I make the garlic aioli from scratch?

    Absolutely! Blend 1 egg yolk, 2 garlic cloves, 1 tablespoon lemon juice, and ½ teaspoon salt, then slowly drizzle in ¾ cup oil while blending until thick and creamy.

    How do I prevent my fish from sticking to the pan?

    Ensure your pan is properly heated before adding oil, pat fish completely dry before cooking, and resist the urge to flip too early – the fish will release naturally when a crust forms.

    Can I make this recipe dairy-free?

    Yes! Substitute the butter with olive oil or a high-quality dairy-free butter alternative. The flavor profile will change slightly but will still be delicious.

    Is there a way to make these ahead for a party?

    Prepare the aioli up to 3 days ahead and store refrigerated. The fish is best cooked just before serving, but you can prep by cutting the fish and storing covered in the refrigerator for up to 24 hours.

    Final Thoughts

    These Lemon Butter Fish Bites with Garlic Aioli have become my secret weapon for elevating ordinary dinners into special occasions without hours of work. There’s something deeply satisfying about watching someone’s face light up when they taste that perfect combination of buttery fish, bright lemon, and creamy garlic. I hope you’ll give this recipe a try the next time you want something that feels special but doesn’t require culinary school skills. And if you make them, I’d love to see your creations over on Pinterest! These little bites prove that seafood doesn’t have to be intimidating – just delicious.
  • Creamy Salmon Bowl That Melts Fat Fast – Weight Loss Magic!

    Creamy Salmon Bowl That Melts Fat Fast – Weight Loss Magic!

    Creamy Salmon Bowl That Melts Fat Fast – Weight Loss Magic!

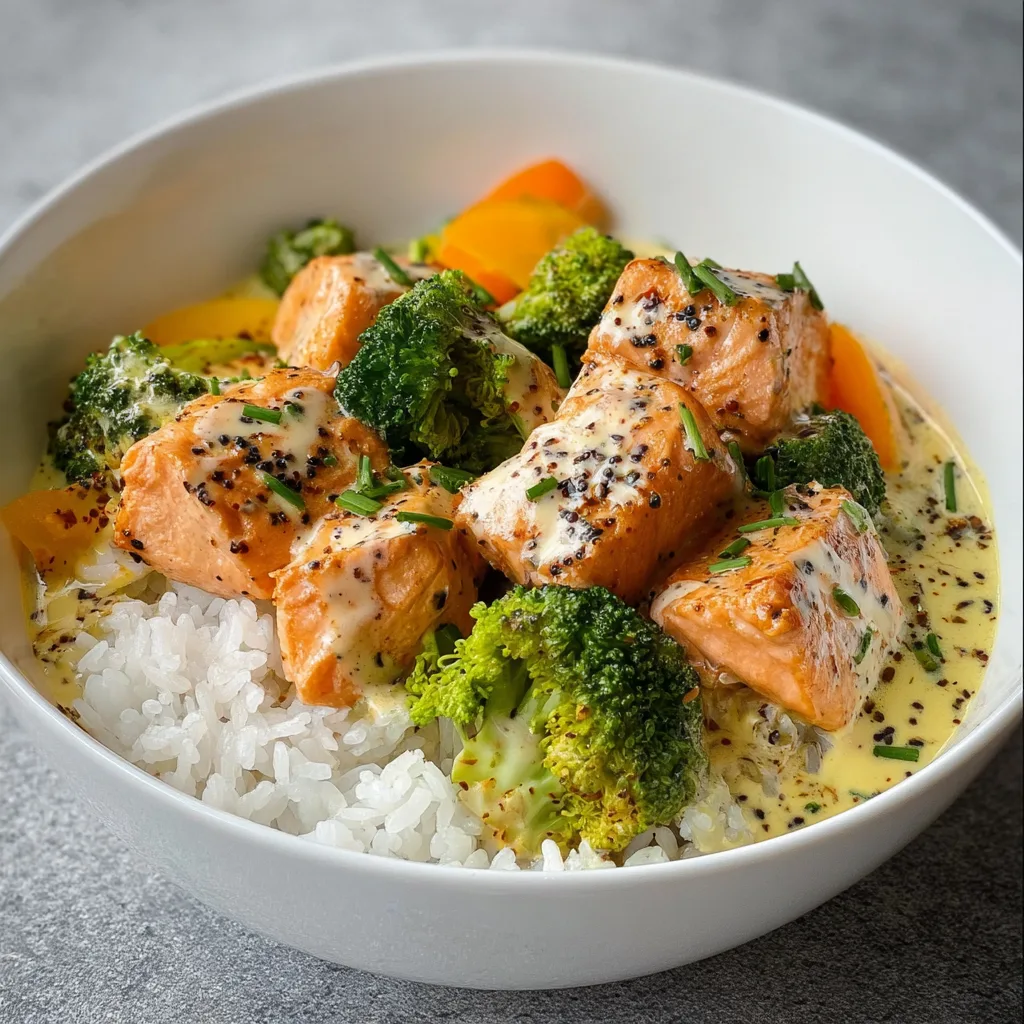
    This Creamy Salmon Bowl That Actually Helps With Weight Loss is the perfect balance of indulgence and nutrition that I’ve been craving lately. The velvety sauce coats each tender piece of salmon and mingles beautifully with fluffy quinoa and crisp vegetables. I discovered this recipe during my own weight loss journey when I was desperately seeking meals that didn’t taste like punishment. The first time I made it, my kitchen filled with the most amazing aroma of garlic and herbs, and I knew immediately this would become a staple in my meal rotation. The protein-packed salmon and fiber-rich veggies keep me satisfied for hours, proving that “healthy” and “delicious” can absolutely coexist on the same plate.

    Recipe

    Why You’ll Love This Creamy Salmon Bowl That Actually Helps With Weight Loss

    Nutrient-Dense Ingredients That Support Weight Management

    This bowl is strategically designed with weight-loss friendly ingredients that work together beautifully. Wild-caught salmon provides lean protein that keeps you fuller longer while boosting metabolism. The quinoa base offers complete protein and complex carbs that stabilize blood sugar, preventing those energy crashes that lead to snacking. I’ve included plenty of fiber-rich vegetables that add volume without excessive calories. The creamy sauce might taste indulgent, but it’s made with Greek yogurt instead of heavy cream, slashing calories while maintaining that luxurious mouthfeel. Everything in this bowl serves a purpose for both your taste buds and your weight management goals.

    Perfect Balance of Macronutrients for Sustainable Results

    What makes this salmon bowl special is its balanced macronutrient profile – the key to sustainable weight loss. Each component contributes to the perfect ratio of protein, healthy fats, and complex carbohydrates. The salmon provides omega-3 fatty acids that actually help reduce inflammation and support fat metabolism. I’ve carefully portioned the quinoa to give you energy without carb overload. The vegetables add essential micronutrients and fiber that slow digestion and enhance satisfaction. Unlike restrictive diets that leave you hungry, this bowl keeps you energized and satisfied, making it easier to maintain a calorie deficit without feeling deprived or battling constant cravings.

    Essential Tips & Tricks

    Perfecting Your Salmon for Maximum Flavor

    The secret to this bowl is starting with perfectly cooked salmon that’s crispy outside and tender inside. I recommend patting the salmon completely dry before seasoning – this ensures a beautiful sear rather than steaming. Season generously with salt, pepper, and a pinch of smoked paprika for depth. Heat your pan until it’s properly hot before adding the salmon, skin-side down. The skin should sizzle immediately on contact. Cook 90% of the way on the skin side (about 4 minutes), then flip for just 30-60 seconds to finish. This method locks in moisture while creating that irresistible texture contrast that elevates the entire bowl experience.

    Making the Creamy Sauce Lighter Without Sacrificing Flavor

    The creamy sauce is where many recipes derail weight loss efforts, but not ours! Start with Greek yogurt as your base instead of heavy cream or mayo. The tangy profile actually complements the rich salmon perfectly. For maximum flavor with minimal calories, I bloom fresh minced garlic in just a teaspoon of olive oil before mixing it into the yogurt – this creates depth without excess fat. Add brightness with fresh lemon juice and zest, plus chopped dill and chives. A tiny drizzle of honey balances the acidity. This technique creates a sauce that tastes indulgent but aligns with your weight management goals.

    Serving Ideas & Creative Variations

    Seasonal Adaptations to Keep the Bowl Fresh Year-Round

    This salmon bowl evolves beautifully with the seasons, keeping your meals exciting while supporting your weight loss journey. In summer months, I lighten it up with cucumber ribbons, cherry tomatoes, and fresh corn kernels for a refreshing crunch. Fall calls for roasted butternut squash cubes and wilted kale. Winter is perfect for steamed broccoli and roasted red peppers. Spring shines with asparagus tips and sugar snap peas. The quinoa base can be swapped for cauliflower rice when you want something lighter, or try cilantro lime rice for a flavor twist. This adaptability ensures you’ll never get bored while maintaining your health goals.

    Meal Prep Strategies for Busy Weekdays

    Transform this salmon bowl into a meal prep superhero by preparing components in advance. On Sunday, cook a large batch of quinoa and portion into containers. Roast a sheet pan of seasonal vegetables with just olive oil, salt and pepper until caramelized. Make a double batch of the creamy sauce and store in a mason jar. When ready to eat, quickly pan-sear fresh salmon (takes just 5 minutes) and assemble your bowl. For even faster assembly, you can pre-cook salmon portions and gently reheat them. This approach saves time without compromising on freshness or flavor, making healthy eating sustainable even during hectic weeks.

    Storage & Troubleshooting Guide

    Proper Storage for Optimal Freshness

    Storing components separately is the key to freshness when meal prepping this salmon bowl. The cooked quinoa stays good for up to 5 days in airtight containers in the refrigerator. For the vegetables, store roasted varieties in glass containers – they’ll maintain texture for 3-4 days. The creamy yogurt sauce should be kept in a sealed jar with minimal air exposure to prevent it from separating or developing excess moisture. The salmon itself is best enjoyed fresh, but if needed, store cooked portions for no more than 2 days. When reheating, do so gently at a low temperature to prevent the fish from drying out or developing that strong “reheated fish” smell.

    Troubleshooting Common Issues

    If your salmon turns out dry, you’ve likely overcooked it – remember that residual heat continues cooking after removal from heat. Next time, remove it from the pan when it still looks slightly underdone in the center. For sauce separation issues, whisk vigorously before serving or add a teaspoon of hot water to help it recombine. If your quinoa becomes sticky, rinse it under cold water and toss with a bit of olive oil to separate the grains. When vegetables lose their crunch after storage, quickly reheat them in a hot skillet rather than microwave to restore some texture. These simple fixes ensure your weight-loss friendly bowl remains delicious every time.

    Frequently Asked Questions

    Can I use frozen salmon for this Creamy Salmon Bowl That Actually Helps With Weight Loss?

    Yes! Thaw completely in the refrigerator overnight, then pat thoroughly dry before cooking. Frozen salmon works perfectly when properly thawed and dried, giving you the same protein benefits for weight management.

    How many calories are in each serving?

    Each complete bowl contains approximately 425-450 calories, with 30g protein, 15g healthy fats, and 35g complex carbs. This balanced profile supports satiety while maintaining a calorie deficit.

    Can I make this dairy-free?

    Absolutely! Substitute the Greek yogurt with dairy-free coconut yogurt or cashew cream. Add extra lemon juice to maintain the tangy flavor profile that balances the rich salmon.

    Is this recipe suitable for meal prep?

    Yes, but store components separately. Prepare quinoa and vegetables up to 4 days ahead, make sauce 3 days ahead, and cook fresh salmon when ready to eat for best results.

    How can I increase the protein content further?

    Add a soft-boiled egg, a quarter cup of edamame, or swap regular quinoa for a higher-protein grain like amaranth. These additions boost protein while maintaining the bowl’s weight-management benefits.

    Final Thoughts

    This Creamy Salmon Bowl That Actually Helps With Weight Loss has transformed how I approach healthy eating. It proves that nutritious food can be crave-worthy and satisfying while supporting your body goals. The combination of protein-rich salmon, fiber-filled vegetables, and that incredible creamy sauce (without the guilt!) creates a meal that feels like a treat rather than a diet requirement. I find myself looking forward to this bowl, which makes staying consistent infinitely easier. For more delicious, health-conscious recipes that don’t sacrifice flavor, check out my Pinterest collection where I share new ideas weekly!

  • Loaded Dirty Fries: Irresistibly Cheesy, Crispy, and Totally Addictive!

    Loaded Dirty Fries: Irresistibly Cheesy, Crispy, and Totally Addictive!

    Loaded Dirty Fries: Irresistibly Cheesy, Crispy, and Totally Addictive!

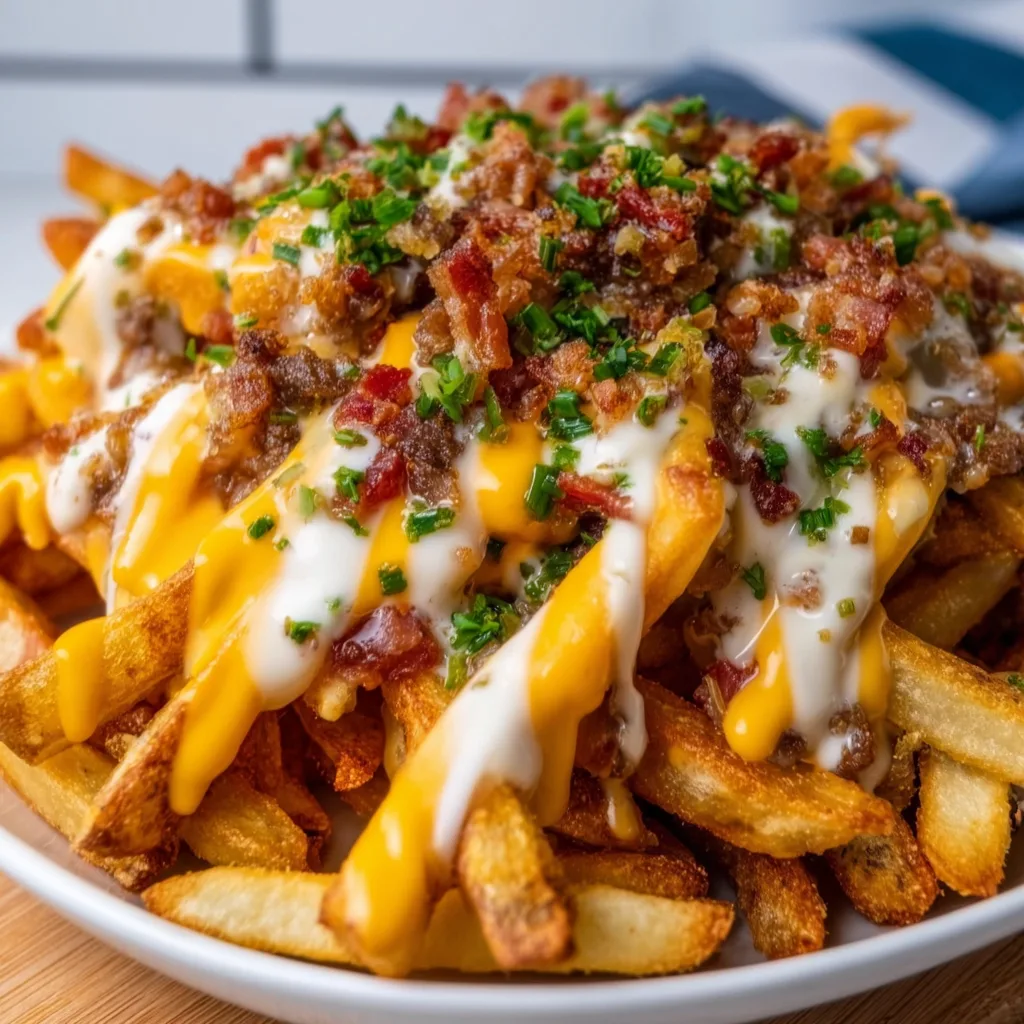
    Loaded Dirty Fries are my ultimate comfort food indulgence – crispy golden potatoes smothered in melty cheese, savory toppings, and decadent sauces that create pure magic on a plate. There’s something irresistibly satisfying about diving into a steaming platter of these loaded beauties after a long day. I still remember making these for my sister’s birthday gathering last summer – the moment I set them on the table, conversation stopped and all eyes locked on that mountain of deliciousness. Today, I’m sharing my foolproof method for creating restaurant-quality loaded fries that will have everyone reaching for seconds before they’ve even finished firsts.

    Recipe

    Why You’ll Love This Loaded Dirty Fries

    The Perfect Balance of Flavors and Textures

    These Loaded Dirty Fries deliver an explosive flavor combination that hits all the right notes. The contrast between crispy fries, gooey cheese, and tender toppings creates a texture paradise that’s impossible to resist. I love how each bite offers something different – a hint of smokiness from bacon, richness from cheese, freshness from green onions, and that delightful kick from jalapeños. What makes these truly special is how the toppings melt slightly into the hot fries, creating those magical forkfuls where everything comes together in perfect harmony. It’s comfort food elevated to an art form.

    Quick Preparation with Maximum Impact

    Despite their show-stopping appearance, these Loaded Dirty Fries come together in under 30 minutes, making them perfect for impromptu gatherings or satisfying late-night cravings. The beauty lies in their versatility – you can use frozen fries when pressed for time or make them from scratch when you want to impress. I’ve served these at everything from casual movie nights to fancy game day parties, and they’re always the first dish to disappear. The simplicity-to-impact ratio is off the charts, giving you maximum flavor rewards for minimal kitchen effort.

    Essential Tips & Tricks

    Achieving Ultra-Crispy Fries Every Time

    The foundation of amazing Loaded Dirty Fries is getting your potatoes perfectly crispy before adding toppings. For frozen fries, arrange them in a single layer and cook slightly longer than package directions. When making from scratch, soak cut potatoes in cold water for 30 minutes to remove excess starch, then pat thoroughly dry before frying or baking. My game-changing trick? Toss them with 1 tablespoon of cornstarch before cooking for that extra crunch. This creates the sturdy base needed to hold up under all those glorious toppings without becoming soggy too quickly.

    Layering Strategy for Maximum Flavor

    The secret to extraordinary Loaded Dirty Fries lies in strategic layering. Start with a thin layer of cheese directly on hot fries, allowing it to melt slightly before adding heavier toppings. This creates a protective barrier that helps maintain crispiness. For saucy elements like sour cream or homemade ranch, serve them on the side or drizzle just before serving. I always reserve some fresh ingredients like chopped herbs or green onions for the final garnish – this adds brightness, color contrast, and that final layer of flavor that elevates the entire dish.

    Serving Ideas & Creative Variations

    Family-Style Presentations That Wow

    Serve your Loaded Dirty Fries in oversized platters for maximum visual impact and easy sharing. I love using cast iron skillets for their rustic appeal and heat retention – the fries stay warmer longer as everyone digs in. For entertaining, create a DIY loaded fries bar with the base fries and separate bowls of toppings so guests can customize their portions. This interactive approach is always a hit at parties! For an extra special touch, serve with small individual dipping bowls of warm cheese sauce alongside – it’s these thoughtful details that transform a simple dish into a memorable experience.

    Global Flavor Inspirations

    Take your Loaded Dirty Fries on a worldwide flavor tour with internationally-inspired variations. Mediterranean-style fries with feta, olives, cucumber, and tzatziki deliver bright, fresh flavors. For Asian-inspired fries, try topping with teriyaki chicken, scallions, sesame seeds, and sriracha mayo. My personal favorite is Mexican street corn fries – topped with grilled corn kernels, cotija cheese, cilantro, lime, and chili powder. The beauty of dirty fries is their adaptability to whatever flavor profile you’re craving. Don’t be afraid to experiment with unexpected combinations – some of my most requested versions started as creative experiments!

    Storage & Troubleshooting Guide

    Reviving Leftover Loaded Fries

    While Loaded Dirty Fries are best enjoyed fresh, leftovers can be successfully revitalized with the right approach. Store any remaining fries separate from cold toppings in an airtight container in the refrigerator. To reheat, spread them on a baking sheet and warm in a 375°F oven for 7-10 minutes until crispy again. Avoid the microwave, which will leave you with soggy disappointment. For maximum revival success, add a sprinkle of fresh cheese during reheating and finish with new fresh toppings. This method gives leftover fries a second life that’s almost as good as the original.

    Troubleshooting Common Issues

    The most frequent problem with Loaded Dirty Fries is sogginess, which can be prevented with a few simple steps. Always ensure your fries are completely crisp before adding toppings. If serving at a party, consider placing the fries on a wire rack over the baking sheet to promote air circulation. For very wet toppings like salsa or sour cream, serve them on the side for dipping. If your cheese isn’t melting properly, cover the fries with foil for the last minute of baking, or use a kitchen torch for that perfect melt. These simple adjustments ensure your loaded fries maintain that ideal texture balance.

    Frequently Asked Questions

    What are the best potatoes for homemade Loaded Dirty Fries?

    Russet potatoes are ideal due to their high starch content, which creates crispy exteriors and fluffy interiors. For a waxier alternative with thinner skin, Yukon Golds work beautifully and hold their shape well under toppings.

    Can I make Loaded Dirty Fries in an air fryer?

    Absolutely! Air fryers create exceptionally crispy fries. Cook in batches at 380°F for 12-15 minutes, shaking halfway through. Add toppings after cooking, then return to the air fryer for 2-3 minutes to melt cheese.

    How do I keep my Loaded Dirty Fries from getting soggy?

    Ensure fries are extra-crispy before adding toppings, create a cheese barrier first, and serve wet ingredients like sauces on the side or add them just before serving. Using a wire rack during baking also helps maintain crispiness.

    What’s the difference between Loaded Dirty Fries and poutine?

    While both feature fries with toppings, traditional poutine specifically includes cheese curds and gravy. Loaded Dirty Fries offer more variation with endless topping possibilities including meats, vegetables, various cheeses, and multiple sauces.

    How far in advance can I prepare components for Loaded Dirty Fries?

    Prep toppings up to 24 hours ahead and store refrigerated. Cook fries just before serving. For parties, keep cooked fries warm in a 200°F oven while finishing other components. Never pre-assemble or fries will become soggy.

    Final Thoughts

    Loaded Dirty Fries represent comfort food at its finest – adaptable, crowd-pleasing, and bursting with flavor in every bite. What makes them special isn’t just the ingredients but the joy they bring to any gathering. I’ve watched quiet dinner tables transform into lively conversations once these fries hit the center. Whether you’re feeding a hungry crowd or treating yourself after a long week, these loaded fries deliver that perfect combination of indulgence and satisfaction. Create your own signature Loaded Dirty Fries variation and watch them become your most requested dish! Don’t forget to share your creations on Pinterest for inspiration.

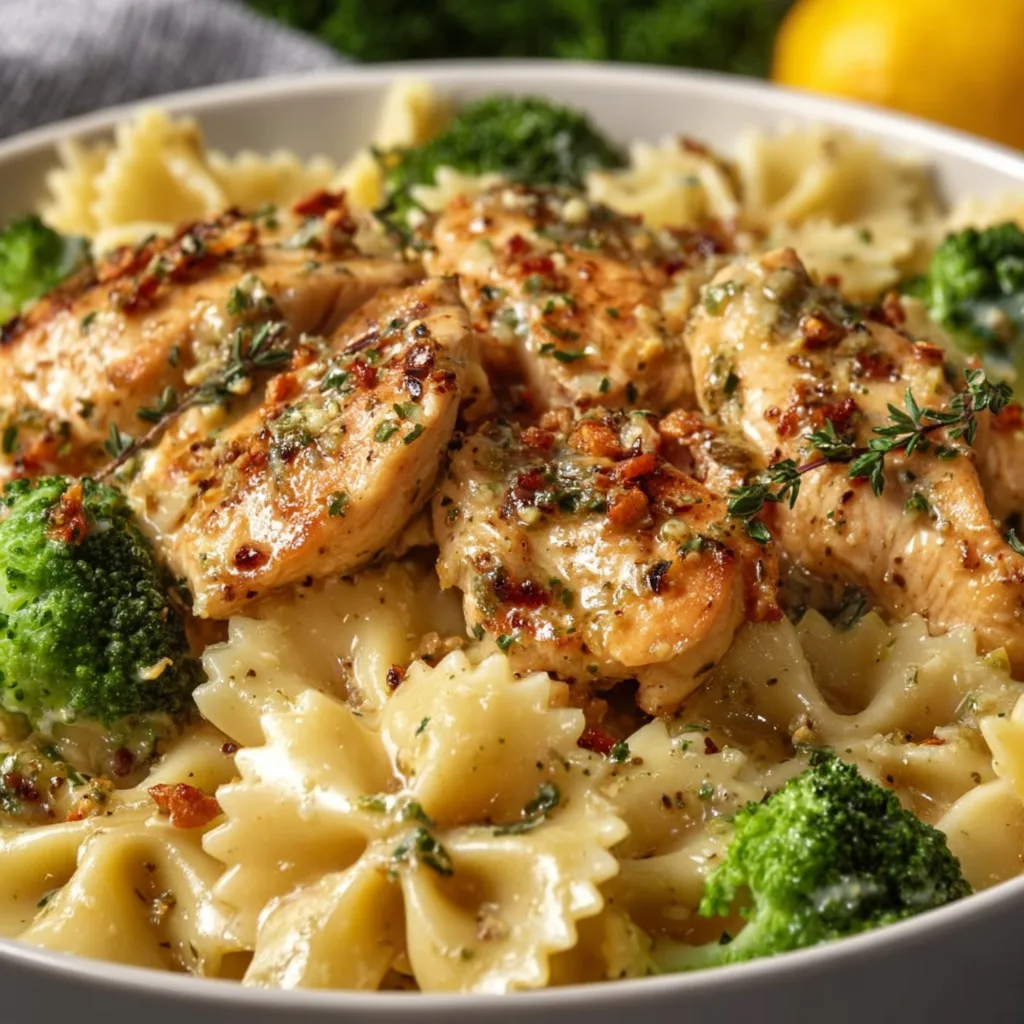
  • Lemon Garlic Bowtie Chicken with Broccoli – Irresistibly Fresh & Easy!

    Lemon Garlic Bowtie Chicken with Broccoli – Irresistibly Fresh & Easy!

    Lemon Garlic Bowtie Chicken with Broccoli – Irresistibly Fresh & Easy!

    Lemon Garlic Bowtie Chicken with Broccoli has become my weeknight dinner superhero, and I’m so excited to share it with you! There’s something magical about the way tangy lemon juice brightens up the rich garlic butter sauce, coating each bowtie pasta piece perfectly. When I first made this dish after a particularly exhausting Monday, the bright citrus aroma filled my kitchen and instantly lifted my mood. It’s that rare combination of comfort food that also feels light and refreshing. If you’re looking for a family-friendly meal that delivers on flavor without hours of prep, this recipe needs to be in your regular rotation.

    Recipe

    Why You’ll Love This Lemon Garlic Bowtie Chicken with Broccoli

    Perfect Balance of Flavors

    The magic of this dish lies in its perfect harmony of flavors. The bright acidity of fresh lemon juice cuts through the richness of the garlic butter sauce, creating a balanced bite every time. I love how the sauce clings to the ridges of the bowtie pasta, ensuring flavor in every forkful. The tender chicken pieces soak up all those incredible flavors, while the broccoli adds a fresh, earthy element that complements the citrus notes. When my sister first tried this recipe, she immediately asked for seconds – that’s when I knew this dish was something special!

    Quick and Nutritious Weeknight Solution

    On those evenings when you’re staring into the fridge wondering what to make, this recipe is your answer. It comes together in just 30 minutes from start to finish, making it perfect for busy weeknights. The combination of protein-packed chicken, fiber-rich broccoli, and satisfying pasta creates a nutritionally balanced meal in one pot. I started making this recipe during my busiest work weeks, and it’s become my reliable solution when I need something quick yet nourishing. The leftovers also reheat beautifully for lunch the next day – if there are any left!

    Essential Tips & Tricks

    Perfecting Your Pasta and Sauce

    For the best results, cook your bowtie pasta just until al dente – about 1 minute less than the package instructions. The pasta will continue cooking slightly when tossed with the hot sauce. When creating the lemon garlic sauce, be sure to slowly add the lemon juice while whisking to prevent any curdling. My secret ingredient is a splash of the starchy pasta water – it helps the sauce cling perfectly to every piece of pasta. For maximum flavor infusion, let the chicken rest in the lemon-garlic marinade for at least 15 minutes before cooking, similar to the technique in my Creamy Chicken Salad.

    Broccoli Preparation Secrets

    The key to perfectly cooked broccoli is cutting the florets into uniform sizes to ensure even cooking. I prefer to blanch my broccoli for just 2 minutes before adding it to the pasta – this maintains its bright green color and crisp-tender texture. If you’re short on time, you can add the raw broccoli directly to the boiling pasta during the last 3 minutes of cooking time. For extra flavor, try roasting the broccoli with a drizzle of olive oil and a pinch of red pepper flakes before adding it to the pasta. The slight char adds a wonderful depth that elevates the entire dish.

    Serving Ideas & Creative Variations

    Elegant Presentation Options

    Transform this weeknight staple into a dinner party worthy dish with a few simple touches. Serve it in a large, shallow pasta bowl and garnish with additional lemon zest, fresh parsley, and a sprinkle of toasted pine nuts for visual appeal and texture. For a beautiful finish, add shaved Parmesan that slowly melts into the warm pasta. I love to serve this alongside a simple arugula salad dressed with lemon vinaigrette for a complete meal. For special occasions, consider pairing with a crisp Pinot Grigio or Sauvignon Blanc to complement the citrus notes in the dish.

    Delicious Twist Suggestions

    This versatile recipe welcomes creative adaptations to keep things interesting! Try swapping the chicken for plump shrimp or tender scallops for a seafood version that cooks even faster. For a vegetarian option, replace the chicken with sautéed mushrooms and white beans for hearty protein. You can also experiment with different pasta shapes – orecchiette or shells capture the sauce beautifully. During summer months, I love adding cherry tomatoes and fresh basil for a seasonal twist. For a creamier variation, stir in 2 tablespoons of mascarpone or cream cheese just before serving.

    Storage & Troubleshooting Guide

    Proper Storage Methods

    Store any leftover Lemon Garlic Bowtie Chicken with Broccoli in an airtight container in the refrigerator for up to 3 days. The flavors actually continue to develop overnight, making this dish sometimes even better the next day! When reheating, add a splash of chicken broth or water to loosen the sauce, as the pasta will absorb liquid while storing. For meal prep, you can prepare the components separately – cook the pasta, marinate the chicken, and blanch the broccoli – then assemble just before serving. This prevents the pasta from becoming soggy and maintains the bright flavors.

    Fixing Common Issues

    If your sauce seems too thin, create a quick slurry with 1 teaspoon of cornstarch and 1 tablespoon of cold water. Add this to the simmering sauce and watch it thicken beautifully within minutes. For sauce that’s too thick, gradually add more pasta water until you reach your desired consistency. If your lemon flavor is too subtle, try adding fresh lemon zest rather than more juice – it provides intense citrus flavor without additional acidity. And if you accidentally overcooked your broccoli, don’t worry! Simply chop it more finely and it will incorporate into the sauce, adding flavor throughout.

    Frequently Asked Questions

    Can I make Lemon Garlic Bowtie Chicken with Broccoli ahead of time?

    Yes! Prepare it up to 24 hours ahead, but slightly undercook the pasta and broccoli. Store components separately and combine when reheating with a splash of chicken broth to refresh the sauce.

    What can I substitute for bowties if I don’t have them?

    Any medium pasta shape works well – penne, rotini, or shells are excellent alternatives that still capture the sauce in their ridges and crevices.

    Is this recipe freezer-friendly?

    While you can freeze it for up to 2 months, the texture of the broccoli and pasta may change slightly upon thawing. Reheat gently with added broth to revive the sauce.

    Can I use frozen broccoli instead of fresh?

    Absolutely! No need to thaw – add frozen broccoli directly to the boiling pasta water for the last 2 minutes of cooking time.

    How can I make this Lemon Garlic Bowtie Chicken with Broccoli dairy-free?

    Replace butter with olive oil and skip the Parmesan. Add nutritional yeast and a touch more lemon zest to maintain rich flavor depth.

    Final Thoughts

    This Lemon Garlic Bowtie Chicken with Broccoli has become a staple in my kitchen for good reason – it delivers restaurant-quality flavor with minimal effort. The bright lemon, aromatic garlic, and tender chicken create a symphony of flavors that satisfy every time. What I love most is how versatile this dish can be, adapting to whatever ingredients you have on hand. Whether you’re cooking for picky eaters or gourmet food lovers, this pasta dish bridges the gap beautifully. Don’t forget to check out more pasta inspiration on our Pinterest board for your next cooking adventure!

  • Chicken Birria Tacos: Irresistibly Juicy & Flavor-Packed Fiesta!

    Chicken Birria Tacos: Irresistibly Juicy & Flavor-Packed Fiesta!

    Chicken Birria Tacos: Irresistibly Juicy & Flavor-Packed Fiesta!

    Chicken Birria Tacos have completely stolen my heart and kitchen lately. There’s something magical about the way the tender, slow-cooked chicken soaks up all those rich, aromatic spices, creating a symphony of flavors that dance across your taste buds. The moment that consommé-dipped tortilla hits the hot pan and sizzles to crispy perfection, I’m transported to taco heaven. I discovered these beauties during a rainy Sunday cooking marathon, and now they’ve become my go-to when I want to impress friends or simply treat myself to something extraordinary. Trust me, these aren’t your everyday tacos—they’re an experience worth savoring.

    Recipe

    Why You’ll Love These Chicken Birria Tacos

    A Flavor Explosion in Every Bite

    The magic of these Chicken Birria Tacos lies in their complex flavor profile that develops during the slow cooking process. Dried chiles, toasted cumin, and Mexican oregano create a rich, slightly smoky base, while cinnamon and cloves add unexpected warmth. I love how the chicken thighs stay incredibly juicy, absorbing every bit of that gorgeous sauce. The first time I made these, my kitchen filled with an aroma so intoxicating that my neighbor actually texted to ask what I was cooking! That consommé isn’t just for dipping—it infuses the entire taco with deep, satisfying flavor.

    Easier Than They Look

    Don’t let the impressive results fool you—these tacos are surprisingly approachable for home cooks. While traditional birria uses goat or beef and requires hours of attention, this chicken version streamlines the process without sacrificing flavor. I’ve broken down the recipe into manageable steps that even weeknight warriors can tackle. The slow cooker does most of the heavy lifting, transforming simple ingredients into something extraordinary while you go about your day. That moment when you shred the tender chicken and it falls apart with just the touch of a fork? Pure kitchen satisfaction that makes you feel like a culinary genius.

    Essential Tips & Tricks

    Mastering the Perfect Consommé

    The consommé is the heart and soul of these tacos—don’t rush this step! Toast your dried chiles until they’re fragrant but not burnt (about 30 seconds per side in a dry pan) before soaking them. This simple step awakens their oils and creates incredible depth. For maximum flavor extraction, blend your soaked chiles with onions, garlic, and spices until silky smooth, then strain through a fine-mesh sieve. I learned the hard way that skipping the straining step leaves you with a gritty texture. For an extra flavor boost, skim the fat that rises to the top and save it for dipping your tortillas before crisping them up.

    The Art of the Dip & Crisp

    The crispy exterior is what elevates these tacos from good to unforgettable. Heat a cast iron skillet until it’s properly hot—water should dance across the surface. Dip each tortilla quickly in the skimmed consommé fat (or use a brush if you prefer more control), then place immediately on the hot surface. Work quickly but carefully as you add your chicken filling and cheese to one half, then fold and press with a spatula. Like my chicken cheese steak sandwiches, the key is getting that perfect golden crunch without burning. Give each taco about 2 minutes per side, watching for that mouthwatering golden-brown color.

    Serving Ideas & Creative Variations

    Build the Ultimate Birria Experience

    Create a complete birria feast by serving these tacos with small bowls of hot consommé for dipping—this is non-negotiable! The contrast between the crispy taco and the rich broth is what makes this dish special. I like to set up a DIY taco bar with finely diced white onion, fresh cilantro, lime wedges, and a bright salsa verde. For something unexpected, try pickled red onions for a tangy contrast. My friends went crazy when I added a simple cabbage slaw with lime and a touch of honey to cut through the richness. For a heartier meal, serve alongside cilantro lime steak bowls for a Mexican-inspired feast.

    Exciting Twists on Tradition

    While traditional birria tacos are divine, don’t be afraid to experiment with this versatile recipe. Try using leftover birria chicken in enchiladas, quesadillas, or even as a topping for nachos. The consommé makes an incredible base for Mexican rice—just substitute it for some of the water. For a fusion twist, I’ve stuffed birria chicken into egg rolls with Oaxaca cheese and served them with consommé as a dipping sauce. My vegetarian friends love when I substitute jackfruit or mushrooms for the chicken, using the same spice blend and cooking method. The complex flavors work beautifully with hearty vegetables.

    Storage & Troubleshooting Guide

    Keeping Birria Fresh

    Properly stored, your chicken birria components will maintain their incredible flavor for days. Store the shredded chicken and consommé separately in airtight containers in the refrigerator for up to 4 days. The flavors actually deepen overnight, making this a perfect make-ahead meal. For longer storage, freeze the meat and consommé for up to 3 months—just thaw overnight in the refrigerator before reheating. Never microwave the assembled tacos (they’ll turn soggy); instead, reheat the components separately and assemble fresh tacos. I often make a double batch of the chicken specifically to freeze half for those nights when I need dinner magic in minutes.

    Fixing Common Birria Challenges

    Even experienced cooks encounter birria troubles occasionally. If your consommé is too thin, simmer it uncovered to reduce and concentrate the flavors. Too thick? Add chicken broth a tablespoon at a time. If your chicken seems dry, it likely cooked too long—next time, check it earlier or add more liquid. For tacos that won’t stay crispy, your skillet probably wasn’t hot enough. Make sure it’s properly preheated and work in smaller batches if needed. If your tortillas are breaking when you dip them, they’re either too cold or too stiff—warm them slightly first or try a different brand with more flexibility.

    Frequently Asked Questions

    What makes Chicken Birria Tacos different from regular tacos?

    Chicken Birria Tacos feature slow-cooked meat in a rich chile sauce, with tortillas dipped in consommé before being crisped on a griddle. The result is a flavor-packed taco with a crispy exterior and tender, juicy filling that regular tacos don’t offer.

    Can I use chicken breast instead of thighs?

    Yes, but chicken thighs provide more flavor and moisture. If using breasts, reduce the cooking time by about 30 minutes and add a tablespoon of olive oil to prevent dryness.

    How spicy are these tacos?

    The spice level is customizable. For milder tacos, remove the seeds from the dried chiles and use fewer chiles. For extra heat, add a chopped chipotle pepper in adobo sauce to the mixture.

    What’s the best cheese to use?

    Oaxaca cheese is traditional for its meltability and mild flavor. Good substitutes include mozzarella, Monterey Jack, or quesadilla cheese if Oaxaca isn’t available.

    Can I make the consommé ahead of time?

    Absolutely! The consommé actually improves after a day in the refrigerator as flavors meld. Make it up to 3 days ahead and reheat before serving.

    Final Thoughts

    These Chicken Birria Tacos have become my signature dish for good reason—they strike that perfect balance between impressive and achievable. There’s something deeply satisfying about transforming simple ingredients into something that makes people close their eyes and savor each bite. The rich consommé, the tender chicken, the crispy exterior—it’s a sensory experience that brings people together around the table. Whether you’re cooking for a special occasion or just treating yourself on a Tuesday, these tacos deliver restaurant-quality flavor right in your kitchen. I’d love to see your Chicken Birria Taco creations over on Pinterest!

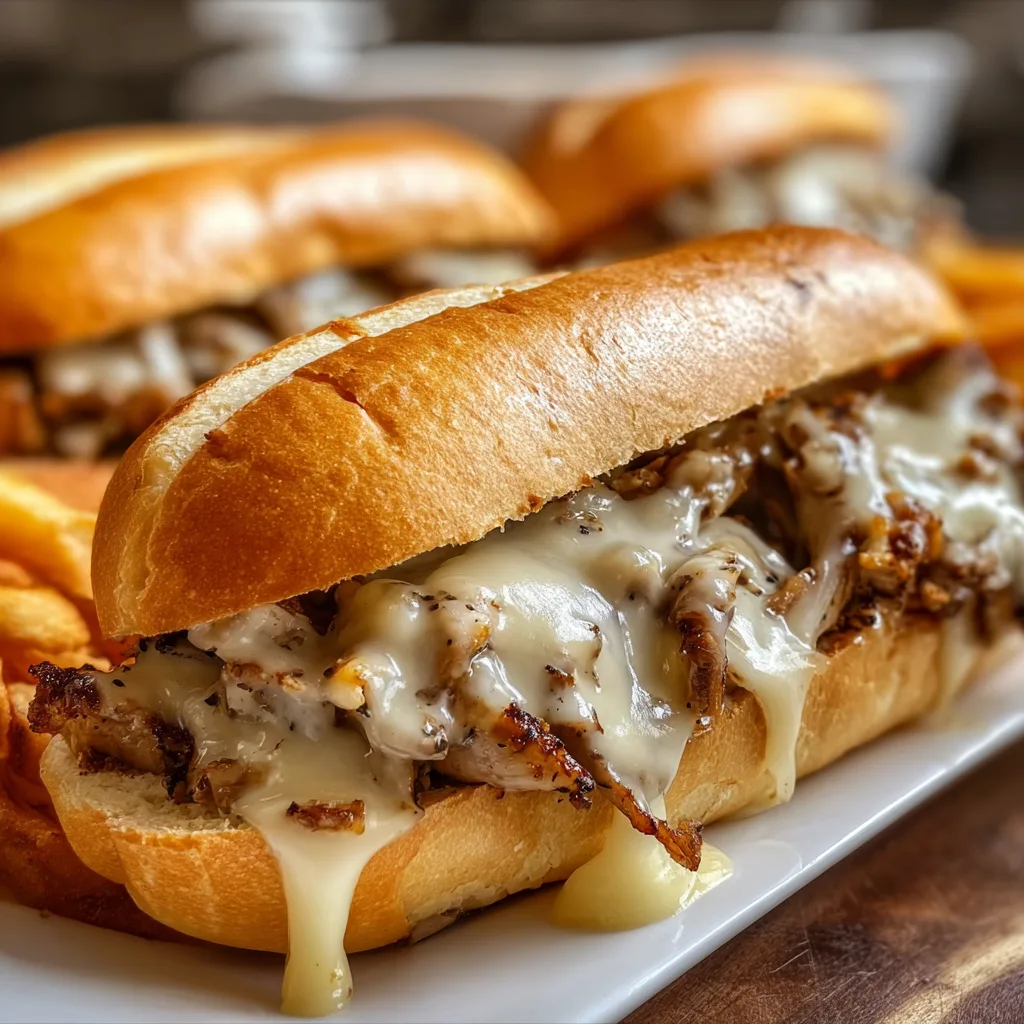
  • Chicken Cheese Steak Sandwiches That’ll Blow Your Mind!

    Chicken Cheese Steak Sandwiches That’ll Blow Your Mind!

    Chicken Cheese Steak Sandwiches That'll Blow Your Mind!

    Chicken Cheese Steak Sandwiches are the ultimate comfort food that brings Philadelphia-inspired flavors right to your kitchen. There’s something magical about the combination of tender, seasoned chicken strips nestled in a soft roll and smothered with melty cheese that makes my heart (and stomach) so happy. The first time I made these for my family, the kitchen filled with the aroma of sautéed peppers and onions, and everyone gathered around before I could even call them to dinner.

    These sandwiches strike that perfect balance between indulgent satisfaction and everyday ease—exactly what we all need after a busy day. If you love quick, flavorful meals that feel special, you’ll want to add this recipe to your regular rotation, just like my creamy chicken salad.

    Recipe

    Why You’ll Love This Chicken Cheese Steak Sandwiches

    Perfect Weeknight Solution

    These chicken cheese steak sandwiches have saved me countless times when I’m staring into the fridge at 5 pm with no dinner plan. They come together in about 25 minutes from start to finish, making them faster than takeout and infinitely more satisfying. The simple ingredients transform magically when cooked together—thinly sliced chicken gets a beautiful caramelization, peppers and onions become sweet and tender, and that cheese blanket on top ties everything together. I love how this meal feels special enough for a Friday night but is easy enough for a Tuesday when you’re running on empty.

    Customizable For Everyone

    What makes these chicken cheese steak sandwiches a family favorite is how easily they adapt to everyone’s preferences. My daughter skips the peppers but doubles up on cheese, while my husband adds extra hot sauce and mushrooms to his. The basic formula stays the same, but each sandwich can be a personal creation. I keep a variety of cheese options on hand—provolone for authenticity, pepper jack for spice lovers, and American for that unbeatable melt factor. You can even set up a build-your-own sandwich bar when friends come over, which has been a huge hit at casual gatherings.

    Essential Tips & Tricks

    Mastering the Chicken

    The secret to restaurant-quality chicken cheese steak sandwiches lies in how you prepare the chicken. I’ve learned to slice chicken breast when it’s still slightly frozen—this makes getting those thin, even strips so much easier. Season generously with salt, pepper, and garlic powder before cooking, and don’t crowd the pan! Cook in batches if needed to get that beautiful caramelization instead of steaming. The chicken should have some golden-brown edges but still remain juicy inside. I’ve found that high heat and quick cooking preserves that tenderness we’re all looking for.

    Perfect Bread Selection

    The foundation of any great sandwich is the bread, and chicken cheese steak sandwiches are no exception. Traditional hoagie rolls work beautifully, but don’t hesitate to experiment with what’s available. The ideal roll should have a slightly crisp exterior with a soft, pillowy interior that can hold up to the juicy filling without becoming soggy. I always give my rolls a quick toast in the oven before assembling—just enough to warm them through and create a bit of structure. This simple step prevents the dreaded soggy-bottom situation that can ruin an otherwise perfect sandwich, similar to how I prepare bread for my baked Italian grinder sandwiches.

    Serving Ideas & Creative Variations

    Perfect Pairings

    Chicken cheese steak sandwiches shine brightest when paired with complementary sides that enhance the experience. My family’s favorite combination includes crispy air fryer fries dusted with garlic salt and a simple side salad with vinaigrette to cut through the richness. On game days, I serve these alongside pickle spears and kettle chips for that authentic deli experience. For a more substantial spread, consider adding a light vegetable soup or some tangy coleslaw. The key is balancing the hearty sandwich with sides that add contrast in texture and flavor without overwhelming your palate.

    Creative Twists

    While traditional chicken cheese steak sandwiches are divine, don’t be afraid to put your personal spin on them! I created a Mediterranean version with feta, olives, and tzatziki that was an unexpected hit at our last gathering. For a southwestern twist, add roasted poblanos and pepper jack cheese, then top with avocado slices and cilantro. Buffalo chicken cheese steaks are another favorite—just toss the cooked chicken in buffalo sauce before adding to the rolls, then drizzle with ranch or blue cheese dressing. These variations keep the basic concept fresh and exciting, much like how I reinvent classic recipes in my chicken parmesan grilled cheese.

    Storage & Troubleshooting Guide

    Make-Ahead and Storage Options

    Chicken cheese steak sandwiches are best enjoyed fresh, but with a few tricks, you can prep components ahead and even store leftovers successfully. I often slice and season the chicken, peppers, and onions the night before, storing them separately in the refrigerator. This meal prep approach cuts dinner assembly time in half! For leftovers, store the filling separate from the bread and reheat gently in a skillet with a splash of chicken broth to restore moisture. The filling stays good for up to 3 days refrigerated. If you want to freeze portions, the cooked filling freezes well for up to 2 months—just thaw overnight and reheat with fresh cheese.

    Common Issues Solved

    Even experienced cooks encounter challenges with chicken cheese steak sandwiches. If your chicken turns out tough, it’s likely overcooked—remember that thin slices need just 2-3 minutes per side. For soggy sandwiches, try toasting the inside of the roll and letting the filling cool slightly before assembly. If your cheese isn’t melting properly, cover the sandwiches with a lid during the last minute of cooking to create a steam environment. And for those times when the filling falls out with every bite, try creating a slight well in the bread and arranging ingredients in layers rather than piling everything on haphazardly.

    Frequently Asked Questions

    What’s the best cheese for chicken cheese steak sandwiches?

    Provolone offers authentic flavor and excellent melt, while American cheese provides that creamy texture many love. For a kick, try pepper jack. I often use a combination of provolone and white American for the perfect balance.

    Can I use pre-cooked chicken for these sandwiches?

    Yes! Leftover rotisserie or grilled chicken works wonderfully. Slice it thinly and add it to the peppers and onions just long enough to warm through before adding cheese.

    How do I get that restaurant-quality melt on my chicken cheese steak sandwiches?

    Place cheese directly on hot chicken, then cover with a lid for 30 seconds. The steam will create a perfect melt without overcooking the filling.

    What’s the best way to slice chicken for cheese steaks?

    Partially freeze chicken breasts for 20 minutes, then use a sharp knife to cut against the grain into very thin slices. This technique gives you tender, easy-to-cook pieces.

    Can I make chicken cheese steak sandwiches healthier?

    Absolutely! Use whole grain rolls, load up on vegetables, choose reduced-fat cheese, and consider using chicken breast instead of thighs. You can also serve open-faced to reduce carbs.

    Final Thoughts

    Chicken cheese steak sandwiches have earned their place in my family’s regular meal rotation because they hit all the right notes—quick, customizable, and universally loved. There’s something deeply satisfying about biting into that perfect combination of tender chicken, sweet peppers, and melty cheese all nestled in a toasted roll. Whether you’re feeding hungry teenagers, impressing dinner guests, or simply treating yourself after a long day, these sandwiches deliver comfort and satisfaction every time. Don’t forget to check out more sandwich inspiration on Pinterest and keep experimenting with your own signature chicken cheese steak creation!

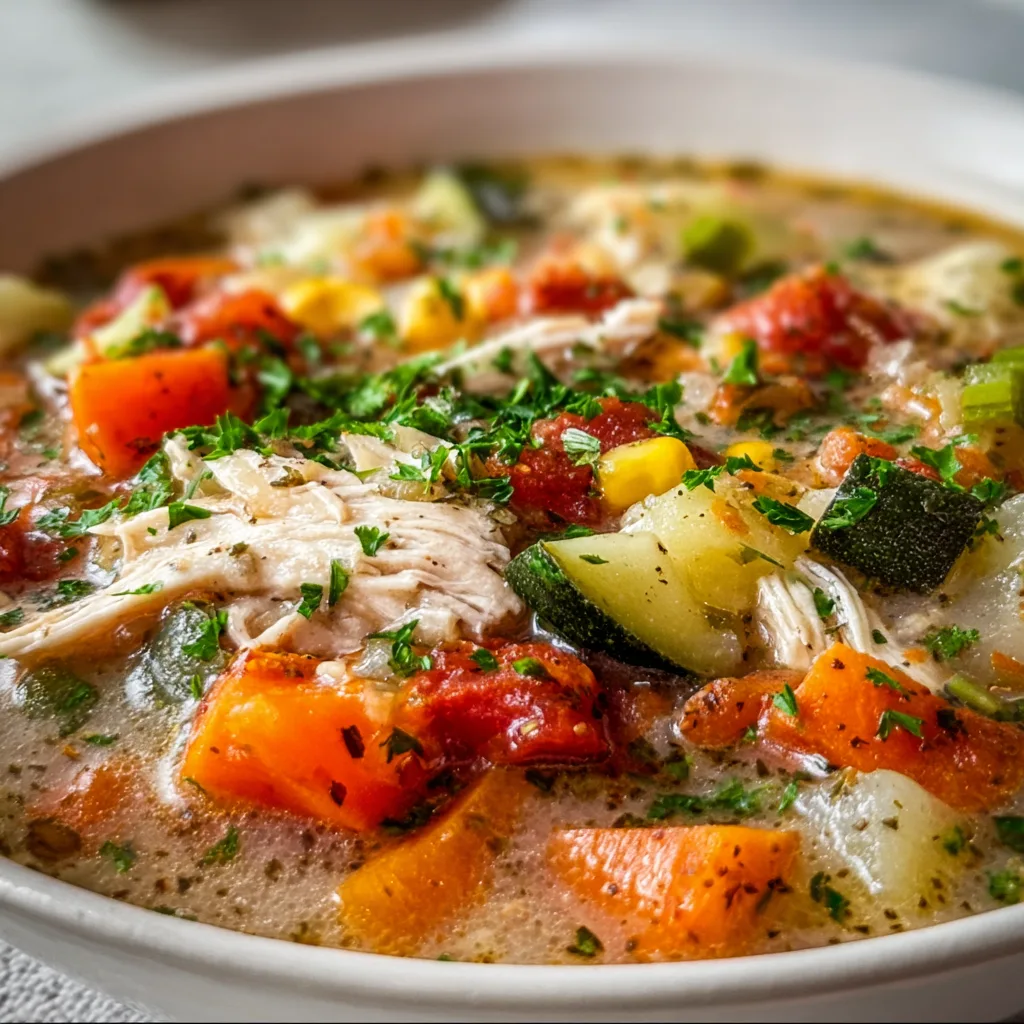
  • Ranch Chicken Veggie Soup Recipe That Warms Your Soul Instantly

    Ranch Chicken Veggie Soup Recipe That Warms Your Soul Instantly

    Ranch Chicken Veggie Soup Recipe That Warms Your Soul Instantly

    Ranch Chicken Veggie Soup is the ultimate comfort food hug-in-a-bowl that’s become my go-to remedy for chilly evenings and busy weeknights alike. There’s something magical about the way the creamy ranch-infused broth wraps around tender chicken and vibrant veggies that just soothes the soul. I discovered this recipe during a particularly brutal winter when my family needed something warming yet nutritious. Now it’s our most requested meal when the temperature drops! This hearty one-pot wonder delivers all the cozy vibes of classic comfort food with a nutritional boost that makes it perfect for any day of the week.

    Recipe

    Why You’ll Love This Ranch Chicken Veggie Soup

    Perfect Balance of Flavor and Nutrition

    This soup strikes that elusive sweet spot between indulgent comfort food and nourishing meal. The ranch seasoning infuses every spoonful with herby, garlicky goodness while keeping the overall profile light enough that you can taste each vegetable’s unique contribution. I love watching my veggie-skeptical nephew devour his bowl without realizing he’s eating carrots, celery, and zucchini! The protein from the chicken keeps you satisfied for hours, while the rainbow of vegetables delivers a powerhouse of vitamins and minerals that support your immune system during cold and flu season.

    Incredibly Versatile and Adaptable

    One of my favorite things about this Ranch Chicken Veggie Soup is how easily it adapts to whatever you have on hand. No chicken? Swap in turkey or white beans for a vegetarian version. The veggie lineup is completely customizable based on what’s in your crisper drawer or what looks fresh at the market. I’ve made this with everything from sweet potatoes to kale to corn depending on the season. The ranch flavor profile works beautifully with almost any combination, making this a perfect clean-out-the-fridge recipe that never feels like you’re compromising on taste.

    Essential Tips & Tricks

    Maximizing Ranch Flavor Without Extra Calories

    The secret to achieving that perfect ranch flavor depth lies in layering. Rather than dumping in extra packets of seasoning (which can quickly make things too salty), I start by sautéing fresh garlic, onions and herbs in a bit of butter before adding any liquid. This creates a flavor foundation that amplifies the ranch seasoning you’ll add later. For an extra flavor boost without calories, try adding a tablespoon of ranch seasoning to your soup during the last 5 minutes of cooking, which preserves those fresh herb notes that can sometimes get lost during a long simmer.

    Achieving the Perfect Texture

    Nothing ruins a good soup faster than mushy vegetables or rubbery chicken. The key is strategic timing when adding ingredients. Start with your aromatics (onions, celery, carrots), then add chicken and harder vegetables that need more cooking time. Save quick-cooking veggies like zucchini, spinach, or frozen peas for the final few minutes. For the creamiest texture without using heavy cream, try my favorite hack: blend 1/4 cup of white beans with a little broth and stir it in. This adds body and silky richness without dairy, perfect for those watching their calorie intake!

    Serving Ideas & Creative Variations

    Delicious Pairings That Elevate Your Soup

    While this Ranch Chicken Veggie Soup is hearty enough to stand alone, a few thoughtful accompaniments can transform it into a feast. My family goes crazy for a side of warm crusty bread for dipping – sourdough or a rustic Italian loaf works beautifully. For a complete meal that still feels light, try serving smaller portions alongside a crisp green salad with a lemon vinaigrette to balance the creamy soup. When I’m feeding a crowd, I set up a toppings bar with crispy bacon bits, fresh herbs, extra shredded cheese, and avocado slices so everyone can customize their bowl.

    Exciting Flavor Variations to Try

    The classic ranch profile is just the beginning! One of my favorite variations is the Southwest Ranch version – I add a can of diced green chiles, black beans, corn, and a dash of cumin, then top with tortilla strips and lime wedges. For a Mediterranean twist, try adding artichoke hearts, olives, and sundried tomatoes, then finishing with a sprinkle of feta cheese. When I’m craving something with a kick, I’ll stir in some buffalo sauce and blue cheese crumbles for a Buffalo Ranch variation that’s perfect for game day gatherings – it disappears faster than I can ladle it out!

    Storage & Troubleshooting Guide

    Proper Storage for Maximum Freshness

    This Ranch Chicken Veggie Soup stores beautifully, actually improving in flavor after a day in the refrigerator as the herbs and spices meld together. Store in airtight containers for up to 4 days in the refrigerator. For longer storage, freeze in individual portions for up to 3 months. My time-saving tip: freeze in silicone muffin trays, then pop out the frozen portions into a larger container for easy single servings. When reheating, add a splash of fresh broth if it’s thickened too much, and a squeeze of lemon just before serving to brighten all the flavors that may have dulled during storage.

    Fixing Common Soup Problems

    Even experienced cooks occasionally encounter soup issues, but most are easily fixed! If your soup is too thin, try a quick slurry of 1 tablespoon cornstarch mixed with 2 tablespoons cold water, then stir into the simmering soup until it reaches your desired thickness. Too thick? Simply add more broth until you reach the perfect consistency. If the ranch flavor isn’t pronounced enough, don’t just add more seasoning which can make it too salty – instead, try adding a dollop of actual ranch dressing to each bowl when serving. This adds creaminess and flavor without overwhelming the soup’s balance.

    Frequently Asked Questions

    Can I make Ranch Chicken Veggie Soup in a slow cooker?

    Absolutely! Add all ingredients except dairy components and quick-cooking vegetables. Cook on low for 6-7 hours, then add remaining ingredients during the last 30 minutes. This method intensifies the flavors beautifully.

    What’s the best chicken to use for this soup?

    Boneless skinless chicken thighs offer the most flavor and stay tender during cooking. If using breasts, be careful not to overcook them, as they can become dry.

    Can I make this soup vegetarian?

    Yes! Replace chicken with white beans or chickpeas, and use vegetable broth instead of chicken broth. The ranch seasoning typically contains no animal products.

    How can I make this soup creamier without adding calories?

    Puree a portion of the cooked vegetables and broth, then stir back into the soup. This creates a thicker, creamier texture without extra dairy.

    Is Ranch Chicken Veggie Soup freezer-friendly?

    Definitely! Freeze in airtight containers for up to 3 months. If using dairy, the texture may change slightly when thawed, but a good stir while reheating resolves this.

    Final Thoughts

    This Ranch Chicken Veggie Soup has become more than just a recipe in my household—it’s a reliable friend that shows up on our dinner table throughout the year. The beauty lies in its simplicity and adaptability, making it perfect for both planned family dinners and impromptu gatherings. I love how it transforms basic ingredients into something truly special, with that signature ranch flavor tying everything together beautifully. Whether you’re cooking for picky eaters or sophisticated palates, this soup hits all the right notes. Find more cozy recipes on Pinterest and discover why this has become a staple in so many homes!

  • Anti-Inflammatory Turmeric Waffles: Boost Health & Delight Your Tastebuds!

    Anti-Inflammatory Turmeric Waffles: Boost Health & Delight Your Tastebuds!

    Anti-Inflammatory Turmeric Waffles: Boost Health & Delight Your Tastebuds!

    Anti-Inflammatory Turmeric Waffles have become my weekend obsession lately, and I can’t wait to share why. These golden-hued breakfast beauties aren’t just Instagram-worthy – they’re packed with healing spices that make your body feel as good as your taste buds. The first time I made these for my sister after her marathon, she declared them “healing magic on a plate.” The earthy warmth of turmeric paired with the subtle sweetness of cinnamon creates a flavor profile that feels like a warm hug from the inside out. If you’ve been looking for a delicious way to incorporate more anti-inflammatory ingredients into your diet, these waffles are about to become your new favorite breakfast staple.

    Recipe

    Why You’ll Love These Anti-Inflammatory Turmeric Waffles

    A Nutritional Powerhouse

    These aren’t your ordinary waffles – they’re packed with turmeric’s curcumin, which research suggests may help reduce inflammation throughout the body. I’ve incorporated ground ginger and cinnamon too, creating a triple threat of anti-inflammatory spices. The first time I served these to my inflammation-prone friend Mia, she texted me the next day saying she felt noticeably better. Beyond the spices, I’ve used whole grain flour for fiber and added ground flaxseed for omega-3 fatty acids. Each bite delivers nutrition without sacrificing that perfect waffle texture we all crave.

    Perfect Balance of Flavors

    Don’t worry – these don’t taste like you’re eating a spice cabinet! The flavor balance is what makes these waffles truly special. The earthy turmeric is complemented by warming cinnamon and zingy ginger, while a touch of vanilla and maple syrup in the batter rounds everything out beautifully. My husband (who typically reaches for chocolate chip pancakes) now requests these regularly. The subtle sweetness pairs perfectly with both savory and sweet toppings, making them incredibly versatile. You’ll be surprised how the golden color signals something special even before the first bite.

    Essential Tips & Tricks

    Mastering the Batter Consistency

    Getting the perfect consistency is key to anti-inflammatory turmeric waffle success. The batter should be pourable but not runny – think melted ice cream thickness. I learned this the hard way after one too many waffle iron cleanups! Let the batter rest for 5-10 minutes before cooking; this allows the flaxseed to work its binding magic and the spices to fully bloom. If your batter seems too thick, add non-dairy milk one tablespoon at a time. Too thin? A sprinkle of additional flour will do the trick. This patience-requiring step makes all the difference in creating that ideal crisp exterior with a tender interior.

    Waffle Iron Wisdom

    Your waffle iron is your best friend for this recipe, but it needs proper treatment! Always preheat completely before adding batter – I wait until the indicator light shows it’s ready, then give it two more minutes. This ensures that gorgeous golden crust. A light spritz of avocado oil (even on non-stick surfaces) prevents sticking and enhances crispiness. Don’t peek too early! Opening the iron before the waffles are done leads to tearing and uneven cooking. These turmeric waffles take slightly longer than standard waffles – about 30-45 seconds more – for that perfect crispy exterior we’re after.

    Serving Ideas & Creative Variations

    Sweet & Savory Toppings

    These golden beauties are incredibly versatile when it comes to topping combinations. For a sweet approach, try fresh berries, sliced banana, and a drizzle of honey – the fruit’s brightness beautifully complements the earthy turmeric. My personal favorite is Greek yogurt with a sprinkle of chopped pistachios and a light drizzle of maple syrup. For a savory twist, try avocado slices, a perfectly poached egg, and a sprinkle of microgreens. The anti-inflammatory properties pair wonderfully with protein-rich toppings like smoked salmon or grilled chicken. The contrast between the golden waffle and colorful toppings makes for a stunning presentation.

    Seasonal Adaptations

    One of the joys of this recipe is how easily it adapts to seasonal ingredients. In summer, I fold fresh blueberries directly into the batter and top with peach compote. Fall calls for diced apples and an extra sprinkle of cinnamon. Winter waffles get brightened with citrus zest in the batter and a blood orange supremes topping. Spring brings opportunities for fresh herbs like mint or basil mixed into the batter. You can also adjust the spice levels seasonally – more warming ginger in winter, more bright lemon zest in summer. These adaptations keep the recipe exciting year-round while maintaining the anti-inflammatory benefits.

    Storage & Troubleshooting Guide

    Make-Ahead and Freezing Methods

    These turmeric waffles are perfect for meal prepping! Allow extras to cool completely on a wire rack (this prevents sogginess), then store in an airtight container in the refrigerator for up to 3 days. For longer storage, freeze in a single layer on a baking sheet, then transfer to a freezer bag with parchment between each waffle. They’ll keep for up to 3 months! To reheat, pop them in the toaster on a low setting or in a 350°F oven for 5-7 minutes. The toaster method restores that delightful crispness beautifully. I make a double batch every Sunday for easy weekday breakfasts.

    Troubleshooting Common Issues

    If your waffles aren’t turning out perfectly, don’t worry! The most common issue is sticking to the iron, which usually means either the iron wasn’t hot enough or needed more oil. For pale waffles lacking that golden color, try adding an extra ¼ teaspoon of turmeric to the batter. If they’re too dense, your batter might be overmixed – stir just until combined, leaving a few small lumps. Waffles falling apart? The batter may be too thin, or they might need another minute of cooking time. Remember that the first waffle is often the test run, just like pancakes! Adjust heat or cooking time as needed.

    Frequently Asked Questions

    Can I make these Anti-Inflammatory Turmeric Waffles gluten-free?

    Absolutely! Substitute the regular flour with a 1:1 gluten-free baking blend. I’ve tested with both Bob’s Red Mill and King Arthur with excellent results. Add ¼ teaspoon xanthan gum if your blend doesn’t include it.

    How much turmeric should I use for the best anti-inflammatory benefits?

    For optimal benefits, use 1-1½ teaspoons of high-quality ground turmeric. Adding a pinch of black pepper enhances curcumin absorption. Don’t exceed 2 teaspoons as the flavor can become overwhelming.

    Can I make the batter ahead of time?

    Yes! Prepare the batter up to 12 hours ahead and refrigerate. Let it come to room temperature for 15 minutes before cooking, and add a splash of milk if it’s thickened too much.

    What’s the best milk substitute for dairy-free turmeric waffles?

    Coconut milk creates the richest texture, while almond milk keeps things lighter. Oat milk offers a middle ground with a naturally sweet flavor that complements the spices beautifully.

    How do I prevent the turmeric from staining my waffle iron?

    Spray your waffle iron thoroughly with cooking spray before adding batter. Clean while still slightly warm (not hot) with a damp cloth. Most staining is temporary and will fade with subsequent use.

    Final Thoughts

    These Anti-Inflammatory Turmeric Waffles have transformed my relationship with breakfast, proving that healing foods can be utterly delicious. There’s something magical about watching someone take that first bite – eyes widening as they realize these golden-hued waffles deliver both wellness and incredible flavor. Whether you’re actively seeking anti-inflammatory foods or simply want to elevate your breakfast game, this recipe delivers on all fronts. I’d love to see your creations on Pinterest – tag me in your golden waffle masterpieces!