Blog

  • Limoncello Zucchini Ricotta Bread: Irresistibly Moist & Flavorful!

    Limoncello Zucchini Ricotta Bread: Irresistibly Moist & Flavorful!

    Limoncello Zucchini Ricotta Bread: Irresistibly Moist & Flavorful!

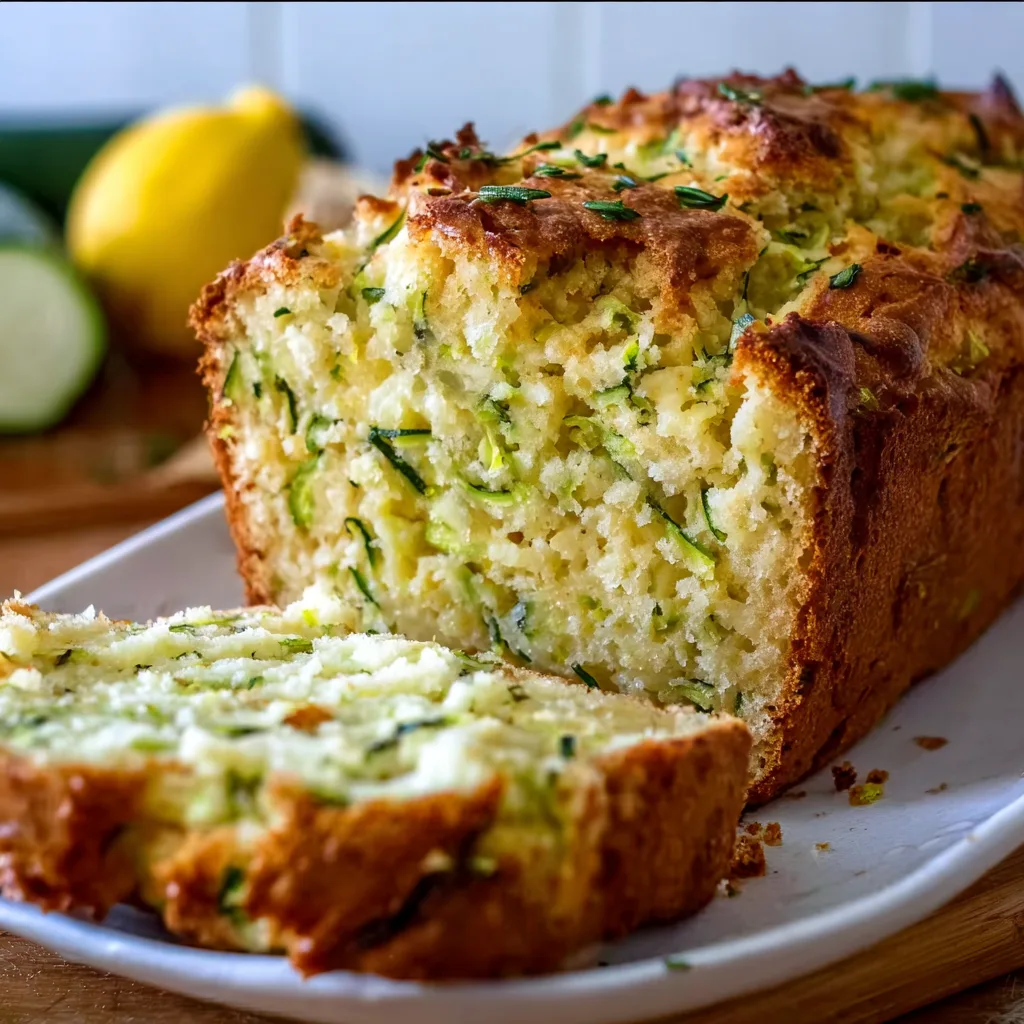
    Limoncello Zucchini Ricotta Bread brings together the bright, citrusy punch of limoncello liqueur with the moistness of fresh zucchini and the creamy richness of ricotta cheese. This summery loaf has become my absolute go-to when I want something that feels both indulgent and refreshing. The first time I made this bread, the aroma filled my kitchen with such a heavenly lemon scent that my neighbor actually texted to ask what I was baking! It’s that kind of recipe—the one that creates memories and draws people to your kitchen with its irresistible citrus-forward charm.

    Recipe

    Why You’ll Love This Limoncello Zucchini Ricotta Bread

    A Perfect Balance of Flavors and Textures

    This bread strikes the most beautiful balance between sweet and tangy, moist and tender. The limoncello adds a sophisticated citrus complexity that regular lemon juice just can’t match, while the zucchini disappears into the batter, leaving only its moisture behind. The ricotta creates pockets of creaminess throughout each slice, making every bite slightly different from the last. I love how the top develops a slight crackle while the inside stays incredibly tender. It’s the kind of texture contrast that makes you close your eyes with each bite, savoring the moment.

    Quick Prep with Impressive Results

    Don’t let the fancy name fool you—this bread comes together in about 15 minutes of active prep time. The ingredients do all the heavy lifting here! Simply grate your zucchini, mix your wet ingredients, fold in your dry ingredients, and you’re ready to bake. The aromatic results are completely disproportionate to the effort required. I’ve served this at brunches where guests assumed I’d spent hours in the kitchen, when really I was relaxing with coffee while it baked. It’s my secret weapon for entertaining with minimal stress.

    Essential Tips & Tricks

    Mastering the Zucchini Prep

    The key to perfect texture lies in how you handle your zucchini. After grating, place it in a clean kitchen towel and squeeze firmly to remove excess moisture. This prevents a soggy loaf while still benefiting from zucchini’s moistening properties. I learned this the hard way after my first attempt turned out too wet in the center! For optimal flavor distribution, use the smaller side of your grater—larger shreds can create wet pockets. If you’re short on time, you can prep and drain your zucchini the night before, storing it in the refrigerator until ready to use.

    The Secret to Ricotta Integration

    Ricotta can make or break this bread, so handle it with care! For the creamiest texture, use whole milk ricotta and drain it for 30 minutes if it seems watery. When folding ricotta into your batter, aim for gentle incorporation rather than complete mixing—those beautiful pockets of cheese create the signature texture. Try warming your ricotta to room temperature before adding it to your batter, as cold ricotta can seize up your butter mixture. For an extra flavor boost, try ricotta with a hint of orange that complements the limoncello beautifully.

    Serving Ideas & Creative Variations

    Elevated Serving Suggestions

    Transform this bread from a simple snack to an elegant dessert with thoughtful presentation. Try toasting slices lightly and topping with a dollop of mascarpone cream and fresh berries for a sophisticated dessert. For brunch, serve alongside a limoncello-spiked prosecco cocktail—the complementary flavors are divine! I once served this bread as part of a lemon-themed afternoon tea, sliced thinly with lemon curd on the side, and my friends still talk about it months later. For a simple but stunning presentation, dust with powdered sugar and garnish with thin lemon slices and a sprig of fresh mint.

    Exciting Flavor Variations

    While the classic recipe is perfection, don’t be afraid to experiment! Swap the limoncello for Grand Marnier for an orange twist, or add 1/2 cup of blueberries for bursts of juicy sweetness. For a more decadent version, fold in white chocolate chips and top with a limoncello glaze. If you’re serving to those avoiding alcohol, substitute the limoncello with lemon juice and zest mixed with a touch of vanilla. My personal favorite variation adds 2 tablespoons of poppy seeds and a teaspoon of fresh thyme leaves—the herbaceous note elevates the entire loaf.

    Storage & Troubleshooting Guide

    Proper Storage for Maximum Freshness

    To maintain this bread’s incredible moisture and flavor, proper storage is crucial. At room temperature, wrap tightly in plastic wrap or store in an airtight container for up to 3 days. For longer storage, refrigeration extends freshness to a full week, though the texture becomes slightly more dense (which some actually prefer!). This bread also freezes beautifully—wrap individual slices in plastic, then foil, and freeze for up to three months. I often make double batches specifically to freeze half for emergency dessert situations. To revive from frozen, thaw at room temperature and warm slightly in a 300°F oven for 5 minutes.

    Troubleshooting Common Issues

    If your bread sinks in the middle, you likely have too much moisture—be more aggressive with squeezing your zucchini next time. For a bread that’s too dry, you’ve either overbaked or removed too much zucchini moisture. The perfect doneness test is when a toothpick inserted comes out with a few moist crumbs (not wet batter). If your limoncello flavor isn’t pronounced enough, brush the warm loaf with a mixture of 2 tablespoons limoncello and 1 tablespoon sugar for a flavor-boosting glaze. For uneven ricotta distribution, try tossing the ricotta with a tablespoon of flour before folding it into the batter.

    Frequently Asked Questions

    Can I make Limoncello Zucchini Ricotta Bread without alcohol?

    Absolutely! Substitute the limoncello with 3 tablespoons of fresh lemon juice, 1 tablespoon of lemon zest, and 1 teaspoon of vanilla extract for a non-alcoholic version with similar bright flavor.

    How do I know when my bread is perfectly baked?

    Insert a toothpick into the center—it should come out with a few moist crumbs but no wet batter. The top should be golden brown and spring back slightly when touched.

    Can I use yellow squash instead of zucchini?

    Yes! Yellow squash works perfectly as a 1:1 substitute for zucchini. The flavor is nearly identical, though the tiny yellow flecks might be visible in the finished bread.

    What can I substitute for ricotta cheese?

    Full-fat cottage cheese (drained and blended until smooth) or mascarpone make excellent substitutes, though each will slightly alter the final texture and flavor profile.

    Why did my Limoncello Zucchini Ricotta Bread crack on top?

    A crack on top is actually desirable! It indicates your bread has risen properly. For a more even rise, avoid overmixing the batter and ensure your oven temperature is accurate.

    Final Thoughts

    This Limoncello Zucchini Ricotta Bread represents everything I love about creative baking—unexpected combinations that create something greater than the sum of their parts. The bright limoncello, humble zucchini, and creamy ricotta come together in a loaf that’s both sophisticated and comforting. Whether you’re serving it at a special brunch or enjoying a slice with your afternoon tea, this bread brings a moment of sunshine to any occasion. Don’t forget to check out more inspired recipes on Pinterest for your next baking adventure!
  • Baked Jamaican Jerk Chicken Wings That Will Blow Your Mind!

    Baked Jamaican Jerk Chicken Wings That Will Blow Your Mind!

    Baked Jamaican Jerk Chicken Wings That Will Blow Your Mind!

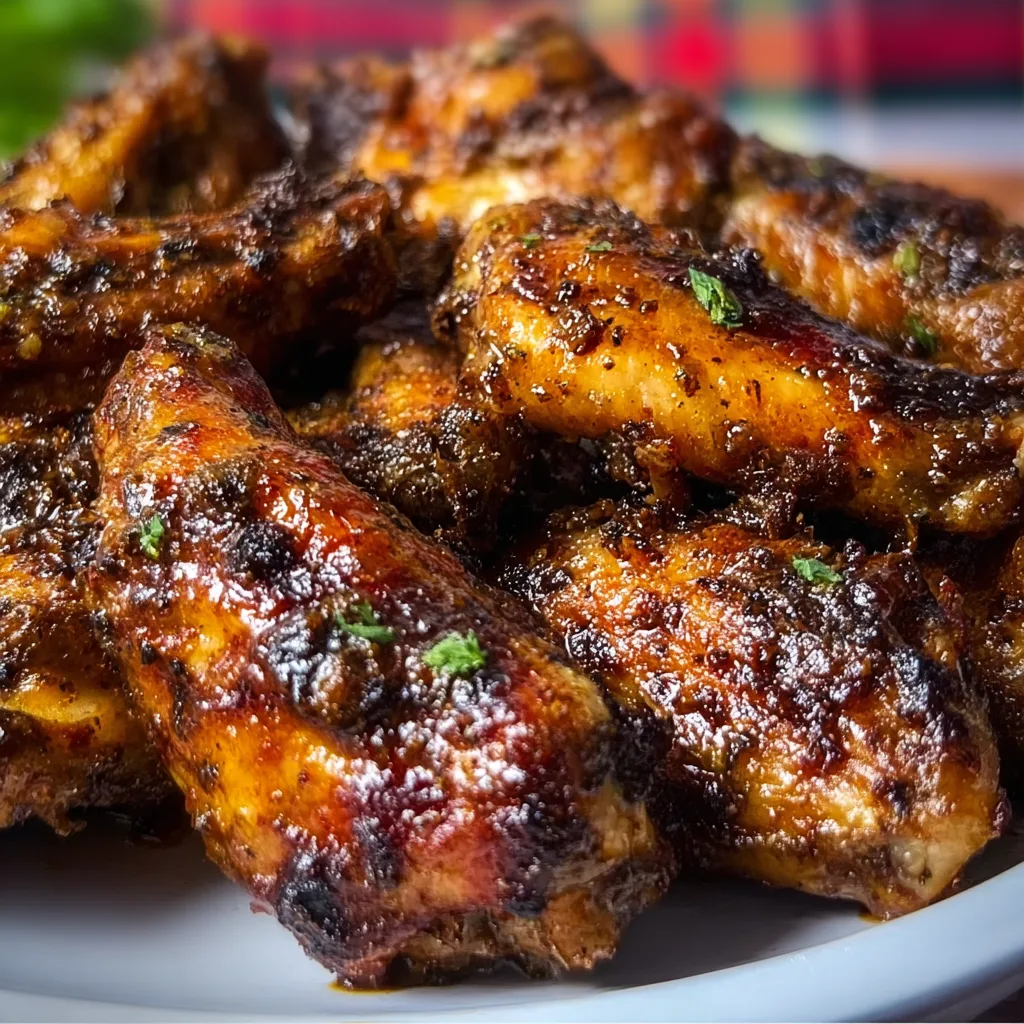
    Baked Jamaican Jerk Chicken Wings bring the vibrant flavors of the Caribbean straight to your dinner table without the hassle of firing up the grill! These wings capture that perfect balance of spicy, sweet, and smoky that makes jerk seasoning so irresistible. I discovered my love for jerk chicken during a trip to Jamaica years ago, and I’ve been perfecting this oven-baked version ever since. The aroma that fills your kitchen as these wings bake is absolutely transportive – close your eyes and you might just hear ocean waves! If you love bold flavors like I do, these wings will quickly become a staple in your recipe collection.

    Recipe

    Why You’ll Love This Baked Jamaican Jerk Chicken Wings

    Perfect Balance of Heat and Flavor

    There’s something magical about the way authentic jerk seasoning dances on your taste buds. These Baked Jamaican Jerk Chicken Wings deliver that perfect harmony of scotch bonnet heat, warm allspice, bright thyme, and sweet brown sugar. What I adore most is how the oven-baking method allows the marinade to caramelize, creating sticky, flavorful edges while keeping the inside juicy. The heat level is customizable too – dial it up for spice lovers or tone it down for family meals. You get all the complex flavors of traditional jerk without having to manage a charcoal fire or smoke up your kitchen!

    Easier Than You Think

    Don’t let the complex flavor profile fool you – these Baked Jamaican Jerk Chicken Wings are surprisingly simple to make! The marinade comes together in just minutes with a quick blitz in the blender. Most of the ingredients are pantry staples, and the hands-on time is minimal. I love that I can prep these wings the night before, letting them marinate while I sleep, then just pop them in the oven when I’m ready. The oven does all the work, transforming them into crispy, caramelized perfection. It’s the perfect recipe for entertaining – impressive flavor with minimal effort!

    Essential Tips & Tricks

    Nailing the Marinade

    The soul of great Baked Jamaican Jerk Chicken Wings lies in the marinade. For authentic flavor, use fresh ingredients whenever possible – especially thyme, ginger, and garlic. If you can find scotch bonnet peppers, they provide the traditional heat, but habaneros make a good substitute. Don’t skip the overnight marinating step; those 8+ hours allow the acids to tenderize the meat while the flavors penetrate deeply. Make small slits in the chicken wings before marinating to help the flavors reach deeper. The longer you marinate, the more pronounced the jerk flavor will be – I’ve gone up to 24 hours with amazing results!

    Perfect Baking Technique

    The key to crispy exterior and juicy interior is all in the baking method. Line your baking sheet with parchment paper (not foil – it sticks!) and use a rack if you have one to elevate the wings for even cooking. Start with a hot oven (425°F) for the first 15 minutes to kick-start browning, then reduce to 375°F to finish cooking without burning the sugars in the marinade. Baste halfway through with reserved marinade that you’ve boiled for food safety.

    For extra caramelization, brush with a little honey mixed with jerk sauce during the last 5 minutes or give them a quick broil – just watch carefully to avoid burning! These would also be fantastic in the air fryer for extra crispiness.

    Serving Ideas & Creative Variations

    Perfect Pairings

    These Baked Jamaican Jerk Chicken Wings shine as the star of your meal, but the right sides elevate the experience. Traditional Caribbean accompaniments like coconut rice and beans or fried plantains create an authentic meal. I love serving them with a cooling cucumber salad to balance the heat – the contrast is divine! A bright mango salsa adds sweetness that complements the spice perfectly. For drinks, nothing beats a cold Red Stripe beer or a rum punch. If you’re serving these at a party, provide plenty of napkins and perhaps some cooling yogurt-based dip on the side. The wings pair beautifully with other Caribbean-inspired dishes like blackened chicken for a complete feast.

    Exciting Flavor Twists

    While traditional jerk seasoning is incredible, don’t be afraid to put your own spin on these Baked Jamaican Jerk Chicken Wings! Add a pineapple twist by incorporating crushed pineapple into your marinade for tropical sweetness. For a fusion approach, mix in some soy sauce and ginger for an Asian-Jamaican hybrid that’s absolutely delicious. Coconut milk makes a creamy addition that tempers the heat while adding richness. For a citrus variation, add orange zest and juice to brighten the flavor profile. If you’re feeling adventurous, a touch of dark rum in the marinade adds complexity and helps tenderize the meat even more. Each variation maintains the jerk essence while creating a unique experience!

    Storage & Troubleshooting Guide

    Keeping Leftovers Fresh

    Properly stored, these Baked Jamaican Jerk Chicken Wings make fantastic leftovers! Allow wings to cool completely before transferring to airtight containers in the refrigerator, where they’ll keep for 3-4 days. For longer storage, freeze the wings on a baking sheet until solid, then transfer to freezer bags – they’ll maintain quality for about 3 months. When reheating refrigerated wings, the oven at 350°F for 10-15 minutes works best to restore crispiness. For frozen wings, thaw overnight in the refrigerator before reheating. Microwaving works in a pinch but sacrifices texture. I sometimes chop leftover wings and add them to salads or wraps for quick lunches with built-in flavor!

    Solving Common Problems

    If your Baked Jamaican Jerk Chicken Wings aren’t turning out perfectly, a few simple fixes can help! For wings that aren’t crispy enough, make sure you’re patting them completely dry before applying marinade, and consider a light dusting of baking powder in your marinade for extra crispiness. If they’re too spicy, serve with cooling elements like coconut rice or yogurt sauce, or reduce the hot peppers next time. For wings that burn before cooking through, lower your oven temperature and loosely tent with foil. If the flavor isn’t penetrating, try scoring the wings before marinating and extend marination time. Remember that authentic jerk has a blackened exterior – that’s not burning, it’s flavor!

    Frequently Asked Questions

    What makes Jamaican jerk seasoning unique?

    Authentic jerk seasoning combines allspice (called “pimento” in Jamaica), thyme, scotch bonnet peppers, ginger, and various other spices. This creates a complex flavor profile that’s simultaneously spicy, sweet, smoky, and herbaceous – unlike any other seasoning blend.

    Can I make Baked Jamaican Jerk Chicken Wings ahead of time?

    Absolutely! Marinate the wings up to 24 hours ahead, and you can even bake them earlier in the day and reheat at 350°F for 10-15 minutes before serving. The flavor actually improves with a little time.

    How can I adjust the spice level?

    Control the heat by adjusting the amount of hot peppers. For milder wings, remove the seeds and membranes from the peppers or substitute jalapeños. For extra heat, keep all the seeds and add a dash of cayenne.

    Can I use this same recipe for chicken thighs or breasts?

    Yes! The marinade works beautifully on all chicken cuts. Adjust cooking times accordingly – bone-in thighs need about 35-40 minutes, while boneless breasts require only 20-25 minutes at 375°F.

    Is there a way to make these wings on the grill?

    Traditional jerk chicken is grilled! Marinate as directed, then grill over medium heat, turning occasionally until cooked through (165°F internal temperature), about 20-25 minutes. Add soaked pimento wood chips for authentic smoky flavor.

    Final Thoughts

    These Baked Jamaican Jerk Chicken Wings bring a taste of the Caribbean to your table with minimal effort and maximum flavor. What I love most is how they transport me back to beachside dinners with each bite – spicy, sweet, and utterly satisfying. The oven-baked method makes this exotic dish accessible for any home cook while still honoring the authentic flavors that make jerk chicken so beloved worldwide. Whether you’re hosting a party or just craving something different for dinner, these wings deliver a memorable flavor experience that will have everyone asking for your secret. Find more delicious recipes on Pinterest and keep exploring the wonderful world of global flavors!

  • Crispy Italian Chicken Cutlets: Irresistibly Crunchy & Juicy Delight!

    Crispy Italian Chicken Cutlets: Irresistibly Crunchy & Juicy Delight!

    Crispy Italian Chicken Cutlets: Irresistibly Crunchy & Juicy Delight!

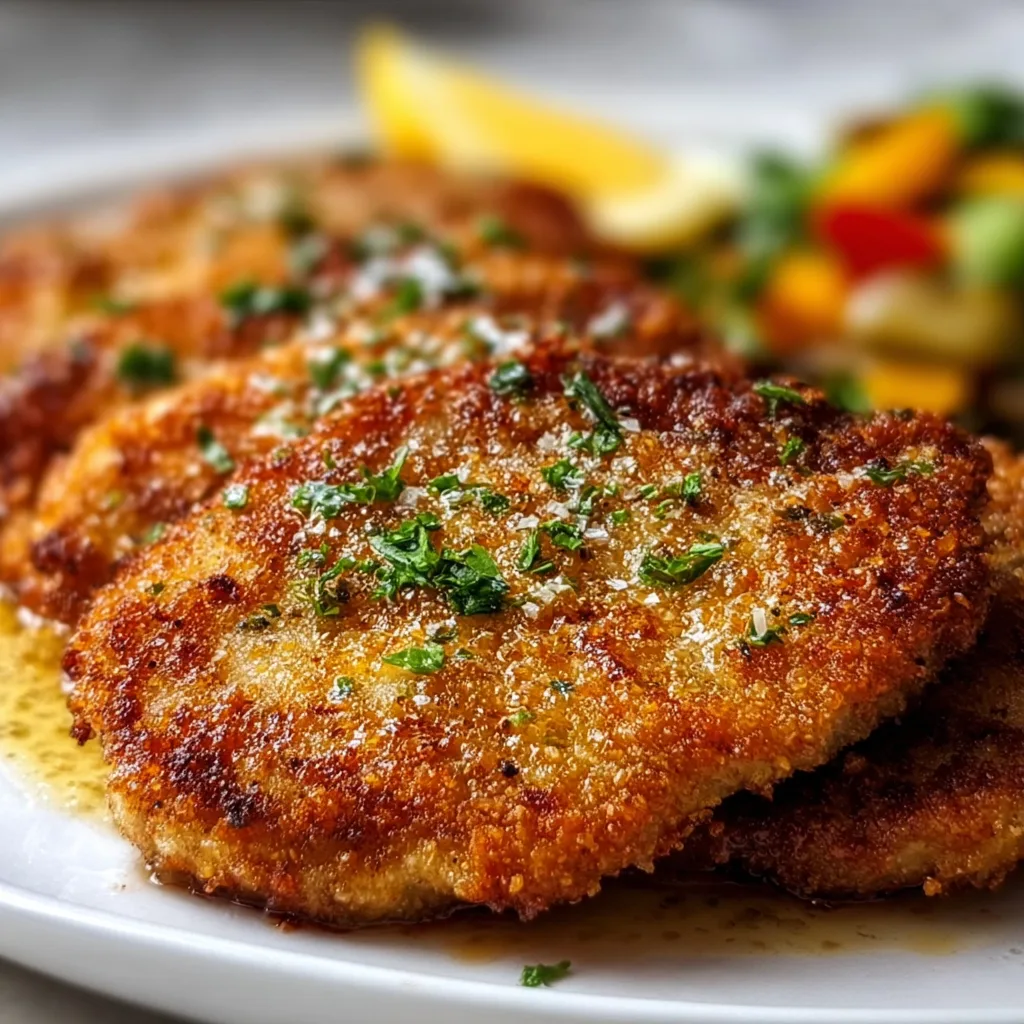
    Crispy Italian Chicken Cutlets are my absolute go-to when I need a dinner that’s both impressive and comforting. There’s something magical about that perfect golden crust giving way to tender, juicy chicken inside. The first time I made these for my family, the kitchen filled with that intoxicating aroma of herbs and Parmesan, and I knew I’d found a keeper. These cutlets strike that perfect balance between restaurant-quality and homemade goodness that makes everyone feel special. Whether you’re serving them with pasta, in a sandwich, or atop a salad, these crispy chicken cutlets are versatile enough for any meal.

    Recipe

    Why You’ll Love These Crispy Italian Chicken Cutlets

    Perfect Texture Every Time

    The secret to perfection lies in the double-dredging technique that creates that irresistible crust. I still remember the first time I got it right—that satisfying crunch when I cut into the cutlet made me feel like a culinary genius! The contrast between the crispy exterior and juicy interior is what makes these cutlets so special. The key is pounding the chicken to an even thickness, which ensures quick, even cooking. And don’t skip patting the chicken dry before coating—this simple step makes all the difference in achieving that golden-brown perfection that makes everyone at the table reach for seconds.

    Italian Flavor Profile

    These cutlets are infused with authentic Italian flavors that transport you straight to a cozy trattoria. The blend of Parmesan cheese, garlic powder, and Italian herbs creates a depth of flavor that elevates simple chicken into something extraordinary. I love adding a touch of lemon zest to the breadcrumb mixture—it brightens everything up with that subtle citrus note. The herbs and cheese don’t just coat the chicken; they become one with it, infusing every bite with Mediterranean warmth. It’s comfort food with elegance, the kind of dish that makes weeknight dinners feel special without requiring hours in the kitchen.

    Essential Tips & Tricks

    Perfecting Your Breading Station

    Setting up a proper breading station is absolutely crucial for success. I arrange mine in a specific order: seasoned flour, beaten eggs with a splash of milk, and finally, the seasoned breadcrumb mixture. This assembly-line approach keeps things organized and prevents the dreaded “clumpy fingers” situation! Use one hand for dry ingredients and one for wet to keep things clean. Make sure your breadcrumbs are fresh—stale ones won’t deliver that perfect crunch. For an extra flavor boost, I like to add a tablespoon of grated Parmesan to the egg mixture too. Trust me, it’s worth that extra step!

    Oil Temperature Matters

    The perfect frying temperature makes all the difference between soggy cutlets and crispy golden perfection. I heat my oil to 350°F (175°C) and maintain that temperature throughout cooking. Too cool, and your chicken absorbs oil like a sponge; too hot, and the outside burns before the inside cooks. I learned this lesson the hard way during a dinner party disaster! Use a heavy-bottomed pan that distributes heat evenly. Add the cutlets one at a time, giving them plenty of space—overcrowding causes the temperature to drop dramatically. When they’re that perfect golden brown color (about 3-4 minutes per side), they’re ready to drain on paper towels.

    Serving Ideas & Creative Variations

    Classic Pairings

    These cutlets shine brightest when paired with simple sides that complement without competing. A squeeze of fresh lemon juice just before serving brightens everything up beautifully. I serve mine with a light arugula salad dressed with lemon and olive oil for that peppery contrast. For something heartier, nothing beats serving them over spaghetti with marinara sauce for an easy chicken parmesan. Roasted garlic potatoes make another excellent side—the crispy exteriors of both dishes play off each other wonderfully. For a complete Italian experience, add a glass of Pinot Grigio and some crusty bread for sopping up any leftover sauce.

    Creative Twists

    Don’t be afraid to put your own signature spin on these versatile cutlets! One of my favorite variations is adding crushed pistachios to the breadcrumb mixture for nutty flavor and extra crunch. For a spicy kick, mix red pepper flakes into your breadcrumbs—my husband requests this version constantly. These cutlets also make incredible sandwiches on ciabatta with fresh mozzarella, basil, and a smear of pesto. You can even cut them into strips for the ultimate chicken Caesar salad topper. For a gluten-free version that doesn’t sacrifice texture, replace regular breadcrumbs with a mixture of almond flour and crushed pork rinds—surprisingly delicious!

    Storage & Troubleshooting Guide

    Make-Ahead and Storage

    These cutlets are perfect for meal prep and actually store quite well when done right. To make ahead, complete the breading process, then arrange them on a parchment-lined baking sheet and freeze until solid. Transfer to a freezer bag, and they’ll keep for up to 3 months! For leftovers, store in an airtight container with paper towels between layers to absorb moisture. They’ll stay crispy in the refrigerator for 2-3 days. To reheat, avoid the microwave (soggy city!). Instead, place them on a wire rack in a 375°F oven for 10 minutes. The rack allows air circulation, helping restore that wonderful crispiness we work so hard to achieve.

    Fixing Common Problems

    Even experienced cooks encounter troubleshooting moments with chicken cutlets. If your breading falls off during cooking, you likely didn’t press it firmly enough into the chicken. Another culprit could be wet chicken—always pat it completely dry before starting. If your cutlets are browning too quickly but remain undercooked inside, your oil is too hot. Lower the heat and continue cooking. For cutlets that aren’t browning properly, your oil may not be hot enough. Remember that maintaining consistent oil temperature is key. If your cutlets end up oily, you didn’t drain them properly—always rest them on paper towels at a slight angle to let excess oil drip away.

    Frequently Asked Questions

    Can I bake these Crispy Italian Chicken Cutlets instead of frying?

    Yes! Bake at 425°F for 15-20 minutes, flipping halfway through. Spray both sides with cooking oil for better browning. The texture won’t be identical to fried, but still delicious.

    How do I know when the chicken is fully cooked?

    Use a meat thermometer to ensure the internal temperature reaches 165°F. The cutlets should have a golden-brown crust and firm texture when pressed gently.

    Can I use chicken thighs instead of breasts?

    Absolutely! Boneless skinless thighs work beautifully. They’re more forgiving and naturally juicier, though you’ll need to pound them carefully for even thickness.

    What’s the best oil for frying these cutlets?

    Vegetable, canola, or grapeseed oil are ideal due to their high smoke points. Olive oil adds flavor but can smoke at high temperatures, so use a light olive oil if preferred.

    How thin should I pound the chicken?

    Aim for about ¼-inch thickness throughout. This ensures quick, even cooking while keeping the meat juicy and tender.

    Final Thoughts

    These Crispy Italian Chicken Cutlets represent everything I love about cooking—simple ingredients transformed into something extraordinary through technique and love. They’ve become my signature dish for good reason: they’re reliable, versatile, and always met with enthusiasm. The golden, herb-flecked crust and tender interior create that perfect textural contrast that makes them irresistible. Whether for a family dinner or special occasion, these cutlets deliver restaurant-quality results right in your kitchen. Find more delicious recipes on Pinterest and keep that crispy chicken magic happening!

  • Italian Herbs And Cheese Bread: Irresistibly Cheesy & Flavor-Packed!

    Italian Herbs And Cheese Bread: Irresistibly Cheesy & Flavor-Packed!

    Italian Herbs And Cheese Bread: Irresistibly Cheesy & Flavor-Packed!

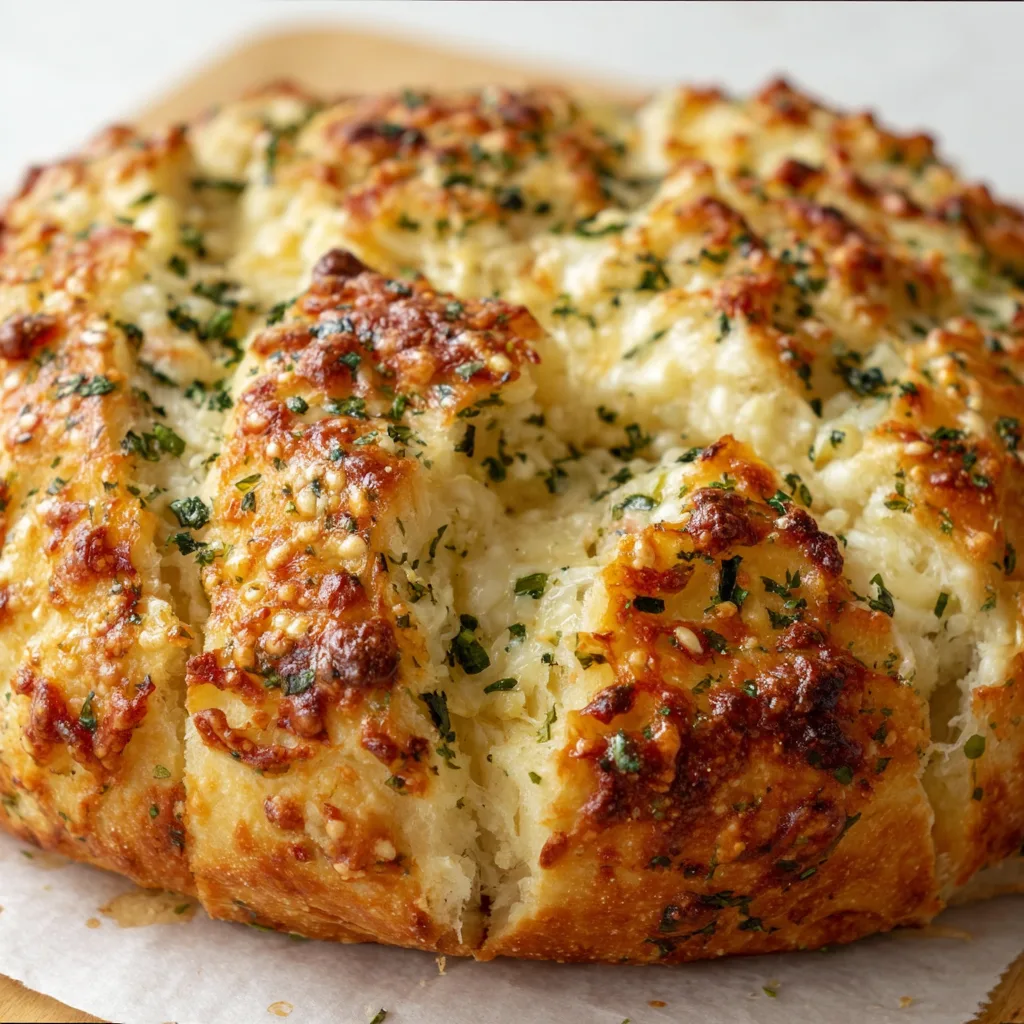
    This Italian herbs and cheese bread is my absolute pride and joy in the kitchen. The moment that warm, aromatic loaf emerges from the oven, with its golden crust studded with herbs and melty cheese pockets, I’m instantly transported to my grandmother’s kitchen in upstate New York. There’s something magical about the way the herbs infuse the dough, creating layers of flavor that store-bought bread simply can’t match. Whether you’re serving it alongside a bowl of ranch chicken veggie soup or enjoying it on its own with a swipe of butter, this bread will become your new kitchen superstar.

    Recipe

    Why You’ll Love This Italian Herbs And Cheese Bread

    Perfect Texture Every Time

    This bread achieves that elusive perfect balance between a crispy exterior and a pillowy interior that will make your heart sing. The cheese pockets create these delightful little surprises throughout each slice, melting into the crumb and creating rich, savory bites. I still remember the first time I nailed this recipe—my kitchen filled with an aroma so intoxicating that my neighbor actually texted to ask what I was baking! The dough has just enough structure to hold up to hearty sandwiches but remains tender enough to tear apart with your fingers for a quick snack.

    Versatile For Any Meal

    What makes this Italian herbs and cheese bread truly special is how it elevates literally any meal it accompanies. It’s substantial enough to serve as the foundation for gourmet sandwiches yet delicate enough to complement a simple pasta dinner. Last Sunday, I served it alongside a simple tomato soup, and my usually picky brother-in-law asked for the recipe—a true miracle! The herb blend brings Mediterranean warmth while the cheese adds richness, making it appropriate for breakfast toast, lunch sandwiches, or as a dinner side that outshines the main course.

    Essential Tips & Tricks

    Mastering The Herb Blend

    Creating the perfect herb blend is crucial for authentic Italian herbs and cheese bread. I use a signature mixture of dried oregano, basil, thyme, and rosemary as the foundation, but the secret ingredient is a pinch of fennel seeds. They add this subtle licorice note that makes people say, “What is that amazing flavor?” Fresh herbs work beautifully too—just double the quantity since dried herbs are more concentrated. When incorporating them into the dough, I rub them between my palms first to release the essential oils, which dramatically intensifies their aroma and flavor.

    The Cheese Selection Strategy

    The cheese you select makes all the difference in this bread’s character. My go-to combination is sharp provolone and aged Parmesan for depth, with a bit of mozzarella for those stretchy, melty pockets. For an elevated version that pairs beautifully with creamy pesto chicken, try adding smoked gouda or fontina. A crucial technique: cube firmer cheeses rather than grating them to create those beautiful pockets of melted goodness throughout the loaf. Cold cheese works better than room temperature—it melts more slowly during baking, preventing it from completely disappearing into the dough.

    Serving Ideas & Creative Variations

    Beyond Basic Bread

    Transform this Italian herbs and cheese bread into an impressive centerpiece by shaping it into a pull-apart wreath for holiday gatherings. Last Christmas, I arranged the dough into small balls, each filled with a different cheese, then formed them into a ring before baking. The presentation was stunning, and it disappeared faster than any other dish! For weeknight dinners, try slicing the bread horizontally, adding garlic butter and extra cheese, then baking until bubbly for the ultimate garlic bread experience that pairs perfectly with honey pepperoni ricotta pizza.

    Seasonal Adaptations

    This bread welcomes seasonal adaptations that keep it exciting year-round. In summer, I fold in sun-dried tomatoes and fresh basil from my garden, creating a loaf that tastes like pure sunshine. Fall calls for sage and brown butter incorporated into the dough, with a sprinkle of pumpkin seeds on top. Winter versions with roasted garlic and rosemary feel especially cozy, while spring iterations with lemon zest and thyme bring brightness. The dough recipe remains consistent—it’s the mix-ins and toppings that create these delightful seasonal variations your family will request by name.

    Storage & Troubleshooting Guide

    Keeping It Fresh

    To maintain that just-baked magic, proper storage is essential. For short-term freshness, store completely cooled bread in a paper bag at room temperature for up to 2 days—this preserves the crispy crust better than plastic. For longer storage, slice the entire loaf once cool, then freeze in a ziplock bag with parchment between slices for up to 3 months. The genius part? You can toast frozen slices directly without thawing! If your bread has softened but isn’t stale, five minutes in a 350°F oven will revive that wonderful crust.

    Solving Common Problems

    Even experienced bakers encounter challenges with herb and cheese bread. If your loaf is dense or heavy, you likely need more rising time or your kitchen was too cool—I place mine near a sunny window or inside the oven with just the light on. If the cheese leaks out during baking, try pressing it deeper into the dough or wrapping cheese cubes in small dough pockets before incorporating them. For bread that browns too quickly before cooking through, loosely tent with foil halfway through baking and lower your oven temperature by 25 degrees for the remainder of the bake time.

    Frequently Asked Questions

    Can I make Italian herbs and cheese bread ahead of time?

    Absolutely! Prepare the dough through the first rise, then refrigerate overnight. The slow, cold fermentation actually enhances the flavor. Bring to room temperature before the final shaping and second rise.

    What’s the best flour to use?

    I recommend bread flour for its higher protein content, which creates better structure. All-purpose works too, but you might need to reduce the liquid slightly (about 2 tablespoons less).

    Can I make this in a bread machine?

    Yes! Add ingredients in the order your machine recommends, but add herbs during the second kneading cycle and cheese just before the final rise to maintain texture.

    How do I know when it’s perfectly baked?

    The loaf should be golden brown with an internal temperature of 190-200°F. It should sound hollow when tapped on the bottom and have a firm crust.

    Can I use fresh herbs instead of dried?

    Definitely! Use triple the amount of fresh herbs compared to dried, and chop them finely. Fresh herbs add beautiful flecks of color throughout the bread.

    Final Thoughts

    This Italian herbs and cheese bread has become more than just a recipe in my kitchen—it’s a reliable friend that shows up for casual weeknight dinners and special celebrations alike. The combination of aromatic herbs and pockets of melted cheese creates something truly greater than the sum of its parts. I encourage you to make this recipe your own by adjusting the herb blend and cheese selection to suit your taste. Don’t forget to check out more bread inspirations on Pinterest to keep your baking adventures fresh and exciting!

  • Chicken Fajitas Bowl with Rice: Irresistible Flavor You Can’t Miss!

    Chicken Fajitas Bowl with Rice: Irresistible Flavor You Can’t Miss!

    Chicken Fajitas Bowl with Rice: Irresistible Flavor You Can’t Miss!

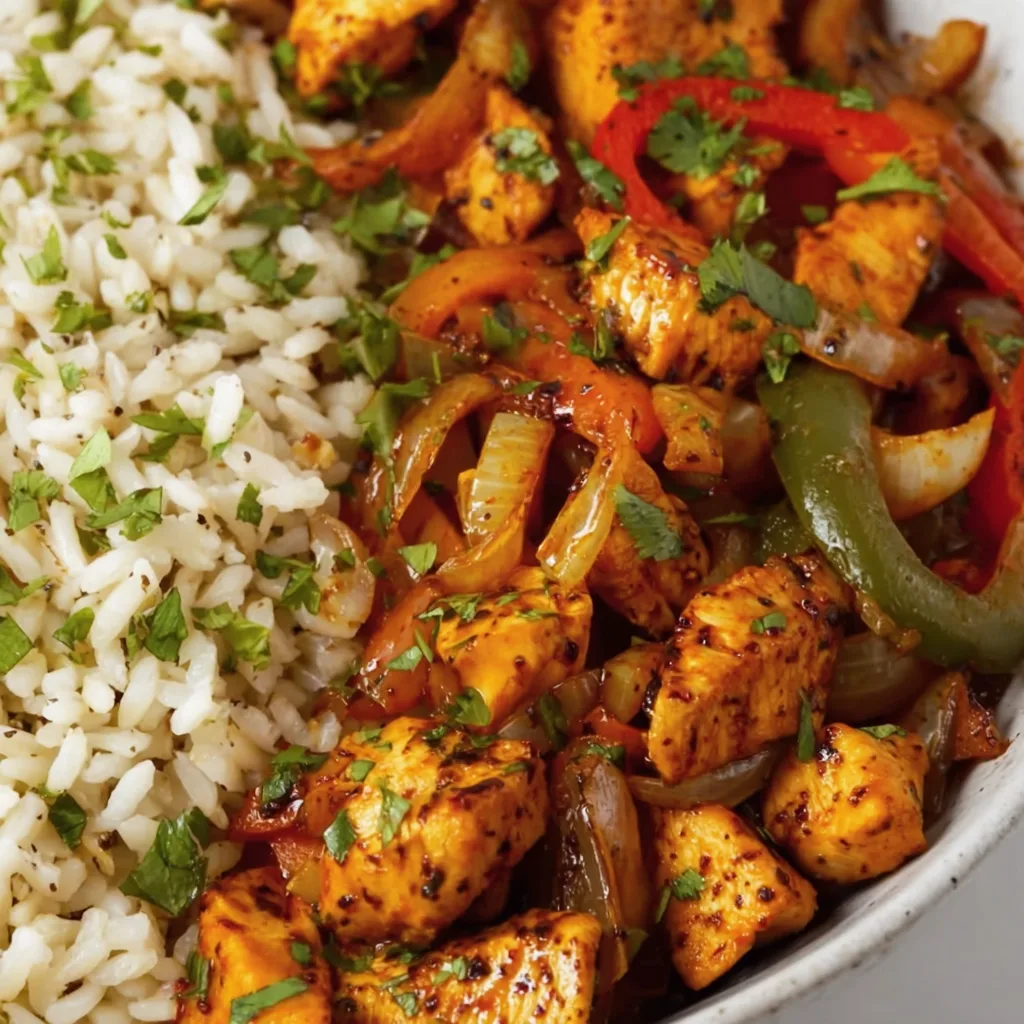
    Chicken fajitas bowls with rice have become my weeknight salvation – a perfect blend of sizzling proteins and vibrant veggies that never fails to bring smiles around our dinner table. I first created this recipe during a particularly chaotic Tuesday when the clock was ticking toward dinner time and inspiration was running low. The moment those peppers hit the hot pan, filling my kitchen with that unmistakable fajita aroma, I knew I’d found a keeper. These colorful, customizable bowls deliver all the flavor of traditional fajitas with the satisfying heartiness of a complete meal. If you love Tex-Mex flavors with minimal fuss, this recipe deserves a permanent spot in your rotation.

    Recipe

    Why You’ll Love This Chicken Fajitas Bowl with Rice

    Perfect Balance of Flavors and Textures

    The magic of these bowls lies in their perfect textural contrast – tender, juicy chicken against the slight crunch of bell peppers and onions, all nestled on a bed of fluffy rice. The marinade infuses the chicken with lime, garlic, and smoky spices that penetrate deep into every bite. What I adore most is how each component maintains its distinct personality while creating something greater together. The rice soaks up all those wonderful juices, creating little pockets of flavor that burst with each forkful. It’s one of those meals where you’ll find yourself chasing “just one more bite” until suddenly, your bowl is empty!

    Quick, Customizable, and Meal-Prep Friendly

    These fajita bowls are incredibly versatile and adapt to whatever you have on hand. Running low on chicken? Swap in shrimp or steak. No red peppers? Yellow or orange work beautifully. The base recipe comes together in about 30 minutes, making it perfect for busy weeknights when cooking feels like a chore. I often double the recipe on Sundays, portioning everything into containers for grab-and-go lunches. My husband prefers extra guacamole while I pile on the pico de gallo – everyone gets exactly what they want. This adaptability makes it a winner for families with varying preferences.

    Essential Tips & Tricks

    Mastering the Perfect Chicken

    The secret to juicy, flavorful chicken starts with a brief but effective marinade time – even 15 minutes makes a difference, though I aim for 30 when possible. Slice your chicken against the grain into strips of equal thickness (about ½ inch) to ensure even cooking. The biggest mistake I see is overcrowding the pan, which steams rather than sears the meat. Work in batches if needed, giving each piece room to develop that gorgeous caramelization. I’ve found that a cast iron skillet creates the best charred edges that mimic restaurant-quality fajitas. Remember: high heat, quick cooking, and let the chicken rest before adding it to your bowl.

    Creating Restaurant-Quality Rice

    The rice isn’t just a filler – it’s an essential component that deserves attention! I start by toasting the rice in a touch of oil until it smells nutty and some grains look slightly translucent. This simple step adds incredible depth of flavor to your finished bowls. For extra dimension, swap plain water for chicken broth and add a squeeze of lime juice and chopped cilantro once it’s cooked. The cilantro lime steak bowls on my site use a similar technique that works perfectly here. Fluff with a fork rather than stirring to maintain that perfect texture, and let it rest covered for 5 minutes after cooking for rice that’s fluffy, not gummy.

    Serving Ideas & Creative Variations

    Building the Ultimate Toppings Bar

    Toppings transform good fajita bowls into unforgettable meals. I always include fresh lime wedges, chopped cilantro, and sliced avocado as my base trio. From there, the possibilities expand: pickled red onions add bright acidity, crumbled cotija cheese brings salty creaminess, and a dollop of sour cream cools everything down. My family goes crazy for a simple corn salsa made with charred kernels, diced jalapeño, and a squeeze of lime. Set everything out in small bowls and let everyone customize their creation. This interactive approach makes dinner feel special even on ordinary weeknights.

    Global Fusion Variations

    While traditional Tex-Mex flavors are delicious, don’t be afraid to experiment with cross-cultural inspirations. Try a Mediterranean spin with tzatziki, feta, and olives instead of Mexican toppings. For an Asian-inspired variation, marinate the chicken in soy, ginger, and garlic, then top with sriracha mayo and quick-pickled vegetables. The creamy chicken with sweetcorn and broccoli recipe offers another delicious flavor profile that could inspire your variations. My personal favorite twist is adding pineapple chunks to the pepper mix during the last minute of cooking – the sweet-savory combination is absolutely divine!

    Storage & Troubleshooting Guide

    Meal Prep and Reheating Strategies

    These bowls are meal prep champions when stored properly. Keep components separate when possible – rice in one container, chicken and veggies in another, and cold toppings separate until serving time. This prevents soggy rice and maintains textural integrity. Properly stored, they’ll last 3-4 days in the refrigerator. When reheating, add a splash of water or broth to the rice before microwaving to restore moisture. For the best texture, reheat chicken and vegetables in a hot skillet rather than the microwave. If freezing, omit avocado and fresh herbs, adding them fresh when serving.

    Troubleshooting Common Issues

    If your chicken turns out tough, you’re likely overcooking it or slicing with (rather than against) the grain. Remember that chicken continues cooking after removal from heat, so it’s better to slightly undercook than overcook. For vegetables that turn out soggy instead of caramelized, ensure your pan is hot enough before adding them, and don’t overcrowd. If your rice clumps together, rinse it thoroughly before cooking to remove excess starch, and use the correct liquid ratio (typically 1:1.5 for most white rice). Lastly, if flavors seem bland, don’t underestimate the power of a final squeeze of lime and sprinkle of flaky salt just before serving.

    Frequently Asked Questions

    Can I make chicken fajitas bowls with rice in advance?

    Absolutely! Prep components separately and store refrigerated for up to 3 days. Keep cold toppings separate and add just before serving for the freshest experience.

    What’s the best rice to use for fajita bowls?

    Long-grain white rice or basmati work beautifully. For a healthier option, brown rice adds nutty flavor and extra fiber, though it requires longer cooking time.

    How can I make this recipe vegetarian?

    Replace chicken with portobello mushrooms, chickpeas, or firm tofu. Marinate them in the same spices and cook similarly to chicken for comparable flavor profiles.

    What’s the best way to slice chicken for fajitas?

    Always slice chicken breast against the grain into ½-inch strips. This shortens the muscle fibers, resulting in more tender meat that’s easier to chew.

    Can I use pre-cooked rice for my chicken fajitas bowl?

    Yes! Pre-cooked or leftover rice works perfectly. Simply reheat with a splash of water and fluff before assembling your bowls to restore moisture and texture.

    Final Thoughts

    The humble chicken fajitas bowl with rice has become more than just a meal in my household—it’s a solution to hectic weeknights, a crowd-pleasing dinner party option, and a reliable meal prep standby. What makes it truly special is how it brings everyone to the table, excited to build their perfect bowl. The sizzling sounds, vibrant colors, and mouthwatering aromas create an experience that transcends ordinary weeknight dinners. I hope these bowls bring the same joy to your table as they have to mine! Don’t forget to check out more inspiration on Pinterest for your next culinary adventure.

  • Chicken Shawarma with Garlic Sauce: Irresistible Flavor Explosion!

    Chicken Shawarma with Garlic Sauce: Irresistible Flavor Explosion!

    Chicken Shawarma with Garlic Sauce: Irresistible Flavor Explosion!

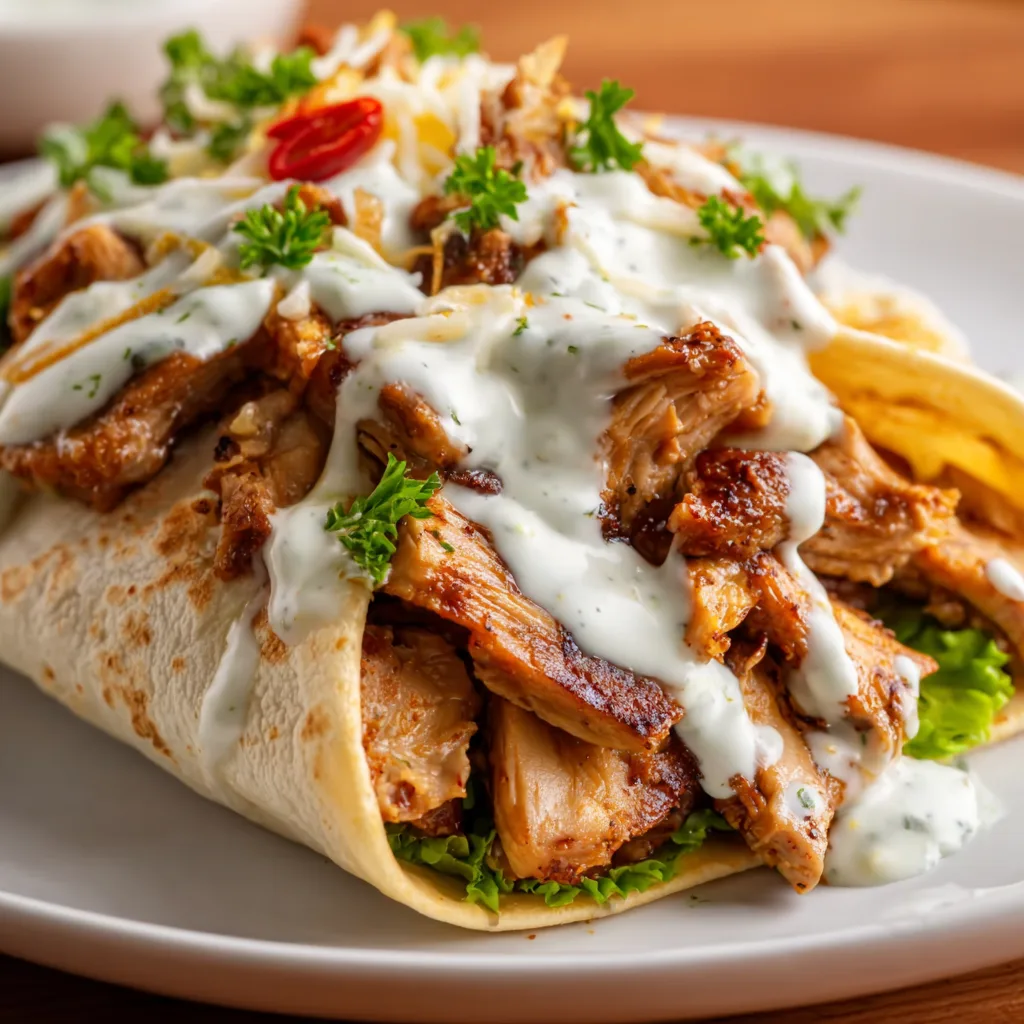
    Chicken shawarma with garlic sauce brings the vibrant flavors of Middle Eastern street food right to your kitchen. The first time I made this dish, the warm, aromatic spices filled my entire apartment, and I was instantly transported back to that tiny shawarma stand I discovered while traveling. There’s something magical about the way the tender, marinated chicken crisps up at the edges while staying juicy inside. Paired with that creamy, pungent garlic sauce, it creates a perfect harmony of flavors that’s both comforting and exciting. If you love bold flavors that dance on your tongue, this recipe will quickly become your new weeknight favorite.

    Recipe

    Why You’ll Love This Chicken Shawarma with Garlic Sauce

    Perfect Balance of Spices

    The secret magic of chicken shawarma lies in its spice blend. I’ve tested countless combinations to find the perfect balance of warm cumin, smoky paprika, and fragrant cardamom that infuses every bite with authentic flavor. The marinade works overtime, tenderizing the chicken while imparting deep flavor that penetrates to the core. What I love most is how these spices create layers of flavor—first you taste the brightness of lemon, then the earthiness of cumin, followed by a gentle warmth that lingers pleasantly. It’s complex without being complicated, making it accessible for even weeknight cooking.

    Irresistible Garlic Sauce

    This creamy dream of a sauce deserves its own spotlight! The garlic sauce (toum) is velvety, intensely garlicky, and brightened with fresh lemon juice. I still remember the first time I nailed this sauce—I did a little kitchen dance as the emulsion came together perfectly. It’s the ideal cool counterpoint to the warm spiced chicken, creating that perfect temperature and flavor contrast that makes each bite more exciting than the last. The sauce also brings a wonderful richness that ties everything together, making each wrap feel like a complete meal rather than just ingredients in bread.

    Essential Tips & Tricks

    Mastering the Marinade

    The longer marinade time makes all the difference with chicken shawarma. While you can get away with 2 hours, I’ve found overnight marination creates flavor that’s twice as intense. My little trick? Score your chicken thighs lightly before marinating to help the spices penetrate deeper. I learned this from my neighbor who grew up in Lebanon, and it transformed my shawarma game! The yogurt in the marinade isn’t just for flavor—it contains enzymes that tenderize the meat, giving you that signature melt-in-your-mouth texture that makes authentic shawarma so irresistible.

    Perfect Cooking Technique

    Achieving that crispy exterior while maintaining juicy meat inside requires the right technique. High heat is your friend here! I preheat my cast iron skillet until it’s screaming hot before adding the chicken. This creates that beautiful caramelization on the outside that mimics traditional vertical spit roasting. Don’t overcrowd your pan—cook in batches if needed to maintain temperature. For the most authentic texture, let the chicken rest for 5 minutes after cooking, then slice it thinly against the grain. This replicates the shaved texture of traditional shawarma and allows each piece to soak up more sauce.

    Serving Ideas & Creative Variations

    Traditional Presentation

    Serve your chicken shawarma in warm pita bread with a generous drizzle of that heavenly garlic sauce. I like to add crisp lettuce, juicy tomatoes, and thinly sliced red onions for freshness and texture. A sprinkle of sumac adds an authentic touch and bright color. When hosting friends, I set up a DIY shawarma station with all the fixings in separate bowls—it’s always a hit! The interactive element makes dinner fun, and everyone can customize their wrap to their liking. This presentation style works beautifully for casual gatherings and has become my go-to for easy entertaining.

    Fusion Inspirations

    Get creative with your shawarma by thinking beyond the wrap! I love making shawarma-spiced chicken bowls with turmeric rice, cucumber-tomato salad, and that incredible garlic sauce drizzled over everything. Another favorite variation is shawarma-stuffed baked potatoes topped with garlic sauce and a sprinkle of fresh herbs. The spice blend also works beautifully on roasted vegetables—try cauliflower or chickpeas for a vegetarian twist that captures all those same aromatic flavors. The versatility of these flavors means you can enjoy them in countless creative ways.

    Storage & Troubleshooting Guide

    Proper Storage Methods

    For maximum freshness, store the components separately. The cooked chicken keeps well in an airtight container for up to 4 days in the refrigerator. The garlic sauce is the trickiest part—store it in a glass jar with a thin layer of olive oil on top to prevent oxidation, and it will last up to 2 weeks. When reheating the chicken, add a splash of water to the pan to restore moisture, or better yet, use a steamer basket for 2-3 minutes. I’ve found that gentle reheating prevents that dreaded dried-out texture that can happen with leftover chicken.

    Common Pitfalls to Avoid

    The most common shawarma mistake is using chicken breast instead of thighs—the lower fat content means it dries out quickly. If your garlic sauce breaks or becomes bitter, start fresh with a small amount of garlic and slowly incorporate the broken sauce. For too-spicy shawarma, serve with cooling elements like yogurt or cucumber. If your shawarma lacks that authentic flavor, toast your spices in a dry pan before mixing the marinade—this simple step awakens the essential oils and dramatically intensifies the flavor profile. Small adjustments make a world of difference in the final result.

    Frequently Asked Questions

    Can I make chicken shawarma with breast meat instead of thighs?

    Yes, but reduce the cooking time by about 2 minutes per side and consider adding 1 tablespoon of olive oil to the marinade to prevent dryness. Breast meat works best when sliced very thinly after cooking.

    How can I make the garlic sauce less intense?

    Blanch the garlic cloves in boiling water for 30 seconds before using them in the sauce. This tempers the sharpness while preserving the flavor. You can also add more lemon juice for balance.

    Is chicken shawarma with garlic sauce healthy?

    Yes! It’s packed with lean protein from the chicken, and the spices have anti-inflammatory properties. Use Greek yogurt in the garlic sauce for added protein and probiotics.

    Can I freeze leftover shawarma?

    Absolutely. Freeze the cooked chicken in airtight containers for up to 3 months. The garlic sauce doesn’t freeze well, so make that fresh when serving the defrosted chicken.

    What’s the difference between shawarma and gyros?

    Shawarma originates from the Middle East with a distinctive spice blend, while gyros come from Greece and typically use oregano and rosemary. Both are cooked on vertical rotisseries but have different flavor profiles.

    Final Thoughts

    This chicken shawarma with garlic sauce recipe brings restaurant-quality Middle Eastern flavors into your home kitchen with surprisingly little effort. The combination of tender, spiced chicken and creamy garlic sauce creates a meal that’s both satisfying and exciting. I find myself returning to this recipe whenever I want to impress guests or simply treat myself to something special. Don’t forget to check out more of my Mediterranean-inspired recipes on Pinterest for additional flavor adventures. Once you master this shawarma, you’ll have a versatile dish that can transform into countless meals.

  • Classic Peach Cobbler Cheesecake Donuts: Irresistibly Delicious!

    Classic Peach Cobbler Cheesecake Donuts: Irresistibly Delicious!

    Classic Peach Cobbler Cheesecake Donuts: Irresistibly Delicious!

    Classic Peach Cobbler Cheesecake Donuts are what happen when three beloved desserts collide in the most magnificent way possible. The first time I made these for my sister’s birthday brunch, there was a moment of pure silence followed by audible gasps around the table. These pillowy donuts filled with velvety cheesecake and topped with warm, cinnamon-spiced peach cobbler topping create an irresistible symphony of textures and flavors. They’re indulgent yet approachable, and perfect for those moments when you want to create something truly special without spending hours in the kitchen. Let me show you how to bring these delightful treats to life.

    Recipe

    Why You’ll Love These Classic Peach Cobbler Cheesecake Donuts

    Perfect Fusion of Beloved Desserts

    There’s something magical about the way these three desserts complement each other. The soft, yeasted donuts provide the perfect canvas for the creamy cheesecake filling that melts in your mouth with each bite. Then comes the warm peach cobbler topping with its juicy fruit and buttery crumble that adds the perfect textural contrast. I still remember my neighbor knocking on my door after smelling these baking, practically begging for the recipe! The balance of sweet, tangy, and spiced notes creates a flavor profile that feels both nostalgic and exciting at the same time.

    Easy Make-Ahead Components

    What I adore most about these donuts is how the components can be prepared in stages, making them perfect for entertaining. The cheesecake filling can be made up to two days ahead and stored in the refrigerator. The peach topping can be prepared the day before and gently reheated when needed. Even the donut dough can rise overnight in the refrigerator, allowing you to simply fry them fresh the morning of serving. This flexibility saved me during last summer’s family reunion when I needed to impress but had limited kitchen time.

    Essential Tips & Tricks

    Mastering the Donut Dough

    The foundation of these incredible treats is a perfectly executed donut dough. The key secret is temperature control – make sure your milk is warm (110°F-115°F) to properly activate the yeast, but not hot enough to kill it. I learned this the hard way after a flat-donut disaster at my first attempt! When kneading, look for the “windowpane test” – stretch a small piece of dough; if it stretches thin enough to see light through without tearing, you’ve developed enough gluten. Allow proper rising time in a warm, draft-free spot for those airy, fluffy results.

    Perfecting the Peach Topping

    The peach cobbler element brings these donuts to life with its caramelized sweetness and warm spices. For the best flavor, use ripe, in-season peaches if possible – the fragrance alone will transport you! If using frozen peaches, thaw and drain them thoroughly to prevent excess moisture. The cinnamon-nutmeg combination is non-negotiable here, creating that authentic cobbler flavor. My personal touch? A tiny splash of bourbon in the peach mixture. It evaporates during cooking but leaves behind a complex caramel note that makes people ask, “What’s your secret?”

    Serving Ideas & Creative Variations

    Seasonal Adaptations

    While peaches create the classic version of these donuts, don’t be afraid to experiment with seasonal fruits throughout the year. In fall, substitute with spiced apples and a touch of caramel for an autumn harvest feel. Summer berries create a vibrant, tangy alternative that pairs beautifully with the cheesecake filling. Winter citrus like blood oranges can be candied and used as a sophisticated topping. I once made a strawberry version for Valentine’s Day that paired perfectly with champagne and my Strawberry Dump Cake for an unforgettable dessert table.

    Presentation Possibilities

    Elevate these donuts from delicious treats to showstopping desserts with thoughtful presentation. For brunch gatherings, arrange them on a tiered stand with fresh peach slices and mint leaves as garnish. For dessert service, place a warm donut in a shallow bowl with a scoop of vanilla bean ice cream and drizzle with additional peach syrup. Create a donut bar where guests can customize their toppings with choices like crushed graham crackers, toasted pecans, or white chocolate drizzle. The joy on people’s faces as they create their perfect combination is priceless!

    Storage & Troubleshooting Guide

    Keeping Donuts Fresh

    These donuts are best enjoyed fresh, but proper storage can extend their deliciousness. Store fully assembled donuts in an airtight container in the refrigerator for up to 2 days. Before serving, let them come to room temperature for about 20 minutes to soften the texture. For longer storage, freeze the unglazed donuts without filling or topping for up to 1 month. When ready to serve, thaw at room temperature, then warm briefly in a 300°F oven for 5 minutes before filling and topping. I’ve learned to slightly underfill frozen-then-thawed donuts as they can become more delicate.

    Solving Common Problems

    Even experienced bakers encounter challenges! If your donut dough isn’t rising properly, check your yeast’s freshness and ensure your environment is warm enough. For troubleshooting runny fillings, refrigerate the cheesecake mixture longer or add an extra tablespoon of cornstarch to the peach topping. If the donuts absorb too much oil during frying, your oil temperature might be too low – aim for a consistent 350°F. My biggest disaster was when I rushed the process and injected hot filling into warm donuts – the melting mess taught me patience is essential for these multi-component treats!

    Frequently Asked Questions

    Can I make Classic Peach Cobbler Cheesecake Donuts without a deep fryer?

    Absolutely! Bake the donuts in a 350°F oven for 12-15 minutes until golden. While the texture will be slightly different, they’ll still be delicious with all the wonderful toppings.

    Can I use canned peaches instead of fresh?

    Yes! Drain canned peaches well and reduce the sugar in the cobbler topping by 2 tablespoons since canned peaches are typically pre-sweetened.

    How far in advance can I prepare components?

    The cheesecake filling can be made 2 days ahead, the peach topping 1 day ahead, and the dough can rise overnight in the refrigerator for next-day frying.

    What’s the best way to fill the donuts?

    Use a piping bag fitted with a long filling tip. Insert the tip into the side of the donut, gently squeeze filling inside, and stop when you feel slight resistance.

    Can I make a gluten-free version?

    Yes! Substitute a 1:1 gluten-free flour blend in the donut recipe and add ½ teaspoon xanthan gum if your blend doesn’t include it already.

    Final Thoughts

    These Classic Peach Cobbler Cheesecake Donuts represent everything I love about creative baking – taking familiar favorites and transforming them into something unexpectedly wonderful. They’ve become my signature bring-along for special gatherings, earning me the unofficial title of “donut queen” among friends. The joyful reactions they inspire make every step worthwhile. I hope you’ll experience the same delight in both making and sharing these treats. Don’t forget to tag me on Pinterest when you create your own version – I can’t wait to see your delicious interpretations!

  • Crispy Bacon & Ranch Chicken Melt: Irresistibly Delicious & Easy!

    Crispy Bacon & Ranch Chicken Melt: Irresistibly Delicious & Easy!

    Crispy Bacon & Ranch Chicken Melt: Irresistibly Delicious & Easy!

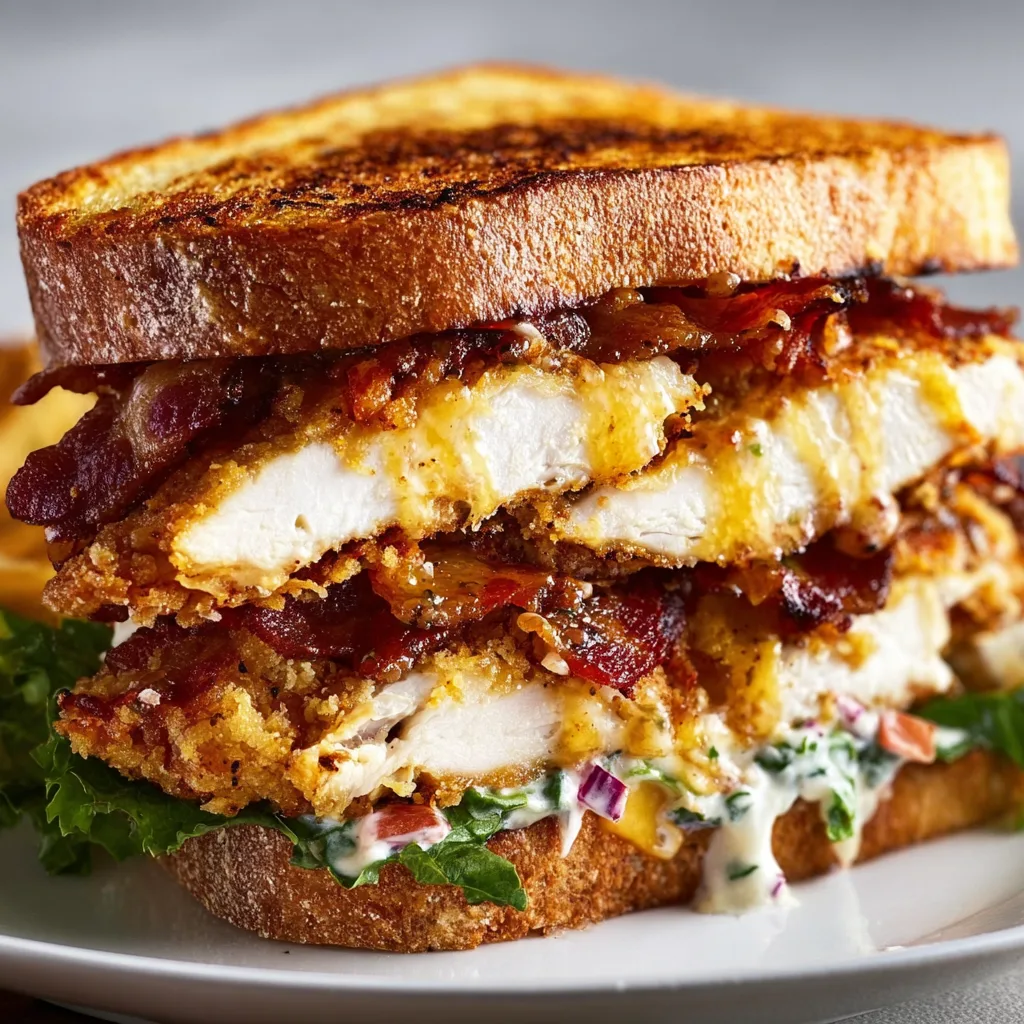
    Crispy Bacon & Ranch Chicken Melt – the ultimate comfort sandwich that’s transformed my weeknight dinner routine! The golden-brown chicken, crispy bacon, and melty cheese create a symphony of textures that’s utterly irresistible. Every time I make these, the kitchen fills with that mouthwatering aroma that has my family gathering around before I can even call them. This sandwich combines the nostalgic flavors of a classic grilled cheese with grown-up ingredients that make it special enough for any occasion. If you love hearty sandwiches like I do, you’ll find this one rivals even the best chicken cheese steak sandwiches for pure satisfaction.

    Recipe

    Why You’ll Love This Crispy Bacon & Ranch Chicken Melt

    Perfect Flavor Combination

    The magic of this Crispy Bacon & Ranch Chicken Melt is all in the flavor harmony. The savory chicken breast, seasoned just right, creates the perfect foundation. Then comes that smoky bacon crunch that makes everything better, while the tangy ranch dressing cuts through the richness with herb-flecked creaminess. I still remember making these for my sister’s birthday gathering – the way everyone fell silent at first bite before erupting into “OMG, what’s in this?!” questions made my heart swell. The melted cheese blankets everything in gooey perfection, creating that Instagram-worthy cheese pull that’s as satisfying to photograph as it is to eat.

    Quick & Easy Preparation

    What makes this Crispy Bacon & Ranch Chicken Melt a regular in my rotation is how surprisingly simple it is to prepare. Even on those evenings when I’m running on fumes after a long day, I can have these sandwiches ready in under 30 minutes. The multi-tasking method – cooking chicken while the bacon crisps – saves precious time without sacrificing flavor. I’ve streamlined the process to minimize dishes too (you’re welcome!). The beauty lies in how these sandwiches feel special enough for weekend entertaining but easy enough for Monday night dinner. Trust me, once you’ve made these once, they’ll become your go-to when you need to impress without stress.

    Essential Tips & Tricks

    Perfecting Your Chicken

    The foundation of an exceptional Crispy Bacon & Ranch Chicken Melt starts with properly cooked chicken. For maximum juiciness, I recommend pounding the chicken to an even thickness before cooking – this ensures it cooks evenly without drying out the thinner edges. Season generously with salt, pepper, and a touch of garlic powder for depth. The golden-brown crust is non-negotiable – let that chicken sizzle undisturbed for at least 4 minutes per side. My game-changing tip? Let the chicken rest for 5 minutes before slicing. This allows the juices to redistribute, keeping every bite moist and flavorful. When you slice, go against the grain for the most tender texture.

    Achieving the Perfect Melt

    The art of the perfect cheese melt deserves attention! I’ve found that grating your own cheese rather than using pre-shredded makes a world of difference – it melts more smoothly without those anti-caking agents. My favorite blend is equal parts sharp cheddar and mozzarella for the perfect balance of flavor and meltability. For that restaurant-quality finish, cover your sandwich with a lid while it cooks on medium-low heat. This creates a mini steam environment that helps the cheese melt evenly while keeping your bread perfectly crisp. For an extra flavor boost, try brushing the outside of your bread with ranch-seasoned butter before grilling, like in my ranch chicken veggie soup recipe.

    Serving Ideas & Creative Variations

    Perfect Pairings

    Elevate your Crispy Bacon & Ranch Chicken Melt experience with thoughtfully chosen sides. My personal favorite is a crisp green salad with a light vinaigrette – the acidity balances the richness of the sandwich perfectly. For heartier appetites, sweet potato fries with a sprinkle of rosemary salt make an irresistible companion. When I’m feeling extra, I serve these melts alongside a small cup of roasted tomato soup for dipping – the combination is utterly divine. For a refreshing beverage pairing, try an iced tea with fresh lemon or, for dinner parties, a crisp Pinot Grigio complements the flavors beautifully. Don’t forget a pickle spear on the side for that perfect palate-cleansing crunch!

    Exciting Flavor Twists

    The beauty of this Crispy Bacon & Ranch Chicken Melt lies in its adaptability. Try a Southwest version by adding sliced avocado, pepper jack cheese, and a sprinkle of taco seasoning to the chicken. For an Italian twist, substitute the ranch with pesto, use provolone cheese, and add sun-dried tomatoes – absolutely scrumptious! Feeling adventurous? Take inspiration from my crispy feta fried eggs and add a layer of crumbled feta and a fried egg for an indulgent brunch version. For a lighter option, use grilled zucchini slices alongside the chicken, and opt for a whole grain bread. The possibilities are endless, making this recipe a perfect template for culinary creativity!

    Storage & Troubleshooting Guide

    Proper Storage Methods

    While the Crispy Bacon & Ranch Chicken Melt is best enjoyed fresh off the griddle, life sometimes requires make-ahead solutions. For meal prep convenience, cook and slice the chicken and bacon ahead of time, storing them separately in airtight containers for up to 3 days. When ready to assemble, simply reheat the components before building your sandwich. If you have leftover fully-assembled melts, wrap them tightly in foil and refrigerate for up to 2 days. To reheat, unwrap and place in a 325°F oven for 10-12 minutes – this preserves the crispiness better than microwaving. For freezing, I recommend storing the cooked components separately rather than freezing completed sandwiches to maintain texture quality.

    Common Problems & Solutions

    Even experienced cooks encounter challenges with sandwiches. If your bread is burning before the cheese melts, the heat is too high – lower the temperature and be patient. Using a lid helps melt the cheese without burning the bread. Dealing with soggy bread? Try toasting it lightly before assembly, and place cheese slices directly against the bread as a moisture barrier before adding juicier ingredients. If your chicken is turning out dry, remember to pound it evenly and don’t overcook – 165°F internal temperature is perfect.

    For bacon that curls up and cooks unevenly, try starting it in a cold pan then heating gradually, or use a bacon press. These simple adjustments will elevate your Crispy Bacon & Ranch Chicken Melt from good to absolutely perfect.

    Frequently Asked Questions

    Can I use rotisserie chicken for this Crispy Bacon & Ranch Chicken Melt?

    Absolutely! Shredded rotisserie chicken works beautifully as a time-saver. Just warm it slightly with a sprinkle of your favorite seasonings before assembling your sandwich for that fresh-cooked flavor.

    What’s the best bread for this sandwich?

    Sourdough is my top choice for its sturdy texture and tangy flavor, but Texas toast, ciabatta, or a hearty artisan white bread all work wonderfully. The key is choosing something that can stand up to the fillings.

    Can I make this sandwich healthier?

    Yes! Use grilled chicken breast, turkey bacon, light ranch dressing, and reduced-fat cheese. Serve open-faced on whole grain bread to reduce calories while keeping all the delicious flavors.

    How do I prevent my sandwich from getting soggy?

    Toast your bread lightly before assembly and create a barrier by placing cheese directly against the bread. Apply spreads like ranch to the chicken or bacon rather than directly on the bread.

    What’s the secret to that perfect crispy exterior on the Crispy Bacon & Ranch Chicken Melt?

    Brush the outside of your bread with melted butter or mayonnaise before grilling. Both create a gorgeously golden, crispy exterior that’s evenly browned and adds incredible flavor.

    Final Thoughts

    The Crispy Bacon & Ranch Chicken Melt represents comfort food at its finest – approachable yet special, familiar yet exciting. What makes this sandwich extraordinary is how it transforms simple ingredients into something greater than the sum of its parts. I’ve shared this recipe with countless friends who now make it regularly for their own families, creating their own memories around this beloved dish. The combination of crispy, creamy, and cheesy elements makes this melt irresistible for both weeknight dinners and special gatherings. Don’t forget to check out more sandwich inspiration on our Pinterest page and make this recipe your own!