Blog

  • Greek Turkey Meatballs with Lemon Herb Rice | Irresistibly Zesty & Easy!

    Greek Turkey Meatballs with Lemon Herb Rice | Irresistibly Zesty & Easy!

    Greek Turkey Meatballs with Lemon Herb Rice | Irresistibly Zesty & Easy!

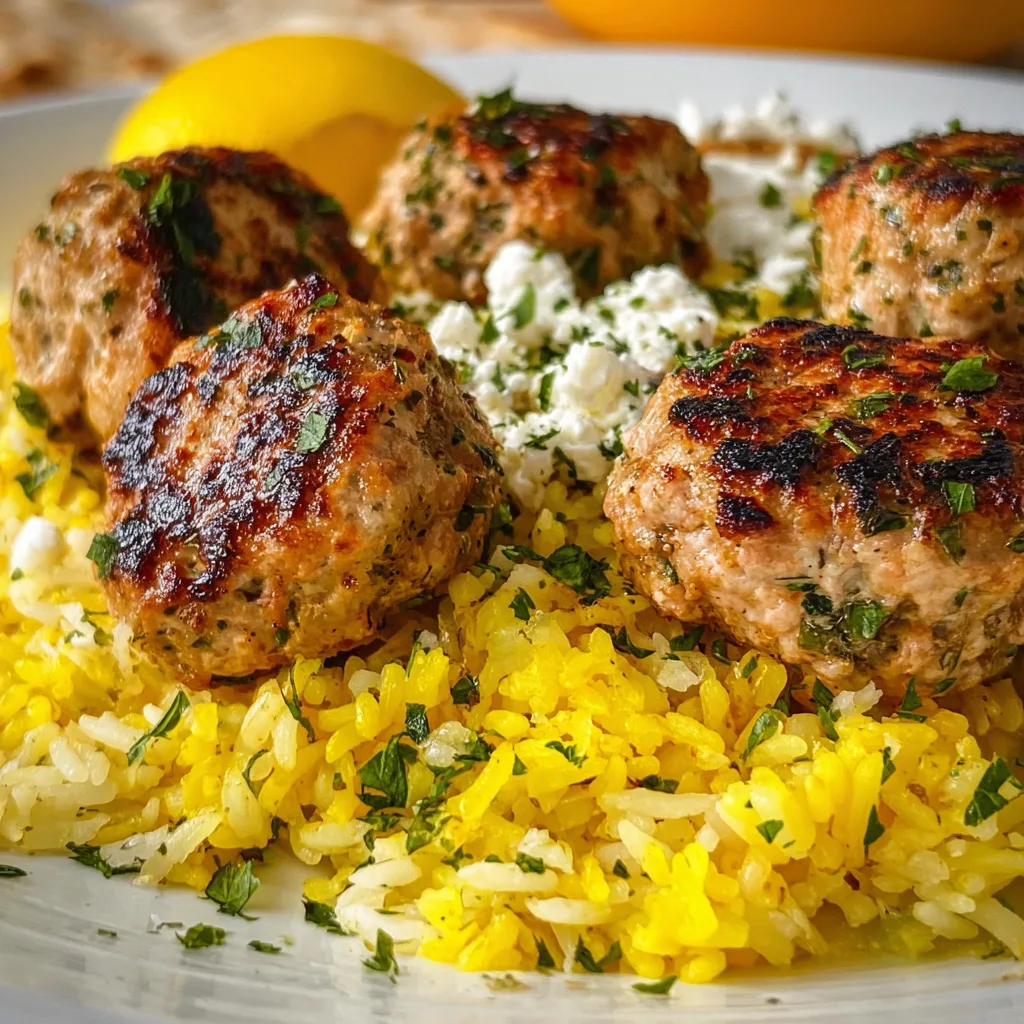
    Greek Turkey Meatballs with Lemon Herb Rice is the perfect Mediterranean-inspired dish that brings together juicy, flavor-packed meatballs and bright, zesty rice for a complete meal that feels both nourishing and indulgent. I’ve been making this recipe since my trip to Santorini, where I fell in love with the way simple herbs and lemon can transform everyday ingredients into something extraordinary. The combination of aromatic herbs, tangy feta, and tender turkey creates a flavor explosion that will transport you straight to a seaside taverna, even on the busiest weeknight. Trust me, this dish is about to become your new favorite dinner solution!

    Recipe

    Why You’ll Love This Greek Turkey Meatballs with Lemon Herb Rice

    A Perfect Balance of Flavors and Textures

    There’s something magical about the way these components work together. The turkey meatballs are incredibly tender with a perfect blend of oregano, mint, and garlic that infuses every bite. I love how the feta cheese melts slightly inside, creating little pockets of tangy creaminess. Meanwhile, the lemon herb rice provides the perfect backdrop with its bright, citrusy notes and fluffy texture. My husband, who usually reaches for seconds of just the meatballs, actually goes back for more rice first! The contrast between the hearty meatballs and the light, aromatic rice creates a meal that feels complete and satisfying without being heavy.

    Quick Weeknight-Friendly Preparation

    Despite its impressive flavors, this dish comes together in about 35 minutes, making it perfect for busy evenings when you want something special but simple. The meatballs can be prepped ahead and stored in the refrigerator, ready to cook when you need them. I often make a double batch on Sunday afternoons while my kids are doing homework, storing half for later in the week. The rice cooks while the meatballs bake, meaning everything finishes at the same time. It’s the kind of efficient cooking that makes me feel like I’ve got my life together, even when the laundry is piled high and emails are unanswered!

    Essential Tips & Tricks

    Perfecting Your Meatballs

    The secret to incredibly tender meatballs is to avoid overmixing the meat mixture. I gently fold the ingredients together just until combined, using my fingertips rather than squeezing or compressing the mixture. Another game-changer is chilling the formed meatballs for 15 minutes before baking – this helps them hold their shape and stay juicy. For maximum flavor, toast the spices in a dry pan for 30 seconds before adding them to the mix. This simple step releases the essential oils and creates a more aromatic result. I learned this trick from my Greek neighbor, Maria, who insists it’s what separates good meatballs from unforgettable ones!

    Elevating Your Rice

    The rice in this dish is far from an afterthought – it’s a star component that deserves attention! For the fluffiest texture, rinse your rice thoroughly until the water runs clear, removing excess starch. After cooking, let it rest covered for 5 minutes, then fluff with a fork rather than stirring. This prevents the rice from becoming gummy. For maximum lemon flavor, add both zest and juice, but incorporate the juice after cooking to maintain brightness. If you love herbs as much as I do, try mixing in additional fresh herbs right before serving – similar to how I do with my Chicken Tzatziki Rice for an extra burst of freshness.

    Serving Ideas & Creative Variations

    Mediterranean-Inspired Accompaniments

    Create a complete feast by serving these meatballs and rice with complementary sides. A simple cucumber tomato salad dressed with olive oil, lemon juice, and a sprinkle of oregano adds freshness and crunch. Warm pita bread brushed with olive oil and sprinkled with za’atar makes the perfect vehicle for scooping up extra sauce and meatballs. For a stunning presentation, serve everything on a large platter with a bowl of tzatziki sauce in the center and scattered olives around the edges. This family-style approach always impresses guests at my dinner parties and encourages everyone to build their perfect plate.

    Exciting Flavor Twists

    While the classic recipe is delicious, don’t be afraid to experiment with variations! For a spicier version, add a pinch of red pepper flakes or finely chopped jalapeño to the meatball mixture. You can swap the feta for goat cheese or even blue cheese for a different tangy element. For a more substantial meal, try adding roasted vegetables like bell peppers, zucchini, or eggplant alongside the rice, similar to my approach in Mediterranean Chicken Orzo. For a plant-based option, replace the turkey with a mixture of chickpeas and mushrooms, pulsed in a food processor until they reach a consistency similar to ground meat.

    Storage & Troubleshooting Guide

    Proper Storage for Maximum Freshness

    These Greek turkey meatballs with lemon herb rice store beautifully, making them perfect for meal prep. Store leftover meatballs and rice separately in airtight containers in the refrigerator for up to 4 days. For freezing, place cooled meatballs on a parchment-lined baking sheet and freeze until solid, then transfer to a freezer bag where they’ll keep for up to 3 months. The rice can be frozen in portion-sized containers for up to 2 months. When reheating, add a splash of water or broth to the rice to revive its moisture, and warm the meatballs gently in the oven or microwave until heated through.

    Solving Common Issues

    If your meatballs are turning out too dry, try adding 2-3 tablespoons of Greek yogurt to the mixture next time – it adds moisture without changing the flavor profile. For meatballs that fall apart during cooking, make sure your mixture isn’t too wet and that you’re giving them enough time to chill before baking. If your rice turns out gummy, remember to rinse it thoroughly before cooking and avoid stirring during the cooking process. For rice that’s too dry or undercooked, add a few tablespoons of hot water, cover, and let it steam for an additional 5 minutes. With these simple fixes, you’ll achieve perfect results every time!

    Frequently Asked Questions

    Can I make Greek Turkey Meatballs with Lemon Herb Rice ahead of time?

    Absolutely! Prepare the meatballs up to 24 hours ahead and refrigerate uncooked. The rice is best made fresh, but you can prep all herbs and seasonings in advance to streamline cooking time.

    What’s the best ground turkey to use for meatballs?

    Choose 93% lean ground turkey for the perfect balance of flavor and juiciness. Avoid 99% lean turkey, which can result in dry meatballs even when perfectly cooked.

    Can I substitute the herbs in this recipe?

    Yes! While oregano and mint are traditional, you can substitute with dill, parsley, or basil. Just maintain the same total quantity to preserve the Mediterranean flavor profile.

    How can I make this recipe gluten-free?

    Simply replace breadcrumbs with gluten-free breadcrumbs or almond flour. For the rice component, ensure your chicken broth is certified gluten-free if not using homemade.

    What’s the best way to reheat leftover meatballs?

    For the juiciest results, reheat meatballs in a 350°F oven for 10 minutes with a splash of broth. Microwave works too, but cover with a damp paper towel to retain moisture.

    Final Thoughts

    Greek Turkey Meatballs with Lemon Herb Rice has become my go-to recipe whenever I want to bring a touch of Mediterranean sunshine to our dinner table. There’s something truly magical about how these simple ingredients come together to create such vibrant flavors. I love watching my family’s eyes light up when they smell the aromatic herbs and lemon wafting through the kitchen. Whether you’re cooking for a quiet family dinner or hosting friends, this dish strikes that perfect balance between impressive and approachable. Don’t forget to check out more Mediterranean-inspired recipes on Pinterest for your next culinary adventure!
  • Creamy Chicken with Sweetcorn & Broccoli Recipe You’ll Love!

    Creamy Chicken with Sweetcorn & Broccoli Recipe You’ll Love!

    Creamy Chicken with Sweetcorn & Broccoli Recipe You’ll Love!

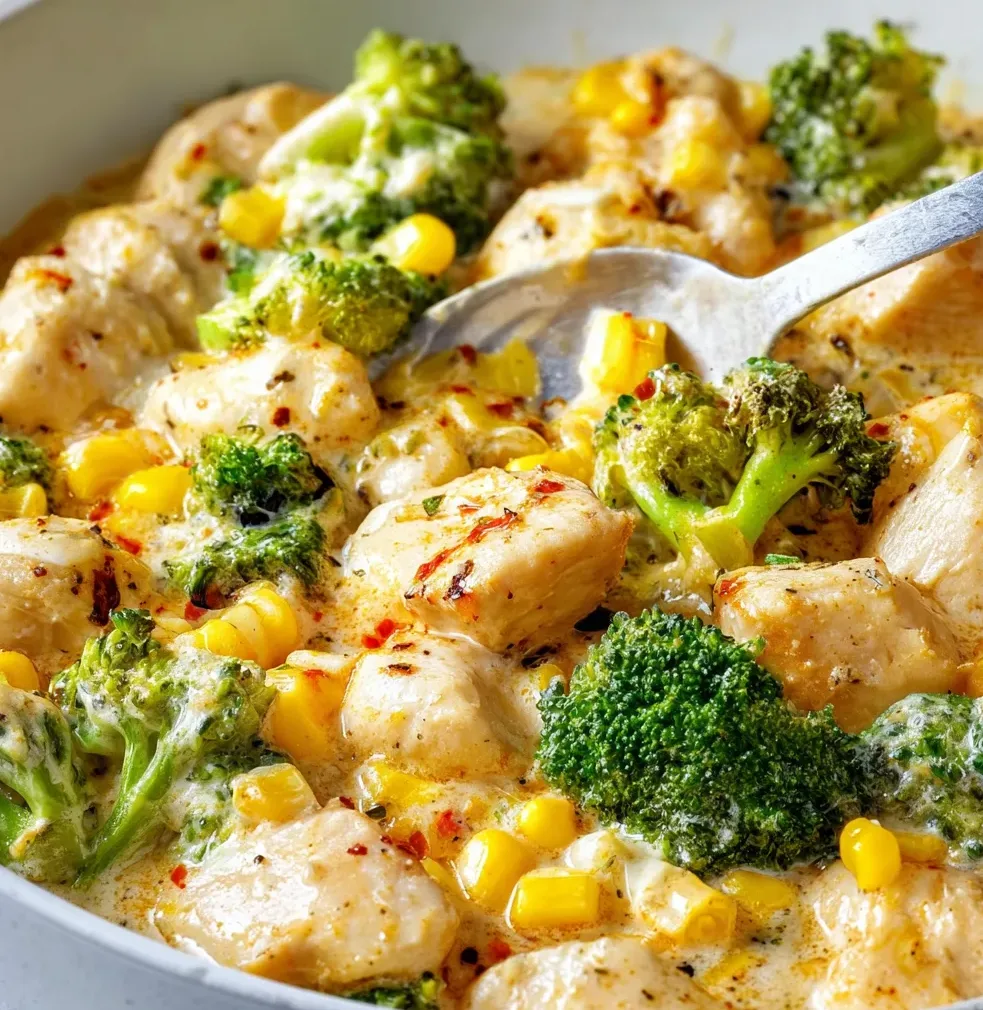
    Creamy Chicken with Sweetcorn and Broccoli is one of those magical comfort dishes that somehow manages to be both indulgent and nourishing at the same time. I first created this recipe on a rainy Sunday when my kitchen became my sanctuary from the dreary weather outside. The combination of tender chicken, sweet corn kernels, and vibrant broccoli florets swimming in a velvety sauce creates a symphony of flavors and textures that dance across your palate. This one-pot wonder has become a staple in my weekly rotation, and I’m thrilled to share it with you on RecipesDarleen.

    Recipe

    Why You’ll Love This Creamy Chicken with Sweetcorn and Broccoli

    Perfect Balance of Comfort and Nutrition

    There’s something deeply satisfying about a dish that makes you feel good while eating it and afterward. The protein-packed chicken keeps you full, while the broccoli delivers essential vitamins and fiber. The sweetcorn adds natural sweetness and a delightful pop of texture. I love how this dish strikes that elusive balance between comfort food indulgence and wholesome nutrition. On busy weeknights when I’m tempted to order takeout, this recipe reminds me that home-cooked goodness can be both convenient and nourishing.

    One-Pot Wonder for Busy Days

    If you’re anything like me, the thought of washing multiple pots and pans after cooking can sometimes be enough to reach for the takeout menu instead. That’s why I adore this recipe—it all comes together in one pot, minimizing cleanup while maximizing flavor. The creamy sauce develops incredible depth as it simmers with the chicken, allowing all those delicious flavors to meld together. Even on my most hectic days, I can manage to throw this together in about 30 minutes, which feels like a small miracle when hunger strikes!

    Essential Tips & Tricks

    Chicken Preparation Secrets

    The foundation of this dish is perfectly cooked chicken that remains tender and juicy. I recommend using boneless, skinless chicken thighs for their natural flavor and resistance to drying out. Cut them into even pieces (about 1-inch cubes) to ensure consistent cooking. Season generously with salt and pepper before adding to the hot pan, and don’t crowd the pan—work in batches if needed to get that beautiful golden sear. This initial caramelization creates depth of flavor that elevates the entire dish, similar to the technique I use in my Homemade Baked Chicken Tenders.

    Creating the Perfect Creamy Sauce

    The magic of this dish lies in its velvety sauce that coats every ingredient in creamy goodness. Start with a roux base (equal parts butter and flour) and cook it until it smells slightly nutty but isn’t browned. Slowly whisk in your liquid of choice—I prefer a combination of chicken broth and half-and-half for the perfect balance. Add the liquid gradually while whisking constantly to prevent lumps. For extra depth, incorporate a tablespoon of Dijon mustard and a pinch of nutmeg. These subtle additions won’t overpower but will make everyone wonder what your secret ingredient is!

    Serving Ideas & Creative Variations

    Complementary Side Dishes

    While this creamy chicken with sweetcorn and broccoli is satisfying on its own, pairing it with the right sides can transform it into a feast. Serve it over fluffy basmati rice to soak up all that luscious sauce, or alongside crusty bread for dipping. For a lower-carb option, cauliflower rice works beautifully. When I’m feeling extra, I’ll make a simple side salad with peppery arugula and a light lemon vinaigrette to cut through the richness. For special occasions, consider serving with my Dutch Oven No-Knead Crusty Bread for an impressive presentation.

    Exciting Flavor Twists

    Don’t be afraid to make this recipe your own with creative variations! Swap the sweetcorn for peas or add mushrooms for an earthy dimension. For a Mediterranean twist, stir in sun-dried tomatoes, olives, and finish with crumbled feta. Spice lovers can add a diced jalapeño or red pepper flakes for heat. My favorite variation involves adding a splash of white wine to the sauce and finishing with fresh herbs like tarragon or dill. You can also experiment with different cheese additions—smoked gouda or fontina melt beautifully into the sauce for added complexity.

    Storage & Troubleshooting Guide

    Proper Storage Solutions

    This creamy chicken with sweetcorn and broccoli stores beautifully, making it perfect for meal prep Sundays. Allow leftovers to cool completely before transferring to airtight containers. Refrigerated, they’ll keep for 3-4 days. For longer storage, you can freeze portions for up to 3 months. I recommend slightly undercooking the broccoli if you plan to freeze, as it will soften further when reheated. When ready to enjoy, thaw overnight in the refrigerator and reheat gently on the stovetop, adding a splash of milk or cream to revive the sauce if it’s thickened too much.

    Fixing Common Issues

    Even experienced cooks encounter challenges! If your sauce breaks or curdles, lower the heat immediately and whisk in a tablespoon of cold cream or a cornstarch slurry (1 teaspoon cornstarch mixed with 1 tablespoon cold water). For a sauce that’s too thin, simmer uncovered for a few extra minutes or add a sprinkle of instant mashed potato flakes as a clever thickener. If your broccoli becomes too soft, next time add it later in the cooking process. And remember, if your chicken seems tough, it likely needs more time—contrary to what you might think, undercooked chicken is often chewier than properly cooked chicken.

    Frequently Asked Questions

    Can I use frozen vegetables in this Creamy Chicken with Sweetcorn and Broccoli recipe?

    Absolutely! Frozen corn and broccoli work perfectly. No need to thaw first—just add them directly to the pan and increase cooking time by 2-3 minutes to ensure they’re heated through.

    How can I make this recipe dairy-free?

    Substitute the cream with full-fat coconut milk and use olive oil instead of butter. The coconut adds a subtle sweetness that complements the corn beautifully.

    What’s the best way to reheat leftovers?

    Gently warm on the stovetop over medium-low heat, stirring occasionally. Add a splash of broth or milk to revive the sauce if it’s thickened in the refrigerator.

    Can I add other vegetables to this dish?

    Definitely! Bell peppers, peas, spinach, or asparagus make excellent additions. Add sturdier vegetables with the broccoli and more delicate ones in the final few minutes.

    Is this recipe suitable for meal prep?

    Yes! It reheats beautifully and tastes even better the next day as the flavors continue to develop. Store in airtight containers for up to 4 days.

    Final Thoughts

    This Creamy Chicken with Sweetcorn and Broccoli has become more than just a recipe in my kitchen—it’s a reliable friend that shows up when comfort is needed but nutrition can’t be compromised. The way the sweet corn pops against the tender chicken and the bright broccoli creates a harmony of flavors that feels like a warm hug on a plate. I hope this dish brings as much joy to your table as it has to mine! For more cozy recipes, follow me on Pinterest where I’m always sharing new comfort food inspirations.

  • Creamy Pesto Chicken Recipe: Irresistibly Delicious & Easy!

    Creamy Pesto Chicken Recipe: Irresistibly Delicious & Easy!

    Creamy Pesto Chicken Recipe: Irresistibly Delicious & Easy!

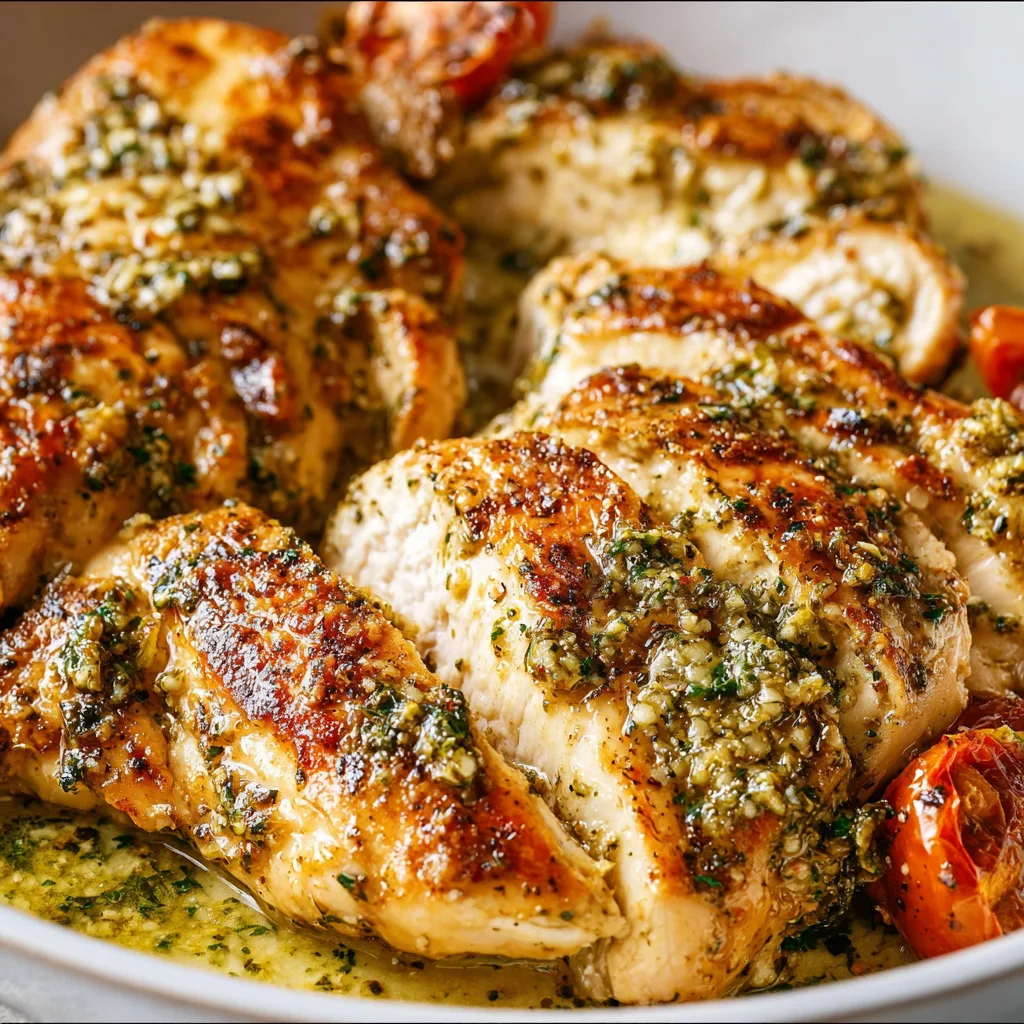
    Creamy Pesto Chicken is the ultimate weeknight dinner hero that transforms ordinary chicken into something extraordinary with minimal effort. The first time I made this dish, my kitchen filled with the most intoxicating aroma of fresh basil and garlic that had my family hovering around the stove before I could even call them for dinner. There’s something magical about how the vibrant green pesto melts into the cream, creating a velvety sauce that clings to each piece of tender chicken. If you’re looking for a restaurant-quality meal that comes together in under 30 minutes, this recipe is about to become your new favorite.

    Recipe

    Why You’ll Love This Creamy Pesto Chicken

    Perfect Balance of Flavors

    The beauty of this dish lies in its perfect harmony of flavors. The herbaceous brightness of basil pesto cuts through the richness of the cream, creating a sauce that’s indulgent without being heavy. I love how the garlic and Parmesan in the pesto bloom in the warm cream, releasing their flavors throughout the dish. The first time my sister tried it, she immediately asked for the recipe, saying it reminded her of our favorite Italian restaurant but somehow better because it tasted fresher. Each bite delivers that ideal balance of savory, creamy, and herbaceous notes.

    Quick and Impressive

    What makes this Creamy Pesto Chicken truly special is how it delivers maximum impact with minimal effort. On those evenings when I have unexpected guests or just don’t feel like spending hours in the kitchen, this dish has saved me countless times. The entire recipe comes together in about 25 minutes, yet tastes like something that simmered all day. I’ve served it at impromptu dinner parties and for casual family meals, and it never fails to impress. The vibrant green sauce against the golden chicken creates a presentation that looks like you spent hours in the kitchen.

    Essential Tips & Tricks

    Perfecting the Chicken

    The foundation of amazing Creamy Pesto Chicken starts with properly cooked chicken. I recommend using boneless, skinless chicken breasts pounded to even thickness (about ½ inch) to ensure quick, even cooking. Season generously with salt and pepper before searing in a hot pan with olive oil until golden brown on both sides. The key is achieving that beautiful golden crust without overcooking. My secret trick? Let the chicken rest for 5 minutes after cooking before slicing, which keeps all those flavorful juices locked inside instead of running all over your cutting board.

    Creating the Ultimate Sauce

    The magic of this dish lies in the silky-smooth sauce. Start by deglazing the pan with a splash of chicken broth, scraping up all those flavorful brown bits from cooking the chicken. When adding the cream, let it come to a gentle simmer before stirring in the pesto – this prevents the sauce from breaking. For the pesto, while homemade is divine (especially in summer when basil is abundant), a high-quality store-bought version works beautifully too. My favorite trick is adding a squeeze of fresh lemon juice right at the end to brighten everything up, just like in my creamy cowboy butter chicken pasta.

    Serving Ideas & Creative Variations

    Perfect Pairings

    This Creamy Pesto Chicken deserves worthy companions on your plate. My favorite way to serve it is over al dente pasta – linguine or fettuccine work particularly well as they catch the sauce beautifully. For a lighter option, try it with zucchini noodles or cauliflower rice. Crusty bread is non-negotiable for sopping up every last drop of that heavenly sauce! A simple side salad with arugula, cherry tomatoes, and a light vinaigrette provides the perfect fresh contrast to the rich chicken. For a complete Italian-inspired feast, pair with my Dutch oven no-knead crusty bread.

    Delicious Twists

    Don’t be afraid to put your own spin on this versatile recipe! One of my favorite creative variations is adding sun-dried tomatoes and artichoke hearts for a Mediterranean twist. For a spicy kick, stir in some red pepper flakes or a spoonful of calabrian chili paste. Protein swaps work beautifully too – try it with shrimp for a faster cook time, or use boneless chicken thighs for extra juiciness. For a lighter version, substitute half the cream with chicken broth. You can even transform it into a casserole by mixing the sauce with pasta and chicken, topping with mozzarella, and baking until bubbly.

    Storage & Troubleshooting Guide

    Proper Storage Techniques

    This Creamy Pesto Chicken stores beautifully, making it perfect for meal prep. Refrigerate leftovers in an airtight container for up to 3 days. The sauce may thicken considerably when chilled, but don’t worry! When reheating, add a splash of chicken broth or cream to bring it back to its silky consistency. I like to store the chicken and sauce separately from any pasta to prevent the noodles from absorbing all the liquid. For freezing, the chicken in sauce can be frozen for up to 2 months, though the texture of the sauce may change slightly upon thawing.

    Fixing Common Issues

    Even experienced cooks encounter challenges! If your sauce breaks or curdles, the likely culprit is heat that’s too high. The fix is simple: lower the heat immediately and whisk in a tablespoon of cold cream. If your sauce is too thin, simmer it uncovered for a few extra minutes. Too thick? Add a splash of chicken broth. If the pesto flavor isn’t pronounced enough, don’t just add more pesto (which can make it oily) – instead, stir in some fresh chopped basil and an extra sprinkle of Parmesan. For bland sauce, a pinch of salt and a squeeze of lemon juice work wonders.

    Frequently Asked Questions

    Can I use homemade pesto for this Creamy Pesto Chicken?

    Absolutely! Homemade pesto offers brighter flavors and lets you control the ingredients. Just ensure it has enough oil to blend smoothly with the cream sauce. I recommend making extra to freeze in ice cube trays for future meals.

    How can I make this recipe dairy-free?

    Replace heavy cream with full-fat coconut milk and use a dairy-free pesto (or make your own without Parmesan). The flavor profile will change slightly, but the creaminess and richness remain delicious.

    What’s the best way to reheat leftovers?

    Reheat gently on the stovetop over medium-low heat, adding a splash of broth or cream to revive the sauce. Microwaving works in a pinch, but use 50% power and stir halfway through.

    Can I add vegetables to this dish?

    Definitely! Spinach, cherry tomatoes, mushrooms, and asparagus all work beautifully. Add quick-cooking vegetables during the last few minutes of cooking the sauce.

    What’s the secret to keeping the chicken tender?

    Don’t overcook it! Pound chicken to even thickness, sear until just golden (about 4 minutes per side), and let it rest before slicing. For extra insurance, brine the chicken in saltwater for 15 minutes before cooking.

    Final Thoughts

    This Creamy Pesto Chicken has become one of my most requested recipes for good reason. It strikes that perfect balance between impressive and achievable, making it ideal for both special occasions and weeknight dinners. The vibrant flavors transport you to an Italian kitchen, while the creamy sauce provides the comfort we all crave. I hope this recipe brings as much joy to your table as it has to mine. Remember to share your creations with me on Pinterest – I love seeing how you make this recipe your own!

  • Wonton Jalapeno Poppers That Explode with Spicy Crunch!

    Wonton Jalapeno Poppers That Explode with Spicy Crunch!

    Wonton Jalapeno Poppers That Explode with Spicy Crunch!

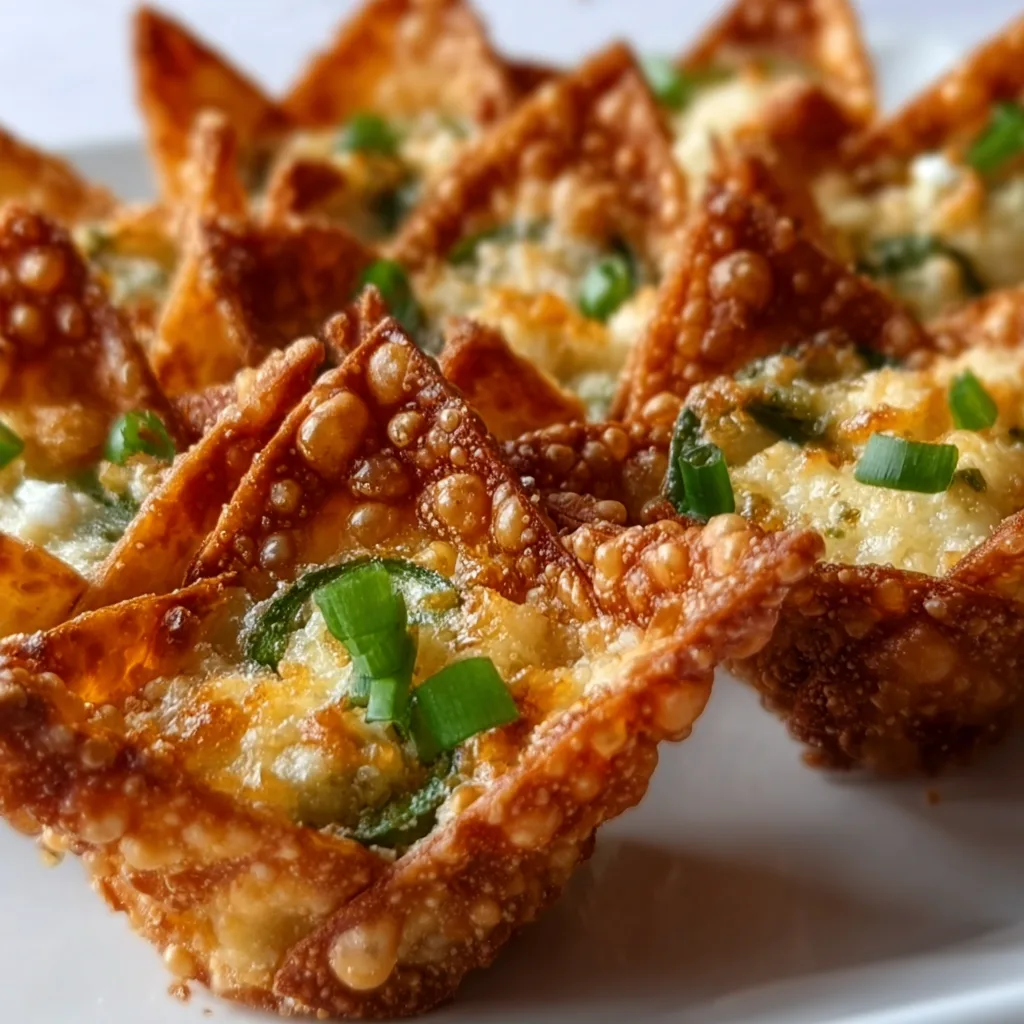
    Wonton Jalapeno Poppers have completely revolutionized my appetizer game! These crispy little bundles combine the perfect balance of creamy, spicy, and crunchy textures that make them absolutely irresistible at any gathering. I first created these for a last-minute game day party when I needed something impressive but quick. The look on my friends’ faces when they bit into these crispy wonton wrappers filled with cheesy, spicy goodness told me everything I needed to know – I had a winner on my hands! If you love the classic jalapeno popper flavors, you’ll be obsessed with this creative twist.

    Recipe

    Why You’ll Love These Wonton Jalapeno Poppers

    Perfect Party Pleasers

    These Wonton Jalapeno Poppers are guaranteed crowd-pleasers that disappear within minutes! The combination of crispy wonton shells and creamy, spicy filling creates an irresistible texture contrast that keeps everyone reaching for more. I love how the wonton wrappers get perfectly golden and crunchy while the center stays molten and cheesy. They’re substantial enough to satisfy but small enough that guests can enjoy several without filling up. Plus, they look so impressive on a serving platter that everyone assumes you spent hours in the kitchen!

    Quick and Customizable

    One of my favorite things about these Wonton Jalapeno Poppers is how ridiculously simple they are to prepare! The assembly process takes just minutes, and you can easily adjust the spice level by removing seeds (or not) from your jalapenos. I’ve made these with cream cheese alone, but adding shredded cheddar or pepper jack takes them to another level. You can even prep them hours ahead and fry just before serving. For busy hosts, this is the perfect recipe that delivers maximum flavor with minimal effort.

    Essential Tips & Tricks

    Perfecting the Filling

    The secret to exceptional Wonton Jalapeno Poppers lies in the balanced filling. I recommend softening your cream cheese completely before mixing to ensure a smooth consistency. When handling jalapenos, wear disposable gloves to protect your skin and eyes from the capsaicin oils. For the perfect heat level, remove seeds and membranes for milder poppers or leave some in for extra kick. Don’t overfill your wontons – about 1 teaspoon per wrapper prevents bursting during cooking. Adding a pinch of garlic powder and a splash of lime juice to the filling elevates the flavor profile dramatically!

    Sealing and Cooking Techniques

    Properly sealing your Wonton Jalapeno Poppers is crucial for success. Apply a thin line of water around the edges of the wrapper before folding to create a tight seal. Press firmly to eliminate air pockets that could cause them to burst when cooking. When frying, maintain oil temperature between 350-375°F for the crispiest results. Work in small batches to avoid overcrowding, which lowers oil temperature and results in soggy wrappers. If you prefer baking, brush with oil and bake at 375°F for 12-15 minutes for a lighter alternative that’s still deliciously crispy, similar to my baked chicken tenders.

    Serving Ideas & Creative Variations

    Dipping Sauces and Presentations

    Elevate your Wonton Jalapeno Poppers with complementary dips that enhance their flavor profile. Ranch dressing is a classic pairing, but try mixing in chopped cilantro and lime zest for a fresh twist. Sweet chili sauce offers a delightful sweet-heat contrast, while a cooling avocado crema balances the spice beautifully. For presentation, arrange them in a circular pattern on a round platter with dipping sauces in the center. Garnish with fresh cilantro leaves, thinly sliced jalapenos, or a light dusting of paprika for a pop of color that makes them even more irresistible!

    Flavor Variations to Try

    While traditional Wonton Jalapeno Poppers are incredible, experimenting with flavors keeps this recipe exciting! Try adding crispy bacon bits to your filling for a smoky element that pairs perfectly with the spicy jalapenos. For a southwestern twist, mix in corn kernels and black beans with taco seasoning. Crab and cream cheese is another luxurious variation that’s perfect for special occasions. Buffalo chicken with blue cheese crumbles creates a game-day favorite that pairs perfectly with celery sticks. For a sweet-heat combination, try adding pineapple tidbits to the filling – it’s unexpectedly delicious, similar to my Hawaiian BBQ Pizza.

    Storage & Troubleshooting Guide

    Make-Ahead and Storage Solutions

    Wonton Jalapeno Poppers are perfect for planning ahead! You can assemble them up to 24 hours in advance – just place them on a parchment-lined baking sheet, cover with plastic wrap, and refrigerate until cooking. For longer storage, freeze uncooked poppers in a single layer until solid, then transfer to a freezer bag for up to three months. Cook directly from frozen, adding 1-2 minutes to the cooking time. Leftover cooked poppers can be refrigerated for 2-3 days and reheated in a 350°F oven or air fryer for 3-5 minutes until crispy and heated through.

    Fixing Common Problems

    Even experienced cooks encounter challenges with Wonton Jalapeno Poppers! If your wrappers tear during filling, they’re likely overfilled or the edges weren’t moistened enough. Use less filling and ensure you create a proper seal by pressing firmly around all edges. If your poppers burst during frying, your oil may be too hot – maintain a consistent temperature and avoid overcrowding the pan. For poppers that aren’t crispy enough, they likely absorbed too much oil from frying at too low a temperature. Ensure oil reaches 350°F before adding poppers, and drain well on paper towels immediately after cooking.

    Frequently Asked Questions

    Can I make Wonton Jalapeno Poppers in an air fryer?

    Absolutely! Spray with cooking oil, then air fry at 375°F for 6-8 minutes until golden and crispy. This method uses less oil while maintaining that perfect crunch.

    How spicy are Wonton Jalapeno Poppers?

    The spice level is customizable. Remove all seeds and membranes for mild poppers, or leave some in for extra heat. The cream cheese also helps temper the spiciness.

    Can I prepare these ahead for a party?

    Yes! Assemble up to 24 hours ahead and refrigerate uncooked. For longer storage, freeze them. Cook just before serving for the best texture and flavor.

    What’s the best way to reheat leftover Wonton Jalapeno Poppers?

    Reheat in a 350°F oven or air fryer for 3-5 minutes. Avoid microwaving as it makes the wrappers soggy instead of crispy.

    Where can I find wonton wrappers for my jalapeno poppers?

    Look in the refrigerated section near tofu or produce in most grocery stores. Asian markets always carry them, usually in the refrigerated or frozen sections.

    Final Thoughts

    These Wonton Jalapeno Poppers have become my signature appetizer for good reason – they’re the perfect combination of impressive yet easy. Every time I serve them, I’m reminded of that first game day when they disappeared in minutes and friends begged for the recipe. The crispy exterior giving way to that creamy, spicy filling creates an irresistible bite that keeps everyone coming back for more. Whether you’re hosting a casual get-together or an elegant cocktail party, these wonton jalapeno poppers are guaranteed to steal the show! Find more appetizer inspiration on my Pinterest board.

  • Baked Lobster Tails with Garlic Butter – Irresistibly Easy & Delicious!

    Baked Lobster Tails with Garlic Butter – Irresistibly Easy & Delicious!

    Baked Lobster Tails with Garlic Butter – Irresistibly Easy & Delicious!

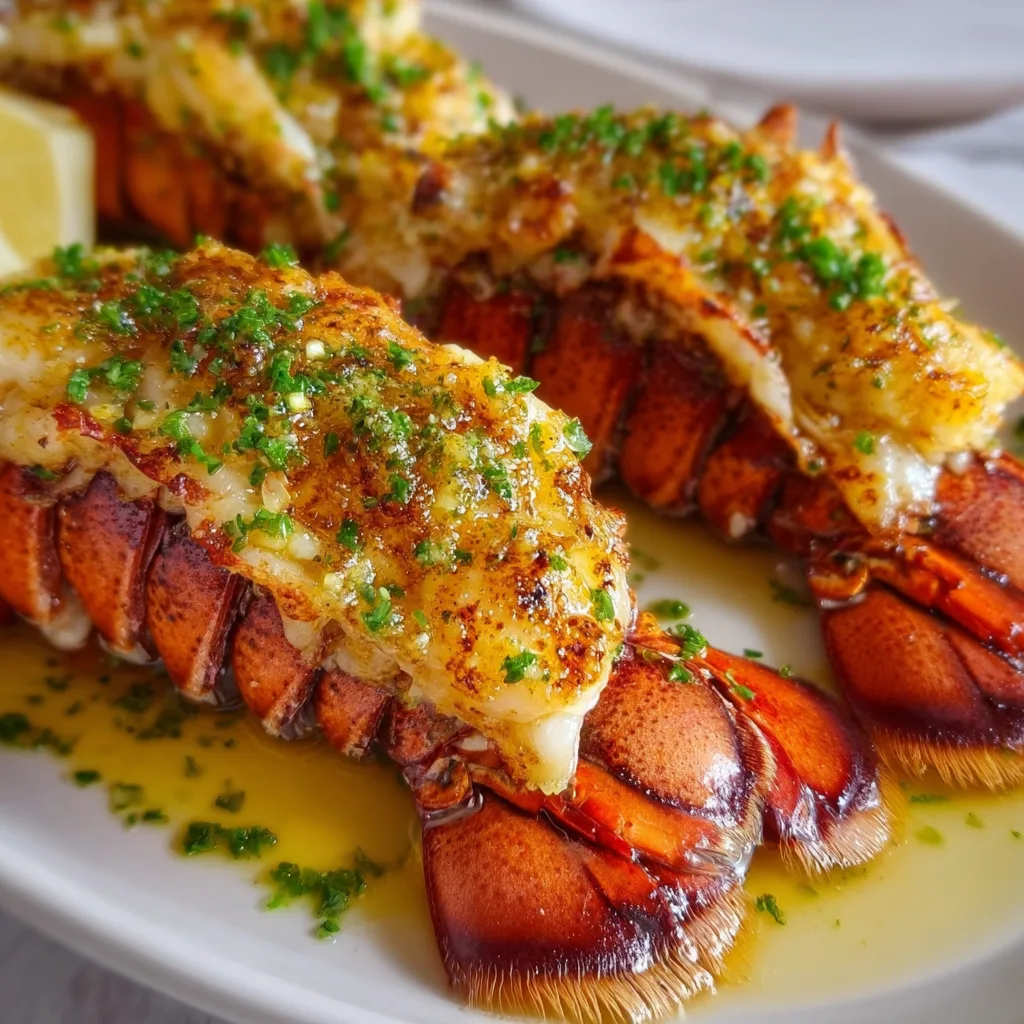
    Baked lobster tails with garlic butter are the ultimate indulgence that transforms any dinner into a special occasion. The first time I made these at home, I was shocked at how simple yet impressive they were! The sweet, tender lobster meat bathed in rich, melted garlic butter creates a combination that’s absolutely heavenly. Even better, this restaurant-worthy dish comes together in just about 15 minutes of active cooking time. If you’re looking to create a memorable meal without spending hours in the kitchen, this recipe belongs in your collection like my fluffy twice baked potatoes.

    Recipe

    Why You’ll Love These Baked Lobster Tails with Garlic Butter

    Impressive Yet Simple

    There’s something magical about serving lobster tails that instantly elevates any meal. What most people don’t realize is how incredibly easy they are to prepare! With just a few quality ingredients and about 20 minutes total, you’ll create a dish that looks like it came from a five-star restaurant. The butterflied presentation makes for a stunning visual impact when the bright white meat contrasts against the vibrant red shells. I still remember my husband’s face the first time I served these—pure amazement that something so elegant came from our own kitchen!

    Rich, Buttery Flavor

    The star of this dish is undoubtedly the garlic butter sauce that bathes every bite in decadence. The combination of sweet lobster meat and savory garlic butter creates a flavor profile that’s simply irresistible. I use high-quality butter and fresh garlic for the best results, with a hint of lemon juice to cut through the richness. The butter melts into every crevice of the tender lobster meat as it bakes, creating an experience that’s both luxurious and comforting. One bite and you’ll understand why lobster has maintained its reputation as a premium dining experience.

    Essential Tips & Tricks

    Selecting and Preparing Lobster Tails

    Choosing the right lobster tails is crucial for this recipe. Look for cold water tails (like Maine or Canadian) when possible, as they typically have sweeter, more tender meat than warm water varieties. Fresh tails should have a clean ocean smell and firm, translucent meat. When preparing, use sharp kitchen shears to cut through the top shell, then gently lift the meat to rest on top—this is called butterflying and creates that restaurant-style presentation. Don’t remove the meat completely! Keeping it attached at the tail end ensures even cooking and makes for a beautiful presentation similar to my garlic butter cod bites.

    Perfect Cooking Technique

    The secret to perfectly baked lobster tails is avoiding overcooking. As a general rule, bake for about 1 minute per ounce of lobster tail at 425°F. The meat should turn from translucent to opaque white with no translucent parts, but still remain moist and tender. I always use an instant-read thermometer to check for an internal temperature of 140-145°F. For even cooking, place the tails on a baking sheet with space between them. Brushing the garlic butter mixture both before and halfway through baking ensures maximum flavor infusion and prevents the delicate meat from drying out.

    Serving Ideas & Creative Variations

    Perfect Pairings

    Baked lobster tails with garlic butter deserve accompaniments that complement without overshadowing their delicate flavor. I love serving them with a simple risotto or pilaf that can soak up the extra garlic butter sauce—pure heaven! For a complete meal, add roasted asparagus or a crisp green salad with a light vinaigrette. If you’re creating a romantic dinner, a glass of chilled Chardonnay or Champagne makes the perfect beverage pairing. For a more casual approach, these lobster tails also pair beautifully with my dutch oven no knead crusty bread for soaking up every last drop of that amazing butter sauce.

    Flavor Variations

    While classic garlic butter is divine, don’t be afraid to experiment with different flavor profiles! For a Cajun twist, add paprika, cayenne, and dried oregano to your butter mixture. Herb lovers can incorporate fresh chopped parsley, chives, or dill. For an Asian-inspired version, try adding ginger, a touch of soy sauce, and a drizzle of sesame oil to the butter. My personal favorite variation includes a tablespoon of white wine in the butter sauce and a sprinkle of fresh tarragon. The slight anise flavor of the tarragon creates an unexpected but delightful complement to the sweet lobster meat.

    Storage & Troubleshooting Guide

    Proper Storage

    Lobster tails are best enjoyed immediately after cooking, but if you have leftovers, proper storage is key. Allow any remaining tails to cool completely, then refrigerate in an airtight container for up to 2 days. When reheating, do so gently—either in a low oven (300°F) covered with foil, or in short intervals in the microwave at 50% power. I recommend making a fresh batch of garlic butter for serving with reheated lobster, as this helps restore moisture and flavor. If you’re planning ahead, you can prepare the garlic butter mixture up to 3 days in advance and keep it refrigerated until needed.

    Common Issues and Solutions

    Even experienced cooks sometimes encounter challenges with lobster tails. If your lobster meat is tough or rubbery, it’s likely overcooked—next time, reduce your cooking time or oven temperature. For shells that are difficult to cut, try using kitchen shears instead of a knife, or partially thaw frozen tails before cutting. If the meat sticks to the shell during eating, you may need to cook it slightly longer next time. Another common issue is watery lobster—this usually happens with previously frozen tails that weren’t properly thawed and patted dry. Always thaw frozen tails overnight in the refrigerator and pat them thoroughly dry before preparing.

    Frequently Asked Questions

    How do I know when baked lobster tails with garlic butter are done cooking?

    Properly cooked lobster meat turns from translucent to opaque white with no translucent areas. The internal temperature should reach 140-145°F, and the meat should be firm but still tender when pierced with a fork.

    Can I use frozen lobster tails for this recipe?

    Absolutely! Thaw frozen tails overnight in the refrigerator for best results. Pat them completely dry before butterflying and cooking to prevent watery results and ensure proper browning.

    What’s the best way to butterfly a lobster tail?

    Use kitchen shears to cut through the top shell (not the underside) lengthwise, then gently pry the shell open and lift the meat to rest on top while keeping it attached at the tail end.

    How much lobster should I serve per person?

    For a main course, plan on one 6-8 oz tail per person. For appetizers or as part of a surf and turf meal, smaller 4-5 oz tails work perfectly.

    Can I prepare baked lobster tails ahead of time?

    You can butterfly the tails and prepare the garlic butter mixture up to 24 hours ahead, but for best results, bake them just before serving. Lobster is at its most tender immediately after cooking.

    Final Thoughts

    Baked lobster tails with garlic butter represent one of those rare culinary treasures that delivers maximum impact with minimal effort. There’s something truly special about the combination of sweet, tender lobster meat and rich, aromatic garlic butter that creates an unforgettable dining experience. Whether you’re celebrating a special occasion or simply treating yourself to something extraordinary, this dish never disappoints. I encourage you to try this recipe and discover just how accessible luxury can be in your own kitchen. Find more inspiration for your next special meal on my Pinterest page!

  • Air Fryer Baked Potato: 4 Easy Steps to Crispy Perfection!

    Air Fryer Baked Potato: 4 Easy Steps to Crispy Perfection!

    Air Fryer Baked Potato: 4 Easy Steps to Crispy Perfection!

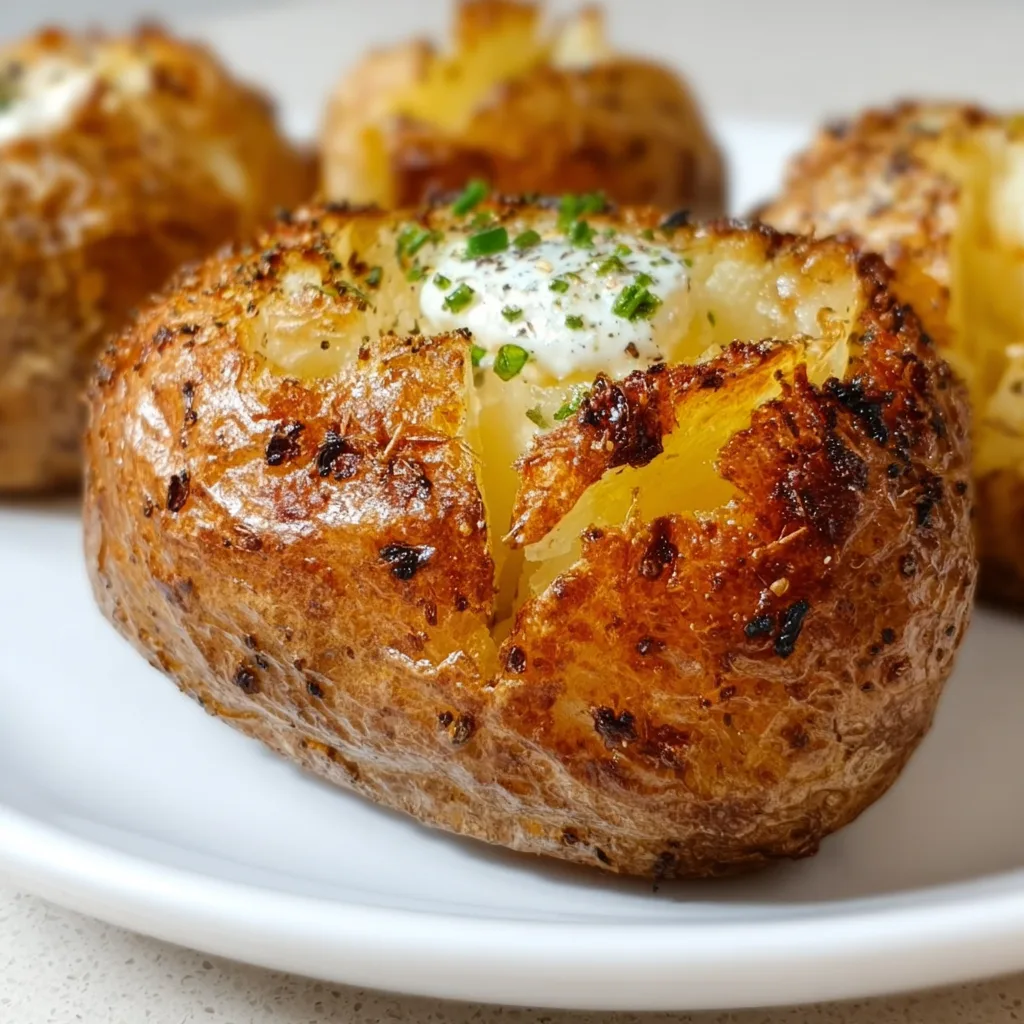
    Air Fryer Baked Potato: 4 Steps to Crispy Perfection has completely transformed my weeknight dinner routine. The first time I pulled a perfectly crispy-skinned, fluffy-centered potato from my air fryer, I nearly did a happy dance in my kitchen! There’s something magical about achieving that restaurant-quality baked potato without heating up your entire kitchen. I’ve tested countless methods, and this foolproof technique delivers consistently amazing results every single time. Whether you’re a potato purist or love loading it with toppings, this method will become your new go-to for perfect potatoes.

    Recipe

    Why You’ll Love This Air Fryer Baked Potato: 4 Steps to Crispy Perfection

    Time-Saving Magic

    Let’s be honest – traditional oven-baked potatoes can take forever! With the air fryer method, you’ll cut your cooking time nearly in half while achieving that coveted crispy exterior. I remember the days of planning dinner around when I needed to start the potatoes. Now? I can decide at 5:30 that I want a loaded baked potato for dinner and be eating by 6:15. The high-speed air circulation creates the perfect environment for rapid, even cooking, giving you that satisfying crunch when your fork first breaks through the skin.

    Texture Perfection Every Time

    The air fryer creates a potato with the ultimate texture contrast – a crackling, slightly salty exterior that gives way to a pillowy, fluffy interior. It’s like the potato version of perfect fried chicken! My husband, who was skeptical about air fryer potatoes, became an instant convert after his first bite. The skin gets this incredible crispiness that oven baking rarely achieves, while the inside stays moist and tender. I’ve found the texture is actually more consistent than traditional baking methods.

    Essential Tips & Tricks

    Preparation Secrets

    Selecting the right potato makes all the difference. Look for medium-sized Russets with firm, unblemished skin for the best results. Before cooking, I always thoroughly scrub the potatoes under cool water, then pat them completely dry – this is crucial for achieving that crispy exterior! Don’t skip the olive oil and salt coating; this simple step elevates your potato from good to magnificent. I like to massage the oil into every nook and cranny, creating a thin, even layer that promotes perfect browning and adds subtle flavor.

    Temperature and Timing Mastery

    For perfect air fryer baked potatoes, temperature control is everything. I’ve found that 390°F (199°C) hits the sweet spot – hot enough for crispy skin without burning before the center cooks. Medium-sized potatoes (8-10 oz) typically need 30-35 minutes, while larger ones may require up to 45 minutes. Always flip halfway through for even cooking! This timing pairs perfectly with preparing a delicious protein main course – everything finishes at once for a stress-free dinner.

    Serving Ideas & Creative Variations

    Classic Toppings with a Twist

    While butter, sour cream, chives, and bacon bits are timeless favorites, I love elevating my air fryer baked potato with unexpected combinations. Try whipped feta with honey and red pepper flakes for a sweet-savory-spicy explosion. Or go for a Mediterranean twist with Greek yogurt, cucumber, dill, and a drizzle of olive oil. My personal favorite? A dollop of garlic chili oil mixed with sour cream, topped with green onions and crispy fried shallots – it’s absolutely divine and takes just minutes to prepare.

    Beyond the Basic Baked Potato

    Transform your air fryer baked potato into a complete meal with creative fillings! Try a breakfast potato stuffed with scrambled eggs, cheese, and avocado. For lunch, split and fill with tuna salad and melted cheese. Dinner possibilities are endless – from chili and cheese to broccoli alfredo. My family loves “potato bar night” where everyone customizes their own creation. The sturdy, crispy shell from air frying holds up beautifully to even the most substantial fillings without getting soggy.

    Storage & Troubleshooting Guide

    Proper Storage Methods

    Air fryer baked potatoes store surprisingly well when done right. For maximum freshness, let them cool completely before refrigerating in an airtight container for up to 4 days. Never wrap warm potatoes – the trapped steam makes them soggy! To reheat, slice in half and place cut-side up in the air fryer at 350°F for 3-5 minutes. The microwave works in a pinch, but you’ll lose that amazing crispy texture. For meal prep, I often make extra potatoes on Sunday to enjoy throughout the busy week.

    Common Problems Solved

    If your potatoes aren’t crisping properly, they’re likely too crowded in the air fryer basket. Always leave space between potatoes for proper air circulation. Undercooked centers with burnt skins usually mean the temperature was too high – next time, reduce by 20 degrees and extend cooking time. For potatoes that won’t soften, try the fork poke test before cooking – 8-10 deep pricks allow steam to escape and promotes even cooking. If your potatoes wrinkle excessively, try a light coating of oil mixed with a tiny bit of baking soda for extra crispiness.

    Frequently Asked Questions

    Can I make Air Fryer Baked Potato: 4 Steps to Crispy Perfection without oil?

    Yes, but the skin won’t be as crispy. For an oil-free version, dampen the potato skin with water and sprinkle with salt before air frying. The results are still good, just less crispy than the oil method.

    What’s the best potato variety to use?

    Russet potatoes are ideal due to their high starch content and thick skins. They create the fluffiest interior with the crispiest exterior when air fried.

    How can I tell when my potato is perfectly done?

    Insert a fork or skewer into the center – it should slide in easily with little resistance. The skin should be crisp and slightly wrinkled, and the internal temperature should reach 210°F.

    Can I cook multiple potatoes at once?

    Yes, but avoid overcrowding. Leave space between potatoes and add 3-5 minutes of cooking time. For more than 4 potatoes, cook in batches for best results.

    Should I wrap my potato in foil for air frying?

    Never use foil in an air fryer! Plus, wrapping traps moisture, preventing the crispy skin that makes air fryer potatoes special.

    Final Thoughts

    Mastering the Air Fryer Baked Potato: 4 Steps to Crispy Perfection has been a game-changer in my kitchen. That perfect contrast between crackling skin and fluffy interior brings restaurant-quality results with minimal effort. I find myself making these potatoes weekly now – they’re that good! Whether as a simple side or an elaborate loaded meal, this technique delivers consistent excellence every time. For more delicious inspiration, check out my Pinterest collection where I share my favorite potato topping combinations and serving ideas.

  • Baked Mayonnaise Parmesan Chicken: Crispy, Juicy & Irresistible!

    Baked Mayonnaise Parmesan Chicken: Crispy, Juicy & Irresistible!

    Baked Mayonnaise Parmesan Chicken: Crispy, Juicy & Irresistible!

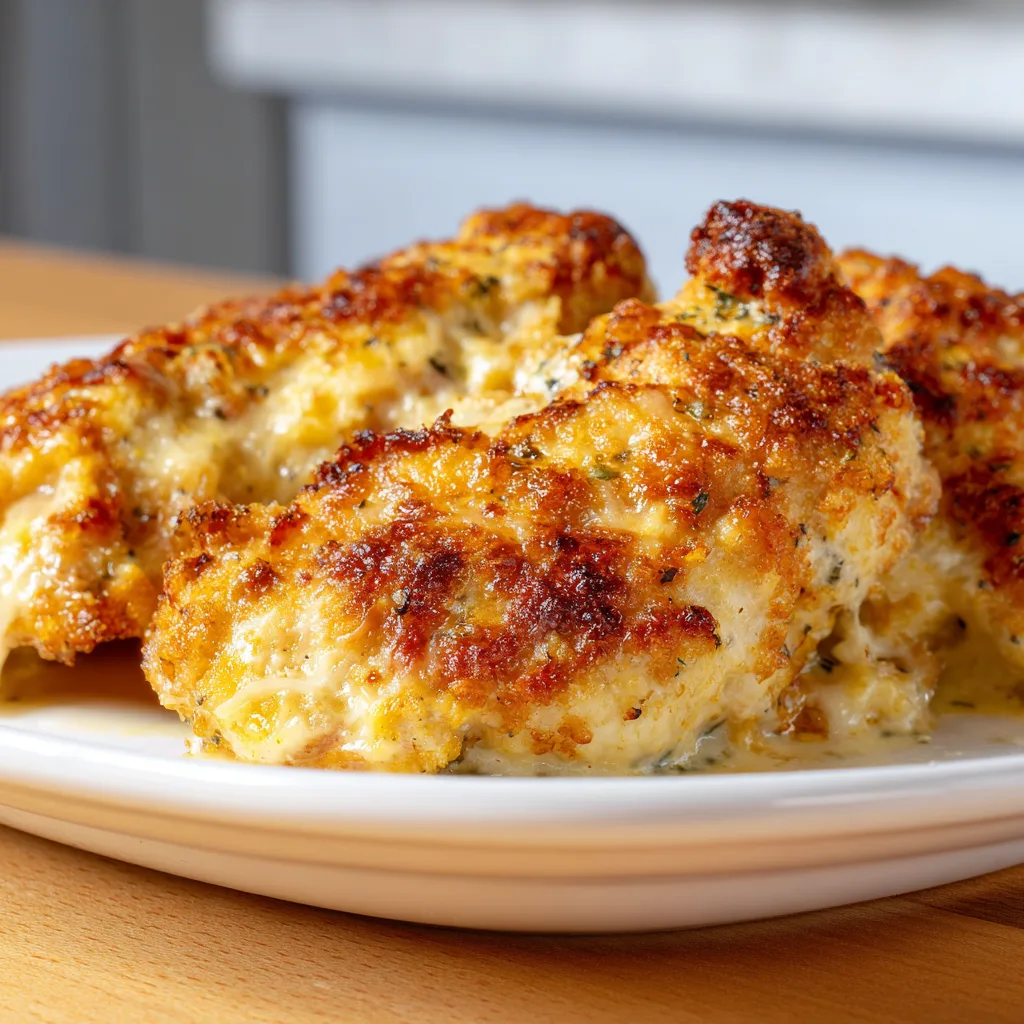
    Baked Mayonnaise Parmesan Chicken has become my absolute go-to dinner when I want something that feels special but requires minimal effort. There’s something magical about how the mayo creates this incredible moisture barrier, keeping the chicken juicy while the Parmesan forms a golden, crispy crust that makes everyone at the table swoon. I still remember the first time I made this for my sister’s impromptu visit—she couldn’t believe it wasn’t a complicated restaurant technique! The beauty lies in its simplicity: just a few pantry staples transform ordinary chicken into something extraordinary that’ll have everyone asking for seconds.

    Recipe

    Why You’ll Love This Baked Mayonnaise Parmesan Chicken

    Perfect Texture Combination

    The mayonnaise magic in this recipe is what sets it apart from ordinary baked chicken. Unlike other coatings that can dry out, the mayo creates a protective layer that seals in moisture while helping the seasonings and cheese adhere perfectly. I’m always amazed at how the outside gets deliciously crisp while the inside stays incredibly tender. The first time I pulled this chicken from the oven, the sizzling sound and golden color made my mouth water instantly. It’s that perfect contrast between the juicy interior and the crispy, cheesy exterior that makes this dish truly irresistible.

    Weeknight Friendly Yet Impressive

    This Baked Mayonnaise Parmesan Chicken is the definition of effortless elegance. It requires just minutes of hands-on time, making it perfect for hectic weeknights when you’re juggling work emails and helping with homework. Yet the results are impressive enough for company! I’ve served this at impromptu dinner parties and received more compliments than dishes that took three times the effort. The ingredients are likely already in your pantry, and the prep is so straightforward you’ll have it memorized after making it once. It’s my secret weapon for those nights when I need something reliable but special.

    Essential Tips & Tricks

    Perfecting Your Coating

    The key to exceptional Baked Mayonnaise Parmesan Chicken lies in the coating technique. I’ve found that room temperature mayonnaise spreads much more evenly than cold mayo straight from the fridge. Take a moment to thoroughly coat each piece, ensuring no spots are missed—this creates that perfect moisture seal. For the crispiest exterior, mix your Parmesan with panko breadcrumbs rather than just regular breadcrumbs. The panko creates extra crunch that stands up beautifully to the creamy mayo layer. Don’t rush this step; a good coating is what transforms this from good to absolutely memorable.

    Temperature Matters

    Getting the perfect doneness in your Baked Mayonnaise Parmesan Chicken requires attention to temperature details. Preheat your oven thoroughly—a hot oven from the start ensures that beautiful golden crust forms quickly. I always use a meat thermometer to check when my chicken reaches 165°F, which prevents both undercooking and the disappointment of dry, overcooked chicken. If you want that extra-golden finish, switch to broil for the final 1-2 minutes, but watch carefully! This technique gives you that restaurant-quality finish that makes the dish look as good as it tastes, similar to my Homemade Baked Chicken Tenders.

    Serving Ideas & Creative Variations

    Complementary Side Dishes

    The versatility of Baked Mayonnaise Parmesan Chicken makes it perfect for endless pairing possibilities. I love serving it over a bed of garlic butter pasta where the crispy chicken contrasts beautifully with the silky noodles. For a lighter option, a bright arugula salad with lemon vinaigrette cuts through the richness perfectly. Roasted vegetables like asparagus or Brussels sprouts add color and nutrition to complete the meal. When I’m feeling extra indulgent, I serve it alongside my Fluffy Twice Baked Potatoes for a meal that always gets rave reviews. The chicken’s flavor profile is neutral enough yet interesting enough to complement almost any side.

    Flavor Twist Options

    Don’t be afraid to make this Baked Mayonnaise Parmesan Chicken your own with creative adaptations. I’ve experimented with adding different herbs to the mayo mixture—rosemary and thyme create a lovely aromatic profile, while fresh basil gives it an Italian twist. For heat lovers, mixing in a teaspoon of sriracha or cayenne with the mayonnaise creates a subtle warmth throughout. You can also play with cheese variations—sharp cheddar, asiago, or pepper jack all work beautifully in place of or alongside the Parmesan. My favorite variation includes a tablespoon of pesto mixed into the mayonnaise, which adds incredible depth of flavor with minimal effort.

    Storage & Troubleshooting Guide

    Proper Storage Methods

    To maintain the quality of leftover Baked Mayonnaise Parmesan Chicken, proper storage is essential. Allow the chicken to cool completely before refrigerating to prevent condensation that could make the coating soggy. I store mine in airtight containers with paper towels on the bottom to absorb excess moisture. Properly stored, this chicken stays good for up to 3 days in the refrigerator. For freezing, wrap individual pieces tightly in plastic wrap, then foil, and freeze for up to 2 months. When reheating, the oven method works best—about 10-15 minutes at 350°F will restore much of that original crispy texture.

    Fixing Common Issues

    Even experienced cooks occasionally encounter challenges with Baked Mayonnaise Parmesan Chicken. If your coating isn’t crisping properly, the culprit is usually excess moisture. Make sure to pat the chicken completely dry before applying the mayo, and consider using a wire rack on your baking sheet to allow air circulation. If your coating slides off during baking, try chilling the coated chicken for 15-20 minutes before baking to help everything adhere better. For uneven browning, rotate your pan halfway through cooking. Sometimes I’ll use parchment paper instead of foil for a more even heat distribution that results in consistent browning across all pieces.

    Frequently Asked Questions

    Can I use light mayonnaise for Baked Mayonnaise Parmesan Chicken?

    Yes, light mayonnaise works fine but may not create quite as rich a result. The fat in regular mayo helps create that perfect crispy exterior, but light versions will still give you a delicious outcome with fewer calories.

    How thick should I cut the chicken breasts?

    For even cooking, pound chicken breasts to an even 3/4-inch thickness or slice larger breasts horizontally. This ensures the coating crisps perfectly while the inside cooks through without drying out.

    Can I make this recipe ahead of time?

    You can prepare the chicken up to the coating stage and refrigerate for 4-6 hours before baking. This actually helps the coating adhere better, but don’t prepare too far in advance or the breadcrumbs may become soggy.

    What’s the best way to reheat leftovers?

    Reheat in a 350°F oven for 10-15 minutes until warmed through. Avoid microwaving as it makes the coating soft rather than crispy. A toaster oven also works well for smaller portions.

    Is there a dairy-free version of Baked Mayonnaise Parmesan Chicken?

    Substitute nutritional yeast for the Parmesan and use dairy-free breadcrumbs. The mayo is already dairy-free, and the nutritional yeast provides a similar savory, cheesy flavor that works beautifully in this recipe.

    Final Thoughts

    Baked Mayonnaise Parmesan Chicken represents everything I love about cooking—simple techniques and everyday ingredients transforming into something truly special. The contrast between the juicy interior and crispy exterior makes this dish a standout that appeals to both picky eaters and gourmands alike. I find myself returning to this recipe again and again, not just for its reliability but for the genuine joy it brings to my dinner table. Whether you’re cooking for a weeknight family meal or a special gathering, this chicken delivers that perfect balance of ease and impression. Find more inspiration for your next meal on Pinterest.

  • Honey Pepperoni Ricotta Pizza That Will Blow Your Mind!

    Honey Pepperoni Ricotta Pizza That Will Blow Your Mind!

    Honey Pepperoni Ricotta Pizza That Will Blow Your Mind!

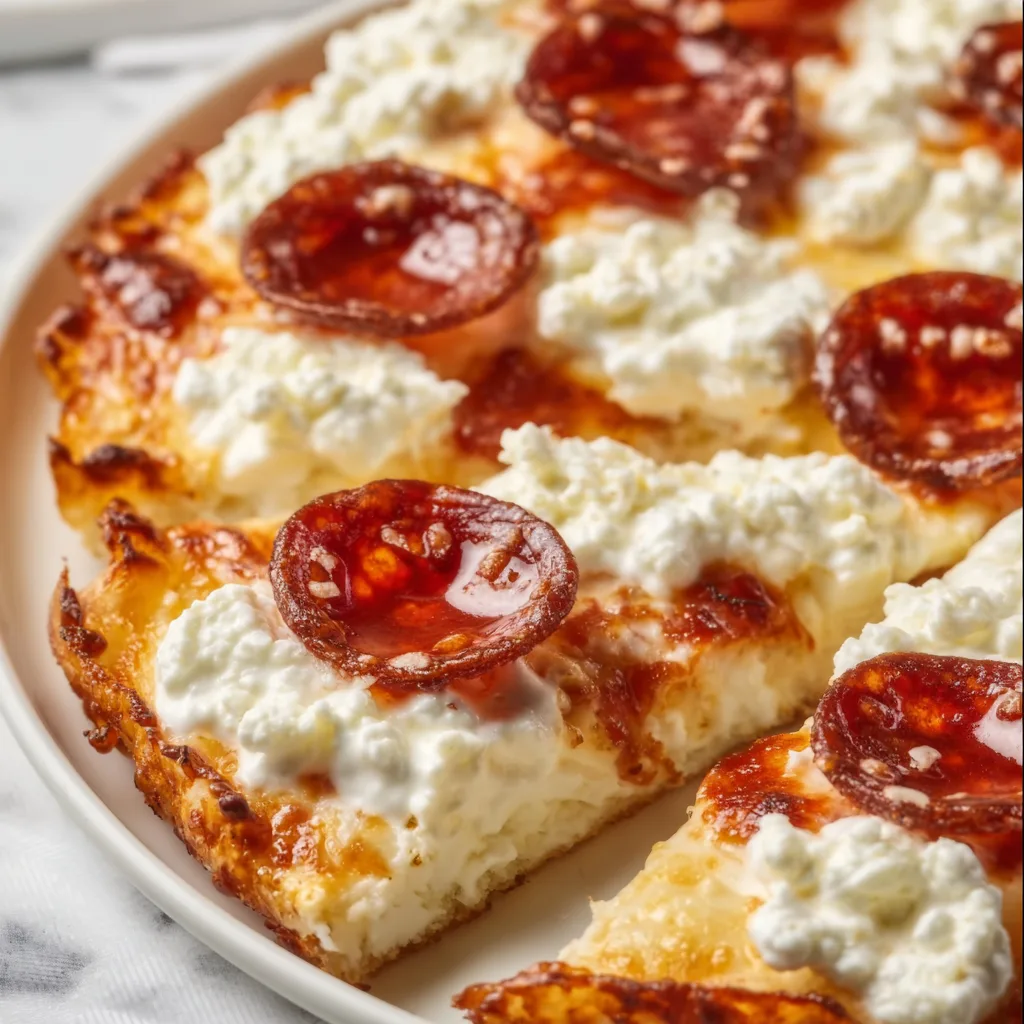
    Honey Pepperoni Ricotta Pizza has completely transformed my Friday night dinner routine. The first time I drizzled warm honey over that perfect combination of spicy pepperoni and creamy ricotta, I actually closed my eyes and savored the moment. There’s something magical about how the sweet honey cuts through the saltiness of the pepperoni while the ricotta adds a luxurious creaminess that ties everything together. If you’re looking for a pizza that balances sweet, salty, spicy, and creamy in every bite, this recipe needs to be your next kitchen adventure. Like my Roasted Red Grape Pizza, this one proves that unexpected toppings create the most memorable pizzas.

    Recipe

    Why You’ll Love This Honey Pepperoni Ricotta Pizza

    A Perfect Balance of Flavors

    The magic of this Honey Pepperoni Ricotta Pizza lies in its contrasting elements that somehow create harmony on your palate. The pepperoni crisps beautifully in the oven, releasing those spicy oils that infuse the entire pizza. Then comes the ricotta – cool, creamy clouds dotted across the surface that mellow the heat. But the true game-changer is that warm honey drizzle at the finish, adding a sweet note that elevates everything. I still remember my husband’s skeptical look when I first mentioned honey on pizza – now he requests it weekly!

    Quick and Impressive for Entertaining

    This Honey Pepperoni Ricotta Pizza is my secret weapon for last-minute entertaining. It takes just minutes to assemble but looks and tastes like something from an artisanal pizzeria. The visual appeal alone – with the white ricotta dollops, red pepperoni circles, and glistening honey – makes guests reach for their phones before taking a bite. I’ve served this at everything from casual game nights to fancier dinner parties, and it’s always the first dish to disappear. Plus, it pairs beautifully with both beer and wine, making it versatile for any gathering.

    Essential Tips & Tricks

    Perfecting Your Pizza Dough

    The foundation of any great pizza is the dough, and for Honey Pepperoni Ricotta Pizza, you want something that can stand up to these bold toppings. I recommend letting your dough come to room temperature for at least 30 minutes before stretching – this prevents that frustrating spring-back effect. For extra flavor, brush the edges with olive oil mixed with a pinch of garlic powder before baking. And don’t overload with sauce! A thin layer lets the toppings shine without making the crust soggy. My Dutch Oven No-Knead Crusty Bread technique can be adapted for pizza dough too!

    Selecting Quality Ingredients

    For a pizza with so few ingredients, quality makes all the difference. Look for whole milk ricotta – the extra fat creates that luxurious mouthfeel that makes this pizza special. Drain it in a fine-mesh sieve for 30 minutes if it seems watery. For pepperoni, thinner slices crisp better, creating those delightful little cups that hold tiny pools of spicy oil. And please, splurge on good honey! A raw, unfiltered variety adds complex floral notes that regular processed honey just can’t match. I keep a special bottle just for drizzling on pizzas.

    Serving Ideas & Creative Variations

    Perfect Pairings and Sides

    This Honey Pepperoni Ricotta Pizza deserves thoughtful accompaniments that complement its sweet-savory profile. A simple arugula salad dressed with lemon and olive oil provides a peppery, fresh counterpoint to the rich pizza. For beverages, try a crisp Italian Pinot Grigio or, my personal favorite, a slightly hoppy pale ale that stands up to the pepperoni’s spice. If you’re serving this as part of a larger spread, my Cheesy Meatball Subs make an excellent companion – the tomato-forward flavor balances the honey’s sweetness perfectly.

    Exciting Flavor Twists

    While the classic Honey Pepperoni Ricotta Pizza is perfection, don’t be afraid to experiment! Try adding thinly sliced jalapeños for extra heat that plays beautifully with the honey. For a more complex flavor profile, sprinkle some fresh thyme leaves over the ricotta before baking. My current obsession is adding a few pieces of crumbled gorgonzola alongside the ricotta – the funky blue cheese adds an unexpected depth. And for a breakfast pizza variation, crack an egg in the center for the last few minutes of baking for a runny yolk that creates its own sauce.

    Storage & Troubleshooting Guide

    Keeping It Fresh

    Honey Pepperoni Ricotta Pizza is best enjoyed fresh from the oven, but leftovers can still be delicious with proper handling. Store any remaining slices in an airtight container with parchment paper between layers to prevent sticking. Refrigerate for up to 3 days. For reheating, skip the microwave! Instead, warm slices in a skillet over medium-low heat with a lid until the cheese melts, about 3-4 minutes. This maintains the crispy crust better than any other method. I always make an extra pizza just to have these leftovers for lunch.

    Solving Common Pizza Problems

    Even experienced home cooks encounter pizza challenges. If your crust is pale and soft rather than golden and crispy, try preheating your baking sheet or pizza stone for at least 30 minutes before sliding your pizza onto it. For ricotta that’s spreading too much, chill it thoroughly before dolloping, or mix with a tablespoon of cream cheese for stability. If your honey is crystallizing and difficult to drizzle, place the container in warm (not hot) water for 10 minutes. And remember – if pepperoni makes your pizza too greasy, blot the slices with paper towels before adding them.

    Frequently Asked Questions

    Can I make Honey Pepperoni Ricotta Pizza ahead of time?

    You can prepare the dough and toppings in advance, but assemble just before baking for best results. Pre-baked crusts can be frozen for up to 1 month and topped just before serving.

    What’s the best cheese base for Honey Pepperoni Ricotta Pizza?

    A light layer of low-moisture mozzarella works best as the base, allowing the ricotta dollops to shine. Avoid pre-shredded cheese as it contains anti-caking agents that prevent proper melting.

    How do I prevent my crust from getting soggy?

    Bake your pizza at a high temperature (475°F minimum) on a preheated stone or sheet. Apply sauce sparingly and consider par-baking the crust for 3-4 minutes before adding toppings.

    Can I substitute the honey with another sweetener?

    Hot honey makes an excellent spicy-sweet alternative. Maple syrup works in a pinch but has a different flavor profile. Avoid artificial sweeteners as they don’t caramelize properly.

    Is there a trick to getting the perfect ricotta dollops on my pizza?

    For picture-perfect Honey Pepperoni Ricotta Pizza, use a small ice cream scoop or two spoons to create uniform dollops. Chill the ricotta beforehand for cleaner placement.

    Final Thoughts

    This Honey Pepperoni Ricotta Pizza has become more than just a recipe in my household – it’s a weekly tradition that everyone looks forward to. The combination of spicy, sweet, and creamy creates something truly greater than the sum of its parts. Don’t be surprised if this becomes your new go-to pizza recipe that friends and family request by name. I’d love to see your creations on Pinterest – tag me and show off your drizzling skills! Remember, the best pizzas come from experimenting and making each recipe your own.