Blog

  • Cherry Cranberry Energy Bites: Boost Your Day with Sweet Power!

    Cherry Cranberry Energy Bites: Boost Your Day with Sweet Power!

    Cherry Cranberry Energy Bites: Boost Your Day with Sweet Power!

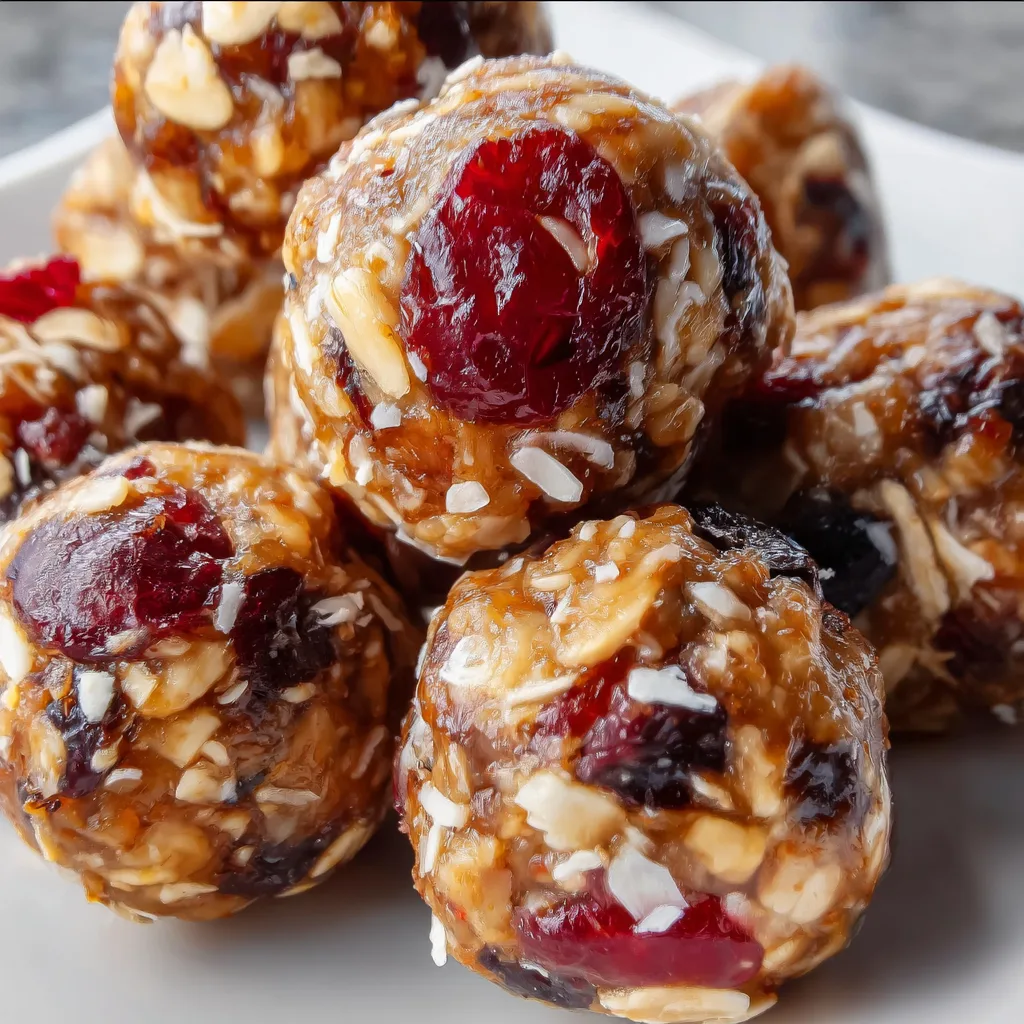
    Cherry Cranberry Energy Bites are my absolute lifesaver during those hectic mid-afternoon slumps when I need something nutritious yet indulgent. These little powerhouses combine the tart sweetness of dried cherries and cranberries with hearty oats and nuts for the perfect balance of flavor and energy. The first time I made these, my kitchen filled with that unmistakable aroma of toasted nuts and honey – instantly transporting me back to my grandmother’s kitchen. They’re incredibly versatile too, perfect for breakfast on-the-go, post-workout fuel, or a sweet treat that won’t derail your healthy eating goals. Check out my Dutch Oven No Knead Crusty Bread for another wholesome recipe!

    Recipe

    Why You’ll Love These Cherry Cranberry Energy Bites

    Perfect Balance of Flavor and Nutrition

    These Cherry Cranberry Energy Bites deliver a perfect harmony of sweet, tart, and nutty flavors that dance on your tongue. The dried cherries provide that subtle sweetness with a hint of tartness, while cranberries add a bright, tangy pop that keeps things interesting. What I love most is how the honey binds everything together with a natural sweetness that doesn’t overwhelm. You’ll get protein from the nuts, fiber from the oats, and antioxidants from the fruit – making these little bites as nutritious as they are delicious. The texture is wonderfully chewy with just enough bite to satisfy those snack cravings.

    Quick and Customizable Recipe

    One of my favorite things about these Cherry Cranberry Energy Bites is how ridiculously simple they are to make. Just 15 minutes of active prep time, and you’ve got snacks for the entire week! No baking required – just mix, roll, and refrigerate. I often make these on Sunday evenings while listening to my favorite podcast, and they’re ready for my busy week ahead. The recipe is incredibly forgiving too – swap in whatever nuts you have on hand, adjust the sweetness to your liking, or add chocolate chips when you’re feeling indulgent. Even my picky nephew gobbles these up without realizing they’re packed with goodness.

    Essential Tips & Tricks

    Ingredient Selection Matters

    The quality of ingredients makes all the difference in these Cherry Cranberry Energy Bites. I recommend using unsweetened dried cherries and cranberries if possible – they provide natural sweetness without the extra sugar. For nut butter, choose a natural variety without added oils or sugar; the pure stuff binds better and tastes more authentic. Toast your oats and nuts lightly before mixing for an enhanced nutty flavor that elevates the entire bite. I learned this trick from a pastry chef friend, and it’s been a game-changer! The freshness of your ingredients matters too – stale nuts can ruin the entire batch with their off flavors.

    Perfect Texture Techniques

    Achieving the ideal consistency for your Cherry Cranberry Energy Bites comes down to a few simple tricks. If your mixture seems too dry and crumbly, add a touch more nut butter or honey until it holds together when pressed. Conversely, if it’s too sticky to roll, refrigerate the mixture for 20 minutes or add more oats to absorb the excess moisture. I like to dampen my hands slightly when rolling to prevent sticking – this makes the process much easier and creates perfectly smooth bites. For uniform sizing, use a cookie scoop or tablespoon measure to portion out each bite before rolling.

    Serving Ideas & Creative Variations

    Perfect Pairings

    These Cherry Cranberry Energy Bites shine as a standalone snack, but they truly elevate any occasion when thoughtfully paired. I love serving them alongside my morning coffee – the fruity notes complement a dark roast beautifully. For an elegant dessert alternative, arrange them on a platter with fresh berries and a small bowl of yogurt for dipping. They’re also perfect additions to lunchboxes or picnic baskets, especially when wrapped individually in parchment paper. When hosting brunch, I place them on a tiered stand alongside my Breakfast Egg Muffins for a spread that always impresses guests without hours in the kitchen.

    Seasonal and Dietary Adaptations

    The versatility of Cherry Cranberry Energy Bites makes them perfect for creative adaptations throughout the year. During fall, I add warming spices like cinnamon, nutmeg, and a touch of ginger for a festive twist. Summer variations might include lemon zest and white chocolate chips for brightness. For keto friends, I swap the honey for a keto-friendly sweetener and use almond flour instead of oats. Vegan guests appreciate when I use maple syrup instead of honey and ensure all other ingredients are plant-based. For those with nut allergies, sunflower seed butter makes an excellent substitute, maintaining that rich, creamy base without compromising flavor.

    Storage & Troubleshooting Guide

    Optimal Storage Methods

    Proper storage is key to maintaining the freshness and texture of your Cherry Cranberry Energy Bites. Store them in an airtight container in the refrigerator for up to two weeks – they actually improve after the first day as the flavors meld together beautifully. For longer storage, these bites freeze exceptionally well for up to three months. I like to freeze them on a baking sheet first, then transfer to a freezer bag to prevent sticking. This method allows me to grab just one or two as needed. When traveling with these energy bites, keep them cool in an insulated container with an ice pack to maintain their perfect chewy texture.

    Fixing Common Issues

    Even experienced bakers encounter challenges with Cherry Cranberry Energy Bites, but most problems have simple solutions. If your bites are falling apart, the mixture likely needs more binding agent – add a tablespoon more nut butter or honey and remix. For bites that are too firm or dry after refrigeration, let them sit at room temperature for 10 minutes before serving. If your mixture won’t roll into balls at all, it might be too warm – refrigerate for 30 minutes to firm up the nut butter. And if you find the flavor lacking depth, a pinch of salt or splash of vanilla extract can work wonders to enhance all the other ingredients.

    Frequently Asked Questions

    Can I make Cherry Cranberry Energy Bites without a food processor?

    Absolutely! While a food processor makes it quicker, you can chop nuts by hand and use quick oats instead of rolled oats. Mix everything in a bowl with a sturdy spoon or your hands – just expect a chunkier texture.

    How many calories are in each Cherry Cranberry Energy Bite?

    Each bite contains approximately 120-150 calories, depending on your exact ingredients. They’re nutrient-dense with healthy fats, fiber, and natural sugars, making them a satisfying and energizing snack despite their small size.

    Can I substitute dried cherries with fresh ones?

    Fresh cherries contain too much moisture for this recipe. Stick with dried cherries, or if unavailable, increase the dried cranberries and add another dried fruit like apricots or dates for variety.

    Are these suitable for children’s lunchboxes?

    These make perfect lunchbox additions! For school-safe versions, substitute sunflower seed butter for nut butters. You can also make them smaller for kid-sized portions and add mini chocolate chips as a special treat.

    How do I prevent my Cherry Cranberry Energy Bites from being too sticky?

    Refrigerate the mixture for 20-30 minutes before rolling. If still too sticky, add more dry ingredients like oats or ground flaxseed, one tablespoon at a time, until you reach a rollable consistency.

    Final Thoughts

    These Cherry Cranberry Energy Bites have become a staple in my kitchen for good reason – they’re the perfect balance of nutritious, delicious, and convenient. Whether you’re fueling a workout, satisfying a sweet craving, or needing a quick breakfast, these little powerhouses deliver every time. The combination of tart cherries, bright cranberries, and wholesome ingredients creates something truly special that both kids and adults adore. I hope you’ll make these vibrant energy bites part of your regular rotation too! For more inspiration, check out my other recipes at Pinterest.
  • Pink Sourdough Bread That Will Melt Your Heart Instantly!

    Pink Sourdough Bread That Will Melt Your Heart Instantly!

    Pink Sourdough Bread That Will Melt Your Heart Instantly!

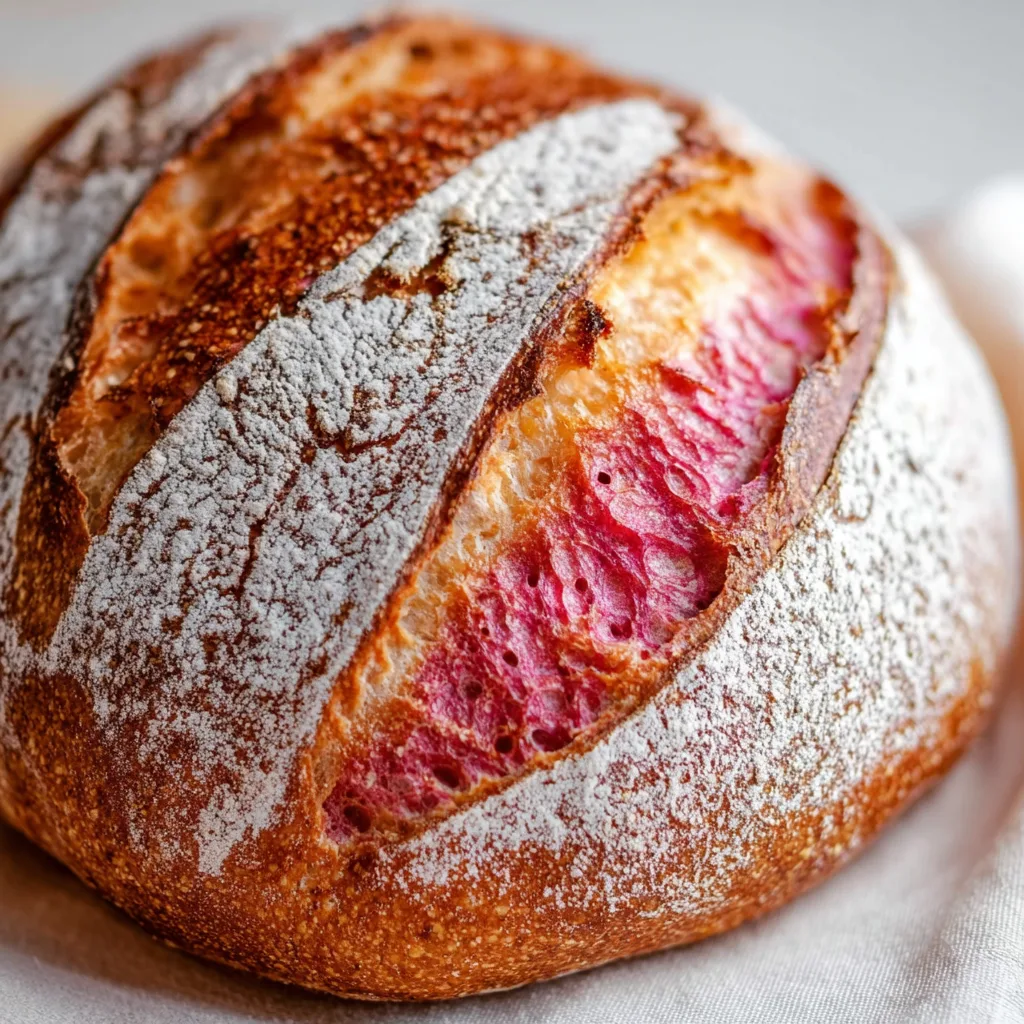
    Pink sourdough bread transforms your everyday loaf into a show-stopping masterpiece that’s as delightful to look at as it is to eat. I still remember the first time I pulled a rosy loaf from my oven—my daughter’s eyes went wide with pure wonder! There’s something magical about that moment when humble ingredients transform into a vibrant, tangy creation. Using natural ingredients like beet powder or dragon fruit, this naturally colored bread maintains all the wonderful qualities of traditional sourdough while adding a playful pink hue that makes breakfast or sandwiches feel extra special. Ready to bring some rosy charm to your bread-baking adventures?

    Recipe

    Why You’ll Love This Pink Sourdough Bread

    A Feast for the Eyes and Taste Buds

    The moment you slice into this pink-hued masterpiece, you’ll understand why it’s worth the effort. The contrast between the rosy exterior and the tender, open crumb inside creates an Instagram-worthy moment every single time. But beyond its beauty, this bread delivers that perfect sourdough tang that makes your taste buds dance. I’ve served this at countless brunches, and guests always pause mid-conversation when I bring it to the table. The subtle earthiness from the beet powder adds complexity without overwhelming the classic sourdough flavor profile you know and love.

    Naturally Colorful Without Artificial Dyes

    What makes this pink sourdough truly special is that its gorgeous color comes from natural ingredients. Instead of artificial food coloring that can leave an unpleasant aftertaste, we’re harnessing the vibrant power of beets, dragon fruit, or hibiscus. These natural colorants infuse the bread with gentle hues ranging from soft blush to vivid magenta, depending on how much you add. I love knowing exactly what goes into my family’s food, and this recipe lets you create something visually stunning while keeping the ingredient list wholesome and pronounceable.

    Essential Tips & Tricks

    Mastering the Pink Color

    Getting that perfect pink shade requires a bit of finesse. I’ve found that freeze-dried dragon fruit powder gives the most vibrant color that holds well during baking, while beet powder creates a more subtle, earthy pink. Start with 1-2 tablespoons per loaf and adjust based on your desired intensity. Mix your colorant with the water before adding to your starter and flour—this ensures even distribution throughout the dough. Remember that the color will lighten slightly during baking, so go a shade darker than your target. I once accidentally doubled the beet powder and ended up with a stunning fuchsia loaf that became the talk of our family dinner!

    Maintaining Proper Fermentation

    The addition of natural colorants can slightly affect your fermentation timeline, so keep a close eye on your dough. Beet powder contains natural sugars that may speed up fermentation, while dragon fruit powder is more neutral. I recommend doing the finger poke test more frequently than with regular sourdough—when you gently poke the dough, it should spring back slowly but not completely. Keep your dough in a clear container marked with a rubber band to track its rise. If your kitchen is warm, consider reducing fermentation time by 30 minutes to avoid over-proofing, which can affect both color and texture.

    Serving Ideas & Creative Variations

    Stunning Breakfast and Brunch Presentations

    Pink sourdough elevates even the simplest meal into something memorably beautiful. For breakfast, try thick-cut slices topped with whipped ricotta, honey, and fresh berries—the creamy white against the pink bread creates a gorgeous contrast. For brunch gatherings, I like to create a grazing board featuring pink sourdough toast points alongside soft cheeses, preserves, and fresh fruit. The bread also makes exceptional French toast that maintains its rosy hue even after soaking and cooking. My family now requests “pink toast” for special weekend breakfasts, paired with a drizzle of maple syrup and a dusting of powdered sugar.

    Seasonal and Holiday Adaptations

    This versatile bread can be adapted for special occasions throughout the year. For Valentine’s Day, shape your pink dough into a heart before baking, or add dried cranberries to the dough for extra sweetness and texture. During spring, I love serving it alongside strawberry-based dishes for a coordinated pink theme. For Easter, shape the dough into small dinner rolls, each with a decorative slash on top. During October’s Breast Cancer Awareness Month, serving pink sourdough becomes a meaningful conversation starter about health and prevention while gathering around the table.

    Storage & Troubleshooting Guide

    Preserving Color and Freshness

    To maintain both the vibrant color and freshness of your pink sourdough, proper storage is essential. Once completely cooled, store your loaf cut-side down on a wooden cutting board or wrapped in a clean kitchen towel for the first day. For longer storage, wrap tightly in parchment paper followed by aluminum foil, which helps preserve moisture without squashing the crust. Avoid plastic bags, which can cause the crust to soften and the color to fade more quickly. If you notice the color starting to dull after a day or two, lightly toast your slices to revive some of the visual appeal.

    Fixing Common Pink Bread Problems

    Even experienced bakers encounter challenges when working with colored dough. If your bread isn’t as vibrantly pink as expected, your colorant might have been old or the acidity in your sourdough might be affecting the pigments. Try adding a pinch of baking soda to neutralize some acidity or use a fresher, more concentrated colorant next time. If your bread has an uneven color distribution, ensure you’re mixing the colorant with your liquid ingredients first, then incorporating thoroughly during the initial mix. For bread that’s too densely colored on the outside but pale inside, try reducing the baking temperature by 25°F and extending the bake time slightly.

    Frequently Asked Questions

    What natural ingredients can I use to color my sourdough pink?

    Beet powder, freeze-dried dragon fruit powder, hibiscus powder, and raspberry powder all work beautifully. Beet provides an earthy pink, while dragon fruit creates a vibrant magenta that holds well during baking. Start with 1-2 tablespoons per loaf.

    Will pink sourdough bread taste different from regular sourdough?

    Depending on your colorant choice, you may notice subtle flavor changes. Beet powder adds earthiness, dragon fruit is mildly sweet, and hibiscus brings slight tartness. The classic sourdough tang remains the dominant flavor profile.

    Can I freeze pink sourdough bread?

    Absolutely! Slice before freezing for easy toasting later. Wrap tightly in parchment paper, then foil or a freezer bag. The color may fade slightly after thawing but will revive somewhat when toasted.

    How do I prevent my pink sourdough bread from turning brown while baking?

    Bake at a slightly lower temperature (25°F less than your usual sourdough recipe) and consider covering with foil during the last 15 minutes. Adding a tablespoon of vitamin C powder (ascorbic acid) to the dough can also help preserve color.

    Why did my pink sourdough bread lose its color after baking?

    Heat breaks down natural pigments. For more vibrant pink sourdough bread, use freeze-dried powders rather than fresh juice, slightly increase the amount of colorant, and avoid over-baking which can diminish the pink hue.

    Final Thoughts

    Pink sourdough bread brings joy to both baking and eating experiences, turning an everyday staple into something extraordinary. The process of creating this colorful loaf connects ancient bread-making traditions with playful modern aesthetics. I’ve found that these vibrant loaves spark conversations, create memorable meals, and bring smiles to faces young and old. Whether you’re baking for a special occasion or simply want to add some cheerful color to your daily bread, this pink sourdough recipe deserves a regular spot in your baking rotation. Don’t forget to share your creations on Pinterest to inspire others!

  • Strawberry Dump Cake Recipe That’ll Melt Your Heart Instantly!

    Strawberry Dump Cake Recipe That’ll Melt Your Heart Instantly!

    Strawberry Dump Cake Recipe That'll Melt Your Heart Instantly!

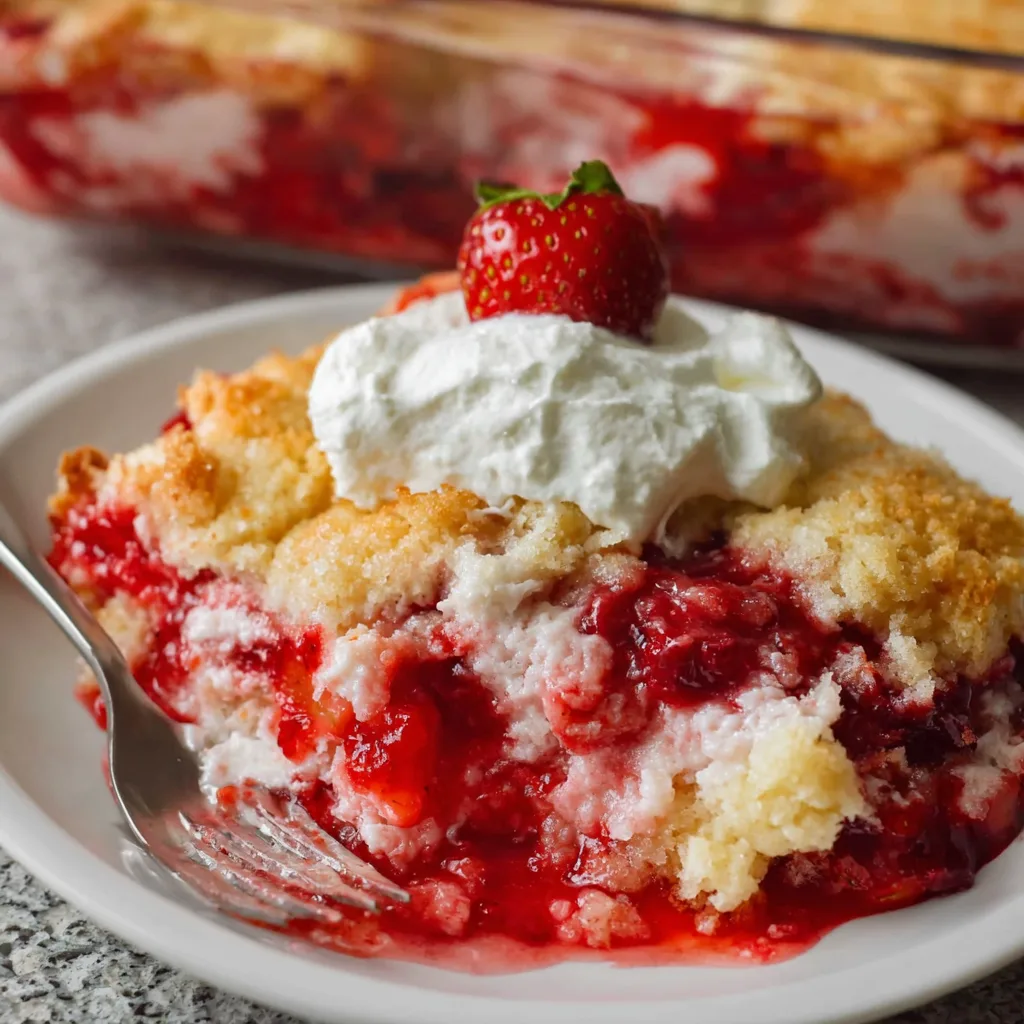
    Strawberry Dump Cake is the ultimate no-fuss dessert that perfectly balances sweet, juicy strawberries with buttery cake topping. I discovered this recipe during a chaotic family reunion when I needed something impressive but effortless. The moment I pulled it from the oven, the sweet berry aroma filled my kitchen, and everyone gathered around like moths to a flame. There’s something magical about how the strawberries bubble up through the golden cake layer, creating pockets of jammy goodness. If you’re looking for a dessert that delivers maximum flavor with minimum effort, this strawberry dream is about to become your new go-to.

    Recipe

    Why You’ll Love This Strawberry Dump Cake

    Perfect for Busy Bakers

    This strawberry dump cake is a busy parent’s secret weapon when you need dessert in a hurry. The name says it all – you literally dump the ingredients in layers and let the oven work its magic. No mixing bowls to wash, no complicated techniques to master. I’ve made this on weeknights when the dessert craving hits hard, and within an hour, I’m curled up on the couch with a warm bowl of berry bliss. The contrast between the gooey strawberry filling and the crisp cake topping creates a texture paradise that feels like you spent hours in the kitchen.

    Crowd-Pleasing Versatility

    Every time I serve this strawberry dump cake, it disappears faster than I can say “seconds, anyone?” It’s become my reliable standby for potlucks, book clubs, and impromptu dinner parties. The beauty lies in its universal appeal – kids devour it with ice cream, adults appreciate it with coffee, and it works year-round with fresh or frozen berries. I once brought this to a neighborhood gathering where three people asked for the recipe before the night ended. The bright, sweet-tart strawberry flavor combined with that buttery cake topping creates a nostalgic comfort food that feels both special and familiar.

    Essential Tips & Tricks

    Perfecting Your Strawberry Layer

    The foundation of an exceptional strawberry dump cake starts with the berry layer. For the juiciest results, I toss my strawberries with a touch of lemon juice and vanilla extract before adding sugar. This small step enhances the natural strawberry flavor and creates that perfect jammy consistency. If using frozen berries, don’t thaw them completely – a partial thaw prevents excess liquid while maintaining structure. I learned this the hard way after once creating strawberry soup instead of cake! For deeper flavor, try adding a handful of blueberries or raspberries to create a mixed berry variation that adds beautiful color contrast.

    Mastering the Cake Topping

    The key to that irresistible golden crust lies in how you handle the cake mix and butter. Rather than melting the butter completely, I’ve found that thinly slicing cold butter and arranging it evenly across the cake mix creates the perfect texture – crisp on top while allowing some mix to meld with the fruit below. For extra richness, try using European-style butter with higher fat content. A sprinkle of coarse sugar before baking adds delightful crunch and sparkle. My personal touch? Adding a half teaspoon of cinnamon to the cake mix creates subtle warmth that complements the strawberries beautifully.

    Serving Ideas & Creative Variations

    Elevate Your Presentation

    Transform this humble dessert into a showstopper with thoughtful presentation. Serve it warm in pretty bowls with a scoop of vanilla bean ice cream slowly melting into the nooks and crannies. For dinner parties, I portion individual servings in ramekins topped with fresh mint leaves and a light dusting of powdered sugar. The vibrant red strawberries against the golden cake create an Instagram-worthy contrast. For brunch gatherings, try serving it with mascarpone whipped cream and a drizzle of honey. The bright strawberry flavor pairs beautifully with coffee and makes an unexpected alternative to traditional breakfast pastries.

    Seasonal Twists & Flavor Combinations

    While classic strawberry dump cake is perfection, don’t be afraid to play with seasonal variations. In summer, add fresh peaches alongside the strawberries for a sunshine-sweet combination. Fall calls for warm spices – try adding cardamom and orange zest to the berries. For holiday gatherings, I incorporate cranberries and white chocolate chips for festive color and flavor. My favorite adult version includes a splash of Grand Marnier in the berry mixture and orange zest in the topping. The versatility of this recipe means you can adapt it to whatever fruits are at their peak or whatever flavors you’re craving.

    Storage & Troubleshooting Guide

    Keeping It Fresh

    To maintain that perfect balance of juicy fruit and crisp topping, store leftover strawberry dump cake properly. Room temperature storage works for 1-2 days, covered loosely with foil rather than plastic wrap to prevent sogginess. For longer storage, refrigerate up to 5 days in an airtight container. The cake portion will soften in the refrigerator, but a quick 15-second microwave zap or 10 minutes in a 300°F oven restores that delightful contrast of textures. For make-ahead convenience, assemble the entire dish, cover tightly, and refrigerate unbaked for up to 24 hours before popping it in the oven.

    Fixing Common Issues

    Even the simplest recipes can sometimes need troubleshooting. If your dump cake turns out too soupy, the likely culprit is excess moisture from the strawberries. Next time, try adding 1-2 tablespoons of cornstarch to the fruit layer or using a mix of fresh and freeze-dried strawberries for intense flavor without added moisture. If your topping stays powdery rather than forming a golden crust, the butter pieces might be too large or unevenly distributed. Try grating cold butter over the cake mix instead of slicing it. For a cake that’s browning too quickly, simply tent with foil halfway through baking time.

    Frequently Asked Questions

    Can I make strawberry dump cake with frozen strawberries?

    Absolutely! Don’t thaw them completely – a partial thaw works best. Add an extra tablespoon of cornstarch to absorb excess moisture and maintain that perfect consistency.

    How do I know when my strawberry dump cake is done baking?

    Look for bubbling fruit around the edges and a golden brown top. The cake should be set but might still have some jiggle in the very center – it will continue to set as it cools.

    Can I make this recipe ahead of time?

    Yes! Assemble up to 24 hours ahead and refrigerate unbaked. Allow an extra 10-15 minutes of baking time if cooking straight from the refrigerator.

    What’s the best cake mix to use for strawberry dump cake?

    White, yellow, or vanilla cake mixes all work beautifully. For a more intense berry experience, try strawberry cake mix for a double-strawberry effect.

    Can I make this recipe gluten-free?

    Definitely! Simply substitute a gluten-free cake mix. The rest of the recipe remains exactly the same with equally delicious results.

    Final Thoughts

    This strawberry dump cake has saved countless dinner parties and satisfied endless sweet cravings in my home. What makes it truly special is how it transforms humble ingredients into something that tastes like it came from a bakery. The bright, jammy strawberry layer bubbling through that buttery golden crust creates a dessert that feels like a warm hug. Whether you’re a seasoned baker or kitchen-phobic, this forgiving recipe delivers spectacular results every time. I hope this strawberry dump cake brings as much joy to your table as it has to mine!

    Check out more delicious dessert ideas on our Pinterest board!

  • Carrot Date Coconut Truffles: Irresistibly Healthy Bliss in Every Bite!

    Carrot Date Coconut Truffles: Irresistibly Healthy Bliss in Every Bite!

    Carrot Date Coconut Truffles: Irresistibly Healthy Bliss in Every Bite!

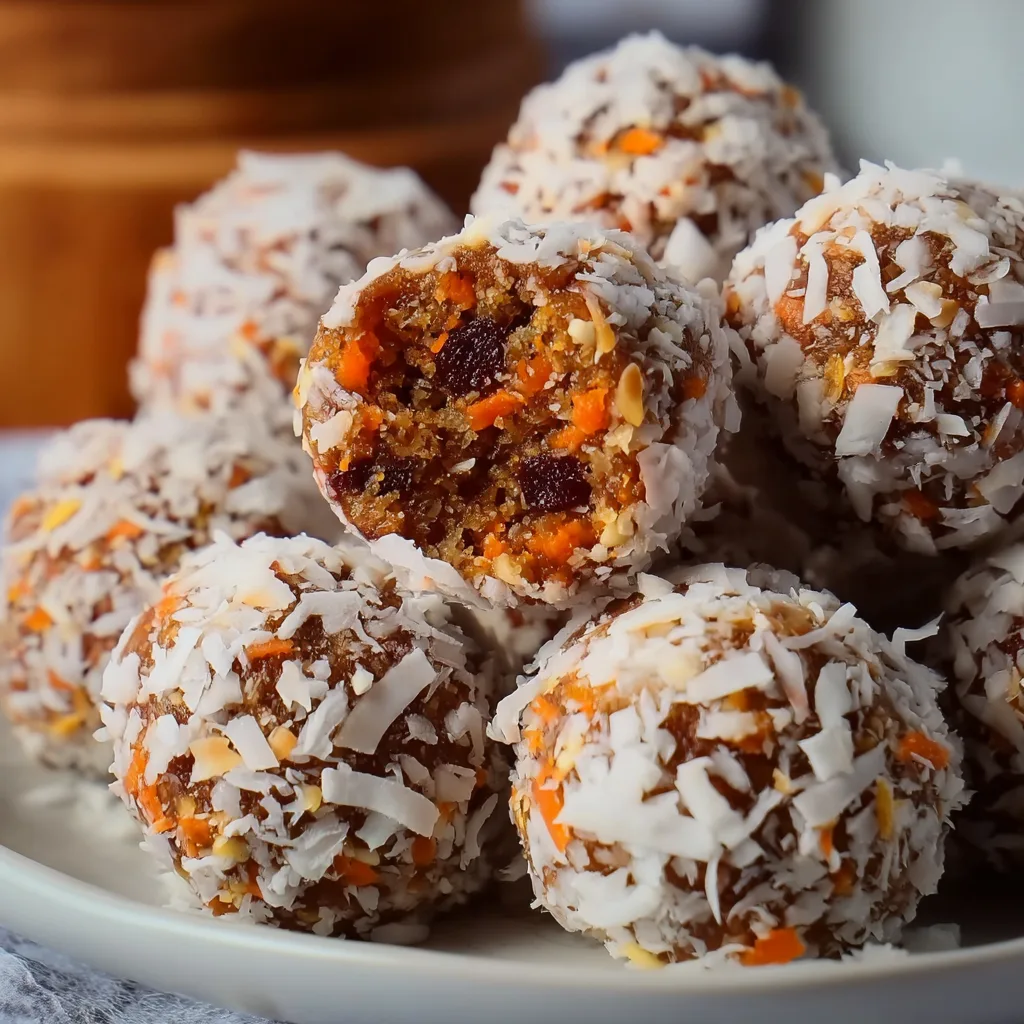
    Carrot Date Coconut Truffles are my absolute favorite no-bake treat for those moments when I’m craving something sweet but don’t want to feel guilty afterward. These little bites of heaven combine the natural sweetness of dates, the earthy goodness of carrots, and the tropical richness of coconut for a truly magical experience. The first time I made these for my sister’s birthday gathering, they disappeared within minutes! Everyone was shocked when I revealed they were actually nutritious while tasting like decadent dessert balls. If you love my Easy 3-Ingredient Cake Mix Cookies, you’ll adore how simple yet impressive these truffles are.

    Recipe

    Why You’ll Love These Carrot Date Coconut Truffles

    Nutritional Powerhouse with Dessert Vibes

    These truffles are seriously the perfect balance between healthy and indulgent. Each bite delivers a boost of fiber from the carrots and dates, healthy fats from the coconut, and natural sweetness that won’t spike your blood sugar like conventional treats. I love making a batch on Sunday evenings when I’m craving something sweet but want to start my week on a nutritious note. The dates provide that caramel-like chewiness while the carrots add moisture and subtle earthiness. You’ll be amazed at how satisfying these little gems are without any refined sugar!

    Quick Prep with Impressive Results

    One of the things I appreciate most about these Carrot Date Coconut Truffles is how ridiculously easy they are to make. The entire process takes about 20 minutes of active time, and there’s absolutely no baking required! Just blitz everything in your food processor, roll into balls, and coat with coconut. I’ve made these countless times when unexpected guests were coming over, and they always think I spent hours in the kitchen. The visual appeal of these bright orange-speckled balls rolled in white coconut makes them look like something from a fancy patisserie!

    Essential Tips & Tricks

    Ingredient Selection Matters

    For the most delicious Carrot Date Coconut Truffles, ingredient quality makes all the difference. Always choose fresh, moist dates (Medjool are my favorite) rather than the dried-out ones that have been sitting in your pantry for months. For carrots, organic ones tend to have a sweeter flavor that really shines through. When it comes to coconut, I prefer unsweetened desiccated coconut for rolling, as it provides the perfect texture contrast without adding unnecessary sugar. The first time I used old, dry dates, my mixture wouldn’t come together – lesson learned!

    Texture Troubleshooting

    Getting the perfect texture for your Carrot Date Coconut Truffles might take a bit of practice, but I’ve got you covered. If your mixture is too wet and sticky, add more coconut flour or almond flour a tablespoon at a time until it reaches a moldable consistency. Conversely, if it’s too dry and crumbly, a teaspoon of coconut oil or a splash of orange juice works wonders. I always chill the mixture for about 15 minutes before rolling – it makes the process so much easier and less messy! Just like with my Mint Oreo Truffles, patience during rolling pays off with prettier results.

    Serving Ideas & Creative Variations

    Elegant Presentation Options

    Transform these humble Carrot Date Coconut Truffles into an elegant dessert with thoughtful presentation. For dinner parties, I like to place each truffle in a mini cupcake liner and arrange them on a tiered stand with fresh mint leaves. For gifting, stack them in a clear glass jar tied with raffia or place them in a small bakery box lined with parchment paper. I once served these at a baby shower by placing them on a bed of shredded coconut “snow” with tiny carrot-shaped fondant decorations – everyone was charmed by the whimsical display!

    Flavor Twist Inspirations

    While the classic Carrot Date Coconut Truffles are divine, experimenting with flavor variations keeps things exciting! My favorite twist is adding 1/2 teaspoon of cardamom for a chai-inspired flavor that pairs beautifully with afternoon tea. For a tropical version, mix in some finely chopped dried pineapple and a hint of lime zest. You could even go decadent by adding mini chocolate chips or a drizzle of melted dark chocolate on top. These variations remind me of how versatile my Banana Oatmeal Muffins recipe is – both are perfect blank canvases for creative flavor combinations!

    Storage & Troubleshooting Guide

    Optimal Storage Methods

    To keep your Carrot Date Coconut Truffles fresh and delicious, proper storage is key. They’ll stay perfect in an airtight container in the refrigerator for up to 10 days, making them ideal for meal prep. For longer storage, these truffles freeze beautifully for up to 3 months – just place them on a parchment-lined tray until frozen solid, then transfer to a freezer bag. I always make a double batch and freeze half for those emergency sweet cravings! Let them thaw in the refrigerator overnight or at room temperature for about 30 minutes before serving.

    Fixing Common Issues

    Even experienced cooks sometimes encounter challenges with Carrot Date Coconut Truffles. If your truffles aren’t holding their shape, the most common culprit is excess moisture from the carrots. Try squeezing grated carrots in a clean kitchen towel before adding them to the mixture. If your coconut coating isn’t sticking well, lightly dampen your hands with water before rolling the truffles in coconut. And if the flavor seems bland, a pinch of salt and a splash of vanilla extract can work wonders to enhance all the other flavors – a little trick I learned from my grandmother!

    Frequently Asked Questions

    Can I make Carrot Date Coconut Truffles ahead of time?

    Absolutely! These truffles actually taste better after the flavors have had time to meld. Make them up to 3 days before serving and store in the refrigerator for best results.

    Are these truffles vegan?

    Yes! Carrot Date Coconut Truffles are naturally vegan as they contain only plant-based ingredients. Just ensure any added flavorings or mix-ins are also vegan if that’s important to you.

    Can I substitute the dates with another dried fruit?

    Dried figs or prunes work well as substitutes, though dates provide the best caramel-like sweetness and binding properties. You may need to adjust other ingredients slightly for proper consistency.

    My mixture is too wet to form balls. What should I do?

    Add coconut flour, almond flour, or more shredded coconut one tablespoon at a time until you reach a moldable consistency. Chilling the mixture for 30 minutes also helps.

    How finely should I grate the carrots?

    Use the fine side of your grater for best results. Large carrot pieces can make the truffles difficult to form and create an unpleasant texture contrast.

    Final Thoughts

    These Carrot Date Coconut Truffles have become my go-to recipe whenever I want to impress guests with something that tastes indulgent but is secretly nutritious. There’s something magical about transforming simple ingredients into these little spheres of joy that satisfy sweet cravings while nourishing your body. Whether you’re making them for a special occasion or weekly meal prep, they’re sure to become a staple in your recipe collection. Don’t forget to check out more of my favorite sweet treats on Pinterest for endless inspiration!

  • Gordon Ramsay Radish Salad Recipe That Will Wow Your Tastebuds!

    Gordon Ramsay Radish Salad Recipe That Will Wow Your Tastebuds!

    Gordon Ramsay Radish Salad Recipe That Will Wow Your Tastebuds!

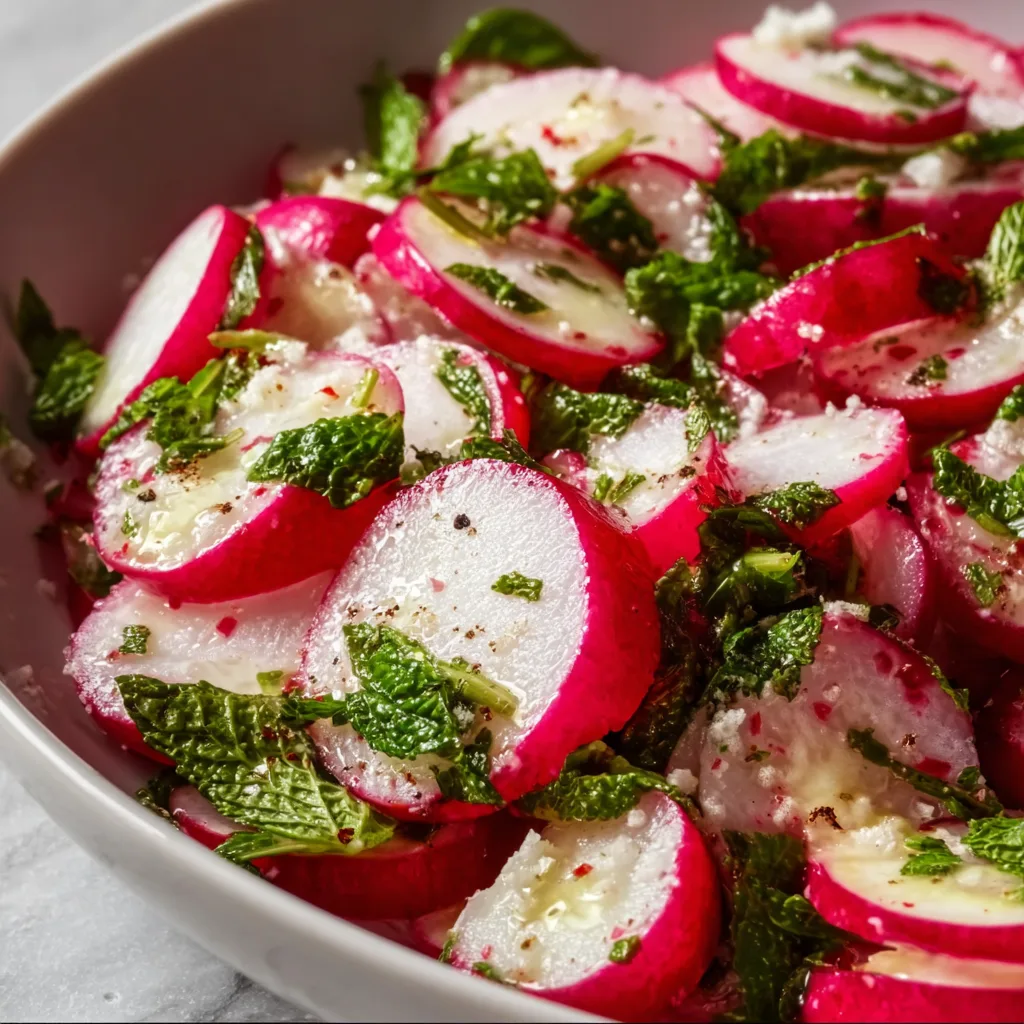
    This Gordon Ramsay-Inspired Radish Salad changed my entire perspective on what a simple salad could be. The first time I made it, I stood in my kitchen, stunned by how the peppery crunch of fresh radishes paired so beautifully with the tangy dressing. There’s something magical about the way Chef Ramsay balances flavors—sharp, creamy, crunchy, and fresh all in one dish. I’ve adapted his technique to create a salad that’s both restaurant-worthy yet completely doable at home. If you’re looking to elevate your salad game without complicated techniques, this recipe deserves a spot in your regular rotation, just like my Dutch oven crusty bread does.

    Recipe

    Why You’ll Love This Gordon Ramsay-Inspired Radish Salad

    A Symphony of Textures and Flavors

    The beauty of this Gordon Ramsay-Inspired Radish Salad lies in its perfect balance of contrasting elements. The peppery bite of thinly sliced radishes creates a beautiful counterpoint to the creamy dressing. I love how the radishes maintain their crispness even after being dressed, giving you that satisfying crunch with every bite. There’s also a subtle heat that wakes up your palate without overwhelming it. Last week, my neighbor tried it and said it was like “a flavor explosion that somehow still feels light and refreshing”—and I couldn’t agree more!

    Quick Preparation with Maximum Impact

    One thing I adore about this Gordon Ramsay-Inspired Radish Salad is how quickly it comes together. From start to finish, you’ll spend just 15 minutes in the kitchen, yet the result looks like something from a high-end restaurant. The vibrant pink and white radish slices create a stunning visual presentation that’s Instagram-worthy. I’ve served this at impromptu dinner parties and received more compliments than dishes that took hours to prepare. It’s my secret weapon when I need to impress but don’t have much time—the perfect balance of effort to reward ratio!

    Essential Tips & Tricks

    Selecting and Preparing the Perfect Radishes

    The foundation of an exceptional Gordon Ramsay-Inspired Radish Salad starts with choosing the right radishes. Look for firm, smooth radishes with vibrant color and fresh, green tops (a sign of freshness). I prefer using a mix of varieties—French breakfast, watermelon, and classic red—for visual appeal and flavor complexity. When preparing, slice them paper-thin using a mandoline for consistent thickness. This allows the dressing to coat each slice evenly while maintaining that crucial crunch. Remember to ice-bath your sliced radishes for about 10 minutes—a trick I learned that makes them extra crisp!

    Mastering the Signature Dressing

    The dressing is what transforms this from an ordinary salad to a Gordon Ramsay-Inspired Radish Salad masterpiece. The key is achieving the perfect acid-to-oil ratio—I recommend 1:2 for balanced tanginess. Whisk your acid (lemon juice or white wine vinegar) with Dijon mustard before slowly incorporating high-quality olive oil to create a proper emulsion. Don’t skip the fresh herbs! Dill and chives add brightness that complements the peppery radishes beautifully. For an authentic Ramsay touch, finish with a pinch of Maldon salt just before serving, which adds texture and makes the flavors pop, similar to what I do in my Chickpea Feta Avocado Salad.

    Serving Ideas & Creative Variations

    Perfect Pairings for Your Radish Salad

    This Gordon Ramsay-Inspired Radish Salad shines as both a starter and a side dish. Serve it alongside grilled fish or a simple roast chicken for a complete meal that feels special yet effortless. I particularly love pairing it with rich dishes where its bright acidity cuts through heavier flavors—think creamy pasta or buttery scallops. For an elegant appetizer, spoon small portions onto endive leaves and top with a sprinkle of microgreens. The salad also makes a beautiful addition to a grazing board, offering a fresh counterpoint to cheeses and cured meats.

    Seasonal Twists and Adaptations

    While the classic Gordon Ramsay-Inspired Radish Salad is perfect on its own, don’t be afraid to make seasonal adaptations. In spring, add tender pea shoots and a sprinkle of fresh mint. Summer calls for cucumber ribbons and perhaps some crumbled feta for a Mediterranean twist. Fall versions can incorporate thinly sliced apples and toasted walnuts for warmth. I recently added avocado chunks and a squeeze of lime for a California-inspired variation that paired beautifully with my Blackened Chicken. The versatility of this salad makes it a year-round staple that never feels repetitive!

    Storage & Troubleshooting Guide

    Keeping Your Salad Fresh

    The Gordon Ramsay-Inspired Radish Salad is best enjoyed immediately after preparation, when the radishes are at their crispest texture. However, if you need to prepare components ahead, store sliced radishes in cold water in the refrigerator for up to 4 hours to maintain their crunch. The dressing can be made up to 3 days in advance and kept in an airtight container. If you have leftover dressed salad, it will keep for about 24 hours, though the radishes will soften slightly. Pro tip: I sometimes intentionally make extra to enjoy the next day—the flavors meld beautifully, creating a slightly pickled quality!

    Solving Common Salad Challenges

    Even with simple recipes, occasional challenges arise. If your Gordon Ramsay-Inspired Radish Salad tastes too peppery, balance it by adding a touch of honey to the dressing or including milder ingredients like butter lettuce as a base. For dressing that separates, simply re-whisk vigorously or add a small dollop of Dijon mustard to help re-emulsify. If your radishes release too much water and dilute the dressing, pat them dry thoroughly before combining or salt them lightly and let sit for 10 minutes, then rinse and dry—this draws out excess moisture before dressing.

    Frequently Asked Questions

    Can I make this Gordon Ramsay-Inspired Radish Salad ahead of time?

    You can prepare the components separately up to a day ahead. Slice radishes and store in cold water, and make the dressing in advance. Combine just before serving to maintain the perfect texture and flavor balance.

    What’s the best way to slice radishes thinly without a mandoline?

    Use a very sharp chef’s knife and slice carefully. Practice makes perfect! Alternatively, some vegetable peelers can create thin ribbons that work beautifully in this salad.

    Can I substitute other vegetables if radishes are too spicy for me?

    Absolutely! Try watermelon radishes which are milder, or mix in cucumber, jicama, or kohlrabi for a similar crunch with less heat.

    How can I make this salad more substantial for a main dish?

    Add protein like grilled chicken, seared tuna, or chickpeas. For a vegetarian option, include avocado, crumbled goat cheese, or toasted nuts for heartiness.

    What’s Gordon Ramsay’s secret to making this radish salad so special?

    The key to the Gordon Ramsay-Inspired Radish Salad is balancing sharp flavors with proper technique—paper-thin slicing, proper seasoning, and using the highest quality ingredients you can find.

    Final Thoughts

    This Gordon Ramsay-Inspired Radish Salad has become my go-to for elevating everyday meals and impressing dinner guests alike. There’s something magical about transforming humble radishes into something so elegant yet approachable. I encourage you to make this recipe your own—experiment with different radish varieties or seasonal additions while keeping the core technique intact. The true beauty lies in its simplicity and versatility. For more inspiration, check out my other recipes on Pinterest where I share seasonal variations of this and other favorite dishes!

  • Strawberry Brownies with Lemon Glaze: Irresistibly Tangy & Sweet!

    Strawberry Brownies with Lemon Glaze: Irresistibly Tangy & Sweet!

    Strawberry Brownies with Lemon Glaze: Irresistibly Tangy & Sweet!

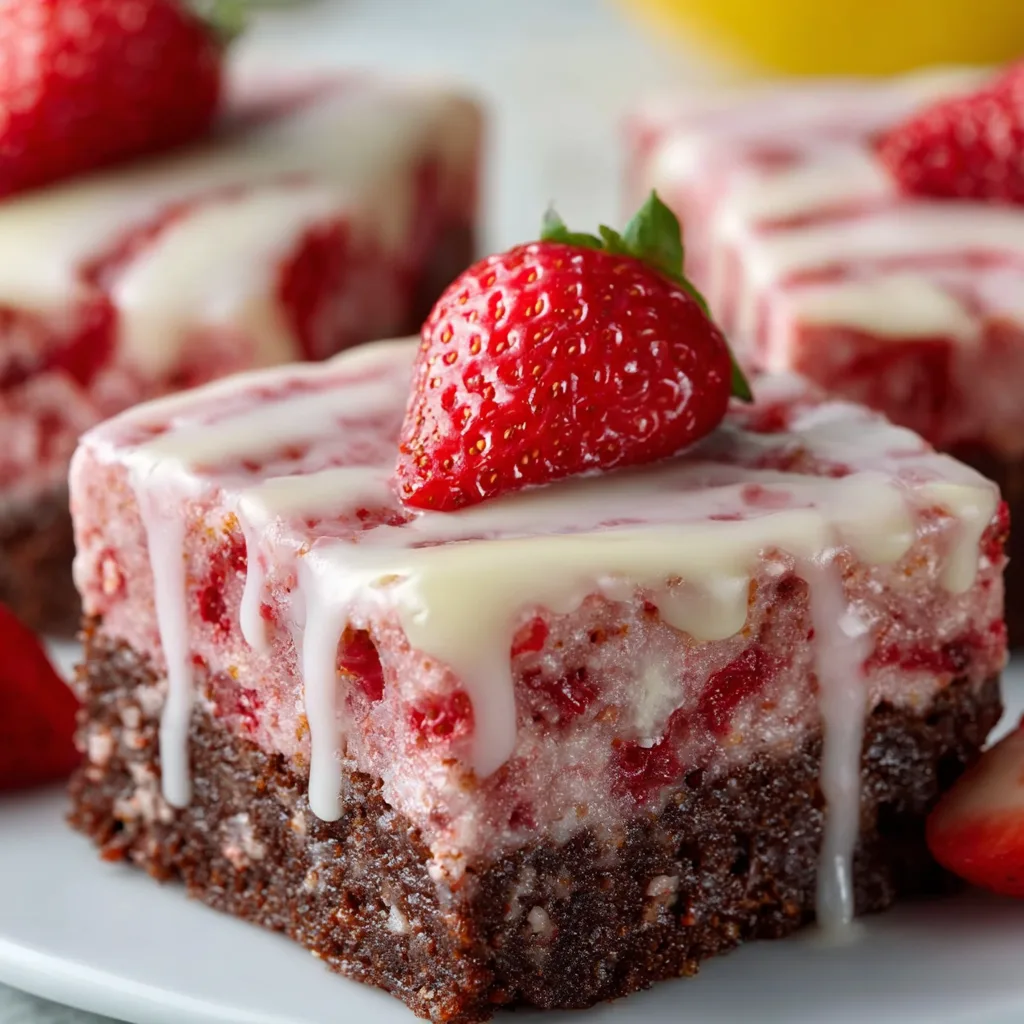
    Strawberry Brownies with Lemon Glaze are the perfect balance of fudgy chocolate, sweet berry, and tangy citrus that will make your taste buds dance! I stumbled upon this recipe during a rainy spring afternoon when I was craving something decadent but bright. The moment that first bite hit my tongue—rich chocolate melting into juicy strawberry chunks with that zingy lemon finish—I knew I’d found my new favorite treat. These brownies have since become my go-to for everything from casual weeknight desserts to fancy dinner parties. Trust me, you’ll want to save this one!

    Recipe

    Why You’ll Love This Strawberry Brownies with Lemon Glaze

    Perfect Flavor Combination

    There’s something magical about how chocolate and strawberries complement each other, but add that lemon glaze and you’ve got an extraordinary treat! The deep, rich chocolate brownies provide the perfect canvas for bursts of sweet-tart strawberries. Then comes that bright, zingy lemon glaze that cuts through the richness and makes every flavor pop. I love watching people’s eyes widen with that first bite—it’s like they’re experiencing brownies for the first time all over again. The contrast between fudgy, fruity, and tangy creates a dessert that’s impossible to resist.

    Easy Yet Impressive

    Don’t let the fancy name fool you—these brownies are surprisingly simple to make! The base is a straightforward brownie recipe that even beginner bakers can nail. Adding fresh strawberries takes just minutes of prep, and the lemon glaze comes together in a flash while the brownies cool. I once made these when unexpected guests announced they were “just stopping by” in 30 minutes—talk about pressure! But these brownies saved the day, and my friends still talk about that impromptu dessert. They look and taste like you spent hours in the kitchen, but our little secret is how effortless they really are.

    Essential Tips & Tricks

    Perfecting the Brownie Base

    The foundation of these amazing treats is getting that brownie texture just right. For the fudgiest results, be careful not to overmix your batter once the flour is added—just fold until no dry streaks remain. Another game-changer is using room temperature eggs, which incorporate much better than cold ones. When checking for doneness, remember that brownies continue cooking slightly after removal from the oven. Look for edges that are set but a center that’s still slightly soft when tested with a toothpick. My easy strawberry cake mix brownies taught me that patience during cooling leads to cleaner cuts and better texture.

    Working with Fresh Strawberries

    The star ingredient deserves special attention! Always pat your fresh strawberries dry after washing to prevent excess moisture from making your brownies soggy. I recommend chopping them into small, uniform pieces (about ¼ inch) for even distribution throughout the batter. For an extra flavor boost, toss the chopped strawberries with a tablespoon of sugar and let them sit for 10 minutes before folding into the batter—this concentrates their natural sweetness. If fresh strawberries aren’t available, frozen will work too, but don’t thaw them first; fold them in while still frozen to minimize bleeding into the batter.

    Serving Ideas & Creative Variations

    Elegant Presentation Options

    Transform these brownies from casual treats to showstopping desserts with a few simple presentation tricks. Try cutting them into perfect squares and arranging them on a white platter with fresh strawberry slices and mint leaves for a pop of color. For dinner parties, I love serving individual brownies slightly warmed with a scoop of vanilla bean ice cream and an extra drizzle of lemon glaze. The contrast of warm brownie and cold ice cream is divine! Another beautiful option is to dust the plated brownies with powdered sugar just before serving, then add a candied lemon slice on top for an elegant finishing touch.

    Flavor Twists to Try

    While the classic version is perfection, these brownies are wonderfully adaptable to different flavor profiles. For a more decadent version, add white chocolate chips to the batter—they create lovely pockets of creamy sweetness. Feeling adventurous? Try swapping the lemon glaze for an orange or lime version for a different citrus kick. My personal favorite variation is adding a teaspoon of cardamom to the brownie batter for a subtle spiced note that pairs beautifully with the strawberries. For special occasions, try infusing the lemon glaze with a splash of prosecco or champagne for a sophisticated twist!

    Storage & Troubleshooting Guide

    Keeping Brownies Fresh

    To maintain that perfect fudgy texture, store your strawberry brownies in an airtight container at room temperature for up to 2 days. For longer storage, refrigerate them for up to 5 days, though the texture might become slightly more dense (still delicious!). I like to place parchment paper between layers to prevent sticking. These brownies also freeze beautifully for up to 3 months—just wrap individual portions in plastic wrap, then foil. When a late-night craving hits, I thaw a brownie at room temperature for about 30 minutes or microwave for 15-20 seconds for that just-baked taste!

    Fixing Common Issues

    Even experienced bakers encounter challenges! If your brownies turn out too cakey instead of fudgy, you likely overmixed the batter or added too much flour—next time, measure flour by spooning it into measuring cups rather than scooping. Brownies too dry? They were probably overbaked; remember that residual heat continues cooking them after removal from the oven. If your lemon glaze is too runny, add more powdered sugar a tablespoon at a time. Too thick? Thin it with a few drops of lemon juice or milk. For strawberries that sink to the bottom, try tossing them in a tablespoon of flour before adding to the batter.

    Frequently Asked Questions

    Can I use frozen strawberries in these brownies?

    Yes! Don’t thaw them first—fold frozen strawberries directly into your batter. They’ll release less moisture this way and won’t turn your brownies soggy. You might need to bake 2-3 minutes longer.

    How do I know when my Strawberry Brownies with Lemon Glaze are done baking?

    Look for set edges with a slightly soft center. A toothpick inserted should come out with a few moist crumbs (not wet batter). Remember, brownies continue cooking slightly after removal from the oven.

    Can I make these brownies ahead for a party?

    Absolutely! Make them 1-2 days ahead and store at room temperature. For the freshest taste, add the lemon glaze the day of serving. They’ll be the hit of your gathering!

    What’s the secret to a smooth, perfect lemon glaze?

    Sift your powdered sugar first to eliminate lumps. Add liquid gradually while whisking constantly. For extra smoothness, let the glaze sit for 5 minutes before drizzling over cooled brownies.

    Can I make these gluten-free?

    Yes! Substitute a 1:1 gluten-free flour blend in place of regular flour. The texture might be slightly different, but still delicious. Make sure your other ingredients are certified gluten-free too.

    Final Thoughts

    These Strawberry Brownies with Lemon Glaze have become my signature dessert for good reason—they’re the perfect balance of indulgent and refreshing, familiar yet unexpected. There’s something truly special about the way the fudgy chocolate, juicy strawberries, and bright lemon come together to create a treat that’s greater than the sum of its parts. Whether you’re baking for a special occasion or simply treating yourself after a long day, these brownies deliver pure joy in every bite. I’d love to see your creations on Pinterest!

  • No Bake Eclair Cake with Chocolate Ganache | Irresistibly Decadent!

    No Bake Eclair Cake with Chocolate Ganache | Irresistibly Decadent!

    No Bake Eclair Cake with Chocolate Ganache | Irresistibly Decadent!

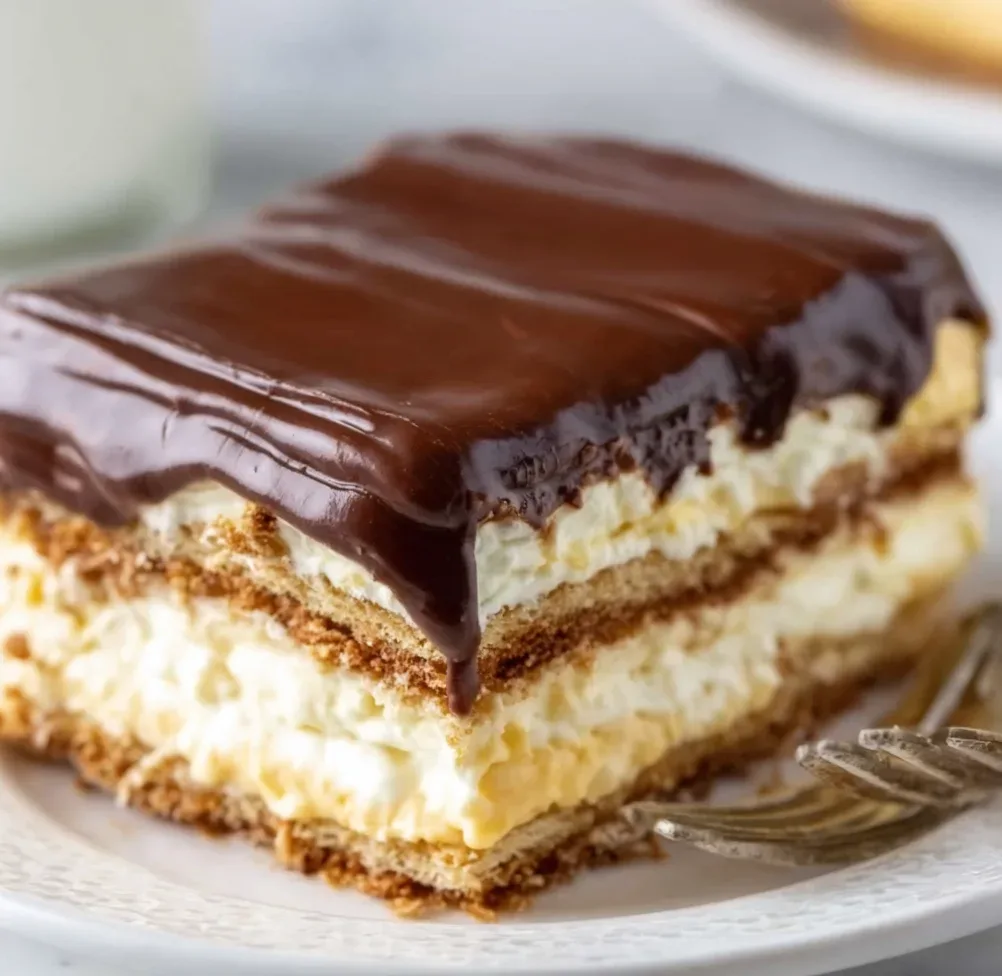
    No Bake Eclair Cake with Chocolate Ganache is the dessert that saved my last-minute dinner party when my oven decided to take an unexpected vacation. The creamy vanilla filling layered between graham crackers and topped with silky chocolate ganache creates a dessert that tastes like you spent hours in the kitchen. Trust me, this no-bake wonder has become my secret weapon for those hot summer days when turning on the oven feels criminal. The best part? It actually tastes better after chilling overnight, making it the perfect make-ahead dessert for your next gathering.

    Recipe

    Why You’ll Love This No Bake Eclair Cake with Chocolate Ganache

    Perfect for Any Occasion

    This no-bake eclair cake is incredibly versatile and always a crowd-pleaser. I’ve brought it to summer barbecues, holiday gatherings, and even my niece’s birthday when she requested “something chocolate but not too chocolate.” The elegant layers give it that wow-factor that makes guests think you’ve been slaving away, when really you spent maybe 20 minutes on actual prep. The balance of textures—crisp graham crackers that soften to a cake-like consistency, velvety pudding, and that glossy chocolate topping—creates a dessert that’s sophisticated yet comforting.

    Quick and Foolproof

    What I adore most about this recipe is how foolproof it truly is. Even when my hands were shaking from too much coffee and I spilled vanilla everywhere, this cake still turned out perfect. There’s no baking, no precise temperatures to monitor, and no risk of a fallen soufflé or cracked cheesecake. The hardest part is waiting for it to chill! This dessert is particularly perfect for novice bakers or when you need something delicious but your brain capacity is running on empty. I’ve made this at midnight for next-day events and still managed to get a good night’s sleep.

    Essential Tips & Tricks

    Perfecting the Layers

    The secret to an exceptional eclair cake lies in the layering technique. Start with a thin spread of pudding mixture on the bottom of your dish before adding the first graham cracker layer—this prevents sticking and helps soften the crackers evenly. When arranging the crackers, don’t worry about small gaps; they’ll disappear as the dessert sets. For the creamiest filling, ensure your pudding mixture is thoroughly whisked until no lumps remain. I once rushed this step and ended up with tiny pudding pockets—still delicious, but not the smooth texture we’re aiming for.

    Ganache Mastery

    For a glossy ganache that cuts perfectly without cracking, the chocolate-to-cream ratio is crucial. Too much chocolate creates a hard top that shatters when cut; too little won’t set properly. Pour the ganache while it’s still warm but not hot, then gently tilt the dish to help it spread evenly without disturbing your carefully crafted layers. For an extra touch of elegance, I sometimes add a teaspoon of espresso powder to the ganache, which deepens the chocolate flavor without making it taste like coffee. If you love this chocolate technique, you’ll also enjoy my Easy Strawberry Cake Mix Brownies with their perfect topping.

    Serving Ideas & Creative Variations

    Elegant Presentation

    Transform this humble dessert into a showstopping centerpiece with a few simple touches. Before serving, dust the top with cocoa powder using a small sieve for an artisanal finish. For special occasions, I add fresh berries along the edges—the tartness cuts through the sweetness beautifully. Individual portions served in clear glasses or mason jars create an impressive deconstructed look that’s perfect for dinner parties. I once served these at my sister’s bridal shower, layering them in champagne coupes with edible gold flakes on top, and guests still talk about them years later!

    Flavor Twists

    While the classic version is divine, this eclair cake welcomes creative adaptations. Try using chocolate graham crackers for a double-chocolate experience, or add a layer of sliced strawberries between the pudding layers for a chocolate-covered strawberry vibe. For an adult version, whisk 2 tablespoons of Bailey’s or Kahlúa into the pudding mixture. My personal favorite variation includes a thin layer of peanut butter spread on the graham crackers—it reminds me of those Classic Peanut Butter Lunch Lady Cookie Bars we all loved as kids, but with a sophisticated eclair twist.

    Storage & Troubleshooting Guide

    Optimal Storage

    For the perfect texture, this eclair cake needs at least 8 hours in the refrigerator—overnight is ideal. The magic happens during this time as the graham crackers soften to a cake-like consistency while still maintaining structural integrity. Store leftovers (if there are any!) covered tightly with plastic wrap for up to 4 days. I don’t recommend freezing this dessert, as the pudding can separate and become watery upon thawing. For the freshest taste, consume within 3 days, though I’ve never actually had it last that long in my house before eager spoons find their way to the fridge!

    Common Pitfalls

    The most common issue with eclair cake is soggy crackers from too much moisture. If your pudding mixture seems very loose, let it set in the refrigerator for 15-20 minutes before assembling. Another frequent problem is ganache that’s too firm to cut cleanly—this happens when the chocolate-to-cream ratio is off or when it’s chilled too quickly. If this happens, let the dessert stand at room temperature for 10-15 minutes before serving. And remember, if your ganache develops a light bloom (whitish appearance), it’s still perfectly safe to eat—just a cosmetic issue from temperature fluctuations.

    Frequently Asked Questions

    Can I make No Bake Eclair Cake with Chocolate Ganache ahead of time?

    Absolutely! This dessert actually improves with time. Make it 24 hours in advance for the best texture, as the graham crackers need time to soften and meld with the creamy filling.

    What if I don’t have graham crackers?

    Digestive biscuits, vanilla wafers, or even ladyfingers make excellent substitutes. The key is using a not-too-sweet cookie that will soften nicely when layered with the pudding mixture.

    Can I use homemade pudding instead of instant?

    Yes! Homemade vanilla pudding adds a luxurious touch. Just make sure it’s completely cooled before folding in the whipped topping to prevent melting.

    How do I know when my ganache is the right consistency for pouring?

    The perfect ganache should coat the back of a spoon and slowly drip off. If it runs too quickly, it needs to cool longer; if it’s too thick, gently rewarm it.

    Why did my eclair cake layers slide around?

    This typically happens when there’s too much moisture. Try placing a paper towel on top of your graham crackers for a few seconds to remove excess moisture before layering.

    Final Thoughts

    This No Bake Eclair Cake with Chocolate Ganache has become my dessert MVP—the one I turn to when I need something foolproof yet impressive. There’s something magical about transforming simple ingredients into a dessert that genuinely makes people close their eyes and savor each bite. The way the layers meld together creates something far greater than the sum of its parts. I’ve shared this recipe with countless friends who now make it for their own special occasions. For more delicious inspiration, follow me on Pinterest where I’m always pinning new no-bake wonders!

  • Cilantro Lime Steak Bowls That Will Blow Your Taste Buds Away!

    Cilantro Lime Steak Bowls That Will Blow Your Taste Buds Away!

    Cilantro Lime Steak Bowls That Will Blow Your Taste Buds Away!

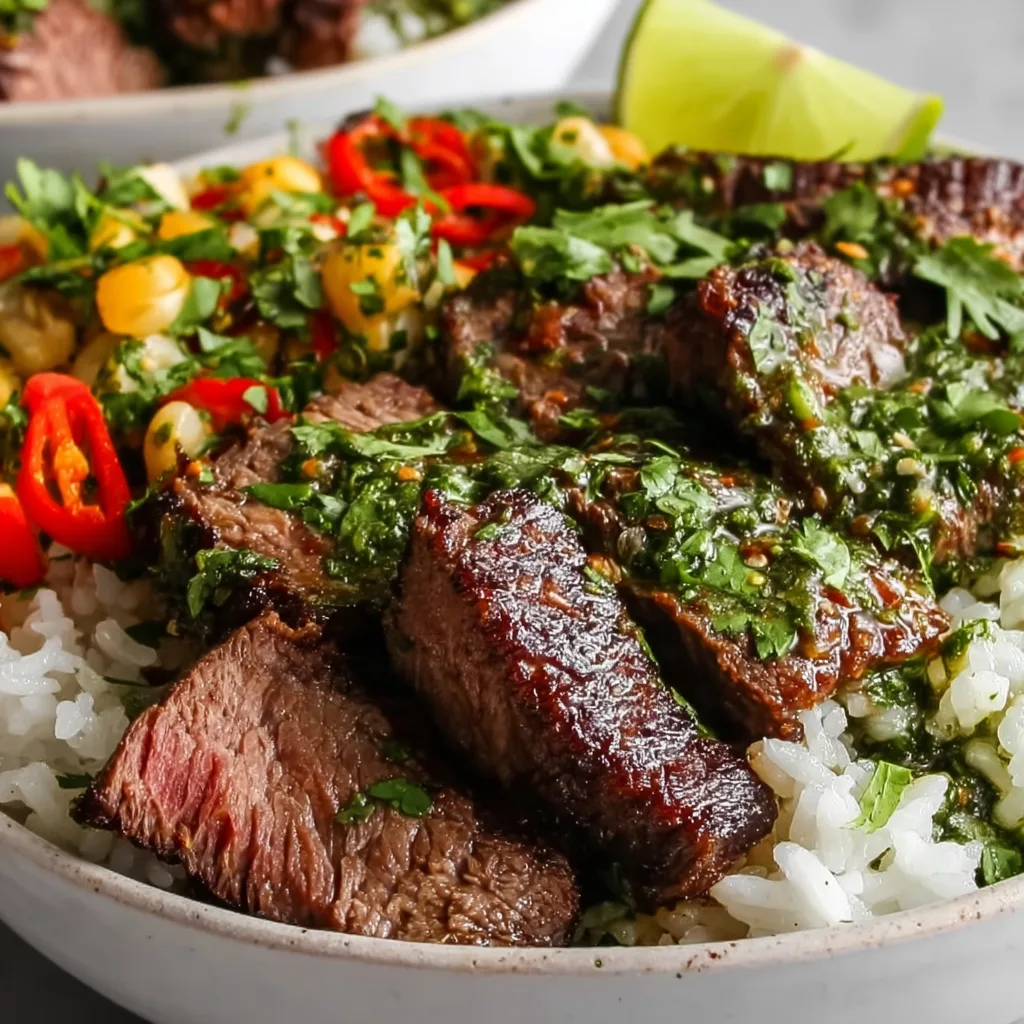
    Cilantro Lime Steak Bowls are my absolute go-to when I want something that feels both indulgent and nourishing. The first time I made these, the bright pop of lime against the savory steak had my kitchen smelling like my favorite taco spot downtown. There’s something magical about that cilantro-lime combination that transforms ordinary ingredients into something crave-worthy. If you’ve been looking for a meal prep option that doesn’t feel like sad leftovers by day three, these bowls are your answer. They remind me of those colorful street food bowls I fell in love with during my weekend trips to the farmer’s market.

    Recipe

    Why You’ll Love These Cilantro Lime Steak Bowls

    Perfect Balance of Flavors and Textures

    These bowls are a sensory delight from the first bite to the last. The marinated steak soaks up all those zesty lime juices and aromatic cilantro oils, creating tender, flavor-packed bites that practically melt in your mouth. I love how the charred edges of the steak contrast with the cool, creamy avocado slices. Then there’s that subtle heat from the jalapeños that builds slowly, balanced perfectly by the sweetness of corn and the earthiness of black beans. Each component plays its part in creating a bowl that feels thoughtfully composed rather than just thrown together.

    Versatile and Customizable

    What makes these Cilantro Lime Steak Bowls truly special is how easily they adapt to what you have on hand. No steak? Swap in chicken or shrimp. Following a plant-based diet? Marinated portobello mushrooms or crispy tofu work beautifully with the same cilantro-lime flavors. The base components can flex with your preferences too – quinoa instead of rice for more protein, cauliflower rice for lower carbs, or even a bed of crisp romaine for a lighter option. I’ve made these bowls at least a dozen different ways, and they never disappoint.

    Essential Tips & Tricks

    Mastering the Marinade

    The secret weapon in these bowls is definitely the marinade. For maximum flavor, give your steak at least 2 hours to soak up all that cilantro-lime goodness, but overnight marinating transforms it completely. I learned the hard way that more isn’t always better with lime juice – too much can actually start “cooking” the meat like ceviche and affect the texture. My perfect ratio is 1/4 cup lime juice to 1/2 cup olive oil, with plenty of fresh cilantro, minced garlic, and a touch of honey to balance the acidity. This also works beautifully with chicken tenders if you’re switching proteins.

    Proper Steak Cooking Technique

    Getting that perfect medium-rare (or your preferred doneness) makes all the difference in these bowls. The key is starting with room temperature meat and a screaming hot cast iron skillet or grill. I like to pat the steak dry before cooking – this ensures you get that beautiful sear rather than steaming the meat. Let it rest for at least 5 minutes before slicing against the grain. This resting period isn’t just chef talk – it actually allows the juices to redistribute throughout the meat, keeping every bite succulent and preventing all those flavorful juices from running out onto your cutting board.

    Serving Ideas & Creative Variations

    Building the Perfect Bowl

    The assembly order matters more than you might think! I start with warm rice or grain base, which gently heats the components above it while leaving others refreshingly cool. Next comes a layer of beans and corn, followed by your sliced steak. Top with fresh elements like diced tomatoes, avocado, and extra cilantro. The final touch is a drizzle of lime crema or spicy sauce that ties everything together. I love serving these with small bowls of additional toppings like pickled red onions, cotija cheese, or crushed tortilla chips so everyone can customize their final creation.

    Exciting Flavor Twists

    While the classic Cilantro Lime Steak Bowl is perfect as is, I love experimenting with different flavor profiles. Try a tropical twist with diced mango and a coconut-lime rice base. For something smokier, add chipotle peppers to the marinade and top with grilled pineapple. A Mediterranean variation works beautifully too – keep the cilantro-lime base but add feta, cucumber, and olives. My personal favorite twist came from a happy accident when I was low on ingredients – I added a spoonful of peanut butter to the marinade, creating an unexpected but delicious Thai-inspired fusion that my family now requests regularly.

    Storage & Troubleshooting Guide

    Meal Prep Strategies

    These Cilantro Lime Steak Bowls are meal prep champions when assembled strategically. I prepare all components separately and store them in individual containers. The steak, rice, and cooked components can be kept together, while fresh elements like avocado, cilantro, and lime wedges should be stored separately and added just before eating. This method keeps everything fresh for up to 4 days. For the avocado dilemma, I either add it fresh each day or toss slices with extra lime juice to prevent browning. Pro tip: slightly undercook your steak if you’ll be reheating it later.

    Fixing Common Issues

    Even experienced cooks encounter challenges! If your steak turns out too tough, it’s likely either overcooked or sliced with the grain instead of against it. For next time, use a meat thermometer and aim for 130-135°F for medium-rare. If your cilantro browns quickly, try storing the stems in water like a bouquet and loosely covering the leaves with a damp paper towel. Bland rice? Cook it in broth instead of water and add a bay leaf. If your bowl components seem dry after refrigeration, keep a small container of extra marinade (that hasn’t touched raw meat) to refresh things when serving.

    Frequently Asked Questions

    Can I make Cilantro Lime Steak Bowls ahead of time?

    Absolutely! Prepare components separately and assemble just before eating. The steak and cooked elements last 3-4 days refrigerated, while fresh toppings should be added day-of for best quality.

    What’s the best cut of steak for Cilantro Lime Steak Bowls?

    Flank or skirt steak work perfectly due to their bold flavor and how well they absorb marinades. Sirloin is another excellent option if you prefer a more tender cut.

    How can I make these bowls vegetarian?

    Replace steak with portobello mushrooms, cauliflower steaks, or extra-firm tofu using the same marinade. Double the beans for added protein and consider adding grilled halloumi cheese.

    What if I don’t like cilantro?

    Substitute with flat-leaf parsley, basil, or a mixture of fresh herbs. The lime component still provides the signature brightness these bowls are known for.

    Can I freeze components of these bowls?

    The marinated and cooked steak freezes well for up to 3 months. Rice and beans also freeze beautifully. Thaw overnight in the refrigerator before reheating gently.

    Final Thoughts

    These Cilantro Lime Steak Bowls have become my reliable kitchen hero – impressive enough for guests but simple enough for weeknights. There’s something deeply satisfying about creating a meal where every bite offers something different yet harmonious. The bright, zesty flavors paired with the savory steak create that perfect balance that keeps me coming back to this recipe again and again. I’d love to see your version if you make these bowls – tag me on Pinterest with your creations! The beauty of these bowls is that they’re endlessly adaptable to your preferences while keeping that core cilantro-lime magic.