Blog

  • Reuben Soup Recipe That Will Warm Your Soul Instantly!

    Reuben Soup Recipe That Will Warm Your Soul Instantly!

    Reuben Soup Recipe That Will Warm Your Soul Instantly!

    Reuben Soup transforms the iconic sandwich into a warm, comforting bowl that’s perfect for chilly evenings. The first time I made this soup, my kitchen filled with the mouthwatering aroma of corned beef, sauerkraut, and melted Swiss cheese—instantly transporting me back to my favorite deli. There’s something magical about how the tangy Russian dressing swirls into the rich broth, creating that perfect balance of flavors. If you love classic comfort foods, this soup delivers all the satisfaction of a traditional Reuben sandwich but in a cozy, spoonable form.

    Recipe

    Why You’ll Love This Reuben Soup

    Perfect Balance of Flavors

    The beauty of Reuben Soup lies in its perfect harmony of flavors—tangy sauerkraut, savory corned beef, and nutty Swiss cheese create a flavor symphony in every spoonful. The broth, infused with caraway seeds, captures that authentic rye bread essence without overwhelming the palate. I’ve found that simmering everything together allows the flavors to meld beautifully, creating depth you simply can’t get from a sandwich alone. My husband, who typically dislikes sauerkraut, requests this soup regularly—that’s how transformative the cooking process is!

    Quick Comfort Food Solution

    When comfort food cravings hit but you’re short on time, Reuben Soup comes to the rescue. It’s ready in about 30 minutes from prep to table, making it perfect for weeknight dinners. I love that it uses simple ingredients I usually have on hand, especially when I grab deli corned beef instead of cooking it from scratch. The soup reheats beautifully too, so I often make a double batch on Sunday for easy lunches throughout the week. It’s become my go-to solution when I need something hearty but don’t have hours to spend in the kitchen.

    Essential Tips & Tricks

    Perfecting the Base

    The secret to an exceptional Reuben Soup starts with building a flavorful base. Begin by sautéing diced onions in butter until translucent, then add caraway seeds and toast them for 30 seconds to release their essential oils. This simple step infuses the entire soup with that distinctive rye bread flavor. For the broth, I recommend using half beef broth and half chicken broth—this creates a lighter base that doesn’t overpower the corned beef. Deglazing the pan with a splash of Worcestershire sauce adds depth that ties everything together beautifully.

    Balancing Tanginess

    Getting the right balance of tanginess in your Reuben Soup requires some finesse. Rinse the sauerkraut briefly if you prefer a milder flavor, or use it straight from the jar for a more authentic punch. When adding the Russian dressing component, start with less and taste as you go—you can always add more, but you can’t take it away! For the creamiest result, stir in the Swiss cheese gradually over low heat rather than all at once. This creates a velvety texture similar to the Chicken Cheese Steak Sandwiches that everyone loves.

    Serving Ideas & Creative Variations

    Perfect Pairings

    Serve your Reuben Soup with a side of toasted rye bread for the complete experience—perfect for dipping into that rich, cheesy broth. For a lighter meal, pair it with a simple side salad dressed with vinaigrette to cut through the richness. I love serving this soup in hollowed-out bread bowls for special occasions; there’s something magical about soaking up those last spoonfuls with edible dishware! For a complete meal that balances the richness, consider serving smaller portions as a starter before a main dish like Ranch Chicken Veggie Soup for a soup-themed dinner party.

    Exciting Twists

    Don’t be afraid to put your own spin on classic Reuben Soup! For a lighter version, substitute turkey pastrami for corned beef—it maintains that deli flavor with less fat. Add diced potatoes for a heartier, stew-like consistency, or stir in a cup of cooked barley for added texture. My favorite variation includes a splash of dark beer in the broth, which adds incredible depth. For a modern twist, top each bowl with homemade rye croutons instead of traditional bread on the side. These little crunchy bites add texture while reinforcing the classic Reuben flavor profile.

    Storage & Troubleshooting Guide

    Proper Storage Methods

    Store leftover Reuben Soup properly to maintain its delicious flavor. Allow it to cool completely before transferring to airtight containers, which prevents condensation that could water down your soup. Refrigerate for up to 4 days, or freeze for up to 3 months for longer storage. I recommend freezing in individual portions for easy lunches. When freezing, leave out the Swiss cheese and add it fresh when reheating for the best texture. The soup may separate slightly when thawed, but a quick whisk while reheating will bring it back to its creamy consistency.

    Fixing Common Issues

    If your Reuben Soup turns out too tangy, balance it with a teaspoon of brown sugar or a splash of heavy cream to mellow the flavor. For soup that’s too thick, thin it with additional broth until you reach your desired consistency. If the cheese clumps instead of melting smoothly, remove the soup from heat and whisk in a cornstarch slurry (1 teaspoon cornstarch mixed with 1 tablespoon cold water) before returning to low heat. Too bland? Add a splash of pickle juice or extra Thousand Island dressing to amp up the classic Reuben flavor profile.

    Frequently Asked Questions

    Can I use leftover corned beef for Reuben Soup?

    Absolutely! Leftover corned beef from St. Patrick’s Day is perfect for this soup. Simply dice it and add it toward the end of cooking to prevent it from becoming tough.

    How can I make Reuben Soup less tangy?

    Rinse the sauerkraut thoroughly before adding it to the soup, and reduce the amount of Russian dressing. You can also add a touch of cream to balance the acidity.

    Is there a vegetarian version of Reuben Soup?

    Yes! Substitute the corned beef with smoked tempeh or seitan, and use vegetable broth instead of beef broth. The caraway seeds still provide that authentic Reuben flavor.

    Can Reuben Soup be made in a slow cooker?

    Definitely. Cook on low for 4-5 hours, adding the Swiss cheese during the last 30 minutes. This method allows the flavors to develop beautifully.

    What’s the best cheese to use in Reuben Soup?

    Swiss cheese is traditional for authentic Reuben flavor, but Gruyère or Emmental also work wonderfully. Shred it yourself for the smoothest melting texture.

    Final Thoughts

    Reuben Soup takes everything wonderful about the classic sandwich and transforms it into a comforting, spoonable delight that’s perfect for any season. The way the flavors meld together creates something even greater than the sum of its parts—a truly satisfying experience in every bowl. Whether you’re a longtime Reuben fan or new to these flavors, this soup deserves a spot in your recipe collection. Don’t forget to check out more comfort food inspirations on Pinterest and share your Reuben Soup creations with us!
  • French Onion Short Rib Soup with Gruyere Toast – Cozy Comfort Magic!

    French Onion Short Rib Soup with Gruyere Toast – Cozy Comfort Magic!

    French Onion Short Rib Soup with Gruyere Toast – Cozy Comfort Magic!

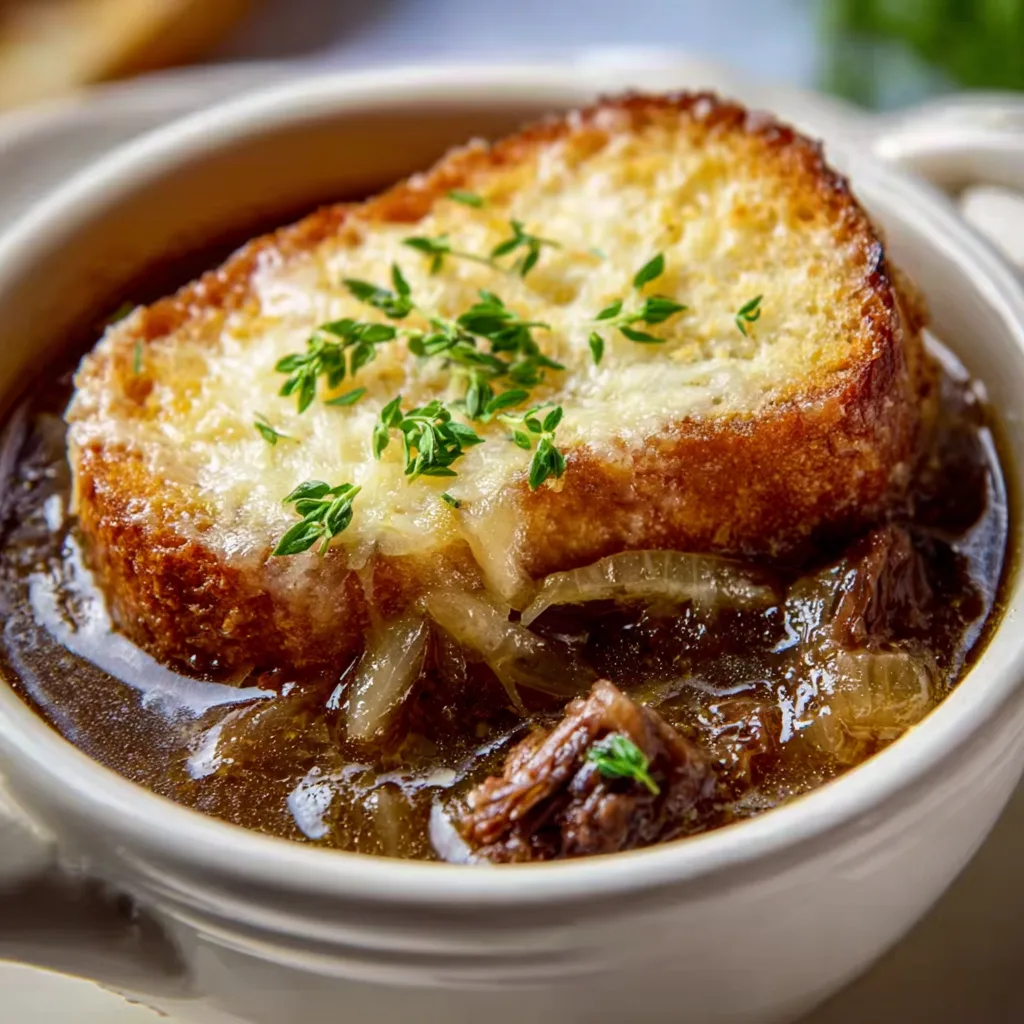
    French Onion Short Rib Soup With Gruyere Toast is the ultimate comfort food marriage – combining the rich, savory depth of slow-cooked short ribs with the classic caramelized sweetness of French onion soup. The first time I made this on a snowy Sunday afternoon, my kitchen filled with an aroma so intoxicating that my neighbor actually texted to ask what I was cooking! There’s something magical about the way the meltingly tender beef mingles with those deeply caramelized onions, all topped with that signature crusty, cheese-smothered toast that makes this dish absolutely irresistible. It’s rustic elegance in a bowl.

    Recipe

    Why You’ll Love This French Onion Short Rib Soup With Gruyere Toast

    Rich Layers of Flavor

    This soup is a flavor powerhouse that builds with each spoonful. The bone-in short ribs release their collagen as they slow-cook, creating a velvety, rich broth that’s impossible to replicate with regular beef cuts. I love watching my guests’ expressions when they take that first bite – there’s always this moment of wide-eyed surprise at the depth of flavor. The sweet caramelized onions provide the perfect counterpoint to the savory meat, while fresh thyme and a splash of good red wine add complexity that makes this soup feel truly special. It’s comfort food elevated to dinner party status.

    Make-Ahead Convenience

    One of the reasons I keep coming back to this recipe is its make-ahead magic. The flavors actually improve when made a day in advance, making it perfect for entertaining without the last-minute kitchen scramble. I’ve served this at three dinner parties this winter, and each time I’ve been able to join my guests for appetizers instead of being stuck in the kitchen. The short ribs become even more tender overnight, and the broth develops an even richer character. Just reheat gently and prepare your Gruyere toasts fresh before serving for that perfect cheese-pull moment everyone loves.

    Essential Tips & Tricks

    Mastering the Onion Caramelization

    The secret to exceptional French onion short rib soup lies in properly caramelizing the onions. This isn’t a step to rush – I dedicate a full 45 minutes to this process alone. Use a heavy-bottomed Dutch oven and keep the heat medium-low to avoid burning. I like to add a pinch of sugar about halfway through to encourage browning and a splash of balsamic vinegar in the final minutes for depth. The patience pays off when those onions transform from sharp and pungent to meltingly sweet with complex caramel notes. This foundation builds the signature flavor that makes this soup so crave-worthy.

    Choosing the Right Cheese Blend

    While traditional Gruyere is non-negotiable for authentic flavor, I’ve found that creating a cheese blend elevates these toasts to extraordinary. I use 80% aged Gruyere for its nutty depth and 20% young fontina for superior meltability. Grate the cheese fresh rather than buying pre-shredded for the best texture and flavor release. For an extra flavor boost, rub each toast with a peeled garlic clove before adding cheese. If you’re looking for another delicious cheesy option, my Chicken Cheese Steak Sandwiches use a similar technique that works wonderfully.

    Serving Ideas & Creative Variations

    Perfect Pairings

    This hearty soup deserves thoughtful accompaniments to create a balanced meal. I love serving it with a crisp green salad dressed simply with lemon and olive oil to cut through the richness. A small board of cornichons, grainy mustard, and thinly sliced apples provides welcome brightness. For wine, choose something with enough structure to stand up to the beef – a medium-bodied Côtes du Rhône or Rioja works beautifully. If you’re looking for another cozy soup option to serve alongside, my Ranch Chicken Veggie Soup offers a lighter counterpoint.

    Seasonal Adaptations

    This soup welcomes seasonal variations that keep it exciting year-round. In spring, I add fresh peas and tender asparagus tips in the final minutes of cooking. Summer calls for a handful of sweet cherry tomatoes and fresh basil. Fall is perfect for adding roasted mushrooms and a touch of cognac, while winter welcomes root vegetables like parsnips and turnips added with the short ribs. The base recipe remains the same, but these thoughtful additions help the soup evolve with your seasonal produce and cravings.

    Storage & Troubleshooting Guide

    Proper Storage Techniques

    To maintain the soup’s quality, cool completely before refrigerating in airtight containers for up to 3 days. The fat will rise and solidify on top – don’t remove this until reheating as it forms a natural seal that preserves flavor. For longer storage, portion the soup (without the toast) into freezer-safe containers, leaving an inch of headspace for expansion. It freezes beautifully for up to 3 months. Always thaw overnight in the refrigerator and reheat gently on the stovetop, adding a splash of fresh broth if needed to adjust consistency.

    Troubleshooting Common Issues

    If your soup seems too greasy, refrigerate it first, then remove the solidified fat layer before reheating. For soup that’s too thin, simmer uncovered for 15-20 minutes to reduce, or create a beurre manié by kneading equal parts butter and flour together, then whisk small amounts into the simmering soup until desired thickness is reached. If your Gruyere toast becomes soggy too quickly, toast the bread more thoroughly before adding cheese, or serve the toast on the side, allowing guests to add it to their bowls just before eating.

    Frequently Asked Questions

    Can I make French Onion Short Rib Soup in a slow cooker?

    Yes! Brown the short ribs and caramelize onions on the stovetop first, then transfer to a slow cooker with remaining ingredients. Cook on low for 7-8 hours until meat falls off the bone. Prepare Gruyere toasts separately.

    What can I substitute for Gruyere cheese?

    Swiss cheese is the closest substitute. Comté, Emmental, or a combination of provolone and parmesan will also work, though each offers slightly different flavor profiles and melting qualities.

    Can I use boneless short ribs instead?

    Yes, boneless short ribs work well but won’t contribute as much richness to the broth. Reduce cooking time by about 30 minutes and consider adding 1-2 cups beef bone broth for depth.

    How do I know when the short ribs are done?

    Short ribs are perfectly cooked when the meat easily pulls away from the bone with light pressure from a fork. They should be tender but not falling apart completely.

    What’s the best bread for the Gruyere toast on French Onion Short Rib Soup?

    Use a sturdy artisan bread like sourdough or French baguette cut ½-inch thick. The bread should be substantial enough to hold up when placed on the soup without immediately disintegrating.

    Final Thoughts

    French Onion Short Rib Soup With Gruyere Toast represents comfort food at its finest – a dish that nourishes both body and soul with every spoonful. There’s something deeply satisfying about transforming humble ingredients into something so extraordinarily delicious through time and technique. I hope this recipe brings the same warmth to your home that it has to mine. For more cozy recipes perfect for any season, visit our collection on Pinterest. This soup reminds us that good things come to those who wait – and this one is absolutely worth waiting for.

  • Beef and Barley Soup Recipe: Cozy, Hearty, and Irresistible!

    Beef and Barley Soup Recipe: Cozy, Hearty, and Irresistible!

    Beef and Barley Soup Recipe: Cozy, Hearty, and Irresistible!

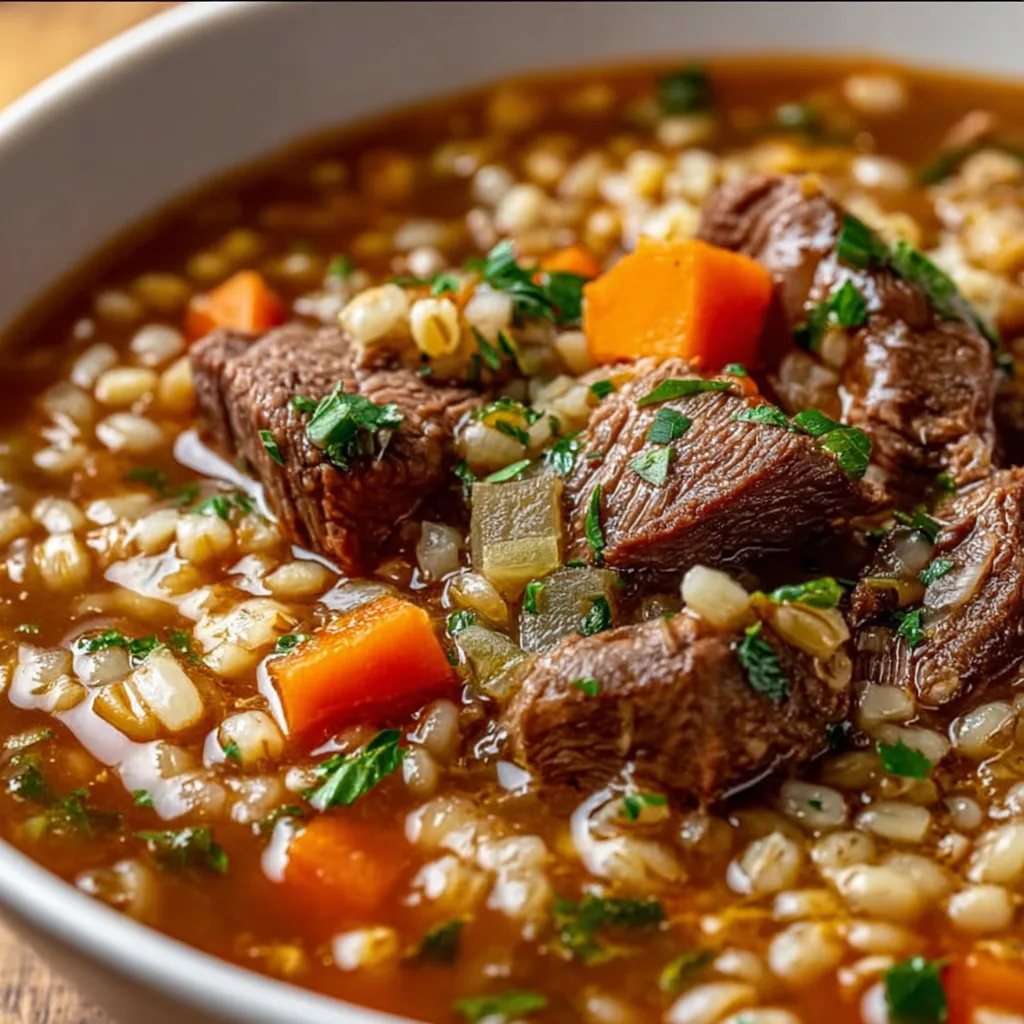
    Beef and barley soup recipe holds a special place in my heart. On chilly evenings when the wind howls outside, I find myself gravitating toward this hearty, soul-warming bowl that combines tender chunks of beef, nutty barley, and a medley of vegetables in rich broth. There’s something magical about how the kitchen fills with that incredible aroma as it simmers away on the stove. This isn’t just soup—it’s a hug in a bowl that nourishes both body and spirit. I’ve perfected this recipe over countless Sunday afternoons, and I’m thrilled to share it with you today.

    Recipe

    Why You’ll Love This Beef And Barley Soup Recipe

    Perfect Balance of Flavors and Textures

    This beef and barley soup recipe delivers incredible depth without complicated techniques. The beef becomes melt-in-your-mouth tender, while the barley adds a pleasant chewiness that makes each spoonful satisfying. I love how the barley releases its starch, naturally thickening the broth to a silky consistency. The vegetables maintain just enough bite, and the herbs infuse everything with warmth. Last week, my neighbor stopped by while it was simmering and literally wouldn’t leave until I served her a bowl—that’s the power of these aromas!

    Make-Ahead Friendly & Budget Conscious

    One of my favorite aspects of this beef and barley soup recipe is how budget-friendly it is. It transforms inexpensive cuts of beef into something extraordinary through slow simmering. The soup actually improves with time as flavors meld, making it perfect for meal prep. I often make a double batch on Sundays, portioning it for lunches throughout the week. The barley keeps its texture beautifully, never turning mushy even after a few days in the refrigerator. Your wallet and schedule will thank you!

    Essential Tips & Tricks

    Selecting and Preparing Your Ingredients

    Choosing the right beef is crucial for this soup. I recommend chuck roast cut into 1-inch cubes—it has enough fat to stay tender and flavorful during cooking. For the barley, pearl barley works best as it cooks more quickly than hulled varieties while still retaining that wonderful nutty flavor. When preparing vegetables, aim for uniform sizes to ensure even cooking. I like to cut carrots slightly larger than celery since they take longer to soften. A quick tip: browning the beef in batches creates that essential flavor foundation that elevates this soup from good to exceptional.

    Perfecting the Cooking Process

    The key to outstanding beef and barley soup lies in layering flavors throughout the cooking process. Start by getting a good sear on your beef—don’t rush this step! Those browned bits on the bottom of the pot (fond) are flavor gold. Deglaze with a splash of red wine or broth, scraping up all those bits. Allow the barley to toast briefly in the pot before adding liquid; this simple step enhances its nutty profile. Simmer gently, never boiling vigorously, which can toughen the meat. Patience pays off here—the soup needs time to develop its rich character.

    Serving Ideas & Creative Variations

    Perfect Pairings & Garnishes

    This beef and barley soup recipe shines when served with a chunk of crusty bread for dipping into that rich broth. For an elevated experience, try topping each bowl with a dollop of sour cream, fresh dill, or a sprinkle of grated parmesan. When I’m feeling indulgent, I serve it with grilled cheese sandwiches made with sharp cheddar and caramelized onions—the combination is absolutely divine! For a complete meal, a simple side salad with a bright vinaigrette provides a refreshing contrast to the hearty soup. The acidity cuts through the richness beautifully.

    Exciting Flavor Variations

    While the classic version is wonderful, this soup welcomes creative twists. For a Mediterranean spin, add a can of diced tomatoes, olives, and finish with fresh basil. Craving something with heat? Incorporate some spice with diced jalapeños or red pepper flakes. My personal favorite variation includes wild mushrooms and a splash of sherry for an earthy, elegant version. You can also swap traditional barley for farro or wheat berries for different textures. For a lighter spring version, stir in fresh peas and lemon zest just before serving.

    Storage & Troubleshooting Guide

    Proper Storage & Reheating

    This beef and barley soup stores beautifully, often tasting even better the next day as flavors continue to develop. Allow it to cool completely before transferring to airtight containers in the refrigerator, where it will keep for 4-5 days. For longer storage, freeze in portion-sized containers for up to 3 months. When freezing, fill containers only ¾ full to allow for expansion. To reheat, thaw overnight in the refrigerator if frozen, then warm gently on the stovetop, adding a splash of broth if needed to adjust consistency. Avoid microwaving large portions as it can lead to uneven heating.

    Common Issues & Solutions

    If your soup seems too thin, there’s an easy fix: remove about ¼ cup of broth, whisk in 1 tablespoon of cornstarch until smooth, then stir this slurry back into the simmering soup. Another option is to mash some of the vegetables against the side of the pot. If your barley has absorbed too much liquid, simply add more broth or water. For beef that’s still tough, continue simmering on low heat—it likely needs more time to break down. If the soup tastes flat, brighten it with a splash of vinegar or lemon juice and adjust salt levels.

    Frequently Asked Questions

    Can I make beef and barley soup in a slow cooker?

    Absolutely! Brown the beef and sauté the aromatics first, then transfer everything to your slow cooker. Cook on low for 7-8 hours or high for 4-5 hours until the beef is tender and barley is cooked through.

    What’s the best cut of beef for this soup?

    Chuck roast is ideal for beef and barley soup because it has enough fat to become tender during cooking. Other good options include beef stew meat, brisket, or short ribs.

    Can I use quick-cooking barley instead of pearl barley?

    Yes, but add it during the last 15-20 minutes of cooking instead of at the beginning. Quick-cooking barley requires much less time to become tender.

    Is beef and barley soup freezer-friendly?

    Definitely! It freezes beautifully for up to 3 months. The barley may absorb more liquid upon thawing, so you might need to add extra broth when reheating.

    Can I make this soup vegetarian?

    Yes! Replace beef with mushrooms for umami flavor and use vegetable broth instead of beef broth. Add extra herbs and a splash of soy sauce for depth.

    Final Thoughts

    This beef and barley soup recipe has been my faithful companion through countless cold evenings and busy weeks. There’s something profoundly satisfying about creating such a nourishing meal from simple ingredients. The way it fills your home with comforting aromas is almost as rewarding as the rich, complex flavors in every spoonful. Whether you’re cooking for family, meal prepping, or simply treating yourself, this soup delivers heartfelt comfort in bowl form. I hope it brings as much warmth to your table as it has to mine! For more cozy recipes, visit our Pinterest page.

  • Lemon Almond Cake to Die For: Irresistibly Zesty & Moist!

    Lemon Almond Cake to Die For: Irresistibly Zesty & Moist!

    Lemon Almond Cake to Die For: Irresistibly Zesty & Moist!

    Lemon Almond Cake to Die For has become my weekend obsession, and I’m not even sorry about it! There’s something magical about the bright citrus aroma that fills my kitchen as this cake bakes—it’s like sunshine in dessert form. I discovered this recipe during a particularly gloomy February when I needed something to lift my spirits. The first bite with its perfect balance of tangy lemon and nutty almond had me closing my eyes in pure bliss. If you love the combination of sweet and tart like in these Strawberry Brownies with Lemon Glaze, you’re in for a real treat!

    Recipe

    Why You’ll Love This Lemon Almond Cake to Die For

    A Symphony of Flavors and Textures

    This cake strikes the perfect balance between richness and lightness. The almond flour creates a tender, moist crumb that practically melts in your mouth, while the lemon zest and juice provide a bright, zingy contrast that wakes up your taste buds. I love how the top develops a slight crust that gives way to the softest interior. The gentle nuttiness of the almonds provides depth without overwhelming the star of the show—that vibrant lemon flavor that makes you close your eyes and savor each bite. It’s sophisticated enough for company but comforting enough for a weeknight treat.

    Impressive Yet Surprisingly Simple

    Don’t let the elegant appearance fool you—this cake is remarkably straightforward to make. Unlike fussy layer cakes, this one-bowl wonder comes together in about 15 minutes of active time. The ingredients are likely already in your pantry, and you don’t need special equipment beyond a mixing bowl and whisk. I’ve made this cake countless times when unexpected guests announced they were “just dropping by,” and it never fails to impress. There’s something deeply satisfying about creating something so beautiful with so little effort. The hardest part is waiting for it to cool before diving in!

    Essential Tips & Tricks

    Mastering the Lemon Elements

    The secret to intensity lies in how you incorporate the lemon. Always zest your lemons before juicing them, and rub the zest into the sugar with your fingertips to release the essential oils. This simple step amplifies the lemon flavor tenfold! For the juice, fresh is non-negotiable—those bottled versions simply won’t deliver the bright, clean taste we’re after. I like to add a tablespoon of lemon juice to the glaze as well, which creates a tangy finish that balances the cake’s sweetness. Remember: more zest equals more pronounced lemon flavor without additional acidity.

    Achieving the Perfect Texture

    The almond-flour ratio is crucial to this cake’s divine texture. Too much, and it becomes dense; too little, and you lose that distinctive moistness. I recommend using room-temperature ingredients to ensure proper incorporation and an even crumb. When mixing, be gentle—overmixing activates the gluten in the all-purpose flour portion, resulting in a tougher cake. For an ultra-moist version like my Dutch Oven No-Knead Crusty Bread, add 2 tablespoons of sour cream or Greek yogurt to the batter. The slight tang complements the lemon beautifully while adding incredible moisture.

    Serving Ideas & Creative Variations

    Seasonal Pairings That Shine

    This versatile cake deserves thoughtful accompaniments that enhance its lemon-almond glory. In summer, I serve it with fresh berries—particularly raspberries or blackberries whose tartness echoes the lemon notes. A dollop of lightly whipped cream or crème fraîche adds luxurious richness without overwhelming. For fall and winter, try roasted pears with a drizzle of honey or a scoop of vanilla bean ice cream. The warm-cold contrast creates a sensory experience that’s utterly delightful. For brunch settings, pair with a glass of prosecco or a creamy latte for the perfect balance.

    Inspired Flavor Twists

    While the classic version is perfection, I love creating seasonal adaptations throughout the year. Add 1/2 teaspoon of lavender buds to the sugar for a Provençal twist, or fold in 1/3 cup of poppy seeds for delightful texture. For a holiday version, incorporate 1/2 teaspoon of cardamom and a splash of amaretto into the batter. My personal favorite variation involves folding in 1/4 cup of finely chopped pistachios and topping with a rosewater glaze—it transforms the cake into something worthy of a Middle Eastern pastry shop!

    Storage & Troubleshooting Guide

    Keeping Your Cake Fresh

    The moisture retention of this cake is remarkable—it actually tastes even better on day two as the flavors meld and develop. Store at room temperature under a cake dome or wrapped in plastic for up to three days. For longer storage, refrigerate for up to a week, but always bring to room temperature before serving to revive the texture and flavors. If you want to freeze portions, wrap individual slices tightly in plastic wrap, then foil, and freeze for up to three months. Thaw overnight in the refrigerator, then unwrap and bring to room temperature for the best taste experience.

    Solving Common Baking Issues

    If your cake sinks in the middle, you likely opened the oven door too early—wait until at least 25 minutes into baking before checking. For a cake that’s too dense, check your leavening agents for freshness; baking powder loses potency after about six months. If the top browns too quickly, loosely tent with foil halfway through baking. For a cake that’s too dry, you may have overbaked it or measured the flour too heavily—I recommend spooning flour into measuring cups rather than scooping directly from the bag, which compacts it. Remember that almond flour burns easily, so watch carefully!

    Frequently Asked Questions

    Can I make this Lemon Almond Cake to Die For gluten-free?

    Absolutely! Replace the all-purpose flour with a 1:1 gluten-free flour blend. The almond flour already provides structure, making this cake particularly adaptable to gluten-free baking without sacrificing texture.

    How do I know when the cake is perfectly done?

    Insert a toothpick into the center—it should come out with a few moist crumbs but no wet batter. The cake will also begin to pull away slightly from the sides of the pan, and the top will spring back when lightly touched.

    Can I use Meyer lemons instead of regular lemons?

    Yes! Meyer lemons add a wonderful floral sweetness. Since they’re less acidic, you might want to add an extra tablespoon of juice to maintain the bright tangy flavor.

    How far in advance can I make this cake for a party?

    This cake actually improves with time! Make it up to two days ahead, store at room temperature, and add any fresh garnishes just before serving.

    Can I bake this in a different pan shape?

    Yes—try a loaf pan (adjust baking time to 45-50 minutes) or cupcakes (18-20 minutes). Just fill pans only 2/3 full as the cake will rise considerably.

    Final Thoughts

    This Lemon Almond Cake to Die For has become my signature dessert for good reason—it consistently delivers that perfect balance of simplicity and sophistication that makes guests think you spent hours in the kitchen. There’s something magical about the way the bright lemon and nutty almond flavors complement each other, creating a cake that feels both comforting and special. Whether you’re serving it at a dinner party or enjoying a slice with your afternoon tea, this cake has a way of brightening even the most ordinary moments. Don’t forget to check out more of my favorite recipes on Pinterest!

  • Tender Korean BBQ Meatballs with Spicy Mayo Dip That Wow!

    Tender Korean BBQ Meatballs with Spicy Mayo Dip That Wow!

    Tender Korean BBQ Meatballs with Spicy Mayo Dip That Wow!

    Tender Korean BBQ Meatballs with Spicy Mayo Dip are my absolute go-to when I need to impress without spending hours in the kitchen. The first time I made these, my kitchen filled with that irresistible sweet-savory aroma that had everyone hovering nearby, asking “how much longer?” These meatballs strike the perfect balance between juicy tenderness and caramelized edges, while the spicy mayo adds a creamy kick that’ll make your taste buds dance. I’ve served these at everything from casual game nights to fancy dinner parties, and the platter is always the first to empty. Trust me, you’ll want to double the recipe!

    Recipe

    Why You’ll Love This Tender Korean BBQ Meatballs With Spicy Mayo Dip

    Perfect Balance of Flavors

    The magic of these meatballs lies in their incredible flavor profile. The combination of gochujang paste, brown sugar, and soy sauce creates that authentic Korean BBQ taste that’s simultaneously sweet, savory, and subtly spicy. I love how the garlic and ginger add aromatic depth without overpowering. The first time I served these at my sister’s birthday, my brother-in-law (who claims to dislike “fancy food”) ate seven in one sitting! The glaze caramelizes beautifully in the oven, creating that sticky, shiny coating that makes these meatballs absolutely irresistible.

    Quick Prep, Maximum Impact

    What I adore most about this recipe is how it delivers restaurant-quality results with minimal effort. The meatball mixture comes together in just one bowl, and you can prep everything in about 15 minutes. While they bake, the heavenly aroma will fill your kitchen, making the anticipation part of the experience! The spicy mayo takes literally 30 seconds to whisk together, but adds that professional touch that makes everyone think you spent hours in the kitchen. These meatballs are my secret weapon for those nights when I want something special without the fuss.

    Essential Tips & Tricks

    Achieving the Perfect Texture

    The key to tender meatballs is handling the mixture with a light touch. Overworking the meat creates tough, dense results—nobody wants that! I gently fold the ingredients together just until combined, then use a small ice cream scoop for uniformly-sized meatballs that cook evenly. Another game-changer? Adding a tablespoon of panko soaked in milk to keep everything juicy. For extra flavor, I like to toast my sesame seeds before adding them to the mixture. The subtle nuttiness elevates the entire dish, similar to how toasted nuts enhance my Chicken Cheese Steak Sandwiches.

    Mastering the Glaze

    The glaze is what transforms these from ordinary meatballs into an unforgettable dish. For the shiniest, stickiest coating, brush the meatballs halfway through cooking, then again during the final few minutes. This double-glazing technique creates that beautiful lacquered finish that makes Korean BBQ so distinctive. I’ve found that adding a teaspoon of cornstarch to the glaze helps it cling perfectly to the meatballs without running off. If you prefer a spicier version, increase the gochujang gradually—it packs serious heat! Let the meatballs rest for 5 minutes after baking to allow the glaze to set properly.

    Serving Ideas & Creative Variations

    Party-Perfect Presentations

    These meatballs are incredibly versatile when it comes to serving. For casual gatherings, I place them in a shallow bowl with the spicy mayo dip in the center and toothpicks nearby—this setup disappears in minutes! For more elegant presentations, arrange them over steamed rice with thinly sliced cucumbers, shredded carrots, and a sprinkle of sesame seeds and green onions. The vibrant colors make for a stunning platter. Another favorite approach is to serve them lettuce-wrap style with crisp butter lettuce leaves, pickled vegetables, and extra sauce, similar to my approach with Bang Bang Chicken Skewers.

    Exciting Flavor Twists

    While the classic recipe is amazing, don’t be afraid to experiment! My pineapple variation adds diced pineapple to the meatball mixture and pineapple juice to the glaze for a tropical twist that’s perfect for summer gatherings. For a fusion approach, try adding finely chopped kimchi to the meat mixture—the fermented flavor adds incredible depth. You can also swap the ground beef for turkey or chicken for a lighter option. The spicy mayo can be customized too; I sometimes add grated garlic, lime zest, or even a drizzle of honey for a sweet-heat balance that complements the meatballs beautifully.

    Storage & Troubleshooting Guide

    Make-Ahead and Storage Solutions

    These meatballs are perfect for meal prep because they actually taste even better the next day! Store cooled meatballs in an airtight container in the refrigerator for up to 3 days. To reheat, cover them loosely with foil and warm in a 300°F oven for about 10 minutes—this preserves their juicy texture better than microwaving. The glaze tends to thicken when chilled, so I recommend making a small amount of extra sauce to brush on while reheating. The spicy mayo keeps for up to 5 days refrigerated. You can also freeze the uncooked meatballs on a parchment-lined tray, then transfer to a freezer bag for up to 3 months.

    Common Issues and Easy Fixes

    If your meatballs are coming out too dry, try adding an extra tablespoon of oil or an egg yolk to the mixture. Too dense? You might be overmixing—remember to handle the meat gently and mix just until ingredients are incorporated. If the glaze isn’t caramelizing properly, position the meatballs on the upper rack of your oven for the last few minutes of cooking. For runny spicy mayo, make sure you’re using thick, full-fat mayonnaise as a base. If it’s still too thin, refrigerate it for 30 minutes before serving. And if your meatballs are sticking to the pan, line it with parchment paper rather than foil for foolproof results.

    Frequently Asked Questions

    Can I make Tender Korean BBQ Meatballs With Spicy Mayo Dip ahead of time?

    Absolutely! Prepare the meatballs up to 24 hours ahead, refrigerate uncooked, then bake when ready. The spicy mayo can be made 3 days in advance and kept refrigerated in an airtight container.

    What’s the best meat to use for these meatballs?

    I recommend 80/20 ground beef for the perfect fat content, but you can use a beef-pork blend for extra flavor. For a lighter version, ground chicken thighs work beautifully.

    Can I make these meatballs gluten-free?

    Yes! Substitute regular soy sauce with tamari and use gluten-free panko breadcrumbs. Double-check your gochujang paste, as some brands contain wheat.

    How spicy are these meatballs?

    The recipe as written provides moderate heat. Adjust the gochujang in both the meatballs and sauce according to your preference. For milder flavor, reduce by half.

    What can I serve with these meatballs for a complete meal?

    These pair beautifully with steamed rice, cucumber salad, and kimchi. For a low-carb option, serve with cauliflower rice and stir-fried vegetables.

    Final Thoughts

    These Tender Korean BBQ Meatballs with Spicy Mayo Dip represent everything I love about cooking—bold flavors, adaptable techniques, and food that brings people together. The combination of sweet-savory glaze and creamy heat from the dip creates an irresistible bite that’ll have everyone asking for your secret. Whether you’re hosting a gathering or simply treating yourself to something special, these meatballs deliver maximum flavor with minimal effort. Don’t forget to check out more of my favorite appetizer recipes on Pinterest for more inspiration!

  • Cheeseburger Stuffed Tater: Irresistibly Delicious Snack Craze!

    Cheeseburger Stuffed Tater: Irresistibly Delicious Snack Craze!

    Cheeseburger Stuffed Tater: Irresistibly Delicious Snack Craze!

    Cheeseburger Stuffed Taters are what comfort food dreams are made of—crispy potato shells cradling seasoned ground beef, melty cheese, and all your favorite burger toppings in one irresistible package. I discovered this genius mashup last winter when I was craving both a juicy burger and loaded baked potatoes but didn’t want to choose between them. The first bite was pure magic—that perfect balance of savory meat, gooey cheese, and fluffy potato that makes your eyes close involuntarily. If you’ve been searching for a crowd-pleaser that combines two beloved classics into one showstopping dish, look no further than these stuffed taters.

    Recipe

    Why You’ll Love This Cheeseburger Stuffed Tater

    A Complete Meal in One Delicious Package

    These stuffed taters aren’t just delicious—they’re the ultimate all-in-one meal. The russet potatoes provide that perfect starchy base while the seasoned ground beef delivers protein-packed satisfaction. I love how the cheese melts into every nook and cranny, creating pockets of gooey goodness in each bite. What really makes these special is how customizable they are for everyone at your table. My husband loads his with extra bacon and jalapeños, while I prefer mine with avocado and a drizzle of special sauce. They’re substantial enough to serve as a complete dinner yet fun enough for game day gatherings.

    Budget-Friendly Without Sacrificing Flavor

    One thing I’ve come to appreciate about this recipe is how it stretches premium ingredients without breaking the bank. A pound of ground beef goes much further when distributed among these potato vessels, making this an economical option for feeding a family. The humble russet potato—often overlooked in our carb-conscious world—deserves its moment in the spotlight as the perfect vehicle for these flavors. I’ve found that even when I’m pinching pennies at the end of the month, I can still make this feel like a special treat by using whatever cheese and toppings I have on hand. The versatility is truly a budget-saver!

    Essential Tips & Tricks

    Perfecting Your Potato Base

    The foundation of an exceptional Cheeseburger Stuffed Tater is, unsurprisingly, the potato itself. I’ve learned through plenty of trial and error that baking time matters tremendously. For that ideal crispy exterior and fluffy interior, rub your potatoes with olive oil and sea salt before baking at 400°F for about an hour. The skin should crackle slightly when pressed. Don’t rush the cooling process before cutting and scooping—about 10 minutes prevents burnt fingers and potato collapse. I like to leave about ¼-inch of potato flesh attached to the skin to maintain structural integrity. These little details make all the difference between a soggy disappointment and a crispy, perfect potato vessel.

    Seasoning Secrets for the Ultimate Flavor

    The magic of these stuffed taters lies in treating the beef filling exactly like you would a premium burger patty. I always start with a hot skillet to develop those flavorful browned bits before adding my signature blend of seasonings: garlic powder, onion powder, Worcestershire sauce, and a touch of mustard powder. Don’t forget to taste and adjust before stuffing! The cheese selection matters too—I recommend a combination of sharp cheddar for flavor and American or Monterey Jack for that quintessential melt factor. Remember that potatoes naturally need more salt than you might expect, so be generous with your seasoning at every stage.

    Serving Ideas & Creative Variations

    Topping Bar for Customized Creations

    Set up a DIY topping station and watch your family or guests get creative with their Cheeseburger Stuffed Taters! I arrange small bowls with diced tomatoes, shredded lettuce, pickles, diced onions, bacon bits, and sliced jalapeños. Don’t forget the sauces—ketchup, mustard, mayo, and my homemade “special sauce” (equal parts mayo, ketchup, and relish with a splash of pickle juice). This interactive approach makes dinner more fun and ensures everyone gets exactly what they want. I’ve noticed kids especially love building their own creation, and it’s a sneaky way to get them excited about vegetables they might otherwise avoid.

    Global-Inspired Variations

    Take your Cheeseburger Stuffed Taters on a world tour by incorporating international flavors! Try a Mediterranean twist with ground lamb, feta cheese, diced cucumbers, and tzatziki sauce. For Mexican-inspired taters, use taco-seasoned beef, pepper jack cheese, and top with guacamole, sour cream, and pico de gallo. My personal favorite is the Italian variation with ground Italian sausage, mozzarella, marinara, and fresh basil. The possibilities are truly endless! These variations have become my secret weapon for refreshing leftovers—the same base ingredients transformed into something that feels completely new the next night.

    Storage & Troubleshooting Guide

    Make-Ahead and Freezing Instructions

    These Cheeseburger Stuffed Taters are perfect for meal prep enthusiasts! Prepare the potatoes and filling separately up to two days ahead and store in the refrigerator. For longer storage, assemble the stuffed potatoes without toppings, wrap individually in plastic wrap, then foil, and freeze for up to three months. When ready to enjoy, thaw overnight in the refrigerator and bake at 350°F for 20-25 minutes until heated through. Add fresh toppings after reheating. I’ve found that freezing them individually lets me pull out just what I need for quick weeknight dinners when I’m too tired to cook from scratch.

    Troubleshooting Common Issues

    If your potato skins turn out too soft rather than crispy, try brushing with oil and placing them under the broiler for 2-3 minutes after the initial bake. For filling that seems dry after reheating, add a tablespoon of beef broth or a small pat of butter before returning to the oven. If cheese isn’t melting properly, cover with foil for the first part of the reheating process to trap heat. For potatoes that won’t stand upright, create a small aluminum foil ring as a base, or slice a thin piece off the bottom to create a flat surface. These simple fixes have saved many of my potato creations from disaster!

    Frequently Asked Questions

    Can I make Cheeseburger Stuffed Taters with sweet potatoes instead?

    Absolutely! Sweet potatoes add a delicious contrast to the savory beef filling. Just increase the baking time by about 10-15 minutes as sweet potatoes often take longer to soften completely.

    What’s the best cheese to use for Cheeseburger Stuffed Taters?

    A combination works best—sharp cheddar provides flavor while American or Monterey Jack delivers that creamy melt. For extra indulgence, add a spoonful of cream cheese to the potato mixture.

    Can I prepare these ahead of time for a party?

    Yes! Bake potatoes and prepare filling up to two days ahead. Store separately in the refrigerator. Assemble and bake for 15-20 minutes at 350°F just before serving.

    How do I prevent the potato skins from becoming too soft?

    Rub potatoes with olive oil and salt before baking, then bake at high heat (400°F). After scooping, brush the insides with butter and broil for 2 minutes before filling.

    What can I do with the scooped-out potato flesh?

    Mix it with butter, sour cream, cheese, and seasonings, then either blend into your beef mixture or save it for shepherd’s pie, potato soup, or breakfast hash the next day.

    Final Thoughts

    These Cheeseburger Stuffed Taters have become my go-to recipe when I want to impress without spending hours in the kitchen. There’s something magical about the way the crispy potato cradles the savory beef and melty cheese, creating the perfect bite every time. I love watching faces light up when I bring these to the table—they’re both familiar and exciting at the same time. Whether you’re feeding picky eaters, hosting a game day gathering, or simply craving comfort food, these stuffed taters deliver satisfaction in every bite. Don’t forget to check out more delicious potato creations on Pinterest!

  • Homemade Beefaroni Recipe That Will Melt Your Heart in Minutes

    Homemade Beefaroni Recipe That Will Melt Your Heart in Minutes

    Homemade Beefaroni Recipe That Will Melt Your Heart in Minutes

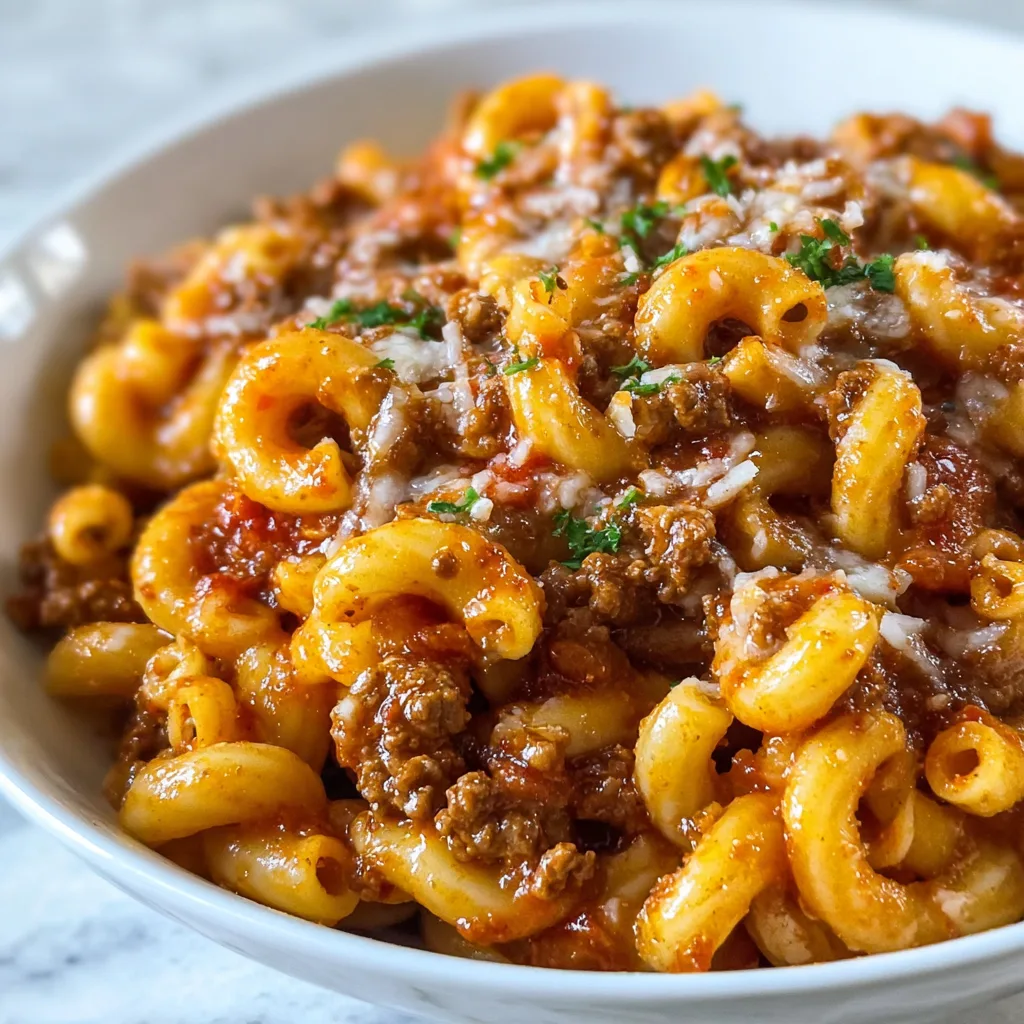
    Homemade Beefaroni Recipe brings back those nostalgic childhood flavors but elevates them with real ingredients and heartwarming homemade goodness. I still remember my mom making this on chilly autumn evenings, the aroma of simmering beef and tomatoes filling our kitchen while I did homework at the counter. There’s something magical about transforming simple pantry staples into a comforting meal that wraps you in a warm hug with every bite. This dish strikes the perfect balance between quick convenience and made-from-scratch satisfaction that even picky eaters will devour.

    Recipe

    Why You’ll Love This Homemade Beefaroni Recipe

    Perfect Weeknight Comfort Food

    This homemade beefaroni recipe is the ultimate time-saving solution for busy evenings when you need dinner on the table without sacrificing flavor. I’ve perfected this one-pot wonder through countless test runs (my kids never complained about being taste-testers!). The rich tomato sauce coats each pasta piece perfectly, while the seasoned ground beef adds satisfying protein. Unlike the canned version, you control the ingredients—meaning deeper flavor, better texture, and the perfect amount of cheese that stretches into those irresistible strands when you take your first bite.

    Budget-Friendly Family Pleaser

    If you’re looking to stretch your grocery budget without compromising on taste, this homemade beefaroni recipe deserves a permanent spot in your meal rotation. It uses affordable ingredients that transform into something truly special. One pound of ground beef easily feeds a family of 4-6, especially when bulked up with pasta and sauce. The leftovers taste even better the next day as the flavors continue to meld overnight in the refrigerator. My family actually requests this meal specifically when we need to tighten our food spending—it’s that satisfying without breaking the bank!

    Essential Tips & Tricks

    Perfecting Your Pasta

    The key secret to exceptional homemade beefaroni is cooking your pasta properly. Always cook it 1-2 minutes less than the package directions suggest since it will continue cooking in the sauce. I’ve learned through many batches that elbow macaroni works best for authentic texture, but small shells or rotini can add fun variety. Salt your pasta water generously—it should taste like the sea! This single step elevates the entire dish by seasoning the pasta from within. Remember to reserve about ½ cup of that starchy pasta water before draining; it contains magic that helps bind your sauce to every noodle.

    Building Flavor Layers

    Don’t rush the flavor-building process when making homemade beefaroni. Start by sautéing diced onions until translucent before adding your ground beef. This creates a foundation of sweetness that balances the acidity of tomatoes. When browning your beef, let it develop some caramelization for deeper flavor—resist the urge to constantly stir! Add minced garlic only for the last 30 seconds to prevent burning. For an elevated touch that reminds me of my grandmother’s Italian recipes, incorporate a tablespoon of tomato paste and let it cook until it darkens slightly before adding your sauce ingredients.

    Serving Ideas & Creative Variations

    Perfect Pairings

    Serve your homemade beefaroni with a simple side salad dressed with vinaigrette to cut through the richness. My family loves it with garlic bread for scooping up extra sauce—I make quick garlic butter by mixing softened butter with minced garlic, parsley, and a pinch of salt. For a complete meal that feels special, roast some broccoli or asparagus with olive oil and lemon while the beefaroni simmers. The slight bitterness of green vegetables provides the perfect contrast to the savory pasta. During summer months, I serve it with sliced fresh tomatoes sprinkled with basil—the cool, bright flavor complements the warm, hearty pasta dish beautifully.

    Creative Twists

    Transform your basic homemade beefaroni recipe into something extraordinary with a few creative additions. Try incorporating a cup of roasted red peppers for sweetness and color, or stir in a handful of baby spinach just before serving for a nutritional boost that wilts perfectly into the hot mixture. For a Mexican-inspired version, add a tablespoon of taco seasoning to the beef and top with avocado and cilantro. My personal favorite variation includes adding mushrooms sautéed with thyme—they add an earthy dimension that elevates the entire dish. For special occasions, consider stirring in some ricotta or cream cheese for an extra creamy texture.

    Storage & Troubleshooting Guide

    Proper Storage Techniques

    Store leftover homemade beefaroni in airtight containers in the refrigerator for up to 4 days. The flavors actually improve overnight as they meld together! For longer storage, freeze in portion-sized containers for up to 3 months—this has saved me on countless busy weeknights. When freezing, slightly undercook the pasta to prevent mushiness when reheating. Allow the dish to cool completely before transferring to storage containers, but don’t leave it at room temperature for more than 2 hours. For meal prep, consider making a double batch specifically for freezing—future you will be incredibly grateful for the homemade convenience food waiting in your freezer.

    Fixing Common Issues

    If your homemade beefaroni sauce seems too watery, don’t panic! Simply simmer uncovered for 5-10 additional minutes to reduce and thicken the sauce. Conversely, if it’s too thick, add a splash of the reserved pasta water or beef broth to thin it to your desired consistency. For pasta that’s slightly overcooked, add a handful of fresh grated cheese and let it sit covered for 5 minutes—the absorption will help improve the texture. If your beefaroni lacks flavor depth, try adding a teaspoon of Worcestershire sauce or a pinch of red pepper flakes to wake up the taste buds. Remember that acidity balances richness, so a small splash of vinegar can revive a flat-tasting sauce.

    Frequently Asked Questions

    Can I make homemade beefaroni in advance?

    Yes! Prepare it up to 2 days ahead and refrigerate. The flavors actually improve overnight. Reheat gently on the stovetop with a splash of broth if needed to restore moisture.

    What pasta shape works best for this recipe?

    Traditional elbow macaroni creates the most authentic homemade beefaroni, but small shells, rotini, or penne work beautifully too. Choose shapes that trap the meaty sauce in their crevices.

    Can I substitute ground turkey for beef?

    Absolutely! Ground turkey, chicken, or even plant-based alternatives work well. If using leaner meats, add 1-2 tablespoons of olive oil to maintain moisture and richness.

    How can I make this recipe healthier?

    Use whole grain pasta, lean ground beef (90/10), and add extra vegetables like diced carrots, bell peppers, or zucchini. Reduce cheese slightly and add nutritional yeast for flavor.

    Can I make this in an Instant Pot?

    Yes! Brown meat using sauté function, add remaining ingredients including uncooked pasta, and cook on high pressure for 4 minutes with quick release. Stir in cheese after cooking.

    Final Thoughts

    This homemade beefaroni recipe represents everything I love about cooking—transforming simple ingredients into something that creates memories around the dinner table. The beauty lies in its versatility; make it exactly as written or customize it to your family’s preferences. I hope this becomes a staple in your meal rotation, bringing the same joy and satisfaction to your home that it has to mine. Don’t forget to share your creations on Pinterest and tag me—I’d love to see your personal spin on this beloved comfort food classic!

  • Authentic Moussaka Recipe: Greek Beef & Eggplant Lasagna Bliss

    Authentic Moussaka Recipe: Greek Beef & Eggplant Lasagna Bliss

    Authentic Moussaka Recipe: Greek Beef & Eggplant Lasagna Bliss

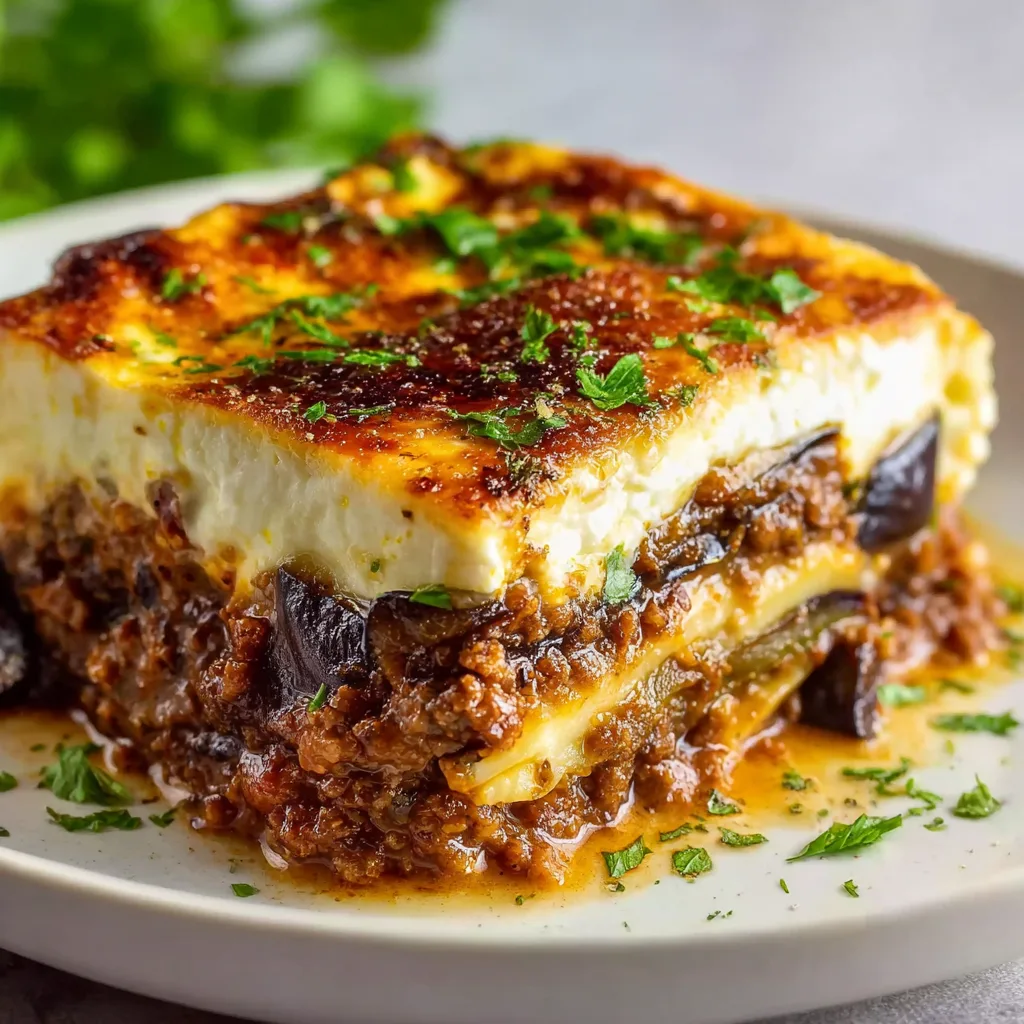
    Authentic Moussaka Greek Beef And Eggplant Lasagna brings the Mediterranean sunshine straight to your dinner table with layers of tender eggplant, seasoned ground beef, and a velvety béchamel topping. The first time I made this dish, the aromas of cinnamon, oregano, and garlic transported me straight to a little taverna overlooking the Aegean Sea. While it might look intimidating with its multiple components, I promise the effort delivers a soul-satisfying meal that’ll have everyone at your table closing their eyes in pure bliss with each bite. If you love dishes with depth and character, this Greek classic deserves a permanent spot in your recipe collection.

    Recipe

    Why You’ll Love This Authentic Moussaka Greek Beef And Eggplant Lasagna

    A Perfect Make-Ahead Dinner Party Star

    There’s something magical about pulling a bubbling moussaka from the oven just as guests arrive. The golden, slightly puffed béchamel crust never fails to impress, and the complex flavor profile develops even more when made a day ahead. I’ve served this at countless dinner parties, and it’s always met with wide eyes and requests for seconds. The layers create such a beautiful cross-section on the plate—the browned eggplant, the rich meat sauce with hints of warm spices, and that creamy topping that brings everything together. It’s sophisticated comfort food at its finest.

    Healthier Than Traditional Lasagna

    While traditional Italian lasagna is delicious (and I make a mean version of that too!), moussaka offers a lighter alternative without sacrificing satisfaction. Swapping pasta sheets for sliced eggplant reduces carbs significantly and adds a wonderful veggie component. The eggplant’s slight sweetness after roasting perfectly complements the savory meat sauce. I love how the vegetables absorb all those amazing flavors while maintaining their integrity. And that protein-rich béchamel topping, enriched with eggs and nutmeg, creates a custard-like finish that’s somehow both lighter and more luxurious than cheese-heavy lasagna toppings.

    Essential Tips & Tricks

    Perfecting the Eggplant Layer

    The foundation of great moussaka lies in properly preparing the eggplant. Salt your slices and let them sit for 30 minutes to draw out bitter juices—this step is non-negotiable! After patting them dry, I prefer roasting over frying; it uses less oil and creates better texture. Arrange them in a single layer on parchment-lined baking sheets, brush lightly with olive oil, and roast at 425°F for about 20 minutes until golden. This method ensures they’ll be tender but not mushy in the final dish, similar to how I prepare eggplant for my Greek Turkey Meatballs with Lemon Herb Rice.

    Creating a Flavor-Packed Meat Sauce

    The meat sauce is where your moussaka’s personality shines through. Start by sautéing onions until translucent before adding garlic and ground beef. Once browned, the magic happens: a splash of red wine to deglaze (watch that satisfying sizzle!), followed by tomato paste, canned crushed tomatoes, and the signature spice blend. Cinnamon, oregano, allspice, and a bay leaf create that distinctive Greek flavor profile. Let it simmer until thickened—at least 20 minutes. The sauce should be rich but not soupy, as excess liquid can make your moussaka watery.

    Serving Ideas & Creative Variations

    Mediterranean-Inspired Sides

    Moussaka is substantial enough to be a meal on its own, but I love serving it with simple, fresh accompaniments. A crisp Greek salad with juicy tomatoes, cucumber, red onion, kalamata olives, and feta cheese provides the perfect contrast to the rich main dish. For bread, skip the Italian garlic bread and opt for warm pita or a crusty country loaf drizzled with olive oil. A side of tzatziki adds a cool, tangy element that cuts through the richness. For a complete Mediterranean feast, consider starting with Crispy Feta Fried Eggs as an appetizer.

    Regional Adaptations Worth Trying

    While this recipe stays true to classic Greek moussaka, regional variations offer delicious twists. For a Turkish-inspired version, add a layer of sliced potatoes at the bottom and incorporate lamb instead of beef. The Bulgarian variation includes a layer of thinly sliced zucchini, which adds a subtle sweetness. For a lighter version, try a vegetarian adaptation using lentils or a plant-based meat substitute in place of beef. I’ve even made a deconstructed version, serving the components in individual ramekins for an elegant presentation that preserves all the flavors while creating a modern twist.

    Storage & Troubleshooting Guide

    Freezing and Reheating For Best Results

    Moussaka is a freezer-friendly dish that actually improves with time. After baking, let it cool completely before covering tightly with foil and freezing for up to three months. When ready to enjoy, thaw overnight in the refrigerator, then reheat covered at 350°F for about 30-40 minutes until the center reaches 165°F. For individual portions, microwave on medium power with a damp paper towel over the top to prevent drying. The béchamel may separate slightly upon reheating, but the flavor remains outstanding—sometimes even better as the spices have more time to meld.

    Solving Common Moussaka Mishaps

    The most frequent issue with moussaka is excess moisture, resulting in a soupy final dish. To prevent this, ensure you’ve thoroughly salted and dried your eggplant before assembly. If your meat sauce seems too liquid, simmer it longer uncovered or add a tablespoon of tomato paste to thicken. For béchamel that’s too thin, cook it a bit longer until it coats the back of a spoon. If your top browns too quickly before the center is hot, cover loosely with foil. Remember that moussaka needs to rest 15-20 minutes after baking—this crucial step allows it to set properly for those picture-perfect slices.

    Frequently Asked Questions

    What makes Authentic Moussaka Greek Beef And Eggplant Lasagna different from Italian lasagna?

    Moussaka uses eggplant instead of pasta sheets, features warm spices like cinnamon and allspice in the meat sauce, and tops everything with a béchamel custard rather than mozzarella cheese. These elements create a distinctly Greek flavor profile.

    Can I make moussaka ahead of time?

    Absolutely! Assemble it up to two days ahead and refrigerate unbaked. You can also bake it, cool completely, and refrigerate for up to three days. The flavors actually improve with time.

    Is there a way to make this vegetarian?

    Yes! Replace the beef with a mixture of lentils and mushrooms or a plant-based meat substitute. Keep the same spice profile for authentic flavor. The béchamel can be made with plant-based milk and butter.

    Why did my béchamel sauce curdle?

    Curdling typically happens when the sauce is heated too quickly or the eggs are added all at once. Whisk constantly while cooking and temper the eggs by adding a little hot sauce to them before incorporating them back.

    How do I know when my moussaka is done baking?

    The top should be golden brown and slightly puffed, and a knife inserted in the center should come out hot. The internal temperature should reach 165°F, and the edges should be bubbling slightly.

    Final Thoughts

    Authentic Moussaka Greek Beef And Eggplant Lasagna represents the best of Mediterranean cooking—layers of flavor, thoughtful preparation, and a stunning presentation that brings people together. Each time I make it, I’m reminded why certain dishes become classics; they tell a story through ingredients and technique that transcends trends. The combination of silky eggplant, aromatic meat sauce, and that crowning glory of béchamel creates something truly special. Share your moussaka creations with me on Pinterest and enjoy the journey to Greece through your kitchen!