Blog

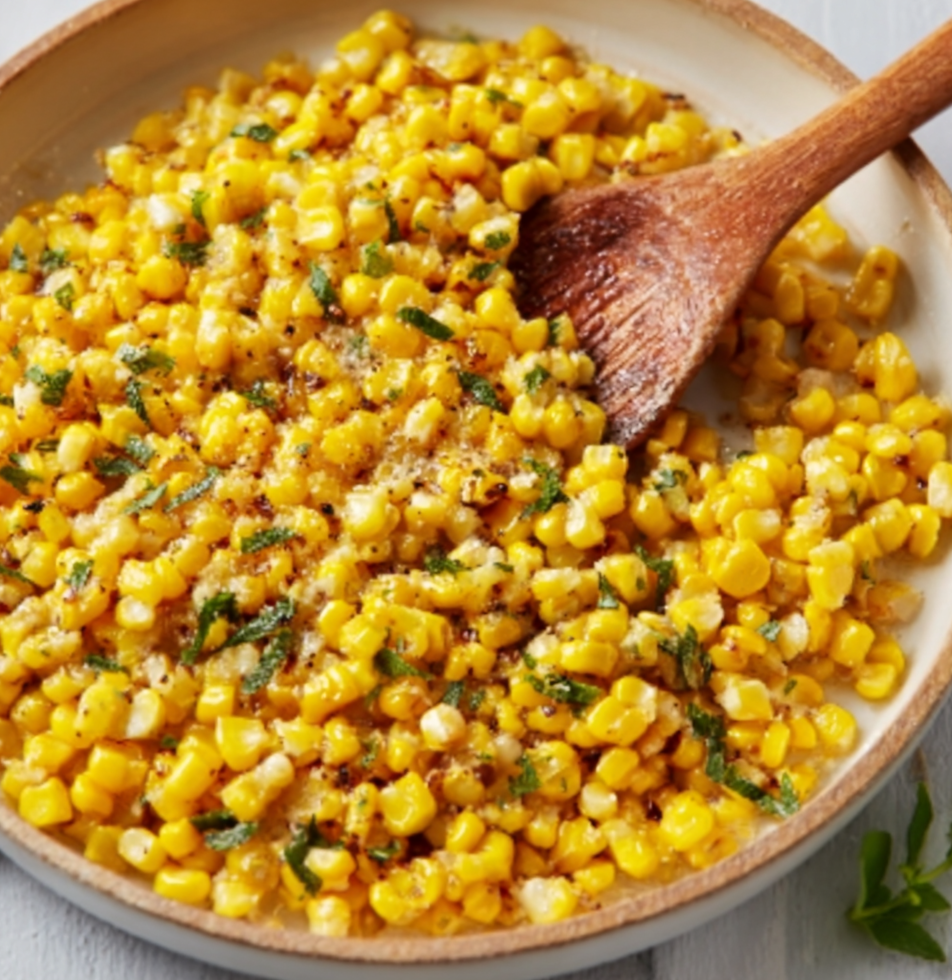
  • Honey Butter Skillet Corn Recipe: Irresistibly Sweet & Savory Delight!

    Honey Butter Skillet Corn Recipe: Irresistibly Sweet & Savory Delight!

    Honey Butter Skillet Corn Recipe: Irresistibly Sweet & Savory Delight!

    There’s something magical about that first bite of Honey Butter Skillet Corn – the way the sweet kernels burst with sunshine flavor, mingling with melted butter and a kiss of honey that makes your taste buds dance. I discovered this recipe during a summer cookout at my sister’s farm, where we shucked fresh corn under the shade of her oak tree, laughing as the silk threads stuck to our fingers. This simple side dish transforms ordinary corn into something extraordinary, requiring just a handful of ingredients and about 15 minutes of your time. Perfect for busy weeknights or holiday gatherings, this skillet corn recipe will become your new go-to veggie side that everyone reaches for first.

    Recipe

    Why You’ll Love This Honey Butter Skillet Corn Recipe

    Quick Comfort Food With Maximum Flavor

    This honey butter skillet corn brings comfort food vibes without hours of preparation. The magic happens when those corn kernels start to caramelize slightly in the butter, creating little pockets of golden goodness that burst with sweetness. I love how the honey doesn’t just add sweetness but creates a light glaze that clings to each kernel. The beauty lies in its simplicity – just corn, butter, honey, and a few seasonings, yet the result tastes like you’ve been cooking all day. Even on my most exhausted weeknights, I can pull this together and feel like I’ve created something special.

    Versatile Year-Round Side Dish

    One of the reasons this honey butter skillet corn has become a staple recipe in my kitchen is its incredible versatility. In summer, nothing beats using fresh sweet corn cut straight from the cob, but I’ve made this countless times in winter using frozen corn with equally delicious results. It pairs beautifully with everything from grilled chicken to flank steak fajitas to holiday ham. I’ve served it at casual BBQs and elegant dinner parties, and the plate always comes back empty. The recipe easily scales up for crowds or down for a cozy dinner for two.

    Essential Tips & Tricks

    Selecting & Preparing Your Corn

    The foundation of amazing honey butter skillet corn starts with choosing the right corn. When using fresh, look for bright green husks that feel slightly damp and silks that are pale and sticky. The kernels should be plump and tightly packed when you peek inside. For the best flavor development, pat your corn kernels completely dry before adding them to the skillet – this ensures proper caramelization instead of steaming. If using frozen corn (which works beautifully), don’t thaw it first; add it directly to the hot skillet and let it cook a minute longer to evaporate excess moisture.

    Perfecting the Honey Butter Balance

    The magic ratio I’ve found after countless batches is 3 tablespoons of butter to 2 tablespoons of honey for every 4 cups of corn. This creates the perfect balance where neither flavor overwhelms the other. When adding the honey, reduce the heat slightly to prevent burning, as honey can caramelize quickly. For an extra dimension of flavor, try browning the butter first until it smells nutty and turns amber – this adds incredible depth to the final dish. For special occasions, I sometimes stir in a tablespoon of authentic pico de gallo right at the end for a sweet-savory contrast that’s absolutely irresistible.

    Serving Ideas & Creative Variations

    Complementary Main Dishes

    This honey butter skillet corn shines brightest when paired with proteins that have complementary flavors. I love serving it alongside grilled chicken brushed with a honey-mustard glaze or next to a juicy pork tenderloin. The sweet notes in the corn balance beautifully with smoky flavors from the grill. For a complete meal that feels cohesive, try it with low-carb Italian grinder salad – the tangy vinaigrette creates a perfect contrast to the corn’s sweetness. During holiday gatherings, this corn steals the spotlight from traditional green bean casserole, offering a bright pop of color and flavor.

    Flavor Twists and Add-Ins

    The beauty of this honey butter skillet corn recipe is how easily it transforms with simple additions. For a Mexican-inspired variation, stir in a pinch of chili powder, lime zest, and crumbled cotija cheese just before serving. When I’m craving something creamy, I fold in 2 tablespoons of cream cheese at the end of cooking, creating a luscious sauce that clings to every kernel. For a flavor explosion, try adding crispy bacon bits and a handful of sliced green onions. My personal favorite twist is stirring in a tablespoon of fresh herbs – basil in summer or sage in fall – to add a fragrant dimension that elevates this simple side dish.

    Storage & Troubleshooting Guide

    Proper Storage for Maximum Freshness

    Leftover honey butter skillet corn maintains its delicious flavor when stored properly. Allow it to cool completely before transferring to an airtight container – this prevents condensation that could make it soggy. Refrigerate for up to 3 days for optimal taste. When reheating, add a small pat of butter to the skillet first to refresh the flavor and prevent sticking. For meal prep, I often make a double batch and portion it into containers alongside protein for easy lunches. Surprisingly, this corn doesn’t freeze well after cooking – the texture becomes mealy – so I recommend enjoying it fresh or within those first few days.

    Common Issues and Easy Fixes

    If your honey butter skillet corn isn’t caramelizing properly, the most likely culprit is excess moisture. Make sure your skillet is hot enough before adding the corn, and don’t overcrowd the pan. If using frozen corn, you might need an extra minute or two of cooking time to evaporate the additional moisture. If the honey is burning rather than creating a nice glaze, your heat is too high – dial it back to medium-low when adding the honey. Sometimes the dish can turn out too sweet; balance this by adding a squeeze of fresh lemon juice or a pinch of salt to create the perfect harmony of flavors.

    Frequently Asked Questions

    Can I make honey butter skillet corn with frozen corn?

    Absolutely! Frozen corn works beautifully in this recipe. Add it directly to the hot skillet without thawing and cook for about 1-2 minutes longer to evaporate excess moisture. The results are nearly identical to fresh corn.

    How can I tell when my honey butter skillet corn is done cooking?

    Look for slight caramelization on some kernels and a glossy appearance from the honey-butter coating. The corn should be tender-crisp, not mushy. This typically takes 6-8 minutes of cooking over medium heat.

    Can I make this honey butter skillet corn recipe ahead of time for a party?

    Yes, but it’s best served within an hour of cooking. Keep it warm in a slow cooker on the lowest setting, adding a small pat of butter before serving to refresh the glaze.

    What’s the best type of honey to use for this recipe?

    I prefer light, floral honeys like clover or orange blossom that won’t overpower the corn’s natural sweetness. Avoid strongly flavored varieties like buckwheat unless you want that robust flavor to dominate.

    Is there a dairy-free alternative for making honey butter skillet corn?

    Certainly! Substitute the butter with a high-quality plant-based butter or even coconut oil for a subtle tropical twist. The honey and corn still create that wonderful sweet glaze you’re looking for.

    Final Thoughts

    This honey butter skillet corn recipe has become my secret weapon for transforming ordinary meals into memorable ones. There’s something about its sweet, buttery goodness that makes everyone at the table pause and ask, “What did you do to this corn?” I love how it bridges seasons and occasions, bringing a touch of sunshine and comfort to everything from summer BBQs to holiday feasts. Don’t forget to check out more side dish inspiration on our Pinterest page for creative pairings. With just a few ingredients and minutes, you can create a side dish that often becomes the star of the show.
  • Creamy Sun Dried Tomato Pappardelle: Comfort in Every Bite!

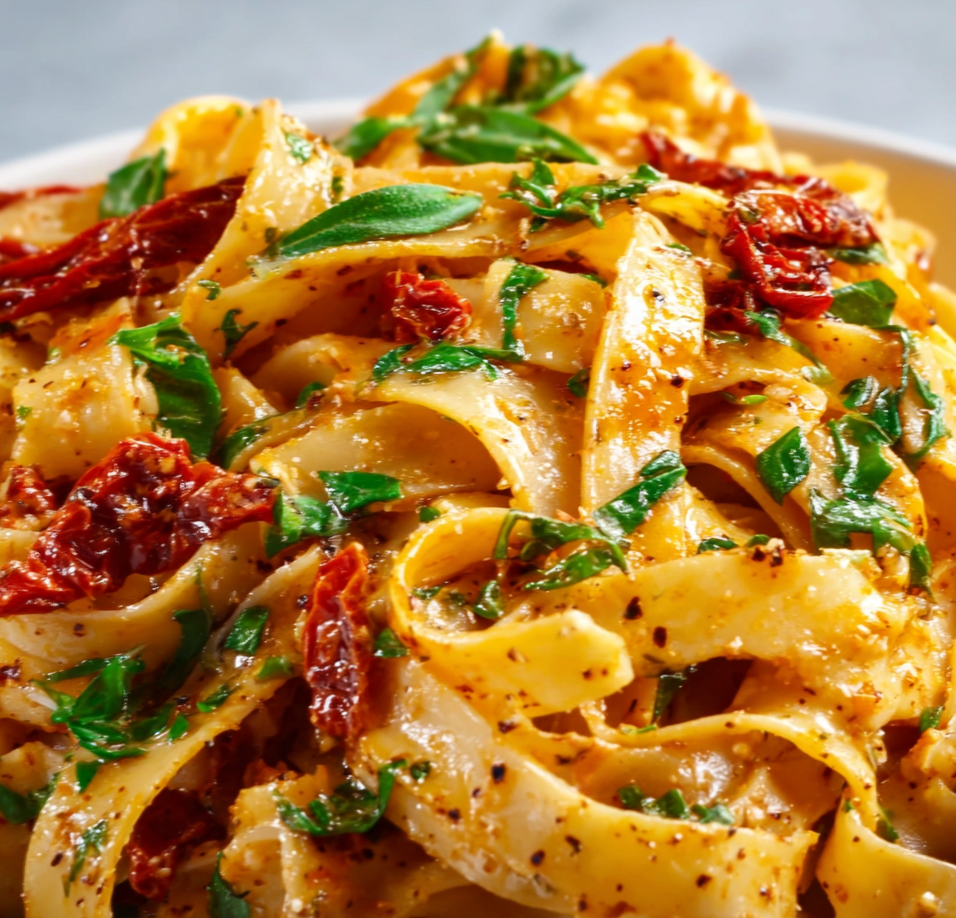
    Creamy Sun Dried Tomato Pappardelle: Comfort in Every Bite!

    Creamy Sun Dried Tomato Pappardelle: Comfort in Every Bite!

    Creamy Sun Dried Tomato Pappardelle is one of those dishes that makes me feel like I’ve transported my kitchen straight to a cozy Italian trattoria. The first time I made this luxurious pasta, my whole apartment filled with the most incredible aroma of garlic, herbs, and those intensely flavored sun-dried tomatoes. There’s something magical about how the wide, silky pappardelle ribbons catch every bit of that velvety sauce. If you’re looking for a restaurant-worthy pasta that’s surprisingly simple to create at home, this recipe deserves a special place in your dinner rotation.

    Recipe

    Why You’ll Love This Creamy Sun Dried Tomato Pappardelle

    A Symphony of Rich Flavors

    The beauty of Creamy Sun Dried Tomato Pappardelle lies in its perfect balance of bold and comforting flavors. Sun-dried tomatoes bring an intense, sweet-tart punch that transforms an ordinary cream sauce into something extraordinary. I love how they rehydrate slightly in the sauce, becoming tender while infusing everything with their concentrated tomato essence. The garlic and herbs create a fragrant base, while a touch of white wine adds complexity. When these elements meld with the cream, they create a sauce that clings beautifully to those wide pappardelle ribbons, ensuring every bite delivers maximum flavor.

    Impressive Yet Effortless

    Don’t let the elegant appearance fool you – this Creamy Sun Dried Tomato Pappardelle is remarkably straightforward to prepare. The sauce comes together in about the same time it takes to boil your pasta, making it perfect for both weeknight dinners and special occasions. I still remember serving this to friends who assumed I’d spent hours in the kitchen, when really, it was ready in under 30 minutes! The ingredient list is refreshingly short, focusing on quality components that do the heavy lifting flavor-wise. Even if you’re new to making cream-based pasta sauces, this recipe is forgiving and consistently delivers impressive results.

    Essential Tips & Tricks

    Perfecting Your Pasta

    Achieving the ideal texture for your pappardelle is crucial to this dish’s success. I always recommend cooking it just shy of al dente – about 1 minute less than the package instructions suggest. The pasta will continue cooking slightly when tossed with the hot sauce. Reserve about 1/2 cup of that starchy pasta water before draining; it contains valuable starches that help the sauce adhere to the pasta. If you can’t find pappardelle, fettuccine or tagliatelle make excellent substitutes. The wide, flat shape is ideal for capturing the creamy sauce and bits of sun-dried tomato, creating that perfect bite every time.

    Sauce Secrets for Maximum Flavor

    The heart of this dish is undoubtedly the luscious sauce, and a few simple techniques will elevate it to restaurant quality. Start by infusing your oil with minced garlic over medium-low heat – this builds a flavorful foundation without burning the garlic. When adding the sun-dried tomatoes, I like to chop some finely and leave others in larger pieces for textural contrast. For the creamiest results, bring your heavy cream to room temperature before adding it to the pan, which prevents it from breaking. A final splash of acidity from lemon juice or a touch more white wine just before serving brightens all the flavors.

    Serving Ideas & Creative Variations

    Perfect Pairings

    Creamy Sun Dried Tomato Pappardelle shines as a main course, but thoughtful accompaniments can create a truly memorable meal. I love serving it with a simple arugula salad dressed with lemon and olive oil – the peppery greens and bright acidity perfectly balance the pasta’s richness. For protein, grilled chicken or sautéed shrimp nestle beautifully alongside or atop the pasta. A piece of crusty bread for sauce-mopping is practically mandatory! For wine pairing, reach for a crisp Pinot Grigio or a light Chardonnay that won’t overwhelm the delicate cream sauce but stands up to the sun-dried tomato intensity.

    Exciting Twists on the Classic

    While the traditional recipe is divine, this versatile dish welcomes creative adaptations. Try adding sautéed mushrooms for earthy depth or baby spinach for color and nutrition. For a protein boost, crispy pancetta or crumbled Italian sausage transform it into a heartier meal. Experiment with different herbs – basil is classic, but thyme or oregano offer interesting variations. For a lighter version, substitute half the cream with chicken broth or pasta water. My personal favorite twist is adding a handful of toasted pine nuts for unexpected crunch and a subtle nutty flavor that complements the sun-dried tomatoes beautifully.

    Storage & Troubleshooting Guide

    Keeping It Fresh

    Properly stored, Creamy Sun Dried Tomato Pappardelle makes excellent leftovers for 2-3 days. Transfer cooled pasta to an airtight container and refrigerate promptly. When reheating, add a splash of cream or milk to revitalize the sauce, as it tends to thicken when chilled. Warm gently over medium-low heat, stirring frequently to prevent sticking. I don’t recommend freezing this dish, as cream-based sauces can separate and the pasta texture suffers. For meal prep, consider making the sauce ahead and refrigerating separately from freshly cooked pasta – this preserves the perfect texture and makes for quick assembly.

    Fixing Common Challenges

    Even experienced cooks occasionally encounter issues with cream sauces. If your sauce seems too thin, continue simmering gently until it reaches your desired consistency. Conversely, if it’s too thick, gradually add reserved pasta water until it loosens. Should your sauce break or appear grainy, lower the heat immediately and whisk in a tablespoon of cold cream. For a sauce that lacks punch, sun-dried tomato oil, a pinch of red pepper flakes, or a few drops of balsamic vinegar can intensify the flavor. Remember that pappardelle can stick together easily – toss it with a bit of olive oil if not adding to the sauce right away.

    Frequently Asked Questions

    Can I make Creamy Sun Dried Tomato Pappardelle ahead of time?

    Yes! Prepare the sauce up to 2 days ahead and refrigerate. Cook fresh pasta just before serving and combine with reheated sauce, adding a splash of cream to refresh the consistency.

    What can I substitute for pappardelle?

    Fettuccine, tagliatelle, or even wide egg noodles work beautifully. The key is choosing a pasta with enough surface area to hold the creamy sauce.

    Is there a dairy-free version of this recipe?

    Absolutely. Use full-fat coconut milk or cashew cream instead of heavy cream. The flavor profile will shift slightly, but it remains delicious.

    How can I add protein to my Creamy Sun Dried Tomato Pappardelle?

    Grilled chicken, sautéed shrimp, or Italian sausage make excellent additions. For vegetarian options, try white beans or pan-fried tofu.

    What herbs work best with this dish?

    Fresh basil is classic, but thyme, oregano, or parsley all complement the sun-dried tomatoes beautifully. Use what you have on hand!

    Final Thoughts

    There’s something truly special about twirling a fork through ribbons of Creamy Sun Dried Tomato Pappardelle. It’s one of those dishes that feels like a warm hug at the end of a long day—comforting yet sophisticated, simple yet impressive. The contrast between the silky sauce and the chewy pasta creates a textural experience that keeps you coming back for just one more bite. Whether you’re cooking for someone special or simply treating yourself, this pasta delivers restaurant-worthy results from your own kitchen. Find more pasta inspiration on Pinterest and happy cooking!

  • Chicken Blueberry Feta Salad Recipe: Fresh, Tangy & Irresistible!

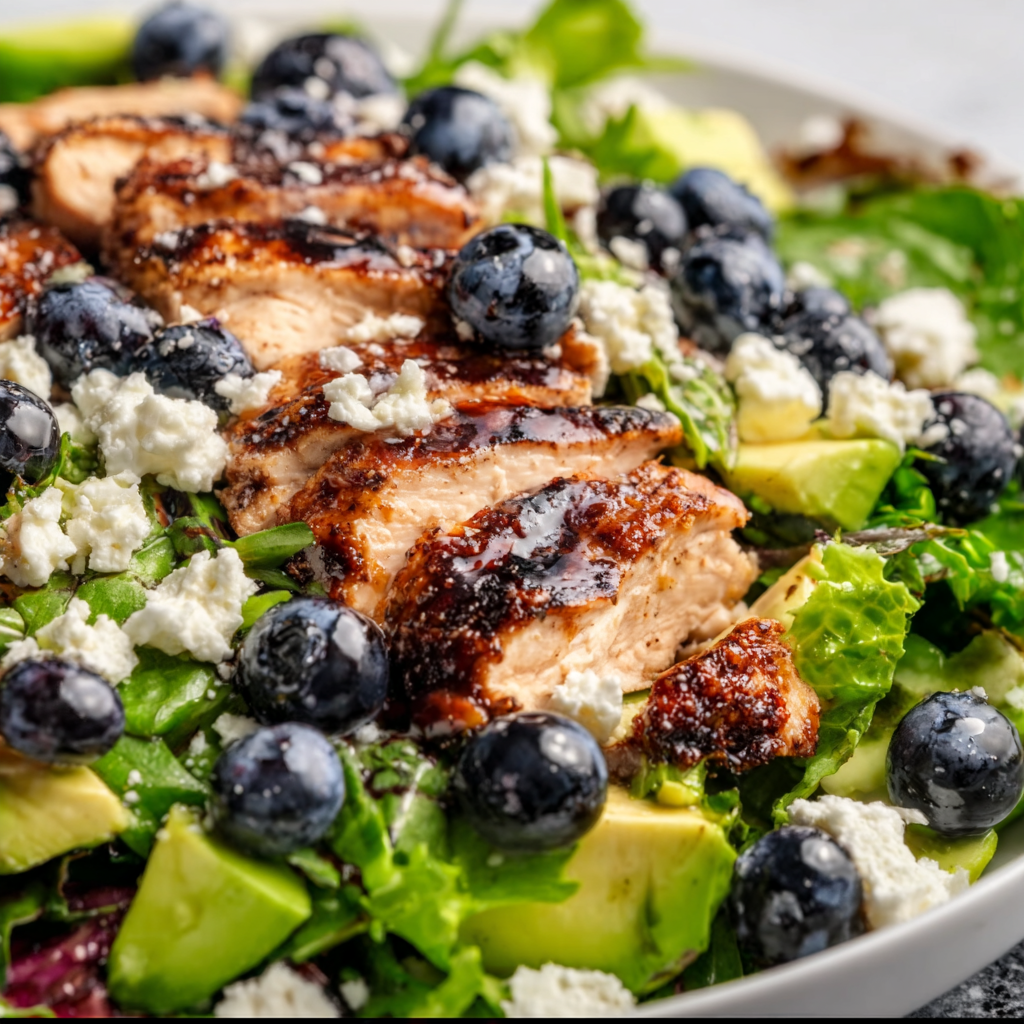
    Chicken Blueberry Feta Salad Recipe: Fresh, Tangy & Irresistible!

    Chicken Blueberry Feta Salad Recipe: Fresh, Tangy & Irresistible!

    The perfect Chicken Blueberry Feta Salad combines tender grilled chicken with sweet, juicy blueberries and tangy feta cheese to create a symphony of flavors that dance across your taste buds. Every time I make this salad, I’m transported back to summer evenings on my grandmother’s porch, where the scent of grilled chicken mingled with the sweet aroma of fresh berries. This refreshing dish strikes the perfect balance between protein-packed satisfaction and light, vibrant freshness—making it ideal for lunch, dinner, or even a show-stopping side at your next gathering. If you’re looking for a salad that’s both nutritious and utterly delicious, this colorful creation is about to become your new favorite.

    Recipe

    Why You’ll Love This Chicken Blueberry Feta Salad

    A Perfect Balance of Flavors and Textures

    There’s something magical about the combination of savory grilled chicken, sweet blueberries, and tangy feta that creates an explosion of flavor in every bite. The chicken provides a hearty, protein-rich base while the blueberries burst with juicy sweetness that cuts through the richness. I still remember the first time I added blueberries to my salad—I was skeptical, but that first forkful had me completely hooked! The creamy feta adds a salty punch that ties everything together, while crisp greens and crunchy nuts create textural contrast that keeps your palate engaged from the first bite to the last.

    Nutrient-Dense and Satisfying

    This isn’t just any ordinary salad—it’s a nutrient powerhouse disguised as a gourmet meal. Blueberries are packed with antioxidants that support overall health, while the lean chicken breast delivers essential protein to keep you satisfied for hours. I started making this salad during my busy workweeks when I needed something that wouldn’t leave me hungry an hour later. The healthy fats from the olive oil dressing and nuts provide sustained energy, while the vibrant mix of greens delivers fiber and essential vitamins. It’s the rare combination of a dish that’s both incredibly delicious and nourishing for your body.

    Essential Tips & Tricks

    Chicken Preparation Secrets

    The key to the perfect Chicken Blueberry Feta Salad lies in how you prepare the chicken. I recommend marinating your chicken breasts for at least 30 minutes (though overnight works wonders) in a simple mixture of olive oil, lemon juice, garlic, and herbs. This ensures every bite is tender and flavorful. For the juiciest results, grill the chicken to an internal temperature of 165°F, then let it rest for 5-10 minutes before slicing. This resting period allows the juices to redistribute throughout the meat. If you’re short on time, you can use rotisserie chicken as a delicious shortcut—I’ve done this countless times for quick weeknight dinners.

    Blueberry Selection and Dressing Pairing

    Not all blueberries are created equal for this salad. Look for plump, firm berries with a deep blue color and slight silvery bloom—these indicate peak ripeness and flavor. I prefer fresh berries when in season, but frozen (thawed) blueberries work surprisingly well in winter months. For the dressing, a light honey-balsamic vinaigrette complements the sweet-tart profile of the berries perfectly. Whisk together 3 tablespoons olive oil, 1 tablespoon balsamic vinegar, 1 teaspoon honey, and a pinch of salt and pepper. The slight sweetness enhances the natural flavor of the blueberries while the acidity cuts through the richness of the feta and chicken.

    Serving Ideas & Creative Variations

    Seasonal Adaptations

    One of the reasons I return to this Chicken Blueberry Feta Salad again and again is its incredible versatility across seasons. In summer, I keep it light with baby spinach, fresh herbs, and a lemon vinaigrette. Come fall, I love swapping in heartier greens like kale or arugula and adding roasted butternut squash cubes. Winter calls for a warmer version—I’ll serve the chicken warm over the greens and add toasted pecans for extra comfort. Spring brings opportunities for tender young lettuces and fresh herbs like mint and basil. The blueberries and feta remain constant anchors, but these seasonal tweaks keep the salad exciting year-round.

    Entertaining and Meal Prep Options

    This salad has saved countless dinner parties and meal prep Sundays at my house. For entertaining, I arrange the components in sections on a large platter—it creates a stunning visual presentation that always impresses guests. Add small bowls of extra toppings like toasted almonds, crispy bacon bits, or additional berries so everyone can customize. For meal prep, keep the components separate: store the dressed greens, cooked chicken, blueberries, and feta in different containers. The morning of, I simply layer everything in a mason jar with dressing at the bottom, greens at the top. This method has given me restaurant-quality lunches all week without any soggy disappointments.

    Storage & Troubleshooting Guide

    Keeping Components Fresh

    The key to maintaining the vibrant flavors and textures in your Chicken Blueberry Feta Salad is proper storage of each component. Store cooked chicken in an airtight container in the refrigerator for up to 3 days—slice it just before serving to prevent it from drying out. Fresh blueberries should be kept unwashed in their original container or a paper towel-lined container to absorb excess moisture. Only wash them right before adding to your salad. For the greens, wrap them loosely in paper towels inside a partially open plastic bag to allow some airflow while preventing wilting. The feta cheese will stay freshest when stored in its original brine or submerged in water in an airtight container.

    Solving Common Salad Dilemmas

    Even the most experienced salad-makers encounter occasional challenges. If your greens are wilting faster than expected, try adding a paper towel to absorb excess moisture in your storage container. For chicken that turns out dry, slice it thinly and toss it with a little extra dressing before adding to the salad. If your blueberries aren’t as sweet as you’d hoped, macerate them in a teaspoon of honey for 10 minutes before adding to the salad—this brings out their natural sweetness. And if your feta is too salty, rinse it briefly under cold water and pat dry before crumbling. I’ve learned these tricks through plenty of trial and error in my own kitchen!

    Frequently Asked Questions

    Can I make Chicken Blueberry Feta Salad ahead of time?

    Yes, but store components separately. Prep chicken, wash greens, and mix dressing up to 3 days ahead. Combine everything just before serving to maintain optimal freshness and prevent soggy greens.

    What’s the best cheese substitute if I don’t have feta?

    Goat cheese provides similar tanginess with a creamier texture. Blue cheese offers more intensity, while ricotta salata gives a milder flavor with similar saltiness. Choose based on your preference for strength and creaminess.

    How can I make this Chicken Blueberry Feta Salad more filling?

    Add quinoa, farro, or wild rice for complex carbohydrates. Include avocado for healthy fats or chickpeas for extra protein and fiber. These additions transform it into a complete meal while maintaining the flavor profile.

    Are there vegetarian alternatives to chicken in this salad?

    Absolutely! Substitute with grilled halloumi cheese, marinated tofu, or tempeh. Roasted chickpeas also work wonderfully, providing protein and a satisfying crunch while complementing the blueberries and feta perfectly.

    What’s the best lettuce base for this salad?

    Mixed spring greens offer variety and texture. Baby spinach provides earthy notes that complement blueberries beautifully. Arugula adds peppery contrast to the sweet berries, while butter lettuce gives a tender, delicate base.

    Final Thoughts

    This Chicken Blueberry Feta Salad has become my go-to recipe for everything from quick lunches to impressive dinner parties. The vibrant colors, contrasting textures, and perfect balance of flavors make it so much more than just another salad. Every time I serve it, I’m reminded of how simple, fresh ingredients can create something truly extraordinary. Whether you’re a salad enthusiast or just beginning to explore beyond basic greens, this recipe deserves a special place in your collection. Don’t forget to share your beautiful creation on Pinterest to inspire others with this delightful combination!

  • High Protein Creamy Beef Pasta: Irresistibly Delicious & Easy!

    High Protein Creamy Beef Pasta: Irresistibly Delicious & Easy!

    High Protein Creamy Beef Pasta: Irresistibly Delicious & Easy!

    This high protein creamy beef pasta has become my weeknight salvation – rich, velvety sauce coating al dente pasta and savory ground beef that makes every bite pure comfort. I discovered this recipe during a particularly chaotic week when I needed something substantial yet quick. The first time I made it, the aroma filled my kitchen with that irresistible garlic-butter perfume that had my neighbor texting to ask what I was cooking! It’s become my go-to for meal prep because it reheats beautifully and keeps me satisfied through long afternoons. Perfect for busy professionals and fitness enthusiasts alike, this pasta delivers protein-packed indulgence without compromise.

    Recipe

    Why You’ll Love This High Protein Creamy Beef Pasta

    Perfect Balance of Nutrition and Flavor

    This pasta dish isn’t just delicious – it’s strategically designed to fuel your body. Each serving delivers approximately 25-30g of protein, making it ideal for muscle recovery or simply staying satisfied longer. I’ve carefully balanced the macronutrients so you’re getting complex carbs from the pasta, protein from the lean beef, and healthy fats from the creamy sauce. What I adore most is how the richness doesn’t leave you feeling heavy afterward. The sauce clings perfectly to each pasta ridge, creating that luxurious mouthfeel without overwhelming heaviness. It’s comfort food that loves you back!

    Quick Preparation for Busy Schedules

    On those nights when cooking feels impossible, this recipe is your saving grace. From pantry to plate in under 30 minutes, it’s faster than delivery and infinitely more satisfying. I’ve streamlined the process to minimize cleanup – everything happens in one pot, which means less time scrubbing and more time enjoying. The beauty lies in its simplicity: brown the beef, build the sauce, add pasta, and dinner’s ready! Even on my most exhausted evenings, I can manage this recipe without feeling overwhelmed. It’s become my Thursday night tradition when the week’s energy is waning but takeout isn’t calling my name.

    Essential Tips & Tricks

    Selecting the Right Ingredients

    The magic starts with choosing high-quality ground beef – I prefer 90/10 lean-to-fat ratio for the perfect balance of flavor without excessive grease. For pasta, select shapes with ridges or hollows like rigatoni, penne, or rotini that capture the creamy sauce in every bite. When building your sauce, don’t skimp on the real Parmesan – pre-grated varieties contain anti-caking agents that prevent proper melting. A splash of starchy pasta water creates silky texture without extra cream. I’ve found that adding a pinch of nutmeg enhances the creamy notes without anyone identifying what makes it taste so special!

    Mastering the Cooking Technique

    The difference between good and extraordinary pasta lies in the technique. Always salt your pasta water generously – it should taste like seawater for proper pasta flavor. When browning the beef, resist the urge to stir constantly; let it develop a caramelized crust for deeper flavor. For the creamiest sauce, reduce your heat before adding dairy components to prevent curdling. My game-changing tip: finish cooking the pasta directly in the sauce for the last 1-2 minutes, allowing it to absorb flavors while releasing starches that thicken the sauce naturally. This method creates that restaurant-quality texture that’ll have everyone asking for your secret! Check out more pasta perfection in my high protein ranch pasta salad recipe.

    Serving Ideas & Creative Variations

    Complementary Side Dishes

    Elevate your pasta experience with thoughtfully paired sides. A bright, acidic fresh Italian chopped salad provides the perfect contrast to the rich pasta. For something warm, consider roasted broccolini with lemon zest and red pepper flakes – the slight bitterness balances the creamy sauce beautifully. Garlic bread is non-negotiable in my house, perfect for capturing every last drop of sauce. For lighter options, I love serving this with quick-pickled vegetables; the vinegary crunch cuts through the richness. Remember that sides should complement rather than compete with your main dish – think contrast in texture, color, and flavor profiles.

    Customizing for Dietary Needs

    This versatile recipe adapts beautifully to various dietary requirements without sacrificing flavor. For gluten-free diners, simply swap in your favorite GF pasta – brown rice or chickpea varieties hold up exceptionally well. Dairy-sensitive? Replace heavy cream with full-fat coconut milk and nutritional yeast instead of Parmesan for that umami depth. To reduce carbs, try serving over roasted spaghetti squash or zucchini noodles. For extra vegetables, fold in wilted spinach, roasted cherry tomatoes, or sautéed mushrooms during the final minutes of cooking. The fundamental flavors remain intact while accommodating everyone at your table.

    Storage & Troubleshooting Guide

    Proper Storage for Maximum Freshness

    Store this pasta properly to enjoy it for days to come. Allow leftovers to cool completely before transferring to airtight containers – this prevents condensation that can make pasta soggy. Refrigerate for up to 4 days, but avoid freezing if possible as the creamy sauce can separate upon thawing. When reheating, add a splash of milk or broth to revive the sauce’s silky texture. For meal prep, consider slightly undercooking the pasta initially so it doesn’t become mushy when reheated. I like portioning individual servings in glass containers for grab-and-go lunches – a minute in the microwave with a teaspoon of water brings it back to life beautifully!

    Fixing Common Recipe Issues

    Even experienced cooks encounter challenges, but most are easily remedied. If your sauce looks curdled, lower the heat immediately and whisk in a tablespoon of cold cream to stabilize the emulsion. Sauce too thin? Create a slurry with a teaspoon of cornstarch dissolved in cold water and gradually incorporate while simmering. Conversely, if it’s too thick, thin with reserved pasta water rather than plain water to maintain flavor. Pasta overcooked? Transform it into a baked pasta dish with additional cheese on top. Beef too greasy? Drain excess fat before adding other ingredients or use leaner meat next time for a cleaner finish.

    Frequently Asked Questions

    Can I use ground turkey instead of beef in this high protein creamy beef pasta?

    Absolutely! Ground turkey works beautifully—just add an extra tablespoon of olive oil when browning since turkey has less fat. The protein content remains excellent, and many find the lighter flavor allows the creamy sauce to shine.

    How can I make this recipe even higher in protein?

    Add 1-2 scoops of unflavored protein powder to the sauce, stir in Greek yogurt instead of some cream, or mix in diced chicken breast alongside the beef. You can also sprinkle with extra Parmesan or add white beans.

    Can I make this pasta dish ahead for meal prep?

    Yes! It stores beautifully for 3-4 days in the refrigerator. Slightly undercook the pasta initially, and add a splash of milk or broth when reheating to refresh the creamy texture.

    What pasta shapes work best for this recipe?

    Choose shapes that trap sauce well—rigatoni, penne, cavatappi, or fusilli are ideal. Their ridges and hollows capture the creamy sauce, ensuring flavor in every bite.

    Is this recipe suitable for beginners?

    Definitely! The one-pot approach simplifies cooking, and the straightforward technique makes it approachable. Just follow the timing guidelines closely, and you’ll create a restaurant-quality meal easily.

    Final Thoughts

    This high protein creamy beef pasta has become more than just a recipe in my kitchen—it’s a solution for busy nights, a crowd-pleaser for unexpected guests, and nourishment that satisfies both body and soul. I love how versatile it is, adapting to whatever ingredients I have on hand while always delivering that perfect balance of comfort and nutrition. Whether you’re cooking for a family, meal prepping for the week, or simply treating yourself to something delicious, this pasta delivers every time. Find more inspiration for your weeknight meals on my Pinterest boards where I’m constantly adding new protein-packed favorites!

  • Southern-Style Honey Butter Cornbread Poppers That Melt Hearts!

    Southern-Style Honey Butter Cornbread Poppers That Melt Hearts!

    Southern-Style Honey Butter Cornbread Poppers That Melt Hearts!

    Southern-Style Honey Butter Cornbread Poppers have completely transformed my approach to serving cornbread at family gatherings. The first time I made these golden, bite-sized morsels, my kitchen filled with that unmistakable sweet corn aroma that instantly transported me back to my grandmother’s Mississippi kitchen. There’s something magical about the way the crispy exterior gives way to a tender, honey-kissed center. These poppers strike the perfect balance between savory and sweet—making them irresistible for everything from holiday feasts to casual weeknight meals at Recipes Darleen.

    Recipe

    Why You’ll Love These Southern-Style Honey Butter Cornbread Poppers

    Perfect Texture Combination

    The secret to these poppers lies in their contrasting textures—crispy golden exterior with a pillowy interior that practically melts in your mouth. I’ll never forget serving these at last summer’s barbecue when my brother-in-law (who claims to hate cornbread) couldn’t stop reaching for more. The mini size creates the ideal ratio of crunchy edges to tender centers. Each bite delivers that satisfying crackle followed by soft, buttery goodness. Plus, their small size means they bake faster than traditional cornbread while developing those coveted caramelized edges that everyone fights over.

    Make-Ahead Convenience

    These Southern-Style Honey Butter Cornbread Poppers are a busy host’s dream. The batter comes together in just one bowl, and you can prepare it up to 24 hours ahead. I’ve learned this the hard way after scrambling to finish cooking while guests arrived! Simply refrigerate the batter overnight, then let it sit at room temperature for 15 minutes before baking. The poppers actually develop a deeper corn flavor with this rest time. For ultimate convenience, you can even freeze the baked poppers for up to 3 months and reheat them in minutes when needed.

    Essential Tips & Tricks

    Mastering the Batter

    The cornmeal quality makes all the difference in these poppers. I recommend stone-ground cornmeal for its authentic texture and flavor depth. One summer afternoon, I accidentally used regular cornmeal instead of stone-ground, and while still delicious, they lacked that distinctive Southern character. For the honey component, use a local variety if possible—wildflower honey adds beautiful floral notes. The batter should be thick but pourable, similar to pancake batter. If it’s too thick, add buttermilk one tablespoon at a time until you reach the right consistency for perfect popper texture.

    Temperature Matters

    Always start with room temperature ingredients when making Southern-Style Honey Butter Cornbread Poppers. Cold eggs or buttermilk can cause the melted butter to solidify, resulting in an uneven batter. I learned this lesson during a holiday rush when I tried to cut corners! Equally important is preheating your mini muffin tin until it’s sizzling hot before adding the batter. This creates that signature crispy exterior that defines these poppers. A cast iron mini muffin pan works best, but any heavy-duty muffin tin will do. Just remember to grease it generously with butter, not cooking spray.

    Serving Ideas & Creative Variations

    Perfect Pairings

    These poppers shine brightest alongside hearty Southern classics like chili, barbecue ribs, or slow-cooked short rib ragu. I still remember the looks of delight when I served these with my grandmother’s Brunswick stew recipe during a chilly fall gathering. For a show-stopping presentation, arrange them in a spiral on a wooden board with small bowls of flavored butters—cinnamon honey butter and jalapeño butter are crowd favorites. They’re also perfect for brunch alongside scrambled eggs and bacon, offering that sweet-savory contrast that makes brunches memorable.

    Flavor Twists

    The versatility of Southern-Style Honey Butter Cornbread Poppers makes them perfect for seasonal adaptations. In fall, fold in finely diced apples and cinnamon. Summer calls for fresh corn kernels and chopped jalapeños for a sweet-heat combo. My personal favorite variation came from a happy accident when I had leftover bacon from breakfast—crumbled bacon and sharp cheddar transformed these into an indulgent savory treat. For a dessert-like version, drizzle the finished poppers with additional honey and sprinkle with cinnamon sugar while still warm.

    Storage & Troubleshooting Guide

    Keeping Them Fresh

    To maintain that perfect crisp-tender texture, store completely cooled Southern-Style Honey Butter Cornbread Poppers in an airtight container at room temperature for up to 2 days. For longer storage, refrigerate for up to 5 days, though they’ll lose some of their crispness. The microwave works for quick reheating (15 seconds), but for best results, wrap them in foil and warm in a 300°F oven for 5-7 minutes. This restores their original texture beautifully. I often make double batches specifically to have leftovers—they’re that good with morning coffee!

    Fixing Common Issues

    If your poppers turn out too dense, you’ve likely overmixed the batter. I made this mistake at my first holiday hosting, frantically beating the mixture until smooth. Instead, stir just until the ingredients are combined—a few small lumps are perfectly fine! If they’re sticking to the pan despite greasing, try dusting the greased cavities with cornmeal before adding batter. For poppers that aren’t browning properly, your oven temperature might be too low. Consider using an oven thermometer to verify accuracy, as many home ovens run 25-50 degrees off their indicated temperature.

    Frequently Asked Questions

    Can I make Southern-Style Honey Butter Cornbread Poppers gluten-free?

    Absolutely! Substitute the all-purpose flour with a 1:1 gluten-free baking blend. Add ¼ teaspoon xanthan gum if your blend doesn’t include it for the best texture.

    How do I know when the poppers are done baking?

    They should be golden brown around the edges with a slight spring when touched. A toothpick inserted in the center should come out with a few moist crumbs, but no wet batter.

    Can I use regular muffin tins instead of mini ones?

    Yes, but increase baking time to 15-18 minutes and reduce the oven temperature to 375°F for regular-sized muffins.

    What’s the best way to incorporate corn kernels into the batter?

    Fold in ½ cup of fresh or thawed frozen corn kernels after mixing the batter. Pat them dry first to prevent excess moisture.

    How can I make these Southern-Style Honey Butter Cornbread Poppers more savory?

    Reduce honey to 2 tablespoons and add ½ cup shredded sharp cheddar and 2 tablespoons chopped chives or green onions.

    Final Thoughts

    These Southern-Style Honey Butter Cornbread Poppers have become my signature contribution to family gatherings and potlucks. There’s something special about watching people’s faces light up with that first bite—the moment the sweetness of honey meets the earthy cornmeal. I treasure how food connects us to memories and creates new ones. Whether you’re serving them alongside a hearty stew or enjoying them with a simple spread of butter, these poppers bring comfort and joy to any table. Find more delicious recipes on Pinterest!

  • Lemon Curd Cookies Recipe: Irresistibly Tangy & Soft Delight!

    Lemon Curd Cookies Recipe: Irresistibly Tangy & Soft Delight!

    Lemon Curd Cookies Recipe: Irresistibly Tangy & Soft Delight!

    This Lemon Curd Cookies Recipe transforms ordinary butter cookies into bright little bites of sunshine. The perfect balance of sweet cookie base and tangy lemon filling creates an irresistible treat that disappears from my cookie jar faster than I can say “citrus.” I discovered this recipe during a rainy spring afternoon when I needed something to brighten the day, and now it’s become my go-to for everything from afternoon tea to holiday cookie exchanges. The buttery shortbread-like base cradles the silky lemon curd in a way that makes each bite pure bliss.

    Recipe

    Why You’ll Love This Lemon Curd Cookies Recipe

    Perfect Balance of Sweet and Tangy

    There’s something magical about lemon desserts that keeps you coming back for “just one more.” These cookies nail that perfect balance where the buttery, melt-in-your-mouth cookie base meets the bright, zingy lemon curd center. I love watching guests take their first bite—their eyes always widen with that moment of surprise when the tanginess hits. The contrast between the tender cookie and the smooth, vibrant filling creates a sensory experience that’s utterly satisfying without being overwhelmingly sweet.

    Easy Make-Ahead Option

    These lemon curd cookies are a time-management dream for busy bakers. The dough can be prepared up to three days ahead and chilled, making them perfect for planning holiday baking or weekend treats. I often make a double batch of dough on Sunday, then bake half for immediate enjoyment and save the rest for midweek when I need a pick-me-up. The lemon curd can also be made in advance or (my little secret) purchased pre-made when time is tight. This flexibility makes them ideal for last-minute guests or cookie exchanges.

    Essential Tips & Tricks

    The key to these cookies is achieving that melt-in-your-mouth texture that perfectly complements the smooth lemon curd. Chill the dough for at least 30 minutes before shaping—this prevents spreading and maintains that tender crumb we’re after. When making the indentation for the lemon curd, use the back of a measuring teaspoon or your thumb, pressing gently but firmly. If the edges crack slightly, simply press them back together with your fingertips. For the ultimate texture, don’t overbake! The cookies should remain pale with just a hint of golden color around the edges.

    Mastering the Lemon Curd

    Whether you’re making homemade lemon curd or using store-bought, there are a few crucial handling tips to know. The curd should be thick enough to hold its shape but still spoonable. If your curd seems runny, refrigerate it for 30 minutes before filling the cookies. When filling, use a small spoon or piping bag to add just enough curd to fill the indentation without overflowing. Add the curd after baking, not before—this prevents the curd from bubbling, darkening, or drying out during the baking process.

    Serving Ideas & Creative Variations

    Elegant Presentation Options

    Transform these humble cookies into showstopping desserts with a few simple touches. For afternoon tea, arrange them on a tiered stand with fresh berries scattered between. When serving for special occasions, dust with powdered sugar just before presenting, or add a tiny sprig of fresh mint to each cookie. I love creating a dessert board with these cookies as the star, surrounded by dark chocolate squares, fresh berries, and mini caramel pecan cheesecakes for an impressive spread that looks like it took hours but comes together in minutes.

    Flavor Twists Worth Trying

    While classic lemon curd is divine, don’t be afraid to experiment with variations. Lime curd offers a slightly different citrus note that pairs beautifully with the buttery cookie base. For a tropical twist, fold a tablespoon of finely chopped mango into your lemon curd before filling. My personal favorite variation is adding a half teaspoon of lavender to the cookie dough—the floral notes complement the bright lemon perfectly. For holiday baking, try adding a touch of cranberry to the lemon curd for a festive red-flecked filling that’s as beautiful as it is delicious.

    Storage & Troubleshooting Guide

    Keeping Cookies Fresh

    These lemon curd cookies will stay perfectly fresh for up to 3 days when stored properly. Place them in a single layer in an airtight container with parchment paper between layers to prevent sticking. Keep them in the refrigerator due to the curd filling, but bring to room temperature for about 15 minutes before serving to allow the flavors to fully bloom. If you need longer storage, the unfilled baked cookies freeze beautifully for up to 3 months—just thaw and add fresh lemon curd before serving.

    Fixing Common Issues

    Even experienced bakers encounter challenges! If your cookies spread too much during baking, your butter was likely too warm or the dough wasn’t chilled enough. For the next batch, refrigerate the shaped cookies for 15 minutes before baking. If your lemon curd weeps or becomes too liquid after storing, gently blot with a paper towel and add a fresh dollop of curd before serving. For cookies that turned out too crisp rather than tender, reduce baking time by 1-2 minutes for your next batch—remember, they should be set but still pale.

    Frequently Asked Questions

    Can I make lemon curd cookies ahead of time for a party?

    Yes! Bake the cookies up to 3 days ahead and store unfilled in an airtight container. Add the lemon curd filling up to 24 hours before serving, then refrigerate until needed.

    How do I prevent my lemon curd cookies from becoming soggy?

    Fill cookies with curd no more than 24 hours before serving and store in the refrigerator. The thicker your curd, the less likely it will soak into the cookie.

    Can I freeze these lemon curd cookies?

    Freeze the baked unfilled cookies for up to 3 months. Thaw at room temperature and add fresh lemon curd before serving for best results.

    What’s the secret to a perfect lemon curd?

    Use fresh lemon juice and zest, cook over low heat while constantly stirring, and strain through a fine mesh sieve for silky-smooth, bright lemon curd.

    Can I use other citrus fruits in this lemon curd cookies recipe?

    Absolutely! Try lime, orange, or grapefruit curd for delicious variations. Each citrus brings its own unique flavor profile to these versatile cookies.

    Final Thoughts

    This lemon curd cookies recipe has become my signature contribution to gatherings, earning rave reviews and recipe requests every time. There’s something about the bright, sunny flavor that lifts spirits and brings smiles—exactly what a good cookie should do. The beauty of these cookies lies in their versatility and that perfect sweet-tart balance that makes them irresistible. Whether you’re an experienced baker or just starting out, these little bites of sunshine deserve a permanent spot in your recipe collection. Don’t forget to share your creations on Pinterest!

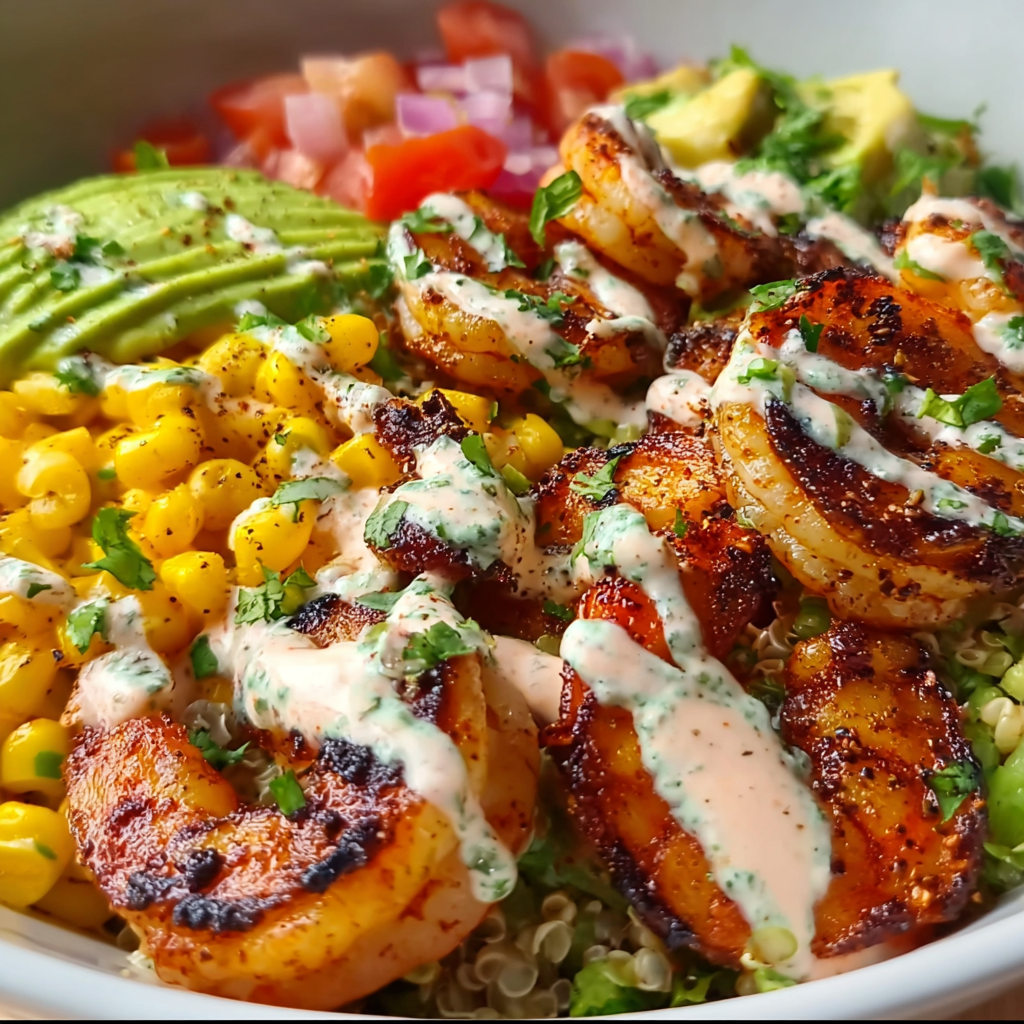
  • Grilled Shrimp Bowl with Avocado Corn Salsa – Creamy, Fresh & Irresistible!

    Grilled Shrimp Bowl with Avocado Corn Salsa – Creamy, Fresh & Irresistible!

    Grilled Shrimp Bowl with Avocado Corn Salsa – Creamy, Fresh & Irresistible!

    This Grilled Shrimp Bowl with Avocado Corn Salsa Creamy Sauce is summer in a bowl! The first time I made this, my kitchen windows were wide open, letting in that perfect evening breeze while the smell of lime and cilantro filled the air. There’s something magical about the combination of charred shrimp against cool, creamy avocado salsa that makes dinner feel like a little celebration. I’ve tested this recipe countless times (my family never complains!), and it’s become our go-to for those nights when we want something that feels special without hours of work.

    Recipe

    Why You’ll Love This Grilled Shrimp Bowl with Avocado Corn Salsa Creamy Sauce

    Perfect Balance of Flavors and Textures

    This bowl is a symphony of contrasts that somehow work in perfect harmony. The smoky grilled shrimp brings that irresistible char flavor while the avocado corn salsa adds freshness and a buttery richness. Each bite offers something different – the slight crunch from the corn, the creaminess of avocado, and the tender bite of perfectly cooked shrimp. I love how the sauce ties everything together, adding just enough tanginess and creaminess without overwhelming the delicate flavors of the seafood. It’s like each component was designed to complement the others.

    Quick and Impressive Weeknight Option

    What initially drew me to this recipe was how it transforms simple ingredients into something that feels restaurant-worthy in under 30 minutes. The prep-to-plate time is minimal, yet guests always think I’ve spent hours in the kitchen. I keep most ingredients on hand during summer months, making this my secret weapon for last-minute dinner invitations. The components can be prepped ahead of time, so when hunger strikes, you’re just a quick grill session away from dinner. Perfect for those evenings when you want something special without the fuss.

    Essential Tips & Tricks

    Mastering the Shrimp

    The key to exceptional shrimp is not overcooking them. I learned this lesson the hard way after serving rubbery shrimp one too many times! Aim for just 2-3 minutes per side until they turn pink and opaque. Marinating them briefly (15-30 minutes max) in olive oil, lime juice, and garlic infuses flavor without starting to “cook” the shrimp in the acid. For extra flavor, I thread them on soaked wooden skewers before grilling – this prevents spinning and ensures even cooking. Remember that shrimp continue cooking after removal from heat, so it’s better to undercook slightly than overdo it.

    Elevating Your Avocado Corn Salsa

    The salsa is where this dish truly shines, reminiscent of the vibrant flavors in my authentic pico de gallo. For the best texture, use fresh corn cut straight from the cob whenever possible – the sweetness is unmatched! If using frozen, quickly char it in a hot skillet to develop flavor. Choose avocados that yield slightly to pressure but aren’t mushy. I like to prepare the salsa base (everything except avocado) up to a day ahead, adding the avocado just before serving to prevent browning. The lime juice helps, but nothing beats last-minute avocado addition for that perfect texture.

    Serving Ideas & Creative Variations

    Build-Your-Own Bowl Bar

    Transform this into an interactive dining experience by setting up a DIY bowl station! I did this for my sister’s birthday dinner and it was a massive hit. Arrange base options like cilantro-lime rice, quinoa, cauliflower rice, or even Mexican street corn salad as a foundation. Offer the grilled shrimp, avocado corn salsa, and sauce alongside additional toppings like black beans, queso fresco, pickled red onions, and hot sauce. This approach is perfect for accommodating different dietary needs while creating a fun, communal dining experience that everyone loves.

    Seasonal Adaptations

    One of my favorite things about this recipe is how easily it adapts to what’s available. In late summer, I add heirloom tomatoes and grilled peaches to the salsa for unexpected sweetness. Fall versions work beautifully with roasted sweet potato cubes and a hint of maple in the sauce. Winter adaptations might include roasted butternut squash and pomegranate seeds. The sauce can shift seasonally too – add chipotle for smokiness, extra cilantro for brightness, or even a touch of mango puree for tropical sweetness. The core elements remain, but the seasonal tweaks keep it exciting year-round.

    Storage & Troubleshooting Guide

    Proper Storage Techniques

    For maximum freshness, store each component separately in airtight containers. The grilled shrimp will keep for up to 3 days in the refrigerator, though they’re best enjoyed within 24 hours. The salsa (minus avocado) can be refrigerated for 2 days – just add fresh avocado when ready to serve. The creamy sauce stays good for about 5 days and actually improves in flavor overnight as ingredients meld. I don’t recommend freezing any components as the textures significantly change upon thawing – the shrimp become rubbery and the vegetables in the salsa turn mushy.

    Fixing Common Issues

    If your shrimp turn out tough, they’re likely overcooked. Next time, reduce cooking time and remove them from heat while still slightly translucent in the center – they’ll finish cooking from residual heat. For watery salsa, drain corn thoroughly and salt your tomatoes in advance to draw out excess moisture. If your sauce breaks or seems too thin, whisk in a teaspoon of Greek yogurt or mayonnaise to re-emulsify. Bland flavor is easily fixed with an extra squeeze of lime, pinch of salt, or dash of hot sauce. Remember that cold temperatures dull flavors, so season a bit more aggressively if serving chilled.

    Frequently Asked Questions

    Can I make this Grilled Shrimp Bowl with Avocado Corn Salsa Creamy Sauce ahead of time?

    Yes! Prep the salsa (without avocado), sauce, and marinate shrimp up to 24 hours ahead. Add avocado and grill shrimp just before serving for the freshest results.

    What can I substitute for shrimp if I have allergies?

    Grilled chicken, salmon, or tofu work beautifully. For plant-based options, try marinated grilled portobello mushrooms or crispy chickpeas seasoned with the same spices.

    Is this recipe gluten-free?

    Yes, all components are naturally gluten-free, but always check individual ingredient labels, especially for pre-made seasonings or sauces that might contain hidden gluten.

    How spicy is this dish?

    The base recipe is mild, but you can adjust heat by adding jalapeños to the salsa or cayenne/hot sauce to the creamy sauce according to your preference.

    Can I use frozen corn instead of fresh?

    Absolutely! Thaw completely and pat dry before using. For extra flavor, quickly char the corn in a hot skillet to replicate that fresh-off-the-cob sweetness.

    Final Thoughts

    This Grilled Shrimp Bowl with Avocado Corn Salsa Creamy Sauce has become my signature summer dish for good reason. There’s something about the combination of perfectly grilled shrimp, fresh vegetables, and that creamy sauce that creates pure magic in a bowl. I love seeing friends’ faces light up with that first bite – it’s the kind of recipe that creates memories around the table. For more delicious inspiration, check out my Pinterest board where I’m always adding new seasonal favorites!

  • Turkey Taco Stuffed Sweet Potatoes: Irresistible Flavor Explosion!

    Turkey Taco Stuffed Sweet Potatoes: Irresistible Flavor Explosion!

    Turkey Taco Stuffed Sweet Potatoes: Irresistible Flavor Explosion!

    Turkey Taco Stuffed Sweet Potatoes combine two of my favorite comfort foods into one deliciously satisfying meal that’s both nourishing and crave-worthy. The first time I made these for my family on a chilly Tuesday evening, the kitchen filled with the warm aroma of spiced taco meat and roasted sweet potatoes, creating an irresistible invitation to gather around the table. The contrast between the sweet, caramelized potato and the savory, spiced turkey creates a perfect balance that makes this dish an absolute winner for weeknight dinners. Plus, they’re customizable with all your favorite taco toppings for a meal that everyone will love.

    Recipe

    Why You’ll Love This Turkey Taco Stuffed Sweet Potatoes

    A Nutrient-Packed Powerhouse

    These Turkey Taco Stuffed Sweet Potatoes aren’t just delicious—they’re a nutritional goldmine. Sweet potatoes deliver fiber, vitamins A and C, while lean ground turkey provides quality protein without excess fat. I love how this meal keeps me feeling satisfied for hours without the heavy feeling that comes from traditional taco shells. The combination of complex carbs from the sweet potatoes and protein from the turkey creates a perfect balance that supports sustained energy. When my afternoon schedule gets hectic, I know this meal will keep me going without the mid-afternoon energy crash.

    Quick and Simple Preparation

    One thing I absolutely adore about Turkey Taco Stuffed Sweet Potatoes is how effortlessly they come together, even on busy weeknights. While the sweet potatoes roast (hands-off time!), I brown the turkey with onions and garlic, creating those wonderful aromatic moments in my kitchen that signal good food is coming. The entire meal requires minimal prep work—just chop an onion, measure some spices, and you’re practically done. I’ve made these on nights when I’m exhausted and still managed to get dinner on the table without feeling overwhelmed. They’re that simple!

    Essential Tips & Tricks

    Perfect Sweet Potato Roasting

    The foundation of amazing Turkey Taco Stuffed Sweet Potatoes lies in how you roast those spuds. For the caramelized exterior and fluffy interior we all crave, prick your potatoes several times with a fork, rub with olive oil and a sprinkle of salt, then roast at 425°F for 45-60 minutes depending on size. I’ve learned that placing them directly on the oven rack (with a sheet pan on the rack below to catch drips) creates the best all-around heat circulation. The natural sugars caramelize beautifully, creating that irresistible contrast with the savory turkey filling that makes this dish so special.

    Seasoning Secrets for the Best Taco Meat

    The turkey filling needs proper seasoning to shine against the sweetness of the potatoes. I create my own taco seasoning blend with chili powder, cumin, paprika, garlic powder, onion powder, oregano, and a pinch of cayenne for heat. This homemade mix delivers much more flavor than store-bought packets and lets you control the sodium. For extra depth, add a splash of low-sodium chicken broth when cooking the turkey to keep it moist and infuse more flavor. Always taste and adjust seasonings before stuffing your potatoes—it makes all the difference!

    Serving Ideas & Creative Variations

    Toppings That Take It to the Next Level

    The beauty of Turkey Taco Stuffed Sweet Potatoes lies in the endless topping possibilities. My family’s favorites include fresh avocado slices, cilantro, lime wedges, and a dollop of Greek yogurt (a healthier stand-in for sour cream). Crisp shredded lettuce adds a refreshing crunch, while pickled red onions bring a tangy brightness that cuts through the richness. For cheese lovers, a sprinkle of sharp cheddar or crumbled cotija adds the perfect finishing touch. I set up a toppings bar and let everyone customize their potatoes—it’s become our favorite way to serve this meal.

    Creative Twists on the Classic Recipe

    Don’t be afraid to experiment with your Turkey Taco Stuffed Sweet Potatoes! Swap ground turkey for black beans for a vegetarian version that’s equally satisfying. For a breakfast-inspired twist, top with a fried egg whose runny yolk creates a luscious sauce when broken. My personal favorite variation includes a drizzle of chipotle-lime crema made by blending Greek yogurt with adobo sauce and lime juice. For special occasions, try a barbecue-inspired version with pulled chicken instead of turkey and a sweet-smoky sauce—it’s unexpectedly delicious!

    Storage & Troubleshooting Guide

    Make-Ahead and Storage Solutions

    Turkey Taco Stuffed Sweet Potatoes are perfect for meal prep and leftovers. You can roast the sweet potatoes and prepare the turkey filling up to three days ahead, storing them separately in airtight containers. For reheating, I’ve found that warming the potatoes in a 350°F oven for 15 minutes maintains their texture better than microwaving, though the microwave works in a pinch. The turkey filling reheats beautifully in a skillet with a splash of water or broth to prevent drying. For freezing, I recommend freezing only the turkey filling, as sweet potatoes change texture when frozen and thawed.

    Fixing Common Issues

    If your sweet potatoes aren’t cooking evenly, try selecting potatoes of similar size and shape for consistent roasting times. When potatoes are taking too long to cook, cut them in half lengthwise halfway through cooking to speed up the process. For turkey filling that seems too dry, add a splash of broth or even salsa to bring back moisture and flavor. If your filling is too wet, simmer uncovered for a few extra minutes to reduce excess liquid. And if your sweet potatoes split or collapse when stuffing, don’t worry! Simply serve the filling over the mashed potato as a “bowl” rather than a stuffed potato.

    Frequently Asked Questions

    Can I make Turkey Taco Stuffed Sweet Potatoes ahead of time?

    Absolutely! Roast potatoes and prepare filling up to 3 days ahead, storing separately in the refrigerator. Reheat potatoes in a 350°F oven for 15 minutes and warm filling in a skillet before assembling.

    How can I make this recipe vegetarian?

    Replace ground turkey with black beans or a plant-based ground meat alternative. Keep all the same seasonings and toppings for an equally delicious vegetarian version.

    What’s the best way to reheat leftovers?

    For best texture, reheat sweet potatoes in a 350°F oven for 10-15 minutes. Microwave works too, but potatoes may soften more. Warm filling separately in a skillet with a splash of liquid.

    Can I use regular potatoes instead of sweet potatoes?

    Yes! White or russet potatoes work well, though you’ll lose the sweet-savory contrast that makes Turkey Taco Stuffed Sweet Potatoes special. Adjust roasting time as needed.

    What’s the best ground turkey to use for this recipe?

    I recommend 93% lean ground turkey for the best balance of flavor and nutrition. It has enough fat to stay moist while cooking but remains a healthier option than beef.

    Final Thoughts

    These Turkey Taco Stuffed Sweet Potatoes have become a staple in my meal rotation because they perfectly balance nutrition, flavor, and ease of preparation. There’s something magical about the way the spiced turkey complements the natural sweetness of the potatoes, creating a satisfying meal that feels both nourishing and indulgent. Whether you’re cooking for a family or meal prepping for yourself, this versatile dish adapts to your needs while delivering consistent deliciousness. Be sure to check out more of my favorite recipes on Pinterest for more inspiration!