Blog

  • Lemon Curd Chia Pudding: Creamy, Tangy, & Blissfully Easy!

    Lemon Curd Chia Pudding: Creamy, Tangy, & Blissfully Easy!

    Lemon Curd Chia Pudding: Creamy, Tangy, & Blissfully Easy!

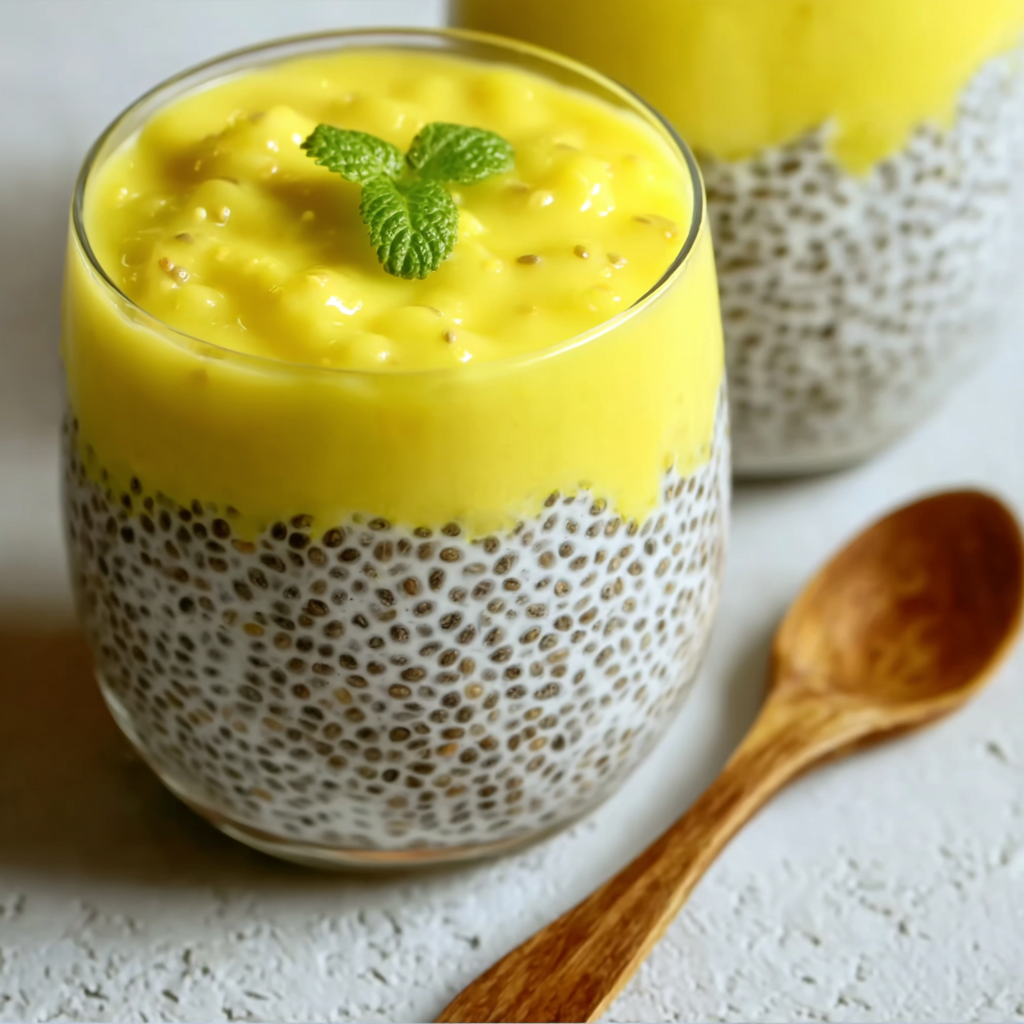
    Lemon Curd Chia Pudding combines two of my favorite things – the bright, zesty flavor of homemade lemon curd and the satisfying texture of chia seeds. This make-ahead breakfast feels like sunshine in a jar! I discovered this recipe during a particularly gloomy winter when I needed something to brighten my mornings. The first spoonful transported me straight to summer with its vibrant citrus notes and creamy consistency. If you love the tangy-sweet balance of lemon desserts, this nutritious breakfast option will become your new morning obsession.

    Recipe

    Why You’ll Love This Lemon Curd Chia Pudding

    Perfect Balance of Flavors and Textures

    There’s something magical about the way the tangy lemon curd melts into the delicate chia pudding base. Each spoonful delivers a perfect harmony of bright citrus, subtle sweetness, and that distinctive chia pop. I love how the seeds create a tapioca-like texture that’s both satisfying and light. The contrast between the smooth, silky lemon layer and the more substantial chia pudding creates a multidimensional experience that keeps your taste buds engaged from the first bite to the last. It’s like enjoying a dessert for breakfast, but one that actually fuels your day with omega-3s and fiber!

    Make-Ahead Convenience

    As someone who values both sleep and a good breakfast, this recipe has become my secret weapon for busy mornings. The beauty of chia pudding lies in its overnight transformation – those tiny seeds work their magic while you sleep! I often prep a batch on Sunday evenings, dividing the mixture into individual jars for grab-and-go breakfasts throughout the week. The lemon curd can be made days in advance or even purchased pre-made when life gets hectic. There’s something deeply satisfying about opening the fridge at 7 AM and finding breakfast already waiting, especially one this delicious.

    Essential Tips & Tricks

    Perfecting Your Chia Pudding Base

    The key to silky-smooth chia pudding without clumps is all in the initial mixing technique. I learned this the hard way after several batches with seed clusters! First, whisk your milk and sweetener thoroughly before adding the chia seeds. Then, stir immediately and again after 10 minutes to prevent clumping. For the creamiest texture, I recommend using full-fat coconut milk or a combination of almond milk and Greek yogurt. The pudding should rest at least 4 hours, but overnight yields the best consistency. If you prefer a less textured pudding, try grinding some of the chia seeds before adding them.

    Lemon Curd Mastery

    Making homemade lemon curd elevates this recipe to spectacular heights, but it does require some attention to detail. The secret ingredient is patience – cook it low and slow to prevent curdling. Always zest your lemons before juicing, and use fresh juice rather than bottled for that vibrant flavor. For the silkiest texture, strain your finished curd through a fine-mesh sieve. If you’re short on time, quality store-bought lemon curd works beautifully too. For a lighter version, try this protein-packed alternative that uses Greek yogurt as a base for your morning routine.

    Serving Ideas & Creative Variations

    Beautiful Breakfast Presentations

    Transform this simple pudding into an Instagram-worthy breakfast by creating gorgeous layers in clear glasses or mason jars. I love alternating the white chia pudding with vibrant yellow lemon curd, then topping with fresh berries, toasted coconut flakes, or crushed pistachios for color and crunch. For special brunches, serve in champagne flutes with edible flowers for an elegant touch. The contrast of textures and colors makes this simple breakfast feel like a special occasion. My family always appreciates the extra effort, especially when I’m hosting weekend visitors.

    Flavor Twists and Adaptations

    While classic lemon curd chia pudding is divine, don’t be afraid to experiment with variations. Try infusing the milk with lavender or thyme before making your pudding base – both pair beautifully with lemon. For a tropical twist, replace some of the milk with coconut cream and top with mango chunks and toasted coconut. You can also layer in other fruit curds like passion fruit or lime for a citrus medley. For a dessert version, try crumbling these 3-ingredient cookies between the layers for added sweetness and texture.

    Storage & Troubleshooting Guide

    Proper Storage for Maximum Freshness

    Storing your lemon curd chia pudding properly ensures you’ll enjoy that perfect texture and flavor all week long. Always use airtight containers – I prefer individual glass jars with secure lids. The pudding will stay fresh in the refrigerator for up to 5 days, though the lemon curd may darken slightly after day 3 (still perfectly safe to eat!). If you want to prep further ahead, make the chia pudding base and lemon curd separately, storing the curd in its own container with plastic wrap pressed directly on the surface to prevent a skin from forming.

    Common Issues and Easy Fixes

    Even experienced cooks encounter chia pudding problems occasionally! If your pudding is too thin, simply stir in additional chia seeds (1-2 teaspoons), wait 30 minutes, and check again. Too thick? Add a splash more liquid and stir well. Clumpy pudding can usually be rescued with vigorous whisking or a quick pulse in the blender. If your lemon curd develops a grainy texture, it likely overcooked – next time, remove it from heat sooner and strain thoroughly. Remember that chia pudding thickens considerably overnight, so what looks runny at first may be perfect by morning.

    Frequently Asked Questions

    Can I make Lemon Curd Chia Pudding vegan?

    Absolutely! Use plant-based milk for the chia base and make vegan lemon curd using coconut cream, lemon juice, sugar, cornstarch, and turmeric for color. The texture is slightly different but equally delicious.

    How long does homemade lemon curd last?

    Homemade lemon curd stays fresh in the refrigerator for up to 2 weeks in an airtight container. For longer storage, you can freeze it for up to 3 months.

    Can I use other seeds instead of chia?

    While chia seeds create the best pudding-like consistency, you can substitute ground flaxseeds at a 1:1 ratio. The texture will be slightly different but still delicious.

    What’s the best milk for Lemon Curd Chia Pudding?

    I find coconut milk creates the creamiest Lemon Curd Chia Pudding, but almond, oat, or dairy milk all work well. Choose based on your dietary preferences and desired richness.

    Is this recipe healthy for breakfast?

    Yes! Chia seeds provide fiber, protein, and omega-3 fatty acids. Balance the sugar in the lemon curd by using less sweetener in the chia base for a nutritious breakfast option.

    Final Thoughts

    This Lemon Curd Chia Pudding has become my sunshine-in-a-jar remedy for both gloomy mornings and busy weeks. There’s something magical about the contrast between the tart, bright lemon layer and the creamy, satisfying chia base that makes this simple breakfast feel special. I encourage you to play with the recipe, making it your own with different toppings or flavor combinations. For more breakfast inspiration, follow me on Pinterest where I’m always sharing new ideas for starting your day deliciously!

  • Vegan Lemon Artichoke Pasta: Zesty, Creamy & Irresistibly Fresh!

    Vegan Lemon Artichoke Pasta: Zesty, Creamy & Irresistibly Fresh!

    Vegan Lemon Artichoke Pasta: Zesty, Creamy & Irresistibly Fresh!

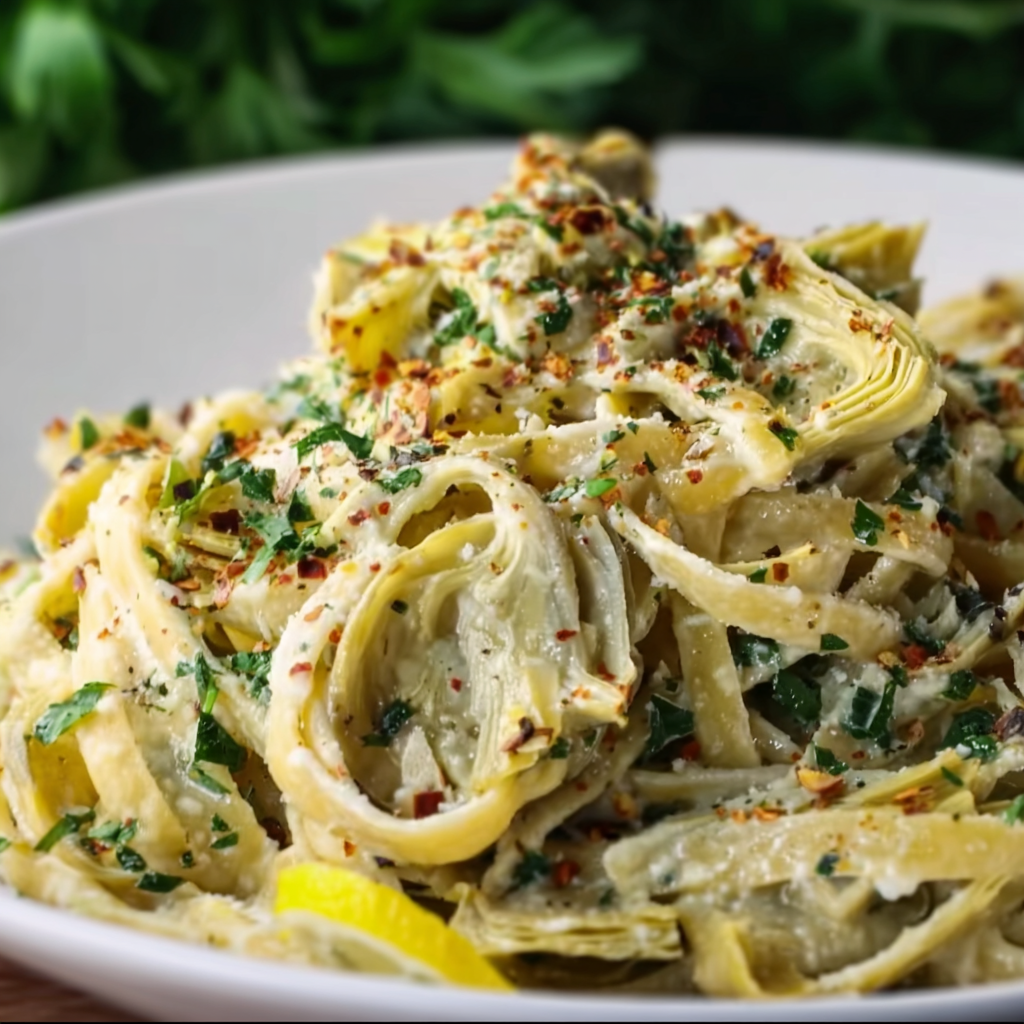
    This Vegan Lemon Artichoke Pasta might just be my new obsession. The first time I made it, the bright citrus aroma filled my kitchen while rain tapped against the windows—instant comfort in a bowl. There’s something magical about how the tangy lemon juice clings to each strand of pasta, complemented by the buttery texture of artichoke hearts. It’s a dish that feels sophisticated yet comes together in just 20 minutes, perfect for those evenings when you crave something special without the fuss. I’ve been experimenting with plant-based recipes lately, and this one has earned a permanent spot in my recipe collection.

    Recipe

    Why You’ll Love This Vegan Lemon Artichoke Pasta

    A Perfect Balance of Flavors

    The beauty of this pasta lies in its perfect harmony of flavors—bright lemon zest cutting through the richness of olive oil, with artichoke hearts adding a subtle earthiness that makes each bite interesting. I love how the nutritional yeast creates a cheesy depth without any dairy. The first time my non-vegan friend tried it, she couldn’t believe there wasn’t parmesan hiding somewhere! The garlic and red pepper flakes add just enough warmth without overwhelming the delicate lemon notes. It’s the kind of dish that feels light yet satisfying, making it perfect for any season.

    Quick and Accessible Ingredients

    One thing I adore about this recipe is how it relies on pantry staples that don’t require a special trip to a health food store. Canned artichokes, pasta, lemons, and olive oil are the backbone here—things most of us already have on hand. Last Tuesday, after a particularly exhausting workday, I managed to throw this together in just 20 minutes while still in my work clothes. The minimal prep work (just some chopping and zesting) means you can have a restaurant-worthy meal without the fuss. It’s become my go-to when I need something impressive but my energy tank is running low.

    Essential Tips & Tricks

    Perfecting Your Pasta Technique

    The secret to success with this dish is saving that starchy pasta water! I always set aside at least 1 cup before draining. This liquid gold helps create a silky sauce that actually clings to the pasta instead of pooling at the bottom of your bowl. Another game-changer is slightly undercooking your pasta (aim for very al dente) since it will continue cooking when tossed with the hot lemon sauce. I learned this the hard way after making mushy pasta one too many times! For maximum flavor absorption, toss your hot pasta directly into the sauce rather than rinsing it—this makes all the difference in the final texture.

    Elevating Your Lemon-Artichoke Flavor Profile

    To take this dish from good to unforgettable, focus on layering the lemon flavor throughout the cooking process. I add zest early to infuse the oil, juice mid-cooking, and then finish with a fresh squeeze just before serving—this creates depth that a single addition can’t match. For the artichokes, make sure to drain them thoroughly and pat dry before adding to prevent a watery sauce. Last month, I discovered that quartering rather than chopping the artichokes preserves their texture better. For an extra flavor boost, try roasting your garlic instead of sautéing it, similar to what I do in my Cauliflower Chickpea Curry for that caramelized sweetness.

    Serving Ideas & Creative Variations

    Perfect Pairings and Presentation

    This pasta shines as a centerpiece dish when served in a wide, shallow bowl that showcases all those beautiful artichoke pieces and flecks of herbs. I love topping it with extra lemon zest, fresh herbs, and a drizzle of your best olive oil for that restaurant-quality presentation. For a complete meal, pair it with a simple arugula salad dressed with lemon and olive oil to echo the pasta’s flavors. When I hosted my sister’s birthday dinner, I served this alongside grilled asparagus and crusty bread for soaking up every bit of the sauce. The vibrant colors make for a stunning table presentation that feels special without hours of work.

    Exciting Recipe Adaptations

    The beauty of this vegan pasta is its versatility as a base for countless variations. In summer, I fold in fresh cherry tomatoes and basil right at the end for a burst of color and flavor. For extra protein, try adding white beans, crispy tofu cubes, or even roasted chickpeas. My personal favorite twist is adding capers and olives for a Mediterranean flair, similar to my Mediterranean Lentil Salad approach. For a creamier version, stir in a few tablespoons of dairy-free cream cheese or cashew cream. During autumn, I sometimes swap artichokes for roasted butternut squash cubes—the sweetness plays beautifully against the tangy lemon.

    Storage & Troubleshooting Guide

    Proper Storage Solutions

    This Vegan Lemon Artichoke Pasta stores surprisingly well for up to 3 days in an airtight container in the refrigerator. The flavors actually develop and deepen overnight, making it one of those rare pasta dishes that sometimes tastes even better the next day. When reheating, add a splash of water or vegetable broth to revive the sauce, as the pasta will have absorbed much of it. For meal prep, I sometimes keep the sauce and pasta separate, combining them only when ready to eat. Freezing isn’t ideal for this dish—the artichokes tend to become mushy and the sauce can separate when thawed.

    Common Issues and Easy Fixes

    The most common problem with this dish is a sauce that won’t cling properly to the pasta. If this happens, the solution is usually adding more pasta water, one tablespoon at a time, while tossing continuously over low heat. If your sauce tastes too acidic, balance it with a teaspoon of maple syrup or a bit more olive oil. For pasta that clumps together, try finishing the dish with a drizzle of olive oil and gentle tossing. If the artichoke flavor isn’t pronounced enough, marinate the drained artichokes in lemon juice for 10 minutes before adding them to the pasta—this simple step intensifies their flavor remarkably.

    Frequently Asked Questions

    Can I make Vegan Lemon Artichoke Pasta gluten-free?

    Absolutely! Simply substitute your favorite gluten-free pasta. I recommend rice or chickpea pasta as they hold their shape well and don’t get mushy. Just be sure to check your pasta water consistency as gluten-free varieties sometimes need less.

    What can I substitute for nutritional yeast?

    If you don’t have nutritional yeast, try a tablespoon of white miso paste or vegan parmesan. The goal is adding that umami depth without dairy. In a pinch, a teaspoon of light miso works wonderfully.

    How do I prevent my sauce from becoming watery?

    Thoroughly drain and pat dry your artichoke hearts before adding them. Also, reduce your lemon sauce slightly longer before adding pasta, and use starchy pasta water sparingly—start with just ¼ cup.

    Can I prepare components of this dish ahead of time?

    Yes! Prep your lemon zest, chop garlic, and quarter artichokes up to two days ahead. Store them separately in the refrigerator. The sauce can also be made a day ahead and gently reheated before tossing with fresh pasta.

    Is Vegan Lemon Artichoke Pasta suitable for meal prep?

    This pasta works well for 2-3 days of meal prep. Store in airtight containers and reheat with a splash of water. The flavors actually develop nicely overnight, making leftovers particularly delicious.

    Final Thoughts

    This Vegan Lemon Artichoke Pasta has become my reliable sunshine-in-a-bowl, regardless of the weather outside. There’s something incredibly satisfying about creating such bright, complex flavors from simple ingredients. I find myself craving its lemony, garlicky goodness weekly, and I love how it satisfies both my plant-based friends and dedicated omnivores alike. Don’t forget to save this recipe to your collection and check out more plant-based inspiration on our Pinterest board. The beauty of this dish truly lies in its simplicity—proving that vegan cooking can be both effortless and extraordinary.

  • Italian Amaretti Cookies: Irresistibly Crunchy & Sweet Delight!

    Italian Amaretti Cookies: Irresistibly Crunchy & Sweet Delight!

    Italian Amaretti Cookies: Irresistibly Crunchy & Sweet Delight!

    There’s something magical about Italian Amaretti Cookies that transports me straight to a cozy café in Milan. These delicate, almond-scented treasures with their crisp exterior and chewy center have been my go-to treat whenever I need a moment of pure bliss with my afternoon espresso. The beauty of these classic Italian cookies lies in their simplicity—just a few quality ingredients that transform into something extraordinary. I first fell in love with amaretti while traveling through northern Italy, and I’ve spent years perfecting this recipe to bring that authentic experience to your kitchen. Ready to create these little clouds of almond heaven? Let’s get baking!

    Recipe

    Why You’ll Love These Italian Amaretti Cookies

    Perfect Texture Combination

    These Italian Amaretti Cookies deliver the most satisfying textural experience—crisp and crackly on the outside while remaining wonderfully chewy inside. The secret lies in the perfect ratio of almond flour to sugar and the precise baking time. I love watching guests take their first bite and seeing their eyes widen with delight! The natural oils in the almonds create that signature chewiness that makes these cookies impossible to resist. And unlike many cookie recipes, these actually improve after a day as the flavors meld and develop.

    Simple Yet Sophisticated

    What amazes me most about amaretti is how such a short ingredient list creates something so sophisticated. With just almond flour, sugar, egg whites, and a hint of almond extract, these cookies showcase the pure almond flavor in its most elegant form. There’s something deeply satisfying about recipes that don’t require a pantry overhaul! These cookies look impressively professional with their characteristic crackled tops, yet they’re surprisingly forgiving for beginners. When friends ask for the recipe, they’re always shocked at how uncomplicated it is.

    Essential Tips & Tricks

    Perfecting Your Meringue

    The foundation of exceptional amaretti cookies starts with properly whipped egg whites. I’ve learned (through many trials!) that room temperature eggs whip to much greater volume than cold ones. Add a tiny pinch of salt and whip until soft peaks form—this means when you lift the beater, the peaks gently curl over. Avoid overbeating to stiff peaks, which can make your cookies too dry. Fold in your dry ingredients gently using a spatula with a cutting motion, maintaining as much air as possible for that perfect light texture.

    Rolling Technique Matters

    The traditional method of rolling Italian Amaretti Cookies involves coating your hands with powdered sugar before shaping each ball. This prevents sticking while creating that characteristic sweet, crackly exterior. Keep your cookie balls uniform in size—about 1 tablespoon each—to ensure even baking. For the classic amaretti look, press each ball slightly before baking, but don’t flatten completely. The cookies will spread naturally, creating those beautiful cracks as they bake and cool.

    Serving Ideas & Creative Variations

    Perfect Pairings

    These almond cookies shine brightest when paired with the right beverages. Traditionally, amaretti are served with espresso or sweet dessert wines like Vin Santo, creating a flavor combination that’s absolutely heavenly. For an elegant dessert platter, I love serving them alongside fresh berries and mascarpone or tucking them into scoops of vanilla gelato. During the holidays, I arrange them on a tiered stand with other small treats—the visual impact is stunning, but these humble cookies always disappear first!

    Delicious Variations

    While traditional amaretti are perfect as is, I’ve experimented with several delightful variations. Try adding orange or lemon zest to the batter for a citrusy twist that brightens the almond flavor beautifully. For chocolate lovers, fold in mini chocolate chips or drizzle cooled cookies with melted dark chocolate. My personal favorite variation includes a hint of cardamom and a dried cherry pressed into the center before baking—the flavor combination is unexpected and absolutely divine. These small tweaks maintain the cookie’s integrity while offering new flavor experiences.

    Storage & Troubleshooting Guide

    Optimal Storage Methods

    Italian Amaretti Cookies actually improve with a bit of time, making them perfect for preparing ahead. Store them in an airtight container at room temperature, where they’ll stay fresh for up to two weeks. The flavors deepen and the textures meld beautifully after 24 hours. For longer storage, these cookies freeze exceptionally well—just place them in a freezer-safe container with parchment between layers to prevent sticking. When ready to enjoy, thaw at room temperature for about 30 minutes—no reheating necessary!

    Common Issues Solved

    If your cookies spread too much during baking, your meringue likely wasn’t firm enough or your oven temperature was too low. For the next batch, whip the egg whites a bit longer and check your oven with a thermometer. Cookies too dry? You’ve probably overbaked them—next time, remove them when they’re still slightly soft in the center. They’ll firm up while cooling. If your cookies aren’t developing those characteristic cracks, try chilling the dough for 15 minutes before baking and make sure you’ve properly coated them in powdered sugar before baking.

    Frequently Asked Questions

    Are Italian Amaretti Cookies gluten-free?

    Yes! Traditional Italian Amaretti Cookies are naturally gluten-free as they’re made with almond flour instead of wheat flour. Just verify all your ingredients are processed in gluten-free facilities if you have celiac disease.

    Can I make these with almond extract only (no amaretto liqueur)?

    Absolutely. Pure almond extract provides the authentic flavor without alcohol. Use 1/2 teaspoon of extract for a classic taste, or increase to 3/4 teaspoon for more intense almond flavor.

    Why did my amaretti cookies flatten too much?

    Overmixing the dough or using warm ingredients can cause excessive spreading. Chill your dough for 15-30 minutes before shaping and maintain a cool kitchen environment.

    How can I get the perfect crackled top?

    Roll the cookie balls thoroughly in powdered sugar before baking and don’t skip the initial high-temperature bake (350°F for the first 5 minutes) before reducing to 325°F.

    Can I use blanched or unblanched almond flour?

    Blanched almond flour (without skins) gives the traditional light color and texture. Unblanched works but produces darker cookies with a slightly different texture and nuttier flavor.

    Final Thoughts

    These Italian Amaretti Cookies have become more than just a recipe in my collection—they’re a portal to cherished memories and a reminder that the simplest ingredients often create the most magical results. Whether you’re serving them alongside coffee, giving them as gifts, or simply treating yourself to a moment of sweetness, these little almond treasures never disappoint. I hope they bring as much joy to your kitchen as they have to mine! Don’t forget to check out more delicious cookie recipes on Pinterest for endless inspiration.

  • Dump and Start Instant Pot Alfredo Recipe – Creamy, Easy, Viral!

    Dump and Start Instant Pot Alfredo Recipe – Creamy, Easy, Viral!

    Dump and Start Instant Pot Alfredo Recipe – Creamy, Easy, Viral!

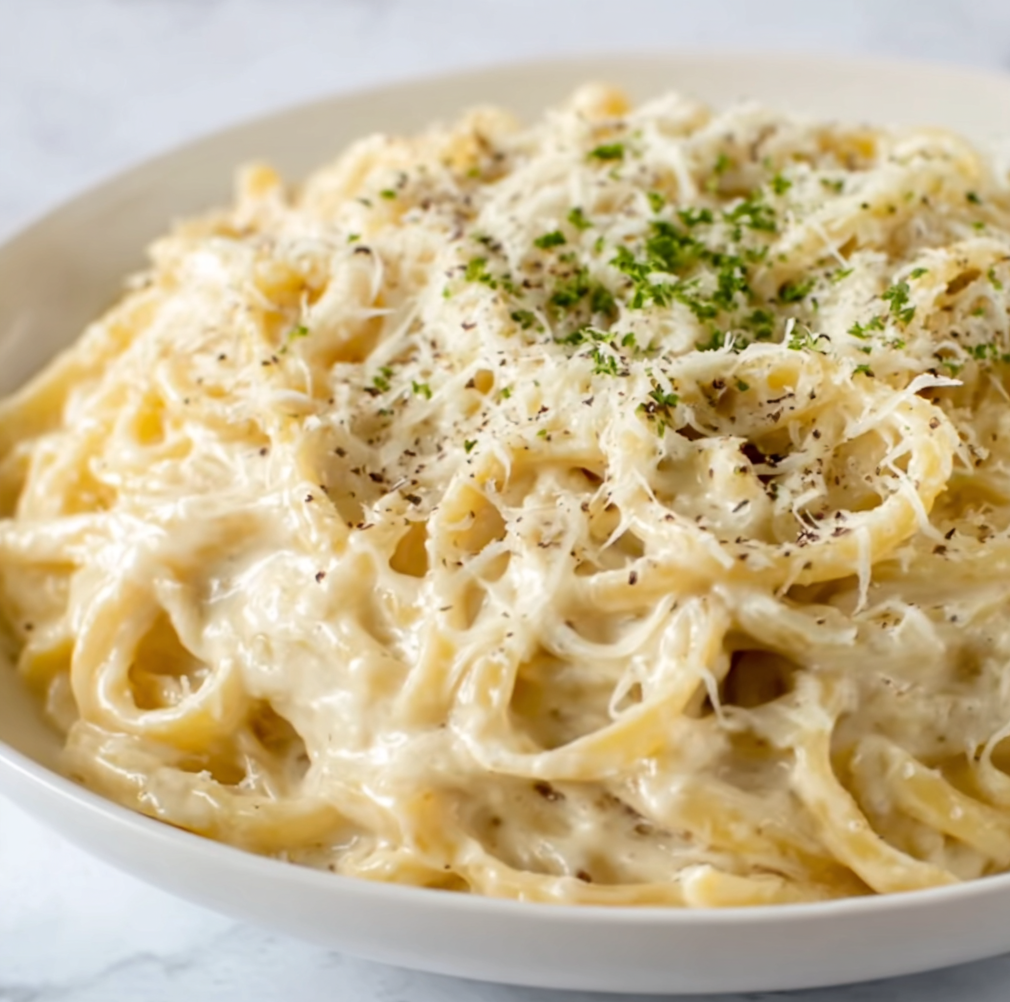
    Dump and Start Instant Pot Alfredo is about to revolutionize your weeknight dinner routine. The first time I made this creamy, dreamy pasta dish, I almost couldn’t believe how simple it was—just toss everything in, press a button, and walk away! The rich, velvety sauce coats each strand of fettuccine perfectly, creating that restaurant-quality experience without the fuss. When life gets hectic (like that time I had to help with my niece’s science project while prepping dinner), this recipe from Recipes Darleen has been my absolute salvation.

    Recipe

    Why You’ll Love This Dump and Start Instant Pot Alfredo

    Time-Saving Convenience

    Nothing beats the effortless preparation of this Instant Pot Alfredo. On busy weeknights when I’m racing against the clock, I can have dinner ready in under 30 minutes with minimal hands-on time. The beauty lies in the “dump and start” approach—add your pasta, liquid, and seasonings, then let the Instant Pot work its magic while you help with homework or take a moment to breathe. I love how the pasta cooks perfectly every time, absorbing all those savory flavors as it softens to al dente perfection.

    Rich, Creamy Results Without the Fuss

    The velvety texture of this Alfredo sauce is what keeps me coming back again and again. Unlike traditional methods that require constant stirring and babysitting, this recipe creates that luxurious, restaurant-quality creaminess without the hassle. The pressure cooking process somehow melds the cream, butter, and parmesan into a silky sauce that clings beautifully to every pasta strand. I still remember my husband’s face lighting up the first time he tasted it—”This is from the Instant Pot?” he asked in disbelief.

    Essential Tips & Tricks

    Perfect Pasta Selection & Liquid Ratio

    Choosing the right pasta type makes all the difference in this recipe. Fettuccine is traditional, but linguine or penne work beautifully too. Whatever you choose, break longer noodles in half before adding them to prevent clumping. The magic liquid ratio is 4 cups of broth to 1 pound of pasta—this ensures perfectly cooked noodles that aren’t soggy or too firm. I learned this the hard way after one unfortunate mushy pasta incident! Add a splash of heavy cream after cooking for that signature richness that makes Alfredo so comforting.

    Pressure Release Method Matters

    The quick release technique is crucial for preventing overcooked pasta. When the cooking cycle finishes, carefully perform a quick pressure release rather than natural release. Those extra minutes of steam can turn your al dente pasta into mush! I always drape a kitchen towel over the valve before releasing to catch any splatter—a trick I learned after redecorating my ceiling with pasta water. Stir immediately after opening to separate any noodles that might be sticking together.

    Serving Ideas & Creative Variations

    Perfect Pairings for a Complete Meal

    This creamy Alfredo pairs perfectly with protein additions like grilled chicken, sautéed shrimp, or crispy bacon crumbles. For a vegetable boost, stir in steamed broccoli, peas, or sautéed mushrooms after cooking. I love serving it with a bright side of Mediterranean Lentil Salad for contrast against the rich sauce. A simple garlic bread on the side creates that perfect Italian restaurant experience at home—ideal for those nights when you want comfort food without the restaurant price tag.

    Flavor Boosters and Dietary Adaptations

    Transform your basic Alfredo into something special with flavor enhancers like roasted garlic, sun-dried tomatoes, or fresh herbs. For a lighter version, substitute half the heavy cream with cream cheese mixed with chicken broth. Need a gluten-free option? Simply swap in your favorite gluten-free pasta and adjust the cooking time by a minute or two. I’ve even made a dairy-free version using coconut cream and nutritional yeast that my lactose-intolerant friend raved about for weeks!

    Storage & Troubleshooting Guide

    Proper Storage for Leftover Alfredo

    Store leftover Dump and Start Instant Pot Alfredo in airtight containers for up to 3 days in the refrigerator. The sauce will thicken considerably when chilled, so when reheating, add a splash of milk or broth to restore that creamy consistency. I find that gentle reheating on the stovetop works better than microwaving, which can make the sauce separate. For meal prep, I sometimes make a double batch and portion it into individual containers—a little splash of olive oil on top prevents the pasta from drying out.

    Solving Common Alfredo Challenges

    If your sauce turns out too thin, try the cornstarch slurry trick—mix 1 tablespoon cornstarch with 2 tablespoons cold water and stir it into the hot pasta. For sauce that’s too thick, gradually add warm broth until you reach your desired consistency. Getting the “burn” notice? This usually means there’s not enough liquid or something is stuck to the bottom. Always deglaze the pot with broth and scrape the bottom thoroughly before pressure cooking. I once salvaged a near-disaster by adding more liquid and giving everything a good stir.

    Frequently Asked Questions

    Can I use frozen chicken in my Dump and Start Instant Pot Alfredo?

    Yes! Add frozen chicken breasts on top of the pasta and increase cooking time by 2 minutes. Shred the chicken after cooking and mix it back into the pasta for a complete meal.

    How do I prevent my pasta from clumping together?

    Break long pasta in half, fan it out in different directions when adding to the pot, and make sure all pasta is submerged in liquid before cooking.

    What’s the best cheese to use for authentic flavor?

    Freshly grated Parmigiano-Reggiano provides the most authentic flavor. Pre-grated cheeses often contain anti-caking agents that can make your sauce grainy.

    Can I make this recipe dairy-free?

    Absolutely! Substitute heavy cream with full-fat coconut milk and use nutritional yeast instead of parmesan cheese for a dairy-free alternative with similar richness.

    Why did my Instant Pot give me a burn notice during cooking?

    This typically happens when there’s insufficient liquid or ingredients are stuck to the bottom. Always deglaze the pot thoroughly and ensure pasta is fully submerged in broth.

    Final Thoughts

    This Dump and Start Instant Pot Alfredo has become my go-to solution for those nights when cooking feels overwhelming but I still want something delicious. There’s something magical about transforming simple ingredients into a luxurious pasta dish with minimal effort. I’ve shared this recipe with countless friends who’ve all added it to their regular rotation. For more inspiration and variations, check out my Pinterest board where I collect all my favorite Instant Pot creations!

  • 3 Ingredient Biscoff Cookies: Easy, Irresistible & Viral Treat!

    3 Ingredient Biscoff Cookies: Easy, Irresistible & Viral Treat!

    3 Ingredient Biscoff Cookies: Easy, Irresistible & Viral Treat!

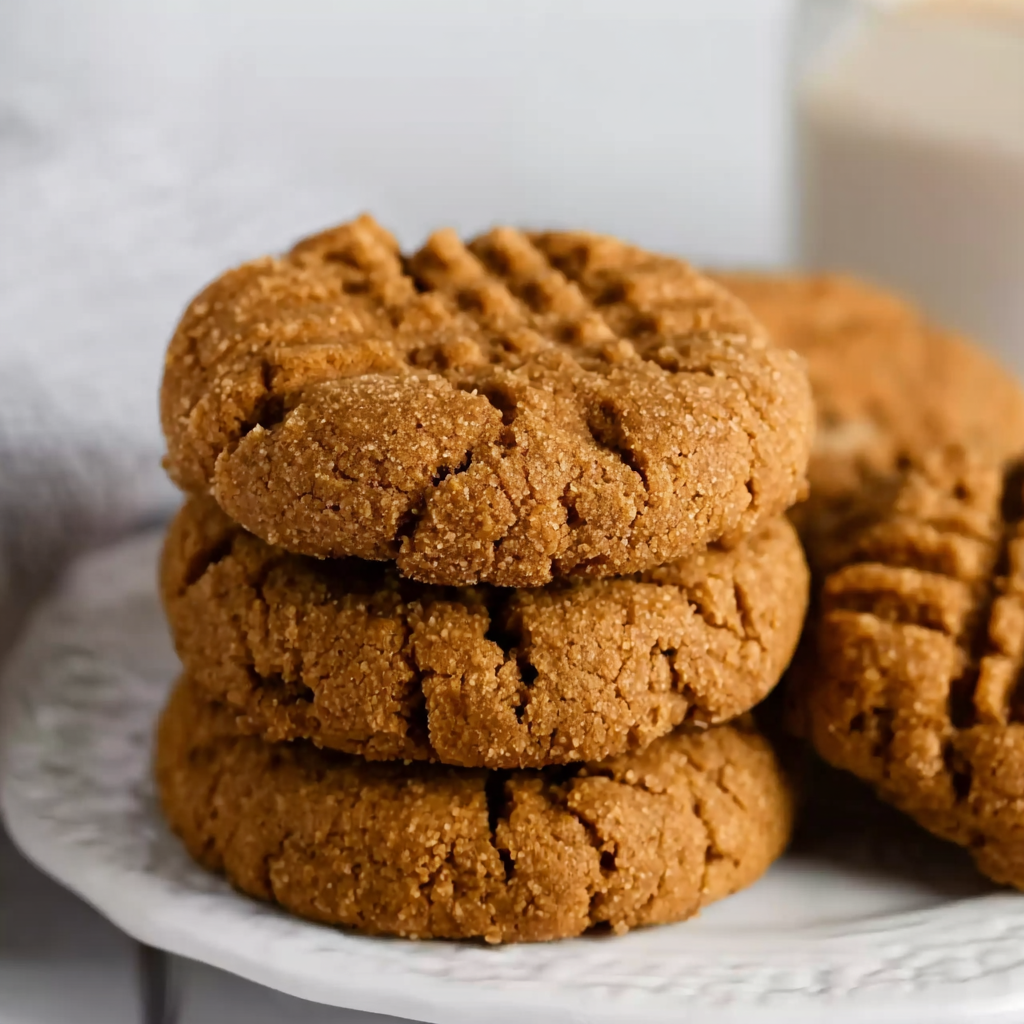
    I’ve been obsessed with creating 3 Ingredient Biscoff Cookies ever since discovering how ridiculously simple they are to make. There’s something magical about transforming that iconic spiced cookie butter into warm, fresh-from-the-oven treats with just two additional pantry staples. The rich caramelized flavor and subtle spice notes fill my kitchen with the most comforting aroma, instantly transporting me back to cozy winter afternoons at my grandmother’s house. If you’re craving something sweet but don’t want to spend hours in the kitchen, these cookies are about to become your new best friend. They’re perfect for last-minute gatherings or midnight cravings!

    Recipe

    Why You’ll Love This 3 Ingredient Biscoff Cookies

    Quick and Easy Preparation

    These cookies are a true lifesaver when you’re short on time but big on cookie cravings. I first made these during a particularly chaotic holiday season when I needed something impressive without the fuss. With just Biscoff spread, one egg, and all-purpose flour, you’ll have the dough ready in under 5 minutes. No mixer required—just a bowl and spoon! The simplicity means less cleanup and more time enjoying warm cookies. I love that there’s no need to chill the dough, making these perfect for those “I need cookies NOW” moments we all experience.

    Rich, Complex Flavor Profile

    Despite the minimal ingredients, these cookies deliver extraordinary flavor complexity. The distinctive taste of Biscoff spread—that perfect blend of caramelized sugar, cinnamon, and other warm spices—shines brilliantly in every bite. What amazes me most is how these cookies manage to capture both crisp edges and slightly chewy centers, creating the perfect textural contrast. The first time I served these at a gathering, friends refused to believe they were made with just three ingredients. They have that special bakery-quality taste that makes them seem far more sophisticated than their simple recipe suggests.

    Essential Tips & Tricks

    The key to nailing the texture lies in how you handle the dough. I’ve found that rolling the dough balls between your palms creates the perfect shape, but avoid overworking it—this keeps the centers tender. For chewier cookies, make the dough balls slightly larger and underbake by a minute. For crispier edges, flatten the balls slightly with your palm before baking. My personal preference is leaving them as balls for that perfect crisp-outside, soft-inside contrast. Watch them carefully during the last few minutes of baking—when the edges turn golden brown but the centers still look slightly underdone, that’s your sweet spot.

    Ingredient Quality Matters

    Since this recipe uses so few ingredients, quality makes a difference. I learned this the hard way after using a generic cookie butter once—the flavor just wasn’t the same. Authentic Lotus Biscoff spread gives these cookies their signature caramelized flavor that’s impossible to replicate. For the flour, all-purpose works perfectly, but I’ve found that using a kitchen scale to measure precisely (125g per cup) yields the most consistent results. The egg should be at room temperature to incorporate more easily. If your dough seems too sticky, don’t panic! Simply add an extra tablespoon of flour until it reaches a rollable consistency.

    Serving Ideas & Creative Variations

    Perfect Pairings

    These cookies shine when paired with the right complementary flavors. My absolute favorite way to enjoy them is still warm from the oven alongside a cup of cinnamon tea or coffee with a splash of cream. The warm spices in the cookies create a beautiful harmony with the beverages. For an elevated dessert experience, sandwich a small scoop of vanilla ice cream between two cookies while they’re still slightly warm—the contrast between warm cookie and cold ice cream is divine. They also make excellent companions to creamy desserts like puddings or custards, where their spiced notes cut through the richness.

    Easy Flavor Twists

    While perfect in their simplest form, these cookies welcome creative adaptations. My recent obsession is adding a quarter cup of mini chocolate chips to the dough—the combination of spiced cookie butter and chocolate is unexpectedly fantastic. White chocolate chips work beautifully too. For texture contrast, try folding in finely chopped nuts like pecans or hazelnuts. During holiday seasons, I love rolling the dough balls in cinnamon sugar before baking for a snickerdoodle-inspired variation. For a more sophisticated twist, press a small thumbprint into each cookie before baking and fill with a tiny dollop of raspberry jam.

    Storage & Troubleshooting Guide

    Keeping Cookies Fresh

    To maintain that perfect texture, store your cookies in an airtight container at room temperature for up to 5 days. I separate layers with parchment paper to prevent sticking. If you want to extend their life, these cookies freeze beautifully! Simply place cooled cookies in a freezer-safe container with parchment between layers and freeze for up to 3 months. When a craving hits, you can enjoy them straight from the freezer (they’re surprisingly delicious cold) or let them come to room temperature for about 20 minutes. For that fresh-baked experience, warm them in a 300°F oven for 3-4 minutes—they’ll taste like they just came out of the oven!

    Fixing Common Issues

    Even with such a simple recipe, occasional troubleshooting might be needed. If your cookies spread too much during baking, your dough was likely too warm or your oven temperature may be off. Try chilling the dough for 15 minutes before baking. For cookies that don’t spread enough, gently press down on the dough balls before baking. If the cookies seem too dry, you may have added too much flour—next time, measure more carefully or add a teaspoon of milk to the dough. For cookies that are too soft, simply bake them a minute or two longer until the edges firm up.

    Frequently Asked Questions

    Yes! While authentic Biscoff spread gives the classic flavor, you can experiment with any cookie butter. Speculoos or homemade versions work well, though the flavor profile will vary slightly.

    Are these cookies gluten-free?

    No, traditional Biscoff spread contains wheat, and the recipe calls for all-purpose flour. For a gluten-free version, you’d need gluten-free cookie butter and a 1:1 gluten-free flour substitute.

    Can I double the recipe?

    Absolutely! This recipe doubles beautifully with no adjustments needed beyond doubling each ingredient. Perfect for cookie exchanges or larger gatherings.

    How can I make these cookies vegan?

    Replace the egg with a flax egg (1 tablespoon ground flaxseed mixed with 3 tablespoons water, left to gel for 15 minutes). The texture will be slightly different but still delicious.

    Why did my cookies turn out dry?

    Too much flour is usually the culprit. Measure carefully or try reducing the flour by 1-2 tablespoons next time. Room temperature ingredients also help create a moister cookie.

    Final Thoughts

    These 3 Ingredient Biscoff Cookies have become my go-to recipe when I need something impressive with minimal effort. There’s something almost magical about transforming that distinctive spiced spread into warm, fragrant cookies that taste like they required hours of work. I’ve shared these cookies with neighbors, packed them for road trips, and served them at holiday gatherings—they never fail to impress. I hope you’ll discover the same joy I have in creating something so delicious with so little fuss. For more simple yet spectacular recipes, check out my other creations on Pinterest.

  • No-Bake Pumpkin Cheesecake Balls That Will Wow Your Taste Buds!

    No-Bake Pumpkin Cheesecake Balls That Will Wow Your Taste Buds!

    No-Bake Pumpkin Cheesecake Balls That Will Wow Your Taste Buds!

    No-Bake Pumpkin Cheesecake Balls are my absolute fall obsession! These bite-sized treats combine the velvety smoothness of cream cheese with warm pumpkin spice in a portable, poppable form that’s impossible to resist. I first made these for a chilly October game night, and they disappeared faster than I could say “autumn”! The best part? They require zero oven time but deliver maximum fall flavor. Perfect for holiday gatherings, afternoon snacks, or anytime you need a quick dessert fix that tastes like pumpkin pie and cheesecake had a delicious baby.

    Recipe

    Why You’ll Love This No-Bake Pumpkin Cheesecake Balls

    Perfect Balance of Flavors

    These little bites of heaven strike the perfect balance between tangy cream cheese and sweet pumpkin spice. The graham cracker coating adds a delightful textural contrast that makes each bite more satisfying than the last. I love how the warming spices—cinnamon, nutmeg, and cloves—bloom on your tongue with each bite. There’s something magical about that first taste when the creamy center meets the crunchy exterior. My neighbor actually gasped when she tried one, declaring them “better than pumpkin pie” (which I consider the highest compliment possible in autumn).

    Quick and Stress-Free Preparation

    The no-bake aspect makes these treats absolutely stress-free to prepare. On busy days when I’m juggling work deadlines and family obligations, I can still whip these up without breaking a sweat. Just mix, roll, chill, and you’re done! No watching the oven, no temperature worries, no baking fails. I made these with my niece last weekend while we caught up on life—the simplicity allowed us to chat and laugh without constantly checking timers. Perfect for beginners or anyone who wants impressive results without complicated techniques.

    Essential Tips & Tricks

    Ingredient Selection Matters

    Using full-fat cream cheese is non-negotiable for that perfect creamy texture—trust me, I tried the light version once and was disappointed. Let it soften completely at room temperature for easier mixing and a smoother result. For the pumpkin, always use pure pumpkin puree (not pumpkin pie filling) to control the sweetness and spice levels yourself. The quality of your graham crackers also makes a difference; I prefer honey graham crackers for their subtle sweetness that complements the pumpkin flavor perfectly.

    Rolling and Coating Techniques

    The rolling stage can get messy, but I’ve discovered a game-changing trick: chill the mixture for 30 minutes before rolling to firm it up. Use a small cookie scoop for uniform balls, and keep your hands slightly damp (not wet) to prevent sticking. When coating, place graham cracker crumbs in a shallow bowl and gently roll each ball until completely covered. For an extra-special touch, try adding a tiny sprinkle of cinnamon to your graham cracker coating—it creates beautiful flecks and enhances the fall flavor profile.

    Serving Ideas & Creative Variations

    Presentation Possibilities

    Transform these humble treats into showstoppers with thoughtful presentation. I love arranging them on a wooden board with fresh cinnamon sticks, small pumpkins, and maple leaves for a stunning fall dessert display. For parties, try placing each ball in a mini cupcake liner or skewering several on a decorative toothpick. They also look gorgeous stacked in a clear glass jar with layers of additional graham cracker crumbs between them. Last Thanksgiving, I served them on individual spoons with a tiny drizzle of caramel sauce, and my family still talks about the elegant presentation.

    Flavor Twists and Add-Ins

    The basic recipe is delicious, but customizing these treats makes them even more special. Try rolling them in crushed gingersnaps instead of graham crackers for a spicier kick. White chocolate chips folded into the mixture add sweet pockets of surprise. For a grown-up version, add 1-2 teaspoons of bourbon or rum to the mixture—the alcohol bakes off, leaving just the flavor. My personal favorite variation includes finely chopped crystallized ginger and a touch of orange zest, which brightens the whole flavor profile and adds a sophisticated twist.

    Storage & Troubleshooting Guide

    Proper Storage Methods

    These pumpkin cheesecake balls stay fresh when properly stored in the refrigerator for up to one week. Place them in an airtight container with parchment paper between layers to prevent sticking. They also freeze beautifully for up to three months—just thaw in the refrigerator overnight before serving. I often make a double batch and freeze half for unexpected guests or late-night cravings. The texture remains almost identical after freezing, though the graham cracker coating might soften slightly. For the best experience, let them sit at room temperature for 10 minutes before serving.

    Fixing Common Issues

    If your mixture is too soft to roll, it likely needs more time in the refrigerator—chill for an additional 30 minutes. Conversely, if it’s too firm, let it warm slightly at room temperature. For balls that won’t hold their shape, try adding more crushed graham crackers to the mixture, 1 tablespoon at a time. If the coating won’t stick, lightly dampen the exterior of each ball with a drop of water before rolling in crumbs. And if your balls taste too sweet, balance with a tiny pinch of salt or a squeeze of fresh lemon juice to brighten the flavors.

    Frequently Asked Questions

    Can I make No-Bake Pumpkin Cheesecake Balls ahead of time?

    Absolutely! These treats actually improve after 24 hours in the refrigerator as the flavors meld together. Make them up to 3 days in advance for parties or gatherings.

    What can I substitute for graham crackers?

    Gingersnaps, vanilla wafers, or digestive biscuits all work beautifully. For gluten-free options, try gluten-free graham crackers or crushed gluten-free cookies.

    Why is my mixture too sticky to roll?

    Your cream cheese might be too warm or your pumpkin puree too wet. Chill the mixture longer and consider adding more powdered sugar or graham cracker crumbs to absorb excess moisture.

    Can I use pumpkin pie filling instead of pumpkin puree?

    I don’t recommend it. Pumpkin pie filling contains added sugars and spices that will throw off the balance of flavors in your No-Bake Pumpkin Cheesecake Balls.

    How do I know when they’re ready to serve?

    After chilling for at least 2 hours, they should feel firm to the touch but yield slightly when bitten into—similar to a truffle consistency.

    Final Thoughts

    These No-Bake Pumpkin Cheesecake Balls have become my signature fall treat for good reason—they’re incredibly delicious yet wonderfully simple. There’s something magical about creating something so impressive with so little effort. The way the spices warm your senses and the creamy texture melts in your mouth creates an experience that’s greater than the sum of its parts. Whether you’re a pumpkin enthusiast or just looking for an easy seasonal dessert, these little bites of autumn joy deserve a spot in your recipe collection. Find more seasonal inspiration on Pinterest.

  • Grilled Chicken Orzo Salad with Avocado: Fresh, Zesty & Irresistible!

    Grilled Chicken Orzo Salad with Avocado: Fresh, Zesty & Irresistible!

    Grilled Chicken Orzo Salad with Avocado: Fresh, Zesty & Irresistible!

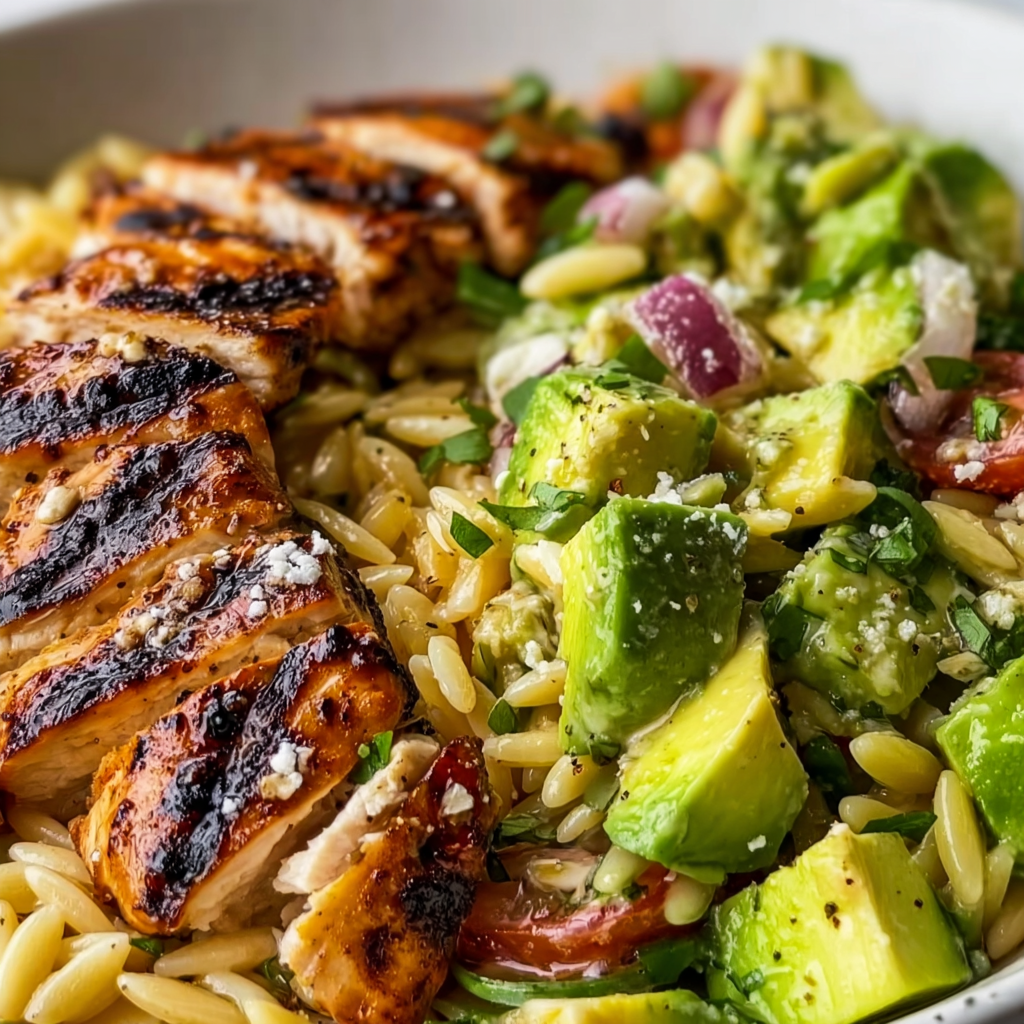
    Grilled Chicken Orzo Salad with Avocado is my absolute summer obsession that combines tender, charred chicken with pillowy orzo pasta and creamy avocado chunks. The first time I made this for my sister’s backyard gathering, everyone kept coming back for seconds (and thirds!). There’s something magical about the way the warm grilled chicken melts against the cool, buttery avocado. The lemony dressing ties everything together with a bright zing that makes each bite feel like sunshine on your tongue. Perfect for meal prep or entertaining guests, this salad strikes that elusive balance between satisfying and light.

    Recipe

    Why You’ll Love This Grilled Chicken Orzo Salad with Avocado

    Perfect Balance of Flavors and Textures

    This salad is a textural wonderland that keeps your taste buds engaged with every bite. The chewy orzo creates the perfect foundation, while the smoky grilled chicken adds substantial protein that makes this a complete meal. What truly elevates this dish is the creamy avocado that melts slightly into the warm components, creating little pockets of richness throughout. I love how the cherry tomatoes burst with juicy sweetness against the peppery arugula. The lemon-herb dressing ties everything together with bright acidity that cuts through the richness and makes the whole dish sing.

    Make-Ahead Friendly and Versatile

    One of the reasons I make this Grilled Chicken Orzo Salad with Avocado weekly is its incredible meal-prep potential. You can prepare most components days in advance – grill the chicken, cook the orzo, and chop the veggies – then just add the avocado and dressing right before serving. I’ve packed this for beach picnics and office lunches alike! It’s also incredibly versatile for dietary needs; swap in gluten-free orzo, add extra veggies, or even substitute the chicken with chickpeas for a vegetarian version that’s equally satisfying. The flavors actually develop beautifully over time.

    Essential Tips & Tricks

    Perfecting Your Chicken and Orzo

    The secret to this salad is properly seasoned chicken that’s been marinated for at least 30 minutes. I use a simple blend of olive oil, lemon juice, garlic, and herbs that infuses the meat with flavor before it even hits the grill. For the juiciest results, let your chicken rest for 5-10 minutes after grilling before slicing. As for the orzo, always cook it al dente and rinse it briefly with cool water to stop the cooking process. This prevents the pasta from becoming mushy when mixed with the other ingredients. One game-changing tip: toss the warm orzo with a splash of olive oil to prevent sticking.

    Handling Avocados Like a Pro

    Nothing ruins this salad faster than brown, mushy avocado. I’ve learned to add the avocado last right before serving, or if making ahead, to sprinkle it with extra lemon juice to prevent oxidation. Choose avocados that yield slightly to gentle pressure – they should feel like pressing the tip of your nose. For meal prep, I keep the avocado whole until serving time. When dicing, use a sharp knife and cut into uniform cubes for the most visually appealing presentation. Pro tip: save the pit and place it in any leftover salad to help keep the avocado fresher longer!

    Serving Ideas & Creative Variations

    Perfect Pairings and Presentation

    Serve this Grilled Chicken Orzo Salad with Avocado in a large, shallow bowl that showcases all the colorful ingredients. For a stunning presentation, arrange components in sections before gently tossing at the table. This salad pairs beautifully with a crisp white wine or sparkling water with cucumber slices. For a complete meal, I love serving it alongside warm pita bread or a crusty baguette to soak up the extra dressing. When hosting, I sometimes create a build-your-own salad bar with the base components and additional toppings like crumbled feta, toasted pine nuts, or fresh herbs for guests to customize.

    Seasonal and Dietary Adaptations

    This salad adapts beautifully across seasons and dietary needs. In summer, add sweet corn kernels and grilled peaches for unexpected sweetness. Fall calls for roasted butternut squash and dried cranberries. For a Mediterranean twist, incorporate olives, feta, and sun-dried tomatoes. To make it heartier, fold in white beans or chickpeas for extra protein and fiber. For a lower-carb option, replace some or all of the orzo with riced cauliflower or zucchini noodles. The dressing works with all these variations – just adjust the acidity depending on your add-ins.

    Storage & Troubleshooting Guide

    Keeping Leftovers Fresh

    To maximize freshness, store this Grilled Chicken Orzo Salad components separately when possible. Keep the dressed base (orzo, chicken, vegetables) in an airtight container for up to 3 days, but store avocado separately or add it fresh before eating. The lemon dressing can be kept in a small jar for up to 5 days – just shake well before using. If you’ve already mixed everything together, press plastic wrap directly onto the surface to minimize air exposure, which helps prevent the avocado from browning. For best texture, bring refrigerated leftovers to room temperature for 15-20 minutes before serving.

    Rescuing Common Issues

    If your orzo clumps together after refrigeration, don’t panic! Simply drizzle a little olive oil and gently separate with a fork. For chicken that’s become dry, shred it and toss with extra dressing to revive moisture. Found yourself with underripe avocados? Speed up ripening by placing them in a paper bag with a banana overnight. Conversely, if your avocado is overripe, use it to make a creamy dressing by blending it with the lemon dressing ingredients. If your salad tastes bland after refrigeration, a fresh squeeze of lemon and additional salt will brighten the flavors right back up.

    Frequently Asked Questions

    Can I make Grilled Chicken Orzo Salad with Avocado ahead of time?

    Yes! Prepare all components except the avocado up to 2 days ahead. Store separately, then combine with freshly diced avocado and dressing just before serving for the best texture and appearance.

    What can I substitute for orzo?

    Farro, pearl couscous, or quinoa work beautifully as alternatives. For low-carb options, try cauliflower rice or zucchini noodles. Each will change the texture slightly but maintain the salad’s essence.

    How do I prevent the avocado from turning brown?

    Toss diced avocado with extra lemon juice before adding to the salad. For leftovers, press plastic wrap directly onto the surface to minimize air exposure.

    Can I use rotisserie chicken instead of grilling my own?

    Absolutely! Shredded rotisserie chicken saves time while adding great flavor. Just toss it with a little olive oil, lemon juice, and seasonings to freshen it up.

    Is this salad suitable for meal prep?

    Yes, it’s perfect for meal prep. Store components separately in airtight containers, keeping avocado whole until ready to serve. Assemble individual portions as needed throughout the week.

    Final Thoughts

    This Grilled Chicken Orzo Salad with Avocado has become my go-to recipe for everything from quick weeknight dinners to impressive entertaining. What makes it special is how it balances being satisfyingly hearty yet refreshingly light at the same time. The combination of warm grilled chicken, chewy orzo, and buttery avocado creates a perfect harmony that never disappoints. I’d love to see your creations if you make this recipe – tag me on Pinterest to share your version of this versatile salad!

  • Italian Chicken Gnocchi Soup: Creamy, Cozy & Irresistibly Delicious!

    Italian Chicken Gnocchi Soup: Creamy, Cozy & Irresistibly Delicious!

    Italian Chicken Gnocchi Soup: Creamy, Cozy & Irresistibly Delicious!

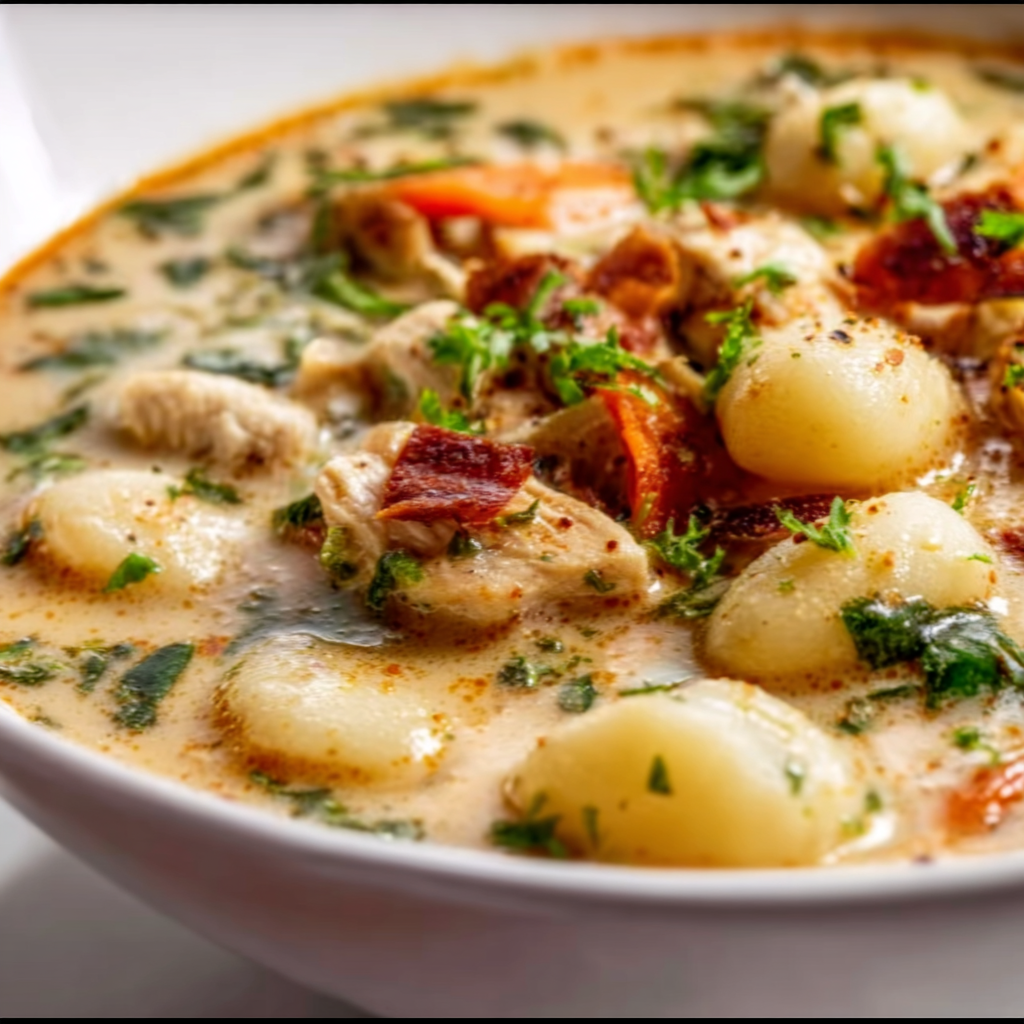
    Italian Chicken Gnocchi Soup has become my ultimate comfort food ritual on those chilly evenings when nothing else will do. There’s something magical about the way those pillowy potato dumplings swim alongside tender chicken and vibrant veggies in a creamy, herb-infused broth. I discovered this recipe during a particularly harsh winter in Vermont, and it’s been my go-to ever since. The Italian-inspired flavors transport me straight to a cozy trattoria, even when I’m just curled up on my sofa with my favorite blue ceramic bowl. If you’re craving something that warms both body and soul, this hearty soup recipe is exactly what you need.

    Recipe

    Why You’ll Love This Italian Chicken Gnocchi Soup

    Comfort Food Perfection

    This soup hits all the right notes with its velvety texture and soul-warming properties. The combination of tender chicken, pillowy gnocchi, and savory broth creates that perfect comfort food trifecta. I love how the cream adds richness without making it heavy—it’s substantial enough to be a meal but won’t weigh you down. On days when the wind howls outside my kitchen window, I find myself chopping vegetables with anticipation, knowing that each spoonful will bring that familiar feeling of contentment that only truly good food can provide. It’s like a warm hug in a bowl!

    Quick and Impressive Results

    One of the best things about this Italian Chicken Gnocchi Soup is how it delivers restaurant-quality flavor in just about 30 minutes. When my sister dropped by unexpectedly last month, I whipped this up from pantry staples, and she was convinced I’d been cooking all day! The pre-made gnocchi is the secret time-saving hero here. I love watching people’s expressions when they take that first bite—eyes closing slightly as they savor the herbaceous broth and tender chicken. For busy weeknights or impromptu gatherings, this soup consistently proves that delicious doesn’t have to mean complicated.

    Essential Tips & Tricks

    Perfecting Your Broth Base

    The soul of this soup lies in its flavorful foundation. I always start by sautéing my aromatics (onion, carrots, celery) until they’re just softened but not browned—about 5 minutes is perfect. This releases their essential oils and creates depth. Adding a splash of white wine and letting it reduce before adding broth brings a subtle acidity that balances the cream beautifully. Don’t rush this step! I’ve learned that those extra 2-3 minutes of simmering make all the difference between a good soup and an exceptional one. The aroma that fills my kitchen during this process is simply intoxicating.

    Working With Gnocchi

    The pillowy gnocchi deserves special attention to ensure soup perfection. Store-bought varieties work wonderfully, but pay attention to cooking times—they can vary significantly between brands. I add mine during the final 3-4 minutes of cooking to prevent them from becoming mushy. For a lighter version that still maintains that satisfying chew, try cauliflower gnocchi. Remember that gnocchi will continue absorbing liquid as the soup sits, so if you’re making it ahead, consider cooking the gnocchi separately and adding it just before serving. This small step preserves that perfect texture we all crave.

    Serving Ideas & Creative Variations

    Complementary Sides

    Elevate your Italian Chicken Gnocchi Soup experience with thoughtfully chosen sides. A rustic bread with a crackling crust is perfect for sopping up every last drop of that creamy broth—my sourdough loaf is the ideal companion. For a complete meal, pair with a simple arugula salad dressed with lemon and Parmesan; the peppery greens and bright acidity cut through the soup’s richness beautifully. When hosting dinner parties, I serve the soup in shallow bowls with a drizzle of high-quality olive oil and a sprinkle of fresh herbs for a presentation that always impresses without requiring extra effort.

    Exciting Flavor Twists

    Don’t be afraid to make this Italian Chicken Gnocchi Soup your own with creative variations. Swap the chicken for Italian sausage for a more robust flavor profile—the fennel and herbs in the sausage add wonderful complexity. For a seafood twist, replace the chicken with shrimp added in the final minutes of cooking. My vegetarian friends rave about my version with cannellini beans and kale instead of chicken. During summer months, I stir in fresh corn kernels and cherry tomatoes for seasonal brightness. The versatility of this recipe means it can evolve with your cravings and what’s available in your pantry or garden.

    Storage & Troubleshooting Guide

    Proper Storage Methods

    Storing this Italian Chicken Gnocchi Soup properly ensures you’ll enjoy those comforting flavors for days to come. Allow it to cool completely before transferring to airtight containers—I divide mine into individual portions for grab-and-go lunches. In the refrigerator, it keeps beautifully for 3-4 days. For freezing, I recommend a slightly different approach: freeze the soup base without the gnocchi and cream, then add fresh gnocchi and cream when reheating. This prevents the gnocchi from becoming waterlogged and the cream from separating. The aroma that fills my kitchen when reheating is almost as wonderful as the first time around!

    Fixing Common Issues

    Even experienced cooks encounter soup challenges, but they’re easily remedied. If your soup is too thick, simply thin it with additional chicken broth until it reaches your desired consistency. Too thin? Create a slurry with 1 tablespoon cornstarch and 2 tablespoons cold water, then stir it in while the soup simmers. If your gnocchi turned mushy, try adding a fresh batch to individual servings when reheating. For cream that’s separated after freezing, remove from heat and whisk vigorously, or blend a small portion then stir it back in. These simple fixes have saved my soup on numerous occasions!

    Frequently Asked Questions

    Can I make Italian Chicken Gnocchi Soup ahead of time?

    Absolutely! Prepare the soup without adding the gnocchi and cream. Refrigerate for up to 3 days, then reheat gently and add fresh gnocchi and cream just before serving for the best texture and flavor.

    What’s the best substitute for cream in this recipe?

    Unsweetened coconut milk or cashew cream work beautifully as dairy-free alternatives. For a lighter option, try evaporated milk or a mixture of whole milk with a tablespoon of butter for richness.

    Can I use frozen vegetables in my soup?

    Yes! Frozen vegetable blends save time without sacrificing quality. Add them directly from frozen, but adjust cooking time slightly as they’ll release additional moisture into your soup.

    Is homemade gnocchi worth the effort for this soup?

    While store-bought gnocchi works perfectly, homemade adds a special touch for special occasions. The pillowy texture is unmatched, but save this project for weekends when you have extra time.

    How can I increase the protein in Italian Chicken Gnocchi Soup?

    Boost protein by adding white beans, increasing the chicken amount, or stirring in a beaten egg during the final minutes (tempering first to prevent curdling). Each option adds richness without altering the classic flavor.

    Final Thoughts

    This Italian Chicken Gnocchi Soup has become more than just a recipe in my collection—it’s a reliable friend that never disappoints. The way the creamy broth embraces those pillowy potato dumplings and tender chicken creates something truly magical in its simplicity. I find myself returning to it season after season, sometimes following the recipe exactly, other times playing with new variations. I’d love to see how you make it your own! Share your creations on Pinterest and tag me—I’m always inspired by how others interpret this beloved comfort classic.