Blog

  • Crispy Egg Salad Recipe That Will Blow Your Mind!

    Crispy Egg Salad Recipe That Will Blow Your Mind!

    Crispy Egg Salad Recipe That Will Blow Your Mind!

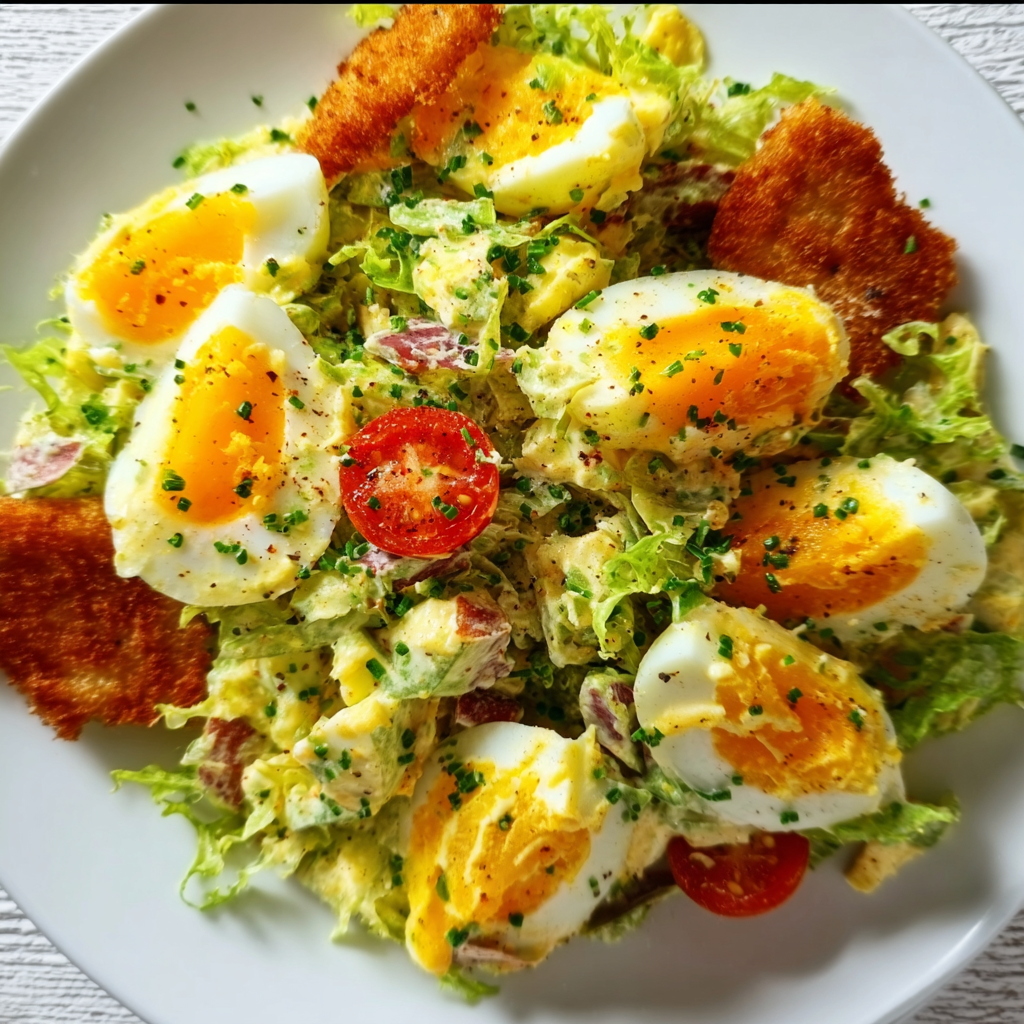
    Crispy Egg Salad has completely transformed my lunch game, friends! There’s something magical about the contrast between crunchy textures and creamy dressing that makes this dish utterly irresistible. I discovered this recipe during a chaotic work-from-home day when my fridge was nearly empty – just eggs, some sad-looking celery, and condiments. What emerged was this delightful creation that’s now my go-to for quick lunches, potlucks, and even fancy brunch spreads. Let me show you how to make this egg-cellent dish that’ll have everyone asking for seconds!

    Recipe

    Why You’ll Love This Crispy Egg Salad

    Perfect Balance of Textures

    The magic of this Crispy Egg Salad lies in its contrasting textures. Perfectly hard-boiled eggs provide a velvety foundation, while crispy bacon bits and water chestnuts add unexpected crunch in every bite. I love the way the silky egg yolks blend with the mayo-based dressing, creating pockets of creaminess that complement the crisp elements. The first time I served this at a garden party, my friend Jen closed her eyes and sighed, “I never knew egg salad could be this exciting!” That’s exactly what makes this recipe special – it transforms the ordinary into something extraordinary.

    Quick and Versatile Meal Solution

    This Crispy Egg Salad comes together in just 20 minutes, making it perfect for those hectic weeknights when cooking feels impossible. The ingredients are pantry staples you likely already have on hand – eggs, mayo, celery, and your choice of crunchy add-ins. I’ve made this on busy Mondays and for impromptu weekend gatherings with equal success. It’s incredibly adaptable too – serve it on toast for breakfast, in lettuce cups for lunch, or as a protein-packed side with dinner. When time is tight but you still want something homemade and satisfying, this recipe consistently delivers.

    Essential Tips & Tricks

    Perfect Hard-Boiled Eggs Every Time

    The foundation of amazing Crispy Egg Salad is perfectly cooked eggs with firm whites and creamy yolks. My foolproof method: place eggs in cold water, bring to a boil, then cover and remove from heat for exactly 9 minutes. Transfer immediately to an ice bath to stop cooking and prevent that unappetizing gray ring around the yolk. For easier peeling, gently tap eggs all over and roll them on the counter before removing shells under a thin stream of cold water. This technique has saved me countless frustrated minutes picking tiny shell fragments from my eggs and ensures the perfect texture for your salad.

    Achieving the Perfect Crispy Elements

    The “crispy” in Crispy Egg Salad comes from strategic ingredient choices and proper preparation. For bacon, cook until extra crispy, then chop into small pieces that distribute evenly throughout the salad. Toast nuts like walnuts or almonds at 350°F for 8-10 minutes until fragrant before chopping. For vegetables, ensure they’re fresh and crunchy – limp celery ruins the experience! I like to soak celery in ice water for 30 minutes before chopping to revive its crispness. For an extra texture boost, try adding crispy rice elements or even crushed potato chips just before serving.

    Serving Ideas & Creative Variations

    Elegant Presentation Options

    Transform this humble Crispy Egg Salad into a showstopping dish with thoughtful presentation. For a beautiful brunch display, hollow out small dinner rolls and fill with the salad, garnishing with microgreens and paprika. Create an impressive appetizer by piping the mixture onto cucumber rounds using a star tip. For a stunning centerpiece, mound the salad into a bowl lined with butter lettuce leaves, creating a fresh, edible vessel. I served mine this way at my sister’s baby shower, arranging edible flowers around the edge, and guests were snapping photos before diving in! These simple touches elevate the everyday into something special.

    Flavor Variations to Try

    The basic Crispy Egg Salad recipe is wonderfully adaptable to different flavor profiles. For a Mediterranean twist, mix in chopped olives, feta cheese, and a squeeze of lemon juice. Craving something spicy? Add diced jalapeños, a dash of hot sauce, and swap regular mayo for a chipotle version. For an Asian-inspired variation, include a teaspoon of sesame oil, soy sauce, and top with crispy wonton strips. My personal favorite is adding curry powder, golden raisins, and toasted almonds for a sweet-savory combination that’s absolutely addictive. Don’t be afraid to experiment with herbs and spices to make this recipe uniquely yours.

    Storage & Troubleshooting Guide

    Proper Storage for Maximum Freshness

    To maintain the distinctive textures of your Crispy Egg Salad, proper storage is crucial. Store the base egg mixture in an airtight container in the refrigerator for up to 3 days. However, I recommend keeping crispy elements separate until serving time. Place bacon bits, toasted nuts, or croutons in small containers or zip-top bags alongside your egg mixture. This prevents them from absorbing moisture and becoming soggy. If you’re packing this for lunch, assemble it in the morning and keep it chilled with an ice pack. For best flavor, remove from the refrigerator 15 minutes before serving to take the chill off.

    Fixing Common Issues

    Even experienced cooks encounter challenges with egg salad. If your mixture is too dry and crumbly, add small amounts of mayo or Greek yogurt until you reach your desired consistency. Too wet? Mix in extra chopped vegetables or a hard-boiled egg to absorb excess moisture. If your crispy elements have softened, quickly refresh them – reheat bacon in a skillet for 30 seconds or toast nuts in a dry pan. Dealing with bland flavor? Add a pinch of salt, a squeeze of lemon juice, or a dash of hot sauce to brighten it up. Remember that egg salad flavors develop over time, so it may taste better after sitting for an hour.

    Frequently Asked Questions

    How long does Crispy Egg Salad stay fresh in the refrigerator?

    The egg base stays fresh for 3 days when properly refrigerated. For best results, store crispy elements separately and combine just before serving to maintain the contrasting textures.

    Can I make this recipe ahead for a party?

    Absolutely! Prepare the egg mixture up to 24 hours ahead, but add crispy ingredients like bacon, nuts, or croutons just before serving to preserve their crunch.

    What’s the best bread for Crispy Egg Salad sandwiches?

    I prefer sturdy breads like sourdough or ciabatta that can support the hearty texture. Toast the bread lightly for extra stability and a nice contrast to the creamy filling.

    Is there a mayo-free version of this recipe?

    Yes! Substitute Greek yogurt mixed with a teaspoon of Dijon mustard, or use mashed avocado for a completely different but equally delicious creamy base.

    How can I add more protein to my Crispy Egg Salad?

    Boost protein by incorporating diced chicken, crumbled turkey bacon, or chickpeas. For a seafood twist, add small shrimp or flaked tuna for a satisfying meal.

    Final Thoughts

    This Crispy Egg Salad has become my secret weapon for impressing guests without spending hours in the kitchen. The combination of creamy eggs with unexpected crunchy elements creates a texture experience that elevates this humble dish into something truly special. I love seeing the surprised expressions when people take their first bite, not expecting the delightful contrast of textures and flavors. Whether you’re making a quick lunch or catering a special event, this versatile recipe adapts to any occasion. Find more inspired recipes on Pinterest and start creating your own crispy, creamy masterpieces!

  • Mini Caramel Pecan Crème Brulee Cheesecakes – Irresistibly Delicious!

    Mini Caramel Pecan Crème Brulee Cheesecakes – Irresistibly Delicious!

    Mini Caramel Pecan Crème Brulee Cheesecakes – Irresistibly Delicious!

    Mini Caramel Pecan Creme Brulee Cheesecakes combine four incredible desserts into one showstopping treat that’s surprisingly simple to make. The first time I served these at a dinner party, my guests literally gasped when I brought them to the table. There’s something magical about the combination of creamy cheesecake, crunchy caramelized sugar topping, buttery pecans, and rich caramel that creates the perfect balance of textures and flavors. These mini desserts look impressive enough for special occasions but are manageable enough for weekend baking projects. Let me show you how to create these little bites of heaven.

    Recipe

    Why You’ll Love This Mini Caramel Pecan Creme Brulee Cheesecakes Recipe

    Perfect Make-Ahead Dessert

    These mini cheesecakes are a time-management dream. I often make them the day before a gathering, which allows the flavors to deepen overnight. The cheesecake base sets up beautifully in the refrigerator, creating that perfect dense-yet-creamy texture we all crave. You’ll appreciate how the caramel notes intensify and meld with the vanilla bean-flecked filling. Plus, you can add the brûlée topping just before serving, giving your guests that dramatic cracking moment that makes creme brulee so special.

    Impressive Without the Stress

    Despite their elegant appearance, these mini desserts are surprisingly forgiving to make. The individual portions eliminate many common cheesecake problems—no water bath needed, no worries about the center setting properly, and no stress about clean slices. The miniature format means faster baking and cooling times too. I’ve found that even baking novices can nail this recipe on the first try. When guests ask how you made something so beautiful, you can smile knowingly while keeping the simplicity your little secret.

    Essential Tips & Tricks

    Mastering the Perfect Texture

    The key to these cheesecakes is achieving that silky-smooth texture without cracks. Always start with room temperature cream cheese and eggs—I set mine out at least an hour before baking. Beat the cream cheese until completely lump-free before adding other ingredients, but avoid over-mixing once the eggs are incorporated. This prevents incorporating too much air, which can cause cracks. A gentle tap of your muffin tin against the counter before baking helps release any trapped air bubbles for that perfect, velvety finish.

    The Brulee Technique

    Creating that perfect caramelized sugar top might seem intimidating, but it’s actually quite simple. The secret lies in timing—sprinkle a thin, even layer of granulated sugar over completely chilled cheesecakes. Use a kitchen torch with a steady hand, moving constantly in circular motions about 2-3 inches from the surface. Watch for that moment when the sugar bubbles and turns amber—that’s your cue to move to the next spot. If you don’t have a torch, you can broil them briefly instead, but keep a vigilant eye to prevent burning!

    Serving Ideas & Creative Variations

    Seasonal Adaptations

    These mini desserts can be easily adapted for any season with simple swaps. In summer, I love adding fresh berries and mint for a refreshing contrast to the rich cheesecake. Fall calls for warming spices like cinnamon and nutmeg in the crust, while winter holidays shine with a splash of bourbon in the caramel sauce. Spring celebrations benefit from a light citrus zest folded into the filling. The versatility of this base recipe means you’ll never tire of making these little treasures, and they’ll always feel special and seasonally appropriate.

    Presentation Variations

    Elevate your Mini Caramel Pecan Creme Brulee Cheesecakes with thoughtful presentation. For casual gatherings, serve them in their cupcake liners on a rustic wooden board. For elegant affairs, carefully remove the liners and place each cheesecake on a small dessert plate with a drizzle of extra caramel sauce creating an artistic pattern. Add a tiny gold fork, a sprinkle of edible gold dust, or a personalized chocolate decoration for special occasions. The miniature format lends itself beautifully to dessert tables where guests can sample multiple treats.

    Storage & Troubleshooting Guide

    Proper Storage Methods

    These cheesecakes maintain their quality remarkably well when stored correctly. Without the brûléed topping, they’ll keep in an airtight container in the refrigerator for up to 4 days. For longer storage, freeze them individually on a baking sheet until solid, then transfer to a freezer container with parchment between layers. They’ll keep for up to 2 months frozen. Always thaw overnight in the refrigerator, never at room temperature, to maintain that perfect creamy texture. Add the caramelized sugar topping only after they’re completely thawed.

    Common Issues and Fixes

    If your cheesecakes develop small cracks, don’t worry—the caramel and pecan topping will hide them beautifully. For sunken centers, a strategic placement of whipped cream or extra caramel sauce works wonders. If your caramelized sugar layer isn’t hardening properly, your cheesecakes might be too warm—chill them thoroughly before attempting to brûlée. For a sugar top that burns rather than caramelizes, you’re likely holding the torch too close or in one spot too long. Practice makes perfect, and remember that even imperfect cheesecakes will taste divine!

    Frequently Asked Questions

    Can I make Mini Caramel Pecan Creme Brulee Cheesecakes without a kitchen torch?

    Yes! You can use your oven’s broiler instead. Place the sugar-topped cheesecakes on the highest rack, 3-4 inches from the heat source, and broil for 1-2 minutes while watching constantly to prevent burning.

    How far in advance can I make these cheesecakes?

    The cheesecake bases can be made up to 3 days ahead and stored in the refrigerator. Add the sugar topping and brûlée it just before serving for the best texture contrast.

    Can I substitute the pecans with another nut?

    Absolutely! Walnuts, macadamia nuts, or even pistachios work beautifully. Toast them lightly before using to enhance their flavor and maintain their crunch.

    Why did my caramel sauce crystallize?

    Crystallization usually happens when sugar crystals form during cooking. Avoid stirring the caramel once the sugar dissolves, and add a teaspoon of corn syrup to the recipe to prevent crystallization.

    What’s the best way to remove the cheesecakes from the liners?

    Freeze the cheesecakes for about 20 minutes, then carefully peel away the liners. The firmer texture from chilling makes this process much easier.

    Final Thoughts

    These Mini Caramel Pecan Creme Brulee Cheesecakes represent everything I love about dessert—they’re indulgent, beautiful, and bring people together around the table. The combination of smooth cheesecake, crunchy brûléed sugar, buttery pecans, and rich caramel creates a perfect harmony of flavors and textures that never fails to impress. Whether you’re celebrating a special occasion or simply treating yourself, these little treasures are worth every moment spent creating them. Find more delicious inspiration on Pinterest and enjoy the sweet moments these mini desserts will create!

  • Flank Steak Fajitas: Sizzle with Peppers & Onions Delight!

    Flank Steak Fajitas: Sizzle with Peppers & Onions Delight!

    Flank Steak Fajitas: Sizzle with Peppers & Onions Delight!

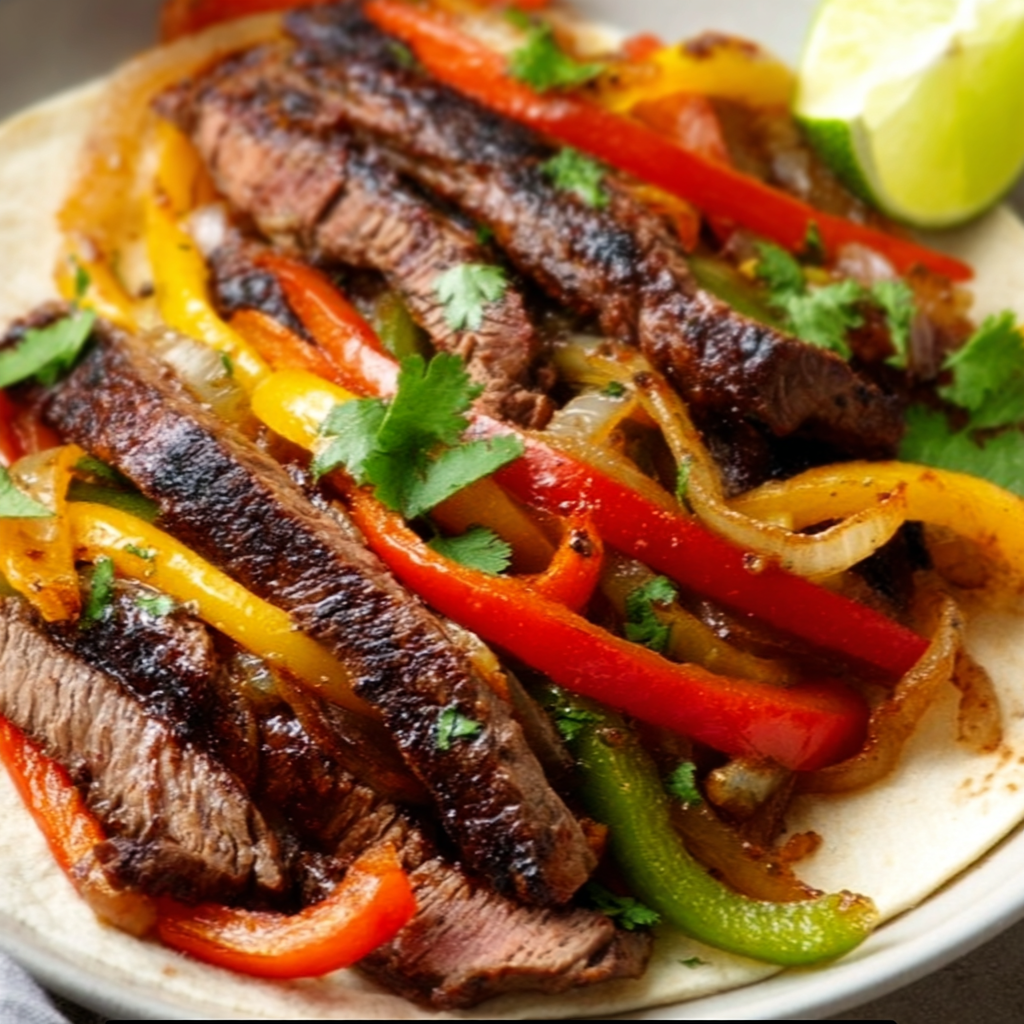
    Flank Steak Fajitas with Sautéed Peppers and Onions have been my go-to dinner party hero for years. There’s something magical about that sizzling platter hitting the table – the vibrant colors of charred peppers against perfectly seasoned steak, the intoxicating aroma of lime and cilantro mingling with smoky spices. I’ll never forget serving these at my sister’s birthday gathering and watching everyone’s eyes light up at that first bite. Today, I’m sharing my foolproof method for creating these restaurant-worthy Flank Steak Fajitas that bring people together around the table.

    Recipe

    Why You’ll Love These Flank Steak Fajitas with Sautéed Peppers and Onions

    Perfect Texture Contrast

    The beauty of flank steak fajitas lies in their incredible textural dance. The steak, when marinated properly and sliced against the grain, becomes melt-in-your-mouth tender while maintaining that satisfying chew that makes beef so craveable. I love how the edges caramelize slightly, creating little flavor bombs throughout each bite. Meanwhile, the peppers and onions develop this gorgeous char while still maintaining a slight crispness – never soggy, never raw. It’s this perfect balance that elevates homemade fajitas from good to absolutely memorable.

    Flavor That Builds With Every Bite

    There’s a reason my family requests these fajitas for every celebration – the flavor development is absolutely incredible. The marinade works double-duty, tenderizing the meat while infusing it with lime, garlic, and a hint of smoky cumin. But what really makes these special is how the flavors build as you eat. First, you get that initial hit of char and caramelization, followed by the bright citrus notes, then the earthy spices, and finally that subtle heat that lingers pleasantly. It’s a complete sensory experience that keeps you coming back for “just one more” fajita.

    Essential Tips & Tricks

    Mastering the Marinade

    The secret to exceptional flank steak fajitas starts with a marinade that balances acid and oil perfectly. I’ve found that a 1:1 ratio of lime juice to olive oil creates the ideal environment for flavor infusion without over-tenderizing the meat. Always include something enzymatic like pineapple juice or yogurt to break down those tough muscle fibers. My non-negotiable ingredient? A tablespoon of brown sugar – it helps create that gorgeous caramelization on the edges. Marinate for at least 2 hours, but never more than 8, or you’ll risk making the meat mushy instead of tender.

    The Perfect Cooking Technique

    The difference between good and great fajitas comes down to cooking temperature. Your pan or grill needs to be screaming hot – I’m talking about that moment when you’re slightly worried about setting off the smoke alarm! This high heat creates that restaurant-style sear while keeping the inside juicy. Another game-changer is cooking your components separately. Sear the steak whole first, let it rest while you cook the peppers and onions, then slice and briefly return the steak to the hot pan with the vegetables for a final flavor meld.

    Serving Ideas & Creative Variations

    Beyond Traditional Tortillas

    While warm flour tortillas are the classic vessel for flank steak fajitas, thinking outside the tortilla opens up exciting possibilities. Try serving over cilantro-lime rice for a hearty fajita bowl that’s perfect for meal prep. For a lighter option, butter lettuce cups create refreshing wraps that let the flavors of the steak and vegetables shine. My personal favorite for summer gatherings? Fajita nachos – layer tortilla chips with the steak mixture, top with cheese, broil until bubbly, then finish with fresh avocado and a drizzle of crema. It’s always the first dish to disappear.

    Customizable Toppings Bar

    The beauty of fajitas lies in their customization potential. Create an interactive dining experience by setting up a toppings bar with small bowls of fresh ingredients. Beyond the classics like sour cream and guacamole, try offering pickled red onions for tanginess, crumbled cotija cheese for saltiness, and Mexican street corn salad for sweetness. For heat lovers, provide both fresh and pickled jalapeños. This approach not only looks impressive but allows everyone to create their perfect bite – especially helpful when feeding both spice-lovers and spice-avoiders at the same table!

    Storage & Troubleshooting Guide

    Proper Storage for Maximum Freshness

    To maintain the quality of leftover flank steak fajitas, proper storage is crucial. Always cool components completely before refrigerating to prevent condensation that leads to sogginess. Store the steak separate from the vegetables in airtight containers – this prevents the meat from absorbing excess moisture. When properly stored, leftovers will maintain their flavor for up to 3 days. For reheating, avoid the microwave which can toughen the meat. Instead, warm gently in a skillet with a splash of water to create steam, covering briefly to help everything heat through evenly.

    Troubleshooting Common Issues

    Even experienced cooks occasionally encounter challenges with fajitas. If your steak turns out tough or chewy, it’s likely due to either insufficient marinating time or, more commonly, incorrect slicing technique. Always cut perpendicular to the visible muscle fibers – this shortens the fibers and results in tender bites. For vegetables that end up soggy instead of crisp-tender, the culprit is usually overcrowding the pan. Work in batches if necessary, and remember that high heat plus quick cooking equals perfect texture. Lastly, if flavors seem bland, a final squeeze of fresh lime and sprinkle of flaky salt just before serving works wonders.

    Frequently Asked Questions

    What cut of beef works best for Flank Steak Fajitas with Sautéed Peppers and Onions?

    While flank steak is traditional, skirt steak makes an excellent alternative with similar texture. In a pinch, sirloin can work but requires less cooking time to prevent toughness.

    How do I get restaurant-quality char on my vegetables?

    Use a cast iron skillet on high heat, avoid overcrowding, and resist stirring too frequently. Allow peppers and onions to develop dark spots before tossing.

    Can I make these fajitas ahead of time?

    Yes! Marinate the steak up to 8 hours ahead, and pre-slice peppers and onions a day before. Cook just before serving for best results.

    What’s the best way to warm tortillas?

    For authentic flavor, heat tortillas directly over a gas flame for 10-15 seconds per side. Alternatively, wrap in foil and warm in a 350°F oven for 5 minutes.

    How can I make these fajitas spicier?

    Add sliced jalapeños or serranos to your vegetable mix, or incorporate cayenne or chipotle powder into your marinade for deeper heat.

    Final Thoughts

    These Flank Steak Fajitas with Sautéed Peppers and Onions have become more than just a recipe in my kitchen – they’re a tradition that brings people together. There’s something about that sizzling platter that creates instant connection and conversation. Whether you’re cooking for a crowd or preparing a special weeknight dinner, these fajitas deliver restaurant-quality results with home-cooked love. I’d love to see your fajita creations – tag me on Pinterest to share your spin on this beloved classic!

  • Low-Carb Tuscan Bake Shrimp: Irresistibly Delicious & Easy!

    Low-Carb Tuscan Bake Shrimp: Irresistibly Delicious & Easy!

    Low-Carb Tuscan Bake Shrimp: Irresistibly Delicious & Easy!

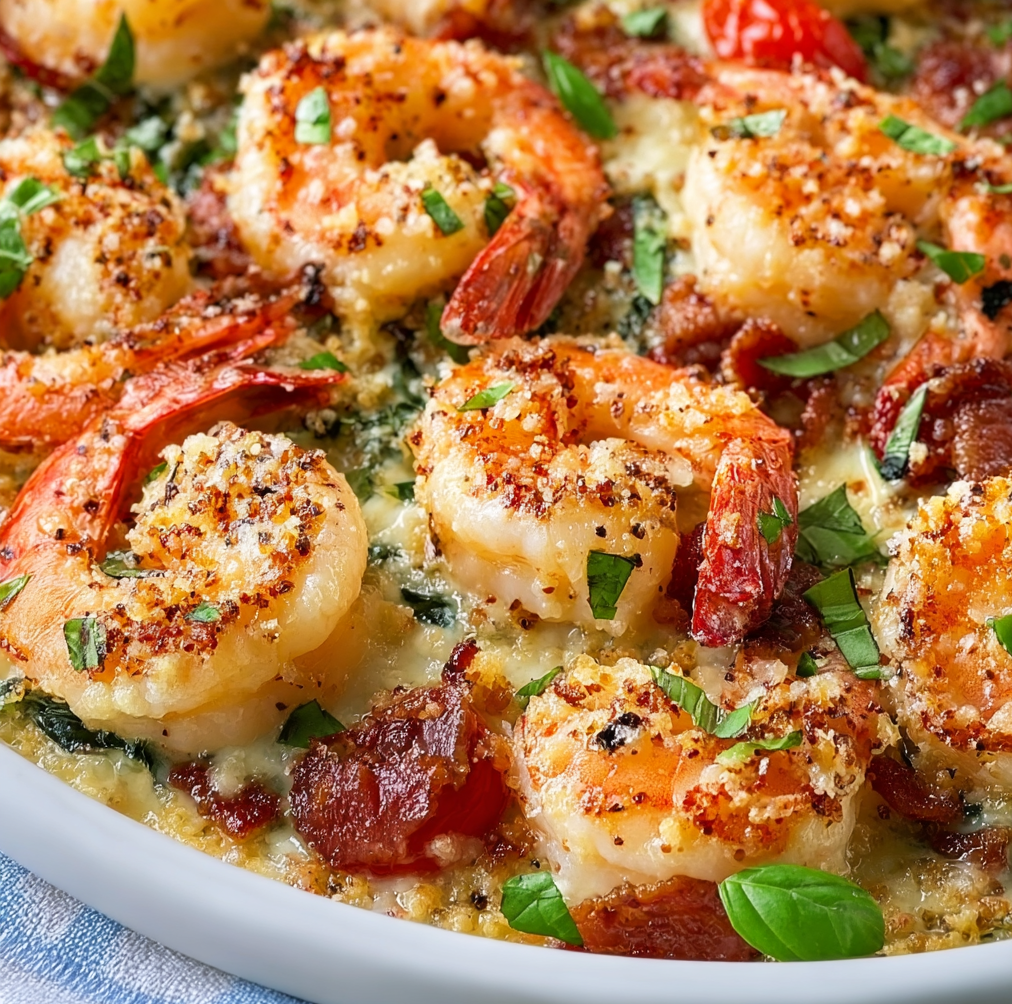
    The aroma of garlic-infused butter and fresh herbs wafting through my kitchen never fails to transport me to the Italian countryside. This Low-Carb Tuscan Bake Shrimp recipe has become my go-to for those evenings when I crave something indulgent yet want to stay mindful of my carb intake. I discovered this gem during a rainy weekend when I was determined to recreate my favorite restaurant dish without the heavy pasta base. The result? A creamy, satisfying meal that’s become a staple in my dinner rotation. Let me share this Mediterranean-inspired delight that combines succulent shrimp with a velvety sauce that’ll make you forget you’re eating low-carb!

    Recipe

    Why You’ll Love This Low-Carb Tuscan Bake Shrimp

    Perfect Balance of Flavors and Nutrition

    This dish delivers a flavor explosion while keeping carbs in check. The combination of plump shrimp, sun-dried tomatoes, and spinach creates a perfect balance of protein and vegetables. What makes this truly special is how the garlic-infused cream sauce brings everything together without the need for pasta or rice. I love how the natural sweetness of the shrimp complements the slight tanginess of the sun-dried tomatoes, creating layers of flavor that make each bite more exciting than the last. It’s a guilt-free indulgence that satisfies my Italian food cravings.

    Quick and Simple Preparation

    Even on my busiest weeknights, this dish remains in my rotation because it’s surprisingly time-efficient. From start to finish, you’ll spend just about 30 minutes in the kitchen, with most of that being hands-off baking time. The prep work is minimal—just chopping a few ingredients and making a quick sauce. I remember making this for unexpected dinner guests who arrived an hour early, and I still managed to serve a restaurant-quality meal without breaking a sweat. It’s the perfect recipe for those nights when you want something impressive without spending hours in the kitchen.

    Essential Tips & Tricks

    Selecting and Preparing the Shrimp

    The quality of shrimp makes all the difference in this dish. I prefer wild-caught shrimp for their superior flavor and texture. Size matters too—I recommend large or jumbo shrimp (16-20 count per pound) as they stand up better to baking without becoming rubbery. Always devein and remove shells completely, but leave the tails on if you prefer a more elegant presentation. Pat them dry thoroughly before cooking to ensure they sear properly rather than steam. This simple step was a game-changer for me, resulting in perfectly cooked, succulent shrimp every time instead of the watery results I used to get.

    Creating the Perfect Tuscan Sauce

    The creamy base is what transforms this from ordinary to extraordinary. Start with quality butter and olive oil, then build flavor with properly minced garlic (never from a jar for this recipe!). When adding cream, keep the heat medium-low to prevent curdling. For an authentic Tuscan flavor, use fresh herbs whenever possible—especially basil and oregano. If you’re watching calories, you can substitute half the heavy cream with chicken broth thickened with a touch of cornstarch, similar to my approach in this low-carb Italian grinder salad. Remember to taste and adjust seasonings before adding the shrimp back in—this ensures balanced flavors throughout.

    Serving Ideas & Creative Variations

    Complementary Side Dishes

    While this dish shines on its own, pairing it with the right sides elevates the experience. My favorite low-carb companions include roasted cauliflower rice seasoned with Italian herbs or spiralized zucchini noodles lightly sautéed in olive oil. For a refreshing contrast, serve alongside a simple arugula salad dressed with lemon juice and olive oil. The peppery notes cut through the richness beautifully. When I’m entertaining guests who aren’t counting carbs, I’ll offer crusty bread for soaking up that incredible sauce. For a complete Mediterranean experience, consider serving with this vibrant Mediterranean lentil salad that complements the flavors perfectly.

    Exciting Recipe Variations

    This versatile base recipe welcomes creative adaptations to keep things interesting. For a spicier kick, add crushed red pepper flakes or a diced jalapeño to the sauce. Seafood lovers can transform this into a mixed seafood bake by incorporating scallops or chunks of firm white fish. For a meatier version, add Italian sausage or pancetta for depth and texture. Vegetable variations work beautifully too—try adding artichoke hearts, roasted red peppers, or sautéed mushrooms. My personal favorite twist is adding a splash of white wine to the sauce and finishing with a squeeze of lemon juice for brightness.

    Storage & Troubleshooting Guide

    Proper Storage and Reheating

    This dish maintains its quality remarkably well when stored properly. Refrigerate leftovers in an airtight container within two hours of cooking, where they’ll keep for up to three days. For reheating, avoid the microwave which can make the shrimp tough. Instead, gently warm in a covered skillet over low heat, adding a splash of cream or broth if the sauce has thickened too much. For meal prep purposes, you can prepare the sauce ahead of time and refrigerate separately, then add fresh shrimp when ready to bake. Freezing isn’t recommended as the cream sauce can separate and the shrimp texture suffers.

    Fixing Common Issues

    If your sauce breaks or appears curdled, don’t panic! Lower the heat immediately and whisk in a tablespoon of cold cream. For a sauce that’s too thin, create a quick thickening agent by mixing a teaspoon of cornstarch with cold water and stirring it in. Conversely, if your sauce is too thick, thin it with a splash of chicken broth. Overcooked shrimp? Unfortunately, there’s no perfect fix, but incorporating them into the sauce thoroughly can help mask the rubbery texture. If your dish lacks flavor, brighten it with lemon zest, a splash of white wine, or additional fresh herbs.

    Frequently Asked Questions

    Can I make Low-Carb Tuscan Bake Shrimp ahead of time?

    You can prepare the sauce up to 24 hours ahead and store in the refrigerator. Add the raw shrimp just before baking for best results. This saves time while ensuring the shrimp maintain their perfect texture.

    What’s the best cheese to use in this recipe?

    Freshly grated Parmesan provides the authentic Tuscan flavor, but Pecorino Romano offers a sharper taste. Avoid pre-shredded varieties which contain anti-caking agents that prevent proper melting.

    Can I substitute the heavy cream with something lighter?

    Yes, you can use half-and-half or a mixture of milk and Greek yogurt. The sauce won’t be as rich, but you’ll save on calories while maintaining a creamy texture.

    How do I know when the shrimp are perfectly cooked?

    Shrimp are done when they form a “C” shape and turn opaque pink throughout—usually 5-7 minutes when baking. If they curl into a tight “O” shape, they’re overcooked.

    What makes this Tuscan Bake Shrimp recipe low-carb?

    This dish achieves its low-carb status by eliminating traditional pasta or rice bases and focusing on protein-rich shrimp and vegetables. The creamy sauce provides satisfaction without the need for starchy components.

    Final Thoughts

    This Low-Carb Tuscan Bake Shrimp has become more than just a recipe in my kitchen—it’s a reminder that eating well doesn’t mean sacrificing flavor or comfort. The rich, creamy sauce paired with perfectly cooked shrimp creates a restaurant-quality experience that fits beautifully into a carb-conscious lifestyle. I love sharing this dish with friends who can never believe it’s actually low-carb! For more delicious recipes like this one, follow me on Pinterest where I’m always posting new low-carb inspirations.

  • Low Carb Italian Grinder Salad: Fresh, Flavorful & Guilt-Free!

    Low Carb Italian Grinder Salad: Fresh, Flavorful & Guilt-Free!

    Low Carb Italian Grinder Salad: Fresh, Flavorful & Guilt-Free!

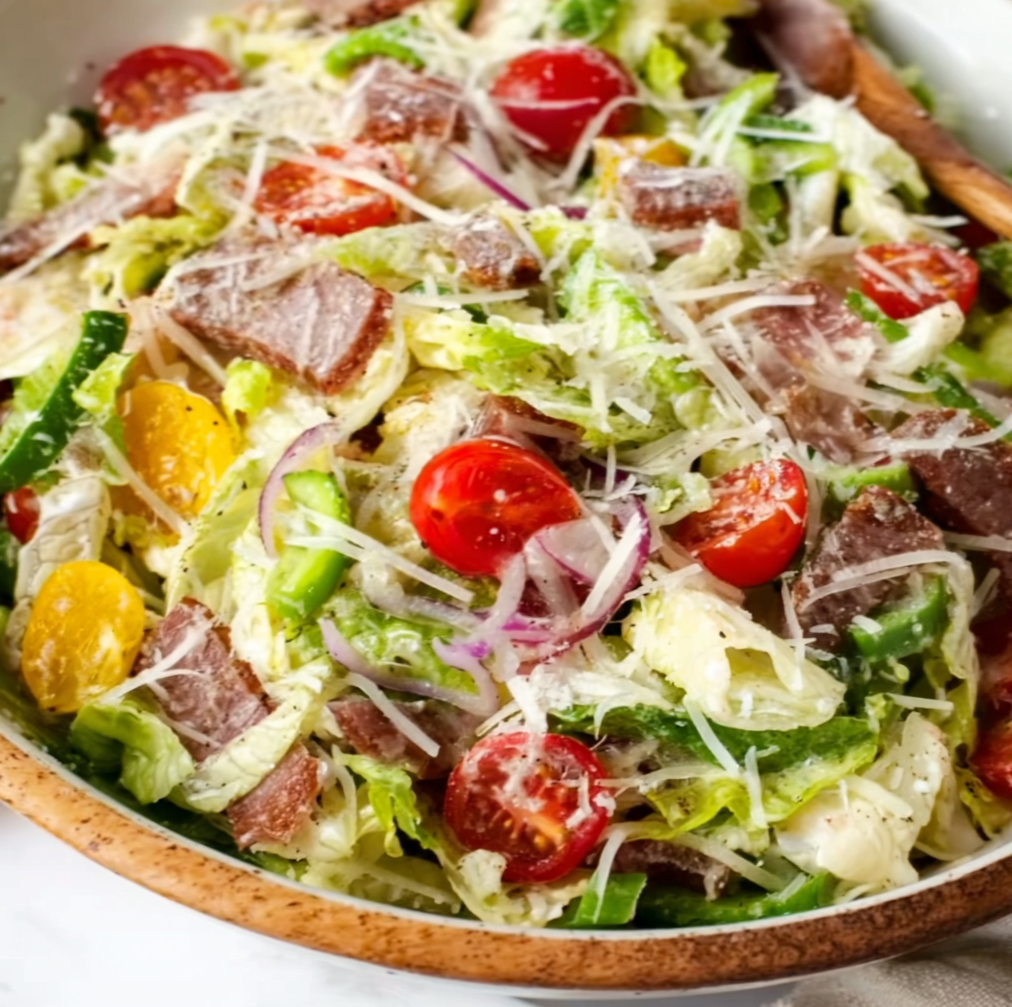
    This Low Carb Italian Grinder Salad has completely transformed my weeknight dinner routine! Imagine all the bold, zesty flavors of your favorite Italian sub sandwich, but without the carb-heavy bread. The first time I made this for my family, the kitchen filled with that unmistakable aroma of Italian seasonings and tangy vinaigrette that had everyone hovering around the counter before I could even finish tossing it. This crunchy, satisfying salad delivers all the authentic Italian flavors you crave while keeping things deliciously low-carb.

    Recipe

    Why You’ll Love This Low Carb Italian Grinder Salad

    Perfect Balance of Flavors and Textures

    There’s something magical about how the sharp provolone plays against the salty cured meats in this salad. Each bite delivers a perfect harmony of tangy, savory, and herbaceous notes that dance across your palate. I still remember serving this at a summer gathering where even my bread-loving uncle went back for seconds! The crisp lettuce and vegetables provide that satisfying crunch you’d get from a fresh Italian roll, while the meats and cheeses deliver richness that makes you forget you’re eating “just a salad.” The pepperoncini adds that perfect hint of heat that lingers pleasantly.

    Quick Prep with Maximum Impact

    On those hectic weeknights when cooking feels impossible, this salad is my secret weapon. It takes just 15 minutes from start to finish, yet tastes like something that required hours of preparation. I’ve made this countless times when unexpected guests drop by, and the way their eyes light up at first bite is priceless. The beauty lies in its simplicity – just chop, toss, and serve. The ingredients work overtime so you don’t have to, creating layers of flavor that belie the minimal effort required. It’s become my go-to when I need something impressive without the stress.

    Essential Tips & Tricks

    Perfecting Your Ingredient Selection

    The quality of ingredients makes all the difference in this simple salad. Seek out authentic Italian meats like sopressata, capicola, and Genoa salami from a good deli counter rather than pre-packaged varieties. Last summer, I splurged on imported provolone that transformed this from delicious to absolutely unforgettable. For the vegetables, crisp romaine creates the perfect foundation, but don’t skip the red onions—they provide that essential sharp bite that cuts through the richness. If possible, use fresh herbs rather than dried in your dressing; the brightness they bring is worth the extra dollar or two at the grocery store.

    Mastering the Dressing Technique

    The vinaigrette is the soul of this salad, so take time to get it right. I learned the hard way that emulsifying properly makes all the difference—whisk the vinegar with the seasonings first, then slowly drizzle in the oil while whisking continuously. This creates that silky texture that clings perfectly to every ingredient. Let the dressing sit for at least 10 minutes before tossing to allow the flavors to meld. For the authentic grinder experience, add a pinch of dried oregano and a tiny splash of pickle juice to your dressing—a trick my Italian neighbor taught me that elevates everything.

    Serving Ideas & Creative Variations

    Complementary Side Dishes

    This Low Carb Italian Grinder Salad pairs beautifully with simple, complementary sides that won’t overshadow its bold flavors. I love serving it alongside roasted vegetables like zucchini or bell peppers seasoned simply with olive oil and herbs. For a heartier meal that still maintains the low-carb profile, try it with a cup of Italian wedding soup or a small portion of cauliflower risotto. When entertaining, I arrange the salad on a large wooden board surrounded by olives, marinated artichoke hearts, and a few wedges of parmesan for guests to nibble on. The colorful presentation always draws compliments.

    Exciting Flavor Variations

    While the classic version is perfection, don’t be afraid to play with variations. For a Mediterranean twist, add chopped sun-dried tomatoes, kalamata olives, and crumbled feta. When I’m craving something spicier, I incorporate thinly sliced calabrian chilies and a sprinkle of crushed red pepper. For a more substantial meal, add diced grilled chicken or shrimp—the protein soaks up the dressing beautifully. Vegetarian guests? Replace the meats with marinated mushrooms and extra cheese. My personal favorite variation includes thinly sliced fennel for a subtle anise flavor that complements the Italian meats perfectly.

    Storage & Troubleshooting Guide

    Proper Storage for Freshness

    To maintain optimal crispness and flavor, store components separately if preparing ahead. Keep the dressed greens in an airtight container with a paper towel to absorb excess moisture, and store meats and cheese in a separate container. I learned this trick after a disappointing soggy salad experience at a picnic last summer! If you must store it fully assembled, place it in a glass container rather than plastic, which seems to preserve the textures better. Properly stored, the salad components will stay fresh for up to 3 days, though the dressed greens are best enjoyed within 24 hours. For best results, refresh with a squeeze of lemon just before serving.

    Solving Common Issues

    If your salad seems lacking in flavor, it’s usually a simple fix. First, check your seasoning—most salads benefit from more salt and acid than you might think. I once rescued an underwhelming batch by adding an extra splash of red wine vinegar and a pinch of flaky sea salt. If your vegetables have released too much water and diluted the dressing, drain excess liquid and add a fresh drizzle of olive oil. For salads that will sit out at gatherings, slightly underdress initially and bring extra dressing on the side to refresh as needed. Hard cheeses like provolone can sometimes clump together—fix this by cutting them slightly thicker or adding them just before serving.

    Frequently Asked Questions

    Is this Low Carb Italian Grinder Salad suitable for keto diets?

    Absolutely! With less than 7g net carbs per serving, it’s perfect for keto. The high healthy fat content from olive oil, cheese, and meats makes it satisfying while keeping carbs minimal.

    Can I make this salad ahead for meal prep?

    Yes, but store components separately. Keep meats, cheese, and vegetables in different containers, and add dressing just before serving to maintain the perfect texture.

    What’s the best substitute for pepperoncini if I don’t have any?

    Banana peppers offer a similar mild tang, or try pickled jalapeños for more heat. In a pinch, even a splash of pickle brine in the dressing can provide that vinegary brightness.

    How can I make this vegetarian while keeping it low-carb?

    Replace the meats with marinated artichoke hearts, olives, roasted red peppers, and extra cheese. Add toasted pine nuts or sunflower seeds for texture and protein.

    What’s the difference between a grinder salad and a regular Italian salad?

    A grinder salad specifically mimics the flavors and components of an Italian grinder sandwich, featuring thinly sliced cured meats, provolone, and a vinaigrette with Italian herbs.

    Final Thoughts

    This Low Carb Italian Grinder Salad has become my reliable crowd-pleaser that never disappoints. I love how it transforms simple ingredients into something extraordinary that satisfies both health-conscious friends and Italian food lovers alike. The way it delivers bold, authentic flavors without the carb overload makes it a recipe I return to weekly. Whether you’re looking for a quick weeknight dinner or an impressive starter for guests, this versatile salad adapts beautifully to any occasion. Find more delicious low-carb inspiration on our Pinterest page!

  • Authentic Pico de Gallo Recipe: Fresh, Zesty & Irresistible!

    Authentic Pico de Gallo Recipe: Fresh, Zesty & Irresistible!

    Authentic Pico de Gallo Recipe: Fresh, Zesty & Irresistible!

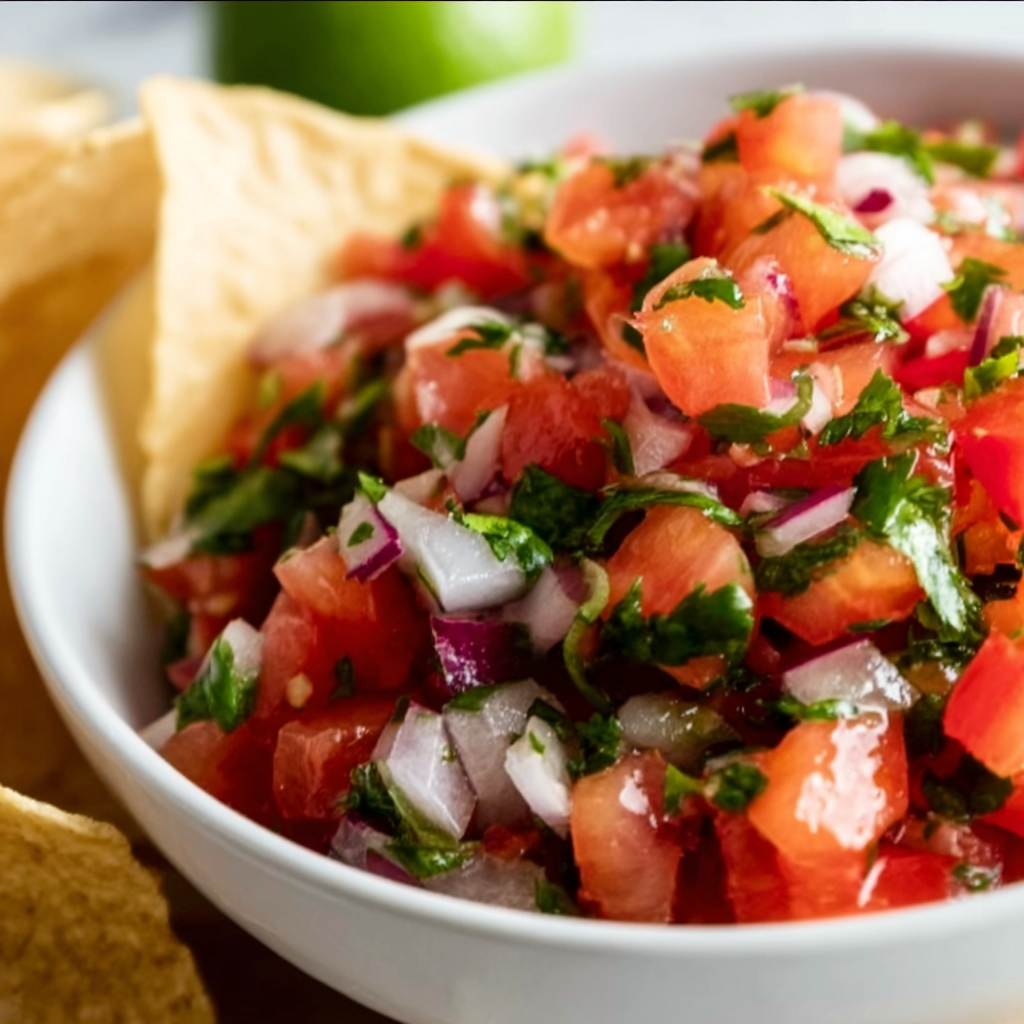
    Authentic Pico de Gallo brings the vibrant essence of Mexican cuisine right to your kitchen with just a handful of fresh ingredients. There’s something magical about the way those crisp tomatoes, zesty lime juice, and aromatic cilantro come together in perfect harmony. I first fell in love with this classic condiment during a summer road trip through Texas, where a tiny roadside stand forever changed my salsa standards. The beauty of authentic pico de gallo lies in its simplicity—each ingredient shines through with bright, clean flavors that elevate everything from tacos to grilled chicken. Let me show you how to create this refreshing treasure at home!

    Recipe

    Why You’ll Love This Authentic Pico de Gallo

    Fresh Ingredients Make All the Difference

    The secret to spectacular pico de gallo is using the freshest ingredients possible. When I bite into a perfectly ripe tomato at the farmers’ market, I can already taste how amazing it will be in this recipe. Those juicy Roma tomatoes provide the perfect base, while crisp white onions add a sharp bite that mellows beautifully after marinating. The fragrance of freshly chopped cilantro fills my kitchen, transporting me straight to a sunny Mexican plaza. You’ll love how each component maintains its distinct texture and flavor while creating something greater than the sum of its parts.

    Versatility Beyond Tacos

    While pico de gallo might be the quintessential taco topping, its versatility extends far beyond Mexican cuisine. I’ve spooned it over grilled fish for a light summer dinner, stirred it into scrambled eggs for a vibrant breakfast, and even used it as a fresh bruschetta topping that had my Italian friend asking for the recipe! The bright acidity cuts through rich dishes perfectly, making it an ideal companion for creamy pasta salads or hearty grilled meats. The best part? It requires zero cooking—just chop, mix, and enjoy the explosion of flavors.

    Essential Tips & Tricks

    Mastering the Perfect Dice

    The texture of authentic pico de gallo hinges on achieving the perfect dice. I aim for pieces that are small enough to get multiple ingredients in each bite, but large enough to maintain their identity—about ¼-inch cubes are ideal. Use a sharp knife (seriously, this makes all the difference!) and take your time with each ingredient. For tomatoes, I remove the seeds and excess juice first to prevent sogginess. When chopping jalapeños, remember that the heat lives in the seeds and membranes—adjust according to your spice tolerance. The uniform size ensures every spoonful delivers the complete pico experience.

    The Art of Balancing Flavors

    Finding the perfect balance of flavors is where pico de gallo transforms from good to unforgettable. Start with less lime juice than you think you’ll need—you can always add more, but you can’t take it away. The salt factor is crucial; it draws moisture from the vegetables and helps meld the flavors. I always add salt gradually, tasting as I go. Let your pico rest for at least 15 minutes before serving to allow the flavors to harmonize. This resting period is when the magic happens—the tomatoes release their juices, the onions mellow, and the lime infuses everything with brightness. Trust me, patience pays off here!

    Serving Ideas & Creative Variations

    Beyond the Basic Chip Dip

    While there’s nothing wrong with enjoying pico de gallo with tortilla chips (it’s a classic for a reason!), thinking beyond the basic chip dip opens up exciting culinary possibilities. I love using it as a fresh topping for grilled proteins—it adds brightness to slow-cooked short rib ragu or transforms simple grilled chicken. Spoon it into lettuce cups for a light appetizer, or use it as the finishing touch on avocado toast for a breakfast upgrade. The vibrant colors and flavors make any dish more interesting, and the textural contrast adds that professional chef touch to home-cooked meals.

    Regional and Seasonal Adaptations

    One of the joys of pico de gallo is how easily it adapts to seasonal produce and regional preferences. In summer, I add diced ripe peaches or mangoes for a sweet-savory combination that’s incredible with grilled fish. During corn season, I toss in some charred kernels for smoky sweetness and extra texture. In the Southwest, you might find roasted green chiles added for depth, while coastal variations often include diced avocado or even fresh seafood. Don’t be afraid to experiment with what’s fresh and local—pineapple pico is a revelation with teriyaki dishes, and watermelon pico brings refreshing sweetness to spicy foods.

    Storage & Troubleshooting Guide

    Keeping It Fresh Longer

    Despite its fresh ingredients, properly stored pico de gallo can maintain its vibrant flavors for several days. Store it in an airtight container with minimal headspace to reduce oxidation. I place a paper towel on top before sealing to absorb excess moisture, which helps prevent sogginess. Refrigerate immediately after preparing, and your pico will stay fresh for up to 3 days. For the best flavor experience, bring it to room temperature before serving—cold temperatures dull the flavor nuances. If you’re making it ahead for a party, consider adding the cilantro just before serving to maintain its bright green color and fresh aroma.

    Rescuing Common Pico Problems

    Even experienced cooks occasionally encounter pico de gallo issues, but most are easily fixed. If your mixture becomes too watery, don’t drain it—that liquid contains valuable flavor! Instead, serve with a slotted spoon or add more diced vegetables to absorb the excess. For overly acidic pico, a tiny pinch of sugar balances the lime without making it sweet. If you’ve gone overboard with jalapeños, add more tomato and a touch of avocado to temper the heat. Remember that flavors intensify over time, especially salt and heat, so it’s better to start mild and adjust just before serving.

    Frequently Asked Questions

    What makes pico de gallo “authentic”?

    Authentic pico de gallo uses only fresh, uncooked ingredients—typically tomatoes, onions, cilantro, jalapeños, lime juice, and salt. The vegetables are hand-chopped rather than blended, creating a chunky texture that distinguishes it from other salsas. The flavors should be balanced with no single ingredient overpowering the others.

    Can I make pico de gallo ahead of time?

    Yes, you can prepare it up to 24 hours in advance. The flavors actually improve after a few hours of marinating. Store it covered in the refrigerator, but add the salt just before serving to prevent the mixture from becoming too watery.

    I don’t like cilantro. What can I substitute?

    Fresh parsley makes a good substitute, though it changes the flavor profile. Fresh basil or mint can work for creative variations. You can also simply omit the cilantro and increase the other ingredients slightly to maintain balance.

    How spicy should authentic pico de gallo be?

    Traditional pico de gallo has a mild to medium heat level. The spiciness comes from jalapeños, which you can adjust by removing seeds and membranes (less heat) or including them (more heat). Remember that heat intensifies as the mixture sits.

    Why is my pico de gallo too watery?

    Excess water usually comes from overly ripe tomatoes or too much salt drawing moisture out of the vegetables. Use firmer tomatoes, remove seeds and excess pulp before chopping, and add salt just before serving to maintain the perfect texture.

    Final Thoughts

    Creating authentic pico de gallo at home connects you to a culinary tradition that spans generations, bringing vibrant flavors to your table with minimal effort. I love how this simple mixture of fresh ingredients can transform ordinary meals into something special. The versatility of pico de gallo means it’s always in my refrigerator during summer months, ready to brighten up anything from breakfast eggs to evening cocktail hour. Share your creations on Pinterest and explore how this classic Mexican condiment might become your new kitchen staple. Your taste buds—and dinner guests—will thank you!

  • Chopped Salad Recipe That Will Totally Transform Your Lunch!

    Chopped Salad Recipe That Will Totally Transform Your Lunch!

    Chopped Salad Recipe That Will Totally Transform Your Lunch!

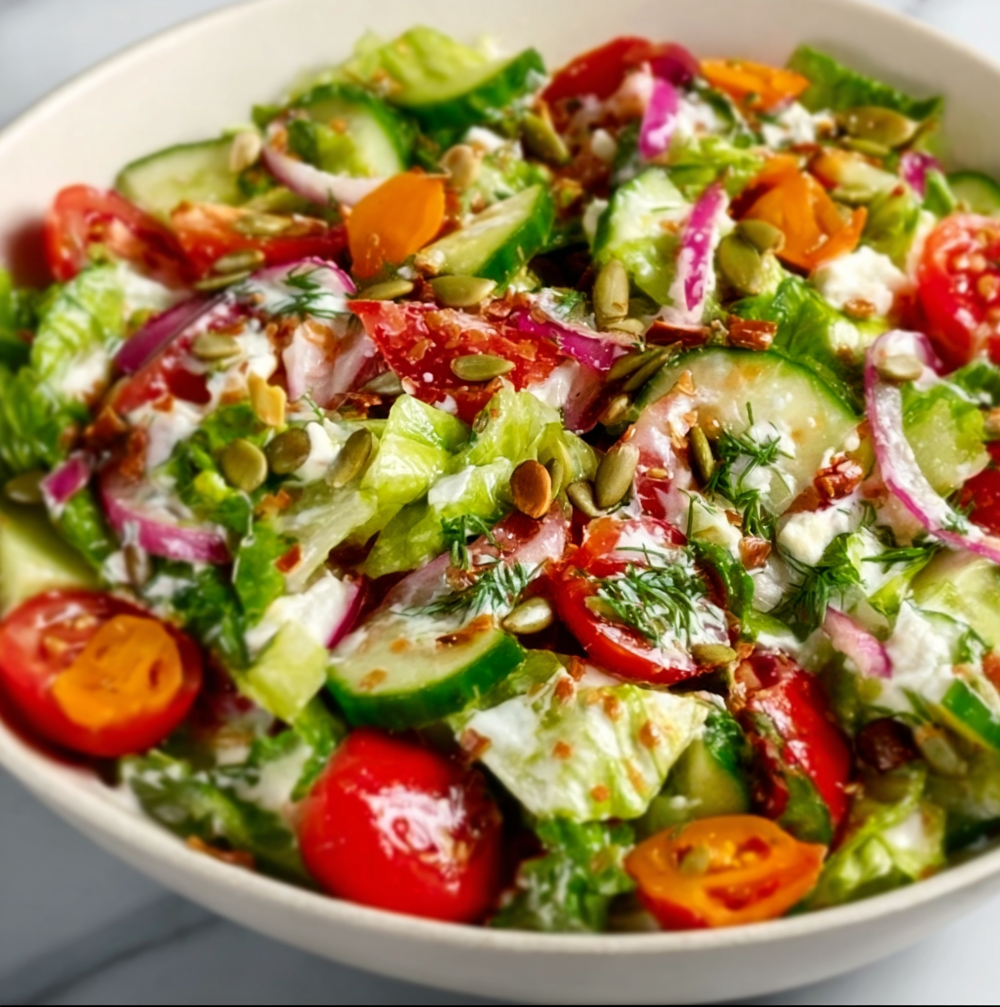
    This chopped salad is the answer to your weeknight dinner prayers – crisp, colorful, and bursting with fresh flavors that dance on your tongue with every bite. I first created this recipe during a particularly hectic Tuesday when the fridge was filled with odds and ends that needed using up. The satisfying crunch as my knife worked through vegetables became almost meditative, transforming simple ingredients into something extraordinary. What makes this salad special is how it brings together a rainbow of textures and tastes in perfect harmony, making it substantial enough to serve as a main dish but versatile enough to complement nearly any meal from my favorite slow-cooked dishes to simple grilled proteins.

    Recipe

    Why You’ll Love This Chopped Salad

    A Texture Lover’s Dream

    The magic of a proper chopped salad lies in its perfectly uniform pieces that allow you to get a little bit of everything in each forkful. I’m slightly obsessed with the contrast between the crisp romaine, crunchy bell peppers, and buttery avocado chunks. The beauty is in how each ingredient maintains its integrity while creating a cohesive experience. I still remember serving this at a summer gathering and watching my friend’s eyes light up as she exclaimed, “I can actually taste every single ingredient!” That’s exactly what makes chopped salads superior – no more hunting through leafy greens for the good stuff!

    Quick Prep, Big Flavor Impact

    Let’s be honest – on busy weeknights, I need dinner solutions that don’t require hours in the kitchen. This chopped salad delivers maximum flavor with minimal effort. The entire salad comes together in about 15 minutes, making it perfect for those evenings when cooking feels overwhelming. I love how adaptable it is to whatever’s in your produce drawer. Last week, I made this with leftover rotisserie chicken, and it transformed what would have been a side dish into a protein-packed meal that kept me satisfied for hours. The homemade vinaigrette takes just 60 seconds to whisk together but tastes infinitely better than anything store-bought.

    Essential Tips & Tricks

    Knife Skills Make All The Difference

    The secret to an exceptional chopped salad is in the consistent sizing of your ingredients. I learned this lesson the hard way after serving a salad where some pieces required a knife to eat while others disappeared into the dressing! Aim for bite-sized pieces about ¼-inch to ½-inch in size. A sharp chef’s knife makes this process infinitely easier and safer. I like to prep all my ingredients before assembling, creating neat piles on my cutting board. This not only makes the process more efficient but also allows me to see the beautiful color palette I’m working with before everything gets tossed together.

    Dressing Strategies For Perfect Texture

    Nothing ruins a beautiful chopped salad faster than soggy vegetables swimming in excess dressing. The key is to use a light hand when adding your vinaigrette and to dress it just before serving. For make-ahead situations, I keep the components separate and assemble at the last minute – similar to how I approach my high protein ranch pasta salad. When I’m serving this for guests, I often put the dressing in the bottom of the bowl, add ingredients on top, and toss just before bringing it to the table. This prevents the dreaded soggy salad syndrome while ensuring every bite has the perfect amount of flavor.

    Serving Ideas & Creative Variations

    Turn It Into A Complete Meal

    Transform this versatile chopped salad into a satisfying main dish by adding protein-rich toppings. My personal favorites include grilled chicken, seared shrimp, or marinated chickpeas for a vegetarian option. Hard-boiled eggs add wonderful richness, while crumbled bacon brings irresistible smokiness. For a Mediterranean twist, add feta cheese and kalamata olives, reminiscent of my popular Mediterranean lentil salad. When I’m feeling particularly hungry, I’ll add cooked quinoa or farro for extra staying power. The beauty of this approach is that everyone can customize their bowl to their preferences, making it perfect for family dinners.

    Seasonal Adaptations Worth Trying

    One of the joys of this chopped salad is how easily it transitions through the seasons with simple swaps. In summer, I load it with juicy tomatoes, sweet corn, and fresh basil. Fall brings opportunities for roasted butternut squash, dried cranberries, and toasted pecans. Winter versions might include citrus segments, pomegranate arils, and hearty kale in place of some lettuce. Spring calls for tender asparagus tips, sweet peas, and fresh herbs. I’ve even created holiday-themed versions with red and green ingredients that look festive on the table while still providing a welcome fresh counterpoint to heavier dishes.

    Storage & Troubleshooting Guide

    Keeping It Fresh For Later

    The beauty of a properly made chopped salad is that it can actually hold up better than regular salads when stored correctly. The key is using sturdy vegetables and storing components strategically. If making ahead, keep wet ingredients (tomatoes, cucumbers) separate from dry ones (lettuce, carrots). I like using glass containers with a paper towel at the bottom to absorb excess moisture. For meal prep, I often create salad jars with dressing at the bottom, hearty vegetables in the middle, and greens on top. When stored this way, your chopped salad can stay crisp for 2-3 days, making it perfect for lunch planning.

    Rescuing Common Salad Mishaps

    Even experienced cooks occasionally end up with salad challenges. If you’ve accidentally over-dressed your salad, don’t panic! Add additional fresh greens or vegetables to absorb the excess dressing. For a salad that’s become slightly wilted, a quick ice bath can revive greens surprisingly well. If your avocado has browned, simply scrape away the discolored portions and add a squeeze of lemon to the rest. And if you’ve created a salad that lacks flavor, a pinch of flaky sea salt, a splash of acid (lemon juice or vinegar), or a drizzle of good olive oil can work wonders to brighten everything up.

    Frequently Asked Questions

    What makes a chopped salad different from regular salads?

    A chopped salad features ingredients cut into uniform, bite-sized pieces that create consistent texture and flavor in every bite. The smaller pieces also allow dressing to coat everything evenly, resulting in better flavor distribution than traditional torn-leaf salads.

    Can I prepare this chopped salad ahead of time?

    Yes! Prep components separately and store in the refrigerator. Keep wet ingredients separate from dry ones, and add dressing just before serving. Properly stored, prepped ingredients will stay fresh for 2-3 days.

    What’s the best knife to use for chopped salads?

    A sharp chef’s knife is ideal for most chopping tasks. For herbs and smaller items, a smaller utility knife works well. The key is keeping your knives properly sharpened for clean cuts.

    How do I prevent my salad from getting soggy?

    Pat washed vegetables dry before chopping, add juicy ingredients like tomatoes just before serving, and dress the salad immediately before eating. For packed lunches, keep dressing separate until ready to eat.

    What’s the ideal size to chop ingredients for a chopped salad?

    Aim for consistently sized pieces between ¼-inch and ½-inch. This size allows for perfect forkfuls with multiple ingredients while maintaining distinct textures and flavors in each bite.

    Final Thoughts

    This versatile chopped salad has become my go-to solution for everything from quick weeknight dinners to impressive entertaining. There’s something deeply satisfying about transforming simple vegetables into a colorful, texture-rich dish that pleases both the eye and palate. I hope you’ll make this chopped salad your own by experimenting with different ingredient combinations that reflect your preferences and what’s in season. Don’t forget to check out more of my fresh and vibrant recipes on Pinterest for endless inspiration!

  • Crispy Honey Garlic Tofu Recipe That Will Blow Your Mind!

    Crispy Honey Garlic Tofu Recipe That Will Blow Your Mind!

    Crispy Honey Garlic Tofu Recipe That Will Blow Your Mind!

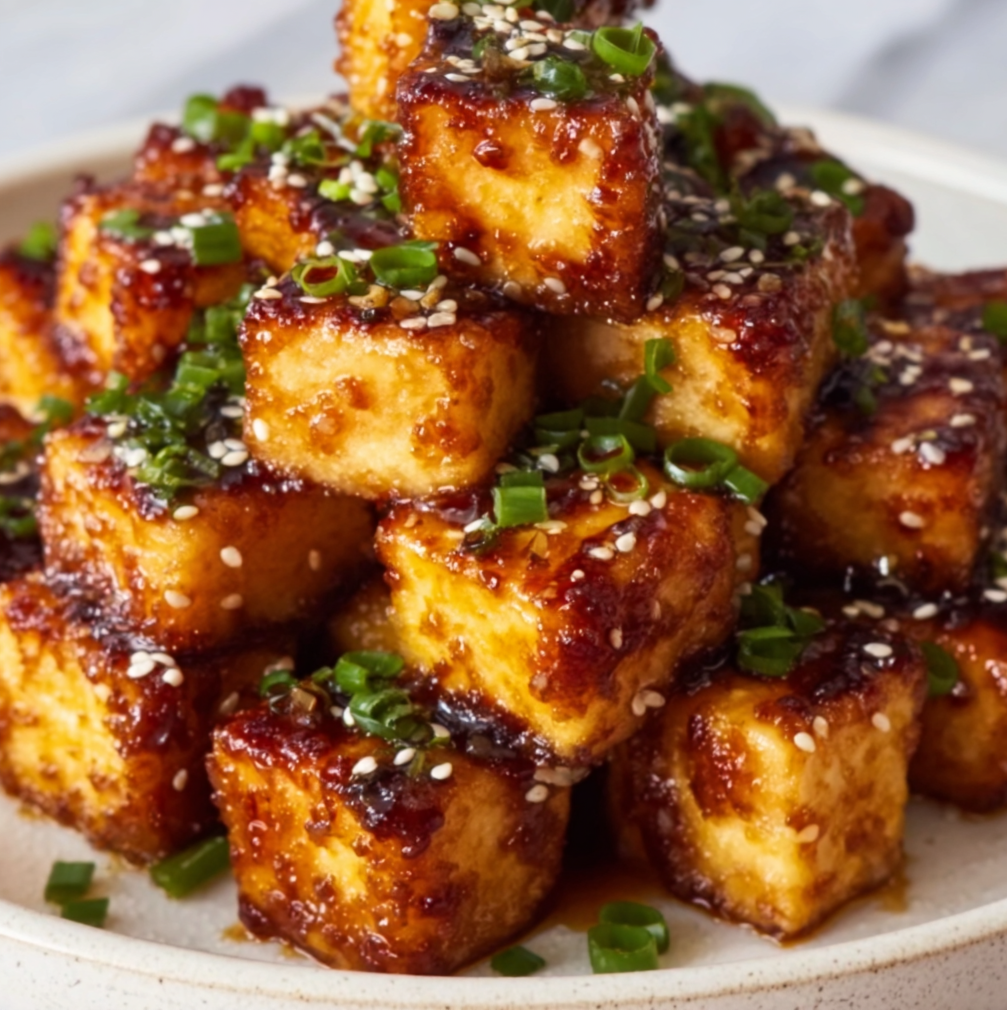
    This Crispy Honey Garlic Tofu Recipe transformed how I think about plant-based cooking. The first time I made it, the satisfying crunch followed by that sticky-sweet glaze had my dinner guests asking for seconds—even the dedicated meat-eaters! There’s something magical about how tofu transforms from bland to brilliant when treated right. The contrast between the crispy exterior and tender interior creates a textural paradise that’s downright addictive. If you’ve been searching for that perfect tofu dish that delivers on both flavor and texture, your search ends here at Recipes Darleen.

    Recipe

    Why You’ll Love This Crispy Honey Garlic Tofu Recipe

    Perfect Texture Every Time

    Getting perfectly crispy tofu used to frustrate me until I discovered a few game-changing secrets. First, press your tofu thoroughly—I wrap mine in clean kitchen towels and place a heavy cookbook on top for at least 30 minutes. This removes excess moisture that prevents crispiness. Then, toss in cornstarch rather than flour for that restaurant-quality crunch. I still remember the first time I bit into a properly crispy tofu cube—the satisfying crackle followed by that pillowy center made me a believer in tofu’s incredible potential!

    Irresistible Flavor Profile

    The honey garlic sauce creates magic when it caramelizes around each tofu cube. The sticky sweetness from honey balances perfectly with savory garlic and a hint of ginger warmth. I add a splash of rice vinegar for tanginess and just enough soy sauce for that umami depth without overwhelming. My partner, who normally reaches for seconds of my Chopped Thai-Inspired Chicken Salad, now requests this tofu dish weekly! The sauce thickens beautifully as it cooks, coating each piece in glossy, flavor-packed goodness.

    Essential Tips & Tricks

    Tofu Selection & Preparation

    Choosing the right tofu type makes all the difference—extra-firm is non-negotiable for this recipe. The firmer the tofu, the better it holds its shape during cooking and the crispier it becomes. After pressing, I cut mine into 1-inch cubes for the perfect surface-to-interior ratio. A little trick I discovered: freezing tofu overnight then thawing creates tiny ice crystal pockets that, when pressed and cooked, give an even meatier texture. The freezing process changes the protein structure, allowing more marinade absorption and creating a chewier result.

    Perfect Frying Technique

    The shallow-frying method works best for achieving that golden exterior without deep-frying. Heat your oil until it’s shimmering but not smoking—around 350°F if you’re using a thermometer. Work in batches to avoid overcrowding, which causes steaming instead of crisping. I learned this lesson the hard way during a dinner party! When frying, resist the urge to constantly move the tofu; let each side develop a golden crust before flipping. For extra crunch, try my double-coating technique that works beautifully with both vegetables and proteins.

    Serving Ideas & Creative Variations

    Perfect Pairings

    Serve this crispy honey garlic tofu over fluffy jasmine rice to soak up every drop of that glorious sauce. For a complete meal, I like to add steamed broccoli or snap peas on the side—their fresh crunch complements the tofu beautifully. Last weekend, I served this with a simple cucumber salad dressed with rice vinegar and sesame seeds, and the contrast of temperatures and textures was divine! For a heartier option, try pairing with my High Protein Ranch Pasta Salad for a satisfying fusion dinner.

    Exciting Flavor Twists

    Don’t be afraid to customize the sauce to match your mood! Add sriracha or red pepper flakes for heat, orange zest for citrusy brightness, or peanut butter for creamy richness. My current obsession is adding a tablespoon of gochujang for Korean-inspired spicy-sweet tofu that’s absolutely addictive. For a tropical twist, substitute half the honey with pineapple juice and add diced pineapple in the final toss. The natural enzymes in pineapple add tenderness while the caramelized fruit pieces create little bursts of juicy sweetness.

    Storage & Troubleshooting Guide

    Keeping It Fresh

    For optimal storage, let the tofu cool completely before refrigerating in an airtight container. It keeps well for up to 3 days, though the crispiness will diminish somewhat. To reheat, avoid the microwave which creates sogginess—instead, use a dry skillet over medium heat to restore some crunch. For meal prep, I recommend storing the crispy tofu and sauce separately, combining them only when reheating. I’ve found that this method preserves the textural contrast that makes this dish so special, giving you restaurant-quality leftovers even days later.

    Solving Common Issues

    If your tofu isn’t getting crispy enough, check three possible culprits: insufficient pressing (moisture is the enemy of crispiness), oil temperature too low, or overcrowding in the pan. For sauce that’s too thin, simmer it longer to reduce, or add a cornstarch slurry (1 teaspoon cornstarch mixed with 1 tablespoon cold water). If it’s too thick, thin with a splash of vegetable broth. Remember that the sauce will thicken as it cools, so it’s better to err on the slightly thinner side when it’s hot.

    Frequently Asked Questions

    Can I make this Crispy Honey Garlic Tofu Recipe in an air fryer?

    Absolutely! Spray your cornstarch-coated tofu with oil and air fry at 400°F for 15 minutes, shaking halfway through. Add the sauce in the last 2-3 minutes to create that sticky glaze.

    Is there a vegan alternative to honey for this recipe?

    Maple syrup makes an excellent substitute with a slightly different flavor profile. Agave nectar works too, though you may need slightly less as it’s sweeter than honey.

    How do I prevent the sauce from burning?

    Add the sauce only after the tofu is crispy, then reduce the heat to medium-low. The sauce should bubble gently, not vigorously, and be stirred frequently to prevent sticking.

    Can I prep any components ahead of time?

    Yes! Press and cut the tofu up to two days ahead, and make the sauce a day in advance. Store separately in the refrigerator, then fry the tofu and combine just before serving.

    What’s the best oil for frying tofu?

    Use neutral oils with high smoke points like vegetable, canola, or peanut oil. Avoid olive oil, which can impart a strong flavor and has a lower smoke point.

    Final Thoughts

    This Crispy Honey Garlic Tofu Recipe has become my go-to for impressing both vegetarians and meat-eaters alike. The contrast between the crispy exterior and tender interior, bathed in that sweet-savory sauce, creates a dish that’s greater than the sum of its parts. I hope you’ll experience the same joy I feel when watching friends discover how incredible tofu can be when prepared with a little care and technique. For more delicious recipes, follow me on Pinterest where I share new favorites weekly!