Blog

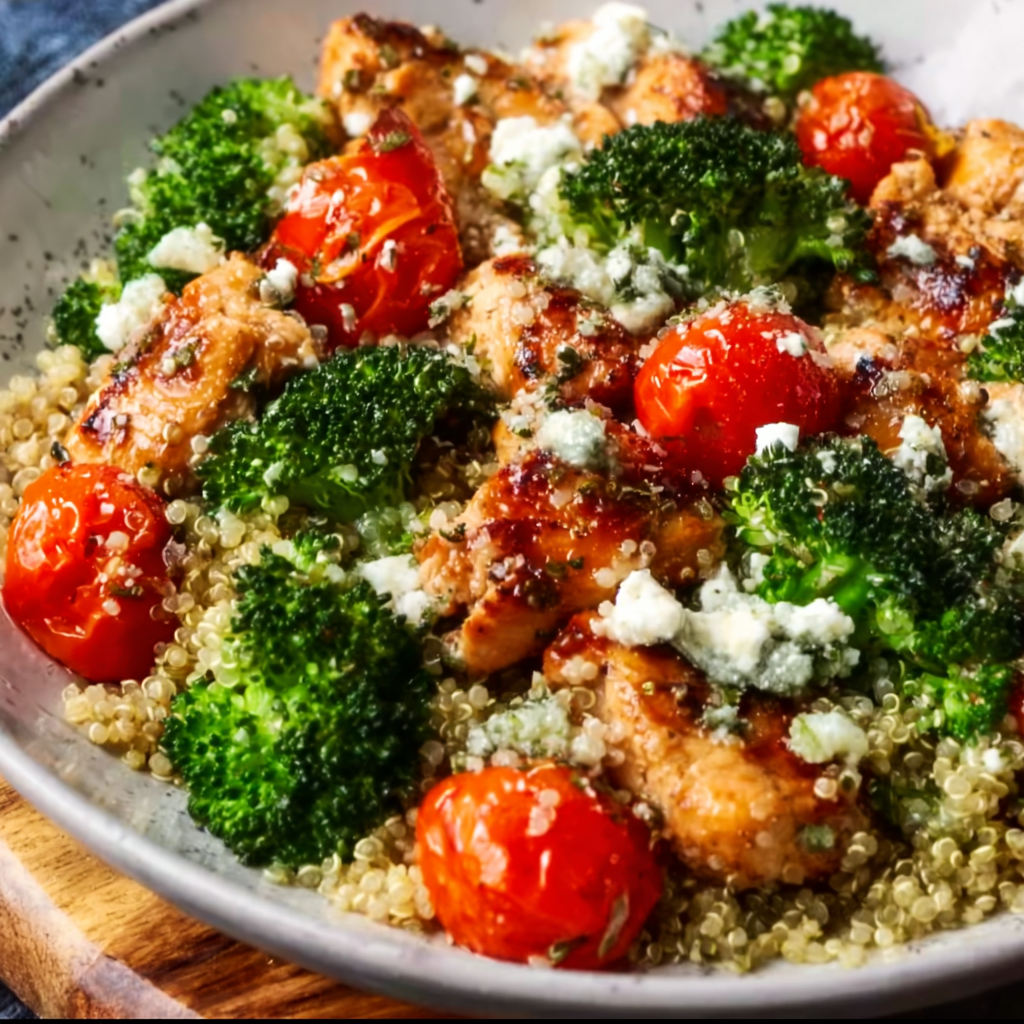
  • Mediterranean Chicken Quinoa Bowl: Fresh, Flavorful, & Healthy!

    Mediterranean Chicken Quinoa Bowl: Fresh, Flavorful, & Healthy!

    Mediterranean Chicken Quinoa Bowl: Fresh, Flavorful, & Healthy!

    The Mediterranean Chicken Quinoa Bowl with Broccoli and Tomato has become my absolute go-to for those evenings when I want something nourishing yet incredibly satisfying. There’s something magical about the combination of tender chicken, nutty quinoa, and vibrant vegetables that just speaks to my soul. I first created this bowl during a particularly hectic week when I needed something that would keep me energized without requiring hours in the kitchen. The bright, fresh flavors transport me to a sunny Mediterranean coastline with every bite, even when I’m just at my kitchen table in pajamas! This bowl is protein-packed, colorful, and endlessly customizable.

    Recipe

    Why You’ll Love This Mediterranean Chicken Quinoa Bowl with Broccoli and Tomato

    Perfect Balance of Nutrition and Flavor

    This bowl isn’t just delicious—it’s a nutritional powerhouse. The quinoa provides complete protein and complex carbs, while the chicken adds lean protein that keeps you satisfied for hours. I love how the tender broccoli florets soak up all the Mediterranean flavors, creating little bursts of garlicky, lemony goodness in each bite. The juicy cherry tomatoes add a sweet-tart pop that brightens the entire dish. What I appreciate most is how this meal makes me feel energized rather than weighed down—it’s hearty without being heavy, which is exactly what I need on busy weeknights.

    Quick and Adaptable for Any Schedule

    When life gets chaotic (which, let’s be honest, is most days), this bowl becomes my saving grace. The entire dish comes together in about 30 minutes, making it perfect for those evenings when you’re starving but short on time. I often prep components in advance—cooking quinoa on Sunday, grilling chicken in batches, and washing veggies ahead of time. This meal prep approach transforms dinner into a simple assembly job. Sometimes I’ll make this while helping my daughter with homework or catching up on a podcast, and dinner still turns out perfectly. It’s virtually impossible to mess up!

    Essential Tips & Tricks

    Mastering the Perfect Quinoa

    The foundation of an amazing Mediterranean Chicken Quinoa Bowl starts with properly cooked quinoa. Always rinse your quinoa thoroughly before cooking to remove the natural bitter coating called saponin. I’ve found the perfect ratio is 1 cup quinoa to 1¾ cups liquid—slightly less than the common 1:2 ratio for fluffier results. For maximum flavor, try cooking your quinoa in chicken or vegetable broth instead of water. Let it rest with the lid on for 5 minutes after cooking, then fluff with a fork. This creates that perfect tender-but-not-mushy texture that makes such a difference in your bowl.

    Elevating Your Chicken Flavor

    The secret to incredibly flavorful chicken in your Mediterranean bowl is all about the marinade timing. I like to combine olive oil, lemon juice, minced garlic, dried oregano, and a touch of honey, then let the chicken bathe in this mixture for at least 30 minutes (though overnight works wonders if you plan ahead). For extra tenderness, try the quick-brine method: soak chicken breasts in salt water for 15 minutes before marinating. Cook chicken until it reaches 165°F, then let it rest before slicing to keep all those flavorful juices locked in. This approach works beautifully with my Crockpot Mustard Herb Chicken technique as well!

    Serving Ideas & Creative Variations

    Building a Stunning Bowl Presentation

    Creating a visually stunning Mediterranean Chicken Quinoa Bowl is almost as satisfying as eating it! I start with a base of quinoa, then arrange the components in sections rather than mixing everything together. The vibrant green broccoli, ruby-red tomatoes, and golden chicken create a gorgeous color palette. Add visual interest with garnishes like lemon wedges, a sprinkle of toasted pine nuts, or a few olives. Drizzle your dressing in a zigzag pattern rather than drowning the bowl. This approach not only looks Instagram-worthy but allows each ingredient to maintain its distinct texture and flavor, making every bite a new experience.

    Seasonal Adaptations and Dietary Swaps

    One reason I return to this Mediterranean Chicken Quinoa Bowl repeatedly is its incredible flexibility. In summer, I’ll swap broccoli for grilled zucchini and add fresh corn. Fall calls for roasted butternut squash and dried cranberries. For a plant-based version, replace chicken with crispy chickpeas or marinated tofu—similar to my Crispy Honey Garlic Tofu approach. Those avoiding grains can substitute cauliflower rice for quinoa, while low-carb followers might increase the protein and vegetables while reducing the quinoa portion. The Mediterranean flavor profile works beautifully with countless ingredients!

    Storage & Troubleshooting Guide

    Meal Prep and Storage Solutions

    This Mediterranean Chicken Quinoa Bowl is a meal prepper’s dream! Store components separately in airtight containers for maximum freshness—this prevents the broccoli from getting soggy and the tomatoes from making everything watery. The quinoa and chicken will last 3-4 days refrigerated, while the vegetables stay fresh for about 2 days. For longer storage, freeze the quinoa and chicken (separately) for up to 3 months. I like to slightly undercook the broccoli for meal prep so it doesn’t become mushy when reheated. When ready to eat, warm the quinoa and chicken, then add the vegetables and dressing for the freshest experience.

    Fixing Common Bowl Issues

    Even the most experienced cooks encounter challenges! If your quinoa turns out mushy, try toasting it dry in the pan before adding liquid next time, or reduce your cooking liquid slightly. For bland chicken, a post-cooking solution is to toss it in a bit of additional lemon juice, olive oil, and fresh herbs. Soggy vegetables usually mean overcooking—try blanching your broccoli instead of fully cooking it for meal prep. If your bowl seems dry when reheating, add a splash of olive oil or a squeeze of lemon juice. And remember that a final pinch of flaky sea salt just before serving can revive flavors that seem dull after refrigeration.

    Frequently Asked Questions

    Can I make this Mediterranean Chicken Quinoa Bowl with Broccoli and Tomato vegetarian?

    Absolutely! Replace the chicken with chickpeas, white beans, or marinated tofu. The Mediterranean flavors work beautifully with plant-based proteins, and you’ll still get a satisfying, protein-rich meal.

    How can I make this bowl more budget-friendly?

    Use chicken thighs instead of breasts, buy quinoa in bulk, and incorporate seasonal vegetables. Frozen broccoli works great too! Stretch the protein by adding more beans or lentils to reduce the amount of chicken needed.

    What’s the best dressing for this Mediterranean bowl?

    I love a simple lemon-tahini dressing (tahini, lemon juice, garlic, water, salt) or a classic Greek vinaigrette. For store-bought options, look for Mediterranean or Greek dressings with olive oil bases.

    Can I eat this bowl cold?

    Yes! It makes an excellent cold lunch option. The flavors actually develop nicely when chilled, making it perfect for meal prep and on-the-go eating.

    How do I prevent the broccoli from becoming soggy?

    Blanch the broccoli briefly (30-45 seconds) in boiling water then immediately transfer to ice water. This preserves the bright green color and crisp texture while taking the raw edge off.

    Final Thoughts

    This Mediterranean Chicken Quinoa Bowl with Broccoli and Tomato has become more than just a recipe in my household—it’s a solution for hectic weeknights, a reliable meal prep staple, and a crowd-pleaser when guests come over. The combination of protein-rich quinoa, lean chicken, and vibrant vegetables creates a perfectly balanced meal that satisfies without weighing you down. I’d love to see your creations if you try this bowl—tag me on Pinterest with your own variations! The beauty of this Mediterranean bowl is that it’s endlessly adaptable to your preferences and what you have on hand.
  • Cauliflower Chickpea Curry Recipe That’ll Blow Your Mind!

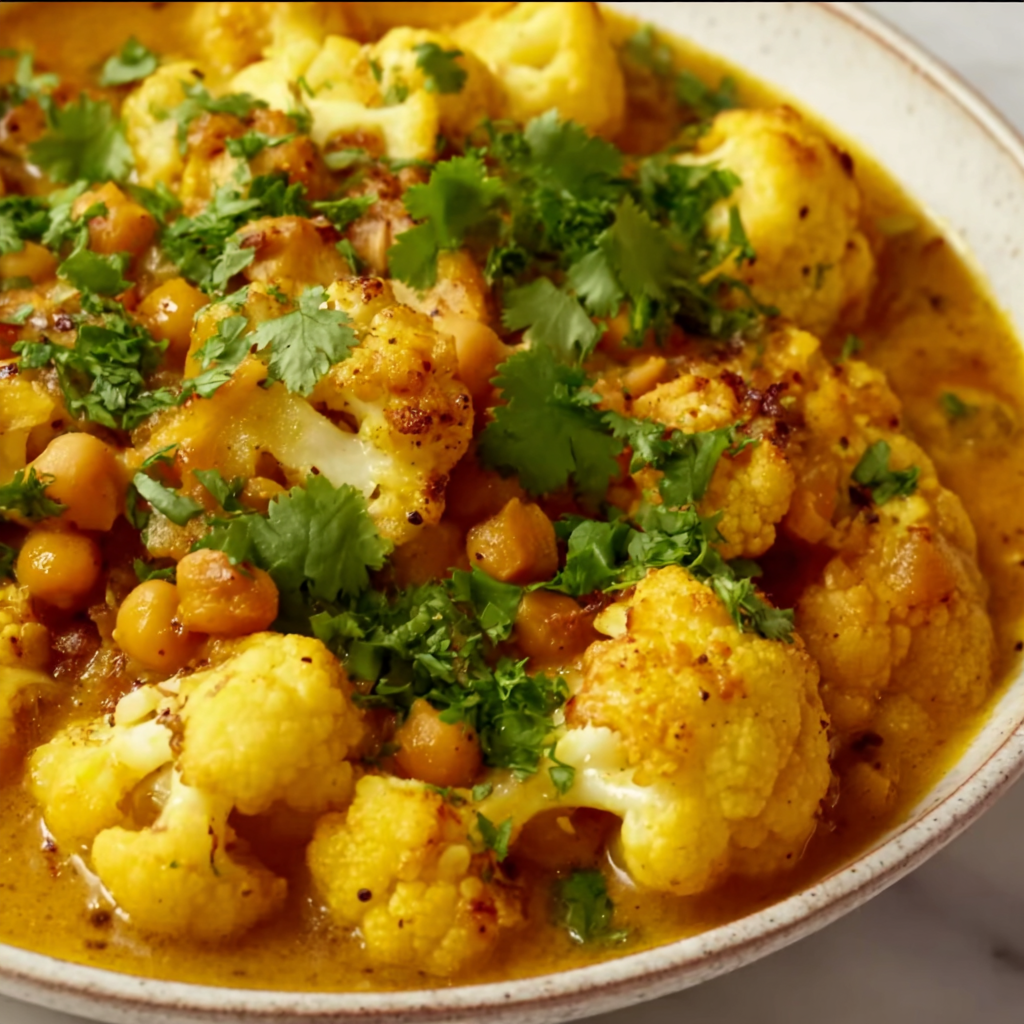
    Cauliflower Chickpea Curry Recipe That’ll Blow Your Mind!

    Cauliflower Chickpea Curry Recipe That’ll Blow Your Mind!

    Cauliflower Chickpea Curry has become my absolute go-to for those evenings when I need something warming yet effortlessly impressive. There’s something magical about how the cauliflower florets soak up the rich, aromatic spices while the chickpeas add that perfect hearty texture. Last Tuesday, when rain tapped against my kitchen window, the fragrant blend of ginger, garlic, and garam masala transformed my entire home into a cozy sanctuary. This plant-based powerhouse isn’t just delicious—it’s a budget-friendly meal that delivers restaurant-quality flavor with minimal effort. Ready to discover your new favorite comfort food? Let’s dive in! Check out my other comfort recipes for more inspiration.

    Recipe

    Why You’ll Love This Cauliflower Chickpea Curry

    Perfect Balance of Flavor and Nutrition

    This Cauliflower Chickpea Curry strikes that elusive balance between deeply satisfying and genuinely nourishing. The cauliflower florets maintain just enough bite while soaking up the velvety tomato-coconut sauce. Each spoonful delivers layers of flavor—earthy cumin, warming garam masala, and bright turmeric that dance on your tongue. Meanwhile, the protein-packed chickpeas ensure you stay full for hours. I love how this dish feels indulgent while secretly being loaded with fiber, plant protein, and anti-inflammatory spices that make your body as happy as your taste buds.

    Quick and Adaptable for Busy Lives

    What initially drew me to this Cauliflower Chickpea Curry was how it fits seamlessly into my chaotic weeknight schedule. The 30-minute miracle comes together in just one pot, saving precious cleanup time. You can easily customize the spice level—dial it back for sensitive palates or crank it up when you need that extra kick. The ingredients are pantry staples I always have on hand, making this my reliable “haven’t-grocery-shopped-in-days” solution. Plus, it’s naturally vegan and gluten-free, making it perfect for accommodating various dietary needs without requiring special ingredients or extra steps.

    Essential Tips & Tricks

    Mastering the Perfect Curry Base

    The secret to an exceptional Cauliflower Chickpea Curry lies in properly building your flavor foundation. Start by sautéing your onions until truly translucent—about 5 minutes, not the rushed 2 minutes many recipes suggest. Add garlic and ginger only after onions are soft to prevent burning these delicate aromatics. Toast your spices in the oil for 30-60 seconds until they become fragrant; this blooming process releases their essential oils and transforms your curry from good to magnificent. For an authentic touch, try adding a cinnamon stick or cardamom pod while simmering—just remember to fish them out before serving!

    Texture Control for Restaurant-Quality Results

    Achieving the perfect texture in your Cauliflower Chickpea Curry requires attention to timing and technique. Cut cauliflower florets uniformly—about 1½-inch pieces ensure even cooking. Add them to the simmering curry in stages if you prefer some pieces tender and others with slight resistance. For chickpeas, I drain and rinse canned varieties thoroughly, but save that final addition until the last 5-7 minutes of cooking. This prevents them from becoming mushy. Similar to my Crispy Honey Garlic Tofu Recipe, controlling moisture is key—if your curry seems watery, simmer uncovered for the final few minutes to reduce and concentrate those flavors.

    Serving Ideas & Creative Variations

    Beyond Basic Rice Pairings

    While basmati rice makes a classic foundation for Cauliflower Chickpea Curry, exploring alternative bases elevates this dish to new heights. Fluffy quinoa offers a protein boost with a delightful nutty undertone that complements the curry’s spices beautifully. For a lower-carb option, try cauliflower rice for a double-cauliflower experience or zucchini noodles for freshness. Warm naan bread is perfect for scooping up that luscious sauce—I love tearing off pieces and watching them soak up the golden curry. For a complete meal, add a side of cooling cucumber raita or a bright Mediterranean Lentil Salad for textural contrast.

    Seasonal Adaptations and Add-ins

    One reason I return to Cauliflower Chickpea Curry repeatedly is its chameleon-like versatility. In summer, stir in handfuls of fresh spinach or kale during the last minute of cooking for vibrant color and nutrition. Fall calls for sweet potato cubes alongside the cauliflower for a gorgeous orange-flecked curry with sweet depth. Winter versions benefit from a handful of dried cranberries or golden raisins for unexpected sweetness. For protein variations, add cubed tofu, replace chickpeas with white beans, or incorporate green peas for a pop of sweetness. A dollop of cashew cream or coconut yogurt on top adds luxurious richness.

    Storage & Troubleshooting Guide

    Maximizing Leftovers for Meal Prep

    Cauliflower Chickpea Curry actually improves with time, making it a meal-prep champion. Store cooled curry in airtight containers in the refrigerator for up to 4 days—the flavors will continue melding and deepening. For freezing, portion into individual servings in freezer-safe containers, leaving slight headspace for expansion, and freeze for up to 3 months. When reheating, add a splash of water or coconut milk if it’s thickened too much. The cauliflower texture softens slightly upon reheating, creating an even creamier consistency that many of my friends actually prefer to the freshly made version.

    Fixing Common Curry Challenges

    Even experienced cooks occasionally encounter Cauliflower Chickpea Curry issues, but most are easily remedied with simple flavor adjustments. If your curry tastes flat or one-dimensional, brighten it with a squeeze of fresh lime juice or a teaspoon of apple cider vinegar—acid is often the missing element. Too spicy? Add coconut cream or a spoonful of yogurt to temper the heat. For a curry that’s too watery, simmer uncovered or stir in 2 teaspoons of cornstarch mixed with water. Too thick? Simply add vegetable broth or coconut milk. Remember that curry flavors bloom overnight, so what seems under-seasoned today might be perfect tomorrow.

    Frequently Asked Questions

    Can I make Cauliflower Chickpea Curry in an Instant Pot?

    Absolutely! Use the sauté function for the aromatics and spices, then add remaining ingredients. Cook on HIGH pressure for 3 minutes with quick release. The cauliflower will be softer than stovetop versions, but equally delicious.

    Is Cauliflower Chickpea Curry spicy?

    The spice level is customizable. For mild curry, reduce or omit cayenne/chili powder. For extra heat, add more cayenne or fresh chili. Start with less—you can always add more later!

    Can I use frozen cauliflower?

    Yes! No need to thaw—add frozen cauliflower directly to the simmering curry and extend cooking time by about 3-5 minutes. The texture will be slightly softer than fresh cauliflower.

    What’s the best way to make this curry creamier?

    For extra creaminess, increase coconut milk or use coconut cream instead. Alternatively, blend ¼ of the finished curry and mix it back in for thickness without additional fat.

    How can I add more protein to my Cauliflower Chickpea Curry?

    Double the chickpeas, add firm tofu cubes, or include red lentils (add extra liquid if using lentils). For non-vegetarians, cubed chicken or shrimp work beautifully with these flavors.

    Final Thoughts

    This Cauliflower Chickpea Curry has become more than just a recipe in my kitchen—it’s a reliable friend that never disappoints. The way it transforms humble ingredients into a vibrant, aromatic meal continues to amaze me with each preparation. What I love most is watching guests’ eyes light up at the first spoonful, often followed by requests for the recipe. Whether you’re a curry aficionado or completely new to these flavors, this dish offers something special. Don’t forget to check out more inspiration on Pinterest and make this Cauliflower Chickpea Curry your own!

  • Sweet Chili Chicken Bowl: Irresistibly Bold Flavor You Crave!

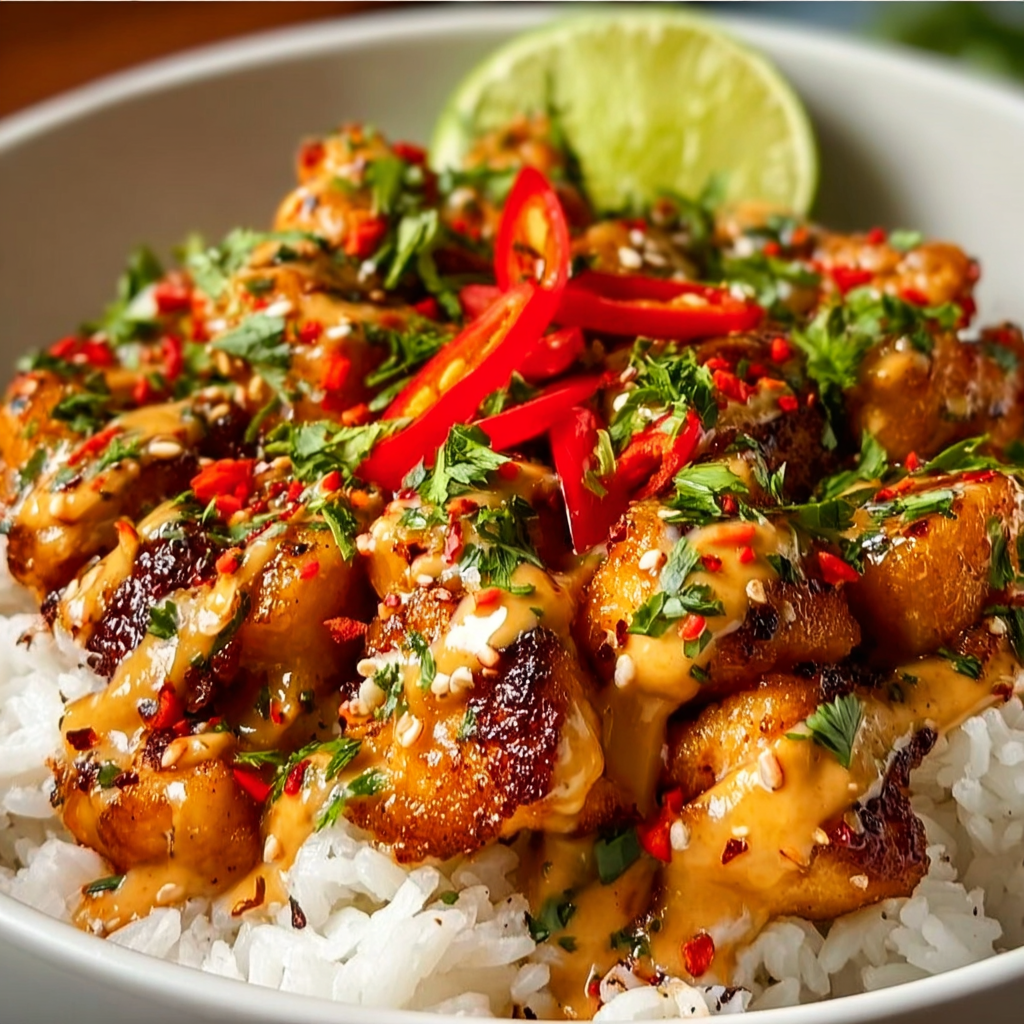
    Sweet Chili Chicken Bowl: Irresistibly Bold Flavor You Crave!

    Sweet Chili Chicken Bowl: Irresistibly Bold Flavor You Crave!

    This Sweet Chili Chicken Bowl has completely revolutionized my weeknight dinner game! The perfect balance of sticky-sweet heat and fresh veggies creates a bowl that’s bursting with flavor in every bite. I discovered this recipe during a particularly hectic week when I needed something quick but refused to sacrifice on taste. Now it’s become my go-to when I want that takeout feeling without leaving home. The vibrant colors alone make this dish Instagram-worthy, but trust me—the flavor is what will keep you coming back to my recipe collection again and again.

    Recipe

    Why You’ll Love This Sweet Chili Chicken Bowl

    A Perfect Balance of Flavors

    There’s something magical about the way the sweet chili sauce caramelizes around tender chicken pieces. That sticky glaze carries hints of garlic, chili, and honey that dance across your taste buds with each forkful. I still remember the first time I made this—my kitchen filled with the most intoxicating aroma that had my neighbor knocking to ask what I was cooking! The sauce strikes that perfect balance between sweet and heat, making it appealing even to those who typically shy away from spicy foods. Plus, the colorful veggie medley adds freshness and crunch that complements the glazed chicken beautifully.

    Quick and Customizable

    On busy weeknights when I’m racing against the clock, this Sweet Chili Chicken Bowl saves the day in just 30 minutes flat. I’ve made this dish countless times, sometimes with whatever vegetables were hiding in my crisper drawer! The recipe is incredibly forgiving—swap in bell peppers for extra sweetness, add snow peas for crunch, or toss in some pineapple chunks for a tropical twist. I’ve served it over fluffy white rice, brown rice, quinoa, and even cauliflower rice when I’m watching my carbs. This adaptability makes it perfect for meal prep too—I often double the recipe on Sunday for ready-to-go lunches throughout the week.

    Essential Tips & Tricks

    Perfecting Your Chicken

    The secret to restaurant-quality Sweet Chili Chicken Bowls lies in how you cook the chicken. I learned (the hard way!) that overcrowding the pan is the enemy of that beautiful caramelization we’re after. Work in batches if needed, giving each piece room to develop that gorgeous golden crust. Another game-changer? Marinating the chicken for just 15 minutes in a tablespoon of soy sauce and cornstarch before cooking. This creates a protective coating that keeps the chicken juicy while promoting that perfect exterior texture. Trust me, this small step makes a world of difference in the final dish!

    Sauce Secrets

    The sweet chili sauce is undeniably the star of this show, but store-bought varieties can vary wildly in sweetness and heat. I always taste and adjust mine with a splash of rice vinegar if it’s too sweet or a drizzle of honey if it’s too spicy. For an extra dimension of flavor, try adding a teaspoon of freshly grated ginger or a squeeze of lime juice to the sauce. When thickening the sauce in the pan, patience is key—let it bubble away until it coats the back of a spoon for that perfect clingy glaze. This technique reminds me of how I approach my Crispy Honey Garlic Tofu Recipe with that same sticky-sweet perfection.

    Serving Ideas & Creative Variations

    Perfect Pairings

    While rice makes a classic base for this Sweet Chili Chicken Bowl, don’t stop there! I’ve fallen in love with serving it over coconut rice—the subtle tropical flavor complements the sweet chili sauce beautifully. For a lighter option, try rice noodles or zucchini noodles. As for toppings, a scatter of toasted sesame seeds, sliced green onions, and fresh cilantro elevates the entire dish. Sometimes I add a quick pickle of thinly sliced cucumbers in rice vinegar and sugar for a bright, acidic counterpoint. For extra crunch, try some crushed peanuts or crispy wonton strips—they add wonderful textural contrast to the tender chicken and veggies.

    Global Fusion Ideas

    Don’t be afraid to take this Sweet Chili Chicken Bowl in exciting new directions! My Korean-inspired version uses gochujang instead of sweet chili sauce and adds kimchi for a fermented tang. For a Thai twist, I incorporate a spoonful of peanut butter into the sauce and finish with a squeeze of lime and fresh Thai basil. You could even give it a Mexican-fusion spin with a side of Authentic Pico de Gallo and sliced avocado. The versatility of this dish means you can travel the world without leaving your kitchen! I’ve even served it as lettuce wraps for a low-carb option that still delivers all that sweet-spicy goodness.

    Storage & Troubleshooting Guide

    Meal Prep & Storage Solutions

    These Sweet Chili Chicken Bowls are meal prep champions! I often make a double batch on Sundays, dividing the components into separate containers. Store the cooled chicken and sauce in an airtight container for up to 4 days in the refrigerator. Keep rice or noodles separate to prevent them from absorbing all the sauce and becoming soggy. Fresh toppings like herbs and crunchy elements should always be added just before eating. For freezing, the chicken and sauce freeze beautifully for up to 3 months—just thaw overnight in the refrigerator and reheat gently on the stovetop with a splash of water to revive the sauce.

    Fixing Common Issues

    If your Sweet Chili Chicken sauce turned out too thin, don’t panic! Create a quick cornstarch slurry with 1 teaspoon cornstarch mixed with 1 tablespoon cold water, then whisk it into the simmering sauce. For sauce that’s too thick, a splash of chicken broth or water will bring it to the perfect consistency. If you’ve accidentally made your dish too spicy, add a dollop of plain yogurt or a drizzle of honey to tame the heat. And for chicken that came out a bit tough, try slicing it thinner next time, or briefly marinate it in a mixture of baking soda and water (1/2 teaspoon baking soda to 1 cup water) for 15 minutes before cooking.

    Frequently Asked Questions

    Can I make Sweet Chili Chicken Bowls ahead of time?

    Absolutely! Prepare all components separately and store in the refrigerator for up to 4 days. Keep the sauce separate from the rice to prevent sogginess, and add fresh toppings just before serving for the best texture and flavor.

    What’s the best rice to use for Sweet Chili Chicken Bowls?

    Jasmine rice works beautifully with its fragrant aroma, but any rice variety works well. For a healthier option, try brown rice or cauliflower rice. Coconut rice adds a delicious tropical element that complements the sweet chili flavors.

    Can I make this recipe vegetarian?

    Definitely! Substitute the chicken with extra-firm tofu, tempeh, or even chickpeas. Press the tofu well before cooking to achieve that crispy exterior that pairs so wonderfully with the sweet chili sauce.

    How spicy is this Sweet Chili Chicken Bowl recipe?

    The heat level is moderate and balanced with sweetness. You can easily adjust by using mild sweet chili sauce and omitting red pepper flakes, or kick up the heat with additional sriracha or chili garlic paste.

    What vegetables work best in this recipe?

    Bell peppers, broccoli, snap peas, and carrots are my favorites for their crunch and color. But feel free to use whatever’s in season or in your refrigerator—this recipe is incredibly versatile!

    Final Thoughts

    This Sweet Chili Chicken Bowl has become more than just a recipe in my kitchen—it’s a reliable friend on busy nights and a crowd-pleaser when entertaining. The vibrant colors, bold flavors, and endless customization options make it a dish I never tire of making or eating. I’d love to see your version of this sweet-spicy delight—tag me on Pinterest with your creations! Whether you follow the recipe exactly or put your own creative spin on it, I’m confident these bowls will bring a little joy to your dinner table.

  • Mexican Rajas Poblanas Recipe: Irresistibly Creamy & Flavorful!

    Mexican Rajas Poblanas Recipe: Irresistibly Creamy & Flavorful!

    Mexican Rajas Poblanas Recipe: Irresistibly Creamy & Flavorful!

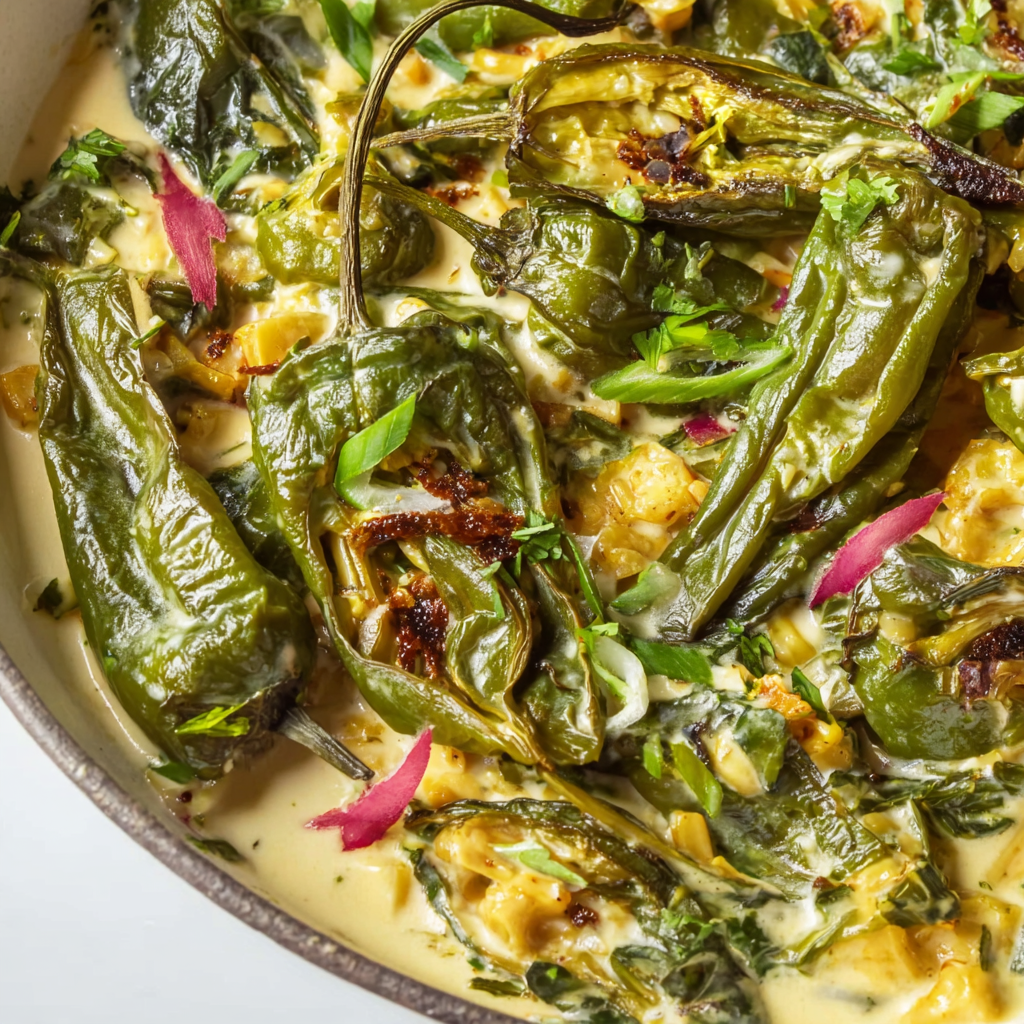
    Mexican Rajas Poblanas is one of those dishes that captures everything I love about comfort food – smoky, creamy, and utterly satisfying. The first time I made this traditional Mexican side dish, my kitchen filled with the most intoxicating aroma of roasted poblanos and sautéed onions. There’s something magical about the way the charred peppers blend with the velvety cream sauce that makes this dish irresistible. Whether you’re serving it alongside flank steak fajitas or enjoying it as a vegetarian main, these rajas will transport you straight to Mexico with every bite.

    Recipe

    Why You’ll Love This Mexican Rajas Poblanas

    A Perfect Balance of Flavors and Textures

    The beauty of Rajas Poblanas lies in its perfect balance of smoky, sweet, and creamy elements. Roasting poblanos until their skins blister and blacken gives them a deep, complex flavor that’s impossible to achieve any other way. When you pair these with sweet onions that have been caramelized until golden and soft, you get a combination that’s utterly irresistible. The cream sauce brings everything together, taming the heat of the peppers while adding richness. I love how each bite offers different sensations – from the tender strips of poblano to the silky sauce coating every piece.

    Quick Prep with Maximum Impact

    Don’t let the impressive flavors fool you – this dish is surprisingly straightforward to prepare. While roasting and peeling the peppers takes a little time, it’s mostly hands-off and can even be done a day ahead. The actual cooking comes together in about 15 minutes once your peppers are ready. I often roast extra poblanos on Sunday to make meal prep easier throughout the week. There’s something deeply satisfying about transforming simple ingredients into something so flavorful with minimal effort. This is exactly the kind of cooking that makes weeknight dinners feel special without exhausting you.

    Essential Tips & Tricks

    Mastering the Poblano Roasting Technique

    The key to authentic Rajas Poblanas is properly roasting the poblanos until their skins blister and blacken evenly. I prefer using a gas flame for direct charring, turning each pepper with tongs until all sides are blistered. If you don’t have a gas stove, broiling works wonderfully too – just place peppers on a baking sheet about 4 inches from the heat source. After roasting, immediately place them in a plastic bag or covered bowl to steam for 10-15 minutes. This makes the skins slip off easily, saving you time and frustration. Remember to remove all seeds unless you prefer extra heat!

    Creating the Perfect Creamy Sauce

    The cream sauce is what transforms this dish from good to unforgettable. Start by using heavy cream rather than substitutes – it creates that silky texture without breaking. For an authentic touch, Mexican crema or crème fraîche adds tanginess that balances the richness. I like to add the cream gradually while the heat is low, stirring constantly to prevent curdling. A pinch of authentic Mexican spices makes all the difference – try a small amount of ground cumin or Mexican oregano. Let the sauce reduce slightly until it coats the back of a spoon for that perfect consistency.

    Serving Ideas & Creative Variations

    Traditional Mexican Pairings

    Rajas Poblanas shines as both a side dish and a versatile filling. Serve it alongside grilled meats for an elevated dinner that impresses without much extra effort. In Mexico, it’s commonly paired with simple rice or used as a taco filling with warm corn tortillas. One of my favorite ways to serve it is with freshly made Mexican street corn salad for a complete vegetarian meal that bursts with authentic flavors. The creamy texture of rajas also makes it perfect for quesadilla filling – just add a sprinkle of Oaxaca or Chihuahua cheese for an indulgent treat.

    Modern Twists on a Classic

    While traditional rajas are perfect as is, there are endless ways to make this dish your own. Try adding diced potatoes that have been par-boiled for a more substantial dish that can serve as a main course. For protein lovers, shredded rotisserie chicken or crispy chorizo crumbles blend beautifully with the creamy sauce. I recently experimented with adding roasted corn kernels for sweetness and texture – it was a game-changer! For a lighter version, substitute half the cream with chicken broth and finish with a squeeze of lime juice. These variations maintain the soul of the dish while adapting it to different dietary needs.

    Storage & Troubleshooting Guide

    Proper Storage for Maximum Freshness

    Rajas Poblanas keeps remarkably well, making it perfect for meal prep. Store leftovers in an airtight container in the refrigerator for up to 4 days. The flavors actually deepen overnight, making this dish even more delicious the next day. If you’re planning ahead, you can roast and peel the poblanos up to 3 days in advance – just keep them refrigerated in a sealed container. For longer storage, freeze the completed dish in portion-sized containers for up to 2 months. When reheating, do so gently over low heat, adding a splash of cream if needed to restore the silky texture.

    Solving Common Rajas Challenges

    Even experienced cooks can face challenges with this dish. If your cream sauce curdles or breaks, lower the heat immediately and whisk in a tablespoon of cold cream to stabilize it. Too much heat is usually the culprit. If your poblanos are too spicy, add more cream or a dollop of sour cream to mellow the heat. Conversely, if they lack heat, leave a few seeds in or add a pinch of cayenne. For peppers that are difficult to peel, try returning them to the steam bath for a few more minutes – patience here pays off with perfectly clean peppers that showcase the silky texture this dish is known for.

    Frequently Asked Questions

    What are Rajas Poblanas exactly?

    Rajas Poblanas is a traditional Mexican dish of roasted, peeled poblano peppers sliced into strips (“rajas”) and cooked with onions, cream, and sometimes cheese. It’s known for its smoky, slightly spicy, and creamy profile.

    Can I make Mexican Rajas Poblanas ahead of time?

    Absolutely! The flavors actually improve overnight. Prepare the entire dish up to 3 days ahead and reheat gently on the stovetop, adding a splash of cream if needed to refresh the sauce.

    Are poblano peppers very spicy?

    Poblanos are relatively mild, ranking 1,000-2,000 on the Scoville scale. They provide a gentle warmth rather than intense heat, making them perfect for those who enjoy flavor without overwhelming spiciness.

    What can I substitute for Mexican crema?

    If you can’t find Mexican crema, use a mixture of sour cream (3 parts) and heavy cream (1 part) whisked together. Crème fraîche is also an excellent substitute with a similar tangy profile.

    Can this dish be made vegetarian or vegan?

    Traditional Rajas Poblanas is already vegetarian. For a vegan version, substitute the dairy cream with full-fat coconut cream or cashew cream, which both provide similar richness and body.

    Final Thoughts

    Mexican Rajas Poblanas represents everything I love about cooking – simple ingredients transformed into something extraordinary through time-honored techniques. The combination of smoky roasted poblanos with sweet onions and velvety cream creates a dish that’s greater than the sum of its parts. Whether you’re serving it as a side, using it as a filling, or enjoying it on its own, rajas brings authentic Mexican flavors to your table with minimal effort. I hope you’ll share your creations with me over at Pinterest – I love seeing how you make this recipe your own!

  • Mexican Street Corn Pasta Salad: Irresistible Flavor Explosion!

    Mexican Street Corn Pasta Salad: Irresistible Flavor Explosion!

    Mexican Street Corn Pasta Salad: Irresistible Flavor Explosion!

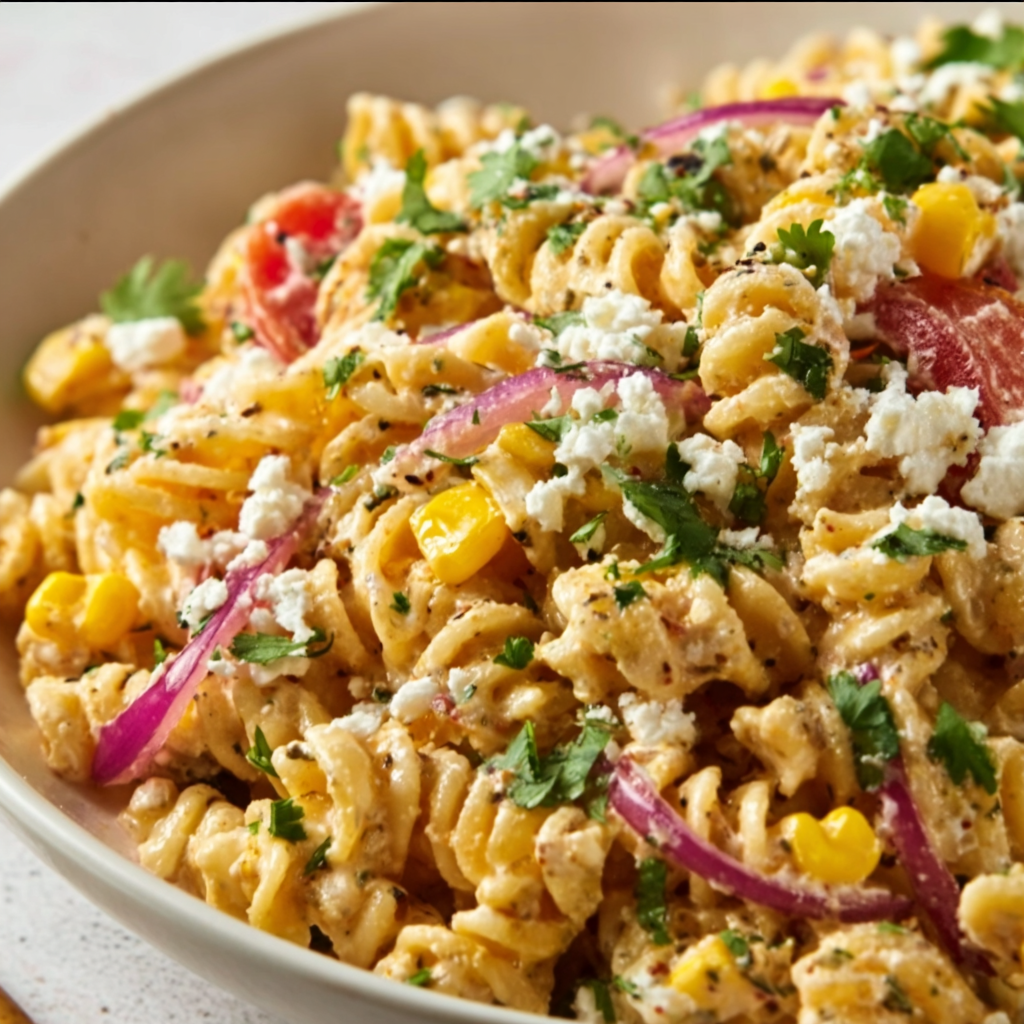
    This Mexican Street Corn Pasta Salad brings all the vibrant flavors of street food to your dinner table with half the mess! The first time I made this for my family’s summer barbecue, my nephew (who claims to hate vegetables) devoured three helpings before anyone could blink. There’s something magical about the combination of sweet corn, tangy lime, creamy cotija, and that hint of smoky chili powder that transforms ordinary pasta into something extraordinary. If you’re looking for a crowd-pleasing side that works equally well for potlucks or weeknight dinners, this might just become your new signature dish. It’s like summer sunshine in a bowl.

    Recipe

    Why You’ll Love This Mexican Street Corn Pasta Salad

    Perfect Balance of Flavors and Textures

    The beauty of this Mexican Street Corn Pasta Salad lies in its harmonious blend of contrasting elements. Each bite delivers the sweet pop of corn against the al dente pasta, while the creamy dressing coats everything in velvety goodness. I love how the tanginess from the lime juice cuts through the richness, creating that perfect balance that keeps you coming back for more. The subtle heat from the chili powder builds slowly, never overwhelming but always present. And those crispy bits of bacon? They add the perfect salty crunch that elevates the entire dish to crave-worthy status.

    Make-Ahead Convenience

    One of my favorite things about this pasta salad is how it actually improves with time. Unlike many salads that wilt or get soggy, this Mexican-inspired masterpiece develops deeper flavors as it sits. I often make it the night before a gathering, which not only saves me precious time when I’m rushing around setting up, but also results in a more flavorful dish. The pasta absorbs all those amazing seasonings, the corn becomes infused with the dressing, and everything melds together beautifully. It’s the perfect solution for busy hosts who want to impress without the last-minute kitchen stress.

    Essential Tips & Tricks

    Selecting and Preparing the Corn

    Getting the corn right is absolutely crucial for authentic Mexican Street Corn Pasta Salad. While fresh corn cut straight from the cob delivers the sweetest, juiciest kernels, don’t stress if it’s not in season. Frozen corn works surprisingly well—just thaw completely and pat dry before charring. The game-changer is taking those extra few minutes to char your corn, either on a grill or in a screaming hot cast iron skillet. That slight caramelization creates those distinctive smoky notes that make this dish sing. I learned this trick from my neighbor who spent summers in Oaxaca—it’s non-negotiable for authentic flavor.

    Mastering the Dressing

    The dressing is the soul of this Mexican Street Corn Pasta Salad, binding all the elements together with creamy, zesty perfection. Start with a quality mayo base (full-fat works best), then whisk in sour cream for tanginess. The secret ingredient? A touch of honey to balance the acidity from the lime juice. I always mix my dressing in a separate bowl before adding to the pasta—this ensures even distribution and prevents having to over-mix the salad itself. When I’m feeling fancy, I’ll add a splash of the pasta cooking water to help the dressing cling better to every piece. This little trick creates a silkier texture that makes all the difference.

    Serving Ideas & Creative Variations

    Perfect Pairings for Any Occasion

    This Mexican Street Corn Pasta Salad shines as both a side dish and a main attraction. For weeknight dinners, I serve it alongside grilled chicken or flank steak for a complete meal that comes together in minutes. At potlucks, it holds its own among other sides, often becoming the first empty bowl. The beauty is in its versatility—it’s equally at home at casual backyard barbecues as it is at more formal gatherings. The bright colors and fresh flavors make it a visual centerpiece, especially when served in a large, shallow bowl garnished with extra cilantro, lime wedges, and a sprinkle of cotija cheese.

    Customization Options for Every Diet

    One reason I love sharing this Mexican Street Corn Pasta Salad recipe is how easily it adapts to different dietary needs. For a lighter version, swap the mayo for Greek yogurt and use turkey bacon instead of regular. Need it vegetarian? Skip the bacon and add black beans for protein and extra texture. Gluten-free friends can enjoy it with corn or chickpea pasta—the robust flavors of the dish hold up beautifully with alternative pastas. My sister makes a vegan version using plant-based mayo and nutritional yeast instead of cotija cheese. The core flavors remain intact while accommodating everyone at the table.

    Storage & Troubleshooting Guide

    Keeping It Fresh for Days

    This Mexican Street Corn Pasta Salad maintains its peak freshness for up to four days when stored properly. Always transfer leftovers to an airtight container and refrigerate within two hours of serving. I’ve found that giving it a quick stir before serving revives the textures and redistributes the dressing. If the pasta seems to have absorbed too much of the moisture, a tiny splash of lime juice and a drizzle of olive oil works wonders to rejuvenate it. For meal prep, I sometimes keep the garnishes (cilantro, extra cheese, and avocado if using) separate and add them just before eating to maintain their fresh appearance and texture.

    Fixing Common Issues

    Even experienced cooks occasionally encounter challenges with pasta salads. If your Mexican Street Corn Pasta Salad turns out too dry, the most likely culprit is under-dressing or pasta that absorbed too much moisture. The easy fix: whisk together a small amount of additional dressing using the same proportions as the original recipe. Too wet? Add more pasta or corn to balance it out. If the flavors seem flat, a pinch of salt and an extra squeeze of lime usually does the trick. Remember that cold dishes need more seasoning, so always taste after chilling and adjust accordingly.

    Frequently Asked Questions

    Can I use canned corn instead of fresh for Mexican Street Corn Pasta Salad?

    Yes! Drain and pat dry canned corn before charring in a hot skillet. You’ll still get good flavor, though fresh or frozen corn typically provides better texture and sweetness.

    What’s the best pasta shape for this salad?

    Medium shapes like rotini, fusilli, or bow ties work best as they catch and hold the creamy dressing in their crevices. Avoid long pasta like spaghetti or delicate shapes that might break.

    Can I make this Mexican Street Corn Pasta Salad ahead of time?

    Absolutely! It actually improves after 4-8 hours in the refrigerator as flavors meld. Just reserve some fresh garnishes to add right before serving.

    Is there a dairy-free alternative for the cotija cheese?

    Crumbled firm tofu seasoned with nutritional yeast and salt makes a surprisingly good substitute. Alternatively, dairy-free feta alternatives provide similar texture and saltiness.

    How spicy is this salad?

    The heat level is mild-to-medium depending on your chili powder. For a spicier version, add diced jalapeños or a dash of cayenne. For milder taste, reduce the chili powder by half.

    Final Thoughts

    This Mexican Street Corn Pasta Salad has become my go-to recipe whenever I need something that’s both impressive and effortless. The way it transforms humble ingredients into something special reminds me why I love cooking—it’s about creating moments of joy around the table. Whether you’re making it for a quiet family dinner or a lively gathering, this pasta salad brings that perfect balance of comfort and excitement to any meal. Don’t forget to check out more inspiring recipes on Pinterest for your next culinary adventure!

  • High Protein Cottage Cheese Pancakes That Boost Energy Fast!

    High Protein Cottage Cheese Pancakes That Boost Energy Fast!

    High Protein Cottage Cheese Pancakes That Boost Energy Fast!

    These High Protein Cottage Cheese Pancakes have completely transformed my morning routine! I used to dread the mid-morning energy crash until I discovered this game-changing breakfast. The first time I folded creamy cottage cheese into my pancake batter, I was skeptical—but that first bite of these protein-packed pillows of perfection made me a believer. They’re fluffy yet substantial, with a subtle tangy note that pairs beautifully with both sweet and savory toppings. Perfect for anyone looking to boost their protein intake while still enjoying a comforting breakfast classic. Ready in just minutes, these pancakes will keep you fueled and satisfied for hours—I promise!

    Recipe

    Why You’ll Love These High Protein Cottage Cheese Pancakes

    The Perfect Protein-to-Carb Balance

    These pancakes aren’t just delicious—they’re nutritional powerhouses. Each serving packs around 20-25 grams of protein depending on your specific ingredients, making them ideal for post-workout recovery or starting your day with lasting energy. The cottage cheese creates a perfect protein-to-carb balance that keeps blood sugar levels stable. I love how they keep me full until lunchtime without that heavy feeling regular pancakes give me. The texture is magical too—slightly custardy in the center with golden crispy edges that make every bite a perfect balance of fluffy and firm.

    Quick Prep, Endless Versatility

    On busy mornings, I need something that doesn’t require a culinary degree to prepare. These High Protein Cottage Cheese Pancakes come together in just 5 minutes of prep time! Simply blend cottage cheese with eggs, a touch of flour (or your favorite alternative), and your preferred seasonings. The batter waits patiently while you get ready for the day. I’ve made them with everything from blueberries to chopped spinach, and they always turn out beautifully. They’re equally delicious for quick weekday breakfasts or leisurely weekend brunches when I have time to get creative with toppings.

    Essential Tips & Tricks

    Achieving the Perfect Texture

    The secret to cloud-like fluffiness lies in how you handle the batter. Blend the cottage cheese completely for the smoothest texture—no one wants surprise cheese pockets! But don’t overmix once you add the flour, as this develops gluten and makes pancakes tough. I let my batter rest for 5 minutes before cooking, which helps the ingredients meld together perfectly. Cook them over medium-low heat rather than high heat to ensure they cook through without burning. Watch for tiny bubbles forming on the surface—that’s your signal to flip! Each pancake needs just about 2-3 minutes per side for golden perfection.

    Ingredient Swaps for Dietary Needs

    These pancakes are incredibly adaptable for different dietary needs. For gluten-free options, I’ve had great success with oat flour, almond flour, or a 1:1 gluten-free baking mix. If you’re watching carbs, reduce the flour and add a tablespoon of ground flaxseed for structure. For dairy-free versions, silken tofu can substitute for cottage cheese with a splash of lemon juice for tanginess. Need more fiber? Add a tablespoon of chia seeds to the batter! These adaptations work beautifully with my High Protein Ranch Pasta Salad meal prep for a full day of balanced eating.

    Serving Ideas & Creative Variations

    Sweet Topping Combinations

    Transform these protein-packed pancakes into a decadent breakfast treat with thoughtfully paired sweet toppings. My weekend favorite is a drizzle of warm maple syrup with fresh berries and a dollop of Greek yogurt for extra protein. For a dessert-like option that still keeps things nutritious, try a thin spread of almond butter topped with sliced bananas and a sprinkle of cinnamon or dark chocolate chips. When I’m craving something special, I’ll make a quick berry compote by simmering frozen mixed berries with a touch of honey—it’s heavenly spooned over a stack with a dusting of powdered sugar.

    Savory Flavor Explorations

    For a complete meal that works any time of day, explore savory variations of these versatile pancakes. I love adding fresh herbs like chives, dill, or basil directly to the batter along with a pinch of garlic powder. Top with sliced avocado, a perfectly fried egg, and everything bagel seasoning for a brunch that impresses everyone. For a Mediterranean twist, try them with a spread of hummus, diced cucumber, cherry tomatoes, and crumbled feta. These savory versions pair perfectly with my Fresh Italian Chopped Salad for a complete lunch that’s both satisfying and nutritious.

    Storage & Troubleshooting Guide

    Make-Ahead and Freezing Methods

    These High Protein Cottage Cheese Pancakes are perfect for meal prepping! I often make a double batch on Sundays for grab-and-go breakfasts throughout the week. Store cooled pancakes in an airtight container with parchment paper between layers to prevent sticking. They’ll keep in the refrigerator for up to 4 days. For longer storage, freeze them in a single layer on a baking sheet until solid, then transfer to a freezer bag. They’ll maintain their quality for about 3 months frozen. To reheat, pop them in the toaster for a minute or microwave for 30 seconds. They maintain their texture surprisingly well—almost as good as fresh!

    Fixing Common Pancake Problems

    Even experienced cooks sometimes encounter pancake challenges. If your batter is too thick, add a tablespoon of milk at a time until it reaches pourable consistency—it should spread slowly when added to the pan. Too thin? Add a tablespoon of flour. Pancakes not cooking through? Your heat is likely too high—lower it and give them more time. For pancakes that fall apart when flipping, try making them slightly smaller or adding an extra egg to the batter for binding. And if they’re browning too quickly before cooking inside, your pan is too hot. Remember that the first pancake is often a “test pancake” to help you adjust temperature and timing!

    Frequently Asked Questions

    Can I substitute the cottage cheese with something else?

    Yes! Greek yogurt works beautifully as a 1:1 replacement, maintaining the high protein content. Ricotta cheese creates a more delicate texture, while silken tofu offers a dairy-free alternative with similar protein benefits.

    Are High Protein Cottage Cheese Pancakes good for weight loss?

    They can support weight management goals due to their high protein content, which promotes satiety and helps maintain muscle mass. Just be mindful of portion sizes and toppings to keep calories in check.

    How can I make these pancakes fluffier?

    Separate your eggs and whip the whites to soft peaks before gently folding them into the batter. This incorporates air for maximum fluffiness without changing the protein content.

    Can I make the batter ahead of time?

    Yes, you can prepare the batter up to 24 hours in advance and store it covered in the refrigerator. Give it a gentle stir before cooking, adding a splash of milk if it’s thickened too much.

    Do these pancakes taste like cottage cheese?

    Not at all! The cottage cheese blends completely into the batter, creating a rich, creamy texture without any distinct cottage cheese flavor—just delicious, fluffy pancakes with extra protein.

    Final Thoughts

    These High Protein Cottage Cheese Pancakes have become my breakfast salvation on busy mornings and a delightful treat on lazy weekends. They prove that nutritious eating doesn’t mean sacrificing flavor or comfort. I love how they’ve helped me maintain energy throughout my morning without the usual carb crash. Whether you’re looking to increase your protein intake, find a kid-friendly healthy breakfast, or simply enjoy a more satisfying start to your day, these versatile pancakes deliver on all fronts. Find more protein-packed inspiration on Pinterest and transform your breakfast routine!

  • Mom’s Cottage Cheese Lasagna: Comfort Food That Warms Your Soul

    Mom’s Cottage Cheese Lasagna: Comfort Food That Warms Your Soul

    Mom’s Cottage Cheese Lasagna: Comfort Food That Warms Your Soul

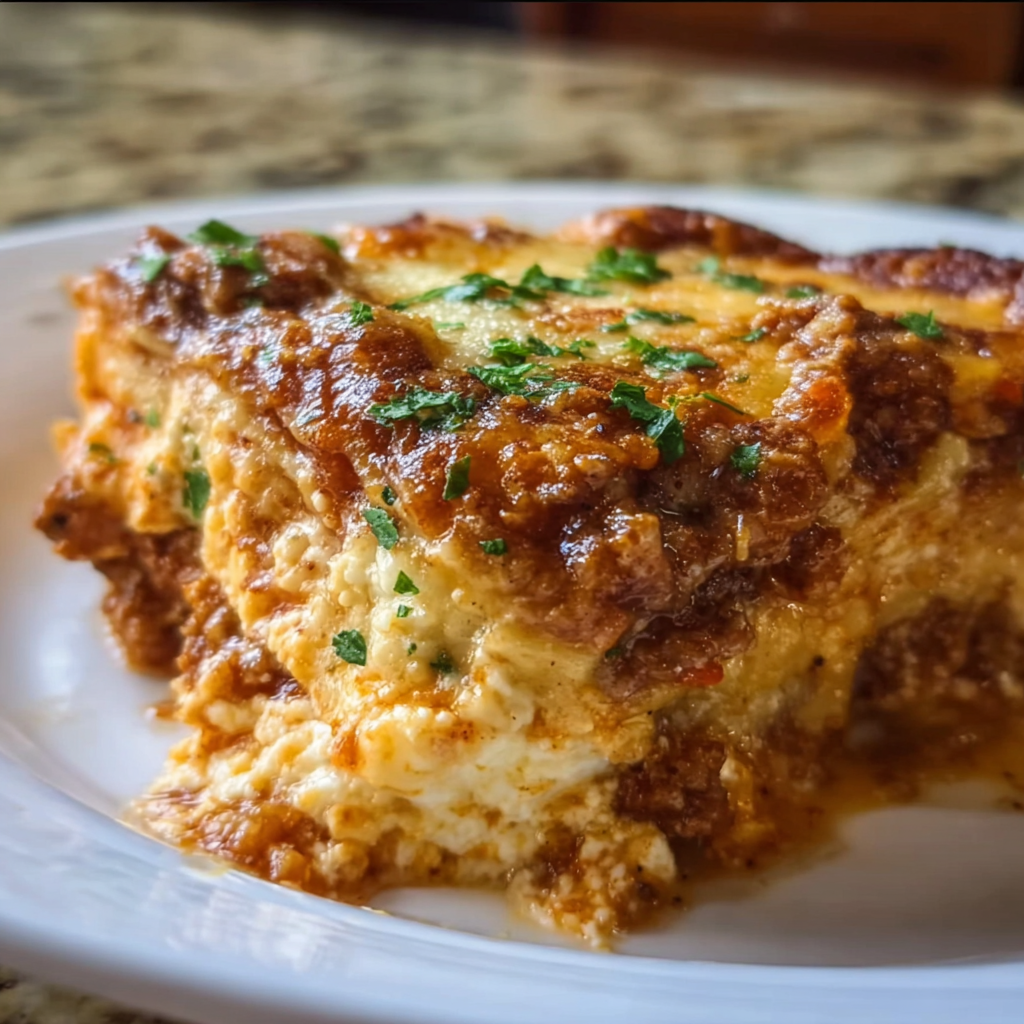
    Mom’s Cottage Cheese Lasagna brings back memories of Sunday dinners at my grandmother’s table—the comforting aroma filling her tiny kitchen as we gathered around. This family treasure combines the creamy richness of cottage cheese with traditional lasagna flavors for a lighter, protein-packed twist on the Italian classic. The secret? A perfect balance of tangy cottage cheese, savory meat sauce, and gooey mozzarella that creates layers of comfort in every bite. I’ve tweaked my mom’s original recipe over the years, but kept the heart intact. Ready to experience this heirloom dish that’s been winning hearts for generations?

    Recipe

    Why You’ll Love This Mom’s Cottage Cheese Lasagna

    Perfect Balance of Flavor and Texture

    The magic of Mom’s Cottage Cheese Lasagna lies in its incredible texture that traditional ricotta versions can’t match. Cottage cheese creates a lighter, more protein-rich layer while maintaining that creamy mouthfeel we all crave. I’ve watched countless friends raise their eyebrows at the ingredient swap, only to ask for seconds minutes later! The large curds melt beautifully between layers of al dente pasta, creating pockets of creamy goodness that perfectly complement the robust meat sauce. Plus, it’s significantly less expensive than ricotta while delivering an even more satisfying bite.

    Budget-Friendly Without Sacrificing Quality

    When I was a new mom on a tight budget, this cottage cheese lasagna became my entertaining secret weapon. Using cottage cheese instead of ricotta can save nearly 40% on your grocery bill while actually improving the nutritional profile. With 24g of protein per cup (compared to ricotta’s 14g), it creates a more filling, satisfying meal that stretches further. I love that I can make this impressive, crowd-pleasing dish for under $15 total—even less when ground beef is on sale! The affordable ingredients never compromise the rich, homemade taste that makes everyone think you spent hours in the kitchen.

    Essential Tips & Tricks

    Perfecting Your Cottage Cheese Layer

    The key to elevated cottage cheese lasagna is treating the cottage cheese properly. I always drain excess liquid by placing it in a fine-mesh strainer for 20 minutes before mixing. This prevents the dreaded watery lasagna syndrome! For ultimate creaminess, blend the cottage cheese with an egg, a handful of Parmesan, and a sprinkle of Italian herbs until just combined. The egg acts as a binding agent while the cheese melts into silky perfection during baking. Don’t overmix—those distinctive curds create wonderful texture pockets that make this version special and reminiscent of authentic Italian cooking.

    Layering Strategy for Perfect Results

    After years of lasagna-making, I’ve learned that strategic layering makes all the difference. Start with a thin layer of sauce on the bottom to prevent sticking, then pasta, meat sauce, cottage cheese mixture, and a light sprinkle of mozzarella. Repeat, saving enough mozzarella for a generous final layer that will create that irresistible golden, bubbly top. The biggest mistake? Overloading each layer. Keep them relatively thin and even for proper cooking. I always let my lasagna rest for 15-20 minutes after baking—this crucial step allows the layers to set properly so you get perfect slices instead of a collapsed mess.

    Serving Ideas & Creative Variations

    Perfect Pairings for a Complete Meal

    Mom’s Cottage Cheese Lasagna shines brightest when paired with complementary sides that balance its richness. I love serving it with a bright, acidic salad with lemon vinaigrette to cut through the creamy layers. My family’s favorite combination includes this fresh chopped salad and warm, garlic-rubbed ciabatta bread. For special occasions, I’ll add roasted vegetables tossed with balsamic glaze—the sweet-tangy notes are magical with the savory lasagna. Don’t forget a medium-bodied red wine like Chianti or Sangiovese if you’re serving adults! The acidity perfectly complements the tomato sauce while standing up to the rich cheese.

    Modern Twists on Mom’s Classic

    While the original recipe is perfect, I’ve developed several variations that maintain the cottage cheese magic while introducing exciting new flavors. My favorite twist incorporates roasted vegetables like zucchini, eggplant and bell peppers between layers for added nutrition and flavor depth. For a protein variation, substitute half the ground beef with Italian sausage or ground turkey. Vegetarians in your life? Skip the meat entirely and double down on mushrooms sautéed with garlic and herbs for a satisfying umami base. The cottage cheese layer works beautifully with all these adaptations, maintaining that creamy, protein-rich foundation that makes this lasagna special.

    Storage & Troubleshooting Guide

    Make-Ahead and Freezing Instructions

    This lasagna is the ultimate meal-prep champion! I regularly make two at once—one for dinner and one for the freezer. To freeze, assemble completely but don’t bake; cover tightly with plastic wrap, then foil, and freeze for up to 3 months. Thaw overnight in the refrigerator before baking as directed, adding 15-20 minutes to the cook time. Already baked leftovers? Store in airtight containers for up to 4 days in the refrigerator. The flavors actually improve overnight as they meld together! For best reheating results, sprinkle a few drops of water over each portion before microwaving to restore moisture.

    Solving Common Lasagna Problems

    The most frequent issue with cottage cheese lasagna is excess moisture. If your lasagna seems too watery after baking, it’s likely from undrained cottage cheese or overly wet sauce. Always drain cottage cheese first and let your sauce reduce until it’s thick, not runny. For too-dry lasagna, your pasta sheets might be the culprit—some no-boil varieties require extra sauce. I always add ¼ cup water around the edges of my dish before baking with no-boil noodles. Uneven cooking? Your oven likely has hot spots. Rotate the dish halfway through baking and consider using a pizza stone underneath to distribute heat more evenly.

    Frequently Asked Questions

    Can I use low-fat cottage cheese for this Mom’s Cottage Cheese Lasagna?

    Yes! While full-fat delivers the creamiest results, low-fat cottage cheese works beautifully and further increases the protein content. Just be sure to drain it well, as low-fat varieties often contain more moisture.

    Do I need to boil the noodles first?

    It depends on the noodles. Traditional lasagna noodles need boiling, while no-boil varieties don’t. If using regular noodles without boiling, add ½ cup extra liquid to your sauce and cover tightly with foil while baking.

    How can I make this vegetarian?

    Replace the meat sauce with sautéed mushrooms, spinach, and bell peppers. The cottage cheese layer already provides plenty of protein, making this substitution seamless and equally satisfying.

    Can I assemble this the night before?

    Absolutely! Assemble completely, cover tightly with plastic wrap, and refrigerate overnight. Let it sit at room temperature for 30 minutes before baking, adding 10-15 extra minutes to the cook time.

    Why is my lasagna falling apart when I serve it?

    Let it rest 15-20 minutes after baking before cutting. This cooling period allows the proteins to set and layers to bond, resulting in picture-perfect slices that hold their shape.

    Final Thoughts

    Mom’s Cottage Cheese Lasagna represents the best of family cooking—practical, nourishing, and filled with love. The humble substitution of cottage cheese creates something truly special that’s become a cornerstone of my family’s food traditions. I hope this recipe brings the same warmth and connection to your table that it has to mine for generations. Whether you follow the classic version or experiment with variations, the creamy, protein-rich layers will surely become a requested favorite. Don’t forget to share your creations on Pinterest!

  • Broiled Halibut with Parmesan Butter – Irresistibly Delicious!

    Broiled Halibut with Parmesan Butter – Irresistibly Delicious!

    Broiled Halibut with Parmesan Butter – Irresistibly Delicious!

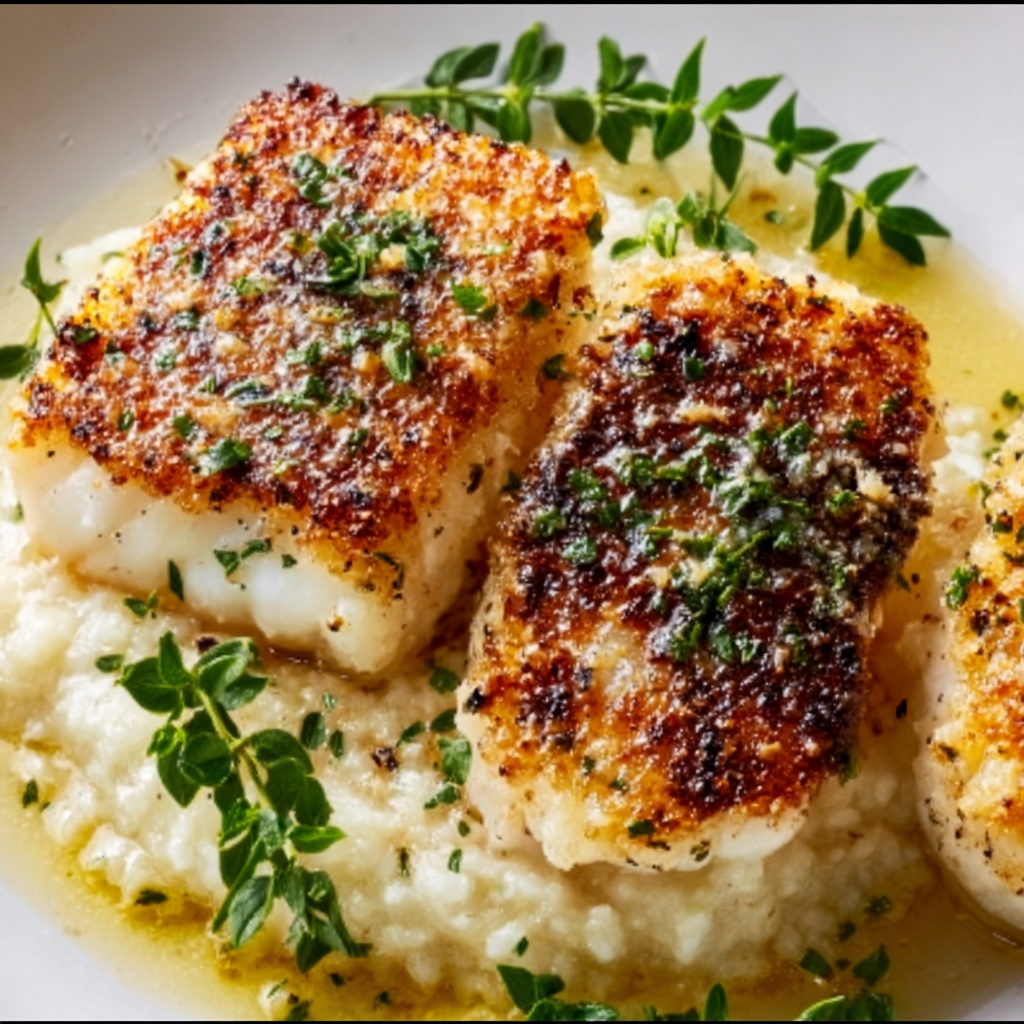
    Broiled Halibut with Parmesan Butter Topping is one of those dishes that feels like a special occasion meal but comes together so effortlessly you’ll wonder why you don’t make it more often. The first time I prepared this for my family, the kitchen filled with that intoxicating aroma of butter, garlic, and herbs that made everyone drift in asking, “What smells so amazing?” The delicate halibut fillets develop a gorgeous golden crust under the broiler while staying moist and tender inside. It’s my go-to recipe when I want to impress without spending hours in the kitchen—perfect for both weeknight dinners and special gatherings at Recipes Darleen.

    Recipe

    Why You’ll Love This Broiled Halibut with Parmesan Butter Topping

    A Restaurant-Quality Dish Made Simple

    This broiled halibut transforms an ordinary dinner into something truly special. The Parmesan butter topping creates a golden, slightly crispy crust that seals in moisture while infusing the fish with rich flavor. I love how the garlic and herbs bloom in the warm butter, releasing their aromatic oils that perfume the entire kitchen. The best part? It takes just minutes under the broiler, making this an achievable luxury even on busy weeknights. When my sister first tried this recipe, she couldn’t believe it wasn’t from an upscale seafood restaurant!

    Nutritious Yet Indulgent

    Halibut is a nutritional powerhouse that feels like an indulgence. Each tender fillet packs impressive protein while remaining low in calories and rich in omega-3 fatty acids. The Parmesan butter topping adds just enough decadence without overwhelming the delicate fish. I appreciate how this dish satisfies my craving for something special while still aligning with healthier eating goals. My husband, who typically reaches for seconds of everything, always comments on how surprisingly filling a single portion is—proof that quality ingredients don’t need quantity to satisfy.

    Essential Tips & Tricks

    Selecting and Preparing Perfect Halibut

    Choosing the right halibut is crucial for this recipe’s success. Look for firm, white fillets with a clean ocean scent—never fishy. I prefer center-cut pieces of equal thickness (about 1-1.5 inches) for even cooking. Pat the fillets completely dry with paper towels before seasoning; this ensures the butter topping adheres properly and helps achieve that beautiful golden crust. Room temperature fish cooks more evenly, so let your halibut sit out for 15 minutes before broiling. This small step made a remarkable difference when I served this at my last dinner party alongside Low Carb Italian Grinder Salad.

    Mastering the Broiling Technique

    The broiler is your secret weapon for restaurant-quality fish at home. Position your oven rack 4-6 inches from the heat source and preheat the broiler for at least 5 minutes before cooking. Watch the halibut carefully—it cooks quickly! I learned this the hard way when I stepped away to answer a phone call and returned to slightly overdone fish. The perfect broiled halibut has a golden, bubbling topping and flakes easily with a fork while remaining moist inside. For even browning, rotate the baking sheet halfway through cooking if your broiler has hot spots.

    Serving Ideas & Creative Variations

    Elegant Pairings for Any Occasion

    This broiled halibut shines as the centerpiece of any meal, from casual weeknights to special celebrations. I love serving it atop a bed of lemon-infused quinoa or alongside roasted asparagus drizzled with olive oil. For a complete dinner that impresses, pair with a crisp white wine and crusty bread for soaking up the delicious butter sauce. When hosting friends recently, I created a Mediterranean-inspired spread with this halibut as the star, accompanied by Authentic Pico de Gallo and a simple arugula salad dressed with lemon and olive oil.

    Flavor Twists to Keep It Exciting

    While the classic Parmesan butter topping is divine, don’t be afraid to experiment with variations. Try adding fresh herbs like dill or tarragon for a bright, seasonal twist. For a Mediterranean flair, incorporate sun-dried tomatoes and olives into the butter mixture. My family goes wild for the spicy version with a pinch of red pepper flakes and a drizzle of honey for sweet heat. When citrus is in season, I’ll add orange or grapefruit zest to the topping—the slight bitterness balances beautifully with the rich butter and sweet halibut.

    Storage & Troubleshooting Guide

    Proper Storage for Leftover Fish

    Properly stored leftover halibut can make a delicious next-day meal. Allow the fish to cool completely before transferring to an airtight container. Refrigerate for up to two days—any longer and the quality significantly diminishes. To reheat, avoid the microwave which can make fish rubbery. Instead, place in a 275°F oven, covered with foil, just until warmed through. I’ve found that leftover halibut makes an incredible addition to salads or grain bowls without reheating at all. For a quick lunch, I flake the cold fish over mixed greens with a squeeze of lemon.

    Solving Common Cooking Challenges

    If your halibut turns out dry, you’ve likely overcooked it. Remember that fish continues cooking after removal from heat—I always take mine out when it’s just shy of done. For perfectly moist halibut, look for the moment when the fish begins to flake but still has a slight translucence at its center. If your topping isn’t browning properly, try patting the fish extra dry before applying the butter mixture, or move your oven rack closer to the broiler. Too much moisture from the fish can prevent that beautiful golden crust from forming.

    Frequently Asked Questions

    Can I use frozen halibut for this Broiled Halibut with Parmesan Butter Topping?

    Yes, but thaw it completely in the refrigerator overnight and pat very dry before cooking. Frozen fish often releases more moisture, so you may need to broil it slightly longer for the same golden finish.

    What’s the best way to tell when halibut is done?

    Perfectly cooked halibut flakes easily with a fork but remains moist. The internal temperature should reach 130-135°F. It will appear opaque but still have a slight translucence in the center.

    Can I make the Parmesan butter topping ahead of time?

    Absolutely! Prepare the butter mixture up to three days in advance and store refrigerated. Bring to room temperature before spreading on the fish to ensure even melting and browning.

    What can I substitute for halibut?

    Cod, sea bass, or grouper work beautifully with this topping. Adjust cooking time based on thickness—thinner fillets will cook more quickly than halibut’s substantial texture.

    How do I prevent the fish from sticking to the pan?

    Line your baking sheet with parchment paper or lightly oil a broiler-safe dish. For extra insurance, let the cold pan come to room temperature before adding the fish.

    Final Thoughts

    This Broiled Halibut with Parmesan Butter Topping has become my signature dish for good reason—it strikes that perfect balance between impressive and achievable. The contrast of the delicate fish with its rich, golden topping creates a sensory experience that makes dinner feel special. I hope this recipe brings as much joy to your table as it has to mine. For more seafood inspiration, follow me on Pinterest where I’m always sharing new favorites and creative twists on classics.