Blog

  • Crockpot Mustard Herb Chicken & Creamy Orzo: Comfort Food Bliss!

    Crockpot Mustard Herb Chicken & Creamy Orzo: Comfort Food Bliss!

    Crockpot Mustard Herb Chicken & Creamy Orzo: Comfort Food Bliss!

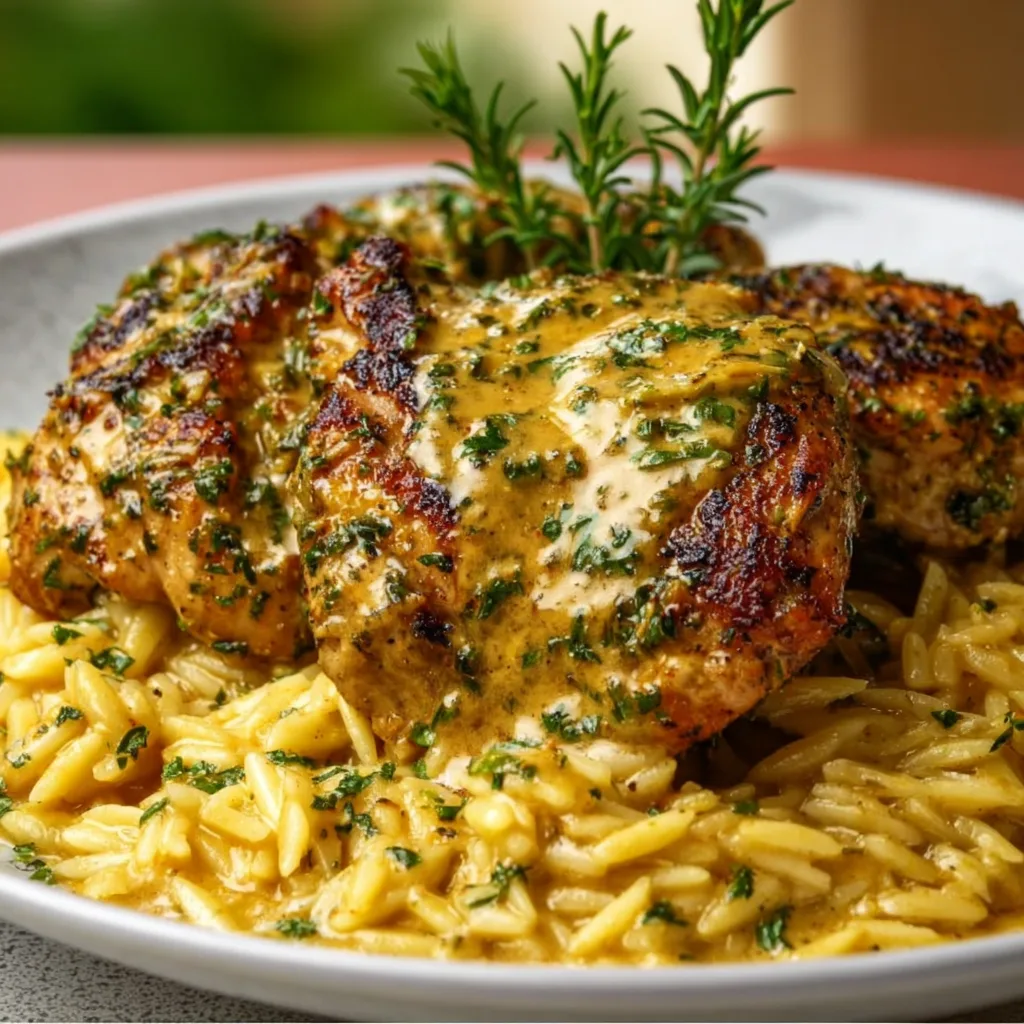
    Crockpot Mustard Herb Chicken And Creamy Orzo is the ultimate comfort food that combines tangy Dijon mustard with aromatic herbs in a slow-cooked masterpiece. I discovered this recipe during a particularly hectic week when I needed something that would practically cook itself while filling my home with irresistible aromas. The tender chicken thighs melt into the creamy orzo, creating a velvety texture that feels like a warm hug on a plate. This dish has become my go-to for those evenings when I want something that tastes like I’ve been cooking all day, but actually requires minimal effort. Perfect for busy weeknights or weekend dinner parties.

    Recipe

    Why You’ll Love This Crockpot Mustard Herb Chicken And Creamy Orzo

    Perfect Balance of Flavors

    The magic of this dish lies in its perfect harmony of flavors. The tangy Dijon mustard creates a beautiful base that’s enhanced by fresh herbs like rosemary and thyme. What I adore most is how the slow cooking process allows the chicken to absorb all these flavors while releasing its natural juices back into the sauce. The result is incredibly tender meat with a depth of flavor that simply can’t be achieved with quick-cooking methods. When you add the creamy orzo at the end, it soaks up all that herb-infused goodness, creating a luscious texture that’s absolutely irresistible.

    Set-It-And-Forget-It Convenience

    There’s something magical about walking through your door after a long day to the aroma of dinner that’s already cooked itself. This recipe gives you that effortless luxury. Just spend 10 minutes in the morning assembling everything in your crockpot, set the timer, and go about your day. The slow cooker does all the heavy lifting, transforming simple ingredients into something spectacular while you’re away. I’ve prepared this on mornings when I barely had time to think straight, yet still managed to serve a dinner that made my family think I’d spent hours in the kitchen. It’s truly kitchen magic at its finest.

    Essential Tips & Tricks

    Choosing the Right Ingredients

    Selecting quality ingredients makes all the difference in this recipe. Opt for bone-in, skin-on chicken thighs as they stay juicier and more flavorful during the long cooking process. For the mustard component, use a good Dijon that has a bit of bite – it mellows beautifully during cooking. Fresh herbs are worth the splurge here; their oils release slowly, infusing everything with their essence. The orzo pasta should be a high-quality brand that holds its shape well. I once tried to save a few pennies with a budget brand, and the pasta turned mushy instead of maintaining that perfect al dente bite that complements the creamy sauce.

    Perfecting the Technique

    The secret to success lies in layering your ingredients correctly and timing the addition of the orzo perfectly. Start by creating a flavor base with aromatics like onions and garlic on the bottom of your crockpot. Season your chicken generously before placing it atop this base. When adding the orzo, wait until the final 30 minutes of cooking time – this prevents it from becoming overcooked and mushy. For an extra luxurious finish, stir in a splash of cream and a handful of freshly grated Parmesan just before serving. This final touch elevates the entire dish, creating a silky sauce that clings beautifully to both the chicken and orzo.

    Serving Ideas & Creative Variations

    Complementary Side Dishes

    This Crockpot Mustard Herb Chicken And Creamy Orzo pairs beautifully with simple sides that let it remain the star of the show. I love serving it with a crisp green salad dressed with lemon vinaigrette – the brightness cuts through the richness perfectly. Roasted asparagus or broccolini also make excellent companions, especially when finished with a sprinkle of lemon zest. For a heartier meal, consider adding crusty artisan bread for sopping up every last drop of that incredible sauce. When entertaining, I arrange everything on a large platter with fresh herb garnishes, which always draws appreciative gasps from my guests before they’ve even taken their first bite. The contrast of textures creates a complete dining experience.

    Creative Twists on the Classic

    Don’t be afraid to make this recipe your own with some creative adaptations. For a Mediterranean twist, add sun-dried tomatoes, kalamata olives, and crumbled feta in the final 15 minutes of cooking. Looking for something with a bit more heat? Incorporate a tablespoon of harissa paste with the mustard for a North African-inspired variation. You can also swap the chicken thighs for turkey tenderloin or even pork loin with excellent results. For a lighter spring version, I sometimes stir in fresh peas and lemon zest just before serving, which adds a bright pop of flavor and color. These simple changes keep the dish exciting even when it becomes a regular in your meal rotation.

    Storage & Troubleshooting Guide

    Proper Storage & Reheating

    This dish makes fantastic leftovers that actually improve in flavor overnight as the herbs continue to infuse the sauce. Store any remaining portions in airtight containers in the refrigerator for up to 3 days. When reheating, add a splash of chicken broth or cream to revitalize the sauce, as the orzo tends to absorb liquid as it sits. For best results, reheat gently on the stovetop over medium-low heat, stirring occasionally to prevent sticking. The microwave works in a pinch, but use 70% power and stir halfway through to ensure even heating. If you’re meal prepping, you can also freeze individual portions for up to 2 months – just thaw overnight in the refrigerator before reheating.

    Troubleshooting Common Issues

    Even experienced cooks encounter challenges occasionally. If your orzo turns out too firm, it likely needs more liquid and cooking time – add ¼ cup of hot broth and continue cooking for 10-15 minutes. Conversely, if it’s too soft, you may have added it too early in the cooking process. For next time, remember that timing is crucial when adding pasta to slow cooker recipes. If your sauce separates or appears curdled, which can happen if dairy is added too early or at too high a temperature, whisk in a cornstarch slurry (1 teaspoon cornstarch mixed with 1 tablespoon cold water) and gently heat until smooth.

    For a sauce that’s too thin, simply remove the lid and cook on high for an additional 15-20 minutes to reduce.

    Frequently Asked Questions

    Can I use chicken breasts instead of thighs for Crockpot Mustard Herb Chicken And Creamy Orzo?

    Yes, but reduce cooking time by about an hour as breasts cook faster and can dry out. I recommend using bone-in breasts with skin for the best results and moisture retention.

    Can I make this recipe dairy-free?

    Absolutely! Substitute the cream with full-fat coconut milk and omit the Parmesan cheese. You can add a tablespoon of nutritional yeast for a cheesy flavor without the dairy.

    What if I don’t have fresh herbs?

    Dried herbs work in a pinch – use one-third the amount called for fresh. Add them earlier in the cooking process to allow proper rehydration and flavor release.

    Can I prepare this the night before?

    Yes! Assemble everything except the orzo in your crockpot insert, cover, and refrigerate overnight. Add an extra 30 minutes to cooking time when starting from cold.

    Is this recipe freezer-friendly?

    The chicken and sauce freeze beautifully for up to 3 months. Prepare fresh orzo when reheating for the best texture, as frozen pasta can become mushy.

    Final Thoughts

    This Crockpot Mustard Herb Chicken And Creamy Orzo has become one of my most treasured recipes for both everyday meals and special occasions. There’s something truly magical about a dish that requires so little hands-on time yet delivers such complex flavors and comfort. I love how it fills my home with mouthwatering aromas that welcome everyone at the door. Whether you’re cooking for a busy family or hosting friends for dinner, this recipe strikes that perfect balance between impressive and achievable. I hope it brings as much joy to your table as it has to mine! For more delicious slow cooker inspirations, visit our Pinterest collection.
  • Gordon Ramsay Macaroni Salad Recipe That Will Blow Your Mind!

    Gordon Ramsay Macaroni Salad Recipe That Will Blow Your Mind!

    Gordon Ramsay Macaroni Salad Recipe That Will Blow Your Mind!

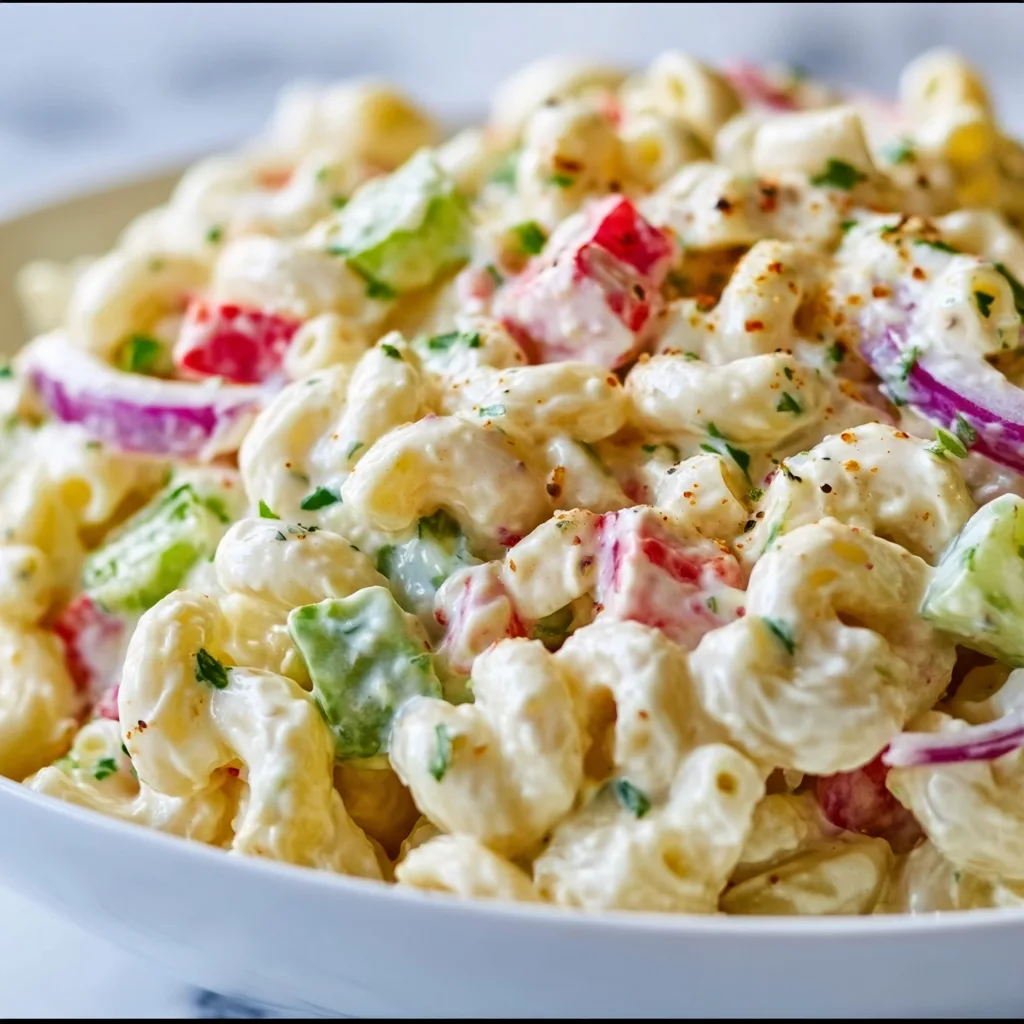
    Gordon Ramsay Macaroni Salad has transformed my summer gatherings from ordinary to extraordinary. The first time I made it, my neighbors practically begged for the recipe! There’s something magical about the way Chef Ramsay balances tangy Dijon with creamy mayo and crisp vegetables. Each bite delivers that perfect harmony of textures and flavors that makes you close your eyes and savor the moment. If you’ve been searching for a pasta salad that stands out from the usual potluck offerings, this recipe deserves a special place in your collection at Recipes Darleen.

    Recipe

    Why You’ll Love This Gordon Ramsay Macaroni Salad

    Perfect Balance of Flavors and Textures

    What sets Gordon Ramsay’s macaroni salad apart is his masterful flavor layering. The sharp Dijon mustard cuts through the richness of the mayonnaise, while a splash of white wine vinegar adds that chef-worthy brightness. I remember serving this at my sister’s baby shower—everyone kept asking, “What’s in this?” The secret is in the balance! The al dente pasta provides the perfect foundation, while crisp celery and red bell peppers add a satisfying crunch. The subtle heat from finely diced red onion wakes up your taste buds without overwhelming the delicate flavors.

    Make-Ahead Convenience

    This macaroni salad actually improves with time, making it the ultimate stress-free dish for entertaining. I’ve made it up to 24 hours in advance, and the flavors meld beautifully in the refrigerator. Last summer, I prepared it the night before a backyard barbecue, which left me free to enjoy my guests instead of rushing around the kitchen. The pasta absorbs all those amazing flavors, and the dressing maintains its creamy consistency without becoming watery or dry. Just give it a quick stir before serving, and you’re ready to impress!

    Essential Tips & Tricks

    Perfecting the Pasta

    The foundation of any great macaroni salad is properly cooked pasta. Gordon Ramsay insists on cooking the macaroni just past al dente—about 30 seconds longer than the package instructions. This slight overcooking allows the pasta to absorb more flavor without becoming mushy. I learned this trick the hard way after making a too-firm batch that didn’t soak up the dressing. Another crucial step: rinse your cooked pasta under cold water to stop the cooking process, then toss it with a tiny drizzle of olive oil to prevent sticking while it cools completely. This ensures perfect texture in your Slow Cooker Mac & Cheese Classic too!

    The Secret Dressing Technique

    The magic of Gordon Ramsay’s macaroni salad lies in his two-stage dressing approach. First, toss the warm (not hot) pasta with a tablespoon of the dressing mixture—this allows the flavors to penetrate deeply. Then, after chilling for 30 minutes, add the remaining dressing and mix thoroughly. I accidentally discovered how well this works when I ran out of time once and had to add dressing in stages. The difference was remarkable! Also, always taste and adjust seasoning right before serving, as cold temperatures dull flavors. A final pinch of salt or squeeze of lemon juice can make all the difference.

    Serving Ideas & Creative Variations

    Perfect Pairings

    Gordon Ramsay’s macaroni salad shines as a versatile side dish that complements nearly any main course. It’s particularly magnificent alongside grilled meats—the creamy texture balances the charred flavors beautifully. Last Fourth of July, I served it with barbecued chicken, and the combination was heavenly! For a complete meal, pair it with Glazed Carrots for a colorful plate. This salad also works wonderfully on a buffet table, as it holds up well at room temperature for up to two hours. For picnics, pack it in a chilled container and place it over ice for food safety.

    Exciting Flavor Twists

    While the classic recipe is perfect, Gordon Ramsay encourages creative adaptations to suit your taste. Add protein by mixing in diced grilled chicken, poached shrimp, or crumbled bacon for a heartier version. For a Mediterranean twist, incorporate kalamata olives, crumbled feta, and sun-dried tomatoes. I once added diced avocado and corn kernels for a Southwestern variation that disappeared in minutes! Experiment with fresh herbs like dill, basil, or tarragon to create your signature version. Just remember Gordon’s principle: maintain balance and don’t overwhelm the dish with too many competing flavors.

    Storage & Troubleshooting Guide

    Optimal Storage Methods

    To maintain the peak freshness of your Gordon Ramsay macaroni salad, store it in an airtight container in the refrigerator. It will keep beautifully for up to three days, though the texture is best within the first 48 hours. I’ve found that using a shallow container rather than a deep bowl helps maintain the salad’s consistency. If you notice the pasta absorbing too much dressing during storage (it happens!), simply refresh it with a tablespoon of mayonnaise and a tiny splash of vinegar before serving. For food safety, never leave the salad at room temperature for more than two hours, especially on warm days.

    Fixing Common Issues

    Even experienced cooks occasionally encounter challenges with macaroni salad. If your salad seems too dry after refrigeration, the pasta has likely absorbed the moisture. The fix is simple: whisk together a tablespoon each of mayonnaise and sour cream with a splash of lemon juice, then gently fold it in. Conversely, if your salad is too wet, add more finely diced vegetables or even a handful of toasted breadcrumbs to absorb excess moisture. Last summer, I saved a watery batch by mixing in some finely grated Parmesan cheese—it absorbed the extra liquid and added wonderful flavor!

    Frequently Asked Questions

    What makes Gordon Ramsay’s Macaroni Salad different from traditional versions?

    Gordon Ramsay’s version uses a balanced combination of Dijon mustard, high-quality mayonnaise, and white wine vinegar. He also incorporates finely diced vegetables for texture contrast and recommends a two-stage dressing application for maximum flavor penetration.

    Can I make this macaroni salad ahead of time?

    Absolutely! This salad actually improves when made 12-24 hours ahead. The flavors meld beautifully, though you might need to refresh it with a little extra dressing before serving.

    What pasta shape works best if I don’t have elbow macaroni?

    Small pasta shapes like shells, farfalle (bow ties), or orecchiette work wonderfully. Avoid long pasta like spaghetti or linguine as they don’t hold the dressing as effectively.

    How can I make this recipe gluten-free?

    Simply substitute your favorite gluten-free pasta. Cook it slightly longer than package directions (as gluten-free pasta can be firmer) and cool it completely before adding dressing.

    Can I lighten up Gordon Ramsay’s Macaroni Salad recipe?

    Yes! Replace half the mayonnaise with Greek yogurt, use light mayonnaise, or substitute part of the mayo with mashed avocado. The flavor profile will change slightly but still be delicious.

    Final Thoughts

    Gordon Ramsay’s Macaroni Salad has earned its place as my go-to recipe for gatherings large and small. Its perfect balance of flavors, make-ahead convenience, and versatility make it a standout dish that guests always remember. The beauty of this recipe lies in its adaptability—follow the core techniques while adding your personal touch. Whether served alongside grilled meats at a summer barbecue or as part of a holiday spread, this macaroni salad delivers restaurant-quality results with home kitchen simplicity. Find more inspiration for your next gathering at Pinterest.

  • High Protein Ranch Pasta Salad: Creamy, Loaded & Irresistible!

    High Protein Ranch Pasta Salad: Creamy, Loaded & Irresistible!

    High Protein Ranch Pasta Salad: Creamy, Loaded & Irresistible!

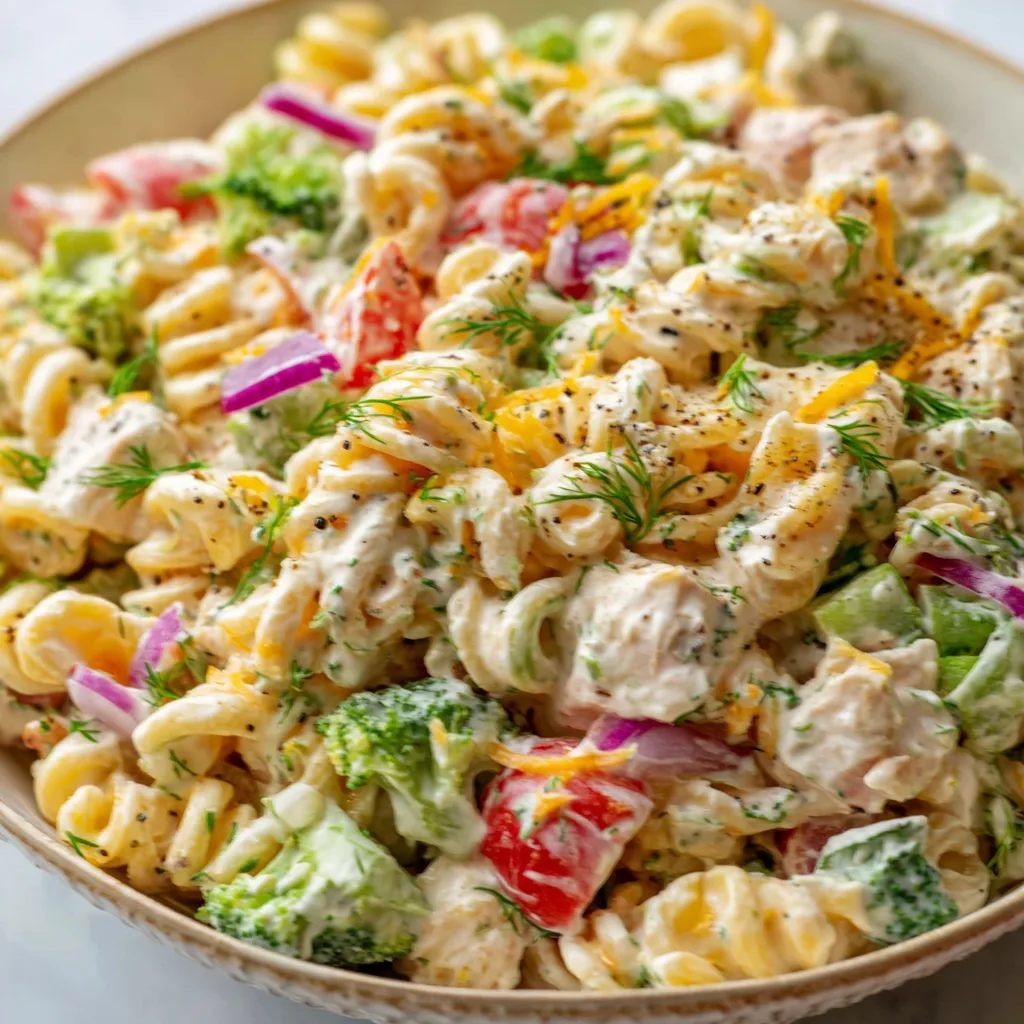
    This High Protein Ranch Pasta Salad has become my absolute summertime salvation! When the temperature climbs and I’m craving something substantial yet refreshing, this dish delivers every single time. The perfect balance of creamy ranch dressing, protein-packed additions, and al dente pasta creates a satisfying meal that keeps me energized through busy afternoons. I first created this recipe during a particularly sweltering July when turning on the oven felt like torture. Now it’s on constant rotation, especially when I need something that can be made ahead for gatherings or meal prep. The tangy, herb-infused flavors just get better overnight!

    Recipe

    Why You’ll Love This High Protein Ranch Pasta Salad

    Perfect Balance of Nutrition and Flavor

    This isn’t your average pasta salad – it’s a complete meal that satisfies both your taste buds and nutritional needs. Each forkful delivers a perfect balance of complex carbs from the pasta, lean protein from chicken or chickpeas, and essential nutrients from fresh vegetables. I’ve carefully calibrated the ranch dressing to coat everything with creamy goodness without drowning the ingredients. The protein content keeps you fuller longer, making this an ideal lunch option that won’t leave you reaching for snacks an hour later. My husband, who typically scoffs at “salad for dinner,” requests this weekly!

    Make-Ahead Convenience That Improves With Time

    One of the magical qualities of this High Protein Ranch Pasta Salad is how it actually improves with time in the refrigerator. The flavors meld beautifully as they sit, allowing the herbs and seasonings to infuse every component. This makes it the ultimate meal prep solution for busy weeks. I often make a double batch on Sunday evenings, portioning it into containers for grab-and-go lunches. The texture remains perfect for up to four days – the pasta stays al dente without becoming mushy, and the proteins retain their satisfying texture. It’s truly a time-saving gift to your future hungry self!

    Essential Tips & Tricks

    Perfecting Your Pasta Technique

    The foundation of any great pasta salad is properly cooked pasta, and this high protein version is no exception. Always cook your pasta just past al dente – slightly firmer than you might for a hot pasta dish, but not crunchy. This prevents it from becoming mushy as it absorbs the dressing. I recommend cooling the pasta completely before adding other ingredients by rinsing it under cold water, then tossing with a tiny drizzle of olive oil. This prevents clumping and allows the ranch dressing to coat each piece evenly rather than being absorbed immediately. Your pasta choice matters too – rotini, farfalle, or penne work beautifully here!

    Creating the Perfect Protein Balance

    The protein component is what elevates this from side dish to satisfying meal. I recommend using a combination of proteins for the best texture and flavor profile. My favorite mix is rotisserie chicken (shredded) with hard-boiled eggs and a can of drained chickpeas. This trio provides varying textures and complementary flavors that make each bite interesting. For a vegetarian version, substitute the chicken with cubed extra-firm tofu that’s been pressed and lightly seasoned. If you’re looking for more protein-packed inspiration, my Crack Chicken Noodle Soup uses a similar flavor profile in a warm, comforting format.

    Serving Ideas & Creative Variations

    Complementary Side Pairings

    This High Protein Ranch Pasta Salad stands beautifully on its own, but pairing it with simple sides can create a more elaborate meal experience. My favorite accompaniment is a stack of butter-toasted baguette slices lightly rubbed with garlic – perfect for scooping up any extra dressing! For a lighter touch, a simple fruit salad with seasonal berries provides a sweet contrast to the savory pasta. When serving at gatherings, I place the pasta salad in a large bowl surrounded by cucumber rounds, endive leaves, and butter lettuce cups that guests can use as edible serving vessels. This interactive serving style always gets compliments!

    Seasonal Adaptations Worth Trying

    One of the reasons I return to this recipe year-round is its incredible adaptability to seasonal ingredients. In summer, I fold in charred corn kernels and cherry tomatoes for bursts of sweetness. Fall calls for roasted butternut squash cubes and dried cranberries. Winter versions feature roasted brussels sprouts and pomegranate seeds, while spring welcomes asparagus tips and fresh peas. The ranch dressing base pairs beautifully with virtually any vegetable. For a cozy winter variation that keeps the same flavor profile but in a different format, try my Slow Cooker Mac & Cheese Classic with some added protein mix-ins.

    Storage & Troubleshooting Guide

    Maximizing Freshness and Shelf Life

    To keep your High Protein Ranch Pasta Salad at its best, proper storage is essential. Always refrigerate in an airtight container within two hours of preparation. For maximum freshness, store the salad in glass containers rather than plastic, which can sometimes impart flavors. If making ahead for several days, consider layering ingredients strategically – place heartier components like chicken and pasta at the bottom, with delicate items like fresh herbs or greens in a separate container to add just before eating. This salad maintains optimal texture and flavor for up to four days when properly stored, making it perfect for weekly meal planning.

    Rescuing Common Pasta Salad Problems

    Even experienced cooks occasionally encounter pasta salad issues, but most are easily fixed! If your salad seems dry after refrigeration (pasta absorbs moisture overnight), simply whisk together a small amount of additional ranch dressing with a splash of lemon juice and drizzle over the top before serving. For salad that’s become too soft or mushy, add textural elements just before serving – toasted sunflower seeds, crisp bacon bits, or fresh cucumber can restore that satisfying crunch. If flavors seem muted after storage, a sprinkle of salt and fresh cracked pepper, plus a squeeze of lemon juice will brighten everything beautifully.

    Frequently Asked Questions

    Can I make this High Protein Ranch Pasta Salad ahead of time?

    Absolutely! It actually improves with 4-24 hours of refrigeration as flavors meld. Just reserve a little extra dressing to refresh it before serving if needed.

    What’s the best pasta shape to use?

    Shapes with ridges or twists like rotini, farfalle, or fusilli work best as they catch and hold the creamy ranch dressing in their crevices.

    How long will this pasta salad keep in the refrigerator?

    When properly stored in an airtight container, it maintains quality for up to 4 days. The texture is best within the first 3 days.

    Can I make this dairy-free?

    Yes! Substitute the ranch dressing with a dairy-free version and use plant-based protein alternatives like chickpeas, edamame, or marinated tofu.

    Is this suitable for meal prep?

    It’s perfect for meal prep! Portion into individual containers for grab-and-go lunches that stay fresh and delicious all week long.

    Final Thoughts

    This High Protein Ranch Pasta Salad has become more than just a recipe in my kitchen – it’s a solution for busy days, a crowd-pleaser for gatherings, and a nutritional powerhouse disguised as comfort food. The versatility means it never gets boring, while the protein-rich ingredients ensure it satisfies on a deeper level than traditional pasta salads. I’d love to see your variations of this recipe – tag me on Pinterest with your creations! Whether you’re making it for meal prep or a summer potluck, I’m confident this will become a staple in your recipe collection.

  • Cucumbers in Spicy Peanut Sauce: Irresistibly Zesty & Refreshing!

    Cucumbers in Spicy Peanut Sauce: Irresistibly Zesty & Refreshing!

    Cucumbers in Spicy Peanut Sauce: Irresistibly Zesty & Refreshing!

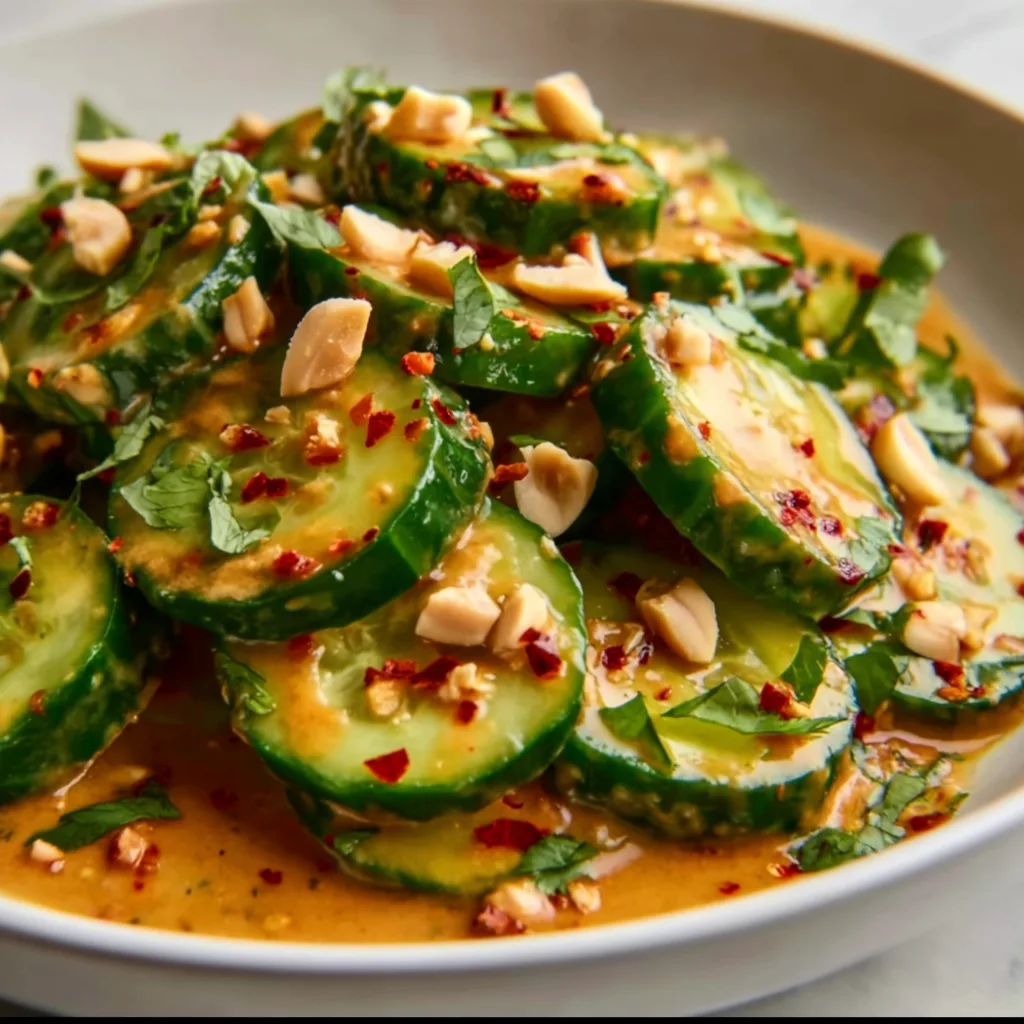
    Cucumbers in Spicy Peanut Sauce have become my absolute obsession this summer! There’s something magical about the crisp, cool cucumber slices bathed in that rich, nutty sauce with just enough heat to wake up your taste buds. I first discovered this dish at a friend’s backyard gathering and couldn’t believe how such simple ingredients created such big flavors. The contrast between the refreshing cucumbers and the creamy, spicy peanut sauce creates a perfect balance that keeps you coming back for “just one more bite.” Perfect for hot days when you’re craving something light yet satisfying.

    Recipe

    Why You’ll Love This Cucumbers in Spicy Peanut Sauce

    A Perfect Balance of Flavors and Textures

    The magic of this dish lies in its contrasting elements working in perfect harmony. Cool, crisp cucumbers provide a refreshing crunch that acts as the ideal canvas for the rich, creamy peanut sauce. Each bite delivers a delightful sensory experience – the initial coolness gives way to nutty depths, followed by a gentle heat that builds rather than overwhelms. I love how the sauce clings to each cucumber slice, ensuring you get the perfect ratio of flavors with every bite. The natural sweetness of the cucumbers balances beautifully with the savory-spicy sauce.

    Quick and Simple Preparation

    One of my favorite things about Cucumbers in Spicy Peanut Sauce is how ridiculously easy it is to prepare. The entire dish comes together in under 15 minutes, making it perfect for those nights when cooking feels like too much effort. Simply slice your fresh cucumbers, whisk together the peanut sauce ingredients, and combine. No oven required! I’ve made this countless times when unexpected guests drop by, and it always earns rave reviews. The ingredients are likely already in your pantry, making this a budget-friendly option that tastes like you spent hours in the kitchen.

    Essential Tips & Tricks

    Choosing and Preparing Your Cucumbers

    For the best results, select firm, unwrinkled cucumbers with vibrant green skin. English or Persian varieties work beautifully here with their thinner skins and fewer seeds. I like to partially peel mine in stripes for visual appeal and textural contrast. Slicing technique matters too – aim for pieces about ¼-inch thick so they hold up to the sauce without becoming soggy. A mandoline makes quick work of this, but a sharp knife works perfectly fine. Don’t forget to salt your cucumber slices and let them sit for 10 minutes, then pat dry – this draws out excess moisture and intensifies their flavor and crunch.

    Perfecting Your Peanut Sauce

    The heart of this dish is the spicy peanut sauce, and getting it right makes all the difference. Natural peanut butter creates the creamiest texture, but any style works in a pinch. Balance is key – aim for the perfect harmony between salty, sweet, spicy, and tangy elements. Start with less chili and add more to taste; you can always increase the heat, but you can’t take it away! For the smoothest sauce, whisk your ingredients at room temperature. If it’s too thick, add warm water a teaspoon at a time until you reach your desired consistency. This sauce is also fantastic with slow cooker chicken burrito bowls for a fusion twist.

    Serving Ideas & Creative Variations

    Perfect Pairings and Presentation

    Serve Cucumbers in Spicy Peanut Sauce in a shallow bowl to catch all that delicious sauce – trust me, you won’t want to waste a drop! This dish shines as part of an Asian-inspired spread alongside dumplings, spring rolls, or cold noodles. For a beautiful presentation, arrange the cucumber slices in a fan pattern and drizzle the sauce on top, finishing with a sprinkle of sesame seeds and chopped cilantro. I love setting this out as an appetizer when hosting friends – it always disappears within minutes! The vibrant colors and enticing aroma make it as appealing to the eyes as it is to the palate.

    Exciting Flavor Variations

    While the classic version is incredible, don’t be afraid to make this recipe your own with creative flavor twists. Add thinly sliced radishes for extra crunch and peppery bite, or mix in avocado chunks for creamy richness. For a Thai-inspired version, incorporate a tablespoon of red curry paste and a squeeze of lime. Toasted coconut flakes make a wonderful garnish for a tropical note. When I’m feeling particularly adventurous, I add spiralized carrots and zucchini to create a more substantial side dish that pairs beautifully with glazed carrots for a colorful vegetable medley that brightens any dinner table.

    Storage & Troubleshooting Guide

    Keeping It Fresh

    For optimal freshness, it’s best to store the cucumber slices and peanut sauce separately in airtight containers in the refrigerator. The cucumbers will stay crisp for up to 2 days, while the sauce remains delicious for about 5 days. When ready to serve, simply combine them and you’ll have that same fresh-made taste. If you’ve already mixed everything together, the dish will still taste wonderful for about 24 hours, though the cucumbers will gradually release water and soften. I like to reserve a bit of extra sauce to refresh leftovers – just a small drizzle brings everything back to life!

    Common Issues and Solutions

    The most common challenge with this dish is a watery sauce caused by cucumber moisture. To prevent this, don’t skip the salting step mentioned earlier, and pat those cucumber slices thoroughly dry before combining with the sauce. If your sauce becomes too thick in the refrigerator, simply whisk in a few drops of warm water until it reaches your desired consistency. For sauce that’s too spicy, add more peanut butter or a touch of honey to balance the heat. And if your sauce separates after refrigeration, don’t worry – a quick stir or shake will bring it back together beautifully.

    Frequently Asked Questions

    Can I make Cucumbers in Spicy Peanut Sauce ahead of time?

    Yes! Prepare the sauce up to 5 days ahead and store refrigerated. Slice cucumbers up to 24 hours before serving, keeping them separate until ready to serve for maximum crispness.

    What can I substitute for peanut butter if I have allergies?

    Sunflower seed butter or almond butter work wonderfully as alternatives. Adjust the sweetness and consistency as needed, as these substitutes may have different natural flavors.

    How spicy is the peanut sauce typically?

    The spice level is completely customizable. Start with less chili and gradually increase to find your perfect balance. My Cucumbers in Spicy Peanut Sauce recipe uses 1-2 teaspoons of sriracha as a starting point.

    Can I add protein to make this a complete meal?

    Absolutely! Add grilled chicken, shrimp, or tofu to transform this into a main dish. Thinly sliced beef also pairs beautifully with the spicy peanut sauce.

    How do I fix a sauce that’s too thick or thin?

    For thick sauce, add warm water a teaspoon at a time until desired consistency. If too thin, whisk in additional peanut butter or a sprinkle of powdered peanut butter.

    Final Thoughts

    Cucumbers in Spicy Peanut Sauce exemplifies how simple ingredients can create extraordinary flavors when combined thoughtfully. The refreshing crunch of cucumber against the rich, spicy peanut sauce creates a perfect harmony that’s impossible to resist. Whether served as an appetizer, side dish, or light meal, this versatile recipe deserves a spot in your regular rotation. I find myself making it whenever I need a quick dish that still feels special. Don’t forget to check out more delicious recipes on Pinterest for more inspiration to pair with this addictive dish!

  • Mexican Street Corn Salad Recipe That Will Wow Your Taste Buds!

    Mexican Street Corn Salad Recipe That Will Wow Your Taste Buds!

    Mexican Street Corn Salad Recipe That Will Wow Your Taste Buds!

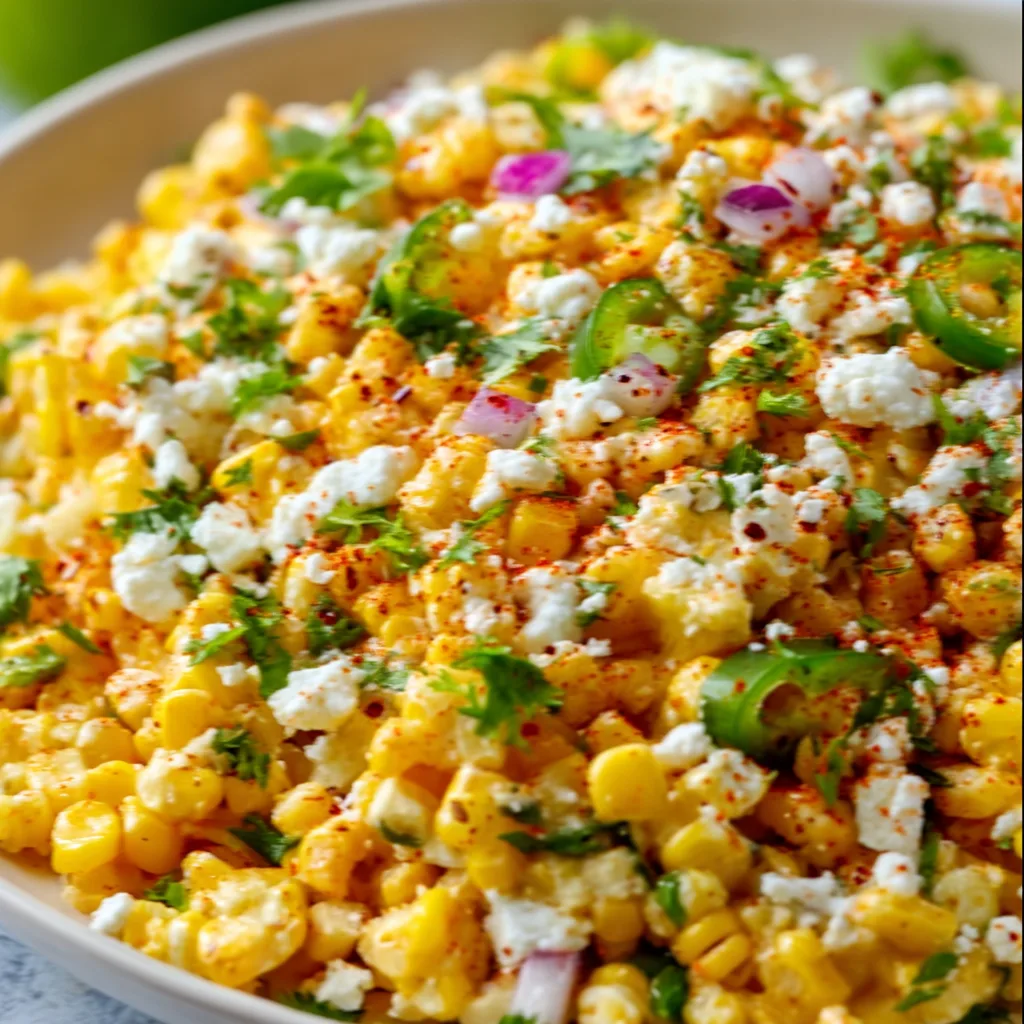
    Mexican Street Corn Salad brings all the vibrant flavors of street-side elotes into a convenient, shareable dish that never fails to impress. The first time I made this for a backyard gathering, the bowl was scraped clean before I could even grab a second helping! There’s something magical about the creamy, tangy dressing mingling with charred corn kernels and fresh herbs that transports you straight to a bustling Mexican mercado. The combination of smoky, sweet, tangy, and spicy elements creates a perfect harmony that’s utterly irresistible—especially on warm summer evenings when fresh corn is at its peak.

    Recipe

    Why You’ll Love This Mexican Street Corn Salad

    Perfect Balance of Flavors and Textures

    This Mexican Street Corn Salad delivers an incredible sensory experience with every bite. The sweet charred corn provides a smoky foundation, while the creamy mayo-sour cream dressing adds richness that’s perfectly cut by fresh lime juice. What I adore most is how the salty cotija cheese crumbles melt slightly into the warm corn, creating little pockets of flavor that burst in your mouth. The gentle heat from chili powder and the fresh pop of cilantro wake up your taste buds in the most delightful way. It’s a textural wonderland—crisp corn, creamy dressing, and the occasional crunch from red onion.

    Make-Ahead Convenience for Gatherings

    One of the greatest advantages of this Mexican Street Corn Salad is its party-perfect timing. Unlike traditional elotes that must be eaten immediately, this salad actually improves after sitting for 30 minutes, allowing all those magnificent flavors to meld together. I’ve made this countless times for potlucks and BBQs, and I love that I can prepare it before guests arrive. The salad holds beautifully for several hours at room temperature, making it ideal for grazing tables. You can even prepare components ahead and assemble just before serving, giving you more time to enjoy your company instead of being stuck in the kitchen.

    Essential Tips & Tricks

    Achieving the Perfect Char

    The secret to exceptional Mexican Street Corn Salad lies in properly charring the corn. For the deepest flavor development, use fresh corn on the cob and grill it until you see those beautiful blackened spots appear—this caramelizes the natural sugars and creates that distinctive smoky essence. Don’t have a grill? No problem! You can achieve similar results by placing husked corn directly over a gas burner flame, rotating occasionally, or broiling corn in your oven for 3-4 minutes per side. In a pinch, a cast-iron skillet works wonderfully too—just add corn kernels in a single layer and don’t stir too frequently, allowing those charred spots to develop.

    Balancing Creaminess and Acidity

    Finding the perfect balance between creamy richness and bright acidity elevates this salad from good to unforgettable. I learned this the hard way after making a too-heavy version that felt overwhelming. The key is using equal parts mayonnaise and sour cream (or Mexican crema if you can find it), then brightening everything with plenty of fresh lime juice. Don’t skip the zest either—it adds an aromatic dimension that makes all the difference! Taste as you go and adjust the lime juice until it cuts through the creaminess with a pleasant tang. This balanced dressing pairs beautifully with the Slow Cooker Chicken Burrito Bowls for a complete Mexican-inspired feast.

    Serving Ideas & Creative Variations

    Perfect Pairings for Every Occasion

    Mexican Street Corn Salad works brilliantly as both a side dish and a versatile topping. Serve it alongside grilled proteins like cilantro-lime chicken, fish tacos, or marinated skirt steak for a complete meal that feels special yet effortless. On hot summer days, I love pairing it with watermelon slices for a sweet-savory contrast that refreshes instantly. This salad also transforms ordinary dishes—spoon it over simple green salads, use it as a topping for baked potatoes, or serve it with tortilla chips as an elevated dip. The versatility is endless! For a more substantial meal, try serving it with Crockpot Chicken Broccoli Alfredo for an unexpected but delicious fusion dinner.

    Creative Twists on the Classic

    While traditional Mexican Street Corn Salad is perfect as is, don’t be afraid to make it your own with creative variations. Add black beans for protein and visual contrast, or incorporate diced avocado for extra creaminess. For a fruit-forward twist that always surprises guests, try adding diced mango or peaches—the sweetness plays beautifully against the savory elements. Spice lovers can kick up the heat with diced jalapeños or a dash of cayenne. For a heartier version, fold in cooked quinoa or farro to create a complete meal. My family particularly loves when I add roasted poblano peppers for a smoky, slightly spicy dimension that complements the charred corn perfectly.

    Storage & Troubleshooting Guide

    Proper Storage for Maximum Freshness

    To maintain the vibrant flavors of your Mexican Street Corn Salad, proper storage is essential. If you’re making it ahead, consider keeping the dressing separate until serving time—this preserves the corn’s texture and prevents the herbs from wilting. Once dressed, the salad will keep in an airtight container in the refrigerator for up to 3 days, though the texture is best within the first 24 hours. When storing leftovers, press plastic wrap directly onto the surface to prevent oxidation and maintain moisture. Before serving refrigerated salad, let it sit at room temperature for 15-20 minutes and give it a good stir—this awakens the flavors and softens any hardened cheese or dressing.

    Fixing Common Issues

    Even experienced cooks occasionally encounter challenges with Mexican Street Corn Salad. If your salad seems too dry after refrigeration, simply whisk together a small amount of lime juice and mayonnaise to refresh the dressing. For salad that’s become too wet (often from the corn releasing moisture), drain excess liquid and add more cotija cheese and a sprinkle of chili powder to rebalance flavors. If you’ve accidentally over-seasoned, add another cup of charred corn or some diced jicama to dilute the intensity. And if your herbs have wilted, don’t worry—a fresh handful of chopped cilantro stirred in just before serving instantly revives the entire dish, bringing back its vibrant appearance and flavor.

    Frequently Asked Questions

    Can I use frozen or canned corn for Mexican Street Corn Salad?

    Yes! While fresh corn provides the best flavor, frozen corn works well too. Thaw completely and pat dry before charring in a hot skillet. Canned corn is also acceptable—just drain thoroughly and pat dry before using.

    How can I make this salad dairy-free?

    Replace mayo with vegan mayo, use dairy-free yogurt instead of sour cream, and substitute nutritional yeast or dairy-free feta for the cotija cheese. The flavor profile remains delicious with these simple swaps.

    Can I prepare Mexican Street Corn Salad the day before serving?

    Absolutely! Prepare all components and store separately, then combine 30 minutes before serving. For best results, add fresh herbs, lime zest, and cheese just before serving to maintain optimal texture and flavor.

    What can I substitute for cotija cheese?

    Feta makes an excellent substitute with its similar crumbly texture and salty profile. Parmesan, though different in flavor, also works well. In a pinch, crumbled queso fresco or even goat cheese can be used.

    How spicy is this Mexican Street Corn Salad?

    Traditional versions have mild heat from chili powder. Adjust spice levels by increasing/decreasing chili powder or adding diced jalapeños. For a kid-friendly version, use smoked paprika instead of chili powder.

    Final Thoughts

    This Mexican Street Corn Salad has become my go-to recipe for gatherings year-round, not just during summer corn season. There’s something about its vibrant combination of flavors that brings people together—I’ve watched even the pickiest eaters go back for seconds and thirds! The beauty of this dish lies in its adaptability; make it as written or put your own spin on it. Either way, this salad captures the essence of Mexican street food in a form that’s perfect for sharing. Find more inspiration for your next gathering on my Pinterest board where I share all my favorite entertaining recipes!

  • Slow-cooked Short Rib Ragu Recipe: Melt-in-Your-Mouth Comfort Food

    Slow-cooked Short Rib Ragu Recipe: Melt-in-Your-Mouth Comfort Food

    Slow-cooked Short Rib Ragu Recipe: Melt-in-Your-Mouth Comfort Food

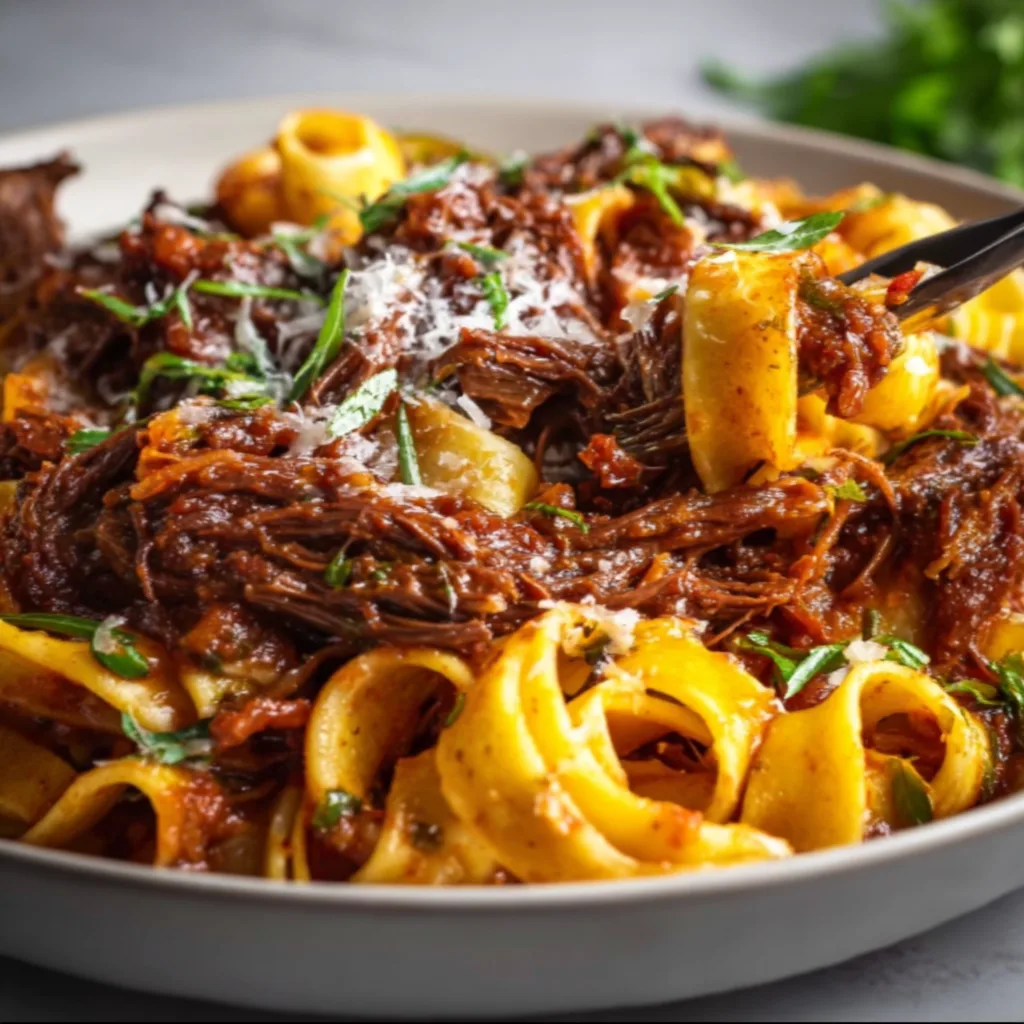
    There’s something magical about Slow-cooked Short Rib Ragu that transforms your kitchen into a haven of comfort. The rich aroma of beef simmering with herbs and wine fills every corner, promising a meal that warms both body and soul. I discovered this recipe during a rainy weekend when I needed something that would cook while I curled up with a good book. The tender meat falling off the bone and melting into that velvety sauce became an instant family favorite. If you’re looking for a dish that delivers maximum flavor with minimal effort, this slow-cooker masterpiece is exactly what you need.

    Recipe

    Why You’ll Love This Slow-cooked Short Rib Ragu

    The Ultimate Comfort Food Experience

    There’s a reason slow-cooked ragu has stood the test of time. The gentle, prolonged cooking breaks down the collagen in the short ribs, creating meat so tender it practically dissolves on your tongue. The deep, complex flavors develop hour by hour, impossible to rush or replicate with quick-cooking methods. I love watching my family’s faces light up when they walk through the door and catch that first whiff. It’s like a warm hug in food form—rich, satisfying, and somehow both sophisticated and homey at the same time. Perfect for Sunday dinners or special occasions that call for something extraordinary.

    Impressive Yet Effortless

    Don’t let the gourmet results fool you—this dish is surprisingly simple to prepare. The beauty of Slow-cooked Short Rib Ragu lies in its hands-off approach. After a quick sear of the meat and sautéing of aromatics, your slow cooker does all the heavy lifting. I often prep everything in the morning before work, set the timer, and return to dinner practically ready to serve. The slow cooking process transforms basic ingredients into something restaurant-worthy with minimal effort. It’s my secret weapon for entertaining guests who think I’ve spent hours laboring in the kitchen when really, I’ve been relaxing with a glass of wine.

    Essential Tips & Tricks

    Perfecting the Sear

    The foundation of an exceptional ragu begins with a proper sear. Take time to brown each short rib thoroughly on all sides until they develop a deep, caramelized crust. This crucial step creates the Maillard reaction, unlocking flavors that define the entire dish. I learned this the hard way after once rushing this step—the difference was noticeable! Work in batches to avoid overcrowding the pan, which causes steaming instead of searing. Be patient here; those extra minutes spent browning will reward you with incredible depth of flavor in your final dish. The rich fond left in the pan becomes the foundation for your sauce.

    Layering Flavors Strategically

    Building complex flavor happens in stages. After searing, use the same pan to sauté your aromatic vegetables (onions, carrots, celery) until they soften and begin to caramelize. This vegetable base, known as soffritto, creates a sweet foundation that balances the richness of the meat. Deglaze with red wine, scraping up all those flavorful brown bits from the bottom of the pan. I like to add herbs in stages—woody herbs like rosemary and thyme go in early, while fresh herbs are reserved for finishing. This approach creates layers of flavor similar to what you’ll find in my Slow Cooker Mac & Cheese Classic, where timing matters just as much as ingredients.

    Serving Ideas & Creative Variations

    Perfect Pairing Partners

    Traditionally, this robust ragu shines when served over wide pasta like pappardelle or tagliatelle, which catch the sauce beautifully. The broad noodles stand up to the substantial texture of the shredded short ribs. For a lower-carb option, try serving over creamy polenta or mashed potatoes—both provide the perfect canvas for soaking up the rich sauce. I once served this over roasted spaghetti squash for a dinner party, and even my Italian grandmother approved! Don’t forget a generous sprinkle of freshly grated Parmesan and perhaps some chopped fresh parsley to brighten the deep flavors. A simple green salad with a lemony dressing makes the perfect side.

    Global Flavor Adaptations

    While the classic Italian version remains timeless, this ragu welcomes creative interpretations. Try a Mediterranean twist by adding olives, capers, and a touch of orange zest during the last hour of cooking. For an Asian-inspired variation, incorporate star anise, five-spice powder, and a splash of soy sauce instead of wine. Last winter, I experimented with a Slow Cooker Mongolian Beef approach, adding ginger, garlic, and a touch of brown sugar—the family requested it three weeks in a row! The versatility of short ribs means you can travel the world with flavor while maintaining that comforting, slow-cooked texture.

    Storage & Troubleshooting Guide

    Maximizing Leftovers

    One of the greatest attributes of Slow-cooked Short Rib Ragu is how the flavors continue to develop over time. Store leftovers in airtight containers in the refrigerator for up to 4 days—I actually think it tastes even better on day two! For longer storage, freeze portions in freezer-safe containers or bags for up to 3 months. I like to freeze in meal-sized portions for quick weeknight dinners. When reheating, add a splash of beef broth if the sauce has thickened too much. The fat that rises and solidifies on top when chilled can be either removed for a lighter dish or stirred back in for added richness.

    Solving Common Challenges

    If your ragu turns out too thin, remove the lid during the final 30-60 minutes of cooking to allow evaporation. Alternatively, create a quick slurry with 1 tablespoon each of cornstarch and cold water, then stir it into the simmering sauce. For ragu that’s too thick, simply thin with additional stock or wine. If the meat isn’t tender enough after the recommended cooking time, your short ribs might be particularly large or tough—continue cooking in 30-minute increments until they reach that perfect, fall-apart texture. Remember that patience is key; this dish cannot be rushed, but the results are always worth the wait.

    Frequently Asked Questions

    Can I make Slow-cooked Short Rib Ragu in advance?

    Absolutely! This dish actually improves with time as flavors meld. Make it 1-2 days ahead, refrigerate, and skim off solidified fat before reheating gently on the stovetop or in your slow cooker.

    What’s the best cut of meat if I can’t find short ribs?

    Chuck roast makes an excellent substitute. Cut it into 2-3 inch chunks and follow the same cooking process. The high collagen content breaks down similarly during slow cooking.

    Can I make this in an Instant Pot instead?

    Yes! Sear the meat and sauté vegetables using the sauté function, then pressure cook for 45 minutes with natural release. The flavor won’t be quite as developed but still delicious.

    How do I know when the short ribs are perfectly cooked?

    They’re done when the meat easily pulls away from the bone and shreds with minimal effort. If there’s resistance, continue cooking. The meat should practically fall apart.

    What wine pairs best with Short Rib Ragu?

    Choose the same robust red wine you used in cooking—Barolo, Chianti, or Cabernet Sauvignon. These stand up to the rich flavors and complement the depth of the dish.

    Final Thoughts

    Slow-cooked Short Rib Ragu represents everything I love about comfort food—it transforms simple ingredients into something extraordinary through time and patience. The tender meat, silky sauce, and developed flavors create a dish that feels like a special occasion even on an ordinary Tuesday. I hope you’ll give yourself the gift of this recipe when you need something truly satisfying. For more inspiration and variations, check out my Pinterest board dedicated to slow-cooker masterpieces. This ragu isn’t just a meal; it’s an experience that brings people together around the table.

  • Chopped Thai Chicken Salad: Fresh, Zesty & Irresistible Crunch!

    Chopped Thai Chicken Salad: Fresh, Zesty & Irresistible Crunch!

    Chopped Thai Chicken Salad: Fresh, Zesty & Irresistible Crunch!

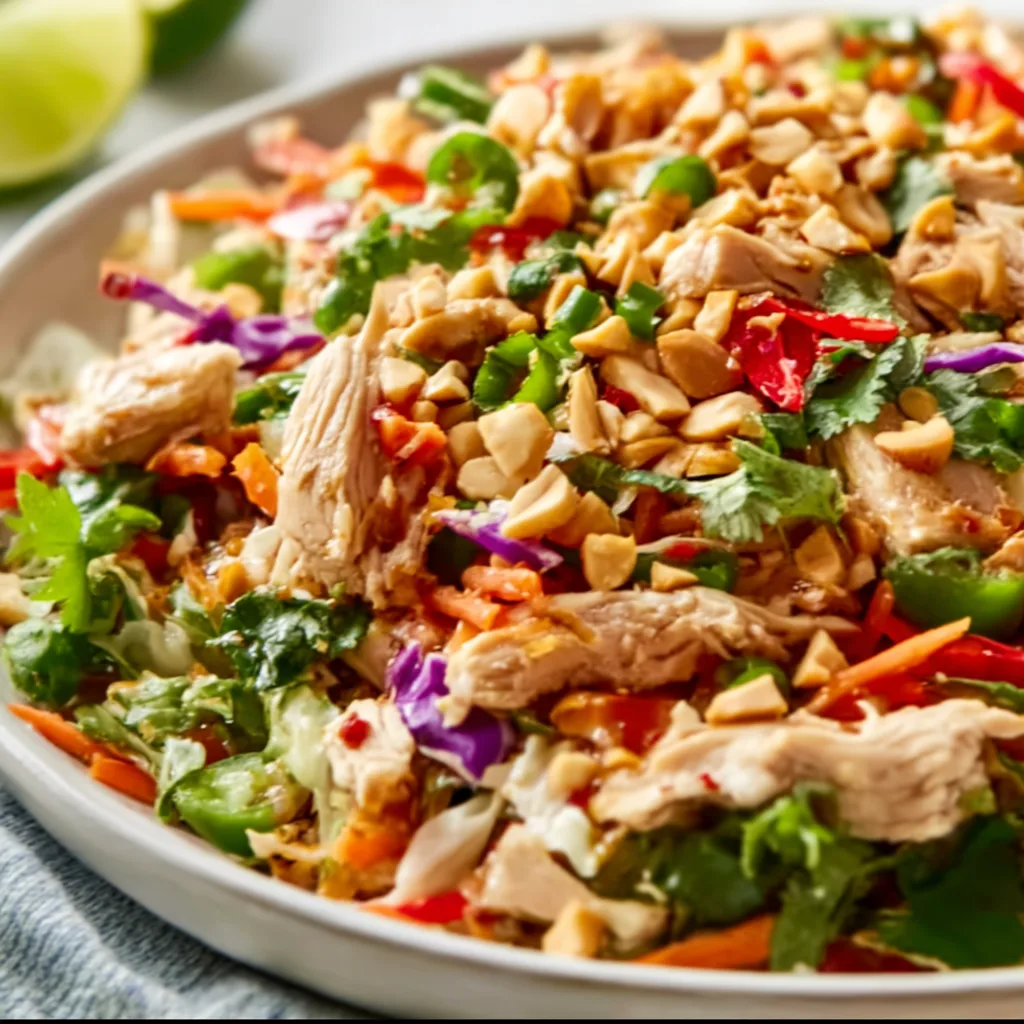
    The aroma of fresh herbs and tangy lime fills my kitchen as I toss together this vibrant Chopped Thai-Inspired Chicken Salad. It’s the perfect balance of crunch, spice, and freshness that transports me straight to my favorite Thai restaurant without leaving home. When summer temperatures soar, this colorful medley becomes my go-to for dinner parties or quiet evenings on the porch. The combination of tender chicken, crisp vegetables, and that irresistible peanut dressing creates a symphony of flavors that will have everyone asking for the recipe. Let’s dive into this refreshing dish that’s as beautiful as it is delicious!

    Recipe

    Why You’ll Love This Chopped Thai-Inspired Chicken Salad

    Perfect Balance of Flavors and Textures

    There’s something magical about the way the sweet, salty, sour, and spicy elements dance together in this salad. Every bite offers a different experience – from the tender chicken pieces to the crunch of fresh bell peppers and cabbage. I still remember serving this at my sister’s birthday gathering and watching everyone’s eyes light up with that first forkful. The creamy peanut dressing coats each ingredient perfectly, while fresh lime juice and herbs keep everything bright and lively. It’s that rare dish that feels both satisfying and light at the same time.

    Quick and Versatile for Any Occasion

    This Chopped Thai-Inspired Chicken Salad comes together in just 30 minutes, making it perfect for busy weeknights when you’re craving something nutritious and flavorful. I love that I can prep most components ahead of time – chop veggies in the morning, mix the dressing during lunch, then assemble everything when dinner rolls around. It’s equally at home as a casual family meal or an impressive dinner party centerpiece. Plus, it’s naturally gluten-free and can easily be adapted for different dietary needs without sacrificing that authentic Thai-inspired taste.

    Essential Tips & Tricks

    Mastering the Peanut Dressing

    The heart of this salad is undoubtedly the creamy peanut dressing. For the best flavor, use natural peanut butter with no added sugar or oils. I learned the hard way that microwaving it for 10-15 seconds makes it easier to whisk into a silky consistency. Don’t skip the fish sauce – it adds that authentic umami depth that makes Thai flavors so distinctive. If you’re serving guests with varying spice preferences, I recommend keeping the dressing on the milder side and offering sriracha or sliced chilies on the side. For a similar flavor profile in a warm dish, check out these Slow Cooker Chicken Burrito Bowls.

    Protein and Vegetable Preparation

    For the juiciest chicken, I prefer poaching boneless breasts in seasoned water until they reach 165°F, then letting them rest before shredding or chopping. This method keeps the meat tender without adding extra oil. When it comes to vegetables, uniform size is key – aim for matchstick or julienne cuts that allow for perfect forkfuls. I like to massage the cabbage with a pinch of salt for about 30 seconds to slightly soften it while maintaining its crunch. For a time-saving hack, quality rotisserie chicken works beautifully, and pre-shredded cabbage can cut your prep time in half.

    Serving Ideas & Creative Variations

    Presentation and Accompaniments

    Transform this Chopped Thai-Inspired Chicken Salad into a showstopping centerpiece by serving it in a large, shallow bowl with garnishes arranged in colorful sections. I love adding a border of lime wedges, fresh herbs, and chopped peanuts that guests can sprinkle to their taste. For a complete meal, pair with warm rice noodles or serve in lettuce cups for an interactive dinner. My favorite way to enjoy leftovers is stuffed into summer rolls with extra herbs! For another Thai-inspired option that’s equally impressive, try this Crockpot Thai Peanut Chicken that shares many of the same flavor notes.

    Seasonal and Dietary Adaptations

    This salad welcomes seasonal substitutions that keep it fresh year-round. In summer, add diced mango or peach for sweet juiciness. Fall calls for thinly sliced apples or pears. For a vegetarian version, replace chicken with crispy tofu or tempeh – just press well and sear until golden. To make it vegan, substitute maple syrup for honey in the dressing and use coconut aminos instead of fish sauce. For a low-carb option, increase the proportion of cabbage and add avocado for extra richness. The framework stays the same while the ingredients evolve with your needs and what’s available.

    Storage & Troubleshooting Guide

    Keeping Components Fresh

    For maximum crispness and flavor, store the components of this salad separately when preparing ahead. I keep the dressing in a mason jar, the chopped vegetables in a container lined with paper towels, and the protein in its own container. This method has saved many of my meal-prep lunches from becoming soggy disappointments! When properly stored, the chicken will keep for 3-4 days, vegetables for 2-3 days, and the dressing for up to a week. For on-the-go lunches, try layering ingredients in a jar with dressing at the bottom and delicate herbs at the top.

    Fixing Common Issues

    If your dressing separates or seems too thick, don’t worry – this is an easy fix! Simply whisk in a teaspoon of warm water until you reach your desired consistency. For dressing that’s too spicy, a touch more honey and peanut butter will tame the heat. If your salad lacks that bright punch, a squeeze of fresh lime usually does the trick – it’s the secret ingredient that wakes up all the flavors. And if your vegetables have released excess moisture after sitting, simply drain the liquid before adding the dressing, or toss in some extra crunchy elements like bean sprouts or crushed rice crackers.

    Frequently Asked Questions

    Can I make Chopped Thai-Inspired Chicken Salad ahead of time?

    Yes! Prepare all components separately and store in the refrigerator. Combine just before serving to maintain optimal texture and freshness – up to 24 hours for the vegetables and 3-4 days for the chicken and dressing.

    What’s the best substitute for fish sauce?

    Coconut aminos or a mixture of soy sauce with a pinch of sugar makes a good substitute. You’ll miss some of the unique umami depth, but the dressing will still be delicious with these alternatives.

    How can I increase the protein without adding more chicken?

    Edamame, chickpeas, or thinly sliced hard-boiled eggs are excellent protein boosters. They complement the Thai flavors while adding interesting textures and nutritional benefits.

    Is this salad spicy?

    The spice level is customizable. For a mild version, omit the chili flakes in the dressing and skip the fresh chilies. Add sriracha or sambal oelek gradually to reach your preferred heat level.

    Can I use a different nut butter if we have peanut allergies?

    Absolutely! Almond, cashew, or sunflower seed butter work wonderfully. Each offers a slightly different flavor profile while maintaining the creamy texture needed for the dressing.

    Final Thoughts

    This Chopped Thai-Inspired Chicken Salad has become my signature dish for good reason – it’s the perfect balance of nourishing and crave-worthy. The vibrant colors, bold flavors, and satisfying textures make everyday meals feel special. I love watching friends discover new favorite flavor combinations with each bite, and how versatile it is for different dietary needs. Whether you’re meal prepping for the week ahead or hosting a summer gathering, this salad delivers restaurant-quality taste with home kitchen simplicity. Find more inspiration for your next meal on Pinterest.

  • Crock Pot Cheesesteak Tortellini: Irresistible Comfort Food Bliss!

    Crock Pot Cheesesteak Tortellini: Irresistible Comfort Food Bliss!

    Crock Pot Cheesesteak Tortellini: Irresistible Comfort Food Bliss!

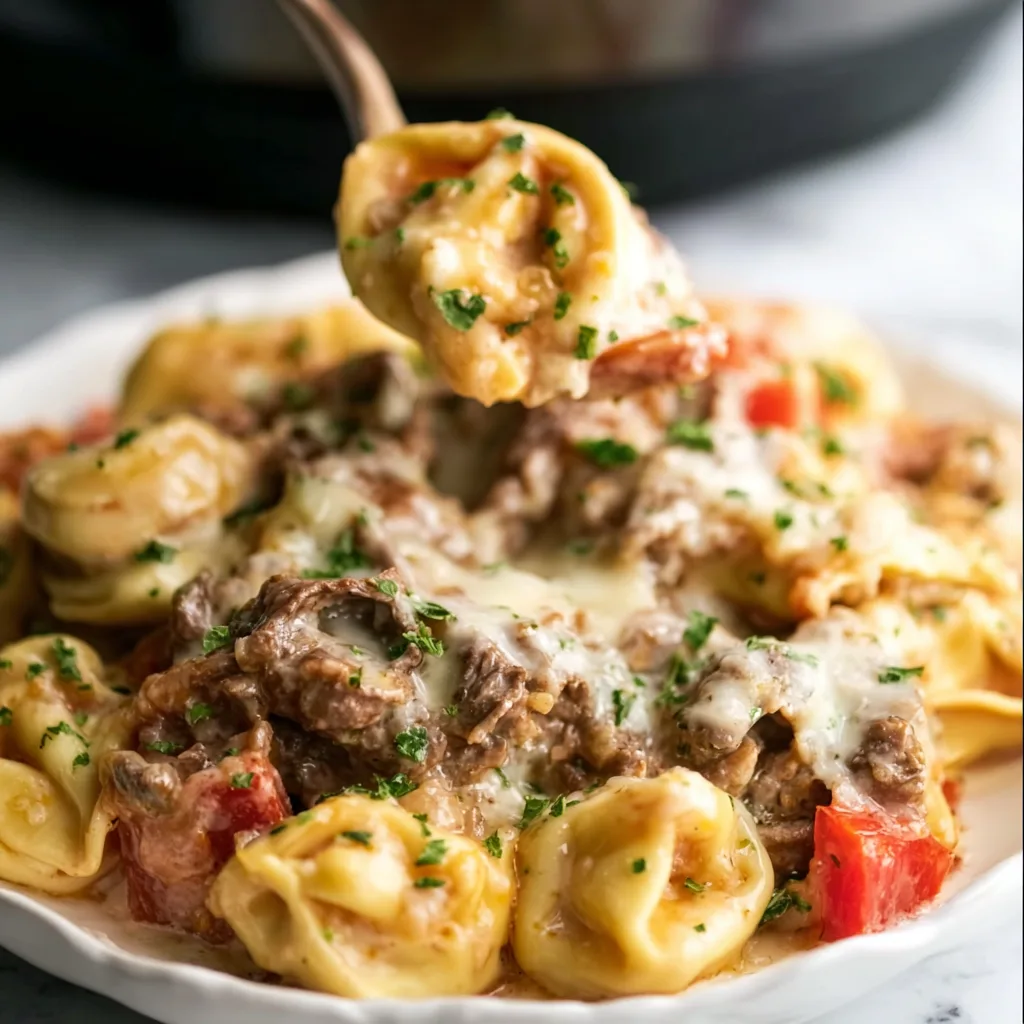
    Crock Pot Cheesesteak Tortellini combines two comfort food favorites in one irresistible dish that practically makes itself! I discovered this recipe during a particularly hectic week when I needed something that would satisfy my cheese-loving family without keeping me in the kitchen all evening. The rich, savory flavors of classic Philly cheesesteak merge beautifully with pillowy cheese tortellini, creating a meal that’s both familiar and exciting. As the ingredients simmer together in the slow cooker, your kitchen fills with an aroma that’ll have everyone asking, “How much longer?” Trust me, this might become your new favorite way to enjoy tortellini.

    Recipe

    Why You’ll Love This Crock Pot Cheesesteak Tortellini

    Perfect for Busy Weeknights

    When life gets chaotic, this set-it-and-forget-it meal becomes a genuine lifesaver. I remember throwing this together before my daughter’s dance recital—walking back into the house afterward to that incredible smell nearly brought tears to my eyes! The slow cooker does all the heavy lifting while you’re handling everything else on your plate. The beef becomes incredibly tender as it cooks, absorbing all those classic Philly cheesesteak flavors. Just 15 minutes of prep time in the morning rewards you with a restaurant-quality dinner that tastes like you’ve been cooking all day.

    Crowd-Pleasing Comfort Food

    There’s something magical about the combination of tender beef, sweet peppers, caramelized onions, and cheese-filled tortellini that makes this dish universally adored. My picky nephew who “doesn’t like pasta” somehow managed three servings last time I made this! The familiar flavors of a Philly cheesesteak transform into something even more comforting when married with pillowy tortellini. The provolone creates those irresistible cheese pulls that make everyone smile, while the beef broth creates a silky sauce that coats every bite. It’s the kind of meal that generates the comfortable silence of happy eating.

    Essential Tips & Tricks

    Selecting the Right Ingredients

    Starting with quality beef makes all the difference in this recipe. I prefer thinly sliced ribeye for authentic cheesesteak flavor, but sirloin works beautifully too and is often more budget-friendly. When selecting tortellini, refrigerated varieties hold their shape better than frozen in the slow cooker, though both will work. Don’t skimp on the provolone—it creates that authentic cheesesteak experience! The beef broth forms the foundation of your sauce, so use low-sodium to control the salt levels. Fresh bell peppers provide the best texture and flavor, but in winter months, I’ve used frozen pepper strips in a pinch.

    Perfecting the Cooking Process

    The layering order actually matters for even cooking and flavor distribution. Begin with a light coating of cooking spray to prevent sticking, then add your sliced beef on the bottom where it can simmer in the juices. I learned the hard way that adding tortellini too early results in mushy pasta! Add it during the final 30 minutes of cooking for the perfect al dente texture. For that authentic cheesy goodness that makes everyone swoon, layer provolone on top and cover for 5-10 minutes until melted rather than stirring it in. Keep the lid closed as much as possible to maintain consistent temperature.

    Serving Ideas & Creative Variations

    Complementary Side Dishes

    This hearty dish pairs beautifully with lighter sides that balance its richness. A simple arugula salad with lemon vinaigrette cuts through the creaminess perfectly—I serve this combo whenever we have guests and always get rave reviews. Garlic bread makes an excellent vehicle for sopping up any remaining sauce (there’s never any left at my house!). For a complete Philly-inspired experience, offer small dishes of hot cherry peppers or pepperoncini on the side. Roasted vegetables like asparagus or Brussels sprouts provide a nutritious contrast while keeping the meal feeling special. Remember that the tortellini is already quite filling, so sides can be simple.

    Exciting Recipe Adaptations

    Transform this classic into something new by making a few creative swaps! For a lighter version, try using ground turkey instead of beef and whole wheat tortellini. My sister makes an incredible spicy variation with pepper jack cheese and a few dashes of hot sauce that’s become legendary at family gatherings. For mushroom lovers, add 8 ounces of sliced cremini mushrooms during the last hour of cooking—they add wonderful umami depth. Feeling adventurous? Try an Italian-inspired version with sun-dried tomatoes, Italian seasoning, and a dollop of pesto stirred in before serving. Vegetarians can substitute portobello mushrooms for the beef.

    Storage & Troubleshooting Guide

    Proper Storage Methods

    This Crock Pot Cheesesteak Tortellini keeps beautifully, making it perfect for meal prep and leftovers. Allow it to cool completely before transferring to airtight containers—I divide mine into individual portions for quick lunches. In the refrigerator, it stays delicious for up to 4 days, though the tortellini will continue to absorb sauce. For freezing, I’ve found it best to slightly undercook the tortellini since it will soften further when reheated. Freeze flat in freezer bags for up to 3 months, labeling with the date. When reheating, add a splash of beef broth to revive the sauce if it seems too thick.

    Solving Common Issues

    If your sauce seems too thin after cooking, don’t panic! Create a quick thickener by mixing 1 tablespoon cornstarch with 2 tablespoons cold water, then stir this slurry into the crock pot and cook on high for 15 minutes with the lid off. For sauce that’s too thick, simply add beef broth a quarter cup at a time until you reach your desired consistency. If your tortellini has overcooked and become too soft, try serving the dish over garlic toast instead of as a pasta bowl. Finding your beef slices clumping together? Next time, toss them in 1 tablespoon of flour before adding to the slow cooker.

    Frequently Asked Questions

    Can I use frozen tortellini in my Crock Pot Cheesesteak Tortellini?

    Yes! Add frozen tortellini during the last 45 minutes of cooking instead of 30 minutes. No need to thaw first, but check for doneness as cooking times may vary slightly.

    What’s the best cut of beef for this recipe?

    Ribeye creates the most authentic cheesesteak flavor, but thinly sliced sirloin or round steak work well too. For budget options, ground beef can substitute—brown it first before adding to the slow cooker.

    Can I make this recipe ahead of time?

    Absolutely! Prep all ingredients the night before and refrigerate separately. In the morning, layer everything except the tortellini and cheese in your slow cooker, then add those in the final cooking stage.

    How do I prevent the tortellini from becoming mushy?

    The key is adding tortellini only during the final 30 minutes of cooking. For even firmer pasta, check at 20 minutes. Never add tortellini at the beginning of the cooking process.

    Can I make Crock Pot Cheesesteak Tortellini vegetarian?

    Yes! Substitute the beef with 16 ounces of portobello mushrooms sliced into strips. Use vegetable broth instead of beef broth and follow the same cooking instructions.

    Final Thoughts

    This Crock Pot Cheesesteak Tortellini has become my go-to recipe when I need something that’s both impressive and effortless. There’s something deeply satisfying about creating a dish that honors two beloved comfort foods while requiring minimal effort on my part. The combination of tender beef, sweet peppers, and cheese-filled tortellini creates a meal that’s greater than the sum of its parts. I’d love to see how you make this recipe your own—share your creations with me on Pinterest and let me know what variations your family enjoys!