Blog

  • Creamy Keto Philly Cheesesteak Skillet – Irresistibly Delicious!

    Creamy Keto Philly Cheesesteak Skillet – Irresistibly Delicious!

    Creamy Keto Philly Cheesesteak Skillet – Irresistibly Delicious!

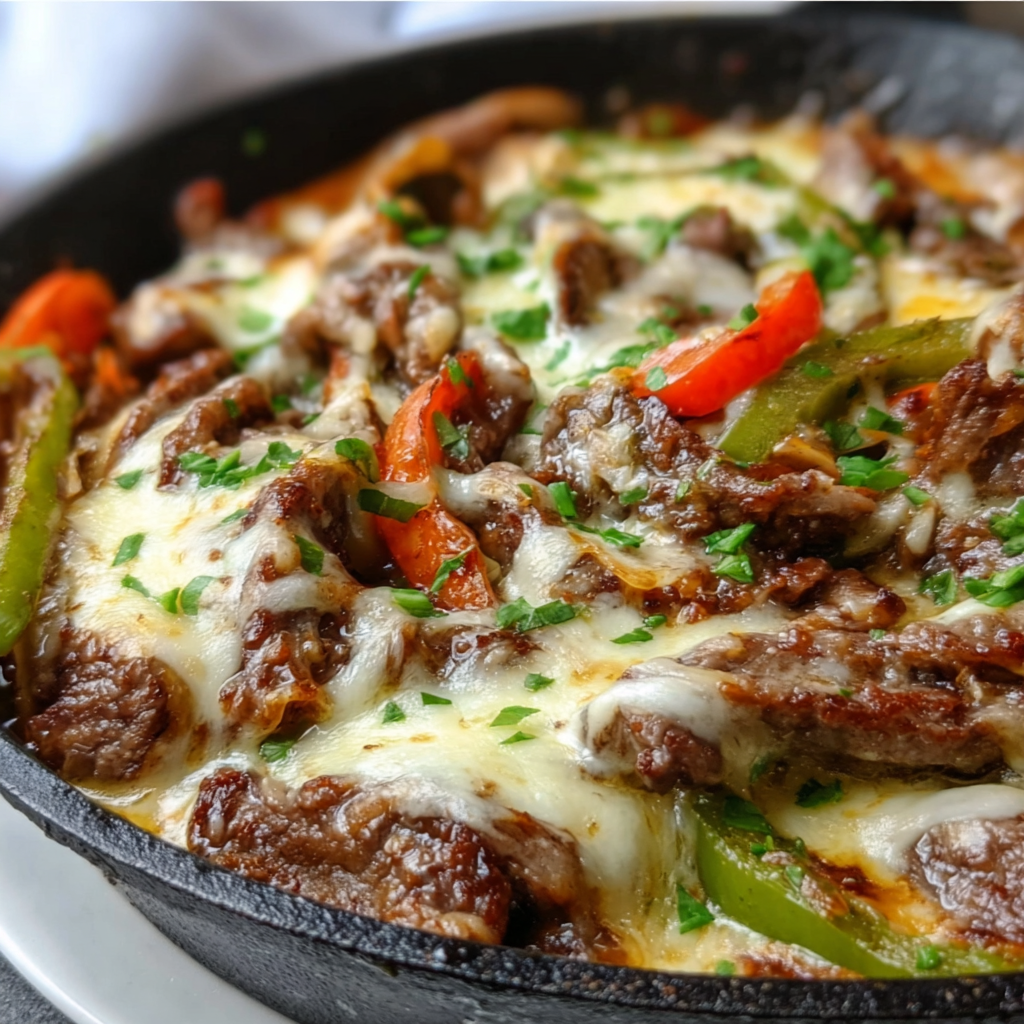
    The Creamy Keto Philly Cheesesteak Skillet has become my absolute salvation on busy weeknights when I’m craving comfort food without the carb crash. Picture this: tender strips of beef sizzling alongside caramelized onions and peppers, all bathed in a velvety cream cheese sauce that makes you forget you’re eating healthy. I discovered this one-pan wonder last winter when my kitchen felt particularly cold and uninviting, but the aroma of this dish transformed the space into a cozy haven. If you’re looking for a 30-minute meal that tastes like it took hours, this low-carb masterpiece deserves a permanent spot in your dinner rotation.

    Recipe

    Why You’ll Love This Creamy Keto Philly Cheesesteak Skillet

    Perfect Weeknight Solution

    This skillet has saved me countless times when I’m staring blankly into my fridge at 6 PM. The entire meal comes together in under 30 minutes, making it faster than delivery and infinitely more satisfying. The beauty lies in its simplicity—just a handful of ingredients that transform into something magical. On those evenings when my energy is depleted but I refuse to compromise on flavor, this dish delivers that restaurant-quality experience without the wait. I love how the beef gets that perfect sear while the vegetables maintain just enough bite to create textural contrast in every forkful.

    Keto-Friendly Without Sacrifice

    Let’s be honest—most keto recipes leave something to be desired in the satisfaction department. Not this one. The rich cream cheese sauce creates such decadence that you won’t miss the bread one bit. With only 7g net carbs per generous serving, it keeps you firmly in ketosis while delivering the comfort food experience you crave. What I appreciate most is how it doesn’t feel like a diet meal. The melted provolone creates those irresistible cheese pulls that make you want to snap a photo before diving in, and the savory umami from the beef and mushrooms creates depth that many keto dishes lack.

    Essential Tips & Tricks

    Selecting and Preparing the Beef

    The secret to restaurant-quality results starts with choosing the right cut. Ribeye or sirloin deliver the perfect balance of tenderness and flavor, though I’ve used budget-friendly flank steak with great success too. The game-changer is slicing the beef while it’s still slightly frozen—about 20 minutes in the freezer creates the perfect firmness for achieving those thin, even strips. Always cut against the grain and at a slight angle to maximize tenderness. I learned this technique from my grandfather who insisted that proper meat preparation is the foundation of any great dish, and he was absolutely right.

    Achieving the Perfect Sear

    Nothing ruins this dish faster than soggy, steamed beef. The key is working in small batches and giving each piece breathing room in the pan. When meat is overcrowded, it releases moisture and steams instead of searing, robbing you of that beautiful caramelization that delivers concentrated flavor. I use a cast-iron skillet cranked to high heat and wait until it’s smoking slightly before adding the meat. Each batch takes just 60-90 seconds—you’re looking for color, not full cooking, as the beef will finish in the sauce later. Pat your meat dry with paper towels before seasoning to ensure the best possible crust.

    Serving Ideas & Creative Variations

    Low-Carb Serving Options

    While this skillet is completely satisfying on its own, I love creating different serving experiences depending on my mood. Cauliflower rice makes an excellent base that soaks up the creamy sauce beautifully—I season it simply with butter and herbs to let the cheesesteak flavors shine. For a more substantial meal, try serving over zucchini noodles or alongside a crisp side salad with a tangy vinaigrette to cut through the richness. When I’m feeling particularly indulgent but still want to keep it keto, I’ll hollow out bell peppers and stuff them with the mixture before broiling with extra cheese on top, similar to my approach with stuffed zucchini boats.

    Flavor Variations to Try

    The classic Philly flavor profile is unbeatable, but this recipe welcomes creative adaptations. Try incorporating smoked paprika and a dash of cayenne for a spicy southwestern twist that wakes up your taste buds. For an Italian-inspired version, add sun-dried tomatoes and substitute the provolone with fontina or mozzarella. My personal favorite variation includes adding crumbled bacon and a few drops of liquid smoke for an incredible smoky depth. Sometimes I’ll stir in baby spinach right at the end—it wilts perfectly in the hot sauce and adds beautiful color contrast along with a nutritional boost.

    Storage & Troubleshooting Guide

    Proper Storage for Leftovers

    This dish reheats beautifully, making it perfect for meal prep or planned leftovers. Store in airtight containers in the refrigerator for up to 3 days—any longer and the texture of the vegetables begins to deteriorate. When reheating, add a splash of heavy cream or chicken broth to revive the sauce, as it tends to thicken considerably when chilled. For the best texture, reheat gently on the stovetop rather than microwaving, which can make the beef tough. I often make a double batch specifically to have convenient lunches ready for busy workdays—the flavors actually develop and improve overnight.

    Fixing Common Issues

    Even experienced cooks encounter challenges, but most problems with this recipe have simple solutions. If your sauce breaks or curdles, lower the heat immediately and whisk in a tablespoon of cold cream cheese off the heat until smooth. For sauce that’s too thin, simmer uncovered for a few additional minutes or add a sprinkle of xanthan gum to thicken without adding carbs. If your vegetables release too much moisture and make the sauce watery, try sautéing them separately and draining before combining with the sauce. I once rescued an overly salty batch by adding a splash of unsweetened almond milk and extra cream cheese to dilute and balance the flavors.

    Frequently Asked Questions

    Can I make Creamy Keto Philly Cheesesteak Skillet ahead of time?

    Yes! Prepare it up to 2 days ahead, but store the beef separately from the sauce and vegetables. Combine and reheat gently on the stovetop when ready to serve for the best texture.

    What’s the best cheese to use?

    Provolone offers that authentic Philly flavor, but white American, mozzarella, or even Swiss work beautifully. Avoid pre-shredded varieties as they contain anti-caking agents that prevent smooth melting.

    Can I substitute the beef with another protein?

    Absolutely! Thinly sliced chicken thighs or turkey breast work wonderfully. For a vegetarian option, try portobello mushrooms sliced into strips—they provide a similar meaty texture.

    How can I thicken the sauce without adding carbs?

    Xanthan gum is your friend—start with ¼ teaspoon whisked with a tablespoon of cold water before stirring into the hot sauce. Alternatively, simply reduce the sauce longer uncovered.

    Is this recipe suitable for meal prep?

    Definitely! The Creamy Keto Philly Cheesesteak Skillet portions beautifully into meal prep containers and maintains its flavor and texture for up to 3 days in the refrigerator.

    Final Thoughts

    This Creamy Keto Philly Cheesesteak Skillet has become more than just a recipe in my household—it’s a reliable friend that shows up when comfort is needed without derailing health goals. The way the cream cheese sauce coats each morsel of beef and vegetables creates a harmonious bite that satisfies on a profound level. I’d love to see how you make this recipe your own! Share your creations on Pinterest or tag me in your photos. Remember that cooking is about making something that brings you joy, so adjust the seasonings and ingredients to match your personal taste preferences.

  • Creamy Chicken Sausage Orzo Recipe That Will Melt Your Heart

    Creamy Chicken Sausage Orzo Recipe That Will Melt Your Heart

    Creamy Chicken Sausage Orzo Recipe That Will Melt Your Heart

    This creamy chicken sausage orzo has become my weeknight salvation—a 30-minute miracle that transforms simple ingredients into pure comfort. The first time I made it, I was racing against the clock after a long workday, frantically searching for something both satisfying and quick. The creamy sauce clings perfectly to each tiny rice-shaped pasta, while juicy chicken sausage adds that savory punch we all crave. I’ve since made this dish countless times, tweaking it until it reached perfection. Trust me, this one-pot wonder will have everyone at your table asking for seconds before they’ve finished their firsts. It’s become a staple in my home, and after trying it, I bet it will in yours too.

    Recipe

    Why You’ll Love This Creamy Chicken Sausage Orzo

    Perfect Weeknight Simplicity

    There’s something magical about a dish that delivers maximum flavor with minimal effort. This creamy chicken sausage orzo requires just one pot, meaning fewer dishes and more time to actually enjoy your evening. The orzo cooks directly in the same pan where you’ve built all those delicious flavors, absorbing every bit of goodness. I love how the tiny pasta plumps up and becomes tender in about 10 minutes, making this truly doable even on the busiest nights. The chicken sausage adds protein without requiring extra prep—just slice and sizzle until those beautiful caramelized edges appear.

    Creamy Comfort Without the Guilt

    This dish strikes that perfect balance between indulgent creaminess and not leaving you feeling weighed down. I use a combination of chicken broth and a modest amount of cream to create that silky texture we all crave. The orzo releases its natural starches as it cooks, contributing to the sauce’s velvety consistency without needing cups of heavy cream. Fresh spinach wilts right into the mixture, adding color, nutrients, and a slight earthiness that cuts through the richness. It’s the kind of satisfying meal that feels special enough for company but simple enough for Monday night.

    Essential Tips & Tricks

    Perfecting Your Orzo Texture

    The secret to perfect orzo lies in the timing and liquid ratio. Unlike traditional pasta cooking methods, you’ll want to toast the dry orzo briefly in the pan with a touch of butter before adding liquid—this develops a nutty flavor that elevates the entire dish. Keep the mixture at a gentle simmer rather than a rolling boil, stirring occasionally to prevent sticking. Test the pasta about 2 minutes before the package directions indicate—you want it al dente since it will continue absorbing liquid even after you remove it from heat. If needed, add hot broth a tablespoon at a time if the mixture looks dry before the pasta is tender.

    Building Layers of Flavor

    The difference between a good orzo dish and an unforgettable one lies in the flavor-building techniques you employ. Start by thoroughly browning your chicken sausage—those caramelized bits on the bottom of the pan are flavor gold. Deglaze with a splash of white wine if you have it, scraping up all those browned bits. Adding aromatic vegetables like shallots instead of regular onions brings a more delicate sweetness. For an extra dimension, try incorporating a Mediterranean touch with sun-dried tomatoes or artichoke hearts. Remember to season in layers rather than just at the end.

    Serving Ideas & Creative Variations

    Perfect Pairings for a Complete Meal

    This creamy chicken sausage orzo stands beautifully on its own, but a few thoughtful sides can transform it into a restaurant-worthy spread. A simple arugula salad dressed with lemon juice and olive oil provides a peppery contrast to the creamy pasta. For a heartier meal, add crusty garlic bread for sopping up every last bit of that luscious sauce. During summer months, I love serving this alongside charred vegetables like asparagus or zucchini from the grill. For wine pairing, reach for a crisp Pinot Grigio or unoaked Chardonnay—the bright acidity cuts through the creaminess perfectly.

    Seasonal Adaptations Worth Trying

    One reason I return to this recipe again and again is its incredible versatility. In spring, stir in fresh peas and tender asparagus tips during the final minutes of cooking. Summer calls for cherry tomatoes and fresh basil added just before serving. Fall is perfect for incorporating roasted butternut squash cubes and crispy sage leaves. Winter versions shine with hearty greens like kale instead of spinach and perhaps a sprinkle of nutmeg. You can also experiment with different sausage varieties—spicy Italian, apple, or herb-flecked chicken sausages all bring their own unique character to the dish.

    Storage & Troubleshooting Guide

    Making Ahead and Proper Storage

    This creamy chicken sausage orzo reheats beautifully, making it a meal prep champion. Store leftovers in airtight containers in the refrigerator for up to 3 days. When reheating, add a splash of chicken broth or water to loosen the sauce, as the orzo will continue absorbing liquid as it sits. For best results, reheat gently on the stovetop rather than the microwave. If you’re planning to make this dish entirely ahead, consider undercooking the orzo slightly and reserving some extra broth to add when reheating. The texture difference between freshly made and properly reheated is minimal—I’ve served day-old versions to guests who couldn’t tell it wasn’t made minutes ago.

    Fixing Common Issues

    Even experienced cooks occasionally encounter challenges with creamy pasta dishes. If your sauce looks too thin, allow it to simmer uncovered for a few extra minutes—the starch from the orzo will help thicken it naturally. Conversely, if the mixture becomes too thick, gradually add warm broth until you reach your desired consistency. Should your sauce break or appear curdled, lower the heat immediately and whisk in a tablespoon of cold cream. For those finding the dish not creamy enough, try finishing with a dollop of mascarpone cheese or cream cheese. If you’re missing that depth of flavor, a teaspoon of Dijon mustard or splash of white wine vinegar can brighten everything up.

    Frequently Asked Questions

    Can I use regular pasta instead of orzo?

    Yes, but cooking times will vary. Small shapes like ditalini work best as substitutes. Adjust liquid amounts and cooking time according to the package directions for your chosen pasta.

    Is there a dairy-free option for making creamy chicken sausage orzo?

    Absolutely! Substitute the cream with full-fat coconut milk or cashew cream. The starchiness of the orzo will still create a creamy texture even without dairy.

    What can I use instead of chicken sausage?

    Turkey sausage works perfectly, or try plant-based sausage for a vegetarian version. You can also use boneless chicken thighs cut into small pieces with Italian seasoning added.

    How do I prevent the orzo from sticking to the pot?

    Stir frequently, especially during the first few minutes of cooking. Using a heavy-bottomed pan and maintaining a gentle simmer rather than a boil helps prevent sticking.

    Can I freeze leftover creamy chicken sausage orzo?

    Yes, though the texture may change slightly. Freeze in portion-sized containers for up to 2 months. Thaw overnight in the refrigerator and reheat with additional broth to restore creaminess.

    Final Thoughts

    This creamy chicken sausage orzo has earned its place in my regular rotation for good reason—it delivers that perfect combination of comfort, convenience, and flavor that we’re all searching for. There’s something magical about watching a handful of simple ingredients transform into something so satisfying. Whether you’re cooking for a busy weeknight or a casual dinner with friends, this versatile dish adapts to your needs. I encourage you to make it your own with seasonal ingredients and personal touches. Don’t forget to check out more pasta inspiration on Pinterest for your next cooking adventure!

  • Cajun Steak Tips in Cheesy Rigatoni Parmesan Sauce—Irresistible!

    Cajun Steak Tips in Cheesy Rigatoni Parmesan Sauce—Irresistible!

    Cajun Steak Tips in Cheesy Rigatoni Parmesan Sauce—Irresistible!

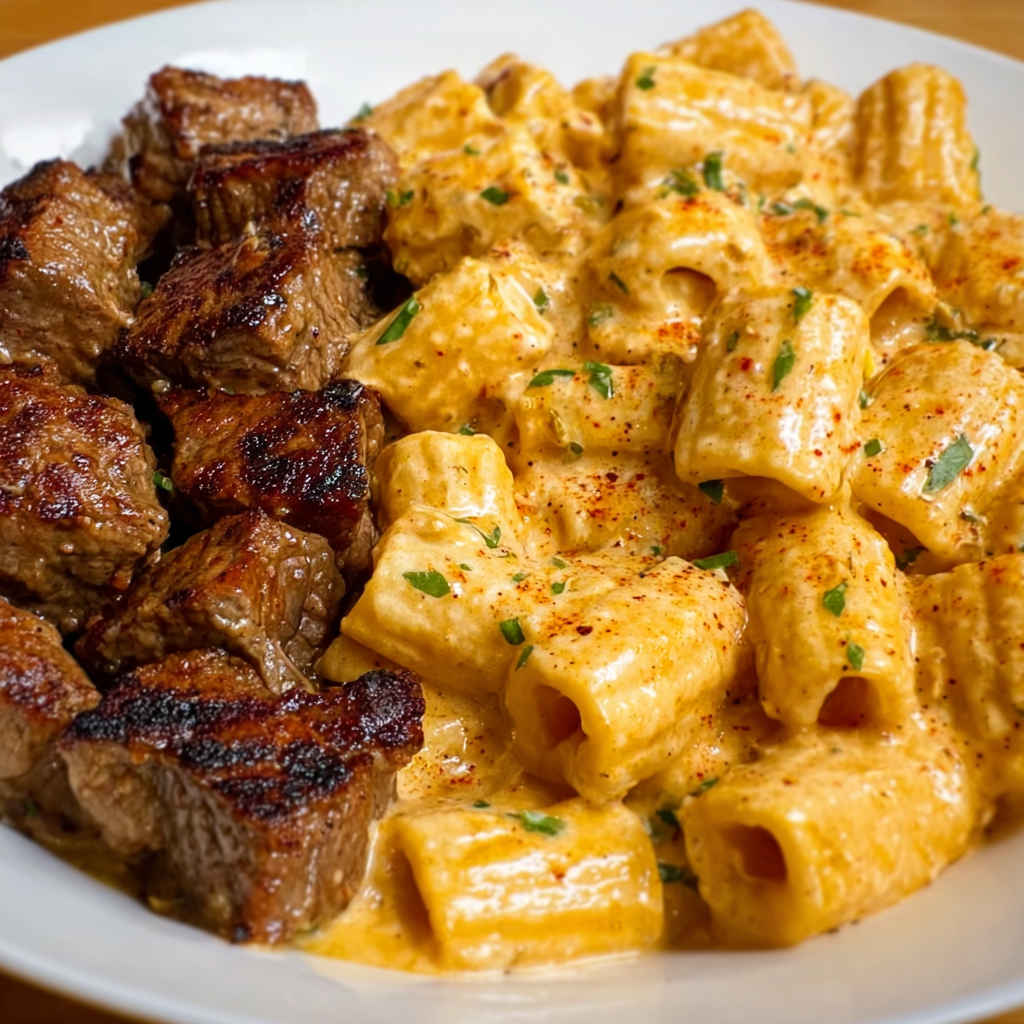
    My love affair with Cajun Steak Tips in Cheesy Rigatoni Parmesan Sauce began on a rainy Sunday when comfort food was calling my name. There’s something magical about the way those perfectly seasoned steak tips nestle into creamy, cheesy pasta that makes my heart sing. The spicy Cajun kick paired with velvety parmesan sauce creates a dish that’s both sophisticated and soul-warming. I’ve tweaked this recipe countless times in my kitchen, and now it’s become our family’s most requested dinner when we need something special but don’t want to fuss with complicated recipes.

    Recipe

    Why You’ll Love This Cajun Steak Tips in Cheesy Rigatoni Parmesan Sauce

    Perfect Balance of Flavors and Textures

    The beauty of this dish lies in its harmonious contrasts. The tender steak tips, kissed with Cajun spices, provide a bold, smoky flavor that stands up beautifully against the rich, creamy parmesan sauce. The al dente rigatoni captures pockets of that luscious sauce in its ridges and hollow centers, ensuring every bite delivers maximum flavor. I still remember my husband’s face lighting up the first time I made this—he actually stopped mid-bite, wide-eyed, to tell me this might be the best pasta dish I’d ever created. It’s that perfect balance between spicy, savory, and creamy that makes it irresistible.

    Quick Weeknight Luxury

    Don’t let the fancy-sounding name fool you—this dish comes together surprisingly quickly. While it tastes like something you’d order at an upscale restaurant, it’s actually perfect for busy weeknights when you want something special without hours of cooking. The multi-tasking method allows you to prep the sauce while the pasta cooks and the steak tips sear, meaning dinner can be on the table in about 30 minutes. Last Tuesday, after a particularly exhausting workday, I still managed to whip this up before my hangry family staged a revolt—and the appreciative silence as everyone devoured their plates was all the thanks I needed.

    Essential Tips & Tricks

    Mastering the Steak Tips

    The secret to perfect Cajun steak tips lies in two critical steps: proper seasoning and careful cooking. For the seasoning, I recommend making your own Cajun spice blend (paprika, cayenne, garlic powder, oregano, thyme) to control the heat level and avoid excess salt. Let the meat sit with the spices for at least 15 minutes before cooking. When it’s time to cook, use a screaming hot cast iron skillet to get that beautiful sear without overcooking. I learned this the hard way—my first attempt resulted in tough, chewy meat because I crowded the pan. Work in batches if needed, giving each piece room to develop that gorgeous crust while staying tender inside.

    Creating the Ultimate Cheese Sauce

    A truly spectacular parmesan sauce requires attention to detail. Start with a proper roux base—equal parts butter and flour cooked until it smells nutty but hasn’t browned. Warm your milk separately before adding it gradually to prevent lumps. The cheese should be added off the heat to prevent graininess. I once rushed this step at a dinner party and ended up with a slightly separated sauce—still delicious but not as silky as it should be. For extra richness, try mixing in a splash of the starchy pasta cooking water before combining everything. This creates a sauce that clings beautifully to both the pasta and steak.

    Serving Ideas & Creative Variations

    Perfect Pairings and Sides

    This hearty dish stands beautifully on its own, but thoughtful sides can elevate the meal even further. A simple arugula salad with lemon vinaigrette provides a peppery, acidic counterpoint that cuts through the richness. Garlic bread is never wrong here, especially for soaking up extra sauce. For a more substantial spread, roasted asparagus or broccoli adds color and nutrition. When I served this at my sister’s birthday dinner, I included a Mediterranean Lentil Salad on the side, and the combination of textures and flavors had everyone asking for the recipes. Don’t forget a bold red wine if you’re so inclined—a Zinfandel or Syrah stands up nicely to the Cajun spices.

    Exciting Twist Options

    The beauty of this recipe lies in its adaptability. Swap steak tips for blackened shrimp for a seafood variation that’s equally delicious but lighter. Chicken thighs work wonderfully too, especially when given a good marinade in the Cajun spices. For a vegetarian version, try using meaty portobello mushrooms and adding a touch more smoked paprika to maintain that depth of flavor. The cheese component is also flexible—while parmesan creates a classic base, mixing in some sharp white cheddar or smoked gouda adds interesting complexity. My neighbor tried adding roasted red peppers to the sauce, which added a sweet, smoky dimension I’ve since incorporated into my own version.

    Storage & Troubleshooting Guide

    Proper Storage and Reheating

    This dish reheats beautifully when stored properly, making it perfect for meal prep or leftovers. Store the pasta and sauce together in airtight containers in the refrigerator for up to 3 days. The steak tips are best stored separately to prevent overcooking when reheating. When it’s time to enjoy again, gently warm the pasta mixture over medium-low heat with a splash of milk to revive the sauce. Add the steak tips only for the last minute of heating. Microwaving works in a pinch, but use 50% power and stir halfway through. I’ve found that a quick sprinkle of fresh parmesan just before serving helps refresh the flavors and brings back some of that just-made magic.

    Common Issues and Solutions

    Even experienced cooks can encounter challenges with this recipe. If your sauce turns out too thin, a quick fix is to simmer it a bit longer before adding the pasta. For sauce that’s too thick, gradually whisk in warm milk until you reach your desired consistency. If the Cajun seasoning proves too spicy, balance it with a dollop of sour cream stirred into individual portions. Conversely, if it’s not spicy enough, a few dashes of hot sauce can amp up the heat without altering the overall flavor profile. Once, when my sauce broke slightly, I found that vigorously whisking in a tablespoon of cold butter helped bring it back together—a trick I learned from my grandmother that’s saved many a sauce since.

    Frequently Asked Questions

    Can I make Cajun Steak Tips in Cheesy Rigatoni Parmesan Sauce ahead of time?

    Yes! Prepare the components separately—cook the pasta al dente, make the sauce, and season the steak tips. Store refrigerated for up to 24 hours, then quickly sear the steak and combine everything before serving.

    What cut of beef works best for the steak tips?

    Sirloin or ribeye work beautifully. Look for well-marbled pieces that can be cut into 1-inch cubes. Tenderloin is another excellent option if you’re splurging for a special occasion.

    Can I use pre-made Cajun seasoning?

    Absolutely! Store-bought Cajun seasoning works well, but check the salt content first. If it’s high in salt, reduce any additional salt in the recipe to maintain balance.

    How can I make this recipe gluten-free?

    Simply substitute gluten-free pasta and use cornstarch instead of flour for the roux. The flavor profile remains virtually identical, and the texture is just as satisfying.

    Is there a way to reduce the calories in this dish?

    Try using half-and-half instead of heavy cream, reducing cheese by 25%, and choosing leaner steak cuts. You can also increase the protein-to-pasta ratio for a more balanced meal.

    Final Thoughts

    This Cajun Steak Tips in Cheesy Rigatoni Parmesan Sauce has become my go-to recipe when I want to impress without stressing. The bold Cajun flavors paired with the comforting cheese sauce create a dish that feels both exciting and familiar. It’s versatile enough for both special occasions and weeknight dinners, and the leftovers (if you’re lucky enough to have any!) might taste even better the next day. I’d love to see your versions of this recipe—tag me on Pinterest with your creations!

  • Mushroom Chicken Recipe: Irresistibly Creamy & Packed with Flavor!

    Mushroom Chicken Recipe: Irresistibly Creamy & Packed with Flavor!

    Mushroom Chicken Recipe: Irresistibly Creamy & Packed with Flavor!

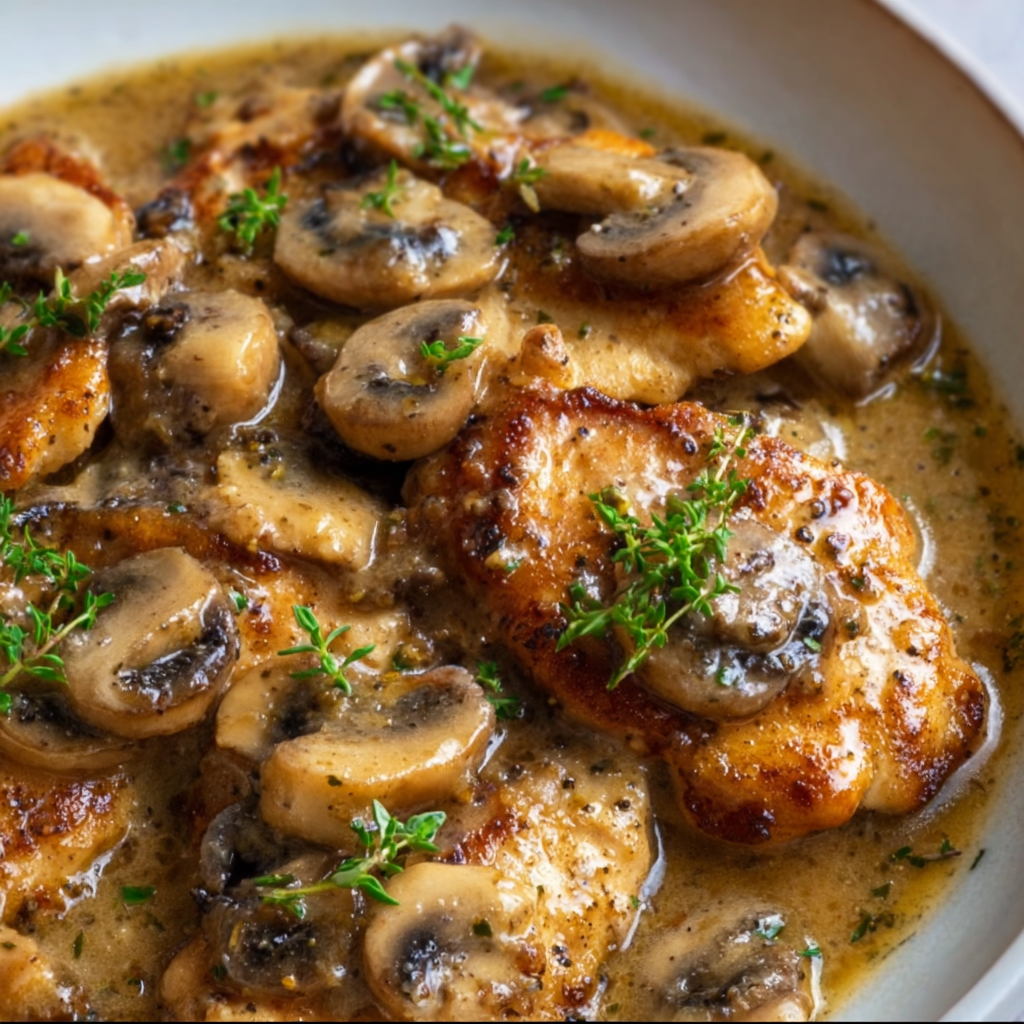
    Mushroom Chicken is my absolute favorite weeknight dinner miracle—tender chicken breasts smothered in a rich, velvety mushroom sauce that tastes like it took hours, but comes together in just 30 minutes. The first time I made this for my family, the kitchen filled with that intoxicating aroma of butter-sautéed mushrooms and herbs. My husband actually wandered in from the garage asking, “What smells so amazing?” That’s the magic of this dish—it transforms simple ingredients into something that feels special enough for company but easy enough for Monday night. If you’re looking for a cozy, comforting meal that delivers big on flavor without complicated techniques, you’ve found it at Recipes Darleen.

    Recipe

    Why You’ll Love This Mushroom Chicken

    Perfect Balance of Flavors

    The beauty of this Mushroom Chicken lies in its perfect balance of savory elements. The chicken provides a tender, juicy canvas while the mushrooms bring that incredible umami depth that makes your taste buds dance. I use a combination of cremini and white button mushrooms for the best texture and flavor complexity. What really makes this dish sing is the delicate harmony between the earthy mushrooms, fragrant herbs, and the silky sauce that ties everything together. The splash of white wine (optional but recommended) adds brightness that cuts through the richness, creating that “can’t-stop-eating-this” quality that makes dinner disappear in minutes.

    Quick Yet Impressive Results

    Despite its gourmet taste, this Mushroom Chicken comes together with surprising speed—a true weeknight wonder. The most time-consuming part is simply slicing the mushrooms, which I find oddly therapeutic after a long day. Everything cooks in one pan, meaning minimal cleanup (always a win in my book). I love recipes that deliver maximum impact with minimum effort, and this one tops the list. The sauce thickens to a gorgeous consistency that looks like it came from a restaurant kitchen, but requires no special techniques. It’s become my go-to when I want to impress last-minute dinner guests without stressing myself out.

    Essential Tips & Tricks

    Perfecting Your Mushrooms

    The key to exceptional Mushroom Chicken is treating those mushrooms right! Never, ever wash mushrooms under running water—they act like little sponges and will become waterlogged. Instead, wipe them clean with a damp paper towel or mushroom brush. For the best caramelization, avoid overcrowding your pan. Cook mushrooms in a single layer with enough space between them, working in batches if needed. Patience is rewarded here—let them develop that gorgeous golden-brown color before stirring. This concentrates their flavor and prevents the soggy, gray mushrooms that give this ingredient a bad reputation in some kitchens.

    Creating the Perfect Sauce

    The sauce in this dish deserves special attention as it’s the flavor carrier that transforms simple ingredients into something magical. Start by properly deglazing the pan with either broth or wine, scraping up all those delicious browned bits (that’s where the flavor lives!). For the creamiest texture, add your liquid slowly while stirring constantly. If you’re looking for a dairy-free option, my Cauliflower Chickpea Curry taught me that full-fat coconut milk makes an excellent substitute for heavy cream. Allow the sauce to simmer until it coats the back of a spoon—not so thick it’s pasty, but substantial enough to cling beautifully to both chicken and mushrooms.

    Serving Ideas & Creative Variations

    Perfect Pairings

    This Mushroom Chicken begs to be served over something that will catch every drop of that luxurious sauce. My family’s favorite is a bed of buttery egg noodles that cradle the sauce in their little curves. For a lighter option, mashed cauliflower provides a similar comfort-food experience with fewer carbs. A bright, acidic side like a simple arugula salad with lemon vinaigrette offers the perfect contrast to the rich main dish. For a complete meal inspired by Italian flavors, pair with my Italian Chicken Gnocchi Soup as a first course—the flavors complement each other beautifully while offering textural variety.

    Exciting Flavor Twists

    While the classic version is unbeatable, this Mushroom Chicken recipe welcomes creative adaptations. For a French-inspired version, add a tablespoon of Dijon mustard to the sauce and finish with fresh tarragon. Craving something with a kick? Incorporate smoked paprika and a pinch of cayenne for a Spanish twist. My personal favorite variation includes sun-dried tomatoes and a handful of baby spinach stirred in during the last few minutes of cooking—the colors are gorgeous, and the flavors complement the mushrooms beautifully. For special occasions, splurge on wild mushrooms like chanterelles or oyster mushrooms for an elevated forest flavor.

    Storage & Troubleshooting Guide

    Proper Storage Methods

    This Mushroom Chicken stores beautifully, actually developing deeper flavor overnight. Allow leftovers to cool completely before transferring to airtight containers in the refrigerator, where they’ll keep for 3-4 days. For freezing, I recommend slightly undercooking the chicken initially since it will cook more upon reheating. The sauce may separate slightly when frozen and thawed, but a quick whisking while reheating solves this problem. For meal prep, you can prepare the components separately—cook the chicken and make the mushroom sauce, storing them in separate containers, then combine and reheat when ready to serve for the freshest taste.

    Fixing Common Issues

    Even experienced cooks encounter challenges! If your sauce breaks or looks curdled, lower the heat immediately and whisk in a tablespoon of cold butter or cream to re-emulsify. For sauce that’s too thin, mix a teaspoon of cornstarch with a tablespoon of cold water to create a slurry, then whisk into the simmering sauce. Conversely, if your sauce reduces too much, simply add a splash of chicken broth to thin it to your desired consistency. Tough chicken usually means it’s overcooked—next time, remove it from the pan slightly earlier or try using chicken thighs, which are more forgiving and stay juicier than breasts.

    Frequently Asked Questions

    Can I use boneless chicken thighs instead of breasts?

    Absolutely! Chicken thighs work beautifully in this recipe and stay even juicier than breasts. Adjust cooking time to about 7-8 minutes per side for boneless thighs until they reach 165°F internally.

    What mushrooms work best for Mushroom Chicken?

    Cremini (baby portobello) mushrooms offer the best flavor, but white button mushrooms work well too. For special occasions, a mix of wild mushrooms creates incredible depth.

    Can I make this dairy-free?

    Yes! Substitute the butter with olive oil and replace cream with full-fat coconut milk or a plant-based cream alternative. The flavor profile will change slightly but remain delicious.

    How can I thicken the sauce if it’s too runny?

    Create a cornstarch slurry with 1 teaspoon cornstarch mixed with 1 tablespoon cold water. Whisk into the simmering sauce and cook for 1-2 minutes until thickened.

    Is this recipe gluten-free?

    The basic recipe can be gluten-free if you use cornstarch instead of flour for thickening and ensure your broth is certified gluten-free. Always check all ingredient labels.

    Final Thoughts

    This Mushroom Chicken has earned its place as a staple in my dinner rotation for good reason—it delivers that perfect combination of comfort, elegance, and ease that we all crave. I’ve served it for casual family dinners and dinner parties alike, always to rave reviews. There’s something magical about the way mushrooms transform into something so much greater than the sum of their parts. For more inspiration and variations on this beloved recipe, visit our Pinterest board where I’m constantly adding new ideas. Happy cooking!

  • Creamy & Cheesy Au Gratin Potatoes: Irresistibly Delicious Comfort Food!

    Creamy & Cheesy Au Gratin Potatoes: Irresistibly Delicious Comfort Food!

    Creamy & Cheesy Au Gratin Potatoes: Irresistibly Delicious Comfort Food!

    There’s something almost magical about the way Creamy & Cheesy Au Gratin Potatoes transform a simple dinner into a special occasion. The first time I made this dish, the aroma of bubbling cheese and herbs filled my little kitchen, and I knew I’d found a forever recipe. Those tender layers of potatoes bathed in creamy sauce, topped with that irresistible golden crust? Pure comfort. I’ve spent years perfecting this recipe, and today I’m sharing all my secrets for creating the ultimate au gratin potatoes that’ll have everyone asking for seconds. Let’s dive into this classic that never disappoints!

    Recipe

    Why You’ll Love This Creamy & Cheesy Au Gratin Potatoes

    Perfect Texture Every Time

    Getting that ideal texture is what separates good au gratin potatoes from unforgettable ones. The key is slicing your potatoes to a consistent 1/8-inch thickness—I use a mandoline for this, but a sharp knife works too. This uniformity ensures even cooking, with each slice becoming tender without turning mushy. The cream mixture needs to reach every layer, creating that luxurious mouthfeel that makes you close your eyes with each bite. I’ve found that letting the assembled dish rest for 15 minutes before baking allows the potatoes to absorb some liquid, resulting in that perfect creamy-but-not-soupy consistency.

    Flavor That Builds In Layers

    The depth of flavor in these au gratin potatoes comes from building taste in layers. I start by infusing the cream with fresh thyme, bay leaves, and crushed garlic—letting these aromatics steep while I prep everything else. A touch of nutmeg adds warmth without being detectable. The cheese selection matters tremendously: a combination of sharp cheddar for tanginess and Gruyère for that nutty complexity creates the perfect balance. Don’t skip seasoning each potato layer individually! This simple step ensures flavor throughout, not just on top, making every forkful equally delicious.

    Essential Tips & Tricks

    Choosing The Right Potatoes

    The foundation of exceptional au gratin potatoes begins with selecting the right variety. Yukon Golds are my go-to choice—their buttery flavor and waxy-yet-creamy texture hold up beautifully during baking. Russets work too, but they tend to break down more, creating a different (though still delicious) final texture. Whatever you choose, make sure they’re fresh and firm. Always remove any green spots or eyes before slicing. I’ve found that rinsing the sliced potatoes and patting them dry removes excess starch, preventing that gluey texture that can sometimes happen with potato dishes.

    Perfecting The Cheese Sauce

    The cheese sauce is where magic happens! Start with a proper roux—equal parts butter and flour cooked until it smells slightly nutty but hasn’t browned. Warm your cream mixture before adding it gradually, whisking constantly to prevent lumps. The key temperature moment: remove from heat before adding cheese to prevent separation. I always grate my cheese fresh rather than using pre-shredded, which contains anti-caking agents that can make your sauce grainy. For extra richness, try adding a tablespoon of Dijon mustard—it enhances the cheese flavor without tasting mustardy.

    Serving Ideas & Creative Variations

    Complementary Main Dishes

    These Creamy & Cheesy Au Gratin Potatoes deserve main dishes that match their comfort level. They pair beautifully with a simple roasted chicken or beef tenderloin—the potatoes providing that rich counterpoint to simpler proteins. For holiday meals, they’re perfect alongside ham or turkey, stealing the show from traditional mashed potatoes. I love serving them with something that has a bit of acidity, like Italian Chicken Gnocchi Soup or a simple roast with a vinegary sauce, which cuts through the richness. For a complete meal, add a bright green vegetable like steamed asparagus or a crisp salad.

    Flavor Twists Worth Trying

    Don’t be afraid to put your spin on this classic! One of my favorite variations is adding caramelized onions between the layers—their sweetness creates an amazing contrast. For a smoky twist, mix in crispy bacon bits and smoked Gouda instead of some of the cheddar. Herb lovers can experiment beyond thyme—rosemary, sage, or even a bit of tarragon create entirely different profiles. For a luxurious upgrade, drizzle truffle oil over the top before serving. Want something spicy? Add thinly sliced jalapeños or a pinch of cayenne to the cream mixture for heat that builds with each bite.

    Storage & Troubleshooting Guide

    Make-Ahead and Freezing Options

    These au gratin potatoes are perfect for planning ahead! You can assemble completely up to 24 hours before baking—just cover tightly and refrigerate. Let it sit at room temperature for 30 minutes before baking. For longer storage, I’ve found that freezing works best when the dish is unbaked—assemble completely, cover with plastic wrap pressed directly onto the surface, then foil, and freeze for up to 3 months. Thaw overnight in the refrigerator before baking. The texture remains excellent when prepared this way. Already baked leftovers keep well for 3-4 days refrigerated, though the sauce may break slightly when reheated.

    Solving Common Problems

    Even experienced cooks encounter issues sometimes! If your sauce appears curdled after baking, it’s likely from overheating or using pre-shredded cheese. Next time, remove the cream from heat before adding cheese and grate it yourself. Potatoes still firm after full baking time? They were probably sliced too thickly—cover with foil and bake longer. Too much liquid? Let the dish rest 15-20 minutes before serving; it will thicken as it stands. If the top browns too quickly before potatoes are tender, simply cover with foil for the remainder of baking time. Consistent results come from watching these details.

    Frequently Asked Questions

    Can I make Creamy & Cheesy Au Gratin Potatoes ahead of time?

    Yes! Assemble up to 24 hours ahead and refrigerate. You can also freeze the unbaked dish for up to 3 months. Allow extra baking time if cooking directly from the refrigerator.

    What’s the difference between scalloped potatoes and au gratin?

    Scalloped potatoes traditionally contain no cheese and are made with a cream sauce. Au gratin potatoes include cheese both in the sauce and sprinkled on top, creating that signature golden crust.

    Can I use different cheeses?

    Absolutely! While Gruyère and cheddar are classic, fontina, Comté, or Gouda work beautifully. Avoid very soft cheeses like brie or very hard varieties like Parmesan as the main cheese.

    Why are my potatoes still crunchy?

    Either they were sliced too thickly or needed more baking time. For even cooking, aim for 1/8-inch slices and make sure your oven is properly calibrated.

    How do I reheat leftovers without the sauce breaking?

    Reheat covered in a 325°F oven until warmed through (about 20 minutes). For smaller portions, microwave at 50% power with a damp paper towel covering the dish.

    Final Thoughts

    These Creamy & Cheesy Au Gratin Potatoes have been my go-to comfort dish for years—the one recipe friends always request and family expects at gatherings. There’s something truly special about creating a dish where simple ingredients transform into something so deeply satisfying. The golden, bubbling top gives way to those perfectly tender layers, and suddenly, an ordinary meal becomes a memory. I hope you’ll try these techniques and make this recipe your own. For more comfort food inspiration, visit our Pinterest page where I’m always sharing new favorites!

  • Keto Hamburger Broccoli Skillet: Irresistibly Easy & Delicious!

    Keto Hamburger Broccoli Skillet: Irresistibly Easy & Delicious!

    Keto Hamburger Broccoli Skillet: Irresistibly Easy & Delicious!

    This Keto Hamburger Broccoli Skillet has become my weeknight salvation—a one-pan wonder that delivers all the comfort of a hearty meal without the carb crash afterward. The first time I made it, the kitchen filled with that irresistible aroma of sizzling beef and garlic that made my mouth water instantly. The tender broccoli soaks up all those savory juices, creating the perfect balance of protein and veggies that keeps me satisfied for hours. If you’re looking for a quick, nutrient-dense dinner that doesn’t sacrifice flavor for health benefits, this skillet has your name written all over it. Let me show you why this has become a staple in my kitchen rotation.

    Recipe

    Why You’ll Love This Keto Hamburger Broccoli Skillet

    Perfect Macros for Keto Success

    This skillet dish hits all the right notes for anyone following a ketogenic lifestyle. With approximately 6g net carbs per serving, it keeps you firmly in ketosis while delivering a whopping 25g of protein that helps maintain muscle mass. The combination of ground beef fat and cheese creates that magical high-fat profile that keto enthusiasts crave. I love how it keeps me feeling full for hours without any energy crashes. The broccoli adds essential fiber and nutrients while absorbing all those delicious savory flavors from the beef. It’s truly the perfect balance of satisfying comfort food that won’t kick you out of ketosis.

    Quick One-Pan Convenience

    There’s something deeply satisfying about creating a complete meal in just one pan. On busy weeknights when dishes are the last thing I want to think about, this skillet saves my sanity. From start to finish, you’ll have dinner on the table in under 30 minutes—perfect for those evenings when hunger strikes and patience wanes. The cleanup is minimal, just one skillet to wash! I’ve found that using a well-seasoned cast iron skillet gives the beef beautiful caramelization while evenly cooking the broccoli to that perfect tender-crisp texture. For busy families or solo diners alike, this efficiency is a game-changer.

    Essential Tips & Tricks

    Mastering the Perfect Beef-to-Broccoli Ratio

    Finding that ideal balance between meat and vegetables makes this dish truly shine. I recommend using 1 pound of ground beef to 4 cups of broccoli florets for optimal flavor distribution. When browning the beef, take your time to develop those rich flavor foundations—about 5-7 minutes until it’s properly caramelized. This creates those delicious browned bits that will flavor everything else. For the broccoli, cut florets to similar sizes (about 1-inch pieces) to ensure even cooking. If you prefer softer broccoli, add 2 tablespoons of water to the skillet and cover for 2-3 minutes during the final cooking stage.

    Cheese Selection Matters

    The cheese you choose can transform this dish from good to absolutely crave-worthy. While standard cheddar works beautifully, don’t be afraid to experiment with flavor-forward options like smoked gouda or pepper jack for added dimension. For the creamiest result, shred your cheese fresh rather than using pre-packaged varieties which often contain anti-caking agents. Add the cheese in two stages—half mixed through to create a creamy sauce base, and the remainder sprinkled on top to create that irresistible golden crust. This technique ensures perfect cheese distribution throughout the dish, similar to what I do in my Mediterranean Chicken Quinoa Bowl.

    Serving Ideas & Creative Variations

    Complementary Side Dishes

    While this skillet is a complete meal on its own, sometimes I like to round it out with keto-friendly accompaniments. A simple side salad with arugula and a zesty vinaigrette adds a fresh contrast to the rich skillet flavors. Roasted cauliflower rice makes an excellent base if you’re looking to stretch servings without adding significant carbs. For a touch of indulgence that still keeps things keto, try a dollop of sour cream or a few slices of avocado on top. The cool creaminess against the hot skillet creates a delightful temperature contrast that elevates the entire eating experience.

    Exciting Flavor Variations

    Don’t be afraid to transform this basic recipe with different flavor profiles! My Tex-Mex version with taco seasoning, diced peppers, and topped with fresh cilantro and avocado is a family favorite. For an Italian twist, add Italian seasoning, a splash of sugar-free marinara, and swap the cheddar for mozzarella and parmesan. Asian-inspired variations work beautifully too—try adding ginger, coconut aminos, and sesame oil, then garnish with green onions and sesame seeds. These variations keep the dish in regular rotation without boredom, much like the versatility in my Low-Carb Italian Grinder Salad.

    Storage & Troubleshooting Guide

    Proper Storage for Maximum Freshness

    This Keto Hamburger Broccoli Skillet makes exceptional leftovers when stored correctly. Allow the dish to cool completely before transferring to airtight containers—this prevents condensation that can make broccoli soggy. Refrigerated leftovers maintain optimal flavor and texture for up to 4 days. For freezing, portion into individual servings and store in freezer-safe containers for up to 3 months. The key to reheating without overcooking the broccoli is gentle heat—microwave at 70% power with a damp paper towel covering, or reheat in a skillet over medium-low heat with a splash of beef broth to restore moisture.

    Troubleshooting Common Issues

    If your skillet turns out watery, the likely culprit is the broccoli releasing moisture. To prevent this, ensure you’re cooking at a high enough temperature to evaporate excess liquid, and don’t overcrowd the pan. For broccoli that’s too crunchy, simply cover the skillet for a few minutes to steam it to your preferred tenderness. If the cheese sauce breaks or becomes grainy, lower the heat immediately and add a splash of heavy cream while stirring constantly to re-emulsify. For bland results, don’t underestimate the power of adequate salt and acid—a squeeze of fresh lemon juice just before serving can brighten all the flavors and transform the entire dish.

    Frequently Asked Questions

    Can I use frozen broccoli in this Keto Hamburger Broccoli Skillet?

    Yes! Thaw and drain it thoroughly first to remove excess moisture. You’ll need to reduce cooking time by about 2-3 minutes since frozen broccoli is partially cooked.

    How can I increase the fat content for strict keto macros?

    Add 2-3 tablespoons of butter when sautéing the meat, or mix in 1/4 cup of heavy cream with the cheese. Topping with diced avocado also adds healthy fats.

    Will ground turkey work instead of beef?

    Absolutely! Turkey is leaner, so add 1-2 tablespoons of olive oil or butter to maintain the dish’s richness. You may need additional seasonings as turkey is milder.

    Can I make this dairy-free?

    Yes, omit the cheese and use nutritional yeast (2-3 tablespoons) for a cheesy flavor. Coconut cream can add richness, and dairy-free cheese alternatives melt reasonably well.

    How do I prevent the broccoli from becoming mushy?

    Add broccoli only after the meat is fully cooked, and sauté for just 3-4 minutes until bright green. For firmer texture, blanch it separately and add during the final minute.

    Final Thoughts

    This Keto Hamburger Broccoli Skillet has become more than just a convenient meal in my kitchen—it’s a testament to how satisfying low-carb eating can be without feeling restrictive. What I love most is its adaptability to whatever’s happening in my day, whether I need a quick dinner or meal-prep solution. The combination of savory ground beef and tender broccoli creates that perfect comfort food experience while keeping my energy levels steady and cravings at bay. I hope this skillet brings the same satisfaction to your table! For more keto-friendly inspiration, check out my other recipes at Pinterest.

  • Peanut Butter Stuffed Chocolate Cookies: Irresistibly Gooey & Viral!

    Peanut Butter Stuffed Chocolate Cookies: Irresistibly Gooey & Viral!

    Peanut Butter Stuffed Chocolate Cookies: Irresistibly Gooey & Viral!

    These Peanut Butter Stuffed Chocolate Cookies are the ultimate indulgence for anyone who loves that magical combination of chocolate and peanut butter. Rich, fudgy chocolate cookies with a gooey peanut butter center that melts in your mouth with each bite. I discovered this recipe during a rainy weekend when my kids were begging for something sweet, and now it’s our go-to comfort treat. The contrast between the slightly crisp exterior and that molten peanut butter center creates a texture experience that’s simply irresistible. If you love desserts with hidden surprises, this recipe from Recipes Darleen will become your new favorite.

    Recipe

    Why You’ll Love This Peanut Butter Stuffed Chocolate Cookies

    A Perfect Balance of Flavors

    The magic of these cookies lies in their perfect balance of flavors. The chocolate cookie dough has deep, rich notes with just the right amount of sweetness that complements the salty-sweet peanut butter center. I’ve tested countless versions to get this ratio just right! The chocolate isn’t too bitter or too sweet, and the peanut butter filling stays creamy even after baking. The slight saltiness from the peanut butter cuts through the richness, making these cookies impossible to eat just one. It’s like having a homemade peanut butter cup in cookie form!

    Impressive Yet Simple to Make

    Don’t let their impressive appearance fool you – these cookies are surprisingly easy to make. The dough comes together in just one bowl, and the filling requires minimal prep. I love making these with my daughter on Sunday afternoons; she’s become an expert at rolling the perfect peanut butter balls for the centers! The process of wrapping the chocolate dough around the peanut butter filling is actually quite therapeutic. Plus, they look so professional when finished that friends always think I spent hours in the kitchen. Perfect for impressing guests without exhausting yourself!

    Essential Tips & Tricks

    Perfecting the Peanut Butter Center

    The key to a perfect filling is using creamy peanut butter at the right temperature. I recommend chilling your peanut butter balls for at least 30 minutes before wrapping them in cookie dough. This prevents the filling from melting too quickly during baking. For extra flavor, I sometimes mix in a tablespoon of honey or a sprinkle of sea salt to the peanut butter. If you’re finding the peanut butter too soft to work with, add a tablespoon of powdered sugar to firm it up. This technique also works beautifully in 3-Ingredient Biscoff Cookies when you want to create filled versions.

    Achieving the Perfect Texture

    For that ideal fudgy texture, don’t overbake these cookies! They should look slightly underdone when you take them out of the oven – they’ll continue cooking as they cool. I’ve found that 10-12 minutes at 350°F is the sweet spot for my oven. The edges should be set but the center still soft. Let them cool on the baking sheet for 5 minutes before transferring to a wire rack. This cooling period is crucial for the texture development. If you want a more gooey center, you can add a chocolate chip right in the middle of the peanut butter filling for an extra surprise.

    Serving Ideas & Creative Variations

    Take these cookies to the next level by serving them slightly warm with a scoop of vanilla ice cream on top. The contrast of cold ice cream and warm cookie creates an incredible dessert experience! For dinner parties, I arrange them on a wooden board with fresh berries and a small bowl of extra melted chocolate for dipping. You can also crumble them over yogurt for a decadent breakfast treat. For a special touch, drizzle caramel sauce over the top just before serving, similar to how I finish my No-Bake Pumpkin Cheesecake Balls for that extra wow factor.

    Exciting Flavor Twists

    Don’t be afraid to experiment with creative variations! Try using almond butter or cookie butter instead of peanut butter for a different flavor profile. For a holiday twist, add crushed candy canes to the chocolate dough in December. My personal favorite variation includes adding orange zest to the chocolate dough and using dark chocolate peanut butter for the filling. You can also roll the finished cookies in chopped nuts or sprinkles before baking for added texture and visual appeal. White chocolate chips mixed into the dough create beautiful pops of color and sweetness.

    Storage & Troubleshooting Guide

    Keeping Your Cookies Fresh

    These cookies maintain their best quality when stored in an airtight container at room temperature for up to 5 days. Place parchment paper between layers to prevent sticking. For longer storage, freeze the baked cookies for up to 3 months – they thaw beautifully! You can also freeze the unbaked cookie dough balls and bake them whenever a craving strikes. Just add 2-3 minutes to the baking time when cooking from frozen. I often make a double batch specifically to freeze half for emergency dessert situations!

    If your cookies spread too much during baking, the dough temperature is likely the culprit. Refrigerate the wrapped dough balls for 30 minutes before baking. For cookies that turn out too dry, you might have overbaked them or used too much flour – remember that measuring flour by weight rather than volume gives more consistent results. If your peanut butter leaks out during baking, make sure your chocolate dough completely seals around the filling. And if the cookies crack too much on top, try baking at 25°F lower temperature for a minute or two longer.

    Frequently Asked Questions

    Can I use crunchy peanut butter instead of creamy?

    Yes! Crunchy peanut butter works well for a textural contrast. Just ensure you can form it into balls that hold their shape when chilled.

    How do I know when my Peanut Butter Stuffed Chocolate Cookies are done baking?

    Look for set edges with slightly soft centers. They’ll appear a bit underdone but will firm up as they cool while keeping that gooey center.

    Can I make these cookies gluten-free?

    Absolutely! Replace the all-purpose flour with a 1:1 gluten-free flour blend. The texture might be slightly different, but they’ll still be delicious.

    How far in advance can I prepare the dough?

    The dough can be made up to 3 days ahead and refrigerated, or frozen for up to 3 months. Just wrap it tightly in plastic wrap.

    If your peanut butter center disappeared, it likely wasn’t chilled enough before baking. Freeze the peanut butter balls for 15 minutes longer next time.

    Final Thoughts

    These Peanut Butter Stuffed Chocolate Cookies have become my signature dessert for good reason. They strike that perfect balance between impressive and achievable, while delivering an unforgettable flavor experience. The joy on people’s faces when they bite into that hidden peanut butter center makes all the effort worthwhile. I’d love to see your creations if you try this recipe – share them with me on Pinterest! Remember, baking is about having fun in the kitchen, and these cookies certainly deliver on both the fun and delicious fronts.

  • Creamy Leftover Pulled Beef Pasta Recipe: Irresistibly Delicious!

    Creamy Leftover Pulled Beef Pasta Recipe: Irresistibly Delicious!

    Creamy Leftover Pulled Beef Pasta Recipe: Irresistibly Delicious!

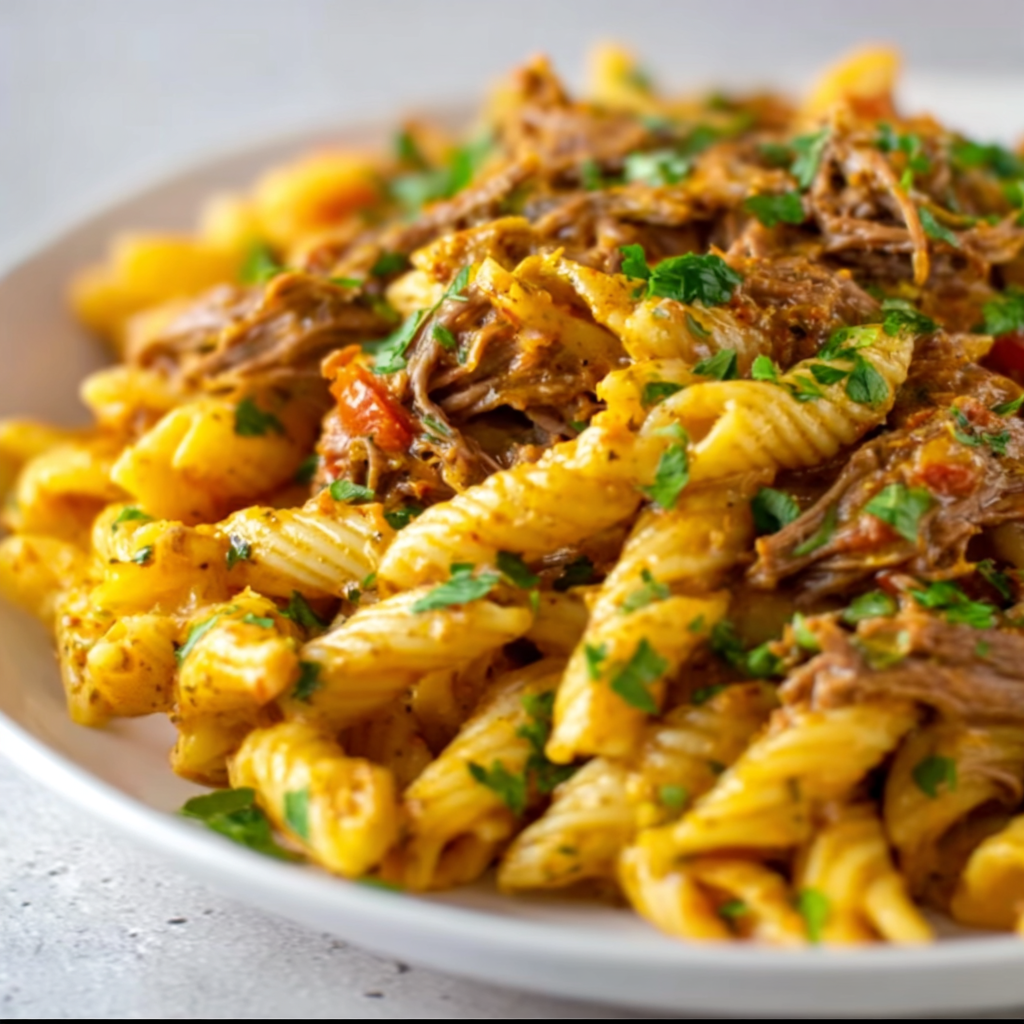
    There’s something magical about transforming leftovers into something completely new and delicious. This Creamy Leftover Pulled Beef Pasta Recipe is my absolute favorite way to breathe new life into yesterday’s pulled beef. The tender shreds of beef meld with a velvety sauce that coats each pasta strand perfectly, creating a dish that’s pure comfort in a bowl. I discovered this recipe during a particularly busy week when my fridge was filled with containers of leftover pot roast. What started as a quick kitchen experiment has become one of my family’s most requested meals. Let me show you how to create this simple yet impressive pasta dish that will have everyone asking for seconds.

    Recipe

    Why You’ll Love This Creamy Leftover Pulled Beef Pasta Recipe

    A Time-Saving Solution with Gourmet Results

    This recipe is a weeknight miracle for busy families. Instead of starting from scratch, you’re already halfway there with pre-cooked beef. I love how it transforms in just 20 minutes from leftover status to a restaurant-worthy pasta dish. The rich, creamy sauce develops complex flavors that taste like they’ve been simmering all day. One evening after a particularly exhausting day, I threw this together while still in my work clothes, and my husband thought I’d been cooking for hours! The best part? You’ll save money by repurposing food that might otherwise go to waste.

    Perfect Balance of Flavors and Textures

    The combination of tender beef, al dente pasta, and silky sauce creates an irresistible texture contrast in every bite. I’ve carefully balanced the richness with bright notes from fresh herbs and a touch of acidity. The depth of flavor comes from building layers – starting with sautéed aromatics, then incorporating the beef’s existing seasonings, and finishing with cream to unite everything. The sauce clings beautifully to the pasta, whether you choose fettuccine, pappardelle, or even spiral shapes. This isn’t just leftover makeover – it’s a completely transformed dish that stands proudly on its own merits.

    Essential Tips & Tricks

    Pasta Selection and Cooking Techniques

    Choose pasta shapes that capture the sauce in their ridges or hollows – penne, rigatoni, and fusilli work beautifully. For a more elegant presentation, wide ribbons like pappardelle or fettuccine create a luxurious base for the beef. Always cook pasta just shy of al dente (about 1-2 minutes less than package directions) as it will continue cooking when combined with the hot sauce. Reserve at least 1/2 cup of starchy pasta water before draining – this magical ingredient helps the sauce cling to the pasta. For an extra flavor boost, try the technique from my Dump and Start Instant Pot Alfredo where the pasta actually finishes cooking in the sauce.

    Sauce Perfection and Beef Preparation

    The secret to a silky-smooth sauce lies in temperature control. Heat your cream slowly to prevent curdling, and if using cheese, add it off the heat in small batches. Shred or chop your leftover beef into bite-sized pieces, removing any large pieces of fat or gristle. If your beef is dry, rejuvenate it by simmering it briefly in beef broth before adding to the sauce. For depth of flavor, deglaze your pan with a splash of red wine or beef broth, scraping up all those flavorful browned bits. I learned this trick after a sauce disaster – now I never rush the process, and my sauces are consistently velvety and lump-free.

    Serving Ideas & Creative Variations

    Complementary Side Dishes and Garnishes

    This hearty pasta pairs beautifully with fresh, bright sides that balance its richness. I love serving it with a simple arugula salad dressed with lemon and olive oil, or my Mediterranean Lentil Salad for a protein boost. For garnishes, think about adding texture and color – toasted breadcrumbs, fresh herbs like parsley or basil, or a sprinkle of lemon zest. A drizzle of high-quality olive oil just before serving adds a lovely finishing touch. Don’t forget warm, crusty bread for sopping up every last bit of that incredible sauce! My family fights over who gets to run their bread around the empty serving bowl.

    Creative Recipe Adaptations

    This versatile recipe welcomes endless variations based on what you have on hand. Swap the beef for leftover pulled pork, chicken, or even roasted vegetables for a meat-free option. Add sautéed mushrooms for an earthy dimension, or stir in spinach or kale for added nutrition. For a spicy kick, incorporate red pepper flakes or a dollop of harissa. Create a fusion twist by adding Asian flavors like ginger, soy, and sesame oil to the beef before combining with the pasta. You can even transform this into a baked pasta dish by topping with cheese and breadcrumbs before a quick trip to the broiler.

    Storage & Troubleshooting Guide

    Proper Storage and Reheating Methods

    Store any leftover pasta in an airtight container in the refrigerator for up to 3 days. The flavors often deepen overnight, making it even more delicious the next day. When reheating, add a splash of milk or cream to revive the sauce, as pasta tends to absorb liquid during storage. For best results, warm slowly over medium-low heat rather than using high temperatures that might cause the sauce to separate. Microwave reheating works in a pinch – cover with a damp paper towel and heat in 30-second intervals, stirring between each. I don’t recommend freezing this dish, as cream-based sauces can break when thawed.

    Fixing Common Recipe Issues

    If your sauce seems too thick, thin it gradually with reserved pasta water until you reach your desired consistency. For sauce that’s too thin, create a quick slurry by mixing 1 teaspoon of cornstarch with 1 tablespoon cold water, then stir into the simmering sauce. If your sauce breaks or looks curdled, lower the heat immediately and whisk in a tablespoon of cold cream. For beef that seems dry or tough, try shredding it more finely and allowing it to simmer in the sauce longer. Remember that patience is key – many sauce issues can be resolved by adjusting heat and taking your time.

    Frequently Asked Questions

    Can I make this Creamy Leftover Pulled Beef Pasta Recipe ahead of time?

    Yes, you can prepare the sauce and beef mixture up to 2 days ahead. Store refrigerated, then reheat gently and combine with freshly cooked pasta just before serving.

    What’s the best pasta shape to use?

    Ribbons like fettuccine or pappardelle work beautifully, but any shape that catches sauce works well. Rigatoni, fusilli, and penne are excellent alternatives.

    Can I use cream alternatives for a lighter version?

    Absolutely! Try half-and-half, evaporated milk, or even Greek yogurt thinned with a bit of milk. The sauce won’t be quite as rich but will still be delicious.

    My sauce is separating. How can I fix it?

    Lower the heat immediately and whisk vigorously. Adding a tablespoon of cold cream or a small amount of cornstarch slurry can help reunite the sauce.

    What can I use if I don’t have leftover beef?

    Rotisserie chicken, canned tuna, or even sautéed mushrooms make great substitutes. Adjust seasonings to complement your protein choice.

    Final Thoughts

    This Creamy Leftover Pulled Beef Pasta Recipe has saved countless dinners in my home, transforming ordinary leftovers into something truly special. I love how it combines practicality with indulgence – it’s economical and quick, yet feels like a treat. The rich, velvety sauce paired with tender beef creates a meal that’s greater than the sum of its parts. I hope you’ll give this recipe a try the next time you have leftover beef in your refrigerator. Don’t forget to check out more pasta inspiration on our Pinterest page for endless mealtime ideas!