Category: Lunch

Easy lunch ideas for busy days. Simple, quick recipes with fresh flavor and satisfying meals you can enjoy at home or on the go.

  • Steak Egg Cheese Bagel: Irresistible Morning Boost You Crave!

    Steak Egg Cheese Bagel: Irresistible Morning Boost You Crave!

    Steak Egg Cheese Bagel: Irresistible Morning Boost You Crave!

    The steak egg cheese bagel brings together everything I love about breakfast in one glorious handful. That first bite where the runny yolk meets perfectly seasoned steak and melty cheese is pure morning magic. I discovered this combination during my college years when I needed something substantial to power through early classes, and it’s remained my go-to weekend treat ever since. The beauty lies in its perfect balance—hearty protein, creamy cheese, and that pillowy bagel that holds everything together. This breakfast sandwich isn’t just food; it’s a ritual worth savoring.

    Recipe

    Why You’ll Love This Steak Egg Cheese Bagel

    Perfect Balance of Flavors and Textures

    The contrasting textures in this sandwich create an experience that’s impossible to resist. The crispy seared edges of the steak against the creamy, melted cheese and the slight chew of a toasted bagel create perfect harmony. I love how the rich yolk creates a natural sauce that brings everything together. There’s something deeply satisfying about that moment when the flavors meld—savory beef, buttery egg, sharp cheese, and the subtle sweetness of the bagel. It’s a symphony of tastes that makes even Monday mornings bearable.

    Quick Yet Impressive Breakfast Option

    Despite its gourmet appeal, this steak egg cheese bagel comes together in just 15 minutes once you have the ingredients ready. I’ve made this on busy weekday mornings and for impromptu brunches when friends stop by. The speed-to-impression ratio is off the charts! You can prep components ahead of time—cook the steak the night before or scramble eggs in batches. This flexibility makes it perfect for meal prep or when you need to feed a hungry crowd with minimal fuss but maximum flavor impact.

    Essential Tips & Tricks

    Selecting and Preparing the Perfect Steak

    The cut of steak makes all the difference in this breakfast sandwich. I prefer ribeye or strip steak for their marbling and flavor, but leftover steak works beautifully too. Slice it thin (against the grain!) and give it a quick sear with simple seasonings—salt, pepper, and maybe a touch of garlic powder. The key is not overcooking when reheating. Thirty seconds per side in a hot pan revives the meat without toughening it. Remember that the steak continues cooking slightly from residual heat, so pull it just before it reaches your desired doneness.

    Bagel Selection and Preparation

    Not all bagels are created equal for this sandwich. Look for freshly baked bagels with a slightly chewy texture—everything, sesame, or asiago varieties complement the savory fillings beautifully. For the perfect foundation, toast your bagel until it’s golden but still yielding in the center. This creates a sturdy base that won’t get soggy while still being easy to bite through. I learned the hard way that an under-toasted bagel turns mushy, while over-toasted ones scrape the roof of your mouth—aim for that golden middle ground, just like in these delicious breakfast quesadillas.

    Serving Ideas & Creative Variations

    Complementary Side Dishes

    Pair your steak egg cheese bagel with simple sides that enhance without overwhelming. Crispy hash browns or roasted breakfast potatoes offer textural contrast while soaking up any escaped egg yolk. For something lighter, a small fruit salad with berries and citrus provides refreshing balance. When I’m feeling extra, I serve these with a spicy Bloody Mary or cold brew coffee with cream. Weekend brunch gets elevated when you add a side of crispy air fryer chicken wings for a savory feast that’ll keep everyone satisfied until dinner.

    Seasonal and Dietary Adaptations

    This sandwich template welcomes adaptation for any season or dietary need. In summer, add garden-fresh tomatoes and avocado; in fall, caramelized onions and mushrooms create earthy depth. For lighter versions, use egg whites or plant-based eggs, turkey instead of beef, and reduced-fat cheese. Gluten-free bagels work beautifully, as do lettuce wraps for carb-conscious eaters. My favorite twist is adding kimchi or pickled jalapeños for brightness and heat. The versatility means everyone can customize their perfect breakfast without compromising on satisfaction.

    Storage & Troubleshooting Guide

    Make-Ahead and Reheating Methods

    For busy mornings, prep components separately—cook steak and store in airtight containers, pre-slice cheese, and have bagels ready. Assembly takes minutes when everything’s prepped. For reheating fully-assembled sandwiches, wrap loosely in foil and warm in a 300°F oven for 8-10 minutes. Microwaving works in a pinch, but wrap in a damp paper towel and use 50% power to prevent toughening the steak or rubbery eggs. I’ve found that keeping the components separate until serving time yields the freshest results.

    Solving Common Issues

    If your egg yolks break during cooking, don’t panic—they’ll still taste delicious and actually distribute better throughout the sandwich. For cheese that won’t melt properly, place it directly on the hot steak or egg rather than against the cold bagel. If your bagel is too dry, a light brush of butter before toasting works wonders. When the sandwich feels too heavy, lighten it with arugula or a schmear of herb cream cheese instead of sliced cheese. Remember that perfection comes with practice—each sandwich teaches you something new.

    Frequently Asked Questions

    What’s the best cut of steak for a steak egg cheese bagel?

    Ribeye and strip steak offer excellent flavor and tenderness. Leftover steak works beautifully too—just slice thin and quickly reheat to prevent toughening.

    Can I make this ahead for meal prep?

    Yes! Prepare components separately and store refrigerated. Assemble fresh or reheat assembled sandwiches wrapped in foil at 300°F for 8-10 minutes.

    How do I prevent my bagel from getting soggy?

    Toast your bagel thoroughly and let hot components cool slightly before assembly. For extra protection, spread a thin layer of butter or cream cheese on both halves.

    What cheese melts best for this sandwich?

    American cheese melts most smoothly, but cheddar, provolone, and Swiss offer more flavor. For best melting, place cheese directly on hot steak or eggs.

    Can I make a steak egg cheese bagel without a stovetop?

    Absolutely! Use an air fryer for the bagel, microwave for scrambled eggs, and reheat pre-cooked steak in either appliance for a dorm-friendly version.

    Final Thoughts

    The steak egg cheese bagel represents breakfast perfection—substantial enough for the hungriest mornings yet adaptable to your personal taste. I love how something so simple can feel so special, transforming ordinary ingredients into a meal worth lingering over. Whether you’re making it for yourself as a weekend treat or serving a crowd at brunch, this sandwich delivers satisfaction in every bite. Share your creations on Pinterest and discover how this breakfast classic becomes uniquely yours with each delicious iteration.
  • Spinach Feta Puff Pastry Recipe That Will Wow Your Taste Buds!

    Spinach Feta Puff Pastry Recipe That Will Wow Your Taste Buds!

    Spinach Feta Puff Pastry Recipe That Will Wow Your Taste Buds!

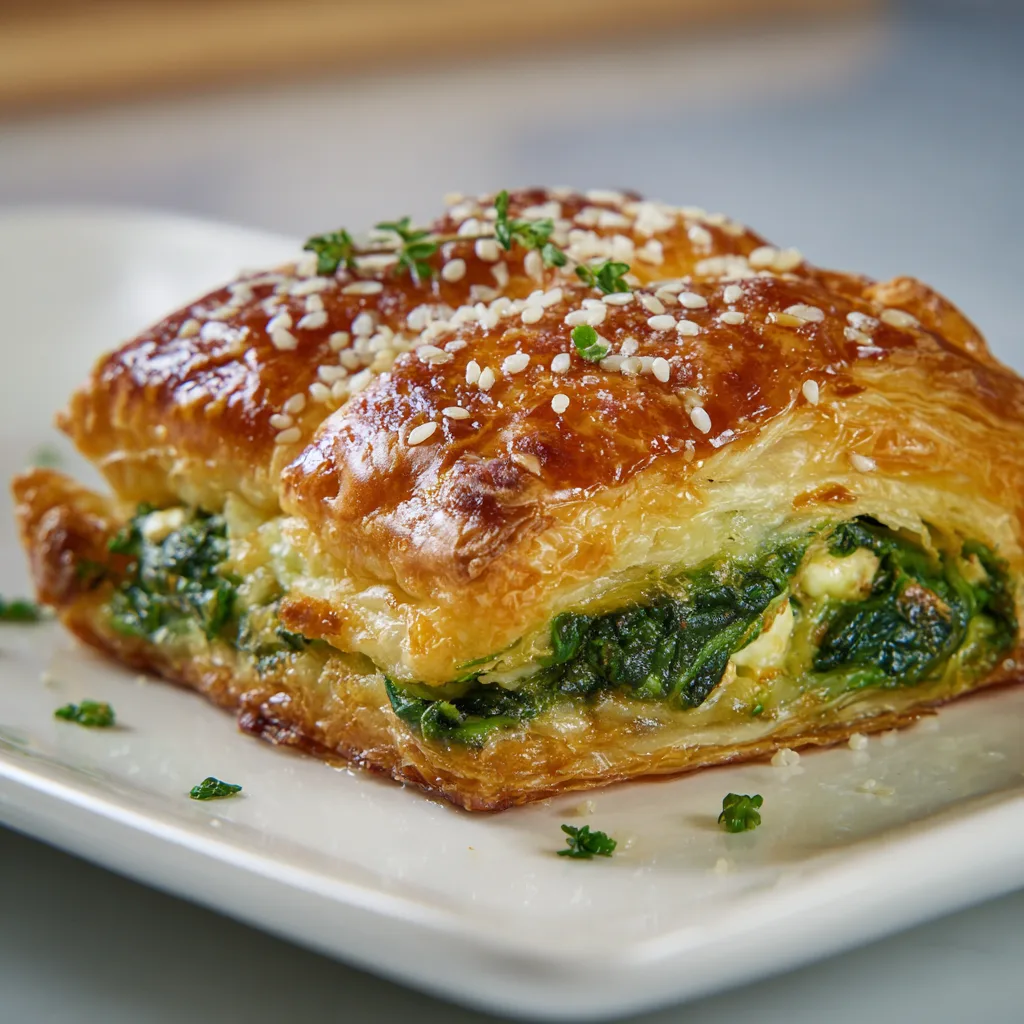
    Spinach Feta Puff Pastry is my absolute favorite way to transform simple ingredients into something that looks and tastes gourmet with minimal effort. There’s something magical about the way flaky, buttery pastry embraces the savory combination of wilted spinach and tangy feta cheese. I discovered this recipe during a rainy Sunday afternoon when I needed comfort food but didn’t want to spend hours in the kitchen. The first bite—with that perfect crunch followed by the creamy interior—made me wonder why I hadn’t been making these all along. If you love the Mediterranean flavor profile in my roasted red pepper hummus, you’ll adore these elegant pastries.

    Recipe

    Why You’ll Love This Spinach Feta Puff Pastry

    Perfect Balance of Flavors and Textures

    There’s nothing quite like the textural contrast between the shatteringly crisp exterior and the warm, creamy filling of these pastries. The earthy spinach perfectly balances the salty punch of feta, while a hint of nutmeg brings everything together with surprising depth. I love watching my guests’ faces light up with that first bite—their expressions shifting from polite interest to wide-eyed delight. The beauty is in the simplicity: just a few quality ingredients that complement each other perfectly. And despite their impressive appearance, they’re remarkably forgiving for beginners.

    Quick Prep for Maximum Impact

    What truly makes this Spinach Feta Puff Pastry a staple in my entertaining arsenal is the incredible effort-to-reward ratio. With just 15 minutes of active prep time, you’ll create something that looks like it came from a fancy bakery. I’ve made these on harried weeknights and for last-minute gatherings when I needed something special but lacked time. The versatility is unmatched—serve them as elegant appetizers, pair with soup for a light dinner, or include them in brunch spreads. They’re equally at home at casual gatherings and sophisticated dinner parties.

    Essential Tips & Tricks

    Working With Puff Pastry Like a Pro

    The secret to perfect Spinach Feta Puff Pastry starts with properly handling the puff pastry itself. Always thaw it in the refrigerator overnight rather than on the counter—this prevents the butter layers from melting prematurely. When rolling, work quickly with a lightly floured surface, and keep the pastry cold until the last possible moment. One trick I learned from a pastry chef friend: chill your filled and shaped pastries for 15 minutes before baking. This extra step allows the butter in the pastry to firm up again, creating those gorgeous flaky layers that make puff pastry so irresistible.

    Perfecting the Spinach Filling

    The difference between good and exceptional Spinach Feta Puff Pastry lies in how you handle the spinach. Always thoroughly drain your spinach—I wrap mine in a clean kitchen towel and squeeze until not a drop of moisture remains. Excess water is the enemy of crisp pastry! Season aggressively; the pastry itself is bland, so your filling needs to carry the flavor weight. I like adding a pinch of red pepper flakes for subtle heat, minced garlic for depth, and a whisper of lemon zest to brighten everything. Let the filling cool completely before assembling to prevent the pastry from becoming soggy.

    Serving Ideas & Creative Variations

    Elegant Presentation Techniques

    Transform your Spinach Feta Puff Pastry from delicious to showstopping with simple presentation tricks. For dinner parties, I arrange individual triangles on a wooden board with fresh herbs scattered between them and lemon wedges for squeezing. For brunch gatherings, try cutting the pastry into long strips, twisting them with filling, and forming spirals—they bake into beautiful pinwheels. A light egg wash with a sprinkle of everything bagel seasoning or black sesame seeds adds visual interest and flavor. Serve alongside a creamy yogurt dip for an extra touch of luxury.

    Creative Flavor Variations

    While the classic spinach and feta combination is timeless, don’t be afraid to experiment with your puff pastry creations. My Mediterranean-inspired variation adds chopped sun-dried tomatoes, pine nuts, and fresh basil to the filling. For something more decadent, try incorporating caramelized onions, goat cheese, and a drizzle of honey. A handful of chopped Kalamata olives brings a briny punch that complements the feta beautifully. For meat lovers, add crispy prosciutto bits or cooked, crumbled sausage. Each variation maintains the spirit of the original while offering a new flavor adventure.

    Storage & Troubleshooting Guide

    Make-Ahead and Storage Solutions

    The versatility of Spinach Feta Puff Pastry extends to its make-ahead potential. You can prepare the filling up to three days in advance and store it in an airtight container in the refrigerator. For partially assembled pastries, freeze them unbaked on a baking sheet, then transfer to freezer bags once solid—they’ll keep for up to three months. Bake directly from frozen, adding just 5-7 minutes to the baking time. Fully baked pastries can be refrigerated for 2-3 days and reheated in a 350°F oven for 5-10 minutes to restore crispness. Never microwave them unless you enjoy soggy pastry!

    Fixing Common Pastry Problems

    Even experienced bakers encounter challenges with puff pastry. If your pastry isn’t rising properly, the most common culprit is temperature. Either the pastry got too warm before baking (chill it!) or your oven isn’t hot enough (preheat thoroughly). Leaking filling usually means you’ve overfilled or haven’t sealed the edges properly—a fork pressed firmly around the edges creates both a decorative finish and a good seal. If your pastry browns too quickly before cooking through, loosely tent with foil after the first 15 minutes of baking. Remember that puff pastry should be deeply golden, not pale, for the best texture.

    Frequently Asked Questions

    Can I use frozen spinach for Spinach Feta Puff Pastry?

    Absolutely! Thaw it completely and squeeze out all moisture—I recommend using a clean kitchen towel for this. One 10-ounce package of frozen spinach equals about 1½ pounds of fresh spinach after cooking.

    What can I substitute for feta cheese?

    Goat cheese provides similar tanginess with a creamier texture. Ricotta mixed with Parmesan works well too, though you’ll need to add more salt. For a non-dairy option, try firm tofu crumbled with nutritional yeast and lemon juice.

    How do I prevent my puff pastry from getting soggy?

    Ensure all filling ingredients are cool and as dry as possible before assembly. For extra protection, you can brush the inside of the pastry with beaten egg or sprinkle with a thin layer of breadcrumbs before adding filling.

    Can I prepare these in advance for a party?

    Yes! Assemble them completely, then refrigerate unbaked for up to 24 hours or freeze for longer storage. Brush with egg wash just before baking, not in advance.

    Why did my Spinach Feta Puff Pastry not puff up properly?

    Your pastry was likely too warm when it went into the oven. Always chill assembled pastries for 15-20 minutes before baking, and ensure your oven is fully preheated to the correct temperature.

    Final Thoughts

    Spinach Feta Puff Pastry represents that perfect intersection of simplicity and sophistication that makes cooking so rewarding. I find myself returning to this recipe whenever I want to create something special without spending hours in the kitchen. The combination of buttery layers, savory spinach, and tangy feta creates a memorable bite that friends request again and again. Whether you’re serving these as elegant appetizers or casual weeknight fare, they bring a touch of effortless elegance to any table. Find more inspiration for your next gathering on Pinterest.

  • Cajun Chicken Sloppy Joes: Irresistibly Spicy Comfort Food!

    Cajun Chicken Sloppy Joes: Irresistibly Spicy Comfort Food!

    Cajun Chicken Sloppy Joes: Irresistibly Spicy Comfort Food!

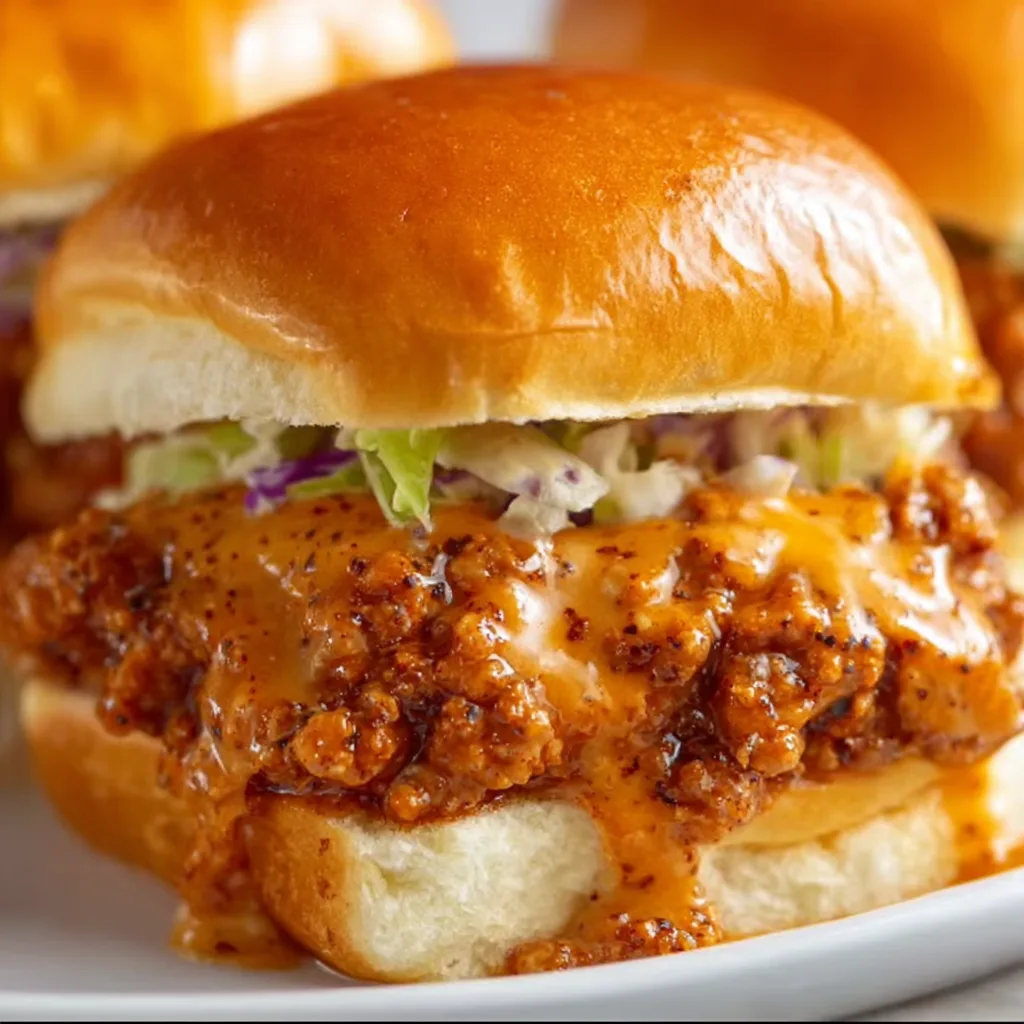
    Cajun Chicken Sloppy Joes bring the perfect balance of Louisiana heat and comfort food nostalgia to your dinner table. I discovered this recipe during a rainy weekend when I was craving something that would warm our kitchen with spicy aromas and satisfy my family’s hunger for bold flavors. The combination of tender chicken, zesty Cajun spices, and that gloriously messy sandwich experience makes this dish an absolute winner. It’s quicker than traditional beef versions but packs even more personality! If you love dishes with a kick like my One-Pot Cajun Chicken Shellbows Pasta, you’ll adore this twisted take on an American classic.

    Recipe

    Why You’ll Love This Cajun Chikcne Sloppy Joes

    Perfect Balance of Heat and Flavor

    These Cajun Chikcne Sloppy Joes deliver that just right level of spice that warms your mouth without overwhelming it. The holy trinity of Cajun cooking—bell peppers, onions, and celery—creates a fragrant base that perfumes your kitchen with irresistible aromas. I’ve carefully balanced the traditional Cajun spices with a touch of sweetness from tomato sauce and brown sugar that helps round out the heat. Even my spice-cautious mother-in-law went back for seconds! The ground chicken soaks up all these flavors beautifully, creating a lighter yet still indulgent sandwich filling.

    Quick Weeknight Wonder

    When the clock is ticking and hungry faces are staring, this recipe is my secret weapon. Unlike beef versions that need longer simmering, these Cajun Chikcne Sloppy Joes come together in just about 25 minutes from start to finish. The chicken cooks quickly while still developing deep flavor thanks to our powerhouse spice blend. I often prep the vegetables on Sunday during my meal prep session, which makes this practically a 15-minute meal on busy weeknights. Plus, the leftovers taste even better the next day as the spices have time to meld and intensify.

    Essential Tips & Tricks

    Mastering the Spice Blend

    Creating the perfect Cajun spice blend is crucial for authentic flavor. I recommend toasting your spices in a dry pan for 30 seconds before adding them to the chicken—this simple step awakens their essential oils and deepens the flavor profile dramatically. Don’t skimp on the paprika (use smoked if you have it) and cayenne, but adjust according to your heat preference. The secret ingredient that many miss is a dash of file powder (ground sassafras) which adds that distinctive earthiness. If you’re sensitive to heat, start with half the cayenne and taste as you go—you can always add more!

    Texture Perfection Techniques

    The ideal Cajun Chikcne Sloppy Joe should be moist and saucy but not swimming in liquid. After browning your chicken, don’t drain completely—those flavorful juices contribute to the final sauce. For perfect texture balance, simmer uncovered for the last 5 minutes to reduce excess moisture. If your mixture looks too dry, add chicken broth a tablespoon at a time. For thicker sauce, try my trick of adding 1-2 tablespoons of crushed crackers or breadcrumbs. This technique works beautifully in my Garlic Butter Steak Bites and Shrimp recipe too!

    Serving Ideas & Creative Variations

    Beyond Basic Buns

    While traditional burger buns work wonderfully, exploring different bread options elevates these Cajun Chikcne Sloppy Joes to new heights. Try brioche buns for a buttery, slightly sweet contrast to the spicy filling, or go for garlic Texas toast for an indulgent twist. For a lower-carb option, butter lettuce cups create a fresh, crunchy vessel. My personal favorite is serving the mixture over creamy grits or mashed potatoes with a sprinkle of green onions—it transforms the dish into a comforting bowl meal that’s perfect for colder evenings.

    Fusion Flavor Adventures

    Don’t be afraid to experiment with fusion elements to create your own unique version. Add creole cream cheese or a dollop of remoulade sauce for authentic Louisiana creaminess. For a Cajun-Asian fusion that my teenagers request weekly, mix in a tablespoon of hoisin sauce and top with quick-pickled vegetables. Mediterranean-inspired versions with feta and olives are surprisingly delicious too! For a complete Cajun feast, serve alongside my Loaded Cajun Seafood Stuffed Potatoes for a meal that’ll transport you straight to New Orleans.

    Storage & Troubleshooting Guide

    Keeping It Fresh

    These Cajun Chikcne Sloppy Joes actually improve with a bit of time as the flavors continue to develop. Store the chicken mixture separately from the buns in an airtight container for up to 4 days in the refrigerator. For longer storage, freeze flat in ziplock bags for up to 3 months—this allows for quick thawing and easy portion control. To reheat, add a splash of chicken broth to maintain moisture and warm slowly on the stovetop. I often make a double batch specifically to freeze half for those hectic nights when cooking from scratch isn’t possible.

    Fixing Common Issues

    If your Cajun Chikcne Sloppy Joes turn out too spicy, don’t panic! Balance the heat by stirring in a tablespoon of honey or a dollop of cooling sour cream right before serving. For mixtures that become too watery, simmer uncovered for a few extra minutes or add a cornstarch slurry (1 teaspoon cornstarch mixed with 1 tablespoon cold water). If the flavor seems flat, a splash of apple cider vinegar or hot sauce can brighten everything up. Remember that ground chicken can sometimes cook faster than beef, so watch carefully to prevent it from becoming dry.

    Frequently Asked Questions

    Can I use ground turkey instead of chicken for Cajun Chikcne Sloppy Joes?

    Absolutely! Ground turkey works beautifully as a substitute. Choose a blend with some dark meat for better moisture and flavor, and you may want to add an extra tablespoon of oil when cooking.

    How can I make this recipe less spicy for my kids?

    Reduce the cayenne pepper by half and omit the hot sauce. You can serve additional hot sauce on the side for adults who prefer more heat. The bell peppers still provide wonderful flavor without the burn.

    Can I make this recipe in a slow cooker?

    Yes! Brown the chicken and vegetables first, then transfer to a slow cooker with remaining ingredients. Cook on low for 3-4 hours. The texture will be slightly different but equally delicious.

    What sides pair well with these sloppy joes?

    Sweet potato fries, coleslaw, or corn on the cob complement these sandwiches perfectly. For a lighter option, a simple green salad with vinaigrette balances the richness of the dish.

    Is there a way to make Cajun Chikcne Sloppy Joes ahead for a party?

    Prepare the filling up to two days ahead and refrigerate. Reheat in a slow cooker on low setting, adding a splash of broth if needed. Serve with warm buns on the side for guests to assemble.

    Final Thoughts

    These Cajun Chikcne Sloppy Joes have become a staple in my meal rotation, bringing Louisiana flair to an American classic. There’s something magical about the way the spicy, savory chicken mixture contrasts with the soft bun, creating that perfect comfort food experience with a sophisticated twist. I love seeing the looks on my guests’ faces when they take their first bite—surprise followed by pure delight! Don’t forget to check out more of my favorite recipes on Pinterest for more inspiration. This Cajun chicken twist might just become your new favorite too!

  • Crispy Air Fryer Blooming Onion: Irresistibly Crunchy & Easy!

    Crispy Air Fryer Blooming Onion: Irresistibly Crunchy & Easy!

    Crispy Air Fryer Blooming Onion: Irresistibly Crunchy & Easy!

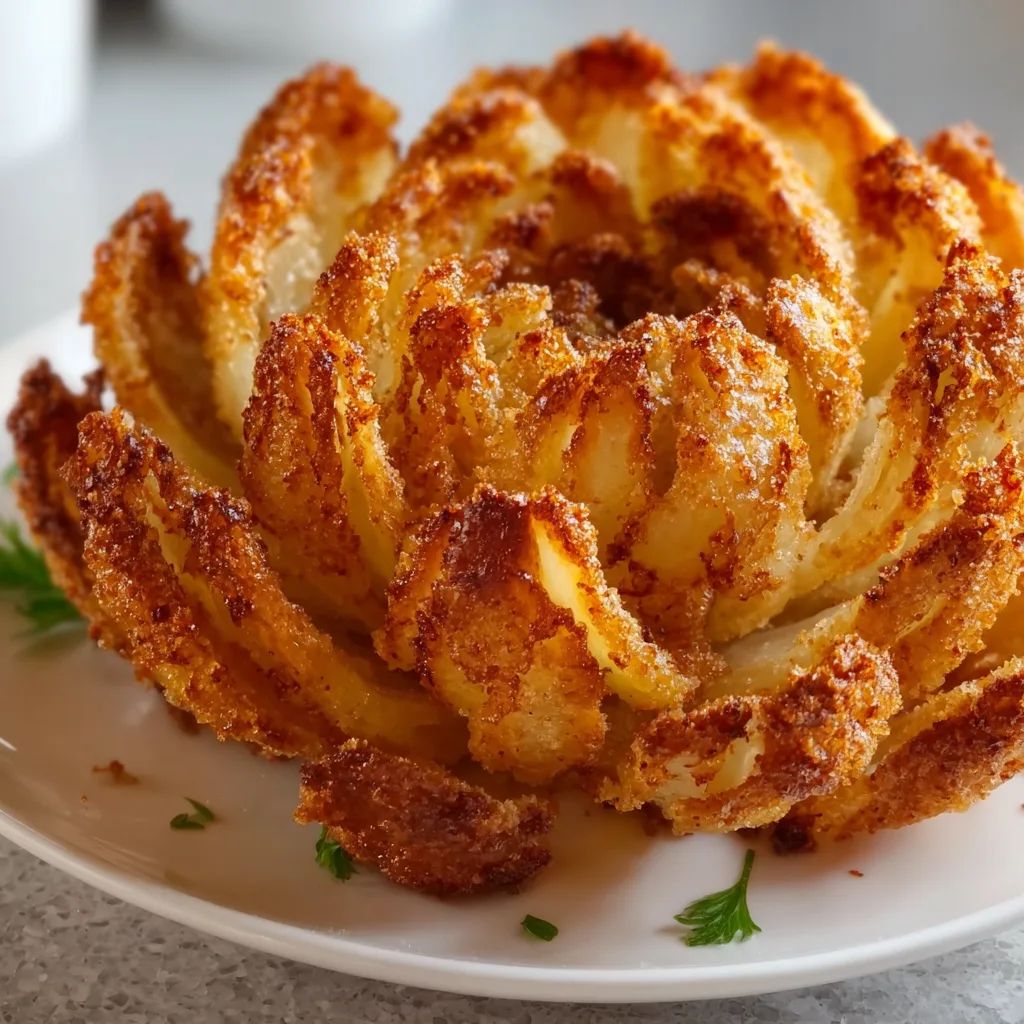
    Crispy Air Fryer Blooming Onion – that magical restaurant appetizer we all fight over – has finally found its way into my home kitchen, and I couldn’t be more thrilled to share this healthier version with you! The first time I made this showstopper at home, my kitchen filled with that irresistible savory aroma that had my family hovering nearby, waiting for that first crispy, golden bite. Using the air fryer cuts down on oil while still delivering that satisfying crunch we crave. If you’ve been hesitant to try making a blooming onion at home, this foolproof method will change your mind forever. Trust me, it’s easier than you think!

    Recipe

    Why You’ll Love This Crispy Air Fryer Blooming Onion

    A Healthier Take on a Restaurant Favorite

    The traditional blooming onion is delicious but often leaves me feeling a bit guilty after indulging. This air fryer version uses significantly less oil while still achieving that perfect golden crust we all crave. I was genuinely shocked the first time I made this – the petals were crispy on the outside, tender on the inside, and the flavor was spot-on! With just a light spray of oil and the magic of circulating hot air, you’ll get all the satisfaction of the deep-fried version with a fraction of the calories. Plus, there’s no messy oil to dispose of afterward!

    Impressive Yet Surprisingly Simple

    Don’t let the dramatic presentation fool you – creating a blooming onion at home is much easier than it looks! The most challenging part is simply cutting the onion properly, and I’ll walk you through that step by step. The first time I served this at a game day gathering, my friends couldn’t believe I’d made it myself. Their wide eyes as I placed it on the table made all the effort worthwhile! The air fryer does most of the work for you, transforming a humble onion into a conversation-starting centerpiece that everyone will gather around. It’s the perfect way to elevate any casual get-together.

    Essential Tips & Tricks

    Selecting and Preparing Your Onion

    The foundation of a perfect blooming onion starts with choosing the right onion. Look for large, round sweet onions like Vidalia or Spanish varieties with flat bottoms that will stand upright. I once tried using a regular yellow onion from my pantry and while it worked, the sweet varieties truly make a difference in flavor. When cutting, leave about ½ inch intact at the root end – this keeps your “bloom” together. I find it helpful to place the onion root-side up on a cutting board, make the first cut down the center, then rotate and continue making cuts between the existing ones until you have 16 sections.

    Coating Techniques for Maximum Crispiness

    The secret to achieving that restaurant-quality crunch lies in your battering technique. After cutting, gently open the “petals” and rinse under cold water to remove any loose pieces. Pat completely dry – moisture is the enemy of crispiness! For an extra crispy exterior, I recommend double-dipping: first in the seasoned flour mixture, then in the egg wash, and finally back in the flour mixture again. When I’m feeling extra, I’ll refrigerate the coated onion for 15-20 minutes before air frying, which helps the coating adhere better and creates even more texture.

    Serving Ideas & Creative Variations

    Dipping Sauces That Elevate Your Blooming Onion

    While the classic blooming onion sauce (a spicy mayo-horseradish blend) is always a winner, experimenting with different dipping options truly takes this appetizer to new heights. My family’s current favorite is a sriracha-honey mayo that brings just the right balance of heat and sweetness. For a tangier option, try a Greek yogurt-based sauce with lemon, dill, and garlic. I once served my blooming onion with three different dipping options arranged around it, and it became an interactive tasting experience that had everyone debating their favorites. The cool, creamy sauces provide the perfect contrast to the warm, crispy onion petals.

    Flavor Variations to Keep Things Interesting

    Don’t be afraid to play with different seasoning blends in your batter! While the traditional paprika-cayenne mix is delicious, I’ve had great success with everything from Italian herbs to taco seasoning. My personal favorite twist is adding a tablespoon of ranch seasoning mix to the flour coating – it adds a tangy, herbaceous note that pairs beautifully with the sweet onion. For heat lovers, try incorporating some chipotle powder like I use in my Crispy Hot Honey Feta Chicken. You can also experiment with different breadcrumbs – panko creates extra crunch, while seasoned breadcrumbs add another layer of flavor.

    Storage & Troubleshooting Guide

    Reheating for Maximum Crispiness

    Let’s be honest – a blooming onion is at its absolute peak freshness right after air frying. However, if you find yourself with leftovers (a rare occurrence in my house!), proper reheating is key. Never microwave unless you enjoy soggy results! Instead, preheat your air fryer to 350°F and reheat for 3-4 minutes. This revives much of the original crispiness without drying out the onion. I like to spritz the leftover petals with a tiny bit of oil spray before reheating to help restore that golden exterior. Remember that the texture won’t be quite as perfect as fresh, but it’s still delicious.

    Troubleshooting Common Issues

    If your blooming onion isn’t opening properly, the most likely culprit is that you didn’t cut deep enough toward the root end. Make sure you’re cutting about 80% of the way down through the onion, leaving just enough intact to hold it together. Another common issue is uneven cooking – if the outer petals are browning too quickly while the center remains underdone, simply cover the outer sections with small pieces of foil. If your coating is falling off during air frying, the batter might be too thick or the onion too wet. Pat the onion completely dry before coating, and make sure your egg wash isn’t too thin.

    Frequently Asked Questions

    What size air fryer do I need for a blooming onion?

    A 5-quart or larger air fryer works best for a medium-sized blooming onion. For smaller air fryers, consider making mini blooms using smaller onions or just cook the petals separately.

    Can I make a crispy air fryer blooming onion ahead of time?

    You can cut and prepare the onion up to 8 hours ahead, but for best results, coat and air fry just before serving. The crispy texture significantly diminishes when stored.

    What’s the best onion variety to use?

    Sweet onions like Vidalia, Walla Walla, or Spanish onions work best. Their natural sweetness caramelizes beautifully and balances the savory coating.

    How do I know when my blooming onion is done?

    Look for a golden brown exterior and test by gently pulling on an inner petal. It should be tender but still have slight resistance – typically 12-15 minutes at 375°F.

    Can I make this recipe gluten-free?

    Absolutely! Substitute all-purpose flour with a gluten-free flour blend and use gluten-free breadcrumbs. The crispy texture may vary slightly but still turns out delicious.

    Final Thoughts

    Creating a crispy air fryer blooming onion at home has become one of my favorite ways to impress guests without spending hours in the kitchen. There’s something magical about transforming a humble onion into a golden, crispy masterpiece that everyone gathers around. The air fryer method makes this indulgent treat more accessible for everyday enjoyment, not just special occasions. I hope you’ll give this recipe a try and experience the joy of pulling apart those perfectly seasoned petals! Don’t forget to share your creations with me on Pinterest – I love seeing your versions of this showstopper!

  • Tasty Cucumber Chickpea Dill Salad: Fresh, Zesty & Irresistible!

    Tasty Cucumber Chickpea Dill Salad: Fresh, Zesty & Irresistible!

    Tasty Cucumber Chickpea Dill Salad: Fresh, Zesty & Irresistible!

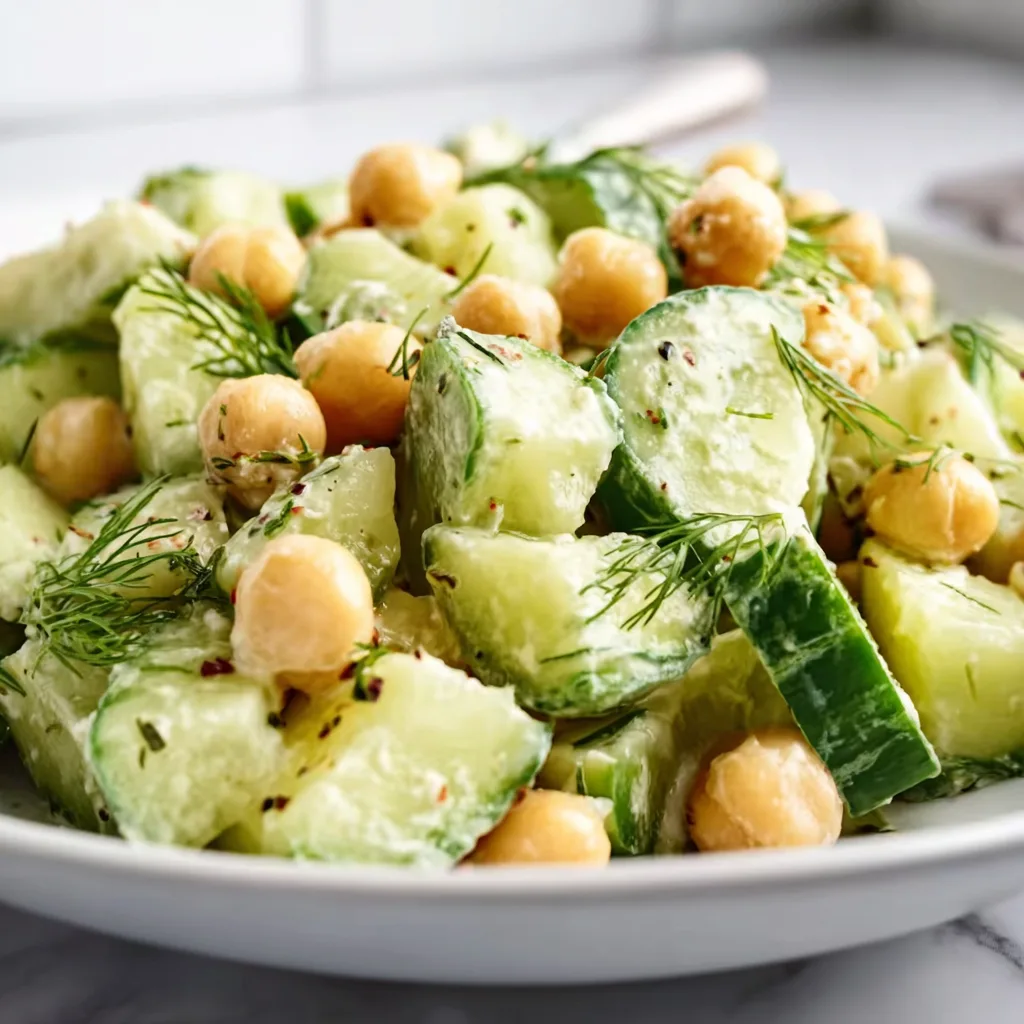
    This Tasty Cucumber Chickpea Dill Salad is my summer salvation on those sweltering afternoons when the kitchen feels like a sauna. The first time I made it, I was standing barefoot on cool tile, desperate for something refreshing yet substantial. The crisp snap of fresh cucumbers against the earthy chickpeas creates a perfect harmony that’s both satisfying and light. With bright dill weaving throughout and a tangy lemon dressing that makes everything sing, this salad has become my go-to for everything from quick lunches to potluck gatherings. The best part? It comes together in minutes but tastes like you spent hours.

    Recipe

    Why You’ll Love This Tasty Cucumber Chickpea Dill Salad

    Perfect Balance of Flavors and Textures

    There’s something magical about the combination of cool cucumbers and hearty chickpeas that makes this salad irresistible. The cucumbers provide that refreshing crunch that cools you down instantly, while the chickpeas deliver a satisfying protein punch that keeps hunger at bay. I love how the aromatic dill brings a garden-fresh brightness that elevates the whole dish. The zingy lemon dressing ties everything together with just the right amount of acidity. It’s like each bite tells a different story – sometimes cucumber-forward, sometimes chickpea-dominant – creating a texture adventure that keeps your palate engaged.

    Quick Preparation with Maximum Impact

    On days when cooking feels like climbing a mountain, this salad is my saving grace. It takes just 15 minutes from start to finish, yet delivers flavor that tastes like it developed for hours. I remember throwing this together for an impromptu backyard gathering when friends texted they were “in the neighborhood.” While they sipped drinks on the patio, I quickly diced cucumbers, drained chickpeas, and whisked the dressing. The compliments flowed as freely as the conversation! This salad proves that sometimes the simplest combinations create the most memorable meals. Plus, it’s naturally vegetarian and can easily be made vegan.

    Essential Tips & Tricks

    Cucumber Selection and Preparation

    The foundation of any great Tasty Cucumber Chickpea Dill Salad lies in how you handle your cucumbers. I prefer English cucumbers for their thinner skin and fewer seeds, though Persian cucumbers work beautifully too. The secret? After slicing, place your cucumbers in a colander, sprinkle with a pinch of salt, and let them sit for 10 minutes. This draws out excess moisture, preventing your salad from becoming watery later. For texture variety, I like to leave some cucumber pieces chunky while dicing others smaller. This creates little pockets of crunch throughout the salad that make each bite interesting and keeps the flavors balanced.

    Elevating Your Dressing Game

    The dressing is where this salad truly shines, transforming simple ingredients into something spectacular. Always use fresh lemon juice – the bottled stuff simply can’t compare to the bright, vibrant notes of freshly squeezed citrus. My personal touch is adding a tiny splash of honey to balance the acidity without making it sweet. When mixing your dressing, whisk in a small spoonful of Dijon mustard to help emulsify the oil and lemon juice, creating a silky texture that coats every component perfectly. For maximum flavor infusion, make the dressing first and let it sit while you prepare the other ingredients.

    Serving Ideas & Creative Variations

    Perfect Pairings for Every Occasion

    This versatile Tasty Cucumber Chickpea Dill Salad plays well with countless main dishes. For casual weeknight dinners, I serve it alongside grilled chicken or pan-seared fish for a complete meal that feels both nourishing and indulgent. It’s become my signature contribution to summer barbecues, where it provides a refreshing counterpoint to smokier, heavier options. The salad also makes a stunning bed for grilled halloumi cheese, creating an impressive vegetarian entrée in seconds. When hosting brunch, I’ve served smaller portions in lettuce cups as a beautiful starter that gets everyone talking. For more protein-packed meal ideas to pair with this salad, check out my Crispy Hot Honey Feta Chicken.

    Seasonal Adaptations and Add-ins

    The beauty of this salad lies in its adaptability through seasons and preferences. In summer, I fold in heirloom cherry tomatoes and fresh corn kernels for bursts of sweetness. Come fall, I’ll add diced apple and toasted walnuts for a heartier version with delightful textural contrast. For Mediterranean flair, crumble feta cheese and add kalamata olives – this variation always disappears first at potlucks! When I’m feeling fancy, I’ll add thinly sliced radishes for peppery crunch and visual appeal. For heat lovers in my family, I sometimes include a finely diced jalapeño that transforms the salad into something with gentle warmth that builds with each bite.

    Storage & Troubleshooting Guide

    Maintaining Freshness and Crunch

    To keep your Tasty Cucumber Chickpea Dill Salad at its peak freshness, store it properly by placing it in an airtight container in the refrigerator. The salad will stay crisp for up to 3 days, though the cucumbers will gradually release more moisture. My favorite trick is to store the components separately when planning ahead – keep the dressed chickpeas in one container and the cucumbers in another, then combine just before serving. If you’re making this for meal prep, add the herbs last minute to prevent wilting. For picnics or outdoor gatherings, I nestle the salad container in ice to maintain that refreshing temperature that makes this dish so appealing.

    Rescuing Common Salad Issues

    Even the most experienced cooks encounter salad challenges! If your salad becomes too watery after sitting, don’t panic. Simply drain the excess liquid or toss with a tablespoon of cooked quinoa or couscous to absorb the moisture while adding interesting texture. For salads that need flavor revival after refrigeration, a fresh squeeze of lemon and a sprinkle of flaky sea salt works wonders. If your dill has wilted, quickly refresh it by snipping new herbs over top. Found your salad too tangy? Balance it with a drizzle of good olive oil or a sprinkle of feta cheese. Remember that this forgiving recipe welcomes adjustments.

    Frequently Asked Questions

    Can I make Tasty Cucumber Chickpea Dill Salad ahead of time?

    Yes! Prepare it up to 24 hours ahead, but store the dressing separately and add it 30 minutes before serving. This prevents the cucumbers from becoming soggy while allowing flavors to meld beautifully.

    What can I substitute for fresh dill?

    Fresh mint or basil work wonderfully as alternatives. For dried herbs, use 1 teaspoon of dried dill instead of 1 tablespoon fresh, but add it to the dressing rather than sprinkling it on top.

    Are canned chickpeas okay to use?

    Absolutely! Rinse them thoroughly under cold water to remove excess sodium and starch. For extra flavor, try roasting drained chickpeas with olive oil and salt for 10 minutes before adding them.

    How can I make this salad more filling?

    Add cooked quinoa, farro, or pearl couscous for hearty grains. Diced avocado adds healthy fats, while grilled chicken or canned tuna transforms it into a complete protein-packed meal.

    Can this salad be frozen?

    I don’t recommend freezing this salad as cucumbers become mushy when thawed. If you must preserve ingredients, freeze only the dressed chickpeas and add fresh cucumbers and herbs after thawing.

    Final Thoughts

    This Tasty Cucumber Chickpea Dill Salad has become more than just a recipe in my kitchen—it’s a solution for busy days, unexpected guests, and moments when I crave something both nourishing and delightful. What I love most is watching people’s faces light up with that first bite, when the crisp cucumber, tender chickpeas, and aromatic dill create a moment of pure refreshment. Whether you make it exactly as written or add your own creative twist, this salad delivers big on flavor while keeping preparation beautifully simple. Find more inspiration for fresh, vibrant recipes on my Pinterest boards!

  • Ground Beef Burrito Bowl: Irresistible Cilantro Rice Flavor Bomb!

    Ground Beef Burrito Bowl: Irresistible Cilantro Rice Flavor Bomb!

    Ground Beef Burrito Bowl: Irresistible Cilantro Rice Flavor Bomb!

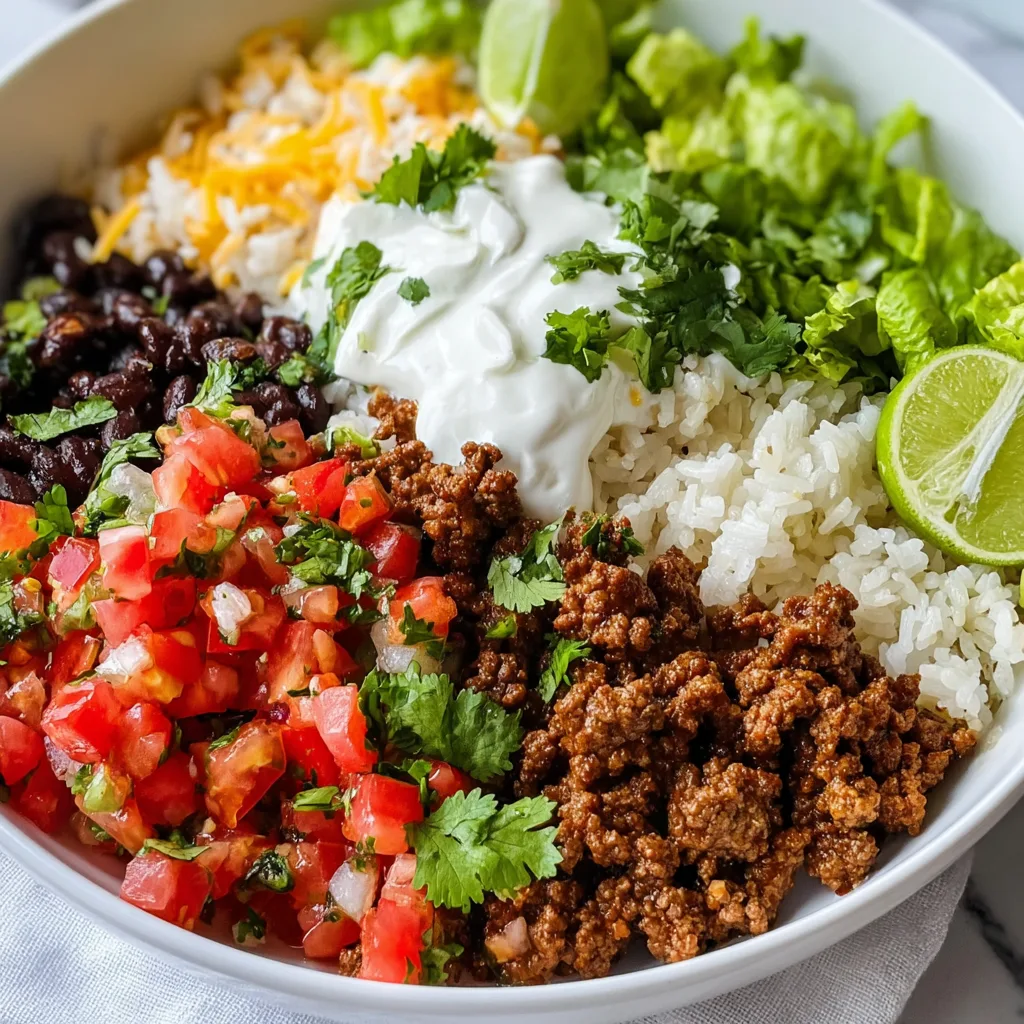
    Ground Beef Burrito Bowl With Cilantro Rice has become my absolute go-to weeknight dinner when I’m craving something flavorful but don’t want to spend hours in the kitchen. There’s something magical about that first bite—tender seasoned beef, fragrant cilantro rice, and all those colorful toppings coming together in perfect harmony. I discovered this recipe during my post-college days when my budget was tight but my cravings for restaurant-quality meals were strong. Now it’s a family favorite that never disappoints! If you love customizable meals that please everyone at the table, you’ll want to add this to your regular rotation.

    Recipe

    Why You’ll Love This Ground Beef Burrito Bowl With Cilantro Rice

    A Complete Meal in One Bowl

    This Ground Beef Burrito Bowl With Cilantro Rice truly delivers on both flavor and convenience. The combination of protein-packed beef and fluffy cilantro-infused rice creates a satisfying base, while the customizable toppings allow everyone to make it their own. I love how the warm spices blend with the bright, fresh elements—creating that perfect balance of comfort and zestiness. What makes this dish extra special is how it transforms simple ingredients into something that feels restaurant-worthy, but can be made in your kitchen in under 30 minutes. It’s that rare recipe that’s both impressive and practical.

    Customize to Your Heart’s Content

    What I adore most about these burrito bowls is their incredible flexibility. Start with the cilantro rice base and seasoned ground beef, then let your creativity run wild! Vegetarian guests? Swap the beef for black beans or roasted vegetables. Spice lovers can amp up the heat with extra jalapeños or a drizzle of hot sauce, while those with milder palates can focus on creamy avocado and cheese. My husband prefers his loaded with extra corn and salsa, while I pile on the lettuce and cilantro. This adaptability makes it perfect for family dinners where everyone has different preferences but still wants to share the same meal.

    Essential Tips & Tricks

    Perfect Cilantro Rice Every Time

    The secret to truly outstanding cilantro rice lies in a few simple techniques. First, rinse your rice thoroughly before cooking to remove excess starch and prevent clumping. For maximum flavor infusion, I like to toast the rice in a bit of oil before adding liquid—this simple step adds a wonderful nutty dimension. When adding the cilantro, wait until the rice is fully cooked, then fluff with a fork and fold in finely chopped cilantro along with a squeeze of lime juice. The residual heat will release the herb’s aromatic oils without turning it brown. This method ensures each grain remains distinct while carrying that fresh, vibrant cilantro flavor that elevates the entire bowl.

    Seasoning Your Ground Beef Like a Pro

    The heart of any great burrito bowl is perfectly seasoned ground beef, and achieving that restaurant-quality flavor is easier than you think. Start with quality ground beef (I prefer 85/15 for the right balance of flavor and juiciness), and don’t skip browning it properly. Let it develop a deep caramelization before breaking it up—this creates those delicious flavor-packed bits. My signature seasoning blend includes cumin, chili powder, garlic powder, oregano, and a pinch of cinnamon for depth. Add this to the beef after it’s browned, then splash in some beef broth and let it reduce—this creates a light sauce that clings to the meat and intensifies the flavor.

    Serving Ideas & Creative Variations

    Family-Style Burrito Bowl Bar

    Transform dinner into an interactive experience by setting up a DIY burrito bowl bar. Arrange each component in separate serving dishes—cilantro rice, seasoned ground beef, black beans, corn, diced tomatoes, shredded lettuce, cheese, sour cream, guacamole, and various salsas. Add some unexpected elements like pickled red onions or roasted peppers for a gourmet touch. This approach is perfect for entertaining or family meals where everyone can customize their creation. I started doing this for birthday dinners, and it’s become our most requested celebration meal! It pairs beautifully with homemade margaritas for adults and fruit agua frescas for the kids.

    Weekly Meal Prep Champion

    Ground Beef Burrito Bowls with Cilantro Rice make exceptional meal prep options that actually improve with time. Prepare all components on Sunday, then store them separately in containers. The flavors in the seasoned beef deepen overnight, while the rice maintains its texture when properly cooled before storing. For work lunches, layer ingredients strategically—rice on bottom, beef next, then cold toppings, with sauces in separate containers. This approach gives you five distinct meals that never feel repetitive, especially if you vary your toppings daily. I’ve converted countless colleagues to meal prepping with this versatile recipe that saves both money and mealtime decision fatigue.

    Storage & Troubleshooting Guide

    Keeping Components Fresh

    Proper storage is key to maintaining the quality of your burrito bowl components. Store the cooked ground beef in an airtight container in the refrigerator for up to 4 days—it actually develops more flavor overnight! The cilantro rice stays best when cooled completely before refrigerating and can last 3-4 days. Keep wet and dry ingredients separate until serving time—store cheese, sour cream, and salsas individually. For avocado or guacamole, add a thin layer of lime juice on top before sealing the container to prevent browning. If meal prepping, I recommend preparing fresh toppings like diced tomatoes and shredded lettuce no more than 2 days ahead for optimal freshness.

    Reviving Leftovers Like New

    Leftover burrito bowl ingredients can easily be transformed into meals that taste freshly made. To revive refrigerated rice, sprinkle it with a few drops of water before microwaving covered—this creates steam that restores moisture. For ground beef that’s dried out, add a splash of broth or water when reheating. If your toppings have wilted, refresh them with a quick ice water bath, then pat dry. My favorite way to repurpose leftovers is to wrap everything in a large tortilla for a burrito, or scramble with eggs for a delicious breakfast hash. You can also layer everything in a baking dish, top with cheese, and bake for a Mexican-inspired casserole that tastes nothing like leftovers!

    Frequently Asked Questions

    Can I make Ground Beef Burrito Bowl With Cilantro Rice ahead of time?

    Absolutely! Prepare components separately up to 3 days ahead. Store rice, beef, and toppings in separate containers. Reheat rice and beef before assembling, keeping fresh toppings cold until serving for the perfect temperature contrast.

    What’s the best rice for cilantro rice?

    Long-grain white rice like basmati or jasmine works best for cilantro rice. These varieties remain fluffy and separate after cooking, allowing the cilantro flavor to distribute evenly without becoming mushy.

    Can I use brown rice instead?

    Yes! Brown rice makes a nutritious substitute, though it requires longer cooking time (about 45 minutes). Adjust liquid accordingly and expect a nuttier flavor and chewier texture that pairs wonderfully with the seasoned beef.

    How can I make this recipe vegetarian?

    Replace ground beef with black beans, pinto beans, or plant-based meat alternatives. Season the beans with the same spice blend for authentic flavor. Adding roasted vegetables like bell peppers and zucchini adds heartiness.

    What’s the best cheese to use for burrito bowls?

    Freshly shredded cheese works best—pre-shredded has anti-caking agents that prevent proper melting. Try Monterey Jack for mild creaminess, cotija for authentic Mexican flavor, or pepper jack for a spicy kick.

    Final Thoughts

    This Ground Beef Burrito Bowl With Cilantro Rice has become more than just a recipe in my household—it’s a flexible framework for countless delicious meals that never fail to satisfy. What I love most is how it brings everyone to the table, excited to create their perfect bowl. The combination of fragrant rice, seasoned beef, and colorful toppings creates a sensory experience that feels special even on ordinary weeknights. Whether you’re feeding a family with diverse preferences or meal prepping for one, this versatile dish delivers big on flavor while keeping things simple. Don’t forget to check out more of my favorite recipes on Pinterest!

  • Old Chicago’s Italian Nachos Copycat Recipe That Will Blow Minds!

    Old Chicago’s Italian Nachos Copycat Recipe That Will Blow Minds!

    Old Chicago’s Italian Nachos Copycat Recipe That Will Blow Minds!

    Old Chicago’s Italian Nachos Copycat recipe brings the beloved restaurant appetizer right to your kitchen with crispy wonton chips layered with zesty Italian sausage, melty cheese, and all the fixings that make this dish irresistible. I stumbled upon this recipe years ago during a desperate craving when my favorite location closed down. The first time I recreated these nachos at home, my friends literally fought over the last bite! There’s something magical about that perfect combination of crispy, savory, and cheesy elements that makes this Old Chicago’s inspired dish absolutely addictive.

    Recipe

    Why You’ll Love This Old Chicago’s Italian Nachos Copycat

    Perfect Party Pleaser

    These Italian nachos are guaranteed to disappear within minutes at any gathering. The combination of crispy wonton chips, savory Italian sausage, and melty cheese creates an irresistible appetizer that’s both familiar and unique. I served these at my sister’s housewarming party, and three people asked for the recipe before the night was over! The beauty lies in how they perfectly balance textures—crispy chips, tender sausage, and gooey cheese—while delivering bold Italian flavors that everyone recognizes and loves.

    Restaurant Quality at Home

    Making this Old Chicago’s Italian Nachos Copycat at home gives you the freedom to customize while saving money. The restaurant version costs around $14, but the homemade version comes in under $10 and feeds more people! Plus, you control the quality of ingredients—I use local Italian sausage from my favorite butcher and freshly grated cheese instead of pre-packaged. The difference in flavor is remarkable, and there’s something deeply satisfying about recreating restaurant favorites in your own kitchen, especially when friends can’t tell the difference!

    Essential Tips & Tricks

    Perfecting Your Wonton Chips

    The foundation of great Italian nachos is perfectly crispy wonton chips. I learned the hard way that oil temperature is crucial—too cool and they’re greasy, too hot and they burn instantly. Maintain your oil at 350°F and work in small batches, frying for just 15-20 seconds per side. Pat them dry immediately after frying to maintain that satisfying crunch. For a healthier alternative, brush with olive oil and bake at 375°F for 7-9 minutes, watching carefully as they can go from golden to burnt in seconds. These chips also pair beautifully with creamy dips.

    Cheese Selection Matters

    The cheese blend makes or breaks these nachos. While Old Chicago uses a combination of mozzarella and pepper jack, I’ve found that adding a touch of provolone deepens the flavor profile. Grate your cheese fresh rather than using pre-shredded—the anti-caking agents in packaged cheese prevent that luscious melt we’re after. Layer half your cheese directly on the chips before adding toppings, then finish with the remaining cheese on top. This creates that perfect cheese pull moment when you grab a loaded chip!

    Serving Ideas & Creative Variations

    Impressive Presentation Styles

    Serve your Old Chicago’s Italian Nachos Copycat on a large platter for family-style dining or create individual portions in cast iron skillets for a restaurant-worthy presentation. I love arranging the nachos in a circular pattern, creating a “flower” of chips with toppings concentrated in the center—this ensures every chip gets some goodness! For special occasions, serve on a heated pizza stone to keep everything warm longer. Add a dramatic touch by finishing with a drizzle of balsamic glaze in a zigzag pattern across the top, just before serving with your favorite pizza.

    Exciting Flavor Variations

    Transform these nachos into different culinary experiences by switching up key ingredients. Try a Mediterranean version with lamb sausage, feta cheese, olives, and tzatziki drizzle. For spice lovers, incorporate pepperoncini, calabrian chilies, and spicy capicola alongside the Italian sausage. My vegetarian friends rave about my mushroom version—I sauté portobello and cremini mushrooms with Italian herbs until deeply caramelized for that meaty umami flavor without the meat. The wonton chips provide the perfect neutral base for endless creative possibilities!

    Storage & Troubleshooting Guide

    Proper Storage Solutions

    While fresh nachos are always best, you can store components separately to enjoy later. Keep fried wonton chips in an airtight container at room temperature for up to 3 days—add a paper towel to absorb excess moisture. The cooked Italian sausage mixture stays good refrigerated for up to 4 days. For quick assembly later, store prepared toppings in separate containers. If you must store assembled nachos, keep them uncovered in the refrigerator and reheat in a 350°F oven for 5-7 minutes until the cheese is bubbly again—though the chips won’t regain their original crispness.

    Fixing Common Problems

    If your wonton chips turn out too greasy, your oil likely wasn’t hot enough. Next time, use a thermometer to maintain 350°F. Soggy nachos? Layer chips more carefully, keeping wet ingredients (like tomatoes and peppers) toward the top rather than directly on chips. If cheese isn’t melting properly, it’s likely too thick or the wrong type—shred it finer and consider adding a more meltable cheese like fontina. For chips that brown too quickly when frying, your oil is too hot—reduce heat and test with a small piece before frying the batch.

    Frequently Asked Questions

    Can I make Old Chicago’s Italian Nachos Copycat ahead of time?

    Prepare components separately up to 2 days ahead—fry chips, cook sausage, and prep toppings. Store separately, then assemble and bake just before serving for the best texture and flavor experience.

    What’s the best cheese substitute for a dairy-free version?

    Use dairy-free mozzarella and pepper jack alternatives that specifically mention “good melting” on the package. Violife and Miyoko’s brands work particularly well for achieving that stretchy cheese pull.

    How can I make these nachos spicier?

    Add crushed red pepper flakes to the sausage while cooking, use hot Italian sausage instead of mild, incorporate diced jalapeños with the peppers, or drizzle with spicy pepper oil before serving.

    What’s the best dipping sauce for Old Chicago’s Italian Nachos Copycat?

    Serve with warm marinara, garlic aioli, pesto cream sauce, or my personal favorite—a blend of sour cream with Italian herbs and a dash of hot sauce.

    Can I use tortilla chips instead of wonton wrappers?

    Yes, though the texture and flavor will differ from the authentic Old Chicago’s version. If using tortilla chips, choose thicker restaurant-style chips that can support the hearty toppings without breaking.

    Final Thoughts

    This Old Chicago’s Italian Nachos Copycat recipe has become my go-to crowd-pleaser for everything from game days to casual dinner parties. There’s something magical about watching friends dive in, eyes widening at that first perfect bite of crispy wonton, savory sausage, and melty cheese. Don’t be surprised when this becomes your most requested recipe! The beauty lies in its versatility—make it exactly like the restaurant version or put your own creative spin on it. Either way, these Italian nachos bring that special restaurant experience right to your table. Find more of my recipes on Pinterest!

  • Crab Rangoon Pizza: Irresistible, Crunchy, Creamy Flavor Explosion!

    Crab Rangoon Pizza: Irresistible, Crunchy, Creamy Flavor Explosion!

    Crab Rangoon Pizza: Irresistible, Crunchy, Creamy Flavor Explosion!

    Crab Rangoon Pizza combines two beloved favorites into one irresistible dish that’s guaranteed to wow your taste buds! This fusion masterpiece takes the creamy, savory filling of crab rangoon—that addictive appetizer we all fight over at Chinese restaurants—and transforms it into a mouthwatering pizza topping. The first time I made this for my family game night, the entire pizza disappeared in minutes, with everyone reaching for seconds that didn’t exist! The contrast between the crispy crust, velvety cream cheese spread, and sweet chunks of crab creates a flavor explosion that’s both familiar and excitingly new.

    Recipe

    Why You’ll Love This Crab Rangoon Pizza

    Perfect Party Pleaser

    This Crab Rangoon Pizza is an absolute showstopper at gatherings! The combination of creamy, tangy cream cheese, sweet crab meat, and crispy wonton strips creates a unique flavor profile that guests can’t stop talking about. I served this at my sister’s housewarming party, and it became the conversation piece of the evening. The beautiful presentation with those vibrant green onions scattered on top makes it Instagram-worthy, while the familiar-yet-exotic flavors appeal to both adventurous eaters and comfort food lovers alike. Plus, it’s substantial enough to satisfy hungry guests without being too heavy.

    Quick Weeknight Wonder

    On busy weeknights when you’re craving something special but don’t have hours to spend in the kitchen, this Crab Rangoon Pizza comes to the rescue! Using pre-made pizza dough cuts your prep time dramatically, and the cream cheese spread comes together in minutes. I’ve made this on Wednesday nights when my energy is flagging, and it always revives my midweek cooking enthusiasm. The hands-on time is minimal—just mix, spread, and bake—but the results taste like you spent hours crafting a gourmet meal. The combination of convenience and wow-factor makes this a recipe you’ll return to again and again.

    Essential Tips & Tricks

    Perfecting Your Crust

    The foundation of an exceptional Crab Rangoon Pizza is getting that perfect crust that’s crispy on the outside yet chewy inside. I recommend pre-baking your dough for 3-5 minutes before adding toppings to prevent sogginess from the cream cheese mixture. For an authentic touch, brush the outer edge with sesame oil and sprinkle with sesame seeds before that final bake. Temperature matters tremendously here—a hot oven (425°F) creates that ideal texture. If you’re feeling adventurous, try a deep dish meat lovers pizza pie style base for an even heartier version!

    Balancing Flavors

    The magic of Crab Rangoon Pizza lies in the perfect balance between creamy, savory, sweet and tangy elements. When mixing your cream cheese spread, room temperature cream cheese is non-negotiable for smooth blending. Add a splash of rice vinegar for that subtle tang that makes traditional crab rangoon so addictive. Don’t skimp on the green onions—they provide essential brightness that cuts through the richness. For the crab itself, lump crab meat provides the best texture and flavor, though imitation works in a pinch. Remember that a light hand with garlic prevents overpowering the delicate crab flavor.

    Serving Ideas & Creative Variations

    Perfect Pairings

    Serve your Crab Rangoon Pizza with complementary sides that enhance its Asian-inspired flavors. A simple cucumber salad dressed with rice vinegar and sesame oil provides a refreshing contrast to the rich pizza. Sweet chili sauce served on the side offers a delightful dipping option for those who enjoy a hint of heat. For beverages, a crisp Riesling or light Japanese beer beautifully balances the creamy, seafood notes. When I host dinner parties, I often pair this with crispy cilantro lime chicken sandwiches as an alternative for guests who might not enjoy seafood—the flavor profiles complement each other wonderfully!

    Creative Twists

    Don’t be afraid to put your personal spin on this Crab Rangoon Pizza with some creative variations! Try a wasabi cream cheese base for those who enjoy a hint of heat, or add thinly sliced water chestnuts for extra crunch. For a luxurious upgrade, scatter a few cooked shrimp alongside the crab meat. A drizzle of unagi sauce (eel sauce) adds wonderful caramelized sweetness. For a fun appetizer version, use mini naan breads or English muffins as the base to create bite-sized pizzas. My favorite variation includes a sprinkle of furikake seasoning for an authentic Japanese twist.

    Storage & Troubleshooting Guide

    Proper Storage

    Crab Rangoon Pizza is best enjoyed fresh from the oven when the contrast between the crispy crust and creamy topping is at its peak. If you do have leftovers, store them in an airtight container in the refrigerator for up to two days. To reheat, avoid the microwave which will make the crust soggy. Instead, place slices on a baking sheet in a 350°F oven for 5-7 minutes until heated through. For make-ahead preparation, you can mix the cream cheese topping up to 24 hours in advance and store it covered in the refrigerator, bringing it to room temperature before spreading on your dough.

    Common Pitfalls

    The most common issue with Crab Rangoon Pizza is a soggy middle. To prevent this, don’t overload the center with too much cream cheese mixture. Spread it evenly, leaving a half-inch border around the edge. Another frequent problem is burning the wonton strips—these should be added during the last few minutes of baking or even after the pizza comes out of the oven. If your cream cheese mixture seems too thick to spread easily, add a tablespoon of sour cream to loosen it. And remember that seasoning is crucial—taste your cream cheese mixture before spreading it on the dough to ensure it has enough salt and pepper.

    Frequently Asked Questions

    Can I use imitation crab for Crab Rangoon Pizza?

    Yes! While real crab meat provides the best flavor, imitation crab (surimi) works well and is more budget-friendly. Chop it finely and mix with a dash of fish sauce to enhance its seafood flavor.

    How do I prevent my Crab Rangoon Pizza from getting soggy?

    Pre-bake your crust for 3-5 minutes before adding toppings, don’t overload with cream cheese mixture, and ensure your oven is properly preheated to 425°F for a crisp result.

    Can I make this Crab Rangoon Pizza ahead of time for a party?

    Prepare components separately—pre-bake the crust slightly and refrigerate, mix the cream cheese topping and store covered. Assemble and finish baking just before serving for best results.

    What’s the best dipping sauce for Crab Rangoon Pizza?

    Sweet chili sauce is traditional and delicious, but duck sauce, sweet and sour, or even a sriracha-honey blend work beautifully with the creamy, seafood flavors.

    What’s the secret to authentic Crab Rangoon Pizza flavor?

    The key is balancing cream cheese with subtle seasonings like garlic, green onions, and a touch of Worcestershire sauce, plus using quality crab meat and adding crispy wonton strips for texture.

    Final Thoughts

    This Crab Rangoon Pizza represents everything I love about fusion cooking—it takes familiar flavors and transforms them into something excitingly new. The combination of crispy crust, creamy filling, and sweet crab creates a memorable meal that bridges culinary traditions. Whether you’re hosting friends or treating yourself to a special dinner, this recipe delivers both comfort and sophistication. Don’t forget to check out more creative pizza ideas on Pinterest for endless inspiration! The Crab Rangoon Pizza might just become your new signature dish.