Category: Lunch

Easy lunch ideas for busy days. Simple, quick recipes with fresh flavor and satisfying meals you can enjoy at home or on the go.

  • Crispy Zucchini Rings Recipe with Irresistible Creamy Dip!

    Crispy Zucchini Rings Recipe with Irresistible Creamy Dip!

    Crispy Zucchini Rings Recipe with Irresistible Creamy Dip!

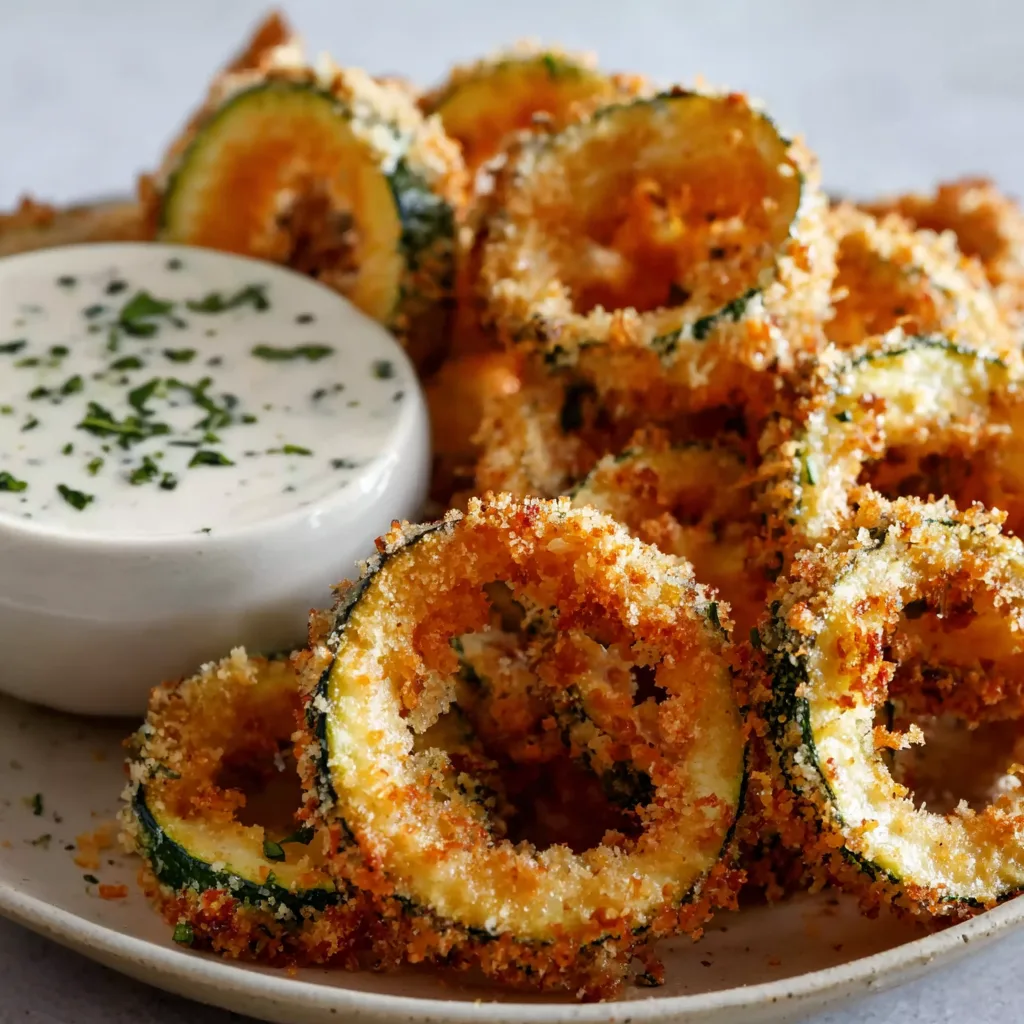
    Crispy Zucchini Rings with Creamy Dip have completely transformed my appetizer game, friends! There’s something magical about that perfect crunch giving way to tender zucchini inside, especially when paired with a cooling dip that makes every bite sing. I first made these for my sister’s backyard gathering last summer, and they disappeared faster than I could refill the platter! The beauty lies in their simplicity—just a few pantry staples transform humble zucchini into a crowd-pleasing snack that even veggie-skeptics can’t resist. Let me show you how to make these irresistible rings that’ll have everyone asking for your secret recipe.

    Recipe

    Why You’ll Love This Crispy Zucchini Rings with Creamy Dip

    Perfect Texture Contrast

    The ultimate crunch factor is what makes these zucchini rings so addictive! The outside develops this gorgeous golden coating that shatters when you bite into it, revealing the tender zucchini inside. I’m all about that textural magic. The panko breadcrumbs are the real hero here—they create a lighter, airier coating than regular breadcrumbs. And that moment when they’re fresh from the fryer? Pure bliss! The zucchini itself stays just firm enough without becoming soggy, creating that perfect balance that keeps you reaching for “just one more.”

    Quick Prep, Big Flavor

    Would you believe these Crispy Zucchini Rings with Creamy Dip come together in under 30 minutes? That’s my kind of appetizer! The simple seasoning blend wakes up the mild zucchini with just the right amount of flavor—garlic powder, paprika, and a touch of cayenne for those who like a gentle kick. What I adore most is how the natural sweetness of the zucchini shines through. The creamy dip counters with cool tanginess that makes each bite completely irresistible. It’s that perfect balance of effort-to-reward that makes this recipe a keeper.

    Essential Tips & Tricks

    Perfecting Your Batter

    Getting that dream coating on your Crispy Zucchini Rings starts with proper preparation. I’ve learned (the hard way!) that patting the zucchini slices dry with paper towels is absolutely non-negotiable. Extra moisture is the enemy of crispiness! For the batter, keep one hand for dry ingredients and one for wet to avoid the dreaded “club fingers” situation. My secret weapon? A pinch of baking powder in the flour mixture—it creates tiny air pockets that make the coating extra light. And don’t rush the three-step breading process—it’s what builds that perfect crust that’ll stay crispy.

    Frying for Maximum Crispiness

    The key to perfectly crisp zucchini rings lies in maintaining the right oil temperature—365°F to 375°F is your sweet spot. Too cool and they’ll absorb oil like a sponge; too hot and they’ll burn before cooking through. I always fry in small batches to avoid crowding, which drops the oil temperature. After frying, transfer to a wire rack instead of paper towels—this prevents steam from softening that beautiful crust we worked so hard for! Listen for that sizzle when you drop them in—it’s the sound of crispy perfection in the making.

    Serving Ideas & Creative Variations

    Beyond the Basic Dip

    While the classic creamy dip is heavenly, these Crispy Zucchini Rings deserve a dip wardrobe! I love offering a trio of options: the traditional herb-spiked sour cream, a spicy sriracha mayo that brings heat, and a bright lemon-garlic aioli that cuts through the richness. For a Mediterranean twist, try tzatziki with fresh cucumber and dill. These rings also pair beautifully with marinara for an Italian vibe, similar to my Crispy Chicken Parmesan Zucchini Boats. The dips can be made a day ahead, which is perfect when you’re entertaining and want to minimize day-of prep.

    Seasonal Adaptations

    These versatile rings transform beautifully with the seasons! In summer, I love adding fresh garden herbs to both the coating and dip—basil, parsley, and chives are my go-to trio. For fall gatherings, warming spices like smoked paprika and a pinch of cumin create a cozy flavor profile. You can even swap half the zucchini for yellow squash to create a colorful platter. During holiday seasons, I’ll add cranberry sauce as an unexpected sweet-tart dipping option. The basic technique stays the same, but these simple tweaks keep the recipe feeling fresh and exciting all year round.

    Storage & Troubleshooting Guide

    Keeping That Crunch

    Let’s be honest—these Crispy Zucchini Rings with Creamy Dip are at their absolute best when freshly made. But if you find yourself with leftovers (a rare occurrence in my house!), store them uncovered in the refrigerator for up to 2 days. To revive their crispiness, avoid the microwave at all costs! Instead, place them on a baking sheet in a 375°F oven for 5-7 minutes until they’re heated through and the coating crisps up again. The dip can be stored separately in an airtight container for up to 4 days—just give it a good stir before serving.

    Troubleshooting Common Issues

    The most frequent problem with zucchini rings is soggy coating, which usually happens when the zucchini releases moisture during cooking. My foolproof solution? After slicing, sprinkle the rings with salt and let them sit for 15 minutes before patting thoroughly dry—this draws out excess moisture. If your coating isn’t sticking properly, make sure your flour layer is complete before dipping in egg, and that your egg mixture isn’t too thin. For pale rings that lack that golden color, your oil likely isn’t hot enough. Use a thermometer to maintain that perfect 365°F-375°F range for Instagram-worthy results.

    Frequently Asked Questions

    Can I bake these Crispy Zucchini Rings instead of frying?

    Yes! Arrange them on a parchment-lined baking sheet, spray with cooking oil, and bake at 425°F for 15-18 minutes, flipping halfway. They won’t be quite as crispy but still delicious and healthier.

    Why are my zucchini rings soggy?

    Excess moisture is the culprit. Salt the zucchini slices and let them sit for 15 minutes, then pat thoroughly dry before coating. Also ensure your oil is hot enough (365°F-375°F).

    Can I make these ahead for a party?

    You can prepare the dip and slice the zucchini (store in water) a day ahead, but coat and fry just before serving for best results.

    What’s the best thickness for zucchini rings?

    Aim for ¼-inch thick slices. Too thin and they’ll become floppy; too thick and the coating will burn before the zucchini cooks through.

    What can I serve with Crispy Zucchini Rings with Creamy Dip?

    They’re perfect alongside grilled meats, burgers, or as part of an appetizer spread with other finger foods like mozzarella sticks or chicken wings.

    Final Thoughts

    These Crispy Zucchini Rings with Creamy Dip have earned their place in my entertaining rotation for good reason—they’re that perfect balance of impressive yet achievable. There’s something so satisfying about transforming a humble vegetable into something that disappears in minutes! The contrast between the crunchy exterior and tender zucchini creates that “just one more” quality that makes them irresistible. I’d love to see your creations if you make them—tag me on Pinterest so I can admire your golden rings of deliciousness!
  • Fried Falafel with Zesty Herb Infusion That Will Blow Your Mind!

    Fried Falafel with Zesty Herb Infusion That Will Blow Your Mind!

    Fried Falafel with Zesty Herb Infusion That Will Blow Your Mind!

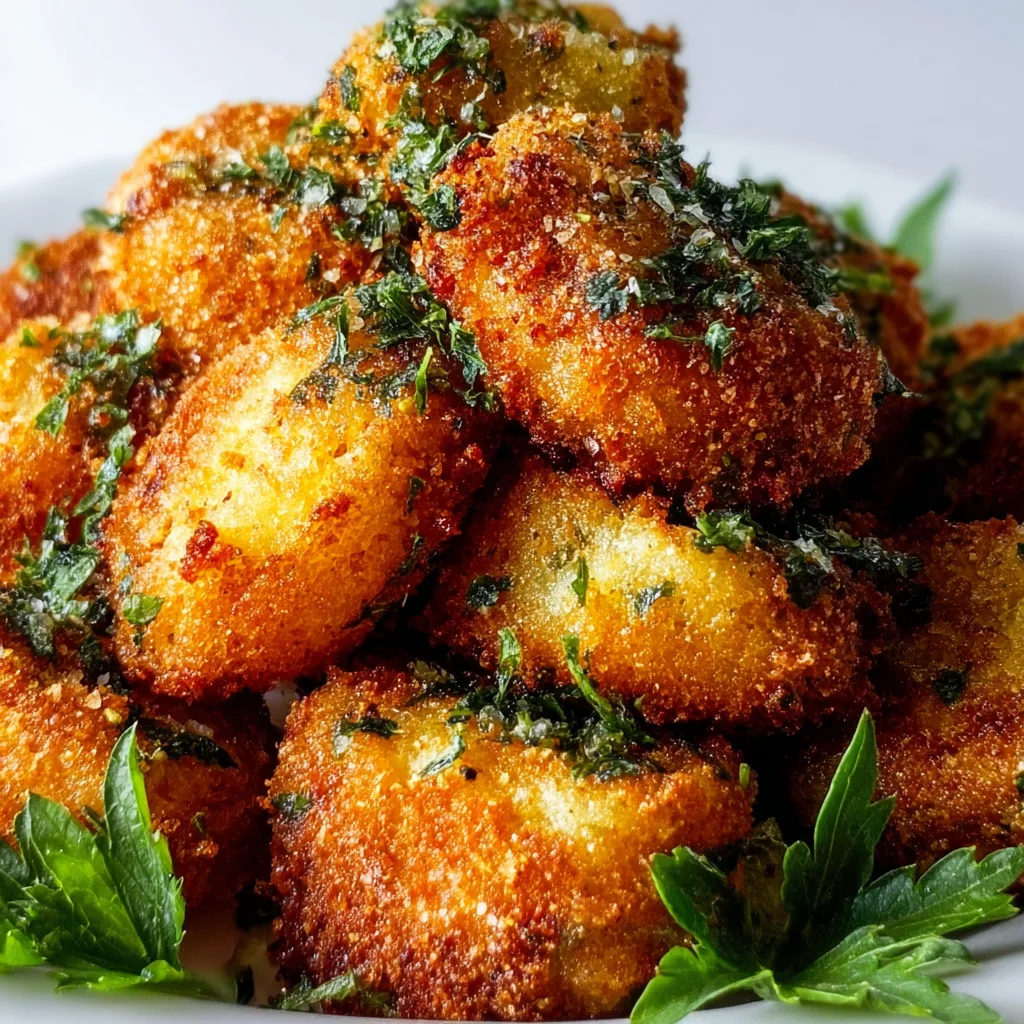
    Fried Falafel with Zesty Herb Infusion has been my obsession ever since that magical summer evening in Athens. The crispy exterior giving way to a fragrant, herb-packed interior creates a texture contrast that’s simply irresistible. I’ve spent years perfecting this recipe, balancing traditional techniques with my own twist of fresh herb infusion that elevates these humble chickpea patties into something extraordinary. Trust me when I say these aren’t your average falafels—they’re crispy little flavor bombs that will transport your taste buds straight to the Mediterranean. Ready to transform your kitchen into a Middle Eastern street food haven? Let’s get frying! Check out my other Mediterranean-inspired recipes for more culinary adventures.

    Recipe

    Why You’ll Love This Fried Falafel with Zesty Herb Infusion

    Perfect Texture Combination

    The magic of these falafels lies in their incredible texture contrast—crunchy golden exterior giving way to a tender, herb-flecked interior that practically melts in your mouth. I’ve tested countless methods, and this recipe nails that perfect balance every time. The secret? Dried chickpeas (never canned!) soaked overnight, then pulsed with fresh herbs until just right. Not too fine, not too chunky. That overnight soak is non-negotiable—it’s what gives these falafels their authentic texture that makes you close your eyes with that first satisfying bite. Trust me, your patience will be rewarded!

    Flavor Explosion in Every Bite

    These aren’t just any falafels—they’re little green-speckled flavor bombs bursting with zesty herbs and warming spices. The combination of cilantro, parsley, mint, and dill creates a garden-fresh brightness that dances with earthy cumin and coriander. I remember serving these at my sister’s birthday gathering—everyone kept asking, “What’s in these?!” with wide eyes after their first bite. The zesty herb infusion cuts through the richness of the fried exterior, creating this perfect balance that keeps you coming back for “just one more.” It’s the kind of recipe that ruins restaurant falafels for you forever!

    Essential Tips & Tricks

    Perfecting Your Falafel Mixture

    The key to exceptional falafels starts with the right consistency in your mixture. After soaking dried chickpeas overnight, drain thoroughly and pat dry with paper towels before processing. When pulsing, stop frequently to scrape down the sides—you’re aiming for a coarse meal texture, never a smooth paste. The mixture should hold together when pressed but still show tiny bits of chickpeas and herbs. If it’s too wet, add a tablespoon of chickpea flour; too dry, a few drops of water. I learned this balance through many (delicious) failures until finding that sweet spot where the patties hold together perfectly during frying.

    Frying Technique for Golden Perfection

    Temperature control is everything when frying falafels. Heat your oil to 350°F (175°C) and maintain it there—too hot and they’ll burn outside while remaining raw inside; too cool and they’ll absorb oil and become greasy. Use a thermometer for precision and fry in small batches to avoid temperature drops. The perfect falafel should sizzle immediately when it hits the oil and turn golden brown in about 3-4 minutes. I like to keep my first batch warm in a 200°F oven while frying the rest, ensuring everyone gets that fresh-from-the-fryer experience. For more frying tips, check out my Crispy Fried Oyster Mushrooms recipe!

    Serving Ideas & Creative Variations

    Traditional and Modern Serving Styles

    Serve these crispy gems piping hot for maximum flavor impact! Traditional presentation includes stuffing them into warm pita pockets with tahini sauce, fresh tomatoes, cucumbers, and pickled turnips. For a modern twist, create a falafel bowl with quinoa or rice, topped with hummus, tzatziki, and a sprinkle of sumac. My personal favorite weekend brunch? Falafel benedict—crispy falafels topped with poached eggs and lemony hollandaise. The herb-infused centers pair beautifully with the rich sauce, creating a memorable flavor combination that’s become a requested specialty among my friends.

    Exciting Flavor Adaptations

    While the classic herb blend is divine, don’t be afraid to experiment with regional variations! Try a Moroccan twist with preserved lemon and olives mixed into your herb blend, or go Greek with extra dill and a touch of oregano. For heat lovers, incorporate jalapeños or Aleppo pepper flakes into your mixture—the spice plays beautifully against the cooling herbs. My recent obsession is adding roasted garlic and lemon zest to the base recipe, which adds incredible depth. These variations pair wonderfully with my Creamy Cauliflower Carrot Soup for a complete Mediterranean-inspired meal that will transport you straight to a seaside taverna.

    Storage & Troubleshooting Guide

    Preserving Freshness and Crispiness

    Falafels are best enjoyed fresh, but proper storage can maintain their delightful texture. For leftovers, cool completely before refrigerating in an airtight container lined with paper towels to absorb excess moisture. They’ll keep for up to 3 days. To reheat, avoid the microwave which makes them soggy—instead, place in a 350°F oven for 5-7 minutes until heated through and crispy again. You can also freeze uncooked falafel mixture in patty form for up to a month. I like to make double batches, freezing half on a parchment-lined tray before transferring to freezer bags for quick weeknight meals.

    Solving Common Falafel Problems

    If your falafels are falling apart during frying, your mixture is likely too wet or too coarsely ground. The solution? Add 1-2 tablespoons of chickpea flour as a binding agent, or pulse the mixture a few more times. For falafels that aren’t crisping properly, your oil temperature may be too low—always verify with a thermometer. If they’re browning too quickly but remaining raw inside, your oil is too hot or your patties are too thick. I once saved a too-wet mixture by refrigerating it for 30 minutes, which helped it firm up beautifully. Remember that perfect falafels come with practice—each batch teaches you something new!

    Frequently Asked Questions

    Can I use canned chickpeas for this Fried Falafel with Zesty Herb Infusion?

    No, canned chickpeas are too soft and contain too much moisture, resulting in mushy falafels. Always use dried chickpeas soaked overnight but not cooked for authentic texture.

    How do I know when the oil is the right temperature?

    Drop a small piece of falafel mixture into the oil—it should sizzle immediately and float to the surface. Ideally, use a thermometer and maintain 350°F (175°C).

    Can I bake these falafels instead of frying?

    Yes, though texture will differ. Brush with olive oil and bake at 375°F for 25-30 minutes, flipping halfway. They’ll be less crispy but still delicious.

    Why are my falafels dry inside?

    Your mixture might be too fine or overprocessed. Maintain some texture by pulsing just until ingredients hold together, and don’t skip the fresh herbs.

    How far in advance can I prepare the mixture?

    The mixture can be refrigerated for up to 24 hours before frying. This actually improves flavor as the herbs infuse more deeply into the chickpeas.

    Final Thoughts

    This Fried Falafel with Zesty Herb Infusion recipe represents everything I love about cooking—transforming simple ingredients into something magical through technique and fresh flavors. The contrast between the crispy exterior and herb-packed interior creates that perfect bite that keeps you coming back for more. Whether served traditionally in pita or as part of your modern Mediterranean feast, these falafels bring a touch of authentic street food magic to your table. I’d love to see your creations on Pinterest—tag me and share your herb combinations and serving styles!

  • Crispy Southwest Egg Rolls: Irresistibly Crunchy & Flavor-Packed!

    Crispy Southwest Egg Rolls: Irresistibly Crunchy & Flavor-Packed!

    Crispy Southwest Egg Rolls: Irresistibly Crunchy & Flavor-Packed!

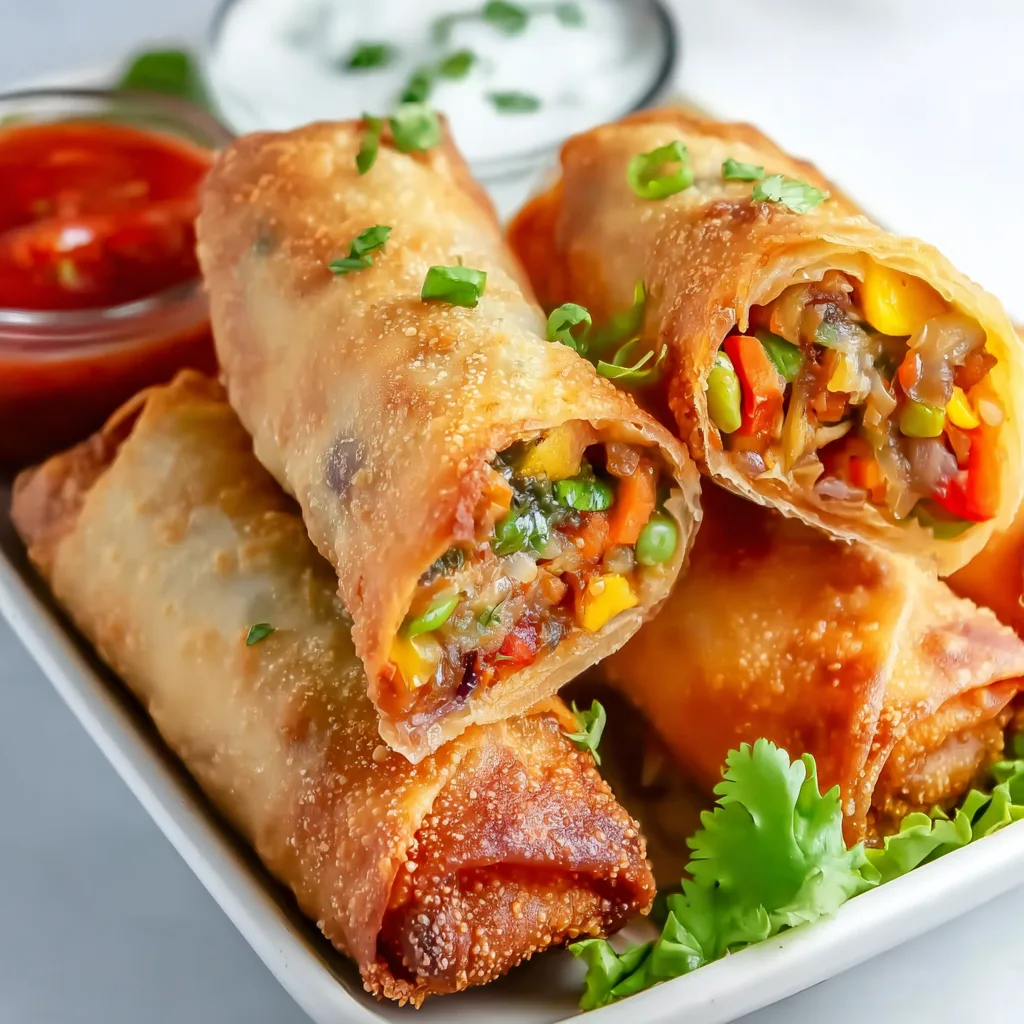
    Crispy southwest egg rolls have become my absolute obsession this season! There’s something magical about that first bite—the satisfying crunch giving way to a warm, spicy filling that hits all the right notes. I discovered these beauties at a friend’s game night and immediately needed to recreate them at home. The combination of seasoned chicken, black beans, corn, and melty cheese wrapped in a crispy shell is pure comfort food perfection. When my kitchen fills with that unmistakable aroma of southwest spices, I know I’m about to serve something that’ll have everyone asking for the recipe. If you love buffalo chicken quesadillas, these egg rolls will be your new favorite!

    Recipe

    Why You’ll Love These Crispy Southwest Egg Rolls

    Perfect Texture Contrast

    The textural magic of these egg rolls is what makes them truly special. The exterior achieves that golden-brown crispiness that makes your teeth sink in with the most satisfying crackle. Meanwhile, the interior stays wonderfully tender and moist. I’ve found the secret is patting the filling ingredients dry before mixing—this prevents soggy wrappers! The combination of creamy cheese, tender chicken, and the slight pop from the corn kernels creates a textural symphony that keeps you coming back for “just one more.” My husband claims he can identify my egg rolls blindfolded just by that distinctive crunch!

    Make-Ahead Convenience

    One of my favorite aspects of these crispy southwest egg rolls is their incredible meal prep potential. You can prepare the filling up to two days ahead and store it covered in the refrigerator. When you’re ready to assemble, the rolling process becomes quick and effortless. You can even roll them all and freeze them uncooked for up to three months! This makes them perfect for unexpected guests or busy weeknights when cooking from scratch feels impossible. I always keep a batch in my freezer for those “nothing in the fridge” emergencies that inevitably happen on Thursday nights.

    Essential Tips & Tricks

    Wrapping Technique Mastered

    The key to perfectly sealed egg rolls is all in the wrapping technique. Start by placing the wrapper diamond-style with a point facing you. Add about 2-3 tablespoons of filling just below the center line. Fold the bottom point up over the filling, then fold in the sides tightly. Roll upward, keeping everything snug, and seal the final point with a bit of water or egg wash. Don’t overfill—this is the most common mistake! When I first started making these, mine would burst open during cooking until I learned the “less is more” approach with filling. Now they come out picture-perfect every time!

    The Perfect Fry (or Bake!)

    Achieving that golden-brown exterior requires the right cooking method. For traditional frying, maintain your oil at 350°F—too hot and they’ll burn before cooking through, too cool and they’ll absorb too much oil. Use a thermometer for precision! If you prefer baking, brush them lightly with oil and bake at 425°F for 15-20 minutes, flipping halfway. For air fryer enthusiasts like me, spray with a little oil and cook at 375°F for about 8 minutes, turning halfway. This method gives you that crispy exterior with less oil, similar to these crispy garlic air fryer broccoli results!

    Serving Ideas & Creative Variations

    Dipping Sauce Pairings

    The right dipping sauce elevates these crispy southwest egg rolls to restaurant-quality status. My go-to is a simple avocado crema—blend ripe avocado with sour cream, lime juice, cilantro, and a pinch of salt until smooth. For heat lovers, mix mayo with chipotle peppers in adobo sauce and a squeeze of lime. Ranch dressing with a few dashes of hot sauce is always a crowd-pleaser at parties. I’ve even served them with mango salsa for a sweet-spicy contrast that my guests still talk about months later. The tanginess cuts through the richness perfectly!

    Creative Filling Variations

    While the classic filling is amazing, these egg rolls welcome creative adaptations! For a breakfast twist, use scrambled eggs, chorizo, potatoes, and cheese. Vegetarians will love a version with roasted sweet potatoes, black beans, corn, and pepper jack cheese. Seafood lovers can try a shrimp and corn version with Old Bay seasoning. My personal favorite variation uses leftover BBQ chicken pasta salad chopped fine with extra cheese—it’s an incredible way to transform leftovers! Just remember to keep moisture levels in check with any substitutions to maintain that perfect crispy exterior.

    Storage & Troubleshooting Guide

    Proper Storage Methods

    To maintain that signature crispiness, proper storage is crucial. Allow cooked egg rolls to cool completely before refrigerating. Store them in a single layer with paper towels between any stacked layers to absorb moisture. They’ll keep in the refrigerator for 3-4 days. For reheating, avoid the microwave which makes them soggy! Instead, place them on a wire rack in a 350°F oven for 10 minutes. For longer storage, freeze fully cooled egg rolls in a single layer, then transfer to a freezer bag once frozen solid. They’ll maintain quality for up to three months.

    Fixing Common Problems

    If your egg rolls are splitting during cooking, you’re likely dealing with moisture issues or overfilling. Make sure your filling isn’t too wet—drain and pat ingredients dry before mixing. If the wrappers tear while rolling, they may be too dry; keep unused wrappers covered with a damp paper towel while working. For egg rolls that aren’t browning evenly, your oil temperature may be fluctuating—use a deeper pot for more stable heat. If baking and they’re not crisping, try brushing with a bit more oil or increasing the oven temperature by 25 degrees for the last few minutes.

    Frequently Asked Questions

    Can I make crispy southwest egg rolls ahead of time?

    Yes! Prepare the filling up to 2 days ahead and refrigerate. You can also roll them completely and freeze uncooked for up to 3 months. Cook directly from frozen, adding 2-3 minutes to the cooking time.

    What’s the best oil for frying egg rolls?

    Neutral oils with high smoke points work best. Vegetable, canola, or peanut oil are excellent choices. Avoid olive oil as its flavor can overpower the filling and it has a lower smoke point.

    How do I prevent my egg rolls from getting soggy?

    Ensure filling ingredients are well-drained and slightly cooled before rolling. Fry at the proper temperature (350°F) and drain on paper towels immediately after cooking. Serve promptly for maximum crispiness.

    Can I use different wrappers for southwest egg rolls?

    Yes! Traditional egg roll wrappers work best, but you can substitute spring roll wrappers (thinner, crispier result) or even flour tortillas (for a southwestern-style chimichanga variation).

    Are crispy southwest egg rolls spicy?

    The spice level is customizable! For mild egg rolls, use less chili powder and omit jalapeños. For extra heat, add diced jalapeños with seeds or a dash of cayenne pepper to the filling.

    Final Thoughts

    These crispy southwest egg rolls have become my signature party appetizer for good reason—they combine the best of comfort food with impressive presentation. There’s something about that perfect crunch giving way to a flavorful, cheesy filling that makes people’s eyes light up. Whether you’re serving them for game day, as a fun dinner side, or as the star appetizer at your next gathering, they’re guaranteed to disappear quickly! Don’t forget to check out more of my favorite appetizer recipes on Pinterest for more inspiration to pair with these irresistible egg rolls.

  • Cajun Roasted Sweet Potatoes: Irresistibly Spicy & Perfectly Crispy!

    Cajun Roasted Sweet Potatoes: Irresistibly Spicy & Perfectly Crispy!

    Cajun Roasted Sweet Potatoes: Irresistibly Spicy & Perfectly Crispy!

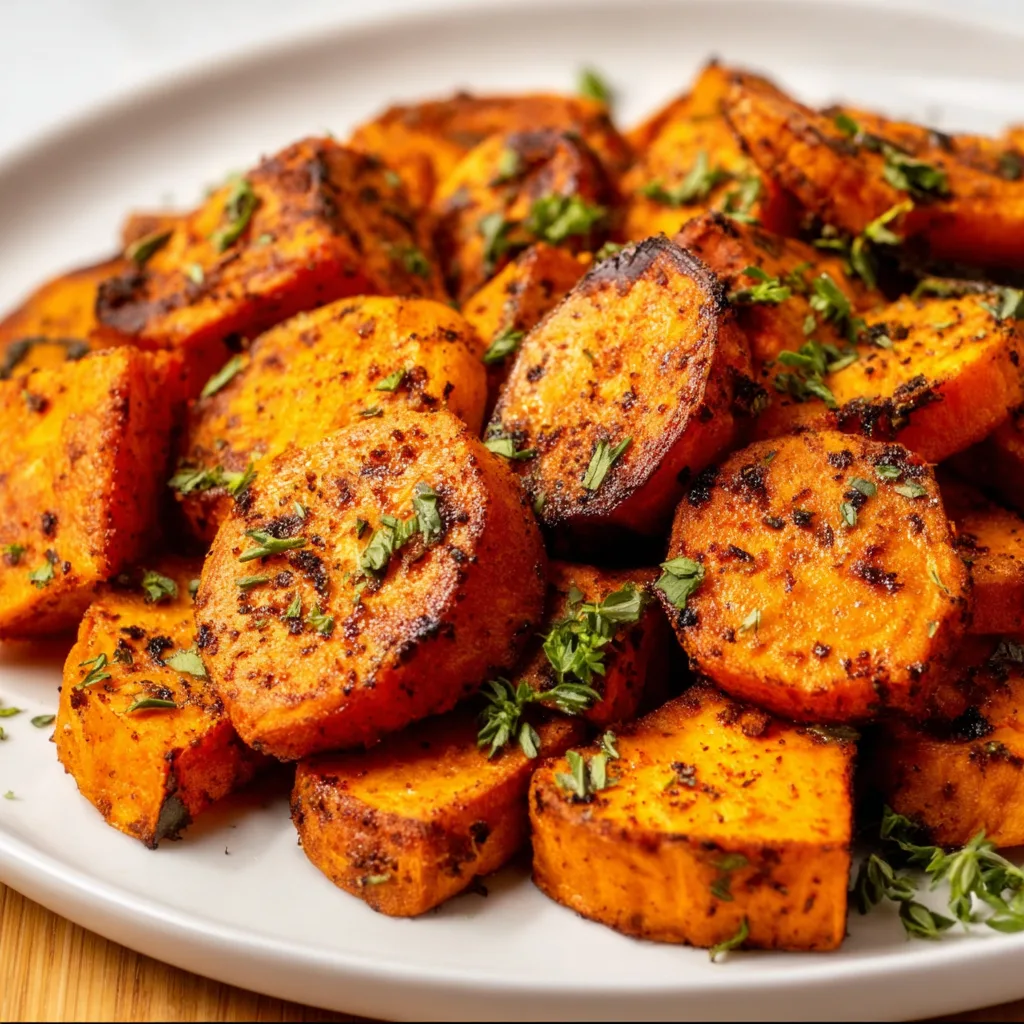
    Cajun Roasted Sweet Potatoes have become my absolute obsession this season! There’s something magical about the way those bold Cajun spices create the perfect contrast against the natural sweetness of these orange gems. I discovered this recipe during a rainy weekend when I was craving something comforting yet exciting. The aroma that fills your kitchen as these potatoes roast is simply intoxicating – warm, spicy, and promising. If you’re looking for a side dish that transforms the ordinary into extraordinary, you’ll want to add this to your rotation alongside my Roasted Brussels Sprouts with Balsamic Pecans.

    Recipe

    Why You’ll Love These Cajun Roasted Sweet Potatoes

    Perfect Texture Balance

    The crispy exterior combined with the meltingly soft interior creates a texture experience that’s absolutely addictive. I’ve perfected the roasting technique to ensure you get that caramelized edge that concentrates the natural sugars while maintaining a tender center. The key is cutting your sweet potatoes into uniform pieces – about 1-inch cubes work perfectly. This size allows them to cook evenly while developing those gorgeous crispy edges. I’ve made these for countless dinner parties, and guests always ask for the recipe before they leave!

    Bold, Complex Flavor Profile

    These aren’t your basic roasted sweet potatoes. The Cajun seasoning creates a sophisticated flavor profile that dances between spicy, smoky, and herbaceous notes. I love how the natural caramelization of the sweet potatoes creates a subtle sweetness that balances the heat from the cayenne and paprika. The dried herbs in the Cajun blend – thyme, oregano, and basil – add an earthy dimension that makes these potatoes feel special. It’s this complexity that elevates them from a simple side dish to something truly memorable.

    Essential Tips & Tricks

    Perfecting Your Seasoning Blend

    Creating the perfect Cajun blend is worth the extra minute! I combine paprika, garlic powder, onion powder, cayenne, dried thyme, oregano, and a touch of brown sugar to balance the heat. The secret ingredient is a pinch of smoked paprika, which adds incredible depth. Don’t be shy with the seasoning – toss the potatoes thoroughly to ensure every piece gets coated. For extra flavor, let the seasoned potatoes rest for 15 minutes before roasting to allow the spices to penetrate. This small step makes a noticeable difference in the final flavor intensity.

    Mastering the Roasting Process

    The roasting technique makes all the difference between good and exceptional sweet potatoes. Always preheat your oven completely – 425°F is the sweet spot for developing caramelization without burning. Use a large baking sheet and avoid overcrowding, which causes steaming instead of roasting. For the crispiest results, try my technique of heating the baking sheet in the oven before adding the potatoes, similar to how I prepare my Baked Bang Bang Cauliflower. Halfway through cooking, flip each piece for even browning.

    Serving Ideas & Creative Variations

    Perfect Pairings

    These Cajun sweet potatoes are incredibly versatile and pair beautifully with so many mains. I love serving them alongside grilled chicken or a simple roasted fish for a healthy weeknight dinner. They’re substantial enough to accompany lighter proteins while adding vibrant color to your plate. For a showstopping holiday meal, pair them with a glazed ham or turkey. The spicy-sweet combination works wonderfully with the savory meat. They’re also perfect with my Crispy Baked Chicken Wings for a game day spread that will disappear in minutes!

    Exciting Flavor Twists

    While the classic Cajun seasoning is amazing, don’t be afraid to experiment with flavor variations! For a Caribbean twist, add some cinnamon and a touch of allspice to the seasoning blend. The warm spices complement the sweet potatoes beautifully. Another favorite variation is adding a maple glaze during the last 5 minutes of roasting – just mix 2 tablespoons of maple syrup with a dash of bourbon and brush over the potatoes. For a fresh finish, try sprinkling with chopped cilantro or green onions right before serving.

    Storage & Troubleshooting Guide

    Proper Storage Methods

    These Cajun roasted sweet potatoes maintain their delicious flavor for several days when stored properly. Allow them to cool completely before transferring to an airtight container and refrigerating for up to 4 days. For reheating, avoid the microwave which makes them soggy. Instead, spread them on a baking sheet and warm in a 350°F oven for 10 minutes until heated through. They’ll regain much of their original texture. You can also freeze them for up to 3 months – just arrange in a single layer on a baking sheet before transferring to freezer bags.

    Solving Common Problems

    If your sweet potatoes aren’t crisping properly, a few simple adjustments can help. The most common issue is overcrowding the pan – each potato piece needs space for air circulation. Another potential problem is cutting pieces too large or unevenly, which leads to inconsistent cooking. If the spices are burning before the potatoes are tender, try reducing the oven temperature to 400°F and extending the cooking time. For potatoes that aren’t flavorful enough, don’t hesitate to season again halfway through cooking, especially after flipping them.

    Frequently Asked Questions

    Can I make Cajun Roasted Sweet Potatoes ahead of time?

    Yes! Roast them until just tender, then reheat at 375°F for 10-15 minutes before serving. They’ll regain their crispy exterior while staying perfectly tender inside.

    How spicy are these Cajun sweet potatoes?

    The heat level is moderate but customizable. Adjust the cayenne pepper to your preference – start with ¼ teaspoon for mild heat or increase to 1 teaspoon for a significant kick.

    Can I use pre-made Cajun seasoning?

    Absolutely! Use 2-3 tablespoons of your favorite Cajun blend. Just check if it contains salt and adjust accordingly to avoid over-salting.

    What’s the best way to cut sweet potatoes evenly?

    First slice the potato in half lengthwise, then cut each half into planks. Cut the planks into sticks, then dice into cubes for perfectly uniform pieces.

    Are Cajun Roasted Sweet Potatoes healthy?

    Yes! Sweet potatoes are packed with vitamins A and C, fiber, and antioxidants. Using olive oil adds healthy fats, making this a nutritious side dish.

    Final Thoughts

    These Cajun Roasted Sweet Potatoes have become a staple in my kitchen for good reason. They strike that perfect balance between everyday simplicity and special-occasion worthy flavor. I love how versatile they are – equally at home beside a weeknight chicken dinner or as part of a holiday feast. The combination of sweet, spicy, and savory creates a side dish that refuses to be overshadowed by any main course. Give them a try and I guarantee they’ll earn a permanent spot in your recipe collection! For more delicious recipes, follow me on Pinterest.

  • Gourmet Roasted Stuffed Dates with Goat Cheese: Irresistibly Delicious!

    Gourmet Roasted Stuffed Dates with Goat Cheese: Irresistibly Delicious!

    Gourmet Roasted Stuffed Dates with Goat Cheese: Irresistibly Delicious!

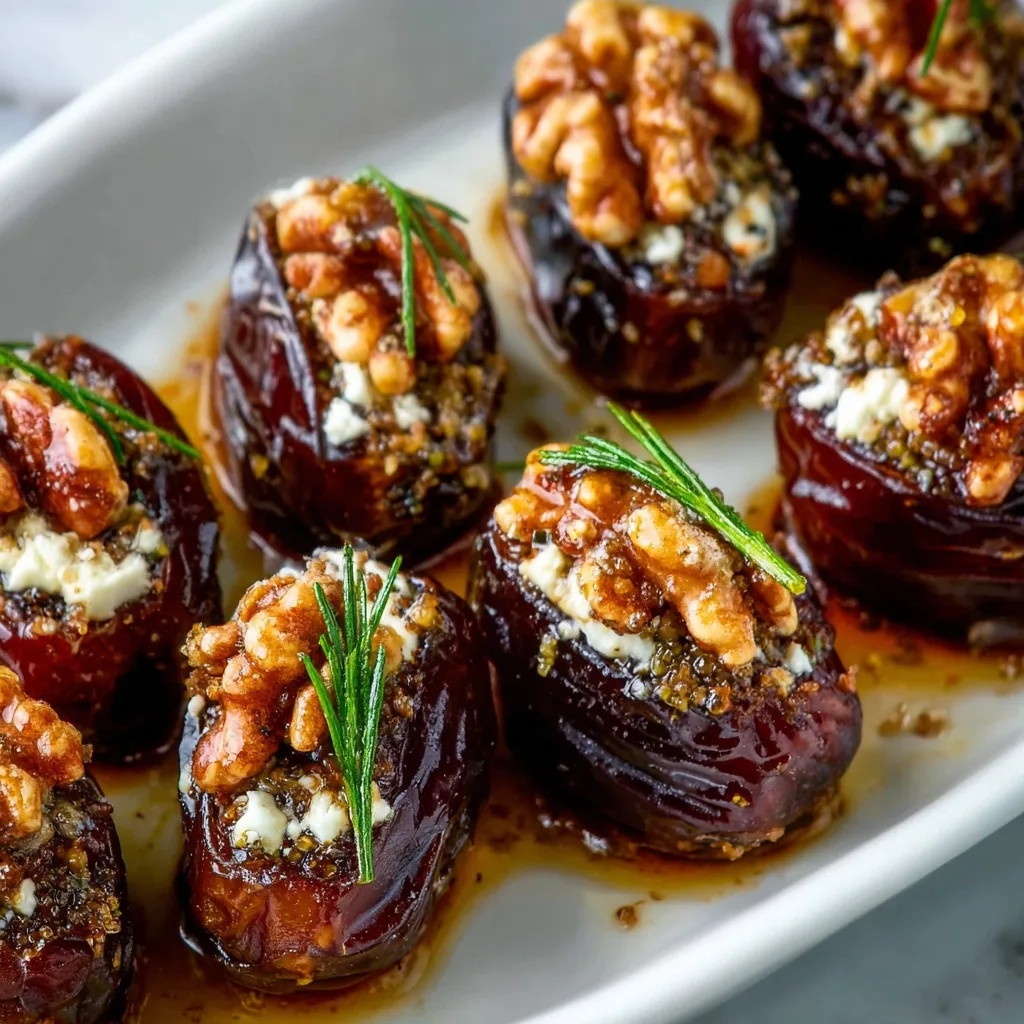
    Gourmet Roasted Stuffed Dates with Goat Cheese are the perfect blend of sweet and savory that elevate any gathering from ordinary to extraordinary. The first time I made these for a dinner party, my guests literally gasped when they bit into the warm, creamy centers contrasted with the caramelized exterior. There’s something magical about the way the tangy goat cheese melts against the natural sweetness of dates. These little jewels have become my go-to appetizer when I want to impress without spending hours in the kitchen. Like my Crispy Shrimp Toast, they strike that perfect balance between elegant and approachable.

    Recipe

    Recipe

    Why You’ll Love This Gourmet Roasted Stuffed Dates with Goat Cheese

    A Perfect Balance of Flavors and Textures

    These stuffed dates are a sensory delight that hits all the right notes. The natural caramelization that happens when dates roast creates an almost candy-like exterior that gives way to creamy, tangy goat cheese. Add a drizzle of honey and a sprinkle of sea salt, and you’ve got a perfect bite that dances between sweet and savory. I love how the slight crunch of the date skin yields to that warm, molten center. The best part? You’ll only need a handful of quality ingredients to create something that tastes genuinely gourmet. The contrast between the chewy dates and creamy filling creates a textural experience that keeps everyone reaching for more.

    Quick Preparation with Impressive Results

    One thing I adore about these gourmet roasted stuffed dates with goat cheese is how they deliver maximum impact with minimal effort. You can prep them in under 15 minutes, yet they look like something from an upscale restaurant. The visual appeal alone—golden brown dates with their creamy centers peeking out—signals to guests that something special awaits. I’ve served these at everything from casual wine nights to holiday gatherings, and they always disappear within minutes. There’s something deeply satisfying about creating something so elegant with such simple ingredients. Plus, they can be partially prepped ahead, making them perfect for entertaining when you don’t want to be stuck in the kitchen.

    Essential Tips & Tricks

    Selecting and Preparing the Perfect Dates

    The foundation of truly exceptional stuffed dates begins with choosing the right variety. Medjool dates are my absolute favorite for this recipe—they’re larger, softer, and have a caramel-like sweetness that works beautifully with tangy goat cheese. When preparing them, make a lengthwise slit that’s deep enough to hold a generous amount of filling but not so deep that the date splits completely. I’ve found that removing the pit with a gentle twist preserves the date’s shape better than cutting it out. For an extra touch of luxury, let your dates come to room temperature before stuffing—they’re more pliable and the flavors bloom more intensely when they’re not cold from the refrigerator.

    Cheese Selection and Flavor Enhancements

    While plain goat cheese creates a wonderful stuffed date, taking it up a notch with flavored varieties can transform this appetizer. I love using honey-infused goat cheese for an extra layer of sweetness or herb-coated varieties for a more savory profile. For the creamiest texture, let your goat cheese soften at room temperature for 15-20 minutes before stuffing. This makes it easier to work with and helps it melt more evenly during roasting. For an unexpected twist, try mixing your goat cheese with a touch of Italian Chopped Salad inspired herbs like basil and oregano. The bright herbaceous notes cut through the richness beautifully, creating a more complex flavor profile that will have everyone asking for your secret.

    Serving Ideas & Creative Variations

    Elegant Presentation Techniques

    Elevate your gourmet roasted stuffed dates with goat cheese through thoughtful presentation that makes them look as special as they taste. Arrange them on a wooden board with fresh herbs scattered between for a rustic-elegant look that photographs beautifully. For cocktail parties, secure each date with a decorative toothpick for easy grabbing. I love serving them on a bed of arugula drizzled with balsamic glaze—the peppery greens and tangy reduction complement the sweet-savory profile perfectly. For holiday gatherings, try arranging them in a wreath pattern with pomegranate arils and rosemary sprigs. The jewel-toned garnishes against the amber dates create a festive display that’s almost too pretty to eat.

    Sweet and Savory Variations to Try

    The classic goat cheese filling is just the beginning—these dates are incredibly versatile. For a sweet-meets-heat version, add a tiny drizzle of hot honey or a pinch of chili flakes to the goat cheese. The subtle spice cuts through the sweetness beautifully. For a more substantial bite, wrap each stuffed date in prosciutto before roasting—the salty meat crisps up and adds another dimension of flavor. My personal favorite variation includes a small piece of Crispy Bacon and a walnut half pressed into the cheese. The combination of creamy, crunchy, sweet, and smoky creates an irresistible bite that disappears in seconds at parties. Don’t be afraid to experiment with blue cheese or mascarpone for completely different flavor profiles.

    Storage & Troubleshooting Guide

    Make-Ahead Options and Reheating

    These gourmet roasted stuffed dates with goat cheese are perfect for planning ahead when entertaining. You can stuff the dates up to 24 hours in advance and store them covered in the refrigerator until you’re ready to roast. If you want to prepare them even further ahead, freeze the stuffed (but not yet roasted) dates on a parchment-lined tray, then transfer to a freezer bag once solid. They’ll keep for up to a month! When reheating already roasted dates, avoid the microwave which can make them tough. Instead, warm them in a 300°F oven for 5-7 minutes until just heated through. The texture won’t be quite as perfect as freshly roasted, but they’ll still be delicious.

    Solving Common Problems

    If your dates are splitting open too much during roasting, try reducing the oven temperature by 25 degrees and watching them more closely. The perfect balance is achieving a warm, melty center without the dates completely falling apart. If your goat cheese is oozing out too much, try chilling the stuffed dates for 15 minutes before roasting to firm up the cheese. For dates that seem too dry after roasting, a light drizzle of honey or aged balsamic right before serving adds moisture and flavor. If you find the flavor too one-dimensional, a pinch of flaky sea salt or a few drops of lemon juice just before serving will brighten everything up and make the flavors pop.

    Frequently Asked Questions

    Can I make gourmet roasted stuffed dates with goat cheese ahead of time?

    Yes! You can stuff the dates up to 24 hours ahead and refrigerate. For best results, bring to room temperature for 15 minutes before roasting. They’re actually better when the flavors have time to meld together.

    What can I substitute for goat cheese?

    Cream cheese, mascarpone, or ricotta work beautifully. For dairy-free options, try cashew cheese or firm tofu blended with nutritional yeast and lemon juice for tanginess.

    How long do these stuffed dates stay fresh?

    Roasted stuffed dates will keep for up to 3 days refrigerated in an airtight container. The texture is best on the first day, but they’re still delicious cold from the fridge.

    Can I freeze these before or after roasting?

    Freeze them before roasting for best results. Arrange stuffed dates on a baking sheet until solid, then transfer to a freezer bag. Roast directly from frozen, adding 2-3 minutes to cooking time.

    What wines pair well with stuffed dates?

    Sweet dates with tangy goat cheese pair beautifully with sparkling wines like Prosecco or a light rosé. For contrast, try an off-dry Riesling or a nutty Sherry.

    Final Thoughts

    These gourmet roasted stuffed dates with goat cheese have become my signature appetizer for good reason—they strike that perfect balance between sophisticated and approachable, impressive and easy. What I love most is how versatile they are, fitting in at both casual gatherings and elegant dinner parties. The way they hit those sweet-savory notes makes them universally appealing, and I’ve yet to meet someone who can stop at just one. I hope you’ll make these little jewels your own, perhaps adding your personal twist to the filling or presentation. They’re proof that sometimes the simplest combinations create the most memorable experiences. Find more inspiration on my Pinterest page!

  • Crispy Chicken & Bell Pepper Ranch Burritos: Irresistibly Crunchy Flavor!

    Crispy Chicken & Bell Pepper Ranch Burritos: Irresistibly Crunchy Flavor!

    Crispy Chicken & Bell Pepper Ranch Burritos: Irresistibly Crunchy Flavor!

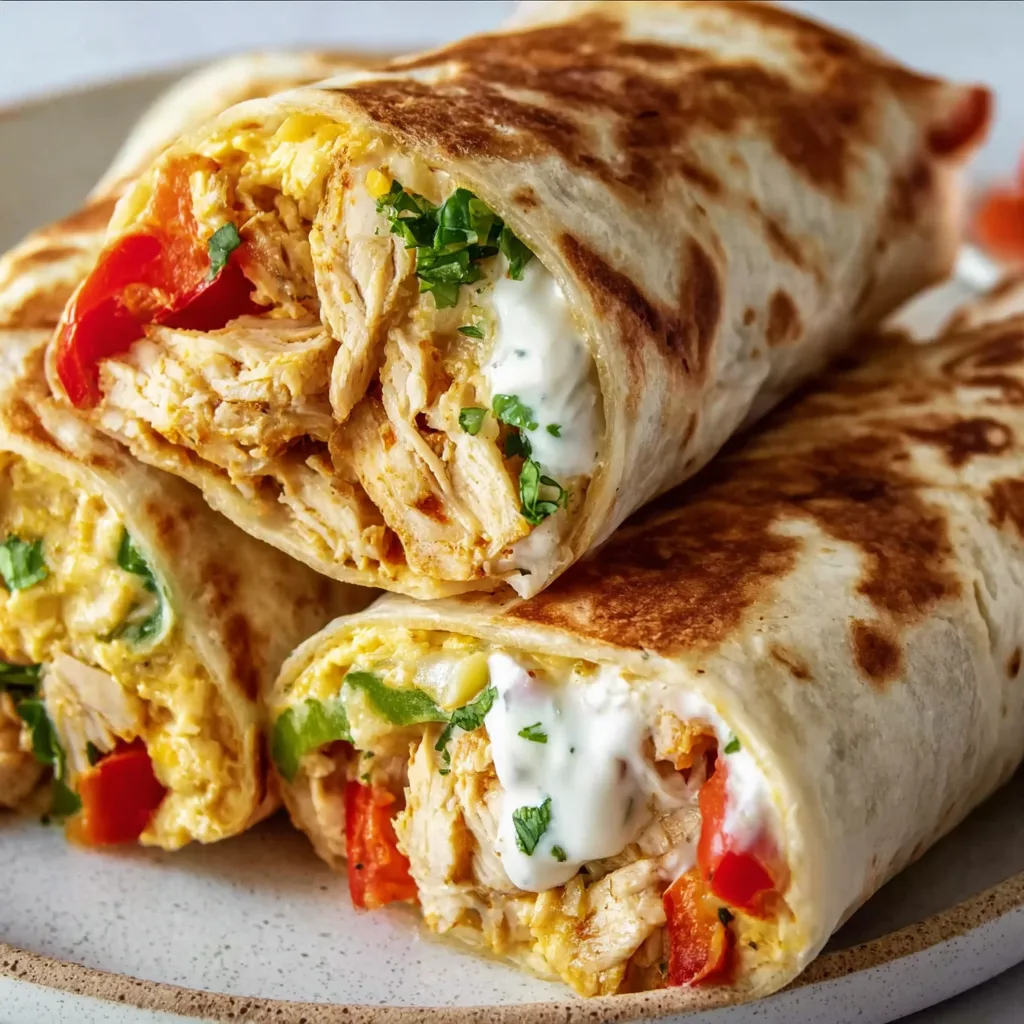
    Crispy Chicken & Bell Pepper Ranch Burritos are my weeknight savior when I’m craving something satisfying but don’t want to spend hours in the kitchen. The combination of golden, crispy chicken paired with sweet bell peppers and creamy ranch sauce wrapped in a warm tortilla creates pure comfort food magic. I discovered this recipe during a particularly chaotic Tuesday when my sister dropped by unexpectedly with her kids. We needed something quick yet impressive, and these burritos delivered spectacularly. The kids devoured them, and now they’re a regular request when family visits. Let me show you how to make these crowd-pleasing wraps!

    Recipe

    Why You’ll Love These Crispy Chicken & Bell Pepper Ranch Burritos

    Perfect Balance of Flavors and Textures

    There’s something magical about the contrast between crispy chicken and soft tortillas that makes these burritos irresistible. The bell peppers provide a sweet crunch that complements the savory chicken perfectly, while the ranch dressing adds a creamy, tangy dimension that ties everything together. I love how the peppers slightly caramelize when cooked, releasing their natural sweetness. The first time I made these, my husband—who typically reaches for hot sauce with everything—didn’t add a single condiment because the flavor balance was just right. These burritos satisfy multiple cravings in one delicious package.

    Quick and Customizable for Any Occasion

    These Crispy Chicken & Bell Pepper Ranch Burritos come together in under 30 minutes, making them perfect for busy weeknights or last-minute gatherings. The basic formula is incredibly flexible—swap chicken for crispy tofu for vegetarian guests, use different colored bell peppers for visual appeal, or adjust the spice level to suit your family’s preferences. I’ve made these for casual movie nights and for more formal dinner parties (just slice them into pinwheels!). They’re equally at home on a paper plate or on your favorite serving platter, which is why they’ve become my go-to when I need something reliably delicious without overthinking the menu.

    Essential Tips & Tricks

    Getting the Perfect Crispy Chicken

    The secret to truly outstanding Crispy Chicken & Bell Pepper Ranch Burritos lies in the chicken’s texture. I recommend using chicken thighs instead of breast meat—they stay juicier and develop a better crust. Pat the chicken completely dry before seasoning, and don’t crowd the pan when cooking. Give each piece room to release moisture and crisp up properly. A cast iron skillet works wonders here! For extra crispiness, try dredging the chicken pieces in a light coating of seasoned cornstarch before pan-frying. This creates a delicate crust that holds up even when wrapped with the other ingredients in the quick jumbo dinner rolls.

    Mastering the Assembly Process

    Assembly is where many burrito attempts fall apart—literally! Start by warming your tortillas properly; this makes them pliable and less likely to tear. Thirty seconds in a dry skillet or microwave wrapped in damp paper towels works perfectly. When placing ingredients, leave a one-inch border around the edges and don’t overstuff. The proper folding technique matters: fold in the sides first, then roll from the bottom up, keeping everything tight. For extra insurance against burrito collapse, wrap the finished burrito in foil and let it rest for 2-3 minutes. This helps the tortilla seal to itself and holds everything together when you cut into it.

    Serving Ideas & Creative Variations

    Complementary Side Dishes

    These Crispy Chicken & Bell Pepper Ranch Burritos pair beautifully with sides that enhance their Southwestern flair. My family loves them with a simple cilantro-lime rice that soaks up any escaping sauce. A crisp, tangy coleslaw provides refreshing contrast to the rich burritos—try my version with apple cider vinegar dressing and a touch of honey. For a more substantial spread, add Italian chopped salad for a surprising but delicious fusion meal. When serving for gatherings, I arrange a platter of sliced burritos surrounded by small bowls of additional ranch, hot sauce, and fresh pico de gallo. This interactive approach always gets compliments and lets guests customize each bite.

    Exciting Flavor Variations

    While the classic Crispy Chicken & Bell Pepper Ranch Burritos are fantastic, don’t be afraid to experiment! For a breakfast twist, add scrambled eggs and swap the ranch for salsa verde. Feeling indulgent? Try a buffalo version with blue cheese dressing instead of ranch and add some crispy bacon. For international flair, incorporate Greek flavors with tzatziki replacing ranch, adding cucumber and feta to the filling. My personal favorite variation includes caramelized onions and pepper jack cheese for extra sweetness and heat. These variations keep the basic recipe exciting week after week, and I’ve yet to find a combination my family doesn’t enjoy.

    Storage & Troubleshooting Guide

    Proper Storage for Maximum Freshness

    To keep your Crispy Chicken & Bell Pepper Ranch Burritos tasting their best, proper storage is essential. For make-ahead convenience, prepare all components separately and refrigerate them in airtight containers for up to three days. Assemble just before serving to maintain the perfect texture. If you have leftover assembled burritos, wrap each one tightly in aluminum foil and refrigerate for up to two days. The key to reheating without sogginess is using a dry heat method—either a 350°F oven for 15 minutes or a panini press. For longer storage, freeze uncooked burritos individually wrapped in plastic and foil, then stored in freezer bags for up to three months.

    Solving Common Burrito Problems

    Even experienced cooks encounter burrito challenges! If your tortillas keep cracking, they’re likely too cold or dry—microwave them between damp paper towels for 20 seconds to make them more pliable. Dealing with soggy burritos? Try placing the ranch and wetter ingredients in the center, surrounded by the drier ingredients like chicken. For burritos that unravel when eating, try securing them with toothpicks or wrapping the bottom half in parchment paper. If your chicken isn’t crisping properly, your pan probably isn’t hot enough—start with a screaming hot skillet and don’t add the chicken until you see wisps of smoke rising from the oil.

    Frequently Asked Questions

    Can I make Crispy Chicken & Bell Pepper Ranch Burritos ahead of time?

    Yes! Prepare components separately and store in the refrigerator for up to 3 days. Assemble just before serving, or fully assemble and wrap in foil for reheating later. This maintains the crispy texture better than storing assembled burritos.

    What’s the best way to reheat leftover burritos?

    For best results, reheat in a 350°F oven for 10-15 minutes if wrapped in foil. For a crispier exterior, unwrap and place directly on the oven rack for the last 5 minutes. Avoid microwaving as it makes tortillas soggy.

    Can I use flour alternatives for a gluten-free version?

    Absolutely! Corn tortillas or certified gluten-free flour tortillas work well. Just warm them slightly longer to increase pliability, as gluten-free options tend to be less flexible and crack more easily.

    How can I make these burritos spicier?

    Add diced jalapeños or chipotle peppers to the filling, use pepper jack cheese instead of regular, or mix hot sauce into your ranch dressing. You can also serve with additional hot sauce on the side.

    What’s the key to getting truly crispy chicken for these burritos?

    The secret is patting chicken completely dry before cooking, using high heat, and not overcrowding the pan. For extra crispiness, lightly dust chicken pieces with cornstarch seasoned with salt and pepper before frying.

    Final Thoughts

    These Crispy Chicken & Bell Pepper Ranch Burritos have saved countless dinners in my household, combining convenience with crave-worthy flavor. The beauty lies in their versatility—dress them up for guests or keep them simple for family dinner. I’ve watched even the pickiest eaters devour these without complaint, which feels like a small miracle in itself. Whether you follow my recipe exactly or use it as a springboard for your own creation, I’m confident these burritos will earn a permanent spot in your meal rotation. Check out more of my favorite recipes on Pinterest!

  • Crispy Fried Oyster Mushrooms That Will Blow Your Mind!

    Crispy Fried Oyster Mushrooms That Will Blow Your Mind!

    Crispy Fried Oyster Mushrooms That Will Blow Your Mind!

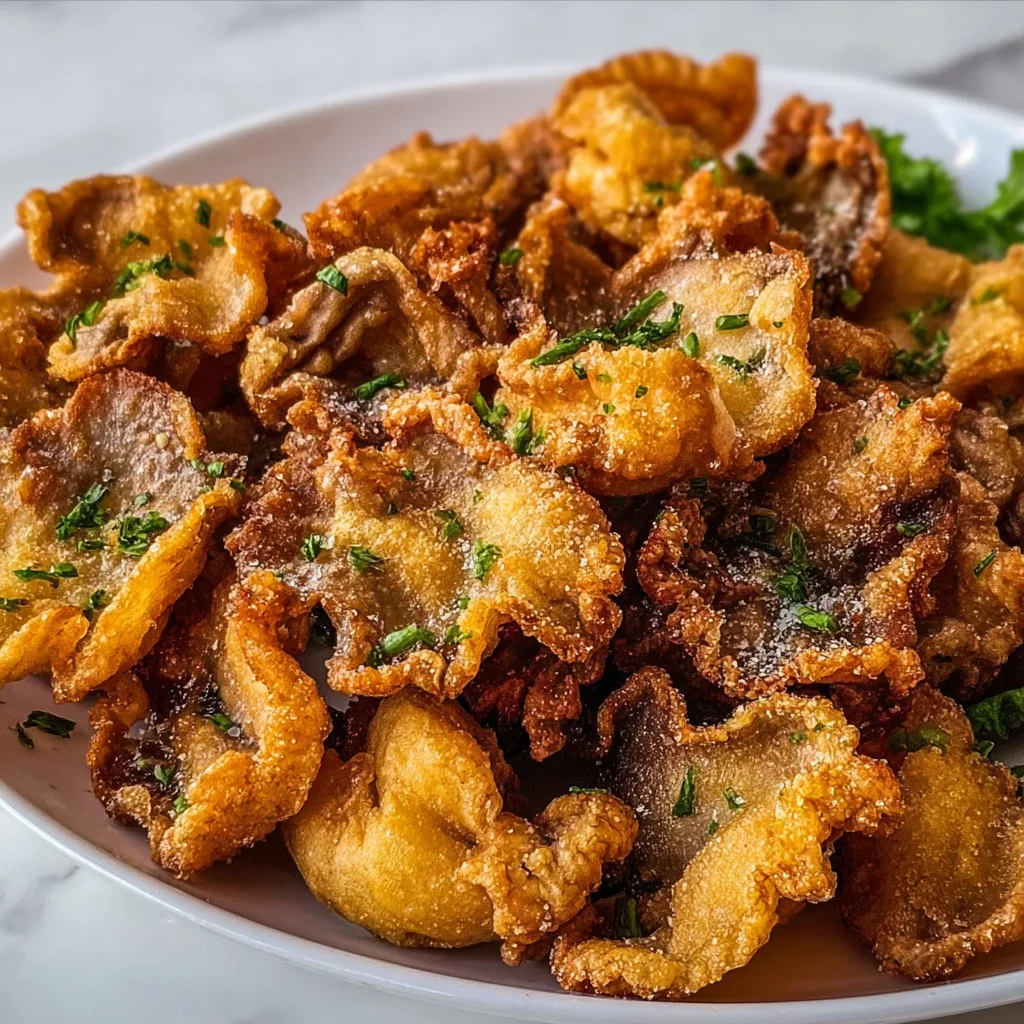
    Crispy Fried Oyster Mushrooms have completely changed my weeknight dinner game! The first time I made these golden, crunchy beauties, my kitchen filled with the most intoxicating aroma of herbs and earthy mushrooms. There’s something magical about the way these humble fungi transform when coated in a perfectly seasoned batter and fried to crispy perfection. I’ve tested dozens of variations to bring you this foolproof recipe that delivers that satisfying crunch with every bite. If you’re looking for a vegetarian alternative that even meat-lovers will devour, this recipe from my collection is about to become your new obsession!

    Recipe

    Why You’ll Love This Crispy Fried Oyster Mushrooms

    Perfect Texture Combination

    The magic of crispy fried oyster mushrooms lies in their incredible texture contrast. The exterior develops this irresistible golden crust that shatters between your teeth, while the interior remains tender and juicy. Oyster mushrooms are ideal for this technique because their natural structure holds up beautifully during frying, maintaining that meaty bite we all crave. I still remember my husband (a dedicated carnivore) reaching for thirds, completely forgetting he was eating mushrooms! The natural folds and crevices of oyster mushrooms also create extra surface area for the batter to cling to, resulting in more of that addictive crunch.

    Flavor That Adapts to Any Cuisine

    What makes crispy fried oyster mushrooms truly special is their flavor versatility. These mushrooms have a naturally subtle, earthy taste that serves as the perfect canvas for whatever seasonings you prefer. I’ve made Asian-inspired versions with five-spice powder that transported me straight to my favorite street food markets. For Italian night, a sprinkle of oregano and garlic powder in the batter creates magic. The mushrooms themselves contain natural glutamates that enhance savory flavors, making them taste remarkably rich and satisfying. You can easily customize the spice level from mild to wild depending on your mood.

    Essential Tips & Tricks

    The Perfect Batter Technique

    Creating the ideal batter for crispy fried oyster mushrooms requires a two-step approach. Start with a dry mixture containing flour, cornstarch, and your seasonings, then prepare a wet batter using cold sparkling water (my secret weapon!). The carbonation creates tiny air pockets that make the coating exceptionally light and crispy. Temperature matters tremendously here – keep your wet batter ice-cold until the moment you use it. I learned this trick after several disappointing batches with a soggy coating. Make sure to dip each mushroom in the dry mix first, then the wet batter, and finally back into the dry mix for that ultimate crispy crust similar to my Crispy Shrimp Toast.

    Mushroom Preparation Secrets

    The way you handle your oyster mushrooms before frying makes all the difference in the final result. Always pat them completely dry with paper towels before coating – any excess moisture will create steam and prevent proper crisping. I like to tear larger oyster mushrooms into bite-sized pieces rather than cutting them, which preserves their natural texture and creates those beautiful irregular edges that get extra crispy. Let the torn mushrooms rest on paper towels for 15 minutes before battering. This draws out additional moisture and allows the mushrooms to warm to room temperature, which prevents the oil temperature from dropping too much when you add them to the pan.

    Serving Ideas & Creative Variations

    Dipping Sauces That Elevate

    The right dipping sauce can take your crispy fried oyster mushrooms from delicious to absolutely unforgettable. My personal favorite is a spicy honey drizzle – just mix two tablespoons of honey with one teaspoon of hot sauce and a squeeze of lime. The sweet-heat combination perfectly complements the earthy mushrooms and crunchy exterior. For something creamy, whip up a quick sriracha mayo by combining three tablespoons of mayonnaise with one tablespoon of sriracha and a dash of lime juice. These mushrooms also pair beautifully with a tangy yogurt-based sauce similar to what I use in my Bang Bang Salmon recipe, adding a cooling contrast to the warm, crispy bites.

    Creative Serving Suggestions

    Transform your crispy fried oyster mushrooms into a complete meal with these creative serving ideas. One of my favorite weeknight shortcuts is using them as the star protein in tacos – just add some shredded cabbage, pickled onions, and avocado for an incredible meat-free taco night. They also make phenomenal sliders when tucked into small buns with some coleslaw and pickle. For a lighter option, use them as a topper for grain bowls with quinoa, roasted vegetables, and a tahini drizzle. When I’m entertaining, I arrange them on a platter with various dipping sauces as an appetizer that disappears within minutes!

    Storage & Troubleshooting Guide

    Maintaining Maximum Crispiness

    The biggest challenge with crispy fried oyster mushrooms is keeping that perfect crunch after they’re cooked. For immediate serving, place them on a wire rack instead of paper towels – this prevents steam from softening the underside. If you need to make them ahead, cool completely on a rack, then store in a single layer in an airtight container with paper towels between layers to absorb moisture. To reheat, avoid the microwave at all costs! Instead, place them on a baking sheet in a 375°F oven for 5-7 minutes. The dry heat will restore most of that fresh-fried texture without drying out the mushrooms inside.

    Troubleshooting Common Issues

    If your crispy fried oyster mushrooms aren’t turning out perfectly, a few simple adjustments can make all the difference. When facing soggy results, the culprit is usually oil temperature – invest in a kitchen thermometer and maintain 350-375°F throughout cooking. Another common issue is batter that slides off during frying, which happens when mushrooms are too wet or the batter is too thin. To fix this, ensure mushrooms are thoroughly dried and add a tablespoon more flour to thicken the batter if needed. If your mushrooms are browning too quickly but remain raw inside, your oil is likely too hot – lower the temperature and try again.

    Frequently Asked Questions

    Can I use other mushroom varieties for this recipe?

    Yes! King oyster, lion’s mane, and even large shiitake mushrooms work wonderfully. Each variety offers a different texture, but the same battering technique applies to all of them.

    How can I make crispy fried oyster mushrooms gluten-free?

    Simply substitute the all-purpose flour with a gluten-free flour blend. Add 1/4 teaspoon of xanthan gum to help with binding if your blend doesn’t already contain it.

    What’s the best oil for frying crispy oyster mushrooms?

    Neutral oils with high smoke points work best – vegetable, canola, or peanut oil are ideal. Avoid olive oil as its low smoke point can create a bitter taste.

    Can I make crispy fried oyster mushrooms in an air fryer?

    Absolutely! Spray the coated mushrooms with cooking oil, then air fry at 380°F for 8-10 minutes, flipping halfway through for even crisping.

    How do I know when my crispy fried oyster mushrooms are perfectly cooked?

    They should be golden brown with a firm exterior that doesn’t feel soggy. The mushrooms inside should be tender but not mushy when bitten into.

    Final Thoughts

    These crispy fried oyster mushrooms have earned a permanent spot in my recipe rotation for good reason. They deliver that perfect combination of addictive crunch and meaty satisfaction that keeps everyone coming back for more. I love how they can transform from a casual weeknight dinner to an impressive party appetizer with just a change in presentation. The versatility of flavors means they never get boring, and the relatively simple preparation makes them accessible even on busy days. Be sure to check out more of my recipes on Pinterest for more mushroom inspiration!

  • Classic Divorce Salad Recipe: Crisp, Creamy, and Unforgettable!

    Classic Divorce Salad Recipe: Crisp, Creamy, and Unforgettable!

    Classic Divorce Salad Recipe: Crisp, Creamy, and Unforgettable!

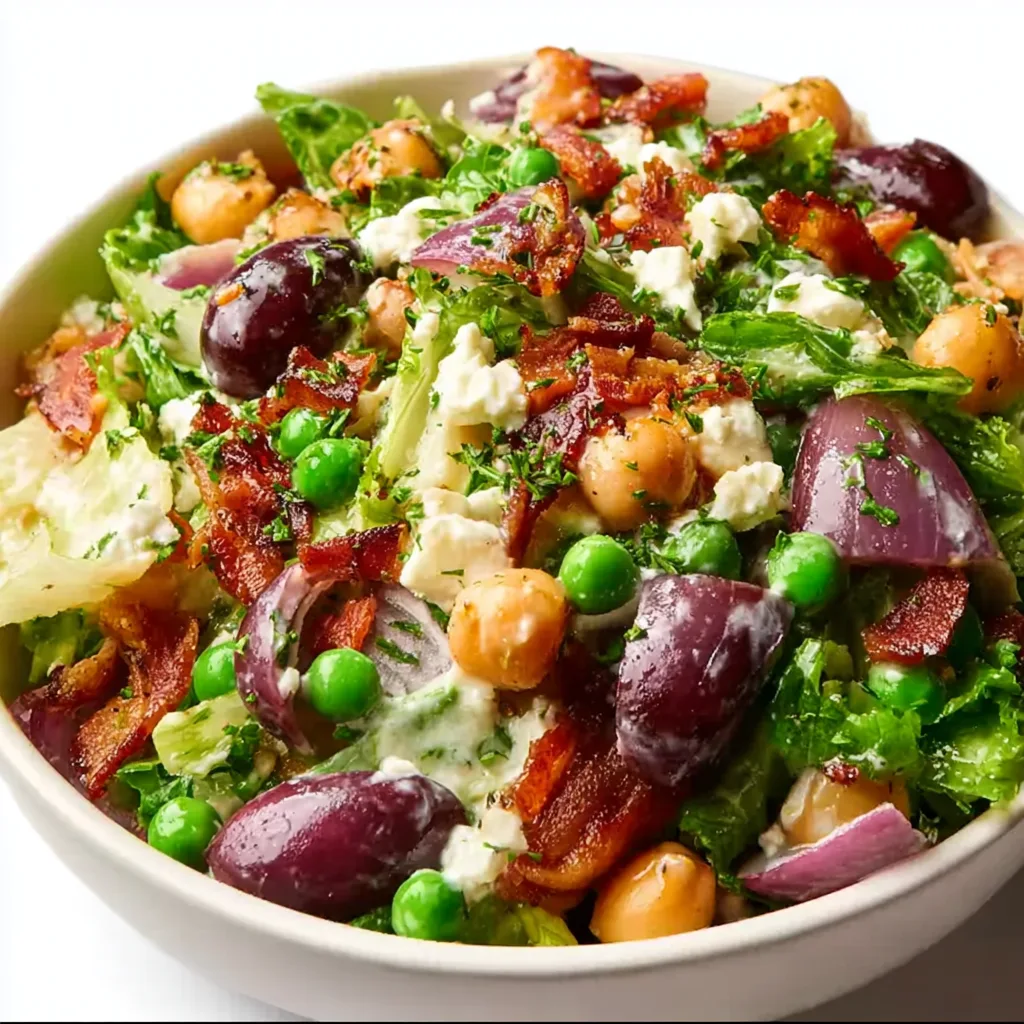
    The Classic Divorce Salad Made with crisp lettuce, peas, bacon, cheese, and a creamy dressing is one of those dishes that brings everyone to the table, no matter what’s happening in life. I first discovered this retro gem at my aunt’s potluck, where it disappeared faster than family gossip! There’s something magical about the way the crisp lettuce cradles those perfect little peas, while bacon adds that irresistible smoky crunch. The creamy dressing ties everything together in a way that feels like comfort in a bowl. Trust me, this salad has reconciled more dinner disagreements than I can count! It’s a crowd-pleaser that never fails to impress.

    Recipe

    Why You’ll Love This Classic Divorce Salad Made with crisp lettuce, peas, bacon, cheese, and a creamy dressing

    Perfect Balance of Textures and Flavors

    What makes this Classic Divorce Salad truly special is the symphony of textures in every bite. The crisp lettuce provides that satisfying crunch, while the sweet peas pop gently against your teeth. Then there’s the bacon—oh, that glorious bacon!—delivering smoky, salty goodness that melts into the creamy dressing. The cheese adds a rich tanginess that cuts through everything else. I love watching people’s expressions when they take their first bite—eyes closing slightly as they experience that perfect harmony. It’s like a party where all the ingredients actually get along!

    Make-Ahead Convenience

    This salad is a lifesaver when you’re juggling a busy schedule. I can prep most components the night before—cook the bacon, chop the lettuce, mix the dressing—and then assemble everything just before serving. The layered presentation creates a stunning visual impact that belies how simple it actually is to put together. Last weekend, I brought this to my neighbor’s cookout, and three people asked for the recipe before I’d even set the bowl down! It travels beautifully too, making it perfect for potlucks, picnics, or any gathering where you want to impress without stressing.

    Essential Tips & Tricks

    Perfecting Your Ingredients

    The quality of ingredients makes all the difference in this Classic Divorce Salad. Always use the freshest lettuce you can find—I prefer a mix of romaine for crunch and butter lettuce for tenderness. For the bacon, thick-cut is worth the splurge; it maintains that perfect texture without disappearing into the salad. When it comes to peas, frozen actually works better than fresh, as they’re flash-frozen at peak sweetness. Let them thaw naturally for about 30 minutes before adding. The cheese should be freshly grated from a block—pre-shredded has anti-caking agents that affect both texture and meltability in the creamy dressing.

    Mastering the Layering Technique

    The magic of this salad lies in how you build it. Start with a foundation of crisp lettuce, then add your peas as the second layer. The key technique is to place the bacon and cheese in the middle layers rather than on top—this prevents them from sinking to the bottom while ensuring every serving gets a fair share. I learned this the hard way after watching guests dig desperately for bacon bits at the bottom of the bowl! Pour the dressing just before serving, or serve it on the side if you’re concerned about wilting. This preserves the perfect texture that makes this salad so addictive.

    Serving Ideas & Creative Variations

    Perfect Pairings for Any Occasion

    This Classic Divorce Salad pairs beautifully with almost anything, making it incredibly versatile. For casual gatherings, I serve it alongside grilled chicken or a hearty Italian sausage pasta bake for a complete meal that satisfies everyone. For more formal occasions, it complements roasted salmon or prime rib beautifully. The creamy dressing works as a delicious counterpoint to spicier main dishes too. My favorite summer pairing? Serving it with chilled gazpacho and crusty bread for a refreshing meal when it’s too hot to cook. The versatility of this salad means it never feels out of place, whether at a backyard barbecue or holiday dinner.

    Seasonal and Dietary Adaptations

    Don’t be afraid to make this salad your own with creative variations. In summer, I add fresh corn kernels and cherry tomatoes for bursts of sweetness. Fall calls for diced apples and toasted walnuts, while winter versions benefit from pomegranate seeds and roasted butternut squash. For vegetarians, substitute the bacon with smoked almonds or crispy fried shallots—they provide that essential savory crunch. To make it dairy-free, avocado adds creamy richness without cheese. For a lighter version, use Greek yogurt in the dressing instead of sour cream. These adaptations keep the essential character of the salad while accommodating different needs and seasonal produce.

    Storage & Troubleshooting Guide

    Keeping It Fresh

    The enemy of any salad is sogginess, but with a few tricks, your Classic Divorce Salad can maintain its appeal beyond the first serving. Store components separately when possible—keep the lettuce, peas, bacon, cheese, and dressing in individual containers. This prevents the lettuce from wilting and the bacon from losing its crunch. If you must store an assembled salad, place a paper towel at the bottom of your storage container to absorb excess moisture. The dressed salad will last about 4-6 hours before quality declines, while undressed components can last 2-3 days refrigerated. When ready to serve leftovers, add a splash of fresh dressing and a sprinkle of new bacon to revive the flavors.

    Rescuing Common Issues

    Even the best salads sometimes need a little rescue operation! If your lettuce has wilted slightly, a 10-minute ice water bath can help restore crispness—just be sure to dry thoroughly afterward. For dressing that’s separated or too thick, whisk in a teaspoon of warm water to re-emulsify. If your bacon has lost its crunch, a quick 10-second microwave blast on a paper towel can revive it. Finding your salad bland after refrigeration? Cold temperatures dull flavors, so add an extra pinch of salt and a squeeze of fresh lemon juice to brighten everything up. These simple fixes can transform a disappointing leftover into something nearly as good as freshly made.

    Frequently Asked Questions

    Why is it called a “Divorce Salad”?

    The name comes from its reputation for being so delicious it could bring feuding couples back together! Legend has it that this Classic Divorce Salad made with crisp lettuce, peas, bacon, cheese, and a creamy dressing was served at reconciliation dinners in the 1950s.

    Can I make this salad ahead of time?

    Yes, but keep components separate. Prep lettuce, cook bacon, and make dressing up to 2 days ahead. Combine everything just before serving to maintain optimal texture and freshness.

    What’s the best cheese to use?

    Sharp cheddar provides the best flavor contrast, but Swiss, Gouda, or blue cheese are excellent alternatives. Avoid soft cheeses like mozzarella, which get lost among the other flavors.

    Is there a lighter version of the dressing?

    Substitute Greek yogurt for half the mayonnaise and sour cream. Add extra herbs like dill or chives to boost flavor while reducing fat content.

    How do I prevent the lettuce from getting soggy?

    Make sure all ingredients are completely dry before assembling, particularly the lettuce. Serve dressing on the side or toss just before serving for maximum crispness.

    Final Thoughts

    This Classic Divorce Salad Made with crisp lettuce, peas, bacon, cheese, and a creamy dressing has become my go-to when I need something that’s both impressive and reliable. There’s something deeply satisfying about watching people’s faces light up over a “simple” salad that delivers so much more than expected. Its versatility means it works for casual Tuesday dinners or special celebrations alike. The combination of textures and flavors creates something greater than the sum of its parts—much like the best relationships in our lives. I hope this salad brings as much joy to your table as it has to mine! Don’t forget to check out more of my favorite recipes on Pinterest.