Category: Lunch

Easy lunch ideas for busy days. Simple, quick recipes with fresh flavor and satisfying meals you can enjoy at home or on the go.

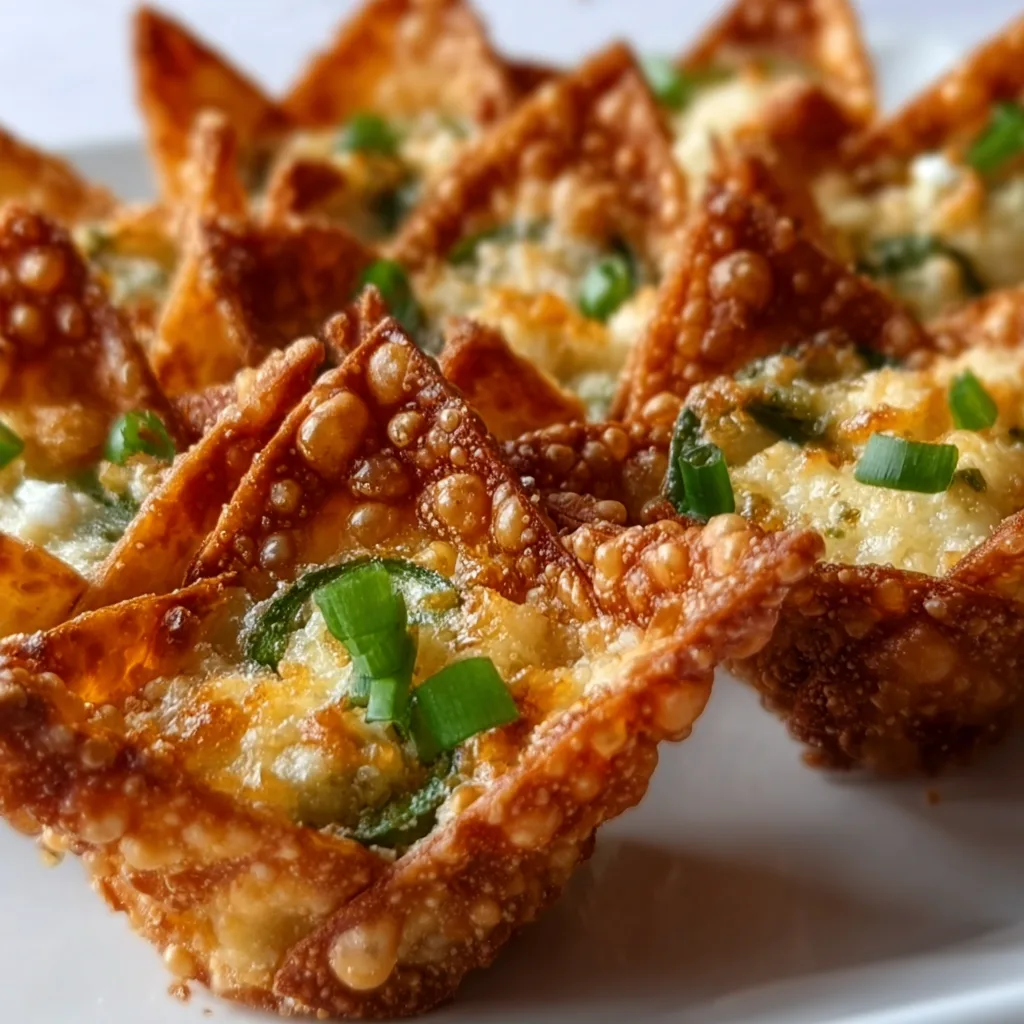
  • Wonton Jalapeno Poppers That Explode with Spicy Crunch!

    Wonton Jalapeno Poppers That Explode with Spicy Crunch!

    Wonton Jalapeno Poppers That Explode with Spicy Crunch!

    Wonton Jalapeno Poppers have completely revolutionized my appetizer game! These crispy little bundles combine the perfect balance of creamy, spicy, and crunchy textures that make them absolutely irresistible at any gathering. I first created these for a last-minute game day party when I needed something impressive but quick. The look on my friends’ faces when they bit into these crispy wonton wrappers filled with cheesy, spicy goodness told me everything I needed to know – I had a winner on my hands! If you love the classic jalapeno popper flavors, you’ll be obsessed with this creative twist.

    Recipe

    Why You’ll Love These Wonton Jalapeno Poppers

    Perfect Party Pleasers

    These Wonton Jalapeno Poppers are guaranteed crowd-pleasers that disappear within minutes! The combination of crispy wonton shells and creamy, spicy filling creates an irresistible texture contrast that keeps everyone reaching for more. I love how the wonton wrappers get perfectly golden and crunchy while the center stays molten and cheesy. They’re substantial enough to satisfy but small enough that guests can enjoy several without filling up. Plus, they look so impressive on a serving platter that everyone assumes you spent hours in the kitchen!

    Quick and Customizable

    One of my favorite things about these Wonton Jalapeno Poppers is how ridiculously simple they are to prepare! The assembly process takes just minutes, and you can easily adjust the spice level by removing seeds (or not) from your jalapenos. I’ve made these with cream cheese alone, but adding shredded cheddar or pepper jack takes them to another level. You can even prep them hours ahead and fry just before serving. For busy hosts, this is the perfect recipe that delivers maximum flavor with minimal effort.

    Essential Tips & Tricks

    Perfecting the Filling

    The secret to exceptional Wonton Jalapeno Poppers lies in the balanced filling. I recommend softening your cream cheese completely before mixing to ensure a smooth consistency. When handling jalapenos, wear disposable gloves to protect your skin and eyes from the capsaicin oils. For the perfect heat level, remove seeds and membranes for milder poppers or leave some in for extra kick. Don’t overfill your wontons – about 1 teaspoon per wrapper prevents bursting during cooking. Adding a pinch of garlic powder and a splash of lime juice to the filling elevates the flavor profile dramatically!

    Sealing and Cooking Techniques

    Properly sealing your Wonton Jalapeno Poppers is crucial for success. Apply a thin line of water around the edges of the wrapper before folding to create a tight seal. Press firmly to eliminate air pockets that could cause them to burst when cooking. When frying, maintain oil temperature between 350-375°F for the crispiest results. Work in small batches to avoid overcrowding, which lowers oil temperature and results in soggy wrappers. If you prefer baking, brush with oil and bake at 375°F for 12-15 minutes for a lighter alternative that’s still deliciously crispy, similar to my baked chicken tenders.

    Serving Ideas & Creative Variations

    Dipping Sauces and Presentations

    Elevate your Wonton Jalapeno Poppers with complementary dips that enhance their flavor profile. Ranch dressing is a classic pairing, but try mixing in chopped cilantro and lime zest for a fresh twist. Sweet chili sauce offers a delightful sweet-heat contrast, while a cooling avocado crema balances the spice beautifully. For presentation, arrange them in a circular pattern on a round platter with dipping sauces in the center. Garnish with fresh cilantro leaves, thinly sliced jalapenos, or a light dusting of paprika for a pop of color that makes them even more irresistible!

    Flavor Variations to Try

    While traditional Wonton Jalapeno Poppers are incredible, experimenting with flavors keeps this recipe exciting! Try adding crispy bacon bits to your filling for a smoky element that pairs perfectly with the spicy jalapenos. For a southwestern twist, mix in corn kernels and black beans with taco seasoning. Crab and cream cheese is another luxurious variation that’s perfect for special occasions. Buffalo chicken with blue cheese crumbles creates a game-day favorite that pairs perfectly with celery sticks. For a sweet-heat combination, try adding pineapple tidbits to the filling – it’s unexpectedly delicious, similar to my Hawaiian BBQ Pizza.

    Storage & Troubleshooting Guide

    Make-Ahead and Storage Solutions

    Wonton Jalapeno Poppers are perfect for planning ahead! You can assemble them up to 24 hours in advance – just place them on a parchment-lined baking sheet, cover with plastic wrap, and refrigerate until cooking. For longer storage, freeze uncooked poppers in a single layer until solid, then transfer to a freezer bag for up to three months. Cook directly from frozen, adding 1-2 minutes to the cooking time. Leftover cooked poppers can be refrigerated for 2-3 days and reheated in a 350°F oven or air fryer for 3-5 minutes until crispy and heated through.

    Fixing Common Problems

    Even experienced cooks encounter challenges with Wonton Jalapeno Poppers! If your wrappers tear during filling, they’re likely overfilled or the edges weren’t moistened enough. Use less filling and ensure you create a proper seal by pressing firmly around all edges. If your poppers burst during frying, your oil may be too hot – maintain a consistent temperature and avoid overcrowding the pan. For poppers that aren’t crispy enough, they likely absorbed too much oil from frying at too low a temperature. Ensure oil reaches 350°F before adding poppers, and drain well on paper towels immediately after cooking.

    Frequently Asked Questions

    Can I make Wonton Jalapeno Poppers in an air fryer?

    Absolutely! Spray with cooking oil, then air fry at 375°F for 6-8 minutes until golden and crispy. This method uses less oil while maintaining that perfect crunch.

    How spicy are Wonton Jalapeno Poppers?

    The spice level is customizable. Remove all seeds and membranes for mild poppers, or leave some in for extra heat. The cream cheese also helps temper the spiciness.

    Can I prepare these ahead for a party?

    Yes! Assemble up to 24 hours ahead and refrigerate uncooked. For longer storage, freeze them. Cook just before serving for the best texture and flavor.

    What’s the best way to reheat leftover Wonton Jalapeno Poppers?

    Reheat in a 350°F oven or air fryer for 3-5 minutes. Avoid microwaving as it makes the wrappers soggy instead of crispy.

    Where can I find wonton wrappers for my jalapeno poppers?

    Look in the refrigerated section near tofu or produce in most grocery stores. Asian markets always carry them, usually in the refrigerated or frozen sections.

    Final Thoughts

    These Wonton Jalapeno Poppers have become my signature appetizer for good reason – they’re the perfect combination of impressive yet easy. Every time I serve them, I’m reminded of that first game day when they disappeared in minutes and friends begged for the recipe. The crispy exterior giving way to that creamy, spicy filling creates an irresistible bite that keeps everyone coming back for more. Whether you’re hosting a casual get-together or an elegant cocktail party, these wonton jalapeno poppers are guaranteed to steal the show! Find more appetizer inspiration on my Pinterest board.
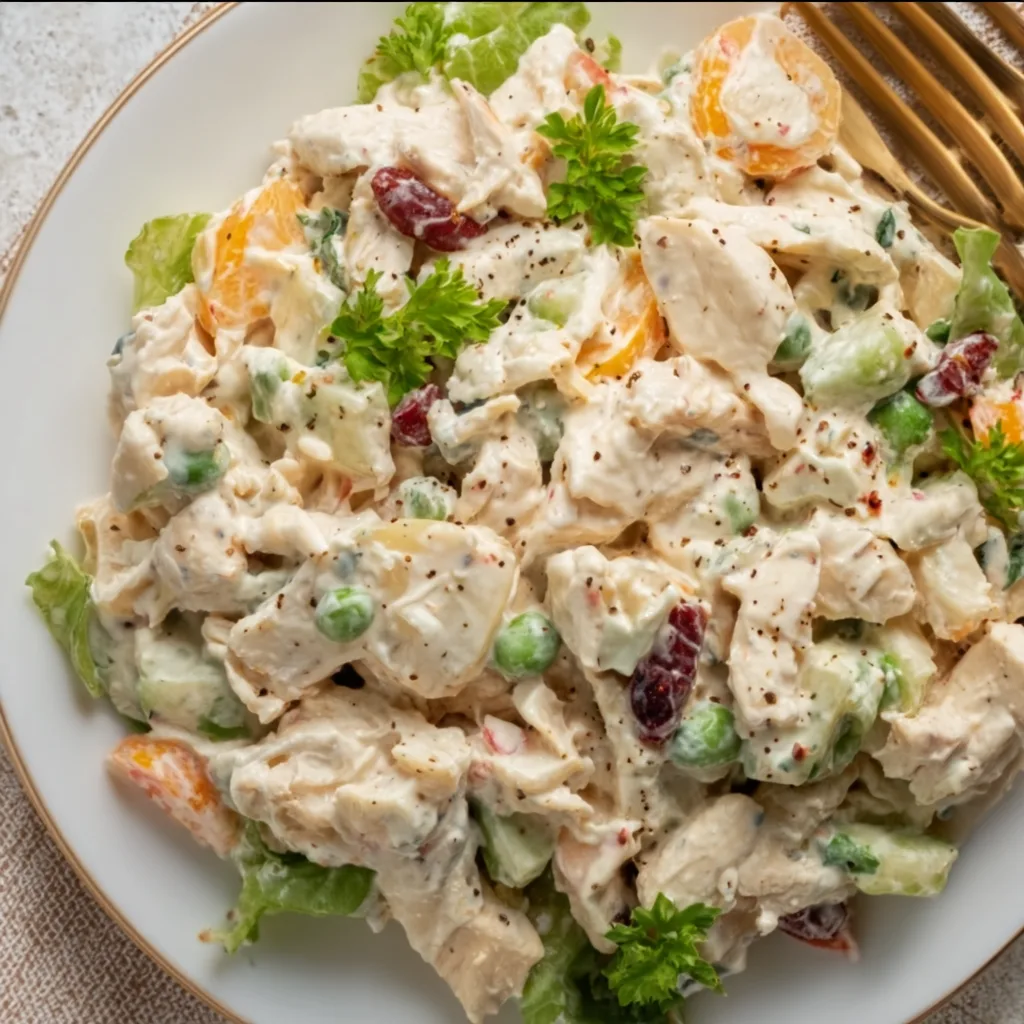
  • Creamy Chicken Salad Recipe That Will Wow Your Taste Buds!

    Creamy Chicken Salad Recipe That Will Wow Your Taste Buds!

    Creamy Chicken Salad Recipe That Will Wow Your Taste Buds!

    Creamy chicken salad has been my ultimate go-to recipe for busy weekdays and impromptu gatherings for years. There’s something magical about the tender chunks of chicken nestled in that perfectly seasoned mayo dressing that makes everyone come back for seconds. I still remember bringing this to my sister’s baby shower last summer – the bowl was completely empty within 20 minutes! The beauty of this versatile dish lies in its simplicity and how easily it transforms basic ingredients into something truly special. Whether tucked into a sandwich or scooped onto crackers, this creamy chicken salad delivers comfort in every bite.

    Recipe

    Why You’ll Love This Creamy Chicken Salad

    Perfect Balance of Flavors and Textures

    The secret to an unforgettable creamy chicken salad lies in the harmonious balance between tender chicken, crunchy elements, and that luscious dressing. I use a combination of Greek yogurt and mayo for the perfect creamy base without heaviness. The crunch from celery and toasted almonds creates a delightful textural contrast against the soft chicken pieces. A hint of dijon mustard adds that subtle tang that makes your taste buds dance, while fresh herbs bring brightness to each forkful. When these elements come together, magic happens – a symphony of flavors that’s both comforting and exciting.

    Versatile Meal Prep Champion

    Nothing beats having a container of creamy chicken salad waiting in the fridge when hunger strikes. This recipe has saved me countless times during hectic workweeks! The flavors actually improve after a day in the refrigerator as everything melds together beautifully. Make a double batch on Sunday, and you’ve got the foundation for multiple meal options throughout the week – tucked into wraps, piled onto croissants, or served atop mixed greens for a lighter option. It’s also perfect for those nights when cooking feels impossible – just reach in the fridge, and dinner is practically ready.

    Essential Tips & Tricks

    Chicken Preparation Secrets

    The foundation of exceptional creamy chicken salad is perfectly cooked, well-seasoned chicken. I’ve found that poaching boneless chicken breasts in broth with aromatics yields the most tender, flavorful results. Alternatively, rotisserie chicken creates an incredible shortcut without sacrificing quality – I often grab one when time is tight! Whatever method you choose, allow the chicken to cool completely before mixing to prevent a watery salad. The chicken shredding technique matters too – I prefer a combination of larger chunks and smaller pieces for textural interest rather than uniformly diced meat. This creates pockets of chicken goodness throughout the salad.

    Dressing Techniques for Maximum Creaminess

    Creating the perfect creamy dressing requires attention to both ingredients and technique. I always start by whisking the mayo and yogurt separately before adding other components – this ensures the smoothest texture without lumps. For extra depth, let your dressing ingredients come to room temperature before mixing, allowing flavors to blend more harmoniously. Don’t rush this step! Homemade baked chicken tenders can be chopped and used in this recipe for amazing results. Remember to taste and adjust seasoning after combining with the chicken, as cold temperatures dampen flavors – you’ll likely need more salt and acid than you initially think.

    Serving Ideas & Creative Variations

    Beyond the Basic Sandwich

    While a classic chicken salad sandwich on toasted bread is divine, there are countless creative ways to enjoy this versatile dish. Try serving it in butter lettuce cups for a refreshing low-carb option that’s perfect for summer lunches. Hollowed-out tomatoes or avocado halves make impressive individual portions for brunches or light dinners. For an elegant appetizer, pipe small mounds onto cucumber rounds or endive leaves. I’ve even used it as a filling for twice-baked potatoes – the creamy chicken salad melts beautifully into the fluffy potato interior for a surprisingly delicious combination that always impresses dinner guests.

    Flavor Variations to Keep It Exciting

    The beauty of creamy chicken salad lies in its adaptability to different flavor profiles. For a Mediterranean twist, add chopped olives, feta, and sun-dried tomatoes to the mix. Curry powder, golden raisins, and cashews create an exotic variation that pairs beautifully with Dutch oven no-knead crusty bread. My personal favorite fall version incorporates dried cranberries, toasted pecans, and diced apples with a touch of cinnamon in the dressing. For a southwest-inspired take, mix in black beans, corn, and avocado with a lime-cilantro dressing instead of the traditional mayo base. These variations ensure you’ll never tire of this versatile dish.

    Storage & Troubleshooting Guide

    Proper Storage for Maximum Freshness

    Maintaining the quality of your creamy chicken salad requires proper storage techniques. Always refrigerate in an airtight container within two hours of preparation. For optimal freshness, press a piece of plastic wrap directly onto the surface before sealing the container – this prevents that unappetizing dry layer from forming on top. Properly stored, your chicken salad will maintain peak quality for 3-4 days. If you’re meal prepping, consider keeping mix-ins like nuts and crisp vegetables separate until serving time to preserve their texture. For picnics or potlucks, nestle your serving bowl in a larger container filled with ice to keep everything safely chilled.

    Fixing Common Chicken Salad Problems

    Even experienced cooks occasionally encounter issues with creamy chicken salad. If your mixture becomes too dry after refrigeration (chicken can absorb moisture overnight), simply stir in a tablespoon of mayo or Greek yogurt to refresh the texture. For a watery salad, drain excess liquid, then fold in a sprinkle of dry breadcrumbs or finely crushed crackers to absorb moisture. If flavors seem bland after chilling, a splash of lemon juice or vinegar will brighten everything up – cold temperatures dull seasonings, so don’t be afraid to adjust before serving. And if you’ve accidentally overseasoned, adding more chicken or a neutral element like diced cucumber can help balance the flavors.

    Frequently Asked Questions

    How long does creamy chicken salad last in the refrigerator?

    When stored in an airtight container, your chicken salad will stay fresh for 3-4 days. Always refrigerate within two hours of preparation and keep it cold (below 40°F) for food safety.

    Can I freeze creamy chicken salad?

    I don’t recommend freezing chicken salad with mayo-based dressings as they tend to separate when thawed, resulting in an unpleasant texture. The vegetables also become soggy after freezing.

    What can I substitute for mayo in chicken salad?

    Greek yogurt makes an excellent substitute – use it alone or mixed with avocado for creaminess. Mashed avocado with a splash of olive oil and lemon juice also works beautifully.

    How can I make my creamy chicken salad healthier?

    Use Greek yogurt instead of mayo, load up on extra vegetables like bell peppers and cucumbers, and incorporate fresh herbs for flavor without additional calories.

    Why is my chicken salad dry/watery?

    Dry chicken salad typically needs more dressing or moisture. If it’s watery, your chicken might not have cooled completely before mixing, or your vegetables released excess moisture.

    Final Thoughts

    This creamy chicken salad recipe has become more than just a meal in my kitchen – it’s a reliable friend that shows up for quick lunches, impressive dinner parties, and everything in between. The versatility and make-ahead convenience make it perfect for both everyday meals and special occasions. I love how it transforms simple ingredients into something truly satisfying while allowing for endless creative variations. Whether you stick to the classic version or experiment with bold flavor combinations, this creamy chicken salad delivers comfort, nutrition, and deliciousness in every bite. Find more inspiration for your kitchen adventures on Pinterest.

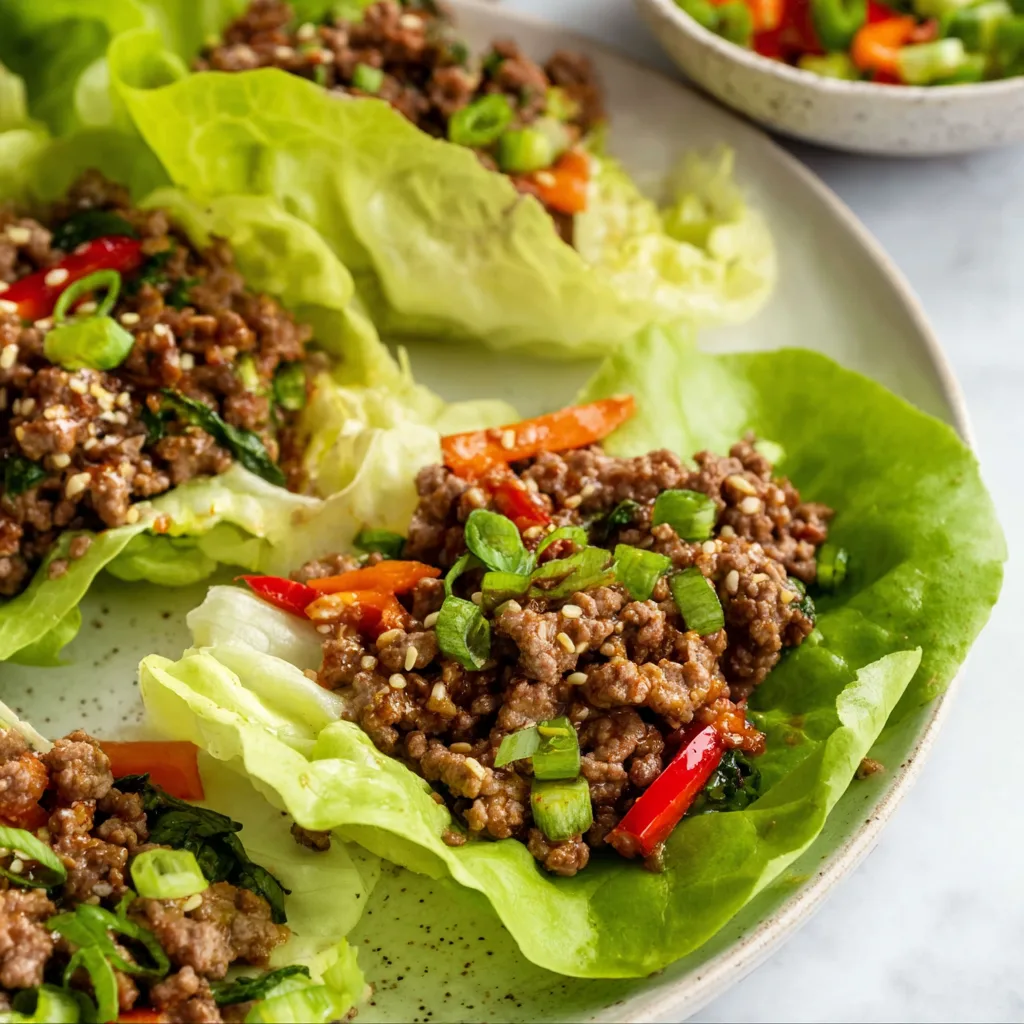
  • 15-Minute Ground Beef Lettuce Wraps That Will Blow Your Mind!

    15-Minute Ground Beef Lettuce Wraps That Will Blow Your Mind!

    15-Minute Ground Beef Lettuce Wraps That Will Blow Your Mind!

    15-Minute Ground Beef Lettuce Wraps are my absolute lifesaver on those nights when I’m craving something satisfying but don’t have the energy for a complicated meal. The first time I made these, I had just finished a marathon workday and was thisclose to ordering takeout. Instead, I threw these together with ingredients I already had, and now they’re in my regular rotation. The combination of savory beef, crisp lettuce, and customizable toppings creates a meal that feels both indulgent and light at the same time. If you’re looking for quick dinners that don’t sacrifice flavor, these lettuce wraps are about to become your new best friend.

    Recipe

    Why You’ll Love This 15-Minute Ground Beef Lettuce Wraps

    Perfect for Busy Weeknights

    There’s something magical about recipes that can be thrown together faster than delivery arrives. These 15-Minute Ground Beef Lettuce Wraps have saved me countless times when hunger strikes and patience is low. The quick cooking time means you can have dinner on the table in less time than it takes to decide what movie to watch. I love that the beef cooks in under 10 minutes, and while it’s sizzling away, I can prep all the toppings and wash the lettuce leaves. It’s the ultimate multitasking meal that doesn’t feel rushed or thrown together, despite coming together in mere minutes.

    Customizable for Everyone

    What I adore most about these lettuce wraps is how easily they adapt to everyone’s preferences. My partner loads up on extra sriracha and jalapeños while I pile on the avocado and cilantro. The flexible toppings mean everyone gets exactly what they want without extra work for the cook (that’s you!). I’ve served these at impromptu gatherings where guests create their own perfect wrap—it’s like a mini taco bar but lighter and fresher. The interactive element makes dinner more fun, and I’ve found even picky eaters get excited about building their own creation.

    Essential Tips & Tricks

    Getting the Perfect Beef Flavor

    The secret to these wraps is all in how you season the beef. I’ve learned that blooming the spices in the hot pan for 30 seconds before adding the meat makes a world of difference. This quick step releases their essential oils and creates a depth of flavor you wouldn’t expect in a 15-minute meal. Don’t be shy with the garlic and ginger—they create that irresistible aroma that makes everyone wander into the kitchen asking what smells so good. And remember to let the beef develop a slight crust before breaking it up; those caramelized bits are little flavor bombs that elevate the entire dish.

    Lettuce Selection Matters

    Not all lettuce is created equal when it comes to wraps! After some trial and error (and a few lap disasters), I’ve found that butter lettuce or romaine hearts provide the perfect balance of flexibility and structure. The leaves should be large enough to hold a generous portion of filling but sturdy enough not to tear when picked up. I like to double up thinner leaves for extra support, especially when serving to guests. A quick tip I learned from a Japanese beef bowl recipe: pat your lettuce leaves completely dry after washing to prevent the dreaded soggy wrap syndrome that can ruin an otherwise perfect bite.

    Serving Ideas & Creative Variations

    Family-Style Presentation

    There’s something delightfully communal about setting out all the components and letting everyone build their own wraps. I arrange everything in colorful serving bowls on a large wooden board—the seasoned beef in the center, surrounded by neat piles of toppings like shredded cheese, diced tomatoes, sliced avocado, and fresh herbs. This presentation style not only looks beautiful (hello, Instagram-worthy dinner!) but also makes cleanup easier since everyone serves themselves. For a special touch, I include small ramekins of different sauces like lime crema, hot sauce, and a quick peanut sauce inspired by my favorite chickpea feta avocado salad dressing.

    Beyond Basic Beef

    While the classic version is delicious, sometimes I like to switch things up with different flavor profiles. For an Asian-inspired twist, I add hoisin sauce, water chestnuts, and top with crunchy wonton strips. Mediterranean-style wraps with lemon, oregano, and a dollop of tzatziki are another favorite variation. You can even go breakfast-for-dinner by using breakfast sausage instead of beef and topping with scrambled eggs and salsa. The 15-minute cooking time stays the same, but these simple swaps keep the meal feeling fresh and exciting, even when it appears on your table several times a month.

    Storage & Troubleshooting Guide

    Meal Prep Strategies

    These lettuce wraps are perfect for meal planning because the components store beautifully when kept separate. I often make a double batch of the seasoned beef on Sunday and store it in an airtight container in the refrigerator for up to three days. The key is reheating it gently with a splash of water or broth to restore moisture. Prep your toppings in advance too—chopped veggies in one container, washed and dried lettuce leaves in another (with a paper towel to absorb excess moisture). This approach means you can have dinner ready in 5 minutes instead of 15 on particularly hectic weeknights.

    Fixing Common Issues

    Even a simple recipe can sometimes go sideways! If your beef mixture turns out too watery, don’t panic—just continue cooking over medium-high heat until the excess moisture evaporates. For beef that’s too dry, a tablespoon of beef broth or even water can restore juiciness. If your lettuce leaves keep tearing, try the “taco within a taco” method: use a sturdy outer leaf like romaine with a softer butter lettuce leaf inside. And for picky eaters who aren’t fans of lettuce, these fillings work beautifully in soft tortillas or even as a topping for rice bowls without compromising that 15-minute timeframe.

    Frequently Asked Questions

    Can I make 15-Minute Ground Beef Lettuce Wraps with ground turkey instead?

    Absolutely! Ground turkey works perfectly—just add an extra tablespoon of oil since it’s leaner than beef. The cooking time remains the same, and you might want to increase seasonings slightly as turkey can be milder.

    How do I prevent my lettuce wraps from getting soggy?

    Pat the lettuce completely dry after washing, drain the beef filling well before serving, and consider placing a layer of cheese or avocado between the lettuce and meat as a moisture barrier.

    What’s the best lettuce variety to use?

    Butter lettuce offers the perfect combination of flexibility and strength, but romaine hearts and iceberg are good alternatives. Look for large, intact leaves without tears.

    Can I make these spicy?

    Definitely! Add diced jalapeños, red pepper flakes, or sriracha to the beef while cooking. You can also offer hot sauce on the side for customizable heat levels.

    Are these 15-Minute Ground Beef Lettuce Wraps keto-friendly?

    Yes! These wraps are naturally low-carb and keto-friendly. Just be mindful of toppings—choose full-fat cheese and sour cream while limiting higher-carb additions like corn.

    Final Thoughts

    These 15-Minute Ground Beef Lettuce Wraps have become my go-to solution for those nights when cooking feels impossible but takeout isn’t the answer. There’s something deeply satisfying about creating a meal that’s both nourishing and quick. I love watching friends’ surprised expressions when they learn how quickly these came together—proof that delicious doesn’t have to mean difficult. Whether you’re cooking for one or feeding a crowd, these wraps adapt to your needs while keeping that precious 15-minute timeline intact. I’d love to see your creations on Pinterest!

  • 7 Layer Dip Recipe: Irresistible Party Snack Everyone Loves!

    7 Layer Dip Recipe: Irresistible Party Snack Everyone Loves!

    7 Layer Dip Recipe: Irresistible Party Snack Everyone Loves!

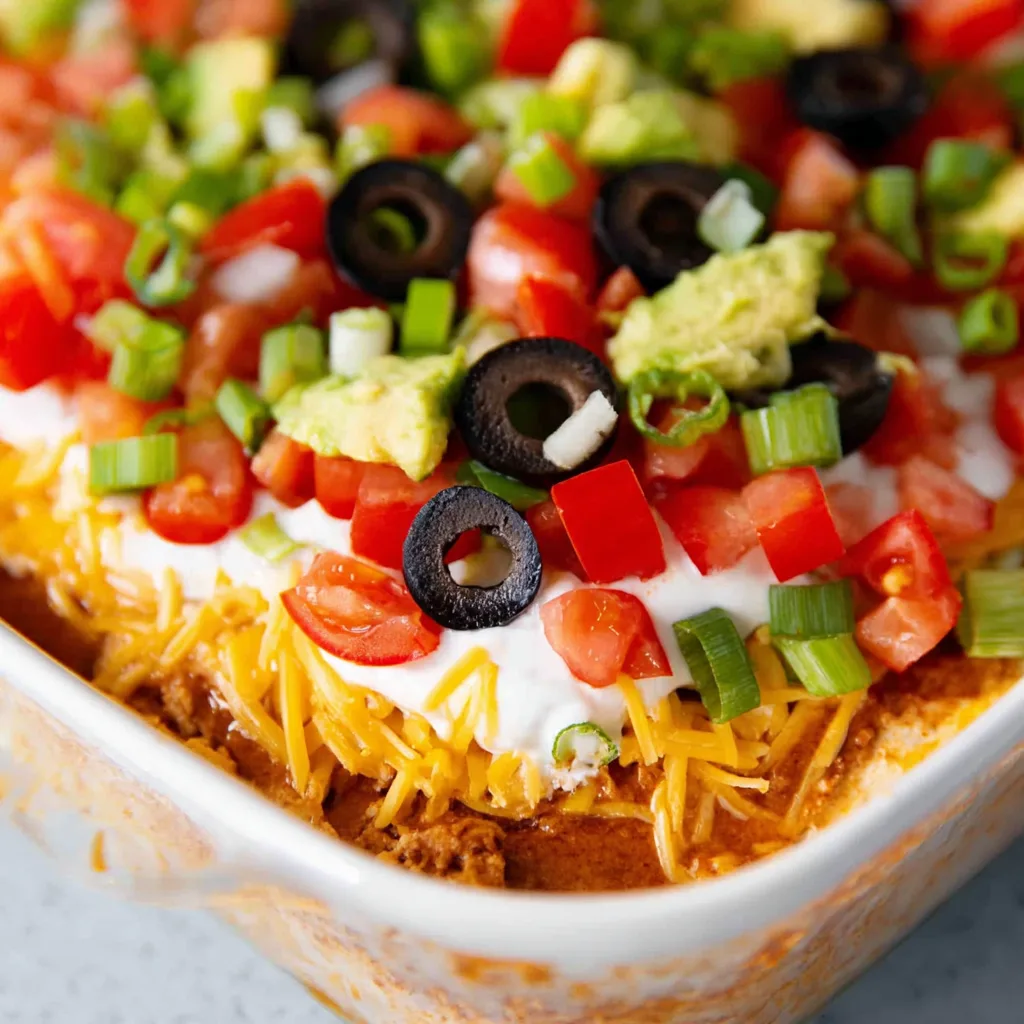
    7 Layer Dip is the ultimate crowd-pleaser that transforms any gathering into a fiesta of flavors. The moment I set this colorful creation on the table, it becomes the centerpiece that everyone gravitates toward. Layers of creamy refried beans, tangy sour cream, zesty guacamole, and vibrant toppings create a symphony of textures and tastes that dance across your palate with every scoop. I’ve watched friends fight over the last bite at countless game days and potlucks. Trust me, this dip isn’t just a recipe—it’s an experience that brings people together, one tortilla chip at a time.

    Recipe

    Why You’ll Love This 7 Layer Dip

    Perfect Party Pleaser

    There’s something magical about watching guests’ eyes light up when they spot a 7 Layer Dip on the buffet table. The vibrant colors alone are enough to make mouths water! I love how this dip satisfies everyone—the bean lovers, the cheese enthusiasts, the guacamole devotees—all in one gorgeous dish. The beauty is in its versatility; you can easily customize layers to accommodate preferences while maintaining that stunning visual appeal. When I made this for my sister’s housewarming, even her picky father-in-law went back for seconds (and thirds)!

    Make-Ahead Convenience

    One of my favorite things about this crowd-pleasing appetizer is how brilliantly it works with busy schedules. I can assemble most layers the night before, cover tightly, and add the final delicate toppings just before guests arrive. This make-ahead magic means I’m not frantically chopping tomatoes when I should be greeting friends at the door. The flavors actually develop and meld overnight, creating an even more delicious experience. I’ve found this dip tastes even better after the beans and seasoned layers have had time to become acquainted in the refrigerator.

    Essential Tips & Tricks

    Layer Like a Pro

    The secret to a show-stopping 7 Layer Dip lies in the architecture of your creation. Start with a solid foundation—I always spread refried beans evenly across the bottom, making sure to reach the edges of my clear glass dish (showing off those layers is half the fun!). Each subsequent layer should be applied with gentle precision, avoiding mixing or muddying the colors. For picture-perfect presentation, use the back of a spoon to smooth creamy layers and sprinkle toppings evenly. My game-changing tip? Chill your serving dish beforehand to help each layer set firmly as you build your masterpiece.

    Ingredient Quality Matters

    Don’t underestimate how much fresh, quality ingredients elevate this simple dip. I learned this lesson when I once used pre-made guacamole that turned an unappetizing brown before guests arrived. Now I always make fresh guacamole with perfectly ripe avocados and a splash of lime juice to maintain that gorgeous green hue. Similarly, freshly grated cheese creates melty pockets of flavor that pre-shredded bags can’t match. When choosing tomatoes, opt for Roma varieties—they’re less watery and won’t make your top layers soggy. These small upgrades make a remarkable difference in both presentation and taste.

    Serving Ideas & Creative Variations

    Beyond Basic Chips

    While tortilla chips are the classic companion, thinking outside the chip bag opens up exciting possibilities for your 7 Layer Dip experience. I love serving a variety of dipping vehicles—crisp bell pepper wedges, cucumber rounds, and endive leaves create a gorgeous rainbow around the dip while offering healthier options. For a truly impressive spread, add warm pita triangles, pretzel crisps, or crispy wonton chips for textural contrast. At my last book club, I included breadsticks standing upright in a separate glass—they looked elegant and were perfect for scooping through all seven layers in one satisfying bite!

    Seasonal & Themed Twists

    Transform this versatile dip to match any occasion with creative layer substitutions. For summer gatherings, I brighten things up with a corn and black bean salsa layer that adds sweet pops of flavor. During fall, I’ve swapped traditional guacamole for a roasted green chile layer that adds wonderful warmth. My Mediterranean variation replaces Mexican flavors with layers of hummus, tzatziki, feta, olives, cucumbers, and roasted red peppers. The holidays call for festive touches—arranging red and green toppings in decorative patterns or using cookie cutters to create shaped cheese garnishes that float on top makes the dip instantly celebration-worthy.

    Storage & Troubleshooting Guide

    Keeping It Fresh

    Preserving the beauty and taste of your 7 Layer Dip requires some strategic planning. To prevent the dreaded browning of avocado layers, I always add a thin protective barrier of sour cream or lime juice directly on top of the guacamole. When storing leftovers (if you’re lucky enough to have any!), press plastic wrap directly against the surface of the dip rather than just covering the container. This minimizes air exposure that leads to discoloration and texture changes. For optimal freshness, consume within 2 days—though I’ve never seen a 7 Layer Dip last that long in my house!

    Solving Common Problems

    Even experienced dip-makers encounter occasional challenges. If your layers start bleeding together, your dip might be too warm—place it in the refrigerator for 15-20 minutes between adding each component to help them set. Dealing with watery tomatoes? I pat them dry with paper towels before adding them to prevent soggy upper layers. For dips that will sit out during longer gatherings, build your creation in two separate smaller dishes rather than one large one, keeping the second refrigerated until needed. This freshness strategy ensures your late-arriving guests enjoy the same beautiful presentation as the early birds.

    Frequently Asked Questions

    Can I make 7 Layer Dip the day before?

    Absolutely! Prepare the first 5 layers, cover tightly, and refrigerate. Add the final delicate toppings (tomatoes, green onions) just before serving to maintain maximum freshness and prevent sogginess.

    What’s the best container for 7 Layer Dip?

    A clear glass dish with straight sides showcases the beautiful layers. I recommend a 9×13 dish for larger gatherings or an 8×8 for intimate parties. Depth matters—aim for at least 2 inches.

    How can I make a healthier version?

    Use Greek yogurt instead of sour cream, fat-free refried beans, and load up on fresh veggies. You can also substitute guacamole with mashed edamame for a protein boost.

    How long can 7 Layer Dip sit out at a party?

    Follow the 2-hour safety rule—don’t leave the dip at room temperature longer than 2 hours (1 hour if your room is particularly warm). Consider serving in smaller batches.

    What are the traditional seven layers in 7 Layer Dip?

    The classic version includes refried beans, sour cream (often mixed with taco seasoning), guacamole, shredded cheese, diced tomatoes, sliced black olives, and green onions or jalapeños.

    Final Thoughts

    Creating the perfect 7 Layer Dip is like painting a delicious canvas that brings people together. I love watching friends gather around it, sharing stories between bites and debating which layer is their favorite. There’s something deeply satisfying about presenting a dish that’s both visually stunning and bursting with flavor. Whether you follow the classic recipe or venture into creative variations, this beloved appetizer remains a testament to how simple ingredients, thoughtfully layered, can create something truly extraordinary. So grab your favorite serving dish and start building your masterpiece—it’s bound to disappear quickly!

    For more party-perfect recipes, check out my Pinterest collection!

  • Bean and Cheese Burritos: Irresistibly Cheesy & Packed with Flavor!

    Bean and Cheese Burritos: Irresistibly Cheesy & Packed with Flavor!

    Bean and Cheese Burritos: Irresistibly Cheesy & Packed with Flavor!

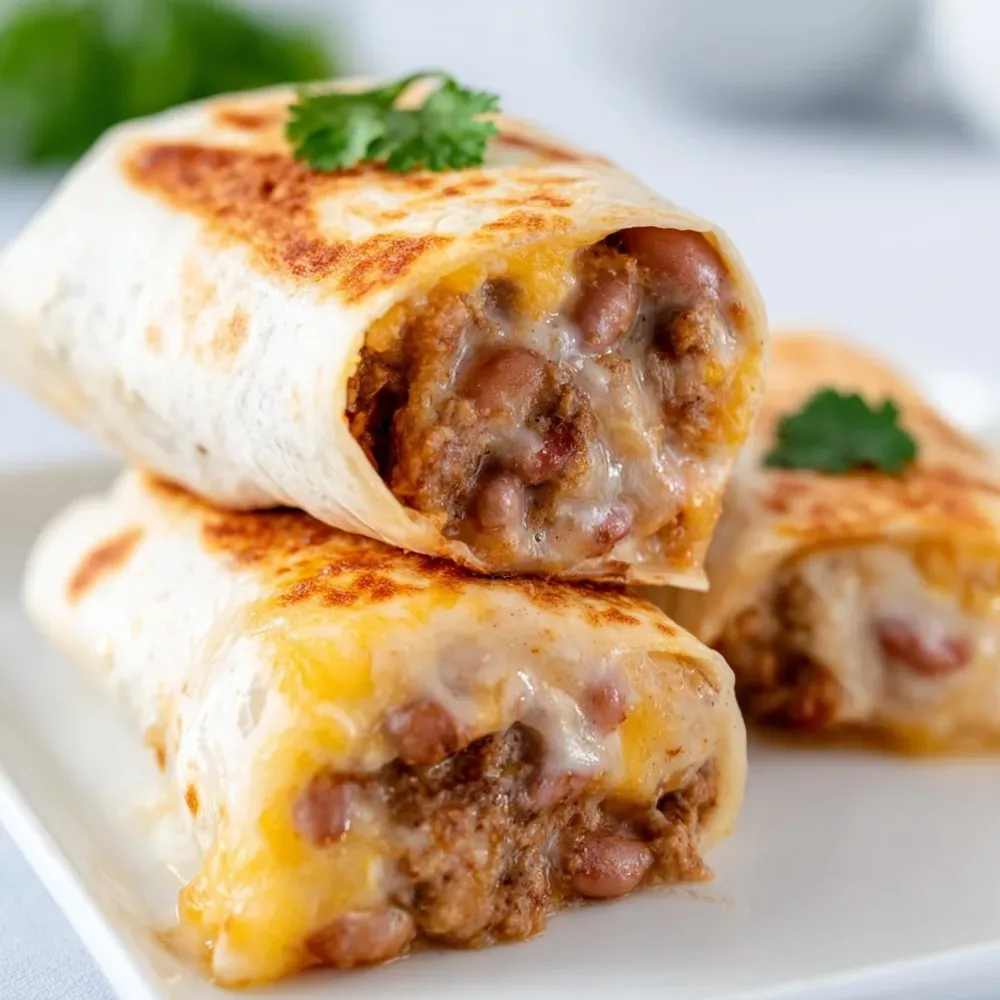
    Bean and cheese burritos are my ultimate comfort food—warm, gooey, and endlessly satisfying. There’s something magical about that first bite when the melted cheese stretches between your teeth and the savory beans warm you from the inside out. I discovered my love for these simple treasures during college when my budget was tight but my hunger was mighty. Now, they’re my go-to when I need a quick dinner that feels like a hug on a plate. Whether you’re feeding a family or meal prepping for one, these bean and cheese burritos deserve a permanent spot in your recipe collection.

    Recipe

    Why You’ll Love These Bean and Cheese Burritos

    Perfect Balance of Simplicity and Flavor

    Bean and cheese burritos might seem basic, but don’t let that fool you—they’re a canvas for incredible flavor development. The key is layering seasonings: cumin, chili powder, and garlic create depth, while a touch of lime brightens everything. I love how the beans become creamy when mashed slightly, creating that perfect texture that clings to every bite of cheese. What makes these truly special is how adaptable they are to whatever you have on hand. Even on my busiest nights when the pantry feels bare, I can always pull together these satisfying bundles.

    Budget-Friendly Meal Solution

    As someone who watches grocery bills carefully, I appreciate how these burritos deliver maximum satisfaction with minimal cost. Dried beans are pennies per serving when cooked from scratch, but even canned beans keep this meal economical. One night when unexpected guests dropped by, I stretched two cans of pinto beans and a block of cheese into dinner for five with just a few tortillas. The humble ingredients create something greater than their parts, especially when you add those little touches that elevate—like toasting the tortillas or adding a sprinkle of fresh cilantro. Your wallet stays happy while your taste buds celebrate.

    Essential Tips & Tricks

    Mastering the Perfect Bean Texture

    The secret to exceptional bean and cheese burritos lies in the bean preparation. I’ve found that partially mashing about half the beans creates the ideal texture—creamy enough to hold everything together but with enough whole beans for substance. Heat your beans with a splash of broth (or even just water) and add seasonings while they’re warming to infuse maximum flavor. My game-changing discovery was adding a tablespoon of butter to the beans during heating—it creates a silky richness that transforms the entire burrito. Don’t rush this step; let those flavors meld together for at least 5 minutes.

    Foolproof Rolling Technique

    Nothing ruins a perfect burrito faster than filling spilling everywhere. The proper rolling method makes all the difference between disappointment and delight. Start by warming your tortillas—either over a gas flame for 10 seconds per side or wrapped in damp paper towels in the microwave. Place your fillings slightly off-center in a horizontal line, leaving an inch of space on the sides. Fold in those sides first, then roll from the bottom up, keeping everything tight like when making sushi. For extra insurance against burrito collapse, wrap the finished burrito in foil and let it rest for 2 minutes—this helps the tortilla seal to itself.

    Serving Ideas & Creative Variations

    Elevate with Thoughtful Toppings

    Transform basic bean and cheese burritos into a restaurant-worthy meal with strategic toppings. I create a simple lime crema by mixing sour cream with lime zest and a pinch of salt—it adds brightness that cuts through the richness. Quick-pickled red onions bring color and tang; just soak thinly sliced onions in lime juice with a pinch of sugar for 15 minutes. For texture contrast, add crushed tortilla chips or toasted pepitas. When I’m feeling fancy, I’ll make a simple pico de gallo or set out sliced avocado. These little extras take minimal effort but make the meal feel special.

    Global Flavor Inspirations

    While traditional bean and cheese burritos are Mexican-inspired, don’t be afraid to experiment with global flavors. Try a Mediterranean twist with white beans, feta, and oregano, or go Greek with tzatziki sauce instead of sour cream. I once made an Indian-inspired version with chickpeas, paneer cheese, and garam masala that was absolutely divine alongside my chickpea feta avocado salad. For an Italian take, use cannellini beans with mozzarella and a touch of pesto. The basic formula stays the same—beans plus cheese in a tortilla—but the flavor possibilities are endless. These variations keep meal planning exciting without requiring entirely new ingredients.

    Storage & Troubleshooting Guide

    Make-Ahead and Freezer Strategy

    Bean and cheese burritos are perfect for batch preparation. When making ahead, slightly undercook your beans so they don’t get mushy upon reheating. For freezing, wrap each burrito tightly in parchment paper, then aluminum foil, and store in freezer bags for up to three months. The key to preventing soggy reheated burritos is cooling them completely before wrapping. I label mine with the date and any special ingredients I’ve added. To reheat, unwrap from the parchment, rewrap in foil, and bake at 350°F for 20 minutes, or microwave for 2-3 minutes after removing all wrapping.

    Solving Common Burrito Problems

    Even experienced cooks encounter burrito challenges. If your tortillas crack, they’re likely too cold or dry—warm them properly and consider more flexible brands like Mission or La Banderita. For filling overflow, you’re probably overstuffing; stick to about ⅓ cup beans and ¼ cup cheese per standard tortilla. If your burritos seem bland, remember that beans need generous seasoning—don’t be shy with salt and spices. For too-dry burritos, add a spoonful of salsa or bean cooking liquid to the filling. And if cheese isn’t melty enough, let the hot beans sit on the cheese for a minute before rolling, or give the finished burrito a quick toast in a pan.

    Frequently Asked Questions

    Can I use different types of beans for these burritos?

    Absolutely! Pinto and black beans are traditional, but any variety works. Try refried beans for creamier texture, chickpeas for nuttier flavor, or white beans for a milder profile. Mix varieties for interesting texture and flavor combinations.

    How do I keep my bean and cheese burritos from getting soggy?

    Drain beans thoroughly before adding to tortillas. If using wet ingredients like salsa, place them between cheese and beans rather than directly on the tortilla. For make-ahead burritos, cool filling completely before assembling.

    What’s the best cheese for authentic flavor?

    Traditional Mexican cheeses like Oaxaca or queso fresco are ideal. For melty texture, try Monterey Jack or a Mexican blend. Sharp cheddar adds nice flavor contrast, while pepper jack brings gentle heat.

    Can these be made vegan?

    Definitely! Substitute dairy cheese with plant-based alternatives—Violife and Follow Your Heart melt particularly well. Add nutritional yeast to the beans for extra cheesy flavor and a sprinkle of turmeric for color.

    What’s the secret to restaurant-quality bean and cheese burritos?

    The difference is in the details: properly seasoned beans (don’t skimp on salt), freshly grated cheese rather than pre-shredded, and slightly toasting assembled burritos in a dry skillet until golden and crisp.

    Final Thoughts

    Bean and cheese burritos prove that culinary joy often comes from the simplest combinations. There’s something deeply satisfying about transforming humble ingredients into something that brings genuine happiness to the table. I find myself returning to this recipe whenever I need reliable comfort or a quick meal solution that doesn’t sacrifice flavor. Whether you make them exactly as written or use this as a foundation for your own creative variations, these bean and cheese burritos deserve to be celebrated for their perfect balance of accessibility and satisfaction. Don’t forget to share your creations on Pinterest!

  • Juicy Crockpot Lil Smokies Recipe That’ll Wow Your Taste Buds!

    Juicy Crockpot Lil Smokies Recipe That’ll Wow Your Taste Buds!

    Juicy Crockpot Lil Smokies Recipe That'll Wow Your Taste Buds!

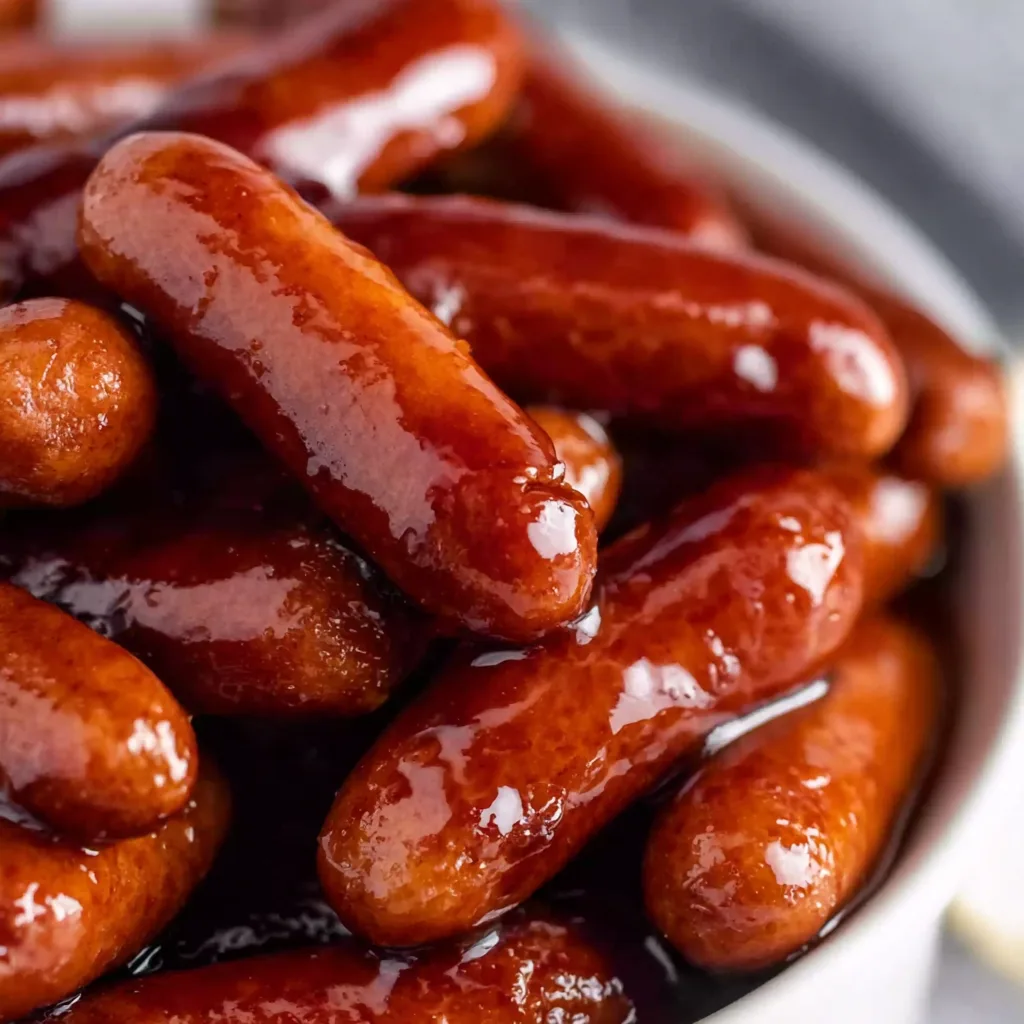
    Juicy Crockpot Lil Smokies are my absolute favorite party appetizer when I want something that’s both effortless and guaranteed to disappear within minutes. The first time I served these at a holiday gathering, my brother-in-law ate so many that he couldn’t touch the main course! There’s something magical about how these tiny sausages transform in the slow cooker, soaking up that sweet-tangy sauce until they’re irresistibly tender and glossy. The best part? Your house fills with an aroma that makes everyone ask “what smells so good?” the moment they walk through the door.

    Recipe

    Why You’ll Love This Juicy Crockpot Lil Smokies

    Perfect Party Food That Disappears Fast

    These little flavor bombs are the ultimate crowd-pleaser that practically cook themselves. I’ve watched even the pickiest eaters reach for seconds and thirds! The sweet-savory balance creates that addictive quality that keeps everyone coming back for “just one more.” Plus, they’re incredibly budget-friendly when feeding a crowd. I always make a double batch for game days because they vanish faster than you can say touchdown. The sticky glaze creates that beautiful sheen that makes them look as appetizing as they taste—perfect for those inevitable pre-party food photos!

    Effortless Preparation With Big Flavor Payoff

    What I adore most about this recipe is the magical dump-and-go simplicity. Just five minutes of prep work delivers hours of delicious results. On busy hosting days, I can focus on other dishes while these little gems bubble away to perfection. The slow cooking process allows the smokies to absorb every bit of flavor from the sauce, creating that perfect texture—tender but not mushy, with edges that get slightly caramelized. There’s something deeply satisfying about lifting the lid after a few hours to find them transformed into glossy, irresistible bites.

    Essential Tips & Tricks

    Sauce Secrets For Maximum Flavor

    The key to truly exceptional lil smokies lies in creating that perfect flavor foundation. I’ve learned that adding a tablespoon of Dijon mustard provides a subtle tang that balances the sweetness beautifully. For deeper flavor complexity, try using brown sugar instead of white, and add a splash of Worcestershire sauce for that umami boost. Don’t rush the cooking process—at least 2 hours on low allows the sauce to thicken properly and coat each smokie evenly. If your sauce seems too thin after cooking, simply remove the lid for the last 30 minutes to help it reduce and concentrate those flavors.

    Preventing Common Cooking Mistakes

    The biggest mistake I see is overcrowding the crockpot, which prevents even cooking. Always leave about an inch of space at the top and avoid the temptation to stir too frequently. Gentle stirring once per hour is plenty—excessive stirring can cause the smokies to break apart. If you’re bringing these to a potluck, transport them in the cooking liquid, then use the “warm” setting once you arrive. For the juiciest results, avoid the high setting entirely unless you’re truly in a rush—low and slow is the secret to that perfect texture. Check out these slow cooker shredded beef sandwiches for another crowd-pleasing crockpot option!

    Serving Ideas & Creative Variations

    Presentation Upgrades That Wow Guests

    Elevate your juicy crockpot lil smokies from casual to impressive with thoughtful presentation. I love serving them in a shallow ceramic dish with decorative toothpicks for easy grabbing. For holiday gatherings, arrange them around a small bowl of additional dipping sauce on a wooden board with fresh rosemary sprigs for color and aroma. Consider serving them in individual mini crocks for a dinner party, or line a serving tray with parchment for easy cleanup. The sauce is too good to waste—provide small spoons so guests can drizzle extra over their smokies!

    Flavor Variations To Try Next Time

    Once you’ve mastered the classic recipe, it’s time to experiment with exciting flavor profiles! My family goes crazy for the spicy-sweet version with a tablespoon of sriracha and a drizzle of honey. For a tropical twist, try pineapple juice, soy sauce, and a touch of ginger. BBQ lovers should try mixing your favorite barbecue sauce with apricot preserves for smoky-sweet perfection. For an elevated appetizer, try wrapping them in puff pastry after cooking for mini pigs-in-blankets! These BBQ sausage bites offer another delicious variation on the theme.

    Storage & Troubleshooting Guide

    Proper Storage For Maximum Freshness

    Leftover juicy crockpot lil smokies (if you’re lucky enough to have any!) will keep beautifully when stored properly. Allow them to cool completely before transferring to an airtight container with their sauce. They’ll maintain their best quality in the refrigerator for up to 4 days. When reheating, add a splash of water or broth to prevent the sauce from becoming too thick. For longer storage, freeze them in portion-sized containers for up to 3 months. I like to label them with the date and contents—they make a perfect emergency appetizer when unexpected guests arrive!

    Quick Fixes For Common Issues

    If your sauce becomes too thick during cooking, simply add a quarter cup of broth or water and stir gently. Conversely, if it’s too thin, mix a teaspoon of cornstarch with cold water to create a quick slurry and stir it in during the last 30 minutes with the lid off. For smokies that seem dry, a tablespoon of butter stirred in at the end adds moisture and shine. If your sauce has separated slightly, whisk it gently before serving to recombine. And remember, if they’ve been sitting on “warm” for several hours at a party, a quick stir and fresh garnish will revive their appearance.

    Frequently Asked Questions

    Can I make juicy crockpot lil smokies ahead of time?

    Absolutely! You can prepare them up to 2 days ahead and refrigerate. Simply reheat in your slow cooker on low for 1-2 hours before serving. The flavors actually improve with time!

    What’s the best cooking time for perfect texture?

    For the juiciest results, cook on low for 3-4 hours or on high for 1-2 hours. They’re technically ready when heated through, but longer cooking develops better flavor.

    Can I use different types of sausages?

    Yes! While classic lil smokies work best, you can substitute sliced kielbasa, cocktail wieners, or even cut-up hot dogs. Just adjust cooking time slightly for larger pieces.

    What’s the best sauce combination for these?

    The classic combination is equal parts BBQ sauce and grape jelly, but chili sauce, cranberry sauce, or pineapple preserves make excellent alternatives to create different flavor profiles.

    How many juicy crockpot lil smokies should I make per person?

    Plan for about 8-10 pieces per person as an appetizer. For hungry crowds (like game days), I recommend doubling that amount—they disappear quickly!

    Final Thoughts

    These juicy crockpot lil smokies have saved countless parties and potlucks for me over the years. There’s something wonderfully nostalgic about them—they remind me of childhood gatherings while still feeling perfectly at home at sophisticated adult parties. The combination of effortless preparation and guaranteed crowd-pleasing results makes them my secret weapon for stress-free entertaining. Whether you’re hosting a holiday feast or just looking for a cozy weekend snack, these little flavor bombs never disappoint. Find more party-perfect recipes on Pinterest!

  • 20-Minute Healthy Pizza Recipe That’ll Blow Your Mind!

    20-Minute Healthy Pizza Recipe That’ll Blow Your Mind!

    20-Minute Healthy Pizza Recipe That'll Blow Your Mind!

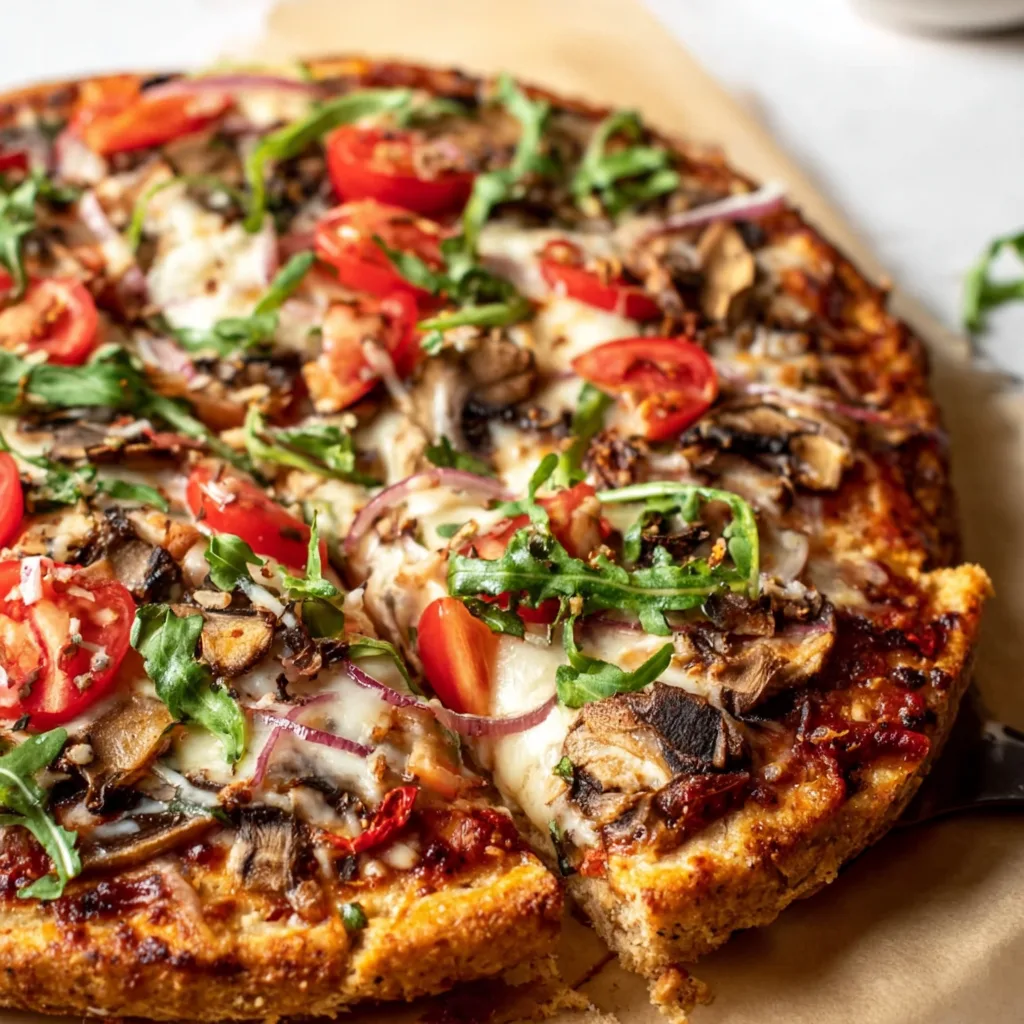
    This 20-Minute Healthy Pizza revolutionized my weeknight dinner routine! I used to think “healthy” and “pizza” were contradictory terms until I discovered this game-changing recipe. The first time I made it, my kitchen filled with that irresistible aroma of herbs and melting cheese, and I knew I’d found my new go-to meal. Perfect for busy evenings when you’re craving something satisfying without the guilt, this pizza delivers all the flavor with none of the fuss. Trust me, once you try this quick and nutritious alternative, you’ll never look back at delivery menus the same way again!

    Recipe

    Why You’ll Love This 20-Minute Healthy Pizza

    Nutrition Without Sacrifice

    This 20-Minute Healthy Pizza packs a serious nutritional punch while keeping your taste buds dancing. The whole grain crust provides fiber and complex carbs that keep you fuller longer, while the lean protein toppings support muscle recovery. I was genuinely surprised how satisfying it felt compared to traditional pizza! The vibrant vegetables add essential vitamins and antioxidants, creating that perfect balance of nutrition and indulgence. My favorite part? The reduced-fat cheese still melts beautifully, giving you that stretchy, Instagram-worthy cheese pull without excess calories.

    Quick Prep, Minimal Cleanup

    On nights when cooking feels impossible, this 20-Minute Healthy Pizza is truly a lifesaver. The streamlined process eliminates unnecessary steps—I’ve timed it, and you can genuinely have this on the table in under 20 minutes! I love that it requires just one baking sheet and minimal prep tools, meaning fewer dishes to wash afterward. The assembly-line approach works beautifully: prep your veggies while the crust pre-bakes, then top and finish cooking. This efficiency factor alone makes it my Wednesday night hero when I’m exhausted but still want something homemade and delicious.

    Essential Tips & Tricks

    Perfecting Your Crust

    The foundation of any great 20-Minute Healthy Pizza is a properly prepared crust. For the crispiest bottom, preheat your baking sheet or pizza stone for at least 10 minutes before adding your dough. This creates that restaurant-quality crunch that’s often missing from homemade pizzas. I learned this trick after several soggy-centered disappointments! When using whole grain alternatives, a light brush of olive oil helps achieve that golden edge. Don’t skip the 5-minute pre-bake before adding toppings—this simple step prevents the dreaded soggy middle and ensures even cooking throughout.

    Strategic Topping Application

    Mastering the art of topping distribution transforms good pizza into great pizza. Start with a thin layer of low-sodium sauce spread to within half an inch of the edge. This creates the perfect sauce-to-crust ratio without sogginess. When adding vegetables, consider their moisture content—I pre-cook mushrooms and zucchini briefly to release excess water. Place heavier ingredients like chicken or bell peppers under the cheese to prevent them from rolling off during serving. For maximum flavor with minimal calories, use strong-flavored ingredients sparingly—a little feta, olives, or sun-dried tomatoes goes a long way!

    Serving Ideas & Creative Variations

    Family-Friendly Customization

    Transform pizza night into an interactive family experience by setting up a DIY topping station. I prepare individual mini crusts and let everyone create their personal masterpiece—my daughter always goes heavy on the pineapple while my husband loads up on jalapeños! This approach ensures everyone gets exactly what they want while still maintaining the healthy foundation. For picky eaters, try “sneaky” nutrition boosters like pureed spinach mixed into the sauce or finely diced vegetables that blend with the cheese. Pair with a simple side salad dressed with balsamic vinaigrette for a complete meal that satisfies everyone.

    Global Flavor Adventures

    Take your 20-Minute Healthy Pizza on a worldwide tour by experimenting with international flavor profiles. My current obsession is Mediterranean-style with hummus instead of tomato sauce, topped with olives, artichokes, and a sprinkle of za’atar. For Asian inspiration, try a teriyaki base with thinly sliced bell peppers, pineapple, and a light drizzle of sriracha yogurt after baking. Mexican night? Use salsa as your base, add black beans, corn, and finish with fresh avocado and cilantro. These variations keep the concept fresh and exciting while maintaining the quick preparation time and nutritional benefits that make this recipe so valuable for busy weeknights.

    Storage & Troubleshooting Guide

    Proper Leftover Management

    Storing your 20-Minute Healthy Pizza properly ensures it remains delicious for days. Allow leftovers to cool completely before refrigerating to prevent condensation that leads to sogginess. I prefer stacking slices with parchment paper between them rather than placing them flat in a container—this preserves the crust integrity much better! Refrigerated pizza stays fresh for up to 3 days. For longer storage, wrap individual slices tightly in plastic wrap followed by foil, then freeze for up to 1 month. The microwave works in a pinch, but for that just-baked texture, reheat on a preheated baking sheet at 350°F for 5-7 minutes until the cheese bubbles.

    Troubleshooting Common Issues

    Even the most experienced home cooks encounter pizza problems occasionally. If your crust turns out too soft in the middle, your toppings likely contained excess moisture—next time, pre-cook water-heavy vegetables and pat them dry before adding. Burnt edges but undercooked center? Your oven temperature may be too high; try reducing by 25°F and positioning the rack in the middle. For cheese that separates or becomes oily, you’re likely using pre-shredded varieties with anti-caking agents—switch to block cheese that you grate yourself. If your pizza sticks to the pan despite oiling, try parchment paper underneath for foolproof release every time.

    Frequently Asked Questions

    Can I make this 20-Minute Healthy Pizza gluten-free?

    Absolutely! Substitute a pre-made gluten-free crust or cauliflower base. Just adjust the initial baking time as gluten-free crusts often need a few extra minutes to crisp up properly.

    How can I boost the protein content?

    Add lean protein toppings like grilled chicken, turkey pepperoni, or chickpeas. For vegetarians, a sprinkle of hemp seeds or nutritional yeast adds protein while enhancing flavor.

    Can I prepare components ahead of time?

    Yes! Pre-chop all vegetables and store in airtight containers. You can even pre-bake crusts for 3-4 minutes, cool completely, and freeze them for ultra-quick assembly later.

    What’s the best cheese alternative for dairy-free diets?

    Cashew-based cheese substitutes melt beautifully, or try nutritional yeast mixed with a little olive oil for a cheesy flavor without dairy. Avocado slices add creaminess too!

    How do I know when my pizza is perfectly done?

    Look for a golden-brown crust edge, bubbling cheese, and slight caramelization on vegetable toppings. The bottom should be firm when you lift a corner with a spatula.

    Final Thoughts

    This 20-Minute Healthy Pizza has become my reliable solution for those evenings when time is short but I refuse to compromise on nutrition or flavor. The versatility means it never gets boring, while the quick preparation fits seamlessly into even the busiest schedules. I love watching friends’ surprise when they discover it’s both healthy and delicious! Whether you’re cooking for one or feeding a family, this recipe deserves a permanent spot in your meal rotation. Find more inspiration for quick, nutritious meals on Pinterest and revolutionize your weeknight dinners starting tonight!

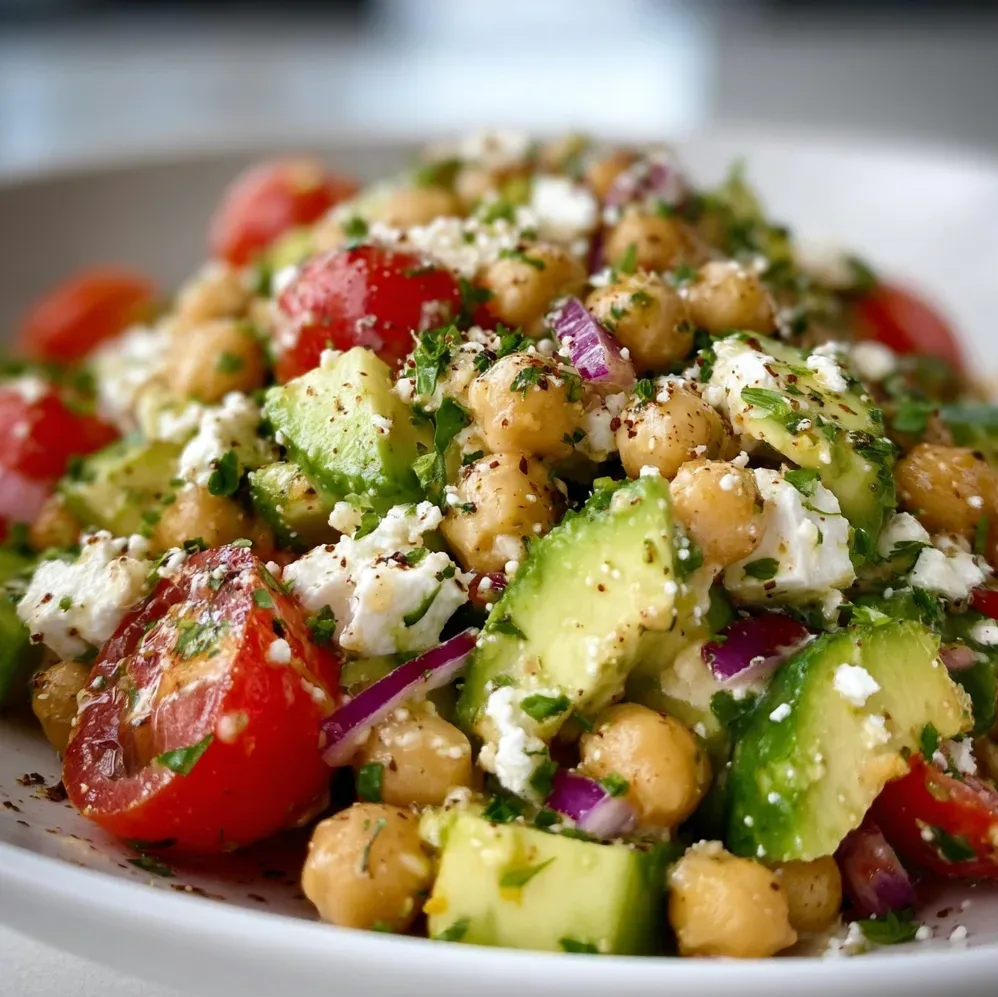
  • Chickpea Feta Avocado Salad: Fresh, Zesty & Irresistibly Healthy!

    Chickpea Feta Avocado Salad: Fresh, Zesty & Irresistibly Healthy!

    Chickpea Feta Avocado Salad: Fresh, Zesty & Irresistibly Healthy!

    This Chickpea Feta Avocado Salad is my go-to recipe when I want something that’s both satisfying and nourishing. The first time I made it, I was standing in my kitchen on a sweltering summer afternoon, desperately seeking something that wouldn’t require turning on the oven. The combination of creamy avocado, tangy feta, and hearty chickpeas created such a perfect harmony that it’s become a staple in my weekly meal prep. The textures and flavors complement each other beautifully, creating a dish that’s simple yet sophisticated enough for any occasion. Check out my Glow Bowl Recipe for another nutritious option!

    Recipe

    Why You’ll Love This Chickpea Feta Avocado Salad

    Perfect Balance of Flavors and Textures

    There’s something magical about the way the creamy avocado melts against the salty punch of feta cheese in this salad. The chickpeas provide a satisfying heartiness that makes this dish feel substantial rather than just a side. I love how the red onions add a gentle bite while the lemon dressing brings everything together with its bright acidity. When you take that first forkful, you’ll experience a symphony of textures – the soft avocado, the firm chickpeas, and the crumbly feta create a mouthfeel that keeps you coming back for more.

    Quick and Nutritious Meal Solution

    This salad has saved me countless times when I needed a nutrient-dense meal in minutes. It takes just about 15 minutes to throw together, making it perfect for busy weeknights or impromptu lunch guests. The protein from the chickpeas combined with healthy fats from the avocado and olive oil makes this incredibly satisfying. I’ve brought this to office potlucks and weekend picnics, and it always disappears first. The best part? You’ll feel energized rather than sluggish after enjoying this colorful bowl of goodness.

    Essential Tips & Tricks

    Ingredient Selection Matters

    The quality of ingredients makes all the difference in this simple salad. Look for firm avocados with just a slight give when gently pressed – too soft and they’ll turn mushy in the salad. For chickpeas, I prefer using canned ones rinsed thoroughly, but cooking dried chickpeas gives them an even better texture if you have the time. The feta is another crucial element – choose a block packed in brine rather than pre-crumbled for the best flavor and texture. I once made this with a cheap pre-crumbled feta, and the difference was immediately noticeable. Fresh herbs are non-negotiable here!

    Perfecting the Dressing Ratio

    The dressing is what ties this Chickpea Feta Avocado Salad together, and getting the proportions right is key. I use a 2:1 ratio of olive oil to lemon juice as the base, then add a small clove of minced garlic and a teaspoon of Dijon mustard to emulsify everything. Don’t skimp on seasoning – a generous pinch of flaky sea salt and freshly ground black pepper makes all the flavors pop. If you’re feeling adventurous, a pinch of sumac or za’atar adds a wonderful Middle Eastern twist that complements the chickpeas beautifully.

    Serving Ideas & Creative Variations

    Meal Prep and Serving Suggestions

    This salad is incredibly versatile for serving. For an elegant presentation, try serving it in avocado halves with an extra sprinkle of feta on top. If meal prepping, keep the dressing separate and add the avocado just before eating to prevent browning. I love serving this alongside Garlic Butter Cod Bites for a complete meal that impresses guests. For a portable lunch option, stuff the salad into pita pockets with some extra greens. The salad also makes a beautiful addition to a Mediterranean-inspired grazing board.

    Seasonal Adaptations and Substitutions

    Don’t be afraid to adapt this salad throughout the year with seasonal produce. In summer, I add cherry tomatoes and cucumber for extra freshness. Fall calls for roasted sweet potato cubes and a sprinkle of pepitas. Winter versions work beautifully with segments of blood orange and a handful of arugula. If you’re dairy-free, substitute the feta with a firm cashew cheese or simply add extra avocado. Vegans can enjoy this with marinated tofu cubes instead of feta. The chickpeas can be swapped for white beans or lentils depending on what you have on hand.

    Storage & Troubleshooting Guide

    Keeping It Fresh

    The biggest challenge with this salad is maintaining the avocado’s freshness. If storing leftovers, press plastic wrap directly onto the surface of the salad to minimize air exposure, which causes browning. A squeeze of extra lemon juice over the top also helps preserve the avocado’s color. Store in an airtight container in the refrigerator for up to 24 hours. For meal prep, store all components separately – chickpeas with herbs and feta in one container, diced avocado (with lemon juice) in another, and dressing in a small jar – then combine when ready to eat.

    Rescuing Common Issues

    If your salad seems too dry after being refrigerated, simply drizzle a little extra olive oil and lemon juice to refresh it. Found yourself with underripe avocados? Dice them smaller and let them sit in the dressing for 10 minutes before adding other ingredients – the acid helps soften them slightly. If your salad lacks flavor, don’t immediately add more salt; try a pinch of red pepper flakes or a drizzle of honey to balance the flavors. Soggy herbs can be revived by plunging them briefly in ice water before patting dry.

    Frequently Asked Questions

    Can I make Chickpea Feta Avocado Salad ahead of time?

    Yes, but store components separately. Combine chickpeas, feta, and vegetables with dressing up to 24 hours ahead, but add diced avocado just before serving to prevent browning.

    Is this salad suitable for vegans?

    Not as written, but you can easily substitute the feta with firm tofu marinated in lemon juice, nutritional yeast, and herbs for a vegan version that maintains the texture contrast.

    How can I make this salad more filling?

    Add cooked quinoa or farro for extra protein and fiber. You could also include roasted vegetables or grilled chicken if you want a more substantial meal.

    What herbs work best in this recipe?

    Fresh mint, parsley, dill, and basil all work beautifully. I recommend using at least two different herbs for complexity of flavor.

    Can I use dried chickpeas instead of canned?

    Absolutely! Cook dried chickpeas until tender but still firm. They’ll have better texture and flavor, though they require advance planning for soaking and cooking time.

    Final Thoughts

    This Chickpea Feta Avocado Salad has become more than just a recipe in my kitchen—it’s a solution for healthy eating that doesn’t sacrifice flavor or satisfaction. The way the ingredients come together creates something greater than the sum of its parts. I find myself craving the bright, fresh flavors and contrasting textures regularly. Whether you’re looking for a quick lunch, a side dish, or a light dinner, this versatile salad delivers every time. Don’t forget to check out more of my favorite recipes on Pinterest!