Category: Lunch

Easy lunch ideas for busy days. Simple, quick recipes with fresh flavor and satisfying meals you can enjoy at home or on the go.

  • Deep-Dish Meat Lover’s Pizza Pie: Irresistible, Cheesy & Loaded!

    Deep-Dish Meat Lover’s Pizza Pie: Irresistible, Cheesy & Loaded!

    Deep-Dish Meat Lover’s Pizza Pie: Irresistible, Cheesy & Loaded!

    There’s something utterly magical about a Deep-Dish Meat Lover’s Pizza Pie that makes my heart skip a beat. That first bite through the thick, chewy crust into layers of gooey cheese and savory meats is pure bliss! I discovered my passion for these hearty pies during college when my tiny apartment kitchen became my weekend pizza lab. The beauty of this recipe is how it transforms simple ingredients into a show-stopping meal that’ll have everyone reaching for seconds. If you love the classic flavors of crispy zucchini rings but crave something more substantial, this deep-dish delight is calling your name.

    Recipe

    Why You’ll Love This Deep-Dish Meat Lover’s Pizza Pie

    A Feast for Meat Enthusiasts

    This Deep-Dish Meat Lover’s Pizza Pie isn’t just dinner—it’s an experience. Imagine layers of pepperoni, savory Italian sausage, crispy bacon, and ham nestled between rivers of melted mozzarella and provolone. The thick crust cradles everything perfectly, creating that distinctive Chicago-style edge that gets beautifully caramelized. What makes this version special is the balance of meats—each bringing its unique flavor profile without overwhelming the others. I’ve found that cooking the sausage and bacon beforehand creates deeper flavors that permeate the entire pie.

    Perfect Make-Ahead Meal Solution

    One reason I keep returning to this Deep-Dish Meat Lover’s Pizza Pie is its flexibility as a make-ahead option. The dough can be prepared up to 24 hours in advance and stored in the refrigerator, developing even more flavor as it chills. You can also prep all your toppings the day before, making assembly a breeze when you’re ready to bake. This has saved countless dinner parties at my house! The pie also reheats beautifully, sometimes tasting even better the next day when the flavors have had time to meld together. Perfect for busy weeknights or weekend gatherings.

    Essential Tips & Tricks

    Mastering the Perfect Crust

    The foundation of any stellar Deep-Dish Meat Lover’s Pizza Pie is its crust. Use bread flour for that perfect chew and structure—it contains more protein than all-purpose flour, creating stronger gluten networks. Let your dough rise twice for the best texture: once after kneading and again after pressing into the pan. My game-changing discovery was brushing the crust with olive oil and a sprinkle of garlic powder before adding toppings. This creates a moisture barrier that prevents sogginess and adds incredible flavor. Don’t rush the process—good dough needs time to develop its character.

    Layering Strategy for Maximum Flavor

    Unlike regular pizza, a Deep-Dish Meat Lover’s Pizza Pie requires strategic layering. Start with sliced mozzarella directly on the dough, creating a protective barrier against moisture from the sauce. Then add your pre-cooked meats—I recommend starting with pepperoni, followed by crumbled sausage, then bacon and ham. The sauce goes last, not first! This keeps the crust from getting soggy while baking. For an extra flavor boost, try incorporating some hearty beef veggie filling techniques by sautéing your meats with onions and fresh herbs before adding them to the pie.

    Serving Ideas & Creative Variations

    Perfect Pairings for Your Pizza Feast

    A Deep-Dish Meat Lover’s Pizza Pie deserves thoughtful accompaniments to create a balanced meal. I love serving it with a bright arugula salad dressed simply with lemon and olive oil—the peppery greens cut through the richness perfectly. For beverages, a robust red wine like Zinfandel or a crisp IPA complements the savory flavors. Don’t forget a side of warm marinara for crust-dipping! When I’m feeling extra, I’ll make some garlic butter parmesan knots to serve alongside—because is there such a thing as too much carby goodness? (The answer is no.)

    Exciting Twists on the Classic Recipe

    While traditional Deep-Dish Meat Lover’s Pizza Pie is divine, don’t be afraid to get creative. Try a breakfast version with scrambled eggs, breakfast sausage, and cheddar cheese. For heat lovers, incorporate spicy capicola and hot honey drizzled on top after baking. My family’s favorite variation includes a layer of ricotta mixed with fresh herbs spread beneath the mozzarella. For a fusion twist, try Korean BBQ-inspired toppings with marinated beef, scallions, and a gochujang-spiked sauce. The sturdy structure of deep-dish can handle bold flavors that might overwhelm thinner crusts.

    Storage & Troubleshooting Guide

    Proper Storage for Leftovers

    Storing your Deep-Dish Meat Lover’s Pizza Pie properly ensures you’ll enjoy those leftovers just as much as the fresh-baked version. Allow the pie to cool completely before refrigerating to prevent condensation that leads to sogginess. Store individual slices in airtight containers, separating layers with parchment paper. Refrigerated pizza stays fresh for up to 4 days. For longer storage, wrap slices tightly in plastic wrap, then foil, and freeze for up to 2 months. The best reheating method is in a 350°F oven for 10-15 minutes—the microwave works in a pinch but sacrifices crust texture.

    Solving Common Deep-Dish Dilemmas

    Even experienced bakers encounter challenges with Deep-Dish Meat Lover’s Pizza Pie. If your crust turns out soggy, try blind-baking it for 10 minutes before adding toppings. For crust that’s too dense, your dough likely needed more rise time or was overworked. If cheese burns before the crust is done, cover the top with foil halfway through baking. When dealing with bubbling overflow, place a baking sheet on the rack below to catch drips. Remember that deep-dish requires longer baking times than regular pizza—patience yields that perfect golden crust and fully melted cheese interior.

    Frequently Asked Questions

    What’s the best pan for making Deep-Dish Meat Lover’s Pizza Pie?

    A 12-inch cast iron skillet or high-sided cake pan works best. The heavy material conducts heat evenly, creating that signature crispy exterior while allowing the interior to cook thoroughly.

    Can I make this recipe vegetarian?

    Absolutely! Replace the meats with hearty vegetables like mushrooms, bell peppers, and olives. Add extra cheese varieties like fontina or smoked gouda to maintain that rich, satisfying flavor profile.

    How do I prevent my Deep-Dish Meat Lover’s Pizza Pie from getting soggy?

    Layer cheese directly on the dough before adding other toppings, pre-cook watery vegetables, and place sauce on top rather than on the bottom. Blind-baking the crust for 10 minutes also helps.

    What’s the best way to reheat leftovers?

    For best results, reheat in a 350°F oven for 10-15 minutes. This restores the crispy crust while warming the filling evenly. Avoid microwaving if possible.

    Can I prepare this pizza ahead of time?

    Yes! Prepare the dough and toppings up to a day in advance. You can even assemble the entire pizza, refrigerate it unbaked, then add 5-10 minutes to the baking time when ready to cook.

    Final Thoughts

    Creating the perfect Deep-Dish Meat Lover’s Pizza Pie is both an art and a science—a delicious project that rewards patience and attention to detail. The layers of flavor, the satisfying chew of the crust, and that moment when you pull out the first slice to reveal the glorious cross-section make every minute worthwhile. I hope you’ll share your creations with me over at Pinterest and make this recipe your own. Remember, the best pizzas aren’t just about following instructions—they’re about creating memories around the table with those you love.
  • California Turkey Club Wraps: Irresistibly Fresh & Perfectly Packed!

    California Turkey Club Wraps: Irresistibly Fresh & Perfectly Packed!

    California Turkey Club Wraps: Irresistibly Fresh & Perfectly Packed!

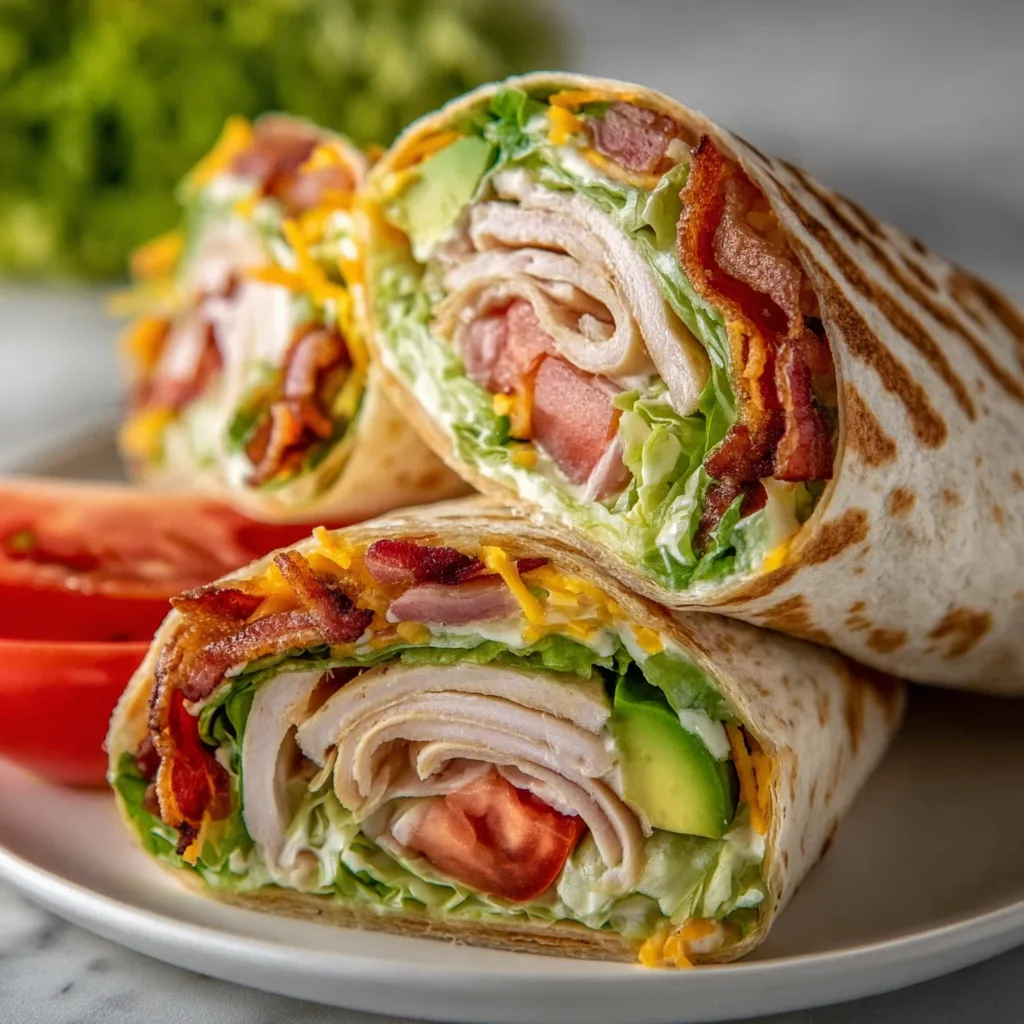
    California Turkey Club Wraps are my latest obsession, combining crisp bacon, juicy turkey, and creamy avocado in a portable package that’s perfect for lunch on the go. Every bite delivers that classic club sandwich experience without the fuss of traditional bread. I first made these wraps during a particularly hectic week when I needed something substantial that wouldn’t leave crumbs all over my keyboard during working lunches. The combination of flavors and textures instantly won me over, and I’ve been perfecting my California Turkey Club Wraps ever since. Trust me, these wraps will revolutionize your lunch routine just like they did mine.

    Recipe

    Why You’ll Love These California Turkey Club Wraps

    Perfect Balance of Flavors and Textures

    There’s something magical about the way these California Turkey Club Wraps combine savory and fresh elements. The smoky bacon plays against the cool, creamy avocado while the roasted turkey brings that satisfying protein punch. I love how the crisp lettuce adds a refreshing crunch that contrasts beautifully with the soft tortilla. The tanginess of the mayo-based sauce ties everything together, creating that perfect umami experience that keeps me coming back for more. These wraps hit all the right notes without being complicated or fussy.

    Quick and Customizable Meal Solution

    What makes California Turkey Club Wraps truly special is how adaptable they are to your preferences and schedule. You can prep components ahead of time for lightning-fast assembly when hunger strikes. Running late? Grab your wrap and go! Need to feed a crowd? Set up a DIY wrap station and let everyone customize their own. I’ve made these with leftover Thanksgiving turkey, deli slices, and even rotisserie chicken in a pinch. The versatility means you’ll never get bored, and you can adjust ingredients based on what’s in your fridge.

    Essential Tips & Tricks

    Mastering the Perfect Wrap Technique

    The secret to exceptional California Turkey Club Wraps lies in the assembly method. Start with a slightly warmed tortilla (10 seconds in the microwave works wonders) to make it more pliable and prevent tearing. Layer ingredients in the center, leaving a one-inch border all around. Apply spreads directly to the tortilla rather than on top of vegetables to prevent slippage. When rolling, fold in the sides first, then roll from the bottom up, keeping everything tight. For the cleanest cut, let the wrapped tortilla rest for 2-3 minutes before slicing.

    Ingredient Selection and Preparation

    Choosing the right components elevates your California Turkey Club Wraps from good to unforgettable. Opt for thick-cut bacon cooked until perfectly crisp – no soggy bacon allowed! For turkey, freshly roasted and sliced is divine, but quality deli meat works beautifully too. Avocados should be ripe but firm (gently squeeze – it should yield slightly without being mushy). Pre-shredded lettuce saves time, but nothing beats the freshness of just-torn romaine or butter lettuce. These wraps pair wonderfully with crispy zucchini rings for a complete meal.

    Serving Ideas & Creative Variations

    Presentation and Pairing Suggestions

    Transform your California Turkey Club Wraps into an impressive meal with thoughtful presentation. Cut wraps diagonally and arrange attractively on a platter with colorful garnishes like cherry tomatoes or pickle spears. For a picnic, secure each wrap with parchment paper and twine for an Instagram-worthy touch. These wraps pair beautifully with light sides like cucumber salad, potato chips, or fresh fruit. For dinner, serve alongside a warm cup of tomato soup or creamy cauliflower carrot soup for a satisfying meal that feels special without hours of preparation.

    Exciting Flavor Variations

    While classic California Turkey Club Wraps are divine, experimenting with variations keeps lunch exciting. Try a Southwest twist by adding pepper jack cheese and chipotle mayo. For Mediterranean flair, incorporate feta, olives, and tzatziki sauce instead of traditional mayo. Craving something lighter? Swap the tortilla for large lettuce leaves for a low-carb option. My personal favorite variation uses cranberry sauce instead of mayo during the holiday season – the sweet-tart flavor against the savory turkey is absolutely magical. Don’t be afraid to play with different spreads, cheeses, and greens!

    Storage & Troubleshooting Guide

    Proper Storage for Maximum Freshness

    Keeping your California Turkey Club Wraps fresh requires proper storage techniques. For make-ahead wraps, avoid soggy tortillas by placing a layer of lettuce between the tortilla and wet ingredients like tomatoes or spreads. Wrap tightly in parchment paper first, then aluminum foil, and refrigerate for up to 24 hours. For meal prep, store components separately: pre-cook bacon, slice vegetables, and prepare spreads in individual containers. This approach keeps everything fresh and allows for quick assembly throughout the week, maintaining that perfect texture contrast that makes these wraps so satisfying.

    Solving Common Wrap Problems

    Even experienced cooks occasionally struggle with California Turkey Club Wraps. If your wrap keeps unraveling, you’re likely overfilling or not tucking the sides properly before rolling. The solution? Use slightly less filling and practice the fold-and-roll technique. Dealing with torn tortillas? Warm them slightly or choose a higher quality, fresher brand. If ingredients slide around during eating, try spreading a thin layer of cream cheese on the tortilla first – it acts as “glue.” For wraps that become soggy in lunchboxes, pack wet ingredients separately in small containers and assemble just before eating.

    Frequently Asked Questions

    Can I make California Turkey Club Wraps ahead of time?

    Yes! Assemble up to 24 hours in advance, but place a barrier of lettuce between wet ingredients and the tortilla. Wrap tightly in parchment paper then foil for best results.

    What’s the best tortilla to use for these wraps?

    Large (10-12 inch) flour tortillas work best. For a healthier option, try whole wheat, spinach, or low-carb varieties, but ensure they’re fresh and pliable.

    How can I make these wraps vegetarian?

    Replace turkey with smoked tempeh, plant-based deli slices, or extra avocado. Keep the bacon flavor by using coconut bacon or smoked paprika in your spread.

    What sauce works best for California Turkey Club Wraps?

    Classic mayo is traditional, but try avocado mayo, chipotle aioli, or ranch dressing. For tanginess, mix mayo with Dijon mustard and a squeeze of lemon.

    Can I use leftover Thanksgiving turkey in these wraps?

    Absolutely! Leftover Thanksgiving turkey works beautifully in these wraps – just slice or shred it thinly and warm slightly before assembling.

    Final Thoughts

    California Turkey Club Wraps have become my go-to solution for satisfying, portable meals that don’t sacrifice flavor for convenience. The beauty lies in their simplicity and adaptability—perfect for busy weekdays, casual gatherings, or packed lunches. I love how they transform basic ingredients into something that feels special, yet requires minimal effort. Whether you follow my classic version or create your own signature variation, these wraps deliver that perfect balance of protein, freshness, and comfort. For more wrap inspiration, check out our Pinterest board and elevate your lunch game with these California-inspired delights.

  • Crispy Cilantro Lime Chicken Sandwiches That’ll Wow Your Taste Buds!

    Crispy Cilantro Lime Chicken Sandwiches That’ll Wow Your Taste Buds!

    Crispy Cilantro Lime Chicken Sandwiches That'll Wow Your Taste Buds!

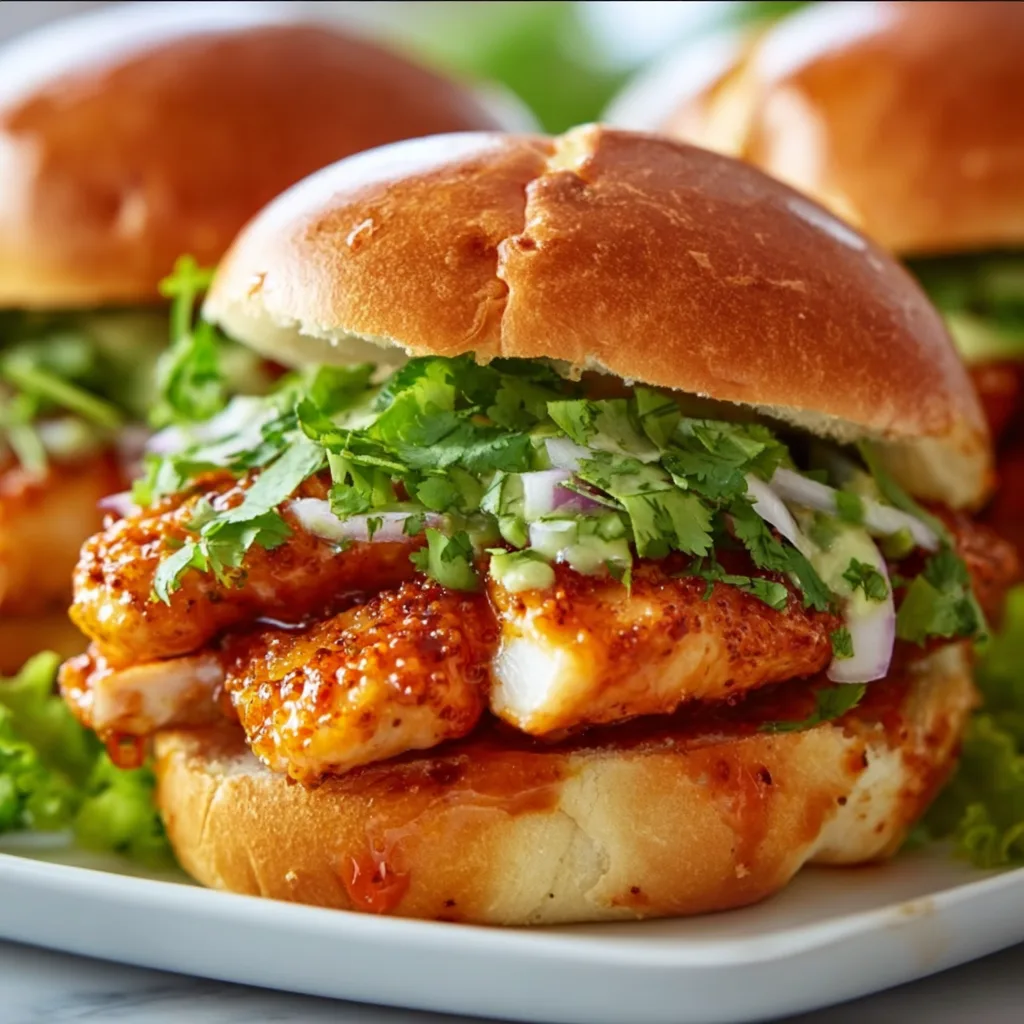
    Crispy Cilantro Lime Chicken Sandwiches have completely transformed my weeknight dinner routine! The first time I made these, my kitchen filled with the most intoxicating aroma of lime zest and fresh cilantro that had my family hovering around the stove like hungry satellites. That perfect crunch when you bite through the golden exterior gives way to juicy, tender chicken infused with bright, zesty flavors. I’ve tested countless chicken sandwich recipes from my collection, but this one strikes the perfect balance between quick preparation and restaurant-quality results. Trust me, these sandwiches will make you feel like a culinary genius!

    Recipe

    Why You’ll Love These Crispy Cilantro Lime Chicken Sandwiches

    Perfect Texture Combination

    The contrasting textures in these crispy cilantro lime chicken sandwiches create a truly memorable eating experience. The chicken’s exterior develops a satisfying crackle from a quick dredge in seasoned flour before pan-frying, while the interior remains incredibly juicy. I love adding creamy avocado slices that melt against the warm chicken and crisp lettuce that provides a fresh crunch. My daughter always says the perfect sandwich needs “crispy, creamy, and juicy” elements – this recipe delivers all three! The toasted brioche buns add that final buttery crunch that elevates everything.

    Bright, Bold Flavor Profile

    The cilantro-lime marinade is what makes these sandwiches truly special. The acidic lime juice tenderizes the chicken while infusing it with brightness that cuts through the richness. Fresh cilantro adds that distinctive herbal note that makes these sandwiches instantly craveable. I’ve found that adding a touch of honey balances the acidity perfectly, creating a complex flavor that’s tangy, slightly sweet, and deeply savory. My family particularly loves the garlic-lime mayo I spread on the buns – it ties all the flavors together and adds another layer of zesty goodness.

    Essential Tips & Tricks

    Perfecting the Crispy Coating

    Achieving that golden-brown crust requires a few simple techniques. First, thoroughly pat your chicken dry before marinating – excess moisture is the enemy of crispiness. After marinating, let any excess drip off before dredging in the flour mixture. I press the coating firmly onto each piece to ensure good adhesion. Maintain your oil at a steady medium-high heat (about 350°F) for optimal crispiness without burning. The most important tip? Don’t overcrowd your pan! Cook in batches if needed – those crispy cilantro lime chicken cutlets need space to develop their perfect texture, just like my Crispy Zucchini Rings with Creamy Dip.

    Mastering the Marinade

    The marinade timing makes all the difference in these sandwiches. I’ve found 30 minutes is the minimum for good flavor, but 2-4 hours creates magic. The lime juice can actually start “cooking” the chicken if left too long (similar to ceviche), so I never exceed 4 hours. For maximum flavor infusion, make shallow cuts in thicker chicken pieces before marinating. I also reserve 2 tablespoons of the marinade (before adding raw chicken) to mix into the mayo for an extra flavor boost. Fresh ingredients are non-negotiable here – bottled lime juice simply can’t replicate the brightness of fresh-squeezed.

    Serving Ideas & Creative Variations

    Perfect Pairings

    These crispy cilantro lime chicken sandwiches shine alongside complementary sides that enhance their vibrant flavors. My family’s favorite pairing is sweet potato fries dusted with a touch of chili powder – the sweetness balances the tangy chicken beautifully. A simple slaw dressed with lime vinaigrette makes for a refreshing side that echoes the sandwich’s flavor profile. For something heartier, try my Creamy Coconut Curry Prawn Spaghetti for a complete feast. On hot summer days, a watermelon-feta salad provides the perfect cool contrast to these warm, crispy sandwiches.

    Creative Twists

    The versatility of these cilantro lime chicken creations allows for endless variations. Transform them into wraps using flour tortillas for a portable lunch option. For a lower-carb alternative, serve the crispy chicken over mixed greens with avocado, corn, and black beans for a satisfying salad. My husband loves when I dice the chicken and stuff it into tacos with mango salsa for a fusion twist. You can also adjust the heat level – add jalapeño to the marinade for spice lovers or keep it mild with just a touch of black pepper. For special occasions, top with pepper jack cheese and crispy bacon for an indulgent treat.

    Storage & Troubleshooting Guide

    Keeping It Fresh

    Proper storage techniques ensure these crispy cilantro lime chicken sandwiches remain delicious even as leftovers. Store cooked chicken separate from toppings and buns in an airtight container for up to 3 days. To maintain crispiness when reheating, use a 350°F oven for 10 minutes rather than the microwave, which will make the coating soggy. I often make extra chicken specifically for leftovers – it’s fantastic cold in salads or quickly reheated for lunch. If you’re meal prepping, prepare the marinade and chicken in advance, but wait to cook until serving day for the freshest results.

    Common Challenges Solved

    Even experienced cooks encounter troubleshooting moments with crispy chicken. If your coating falls off during cooking, the likely culprit is either oil that’s not hot enough or chicken that’s too wet. Make sure your oil reaches temperature before adding chicken, and thoroughly pat dry between marinade and flour coating. If your chicken is browning too quickly but remains undercooked inside, lower your heat and finish cooking with a lid to trap heat. For chicken that’s not flavorful enough, try marinating longer or adding more zest to the flour mixture. Remember that thinner, pounded chicken pieces cook more evenly and absorb marinade better.

    Frequently Asked Questions

    Can I make these Crispy Cilantro Lime Chicken Sandwiches ahead of time?

    Yes! Marinate the chicken up to 4 hours ahead, and prepare the toppings. Cook just before serving for maximum crispiness, or reheat in a 350°F oven for 8-10 minutes if needed.

    What’s the best substitute for cilantro if I don’t like it?

    Fresh parsley makes a great substitute, though it changes the flavor profile. Basil or mint can also work beautifully, creating a different but equally delicious sandwich variation.

    Can I bake these instead of frying?

    Absolutely! Spray breaded chicken with cooking oil and bake at 425°F for 15-18 minutes, flipping halfway through. The coating won’t be quite as crispy but still delicious.

    How do I prevent the breading from falling off?

    Ensure your chicken is patted dry before dredging, press the flour mixture firmly onto the meat, and don’t disturb the chicken for the first 3-4 minutes of cooking.

    What’s the best bread for these sandwiches?

    Brioche buns offer the perfect buttery complement to the tangy chicken, but ciabatta rolls, potato buns, or even sliced sourdough all work beautifully.

    Final Thoughts

    These crispy cilantro lime chicken sandwiches have earned permanent status in my recipe collection for good reason – they deliver restaurant-quality flavor with home-kitchen simplicity. The bright, zesty profile combined with that irresistible crunch creates something truly special that feels both comforting and exciting. I love seeing my family’s eyes light up when these appear on our dinner table! Whether you’re cooking for a weeknight dinner or weekend gathering, these sandwiches strike that perfect balance between impressive and approachable. Find more inspiration for your next meal on Pinterest!

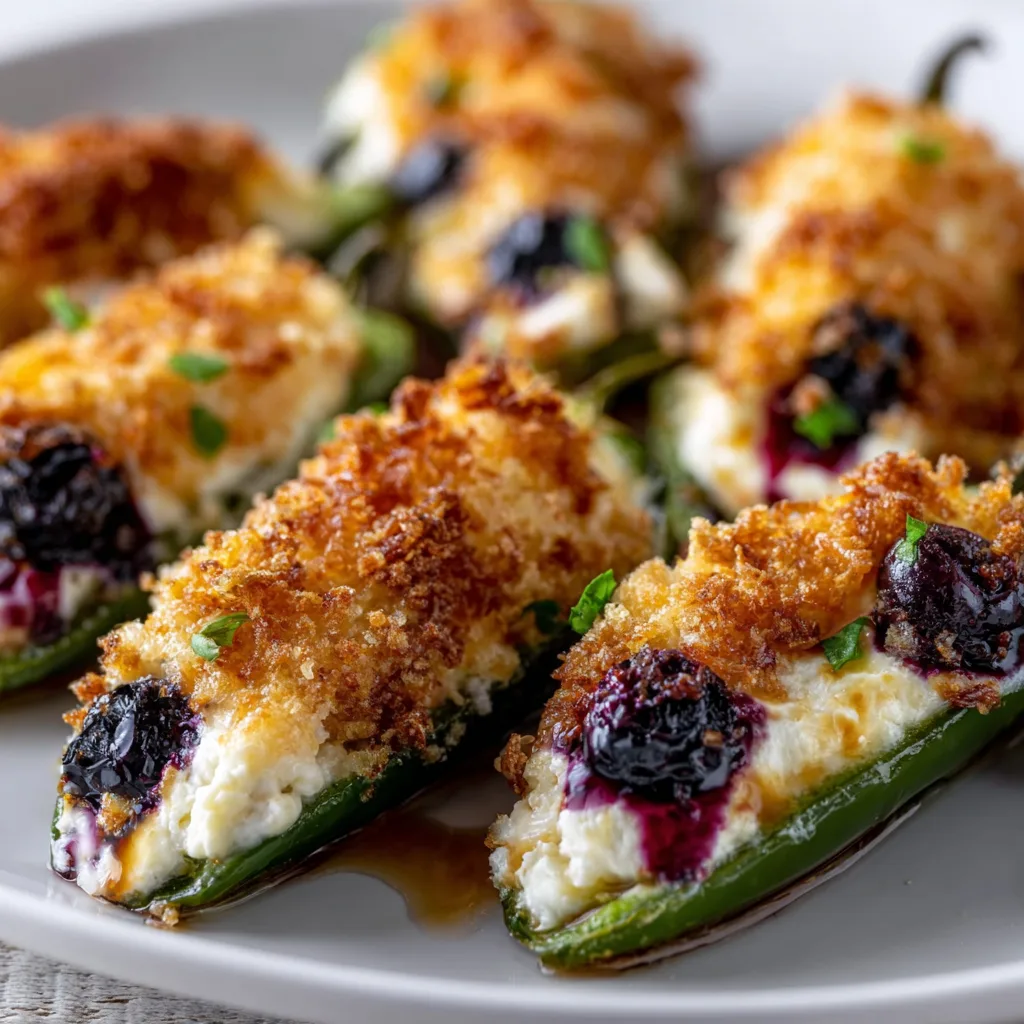
  • Blueberry Brie Jalapeño Poppers: Irresistibly Bold & Flavor-Packed!

    Blueberry Brie Jalapeño Poppers: Irresistibly Bold & Flavor-Packed!

    Blueberry Brie Jalapeño Poppers: Irresistibly Bold & Flavor-Packed!

    Blueberry Brie Jalapeño Poppers are what happens when sweet meets heat in the most delicious way possible. I discovered this irresistible appetizer last summer when hosting a backyard gathering, and they disappeared faster than I could say “seconds, please!” The combination of creamy brie, sweet blueberries, and spicy jalapeños creates a flavor explosion that will have your guests begging for the recipe. Trust me, I’ve made these for countless dinner parties since then, and they’re always the first empty plate on the table. Check out my crispy zucchini rings for another crowd-pleasing appetizer option!

    Recipe

    Why You’ll Love These Blueberry Brie Jalapeño Poppers

    Perfect Balance of Flavors

    There’s something magical about the way these ingredients play together. The rich, buttery brie melts into a creamy dream while the blueberries burst with sweet-tart juice that cuts through the richness. Then comes that jalapeño kick—just enough heat to wake up your taste buds without overwhelming them. I remember serving these at my sister’s birthday, and my spice-averse mother-in-law couldn’t stop eating them! The heat level is customizable too; leave some seeds in for more kick or remove them all for a milder experience. It’s this perfect harmony that makes these poppers absolutely addictive.

    Impressive Yet Simple

    Don’t let their elegant appearance fool you—these poppers come together in under 30 minutes! The prep is straightforward and the ingredients list is refreshingly short. I’ve made these while simultaneously juggling other dinner party tasks, and they still turned out perfectly. The assembly is almost therapeutic: slice, scoop, fill, and bake. What I love most is how they look like something from a fancy restaurant but require no special skills. They’re my go-to when I want to impress guests without spending hours in the kitchen. Plus, they can be prepped ahead and baked just before serving!

    Essential Tips & Tricks

    Jalapeño Preparation Secrets

    Always, always wear gloves when handling jalapeños! I learned this lesson the hard way when I absentmindedly rubbed my eye after seeding peppers—not a mistake you make twice! For the perfect heat balance, I recommend removing most seeds but leaving a few for character. Cut your jalapeños lengthwise and use a small spoon (a grapefruit spoon works wonders) to scrape out the membranes. Pro tip: choose jalapeños of similar size for even cooking, and look for ones with smooth skin rather than striations, as those tend to be milder. Your fingers will thank you later for those gloves, trust me!

    Cheese & Blueberry Selection

    The cheese makes or breaks these poppers! Choose a high-quality brie that’s slightly chilled but not cold from the refrigerator—this makes it easier to cut into small pieces that fit perfectly in the jalapeño boats. For an extra-special touch, try a triple cream brie for maximum meltiness. As for blueberries, fresh is best when in season, but don’t hesitate to use frozen (thawed and patted dry) during winter months. I’ve found that wild blueberries offer more concentrated flavor, but any variety works beautifully. For an extra flavor dimension, try my raspberry brownie date energy bites for dessert!

    Serving Ideas & Creative Variations

    Perfect Pairings

    These poppers shine as part of a larger appetizer spread or as a standalone starter. I love serving them alongside chilled white wine or a light rosé—the fruity notes complement the blueberries beautifully. For a non-alcoholic option, sparkling water with a splash of elderflower cordial works wonderfully. Temperature-wise, serve these warm but not blazing hot to appreciate all the flavors. I arrange them on a wooden board with fresh herbs scattered around for a rustic presentation. For a complete spread, add some crusty bread, honey, and maybe a few slices of prosciutto for guests to create their own flavor combinations.

    Exciting Flavor Twists

    While the classic recipe is perfection, I’ve experimented with several delicious variations. Try substituting goat cheese for brie for a tangier profile, or mix in a spoonful of fig jam with the blueberries for added sweetness. Bacon lovers can add a small piece of cooked bacon on top before baking—the smokiness is divine! For a Mediterranean twist, sprinkle with chopped pistachios and a drizzle of honey after baking. Another winning combination is adding a tiny basil leaf to each popper before serving. These variations pair beautifully with my crispy garlic air fryer broccoli for a complete meal!

    Storage & Troubleshooting Guide

    Make-Ahead and Storage Tips

    These poppers are at their absolute best fresh from the oven, but that doesn’t mean you can’t plan ahead! You can prep everything up to 24 hours in advance—just store the filled peppers covered in the refrigerator and bake when needed. If you have leftovers (which rarely happens in my house!), store them in an airtight container for up to 2 days. Reheat in a 350°F oven for 5-7 minutes until warmed through. I don’t recommend microwaving as it makes them soggy. Freezing isn’t ideal for these particular poppers as the texture of both the brie and blueberries changes significantly.

    Common Issues Solved

    The most frequent challenge is preventing cheese overflow during baking. To avoid this, don’t overfill your jalapeños and make sure to place them cheese-side up on the baking sheet. If your jalapeños won’t sit flat, slice a tiny bit off the bottom to create a stable base. Finding your poppers too spicy? Soak the halved jalapeños in cold water for 30 minutes before filling to reduce heat. Not spicy enough? Mix a pinch of red pepper flakes into your cheese mixture. If your blueberries are releasing too much liquid, toss them with a teaspoon of cornstarch before adding to help absorb excess moisture.

    Frequently Asked Questions

    Can I make Blueberry Brie Jalapeño Poppers vegetarian?

    Absolutely! These poppers are naturally vegetarian. Just ensure your brie doesn’t contain animal rennet if serving to strict vegetarians. The recipe requires no modifications otherwise.

    How do I know when they’re perfectly done?

    Look for bubbling cheese and slightly wrinkled jalapeño skin. The peppers should be tender when pierced with a fork, usually after 15-18 minutes at 375°F.

    Can I substitute the blueberries with other fruit?

    Yes! Blackberries, raspberries, or diced peaches work beautifully. Each brings a different sweetness profile that pairs wonderfully with the brie.

    Are these suitable for a keto diet?

    They’re relatively keto-friendly! Jalapeños and brie are low-carb, while blueberries contain some carbs. Each popper has approximately 2-3g net carbs.

    Can I prepare Blueberry Brie Jalapeño Poppers on the grill?

    Definitely! Place them on a grill-safe pan over indirect heat for 12-15 minutes. This adds a wonderful smoky dimension to the poppers.

    Final Thoughts

    These Blueberry Brie Jalapeño Poppers represent everything I love about entertaining—they’re unexpected, delightful, and bring people together over amazing food. The contrast of creamy, sweet, and spicy creates an unforgettable bite that elevates any gathering from ordinary to special. I’ve watched skeptical first-timers become devoted fans after just one taste! Whether you’re hosting a sophisticated dinner party or a casual game night, these flavor-packed poppers will undoubtedly become your signature appetizer. Don’t forget to check out more inspiration on Pinterest!

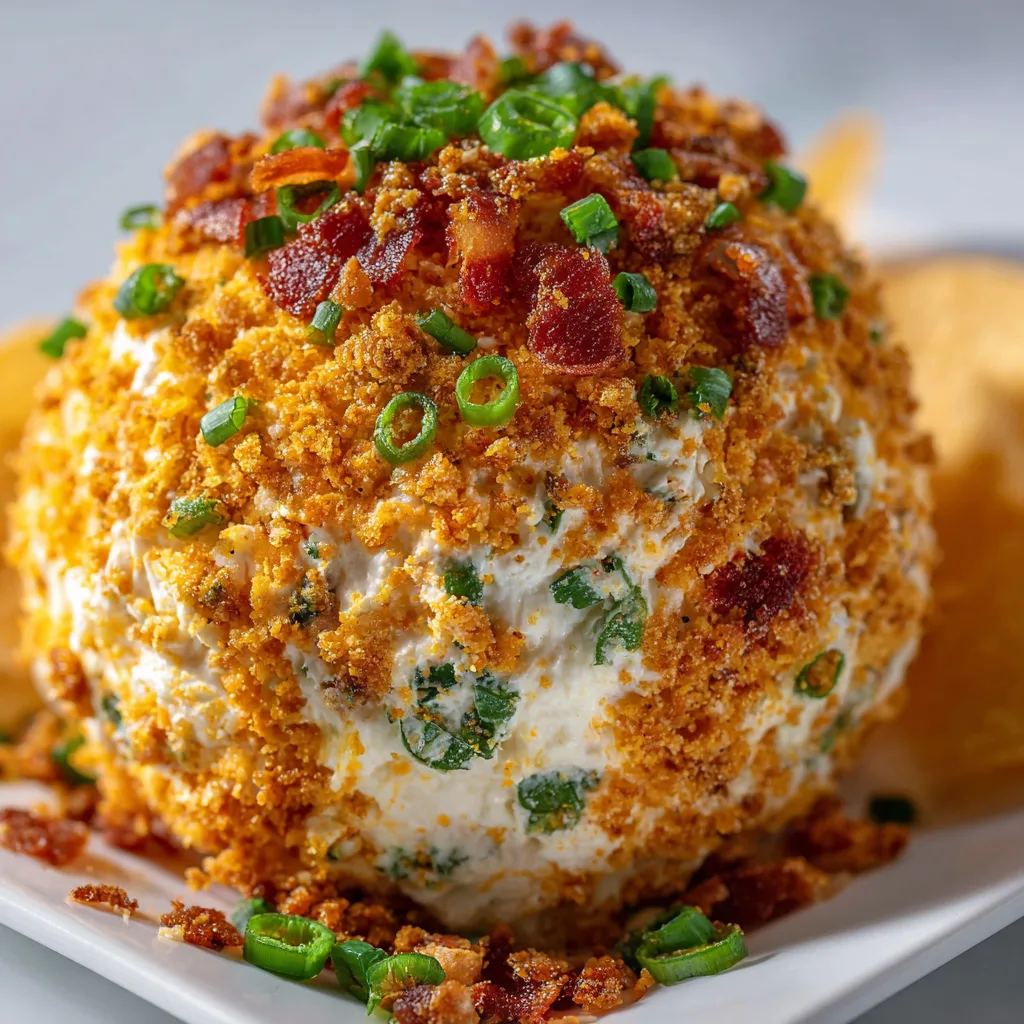
  • Jalapeño Popper Cheese Ball: Irresistibly Spicy & Cheesy Party Hit!

    Jalapeño Popper Cheese Ball: Irresistibly Spicy & Cheesy Party Hit!

    Jalapeño Popper Cheese Ball: Irresistibly Spicy & Cheesy Party Hit!

    Jalapeño Popper Cheese Ball – that magical combination of creamy, spicy, and crunchy that transforms any gathering into a celebration. I first made this addictive appetizer for my sister’s housewarming, and it disappeared faster than I could refill the cracker plate! There’s something about the way the cream cheese melts against the subtle heat of jalapeños that creates pure magic. If you’re looking for a crowd-pleaser that balances indulgence with just the right kick, this recipe belongs in your entertaining arsenal. It pairs beautifully with crispy zucchini rings for a complete appetizer spread.

    Recipe

    Why You’ll Love This Jalapeño Popper Cheese Ball

    Perfect Balance of Flavors and Textures

    The beauty of this Jalapeño Popper Cheese Ball lies in its harmonious contrasts. The velvety cream cheese base gets a punch from diced jalapeños, while crispy bacon adds smoky depth that tingles your taste buds. I love how the exterior coating of toasted panko creates that satisfying crunch reminiscent of traditional poppers. The first time my neighbor tried it, she closed her eyes and whispered, “It’s like a jalapeño popper and cheese ball had a delicious baby!” That perfect textural interplay between creamy and crunchy is what makes this recipe utterly irresistible.

    Make-Ahead Convenience

    One of my favorite things about this Jalapeño Popper Cheese Ball is how it improves with time in the refrigerator. You can prepare it up to three days ahead, making it the ultimate stress-free appetizer for entertaining. I’ve found that letting it chill overnight allows the flavors to meld beautifully – the jalapeño heat mellows slightly while infusing the cheese with its distinctive brightness. This make-ahead magic saved my sanity last Christmas when unexpected guests arrived early! Simply roll in the crunchy coating just before serving, and you’ve got an impressive appetizer that required zero last-minute effort.

    Essential Tips & Tricks

    Mastering the Heat Level

    Controlling the spice level in your Jalapeño Popper Cheese Ball is all about strategic preparation. For milder heat, remove all seeds and membranes from your jalapeños – these parts contain most of the capsaicin that creates that burning sensation. For medium heat (my personal favorite), leave a few seeds in. And for those who love the fire? Keep most of those seeds! I always taste-test a tiny bit of each jalapeño before adding it, as their heat can vary dramatically. Remember to wear gloves when handling hot peppers – I learned this lesson the hard way after touching my eye after chopping. Ouch!

    Achieving the Perfect Texture

    The secret to a perfectly textured Jalapeño Popper Cheese Ball starts with room temperature cream cheese. Cold cream cheese will leave you with lumps and arm fatigue! Let it sit out for at least 30 minutes before mixing. For the coating, I’ve found that toasting the panko breadcrumbs in a dry skillet until golden brown creates that authentic jalapeño popper crunch we all crave. Another game-changing tip is to chill the formed ball for at least 2 hours before rolling in the coating – this firms everything up and makes the final presentation much neater.

    Serving Ideas & Creative Variations

    Perfect Pairings

    Your Jalapeño Popper Cheese Ball deserves worthy companions! I serve mine with an assortment of crackers – buttery Ritz, hearty wheat crackers, and pretzel thins all work beautifully. For a fresher approach, thick-cut cucumber slices or bell pepper wedges provide a crisp, cooling contrast to the spicy cheese. My absolute favorite pairing is toasted baguette slices brushed with olive oil and rubbed with garlic. The combination of warm bread and cool, spicy cheese creates a sensory experience that guests always rave about. For a complete appetizer spread, add these crunchy cinnamon sugar tortilla chips for a sweet counterpoint.

    Exciting Flavor Twists

    While the classic Jalapeño Popper Cheese Ball is perfection, don’t be afraid to play with variations! For a southwestern spin, add a half cup of black beans, corn kernels, and a teaspoon of cumin. Craving something smokier? Substitute chipotle peppers for half the jalapeños and add a tablespoon of adobo sauce. My family goes wild for the “pizza popper” version with diced pepperoni, sun-dried tomatoes, and Italian herbs rolled in a mixture of panko and grated Parmesan. The beauty of this recipe is its flexibility – as long as you maintain the basic cream cheese-to-mix-ins ratio, your creativity can run wild!

    Storage & Troubleshooting Guide

    Proper Storage Methods

    Store your Jalapeño Popper Cheese Ball properly to maintain its creamy texture and vibrant flavors. If preparing in advance, wrap the formed ball (without the crunchy coating) tightly in plastic wrap, then in foil for extra protection against refrigerator odors. It will keep beautifully for up to 5 days. For the best experience, remove it from the refrigerator about 20 minutes before serving – this takes the chill off and allows the flavors to bloom. I’ve found that the coating tends to soften after about 4 hours at room temperature, so if you have leftovers, consider re-rolling in fresh panko before serving again.

    Fixing Common Issues

    Even experienced cooks encounter challenges! If your Jalapeño Popper Cheese Ball turns out too soft to hold its shape, pop it in the freezer for 15-20 minutes before attempting to roll it again. Too firm? Let it warm slightly and knead with clean hands. If the flavor lacks punch, add a splash of hot sauce or a pinch of garlic powder – these flavor boosters work wonders without changing the texture. Finding the cheese mixture too spicy? Incorporate additional cream cheese to dilute the heat, or serve with cooling elements like sour cream on the side. Remember, the beauty of homemade is that you can adjust to your taste!

    Frequently Asked Questions

    Can I make a Jalapeño Popper Cheese Ball without bacon?

    Absolutely! Substitute smoked paprika (½ teaspoon) for smokiness. For vegetarians, use plant-based bacon bits or toasted chopped nuts to maintain that crucial textural contrast.

    How far in advance can I prepare this Jalapeño Popper Cheese Ball?

    You can make the cheese mixture up to 3 days ahead. Shape and refrigerate it wrapped in plastic, but wait to add the crunchy coating until 1-2 hours before serving for maximum crunch.

    Can I freeze leftover cheese ball?

    Yes! Wrap tightly without the coating and freeze for up to 1 month. Thaw overnight in the refrigerator, then let stand 30 minutes at room temperature before rolling in fresh coating.

    What’s the best cheese to use besides cream cheese?

    Sharp cheddar provides the classic popper flavor, but Monterey Jack or Colby work beautifully too. For extra tang, add 2-3 tablespoons of goat cheese to the mixture.

    How do I make the Jalapeño Popper Cheese Ball less spicy for kids?

    Use mild green chilies instead of jalapeños, or reduce to just one deseeded jalapeño. The cream cheese naturally tames heat, and serving with plain crackers helps too.

    Final Thoughts

    This Jalapeño Popper Cheese Ball has become my signature party contribution for good reason – it captures everything we love about jalapeño poppers in a format that’s easier to make and serve. The way guests’ eyes light up when they take that first bite makes all the effort worthwhile. There’s something special about creating a dish that brings people together, sparks conversation, and creates little moments of joy. I hope this recipe finds its way into your entertaining repertoire and creates as many happy memories around your table as it has around mine. For more inspiration, check out my Pinterest boards for creative serving ideas!

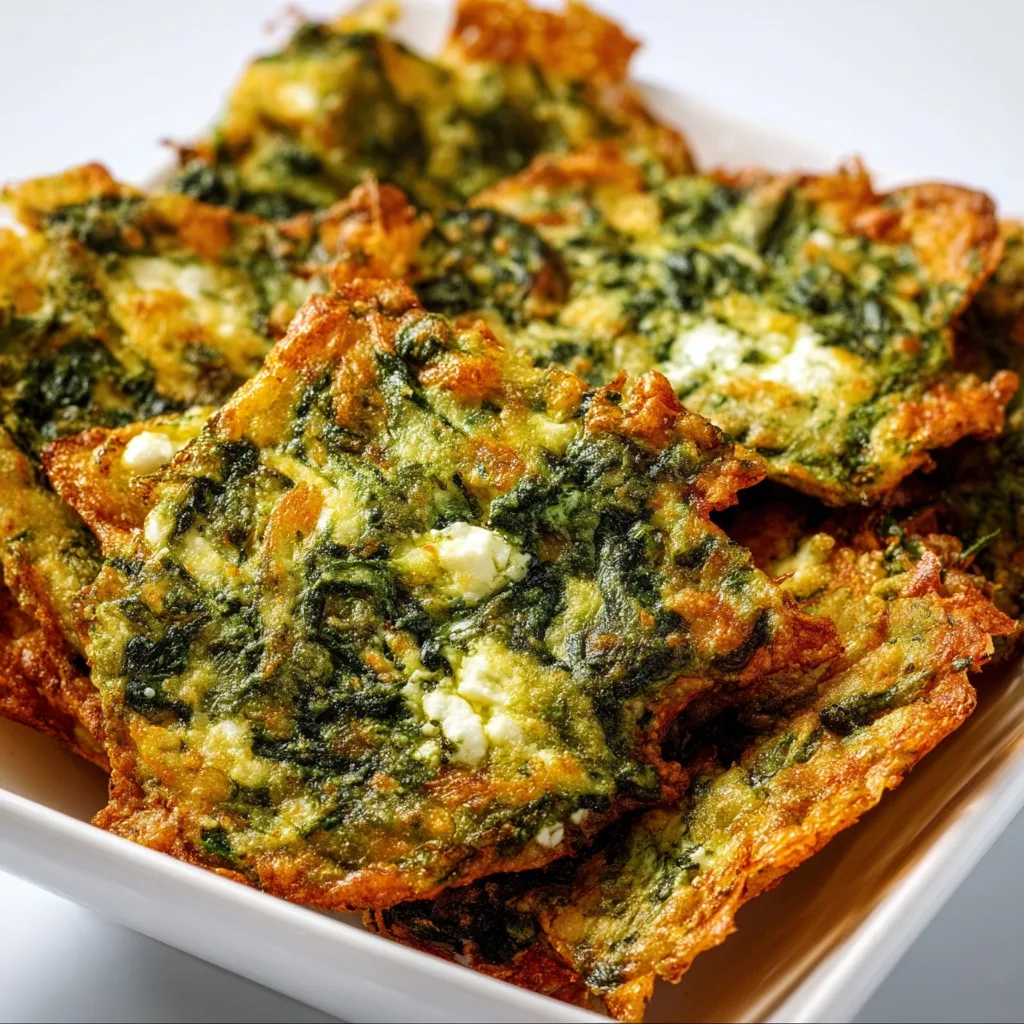
  • Mediterranean Spinach Feta Crisps: Irresistibly Crunchy & Flavorful!

    Mediterranean Spinach Feta Crisps: Irresistibly Crunchy & Flavorful!

    Mediterranean Spinach Feta Crisps: Irresistibly Crunchy & Flavorful!

    Mediterranean Spinach Feta Crisps have become my absolute obsession lately! There’s something magical about the way the salty feta melts against the earthy spinach, all wrapped in that perfectly crispy phyllo shell. Every bite transports me straight to a sun-drenched Greek island, even when I’m just standing in my kitchen on a rainy Tuesday afternoon. The combination of flavors is so Mediterranean – bright, bold, and utterly satisfying. If you’re looking for an appetizer that will make guests swoon or just elevate your weeknight dinner experience, these little flavor bombs are about to become your new favorite.

    Recipe

    Why You’ll Love These Mediterranean Spinach Feta Crisps

    Perfect Balance of Textures and Flavors

    The contrasting textures in these crisps are what make them truly special. The exterior shatters with a delicate crunch while the interior offers a creamy, savory filling that melts in your mouth. I still remember the first time I served these at a dinner party – the sound of that first crispy bite followed by appreciative murmurs around the table! The combination of nutty feta with earthy spinach creates a flavor profile that’s simultaneously bold and comforting. Plus, the hint of lemon zest and fresh herbs adds brightness that keeps you coming back for “just one more” until – oops! – they’ve all disappeared.

    Impressive Yet Simple to Prepare

    Don’t let their elegant appearance fool you – these Mediterranean Spinach Feta Crisps are surprisingly easy to make! The filling comes together in minutes, and working with phyllo dough is much more forgiving than you might think. I used to be intimidated by phyllo until I realized the rustic, slightly imperfect folds actually add to their charm. The make-ahead potential is another huge bonus. You can prepare the filling a day in advance, and even assemble the unbaked crisps hours before your guests arrive. Just pop them in the oven when you’re ready, and enjoy the heavenly aroma that fills your kitchen as they bake to golden perfection.

    Essential Tips & Tricks

    Mastering the Phyllo Dough

    Working with phyllo doesn’t have to be stressful! The key secret is keeping the sheets covered with a slightly damp kitchen towel while you work to prevent them from drying out. I learned this the hard way after ruining an entire package when I first attempted these crisps! Another game-changer is using a light hand with the butter brush – you want enough to create those flaky layers but not so much that they become soggy. And don’t worry about tears or imperfections; simply layer another sheet on top and carry on. The rustic look of these crisps is part of their Mediterranean charm, reminiscent of homemade treats you’d find in a small Greek village bakery.

    Perfecting the Filling Consistency

    The filling for your Mediterranean Spinach Feta Crisps should be moist but never watery. This balance is crucial for crispy results! Always thoroughly drain your thawed spinach – I like to squeeze it in a clean kitchen towel until barely any liquid comes out. For the feta, I recommend using a block that you crumble yourself rather than pre-crumbled, as it has better moisture content and flavor. Adding an egg helps bind everything together perfectly, while a pinch of nutmeg brings out the earthiness of the spinach. If you’re looking for more Mediterranean-inspired dishes with similar flavor profiles, try my Couscous with Shrimp Easy Mediterranean Recipe for a complete meal.

    Serving Ideas & Creative Variations

    Perfect Pairings for Any Occasion

    These Mediterranean Spinach Feta Crisps are incredibly versatile when it comes to serving options! For casual gatherings, I love arranging them on a wooden board with lemon wedges, olives, and a simple yogurt dip on the side. When hosting more formal dinner parties, I place individual crisps on small plates with a drizzle of honey and a sprinkle of crushed pistachios – the sweet-savory combination is absolutely divine! They pair beautifully with crisp white wines like Assyrtiko or Sauvignon Blanc. For a complete Mediterranean-inspired spread, serve alongside Authentic Greek Shrimp Saganaki and watch your guests fall in love with the flavors of Greece.

    Creative Twists on the Classic Recipe

    While the traditional spinach and feta combination is timeless, don’t be afraid to experiment with creative variations! My family goes wild for the sun-dried tomato and olive version, where I mix chopped sun-dried tomatoes and kalamata olives into the filling for an extra punch of Mediterranean flavor. For a more substantial appetizer, try adding shredded rotisserie chicken or cooked ground lamb with a pinch of cinnamon. Vegetable lovers might enjoy a roasted red pepper and artichoke heart variation. You can also play with different cheeses – a mixture of feta and ricotta creates an even creamier texture, while a sprinkle of kefalograviera cheese on top adds a wonderful nutty flavor.

    Storage & Troubleshooting Guide

    Keeping Them Crispy for Later

    The biggest challenge with these Mediterranean Spinach Feta Crisps is maintaining their signature crunch when stored. For best results, cool them completely on a wire rack before storing in an airtight container with paper towels between layers to absorb excess moisture. They’ll keep at room temperature for up to 24 hours, but after that, refrigeration is necessary. To revive their crispiness, reheat in a 300°F oven for 5-7 minutes – never use the microwave, which will make them soggy! If you’re planning ahead, the unbaked assembled crisps freeze beautifully for up to a month; just add a few extra minutes to the baking time when cooking from frozen.

    Troubleshooting Common Issues

    If your Mediterranean Spinach Feta Crisps turned out soggy, the most likely culprit is excess moisture in the filling. Next time, be even more thorough when squeezing liquid from the spinach. Another common issue is phyllo that tears too easily – this usually means it’s dried out, so work more quickly or use a slightly damper towel to cover the sheets. If your crisps are browning too quickly on the outside before the filling heats through, try lowering your oven temperature by 25 degrees and extending the baking time slightly. And remember, if the filling leaks out during baking, don’t worry!

    Those crispy cheese bits that form around the edges are what my family always fights over – we call them the “chef’s treat.”

    Frequently Asked Questions

    Can I make Mediterranean Spinach Feta Crisps ahead of time?

    Absolutely! Prepare the filling up to 2 days ahead and store refrigerated. You can also assemble the unbaked crisps and refrigerate for up to 8 hours or freeze for longer storage. Just add a few extra minutes to the baking time.

    What’s the best cheese to use in these crisps?

    Traditional Greek feta made from sheep’s milk offers the most authentic flavor. Look for blocks packed in brine rather than pre-crumbled varieties, which tend to be drier and less flavorful.

    Can I use fresh spinach instead of frozen?

    Yes! Sauté about 1 pound of fresh spinach until wilted, then cool and squeeze out excess moisture. You’ll get roughly the same amount as a 10-ounce package of frozen spinach.

    Are these suitable for vegetarians?

    These Mediterranean Spinach Feta Crisps are perfect for vegetarians! Just check that your feta is made with vegetarian rennet if serving strict vegetarians.

    How can I make these gluten-free?

    While traditional phyllo contains gluten, you can try rice paper wrappers as an alternative. The texture will be different, but the flavors will still shine through beautifully.

    Final Thoughts

    These Mediterranean Spinach Feta Crisps have become my go-to recipe whenever I want to bring a touch of sunshine to the table. There’s something truly special about the way they combine simple ingredients into something extraordinary – crispy, creamy, savory, and utterly irresistible. Whether you’re serving them as party appetizers, weekend snacks, or alongside a Greek salad for a light dinner, they never fail to transport you to the Mediterranean coast. I hope you’ll give these crisps a try and discover your own favorite way to enjoy them! Find more of my Mediterranean-inspired recipes on Pinterest.

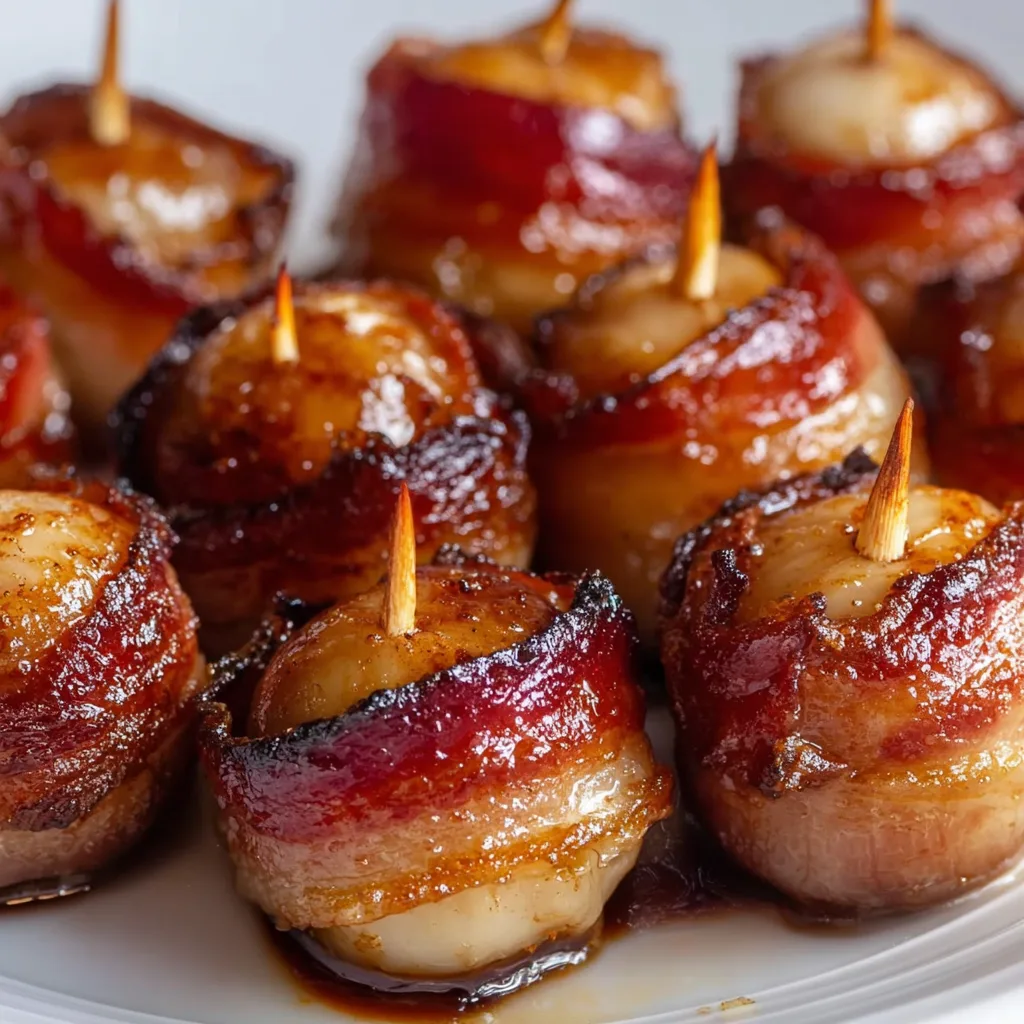
  • Bacon Wrapped Water Chestnuts: Irresistibly Crunchy Party Hit!

    Bacon Wrapped Water Chestnuts: Irresistibly Crunchy Party Hit!

    Bacon Wrapped Water Chestnuts: Irresistibly Crunchy Party Hit!

    Bacon wrapped water chestnuts are the ultimate crowd-pleasing appetizer that combines crispy, salty bacon with the refreshing crunch of water chestnuts. I first made these for a holiday gathering years ago, and they disappeared faster than I could set down the serving tray! There’s something magical about the way the smoky bacon wraps around each water chestnut, creating the perfect bite-sized morsel that keeps everyone coming back for more. Whether you’re hosting a dinner party or bringing a dish to a potluck, these irresistible little bites will have your guests raving and asking for your recipe.

    Recipe

    Why You’ll Love This Bacon Wrapped Water Chestnuts

    The Perfect Texture Combination

    The textural contrast in these bacon wrapped water chestnuts is what makes them truly special. The water chestnuts maintain their signature crispness even after baking, creating an unexpected pop with each bite. Meanwhile, the bacon crisps up around the edges while staying just tender enough where it hugs the chestnut. I love watching people’s faces light up with that first bite—it’s the “wow” moment when they experience that perfect balance of textures. The slight sweetness from the glaze caramelizes during baking, adding another dimension that makes these appetizers absolutely irresistible.

    Quick Prep, Big Impact

    One thing I adore about this recipe is how the effort-to-impression ratio is completely in your favor! With just a handful of ingredients and about 15 minutes of prep time, you’ll create an appetizer that looks and tastes like you spent hours in the kitchen. I’ve found these are perfect for last-minute gatherings when I need something that feels special without the stress. The assembly is simple enough that kids can help too—my niece loves wrapping the bacon strips around each water chestnut and securing them with toothpicks. It’s become our special pre-party ritual!

    Essential Tips & Tricks

    Choosing the Right Ingredients

    Starting with quality bacon makes all the difference in this recipe. I prefer using center-cut bacon that’s not too thick and not too thin—about medium thickness gives you the perfect balance of crispiness and chew. For water chestnuts, always drain and pat them completely dry before wrapping to ensure the bacon crisps properly. The brown sugar mixture should be packed firmly around each wrapped chestnut to create that gorgeous caramelized exterior. When I’m feeling fancy, I’ll add a tiny pinch of cayenne to the sugar mixture for a subtle heat that cuts through the sweetness.

    Perfecting the Baking Process

    The key to evenly cooked bacon wrapped water chestnuts is all in the preparation and baking technique. Line your baking sheet with parchment paper or a silicone mat to prevent sticking and make cleanup easier. I’ve found that elevating the chestnuts on a wire rack allows the bacon to crisp on all sides—no more soggy bottoms! For the best results, broil them for the final 2-3 minutes to achieve that perfect caramelization. Just keep a close eye on them, as they can go from perfectly caramelized to burnt in seconds! My crispy zucchini rings use a similar technique for achieving the perfect crunch.

    Serving Ideas & Creative Variations

    Presentation Possibilities

    Serving these bite-sized delights on a beautiful platter instantly elevates any gathering. I love arranging them in a circular pattern with a small bowl of additional dipping sauce in the center—it creates a stunning visual that guests can’t resist. For an elegant touch, sprinkle freshly chopped parsley or chives over the top just before serving. At my last holiday party, I placed them on a tiered stand alongside other appetizers, and they were the first to disappear! Consider serving them warm rather than hot to allow the flavors to meld together perfectly while preventing burned mouths.

    Flavor Variations to Try

    While the classic recipe is always a hit, experimenting with different flavor profiles keeps this appetizer exciting every time you serve it. Try brushing them with a maple-bourbon glaze for a sophisticated twist, or add a dash of sriracha to the brown sugar mixture for a sweet-heat combination. For an Asian-inspired version, incorporate a bit of hoisin sauce and ginger into your glaze. These pair beautifully with my green bean bacon bundles for a bacon-lover’s dream appetizer spread. I’ve even tried a version with a sprinkle of blue cheese that melts slightly during the final minutes of baking—absolute heaven!

    Storage & Troubleshooting Guide

    Making Ahead and Storing

    These bacon wrapped water chestnuts are perfect for meal prepping because you can assemble them up to 24 hours in advance. Simply prepare them through the wrapping stage, cover tightly with plastic wrap, and refrigerate until you’re ready to add the glaze and bake. Once cooked, leftovers can be stored in an airtight container in the refrigerator for up to 3 days, though they’re rarely around that long in my house! To reheat, place them on a baking sheet in a 350°F oven for about 10 minutes until warmed through and the bacon crisps back up. Avoid microwaving if possible, as it makes the bacon soft and chewy.

    Troubleshooting Common Issues

    The most common challenge with bacon wrapped water chestnuts is keeping the bacon securely wrapped during baking. I’ve found that pre-cooking the bacon for just 3-4 minutes (until it’s still pliable but has rendered some fat) before wrapping helps it adhere better to the water chestnuts. If your bacon is unraveling, try using half slices instead of thirds, giving you more overlap to secure the wrap. Another issue might be overly sweet or burnt glaze—if this happens, reduce the brown sugar slightly and keep a closer eye on them during that final broiling stage. Remember that different ovens heat differently, so your cooking time may need slight adjustments.

    Frequently Asked Questions

    Can I use fresh water chestnuts instead of canned?

    Fresh water chestnuts have a crisper texture and sweeter flavor, making them an excellent substitute. Peel them first, then boil for 5 minutes before using in the recipe. They’ll maintain their crunch even better than canned.

    How do I prevent the bacon from unwrapping during cooking?

    Secure each bacon wrapped water chestnut with a toothpick through the center, making sure to catch both ends of the bacon. Pre-cooking the bacon slightly also helps it adhere better.

    Can I make bacon wrapped water chestnuts in an air fryer?

    Absolutely! Cook them at 375°F for about 10-12 minutes, turning halfway through. The air fryer creates extra crispy bacon with less mess and faster cooking time.

    What dipping sauces pair well with this appetizer?

    Try sweet chili sauce, honey mustard, or a soy-ginger glaze. For a creamy option, mix mayo with sriracha and a splash of lime juice for a spicy, tangy complement.

    How many bacon wrapped water chestnuts should I make per person?

    Plan for 3-4 pieces per person for a cocktail party with other appetizers. If they’re the main appetizer, increase to 5-6 per person—they disappear quickly!

    Final Thoughts

    There’s something truly magical about bacon wrapped water chestnuts that keeps them at the top of my appetizer rotation. The combination of smoky, sweet, and crunchy elements creates a perfect bite that satisfies on so many levels. I love how they bring people together around the serving platter, sparking conversation and delight with each bite. Whether you’re making them for a special occasion or just because it’s Tuesday, these little flavor bombs are sure to become a staple in your recipe collection. Don’t forget to check out more delicious appetizer ideas on Pinterest for your next gathering!

  • Cheesy Pizza Pockets That Will Blow Your Mind Every Time!

    Cheesy Pizza Pockets That Will Blow Your Mind Every Time!

    Cheesy Pizza Pockets That Will Blow Your Mind Every Time!

    Cheesy Pizza Pockets are the ultimate handheld comfort food that brings me right back to after-school snack time—but with a homemade upgrade that puts those frozen varieties to shame! There’s something magical about biting through that golden, flaky crust and hitting that first pocket of molten cheese and zesty sauce. I discovered this recipe during a rainy weekend when my kids were climbing the walls with boredom, and now it’s our Friday night tradition. The beauty is in their simplicity: basic ingredients, minimal prep, maximum satisfaction. Trust me, once you make these from scratch, there’s no going back to store-bought.

    Recipe

    Why You’ll Love These Cheesy Pizza Pockets

    Perfect for Meal Prep and On-the-Go Eating

    These pizza pockets are absolute meal prep champions! I make a double batch on Sunday afternoons while my favorite playlist fills the kitchen, and we’re set for quick lunches all week. The pockets reheat beautifully in just minutes, making them perfect for busy weekday lunches or after-school snacks. My teenagers can grab them straight from the fridge and reheat them themselves—a small miracle in itself! The individual portions mean no arguments over who got more, and they’re sturdy enough to pack in lunchboxes without turning into a sad, soggy mess by noon.

    Customizable for Every Palate

    The beauty of these cheesy pizza pockets lies in their infinite customization possibilities. My husband loves the classic pepperoni and mozzarella, while my youngest insists on ham and pineapple (don’t judge us!). I’ve fallen in love with a spinach, feta, and sun-dried tomato version that feels slightly more grown-up. The base recipe stays the same, but you can adapt the fillings to whatever you have on hand or whatever your family craves. This flexibility makes them perfect for picky eaters—everyone gets exactly what they want without extra cooking effort from me!

    Essential Tips & Tricks

    Mastering the Perfect Dough

    The secret to irresistible pizza pockets starts with the dough consistency. I’ve found that letting the dough rest for at least 30 minutes makes all the difference—it relaxes the gluten and creates that perfect chewy-yet-tender texture we’re after. Room temperature ingredients blend more smoothly, so plan ahead! A light dusting of cornmeal on your work surface prevents sticking while adding a subtle crunch. Don’t overwork the dough when rolling it out; gentle hands make for flakier pockets. If you’re short on time, quality store-bought pizza dough works beautifully too—I won’t tell if you don’t! These garlic butter parmesan knots use a similar dough technique.

    Preventing the Dreaded Filling Leakage

    Nothing’s more disappointing than watching all that glorious cheese and sauce escape during baking! The sealing technique is crucial—I dampen the edges with a bit of water or egg wash before pressing firmly with fork tines. Don’t overfill your pockets; about 2-3 tablespoons of filling is perfect for a 4-inch pocket. Allow at least half an inch of dough border for proper sealing. For extra insurance against leaks, chill the assembled pockets for 15 minutes before baking—this firms up the dough and helps maintain the seal. Finally, those steam vents aren’t just decorative! Cut 2-3 small slits in the top to release pressure and prevent explosive cheese situations.

    Serving Ideas & Creative Variations

    Perfect Pairings for a Complete Meal

    Transform these cheesy pizza pockets from snack to satisfying meal with thoughtful side pairings. My family loves them alongside a crisp green salad with tangy vinaigrette—the fresh crunch balances the rich, melty pockets perfectly. For heartier appetites, a cup of tomato soup creates that classic grilled-cheese-and-soup comfort vibe that never fails to please. In summer, I serve them with cucumber spears and cherry tomatoes for a no-cook side. For entertaining, I make mini versions and serve them with crispy zucchini rings with creamy dip for an appetizer spread that disappears in minutes!

    Global Flavor Inspirations

    Take your pizza pockets on a flavor adventure by drawing inspiration from global cuisines! For Mediterranean vibes, fill with feta, olives, and roasted red peppers with a sprinkle of oregano. My taco-inspired version with seasoned ground beef, cheddar, and a touch of corn salsa is always a hit on Tuesdays. For an Italian twist beyond the classic, try prosciutto with fig jam and fontina cheese—unexpectedly delicious! Asian-inspired fillings like teriyaki chicken with a sprinkle of mozzarella create a fusion that somehow works brilliantly. The dough recipe stays consistent while the fillings take your taste buds traveling around the world.

    Storage & Troubleshooting Guide

    Freezing and Reheating for Best Results

    These cheesy pizza pockets are freezer-friendly superstars! For best results, freeze them unbaked on a parchment-lined sheet until solid (about 2 hours), then transfer to freezer bags. They’ll keep for up to 3 months! When ready to enjoy, you can bake them straight from frozen—just add about 5-7 minutes to the baking time and watch for that golden-brown perfection. For already-baked pockets, reheat in a 350°F oven for 10 minutes to restore that crispy exterior. Microwaving works in a pinch (about 45 seconds), but you’ll sacrifice some crispness. I label each freezer bag with filling types and dates—my color-coded system makes weeknight dinner decisions effortless!

    Troubleshooting Common Issues

    Even experienced bakers encounter challenges! If your dough feels too sticky, resist adding too much flour—just a light dusting on your hands and work surface should do it. Sticky dough actually produces a better texture after baking. For stubborn leaks, try reducing your filling slightly and double-check your seals before baking. If your pockets are browning too quickly but aren’t cooked through, lower your oven temperature by 25°F and cover loosely with foil for the remaining bake time. Pale, soggy bottoms usually mean your oven wasn’t hot enough to start—try preheating longer or using a pizza stone for more even heat distribution.

    Frequently Asked Questions

    Can I make Cheesy Pizza Pockets ahead of time?

    Absolutely! Assemble them up to 24 hours ahead and refrigerate unbaked. You can also freeze them for up to 3 months. For best results, freeze them individually on a baking sheet before transferring to freezer bags.

    What’s the best cheese for pizza pockets?

    Low-moisture mozzarella is ideal as it melts beautifully without releasing too much liquid. For extra flavor, mix in some sharp cheddar, provolone, or parmesan. Pre-shredded cheese works but freshly grated melts more smoothly.

    How do I prevent my pizza pockets from getting soggy?

    Avoid watery fillings and pat ingredients like pineapple or vegetables dry before using. Let tomato sauce reduce slightly to thicken, and don’t overfill your pockets. Those steam vents on top are essential!

    Can I make these Cheesy Pizza Pockets in an air fryer?

    Yes! Preheat your air fryer to 375°F and cook for 8-10 minutes until golden and crispy. They cook faster than in a conventional oven, so check them early to prevent burning.

    Are these suitable for vegetarians?

    Definitely! Fill with your favorite vegetables, cheeses, and meat alternatives. Try combinations like spinach and ricotta, roasted vegetables with pesto, or plant-based pepperoni substitutes.

    Final Thoughts

    These Cheesy Pizza Pockets have become more than just a recipe in our home—they’re a flexible solution for busy days, a creative cooking project for rainy weekends, and sometimes even the peace offering that ends sibling squabbles. The joy of watching someone bite into a pocket and get that first taste of gooey, savory goodness never gets old. Whether you stick with classic pizza flavors or venture into creative territory, these handheld delights deliver comfort food satisfaction every time. I’d love to see your creations on Pinterest—tag me in your pizza pocket masterpieces!