Category: Lunch

Easy lunch ideas for busy days. Simple, quick recipes with fresh flavor and satisfying meals you can enjoy at home or on the go.

  • Venezuelan Sweet Corn Cachapas with Melty Cheese – Irresistible!

    Venezuelan Sweet Corn Cachapas with Melty Cheese – Irresistible!

    Venezuelan Sweet Corn Cachapas with Melty Cheese - Irresistible!

    Venezuelan Sweet Corn Cachapas with Melty Cheese are the golden sunshine of Latin American cuisine that I simply can’t get enough of. These pillowy corn pancakes have been my obsession since I first tasted them at my neighbor Maria’s kitchen gathering last summer. The way the sweet corn batter sizzles on the griddle before being folded over stretchy, gooey cheese creates a perfect harmony of textures and flavors. There’s something magical about that first bite—where the sweetness of fresh corn meets the salty richness of traditional queso de mano (or any good melting cheese). Ready to bring a taste of Venezuela to your kitchen? Let’s dive in!

    Recipe

    Why You’ll Love This Venezuelan Sweet Corn Cachapas with Melty Cheese

    A Perfect Balance of Sweet and Savory

    There’s something utterly irresistible about the contrast between sweet corn and salty cheese. I remember standing in my kitchen, still in pajamas, flipping my first cachapa and watching the steam rise as I folded it over melty cheese. That moment of anticipation! The natural sweetness from the corn kernels creates a complex flavor profile that store-bought pancakes simply can’t match. Plus, these cachapas are naturally gluten-free, making them perfect for serving to friends with dietary restrictions without compromising on taste or texture.

    Quick Comfort Food with Cultural Heritage

    These golden discs of joy take less than 30 minutes from start to finish but taste like they’ve been perfected over generations—because they have! Venezuelan families have been making cachapas for centuries, passing down techniques for achieving that perfect consistency. I love how making them connects me to a rich culinary tradition while still being practical for busy weeknights. There’s something deeply satisfying about creating something so authentic yet so simple. When my kitchen smells like sweet corn and butter, all feels right with the world.

    Essential Tips & Tricks

    Mastering the Perfect Corn Batter

    The secret to exceptional cachapas lies in the corn-to-liquid ratio. Fresh corn is traditional and gives the best flavor, but frozen corn works beautifully when fresh isn’t available. I’ve found that adding just a tablespoon of cornmeal helps with texture when using frozen corn. Pulse the mixture just until combined—you want some texture remaining, not a completely smooth puree. Think of pancake batter that’s slightly thicker with visible corn pieces. The batter should slowly drip off your spoon, not run like water or sit in stiff peaks. Check out these delicious buffalo chicken bowls for another quick weeknight option!

    Cooking Temperature and Timing

    Medium-low heat is your best friend when making cachapas. Too hot, and they’ll burn before cooking through; too cool, and they’ll be pale and soggy. Look for those golden-brown edges as your signal to flip—usually about 3-4 minutes per side. A well-seasoned cast iron pan works wonders, but any non-stick skillet will do. I learned the hard way (after one tragic sticking incident) that patience is key—resist the urge to flip too early! Add a thin coating of butter or oil between each cachapa for that beautiful color and to prevent sticking.

    Serving Ideas & Creative Variations

    Traditional and Modern Pairings

    In Venezuela, cachapas are often served with a slice of hand cheese (queso de mano) or fresh white cheese. But don’t stop there! I love setting up a cachapa bar when friends come over—offering toppings like crema, avocado slices, shredded chicken, or even a drizzle of honey for those who want to lean into the sweetness. Serve them for brunch alongside a tropical fruit salad, or make them dinner-worthy with a side of creamy miso butter beans for a satisfying meal that crosses cultural boundaries in the most delicious way.

    Regional Twists Worth Trying

    Every Venezuelan family has their special touch when making cachapas. Some add a hint of sugar to enhance the corn’s natural sweetness, while others incorporate a pinch of anise for subtle licorice notes. In coastal regions, you might find cachapas stuffed with seafood instead of cheese! My favorite variation includes folding a tablespoon of crumbled queso fresco directly into the batter before cooking. This creates pockets of melty goodness throughout each bite. For special occasions, try adding a sprinkle of fresh herbs like cilantro or even a dash of cinnamon for warmth.

    Storage & Troubleshooting Guide

    Keeping and Reheating Cachapas

    Cachapas are at their absolute best when fresh off the griddle, but life happens, and sometimes you’ll have leftovers. Store unfilled cachapas in an airtight container with parchment paper between each one to prevent sticking. They’ll keep in the refrigerator for up to 3 days. To reheat, avoid the microwave which makes them tough. Instead, warm them in a dry skillet over medium-low heat for about 2 minutes per side. You can also freeze them for up to a month—just thaw completely before reheating to ensure they warm evenly.

    Fixing Common Cachapa Problems

    If your cachapas are falling apart when flipping, your batter might be too wet. Add a tablespoon of cornmeal or masa harina to thicken it up. Too thick? A splash of milk will thin it to the right consistency. For cachapas that aren’t cooking through, try making them slightly thinner or covering the pan with a lid for a minute to help them cook evenly. And if they’re sticking to the pan despite oil, your heat might be too high. Remember that the first cachapa is often like the first pancake—a test run that helps you adjust temperature and technique for perfect results.

    Frequently Asked Questions

    Can I make Venezuelan Sweet Corn Cachapas with canned corn?

    Yes! While fresh corn provides the best flavor, canned corn works in a pinch. Drain thoroughly and pat dry with paper towels to remove excess moisture before blending. Add 1 tablespoon of sugar to compensate for the missing natural sweetness.

    What’s the best cheese to use for authentic cachapas?

    Traditional cachapas use queso de mano or queso telita. Outside Venezuela, try mozzarella, Oaxaca cheese, or a mix of mozzarella and feta for that perfect melty-yet-salty combination that makes cachapas special.

    Why are my cachapas too dense?

    You might be overprocessing the corn batter. Pulse just until combined, leaving some texture. Also, check your corn-to-liquid ratio—too little liquid creates heavy cachapas instead of light, fluffy ones.

    Can cachapas be made ahead for a party?

    Absolutely! Make the batter up to 24 hours ahead and refrigerate. You can also pre-cook cachapas and reheat them in a skillet just before serving. Keep them separated with parchment paper to prevent sticking.

    How do I know when to flip my cachapas?

    Look for bubbles forming on the surface and golden-brown edges, usually after 3-4 minutes on medium-low heat. The top should look set but still slightly wet before flipping.

    Final Thoughts

    Venezuelan Sweet Corn Cachapas with Melty Cheese bring together the simple pleasure of corn pancakes with the indulgence of gooey cheese in a way that feels both comforting and special. There’s something deeply satisfying about mastering this traditional recipe—watching the batter transform into golden discs of joy on your griddle. Whether you’re serving them for weekend brunch or a quick dinner, cachapas offer that rare combination of authentic flavor and effortless preparation that makes them worth adding to your regular rotation. For more Latin-inspired recipes, follow me on Pinterest where I’m always sharing new discoveries!
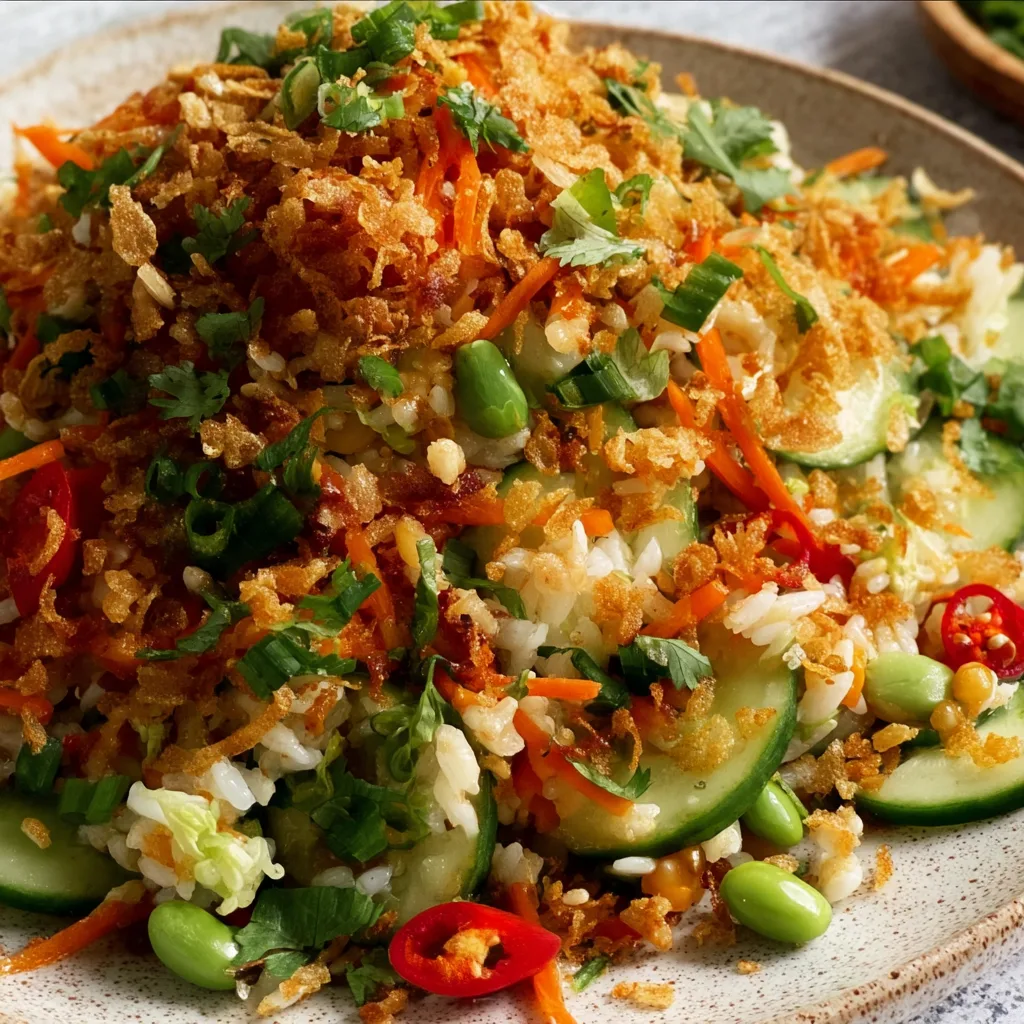
  • Asian Crispy Rice Salad That Will Blow Your Taste Buds Away!

    Asian Crispy Rice Salad That Will Blow Your Taste Buds Away!

    Asian Crispy Rice Salad That Will Blow Your Taste Buds Away!

    This Asian Crispy Rice Salad completely transformed my weeknight dinner routine last month when I was stuck in a serious cooking rut. The addictive crunch of crispy rice contrasts beautifully with tender vegetables, all coated in a tangy-sweet dressing that makes your taste buds dance. I first discovered this gem at a friend’s potluck where I literally couldn’t stop sneaking spoonfuls from the serving bowl! It’s become my go-to when I need something that feels special but doesn’t require hours in the kitchen—perfect for those evenings when you want something impressive but effortless.

    Recipe

    Why You’ll Love This Asian Crispy Rice Salad

    Perfect Texture Combination

    The magical contrast of textures is what makes this salad absolutely irresistible. The rice gets crispy and golden in places while maintaining chewiness in others—creating that perfect bite every single time. I love how the crunch of fresh bell peppers and water chestnuts plays against the softness of edamame. When you take that first forkful, you’ll experience a symphony of textures that keeps you coming back for more. My husband, who typically shrugs at salads, went back for thirds the first time I made this!

    Flavor-Packed Dressing

    The umami-rich dressing ties everything together with its perfect balance of salty, sweet, and tangy notes. Soy sauce provides depth, while rice vinegar adds brightness that cuts through the richness. A touch of sesame oil brings that distinctive nutty flavor that’s unmistakably Asian-inspired. I’ve caught myself licking the spoon after mixing this dressing—it’s that good! The flavors continue to develop as the salad sits, making it even more delicious as leftovers the next day.

    Essential Tips & Tricks

    Getting Perfectly Crispy Rice

    The secret to crispy rice lies in starting with cold, day-old rice—fresh rice simply won’t crisp up properly. Spread your rice in a thin layer on a baking sheet and drizzle with a little oil before roasting at 425°F until golden and crunchy around the edges (about 15-20 minutes). I learned this technique after several soggy attempts, and it’s been a game-changer! Don’t rush this step; those crispy bits are what make this salad special, similar to the crispy elements in my Potsticker Noodle Bowl with Beef Cabbage Slaw.

    Prep-Ahead Components

    Make your life easier by prepping components in advance. The dressing can be made up to 3 days ahead and stored in the refrigerator. Chop all vegetables the night before and store them in airtight containers. The rice can even be crisped up to 2 hours ahead—just don’t combine everything until serving time to maintain those distinct textures. I often prep everything during my Sunday meal prep session, which makes throwing this salad together on busy weeknights absolutely effortless.

    Serving Ideas & Creative Variations

    Perfect Pairings

    This Asian Crispy Rice Salad works beautifully as both a standalone meal or a side dish. For a complete dinner, top with grilled shrimp, chicken, or tofu to add protein. It pairs wonderfully with other Asian-inspired dishes like dumplings or spring rolls for a feast. I recently served this alongside my Sauteed Bok Choy for a dinner party, and guests couldn’t stop raving about the combination. The cooling crunch of the salad balances perfectly with spicier main dishes, making it an ideal accompaniment.

    Seasonal Adaptations

    One thing I adore about this salad is how easily adaptable it is to whatever’s in season. In summer, add fresh corn kernels and cherry tomatoes for sweetness. Fall calls for roasted butternut squash cubes and pomegranate seeds. Winter? Try roasted Brussels sprouts and dried cranberries. Spring begs for snap peas and asparagus tips. The base recipe stays the same, but these seasonal swaps keep the salad feeling fresh and exciting year-round. I’ve made it twelve different ways, and each variation has its own special charm!

    Storage & Troubleshooting Guide

    Maintaining Freshness

    For optimal texture, store the components separately if preparing ahead. Keep the crispy rice in an airtight container at room temperature (refrigeration makes it soggy), while vegetables and dressing should be refrigerated. If you’ve already mixed everything, leftovers will keep for up to 2 days in the refrigerator, though the rice will soften over time. To revive leftover salad, spread it on a baking sheet and pop it under the broiler for 1-2 minutes—this restores some crispness to the rice!

    Fixing Common Issues

    If your rice isn’t getting crispy enough, it’s likely too fresh or too wet. Solution: spread it thinner on the baking sheet and extend roasting time by 5-10 minutes. If your dressing tastes too salty, balance it with a touch more honey or a squeeze of fresh lime juice. For a salad that seems dry after mixing, simply drizzle in a little more dressing or a splash of olive oil. And if vegetables have released too much water making the salad soggy, drain excess liquid and add a fresh batch of crispy rice.

    Frequently Asked Questions

    Can I use fresh rice instead of day-old rice?

    Fresh rice contains too much moisture to crisp properly. If you’re in a pinch, spread freshly cooked rice on a baking sheet, refrigerate uncovered for 30 minutes, then proceed with crisping.

    Is this Asian Crispy Rice Salad gluten-free?

    Not traditionally, due to the soy sauce. Simply substitute tamari or coconut aminos for the soy sauce to make it completely gluten-free.

    How can I make this salad more substantial?

    Add protein like grilled chicken, shrimp, tofu, or edamame. You can also incorporate hearty vegetables like roasted sweet potatoes or avocado.

    Can I prepare this salad the night before?

    Yes, but store components separately. Combine just before serving to maintain the signature crispy texture that makes this salad special.

    What’s the best rice variety to use?

    Medium-grain white rice works best for crispiness. Jasmine and basmati are good alternatives, but avoid sticky or short-grain varieties as they won’t crisp as well.

    Final Thoughts

    This Asian Crispy Rice Salad has become my secret weapon for potlucks and dinner parties—it consistently earns rave reviews while being deceptively simple to prepare. The contrast of textures and flavors makes it memorable, and its versatility means you’ll never tire of making it. I love how it bridges the gap between comfort food and fresh, vibrant eating. Don’t forget to check out more creative recipes on our Pinterest for endless inspiration!

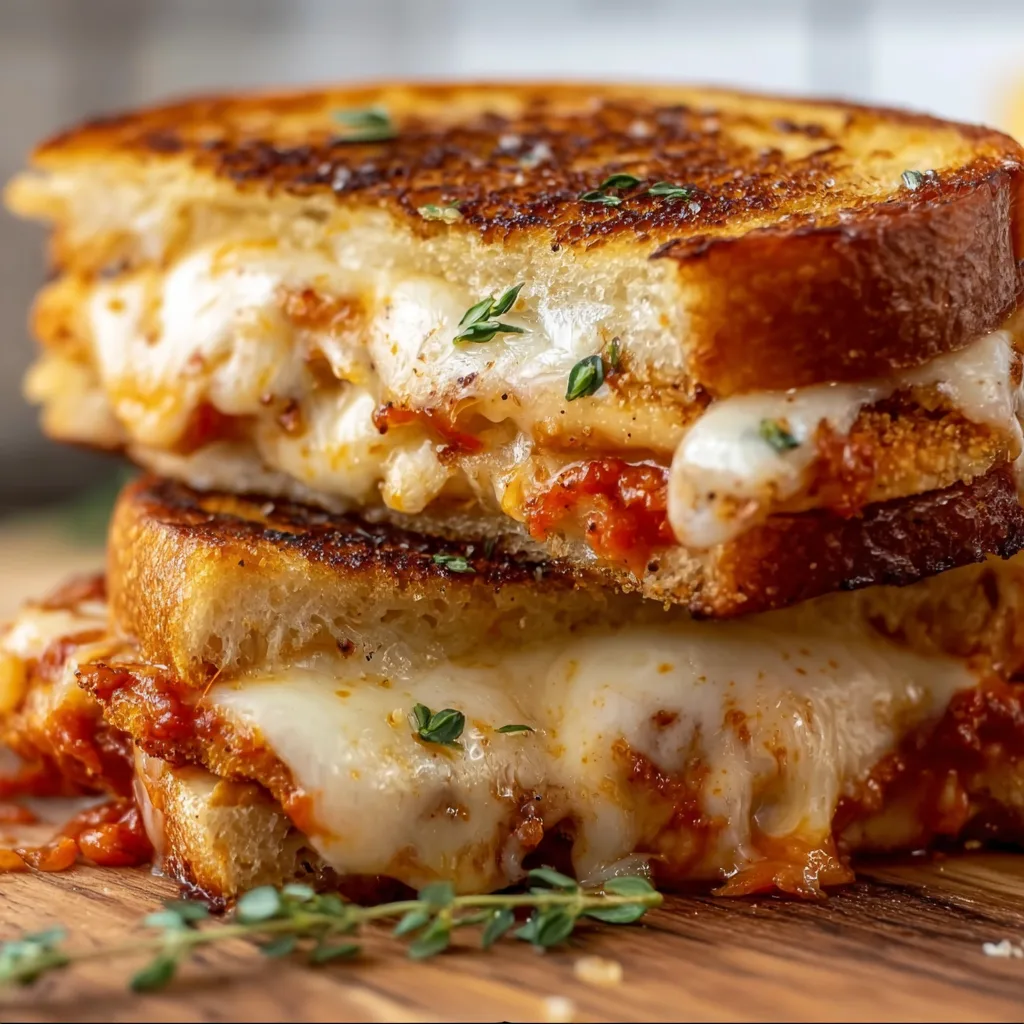
  • Chicken Parmesan Grilled Cheese: Irresistibly Cheesy & Crispy Delight!

    Chicken Parmesan Grilled Cheese: Irresistibly Cheesy & Crispy Delight!

    Chicken Parmesan Grilled Cheese: Irresistibly Cheesy & Crispy Delight!

    Chicken Parmesan Grilled Cheese is what happens when two comfort food classics collide in the most delicious way possible. I first created this sandwich on a rainy Sunday afternoon when I couldn’t decide between Italian night and my go-to grilled cheese. The result? Pure magic that combines crispy, buttery bread with gooey mozzarella, savory marinara, and perfectly seasoned chicken. It’s become my family’s most-requested sandwich, and I’m betting it will become yours too. This elevated grilled cheese brings all the flavors of chicken parmesan but in a handheld, melty package that’s ready in minutes.

    Recipe

    Why You’ll Love This Chicken Parmesan Grilled Cheese

    The Perfect Balance of Flavors and Textures

    There’s something almost magical about that first bite—the way the buttery, toasted bread gives way to layers of melted cheese and savory chicken. I love how the tangy marinara cuts through the richness, while the herbs add freshness to every mouthful. The contrast between the crispy exterior and the gooey interior creates a textural symphony that keeps you coming back for more. What makes this sandwich special is how each element shines without overwhelming the others. It’s comfort food elevated to an art form, yet simple enough for a weeknight dinner.

    Quick and Adaptable for Any Occasion

    When life gets hectic (and when doesn’t it?), this sandwich is my secret weapon. It takes just 15 minutes from start to finish, making it perfect for those evenings when cooking feels overwhelming. I’ve made these for everything from casual movie nights to impromptu gatherings where friends stopped by unexpectedly. The beauty lies in its adaptability—use leftover chicken, rotisserie chicken from the store, or even those chicken tenders sitting in your freezer. It’s fancy enough for company but easy enough for a Tuesday night when you’re running on empty but still craving something that feels like a treat.

    Essential Tips & Tricks

    Mastering the Perfect Cheese Melt

    The secret to that Instagram-worthy cheese pull lies in the layering technique. Start with a thin spread of marinara on the bread (too much makes it soggy), then add a layer of mozzarella, followed by chicken, a touch more sauce, and finish with another layer of cheese. This sandwich-style encapsulation keeps everything melty and contained. I learned the hard way that patience is key—medium-low heat allows the cheese to melt completely while giving the bread time to develop that golden-brown crust. For an extra-special touch, mix your mozzarella with a bit of provolone or fontina for complexity that will make your taste buds sing.

    Bread and Butter Fundamentals

    Don’t underestimate the foundation of your sandwich—the bread choice makes or breaks this recipe. I prefer sourdough for its slight tang and sturdy structure, but a good Italian bread or Texas toast works beautifully too. Whatever you choose, make sure it’s sliced thick enough to hold up to the fillings. As for the butter, salted butter spread all the way to the edges creates that perfect golden crust. For an elevated twist that will make you feel like a gourmet chef, try mixing softened butter with a pinch of garlic powder and Italian herbs before spreading it on the bread. It’s similar to the magic I create in my garlic parmesan cheeseburger bombs.

    Serving Ideas & Creative Variations

    Perfect Pairings to Complete Your Meal

    This sandwich shines as the star of your meal, but the right side dish elevates the entire experience. A simple arugula salad with lemon vinaigrette cuts through the richness perfectly. On chilly evenings, I pair it with a small cup of tomato soup for the ultimate comfort food duo—there’s something nostalgic about dipping the crispy corners into warm soup that takes me back to childhood. For a lighter option, roasted vegetables with a balsamic drizzle complement the sandwich beautifully. And if you’re feeling indulgent, crispy air fryer parmesan crusted chicken wings make a fantastic appetizer to kick off your meal.

    Creative Twists on the Classic

    The beauty of this sandwich lies in its versatility. For a spicy version, add thinly sliced jalapeños or a sprinkle of red pepper flakes to the cheese layer. My family goes wild for the “deluxe” version with thin slices of prosciutto and fresh basil leaves added just before serving. For a vegetarian option, substitute the chicken with grilled eggplant or portobello mushrooms marinated in balsamic vinegar. I’ve even created a breakfast variation using leftover chicken, mozzarella, and a fried egg on top—the runny yolk creates a decadent sauce that’s perfect for weekend brunch. Each variation maintains the soul of the original while offering a new experience.

    Storage & Troubleshooting Guide

    Making Ahead and Reheating Tips

    While this sandwich is best enjoyed fresh off the griddle, there are ways to prep ahead when time is tight. The chicken component can be prepared up to three days in advance—just store it in an airtight container in the refrigerator. For busy weeknights, I assemble several sandwiches (without buttering the outside), wrap them individually in parchment paper, and refrigerate for up to 24 hours. When it’s time to eat, just butter the outside and grill as usual. If you need to reheat a fully cooked sandwich, avoid the microwave which will make it soggy.

    Instead, wrap it loosely in foil and warm in a 300°F oven for 10 minutes, then unwrap for the final 2 minutes to crisp up.

    Troubleshooting Common Issues

    Even the most experienced sandwich makers encounter challenges. If your bread is browning too quickly before the cheese melts, your heat is too high—immediately lower the temperature and continue cooking. Soggy sandwiches usually mean too much marinara sauce; keep it to just 1-2 tablespoons per sandwich and drain your chicken well before adding it. If your cheese isn’t melting properly, try grating it instead of using slices—the finer texture melts more quickly and evenly. For sandwiches that fall apart during flipping, try using a second spatula for support or secure with toothpicks (just remember to remove them before eating!). Patience is key—rushing the process almost always leads to less-than-perfect results.

    Frequently Asked Questions

    Can I use different cheeses for my Chicken Parmesan Grilled Cheese?

    Absolutely! While mozzarella is traditional, provolone, fontina, or even a mix with a little parmesan creates wonderful flavor variations. Just ensure your cheese melts well for that perfect pull-apart texture.

    How do I prevent my sandwich from becoming soggy?

    Use marinara sauce sparingly (1-2 tablespoons max), ensure your chicken is well-drained, and cook on medium-low heat to allow moisture to evaporate while cooking.

    Can I make this sandwich ahead of time for a party?

    Yes! Assemble sandwiches without buttering the outside, wrap individually, and refrigerate. When ready to serve, butter the outside and grill fresh for best results.

    What’s the best bread for this sandwich?

    Sourdough, Italian bread, or Texas toast work best as they’re sturdy enough to hold fillings without falling apart. Avoid very soft or thinly sliced breads.

    Is there a way to make Chicken Parmesan Grilled Cheese healthier?

    Try whole grain bread, reduced-fat cheese, and grilled chicken breast. You can also add vegetables like spinach or roasted red peppers for extra nutrition.

    Final Thoughts

    The Chicken Parmesan Grilled Cheese represents what I love most about cooking—taking familiar favorites and transforming them into something extraordinary. It’s a testament to how simple ingredients can create something truly memorable when combined with a little creativity and care. Whether you’re cooking for your family on a busy weeknight or impressing friends at a casual gathering, this sandwich delivers maximum flavor with minimal effort. I’d love to see your creations on Pinterest when you try this recipe—each person’s version becomes uniquely their own, and that’s the true beauty of cooking.

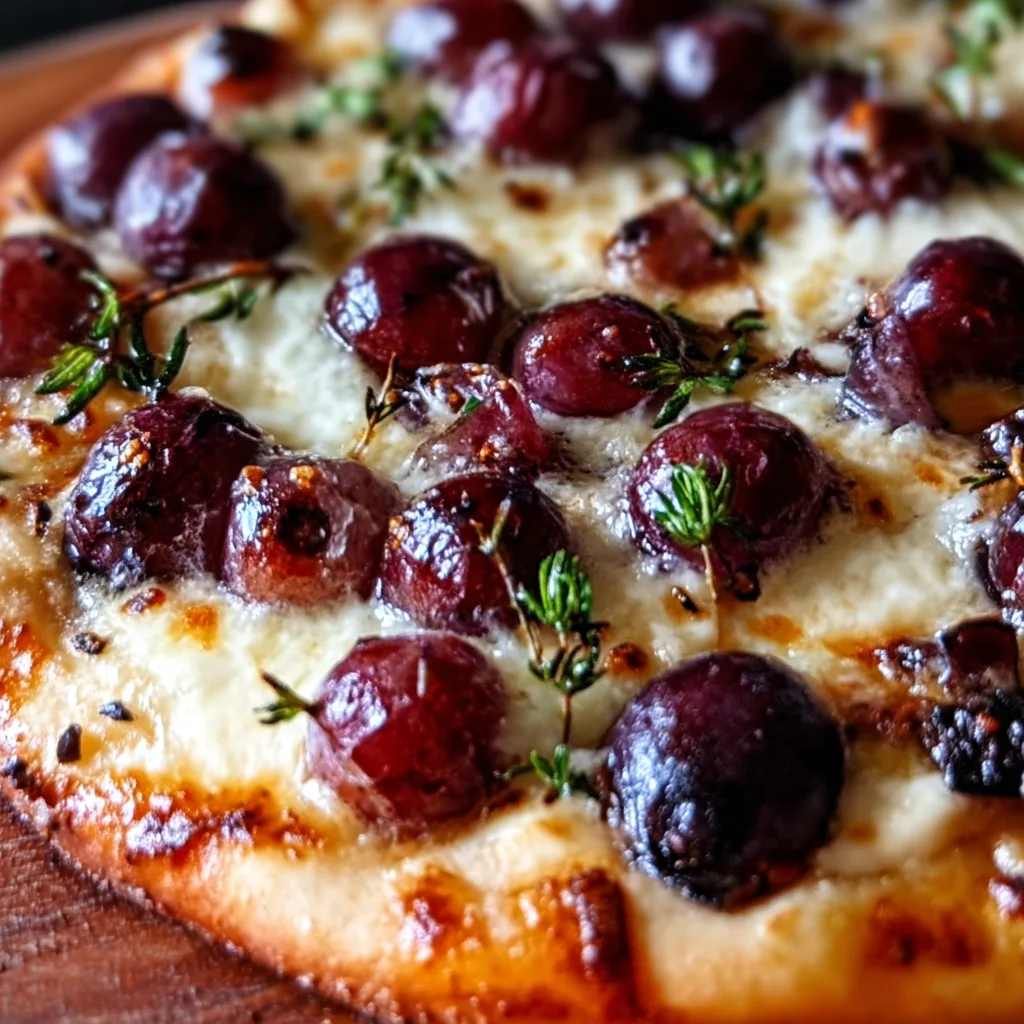
  • Roasted Red Grape Pizza: Irresistible Sweet & Savory Flavor Burst!

    Roasted Red Grape Pizza: Irresistible Sweet & Savory Flavor Burst!

    Roasted Red Grape Pizza: Irresistible Sweet & Savory Flavor Burst!

    Roasted Red Grape Pizza transforms an ordinary pizza night into something extraordinary. The first time I tried this sweet-savory combination, I was skeptical—grapes on pizza? But that first bite changed everything. The burst of juicy grapes against creamy cheese and crispy crust creates a flavor profile that’s unexpectedly perfect. There’s something magical about how roasting intensifies the grapes’ natural sweetness, creating little pockets of jammy goodness across your pizza. If you’re looking to elevate your homemade pizza game, this recipe belongs in your rotation alongside classics like my Buffalo Chicken Mozzarella Sticks. Trust me, this isn’t just pizza—it’s an experience.

    Recipe

    Why You’ll Love This Roasted Red Grape Pizza

    A Perfect Balance of Flavors

    The magic of this Roasted Red Grape Pizza lies in its contrasting elements. Sweet roasted grapes create bursts of jammy goodness that perfectly balance the salty cheese and savory base. I love watching guests’ expressions when they take their first bite—skepticism transforms into pure delight! The grapes caramelize slightly in the oven, concentrating their natural sugars while maintaining that perfect juicy pop. Meanwhile, the cheese (I recommend a combination of mozzarella and goat cheese) provides a creamy backdrop that ties everything together. It’s one of those unexpected combinations that just works on every level.

    Quick and Impressive Entertaining Option

    When I need to impress dinner guests without spending hours in the kitchen, this Roasted Red Grape Pizza is my secret weapon. It looks sophisticated but comes together in under 30 minutes, making it perfect for impromptu gatherings. The vibrant purple-red grapes create a stunning visual against the golden crust and white cheese. I’ve served this at everything from casual Friday night get-togethers to fancier dinner parties, and it consistently earns rave reviews. The combination feels special and unique without requiring complicated techniques or hard-to-find ingredients—just everyday items transformed into something extraordinary.

    Essential Tips & Tricks

    Selecting and Preparing the Grapes

    Choosing the right grapes makes all the difference in this pizza. Look for firm, seedless red grapes with tight skin—they’ll hold their shape better during roasting. I prefer darker varieties like Concord or Black Monukka for their deeper flavor, but any seedless red grape works beautifully. Before adding them to your pizza, give them a quick toss in olive oil, salt, and a touch of honey. This simple step enhances caramelization and prevents them from drying out. For the best texture contrast, slice about half your grapes in half and leave the rest whole—this creates varied pockets of juiciness throughout your pizza.

    Perfecting the Cheese Combination

    The cheese blend on this Roasted Red Grape Pizza deserves special attention. I’ve found that a three-cheese approach yields the most balanced flavor profile. Start with a base of low-moisture mozzarella for that essential stretchy texture, then add crumbled goat cheese for tanginess that complements the sweet grapes. Finish with a light dusting of aged Parmesan or Pecorino Romano for a salty depth. Apply the cheese in layers—some beneath and some on top of the grapes—rather than piling it all on top. This technique ensures proper melting and prevents the grapes from rolling off during baking.

    Serving Ideas & Creative Variations

    Seasonal Pairings and Garnishes

    Elevate your Roasted Red Grape Pizza with thoughtful seasonal garnishes that complement its sweet-savory profile. In summer, I love finishing it with fresh basil leaves and a drizzle of honey for brightness. Fall calls for a sprinkle of toasted walnuts and fried sage leaves, while winter versions shine with a balsamic glaze reduction and fresh thyme. Just before serving, add a light shower of flaky sea salt to heighten all the flavors. For a complete meal, pair with a simple arugula salad dressed in lemon and olive oil—the peppery greens provide the perfect counterpoint to the pizza’s sweetness.

    Global-Inspired Variations

    Transform your Roasted Red Grape Pizza with international flavor profiles that showcase this versatile concept. For a Mediterranean twist, add thin lemon slices, pistachios, and za’atar spice blend alongside the grapes. A French-inspired version works beautifully with caramelized onions, thyme, and Gruyère replacing some of the mozzarella. For something unexpected, try a Mexican-inspired variation with mild chorizo, queso fresco, and a light sprinkle of tajin seasoning after baking—similar to the flavor-forward approach in my Cajun Chicken Alfredo but with a completely different palette of ingredients.

    Storage & Troubleshooting Guide

    Proper Storage and Reheating

    Storing Roasted Red Grape Pizza properly ensures you’ll enjoy those same delicious flavors the next day. Allow leftover pizza to cool completely before refrigerating to prevent sogginess. Rather than stacking slices, store them in a single layer in an airtight container for up to 3 days. When reheating, skip the microwave—it makes the crust rubbery and the grapes mushy. Instead, place cold slices on a preheated baking sheet in a 350°F oven for 5-7 minutes until the cheese just begins to bubble. For the crispiest results, try reheating in a covered skillet over medium-low heat for 2-3 minutes.

    Solving Common Problems

    Even experienced pizza makers encounter challenges with Roasted Red Grape Pizza. If your grapes release too much moisture and make the center soggy, try this pre-roasting technique: roast halved grapes separately at 400°F for 10 minutes before adding them to your pizza. For crust that’s undercooked in the center, parbake your dough for 3-4 minutes before adding toppings. If your grapes burn before the crust is done, position your rack lower in the oven and consider covering just the top with foil for the final few minutes of baking. Remember that every oven has hot spots, so rotate your pizza halfway through cooking for even browning.

    Frequently Asked Questions

    Can I use green grapes instead of red for Roasted Red Grape Pizza?

    Yes! Green grapes work beautifully but offer a tangier flavor profile. They pair wonderfully with sharper cheeses like aged white cheddar or Gruyère instead of the traditional mozzarella base.

    How do I prevent my Roasted Red Grape Pizza from getting soggy?

    Pre-roast halved grapes for 10 minutes before adding them to your pizza. Also, don’t overload with toppings and ensure your oven is fully preheated to at least 450°F.

    What cheeses work best with the roasted grapes?

    Soft cheeses with tangy profiles complement grapes perfectly. Try combinations of mozzarella, goat cheese, brie, or mascarpone for creaminess, with a light sprinkle of Parmesan for depth.

    Can I make this pizza with a gluten-free crust?

    Absolutely! The sweet-savory flavor profile works with any base. Just follow your gluten-free crust recipe’s specific baking instructions, as they often require different temperatures.

    Is Roasted Red Grape Pizza better served hot or at room temperature?

    Both ways offer different experiences. Hot from the oven highlights the melty cheese, while room temperature enhances the wine-like complexity of the roasted grapes. Try both to find your preference!

    Final Thoughts

    This Roasted Red Grape Pizza represents everything I love about cooking—simple ingredients transformed into something unexpectedly delightful. The contrast between juicy, sweet grapes and savory, melty cheese creates a memorable experience that challenges what we think pizza “should” be. It’s become my go-to recipe when I want to impress without complicated techniques. Don’t be surprised when friends request “that grape pizza” at your next gathering! For more creative recipes that play with sweet and savory combinations, visit our Pinterest page where we’re always sharing new inspirations.

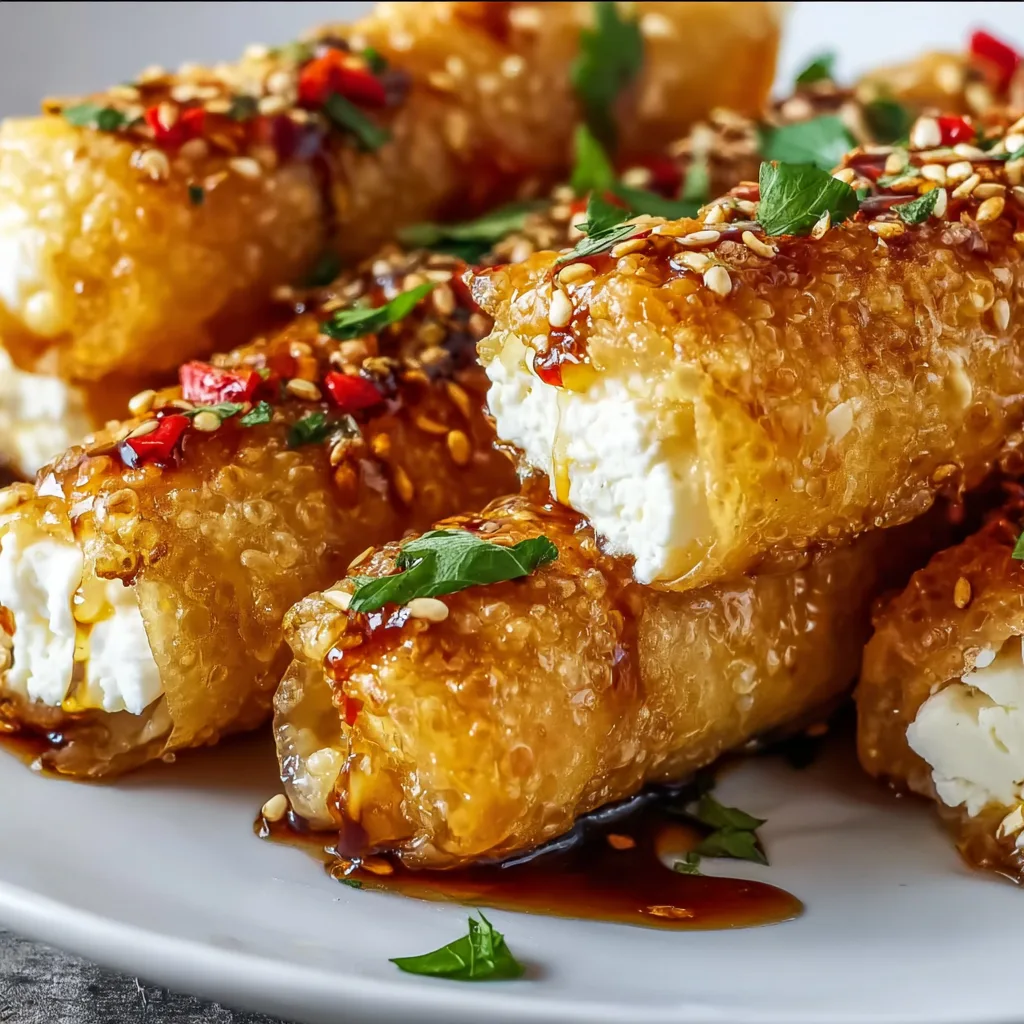
  • Oven-Fried Feta Rolls with Spicy Chili Honey – Irresistibly Crispy!

    Oven-Fried Feta Rolls with Spicy Chili Honey – Irresistibly Crispy!

    Oven-Fried Feta Rolls with Spicy Chili Honey – Irresistibly Crispy!

    These Oven-Fried Feta Rolls with Spicy Chili Honey might be my new obsession. The first time I made them, the kitchen filled with the most intoxicating aroma – that perfect blend of crispy, golden pastry and melting feta cheese. I watched my dinner guests’ eyes widen as they bit through the crunchy exterior into that creamy, tangy center, then dipped into the sweet-spicy honey that leaves a gentle tingle on your lips. These little bundles of joy strike that perfect balance between impressive and approachable – exactly the kind of recipe I love sharing with you at Recipes Darleen.

    Recipe

    Why You’ll Love These Oven-Fried Feta Rolls with Spicy Chili Honey

    Perfect Texture Contrast

    The magical crunch of these feta rolls is what makes them utterly irresistible. Unlike traditional fried appetizers, these beauties get their golden exterior from the oven, meaning less mess and healthier results. I love how the phyllo pastry creates those delicate, shatteringly crisp layers while protecting the creamy feta inside. The cheese softens without completely melting, maintaining that perfect bite and tanginess. It’s like getting the best of both worlds – the satisfaction of something fried with the convenience of baking.

    Sweet Heat Balance

    The spicy chili honey takes these rolls from delicious to unforgettable. There’s something almost addictive about that first hit of sweetness followed by the gentle warmth of chili that builds with each bite. I’ve found the perfect balance where the honey complements the salty feta without overwhelming it. The drizzle also adds a beautiful visual element, making these rolls look as good as they taste. My friends always ask for extra dipping sauce – it’s that good! The contrast between the cool, tangy feta and warm, spicy honey creates flavor magic.

    Essential Tips & Tricks

    Mastering the Phyllo

    Working with phyllo dough intimidated me until I discovered a few game-changing tricks. First, thaw it completely in the refrigerator overnight – never on the counter. When you’re ready to use it, cover the sheets with a slightly damp kitchen towel to prevent drying. Work quickly but don’t panic if a sheet tears – simply patch it with another piece. The secret to that perfect crispiness? A light brush of olive oil between layers, not butter. This creates a lighter finish that complements the feta perfectly, similar to what I do with my Spinach Feta Puff Pastry.

    Perfecting the Chili Honey

    The honey-chili balance is crucial – too much heat overwhelms the delicate feta, too little and it’s forgettable. I start with good-quality honey (local if possible) and warm it gently with red pepper flakes. Let them infuse for at least 10 minutes before straining if you prefer a smoother drizzle. For extra dimension, add a tiny splash of apple cider vinegar and a pinch of flaky salt. Make this ahead of time – the flavors deepen beautifully after a day or two. Store any leftover honey in a glass jar; it’s fantastic on everything from cheese boards to roasted vegetables.

    Serving Ideas & Creative Variations

    Perfect Pairings

    These feta rolls shine as part of a Mediterranean spread alongside olives, hummus, and fresh vegetables. For a stunning appetizer board, I arrange them with Roasted Red Pepper Hummus and cucumber slices. They’re substantial enough to serve as a light lunch paired with a lemony arugula salad. For dinner parties, I present them standing upright in a shallow bowl of extra chili honey for dramatic effect. The rolls are surprisingly versatile – equally at home at casual gatherings or elegant dinner parties. They’re best served warm but remain delicious at room temperature.

    Exciting Flavor Twists

    While the classic version is divine, these rolls welcome creative adaptations. Try mixing herbs like dill, mint, or oregano into the feta for a fresh dimension. For a sweeter variation, add a thin slice of fig or date before rolling. Adventurous eaters might enjoy a version with crumbled blue cheese and a drizzle of hot honey. My personal favorite twist includes a sprinkle of za’atar and lemon zest mixed into the cheese. The basic technique remains the same, making this a wonderfully adaptable recipe that keeps guests guessing what delicious surprise awaits inside.

    Storage & Troubleshooting Guide

    Make-Ahead Options

    These rolls offer excellent meal prep potential without sacrificing quality. You can assemble them up to 24 hours ahead, cover tightly with plastic wrap, and refrigerate unbaked. When ready to serve, simply brush with olive oil and bake. Already baked rolls reheat beautifully in a 350°F oven for 5-7 minutes – avoid the microwave which makes them soggy. The chili honey keeps for up to two weeks in an airtight container at room temperature, making it perfect for advance preparation. I often double the honey recipe to have extra on hand for other dishes.

    Common Challenges Solved

    The biggest challenge with these rolls is preventing phyllo frustration. If your phyllo tears excessively, it’s likely too dry – work more quickly and ensure your damp towel is covering the sheets. If the rolls unfurl during baking, you may have overfilled them or not sealed the edges properly with olive oil. For soggy bottoms, try preheating your baking sheet before adding the rolls. If your honey crystallizes, gently warm it in a water bath. Remember that imperfect-looking rolls still taste amazing – I’ve never had guests complain about a less-than-perfect shape!

    Frequently Asked Questions

    Can I use a different cheese instead of feta?

    Absolutely! Goat cheese works beautifully, as does ricotta mixed with parmesan for tang. Just ensure whatever cheese you choose isn’t too wet, or your phyllo will become soggy.

    How spicy are these Oven-Fried Feta Rolls with Spicy Chili Honey?

    The spice level is customizable. Start with ½ teaspoon red pepper flakes in your honey for mild heat, increasing to 1-2 teaspoons for more intense warmth.

    Can I make these gluten-free?

    Traditional phyllo contains gluten, but you can experiment with gluten-free puff pastry as an alternative. The texture will differ slightly but still delivers that delicious crispy exterior.

    How far in advance can I make the chili honey?

    The honey actually improves with time! Make it up to two weeks ahead and store in an airtight container at room temperature for the flavors to develop.

    Can these be frozen?

    Yes! Freeze unbaked rolls on a baking sheet, then transfer to a freezer bag for up to 1 month. Bake from frozen, adding 5-7 minutes to the cooking time.

    Final Thoughts

    These Oven-Fried Feta Rolls with Spicy Chili Honey represent everything I love about cooking – simple ingredients transformed into something extraordinary. They’re the perfect balance of crispy and creamy, sweet and spicy, familiar and surprising. Every time I serve them, they disappear within minutes, leaving nothing but crumbs and requests for the recipe. I hope they bring the same joy to your table as they have to mine! For more delicious appetizer ideas, visit my Pinterest where I’m always sharing new inspiration.

  • Buffalo Chicken Mozzarella Sticks: Irresistibly Crispy & Cheesy!

    Buffalo Chicken Mozzarella Sticks: Irresistibly Crispy & Cheesy!

    Buffalo Chicken Mozzarella Sticks: Irresistibly Crispy & Cheesy!

    Buffalo Chicken Mozzarella Sticks combine two of my absolute favorite comfort foods into one irresistible appetizer that’s guaranteed to disappear from your table in minutes. The crispy exterior gives way to gooey mozzarella and spicy buffalo chicken in a flavor explosion that feels almost magical. I first made these for a game day gathering last winter, and my friends still talk about them! The perfect balance of creamy cheese, tangy buffalo sauce, and satisfying crunch makes these sticks the ultimate crowd-pleaser for any occasion. Whether you’re hosting a party or just craving something special for movie night, these buffalo chicken bowls inspired mozzarella sticks will become your new obsession.

    Recipe

    Why You’ll Love This Buffalo Chicken Mozzarella Sticks

    Perfect Texture Combination

    The magic of Buffalo Chicken Mozzarella Sticks lies in their incredible textural contrast. The exterior develops this gloriously golden crust that shatters with each bite, revealing stretchy mozzarella and spicy chicken inside. I still remember the first time I pulled one apart and watched that perfect cheese pull unfold before my eyes—it was practically Instagram-worthy! The buffalo chicken filling brings just enough moisture to complement the cheese without making things soggy, creating that perfect balance that keeps you reaching for “just one more.” These sticks satisfy multiple cravings at once!

    Flavor-Packed Every Time

    Every bite delivers an explosion of bold buffalo flavor complemented by the creamy richness of mozzarella. The tangy, spicy kick from the buffalo sauce cuts through the mild cheese perfectly, creating a flavor profile that dances across your taste buds. I’ve adjusted the spice level countless times depending on who’s joining for dinner—you can easily make them milder or kick up the heat! What I love most is how the chicken soaks up all those buffalo flavors, ensuring that even the center of each stick delivers that signature zippy taste we all crave.

    Essential Tips & Tricks

    Prep and Assembly Success

    Freezing the assembled sticks before breading is absolutely non-negotiable! I learned this the hard way when I tried rushing the process once—melted cheese everywhere! Give them at least 30 minutes in the freezer to firm up. For the filling, make sure to finely shred your chicken and drain any excess buffalo sauce to prevent leakage. I like laying out all my ingredients assembly-line style: chicken mixture, cheese sticks, flour, egg wash, and breadcrumbs. This organized approach makes the process so much smoother and less messy, especially if you designate one hand for “wet” ingredients and one for “dry.”

    Perfecting the Frying Technique

    Maintaining the right oil temperature is crucial—too hot and they’ll burn before the cheese melts; too cool and they’ll absorb oil and become greasy. Aim for a steady 350°F (175°C) throughout the cooking process. I always use a kitchen thermometer to monitor this carefully. Work in small batches of 3-4 sticks at a time to prevent overcrowding, which can drop your oil temperature dramatically. For a lighter version that’s still delicious, try making air fryer parmesan crusted chicken wings or adapt this recipe for the air fryer at 375°F for about 6-8 minutes, turning halfway through.

    Serving Ideas & Creative Variations

    Dipping Sauces and Pairings

    These Buffalo Chicken Mozzarella Sticks are incredible on their own, but the right dipping sauce elevates them to restaurant-quality status. My personal favorite is a cooling blue cheese dip that balances the heat perfectly. Ranch dressing, honey mustard, or even a garlic aioli also work beautifully. For a complete appetizer spread, pair these with celery and carrot sticks to echo classic buffalo wing sides. They also make an amazing addition to a game day buffet alongside jalapeno popper twists for a spicy theme that will have everyone coming back for seconds!

    Exciting Flavor Twists

    While traditional buffalo flavor is amazing, don’t be afraid to experiment! Try incorporating blue cheese crumbles directly into the chicken mixture for pockets of tangy goodness throughout. For a sweeter heat profile, mix some honey with your buffalo sauce to create a honey-buffalo variation that’s absolutely addictive. Garlic parmesan buffalo is another crowd-pleaser—just add grated parmesan and garlic powder to your chicken mixture. For special occasions, I’ve even made a version with tiny diced jalapeños mixed into the filling for friends who love extra heat!

    Storage & Troubleshooting Guide

    Make-Ahead and Storage Solutions

    These Buffalo Chicken Mozzarella Sticks are perfect for make-ahead preparation! Assemble them completely through the breading step, then freeze in a single layer on a baking sheet before transferring to a freezer bag. They’ll keep for up to 3 months this way—just fry directly from frozen, adding 1-2 extra minutes to the cooking time. If you have leftovers (which rarely happens in my house!), store them in an airtight container in the refrigerator for up to 2 days. Reheat in a 375°F oven for 7-10 minutes to restore crispiness—microwaving will make them soggy.

    Fixing Common Issues

    If your sticks are leaking cheese during frying, your oil is likely too hot or they weren’t frozen long enough beforehand. Next time, freeze them longer (at least 45 minutes) and double-check your oil temperature. For breading that falls off during cooking, make sure you’re pressing the breadcrumbs firmly onto each stick and giving them a gentle shake to remove excess egg wash before the breadcrumb stage. If you’re finding the buffalo flavor too mild, add a splash of hot sauce directly to your egg wash mixture—this infuses extra flavor into the coating itself!

    Frequently Asked Questions

    Can I bake Buffalo Chicken Mozzarella Sticks instead of frying?

    Yes! Bake at 425°F for 12-15 minutes, turning halfway through. They won’t be quite as crispy as fried, but still delicious. Spray with cooking oil before baking for better browning.

    How spicy are these Buffalo Chicken Mozzarella Sticks?

    The spice level depends on your buffalo sauce. For milder sticks, choose a mild sauce or cut it with a bit of butter or ranch dressing in the chicken mixture.

    Can I use something other than chicken?

    Absolutely! Shredded rotisserie chicken works great, but you can substitute with turkey, plant-based chicken alternatives, or even finely chopped cauliflower for a vegetarian option.

    How do I prevent the cheese from leaking out?

    Ensure your mozzarella sticks are completely wrapped in the buffalo chicken mixture, freeze them thoroughly before breading, and maintain proper oil temperature when frying.

    What’s the best way to reheat leftover Buffalo Chicken Mozzarella Sticks?

    Reheat in an oven or air fryer at 375°F for 5-7 minutes until heated through and crispy again. Avoid microwaving as they’ll become soggy.

    Final Thoughts

    These Buffalo Chicken Mozzarella Sticks represent everything I love about creative comfort food—familiar flavors reimagined in an exciting new format. The combination of spicy buffalo chicken wrapped around melty mozzarella creates an irresistible appetizer that’s sure to impress. I hope you’ll give these a try for your next gathering or weekend treat! For more delicious appetizer ideas, check out my Pinterest board where I’m constantly adding new inspiration. Happy cooking!

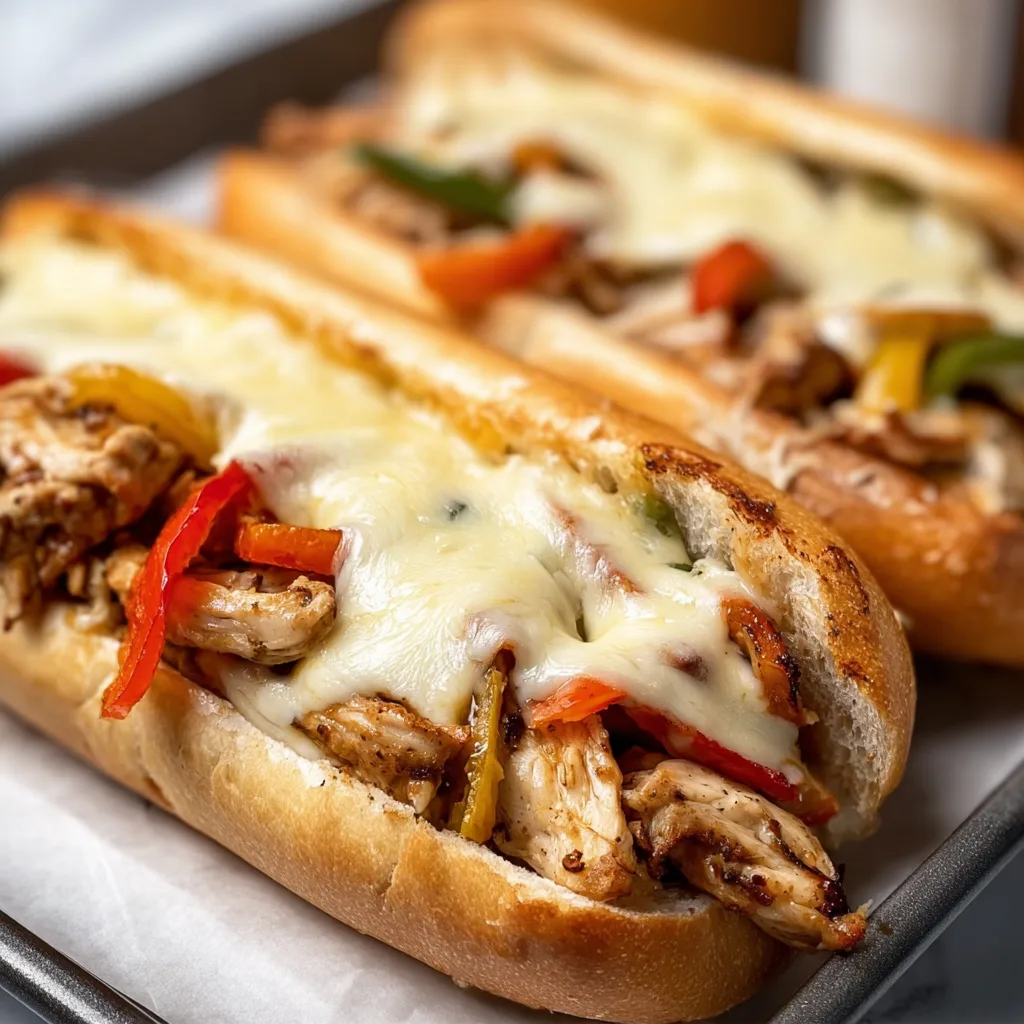
  • Chicken Philly Cheese Steaks: Irresistibly Juicy & Loaded with Flavor!

    Chicken Philly Cheese Steaks: Irresistibly Juicy & Loaded with Flavor!

    Chicken Philly Cheese Steaks: Irresistibly Juicy & Loaded with Flavor!

    Chicken Philly Cheese Steaks have completely transformed my weeknight dinner game. The first time I made these savory sandwiches, my kitchen filled with the aroma of sizzling peppers and onions, and I knew this recipe would become a family favorite. There’s something magical about the combination of tender chicken strips, melty cheese, and perfectly caramelized vegetables all tucked into a soft roll. Whether you’re craving comfort food or need a quick dinner solution, these chicken philly sandwiches deliver big flavor with minimal effort – exactly what my busy evenings call for!

    Recipe

    Why You’ll Love This Chicken Philly Cheese Steaks

    Perfect Balance of Flavors and Textures

    The magic of Chicken Philly Cheese Steaks lies in their incredible flavor harmony. The savory chicken soaks up all the seasonings while the bell peppers and onions caramelize to sweet perfection. I love how the vegetables still maintain a slight crunch against the tender meat. And that cheese? It creates this creamy, gooey layer that brings everything together. Last weekend, I made these for friends who stopped by unexpectedly, and they couldn’t believe how quickly I’d whipped up something so delicious. The contrast between the crisp-tender veggies and juicy chicken is truly what makes this dish irresistible.

    Quick and Adaptable for Any Occasion

    What really sells me on these Chicken Philly Cheese Steaks is their incredible versatility. The basic recipe comes together in under 30 minutes, making it perfect for those nights when I’m exhausted but still want something satisfying. You can easily scale it up for a crowd or customize it based on what’s in your fridge. I’ve made a spicier version with jalapeños when my sister visited (she loves heat!) and a milder one for my kids. You can even prep the components ahead of time and assemble them right before serving, which is a lifesaver for busy weeknights or casual entertaining.

    Essential Tips & Tricks

    Getting the Perfect Chicken Texture

    The secret to outstanding Chicken Philly Cheese Steaks starts with properly prepared chicken. I always slice my chicken breasts against the grain and into thin strips – this ensures maximum tenderness. For best results, slice the chicken when it’s still slightly frozen; it makes getting those thin, even pieces so much easier. Don’t overcrowd your pan when cooking! I work in batches to get that beautiful golden sear rather than steaming the meat. Season the chicken well before cooking with salt, pepper, and a touch of garlic powder for that authentic Philadelphia-inspired flavor.

    Mastering the Vegetable Sauté

    The vegetables in Chicken Philly Cheese Steaks deserve as much attention as the meat! I slice my bell peppers and onions into uniform strips so they cook evenly. Start with a hot pan and a touch of oil, then let the veggies develop some color before stirring – this caramelization is where all the flavor comes from! I’ve found that adding a splash of Worcestershire sauce toward the end adds incredible depth. Don’t rush this step; properly cooked vegetables should be soft with slightly crisp edges and deeply golden in spots. This contrast in textures makes every bite interesting.

    Serving Ideas & Creative Variations

    Beyond the Basic Sandwich

    While traditional rolls are delicious, Chicken Philly Cheese Steaks can transform into so many creative meals. Try serving the filling over crispy fries for loaded philly fries that disappear in minutes at gatherings. I’ve also wrapped the mixture in large flour tortillas for philly quesadillas or stuffed it into bell peppers for a lower-carb option. Last month, I spooned the mixture over baked potatoes for my gluten-free friend, and she raved about it for days! You could even use the filling as a topping for flatbread pizzas – the possibilities are endless.

    Cheese and Bread Considerations

    The cheese you choose can completely transform your Chicken Philly Cheese Steaks experience. While provolone is classic, don’t be afraid to experiment with cheese combinations. My personal favorite is a mix of white American for meltability and provolone for flavor. For an indulgent twist, try a pepper jack or smoked gouda! The bread matters tremendously too – look for rolls with a slightly crisp exterior but soft inside. I toast mine lightly before assembling to prevent sogginess. For a fun party idea, serve a “build your own” philly bar with different cheeses, sauces, and bread options.

    Storage & Troubleshooting Guide

    Proper Storage for Maximum Freshness

    Storing Chicken Philly Cheese Steaks components separately helps maintain their optimal texture. I keep the cooked chicken and vegetable mixture in an airtight container in the refrigerator for up to 3 days. The cheese and bread should be stored separately until you’re ready to assemble. When reheating, I add a tiny splash of chicken broth to the meat and vegetables to restore moisture before warming in a skillet. For meal prep, I portion the filling into individual containers and keep rolls in the freezer, pulling them out as needed. This system gives me quick lunches all week!

    Solving Common Preparation Problems

    The most common issue with Chicken Philly Cheese Steaks is ending up with dry chicken. If this happens, lower your heat and cook for less time – chicken breast cooks quickly! For soggy sandwiches, toast your rolls first and let the filling cool slightly before assembly. If your vegetables release too much liquid, cook them at a higher temperature to evaporate the moisture. When the cheese isn’t melting properly, cover the assembled sandwich with a lid for 30 seconds. I once saved an underseasoned batch by adding a sprinkle of garlic salt and Italian herbs right before serving.

    Frequently Asked Questions

    What’s the best cheese for authentic Chicken Philly Cheese Steaks?

    Provolone is traditional, but white American cheese offers superior meltability. For the best of both worlds, use a combination of the two. Avoid pre-shredded cheeses as they contain anti-caking agents that prevent smooth melting.

    Can I use pre-cooked chicken to save time?

    Absolutely! Rotisserie chicken works wonderfully – just shred or slice it and add it to the peppers and onions to warm through. This cuts your cooking time nearly in half.

    How do I prevent my bread from getting soggy?

    Toast your rolls lightly before assembling, and let the filling cool slightly. For extra protection, spread a thin layer of mayonnaise or butter on the inside of the roll to create a moisture barrier.

    What sides pair well with Chicken Philly Cheese Steaks?

    French fries, onion rings, or a simple green salad balance these sandwiches perfectly. For something lighter, try roasted vegetables or coleslaw for a refreshing contrast.

    Can I freeze assembled Chicken Philly Cheese Steaks?

    I don’t recommend freezing fully assembled sandwiches as they’ll become soggy. Instead, freeze the cooked filling separately from the bread and cheese, then assemble after thawing and reheating.

    Final Thoughts

    These Chicken Philly Cheese Steaks have become my go-to solution for pleasing everyone at my table while keeping dinner stress-free. The combination of juicy chicken, sweet peppers and onions, and melty cheese creates a crave-worthy sandwich that feels special without requiring hours in the kitchen. I love seeing my family’s faces light up when they smell these cooking! Don’t forget to check out more delicious sandwich ideas on Pinterest for inspiration. With these tips in your cooking arsenal, your Chicken Philly Cheese Steaks will quickly become a requested favorite in your home too.

  • Jalapeño Popper Twists: Irresistibly Cheesy, Crispy, and Spicy!

    Jalapeño Popper Twists: Irresistibly Cheesy, Crispy, and Spicy!

    Jalapeño Popper Twists: Irresistibly Cheesy, Crispy, and Spicy!

    Jalapeño Popper Twists have become my absolute weekend obsession! There’s something magical about the combination of spicy jalapeños, creamy cheese, and crispy pastry that makes these little bites completely irresistible. I first made these for a game day gathering last fall, and they disappeared faster than I could set down the serving plate! The beauty of these twists is their perfect balance—crispy exterior with a molten, cheesy center that delivers just the right amount of heat. They’re like the sophisticated cousin of those air fryer chicken wings we all love, but with an addictive twist that keeps everyone coming back for more.

    Recipe

    Why You’ll Love These Jalapeño Popper Twists

    Perfect Party Pleaser

    These twists are the ultimate crowd-pleaser that will have your guests raving for weeks! The puff pastry creates this gorgeous golden exterior that shatters delicately with each bite, revealing the creamy, spicy filling inside. I love watching people’s expressions when they take that first bite—eyes widening as they experience the perfect balance of creamy cheese against the subtle jalapeño kick. What makes these truly special is how they manage to be both elegant and comforting at the same time. Plus, they’re substantial enough to satisfy without weighing anyone down during your gathering.

    Quick & Easy Preparation

    Despite their impressive appearance, these twists are surprisingly simple to make! I can whip these up in about 30 minutes of active time, which is a lifesaver when I’m hosting. The make-ahead potential is what truly sold me—prepare them earlier in the day, refrigerate, then bake just before guests arrive for that fresh-from-the-oven experience. The assembly is actually quite therapeutic; there’s something so satisfying about spreading the creamy filling and watching the pastry transform as you twist. Even my culinary-challenged brother managed to make these successfully on his first try!

    Essential Tips & Tricks

    Mastering the Filling

    The secret to a perfect jalapeño popper twist lies in the filling consistency. I’ve learned through many (delicious) test batches that room-temperature cream cheese blends much more smoothly with the other ingredients. For heat control, remove the jalapeño seeds and membranes for milder twists, or leave some in for an extra kick. My personal touch? Adding a tiny sprinkle of smoked paprika for depth. Be careful not to overfill—about 1½ tablespoons per twist strikes the perfect balance, allowing the pastry to seal properly without bursting during baking. This jalapeño popper cheese ball taught me so much about balancing these flavors!

    Perfecting the Twist Technique

    The twist is where the magic happens! Start with cold puff pastry (but not frozen) for the best results—this prevents the butter from melting too quickly. After cutting your strips, twist each one 3-4 times, applying gentle pressure. The key is finding that sweet spot between too loose (filling escapes) and too tight (pastry can’t expand). I’ve found that lightly flouring my fingertips prevents sticking. For that professional bakery finish, brush with egg wash just before baking, and don’t skip the final sprinkle of flaky sea salt—it elevates the entire experience by creating perfect little pockets of salty crunch.

    Serving Ideas & Creative Variations

    Dipping Sauces & Pairings

    Elevate your Jalapeño Popper Twists with complementary dipping sauces that take them to new heights! My go-to is a cooling ranch that balances the heat beautifully—simply mix sour cream with ranch seasoning and a squeeze of lime. For something more adventurous, try honey drizzled with hot sauce or a cilantro-lime crema. These twists pair wonderfully with crisp vegetables for textural contrast, or alongside crispy air fryer blooming onion for an epic appetizer spread. When serving, I arrange them in a spiral pattern on a wooden board with small ramekins of different sauces in the center—it always draws compliments!

    Flavor Twist Variations

    Don’t be afraid to experiment with different flavor profiles! My current obsession is a buffalo chicken variation—just mix shredded rotisserie chicken with buffalo sauce and blue cheese before adding to the pastry. For a Mediterranean twist, try feta, sun-dried tomatoes, and olives with a touch of oregano. Vegetarian guests will love a spinach-artichoke version that’s equally creamy and satisfying. Sweet-savory fans should try adding a drizzle of honey or maple syrup right after baking—the contrast with the spicy jalapeños is absolutely divine. Each variation maintains that perfect textural contrast while offering a completely new flavor experience.

    Storage & Troubleshooting Guide

    Make-Ahead & Storage Solutions

    These Jalapeño Popper Twists are perfect for planning ahead! You can prepare them up to the twisting stage, then freeze uncooked for up to one month. Simply place them on a baking sheet, freeze until solid, then transfer to a freezer bag. When ready to serve, bake directly from frozen, adding about 5-7 minutes to the baking time. For leftovers (if you’re lucky enough to have any!), store in an airtight container in the refrigerator for up to 3 days. Revive their crispiness by reheating in a 350°F oven for 5-7 minutes—the microwave will make them soggy and rob them of their delightful texture.

    Troubleshooting Common Issues

    If your twists are leaking filling, the likely culprits are overfilling or not sealing the edges properly. Next time, try using slightly less filling and pressing the edges firmly before twisting. Pale, undercooked pastry usually means your oven temperature is too low—invest in an oven thermometer for accuracy. If the outside browns too quickly while the inside stays doughy, your oven is likely too hot. Try lowering the temperature by 25°F and extending bake time slightly. For twists that unravel during baking, make sure you’re twisting firmly enough and consider chilling them for 15 minutes before baking to help them hold their shape.

    Frequently Asked Questions

    Can I make Jalapeño Popper Twists ahead of time?

    Absolutely! Prepare them up to the twisting stage, refrigerate for up to 24 hours, or freeze for up to a month. Just add a few extra minutes to the baking time if cooking from frozen.

    How spicy are these Jalapeño Popper Twists?

    The spice level is customizable. Remove all seeds and membranes for mild twists, or leave some in for extra heat. The cream cheese also helps balance the spiciness.

    Can I use pre-made crescent roll dough instead of puff pastry?

    Yes! While puff pastry gives the best flaky texture, crescent roll dough works in a pinch. Reduce baking time by about 3-4 minutes as it browns faster.

    What cheese works best for these twists?

    Sharp cheddar provides the best flavor, but a combination of cheddar and monterey jack offers excellent meltability. Avoid pre-shredded cheese as it contains anti-caking agents.

    How do I prevent my twists from unraveling while baking?

    Chill the assembled twists for 15 minutes before baking and make sure to twist them firmly enough. Placing them seam-side down on the baking sheet also helps maintain their shape.

    Final Thoughts

    These Jalapeño Popper Twists have become my signature appetizer for good reason—they’re that perfect combination of impressive yet achievable that makes entertaining a joy rather than a stress. The way they balance crispy, creamy, spicy, and savory elements in each bite makes them truly special. I hope you’ll give these twists a try at your next gathering! For more delicious appetizer inspiration, follow me on Pinterest where I’m always sharing new flavor combinations and serving ideas for these addictive little bites.