Category: Lunch

Easy lunch ideas for busy days. Simple, quick recipes with fresh flavor and satisfying meals you can enjoy at home or on the go.

  • Cheesy Beef Bacon Ranch Mozzarella Bombs That Wow Your Taste Buds!

    Cheesy Beef Bacon Ranch Mozzarella Bombs That Wow Your Taste Buds!

    Cheesy Beef Bacon Ranch Mozzarella Bombs That Wow Your Taste Buds!

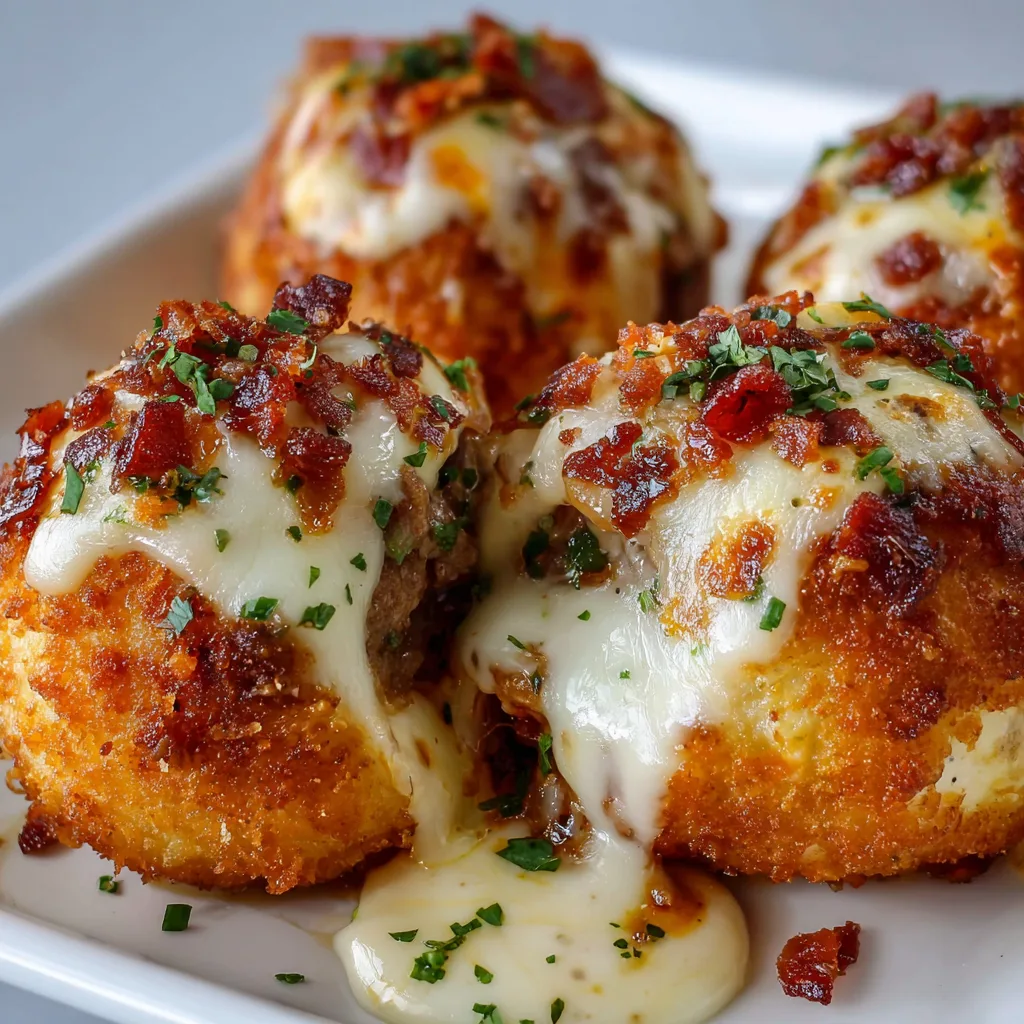
    Cheesy Beef Bacon Ranch Mozzarella Bombs are the ultimate comfort food mashup that will have your family begging for seconds! These little bundles of joy combine seasoned ground beef, crispy bacon, creamy ranch, and gooey mozzarella all wrapped in a golden biscuit shell. I first made these for a game day gathering, and they disappeared faster than I could set down the serving platter! The combination of savory beef, smoky bacon, and tangy ranch creates an explosion of flavor that’s simply irresistible. Perfect for parties, weeknight dinners, or anytime you need a crowd-pleasing appetizer that delivers big on flavor without hours in the kitchen.

    Recipe

    Recipe

    Why You’ll Love These Cheesy Beef Bacon Ranch Mozzarella Bombs

    Perfect Party Food with Minimal Effort

    These mozzarella bombs have become my go-to recipe when I need something impressive without spending hours in the kitchen. The hands-on prep time is just about 15 minutes, making them perfect for last-minute gatherings. I love that they’re individually portioned, eliminating the need for serving utensils or plates – just grab and enjoy! The combination of beef and bacon provides a hearty protein boost, while the ranch seasoning adds that perfect tangy kick that keeps everyone reaching for more. Plus, the sight of melted cheese stretching as guests pull them apart never fails to impress!

    Family-Friendly Comfort Food

    There’s something magical about the way these bombs bring everyone to the table. My picky nephew who “doesn’t eat anything new” devoured three in one sitting! The familiar flavors combined in a fun, handheld package make them irresistible to kids and adults alike. I’ve found they’re perfect for those busy weeknights when you want something satisfying but don’t have the energy for an elaborate meal. Pair them with a simple salad, and dinner is served! The best part? You can customize the filling based on what your family loves – spice them up or keep them mild.

    Essential Tips & Tricks

    Perfecting the Filling Balance

    The secret to exceptional mozzarella bombs lies in the filling-to-dough ratio. I’ve learned through many batches that about 1½ tablespoons of filling is ideal – enough to create that satisfying flavor explosion without risking a blowout during baking. Make sure your ground beef is well-drained to prevent soggy bottoms. I like to cook the beef with onions first, then mix in the bacon and seasonings off-heat to preserve the bacon’s crispiness. For the ultimate flavor boost, try using freshly shredded mozzarella instead of pre-packaged – it melts more beautifully and tastes noticeably fresher.

    Sealing and Shaping Techniques

    The most common pitfall with these bombs is improper sealing, which leads to the dreaded cheese leak! I’ve perfected a pinch-and-twist method that works beautifully. After placing your filling in the center of the dough, gather all edges upward, pinch firmly, and give a slight twist to ensure a tight seal. If your kitchen is warm, refrigerate the shaped bombs for 10 minutes before baking to help maintain their shape. For a professional finish, brush the tops with melted butter mixed with a touch of garlic powder and sprinkle with fresh parsley. These little touches elevate the presentation tremendously, like I do with my Garlic Butter Parmesan Knots.

    Serving Ideas & Creative Variations

    Perfect Pairings and Presentations

    Serve these bombs straight from the oven when the cheese pull is at its most dramatic! I like to arrange them on a wooden board with small bowls of marinara and additional ranch for dipping. For a complete meal, pair them with my Italian Chopped Salad for a fresh contrast to the rich bombs. If you’re hosting a party, consider making mini versions using smaller biscuit portions – they’re perfect one-bite appetizers! I also love serving them alongside soup in winter months; they’re perfect for dunking into tomato or minestrone soup for a cozy, satisfying meal.

    Exciting Flavor Variations

    While the classic beef-bacon-ranch combination is hard to beat, these bombs are incredibly versatile! Try a pizza bomb variation by substituting Italian sausage for the beef, adding pepperoni instead of bacon, and mixing in pizza sauce and Italian herbs. For a breakfast twist, fill them with scrambled eggs, cheese, and breakfast sausage – they make fantastic grab-and-go morning meals! My spicy food-loving friends go crazy for the jalapeño popper version with cream cheese, diced jalapeños, and cheddar. The possibilities are endless, and experimenting with new flavors is half the fun.

    Storage & Troubleshooting Guide

    Make-Ahead and Storage Solutions

    These bombs are perfect for meal prep and can be prepared in advance to save time. You can assemble them completely, then refrigerate unbaked for up to 24 hours – just add 2-3 minutes to the baking time when cooking from cold. For longer storage, freeze the assembled bombs on a baking sheet until solid, then transfer to a freezer bag for up to 3 months. No need to thaw before baking; just add about 5-7 minutes to the cooking time. While they’re best fresh, leftover baked bombs can be refrigerated for 2-3 days and reheated in a 350°F oven for 5-7 minutes.

    Common Issues and Easy Fixes

    If your bombs are leaking cheese during baking, your seals probably weren’t tight enough. Next time, try double-pinching the seams and placing them seam-side down on the baking sheet. Dealing with dough that’s too sticky to work with? Lightly flour your hands before handling. If the bottoms are browning too quickly before the tops are done, place the baking sheet on a higher rack and reduce the temperature by 25°F. For bombs that seem bland, remember that ground beef needs generous seasoning – don’t be shy with the salt and consider adding a dash of Worcestershire sauce to amp up the savory flavors.

    Frequently Asked Questions

    Can I make Cheesy Beef Bacon Ranch Mozzarella Bombs ahead of time?

    Absolutely! Prepare them up to 24 hours ahead and refrigerate unbaked. You can also freeze them for up to 3 months. Just add a few extra minutes to the baking time when cooking from cold or frozen.

    What’s the best dough to use for these bombs?

    Refrigerated biscuit dough works perfectly, but you can also use pizza dough, crescent roll dough, or even homemade bread dough for a more artisanal touch.

    Can I substitute the ground beef?

    Yes! Ground turkey, chicken, or plant-based meat alternatives all work well. Just adjust seasonings accordingly as some alternatives may need extra flavor boosting.

    How do I prevent the cheese from leaking out?

    Ensure you’re using a generous piece of dough and seal it very tightly by pinching and twisting. Placing the bombs seam-side down on the baking sheet also helps prevent leaks.

    How can I make these Cheesy Beef Bacon Ranch Mozzarella Bombs spicier?

    Add diced jalapeños, red pepper flakes, or hot sauce to the beef mixture. You can also use pepper jack cheese instead of mozzarella for an extra kick.

    Final Thoughts

    These Cheesy Beef Bacon Ranch Mozzarella Bombs have become my secret weapon for gatherings where I want to impress without stressing. There’s something magical about watching someone take that first bite – the moment when the golden exterior gives way to reveal the savory, cheesy center. The versatility of these little flavor bombs means they can be customized for any occasion or preference. Whether you’re feeding a hungry family on a weeknight or entertaining guests for the big game, these mozzarella bombs deliver maximum flavor with minimum fuss. Don’t forget to share your creations on Pinterest!
  • Crispy Crab Cake Bites with Lemon-Dill Sauce That Wow!

    Crispy Crab Cake Bites with Lemon-Dill Sauce That Wow!

    Crispy Crab Cake Bites with Lemon-Dill Sauce That Wow!

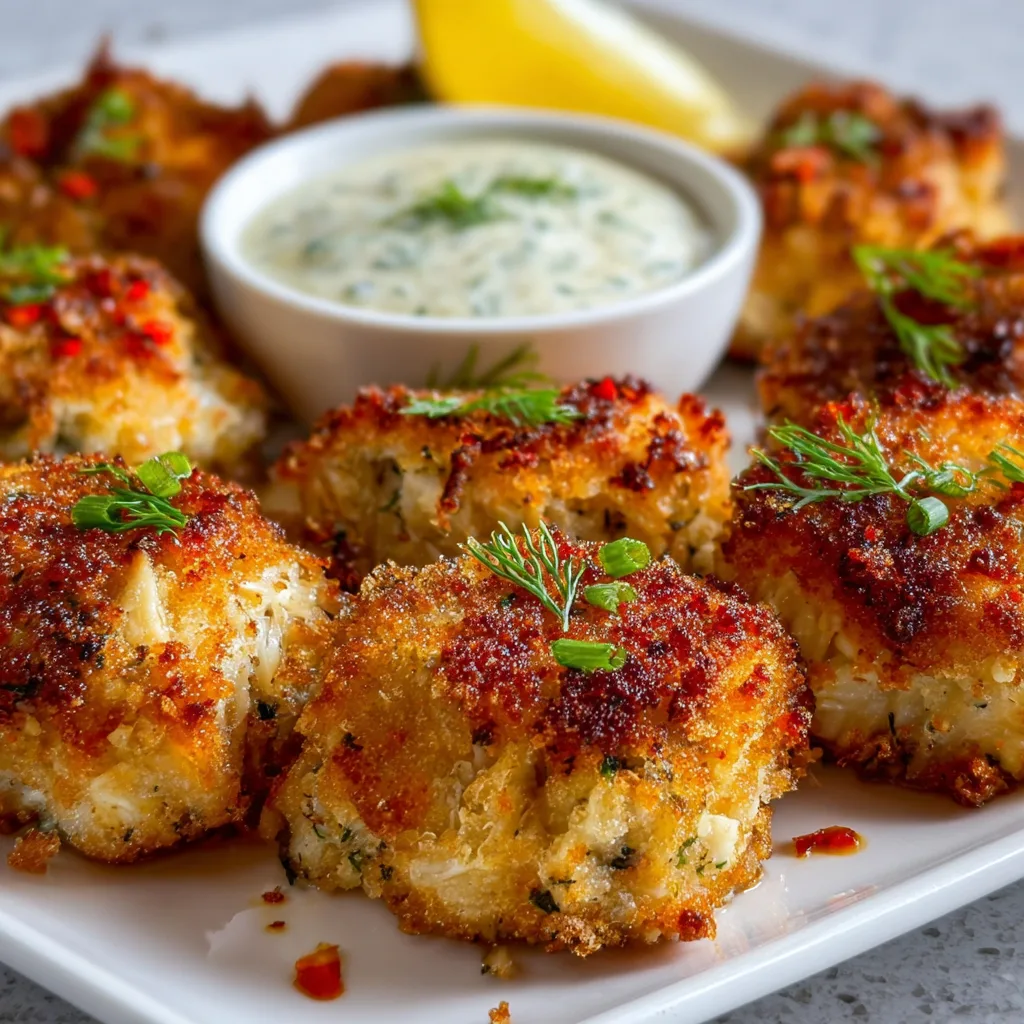
    Crispy Crab Cake Bites with Lemon-Dill Sauce are my absolute favorite appetizer when I want to impress without stressing. These golden, bite-sized morsels combine sweet lump crabmeat with just enough seasoning to enhance—never overpower—that delicate ocean flavor. I still remember serving these at my sister’s engagement party; the platter was empty within minutes! The tangy lemon-dill sauce adds the perfect creamy counterpoint to the crispy exterior. Trust me, these little gems strike that magical balance between elegant and approachable that makes everyone feel special.

    Recipe

    Why You’ll Love This Crispy Crab Cake Bites with Lemon-Dill Sauce

    Perfect Party Pleasers

    These bite-sized treasures are designed for mingling. Unlike traditional crab cakes that require a plate and fork, these two-bite wonders can be enjoyed standing up with a cocktail in hand. I’ve found they’re the first to disappear at gatherings because they hit that sweet spot between sophisticated and accessible. The golden-brown exterior gives a satisfying crunch that contrasts beautifully with the tender, flaky crab inside. Plus, they can be made ahead and quickly reheated, making them a hostess’s dream for stress-free entertaining.

    A Symphony of Flavors

    The lemon-dill sauce isn’t just an accompaniment—it’s essential to the experience. The bright citrus cuts through the richness of the crab while fresh dill adds an aromatic dimension that makes taste buds sing. I’ve watched guests who claim they “don’t like seafood” become instant converts after one bite of these flavor bombs. The sauce also brings a creamy coolness that balances the warm, crispy exterior of the cakes. It’s that perfect harmony of textures and temperatures that makes these bites truly memorable.

    Essential Tips & Tricks

    Selecting and Preparing the Crab

    Always opt for lump crabmeat for the best texture and flavor. I learned this lesson the hard way after using claw meat once—it was tasty but lacked that luxurious mouthfeel. Carefully pick through the meat to remove any shell fragments (nothing ruins the experience faster than an unexpected crunch!). Pat the crabmeat gently with paper towels to remove excess moisture, which is crucial for achieving that perfect crisp exterior. And remember, crab is delicate, so fold your ingredients together rather than stirring vigorously to maintain those beautiful chunks of sweet meat.

    Perfecting the Fry

    The secret to gorgeously golden crab cake bites lies in the oil temperature. Too cool, and they’ll absorb oil and become greasy; too hot, and they’ll burn before cooking through. I always use a thermometer to maintain 350°F precisely. Work in small batches—overcrowding the pan causes temperature drops that lead to soggy results. After frying, let them rest on a wire rack instead of paper towels to keep that crispy exterior intact. This simple step prevents steam from softening all your hard work and maintains that satisfying crunch with every bite.

    Serving Ideas & Creative Variations

    Elegant Presentation Options

    Transform these humble bites into showstopping appetizers with thoughtful presentation. I love arranging them on a slate board with small bowls of sauce, garnished with lemon wedges and fresh dill sprigs. For a more interactive experience, serve them on individual Chinese soup spoons with a tiny dollop of sauce—guests can enjoy them in one perfect bite. For brunch gatherings, try placing them atop small rounds of toasted brioche with a poached quail egg and hollandaise for mini crab cake benedicts. The key is creating visual appeal that hints at the flavor explosion to come.

    Flavor Twists and Adaptations

    While the classic recipe is divine, these bites welcome creative variations. Add finely diced jalapeños and substitute cilantro-lime sauce for a Southwestern kick. For an Asian-inspired version, incorporate ginger, scallions, and a touch of sesame oil, serving with sriracha mayo. I once made a Mediterranean version with lemon zest, fresh oregano, and crumbled feta that disappeared in minutes. For a lighter option, these can be baked at 425°F for 12-15 minutes instead of fried. The texture differs slightly, but the flavor remains spectacular—perfect for those watching their calories.

    Storage & Troubleshooting Guide

    Make-Ahead and Storage Solutions

    These crab cake bites are perfect for advance preparation. Form the patties up to 24 hours ahead and store them covered in the refrigerator with parchment paper between layers. The sauce can be made 2-3 days in advance, improving as flavors meld. For longer storage, freeze uncooked patties on a baking sheet until solid, then transfer to freezer bags for up to one month. Don’t thaw before cooking—just add an extra minute to the frying time. Leftover cooked bites (if you’re lucky enough to have any!) can be refrigerated for 2 days and reheated in a 350°F oven for 5-7 minutes.

    Common Issues and Quick Fixes

    The most frequent problem is cakes falling apart during cooking. If this happens, your mixture may be too wet—add more breadcrumbs, one tablespoon at a time, until it holds together. Chilling the formed patties for 30 minutes before cooking also helps them maintain shape. If your cakes are browning too quickly but remain undercooked inside, your oil is too hot. Lower the temperature and continue cooking. For sauce that’s too thin, whisk in more mayonnaise; if it’s too thick, add lemon juice a teaspoon at a time. Remember, perfection comes with practice!

    Frequently Asked Questions

    Can I use imitation crab for these Crispy Crab Cake Bites with Lemon-Dill Sauce?

    While budget-friendly, imitation crab lacks the sweet flavor and texture of real crab. The recipe will work, but the result won’t have that luxurious flavor that makes these bites special. Real crab is worth the splurge!

    Can I make these gluten-free?

    Absolutely! Substitute regular breadcrumbs with gluten-free panko and ensure your mayonnaise and other condiments are gluten-free. The texture remains crispy and delicious with these simple swaps.

    How can I prevent my crab cakes from falling apart?

    Chill the formed patties for at least 30 minutes before cooking. This helps ingredients bind together. Also, ensure your oil is at the proper temperature (350°F) before adding the cakes.

    What can I serve with these besides the lemon-dill sauce?

    Remoulade, aioli, or cocktail sauce all work beautifully. For something different, try a mango salsa or avocado cream for a tropical twist that complements the sweet crab.

    Can I bake these instead of frying?

    Yes! Preheat your oven to 425°F, lightly spray the bites with cooking oil, and bake for 12-15 minutes, flipping halfway through. They’ll be slightly less crispy but still delicious.

    Final Thoughts

    These Crispy Crab Cake Bites with Lemon-Dill Sauce have become my signature appetizer for good reason—they consistently delight guests while being manageable to prepare. The balance of textures and flavors creates something truly greater than the sum of its parts. What I love most is how they bring a touch of coastal elegance to any gathering, from casual game nights to formal celebrations. Don’t forget to check out more seafood inspiration on Pinterest and let these golden bites work their magic at your next gathering!

  • Crispy Homemade Chicken Spring Rolls: Irresistibly Crunchy & Juicy!

    Crispy Homemade Chicken Spring Rolls: Irresistibly Crunchy & Juicy!

    Crispy Homemade Chicken Spring Rolls: Irresistibly Crunchy & Juicy!

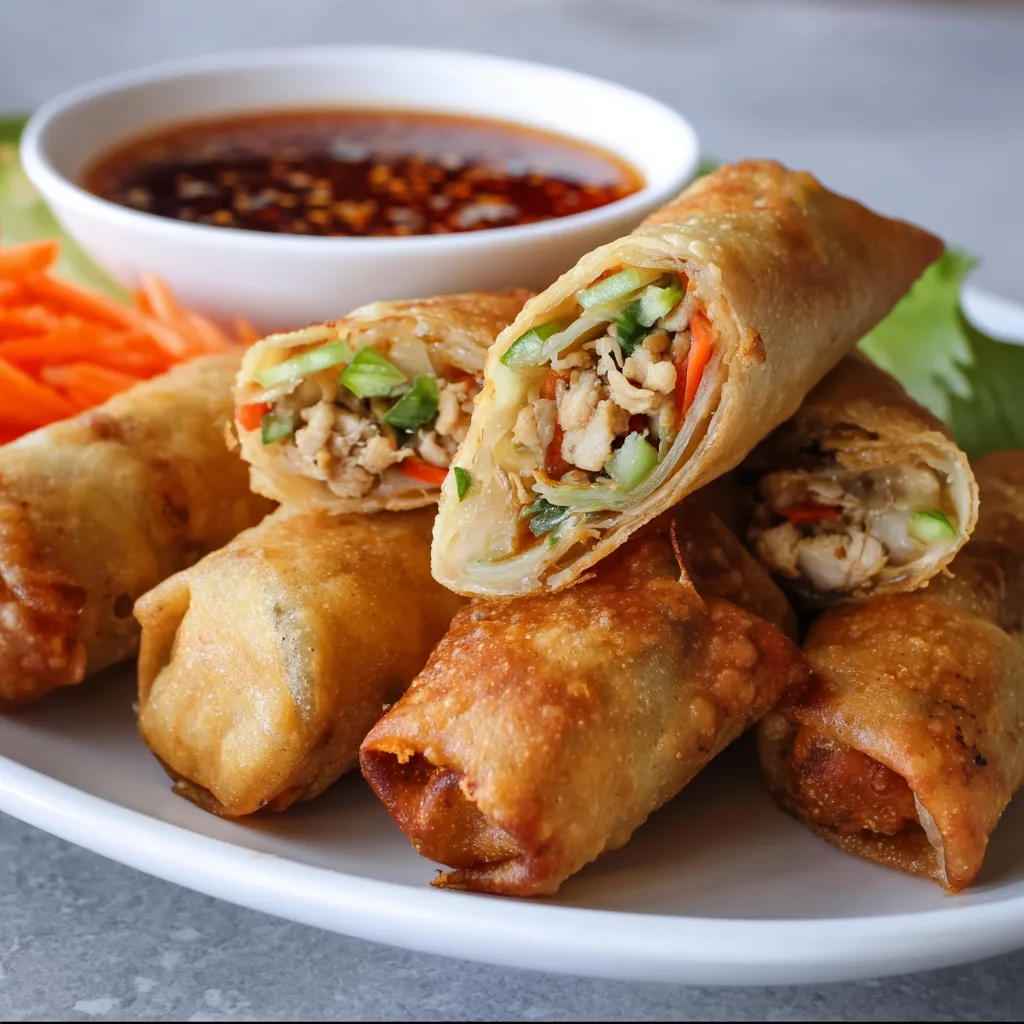
    Crispy Homemade Chicken Spring Rolls are the ultimate crowd-pleaser that brings restaurant-quality appetizers right to your kitchen. The moment that golden, crackling wrapper meets your lips, releasing a burst of savory chicken and vegetable filling – pure magic! I discovered my love for making these at home during a rainy weekend when takeout wasn’t an option. Now they’ve become my go-to for everything from casual family dinners to fancy gatherings. The best part? You can customize them endlessly while mastering a technique that will make you feel like a culinary rock star. Let’s dive into this irresistible recipe!

    Recipe

    Why You’ll Love These Crispy Homemade Chicken Spring Rolls

    Perfect Texture Combination

    The contrast of textures is what makes these spring rolls absolutely irresistible. The wrappers transform into a shatteringly crisp shell while protecting the juicy, tender chicken filling inside. I love hearing that distinctive crunch when someone takes their first bite! The vegetables maintain just enough bite to add freshness and structure. When you achieve that perfect golden-brown exterior – not too dark, not too pale – you’ll feel a little surge of pride. Trust me, that moment when you slice one open to reveal the colorful filling is pure kitchen satisfaction.

    Make-Ahead Convenience

    These spring rolls are a meal-prep dream come true. You can prepare the filling up to two days ahead and store it in the refrigerator, making assembly a breeze when you’re ready. I often roll them all in the morning, refrigerate them covered with a damp paper towel, then fry just before serving. The uncooked rolls even freeze beautifully for up to three months – just add an extra minute to the cooking time. This flexibility has saved me countless times when unexpected guests arrive or when I’m too exhausted to start cooking from scratch.

    Essential Tips & Tricks

    Wrapper Mastery

    Handling spring roll wrappers requires a gentle touch and a few key techniques. Always keep unused wrappers covered with a damp cloth to prevent them from drying out and cracking. When rolling, fold firmly but not too tight – you want to avoid tearing while ensuring no air pockets remain that could cause them to burst during frying. I learned the hard way that overstuffing leads to disaster! For the perfect seal, dab a little beaten egg or cornstarch slurry along the final edge. This creates a foolproof bond that won’t unravel in hot oil, giving you that professional finish every time.

    Oil Temperature Control

    The secret to perfectly crispy spring rolls without greasiness lies in maintaining the right oil temperature. Use a thermometer to keep your oil between 350-375°F (175-190°C). Too cool, and they’ll absorb excess oil and become soggy; too hot, and they’ll brown before the filling cooks through. Work in small batches – overcrowding the pan causes temperature drops. I always test with one roll first, adjusting as needed. After frying, drain them on a wire rack set over paper towels, not directly on paper, which traps steam and softens that beautiful crisp exterior you worked so hard to achieve.

    Serving Ideas & Creative Variations

    Dipping Sauce Pairings

    The right dipping sauce elevates these spring rolls from delicious to unforgettable. Classic sweet chili sauce offers the perfect balance of sweet and spicy, while a tangy nuoc cham (Vietnamese dipping sauce) brings bright citrus notes that cut through the richness. For something creamy, try a peanut sauce with a hint of lime and sriracha. I love setting up a little dipping station with 2-3 options in small bowls. My family’s favorite is a quick sauce I make with soy sauce, rice vinegar, a touch of honey, and toasted sesame oil. These sauces also pair beautifully with Asian Garlic Shrimp for a complete feast.

    Filling Variations

    While the classic chicken filling is fantastic, don’t be afraid to experiment with alternatives. Swap the chicken for ground pork with a touch of five-spice powder, or try shrimp chopped into small pieces with some minced lemongrass. For vegetarian options, crumbled tofu seasoned well works beautifully, as does a mushroom medley with glass noodles. Add unexpected elements like diced water chestnuts for crunch or kimchi for a spicy Korean twist. My personal favorite variation includes a bit of cream cheese mixed into the filling – it creates pockets of creamy richness that contrast wonderfully with the crisp exterior.

    Storage & Troubleshooting Guide

    Keeping Them Crispy

    Maintaining that signature crispness is the biggest challenge with leftovers. For best results, cool completely before storing in a container lined with paper towels, with additional paper towels between layers. Refrigerate for up to 3 days. To reheat, avoid the microwave, which will make them soggy. Instead, place them on a wire rack in a 350°F (175°C) oven for 8-10 minutes until heated through and crisp again. If you’re serving them at a party, keep freshly fried rolls warm in a 200°F (95°C) oven on a wire rack, but serve within an hour for optimal texture.

    Fixing Common Problems

    Even experienced cooks encounter spring roll challenges. If your rolls are splitting during frying, your oil is likely too hot or you’ve overfilled them. If they’re browning unevenly, they may be touching in the pan – ensure they have space to float freely. Soggy rolls usually mean the oil temperature was too low or they weren’t drained properly. If your filling is watery, try pre-cooking vegetables longer to remove excess moisture and always cool filling completely before rolling. When wrappers tear during rolling, they’re either too dry (mist with water) or you’re handling them too roughly.

    Frequently Asked Questions

    Can I bake these Crispy Homemade Chicken Spring Rolls instead of frying?

    Yes! Brush them lightly with oil and bake at 425°F (220°C) for 15-20 minutes, turning halfway through. They won’t be quite as crispy as fried, but still delicious with significantly less oil.

    How do I prevent my spring rolls from becoming soggy?

    Ensure your filling is cool and not watery before rolling. Drain cooked vegetables well and pat dry if needed. Fry at the correct temperature (350-375°F) and drain on a wire rack, not directly on paper towels.

    Can I make these ahead for a party?

    Absolutely! Roll them up to 24 hours ahead and refrigerate uncooked, covered with a damp cloth. You can also fry them 2-3 hours before serving and reheat in a 350°F oven for 8-10 minutes.

    What’s the best oil for frying spring rolls?

    Use a neutral oil with a high smoke point like vegetable, canola, or peanut oil. These oils won’t impart strong flavors and can withstand the high temperatures needed for crispy results.

    How fine should I chop the filling ingredients?

    Aim for small, uniform pieces (about ¼-inch dice) for even cooking and easy rolling. Large chunks can tear the wrapper and make rolling difficult.

    Final Thoughts

    These Crispy Homemade Chicken Spring Rolls have become my signature appetizer for good reason – they’re impressive yet approachable, and the process of making them is almost as enjoyable as eating them. There’s something deeply satisfying about creating these golden, crunchy parcels from scratch and watching friends’ faces light up at first bite. Whether you’re making them for a special occasion or a cozy night in, they bring that perfect blend of restaurant quality with homemade love. Be sure to check out more appetizer inspiration on Pinterest and prepare to add this recipe to your regular rotation!

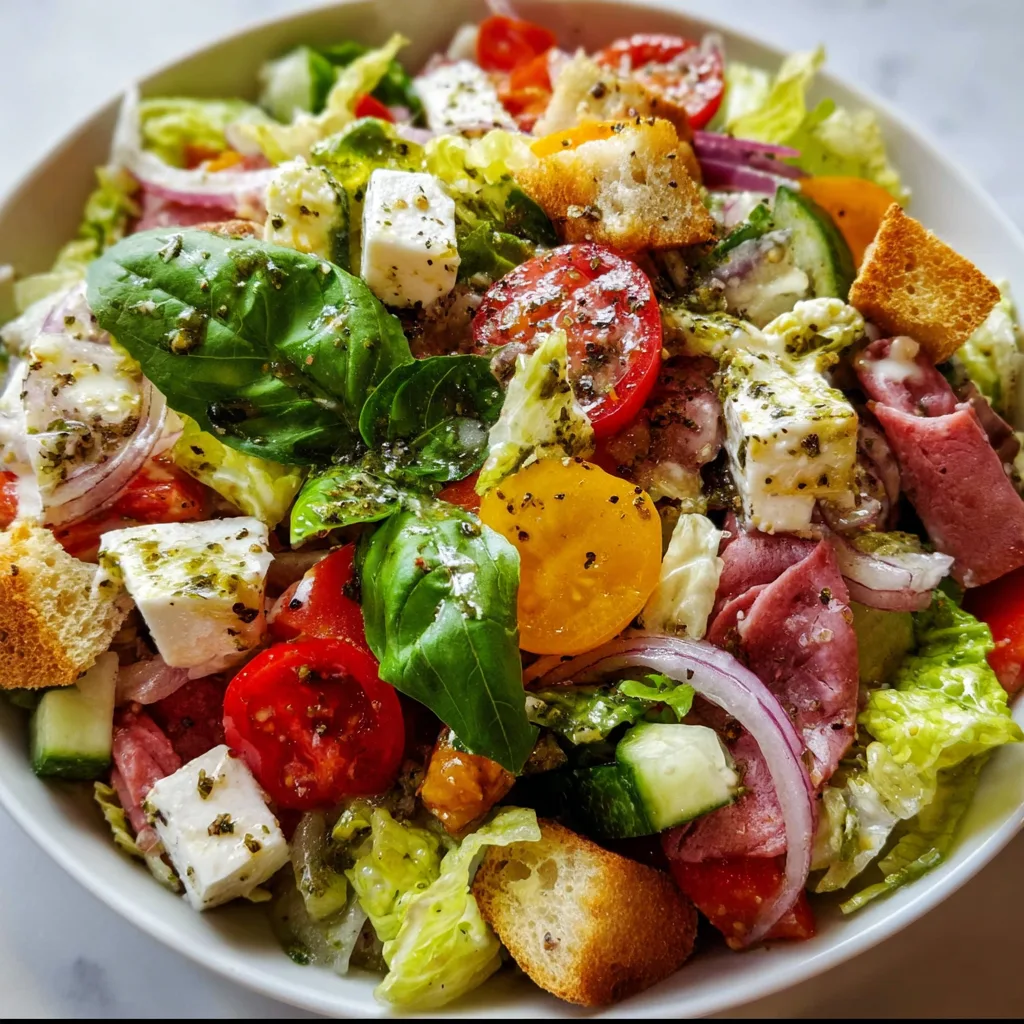
  • Italian Chopped Salad: Fresh, Crunchy & Irresistibly Delicious!

    Italian Chopped Salad: Fresh, Crunchy & Irresistibly Delicious!

    Italian Chopped Salad: Fresh, Crunchy & Irresistibly Delicious!

    This Italian Chopped Salad has completely transformed my weeknight dinner routine! There’s something magical about the perfect balance of crisp vegetables, savory meats, tangy cheese, and that zippy Italian dressing that makes every bite a celebration. I first discovered this recipe during a summer gathering at my neighbor’s house, and I’ve been obsessed ever since. The beauty of this salad is its versatility—it works as a hearty main dish or a show-stopping side. Let me show you how to create this colorful, texture-rich salad that will have everyone asking for seconds!

    Recipe

    Why You’ll Love This Italian Chopped Salad

    A Perfect Meal Prep Solution

    This Italian Chopped Salad has become my go-to for busy weeks when I need something that stays fresh and delicious for days. The hearty ingredients hold up beautifully in the refrigerator, unlike delicate greens that wilt at the first sign of dressing. I love preparing all the components on Sunday—dicing crisp romaine, slicing pepperoncini, cubing salami and provolone—then assembling fresh portions throughout the week. The flavors actually deepen and meld together over time, making each serving more delicious than the last. It’s meal prep that doesn’t feel like a compromise!

    Customizable for Every Diet

    What I adore about this salad is how easily it adapts to different dietary needs without losing its essential Italian character. Vegetarian? Skip the salami and add extra chickpeas or white beans for protein. Watching carbs? Focus on the vegetables and proteins while reducing the garbanzo beans. Need more substance? Add some cooked farro or orzo pasta. My sister follows a dairy-free diet, so when she visits, I simply omit the provolone and add extra olives for that briny flavor dimension. The robust Italian dressing ties everything together beautifully regardless of your modifications.

    Essential Tips & Tricks

    Mastering the Perfect Chop

    The secret to an authentic Italian Chopped Salad lies in the technique—everything should be cut to similar, bite-sized pieces. I use my favorite chef’s knife to create uniform cubes of vegetables, meats, and cheeses, typically aiming for ¼-inch pieces. This consistent size ensures you get a perfect blend of flavors and textures in every forkful. I’ve found that taking the extra minute to properly chop makes all the difference! For ingredients like red onions, I’ll often soak them in ice water for 10 minutes after chopping to maintain their crunch while reducing their bite.

    Dressing Dos and Don’ts

    The dressing can make or break your salad, so don’t rush this crucial component! I always mix my homemade Italian dressing in a mason jar, combining red wine vinegar, extra virgin olive oil, Dijon mustard, and dried Italian herbs with a vigorous shake. Let it sit for at least 30 minutes before using to allow the flavors to marry beautifully. A common mistake is overdressing—start with less than you think you need and add more as desired. For make-ahead preparation, store the dressing separately and combine just before serving to maintain that perfect crunch.

    Serving Ideas & Creative Variations

    Entertaining with Italian Flair

    This Italian Chopped Salad has saved countless dinner parties for me! I love serving it as part of a Mediterranean-inspired buffet alongside crispy chicken parmesan and garlic bread. For an elegant presentation, try arranging the salad on a large wooden board with the ingredients in colorful rows before tossing tableside. Add small bowls of extra toppings like pine nuts, fresh basil, or additional dressing so guests can customize their portions. For summer gatherings, I serve it with chilled Prosecco—the bubbles perfectly complement the tangy, savory flavors.

    Seasonal Adaptations

    One of my favorite aspects of this recipe is how beautifully it transitions through the seasons. In summer, I add juicy heirloom tomatoes and fresh corn kernels. Fall calls for roasted butternut squash cubes and toasted walnuts. Winter versions get brightened with segmented blood oranges and fennel. Spring brings tender asparagus tips and fresh peas. The classic Italian base remains constant—romaine, salami, provolone, chickpeas, and that vibrant dressing—while seasonal produce keeps the salad exciting year-round. This approach ensures you’re always working with ingredients at their peak flavor.

    Storage & Troubleshooting Guide

    Keeping It Fresh

    Proper storage is essential for maintaining the crisp texture of your Italian Chopped Salad. If preparing components ahead, store them separately in airtight containers—vegetables in one, proteins in another, and dressing in a jar. When storing dressed salad, use a container with a tight seal and place a paper towel on top to absorb excess moisture. Properly stored, undressed components will last 3-5 days. I’ve found that sturdy romaine holds up much better than delicate greens, making this salad a rare exception to the “dress right before eating” rule.

    Reviving Wilted Ingredients

    Even the most carefully prepared salad can sometimes lose its vibrancy. If your Italian Chopped Salad has wilted slightly, don’t panic! For limp lettuce, a 10-minute ice bath works wonders—just submerge the greens, then thoroughly pat dry. If your dressed salad has become soggy, try adding fresh romaine and a squeeze of lemon juice to brighten flavors. Too dry? A drizzle of olive oil and a splash of vinegar will refresh it instantly. Remember that this hearty salad is forgiving by nature—its robust ingredients maintain integrity longer than most salads.

    Frequently Asked Questions

    Can I make Italian Chopped Salad ahead of time?

    Yes! Prep components separately up to 3 days ahead. Store dressing separately and combine everything 30 minutes before serving to allow flavors to meld while maintaining texture.

    What’s the best cheese substitute for a dairy-free version?

    Try dairy-free mozzarella shreds or add extra olives and a sprinkle of nutritional yeast for that savory, umami quality that cheese provides.

    How can I turn this into a complete meal?

    Add grilled chicken, shrimp, or white beans for extra protein. You can also serve it with crusty bread or add cooked farro for a heartier dish.

    What’s the key difference between Italian Chopped Salad and other salads?

    Italian Chopped Salad features uniformly diced ingredients, Italian cured meats, cheeses, and a vinaigrette-style dressing with classic Italian herbs and seasonings.

    Can I use bottled Italian dressing?

    Absolutely! While homemade dressing offers better flavor, a high-quality store-bought Italian dressing works well when you’re short on time.

    Final Thoughts

    This Italian Chopped Salad has become more than just a recipe in my kitchen—it’s a reliable friend that shows up for quick lunches, impressive dinner parties, and everything in between. The vibrant colors, bold flavors, and satisfying textures make it a crowd-pleaser every single time. I hope you’ll experiment with your own variations and discover why this classic has stood the test of time. For more Mediterranean-inspired recipes, check out my Pinterest board where I’m always adding new ideas!

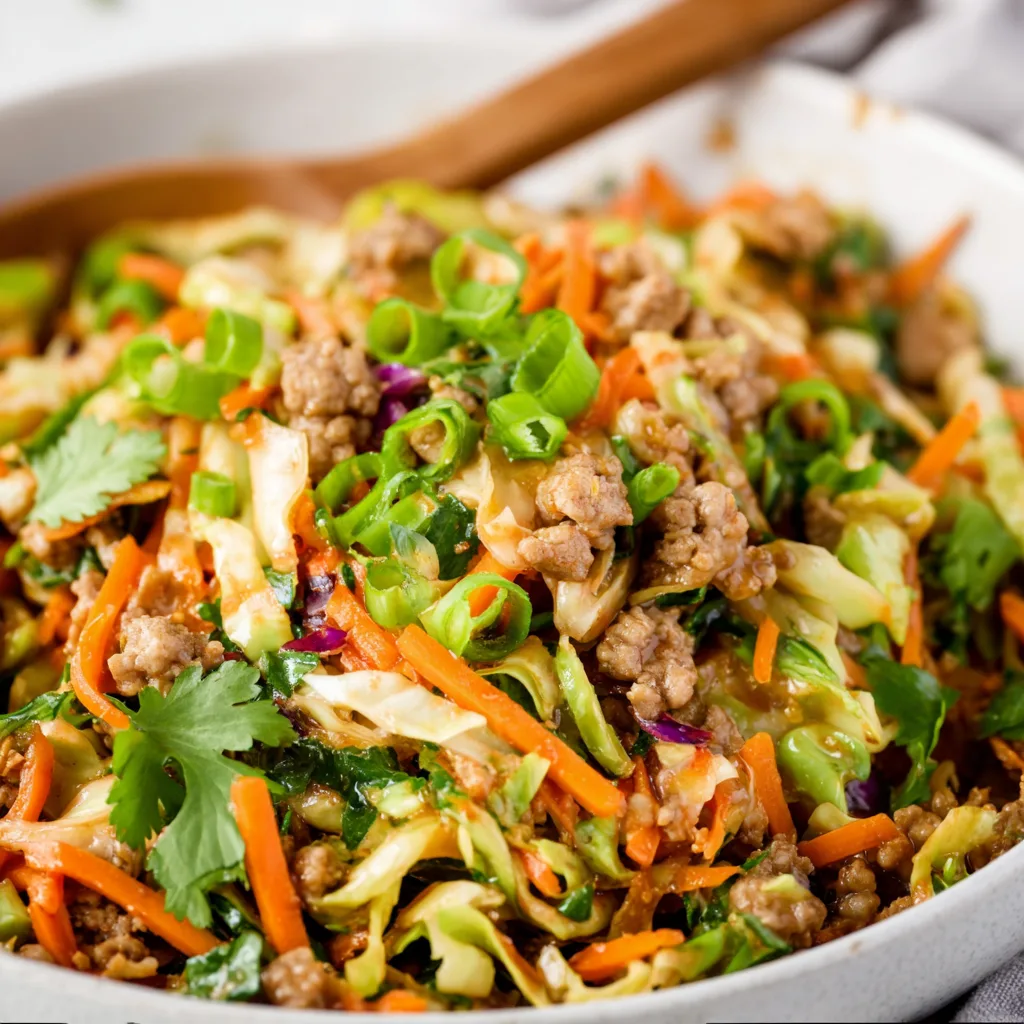
  • 20-Minute One-Pan Turkey Egg Roll Recipe That Will Wow You!

    20-Minute One-Pan Turkey Egg Roll Recipe That Will Wow You!

    20-Minute One-Pan Turkey Egg Roll Recipe That Will Wow You!

    This 20-Minute One-Pan Turkey Egg Roll is the weeknight dinner solution you’ve been searching for! On those evenings when time is tight but you’re craving something satisfying and flavorful, this dish delivers big time. I discovered this recipe during a particularly hectic week when takeout was tempting me daily. The sizzle of ground turkey hitting the hot pan, the aromatic blend of ginger and garlic, and the crisp vegetables coming together in minutes – it’s pure dinnertime magic that feels like a restaurant-quality meal without the wait or the guilt. Let me show you how this simple dish can transform your busy weeknights!

    Recipe

    Why You’ll Love This 20-Minute One-Pan Turkey Egg Roll

    Perfect Weeknight Time-Saver

    There’s something incredibly satisfying about creating a complete meal in just one pan. As a busy mom who values both flavor and efficiency, I’ve made this 20-Minute One-Pan Turkey Egg Roll part of my regular rotation because it truly delivers on its time-saving promise. The prep work is minimal – just some quick chopping of cabbage and carrots if you don’t buy pre-shredded. While everything cooks, I can help with homework or tidy up the kitchen, making this the ultimate multitasking meal. The best part? The entire process from start to finish takes less time than delivery would!

    Healthier Than Takeout Alternative

    When takeout cravings hit, this dish satisfies without the guilt. Using lean ground turkey instead of traditional pork cuts down on saturated fat while still delivering satisfying protein. The abundance of vegetables – crisp cabbage, sweet carrots, and tender onions – provides fiber and nutrients that typical fried egg rolls lack. I love that I can control the sodium and oil levels, unlike restaurant versions that often leave me feeling bloated. My family gets all the familiar flavors they crave with ingredients I feel good about serving, making this a win-win for everyone at the table.

    Essential Tips & Tricks

    Mastering the Perfect Texture

    The secret to this dish is achieving the right texture balance – vegetables that maintain a slight crispness while being tender enough to enjoy. I’ve learned through trial and error that high heat is your friend here! Start with a very hot pan before adding your turkey to get a nice browning effect. When adding the cabbage, don’t overcrowd the pan – work in batches if needed. The cabbage should wilt but still have a slight crunch when done. If you prefer softer vegetables, simply add 1-2 tablespoons of water and cover for 1-2 minutes toward the end of cooking, similar to how I prepare my Baked Lemon Garlic Tilapia.

    Flavor-Boosting Ingredients

    The signature flavor of this dish comes from a perfect balance of savory, sweet, and umami elements. Don’t skip the fresh ginger and garlic – they create the aromatic foundation that makes this dish special. For an authentic taste, use both soy sauce and sesame oil in the sauce mixture. The sesame oil especially adds that distinctive egg roll flavor that ties everything together. I always keep a bottle of chili garlic sauce in my refrigerator to add a customizable heat level at the table. For a flavor variation, try adding hoisin sauce or a tablespoon of rice vinegar to the mix.

    Serving Ideas & Creative Variations

    Family-Style Presentation Options

    Transform this simple dish into a complete meal with thoughtful presentation. I love serving it in lettuce cups for a fresh, handheld option that my kids actually enjoy. For a more substantial dinner, serve over steamed jasmine rice or cauliflower rice for a low-carb alternative. To make it restaurant-worthy, garnish with sliced green onions, sesame seeds, and lime wedges arranged on a large platter. This presentation style works wonderfully alongside my Asian Garlic Shrimp for an impressive Asian-inspired feast that looks like you spent hours in the kitchen.

    Creative Ingredient Swaps

    Don’t be afraid to make this recipe your own with smart substitutions. Ground chicken works beautifully in place of turkey, or try crumbled tofu for a vegetarian version. The vegetable mix is incredibly flexible – add shredded brussels sprouts, bell peppers, or mushrooms based on what’s in your refrigerator. For a different flavor profile, swap the soy-based sauce for teriyaki or sweet chili sauce. My favorite variation includes adding crushed peanuts and chopped cilantro for a Thai-inspired twist. These simple changes keep the dish exciting even when it appears on your table weekly.

    Storage & Troubleshooting Guide

    Make-Ahead and Leftover Solutions

    This dish is a meal-prep champion that actually improves with time as the flavors meld together. Store leftovers in airtight containers for up to 4 days in the refrigerator. For easy lunches, portion into individual containers alongside some rice or greens. When reheating, add a splash of water to prevent drying out, and a fresh squeeze of lime will brighten all the flavors. You can also freeze portions for up to 3 months – I suggest slightly undercooking the vegetables if you know you’ll be freezing some, as they’ll soften further when reheated.

    Fixing Common Issues

    Even the simplest recipes can sometimes need troubleshooting. If your dish turns out too watery, remember that cabbage releases moisture as it cooks. The solution is to cook uncovered and increase heat to evaporate excess liquid. If it’s too dry, add a tablespoon of chicken broth or water. For flavor balance, keep low-sodium soy sauce and honey on hand – add more soy for saltiness or a drizzle of honey for sweetness. If the turkey seems bland, make sure you’re seasoning it well before adding other ingredients, and don’t be shy with garlic and ginger for that authentic egg roll flavor.

    Frequently Asked Questions

    Can I make this 20-Minute One-Pan Turkey Egg Roll vegetarian?

    Absolutely! Substitute the ground turkey with crumbled extra-firm tofu or tempeh. Press the tofu well before crumbling to remove excess moisture, and consider adding an extra teaspoon of soy sauce for flavor depth.

    What’s the best type of cabbage to use?

    Green cabbage works best for its crisp texture and mild flavor. Napa cabbage is a great alternative for a softer texture. Pre-shredded coleslaw mix works perfectly when you’re really pressed for time.

    Can I prepare components ahead of time?

    Yes! Chop all vegetables and mix the sauce ingredients up to 2 days ahead. Store separately in the refrigerator. The actual cooking should be done just before serving for optimal texture.

    How can I make this spicier?

    Add red pepper flakes during cooking or drizzle with sriracha before serving. For deeper heat, include a minced jalapeño or serrano pepper with the garlic and ginger.

    What’s the best pan to use for this recipe?

    A large, wide skillet or wok works best. Cast iron or stainless steel pans help achieve better browning. Avoid non-stick pans if you want the turkey to develop a flavorful crust.

    Final Thoughts

    This 20-Minute One-Pan Turkey Egg Roll has become my reliable solution for those evenings when time is short but I refuse to compromise on flavor or nutrition. There’s something deeply satisfying about transforming simple ingredients into a meal that satisfies cravings while nourishing my family. The versatility of this dish means it never gets boring, and the quick cleanup afterward is the final gift it keeps giving. I hope this becomes a treasured recipe in your collection too! For more quick dinner ideas, follow me on Pinterest where I share my latest kitchen inspirations.

  • Irish Bangers & Mash Cups: Irresistible Comfort Food Bites!

    Irish Bangers & Mash Cups: Irresistible Comfort Food Bites!

    Irish Bangers & Mash Cups: Irresistible Comfort Food Bites!

    Irish Bangers & Mash Cups transform the beloved pub classic into adorable, portable bites perfect for entertaining! These delightful little cups feature savory sausage nestled in creamy mashed potatoes and baked until golden. The first time I made these for a St. Patrick’s Day gathering, my guests couldn’t stop raving about them. There’s something magical about how the edges of the mashed potatoes get slightly crispy while the centers stay velvety smooth. If you love traditional comfort food with a twist, these Irish Bangers & Mash Cups will quickly become your new favorite party appetizer.

    Recipe

    Why You’ll Love These Irish Bangers & Mash Cups

    Perfect Portable Comfort Food

    These little cups deliver all the cozy satisfaction of traditional bangers and mash in a convenient, handheld format. I adore how they solve the classic problem of serving mashed potatoes at parties—no more awkward balancing acts with plates! Each bite offers the perfect ratio of creamy potatoes to savory sausage, and the slight crispness around the edges adds a textural element you don’t get with the traditional version. Plus, they’re substantial enough to be filling without weighing guests down.

    Make-Ahead Friendly for Entertaining

    One of my favorite things about these Irish Bangers & Mash Cups is their party-perfect timing. You can prep nearly everything in advance—cook and crumble the sausage, prepare the mashed potatoes, and even assemble the cups in muffin tins. Simply refrigerate until about 25 minutes before serving, then pop them in the oven. This make-ahead magic means I can actually enjoy my own gatherings instead of being stuck in the kitchen! The cups reheat beautifully, maintaining their creamy centers and crispy edges.

    Essential Tips & Tricks

    Choosing the Right Ingredients

    The secret to exceptional Irish Bangers & Mash Cups lies in quality ingredients. Use authentic Irish sausages if possible—they contain a distinctive blend of seasonings and have that signature snap when you bite into them. For the mashed potatoes, Yukon Golds create the creamiest texture, but russets work beautifully too. Don’t skimp on butter and a splash of cream! For an extra flavor boost, fold some caramelized onions into your mash, similar to what I do in my Garlic Butter Parmesan Knots recipe for that extra depth of flavor.

    Perfecting the Texture

    The key to the perfect cup structure is achieving the right potato consistency. Too loose, and your cups won’t hold their shape; too stiff, and they’ll be dense and heavy. Add an egg to your mashed potatoes—it helps them set while baking without drying out. For the sausage filling, a medium crumble works best. Too fine, and you lose the meaty texture; too chunky, and the cups become difficult to eat. A light sprinkle of cheese on top creates that irresistible golden crust that makes everyone reach for seconds.

    Serving Ideas & Creative Variations

    Complementary Sides and Sauces

    These Irish Bangers & Mash Cups pair beautifully with tangy accompaniments that cut through their richness. I love serving them with a small dish of grainy mustard or a quick onion gravy for dipping. For a complete meal, add a simple green salad with a light vinaigrette or some roasted Brussels sprouts. The slight bitterness of the vegetables balances the savory cups perfectly. For a truly Irish-inspired spread, serve alongside some Corn Fritters with Whipped Feta for a delightful contrast in flavors and textures.

    Exciting Flavor Twists

    While traditional is delicious, these cups welcome creative adaptations. Try incorporating different cheese varieties—sharp cheddar, smoked gouda, or blue cheese all add wonderful complexity. For a breakfast version, use breakfast sausage and fold some scrambled eggs into the potato mixture. Vegetarian guests? Substitute the meat with sautéed mushrooms and leeks. I’ve even made a spicy version with chorizo and pepper jack cheese that disappeared in minutes at my last gathering! The versatility of this recipe makes it perfect for customizing to your taste preferences.

    Storage & Troubleshooting Guide

    Proper Storage Methods

    These Irish Bangers & Mash Cups maintain their delicious quality remarkably well when stored properly. Refrigerate leftovers in an airtight container for up to 3 days. For best results when reheating, avoid the microwave which can make them soggy. Instead, place them on a baking sheet in a 350°F oven for about 10 minutes until heated through. You can also freeze the baked cups for up to 2 months—simply wrap individually in plastic wrap, then foil, and store in a freezer bag. Thaw overnight in the refrigerator before reheating.

    Common Issues and Solutions

    If your cups aren’t holding their shape, the potato mixture is likely too wet. The fix? Chill assembled cups in the muffin tin for 15-20 minutes before baking to help them set. Brown edges but cold centers? Your oven temperature may be too high—try reducing by 25°F and baking slightly longer. For cups that stick to the pan, be generous with the non-stick spray or butter before adding the potato mixture. And if your cups seem bland, remember that potatoes need plenty of seasoning—don’t be shy with salt, pepper, and herbs!

    Frequently Asked Questions

    What are the best sausages to use for Irish Bangers & Mash Cups?

    Traditional Irish bangers or Cumberland sausages work best. If unavailable, any high-quality pork sausage with minimal fillers will create delicious results. Remove casings before cooking for easier integration into the cups.

    Can I make these Irish Bangers & Mash Cups vegetarian?

    Absolutely! Substitute the sausage with a plant-based alternative or sautéed mushrooms seasoned with sage and thyme. The cups will still be delicious and satisfying.

    How far in advance can I prepare these for a party?

    You can assemble the cups up to 24 hours ahead and refrigerate. Add an extra 5-7 minutes to the baking time if cooking directly from the refrigerator.

    Why are my cups falling apart when removed from the pan?

    Allow the cups to cool for 5 minutes before attempting to remove them. This cooling period helps them set properly and maintain their structure.

    Can I use leftover mashed potatoes for this recipe?

    Yes! Leftover mashed potatoes work wonderfully. Just bring to room temperature, add an egg to help binding, and proceed with the recipe as directed.

    Final Thoughts

    These Irish Bangers & Mash Cups have become my go-to recipe whenever I want to impress guests without spending hours in the kitchen. The combination of crispy-edged potatoes and savory sausage creates an irresistible bite that everyone loves. What makes them truly special is how they transform a humble pub classic into an elegant, portable treat. Whether for St. Patrick’s Day celebrations or casual gatherings, these little cups bring comfort and joy to any table. Don’t forget to check out more festive ideas on Pinterest for your next Irish-inspired feast!

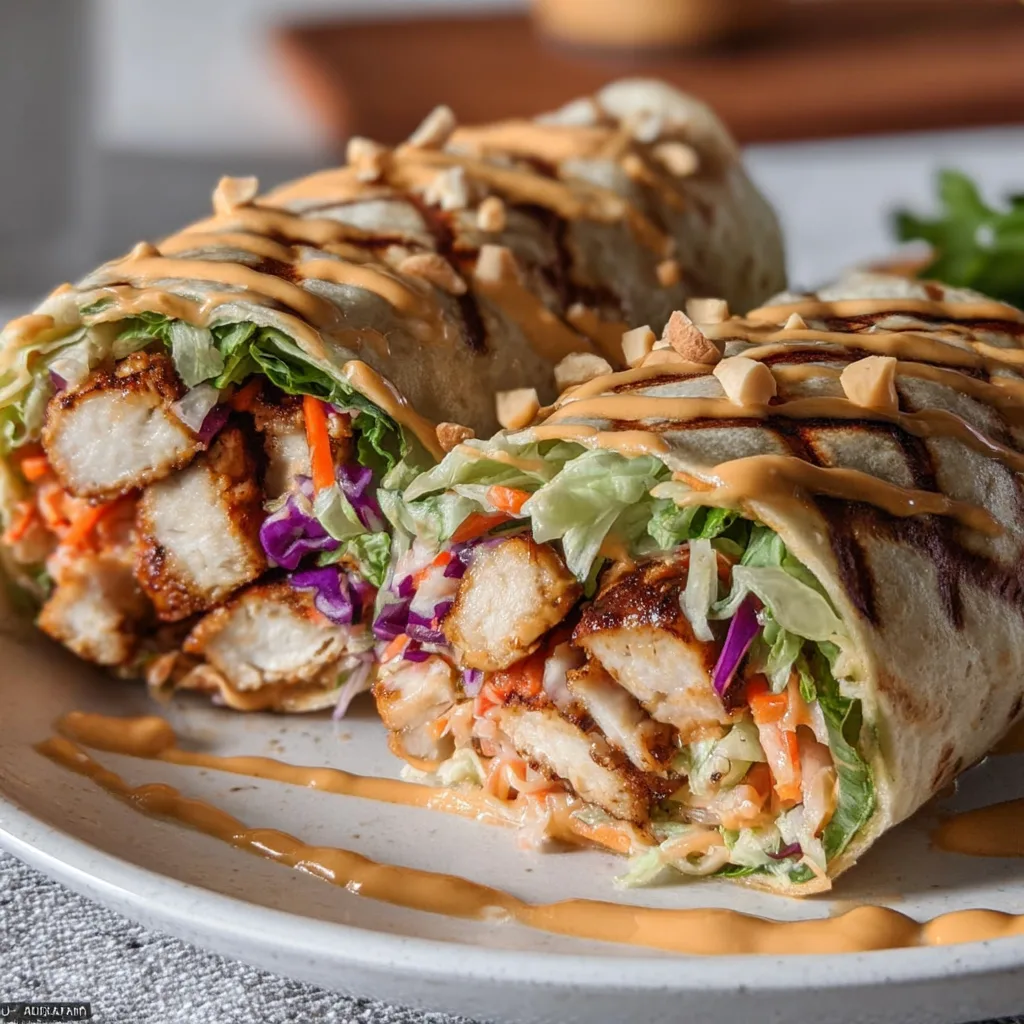
  • Fresh Thai Peanut Chicken Wrap – Irresistibly Bold & Tasty!

    Fresh Thai Peanut Chicken Wrap – Irresistibly Bold & Tasty!

    Fresh Thai Peanut Chicken Wrap – Irresistibly Bold & Tasty!

    Fresh Thai Peanut Chicken Wrap has become my absolute go-to lunch when I’m craving something vibrant yet satisfying. The first time I made these wraps, the aromatic blend of peanut sauce and lime instantly transported me to the bustling streets of Bangkok. There’s something magical about the combination of tender chicken, crunchy vegetables, and that creamy, slightly spicy peanut sauce that makes each bite a perfect balance of textures and flavors. If you’ve been stuck in a lunch rut lately, these wraps are your delicious escape from the ordinary. They’re quick enough for busy weekdays but impressive enough for weekend gatherings with friends who appreciate good food with bold flavors.

    Recipe

    Why You’ll Love This Fresh Thai Peanut Chicken Wrap

    Perfect Balance of Flavors and Textures

    What makes these Fresh Thai Peanut Chicken Wraps truly special is the harmonious dance of flavors and textures in every bite. The creamy peanut sauce delivers that perfect balance of sweet, savory, and spicy notes that Thai cuisine is famous for. I love how the crunch of fresh vegetables contrasts with the tender chicken and soft wrap. The first time I served these at a family gathering, my brother-in-law (who claims to dislike “fancy food”) asked for seconds and then the recipe! That’s when I knew these wraps were something special – they’re sophisticated enough to impress food lovers but accessible enough for everyone to enjoy.

    Quick and Customizable Meal Solution

    These wraps have saved my weeknight dinner plans more times than I can count! In just 20 minutes, you can have a complete meal that feels thoughtful and nourishing. I keep cooked chicken and pre-chopped veggies in my fridge specifically for these wraps. The beauty lies in their adaptability – swap in rotisserie chicken when you’re extra pressed for time, or use tofu for a vegetarian version that’s equally delicious. My daughter prefers hers less spicy, while my husband adds extra sriracha. The wraps become a canvas for personal preference while maintaining that distinctive Thai-inspired flavor profile that makes them special.

    Essential Tips & Tricks

    Perfecting Your Peanut Sauce

    The secret to exceptional Thai peanut chicken wraps lies in the sauce! For the smoothest texture, I recommend using natural creamy peanut butter without added sugar. Warm it slightly before mixing with other ingredients – this prevents that frustrating clumping that can happen with cold peanut butter. Don’t skip the lime juice; it cuts through the richness and brightens everything. I learned this trick from a Thai cooking class: add the soy sauce gradually while tasting. This way, you’ll achieve the perfect balance of salty, sweet, and tangy notes that make these wraps irresistible. Similar to my Chicken Shawarma with Yogurt Sauce, the sauce makes all the difference.

    Prep Strategies for Maximum Flavor

    For truly exceptional wraps, marinate your chicken in a tablespoon of the peanut sauce for at least 15 minutes before cooking. This infuses the protein with flavor from the inside out. When slicing vegetables, aim for uniform, matchstick cuts – they wrap more easily and provide consistent texture in each bite. I like to slightly warm my tortillas or wraps before assembling; this makes them more pliable and prevents tearing. If preparing for a crowd, set up a DIY wrap station with all components separately. This not only looks impressive but allows everyone to customize their wrap with exactly what they love, making the meal interactive and fun!

    Serving Ideas & Creative Variations

    Perfect Pairings for a Complete Meal

    These Fresh Thai Peanut Chicken Wraps shine as a standalone meal, but thoughtful sides can elevate the experience. I love serving them with a simple cucumber salad dressed with rice vinegar and a touch of honey – the cooling crunch complements the wraps beautifully. For a heartier meal, coconut rice makes an excellent accompaniment, soaking up any extra peanut sauce that escapes. When entertaining, I arrange the wraps on a platter surrounded by fresh lime wedges, chopped cilantro, and extra sauce for dipping. For an impressive spread, consider adding my Roasted Tomato Salsa as an additional dipping option – the acidity cuts through the richness of the peanut sauce perfectly.

    Exciting Flavor Variations to Try

    Don’t be afraid to experiment with these versatile wraps! My favorite variation adds thinly sliced mango for a sweet-savory contrast that’s absolutely divine. For a seafood twist, substitute the chicken with grilled shrimp – the sweetness of shrimp pairs wonderfully with the peanut sauce. Vegetarians can enjoy these wraps with crispy tofu or tempeh instead of chicken. For extra texture, try adding crushed peanuts, fried shallots, or even crispy wonton strips. When I’m feeling adventurous, I’ll incorporate lemongrass or Thai basil into the sauce for an authentic street food flavor. The beauty of these wraps is their flexibility – they’re a perfect canvas for culinary creativity!

    Storage & Troubleshooting Guide

    Keeping Components Fresh for Meal Prep

    For meal prep success, store the components of your Thai peanut chicken wraps separately. The peanut sauce will keep in an airtight container in the refrigerator for up to 5 days – just give it a good stir before using, as natural separation may occur. If it thickens too much, add a splash of warm water to restore the creamy consistency. Cooked chicken stays fresh for 3-4 days when properly refrigerated. I like to prep all my vegetables at once but store them separately to maintain their distinct textures. Bell peppers and carrots will stay crisp for days, while cucumber and leafy greens are best prepared closer to serving time to prevent wilting.

    Solving Common Wrap Challenges

    The most common issue with these wraps is overfilling, which leads to tearing and difficult eating. The solution is simple: use slightly less filling than you think you need and fold tightly but gently. If your wraps are still tearing, try double-wrapping with two tortillas or using slightly warmed wraps for more flexibility. For sauce that’s too thick, add a tablespoon of warm water at a time until you reach your desired consistency. Too thin? Add more peanut butter. If your sauce lacks punch, a splash of rice vinegar or extra lime juice will brighten the flavors. And remember – if your wrap completely falls apart, simply serve the components as a delicious Thai chicken bowl instead!

    Frequently Asked Questions

    Can I make Fresh Thai Peanut Chicken Wraps ahead of time?

    Yes! Prepare the peanut sauce and cook the chicken up to 3 days ahead. Store components separately and assemble just before eating to prevent soggy wraps. For grab-and-go lunches, wrap tightly in parchment paper then foil.

    What’s the best wrap to use for these?

    Large flour tortillas work perfectly, but rice paper wrappers offer an authentic Southeast Asian twist. Lettuce leaves create a lighter, low-carb option, while spinach or herb tortillas add extra flavor and visual appeal.

    How can I make these wraps vegetarian?

    Substitute the chicken with firm tofu (pressed and pan-fried until crispy), tempeh, or roasted chickpeas. The peanut sauce is already vegetarian-friendly and provides plenty of protein and flavor.

    Are these wraps spicy?

    The spice level is customizable. For mild wraps, omit the sriracha in the peanut sauce. For extra heat, add more sriracha or include thinly sliced fresh jalapeños in your vegetable mix.

    Can I freeze components of these wraps?

    The peanut sauce freezes well for up to 3 months in ice cube trays for portion control. Cooked chicken can also be frozen, but fresh vegetables should always be prepared just before assembly.

    Final Thoughts

    The Fresh Thai Peanut Chicken Wrap has become more than just a recipe in my kitchen—it’s a reliable solution for flavorful, balanced meals that never disappoint. What I love most is how these wraps bring a touch of culinary adventure to everyday eating without requiring complicated techniques or hard-to-find ingredients. They remind us that delicious, globally-inspired food can be accessible and quick. Whether you’re meal prepping for the week ahead or looking to impress dinner guests, these wraps deliver big on flavor while keeping preparation simple. For more inspiration, check out my other recipes on Pinterest and keep exploring the wonderful world of fusion flavors!

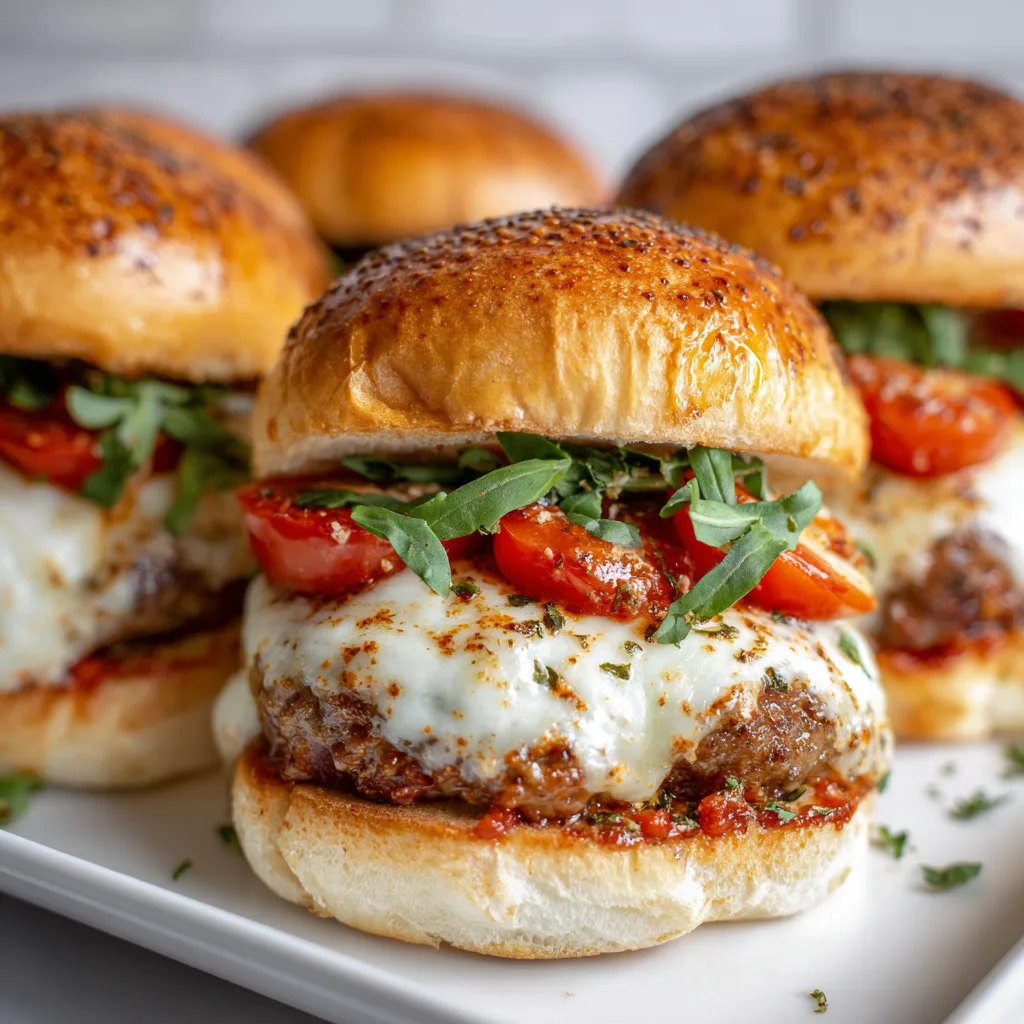
  • Mozzarella-Stuffed Pizza Burgers: Irresistible Melted Cheese Explosion!

    Mozzarella-Stuffed Pizza Burgers: Irresistible Melted Cheese Explosion!

    Mozzarella-Stuffed Pizza Burgers: Irresistible Melted Cheese Explosion!

    Mozzarella-stuffed pizza burgers combine two of America’s favorite foods into one irresistible handheld meal that’s perfect for summer cookouts or weeknight dinners. The first time I made these for my family, my teenage son declared them “life-changing” – and honestly, I couldn’t disagree! There’s something magical about that first bite when the melted mozzarella stretches between your lips and the savory pizza flavors burst across your tongue. If you’re looking to elevate your burger game, these stuffed sensations will become your new go-to recipe that everyone will beg you to make again and again. Check out my chicken caesar sandwiches for another family favorite!

    Recipe

    Why You’ll Love These Mozzarella-Stuffed Pizza Burgers

    Perfect Flavor Fusion

    These burgers deliver the ultimate comfort food mashup that satisfies both pizza and burger cravings simultaneously. The ground beef patties are seasoned with Italian herbs, garlic, and a splash of Worcestershire sauce, creating a flavor base that’s reminiscent of your favorite pizzeria. I love adding a pinch of crushed red pepper for a subtle heat that wakes up your taste buds without overwhelming them. The magic happens when you bite through the seasoned beef into that pocket of molten mozzarella cheese – it’s like hitting the culinary jackpot! My husband says these remind him of the pizza burgers from his childhood, but “a million times better.”

    Simple Yet Impressive

    Don’t let their gourmet appearance fool you – these mozzarella-stuffed pizza burgers are surprisingly easy to make! The secret is in the simple technique of sealing cheese inside each patty, which takes just seconds to master. I remember frantically searching for a showstopper recipe when my in-laws announced a last-minute visit, and these burgers saved the day. Even kitchen novices can create these impressive stuffed patties with minimal effort. The best part? The prep work can be done ahead of time, allowing you to enjoy the company of your guests instead of being stuck in the kitchen. Just form the patties in the morning, refrigerate, and they’ll be ready to grill when hunger strikes.

    Essential Tips & Tricks

    Perfecting the Cheese Pocket

    Creating the perfect cheese pocket is crucial for these mozzarella-stuffed pizza burgers. Start with cold ingredients – refrigerated ground beef and cheese are easier to work with and help prevent cheese leakage during cooking. I learned this the hard way after my first attempt resulted in a spectacular cheese explosion on the grill! Divide your beef mixture into eight equal portions, flatten each into a thin disc, and place a cube of mozzarella in the center of four discs. Top with remaining beef discs and pinch the edges firmly to seal completely. Press gently to flatten slightly while maintaining that precious cheese pocket. For extra insurance against cheese leaks, chill the formed patties for 20 minutes before cooking.

    Cooking for Success

    The key to perfect mozzarella-stuffed pizza burgers is temperature control. Cook these beauties over medium heat rather than high to ensure the beef cooks through before the cheese has a chance to escape. I once rushed the cooking process at a backyard barbecue and ended up with burgers that were charred outside but still raw near the cheese – lesson learned! For stovetop preparation, a cast-iron skillet works wonders, providing even heat distribution.

    Resist the urge to press down on the burgers while cooking, as this will surely force out that precious cheese filling. Instead, flip gently just once, and allow about 4-5 minutes per side for medium doneness. Try serving with garlic butter parmesan knots for the ultimate pizza-inspired meal!

    Serving Ideas & Creative Variations

    Build-Your-Own Burger Bar

    Transform dinner into an interactive experience with a build-your-own mozzarella-stuffed pizza burger bar! Set out an array of pizza-inspired toppings like pepperoni, sautéed mushrooms, roasted red peppers, caramelized onions, and fresh basil leaves. I did this for my daughter’s graduation party, and it was the hit of the evening – everyone loved customizing their own creation! Offer various sauces beyond traditional marinara, such as pesto, garlic aioli, or spicy arrabbiata. Don’t forget different cheese options for topping (provolone, fresh mozzarella slices, or parmesan crisps) and an assortment of buns including ciabatta rolls, garlic toast, or even mini focaccia squares. This approach turns a simple meal into a memorable dining experience that accommodates everyone’s preferences.

    Global Pizza Burger Inspirations

    Take your mozzarella-stuffed pizza burgers on a world tour by incorporating international flavors! For a Greek-inspired version, mix feta into your beef and top with tzatziki, cucumber, and Kalamata olives. My personal favorite is the Mexican variation where I add taco seasoning to the meat, stuff with pepper jack cheese instead of mozzarella, and top with guacamole and pico de gallo. For an Asian twist, try mixing teriyaki sauce into the beef, stuffing with mozzarella, and topping with a quick slaw dressed in sesame oil.

    The Italian version gets elevated with sun-dried tomatoes and basil mixed into the patties, then topped with roasted tomato salsa and fresh arugula for a gourmet experience that will transport your taste buds straight to Italy.

    Storage & Troubleshooting Guide

    Make-Ahead and Storage Solutions

    These mozzarella-stuffed pizza burgers are perfect for meal prep and can be prepared in advance in several ways. Form the raw patties up to 24 hours ahead, placing them on a parchment-lined tray with slight indentations between each to prevent sticking, then cover tightly with plastic wrap and refrigerate. I’ve found this to be a lifesaver for busy weeknights! Cooked burgers can be refrigerated for up to 3 days – just wrap individually in foil and reheat in a 350°F oven for about 10 minutes.

    They also freeze beautifully; double-wrap cooled patties in plastic wrap and foil, then freeze for up to 2 months. For best results when reheating from frozen, thaw overnight in the refrigerator, then warm in a covered skillet with a tablespoon of water to create steam that revives the juiciness.

    Troubleshooting Common Issues

    The most frequent challenge with mozzarella-stuffed pizza burgers is cheese leakage during cooking. If this happens, ensure you’re using cheese cubes rather than shredded cheese, which tends to melt too quickly. My neighbor taught me to freeze the cheese cubes for 15 minutes before stuffing, which works wonders! If your patties are falling apart, the mixture might be too wet – add a tablespoon of breadcrumbs to absorb excess moisture.

    For burgers that shrink too much during cooking, make a slight indentation in the center of each patty with your thumb before grilling. And if your burgers are cooking unevenly, they may be too thick in the center – aim for even thickness throughout, with special attention to sealing the edges where the two beef discs meet.

    Frequently Asked Questions

    Can I use turkey instead of beef for mozzarella-stuffed pizza burgers?

    Absolutely! Ground turkey works beautifully, though I recommend using 85/15 rather than lean turkey to maintain juiciness. Add 1 tablespoon olive oil per pound of turkey to enhance moisture and flavor.

    How do I prevent the cheese from leaking out?

    Ensure your beef discs are thin but without holes, seal edges completely with a pinching motion, and chill formed patties for 20 minutes before cooking. Cook over medium heat rather than high.

    Can I make these mozzarella-stuffed pizza burgers in the oven?

    Yes! Bake on a parchment-lined sheet at 375°F for about 15-18 minutes. This method actually helps prevent cheese leakage since there’s no flipping required.

    What’s the best type of mozzarella to use?

    Low-moisture mozzarella works best as it melts beautifully without releasing excess liquid. Cut into ½-inch cubes rather than using fresh mozzarella, which contains too much moisture.

    Can I prepare the patties ahead of time?

    Definitely! Form patties up to 24 hours in advance, place on a parchment-lined tray with divots between them, cover tightly, and refrigerate until ready to cook.

    Final Thoughts

    These mozzarella-stuffed pizza burgers have become my secret weapon for gathering friends and family around the table with minimal effort but maximum impact. There’s something undeniably satisfying about watching someone take that first bite and experience the surprise of melted cheese stretching from burger to mouth! I’ve served these at casual weeknight dinners and fancy backyard parties alike, and they never fail to impress. The versatility of these burgers means you can customize them endlessly to suit any taste preference or dietary need. Whether you’re a cooking novice or seasoned chef, these stuffed sensations deserve a permanent spot in your recipe collection. Find more of my recipes on Pinterest!