Author: Sara Maren

  • French Onion Potato Bake: Irresistibly Cheesy & Comforting Recipe!

    French Onion Potato Bake: Irresistibly Cheesy & Comforting Recipe!

    French Onion Potato Bake: Irresistibly Cheesy & Comforting Recipe!

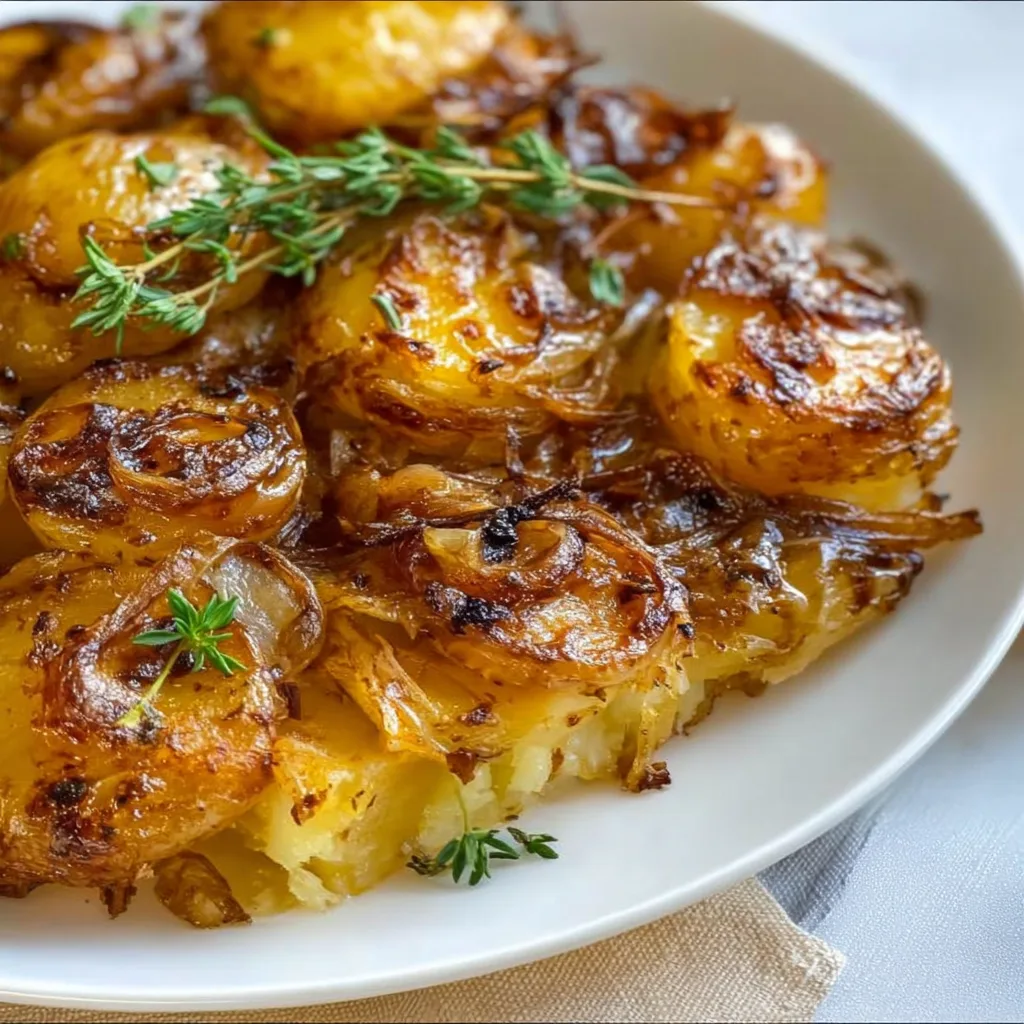
    There’s something magical about the way a French Onion Potato Bake transforms simple ingredients into a dish that feels like a warm hug on a cold evening. I discovered this recipe during a particularly harsh winter when comfort food became my lifeline. The way the caramelized onions meld with tender potatoes and gooey cheese creates a symphony of flavors that’s both rustic and sophisticated. It’s become my go-to dish when hosting dinner parties because it never fails to elicit those “mmm” sounds that every home cook lives for. Let me show you how to create this soul-warming dish that bridges the gap between everyday cooking and special occasion worthy.

    Recipe

    Why You’ll Love This French Onion Potato Bake

    Perfect Comfort Food Fusion

    This dish brilliantly combines two beloved classics—French onion soup and potato gratin—into one showstopping casserole. The sweet depth of caramelized onions infuses every slice of potato, while the broth soaks upward, creating layers of flavor that simple potato dishes can’t match. I love how the edges get slightly crispy while the center remains tender and creamy. The aroma alone will draw everyone to your kitchen before you’ve even called them to dinner. It’s the kind of dish that makes people feel instantly at home, even if they’ve never visited before.

    Make-Ahead Miracle Worker

    One of the greatest virtues of this French Onion Potato Bake is its flexibility as a prep-ahead wonder. I’ve assembled it the night before countless dinner parties, letting all those flavors meld in the refrigerator overnight. The next day, I simply pop it in the oven an hour before guests arrive, freeing me to focus on other dishes or, let’s be honest, last-minute cleaning! The flavors actually improve with time, making this dish even more delicious when reheated. It’s saved my sanity during holiday cooking marathons when oven space and time are at a premium.

    Essential Tips & Tricks

    Perfecting the Onion Caramelization

    The soul of this dish lies in properly caramelized onions—not just softened or browned, but truly transformed onions that have released their natural sugars. I learned the hard way that rushing this step ruins everything. Use a heavy-bottomed pan and keep the heat medium-low, stirring occasionally for 30-40 minutes. The onions should become a deep amber color with a jammy consistency. A splash of balsamic vinegar near the end adds complexity that elevates the entire dish. That rich caramelization is what separates an ordinary potato bake from one that people will remember.

    Choosing the Right Potatoes and Cheese

    The foundation of an exceptional French Onion Potato Bake depends on selecting the proper potatoes. Yukon Golds are my go-to choice for their buttery flavor and ability to hold their shape while absorbing the savory broth. For cheese, a combination works best—Gruyère for authentic French onion flavor and stretchy meltability, plus a bit of Parmesan for sharp depth. Layer them strategically, saving some for that gloriously bubbling top that forms a golden crust. For more cheese-forward comfort food, check out this creamy one-pot broccoli cheddar orzo that pairs beautifully with this dish.

    Serving Ideas & Creative Variations

    Perfect Pairings for Every Occasion

    This versatile dish shines as both a standout side or a satisfying main course. For holiday dinners, serve it alongside a simple roasted chicken or beef tenderloin—the potato bake will hold its own against the protein without competing. For weeknight meals, pair it with a crisp green salad dressed in a bright vinaigrette to cut through the richness. I’ve served this at everything from casual Sunday suppers to Christmas dinner, and it fits seamlessly into any menu. The way it bridges comfort food and elegance makes it uniquely adaptable to almost any occasion.

    Seasonal and Dietary Adaptations

    The basic French Onion Potato Bake template welcomes creative modifications based on dietary needs or seasonal ingredients. For a lighter spring version, incorporate fresh thyme and a layer of sautéed mushrooms. In fall, add a layer of thinly sliced sweet potatoes among the regular ones. For a heartier main dish, add diced ham or shredded chicken between layers. Vegetarians can enjoy a deeper umami flavor by using mushroom broth instead of beef. For more hearty comfort food inspiration, check out this slow cooker Hungarian-style goulash with paprika potatoes.

    Storage & Troubleshooting Guide

    Proper Storage and Reheating Methods

    This French Onion Potato Bake actually improves with time, making it perfect for planned leftovers. Store cooled leftovers in an airtight container for up to 4 days in the refrigerator. For reheating, avoid the microwave which can make the potatoes soggy. Instead, cover with foil and warm in a 325°F oven until heated through, then remove the foil for the last 5-10 minutes to re-crisp the top. I often make a double batch specifically to have leftovers—they make weekday lunches feel special. For freezing, cool completely, wrap tightly, and freeze for up to 3 months.

    Solving Common Preparation Challenges

    Even experienced cooks can encounter issues with this dish. If your potatoes aren’t cooking evenly, it’s likely they were sliced inconsistently. I recommend using a mandoline for uniform thickness—it’s worth the extra care required. If the top browns too quickly before the center is cooked, simply cover with foil for the remainder of the baking time. For a soupy result, let the baked dish rest 15-20 minutes before serving; it will thicken as it stands. If your onions burn rather than caramelize, your heat was too high—next time, lower the temperature and add a tablespoon of water if they start to stick.

    Frequently Asked Questions

    Can I make French Onion Potato Bake ahead of time?

    Absolutely! Assemble it up to 24 hours in advance, cover and refrigerate. Add an extra 10-15 minutes to the baking time when cooking from cold, and it may need a foil cover initially.

    What’s the best cheese substitute if I can’t find Gruyère?

    Swiss cheese makes an excellent substitute, or try a combination of provolone and mozzarella for good meltability with a similar flavor profile.

    Can this French Onion Potato Bake be made vegetarian?

    Yes! Simply substitute vegetable broth for beef broth and ensure your Worcestershire sauce is vegetarian (or omit it). The caramelized onions provide plenty of flavor.

    How thick should I slice the potatoes?

    Aim for 1/8-inch thickness for optimal texture. Too thin and they’ll disintegrate; too thick and they won’t cook through properly.

    What’s the best way to prevent the potatoes from discoloring during prep?

    Keep sliced potatoes in a bowl of cold water until ready to assemble. Drain and pat dry before layering to prevent excess moisture in the finished dish.

    Final Thoughts

    This French Onion Potato Bake has become more than just a recipe in my kitchen—it’s a tradition, a crowd-pleaser, and my secret weapon for gatherings where I want to impress without spending hours hovering over the stove. The way it fills the house with its irresistible aroma creates an atmosphere of warmth even before the first bite. I encourage you to make it your own, adapting it to your family’s preferences while keeping the soul of those caramelized onions and tender potatoes intact. For more inspiration, visit our Pinterest page where comfort food reigns supreme.

  • Homemade Big Mac Wraps: Irresistible, Juicy, Viral Taste Explosion!

    Homemade Big Mac Wraps: Irresistible, Juicy, Viral Taste Explosion!

    Homemade Big Mac Wraps: Irresistible, Juicy, Viral Taste Explosion!

    Homemade Big Mac Wraps have completely transformed my weeknight dinner routine! When that familiar fast-food craving hits but I’m determined to stay in my cozy kitchen, these wraps deliver all the nostalgic flavors without the drive-thru guilt. The first time I made these for my family, my husband actually closed his eyes and sighed with that first bite—that’s when I knew I had a keeper. The combination of seasoned ground beef, special sauce, and fresh toppings wrapped in a warm tortilla creates a hand-held comfort food experience that’s both satisfying and customizable. Plus, they come together in just 20 minutes, making them perfect for busy evenings when you want something delicious but quick.

    Recipe

    Why You’ll Love This Homemade Big Mac Wraps

    Better-Than-Drive-Thru Flavor

    There’s something magical about recreating that iconic Big Mac taste in your own kitchen. The secret sauce is the real star—a tangy, creamy blend that captures that nostalgic flavor we all recognize. I’ve perfected the ratio of mayo, ketchup, pickle relish, and spices that makes these wraps taste authentically “Big Mac-ish” while still feeling homemade. The seasoned ground beef carries all those savory notes, and when paired with fresh lettuce, diced onions, pickles and melty cheese, it creates that perfect balance of textures and flavors that makes the original so craveable—but with ingredients you can pronounce and customize to your liking.

    Quick & Budget-Friendly Meal Solution

    These Homemade Big Mac Wraps have rescued me on countless evenings when time and energy were in short supply. From start to finish, you can have these on the table in under 25 minutes, which is often faster than driving to the restaurant! They’re also remarkably budget-friendly—a package of ground beef and tortillas can stretch to feed a family for significantly less than the drive-thru alternative. I love keeping the components prepped in the fridge for even quicker assembly. My teenagers have even started making these for themselves after sports practice—a definite win in my book when they choose homemade over fast food!

    Essential Tips & Tricks

    Perfect Beef Seasoning Technique

    The foundation of great Homemade Big Mac Wraps is properly seasoned ground beef. I’ve found that cooking the beef in a hot cast-iron skillet creates those delicious browned bits that add depth of flavor. Season generously with salt, pepper, garlic powder, and a touch of onion powder while cooking. The secret step? Add a splash of Worcestershire sauce in the final minute of cooking—it mimics that distinctive fast-food burger taste. Drain excess fat but leave just enough to keep the meat moist and flavorful. For the best texture, avoid overworking the meat as it cooks; break it into small crumbles but don’t pulverize it.

    Sauce & Assembly Secrets

    The special sauce is what transforms these from basic beef wraps into Big Mac magic. Mix mayo, ketchup, sweet pickle relish, white vinegar, paprika, garlic powder, and onion powder until well combined. Let it chill for at least 15 minutes before using—this allows the flavors to meld beautifully. When assembling, warm your tortillas slightly to make them pliable and prevent tearing. Layer in this exact order: sauce, lettuce, beef, cheese, pickles, onions, more lettuce, and a final drizzle of sauce. For extra authenticity, add a sprinkle of sesame seeds like those found on the classic Big Mac bun.

    Serving Ideas & Creative Variations

    Family-Style Wrap Bar

    Transform dinner into an interactive experience by setting up a DIY wrap station! I arrange all the components in separate bowls—seasoned beef, special sauce, shredded lettuce, diced onions, pickles, and cheese—and let everyone build their own creation. This has become a Friday night tradition in our house, and it’s especially perfect for those nights when everyone’s on different schedules. Add some homemade sweet potato fries on the side for a complete meal. What I love most is how this simple meal brings everyone to the table, sharing stories while customizing their wraps exactly how they like them.

    Healthy & Dietary Adaptations

    These wraps are incredibly versatile and can be adapted for almost any dietary preference. For a lighter version, use ground turkey or chicken instead of beef, Greek yogurt in place of some of the mayo in the sauce, and load up with extra veggies. For low-carb needs, swap the tortilla for large lettuce leaves or a low-carb wrap. Dairy-free? Skip the cheese or use your favorite plant-based alternative. My vegetarian daughter loves these with seasoned black beans or lentils instead of beef. The special sauce works beautifully with all these variations, maintaining that signature Big Mac flavor profile while accommodating different nutritional needs.

    Storage & Troubleshooting Guide

    Make-Ahead & Meal Prep Options

    These Homemade Big Mac Wraps are perfect for meal prep because the components store beautifully when kept separate. The seasoned beef can be refrigerated for up to 3 days or frozen for up to 3 months in airtight containers. The special sauce actually improves with time as flavors meld, and will keep for a week in the refrigerator. For grab-and-go lunches, I prepare everything except the lettuce and store components in sectioned containers. This prevents soggy wraps and allows for fresh assembly in just minutes. For best results, reheat the beef separately before assembling, and warm tortillas briefly to restore their flexibility.

    Fixing Common Wrap Problems

    Even experienced cooks sometimes struggle with wrap assembly! If your tortillas are cracking, they’re likely too cold or too dry. Warm them briefly in the microwave under a damp paper towel for 10-15 seconds to make them pliable. If your wraps are falling apart during eating, you may be overfilling them or not folding properly. The solution: place fillings slightly off-center, fold in the sides, then roll from the bottom up, tucking as you go. Too much sauce can also cause structural issues—apply it sparingly and evenly. If your beef mixture seems too dry after storage, add a tablespoon of water when reheating to restore moisture.

    Frequently Asked Questions

    Can I make Homemade Big Mac Wraps ahead of time?

    Yes! Prepare the beef and sauce up to 3 days ahead. Store components separately and assemble just before eating for best texture. Pre-assembled wraps can become soggy if stored too long.

    How do I make these Homemade Big Mac Wraps healthier?

    Use lean ground beef or turkey, whole wheat tortillas, and reduced-fat cheese. Increase vegetables and consider Greek yogurt in place of some mayo in the special sauce.

    Can I freeze these wraps?

    Freeze the cooked beef and assembled wraps (without lettuce and sauce) for up to 3 months. Thaw overnight in the refrigerator and add fresh toppings when reheating.

    What’s the best tortilla to use?

    Large (10-12 inch) flour tortillas work best as they’re pliable and hold ingredients well. For a healthier option, try whole wheat, spinach, or low-carb alternatives.

    How close do these taste to actual Big Macs?

    Very close! The special sauce and seasoned beef capture the iconic flavor profile. Many people say they prefer these homemade wraps as they’re fresher and customizable.

    Final Thoughts

    These Homemade Big Mac Wraps have become a beloved staple in my kitchen rotation—the perfect balance of nostalgic fast-food flavor and homemade goodness. They remind us that comfort food doesn’t have to be complicated or unhealthy to be satisfying. Whether you’re feeding a hungry family or meal prepping for a busy week ahead, these wraps deliver big flavor with minimal effort. I hope they bring as much joy to your table as they have to mine! For more quick dinner inspiration, check out my other recipes at Pinterest.

  • Hearty 13-Bean Minestrone with Sausage | Cozy Slow Cooker Comfort

    Hearty 13-Bean Minestrone with Sausage | Cozy Slow Cooker Comfort

    Hearty 13-Bean Minestrone with Sausage | Cozy Slow Cooker Comfort

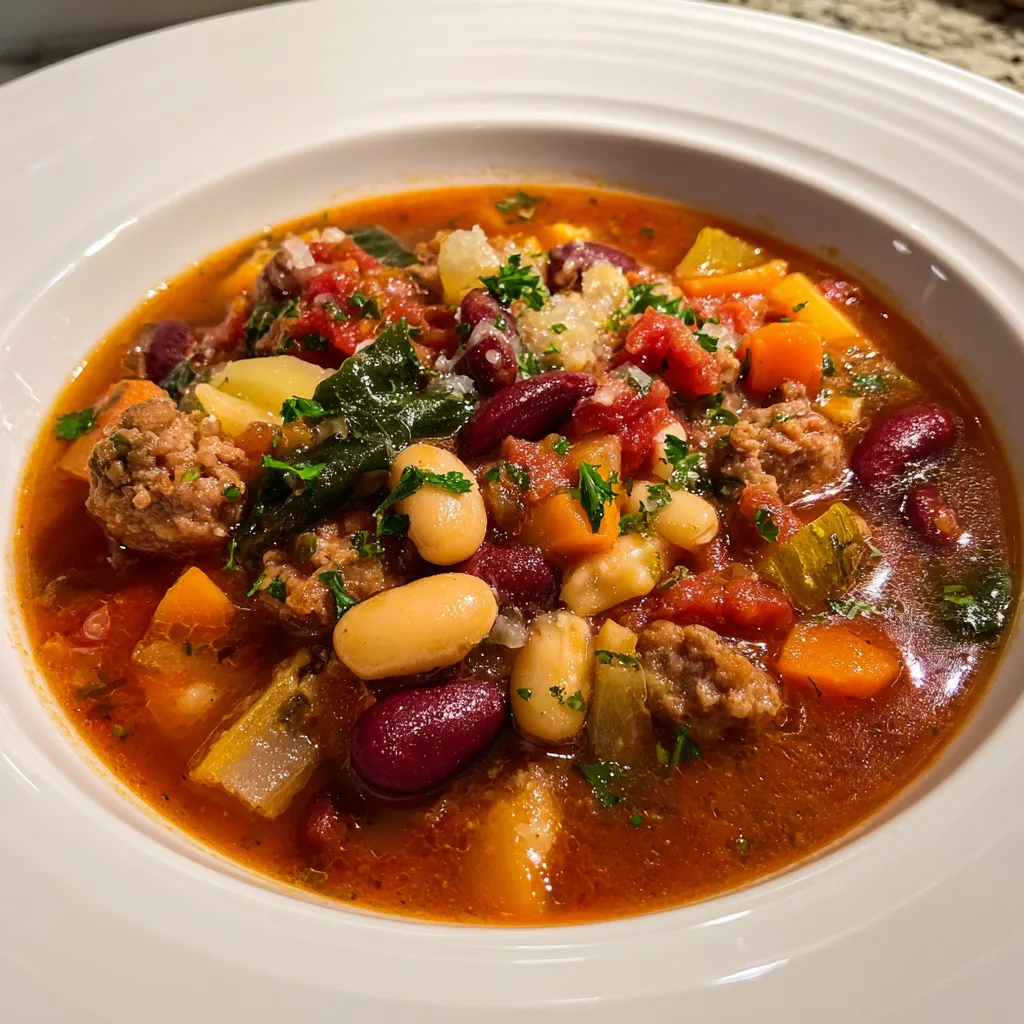
    Hearty 13-Bean Slow Cooker Minestrone with Sausage is the ultimate comfort food that speaks to my soul on chilly evenings. There’s something magical about walking into the kitchen after a long day and being greeted by the aromatic blend of herbs, beans, and savory sausage simmering away. I discovered this recipe during a particularly brutal winter in Chicago, when nothing but a steaming bowl of something substantial would do. The beauty of this 13-bean medley lies in its incredible texture and nutritional punch, creating a meal that’s both satisfying and nourishing. If you love hearty soups that practically cook themselves, you’re in for a treat!

    Recipe

    Why You’ll Love This Hearty 13-Bean Slow Cooker Minestrone with Sausage

    Perfect Balance of Flavors and Textures

    What makes this minestrone truly special is the symphony of textures that unfolds with each spoonful. The 13-bean blend provides varying degrees of creaminess and bite, while the Italian sausage adds rich, savory notes that infuse the entire pot. I love how the beans slowly release their starch, creating a naturally thick broth without needing additional thickeners. The vegetables maintain just enough firmness, and the tomatoes bring a gentle acidity that cuts through the richness. It’s this perfect balance that makes me crave this soup even when the weather turns warm.

    Set-It-and-Forget-It Convenience

    There’s something deeply satisfying about a meal that practically makes itself. This Hearty 13-Bean Slow Cooker Minestrone with Sausage is the epitome of effortless cooking – just brown the sausage, chop a few vegetables, and let your slow cooker work its magic for 6-8 hours. I’ve prepared this on busy weekdays before rushing out the door and returned to dinner ready to serve. The longer cooking time actually improves the flavor as the beans absorb the savory broth and the herbs fully infuse. It’s perfect for meal prep too, yielding enough for several satisfying meals.

    Essential Tips & Tricks

    Bean Selection and Preparation

    The 13-bean blend is the star of this minestrone, typically including navy, pinto, black, kidney, garbanzo, and various other beans. You can find these pre-packaged in most grocery stores, but don’t stress if you can’t find exactly 13 varieties – a 10 or 15-bean mix works beautifully too! I always soak my dried beans overnight to reduce cooking time and improve digestibility. If you forgot to soak, try the quick-soak method: boil beans for 2 minutes, then let sit covered for 1 hour. Discard that water before adding to your slow cooker for the best flavor and texture.

    Layering Ingredients for Maximum Flavor

    The order of operations makes a significant difference in this recipe. I always brown the sausage first to develop those rich, caramelized flavors that form the foundation of the soup. Sautéing the onions, carrots, and celery in the sausage drippings before adding them to the slow cooker creates another dimension of flavor. For herbs, add hardy ones like rosemary and thyme early in the cooking process, but save delicate herbs like basil for the last 30 minutes. A Parmesan rind thrown in while cooking adds incredible umami depth – it’s my secret weapon for taking this minestrone from good to unforgettable.

    Serving Ideas & Creative Variations

    Perfect Pairings and Garnishes

    This Hearty 13-Bean Slow Cooker Minestrone with Sausage deserves thoughtful accompaniments to elevate it from a simple soup to a memorable meal. A chunk of crusty sourdough bread for dipping is non-negotiable in my house! For garnishes, I love a generous sprinkle of freshly grated Parmesan, a drizzle of high-quality olive oil, and a scattering of fresh herbs. The contrast of the hot soup with the cold, sharp cheese creates a delightful sensory experience. For a complete meal, serve with a simple side salad dressed with lemon vinaigrette to cut through the richness of the soup and cleanse the palate between spoonfuls.

    Seasonal and Dietary Adaptations

    The beauty of this minestrone is its adaptability to different seasons and dietary needs. In summer, I lighten it up with fresh zucchini, yellow squash, and a handful of spinach added in the last few minutes of cooking. For a vegetarian version, simply omit the sausage and use vegetable broth – the beans provide plenty of protein. To make it gluten-free, ensure your broth is certified gluten-free and skip any pasta additions. For a protein boost, try adding shredded chicken instead of sausage. During winter months, I love adding hearty greens like kale or Swiss chard for extra nutrients and a beautiful pop of color.

    Storage & Troubleshooting Guide

    Proper Storage and Freezing Methods

    This Hearty 13-Bean Slow Cooker Minestrone with Sausage actually improves with time as the flavors continue to meld. Store leftovers in airtight containers in the refrigerator for up to 5 days. The soup will thicken considerably when chilled – I sometimes add a splash of broth when reheating to achieve the desired consistency. For freezing, allow the soup to cool completely before transferring to freezer-safe containers, leaving an inch of headspace for expansion. It freezes beautifully for up to 3 months. For best results, thaw overnight in the refrigerator before gently reheating on the stovetop over medium-low heat.

    Common Issues and Easy Fixes

    If your beans remain firm after the recommended cooking time, they might be older (dried beans can lose moisture over time). The simple fix is to extend cooking time by 1-2 hours. For soup that’s too thin, remove the lid for the last hour of cooking to allow some liquid to evaporate, or mash some of the beans against the side of the pot to naturally thicken the broth. If it’s too thick, simply add more broth until you reach your desired consistency. If the flavor seems flat, a splash of vinegar or lemon juice can brighten it remarkably, while a pinch of salt or a Parmesan rind can enhance the savory depth.

    Frequently Asked Questions

    Can I use canned beans instead of dried?

    Yes! Substitute 4-5 cans (15oz each) of various rinsed beans. Add them during the last hour of cooking to prevent them from becoming mushy.

    Is this Hearty 13-Bean Slow Cooker Minestrone with Sausage freezer-friendly?

    Absolutely! It freezes beautifully for up to 3 months. Cool completely before freezing and leave expansion space in your containers.

    Can I make this in an Instant Pot instead?

    Yes! Use the sauté function for the meat and vegetables, then pressure cook for 30 minutes with natural release if using soaked beans.

    What can I substitute for Italian sausage?

    Ground turkey, chicken sausage, or plant-based sausage all work well. For vegetarian options, try adding smoked paprika for that savory depth.

    How can I reduce the sodium content?

    Use low-sodium broth, rinse canned beans thoroughly if using them, and choose reduced-sodium sausage. Add herbs and spices for flavor instead of salt.

    Final Thoughts

    This Hearty 13-Bean Slow Cooker Minestrone with Sausage has become my go-to recipe when I need something that nourishes both body and soul. The way it fills my home with comforting aromas as it simmers is almost as satisfying as that first spoonful. I love recipes that deliver maximum flavor with minimum effort, and this minestrone definitely delivers. Whether you’re feeding a hungry family or meal-prepping for a busy week ahead, this soup promises to deliver comfort in a bowl. Don’t forget to check out more hearty soup ideas on Pinterest for endless inspiration!

  • Slow Cooker Hungarian Goulash with Paprika & Potatoes – Comfort in Every Bite

    Slow Cooker Hungarian Goulash with Paprika & Potatoes – Comfort in Every Bite

    Slow Cooker Hungarian Goulash with Paprika & Potatoes – Comfort in Every Bite

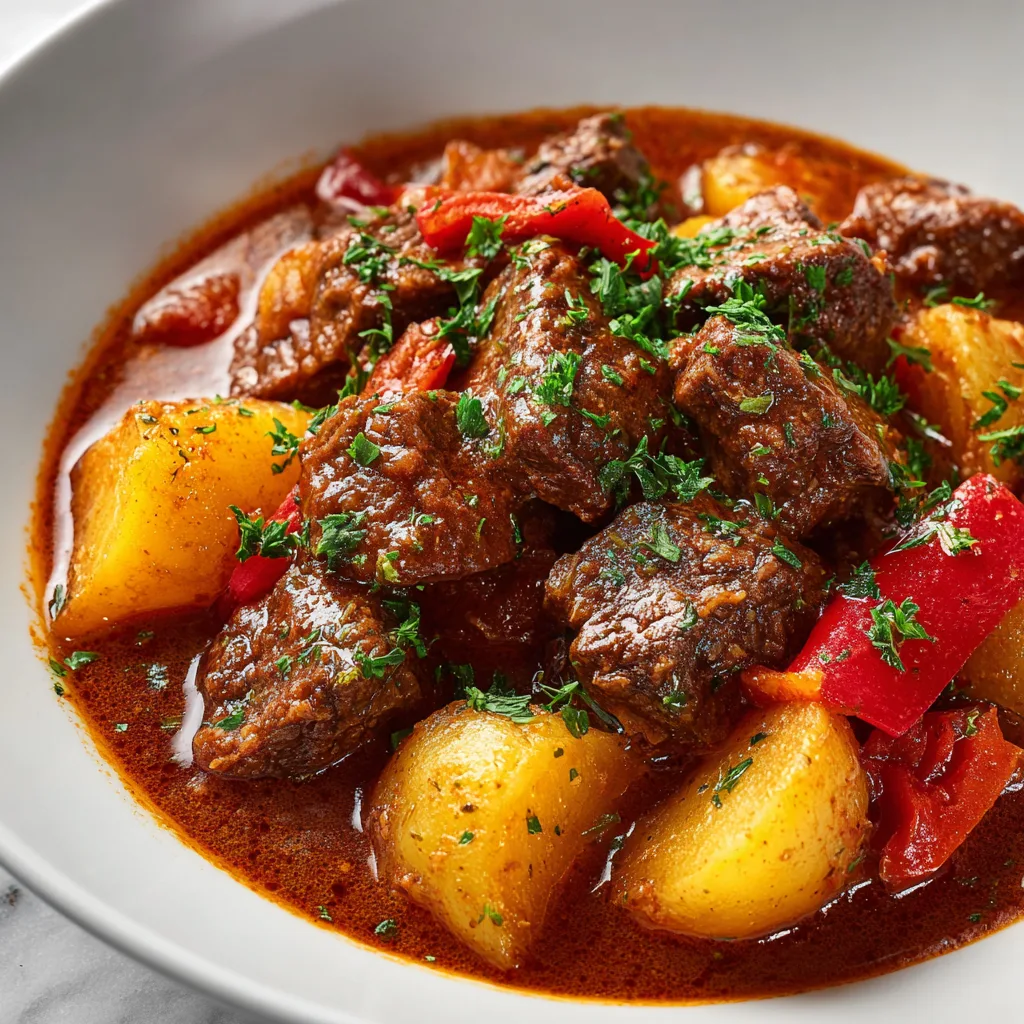
    Slow Cooker Hungarian‑Style Goulash with Paprika & Potatoes transforms simple ingredients into a rich, soul-warming meal that fills your kitchen with irresistible aromas. The first time I made this dish, my entire home smelled like my grandmother’s kitchen—warm, inviting, and promising comfort in every bite. There’s something magical about the way the paprika-infused broth slowly tenderizes the beef until it practically melts in your mouth. This traditional Hungarian comfort food is perfect for those chilly evenings when you need something hearty yet hands-off to nourish your family. Let the slow cooker do all the heavy lifting while you enjoy the delicious results!

    Recipe

    Why You’ll Love This Slow Cooker Hungarian‑Style Goulash with Paprika & Potatoes

    The Perfect Comfort Food for Busy Days

    There’s nothing quite like coming home to a meal that’s been simmering all day, filling your house with mouthwatering aromas. This Hungarian-style goulash practically cooks itself while you’re busy with life. The fork-tender beef absorbs all the rich paprika flavors, creating depth that simply can’t be rushed. I love how the potatoes soak up the savory broth, becoming little flavor bombs in every bite. What makes this dish truly special is how it transforms humble ingredients into something extraordinary—proof that sometimes the most comforting foods are also the simplest.

    A Celebration of Authentic Hungarian Flavors

    The soul of this dish lies in its authentic Hungarian paprika—not the dusty stuff that’s been sitting in your cabinet for years! Sweet Hungarian paprika brings a rich, almost fruity warmth without overwhelming heat. When it blooms in the hot oil, the aroma is intoxicating. My Hungarian neighbor once told me the secret is adding a touch of caraway seeds for that subtle, earthy note that makes goulash taste genuinely European. The slow cooker gently melds these flavors, creating that distinctive taste that’s been comforting generations. It’s like a culinary hug in a bowl!

    Essential Tips & Tricks

    Perfecting Your Paprika Technique

    Don’t skip the step of blooming your paprika in hot oil before adding it to the slow cooker! This crucial technique releases the essential oils and deepens the flavor significantly. I learned this the hard way after once dumping paprika directly into the broth—the difference is remarkable. Use a mix of sweet and hot Hungarian paprika for the most authentic flavor profile. Another game-changing tip: add your paprika off the heat to prevent burning, which can make it taste bitter. The rich red color should develop beautifully during the slow cooking process, transforming into that signature deep russet hue that makes goulash so inviting.

    Choosing and Preparing the Perfect Cuts of Meat

    Select well-marbled chuck roast for the most tender, flavorful results in your Hungarian goulash. This cut breaks down beautifully during the long cooking process, becoming meltingly tender. Before adding to your slow cooker, take the time to brown the meat in batches—don’t overcrowd the pan! This step creates the Maillard reaction that adds incredible depth to the final dish. I like to cut my beef into 1½-inch cubes rather than smaller pieces, as they hold up better during the long cooking time without drying out. Remember to pat the meat dry before browning for the best sear and flavor development.

    Serving Ideas & Creative Variations

    Traditional and Modern Accompaniments

    Serve your Hungarian goulash with fresh sour cream and a sprinkle of chopped parsley for that authentic finishing touch. The cool creaminess against the rich, paprika-infused broth creates a perfect contrast. Traditional Hungarian cucumber salad makes a refreshing side that balances the heartiness of the goulash. For a complete meal, I love serving this with homemade buttered egg noodles or crusty rye bread for sopping up every last bit of that delicious sauce. On chilly nights, nothing beats this combination for pure comfort—it’s the kind of meal that makes everyone linger at the table a little longer.

    Regional Twists to Make It Your Own

    Every Hungarian family has their own goulash variation, and you should feel free to create yours! Add bell peppers for a sweeter flavor profile reminiscent of Southern Hungarian styles. Some regions incorporate tomatoes more heavily, while others keep the broth clearer and more paprika-forward. I’ve experimented with adding a splash of red wine for depth or stirring in prepared horseradish just before serving for a zingy kick. For a modern twist, try serving it over creamy polenta instead of potatoes. The beauty of goulash is its adaptability—make it once following the traditional recipe, then have fun putting your personal stamp on it!

    Storage & Troubleshooting Guide

    Proper Storage for Maximum Flavor

    Like many stews, this Hungarian goulash actually tastes even better the next day after the flavors have had time to meld. Store leftovers in airtight containers in the refrigerator for up to 4 days. For freezing, cool the goulash completely before transferring to freezer-safe containers, leaving some headspace for expansion. It freezes beautifully for up to 3 months! When reheating, do so gently on the stovetop with a splash of broth or water to maintain the proper consistency. I often make a double batch specifically to freeze half—it’s the perfect solution for those busy weeknights when cooking from scratch isn’t possible.

    Fixing Common Goulash Problems

    If your goulash sauce seems too thin, remove the lid during the last 30 minutes of cooking to allow some liquid to evaporate. Alternatively, create a quick slurry with 1 tablespoon cornstarch mixed with 2 tablespoons cold water and stir it in. For goulash that’s too thick, simply add more beef broth until you reach your desired consistency. If your meat isn’t tender enough, it likely needs more time—even an extra hour can make a difference. And if you accidentally oversalted, add a peeled, quartered potato to absorb some salt, then remove it before serving. These simple fixes ensure your goulash turns out perfect every time!

    Frequently Asked Questions

    What’s the difference between Hungarian goulash and American goulash?

    Hungarian goulash is a paprika-seasoned beef stew with potatoes, while American goulash is more like a pasta dish with ground beef and tomato sauce. Authentic Hungarian Slow Cooker Hungarian‑Style Goulash with Paprika & Potatoes has no pasta and focuses on the paprika flavor.

    Can I make this goulash in an Instant Pot instead?

    Yes! Use the sauté function to brown the meat and vegetables, then pressure cook for 35 minutes with a 10-minute natural release. The flavor won’t be quite as developed as slow cooking, but it’s still delicious for a quicker version.

    What type of paprika should I use for authentic flavor?

    Hungarian sweet paprika is essential for authentic flavor. For depth, use a combination of sweet (3 tablespoons) and hot (1 teaspoon) Hungarian paprika. The quality matters significantly in this dish.

    Can I add vegetables other than potatoes?

    Absolutely! Carrots, parsnips, and bell peppers are traditional additions. Add root vegetables with the potatoes, but save bell peppers for the last hour to prevent them from disintegrating.

    Is this recipe gluten-free?

    Yes, this Slow Cooker Hungarian‑Style Goulash is naturally gluten-free as long as you verify your paprika and broth have no additives containing gluten. Serve with gluten-free sides for a complete gluten-free meal.

    Final Thoughts

    This Slow Cooker Hungarian‑Style Goulash with Paprika & Potatoes has become my go-to recipe when I want to impress without spending hours actively cooking. There’s something truly special about how it fills your home with comforting aromas and brings people together around the table. The deep, complex flavors belie how simple it is to prepare. I hope this recipe becomes a cherished part of your comfort food repertoire, bringing warmth to your kitchen on cold days and creating memories around your dinner table for years to come. Don’t forget to check out more cozy recipes on Pinterest!

  • Crockpot Swamp Soup Recipe: Hearty Sausage & Veggie Comfort!

    Crockpot Swamp Soup Recipe: Hearty Sausage & Veggie Comfort!

    Crockpot Swamp Soup Recipe: Hearty Sausage & Veggie Comfort!

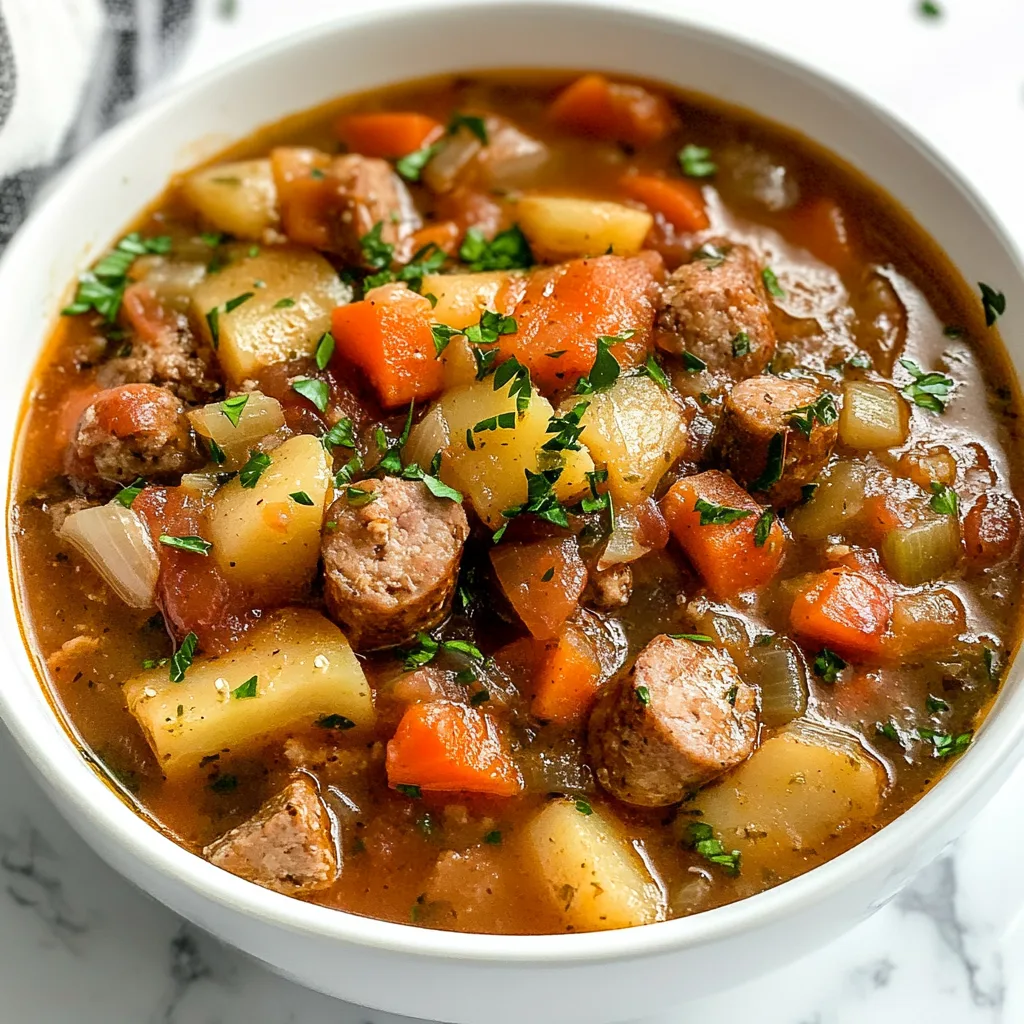
    Crockpot Swamp Soup (Sausage, Potato, Vegetable Medley) is one of those magical one-pot wonders that transforms humble ingredients into something extraordinary. I discovered this recipe during a particularly cold Minnesota winter when my pantry was sparse but my craving for comfort was abundant. The name might sound a bit mysterious, but that’s exactly what makes this soup special—it’s a delightful “swamp” of savory sausage, tender potatoes, and a medley of vegetables that meld together in the slow cooker. With minimal prep and maximum flavor, this hearty soup has become my go-to for busy weeknights and weekend gatherings alike. Trust me, once you try it, you’ll understand why this cozy creation deserves a permanent spot in your recipe collection.

    Recipe

    Why You’ll Love This Crockpot Swamp Soup (Sausage, Potato, Vegetable Medley)

    Perfect for Busy Weeknights

    There’s something deeply satisfying about walking through your front door after a long day and being greeted by the aroma of a meal that’s been simmering to perfection. This Crockpot Swamp Soup practically makes itself while you’re away. Just 15 minutes of morning prep—browning the sausage and chopping vegetables—and your slow cooker handles the rest. The magic happens as the flavors meld together over 6-8 hours, breaking down the vegetables and infusing the broth with rich, savory notes. I’ve lost count of how many Tuesday nights this recipe has saved me from the takeout temptation!

    Versatile and Crowd-Pleasing

    One of my favorite things about this vegetable-packed soup is its incredible adaptability. My husband prefers spicy Italian sausage while my kids love the milder version—so I often use a blend. The vegetable medley is equally flexible; I’ve used everything from classic carrots and celery to bell peppers, zucchini, and kale. This soup has been my secret weapon at potlucks where dietary preferences vary widely. It satisfies meat lovers with its hearty sausage chunks while offering plenty of vegetables for the health-conscious. The robust flavor profile appeals to sophisticated palates, yet it’s familiar enough for picky eaters.

    Essential Tips & Tricks

    Layering Flavors for Maximum Impact

    The difference between a good soup and an unforgettable one lies in how you build those flavors. Always start by browning the sausage properly—those caramelized bits are flavor gold! Don’t rush this step; let the meat develop a deep golden crust before transferring it to your crockpot. I like to deglaze the pan with a splash of chicken broth, scraping up those browned bits to add to the slow cooker. Another game-changer is adding herbs in stages: woody herbs like thyme and rosemary go in at the beginning, while fresh herbs like parsley should be stirred in during the final 30 minutes of cooking to maintain their bright flavor.

    Texture Management Techniques

    The perfect Swamp Soup balances heartiness with a certain harmony of textures. Cut your potatoes slightly larger than the other vegetables—about 1-inch chunks—since they’ll break down more during cooking. For firmer vegetables like carrots, aim for ½-inch pieces. If you’re adding delicate greens like spinach or kale, wait until the final 30-60 minutes of cooking time. My personal trick for creating the ideal consistency: remove about 2 cups of the soup (avoiding sausage pieces) and blend it smooth, then return it to the pot. This creates a partially thickened broth that coats your spoon beautifully while maintaining those chunky, satisfying elements.

    Serving Ideas & Creative Variations

    Complementary Sides and Toppings

    This hearty soup deserves thoughtful accompaniments to elevate the meal from simple to spectacular. My family’s favorite pairing is a batch of gluten-free sourdough discard pretzel bites for dipping into that flavorful broth. For toppings, consider a dollop of tangy sour cream, a sprinkle of sharp cheddar, or crispy fried onions for textural contrast. Fresh herbs like chopped parsley or chives add a pop of color and freshness. When serving for guests, I create a toppings bar with various options in small bowls, allowing everyone to customize their bowl. This interactive element always sparks conversation and makes the meal feel special.

    Seasonal and Dietary Adaptations

    The beauty of Crockpot Swamp Soup lies in its flexibility across seasons and dietary needs. In summer, I lighten it up with yellow squash, corn, and fresh tomatoes, serving it with a squeeze of lemon. Fall calls for heartier additions like butternut squash, mushrooms, and a pinch of nutmeg. For a vegetarian version, substitute the sausage with plant-based alternatives or add extra beans and mushrooms for meaty texture. The broth can easily switch from chicken to vegetable stock. For lower-carb needs, swap half the potatoes for cauliflower florets or turnips—they absorb flavors beautifully while reducing the carbohydrate content without sacrificing that crucial hearty texture.

    Storage & Troubleshooting Guide

    Maximizing Leftovers

    This Swamp Soup actually improves with time as the flavors continue to develop, making it perfect for meal prep. Store cooled leftovers in airtight containers in the refrigerator for up to 4 days. For longer storage, freeze in individual portions using freezer-safe containers or heavy-duty freezer bags. Leave about an inch of headspace to allow for expansion. When reheating, I recommend adding a splash of fresh broth if the soup has thickened too much. For a refreshed flavor profile in leftovers, try stirring in a teaspoon of vinegar or lemon juice just before serving—this brightens all the flavors and makes day-old soup taste newly made.

    Troubleshooting Common Issues

    Even experienced cooks occasionally encounter soup challenges. If your Crockpot Swamp Soup is too thin, try mashing some of the potatoes against the side of the pot to release their starch, or stir in a slurry of 1 tablespoon cornstarch mixed with 2 tablespoons cold water during the last 30 minutes of cooking. Conversely, if your soup is too thick, gradually add more broth until you reach your desired consistency. Flavor too bland? Add a splash of Worcestershire sauce or a parmesan rind to deepen the savory notes. If the vegetables are unevenly cooked, remember for next time that denser vegetables like carrots should be cut smaller than quick-cooking ones like zucchini.

    Frequently Asked Questions

    Can I make Crockpot Swamp Soup (Sausage, Potato, Vegetable Medley) ahead of time?

    Absolutely! This soup actually improves with time. Make it up to 3 days ahead and store in the refrigerator. The flavors will continue to develop, making it even more delicious when reheated gently on the stovetop.

    What’s the best sausage to use in this recipe?

    Italian sausage (mild or hot) provides the best flavor foundation, but Polish kielbasa or smoked sausage work beautifully too. For a leaner option, turkey or chicken sausage creates a lighter version while still delivering great flavor.

    Can I freeze this soup?

    Yes! Cool completely, then freeze in airtight containers for up to 3 months. The texture of potatoes may change slightly upon thawing, but the flavor remains excellent. Thaw overnight in the refrigerator before reheating.

    How can I make this soup vegetarian?

    Replace the sausage with a plant-based alternative or 2 cups of sautéed mushrooms. Use vegetable broth instead of chicken broth, and consider adding a tablespoon of smoked paprika to achieve that smoky depth traditionally provided by the sausage.

    My soup is too thin. How can I thicken it?

    Mash some of the potatoes against the side of the pot, or remove 1 cup of soup, blend until smooth, and return to the pot. Alternatively, stir in a cornstarch slurry (1 tablespoon cornstarch mixed with 2 tablespoons cold water) during the last 30 minutes of cooking.

    Final Thoughts

    There’s something magical about how this Crockpot Swamp Soup (Sausage, Potato, Vegetable Medley) brings people together around the table. The combination of savory sausage, tender potatoes, and colorful vegetables creates a nourishing experience that satisfies on multiple levels. What I love most is watching someone take their first spoonful—that moment of surprise when they discover just how complex and delicious such a humble soup can be. Whether you’re feeding a family on a busy weeknight or entertaining friends on a chilly evening, this recipe delivers comfort and connection in equal measure. Find more cozy recipes on Pinterest to complement this hearty favorite!

  • Shrimp & Creamy Cheddar Grits: Irresistible Comfort Food Bliss!

    Shrimp & Creamy Cheddar Grits: Irresistible Comfort Food Bliss!

    Shrimp & Creamy Cheddar Grits: Irresistible Comfort Food Bliss!

    Shrimp & Creamy Cheddar Grits is the ultimate Southern comfort dish that warms both body and soul. I’ll never forget serving this creamy, cheesy goodness at my first dinner party in my tiny apartment – it was the dish everyone raved about for months! There’s something magical about plump, juicy shrimp nestled on a bed of velvety grits that just speaks to the heart. The combination of sharp cheddar melting into stone-ground grits creates a luxurious base that pairs perfectly with seasoned shrimp. Let me walk you through creating this beloved classic that’s both impressive enough for company and cozy enough for a weeknight dinner.

    Recipe

    Why You’ll Love This Shrimp & Creamy Cheddar Grits

    Perfect Balance of Flavors & Textures

    This dish delivers the most satisfying contrast between creamy grits and tender shrimp. The stone-ground grits slowly simmer until they transform into a velvety canvas that soaks up butter and sharp cheddar like a dream. Meanwhile, the shrimp provides that perfect bite and subtle sweetness that complements the rich, cheesy base. I love how the seasoned shrimp creates little pockets of flavor against the smooth grits. It’s that magical combination of textures – creamy, tender, and slightly firm – that makes each bite a perfect harmony of Southern comfort. The dish manages to feel both luxurious and homey at the same time.

    Quick Yet Impressive Meal

    Don’t let the gourmet reputation fool you – Shrimp & Creamy Cheddar Grits comes together in under 30 minutes! This makes it perfect for those nights when you want something special without hours in the kitchen. The grits simmer while you quickly sauté the shrimp, meaning dinner is ready before hunger turns to hangry. I’ve served this at last-minute dinner gatherings and watched guests’ eyes widen with delight, never suspecting how simple it was to prepare. The dish carries that wonderful illusion of being much more labor-intensive than it actually is, which makes it my secret weapon for entertaining or date nights at home.

    Essential Tips & Tricks

    Perfecting Your Grits

    The foundation of exceptional Shrimp & Creamy Cheddar Grits lies in properly cooked grits. Always start with stone-ground grits rather than instant for authentic texture and flavor. The key is a slow simmer with plenty of stirring – this prevents lumps and develops that silky consistency we’re after. I learned the hard way that patience pays off here! Add your butter and cheese only after the grits have fully cooked, then fold them in gently until melted. For extra creaminess, try a splash of heavy cream in the final minutes. The result should be smooth grits that hold their shape on a spoon without being stiff or runny.

    Shrimp Cooking Secrets

    The biggest mistake with shrimp is overcooking, which turns them rubbery faster than you can say “y’all.” For perfectly tender shrimp in your Creamy Cheddar Grits, cook them just until they turn pink and curl into a loose C-shape – about 2 minutes per side. I like to season mine with a blend of cajun spices for that authentic Southern kick. Pat your shrimp dry before cooking to ensure a nice sear rather than steaming them. And here’s my secret weapon – finish with a squeeze of fresh lemon juice right before serving to brighten all those rich flavors and cut through the creaminess of the dish.

    Serving Ideas & Creative Variations

    Perfect Pairings & Garnishes

    Elevate your Shrimp & Creamy Cheddar Grits with thoughtful garnishes that add color and flavor. A sprinkle of sliced green onions or fresh chopped parsley brings a pop of color and freshness. For extra Southern flair, crumbled bacon adds smoky crunch that contrasts beautifully with the creamy base. I love serving this alongside simple Kickin’ Collard Greens for a complete Southern experience. The slight bitterness of the greens perfectly balances the richness of the grits. For brunch, add a poached egg on top and watch the yolk create an instant sauce that takes this dish to new heights. Don’t forget warm crusty bread for sopping up every last bit!

    Regional & Seasonal Twists

    Transform this classic into something uniquely yours with regional inspirations. For a New Orleans twist, add andouille sausage and holy trinity (bell peppers, onions, and celery) to your shrimp. During summer months, I love folding fresh corn kernels into the grits for sweet pops of flavor and texture. For a fall version, try roasted butternut squash cubes and crispy sage leaves as a garnish. Coastal variations might include fresh crab meat or even lobster for special occasions. You can even go international by adding a Thai-inspired coconut milk base to the grits and topping with curry-spiced shrimp. The versatility of this dish means it can evolve with the seasons while keeping its soulful essence.

    Storage & Troubleshooting Guide

    Make-Ahead & Leftovers Strategy

    While Shrimp & Creamy Cheddar Grits is best enjoyed fresh, you can store components separately for convenience. Refrigerate cooked grits for up to 3 days in an airtight container – they will solidify, but don’t worry! To revive, warm slowly on the stovetop with a splash of milk or cream while whisking until creamy again. I recommend cooking shrimp fresh when possible, but leftover shrimp can be stored separately and gently reheated. For meal prep, prepare the grits base ahead and refrigerate, then quickly cook fresh shrimp just before serving. This approach gives you that just-made quality without the last-minute rush.

    Fixing Common Challenges

    Even experienced cooks encounter issues with grits occasionally. If your grits are too thick, simply whisk in warm milk, broth, or water until you reach your desired consistency. For grits that are too thin, continue cooking uncovered while stirring frequently to evaporate excess liquid. If you notice lumpy grits, don’t panic! Remove from heat and beat vigorously with a whisk, or blend briefly with an immersion blender. For overcooked, rubbery shrimp, chop them and incorporate into a creamy sauce to mask the texture. And if your cheese sauce breaks or becomes grainy, a splash of lemon juice or cream while whisking over low heat can help reunite the ingredients.

    Frequently Asked Questions

    What’s the difference between grits and polenta?

    Grits are typically made from white corn while polenta comes from yellow corn. Grits usually have a softer, creamier texture, while polenta is often firmer. In Shrimp & Creamy Cheddar Grits, the traditional choice is stone-ground grits for authentic Southern flavor.

    Can I make this dish ahead for a dinner party?

    Yes! Prepare the grits up to 2 days ahead and refrigerate. Reheat with extra liquid while stirring constantly. Cook the shrimp just before serving for the best texture and flavor.

    What’s the best cheese for Shrimp & Creamy Cheddar Grits?

    Sharp cheddar provides the classic flavor, but experiment with combinations! Try mixing in smoked gouda for depth, pepper jack for heat, or a touch of cream cheese for extra richness.

    Can I make this dish gluten-free?

    Most grits are naturally gluten-free, but always check packaging for cross-contamination warnings. Ensure any seasonings or broths used are also certified gluten-free for a safe meal.

    What can I substitute for shrimp if someone has a seafood allergy?

    Andouille sausage, smoked chicken, or roasted mushrooms make excellent alternatives that maintain the dish’s Southern character while accommodating dietary restrictions.

    Final Thoughts

    Shrimp & Creamy Cheddar Grits embodies the heart of Southern hospitality – simple ingredients transformed into something truly special. There’s a reason this dish has stood the test of time, bringing comfort to countless tables across generations. I hope you’ll try this recipe and experience the magic of perfectly creamy grits topped with succulent shrimp. It might just become your new go-to for both weeknight dinners and special occasions. For more Southern-inspired recipes, visit our Pinterest board where comfort food is always in season!

  • Dumpling Bake Delight: Irresistible Comfort Food You’ll Crave Instantly

    Dumpling Bake Delight: Irresistible Comfort Food You’ll Crave Instantly

    Dumpling Bake Delight: Irresistible Comfort Food You’ll Crave Instantly

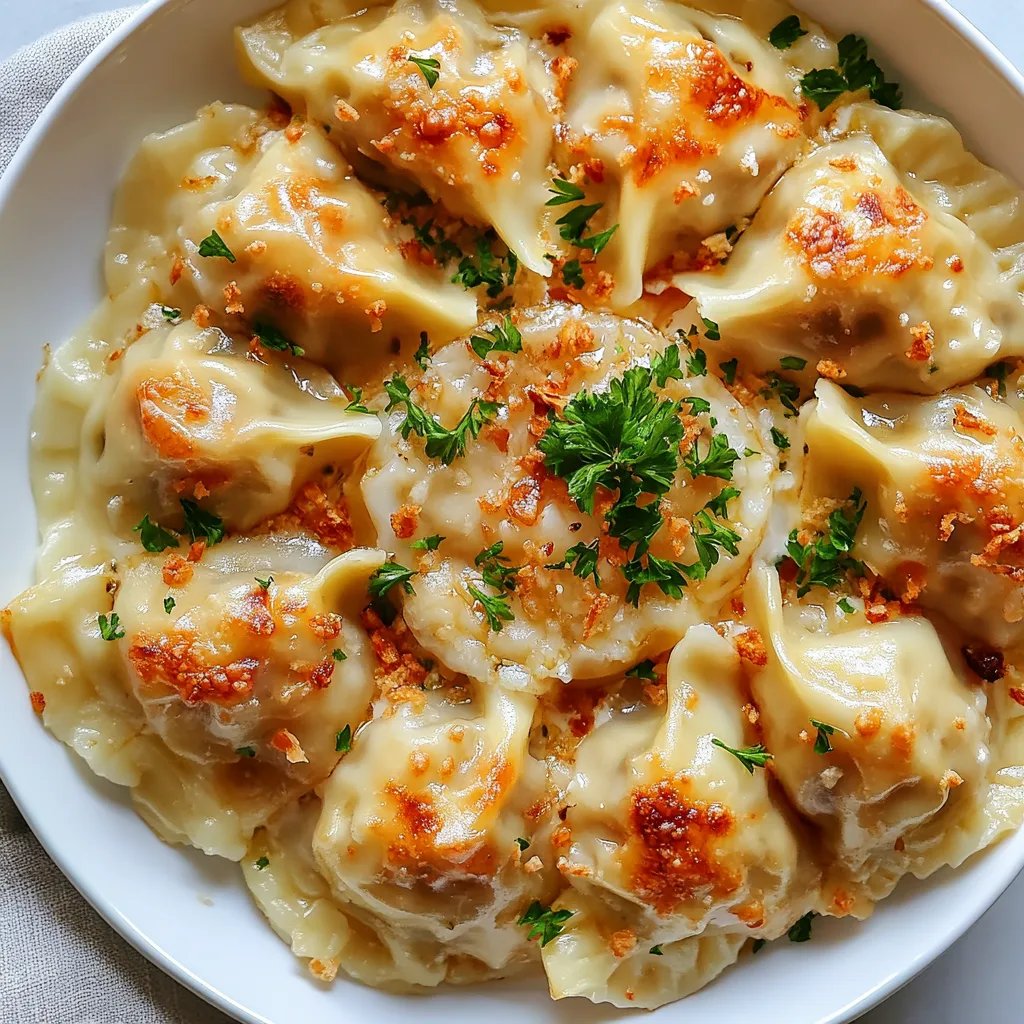
    This Dumpling Bake transforms ordinary ingredients into a soul-warming masterpiece that’s perfect for those evenings when you crave something hearty yet comforting. I discovered this recipe during a particularly chilly autumn weekend when my kitchen became my sanctuary. The way the golden crust forms over those pillowy dumplings while the savory filling bubbles underneath—it’s pure magic! My family now requests this dish whenever the temperature drops, and I’m always happy to oblige. If you love dishes that combine simplicity with impressive results, this one’s about to become your new favorite comfort food.

    Recipe

    Why You’ll Love This Dumpling Bake

    Perfect Comfort Food for Any Season

    There’s something undeniably magical about the way dumplings transform a simple stew into something extraordinary. The tender dumplings absorb all those rich flavors while creating a beautiful textural contrast that’s simply irresistible. I love how they puff up during baking, creating little clouds of doughy goodness that float atop the savory base. On cold evenings, this dish wraps around you like a warm hug, but it’s equally welcome during summer when paired with a crisp salad. The aroma alone as it bakes will have everyone gravitating toward your kitchen!

    Quick Prep with Impressive Results

    One of my favorite things about this Dumpling Bake is how it delivers restaurant-quality results with minimal effort. The prep-to-wow ratio is off the charts! You can assemble everything in about 20 minutes, then let your oven do the heavy lifting. I’ve served this at impromptu dinner parties and received more compliments than dishes that took three times as long. The way the top browns to a perfect golden hue while keeping the dumplings tender underneath creates that professional finish that makes guests think you’ve been cooking all day. It’s my secret weapon for busy weeknights!

    Essential Tips & Tricks

    Mastering the Dumpling Consistency

    Getting your dumpling batter to the perfect consistency is the key to this dish’s success. You’re looking for something that’s thick enough to hold its shape when dropped onto the hot filling, but not so dense that it becomes heavy or doughy. I always use a light touch when mixing—just until the ingredients come together. Over-mixing activates too much gluten and leads to tough dumplings. My foolproof test: the batter should slowly drop from your spoon in a thick ribbon. If it’s runny, add a tablespoon more flour; if it’s too stiff, a splash of milk works wonders. Trust your instincts here!

    Creating the Perfect Base Layer

    The foundation of any great Dumpling Bake lies in its base layer, which needs to have the right balance of flavor and moisture. I learned through trial and error that the filling should be slightly thinner than you might think—those dumplings will absorb liquid as they cook! For maximum flavor, don’t rush the initial sautéing of aromatics. Those extra few minutes developing flavor in your onions and garlic make a world of difference. For a truly spectacular Dumpling Bake, deglaze your pan with a splash of white wine or broth to lift all those delicious browned bits before adding the remaining ingredients.

    Serving Ideas & Creative Variations

    Seasonal Pairings That Elevate the Dish

    This Dumpling Bake shines brightest when paired with simple, complementary sides that balance its richness. During winter months, I love serving it with roasted root vegetables tossed in herbs and olive oil. The slight sweetness and caramelization create a perfect contrast. In warmer seasons, a bright, acidic salad with citrus vinaigrette cuts through the richness beautifully. My family particularly loves when I pair it with Kickin’ Collard Greens for a complete meal that satisfies every craving. Don’t forget a crusty bread for sopping up those incredible juices!

    International Flavor Twists

    One of the joys of this Dumpling Bake is how adaptable it is to different flavor profiles. I’ve created Mediterranean-inspired versions using oregano, lemon zest, and feta in the dumplings, served over a tomato and olive base. For Asian flair, try adding ginger, garlic, and scallions to your dumplings, then serve them over a miso-enriched broth with mushrooms. My personal favorite variation includes fresh herbs and Gruyère cheese in the dumplings, paired with a white wine and leek base. The possibilities are truly endless, making this recipe one you can reinvent countless times without boring your taste buds!

    Storage & Troubleshooting Guide

    Proper Storage for Leftovers

    Storing your Dumpling Bake properly ensures those leftovers remain just as delicious the next day. Allow the dish to cool completely before transferring to airtight containers. The dumplings will continue absorbing liquid as they sit, so I sometimes add a tiny splash of broth when reheating to maintain that perfect consistency. Refrigerated leftovers stay fresh for up to 3 days. For longer storage, portion the bake into freezer-safe containers, leaving some headspace for expansion. When reheating from frozen, I find it’s best to thaw overnight in the refrigerator first, then warm gently in a 325°F oven until heated through.

    Fixing Common Dumpling Issues

    Even experienced cooks occasionally encounter dumpling challenges, but most are easily fixed. If your dumplings seem too dense, you likely over-mixed the batter or used too much flour. Next time, use a lighter touch and remember that a few lumps are actually good! Dumplings that dissolve into the filling usually indicate too much liquid in your batter. To rescue a batch that’s too wet, gently drop spoonfuls onto parchment paper first, then transfer them to your hot filling. If your dumplings aren’t cooking through completely, ensure your filling is bubbling hot before adding them, and consider covering the dish for the first half of baking.

    Frequently Asked Questions

    Can I make this Dumpling Bake ahead of time?

    You can prepare the filling up to 2 days ahead and refrigerate it. When ready to serve, reheat the filling until bubbling, then make fresh dumplings and continue with the recipe. The dumplings are best made just before baking.

    What’s the secret to fluffy dumplings?

    The key is using cold ingredients, minimal mixing, and not peeking while they cook! Over-handling activates gluten and makes tough dumplings. Keep your touch light and let them steam undisturbed.

    Can I make a gluten-free Dumpling Bake?

    Absolutely! Substitute a good quality gluten-free flour blend with xanthan gum. Add 1/4 teaspoon baking powder extra to help them rise, as gluten-free flours need that additional lift.

    How do I know when my Dumpling Bake is done?

    Insert a toothpick into the center of a dumpling—it should come out clean with no wet batter. The top should be golden brown and the filling bubbling around the edges.

    Why did my dumplings sink to the bottom?

    This typically happens when the filling isn’t hot enough when adding the dumplings. Always ensure your base is bubbling hot, and your dumplings are the right consistency—not too wet or heavy.

    Final Thoughts

    This Dumpling Bake has become more than just a recipe in my household—it’s a tradition that signals comfort and togetherness. There’s something magical about watching those simple ingredients transform into something so satisfying. Whether you’re making it for a quiet family dinner or a gathering of friends, the joy it brings to the table is undeniable. I encourage you to make this Dumpling Bake your own by experimenting with flavors that speak to your palate. And don’t forget to share your creations on Pinterest to inspire others on their culinary journey!

  • Cajun Potato Soup: Irresistibly Creamy & Spicy Comfort in Every Spoon!

    Cajun Potato Soup: Irresistibly Creamy & Spicy Comfort in Every Spoon!

    Cajun Potato Soup: Irresistibly Creamy & Spicy Comfort in Every Spoon!

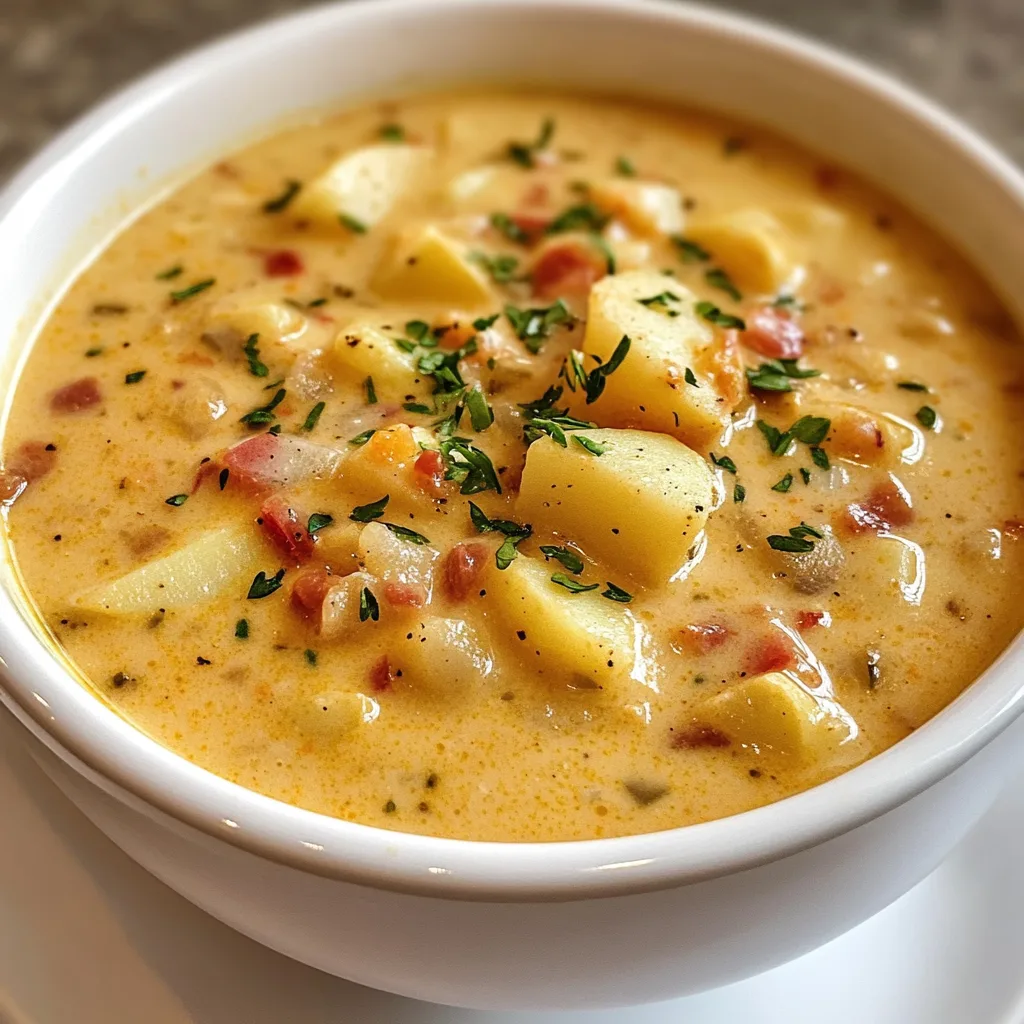
    Cajun Potato Soup has become my ultimate comfort food rescue on those evenings when the wind howls outside and all I want is something warm and substantial. The first time I made this soup, I was snowed in at my sister’s cabin in Vermont. With limited ingredients but plenty of potatoes and Cajun seasoning, I created what has since become a family favorite. This hearty, spice-infused creation strikes the perfect balance between creamy and chunky, with tender potatoes swimming in a rich, flavorful broth that warms you from the inside out. Let me show you how to bring a taste of Louisiana comfort to your dinner table with this soul-warming recipe.

    Recipe

    Why You’ll Love This Cajun Potato Soup

    Perfect Balance of Comfort and Spice

    There’s something magical about the way Cajun seasoning transforms an ordinary potato soup into something extraordinary. The blend of paprika, oregano, thyme, and cayenne creates layers of flavor that develop as the soup simmers. What I adore most is how customizable the spice level is—add more cayenne for heat lovers or dial it back for sensitive palates. The velvety texture comes from the perfect marriage of cream and potato starch, creating a soup that’s substantial enough to be a meal on its own but doesn’t weigh you down like some cream-based soups can.

    Quick Weeknight Wonder

    On busy weeknights when cooking feels like a chore, this Cajun Potato Soup comes to the rescue. Most ingredients are pantry staples, and the active prep time is just 15 minutes. I’ve made this countless times when friends drop by unexpectedly—they always think I’ve been cooking all day! The soup develops incredible depth of flavor quickly, unlike many soups that need hours to taste their best. Plus, it’s a one-pot wonder that minimizes cleanup, which is always a win in my book. Perfect for those evenings when you want something homemade but are short on time.

    Essential Tips & Tricks

    Potato Selection Matters

    The foundation of any great potato soup is, obviously, the potatoes themselves. I’ve experimented with every variety and found that Yukon Golds offer the perfect balance—they hold their shape while still breaking down enough to thicken the soup naturally. If you prefer a chunkier texture, red potatoes work beautifully as they maintain their structure. For a truly silky soup, russets will break down more completely. Whatever you choose, cut them into uniform pieces (about 3/4-inch cubes) so they cook evenly. This simple step makes a remarkable difference in the final texture of your Cajun Potato Soup.

    Building Flavor Foundations

    The secret to an exceptional Cajun Potato Soup lies in the flavor foundation. Always start by sautéing your aromatics—onions, celery, and bell peppers (the Cajun holy trinity)—until they’re soft and fragrant. This process, which takes just 5-7 minutes, releases their essential oils and creates the base notes that will carry through the entire dish. Don’t rush this step! Another game-changer is using chicken stock instead of water for a richer flavor profile. For an extra depth, add a splash of white wine to deglaze the pan after sautéing the vegetables—it lifts all those caramelized bits from the bottom of the pot.

    Serving Ideas & Creative Variations

    Perfect Pairings

    Serve your steaming bowl of Cajun Potato Soup with a chunk of crusty French bread or buttery cornbread for the ultimate comfort meal. For a lighter option, a simple side salad with vinaigrette balances the richness perfectly. My personal favorite way to serve this soup is in bread bowls—there’s something magical about soaking up the last bits of soup with edible dishware! For a complete Louisiana-inspired meal, pair it with a small portion of dirty rice or a simple shrimp remoulade. These combinations turn an already delicious soup into a memorable dining experience.

    Make It Your Own

    The beauty of this Cajun Potato Soup is its versatility. For a heartier version, add andouille sausage, shredded chicken, or crawfish tails during the last few minutes of cooking. Vegetarians can substitute vegetable broth and add extra bell peppers, corn, or even black beans. My neighbor makes a dairy-free version using coconut milk instead of cream, which adds a subtle sweetness that works surprisingly well with the Cajun spices. For a twist, stir in a handful of chopped kale or spinach just before serving for color, texture, and added nutrition.

    Storage & Troubleshooting Guide

    Proper Storage Techniques

    Cajun Potato Soup actually improves with time as the flavors meld together. Store leftovers in an airtight container in the refrigerator for up to 4 days. When reheating, do so gently over medium-low heat, stirring occasionally to prevent scorching. The soup will thicken considerably when chilled, so you may need to add a splash of broth or milk when reheating. For longer storage, this soup freezes beautifully for up to 3 months—just omit the cream and add it fresh when reheating. I like to freeze individual portions in silicone muffin trays for quick single servings.

    Fixing Common Issues

    If your soup becomes too thick, simply thin it with additional broth or milk until you reach your desired consistency. Conversely, if it’s too thin, create a slurry with a tablespoon of cornstarch mixed with cold water and stir it into the simmering soup. For soup that lacks flavor, a splash of hot sauce, a squeeze of lemon juice, or an extra pinch of salt can work wonders to brighten the taste. If you’ve accidentally made it too spicy, add a dollop of sour cream or a splash of cream to mellow the heat without compromising the rich flavor profile.

    Frequently Asked Questions

    Can I make Cajun Potato Soup in a slow cooker?

    Absolutely! Add all ingredients except cream to your slow cooker. Cook on low for 6-7 hours or high for 3-4 hours. Stir in cream during the last 30 minutes of cooking for a hands-off approach that’s perfect for busy days.

    What can I substitute for Cajun seasoning?

    Make your own by combining paprika, garlic powder, onion powder, thyme, oregano, cayenne, salt, and black pepper. Creole seasoning works as a direct substitute, though it typically has a slightly different herb balance.

    How do I make this soup vegetarian?

    Use vegetable broth instead of chicken stock and omit any meat. Add extra vegetables like corn, bell peppers, or mushrooms for substance. The Cajun flavors work beautifully with plant-based ingredients.

    Can I prepare this soup ahead for a party?

    Definitely! Make it 1-2 days ahead, stopping before adding cream. Refrigerate, then reheat gently and add cream just before serving. The flavors actually improve with time.

    Is Cajun Potato Soup gluten-free?

    Most versions are naturally gluten-free, but always check your Cajun seasoning and broth labels for hidden gluten. Use cornstarch instead of flour if you need to thicken the soup.

    Final Thoughts

    This Cajun Potato Soup has become my go-to recipe when I need comfort with a kick. There’s something magical about how simple ingredients transform into something so satisfying and complex-tasting. Whether you’re cooking for a crowd or just treating yourself after a long day, this soup delivers warmth and flavor in every spoonful. I’d love to see your versions on Pinterest – tag me in your creations! Remember, cooking is about making something that brings joy to your table, so don’t hesitate to adjust this recipe to suit your taste preferences.