Author: Sara Maren

  • Crispy Homemade Chicken Spring Rolls: Irresistibly Crunchy & Juicy!

    Crispy Homemade Chicken Spring Rolls: Irresistibly Crunchy & Juicy!

    Crispy Homemade Chicken Spring Rolls: Irresistibly Crunchy & Juicy!

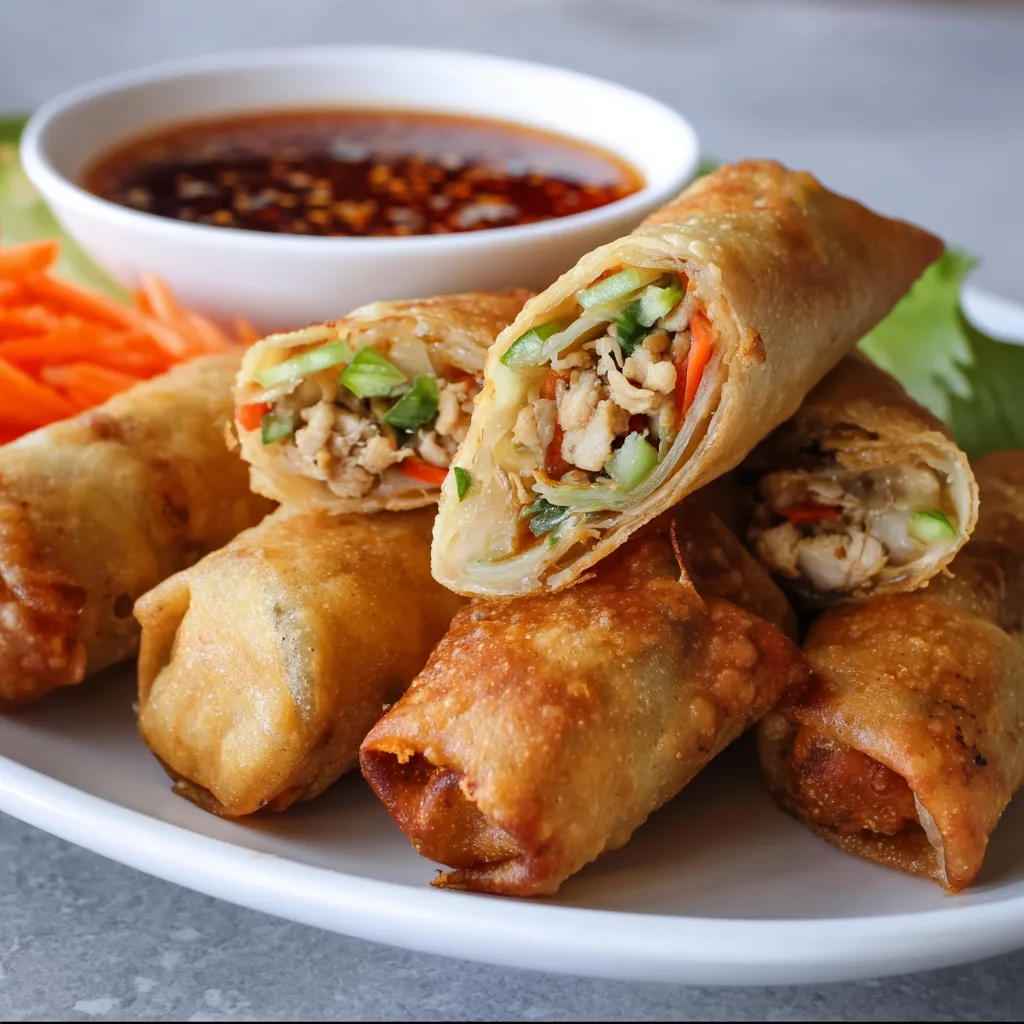
    Crispy Homemade Chicken Spring Rolls are the ultimate crowd-pleaser that brings restaurant-quality appetizers right to your kitchen. The moment that golden, crackling wrapper meets your lips, releasing a burst of savory chicken and vegetable filling – pure magic! I discovered my love for making these at home during a rainy weekend when takeout wasn’t an option. Now they’ve become my go-to for everything from casual family dinners to fancy gatherings. The best part? You can customize them endlessly while mastering a technique that will make you feel like a culinary rock star. Let’s dive into this irresistible recipe!

    Recipe

    Why You’ll Love These Crispy Homemade Chicken Spring Rolls

    Perfect Texture Combination

    The contrast of textures is what makes these spring rolls absolutely irresistible. The wrappers transform into a shatteringly crisp shell while protecting the juicy, tender chicken filling inside. I love hearing that distinctive crunch when someone takes their first bite! The vegetables maintain just enough bite to add freshness and structure. When you achieve that perfect golden-brown exterior – not too dark, not too pale – you’ll feel a little surge of pride. Trust me, that moment when you slice one open to reveal the colorful filling is pure kitchen satisfaction.

    Make-Ahead Convenience

    These spring rolls are a meal-prep dream come true. You can prepare the filling up to two days ahead and store it in the refrigerator, making assembly a breeze when you’re ready. I often roll them all in the morning, refrigerate them covered with a damp paper towel, then fry just before serving. The uncooked rolls even freeze beautifully for up to three months – just add an extra minute to the cooking time. This flexibility has saved me countless times when unexpected guests arrive or when I’m too exhausted to start cooking from scratch.

    Essential Tips & Tricks

    Wrapper Mastery

    Handling spring roll wrappers requires a gentle touch and a few key techniques. Always keep unused wrappers covered with a damp cloth to prevent them from drying out and cracking. When rolling, fold firmly but not too tight – you want to avoid tearing while ensuring no air pockets remain that could cause them to burst during frying. I learned the hard way that overstuffing leads to disaster! For the perfect seal, dab a little beaten egg or cornstarch slurry along the final edge. This creates a foolproof bond that won’t unravel in hot oil, giving you that professional finish every time.

    Oil Temperature Control

    The secret to perfectly crispy spring rolls without greasiness lies in maintaining the right oil temperature. Use a thermometer to keep your oil between 350-375°F (175-190°C). Too cool, and they’ll absorb excess oil and become soggy; too hot, and they’ll brown before the filling cooks through. Work in small batches – overcrowding the pan causes temperature drops. I always test with one roll first, adjusting as needed. After frying, drain them on a wire rack set over paper towels, not directly on paper, which traps steam and softens that beautiful crisp exterior you worked so hard to achieve.

    Serving Ideas & Creative Variations

    Dipping Sauce Pairings

    The right dipping sauce elevates these spring rolls from delicious to unforgettable. Classic sweet chili sauce offers the perfect balance of sweet and spicy, while a tangy nuoc cham (Vietnamese dipping sauce) brings bright citrus notes that cut through the richness. For something creamy, try a peanut sauce with a hint of lime and sriracha. I love setting up a little dipping station with 2-3 options in small bowls. My family’s favorite is a quick sauce I make with soy sauce, rice vinegar, a touch of honey, and toasted sesame oil. These sauces also pair beautifully with Asian Garlic Shrimp for a complete feast.

    Filling Variations

    While the classic chicken filling is fantastic, don’t be afraid to experiment with alternatives. Swap the chicken for ground pork with a touch of five-spice powder, or try shrimp chopped into small pieces with some minced lemongrass. For vegetarian options, crumbled tofu seasoned well works beautifully, as does a mushroom medley with glass noodles. Add unexpected elements like diced water chestnuts for crunch or kimchi for a spicy Korean twist. My personal favorite variation includes a bit of cream cheese mixed into the filling – it creates pockets of creamy richness that contrast wonderfully with the crisp exterior.

    Storage & Troubleshooting Guide

    Keeping Them Crispy

    Maintaining that signature crispness is the biggest challenge with leftovers. For best results, cool completely before storing in a container lined with paper towels, with additional paper towels between layers. Refrigerate for up to 3 days. To reheat, avoid the microwave, which will make them soggy. Instead, place them on a wire rack in a 350°F (175°C) oven for 8-10 minutes until heated through and crisp again. If you’re serving them at a party, keep freshly fried rolls warm in a 200°F (95°C) oven on a wire rack, but serve within an hour for optimal texture.

    Fixing Common Problems

    Even experienced cooks encounter spring roll challenges. If your rolls are splitting during frying, your oil is likely too hot or you’ve overfilled them. If they’re browning unevenly, they may be touching in the pan – ensure they have space to float freely. Soggy rolls usually mean the oil temperature was too low or they weren’t drained properly. If your filling is watery, try pre-cooking vegetables longer to remove excess moisture and always cool filling completely before rolling. When wrappers tear during rolling, they’re either too dry (mist with water) or you’re handling them too roughly.

    Frequently Asked Questions

    Can I bake these Crispy Homemade Chicken Spring Rolls instead of frying?

    Yes! Brush them lightly with oil and bake at 425°F (220°C) for 15-20 minutes, turning halfway through. They won’t be quite as crispy as fried, but still delicious with significantly less oil.

    How do I prevent my spring rolls from becoming soggy?

    Ensure your filling is cool and not watery before rolling. Drain cooked vegetables well and pat dry if needed. Fry at the correct temperature (350-375°F) and drain on a wire rack, not directly on paper towels.

    Can I make these ahead for a party?

    Absolutely! Roll them up to 24 hours ahead and refrigerate uncooked, covered with a damp cloth. You can also fry them 2-3 hours before serving and reheat in a 350°F oven for 8-10 minutes.

    What’s the best oil for frying spring rolls?

    Use a neutral oil with a high smoke point like vegetable, canola, or peanut oil. These oils won’t impart strong flavors and can withstand the high temperatures needed for crispy results.

    How fine should I chop the filling ingredients?

    Aim for small, uniform pieces (about ¼-inch dice) for even cooking and easy rolling. Large chunks can tear the wrapper and make rolling difficult.

    Final Thoughts

    These Crispy Homemade Chicken Spring Rolls have become my signature appetizer for good reason – they’re impressive yet approachable, and the process of making them is almost as enjoyable as eating them. There’s something deeply satisfying about creating these golden, crunchy parcels from scratch and watching friends’ faces light up at first bite. Whether you’re making them for a special occasion or a cozy night in, they bring that perfect blend of restaurant quality with homemade love. Be sure to check out more appetizer inspiration on Pinterest and prepare to add this recipe to your regular rotation!

  • Irish Bangers & Mash Cups: Irresistible Comfort Food Bites!

    Irish Bangers & Mash Cups: Irresistible Comfort Food Bites!

    Irish Bangers & Mash Cups: Irresistible Comfort Food Bites!

    Irish Bangers & Mash Cups transform the beloved pub classic into adorable, portable bites perfect for entertaining! These delightful little cups feature savory sausage nestled in creamy mashed potatoes and baked until golden. The first time I made these for a St. Patrick’s Day gathering, my guests couldn’t stop raving about them. There’s something magical about how the edges of the mashed potatoes get slightly crispy while the centers stay velvety smooth. If you love traditional comfort food with a twist, these Irish Bangers & Mash Cups will quickly become your new favorite party appetizer.

    Recipe

    Why You’ll Love These Irish Bangers & Mash Cups

    Perfect Portable Comfort Food

    These little cups deliver all the cozy satisfaction of traditional bangers and mash in a convenient, handheld format. I adore how they solve the classic problem of serving mashed potatoes at parties—no more awkward balancing acts with plates! Each bite offers the perfect ratio of creamy potatoes to savory sausage, and the slight crispness around the edges adds a textural element you don’t get with the traditional version. Plus, they’re substantial enough to be filling without weighing guests down.

    Make-Ahead Friendly for Entertaining

    One of my favorite things about these Irish Bangers & Mash Cups is their party-perfect timing. You can prep nearly everything in advance—cook and crumble the sausage, prepare the mashed potatoes, and even assemble the cups in muffin tins. Simply refrigerate until about 25 minutes before serving, then pop them in the oven. This make-ahead magic means I can actually enjoy my own gatherings instead of being stuck in the kitchen! The cups reheat beautifully, maintaining their creamy centers and crispy edges.

    Essential Tips & Tricks

    Choosing the Right Ingredients

    The secret to exceptional Irish Bangers & Mash Cups lies in quality ingredients. Use authentic Irish sausages if possible—they contain a distinctive blend of seasonings and have that signature snap when you bite into them. For the mashed potatoes, Yukon Golds create the creamiest texture, but russets work beautifully too. Don’t skimp on butter and a splash of cream! For an extra flavor boost, fold some caramelized onions into your mash, similar to what I do in my Garlic Butter Parmesan Knots recipe for that extra depth of flavor.

    Perfecting the Texture

    The key to the perfect cup structure is achieving the right potato consistency. Too loose, and your cups won’t hold their shape; too stiff, and they’ll be dense and heavy. Add an egg to your mashed potatoes—it helps them set while baking without drying out. For the sausage filling, a medium crumble works best. Too fine, and you lose the meaty texture; too chunky, and the cups become difficult to eat. A light sprinkle of cheese on top creates that irresistible golden crust that makes everyone reach for seconds.

    Serving Ideas & Creative Variations

    Complementary Sides and Sauces

    These Irish Bangers & Mash Cups pair beautifully with tangy accompaniments that cut through their richness. I love serving them with a small dish of grainy mustard or a quick onion gravy for dipping. For a complete meal, add a simple green salad with a light vinaigrette or some roasted Brussels sprouts. The slight bitterness of the vegetables balances the savory cups perfectly. For a truly Irish-inspired spread, serve alongside some Corn Fritters with Whipped Feta for a delightful contrast in flavors and textures.

    Exciting Flavor Twists

    While traditional is delicious, these cups welcome creative adaptations. Try incorporating different cheese varieties—sharp cheddar, smoked gouda, or blue cheese all add wonderful complexity. For a breakfast version, use breakfast sausage and fold some scrambled eggs into the potato mixture. Vegetarian guests? Substitute the meat with sautéed mushrooms and leeks. I’ve even made a spicy version with chorizo and pepper jack cheese that disappeared in minutes at my last gathering! The versatility of this recipe makes it perfect for customizing to your taste preferences.

    Storage & Troubleshooting Guide

    Proper Storage Methods

    These Irish Bangers & Mash Cups maintain their delicious quality remarkably well when stored properly. Refrigerate leftovers in an airtight container for up to 3 days. For best results when reheating, avoid the microwave which can make them soggy. Instead, place them on a baking sheet in a 350°F oven for about 10 minutes until heated through. You can also freeze the baked cups for up to 2 months—simply wrap individually in plastic wrap, then foil, and store in a freezer bag. Thaw overnight in the refrigerator before reheating.

    Common Issues and Solutions

    If your cups aren’t holding their shape, the potato mixture is likely too wet. The fix? Chill assembled cups in the muffin tin for 15-20 minutes before baking to help them set. Brown edges but cold centers? Your oven temperature may be too high—try reducing by 25°F and baking slightly longer. For cups that stick to the pan, be generous with the non-stick spray or butter before adding the potato mixture. And if your cups seem bland, remember that potatoes need plenty of seasoning—don’t be shy with salt, pepper, and herbs!

    Frequently Asked Questions

    What are the best sausages to use for Irish Bangers & Mash Cups?

    Traditional Irish bangers or Cumberland sausages work best. If unavailable, any high-quality pork sausage with minimal fillers will create delicious results. Remove casings before cooking for easier integration into the cups.

    Can I make these Irish Bangers & Mash Cups vegetarian?

    Absolutely! Substitute the sausage with a plant-based alternative or sautéed mushrooms seasoned with sage and thyme. The cups will still be delicious and satisfying.

    How far in advance can I prepare these for a party?

    You can assemble the cups up to 24 hours ahead and refrigerate. Add an extra 5-7 minutes to the baking time if cooking directly from the refrigerator.

    Why are my cups falling apart when removed from the pan?

    Allow the cups to cool for 5 minutes before attempting to remove them. This cooling period helps them set properly and maintain their structure.

    Can I use leftover mashed potatoes for this recipe?

    Yes! Leftover mashed potatoes work wonderfully. Just bring to room temperature, add an egg to help binding, and proceed with the recipe as directed.

    Final Thoughts

    These Irish Bangers & Mash Cups have become my go-to recipe whenever I want to impress guests without spending hours in the kitchen. The combination of crispy-edged potatoes and savory sausage creates an irresistible bite that everyone loves. What makes them truly special is how they transform a humble pub classic into an elegant, portable treat. Whether for St. Patrick’s Day celebrations or casual gatherings, these little cups bring comfort and joy to any table. Don’t forget to check out more festive ideas on Pinterest for your next Irish-inspired feast!

  • Chicken & Sweet Potato Rice Bowl: Irresistible Comfort Food You’ll Crave!

    Chicken & Sweet Potato Rice Bowl: Irresistible Comfort Food You’ll Crave!

    Chicken & Sweet Potato Rice Bowl: Irresistible Comfort Food You’ll Crave!

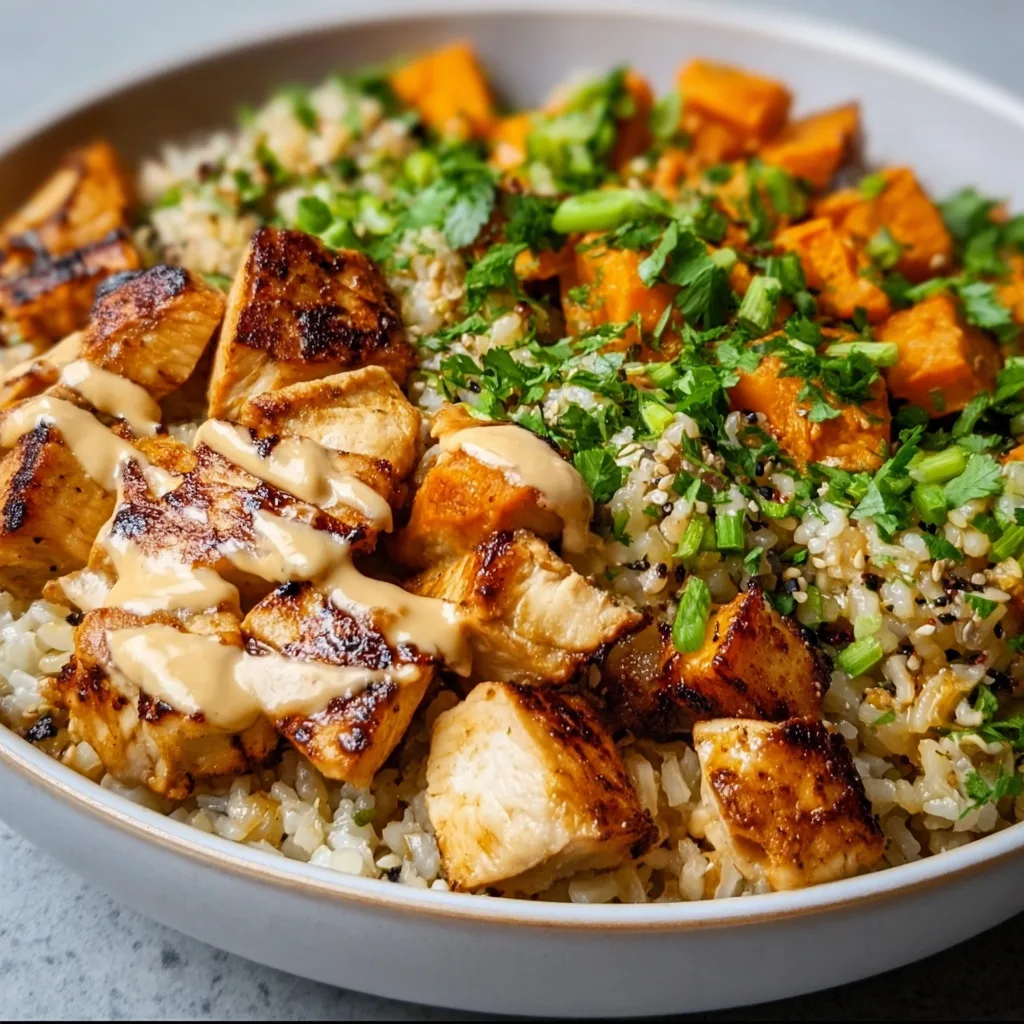
    The Chicken & Sweet Potato Rice Bowl has become my ultimate weeknight savior—a colorful harmony of tender chicken, caramelized sweet potatoes, and fluffy rice that feels like a warm hug in a bowl. I first created this recipe during a particularly hectic week when I needed something nourishing but didn’t have time for complicated cooking. The sweet-savory balance hits just right, with a gentle kick from the spices that transforms simple ingredients into something truly special. If you’re looking for a complete meal that delivers on both comfort and nutrition, this bowl has your name written all over it, much like my Parmesan Garlic Rice but with a protein-packed twist.

    Recipe

    Why You’ll Love This Chicken & Sweet Potato Rice Bowl

    Perfect Balance of Flavors and Textures

    The magic of this Chicken & Sweet Potato Rice Bowl lies in its contrasting textures—tender chunks of chicken against slightly crispy sweet potatoes, all nestled on a bed of fluffy rice. I love how the natural sweetness of the potatoes plays against the savory seasonings on the chicken. The slight char on the sweet potatoes adds a caramelized depth that elevates the entire dish. When you get that perfect bite with all the components together, it’s like a symphony of flavors that somehow manages to be both comforting and exciting at the same time.

    Meal-Prep Champion

    This bowl has saved my sanity during busy weeks as it’s a meal-prep superstar. I can prepare a batch on Sunday, portion it into containers, and have satisfying lunches ready to go. The flavors actually develop beautifully overnight, making day two and three even tastier than the first. What I particularly appreciate is how the components maintain their distinct textures even after refrigeration—the sweet potatoes don’t turn mushy, and the chicken stays juicy. It’s rare to find a meal that reheats this beautifully.

    Essential Tips & Tricks

    Perfecting Your Sweet Potatoes

    The key to exceptional sweet potatoes is giving them enough space on the baking sheet—overcrowding is the enemy of caramelization. I learned this the hard way after years of impatient cooking! Make sure to cut them into uniform cubes (about 3/4-inch works perfectly) so they cook evenly. A drizzle of maple syrup in the last five minutes of roasting creates an irresistible glaze that elevates the entire dish. The slight char on the edges provides that perfect textural contrast against the tender chicken and soft rice.

    Chicken Cooking Technique

    For juicy, flavorful chicken every time, I’ve found that a quick marinade (even just 15 minutes) makes all the difference. A simple mix of olive oil, garlic, smoked paprika, and a touch of cumin creates depth without overwhelming the dish. Rather than stirring constantly, let the chicken pieces develop a golden crust by leaving them undisturbed for the first few minutes in the pan. This technique, which I also use in my Chicken Fajita Casserole, creates those delicious caramelized bits that carry so much flavor.

    Serving Ideas & Creative Variations

    Family-Style Presentation

    Serving this Chicken & Sweet Potato Rice Bowl family-style creates an impressive presentation that encourages everyone to customize their portions. I arrange the components in sections over the rice on a large platter, then surround it with small bowls of toppings—think sliced avocado, cilantro, lime wedges, and perhaps some crumbled feta. This approach transforms a simple meal into an interactive dining experience. My kids love building their own bowls, and I’ve noticed they’re more likely to try everything when presented this way.

    Global Flavor Variations

    The beauty of this bowl is how easily it adapts to different flavor profiles. For a Mediterranean twist, swap the spices for oregano and lemon zest, then top with olives and feta. An Asian-inspired version works wonderfully with ginger, garlic, and soy sauce on the chicken, finished with sesame seeds and green onions. My personal favorite variation uses a Korean BBQ inspired marinade on the chicken with a sprinkle of toasted sesame seeds—the sweet-savory balance with the sweet potatoes is absolutely divine.

    Storage & Troubleshooting Guide

    Perfect Meal Prep Containers

    For optimal storage, invest in divided containers that keep components separate until serving time. This prevents the rice from absorbing too much moisture from the other ingredients. Cool everything completely before refrigerating to prevent condensation that could make your rice soggy. When reheating, sprinkle a few drops of water over the rice before microwaving, and add fresh toppings like avocado or cilantro after heating for the best texture contrast and brightest flavors.

    Rescuing Common Issues

    If your sweet potatoes turned out too soft, transform them into a quick mash to create a base layer under the rice—this happy accident often becomes a family favorite! For dry chicken, a quick sauce drizzled over the top works wonders—mix Greek yogurt with lime juice and a touch of honey for a tangy finish. If your rice clumps together after refrigeration, a fork fluffing with a splash of broth while reheating will revive its texture. These simple fixes have saved many meal-prep batches in my kitchen.

    Frequently Asked Questions

    Can I make this Chicken & Sweet Potato Rice Bowl ahead of time?

    Absolutely! Prepare all components up to 3 days ahead. Store separately in airtight containers and assemble just before serving for the freshest experience. The flavors actually develop nicely over time.

    What’s the best rice to use for this recipe?

    Jasmine or basmati rice works beautifully for their fragrance and fluffiness. Brown rice adds a nutty flavor and extra fiber, though you’ll need to adjust cooking time accordingly.

    Can I substitute the chicken with something else?

    Definitely! Try firm tofu, shrimp, or chickpeas for delicious alternatives. Just adjust cooking times—shrimp cooks in minutes, while chickpeas just need warming through.

    How do I prevent the sweet potatoes from getting mushy?

    Roast at high heat (425°F) and don’t overcrowd the pan. The space allows moisture to evaporate, creating caramelization instead of steaming.

    What’s the best way to reheat leftover Chicken & Sweet Potato Rice Bowl?

    Microwave with a damp paper towel over the bowl for 1-2 minutes. This creates steam that revives the rice without drying out the chicken.

    Final Thoughts

    This Chicken & Sweet Potato Rice Bowl has become more than just a recipe in my household—it’s a reliable solution for those nights when I want something nutritious yet comforting. The balance of protein, complex carbs, and vibrant flavors makes it satisfying in a way that few simple dishes achieve. I find myself returning to it season after season, tweaking the spices and toppings to match my mood. Whether you’re meal prepping for a busy week or serving a casual dinner, this bowl delivers both nourishment and joy in equal measure. Find more of my favorite bowl recipes on Pinterest.

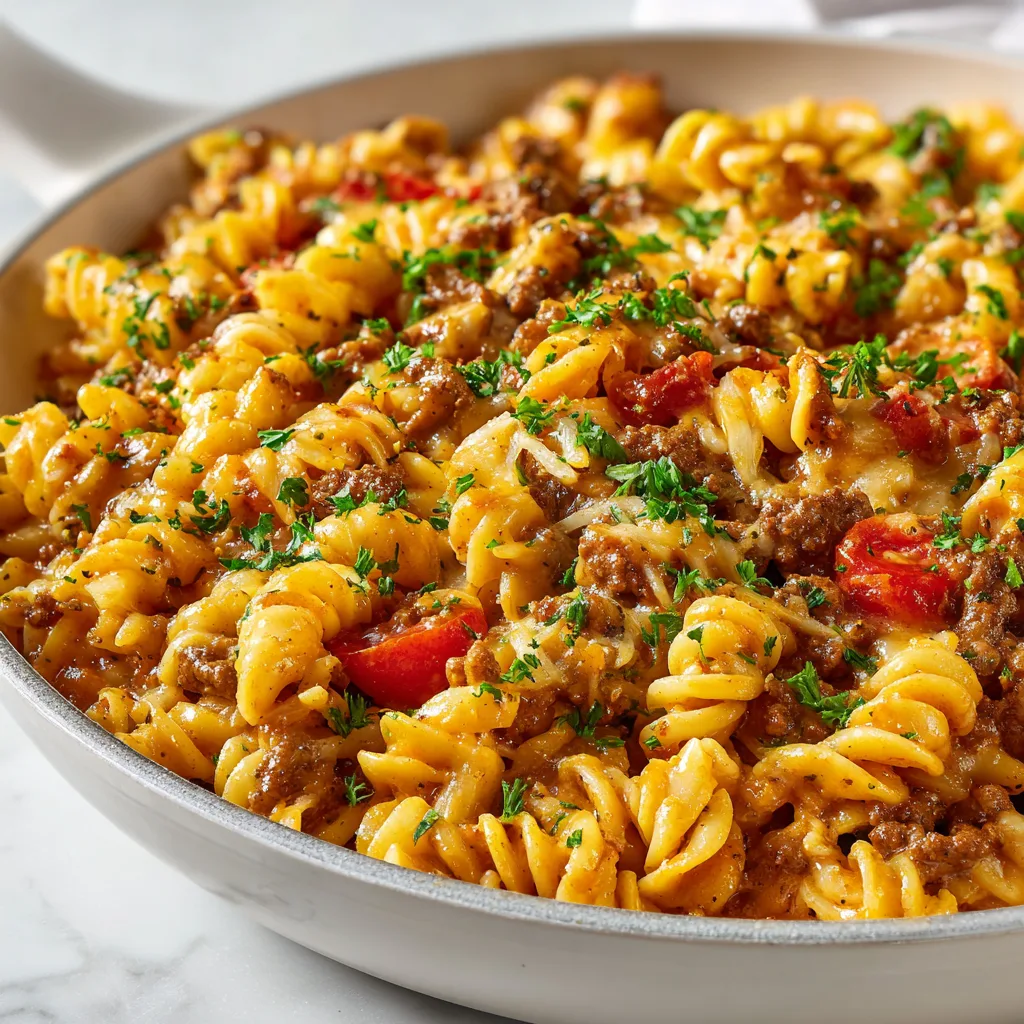
  • Cheeseburger Pasta Skillet: Irresistibly Easy Comfort Food Delight

    Cheeseburger Pasta Skillet: Irresistibly Easy Comfort Food Delight

    Cheeseburger Pasta Skillet: Irresistibly Easy Comfort Food Delight

    Cheeseburger pasta skillet combines two comfort food favorites into one irresistible meal that’s ready in under 30 minutes. The first time I made this dish, my kitchen filled with the savory aroma of seasoned beef and melting cheese, instantly transporting me back to family dinners where we’d gather around sizzling skillets of goodness. There’s something magical about the way pasta soaks up all those juicy burger flavors, creating a dish that satisfies both pasta lovers and burger enthusiasts alike. If you’re looking for a weeknight dinner that brings smiles to the table, this creamy one-pot wonder deserves a permanent spot in your recipe collection.

    Recipe

    Why You’ll Love This Cheeseburger Pasta Skillet

    Perfect One-Pot Convenience

    This cheeseburger pasta skillet truly shines in its simplicity. Everything cooks in a single pan, which means minimal cleanup afterward—music to my ears after a long day! The pasta cooks directly in the seasoned beef broth, absorbing all those rich flavors while creating a naturally creamy sauce. I still remember the first time I made this for my sister who hates doing dishes; her eyes lit up not just from the delicious taste but when she realized there was only one pan to wash. The convenience factor alone makes this recipe worth its weight in gold for busy weeknights when you want something hearty without the hassle.

    Family-Friendly Flavor Profile

    If you’re cooking for picky eaters, this cheeseburger pasta skillet is your new secret weapon. The familiar burger flavors transform ordinary pasta into something extraordinary that even the most selective family members will devour. My nephew, who normally picks around vegetables, happily gobbles this up—even with diced onions and tomatoes mixed in! The melted cheese creates that gooey, comforting texture kids love, while the seasoned beef provides the satisfying richness adults crave. It’s that rare unicorn of a recipe that bridges the gap between sophisticated flavor and kid-approved comfort food, making dinner time peaceful instead of a battlefield.

    Essential Tips & Tricks

    Choosing the Right Pasta

    The pasta you select can make or break this dish. Short, sturdy shapes like elbow macaroni, rotini, or medium shells work best because they catch all that delicious sauce in their nooks and crannies. Avoid long pasta like spaghetti, which can be unwieldy in a skillet dish. I once attempted this recipe with angel hair pasta (big mistake!) and ended up with a clumpy mess. The pasta should be able to withstand the entire cooking process without breaking down or becoming mushy. For an extra nutrition boost, try whole wheat pasta—it adds a nutty flavor that complements the beef beautifully, just like in my honey pepper chicken mac & cheese.

    Perfecting the Cheese Blend

    The cheese is not just a topping—it’s an essential component that creates that authentic cheeseburger experience. For best results, use freshly shredded cheese rather than pre-packaged varieties, which often contain anti-caking agents that prevent proper melting. I prefer a combination of sharp cheddar for flavor and mozzarella or American cheese for that stretchy, gooey texture. Add the cheese in two stages: stir some into the hot pasta to create a creamy sauce, then sprinkle the remainder on top and cover briefly to melt. This two-step approach ensures maximum cheesy goodness throughout the entire dish.

    Serving Ideas & Creative Variations

    Burger-Inspired Toppings

    Transform your cheeseburger pasta skillet into a truly customizable experience by setting up a topping bar with all the classic burger fixings. Crispy bacon bits, diced pickles, fresh tomatoes, and shredded lettuce allow everyone to garnish their portion exactly how they like their burgers. I started doing this for family dinner nights, and it’s become our favorite way to serve this dish. A drizzle of special sauce (mix mayo, ketchup, and a dash of pickle juice) takes it to the next level. For a fun presentation, serve in individual bowls with toasted sesame seed buns on the side, just like you might enjoy with homemade Big Mac wraps.

    Global Flavor Twists

    While the classic American cheeseburger flavor is delicious, don’t be afraid to experiment with international variations. For a Mexican-inspired version, add taco seasoning instead of burger seasoning, mix in black beans and corn, then top with avocado and cilantro. My personal favorite is the Italian twist—incorporate Italian seasoning, sun-dried tomatoes, and finish with fresh basil and a dollop of ricotta. For an Asian-fusion approach, try adding a splash of soy sauce, ginger, and green onions to the beef, then garnish with sesame seeds. These variations keep the dish exciting when it becomes a regular in your meal rotation.

    Storage & Troubleshooting Guide

    Proper Storage Techniques

    This cheeseburger pasta skillet makes excellent leftovers if stored correctly. Allow the dish to cool completely before transferring to airtight containers—this prevents condensation that could make the pasta soggy. Refrigerate for up to 3-4 days for best quality. When reheating, add a splash of beef broth or milk to revive the creamy texture, as the pasta will have absorbed much of the sauce overnight. For freezing portions, slightly undercook the pasta initially, as it will soften during the thawing and reheating process. I often make a double batch specifically to freeze individual portions for quick lunches when I’m working from home.

    Fixing Common Issues

    Even experienced cooks occasionally encounter challenges with one-pot pasta dishes. If your sauce seems too watery, simply simmer uncovered for a few extra minutes to reduce the liquid. Conversely, if the pasta has absorbed too much liquid and seems dry, add ¼ cup of beef broth or milk and gently stir to incorporate. For pasta that’s still too firm after the recommended cooking time, add ¼ cup more liquid, cover, and cook for an additional 2-3 minutes. And if your cheese has become stringy rather than creamy, try lowering the heat and adding a splash of cream while stirring constantly—this usually smooths out the sauce beautifully.

    Frequently Asked Questions

    Can I use ground turkey instead of beef in the cheeseburger pasta skillet?

    Absolutely! Ground turkey works wonderfully as a leaner alternative. Add 1-2 teaspoons of Worcestershire sauce to enhance the savory flavor that beef naturally provides. Turkey may release less fat, so you might need a touch more oil when browning.

    How can I make this recipe gluten-free?

    Simply substitute your favorite gluten-free pasta and ensure your broth and seasonings are certified gluten-free. Gluten-free pasta often requires less cooking time, so check for doneness about 2 minutes earlier than the recipe suggests.

    Can I prep this cheeseburger pasta skillet ahead of time?

    You can brown the meat with onions and garlic up to two days ahead. Store refrigerated, then continue with the recipe when ready to serve, adding a few extra minutes to heat the meat mixture thoroughly.

    What vegetables can I add to make this more nutritious?

    Bell peppers, zucchini, spinach, and mushrooms all work beautifully. Add firmer vegetables like peppers when sautéing the onions, and stir in leafy greens like spinach during the last minute of cooking.

    Why is my sauce separating or looking grainy?

    This usually happens when cheese is added to too high heat. Always remove the skillet from direct heat for 1-2 minutes before adding cheese, and use freshly shredded cheese for the smoothest results.

    Final Thoughts

    This cheeseburger pasta skillet has become my go-to recipe when I need comfort food that doesn’t require hours in the kitchen. There’s something magical about transforming simple ingredients into a meal that feels like a warm hug at the end of a long day. The beauty lies in its versatility—dress it up for guests or keep it simple for a weeknight dinner. I’d love to see your versions of this dish on Pinterest! However you customize your cheeseburger pasta skillet, I guarantee it will bring that special combination of nostalgia and novelty to your dinner table.

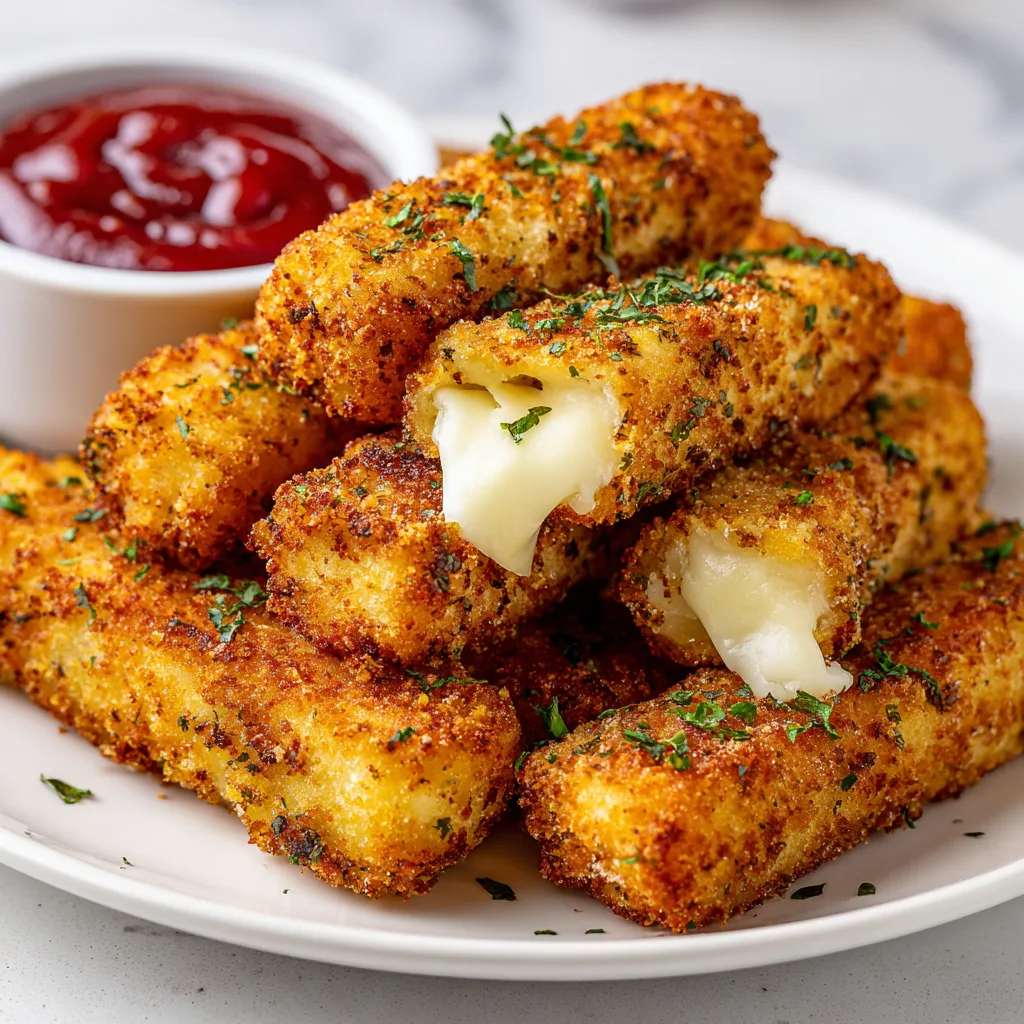
  • Homemade Crispy Mozzarella Sticks: Irresistibly Cheesy & Crunchy!

    Homemade Crispy Mozzarella Sticks: Irresistibly Cheesy & Crunchy!

    Homemade Crispy Mozzarella Sticks: Irresistibly Cheesy & Crunchy!

    Homemade Crispy Mozzarella Sticks have been my guilty pleasure since childhood, and learning to make them myself was a game-changer. That first bite—when the golden-brown crust gives way to molten, stretchy cheese—is pure magic. I still remember the first batch I made for my sister’s birthday party; they disappeared faster than I could set them down! These crispy, cheesy delights are surprisingly simple to prepare at home and taste infinitely better than frozen alternatives. Today I’m sharing my foolproof recipe that delivers restaurant-quality mozzarella sticks every single time.

    Recipe

    Why You’ll Love These Homemade Crispy Mozzarella Sticks

    Perfect Texture Combination

    The contrast of textures is what makes homemade mozzarella sticks irresistible. The exterior develops a satisfying crunch from the seasoned breadcrumb coating, while the interior transforms into a gooey, stretchy cheese paradise. I’ve perfected the double-coating technique that ensures your breading stays intact during frying. The key is patience during the freezing step—this prevents premature cheese leakage and guarantees that beautiful cheese pull when you take your first bite. Trust me, that moment when the cheese stretches between your plate and mouth is worth every minute of prep!

    Customizable Flavors

    One of the biggest advantages of making Homemade Crispy Mozzarella Sticks is the ability to customize the flavors to your preference. The standard Italian seasoning works beautifully, but I’ve experimented with adding garlic powder, smoked paprika, and even a pinch of cayenne for heat. My personal favorite combination includes a dash of ranch seasoning in the breadcrumbs—it adds a tangy dimension that pairs perfectly with the mild cheese. You can also experiment with different cheeses; while traditional mozzarella is classic, mixing in a bit of pepper jack creates a delightful kick that surprises guests.

    Essential Tips & Tricks

    The Double-Freeze Method

    The double-freeze technique is non-negotiable for perfect mozzarella sticks. First, freeze the cheese sticks for 30 minutes after cutting them. Then, after coating them in the breadcrumb mixture, freeze them again for at least 2 hours or overnight. This prevents the dreaded cheese meltdown during frying. I learned this the hard way after a disastrous attempt left me with an oily mess and no appetizers for game night! The freezing process solidifies the cheese enough to withstand the hot oil while still allowing it to melt to perfection once the coating crisps up. Patience here pays off enormously in the final result.

    Oil Temperature Control

    Maintaining the perfect oil temperature (350-375°F) is crucial for achieving that golden-brown exterior without cheese leakage. Too hot, and the coating burns before the cheese warms; too cool, and the sticks absorb excess oil and become soggy. I always use a thermometer rather than guessing—this small investment has saved countless batches. Work in small batches to prevent temperature drops when adding the frozen sticks. This technique pairs wonderfully with other fried favorites like garlic parmesan cheeseburger bombs for an impressive appetizer spread that will have everyone asking for your secrets!

    Serving Ideas & Creative Variations

    Dipping Sauce Pairings

    The right dipping sauce elevates homemade mozzarella sticks from great to unforgettable. Classic marinara is always a winner, but don’t stop there! I love offering a variety of options: ranch dressing, honey mustard, and spicy sriracha mayo are all fantastic companions. For an elevated experience, try a balsamic glaze drizzle or a roasted garlic aioli. My personal favorite is a quick pesto-yogurt blend that adds a fresh, herbaceous note to counter the richness of the cheese. When hosting, I arrange the sticks around a lazy Susan with different dipping bowls—it always becomes the centerpiece of my appetizer table!

    Global Flavor Twists

    Transform your basic mozzarella sticks into international delights with simple spice swaps in the coating. For Mexican-inspired sticks, add cumin, chili powder, and oregano to the breadcrumbs and serve with guacamole. Greek-style sticks benefit from dried oregano, lemon zest, and a touch of dill, paired perfectly with tzatziki. For an Asian twist, incorporate five-spice powder and sesame seeds, then serve with sweet chili sauce. These variations pair beautifully with other global-inspired dishes like chicken shawarma with yogurt sauce for an international appetizer night that will transport your taste buds around the world!

    Storage & Troubleshooting Guide

    Make-Ahead and Freezing

    The beauty of Homemade Crispy Mozzarella Sticks is their make-ahead potential. You can prepare a large batch through the coating stage, freeze them solid on a baking sheet, then transfer to freezer bags for storage up to 3 months. Label with the date and cooking instructions—your future self will thank you! This method has saved me countless times when unexpected guests arrive. Simply fry them directly from frozen, adding about 30 seconds to the cooking time. The texture remains perfect, and nobody will guess they weren’t prepared that day. Always freeze in single layers before bagging to prevent sticks from freezing together.

    Troubleshooting Common Issues

    Even experienced cooks encounter cheese leakage sometimes. If your cheese escapes during frying, your oil temperature might be too low, or the sticks weren’t frozen enough. Ensure your coating completely seals the cheese with no bare spots. If your breading falls off, you may have skipped patting the cheese dry before the flour stage, or your egg wash might be too thin. Add a tablespoon of water to the eggs for better adhesion. For soggy sticks, try a higher frying temperature or consider double-coating with breadcrumbs for extra crispiness. Remember that the first batch is often the learning batch—adjust as needed for perfection!

    Frequently Asked Questions

    Can I bake Homemade Crispy Mozzarella Sticks instead of frying?

    Yes! Preheat to 425°F, spray the sticks with cooking oil, and bake for 8-10 minutes until golden. The texture won’t be identical to fried, but they’ll still be delicious with less mess.

    Why do my mozzarella sticks always burst open?

    Insufficient freezing is usually the culprit. Freeze the coated sticks for at least 2 hours, and maintain proper oil temperature (350-375°F) during frying.

    What’s the best cheese for mozzarella sticks?

    Low-moisture mozzarella works best as it has less water content. String cheese sticks are convenient and perfect for this recipe, providing that classic stretchy pull.

    Can I use gluten-free breadcrumbs?

    Absolutely! Gluten-free panko or regular gluten-free breadcrumbs work wonderfully. Just ensure they’re seasoned well, as some GF options can be blander than regular breadcrumbs.

    How do I know when my mozzarella sticks are done?

    They should be golden brown after about 60-90 seconds of frying. Don’t overcook or the cheese will leak – the outside appearance is your best indicator.

    Final Thoughts

    Homemade Crispy Mozzarella Sticks represent comfort food perfection—simple ingredients transformed into something magical through technique and love. They remind me that sometimes the most beloved recipes aren’t about complexity but about execution and attention to detail. Whether you’re serving them for game day, a family movie night, or just because it’s Tuesday, these crispy, cheese-filled wonders never disappoint. I hope you’ll try them and experience the joy of pulling apart that first perfect stick, watching the cheese stretch into oblivion, and creating memories around food that brings pure happiness. Find more of my comfort food recipes at Pinterest!

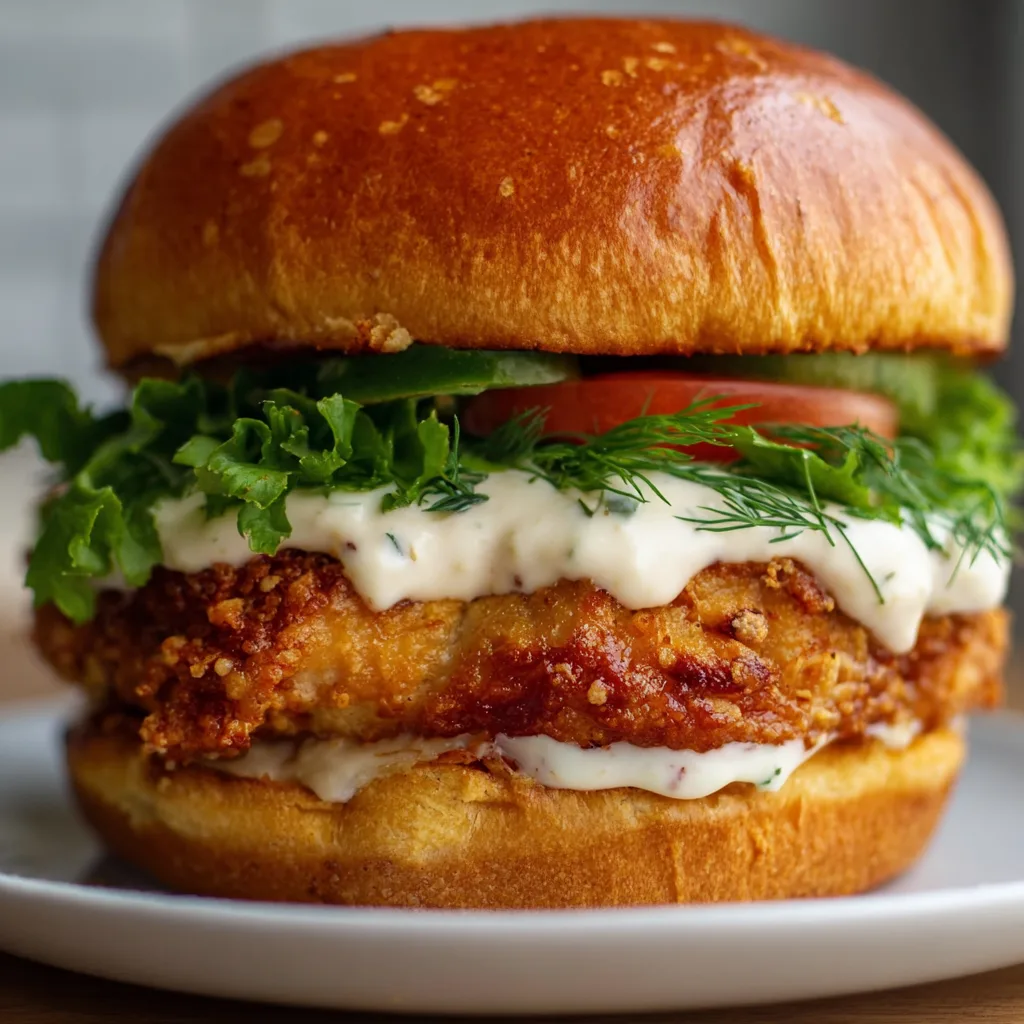
  • Crispy Dill Chicken Burger with Homemade Mayo – Irresistibly Delicious!

    Crispy Dill Chicken Burger with Homemade Mayo – Irresistibly Delicious!

    Crispy Dill Chicken Burger with Homemade Mayo – Irresistibly Delicious!

    There’s something magical about that first bite into a Crispy Dill Chicken Burger with Homemade Mayo – the satisfying crunch giving way to tender, juicy chicken, all complemented by the bright, tangy notes of fresh dill. I discovered this recipe during a summer cookout at my sister’s place, and I’ve been obsessed ever since! The combination of the perfectly seasoned crispy coating and the creamy, herb-infused mayo creates a burger experience that puts those fast-food versions to shame. If you’re looking for a chicken burger that delivers on both texture and flavor, you’ve just found your new favorite recipe from Recipes Darleen.

    Recipe

    Why You’ll Love This Crispy Dill Chicken Burger with Homemade Mayo

    Perfect Texture Combination

    The contrasting textures in this burger are what make it truly special. The chicken breast gets pounded thin, ensuring quick, even cooking while maintaining juiciness. Then comes the magical coating – a seasoned mixture that transforms in the pan into a golden-brown crust that audibly crunches with each bite. I still remember the first time I nailed this recipe; my husband stopped mid-bite, wide-eyed, and declared it better than any restaurant version! The soft burger bun cradles everything perfectly, adding that final textural element that makes each mouthful absolutely perfect.

    Flavor That Pops

    The dill-forward profile of this burger is what sets it apart from standard chicken sandwiches. Fresh dill infuses both the crispy coating and the homemade mayo, creating layers of herbal brightness that wake up your taste buds. The mayo itself is a revelation – creamy, rich, with hints of garlic and lemon that complement the dill perfectly. I’ve had friends who “don’t like dill” completely change their minds after trying this burger! The seasoning blend in the coating adds depth without overwhelming the delicate chicken flavor, creating a perfectly balanced bite every time.

    Essential Tips & Tricks

    Chicken Preparation Secrets

    Properly preparing your chicken breast is crucial for this recipe’s success. I always butterfly larger breasts before pounding them to an even thickness (about ½-inch is perfect). This ensures they cook evenly without drying out. A little tip I learned the hard way: pat the chicken completely dry before coating! Any moisture will prevent that gorgeous crust from forming. For maximum flavor, I recommend brining your chicken for just 30 minutes in a simple salt solution – this makes an incredible difference in juiciness and seasoning. Check out my Tender Greek Yogurt Marinated Chicken Breasts for another great preparation method.

    Perfecting the Crispy Coating

    The double-dredge technique is non-negotiable for achieving that restaurant-quality crunch! First, a light dusting of seasoned flour, then a quick dip in beaten egg, and finally a generous coating of the dill-infused breadcrumb mixture. The key is pressing the final coating firmly onto the chicken to ensure it adheres properly. Another game-changing tip: let the coated chicken rest on a wire rack for 5-10 minutes before cooking. This allows the coating to set, resulting in that satisfying crispy exterior that won’t fall off during cooking. I use a cast-iron skillet for the perfect golden-brown finish every time.

    Serving Ideas & Creative Variations

    Build Your Ultimate Burger

    Assembling your burger thoughtfully makes all the difference. I start with a lightly toasted brioche bun (the buttery flavor complements the dill beautifully). Spread a generous layer of homemade dill mayo on both the top and bottom buns – trust me, you want this flavor in every bite! For toppings, I keep it simple with crisp lettuce, thinly sliced red onion, and ripe tomato. Sometimes I add avocado for creaminess or pickles for extra tang. For a delicious alternative to chicken, try adapting this recipe with my Cheesy Garlic Shrimp Grilled Cheese flavors!

    Exciting Flavor Twists

    While the classic dill version is incredible, this recipe is wonderfully adaptable. For a spicy kick, add cayenne to the coating and mix sriracha into the mayo. Craving something Mediterranean? Incorporate lemon zest, oregano, and feta crumbles. My family loves the “ranch” variation, where I swap the dill for a blend of parsley, chives, and garlic powder. For a healthier twist, the chicken can be air-fried instead of pan-fried – you’ll still get that wonderful crispy exterior with less oil. These burgers also work beautifully with turkey or even firm white fish!

    Storage & Troubleshooting Guide

    Keeping It Fresh

    Proper storage ensures these burgers remain delicious for leftovers. Store cooked chicken patties separately from toppings and buns in an airtight container in the refrigerator for up to 3 days. The homemade mayo keeps for about a week when refrigerated. To reheat, avoid the microwave which will soften your crispy coating. Instead, place the patties on a wire rack in a 350°F oven for 7-10 minutes until heated through. The crispy exterior will revive beautifully! For meal prep, you can freeze the uncooked, breaded chicken patties with parchment paper between layers.

    Fixing Common Issues

    The most common issue with crispy chicken burgers is soggy coating. If this happens, your oil likely wasn’t hot enough before adding the chicken. The perfect temperature is around 350°F – hot enough to sizzle immediately but not so hot it burns before cooking through. If your coating falls off during cooking, you may have skipped the resting period or not pressed the breadcrumbs firmly enough onto the chicken. For chicken that’s cooked outside but still raw inside, your patties were likely too thick – remember to pound them evenly before breading. Always use a meat thermometer to ensure they reach 165°F.

    Frequently Asked Questions

    Can I make the Crispy Dill Chicken Burger with Homemade Mayo ahead of time?

    Yes! Prepare the mayo and bread the chicken up to a day ahead. Store separately in the refrigerator. Cook the chicken just before serving for the best texture and flavor.

    What’s the best oil for frying these chicken patties?

    I recommend vegetable oil or canola oil for their neutral flavor and high smoke point. You’ll need about ¼-inch in your pan for the perfect golden crust.

    Can I use dried dill instead of fresh?

    Yes, but reduce the amount to one-third of what’s called for with fresh dill. The flavor won’t be quite as bright, but it will still be delicious.

    How do I keep the burgers warm while cooking multiple batches?

    Place finished patties on a wire rack over a baking sheet in a 200°F oven. This maintains crispiness while keeping them warm.

    What can I substitute for the homemade mayo?

    Store-bought mayonnaise works fine! Simply mix in fresh dill, a squeeze of lemon juice, and a small clove of minced garlic to elevate the flavor.

    Final Thoughts

    This Crispy Dill Chicken Burger with Homemade Mayo has become my go-to recipe whenever I want to impress without spending hours in the kitchen. There’s something deeply satisfying about creating a restaurant-quality burger at home, especially when friends can’t stop raving about it! The combination of the herbaceous dill, juicy chicken, and that irresistible crunch creates a meal that feels special while being totally achievable. I hope this becomes a favorite in your kitchen too! Don’t forget to check out more delicious recipes on Pinterest for more inspiration.

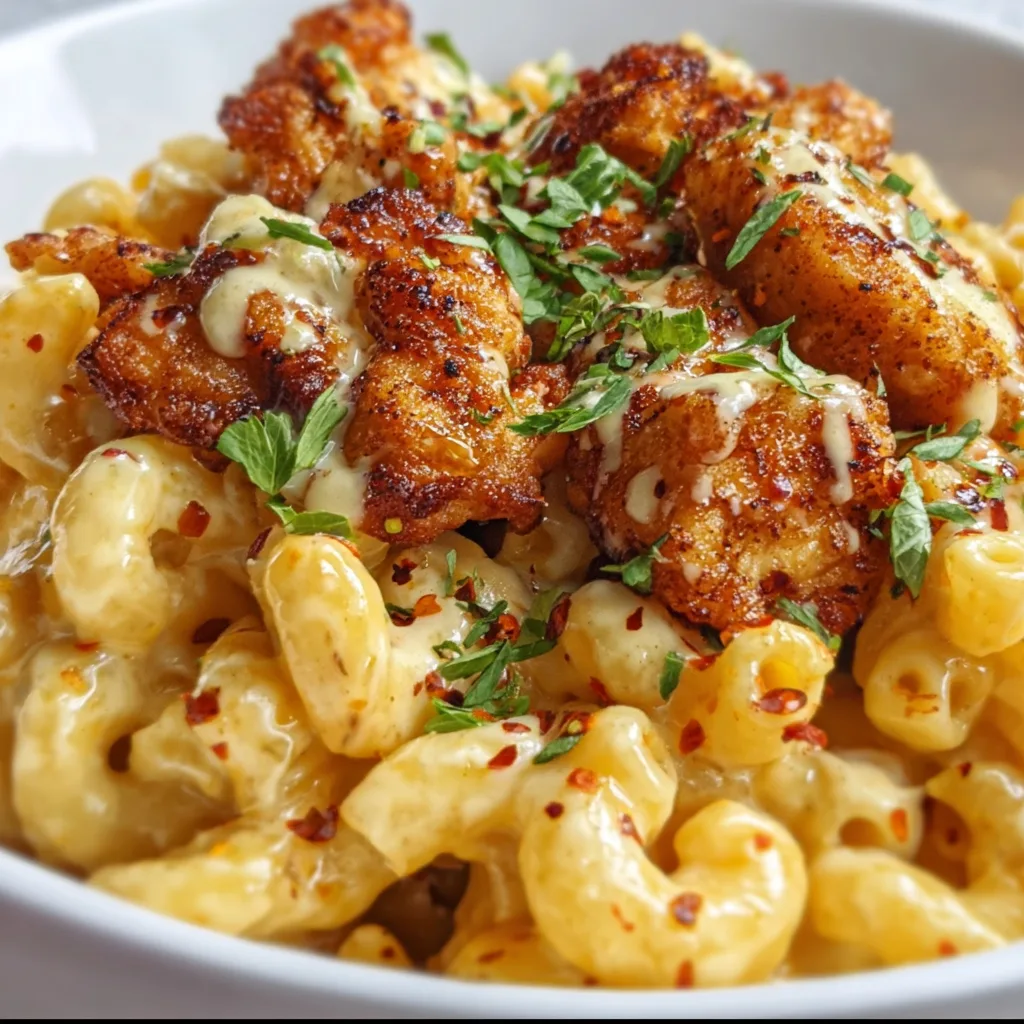
  • Honey Pepper Chicken Mac & Cheese: Irresistibly Creamy Comfort Food!

    Honey Pepper Chicken Mac & Cheese: Irresistibly Creamy Comfort Food!

    Honey Pepper Chicken Mac & Cheese: Irresistibly Creamy Comfort Food!

    Honey Pepper Chicken Mac & Cheese is the ultimate comfort food mashup that’ll have you reaching for seconds before you’ve even finished your first bite. I discovered this recipe during a rainy Sunday afternoon when my pantry was nearly bare, but my craving for something creamy, sweet, and spicy was at an all-time high. The combination of tender chicken, al dente pasta, and that perfect balance of honey sweetness with peppery heat creates a symphony of flavors that dance across your tongue. Trust me, this isn’t your ordinary mac and cheese – it’s a game-changer that’ll become your new go-to dinner hero.

    Recipe

    Why You’ll Love This Honey Pepper Chicken Mac & Cheese

    Perfect Balance of Flavors

    There’s something absolutely magical about the way honey and black pepper play together in this dish. The natural sweetness from the honey creates this gorgeous glaze on the chicken that caramelizes slightly when cooked, while the cracked black pepper adds just enough heat to keep things interesting without overwhelming your palate. I’ve found that using freshly cracked pepper makes all the difference – those little flecks of spice visible throughout the creamy sauce create these delightful little bursts of warmth that’ll make your taste buds sing with joy. It’s comfort food that feels sophisticated enough for company.

    One-Pot Wonder

    Let’s be honest – nobody wants to spend their evening washing a mountain of dishes. That’s why I absolutely adore this recipe. Everything comes together in one pot (okay, technically two if you count cooking the pasta separately, but who’s counting?). The chicken gets beautifully seared, creating those lovely browned bits on the bottom of the pan that become the foundation of the sauce. Then, as the creamy elements meld together, the pasta joins the party, absorbing all those incredible flavors. The result? Maximum flavor with minimal cleanup. It’s perfect for busy weeknights when you want something delicious without the kitchen aftermath.

    Essential Tips & Tricks

    Perfecting the Chicken

    The secret to absolutely stellar honey pepper chicken lies in how you prepare it. I recommend cutting your chicken into uniform, bite-sized pieces (about 1-inch cubes) to ensure they cook evenly and quickly. Season generously with salt and pepper before adding to your hot pan with a splash of olive oil. The key is achieving that beautiful golden sear without overcooking – about 3-4 minutes per side should do it. When you add the honey, watch carefully as it can burn quickly! A good trick is to reduce your heat slightly and keep the chicken moving in the pan to create that perfect glaze that’s sticky and caramelized but not burnt.

    Cheese Selection Matters

    Don’t underestimate the importance of quality cheese in this recipe! While pre-shredded cheese is convenient, it contains anti-caking agents that can make your sauce slightly grainy. I’ve found that grating your own creates a silkier, more luxurious sauce. My perfect blend includes sharp cheddar for tanginess, mozzarella for that stretchy pull, and a touch of parmesan for depth. The key technique is adding your cheese gradually off the heat, stirring constantly until melted before adding more. This prevents clumping and ensures that velvety smooth texture we’re all dreaming about. Trust me, this extra step makes all the difference!

    Serving Ideas & Creative Variations

    Perfect Pairings

    This Honey Pepper Chicken Mac & Cheese stands beautifully on its own, but I love serving it with some bright accompaniments to balance the richness. A simple arugula salad with lemon vinaigrette provides the perfect peppery, acidic counterpoint to cut through the creamy sauce. For a more substantial meal, some roasted broccoli or asparagus adds a wonderful textural contrast and nutritional boost. My family goes crazy when I serve this with garlic butter breadsticks for dunking into any extra sauce. The combination of textures and flavors creates a balanced meal that feels special enough for company but easy enough for weeknight dinners.

    Exciting Twists

    Don’t be afraid to make this recipe your own! One of my favorite variations is adding crispy bacon bits and caramelized onions for a smoky-sweet dimension that’s absolutely divine. For spice lovers, stir in a tablespoon of sriracha or a diced jalapeño with the seeds removed. When I’m feeling fancy, I’ll top the finished dish with buttery panko breadcrumbs and broil for 2-3 minutes for an irresistible crunchy topping. You can even swap chicken for shrimp or make it vegetarian with roasted mushrooms and bell peppers. The honey-pepper flavor profile works beautifully with so many ingredients!

    Storage & Troubleshooting Guide

    Keeping It Fresh

    This Honey Pepper Chicken Mac & Cheese stores beautifully, making it perfect for meal prep or planned leftovers. Let it cool completely before transferring to airtight containers – I like to portion it into individual servings for grab-and-go lunches. In the refrigerator, it’ll stay delicious for 3-4 days. When reheating, add a splash of milk or chicken broth to revive the sauce, as pasta tends to absorb liquid as it sits. For the best texture, reheat gently on the stovetop rather than microwave if possible. Just stir frequently and add liquid gradually until it reaches your desired consistency.

    Fixing Common Issues

    Even experienced cooks occasionally run into challenges! If your sauce seems too thin, don’t panic – simply let it simmer a few minutes longer to reduce and thicken. Conversely, if it’s too thick, gradually whisk in additional milk until you reach the perfect consistency. Should your sauce break or appear curdled (which can happen if heat is too high), try removing from heat and vigorously whisking in a tablespoon of cold cream cheese. For grainy sauce, often caused by adding cheese too quickly or over too high heat, next time try removing the pot from heat completely before adding cheese in small batches, stirring until each addition melts before adding more.

    Frequently Asked Questions

    Can I make Honey Pepper Chicken Mac & Cheese ahead of time?

    Yes! Prepare it up to 2 days ahead, but undercook the pasta slightly. When reheating, add a splash of milk to restore creaminess as the pasta will absorb sauce while stored.

    What’s the best pasta shape for this recipe?

    Medium shells, cavatappi, or rotini work beautifully as they capture the creamy sauce in their ridges and crevices. Avoid long pasta shapes like spaghetti or fettuccine.

    Can I make this recipe spicier?

    Absolutely! Add cayenne pepper, red pepper flakes, or diced jalapeños to increase the heat level while maintaining the honey-pepper balance.

    Is there a way to make this recipe lighter?

    Try using reduced-fat milk, light cream cheese, and increasing the protein-to-pasta ratio. You can also add extra vegetables like broccoli or spinach.

    Can I freeze leftover Honey Pepper Chicken Mac & Cheese?

    Yes, though the texture may change slightly. Freeze in airtight containers for up to 3 months and thaw overnight in the refrigerator before gently reheating.

    Final Thoughts

    This Honey Pepper Chicken Mac & Cheese has become my ultimate crowd-pleaser for good reason. There’s something undeniably special about the way the sweet honey complements the sharp black pepper, all wrapped in a blanket of creamy, cheesy goodness. I’ve served this at family gatherings, potlucks, and cozy nights in, always to rave reviews and requests for the recipe. Don’t forget to check out more comfort food inspiration on our Pinterest page! Whatever the occasion, this dish brings that perfect balance of familiar comfort with an exciting twist.

  • Mexican Corn Chicken Soup: Cozy, Flavor-Packed Comfort Bowl

    Mexican Corn Chicken Soup: Cozy, Flavor-Packed Comfort Bowl

    Mexican Corn Chicken Soup: Cozy, Flavor-Packed Comfort Bowl

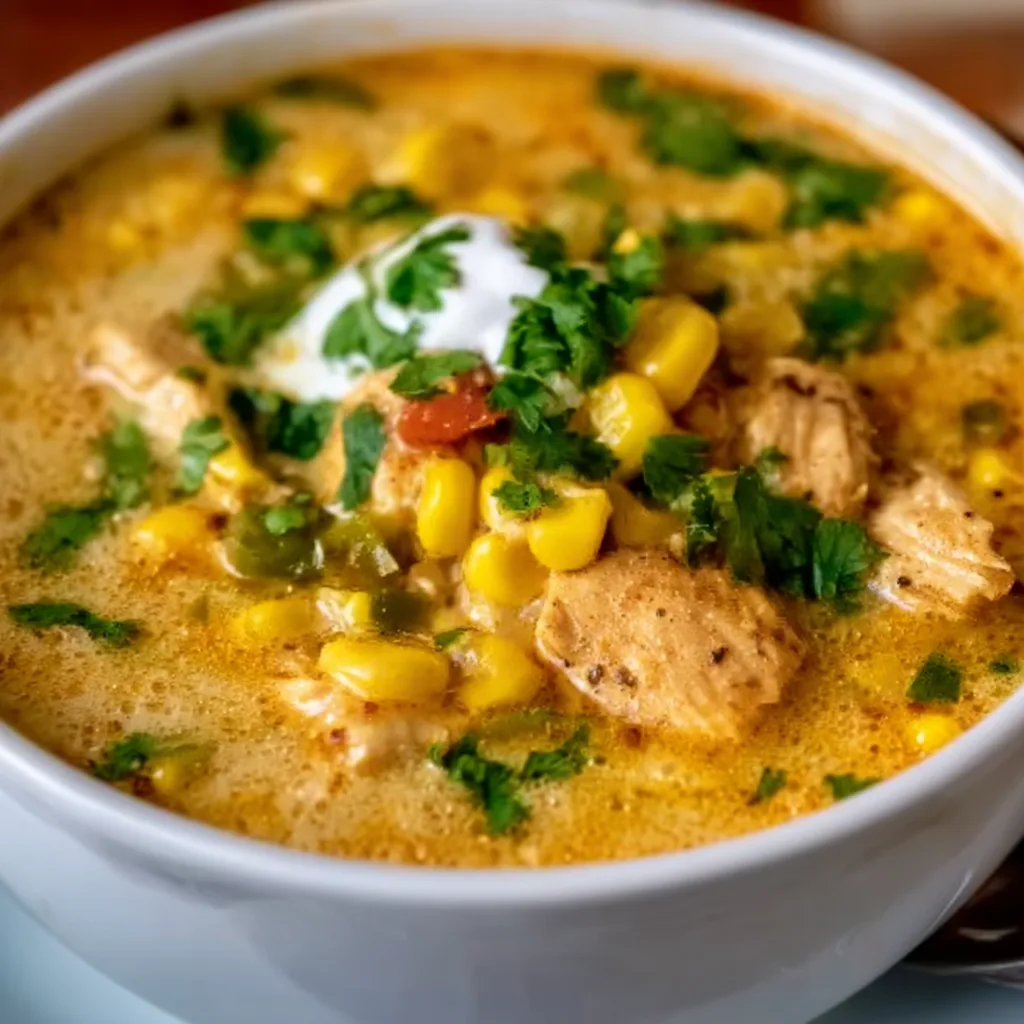
    This Mexican Corn Chicken Soup is the ultimate comfort in a bowl—creamy, zesty, and bursting with south-of-the-border flavors that’ll warm you from the inside out. Every spoonful delivers tender chicken, sweet corn kernels, and a velvety broth that’s both satisfying and soul-warming. I first made this soup during a particularly chilly autumn evening when my family needed something hearty yet vibrant. The moment those aromatic spices hit the air, my kitchen transformed into a cozy haven that drew everyone in with promises of something truly special. If you enjoy hearty soups with bold flavors, this recipe deserves a permanent spot in your collection.

    Recipe

    Why You’ll Love This Mexican Corn Chicken Soup

    Perfect Balance of Flavors and Textures

    This soup strikes that magical balance between creamy indulgence and fresh brightness that keeps you coming back for more. The sweetness of corn plays beautifully against the savory chicken and the subtle heat from jalapeños. I love how the lime juice cuts through the richness, creating layers of flavor that unfold with each spoonful. The texture is equally impressive—tender chicken shreds, soft corn kernels, and just enough thickness to coat your spoon without feeling heavy. It’s comfort food that doesn’t weigh you down, making it perfect for any season, though I find myself craving it most when there’s a slight chill in the air.

    Quick and Adaptable for Any Occasion

    One of the greatest things about this Mexican Corn Chicken Soup is how wonderfully adaptable it is for different needs and occasions. Need a quick weeknight dinner? Use rotisserie chicken and frozen corn to have it ready in under 30 minutes. Feeding a crowd? It doubles beautifully without any adjustments to cooking time. I’ve served this at casual family dinners and at more formal gatherings with friends, and it always receives rave reviews. The soup also works perfectly as a make-ahead meal—in fact, the flavors deepen overnight, making it even more delicious the next day. It’s truly a recipe that works hard for you.

    Essential Tips & Tricks

    Mastering the Base Flavor

    The secret to an exceptional Mexican Corn Chicken Soup lies in building layers of flavor from the very beginning. Start by sautéing your onions until they’re truly translucent and beginning to caramelize—this develops a sweetness that balances the spices. Toast your cumin, chili powder, and oregano directly in the pot with the vegetables for about 30 seconds until they become fragrant. This simple step blooms the spices, releasing their essential oils and creating a much more complex base. I learned this technique years ago, and it transformed my soup-making forever. Remember to scrape the bottom of the pot when adding liquid to capture all those flavorful bits!

    The Perfect Consistency Technique

    Achieving that ideal velvety texture without making the soup too thick or too thin requires a careful approach. I recommend adding only half the corn kernels initially, then pureeing the remaining half with a cup of broth before adding to the pot. This creates natural creaminess without relying solely on cream or cheese. For thickness control, wait until the soup has simmered for at least 15 minutes before deciding if you need more liquid. If you’re using a slow cooker method, reduce the liquid slightly as less evaporation occurs. The soup should coat the back of a spoon but still flow freely when ladled—that’s your visual cue for perfect consistency.

    Serving Ideas & Creative Variations

    Toppings That Transform

    The right toppings can elevate this Mexican Corn Chicken Soup from delicious to absolutely memorable. My non-negotiable favorites include fresh avocado cubes, which add buttery richness, and a generous squeeze of lime that brightens everything. Crispy tortilla strips provide essential textural contrast—I make mine by cutting corn tortillas into thin strips and quickly frying until golden. Fresh cilantro, a dollop of Mexican crema, and a sprinkle of cotija cheese complete the experience. For guests who enjoy heat, offer thinly sliced jalapeños or a bottle of your favorite hot sauce. These finishing touches create a customizable experience that makes everyone feel special.

    Exciting Flavor Variations

    This soup provides a perfect canvas for creative variations that keep it exciting meal after meal. For a smokier profile, add a diced chipotle pepper in adobo sauce and substitute fire-roasted corn for regular corn. Looking for a seafood twist? Replace chicken with shrimp added during the last few minutes of cooking. To make it vegetarian, swap chicken for black beans and use vegetable broth—you’ll still get plenty of protein and flavor. For a fusion approach, add coconut milk instead of cream and include a tablespoon of red curry paste for a Thai-Mexican hybrid that works surprisingly well! I’ve experimented with adding roasted poblanos like in my other recipes, which adds wonderful depth.

    Storage & Troubleshooting Guide

    Proper Storage for Maximum Flavor

    To maintain the vibrant flavors of your Mexican Corn Chicken Soup, proper storage is essential. Allow the soup to cool completely before transferring to airtight containers—this prevents condensation that can water down your creation. The soup keeps beautifully in the refrigerator for up to 4 days, with flavors actually improving after the first day. For longer storage, freeze portions in freezer-safe containers, leaving an inch of headspace for expansion. I like to freeze individual portions for quick lunches. When reheating, do so gently over medium-low heat, stirring occasionally to prevent scorching. If the soup thickens too much during storage, simply add a splash of chicken broth to reach your desired consistency.

    Fixing Common Soup Issues

    Even experienced cooks occasionally encounter soup challenges, but most are easily fixable. If your soup lacks flavor depth, try adding a tablespoon of tomato paste or a splash of Worcestershire sauce—both contain glutamates that enhance savory notes. Too spicy? Add more cream or a dollop of sour cream to temper the heat, or serve with additional avocado, which counteracts spiciness. If the soup seems too thin, create a quick slurry with a tablespoon of cornstarch dissolved in cold water and simmer for a few minutes. Conversely, if it’s too thick, thin with additional broth. Remember that flavors concentrate overnight, so a soup that tastes perfect today might be stronger tomorrow—adjust seasonings just before serving.

    Frequently Asked Questions

    Can I make Mexican Corn Chicken Soup in advance?

    Absolutely! The flavors actually improve after a day in the refrigerator. Make it up to 2 days ahead, store in an airtight container, and gently reheat when ready to serve, adding fresh toppings just before eating.

    Is this soup spicy?

    The base recipe has a mild to medium heat level. You can easily adjust by omitting the jalapeños for a milder version or adding extra peppers and a dash of cayenne for more heat.

    Can I use frozen corn instead of fresh?

    Yes! Frozen corn works perfectly in this Mexican Corn Chicken Soup, especially during off-seasons. No need to thaw first—add it directly to the pot and adjust cooking time by 1-2 minutes.

    What’s the best chicken to use?

    Boneless, skinless chicken breasts or thighs both work well. Thighs offer more flavor and remain tender, while breasts are leaner. Pre-cooked rotisserie chicken is a great time-saver.

    Can I make this soup vegetarian?

    Definitely! Replace chicken with black beans or chickpeas, use vegetable broth instead of chicken broth, and consider adding diced zucchini or bell peppers for extra texture and nutrients.

    Final Thoughts

    This Mexican Corn Chicken Soup has become my go-to recipe when I want to impress without spending hours in the kitchen. The combination of creamy texture, vibrant flavors, and satisfying heartiness makes it perfect for everything from casual family dinners to special gatherings. I love watching guests’ expressions as they take their first spoonful, experiencing that moment of pure comfort and delight. Whether you follow the recipe exactly or make it your own with personal touches, this soup promises to deliver warmth and satisfaction with every bowl. Don’t forget to check out more inspiration for your next cooking adventure on Pinterest!