Author: Sara Maren

  • Thai Chicken Meatballs in Coconut Curry: Irresistibly Creamy & Spicy!

    Thai Chicken Meatballs in Coconut Curry: Irresistibly Creamy & Spicy!

    Thai Chicken Meatballs in Coconut Curry: Irresistibly Creamy & Spicy!

    Thai Chicken Meatballs in Coconut Curry has become my ultimate comfort food revelation this season. There’s something magical about those tender, aromatic meatballs swimming in a velvety coconut sauce that makes even the dreariest evenings feel special. I discovered this recipe during a rainy weekend when I was craving something with depth and warmth. The first spoonful transported me straight to the bustling streets of Bangkok—fragrant, complex, and utterly satisfying. If you’re looking to elevate your weeknight dinner rotation with minimal effort but maximum flavor, this dish from Recipes Darleen deserves your immediate attention.

    Recipe

    Why You’ll Love This Thai Chicken Meatballs in Coconut Curry

    Perfect Balance of Flavors and Textures

    These Thai chicken meatballs deliver that perfect harmony of sweet, spicy, savory, and tangy notes that makes Thai cuisine so irresistible. The lemongrass and ginger-infused meatballs remain incredibly juicy while developing a beautiful caramelized exterior. I love how they soak up the rich coconut curry while still maintaining their distinct texture. The sauce itself is silky yet complex—coconut milk creates the luscious base while red curry paste, fish sauce, and lime provide layers of flavor that unfold with each bite. It’s the kind of dish that makes you close your eyes with that first spoonful.

    Quick Yet Impressive Weeknight Solution

    Despite its complex flavor profile, this dish comes together in under 40 minutes, making it perfect for busy weeknights when you still want something special. The meatballs can be prepped ahead and refrigerated, which cuts your active cooking time even further. I’ve served this to impromptu dinner guests who were convinced I’d spent hours in the kitchen! The visual impact of those golden meatballs nestled in a vibrant curry sauce creates an impressive presentation that belies its simple preparation. It’s my secret weapon recipe that makes me look like a culinary genius with minimal effort.

    Essential Tips & Tricks

    Meatball Mastery for Maximum Flavor

    The key to exceptional meatballs lies in two critical steps: proper seasoning and gentle handling. I mix finely minced lemongrass, fresh ginger, garlic, and cilantro stems directly into the ground chicken for flavor that permeates every bite. A tip I learned from a Thai cooking class: add a tablespoon of fish sauce to the meat mixture—it won’t taste fishy but adds incredible umami depth. When forming the meatballs, wet your hands slightly to prevent sticking and use a light touch. Overworking the meat makes them tough! For extra flavor insurance, I let the formed meatballs rest in the refrigerator for 15 minutes before cooking to allow the flavors to meld.

    Creating the Perfect Curry Base

    The curry sauce deserves as much attention as the meatballs themselves. Start by sautéing aromatics (shallots, garlic, ginger) until fragrant before adding the curry paste—this “blooms” the spices and releases their essential oils. When adding coconut milk, I always opt for full-fat for that luxurious mouthfeel that makes this dish restaurant-quality. My secret ingredient? A teaspoon of brown sugar to balance the heat and acidity. For an authentic touch that elevates the entire dish, finish with a handful of Thai basil leaves (not regular basil!) and a squeeze of fresh lime just before serving. These bright, fresh additions cut through the richness beautifully, as I learned from my Cilbir Eggs Benedict Fusion experiments.

    Serving Ideas & Creative Variations

    Perfect Pairings for a Complete Meal

    Serve these fragrant meatballs over jasmine rice to soak up every drop of that precious curry sauce—I like to make a little well in the center of each rice portion to cradle extra sauce. For a lighter option, cauliflower rice works beautifully while still absorbing the flavors. Add a side of quick-pickled cucumbers for a refreshing contrast to the rich curry—just toss cucumber slices with rice vinegar, a pinch of sugar, and salt 15 minutes before serving. For a complete Thai-inspired feast, consider starting with my Crunchy Asian Ramen Noodle Salad for a textural contrast that complements the creamy curry perfectly.

    Exciting Twists on the Classic Recipe

    This versatile recipe welcomes creative adaptations while maintaining its soul. For a seafood version, substitute the chicken with shrimp or a firm white fish formed into delicate dumplings. Vegetarians can enjoy this dish with tofu “meatballs” or simply with roasted vegetables like sweet potatoes, bell peppers, and zucchini bathed in the luscious curry. For extra texture, sprinkle toasted cashews or peanuts over the finished dish. My favorite variation includes adding a handful of snow peas and halved cherry tomatoes during the last five minutes of cooking—they maintain their vibrant color and provide fresh pops of flavor against the rich sauce.

    Storage & Troubleshooting Guide

    Proper Storage for Leftovers

    These Thai meatballs actually improve overnight as the flavors continue to develop, making them perfect for meal prep. Store leftovers in an airtight container in the refrigerator for up to 3 days. When reheating, add a splash of coconut milk or chicken broth to revive the sauce, as it tends to thicken when chilled. For longer storage, freeze the meatballs and sauce separately—the meatballs for up to 3 months, the sauce for about 1 month (dairy-free coconut sauces freeze better than cream-based ones). Thaw overnight in the refrigerator before gently reheating on the stovetop, adding fresh herbs just before serving.

    Fixing Common Curry Challenges

    If your curry sauce separates or looks grainy, don’t panic! Lower the heat immediately and whisk gently until it comes back together. For a sauce that’s too thin, simmer uncovered for a few extra minutes or add a cornstarch slurry (1 teaspoon cornstarch mixed with 1 tablespoon water). If it’s too thick, thin with additional coconut milk or chicken broth. For meatballs that fall apart during cooking, the mixture was likely too wet—next time, add a tablespoon of panko breadcrumbs to absorb excess moisture. Adjusting seasoning is simple: too spicy? Add more coconut milk and a touch of brown sugar. Not flavorful enough? Fish sauce and lime juice will brighten everything up.

    Frequently Asked Questions

    Can I make Thai Chicken Meatballs in Coconut Curry ahead of time?

    Absolutely! Prepare the meatballs up to 24 hours ahead and refrigerate uncooked. The curry sauce can also be made a day ahead. Reheat gently and combine just before serving for a quick meal with developed flavors.

    What’s the best substitute for red curry paste?

    Yellow or green curry paste works well, though each offers different flavor profiles. In a pinch, combine 1 teaspoon each of cumin, coriander, and paprika with minced garlic, ginger, and a pinch of cayenne for a homemade alternative.

    How can I make this dish less spicy?

    Reduce the curry paste by half and increase coconut milk slightly. Add a teaspoon of brown sugar to balance heat. Serve with cooling sides like cucumber salad or extra rice to temper the spice.

    Can I use a different protein for the meatballs?

    Ground turkey, pork, or a mixture works beautifully. For vegetarian options, try firm tofu crumbled and mixed with breadcrumbs and the same seasonings, or use plant-based meat substitutes.

    How do I know when the Thai Chicken Meatballs are fully cooked?

    The meatballs should be golden brown on the outside and reach an internal temperature of 165°F (74°C). When cut, they should show no pink and the juices should run clear.

    Final Thoughts

    Thai Chicken Meatballs in Coconut Curry has become my go-to recipe when I want to impress without stress. There’s something incredibly satisfying about creating such complex flavors with relatively simple ingredients and techniques. The way the aromatic meatballs complement the velvety curry sauce creates a dish that feels both comforting and sophisticated. I find myself returning to this recipe whenever I need a reliable dinner win—whether for family weeknights or casual entertaining. For more inspiration and creative recipes, check out my collections on Pinterest. This dish proves that extraordinary meals don’t require extraordinary effort—just thoughtful preparation and quality ingredients.

  • Bomboloni – Irresistible Italian Doughnuts You Can’t Resist!

    Bomboloni – Irresistible Italian Doughnuts You Can’t Resist!

    Bomboloni - Irresistible Italian Doughnuts You Can’t Resist!

    Bomboloni – Italian Doughnuts are pure joy in pastry form, little pillows of fried dough that transport me straight to the streets of Florence with each bite. The first time I made these cloudlike treats, my kitchen filled with the intoxicating scent of vanilla and yeast, and I knew I’d found a recipe worth treasuring. There’s something magical about watching the dough puff up in hot oil, transforming into golden-brown perfection that’s just waiting to be filled with luscious custard or jam. If you’re craving a dessert that balances simplicity and indulgence, these Italian doughnuts are exactly what your weekend needs.

    Recipe

    Why You’ll Love This Bomboloni – Italian Doughnuts

    Texture & Flavor Perfection

    These Bomboloni deliver an irresistible combination of textures that make them utterly addictive. The exterior develops a delicate crispness while the interior remains impossibly fluffy and tender. What makes these Italian doughnuts special is their subtle sweetness—they’re not cloying like some American counterparts. The dough itself carries hints of vanilla and a gentle yeasty complexity that pairs beautifully with whatever filling you choose. I love how they’re substantial enough to satisfy but light enough that you’ll definitely reach for a second (or third!). The contrast between the warm dough and cool filling creates a sensory experience that’s simply divine.

    Versatility & Crowd-Pleasing Appeal

    One of my favorite things about Bomboloni is their incredible versatility. These Italian doughnuts work beautifully as a special breakfast treat, afternoon pick-me-up, or elegant dessert. They’re perfect for everything from casual weekend brunches to holiday celebrations. Everyone from kids to grandparents lights up when these appear on the table—there’s something universally appealing about a freshly made doughnut. You can customize the fillings based on what you love or what’s in season: classic custard, Nutella, fruit preserves, or even lemon curd. The possibilities are endless, making them perfect for pleasing a crowd with varying preferences.

    Essential Tips & Tricks

    Dough Development & Rising

    The secret to perfect Bomboloni lies in giving the dough enough time to develop properly. Don’t rush the rising process—this is what creates that ethereal, light texture that makes Italian doughnuts so special. I’ve found that letting the dough rise in a slightly warm spot (around 75°F) yields the best results. My favorite trick is to place the covered bowl near (not on) a preheating oven. Watch for visual cues rather than strict timing; the dough should double in size and feel pillowy when gently poked. If your kitchen is cool, it might take longer than recipes suggest, and that’s perfectly fine! Patience here translates directly to texture in the finished bomboloni.

    Frying Technique & Temperature Control

    Maintaining the right oil temperature is absolutely crucial for perfect Bomboloni. Too hot, and they’ll brown before cooking through; too cool, and they’ll absorb excess oil. Invest in a candy thermometer to keep your oil steady between 340-350°F—this sweet spot ensures golden exteriors and fully cooked centers. Work in small batches to prevent overcrowding, which drops the oil temperature dramatically. I learned this the hard way during my first attempt! Allow plenty of space for the doughnuts to float and expand. After frying, let them drain on paper towels before rolling in sugar, similar to how I prepare my Italian Easter Cookies for the perfect finish.

    Serving Ideas & Creative Variations

    Filling Options & Techniques

    The filling is where you can really make these Bomboloni your own personal masterpiece. Traditional pastry cream offers classic appeal, but don’t stop there! Nutella, lemon curd, raspberry jam, or even mascarpone whipped with a touch of honey all make spectacular fillings. For the neatest results, use a piping bag with a long narrow tip inserted from the side or bottom of the doughnut. My pro tip: chill your fillings slightly before piping—they’ll set up better inside the warm doughnuts. For a fun twist, try creating a sampler platter with different fillings, similar to my approach with Fluffy Yogurt Cloud Dessert where contrasting flavors create an exciting tasting experience.

    Seasonal & Special Occasion Adaptations

    Bomboloni can easily be adapted for different seasons and celebrations, making them a versatile addition to your baking repertoire. For summer, fill with fresh berry compote and dust with powdered sugar. Fall calls for apple butter or pumpkin spice pastry cream. During the holidays, try eggnog custard or gingerbread-spiced fillings. For an elegant dinner party finale, serve warm bomboloni alongside small bowls of different fillings and toppings, letting guests customize their own. I once served these at a New Year’s brunch with prosecco, and the combination was absolutely magical—the slight acidity of the bubbles perfectly balanced the sweet doughnuts.

    Storage & Troubleshooting Guide

    Keeping Bomboloni Fresh

    Bomboloni are at their absolute best when freshly made, but with proper storage, you can enjoy them for a day or two after baking. For unfilled bomboloni, store at room temperature in an airtight container for up to 24 hours. Once filled, refrigeration becomes necessary—store in a single layer to prevent squishing, and consume within 48 hours. If you need to refresh day-old bomboloni, a quick 5-10 seconds in the microwave works wonders to restore their softness. For longer storage, freeze unfilled bomboloni after they’ve completely cooled, then thaw at room temperature and warm slightly before filling and serving.

    Troubleshooting Common Issues

    If your Bomboloni aren’t turning out perfectly, a few simple adjustments can make all the difference. Dense doughnuts typically indicate under-proofing—next time, allow more rising time before frying. If they’re collapsing or deflating, you might be over-proofing or your oil temperature could be too low. Oil-soaked bomboloni usually mean your frying temperature is too cool—aim for that 340-350°F sweet spot. For filling problems, make sure your pastry cream or other fillings are thick enough to hold their shape but still pipeable. If your dough feels too sticky during handling, resist adding too much flour—instead, chill it briefly to make it more manageable.

    Frequently Asked Questions

    What makes Bomboloni different from regular doughnuts?

    Bomboloni are Italian doughnuts made with a richer, yeasted dough that’s typically filled rather than having a hole. They’re less sweet than American doughnuts and have a distinctively light, airy texture with a subtle yeasty flavor.

    Can I make the dough ahead of time?

    Absolutely! Prepare the dough and let it rise once, then refrigerate overnight. The slow, cold fermentation actually improves flavor. Bring to room temperature for 30-45 minutes before shaping and proceeding with the second rise.

    What’s the best oil for frying Bomboloni?

    Use a neutral oil with a high smoke point like vegetable, canola, or peanut oil. These won’t impart strong flavors and can withstand the temperatures needed for perfect frying.

    Can I bake Bomboloni instead of frying them?

    While traditional Bomboloni are fried, you can bake them at 375°F for 12-15 minutes. They’ll be less authentic with a different texture, but still delicious with less mess and oil.

    How do I know when the oil is at the right temperature without a thermometer?

    Drop a small piece of dough into the oil—it should sizzle gently and float to the surface within a few seconds. If it browns immediately, the oil is too hot; if it sits at the bottom, it’s too cool.

    Final Thoughts

    These Bomboloni – Italian Doughnuts have become one of my most treasured recipes, bringing a touch of Italian pastry magic into my home. There’s something deeply satisfying about creating these pillowy delights from scratch—watching the dough transform through rising, frying, and filling. The joy on people’s faces when they bite into a warm, freshly made bomboloni makes every step worthwhile. Whether you’re a seasoned baker or trying your hand at homemade doughnuts for the first time, I hope you’ll give these a try and discover why they’ve been beloved in Italy for generations. Don’t forget to check out more delicious inspiration on Pinterest!

  • Apple Butter Muffins: Irresistibly Soft, Cozy & Perfectly Spiced!

    Apple Butter Muffins: Irresistibly Soft, Cozy & Perfectly Spiced!

    Apple Butter Muffins: Irresistibly Soft, Cozy & Perfectly Spiced!

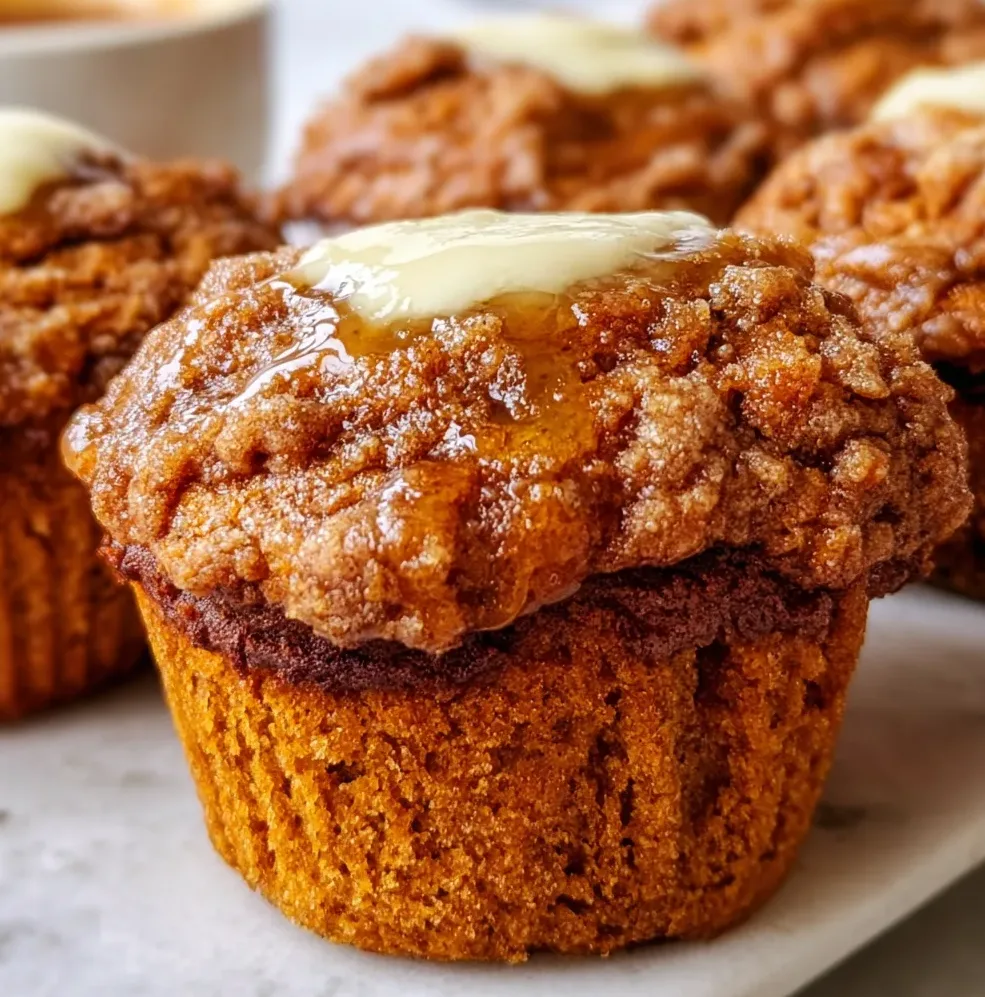
    These Apple Butter Muffins are autumn’s answer to your breakfast prayers! There’s something magical about that first bite—tender crumb infused with warm spices and the concentrated sweetness of apple butter swirled throughout. I discovered this recipe during my annual apple orchard visit last fall, and it’s become my go-to for cozy weekend mornings. The rich aroma that fills your kitchen while these bake is worth the effort alone! Perfect with a steaming cup of coffee, these muffins capture everything wonderful about fall baking in one perfect little package. Let me show you how to make these seasonal treasures that my family now requests weekly.

    Recipe

    Why You’ll Love These Apple Butter Muffins

    Perfect Texture & Flavor Balance

    These muffins achieve that elusive bakery-quality texture—incredibly moist inside with slightly crisp, sugar-dusted tops. The apple butter does double duty here, adding moisture while infusing every bite with concentrated apple flavor and warm spices. Unlike regular applesauce, apple butter’s reduced water content and caramelized sugars create a deeper, more complex flavor profile. I love how the cinnamon and nutmeg complement without overwhelming. When you pull these from the oven, the aroma alone will have your family gathering in the kitchen, asking when they’ll be cool enough to eat!

    Quick & Simple Preparation

    Despite their impressive taste, these muffins come together in just 15 minutes of prep time. The beauty lies in the simplicity—no peeling or chopping apples required! The apple butter does all the heavy lifting, infusing flavor and moisture without extra steps. I always keep a jar in my pantry specifically for baking emergencies. You’ll appreciate how this recipe uses standard pantry ingredients and just one mixing bowl. Even on busy mornings, I can have these in the oven before my coffee finishes brewing. Perfect for last-minute breakfast guests or weekend brunch spreads.

    Essential Tips & Tricks

    Ingredient Selection Matters

    The quality of your apple butter dramatically impacts the final result—look for one with visible spices and a deep brown color. Store-bought works perfectly, but homemade elevates these muffins to spectacular. Room temperature ingredients create a smoother batter that rises more evenly. For the flour, measure by spooning into your measuring cup rather than scooping directly from the bag to prevent dense muffins. I learned this the hard way after wondering why my first batch turned out heavy! The oil keeps these muffins moist for days, but melted butter can substitute for a richer flavor profile.

    Technique Tips for Perfect Results

    Don’t overmix the batter—this is the secret to tender muffins! Stop stirring as soon as the dry ingredients disappear. Those tiny lumps? They’re your friends! Fill your muffin cups about ¾ full for the perfect dome. I like using an ice cream scoop for consistent sizing. The initial high baking temperature (425°F for 5 minutes, then reducing to 350°F) creates that beautiful bakery-style muffin top. For an extra touch, sprinkle cinnamon sugar on top before baking for a delightful crunch that reminds me of my grandmother’s Italian Easter Cookies with its perfect sweet finish.

    Serving Ideas & Creative Variations

    Perfect Pairings & Presentation

    Serve these muffins slightly warm with a swirl of salted butter that melts into all the nooks and crannies. For brunch gatherings, I arrange them on a rustic wooden board with honey butter and apple slices for an Instagram-worthy spread. They pair beautifully with hot apple cider or a frothy cinnamon latte on chilly mornings. For dessert, warm a muffin and top with vanilla bean ice cream and a drizzle of caramel sauce—pure heaven! These also make thoughtful gifts—wrap in parchment paper, tie with twine, and deliver to neighbors or teachers for an autumn surprise.

    Delicious Flavor Adaptations

    The versatility of this recipe makes it a year-round favorite. Add chopped walnuts or pecans for delightful texture contrast. Fold in dried cranberries or golden raisins for fruity bursts. For a decadent twist, press a cube of cream cheese into each muffin before baking—the melty center is divine! Apple chunks create pockets of juicy goodness, while a streusel topping adds irresistible crunch. My personal favorite variation includes a tablespoon of maple syrup and diced crystallized ginger folded into the batter. The subtle heat complements the apple butter’s sweetness perfectly.

    Storage & Troubleshooting Guide

    Keeping Muffins Fresh

    These Apple Butter Muffins stay remarkably moist for days when stored properly. Cool completely before storing to prevent condensation and sogginess. Keep at room temperature in an airtight container lined with paper towels for 3-4 days. The paper towels absorb excess moisture, maintaining that perfect texture. For longer storage, freeze in a single layer until solid, then transfer to freezer bags. They’ll keep for up to 3 months! I always make a double batch specifically for freezing. To refresh, microwave a frozen muffin for 20-30 seconds or thaw overnight and warm in a 300°F oven for 5-7 minutes.

    Common Issues & Solutions

    If your muffins didn’t rise properly, your baking powder might be expired—it loses potency after 6-9 months. For flat-topped muffins instead of domed ones, your oven temperature might be too low—invest in an oven thermometer for accuracy. Tough, rubbery texture usually indicates overmixing; remember to fold gently just until ingredients are incorporated. If muffins stick to the pan, try using parchment liners or a better-quality non-stick pan. For pale muffins, brush tops with milk before baking and don’t forget that initial high-temperature bake to achieve golden perfection.

    Frequently Asked Questions

    Can I substitute homemade applesauce for the apple butter?

    No, apple butter is more concentrated and flavorful. If using applesauce, reduce it by simmering with spices until thick and caramelized, or your muffins will be too wet.

    How can I make these Apple Butter Muffins healthier?

    Substitute whole wheat flour for half the all-purpose flour, reduce sugar by ¼ cup, and use Greek yogurt instead of oil. The apple butter provides natural sweetness.

    Can I make this recipe dairy-free?

    Absolutely! Use plant-based milk and replace butter with coconut oil or vegan butter. The texture remains moist and delicious with these substitutions.

    Why did my muffins sink in the middle?

    Opening the oven door too early disrupts rising. Wait until at least 15 minutes into baking before checking, and ensure your baking powder is fresh.

    How do I know when the muffins are done?

    Insert a toothpick into the center—it should come out with a few moist crumbs but no wet batter. The tops should spring back when lightly touched.

    Final Thoughts

    These Apple Butter Muffins have become my signature fall recipe, requested at every family gathering and neighborhood potluck. The way they fill your home with warming spices while baking is almost as delightful as that first tender bite. I love how they transform simple ingredients into something truly special. Whether enjoyed with your morning coffee or as an afternoon treat with tea, these muffins capture autumn’s essence in the most delicious way. Don’t forget to share your creations on Pinterest and tag us—I’d love to see your version of these seasonal favorites!

  • Chilaquiles Bacon Eggs Cheese: Irresistibly Cheesy Breakfast Bliss!

    Chilaquiles Bacon Eggs Cheese: Irresistibly Cheesy Breakfast Bliss!

    Chilaquiles Bacon Eggs Cheese: Irresistibly Cheesy Breakfast Bliss!

    Chilaquiles with bacon, eggs, and cheese has become my weekend obsession lately! There’s something magical about those crispy tortilla chips soaking up spicy sauce, topped with runny eggs, crispy bacon, and melty cheese that just speaks to my soul. I discovered this Mexican breakfast dish during a trip to San Diego last year, and I’ve been perfecting my homemade version ever since. The beautiful chaos of textures and flavors creates the most satisfying comfort food that works for breakfast, brunch, or even dinner! If you’re looking for a dish that transforms simple ingredients into something extraordinary, this is the one.

    Recipe

    Why You’ll Love This Chilaquiles Bacon Eggs Cheese

    Perfect Balance of Textures

    There’s something utterly irresistible about the textural symphony happening in this dish. The tortilla chips maintain just enough crunch while soaking up the flavorful sauce, creating that perfect not-too-soggy, not-too-crunchy bite. Then comes the crispy bacon adding its smoky crunch, the gooey melted cheese pulling everything together, and those perfectly runny egg yolks creating a silky sauce that coats every bite. I still remember the first time I nailed this recipe—standing in my kitchen on a Sunday morning, that first perfect forkful had me doing a little happy dance!

    Quick Yet Impressive Meal

    What I adore about chilaquiles with bacon, eggs and cheese is how it transforms humble ingredients into something that looks and tastes restaurant-worthy in just 20 minutes! It’s my go-to when friends stay over unexpectedly or when I want to elevate a regular weekend morning. The vibrant colors and textures create an impressive presentation that belies how simple it is to throw together. Plus, it’s incredibly versatile—you can use store-bought tortilla chips and sauce when you’re in a hurry or make everything from scratch when you have more time.

    Essential Tips & Tricks

    Choosing the Right Ingredients

    The soul of great chilaquiles lies in using the right components. For tortilla chips, thicker restaurant-style varieties hold up best against the sauce. When it comes to the sauce, don’t be afraid to go bold—I love using a mixture of red and green salsas for complexity. For the bacon, thick-cut delivers the best texture contrast against the softer elements. The eggs should be fresh and cooked just until the whites set but the yolks remain runny. And for cheese, opt for a good melting variety like Oaxaca or Monterey Jack, similar to what I use in my cilbir eggs benedict fusion for that perfect pull.

    Perfecting the Assembly

    The assembly sequence makes all the difference between soggy disappointment and chilaquiles perfection. Start by lightly toasting your tortilla chips in the oven for 3-5 minutes if they’re not super fresh—this helps them stand up to the sauce. Add your sauce to the chips just 2-3 minutes before serving, tossing gently to coat without crushing. Cook your bacon until crisp, then drain on paper towels. Fry your eggs sunny-side up or over-easy just before serving. Layer everything in individual shallow bowls rather than one large serving dish to maintain the perfect texture in each portion.

    Serving Ideas & Creative Variations

    Complementary Side Dishes

    Chilaquiles with bacon, eggs and cheese pairs beautifully with fresh accompaniments that balance its richness. My favorite sides include sliced avocado drizzled with lime, a simple cucumber salad with a touch of chile, or pickled red onions for a tangy contrast. For a more substantial meal, add a side of refried beans sprinkled with cotija cheese. When I’m feeling fancy, I serve it alongside my creamy ranch turkey veggie skillet for a complete brunch spread that always impresses guests. The cool, fresh sides create the perfect counterpoint to the warm, spicy chilaquiles.

    Exciting Flavor Twists

    Don’t be afraid to put your personal spin on this versatile dish! For a smoky variation, add chipotle peppers in adobo to your sauce. Craving something green? Use tomatillo salsa and top with fresh cilantro and lime. For meat lovers, substitute the bacon with chorizo or carnitas. Vegetarian? Skip the meat and add black beans and grilled corn. My latest obsession is adding pickled jalapeños and a drizzle of Mexican crema just before serving. You can even create a fusion version with Italian flavors using marinara sauce and mozzarella instead of traditional Mexican ingredients.

    Storage & Troubleshooting Guide

    Keeping It Fresh

    While chilaquiles with bacon, eggs and cheese is best enjoyed immediately after preparation, there are ways to manage leftovers or prep ahead. If you know you’ll have leftovers, keep the components separate—store the sauce, cooked bacon, and toppings individually in airtight containers in the refrigerator for up to 3 days. For meal prep, prepare your sauce and toppings ahead of time, but always cook the eggs fresh and assemble just before eating. If you absolutely must store assembled chilaquiles, reheat gently in a covered skillet with a splash of water to rehydrate.

    Solving Common Problems

    The most common chilaquiles challenge is the texture balance—too soggy or too dry. If your chilaquiles are turning to mush, you’re likely using too much sauce or letting it sit too long before serving. Try using sturdier chips or reducing sauce quantity. For dry chilaquiles, warm your sauce before adding it to the chips and don’t be afraid to add a bit more. If your eggs are overcooked, try removing the pan from heat a little earlier—residual heat will continue cooking them. And if your cheese isn’t melting properly, cover the dish for a minute to trap heat and encourage melting.

    Frequently Asked Questions

    What’s the best type of tortilla chips for chilaquiles?

    Thick, sturdy restaurant-style tortilla chips work best as they hold up to the sauce without getting soggy too quickly. Homemade chips from stale tortillas are traditional and extra sturdy if you have time to make them.

    Can I make chilaquiles with bacon, eggs and cheese ahead of time?

    Prepare components separately (sauce, bacon, toppings) up to 3 days ahead, but assemble with chips and cook eggs just before serving for the best texture and flavor.

    What’s the difference between chilaquiles and migas?

    Chilaquiles use tortilla chips simmered in sauce, while migas incorporate tortilla pieces directly into scrambled eggs. Chilaquiles typically feature whole eggs on top rather than scrambled.

    Is there a vegetarian version of this dish?

    Absolutely! Skip the bacon and add black beans, grilled vegetables, or plant-based chorizo. The eggs and cheese still provide plenty of protein and flavor.

    What sauce works best for authentic chilaquiles?

    Traditional chilaquiles use either red sauce (salsa roja) or green sauce (salsa verde). Both work beautifully—choose based on your preference or use half of each for a “divorciados” style.

    Final Thoughts

    There’s something deeply satisfying about mastering chilaquiles with bacon, eggs and cheese—it’s that perfect dish that straddles the line between casual comfort food and impressive culinary creation. I love how it transforms humble ingredients into something truly special, bringing a touch of Mexican breakfast tradition to my table any time of day. Whether you’re cooking for yourself on a lazy weekend morning or hosting a brunch gathering, this adaptable dish never disappoints. The combination of crispy, creamy, spicy, and savory elements creates a meal that’s greater than the sum of its parts. Check out my Pinterest for more inspiring breakfast ideas!

  • Vegan Smoky BBQ Cauliflower Tacos That Will Blow Your Mind!

    Vegan Smoky BBQ Cauliflower Tacos That Will Blow Your Mind!

    Vegan Smoky BBQ Cauliflower Tacos That Will Blow Your Mind!

    Vegan Smoky BBQ Cauliflower Tacos have become my absolute obsession this season! There’s something magical about that perfect balance of smoky spice and sweet tanginess that makes these plant-based tacos irresistible. Last weekend, I served these at a backyard gathering, and even my carnivore friends couldn’t stop raving about them! The tender cauliflower florets, charred to perfection and coated in that rich BBQ sauce, create a satisfying texture that rivals any meat filling. If you’re looking to add more plant-based meals to your rotation while keeping things deliciously crave-worthy, these tacos are your answer.

    Recipe

    Why You’ll Love These Vegan Smoky BBQ Cauliflower Tacos

    Perfect Texture & Flavor Balance

    The secret to these mind-blowing tacos lies in how the cauliflower transforms when roasted. Unlike soggy vegetable fillings that leave you wanting, these florets develop crispy edges while maintaining a tender bite inside. I brush them with a homemade smoky BBQ sauce that caramelizes slightly in the oven, creating complex layers of flavor. The combination of smoked paprika, chipotle powder, and maple syrup creates that authentic BBQ experience without any meat! Plus, they’re incredibly satisfying – I promise you won’t miss the traditional protein one bit in these Vegan Smoky BBQ Cauliflower Tacos.

    Quick & Customizable for Any Diet

    What I adore about these Vegan Smoky BBQ Cauliflower Tacos is how effortlessly they fit into busy weeknights. The active prep time is just 15 minutes, with the oven doing most of the work. While designed to be plant-based, you can easily adjust the spice level to suit your family’s preferences. My niece can’t handle heat, so I make a milder BBQ sauce for her portion. These tacos are naturally gluten-free when served with corn tortillas, making them perfect for gatherings with mixed dietary needs. The recipe is also budget-friendly, as cauliflower is typically less expensive than meat alternatives.

    Essential Tips & Tricks

    Achieving Perfect Cauliflower Texture

    The key to restaurant-quality tacos is properly preparing your cauliflower. Cut florets into uniform, bite-sized pieces to ensure even cooking. I like to spread them on a parchment-lined baking sheet with plenty of space between pieces – overcrowding leads to steaming instead of roasting. For that ideal texture, roast at 425°F and toss halfway through cooking. The edges should be deeply golden and slightly charred while the centers remain tender. This contrast creates that satisfying bite that makes these Vegan Smoky BBQ Cauliflower Tacos so addictive! A final broil for 2 minutes gives them that perfect finish.

    Elevating Your BBQ Sauce

    While store-bought BBQ sauce works in a pinch, taking a few minutes to enhance it makes all the difference. Start with your favorite vegan BBQ base and customize it with smoked paprika, a splash of apple cider vinegar, and a touch of maple syrup for depth. I add a tiny pinch of cinnamon for warmth and complexity – it’s my secret ingredient! Let the sauce simmer for 5-7 minutes to meld the flavors before coating your cauliflower. The sauce should be thick enough to cling to the florets without dripping off. Remember to reserve some extra sauce for drizzling just before serving.

    Serving Ideas & Creative Variations

    Building the Perfect Taco

    The magic of these Vegan Smoky BBQ Cauliflower Tacos happens in the assembly stage. Warm your tortillas directly over a gas flame or in a dry skillet until slightly charred and pliable. Layer with a thin spread of avocado or vegan sour cream as a cooling base. Add your BBQ cauliflower, then top with crunchy elements like thinly sliced red cabbage, pickled red onions, or jicama slaw for textural contrast. Fresh elements are essential – cilantro, lime wedges, and sliced jalapeños brighten everything up. For extra indulgence, add a drizzle of creamy sauce just before serving.

    Exciting Flavor Variations

    These tacos are incredibly versatile as a base recipe. For a Korean-inspired twist, substitute gochujang for part of the BBQ sauce and top with quick-pickled cucumbers and kimchi. Craving something tropical? Add pineapple chunks to roast alongside the cauliflower and finish with a mango-avocado salsa. For a Mediterranean variation, swap the BBQ sauce for harissa paste mixed with maple syrup, then top with cucumber-mint yogurt and pickled red onions. You can even transform this filling into grain bowls, wraps, or loaded nachos for completely different meals using the same core ingredients.

    Storage & Troubleshooting Guide

    Make-Ahead & Storage Solutions

    These Vegan Smoky BBQ Cauliflower Tacos are perfect for meal prep. The roasted cauliflower keeps well in an airtight container in the refrigerator for up to 4 days. Store the sauce and toppings separately to maintain their textures. When reheating, avoid the microwave which can make the cauliflower soggy. Instead, spread it on a baking sheet and heat at 375°F for 7-10 minutes until warmed through. For make-ahead entertaining, prep all components the day before, then quickly reheat the cauliflower and warm the tortillas just before guests arrive. The flavors actually develop nicely overnight!

    Solving Common Challenges

    If your cauliflower turns out soggy instead of crispy, you’re likely overcrowding the pan or your oven temperature isn’t hot enough. Make sure your florets have breathing room and your oven is fully preheated. For cauliflower that’s too dry or burnt, try reducing the cooking time or temperature for your specific oven. If your BBQ sauce isn’t sticking well, make sure to pat the cauliflower dry before coating it, and consider thickening your sauce slightly by simmering it longer. For tortillas that crack, make sure they’re properly warmed or try double-layering them for extra stability.

    Frequently Asked Questions

    Can I make these Vegan Smoky BBQ Cauliflower Tacos gluten-free?

    Absolutely! Use certified gluten-free corn tortillas and check that your BBQ sauce is gluten-free (most are, but some contain soy sauce with wheat).

    How can I make this recipe less spicy?

    Reduce or omit the chipotle powder and use a mild BBQ sauce as your base. The smoked paprika adds smoky flavor without significant heat.

    Can I prepare the cauliflower in an air fryer?

    Yes! Cook at 380°F for about 12-15 minutes, shaking halfway through. Brush with BBQ sauce during the last 5 minutes of cooking.

    What can I substitute for cauliflower?

    Firm tofu, chickpeas, or jackfruit work beautifully with the same BBQ treatment. Each offers a different texture but pairs wonderfully with the smoky sauce.

    How do I keep the tacos from getting soggy when serving?

    Serve components separately and let everyone build their own. This creates an interactive meal and prevents the tortillas from becoming soggy.

    Final Thoughts

    These Vegan Smoky BBQ Cauliflower Tacos have become a staple in my kitchen for good reason – they deliver big flavor with minimal effort. There’s something deeply satisfying about transforming humble cauliflower into such a crave-worthy meal that pleases everyone at the table. I love watching skeptics become converts after just one bite! Whether you’re a committed vegan or simply looking to incorporate more plant-based meals into your rotation, these tacos deserve a spot in your recipe collection. Don’t forget to share your creations on Pinterest – I’d love to see your versions of this versatile dish!

  • Dill Yogurt Cucumber Salad: Refreshing, Creamy & Perfectly Tangy!

    Dill Yogurt Cucumber Salad: Refreshing, Creamy & Perfectly Tangy!

    Dill Yogurt Cucumber Salad: Refreshing, Creamy & Perfectly Tangy!

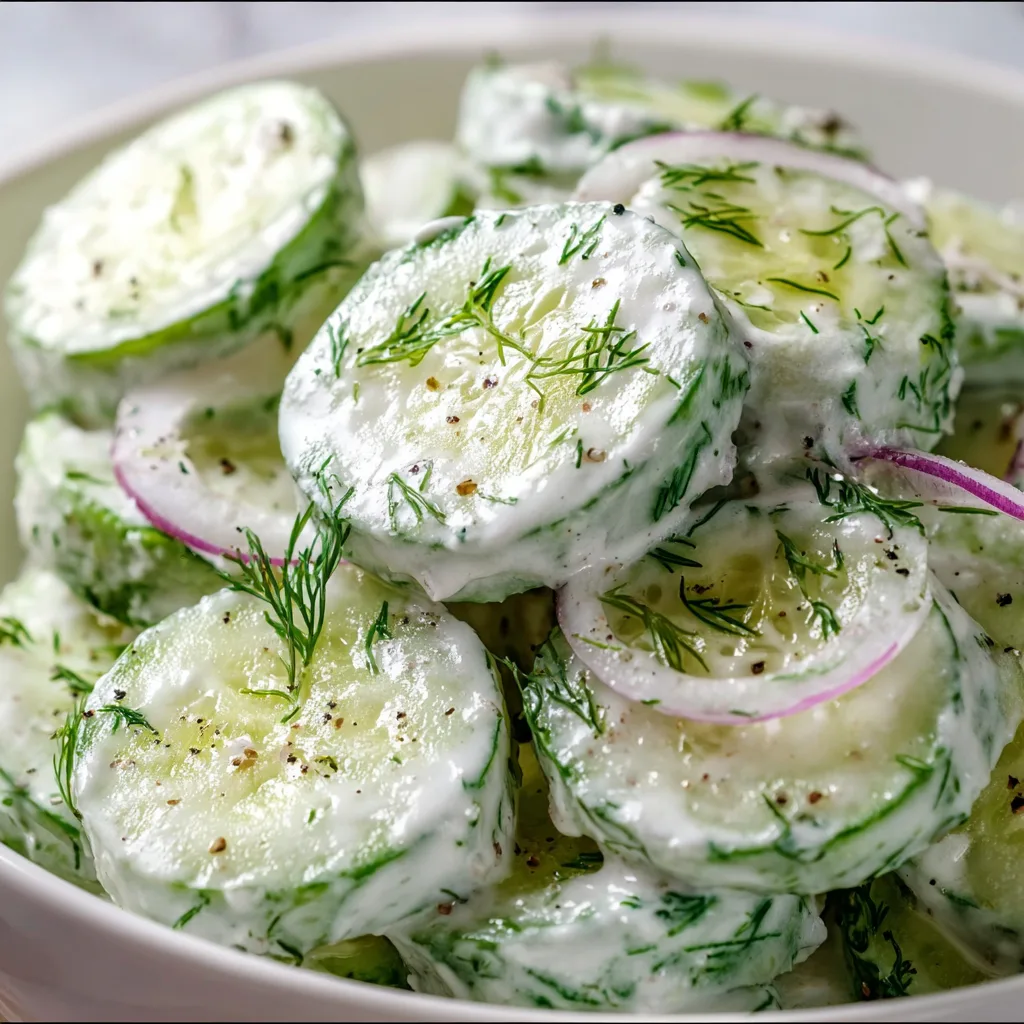
    This Dill Yogurt Cucumber Salad might just be the most refreshing side dish you’ll make all summer. The first time I served it at a backyard barbecue, my neighbor practically chased me around with her plate asking for the recipe! There’s something magical about the combination of cool, crisp cucumbers with tangy yogurt and fragrant dill that makes this salad irresistible. It’s become my go-to for everything from quick lunches to fancy dinner parties, and like my Tomato Burrata Toast, it’s a simple recipe that feels special every time.

    Recipe

    Why You’ll Love This Dill Yogurt Cucumber Salad

    Perfect Balance of Flavors and Textures

    This salad is all about contrasting elements working in perfect harmony. The cool crunch of fresh cucumbers against the creamy yogurt creates a texture paradise in your mouth. I love how the tangy yogurt base gets brightened with lemon juice and deepened with garlic, while fresh dill adds that distinctive herbal note that makes everything taste like summer. The first time I made this, I couldn’t stop sneaking spoonfuls straight from the mixing bowl! It’s light enough for hot days but satisfying enough to feel like a proper side dish.

    Quick Prep with Maximum Impact

    You won’t believe how much flavor comes from just 10 minutes of effort. This is my secret weapon recipe when I need something impressive but don’t have hours to spend in the kitchen. Simply slice cucumbers, whisk together the yogurt dressing, combine, and chill! The hardest part is waiting for the flavors to meld in the refrigerator. I’ve made this countless times when unexpected guests drop by, and it always earns rave reviews despite the minimal effort. Perfect for busy weeknights when you want something fresh alongside your main dish.

    Essential Tips & Tricks

    Cucumber Selection and Preparation

    The foundation of this salad is choosing the right cucumbers. English or Persian varieties work best as they have thinner skins and fewer seeds. I like to partially peel mine in stripes—it keeps some of that gorgeous green color while removing any bitter notes. For the crispest texture, salt your cucumber slices and let them drain in a colander for 15-20 minutes before patting dry. This simple step draws out excess moisture and concentrates the cucumber flavor, preventing that dreaded soggy salad situation we’ve all experienced!

    Yogurt Matters More Than You Think

    Don’t underestimate how much your yogurt choice impacts the final dish! I always reach for full-fat Greek yogurt for its luxurious creaminess and tang. The thicker consistency creates the perfect coating for cucumber slices without becoming watery. For a lighter version, 2% works well too, but avoid non-fat varieties as they often contain additives and lack richness. If you’re feeling adventurous, try making your own yogurt for an extra special touch—the difference is remarkable and adds a homemade quality that store-bought can’t match.

    Serving Ideas & Creative Variations

    Perfect Pairing Partners

    This Dill Yogurt Cucumber Salad shines alongside grilled proteins like lemon chicken, salmon, or lamb kebabs. The cool, creamy texture provides beautiful contrast to anything charred or spicy. I love serving it with Mediterranean-inspired meals—it’s particularly divine with falafel or alongside hummus and warm pita. For a complete summer spread, pair it with my Chili Lime Shrimp Ceviche and watch your guests go wild! The salad also makes a wonderful sandwich topping or pita filling for lunch the next day.

    Exciting Flavor Twists

    While the classic version is perfect, this salad welcomes creative adaptations. Add thinly sliced red onion for peppery bite, or mix in halved cherry tomatoes for juicy pops of color. I sometimes toss in crumbled feta cheese or toasted pine nuts for extra texture and richness. For a Middle Eastern twist, sprinkle with za’atar and a drizzle of olive oil before serving. My personal favorite variation includes diced avocado and a pinch of red pepper flakes—the creamy, spicy combination is absolutely addictive and transforms this side into a light meal.

    Storage & Troubleshooting Guide

    Keeping It Fresh

    The key to maintaining crispness is proper storage. This salad is best enjoyed within 24 hours of making, but will keep for up to 3 days in an airtight container. If preparing ahead for a party, I recommend keeping the cucumber mixture and yogurt dressing separate until about an hour before serving. This prevents the cucumbers from releasing too much water and diluting that gorgeous creamy dressing. Always give it a quick stir before serving, and if it seems watery after storage, simply drain off excess liquid.

    Fixing Common Issues

    Even the simplest recipes can sometimes need troubleshooting. If your salad turns out too watery, drain the excess liquid and add a bit more yogurt to restore creaminess. Too bland? A pinch of salt, extra lemon zest, or more fresh herbs will perk it up instantly. If the garlic flavor is overwhelming, balance it with additional yogurt and a touch of honey. Remember that flavors intensify as the salad sits, so what might taste perfectly seasoned initially could become stronger overnight. Trust your taste buds and adjust accordingly!

    Frequently Asked Questions

    Can I use dried dill instead of fresh?

    Yes, but use only 1 teaspoon of dried dill as it’s more concentrated. Fresh dill provides brighter flavor, but dried works in a pinch. Rehydrate dried dill in a little lemon juice before adding.

    How do I prevent my Dill Yogurt Cucumber Salad from becoming watery?

    Salt and drain cucumber slices for 20 minutes before mixing. Pat them dry with paper towels, then combine with the yogurt dressing just before serving for best results.

    What can I substitute for Greek yogurt?

    Sour cream, labneh, or dairy-free yogurt alternatives work well. Each offers a different tanginess level, so adjust seasonings accordingly. Coconut yogurt adds a subtle sweetness.

    Is this recipe keto-friendly?

    Yes! Cucumbers are low-carb vegetables, and full-fat Greek yogurt fits keto macros. Check yogurt labels for hidden sugars and use herbs generously for maximum flavor without carbs.

    Can I make this salad ahead for meal prep?

    Absolutely! Prepare components separately—slice cucumbers and mix dressing—then combine portions as needed throughout the week for maximum freshness and texture.

    Final Thoughts

    This Dill Yogurt Cucumber Salad has become my summer signature dish for good reason. There’s something magical about how a few simple ingredients transform into something so refreshing and satisfying. I love watching friends’ faces light up with that first cool, creamy bite—it’s the ultimate warm-weather comfort food that never feels heavy. Whether you’re serving it alongside grilled meats or enjoying it straight from the fridge on a hot afternoon, this salad delivers big flavor with minimal effort. Don’t forget to check out more refreshing ideas on our Pinterest for summer inspiration!

  • Sourdough Cheez-Its Crackers: Irresistibly Crispy Snack Bliss!

    Sourdough Cheez-Its Crackers: Irresistibly Crispy Snack Bliss!

    Sourdough Cheez-Its Crackers: Irresistibly Crispy Snack Bliss!

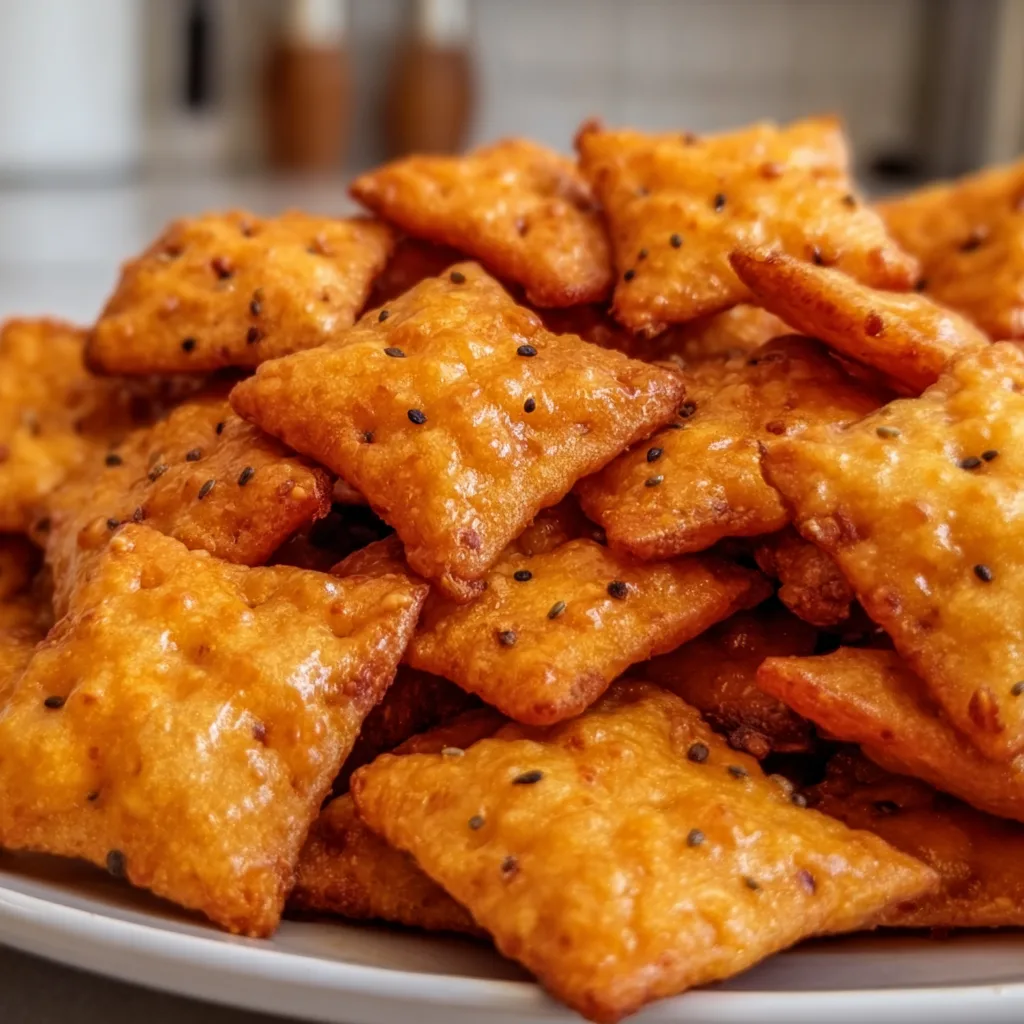
    Sourdough Cheez-Its Snack Crackers are the perfect way to transform your discard into something magical. There’s nothing quite like the tangy zip of homemade cheese crackers that put the store-bought version to shame! I discovered this recipe during a rainy weekend when my sourdough starter was bubbling over, and I couldn’t bear to waste another drop. The combination of sharp cheddar and that signature sourdough tang creates irresistible little squares that disappear faster than I can bake them. If you’re looking for a snack that’s both impressive and addictive, you’ve found it at Recipes Darleen.

    Recipe

    Why You’ll Love This Sourdough Cheez-Its Snack Crackers

    The Perfect Sourdough Discard Solution

    Let’s be honest—finding creative ways to use sourdough discard can feel like a part-time job. These crackers have become my go-to solution because they’re ridiculously simple yet taste like you spent hours perfecting them. The discard adds a complex tanginess that perfectly complements the sharp cheddar, creating a depth of flavor you simply can’t get from regular crackers. Plus, there’s something deeply satisfying about transforming what would have been waste into the star ingredient of a snack everyone fights over. No more guilt-tossing that precious discard!

    Better Than Store-Bought Taste

    The difference between these homemade Sourdough Cheez-Its and the boxed version is like comparing fresh-baked bread to a factory loaf—there’s simply no competition. The crackers emerge from your oven with a gorgeous golden hue and that perfect crisp-yet-tender texture that makes them dangerously poppable. I’ve watched guests who claimed they “weren’t hungry” demolish an entire batch while chatting. The real cheese flavor shines through with none of those artificial ingredients, and the sourdough adds a complexity that makes these truly special.

    Essential Tips & Tricks

    Perfecting Your Dough Consistency

    Getting the right dough consistency is crucial for perfectly crispy Sourdough Cheez-Its. Your dough should be firm but pliable—think play-dough that holds its shape when rolled. If it’s too sticky, don’t panic! Simply dust your work surface with a bit more flour and fold it in gently. For the sharpest flavor, use extra-sharp or aged cheddar cheese and make sure it’s finely grated. I’ve found that chilling the dough for 30 minutes before rolling makes it much easier to work with and helps the crackers hold their shape during baking.

    Rolling and Cutting Techniques

    The secret to professional-looking Sourdough Cheez-Its lies in how you roll and cut them. Aim for uniform thickness—about 1/8 inch is perfect for that ideal crisp texture. I use a pasta roller for super-even crackers, but a regular rolling pin works beautifully too. For that classic look, a fluted pastry wheel creates perfect zigzag edges, while a pizza cutter makes quick work of straight lines. Don’t forget the signature hole in the middle! A wooden skewer or toothpick works perfectly to create that authentic look while helping the crackers bake evenly. Check out these Easy Jalapeno Popper Crescent Rolls for another quick snack idea!

    Serving Ideas & Creative Variations

    Perfect Pairings for Any Occasion

    These Sourdough Cheez-Its elevate any snack board to impressive heights. I love serving them alongside a creamy dip like whipped feta or herb-flecked cream cheese for a simple yet sophisticated appetizer. They’re sturdy enough to scoop up hummus but delicate enough to enjoy on their own. For wine nights, pair them with a bold red that complements the tangy cheese flavor. They’re also perfect tucked into lunchboxes or set out for after-school snacks—my nephew calls them “the fancy orange crackers” and requests them every visit.

    Flavor Variations to Try

    The beauty of homemade Sourdough Cheez-Its is how easily you can customize them! My spicy version with a pinch of cayenne and smoked paprika disappears fastest at parties. For an herb-lovers version, try adding dried rosemary and thyme to the dough. Everything bagel seasoning sprinkled on top before baking creates an irresistible savory crunch. For a more complex cheese flavor, substitute half the cheddar with parmesan or gruyère. These variations pair perfectly with Easy Spinach Stuffed Chicken Breast for a complete meal!

    Storage & Troubleshooting Guide

    Keeping Your Crackers Crispy

    The enemy of crispy crackers is moisture, so proper storage is essential. Once your Sourdough Cheez-Its have completely cooled, store them in an airtight container with a small silica gel packet (save these from vitamin bottles or new shoes). This keeps them perfectly crisp for up to a week. For longer storage, they freeze beautifully for up to three months—just thaw at room temperature and refresh in a 300°F oven for 5 minutes if needed. I’ve found that glass containers maintain crispness better than plastic, but either works in a pinch.

    Troubleshooting Common Issues

    If your crackers aren’t as crispy as you’d like, they likely need a bit more baking time. The color should be a deep golden brown—don’t be afraid to push the baking time a bit longer for maximum crispness. If they’re browning too quickly without crisping, your oven may be running hot. Try reducing the temperature by 25 degrees and baking a bit longer. Uneven thickness is the most common culprit behind inconsistent results, so take your time rolling the dough evenly. For crackers that puff too much, make sure you’re poking enough holes in each piece.

    Frequently Asked Questions

    Can I use fresh sourdough starter instead of discard?

    Yes! Active starter works beautifully, though the crackers may have a stronger sourdough flavor. You might need slightly more flour since active starter is usually more liquid than discard.

    How do I know when my Sourdough Cheez-Its Snack Crackers are perfectly done?

    Look for even golden-brown color and a firm texture when pressed gently. The edges should be slightly darker, and the crackers should feel dry to the touch.

    Can I make these crackers without a food processor?

    Absolutely! Mix the dough by hand using a pastry cutter or two knives to incorporate the butter, then mix in the remaining ingredients until combined.

    Are these crackers suitable for freezing?

    Yes! Freeze them in an airtight container for up to 3 months. Thaw at room temperature and reheat at 300°F for 5 minutes to restore crispness.

    What cheese substitutions work best?

    Any hard, flavorful cheese works well. Try gruyère, gouda, or parmesan. Avoid soft cheeses like mozzarella as they contain too much moisture.

    Final Thoughts

    These Sourdough Cheez-Its Snack Crackers have become a staple in my baking rotation—not just because they use up discard, but because they’re genuinely delicious. There’s something magical about transforming simple ingredients into these perfectly crisp, tangy bites that make everyone think you’re a culinary genius. They’ve saved many last-minute gatherings and quiet afternoons alike. I’d love to see your creations on Pinterest! Whether you stick to the classic recipe or experiment with flavors, these crackers are bound to become your new favorite sourdough discard project.

  • Brown Butter Honey Pistachio Bars: Irresistibly Nutty & Gooey!

    Brown Butter Honey Pistachio Bars: Irresistibly Nutty & Gooey!

    Brown Butter Honey Pistachio Bars: Irresistibly Nutty & Gooey!

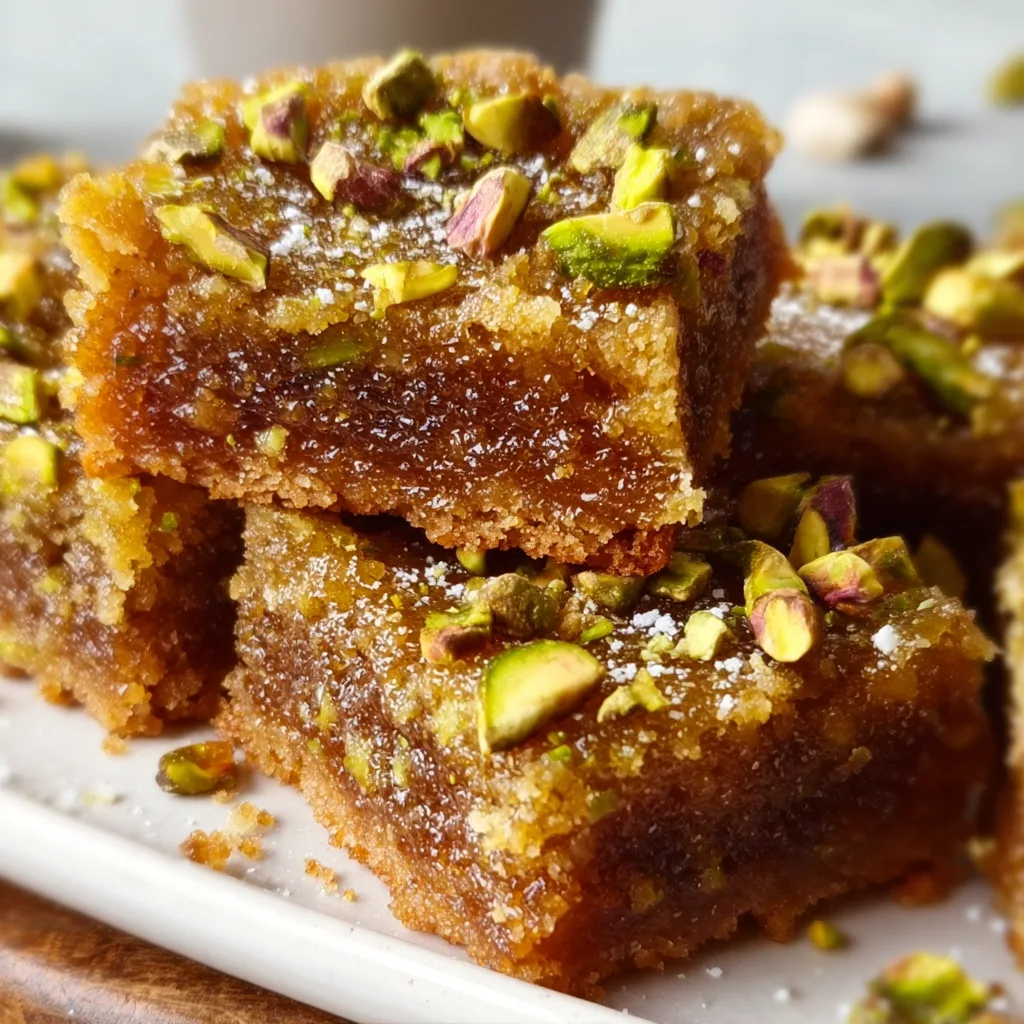
    Brown Butter Honey Pistachio Bars are what happens when buttery shortbread meets golden honey and toasty pistachios. The first time I made these for my sister’s birthday gathering, the pan was empty before I could even snap a photo! There’s something magical about the nutty aroma of brown butter that fills your kitchen as these bake. The combination of textures—crisp base, chewy center, and crunchy pistachios—creates an irresistible treat that’s sophisticated yet comforting. Perfect for holiday gatherings or simply paired with afternoon tea.

    Recipe

    Why You’ll Love These Brown Butter Honey Pistachio Bars

    A Symphony of Flavors

    The brown butter is the star of the show here, lending a complex, nutty flavor that elevates these bars from good to unforgettable. I still remember the first time I discovered brown butter—standing in my grandmother’s kitchen, watching the magical transformation as the butter sizzled and turned golden. The honey adds a floral sweetness that balances perfectly with the slight saltiness of the pistachios. Each bite delivers a perfect harmony of sweet, salty, nutty, and buttery notes that dance across your palate.

    Make-Ahead Convenience

    These bars are a busy host’s dream! You can prepare the shortbread base up to three days ahead and store it in the refrigerator. The honey-pistachio topping comes together in minutes when you’re ready to bake. I’ve even frozen the fully baked bars for up to a month with excellent results—just thaw overnight in the refrigerator. The flavors actually deepen after a day, making these perfect for advance preparation before gatherings. Your future self will thank you when you pull these out for unexpected guests!

    Essential Tips & Tricks

    Mastering the Brown Butter

    Browning butter requires patience and attention—but it’s worth every minute. Use a light-colored pan so you can monitor the color changes. The butter will foam, then the milk solids will sink and gradually turn golden brown. The nutty aroma is your cue it’s ready! Remove it immediately from heat to prevent burning. I once got distracted by a phone call and ended up with black butter—lesson learned! Let it cool slightly before adding to your mixture for the best texture and to avoid cooking your eggs.

    The Perfect Texture Balance

    For the ideal texture, underbake slightly rather than overbake. The center should be set but with a slight jiggle—it will continue cooking as it cools. Allow the bars to cool completely before cutting for clean edges. I recommend chilling them for at least two hours, then using a sharp knife dipped in hot water (and wiped dry) between cuts. This technique gives you those picture-perfect edges that make these bars look as professional as they taste.

    Serving Ideas & Creative Variations

    Elegant Presentation Options

    Transform these bars into a showstopping dessert by serving them slightly warm with a small scoop of vanilla bean ice cream or a dollop of lightly sweetened whipped cream. For dinner parties, I cut them into smaller diamonds instead of squares and dust with a whisper of powdered sugar. The contrast of the golden bars against a white serving plate makes for a beautiful presentation. Add a small sprig of fresh mint or a few additional chopped pistachios on top for a professional touch.

    Seasonal Adaptations

    These versatile bars welcome seasonal twists! In summer, add lemon zest to the shortbread base for brightness. For fall, incorporate a teaspoon of pumpkin spice and swap half the pistachios for pecans. Winter holidays call for a dash of cardamom and dried cranberries. Spring? Try adding dried apricots and a hint of orange blossom water. My personal favorite variation includes a thin layer of dark chocolate between the shortbread and honey-pistachio topping—the chocolate adds another dimension of flavor that pairs beautifully with the brown butter.

    Storage & Troubleshooting Guide

    Keeping Them Fresh

    Store your Brown Butter Honey Pistachio Bars in an airtight container at room temperature for up to 3 days or refrigerate for up to a week. Place parchment paper between layers to prevent sticking. For longer storage, wrap individual bars in plastic wrap, then aluminum foil, and freeze for up to 3 months. I’ve found that the flavor actually deepens after the first day as the honey has time to fully infuse the bars—making them ideal for make-ahead treats.

    Fixing Common Issues

    If your shortbread base crumbles when cutting, it likely needed more time to chill thoroughly before baking. Next time, refrigerate the dough for at least 30 minutes before baking. For a topping that’s too soft, an extra 5 minutes in the oven should help set it properly. If your brown butter has small dark specks, don’t worry! Those are caramelized milk solids and add wonderful flavor. However, if it smells burnt rather than nutty, it’s best to start over—the bitter taste will permeate your bars.

    Frequently Asked Questions

    Can I use salted butter for Brown Butter Honey Pistachio Bars?

    Yes, but reduce any additional salt in the recipe. The nutty flavor of brown butter works beautifully with a touch of salt, enhancing the contrast with the sweet honey.

    How do I know when my brown butter is ready?

    Watch for a golden amber color and a nutty, toasty aroma. The milk solids at the bottom should be light brown, not black.

    Can I substitute another nut for pistachios?

    Absolutely! Pecans, walnuts, or hazelnuts work wonderfully. Each brings its unique flavor profile while maintaining the delightful texture contrast.

    Are these bars gluten-free?

    Not as written, but you can substitute a 1:1 gluten-free flour blend in the shortbread base with good results.

    How do I achieve clean cuts on my Brown Butter Honey Pistachio Bars?

    Chill completely first, then use a sharp knife dipped in hot water and wiped dry between each cut for professional-looking edges.

    Final Thoughts

    These Brown Butter Honey Pistachio Bars have become my signature dessert for good reason. They strike that perfect balance between sophisticated and comforting, impressive yet approachable. The brown butter adds depth that elevates them beyond ordinary bar cookies, while the honey-pistachio combination creates a memorable flavor profile that guests always request again. Whether for holiday gatherings, potlucks, or simply as a special treat for yourself, these bars bring a moment of sweet indulgence to any occasion. Find more delicious recipes on Pinterest.