Author: Sara Maren

  • Polish Sausage Sauerkraut & Potatoes: Irresistible Comfort Feast!

    Polish Sausage Sauerkraut & Potatoes: Irresistible Comfort Feast!

    Polish Sausage Sauerkraut & Potatoes: Irresistible Comfort Feast!

    Polish sausage, sauerkraut and potatoes combine to create the ultimate comfort food trifecta that warms both body and soul. The first time I made this hearty dish, the aroma transported me straight to my grandmother’s kitchen where she’d simmer similar ingredients on cold winter afternoons. There’s something magical about how these simple components transform into a rich, satisfying meal that feels like a warm hug in food form. This one-pot wonder balances tangy sauerkraut with savory sausage and tender potatoes for a classic combination that’s stood the test of time for good reason.

    Recipe

    Why You’ll Love This Polish sausage Sauerkraut and potatoes

    Perfect Balance of Flavors and Textures

    The beauty of Polish sausage sauerkraut and potatoes lies in its perfect harmony of contrasting elements. The smoky richness of the kielbasa provides a savory foundation that pairs beautifully with the bright, tangy crunch of sauerkraut. When these bold flavors mingle with creamy potatoes that absorb all those wonderful juices, magic happens on your plate. I love how each bite offers something different—sometimes the snap of the sausage casing, sometimes the tender yield of a potato chunk. The caraway seeds add subtle aromatic notes that elevate the entire dish from simple to sublime.

    Simple One-Pot Preparation

    There’s something deeply satisfying about a meal that delivers maximum flavor with minimum fuss. This Polish sausage sauerkraut and potatoes dish is the epitome of efficient cooking—everything goes into one pot, meaning fewer dishes and more time to enjoy your evening. I particularly appreciate how it builds flavor as it cooks, with each ingredient contributing to the rich broth that develops. On busy weeknights when I’m tempted to order takeout, I remind myself that this hearty meal requires just about 10 minutes of hands-on time before it simmers away on its own, filling my home with irresistible aromas.

    Essential Tips & Tricks

    Selecting the Best Ingredients

    The quality of your Polish sausage sauerkraut and potatoes dish depends heavily on starting with the right components. For sausage, look for authentic kielbasa with a high meat content and natural casing that provides that satisfying snap. Fresh-packed sauerkraut from the refrigerated section offers brighter flavor than shelf-stable varieties—I drain but never rinse it, preserving those tangy juices. Choose waxy potatoes like Yukon Golds or red potatoes that hold their shape during cooking. A splash of good beer adds depth, while caraway seeds bring traditional flavor. When I splurged on smoked kielbasa from my local Polish deli last month, the difference was remarkable!

    Perfecting the Cooking Process

    The secret to exceptional Polish sausage sauerkraut and potatoes lies in the layering technique and timing. Start by browning the sausage first to render its flavorful fat—this becomes the foundation for everything else. Layer potatoes on the bottom where they’ll absorb the developing broth, then add sauerkraut and nestle the browned sausage on top. A slow simmer is essential; rushing the cooking process won’t allow the flavors to meld properly. I’ve learned through trial and error to keep the lid slightly ajar during the final 15 minutes, allowing some liquid to reduce and concentrate the flavors while maintaining enough moisture to keep everything tender.

    Serving Ideas & Creative Variations

    Complementary Side Dishes

    Polish sausage sauerkraut and potatoes shines as a standalone meal, but thoughtful accompaniments can elevate the experience. A slice of dark rye bread with sweet butter makes the perfect vehicle for soaking up the savory broth—something I never skip! For a fresh contrast to the rich main dish, serve a simple cucumber salad dressed with dill, vinegar, and a touch of sour cream. When hosting guests, I add a platter of pickled vegetables like beets and mushrooms for an authentic Polish spread. For special occasions, consider starting with a cup of borscht or mushroom soup to create a complete feast that honors Eastern European culinary traditions.

    Regional and Seasonal Adaptations

    This versatile dish welcomes adaptation based on regional preferences and seasonal availability. In summer, I love adding fresh herbs like dill and parsley right before serving for brightness. For a Southern twist, substitute smoked andouille and add a dash of Cajun seasoning—surprisingly delicious! Apple-lovers might appreciate adding thinly sliced Granny Smith apples during the last 15 minutes of cooking, creating a sweet-tart counterpoint to the savory elements. During autumn harvest, I sometimes substitute half the potatoes with chunks of butternut squash, which adds gorgeous color and subtle sweetness that complements the tangy sauerkraut beautifully.

    Storage & Troubleshooting Guide

    Proper Storage and Reheating

    Polish sausage sauerkraut and potatoes actually improves with time, making it perfect for meal prep and leftovers. Store cooled portions in airtight containers in the refrigerator for up to 4 days—the flavors will continue to develop and meld. When reheating, add a splash of chicken broth or water to maintain moisture, and warm gently over medium-low heat rather than blasting with high temperatures. For freezing, portion into freezer-safe containers, leaving room for expansion, and use within 3 months. I’ve found that potatoes can become slightly mealy after freezing, but the overall flavor remains delicious—perfect for those nights when cooking from scratch isn’t an option.

    Common Issues and Solutions

    Even experienced cooks occasionally encounter challenges with Polish sausage sauerkraut and potatoes. If your dish turns out too watery, simply remove the lid and increase heat slightly to reduce excess liquid—but watch carefully to prevent scorching. Conversely, if it’s too dry, add small amounts of chicken stock or beer. Sauerkraut too tangy? Rinse it lightly before adding or balance with a teaspoon of brown sugar. Potatoes not cooking evenly? Next time, ensure they’re cut to uniform size and layer them beneath the sauerkraut where they’ll cook more consistently in the developing broth.

    Frequently Asked Questions

    Can I make Polish sausage sauerkraut and potatoes in a slow cooker?

    Absolutely! Brown the sausage first, then combine all ingredients in your slow cooker. Cook on low for 6-7 hours or high for 3-4 hours until potatoes are tender. This method intensifies the flavors beautifully.

    What’s the best type of Polish sausage to use?

    Traditional smoked kielbasa offers authentic flavor, but any smoked Polish sausage works well. Look for varieties with visible garlic and spices for the richest taste experience.

    Can I use fresh cabbage instead of sauerkraut?

    Yes, though it creates a different dish. If using fresh cabbage, sauté it first with onions until softened, and add a splash of vinegar to mimic some of the sauerkraut’s tanginess.

    How can I make this dish less acidic?

    Rinse the sauerkraut before adding it, or include 1-2 tablespoons of brown sugar to balance the acidity. Adding sliced apples also helps neutralize tanginess while adding subtle sweetness.

    What’s the best potato variety for this recipe?

    Waxy potatoes like Yukon Golds or red potatoes hold their shape best during cooking, absorbing flavors without falling apart in the simmering broth.

    Final Thoughts

    Polish sausage sauerkraut and potatoes embodies everything wonderful about comfort food—it’s hearty, flavorful, and carries the weight of culinary tradition in every bite. The magic happens when these humble ingredients transform through slow cooking into something greater than their parts. I hope this dish brings the same warmth and satisfaction to your table that it’s brought to mine over the years. Whether you’re connecting with your heritage or simply exploring new flavor combinations, this one-pot wonder deserves a regular spot in your meal rotation. Find more inspiration for your cooking adventures on Pinterest.
  • Crockpot Black Eyed Peas & Collard Greens: Comfort in Every Bite!

    Crockpot Black Eyed Peas & Collard Greens: Comfort in Every Bite!

    Crockpot Black Eyed Peas & Collard Greens: Comfort in Every Bite!

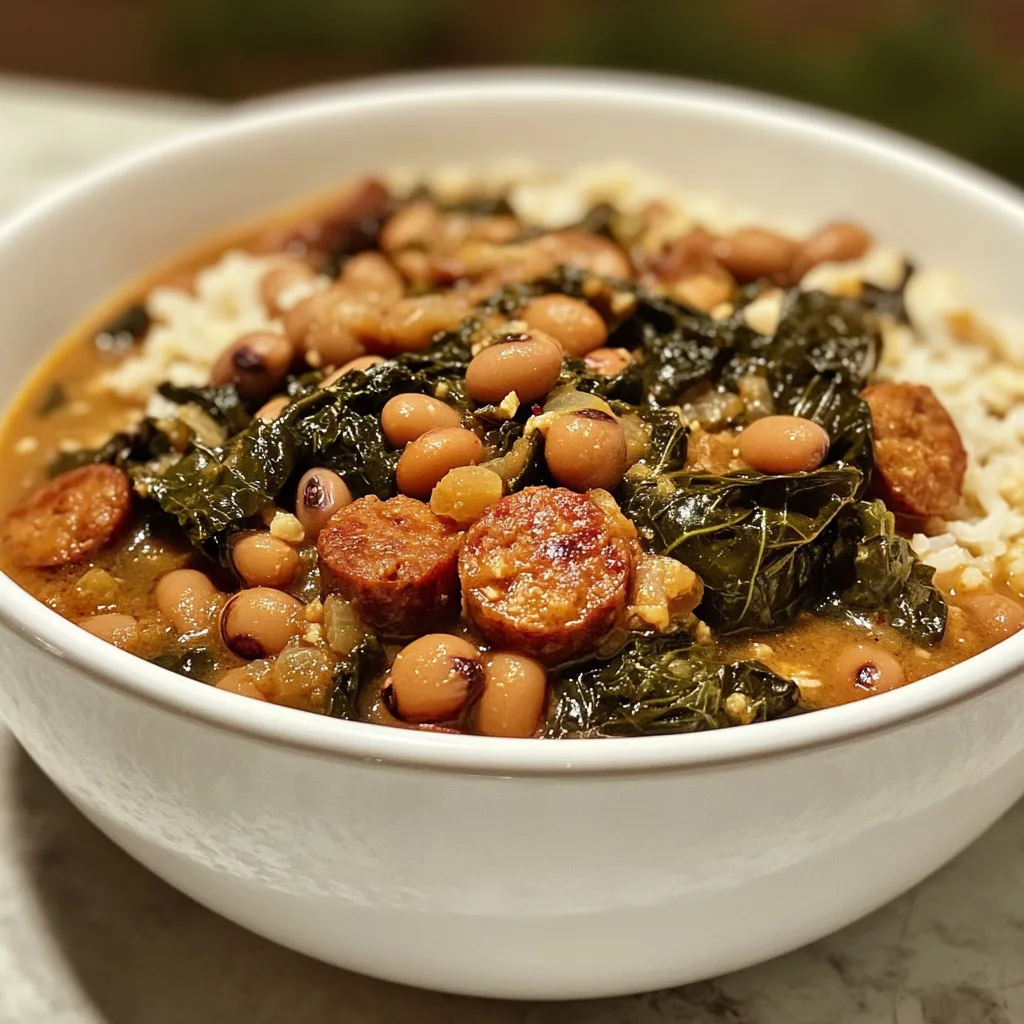
    Crockpot Black Eyed Peas and Collard Greens might just be the ultimate comfort food that speaks to my soul on chilly winter days. There’s something magical about the way these humble ingredients transform into a rich, smoky pot of goodness with barely any effort. I discovered this recipe during my first winter in the South, when my neighbor brought over a steaming container on New Year’s Day. The tender beans, silky greens, and that incredible pot liquor had me instantly hooked. This slow cooker version captures all that traditional flavor while fitting perfectly into our busy lives. Let’s dive into this cozy, hearty dish that feeds both body and spirit.

    Recipe

    Why You’ll Love This Crockpot Black Eyed Peas and Collard Greens

    Perfect Set-It-and-Forget-It Meal

    This Crockpot Black Eyed Peas and Collard Greens recipe is the definition of effortless cooking. I love throwing everything into the slow cooker in the morning and coming home to the most incredible aromas filling my kitchen. The beans become perfectly tender without any babysitting, while the collards break down into silky, flavorful bites. There’s something deeply satisfying about creating such a nourishing meal with just 10 minutes of hands-on time. Plus, it’s budget-friendly comfort food at its finest—feeding a crowd for pennies per serving.

    Packed With Nutrition and Flavor

    Don’t let the simplicity fool you—this dish delivers serious nutrition alongside incredible taste. The combination of black-eyed peas and collard greens creates a nutritional powerhouse rich in protein, fiber, vitamins A and C, and iron. I’m always amazed at how the humble ingredients transform as they simmer. The smoky notes from the ham hock (or smoked turkey) infuse everything with depth, while the greens develop a silky texture that soaks up all that savory broth. It’s soul-satisfying food that happens to be good for you too.

    Essential Tips & Tricks

    Perfect Bean Preparation

    For truly exceptional Crockpot Black Eyed Peas and Collard Greens, proper bean prep makes all the difference. While you can use canned beans in a pinch, dried beans deliver superior texture and flavor absorption. I recommend soaking dried beans overnight, which reduces cooking time and improves digestibility. No time to soak? Try the quick-soak method: boil beans for 2 minutes, then let stand covered for 1 hour. For extra flavor, replace some of the cooking water with chicken broth. This simple swap creates a richer base that transforms the entire dish, similar to how broth elevates my Slow Cooker Creamy Tuscan Chicken Orzo.

    Layering Flavors for Maximum Impact

    The secret to incredible Crockpot Black Eyed Peas and Collard Greens lies in building flavor layers. Start with a quick sauté of onions, garlic, and celery before adding to the crockpot—those caramelized aromatics make a world of difference. Don’t skip the smoked meat component (ham hock, bacon, or smoked turkey wing); it provides that signature smoky depth. For vegetarians, add a tablespoon of smoked paprika and a dash of liquid smoke instead. I always add a splash of apple cider vinegar during the last 30 minutes—that subtle acidity brightens all the flavors and cuts through the richness.

    Serving Ideas & Creative Variations

    Traditional Southern Pairings

    Serving Crockpot Black Eyed Peas and Collard Greens the traditional way creates an authentic Southern experience. Ladle this soulful dish over a scoop of fluffy white rice or alongside a piece of golden cornbread for soaking up that precious pot liquor. I love adding a splash of pepper vinegar or hot sauce at the table—that tangy heat perfectly balances the earthy flavors. For a complete meal, pair with German Goulash or simple fried chicken. Don’t forget to serve with sliced sweet onions and tomatoes on the side for a fresh contrast to the rich, slow-cooked flavors.

    Creative Modern Twists

    While traditional is delicious, don’t be afraid to give your Crockpot Black Eyed Peas and Collard Greens some creative spins. Try a Mediterranean version with olive oil, lemon zest, and crumbled feta added just before serving. For a Cajun twist, add andouille sausage, bell peppers, and a bold spice blend of cayenne, thyme, and oregano. My family loves it served unconventionally as a topping for baked sweet potatoes or stuffed into warm pita with yogurt sauce. You can even transform leftovers into an incredible soup by adding more broth, diced tomatoes, and a handful of small pasta shapes.

    Storage & Troubleshooting Guide

    Proper Storage for Maximum Freshness

    Like many slow-cooked dishes, Crockpot Black Eyed Peas and Collard Greens actually improves with time as the flavors meld. Store leftovers in airtight containers in the refrigerator for up to 4 days. The dish also freezes beautifully—portion into freezer-safe containers, leaving some headspace, and freeze for up to 3 months. I often make a double batch specifically for freezing. When reheating, add a splash of broth or water as the mixture tends to thicken considerably. For best results, thaw frozen portions overnight in the refrigerator before gently reheating on the stovetop over medium-low heat.

    Solving Common Problems

    If your Crockpot Black Eyed Peas and Collard Greens isn’t turning out perfectly, a few simple fixes can help. Beans still tough after cooking? They might be old—dried beans over a year old take significantly longer to soften. Next time, try adding ¼ teaspoon of baking soda to the cooking liquid. Dish too watery? Remove the lid for the final hour of cooking or thicken with a cornstarch slurry. If the flavor seems flat or bland, brighten with acid (vinegar or lemon juice), add more salt gradually, or stir in additional spices. Remember that salt is best adjusted at the end, as beans can toughen if salted too early.

    Frequently Asked Questions

    Can I make Crockpot Black Eyed Peas and Collard Greens vegetarian?

    Absolutely! Skip the ham hock and use vegetable broth instead of chicken broth. Add 1 tablespoon of smoked paprika, 2 tablespoons of olive oil, and a dash of liquid smoke for that savory depth without meat.

    Do I have to soak the black-eyed peas first?

    While soaking isn’t strictly necessary for black-eyed peas, it reduces cooking time and improves digestibility. For unsoaked beans, add 1-2 hours to your cooking time and possibly more liquid.

    Can I use frozen collard greens instead of fresh?

    Yes! Frozen collards work beautifully in this recipe. No need to thaw—add them directly to the crockpot about halfway through the cooking time. You’ll need approximately 2 pounds of frozen greens.

    How do I know when my Crockpot Black Eyed Peas and Collard Greens is done?

    The dish is ready when the beans are tender but still hold their shape and the greens are silky soft. This typically takes 6-8 hours on low or 3-4 hours on high, depending on your slow cooker.

    Can I cook this on the stovetop instead?

    Yes! Simmer everything in a large Dutch oven over low heat for about 2-3 hours, stirring occasionally and adding more liquid if needed. The stovetop method requires more attention but works well.

    Final Thoughts

    This Crockpot Black Eyed Peas and Collard Greens recipe has become my go-to comfort food for good reason. It transforms humble ingredients into something truly special with minimal effort. I love how it connects me to Southern traditions while fitting perfectly into modern life. Whether you’re serving it for a New Year’s Day gathering or a simple weeknight dinner, this dish delivers soul-satisfying warmth in every bite. The combination of tender beans, silky greens, and that incredible savory broth creates something greater than the sum of its parts. Find more cozy recipes at Pinterest.

  • German Goulash Recipes: Hearty, Authentic Comfort Food You’ll Love

    German Goulash Recipes: Hearty, Authentic Comfort Food You’ll Love

    German Goulash Recipes: Hearty, Authentic Comfort Food You’ll Love

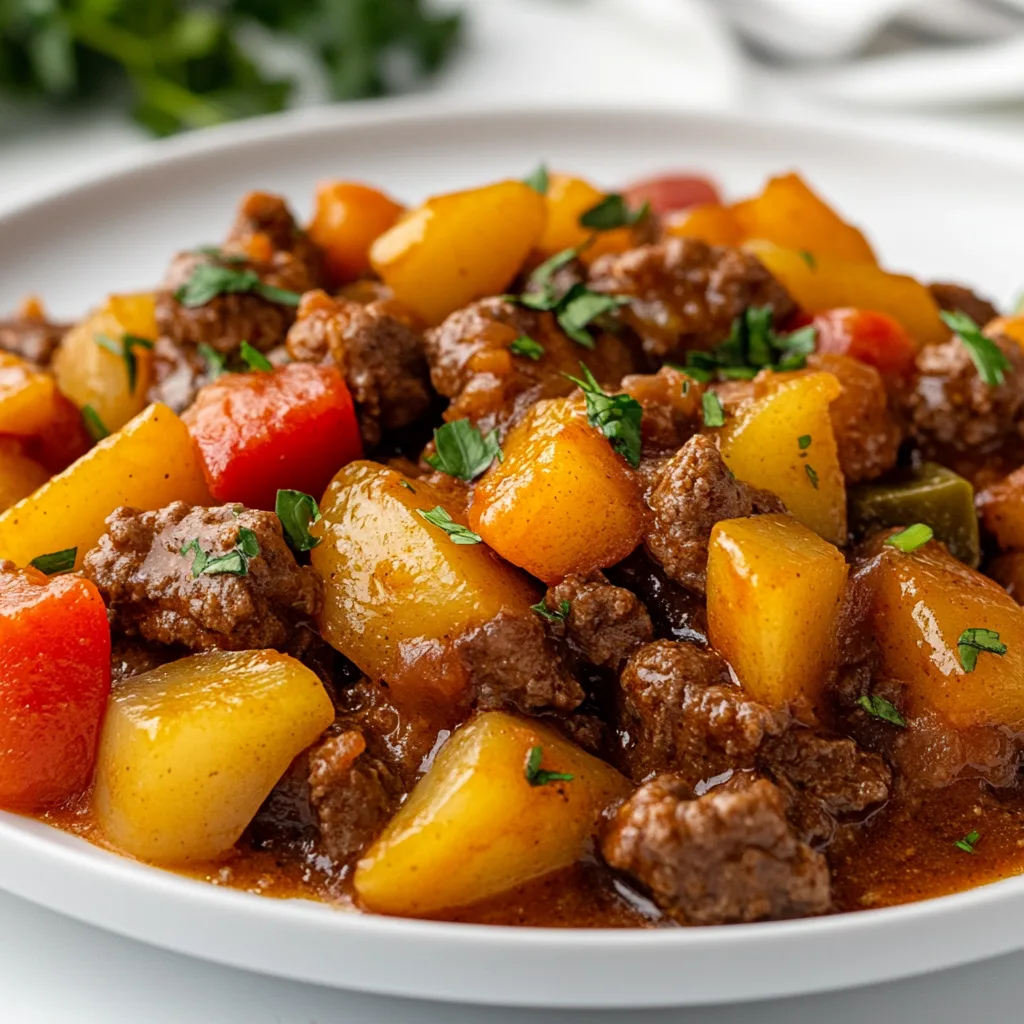
    German goulash recipes hold a special place in my heart, bringing back memories of my grandmother’s kitchen filled with the aroma of paprika, tender beef, and rich gravy. This hearty, soul-warming dish transforms simple ingredients into something magical through slow simmering. Whether you’re craving comfort food on a chilly evening or looking to impress guests with authentic European cuisine, these German goulash recipes will become your new go-to meal. Let me share my favorite versions that balance traditional techniques with modern conveniences.

    Recipe

    Why You’ll Love These German Goulash Recipes

    Perfect Comfort Food for Any Season

    There’s something undeniably comforting about a bowl of authentic German goulash that warms you from the inside out. Unlike its Hungarian cousin, German goulash typically features beef as the star, creating a rich, deeply savory stew that’s less spicy but equally flavorful. I love how it transforms throughout cooking—tough cuts of beef becoming meltingly tender as they simmer in that gorgeous paprika-infused sauce. It’s hearty enough for winter evenings but versatile enough to enjoy year-round, especially when served with traditional sides like spätzle or potato dumplings.

    Simple Ingredients, Extraordinary Flavor

    What amazes me about German goulash recipes is how they turn humble ingredients into something extraordinary. The magic happens with quality paprika (both sweet and smoked varieties), which creates that distinctive rich color and depth. Onions cooked until caramelized form the foundation, while tomato paste adds subtle acidity and body. The slow cooking process allows these simple components to develop complex flavors that taste like they took days to create. I’ve found this dish actually tastes better the next day, making it perfect for meal prep and busy weeknight dinners.

    Essential Tips & Tricks

    Mastering the Meat Selection

    Choosing the right cut of beef makes all the difference in your German goulash. I’ve learned that tougher, collagen-rich cuts like chuck, shoulder, or round transform beautifully during the long, slow cooking process. These cuts break down gradually, releasing gelatin that creates that silky, rich mouthfeel we love. Always cut the meat into uniform 1-inch cubes and pat them thoroughly dry before browning. This crucial step creates the Maillard reaction that builds flavor. Don’t rush this stage—proper browning in batches creates the foundation for an exceptional garlic butter steak with parmesan cream sauce or any meat-based stew.

    The Secret to Perfect Sauce Consistency

    The signature feature of great German goulash recipes is that velvety, cling-to-your-spoon sauce. To achieve this texture, I recommend dusting your browned meat with flour before adding liquids. This creates a natural thickener that develops during cooking. Another trick: resist the urge to add too much liquid initially—the meat and vegetables release moisture as they cook. For extra body, I sometimes add a peeled, diced potato that dissolves completely during cooking, naturally thickening the sauce. If your goulash still seems thin near the end, simmer uncovered for 15-20 minutes rather than adding cornstarch.

    Serving Ideas & Creative Variations

    Traditional German Accompaniments

    German goulash shines brightest when paired with the right sides to soak up that incredible sauce. Homemade spätzle (little German egg noodles) is my absolute favorite—their irregular shapes and chewy texture capture the sauce perfectly. Potato dumplings (kartoffelklöße) offer another authentic option, with their pillowy centers contrasting beautifully with the rich goulash. For something simpler, buttered egg noodles or mashed potatoes work wonderfully. Don’t forget the traditional accompaniment of creamy tomato basil soup as a starter, creating a complete German-inspired meal experience.

    Modern Twists on Classic German Goulash

    While I respect tradition, experimenting with German goulash recipes has led to some delicious discoveries. Try adding roasted red peppers for sweetness and color or incorporating mushrooms for earthy depth. For a lighter version, substitute half the beef with hearty vegetables like parsnips and butternut squash. I’ve even created fusion versions using beer instead of wine (try a German dunkel for amazing results) or adding a touch of balsamic vinegar at the end for brightness. For special occasions, elevate your goulash by adding a dollop of sour cream swirled with horseradish as a garnish.

    Storage & Troubleshooting Guide

    Make-Ahead and Freezer Tips

    German goulash actually improves with time, making it perfect for meal prepping. Store refrigerated goulash in airtight containers for up to 4 days—the flavors will continue developing beautifully. For freezing, cool completely before transferring to freezer-safe containers, leaving about an inch of headspace for expansion. Frozen goulash keeps well for 3 months. When reheating, thaw overnight in the refrigerator, then warm gently on the stovetop with a splash of broth to restore the perfect consistency. The collagen-rich sauce prevents the meat from drying out during reheating, maintaining that tender texture.

    Fixing Common Goulash Problems

    Even experienced cooks occasionally encounter issues with German goulash recipes. If your meat remains tough after hours of cooking, your heat might be too high—low and slow is the golden rule. For goulash that’s too thin, remove the lid and simmer to reduce, or blend a small portion and return it to the pot for natural thickening. Too thick? Add beef broth gradually until you reach your desired consistency. If your goulash lacks depth, try adding a teaspoon of tomato paste, a splash of Worcestershire sauce, or a dash of soy sauce. These umami-rich ingredients enhance flavor without overwhelming the dish’s authentic character.

    Frequently Asked Questions

    What cuts of beef work best for German goulash recipes?

    Chuck roast, beef shoulder, or round cuts work perfectly. These tougher cuts contain connective tissue that breaks down during slow cooking, creating tender meat and a rich, silky sauce.

    How is German goulash different from Hungarian goulash?

    German goulash typically uses beef (not pork or veal), less paprika, and often incorporates tomato paste. It’s generally thicker and less soup-like than Hungarian versions.

    Can I make German goulash in an Instant Pot?

    Absolutely! Brown meat using the sauté function, then pressure cook for 35 minutes with natural release. The flavor won’t be quite as developed as slow-cooked versions, but it’s delicious for weeknights.

    What’s the best way to store leftover goulash?

    Refrigerate in airtight containers for up to 4 days or freeze for 3 months. The flavors actually improve after a day in the refrigerator.

    What alcoholic substitutes work in German goulash recipes?

    If avoiding wine, use additional beef broth with a tablespoon of vinegar for acidity. Dark beer works beautifully too, adding wonderful malty notes.

    Final Thoughts

    Mastering German goulash recipes has brought me countless moments of culinary joy and connection to my heritage. There’s something magical about watching humble ingredients transform into something so profoundly satisfying. Whether you follow traditional methods or incorporate your own creative touches, the heart of this dish remains the same—comfort, flavor, and nourishment. I hope these tips inspire you to create your own German goulash memories. Don’t forget to check out more comfort food inspiration on Pinterest and share your goulash creations!

  • Snickerdoodle Cobbler Bliss: Irresistible Comfort in Every Bite!

    Snickerdoodle Cobbler Bliss: Irresistible Comfort in Every Bite!

    Snickerdoodle Cobbler Bliss: Irresistible Comfort in Every Bite!

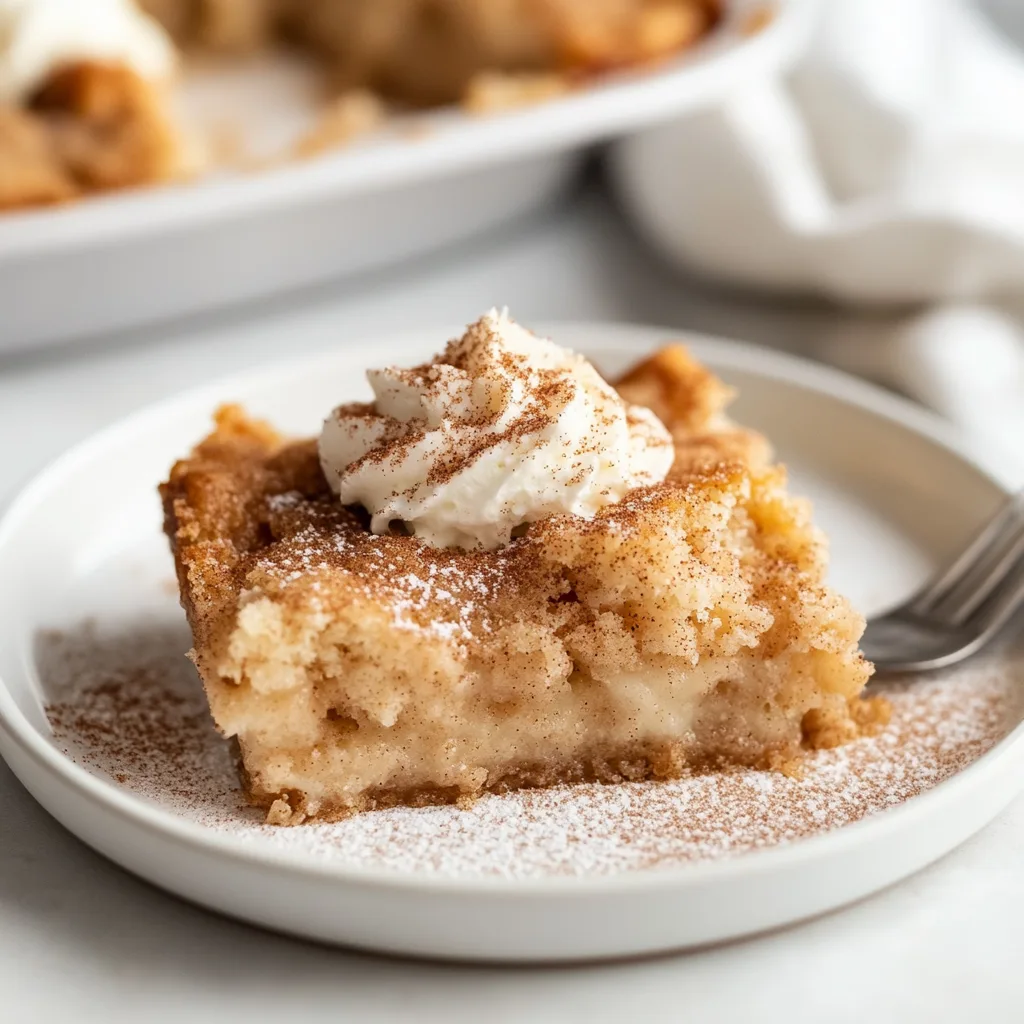
    Snickerdoodle Cobbler has become my absolute obsession this fall – imagine the perfect marriage between a buttery snickerdoodle cookie and a warm, gooey cobbler. The first time I made this for my family, we gathered around the kitchen island with spoons in hand, not even waiting for it to cool properly. That cinnamon-sugar crust that forms on top? Pure magic. It’s the dessert I turn to when I need something that feels like a warm hug, especially when paired with a scoop of vanilla ice cream that slowly melts into all those sweet crevices. If you love cinnamon sugar soft pretzels, this cobbler will absolutely steal your heart.

    Recipe

    Why You’ll Love This Snickerdoodle Cobbler

    The Perfect Balance of Textures

    There’s something utterly mesmerizing about the textural contrast in this snickerdoodle cobbler. The top layer develops this delightful crispness from the cinnamon-sugar coating that crackles under your spoon, while underneath awaits a soft, tender cake-like layer. And beneath that? Oh my goodness – a magical, warm custard that forms during baking. I still remember the first time I served this at a dinner party and watched everyone’s eyes widen with that first bite. The way the different layers create this symphony of textures is what makes this dessert so uniquely satisfying and impossible to resist.

    Simple Ingredients, Extraordinary Results

    What I adore most about this snickerdoodle cobbler is how it transforms basic pantry staples into something truly spectacular. You’ll need just flour, sugar, butter, milk, and a generous helping of cinnamon – ingredients I bet you already have on hand right now! There’s something so satisfying about creating dessert magic without a special trip to the store. Last weekend, when an unexpected snow day kept us homebound, this cobbler saved the day. The simplicity of the recipe belies the complexity of flavors that develop as it bakes, filling your home with the most intoxicating aroma of warm spices.

    Essential Tips & Tricks

    Mastering the Perfect Cinnamon-Sugar Ratio

    The heart and soul of any snickerdoodle cobbler lies in its cinnamon-sugar mixture. I’ve found that a 4:1 ratio of sugar to cinnamon creates that perfect balance – sweet with just enough spice to make your taste buds dance. Don’t skimp on quality cinnamon; it makes a noticeable difference! I once made this with some fancy Vietnamese cinnamon my sister gifted me, and the depth of flavor was absolutely incredible. For an extra dimension, try adding a tiny pinch of nutmeg or cardamom. Just remember to sprinkle the mixture evenly across the top before baking to ensure that signature snickerdoodle cobbler crust forms beautifully.

    The Pour-Over Method Secret

    The magic of this snickerdoodle cobbler happens during a step that might seem strange at first – the hot water pour-over. After assembling your batter and topping, you’ll pour hot water over the entire dish without stirring. This creates that signature gooey sauce that forms underneath while baking! I learned this technique from my grandmother, who used it for her peach cobbler. Trust the process, even if it looks soupy going into the oven. The water will transform into a luscious sauce while the top bakes into a perfect cookie-like crust. For extra richness, try using hot coffee or apple cider instead of water!

    Serving Ideas & Creative Variations

    Seasonal Pairings That Elevate Your Cobbler

    Snickerdoodle cobbler shines brightest when paired with complementary flavors that enhance its warm, cinnamon notes. In fall, I love serving it with a scoop of maple pecan ice cream or a drizzle of salted caramel sauce. During winter holidays, try adding a splash of bourbon to the batter or serving it alongside spiced apple cider. The cobbler also pairs beautifully with fresh berries in summer – the tartness creates a lovely contrast. For an extra special touch, whip up some cinnamon-infused whipped cream by adding a half teaspoon of cinnamon to your cream before whipping. It’s similar to how I finish my snickerdoodle cheesecake for that extra wow factor.

    Mix-In Ideas For Creative Twists

    While classic snickerdoodle cobbler is perfection on its own, adding mix-ins can create exciting variations. Try folding in diced apples tossed in cinnamon for an apple-snickerdoodle cobbler that tastes like fall in a dish. White chocolate chips add delightful pockets of sweetness, while chopped pecans or walnuts provide wonderful textural contrast. My personal favorite variation includes a layer of cream cheese filling in the middle – simply mix 8oz cream cheese with ¼ cup sugar and an egg, then pour it between batter layers. For a festive holiday version, add crushed candy canes on top during the last five minutes of baking for a peppermint-snickerdoodle mashup.

    Storage & Troubleshooting Guide

    Keeping Your Cobbler Fresh

    Snickerdoodle cobbler is at its absolute best when served warm from the oven, but leftovers can be stored and enjoyed for days. Cover any remaining cobbler with plastic wrap or transfer to an airtight container and refrigerate for up to 4 days. When ready to enjoy again, reheat individual portions in the microwave for 30-45 seconds until warm, or place the entire dish (if oven-safe) in a 300°F oven for about 15 minutes. The texture will change slightly – the top won’t be quite as crisp – but the flavors actually deepen overnight! For longer storage, you can freeze portions for up to 3 months in freezer-safe containers.

    Troubleshooting Common Issues

    If your snickerdoodle cobbler turned out too soupy, it likely needed more baking time. Every oven runs differently, and sometimes an extra 5-10 minutes makes all the difference. Look for a golden brown top that’s set in the center – if it jiggles too much, keep baking! Conversely, if your cobbler seems dry, you might have used too little liquid or overbaked it. Next time, try adding an extra tablespoon of butter or reducing the bake time slightly. For a cobbler that didn’t develop that signature crackly top, make sure your oven was fully preheated and consider placing the dish on a higher rack to encourage better browning.

    Frequently Asked Questions

    Can I make Snickerdoodle Cobbler ahead of time?

    Yes! You can prepare the batter up to 24 hours ahead and refrigerate it. Add the hot water pour-over just before baking. Alternatively, bake completely, refrigerate, and reheat at 300°F for 15-20 minutes before serving.

    What’s the difference between a cobbler and a crisp?

    Cobblers have a cake-like or biscuit topping, while crisps feature an oat-based streusel topping. Snickerdoodle cobbler specifically mimics the flavor profile of snickerdoodle cookies with its cinnamon-sugar crust.

    Can I make this recipe gluten-free?

    Absolutely! Simply substitute the all-purpose flour with a 1:1 gluten-free flour blend. I’ve tested this with Bob’s Red Mill Gluten-Free 1-to-1 Baking Flour with excellent results.

    Why did my cobbler separate into distinct layers?

    That’s actually perfect! Snickerdoodle cobbler naturally forms three distinct layers during baking: a cookie-like top, cake-like middle, and saucy bottom. This layering is what makes it special.

    How do I know when my Snickerdoodle Cobbler is done?

    Your cobbler is done when the top is golden brown and set (not wet or raw-looking), usually 35-40 minutes. A toothpick inserted into the cake layer should come out with moist crumbs, not wet batter.

    Final Thoughts

    This Snickerdoodle Cobbler has become my go-to dessert for everything from casual family dinners to holiday gatherings. There’s something about its warm, cinnamon embrace that makes everyone feel instantly at home. The way it fills your kitchen with that irresistible aroma as it bakes is almost as rewarding as the first delicious bite. I’d love to see your creations if you try this recipe – tag me on Pinterest so I can celebrate your baking success! Whether you stick with the classic version or try one of the variations, this snickerdoodle cobbler is bound to become a treasured recipe in your collection.

  • Coconut Curry Soup with Dumplings: Irresistibly Creamy & Comforting!

    Coconut Curry Soup with Dumplings: Irresistibly Creamy & Comforting!

    Coconut Curry Soup with Dumplings: Irresistibly Creamy & Comforting!

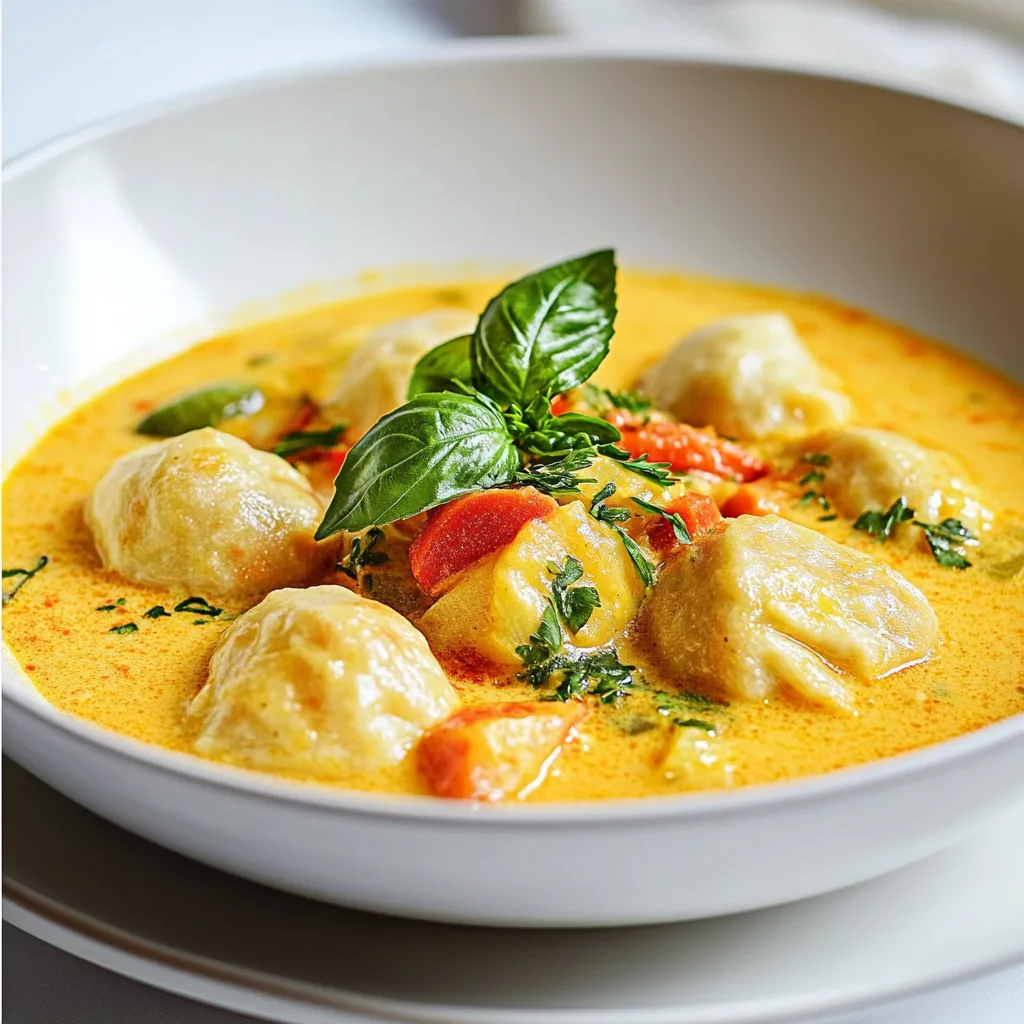
    Coconut Curry Soup with Dumplings is my ultimate comfort food remedy for chilly evenings when nothing else seems to warm the soul. The first time I made this soup, my kitchen filled with the intoxicating aroma of ginger, lemongrass, and coconut milk that literally stopped my husband in his tracks as he walked through the door. There’s something magical about the way the pillowy dumplings soak up the rich, spiced broth while adding their own delicate texture. This recipe strikes that perfect balance between creamy indulgence and bright flavors that keeps me coming back season after season.

    Recipe

    Why You’ll Love This Coconut Curry Soup with Dumplings

    A Symphony of Flavors and Textures

    This soup delivers an incredible depth of flavor that builds with each spoonful. The coconut milk creates a velvety base that carries the warming spices throughout, while the curry paste adds that perfect hint of heat without overwhelming your palate. What makes this dish truly special is the contrast between the silky broth and the tender dumplings that practically melt in your mouth. I love watching guests take their first bite—there’s always that moment of surprise when they discover how the aromatic broth transforms a simple dumpling into something extraordinary.

    Quick Comfort That Feels Gourmet

    Despite its impressive flavor profile, this Coconut Curry Soup with Dumplings comes together in under an hour, making it perfect for weeknights when you need something soul-satisfying without hours in the kitchen. The dumplings require just a few pantry staples and practically cook themselves as they float in the simmering broth. I’ve served this at impromptu dinner gatherings and received more compliments than dishes that took three times the effort. The visual appeal alone—with the golden curry broth, bright vegetables, and plump dumplings—makes it look like you’ve been cooking all day.

    Essential Tips & Tricks

    Perfecting Your Curry Base

    The foundation of any great Coconut Curry Soup with Dumplings is a well-developed base. Start by thoroughly sautéing your aromatics—ginger, garlic, and onions—until they’re fragrant and just beginning to caramelize. This initial step builds incredible depth that store-bought curry paste alone can’t achieve. When adding coconut milk, I always opt for full-fat varieties for that luxurious mouthfeel, though light coconut milk works in a pinch. For an extra layer of flavor, try adding a splash of fish sauce or a squeeze of lime juice to brighten the entire pot. These small touches elevate the soup from good to absolutely unforgettable.

    Dumpling Success Secrets

    The key to perfect dumplings is handling the dough with a gentle touch. Over-mixing is the enemy here—stop stirring as soon as the ingredients come together to ensure they remain tender rather than dense. I like to use a cookie scoop for uniform size, which ensures they’ll cook evenly. When adding dumplings to your simmering soup, resist the urge to stir immediately; let them set for about a minute before gently nudging them to prevent sticking. For extra flavor, consider folding herbs like cilantro or chives into your dumpling mixture, which adds beautiful flecks of color and unexpected bursts of freshness.

    Serving Ideas & Creative Variations

    Garnishes That Transform

    The right garnishes can take your Coconut Curry Soup with Dumplings from delicious to memorable. I always keep a selection of fresh herbs ready—cilantro, Thai basil, and mint are my favorites—along with thinly sliced chilies for heat-lovers. A squeeze of lime just before serving wakes up all the flavors and cuts through the richness. For texture contrast, try crispy fried shallots or toasted coconut flakes sprinkled on top. My family goes crazy for a swirl of chili oil that creates beautiful red patterns in the golden broth. These finishing touches not only enhance flavor but create that Instagram-worthy bowl that makes everyone reach for their phones.

    Protein & Vegetable Mix-Ins

    One of the things I adore about this soup is its versatility. While the classic version features chicken, I’ve made incredible variations with plump shrimp that cook in minutes, or firm tofu that absorbs all those magnificent curry flavors. For vegetables, don’t feel limited to the basics—try adding butternut squash for sweetness, snow peas for crunch, or baby spinach that wilts beautifully in the hot broth. My personal favorite variation includes chunks of sweet potato and a handful of edamame for protein. The soup adapts to whatever is in your refrigerator, making it perfect for using up odds and ends.

    Storage & Troubleshooting Guide

    Proper Storage Techniques

    This Coconut Curry Soup with Dumplings actually improves overnight as the flavors meld together in the refrigerator. Store it in an airtight container for up to three days, keeping in mind that the dumplings will continue to absorb liquid and become softer. When reheating, add a splash of broth or water to thin the soup if it’s thickened too much. For freezing, I recommend storing the broth separately from the dumplings—freeze the broth in containers with room for expansion, and freeze dumplings on a parchment-lined tray before transferring to freezer bags. This method preserves the texture of both components for up to two months.

    Troubleshooting Common Issues

    If your soup lacks flavor depth, try adding more curry paste, a splash of fish sauce, or a squeeze of lime to brighten it up. For a too-thin broth, simmer uncovered for 10-15 minutes to reduce and concentrate flavors. Conversely, if your soup is too thick, add coconut milk or broth to reach your desired consistency. Dumplings falling apart? Your soup might be boiling too vigorously—maintain a gentle simmer instead. For dumplings that are too dense, remember that less mixing equals lighter results. And if your coconut milk has separated, don’t panic! Simply whisk vigorously while heating, or blend a portion of the soup and return it to the pot.

    Frequently Asked Questions

    Can I make Coconut Curry Soup with Dumplings ahead of time?

    Yes! Make the broth up to 2 days ahead and store refrigerated. Prepare and add the dumplings just before serving for the best texture. The flavors actually improve with time.

    What’s the best curry paste to use?

    Red or yellow curry pastes work beautifully. Red offers more heat while yellow provides a milder, aromatic profile. Adjust quantity based on your spice preference.

    Can I make this soup vegetarian?

    Absolutely! Use vegetable broth instead of chicken and add extra vegetables or tofu. Ensure your curry paste is vegetarian as some contain shrimp paste.

    How do I know when the dumplings are cooked?

    They’ll float to the surface after about 8-10 minutes and will be firm but tender when cut with a spoon. They should be cooked through with no raw flour taste.

    What if my Coconut Curry Soup with Dumplings is too spicy?

    Add more coconut milk to temper the heat. A dollop of plain yogurt on top also helps cool things down while adding a pleasant tanginess.

    Final Thoughts

    This Coconut Curry Soup with Dumplings has become my go-to recipe when I need something that feels like a warm hug in bowl form. The beauty lies in its adaptability—whether you’re cooking for a crowd or just yourself, craving something spicy or mild, or working with whatever ingredients you have on hand. I find myself returning to this recipe in all seasons, though it’s especially comforting during colder months when its warming spices and hearty dumplings satisfy on the deepest level. I hope it becomes a beloved staple in your kitchen too!

    Check out more soup inspiration on Pinterest

  • Country Fried Chicken with Gravy: Crispy, Comfort Food Bliss!

    Country Fried Chicken with Gravy: Crispy, Comfort Food Bliss!

    Country Fried Chicken with Gravy: Crispy, Comfort Food Bliss!

    Country Fried Chicken with gravy is the ultimate comfort food that transports me straight back to my grandmother’s kitchen in Georgia. That first bite through the crispy, seasoned coating into tender, juicy chicken smothered in creamy pepper gravy? Pure bliss! I’ve spent years perfecting this recipe, and I’m thrilled to share all my secrets with you. This southern classic might seem intimidating, but I promise it’s easier than you think. Ready to create a meal that’ll have your family scraping their plates clean? Let’s get cooking over at Recipes Darleen!

    Recipe

    Why You’ll Love This Country Fried Chicken with gravy

    Perfect Texture Combination

    The magical contrast between the crunchy exterior and juicy interior is what makes country fried chicken truly special. I double-dip my chicken in seasoned flour with a buttermilk soak in between, creating those beautiful craggy edges that get extra crispy when fried. The first time I nailed this technique, my husband declared it better than his favorite restaurant version! The gravy brings everything together—silky and pepper-speckled, it soaks into the chicken just enough to soften the coating slightly while leaving plenty of crunch. It’s texture heaven on a plate.

    Flavor That Builds With Every Bite

    The layered seasoning approach is what separates good country fried chicken from great country fried chicken. I season the chicken itself, the flour mixture, AND the gravy separately, creating depth with each component. My secret? A pinch of cayenne in the flour and a dash of Worcestershire in the gravy. These subtle additions don’t make it spicy—they just wake up your taste buds! The flavors build as you eat, with the peppery gravy complementing the savory chicken coating. It’s comfort food that never gets boring, even as you reach for that last bite.

    Essential Tips & Tricks

    Temperature Control Is Everything

    Maintaining the perfect oil temperature is crucial for country fried chicken success. Too hot, and you’ll burn the coating before the chicken cooks through; too cool, and you’ll end up with greasy, soggy chicken. I always use a thermometer and aim for 350°F, adjusting the heat as needed. After adding chicken to the oil, the temperature naturally drops, so I wait until it climbs back up before adding more pieces. For the gravy, low and slow is the way to go—rushing it leads to lumps. When I’m feeling extra indulgent, I’ll make this alongside my Crispy Bacon Honey Roasted Potatoes for the ultimate comfort meal.

    The Resting Period Makes All The Difference

    Don’t skip the 10-minute rest after dredging your chicken! This allows the coating to adhere properly and prevents it from sliding off during frying. I learned this the hard way after serving naked-looking chicken to dinner guests years ago—so embarrassing! For the gravy, patience is also key. Let your roux cook until it’s a light golden color before adding liquid, which develops a nutty flavor base. Then, once your gravy is finished, let it sit for 2-3 minutes before serving. It will thicken slightly and the flavors will meld together beautifully, creating that velvety texture we all crave.

    Serving Ideas & Creative Variations

    Classic Southern Pairings

    Nothing complements country fried chicken with gravy like traditional southern sides. Creamy mashed potatoes make the perfect gravy-catching base, while tangy collard greens cut through the richness. For a complete southern feast, add buttermilk biscuits to sop up every last drop of gravy—I’ve been known to fight my husband for the last one! My grandmother always included something sweet and tangy, like pickled green tomatoes or chow-chow relish. For dessert, keep the southern theme going with a slice of Gluten-Free Lemon Pound Cake that cleanses the palate with its bright citrus notes.

    Modern Twists Worth Trying

    While traditional is delicious, don’t be afraid to get creative with your chicken! For a spicy version, add hot sauce to your buttermilk soak and cayenne to your flour mixture. I’ve even made a Nashville-inspired version that had my friends begging for water—and the recipe! For the gravy, try adding sautéed mushrooms or caramelized onions for extra depth. My favorite twist is serving smaller pieces as sliders on mini biscuits with a drizzle of honey—perfect for game day gatherings! You can also play with the coating by adding cornmeal for extra crunch or herbs like rosemary and thyme for an aromatic twist.

    Storage & Troubleshooting Guide

    Keeping It Crispy For Leftovers

    Preserving the signature crunch of country fried chicken can be tricky, but not impossible! Store leftovers in the refrigerator uncovered for about 30 minutes before covering with plastic wrap—this prevents condensation from making the coating soggy. When reheating, skip the microwave (which creates steam) and opt for a 350°F oven for 10-15 minutes. Store gravy separately in an airtight container and gently reheat on the stovetop with a splash of milk to restore its silky texture. I’ve found that leftover chicken makes amazing sandwiches the next day, especially when topped with a fried egg!

    Fixing Common Mistakes

    If your coating falls off during frying, your oil was likely too hot or you skipped the crucial resting period. For quick recovery, reduce heat immediately and ensure future batches rest properly after dredging. Gravy too thin? Make a slurry with equal parts flour and cold water, then whisk in a teaspoon at a time until thickened. Too thick? Add warm milk or chicken broth gradually. For gravy with lumps, strain through a fine-mesh sieve or blend with an immersion blender. Remember that even imperfect country fried chicken is still delicious—my family still talks about the time I dropped half the batch on the floor!

    Frequently Asked Questions

    What’s the difference between country fried chicken and chicken fried steak?

    Country fried chicken uses bone-in chicken pieces, while chicken fried steak uses tenderized beef cutlets. Both are dredged in seasoned flour and fried, but country fried chicken with gravy typically has a slightly thinner coating.

    Can I use chicken breasts instead of bone-in pieces?

    Yes! Boneless chicken works well but cooks faster. Pound breasts to even thickness (about ½-inch) to ensure they cook evenly without drying out. Reduce cooking time by about 3-4 minutes per side.

    How do I know when the oil is the right temperature without a thermometer?

    Drop a small pinch of flour into the oil—it should sizzle immediately and float to the top, but not burn quickly. If it sinks without bubbling, the oil is too cold.

    Why is my gravy lumpy?

    Lumpy gravy usually happens when you add liquid too quickly to the roux. Whisk continuously while adding liquid very slowly, and ensure your roux is smooth before adding any liquids.

    Can I make country fried chicken ahead of time for a party?

    Yes! Fry chicken up to 2 hours ahead, then keep uncovered in a 200°F oven on a wire rack. Make gravy fresh just before serving for best results.

    Final Thoughts

    Country fried chicken with gravy isn’t just a meal—it’s a celebration of southern cooking at its finest. The crispy, seasoned crust giving way to juicy meat, all topped with peppery, creamy gravy creates an experience that’s worth every minute spent in the kitchen. I hope my tips help you create a version that becomes your family’s new favorite comfort food. Don’t forget to check out more comfort food classics on Pinterest for inspiration! Remember, perfect country fried chicken comes with practice, so don’t be discouraged if your first attempt isn’t perfect.

  • Cheesy Scalloped Potatoes & Beef Bake: Ultimate Comfort Feast!

    Cheesy Scalloped Potatoes & Beef Bake: Ultimate Comfort Feast!

    Cheesy Scalloped Potatoes & Beef Bake: Ultimate Comfort Feast!

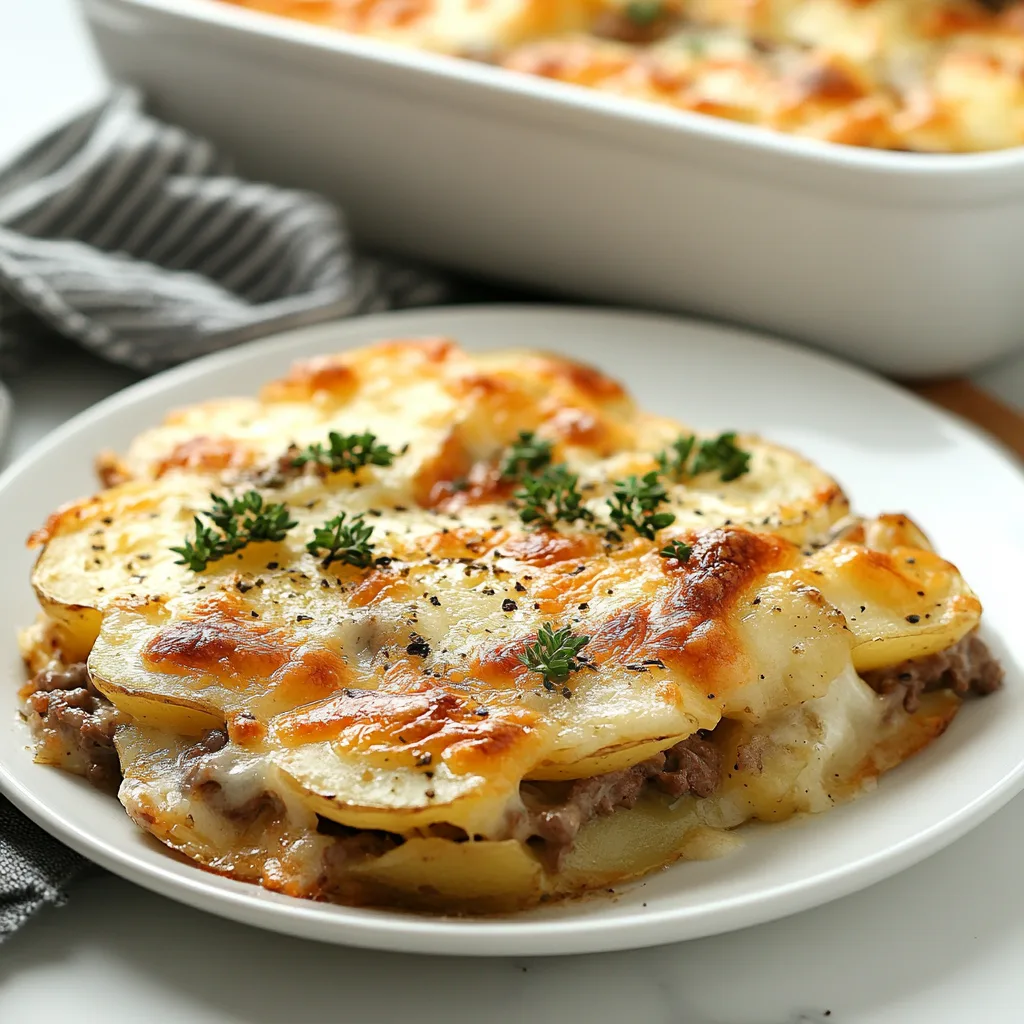
    The aroma of Cheesy Scalloped Potatoes and Beef Bake wafting through my kitchen instantly transports me back to Sunday dinners at my grandmother’s farmhouse. This hearty casserole combines tender slices of potato layered with savory ground beef, all enveloped in a rich, creamy cheese sauce that bubbles to golden perfection in the oven. I’ve perfected this recipe over countless family gatherings, and it never fails to bring everyone to the table with eager anticipation. If you’re craving the ultimate comfort food that satisfies both potato and beef lovers, this classic dish deserves a permanent spot in your recipe collection.

    Recipe

    Why You’ll Love This Cheesy Scalloped Potatoes and Beef Bake

    Perfect Comfort Food for Any Occasion

    There’s something magical about the combination of thinly sliced potatoes and seasoned ground beef that makes this dish irresistible. The layers meld together during baking, creating a texture that’s both creamy and substantial. Last winter, when we were snowed in for three days, I made this casserole with pantry staples, and my family still talks about how it made that cold spell bearable. The beauty of this recipe is its versatility—it’s elegant enough for holiday gatherings but simple enough for weeknight dinners when you need something reliable and satisfying.

    Make-Ahead Friendly and Budget Conscious

    This Cheesy Scalloped Potatoes and Beef Bake is a meal-prep champion. You can assemble it entirely the day before, refrigerate overnight, and simply pop it in the oven when you’re ready to eat. The flavors actually develop beautifully during this rest time. I love that it uses affordable ingredients that stretch your grocery budget without sacrificing flavor. Ground beef goes further when layered with potatoes, and the cheese sauce transforms these humble ingredients into something that feels indulgent. For busy families, this recipe is truly a sanity-saving solution.

    Essential Tips & Tricks

    Perfecting the Potato Layers

    The secret to exceptional scalloped potatoes lies in the consistent thickness of your potato slices. I recommend using a mandoline slicer for uniform, thin cuts—around 1/8 inch thick is ideal. This ensures even cooking and the perfect texture. Yukon Gold potatoes are my go-to choice for their buttery flavor and ability to hold their shape while becoming tender. Before layering, I always pat the slices dry with paper towels to remove excess moisture. This prevents a watery casserole and helps the potatoes absorb all that creamy, cheesy goodness that makes this dish so irresistible.

    Creating the Ultimate Cheese Sauce

    The backbone of this casserole is undoubtedly the velvety cheese sauce. Start with a proper roux using equal parts butter and flour, cooking until it turns slightly golden and smells nutty. Warm your milk before adding it to prevent lumps, then whisk constantly as it thickens. For the cheese, a combination creates the best flavor profile—sharp cheddar for punch, Gruyère for nutty depth, and a touch of Parmesan for savory notes. Always grate your own cheese rather than using pre-shredded, which contains anti-caking agents that can make your sauce grainy instead of silky smooth.

    Serving Ideas & Creative Variations

    Complementary Side Dishes

    This hearty casserole shines as the star of your meal, but thoughtful side dishes can elevate the experience. I love serving it with a crisp green salad dressed simply with vinaigrette—the acidity beautifully cuts through the richness of the cheese sauce. Steamed green beans or roasted Brussels sprouts also provide welcome color and texture contrast. For special occasions, consider adding homemade dinner rolls to soak up every last bit of that delicious sauce. When entertaining, I arrange everything on a wooden board with fresh herbs scattered around for a rustic presentation that always impresses guests.

    Exciting Flavor Variations

    While the classic version is always a crowd-pleaser, this recipe welcomes creative adaptations. For a Mexican-inspired twist, add taco seasoning to your beef, layer in some black beans, and top with pepper jack cheese and fresh cilantro before serving. An Italian variation works beautifully with Italian seasoning, a layer of sautéed mushrooms, and provolone cheese. For extra indulgence, try folding crispy bacon bits into your cheese sauce or adding a layer of caramelized onions between the potatoes. These variations keep the dish exciting even if you serve it regularly.

    Storage & Troubleshooting Guide

    Proper Storage and Reheating Methods

    This casserole is a leftover champion, often tasting even better the next day as the flavors continue to meld. Store cooled leftovers in an airtight container in the refrigerator for up to 4 days. For reheating, cover with foil and warm in a 325°F oven until heated through (about 20-25 minutes), removing the foil for the last few minutes to re-crisp the top. For individual portions, the microwave works well at 70% power. You can also freeze this dish either before or after baking—just wrap tightly and use within 3 months, adding about 20 extra minutes to the baking time when cooking from frozen.

    Troubleshooting Common Issues

    If your Cheesy Scalloped Potatoes and Beef Bake turns out watery, the culprit is likely the potatoes. Always pat them dry before layering and consider par-boiling high-moisture potato varieties. For undercooked potatoes, the slices may have been cut too thick—cover with foil and continue baking until tender. If your cheese sauce breaks or appears grainy, it was likely heated too quickly or the cheese was added while the base was too hot. Next time, remove the sauce from heat before adding cheese and stir gently until just melted. A curdled appearance can also result from using pre-shredded cheese.

    Frequently Asked Questions

    Can I make Cheesy Scalloped Potatoes and Beef Bake ahead of time?

    Absolutely! Assemble the casserole up to 24 hours in advance, cover with plastic wrap, and refrigerate. Remove from the refrigerator 30 minutes before baking, and add 10-15 minutes to the baking time.

    What’s the best type of potato to use?

    Yukon Gold potatoes are ideal for their buttery flavor and ability to hold shape while becoming tender. Russets work well too but may break down more during baking.

    Can I substitute the beef for another protein?

    Yes! Ground turkey, Italian sausage, or even shredded rotisserie chicken work beautifully. For a vegetarian option, try sautéed mushrooms and bell peppers instead.

    Why did my cheese sauce turn grainy?

    This typically happens when cheese is added to a sauce that’s too hot. Always remove the sauce from heat before adding cheese and use freshly grated cheese rather than pre-shredded.

    Can I freeze individual portions for quick meals?

    Definitely! Freeze in single-serving containers for up to 3 months. Thaw overnight in the refrigerator and reheat in the microwave or oven until piping hot.

    Final Thoughts

    There’s something deeply satisfying about watching family and friends enjoy a dish you’ve prepared with love, and this Cheesy Scalloped Potatoes and Beef Bake never disappoints. The combination of creamy potatoes, savory beef, and rich cheese sauce creates the ultimate comfort food experience that bridges generations and creates lasting memories around the table. I’d love to see your creation if you try this recipe—share your photos on Pinterest and tag me so I can celebrate your culinary success!

  • Instant Pot Beef Stew with Carrots & Potatoes – Cozy Comfort Ready!

    Instant Pot Beef Stew with Carrots & Potatoes – Cozy Comfort Ready!

    Instant Pot Beef Stew with Carrots & Potatoes – Cozy Comfort Ready!

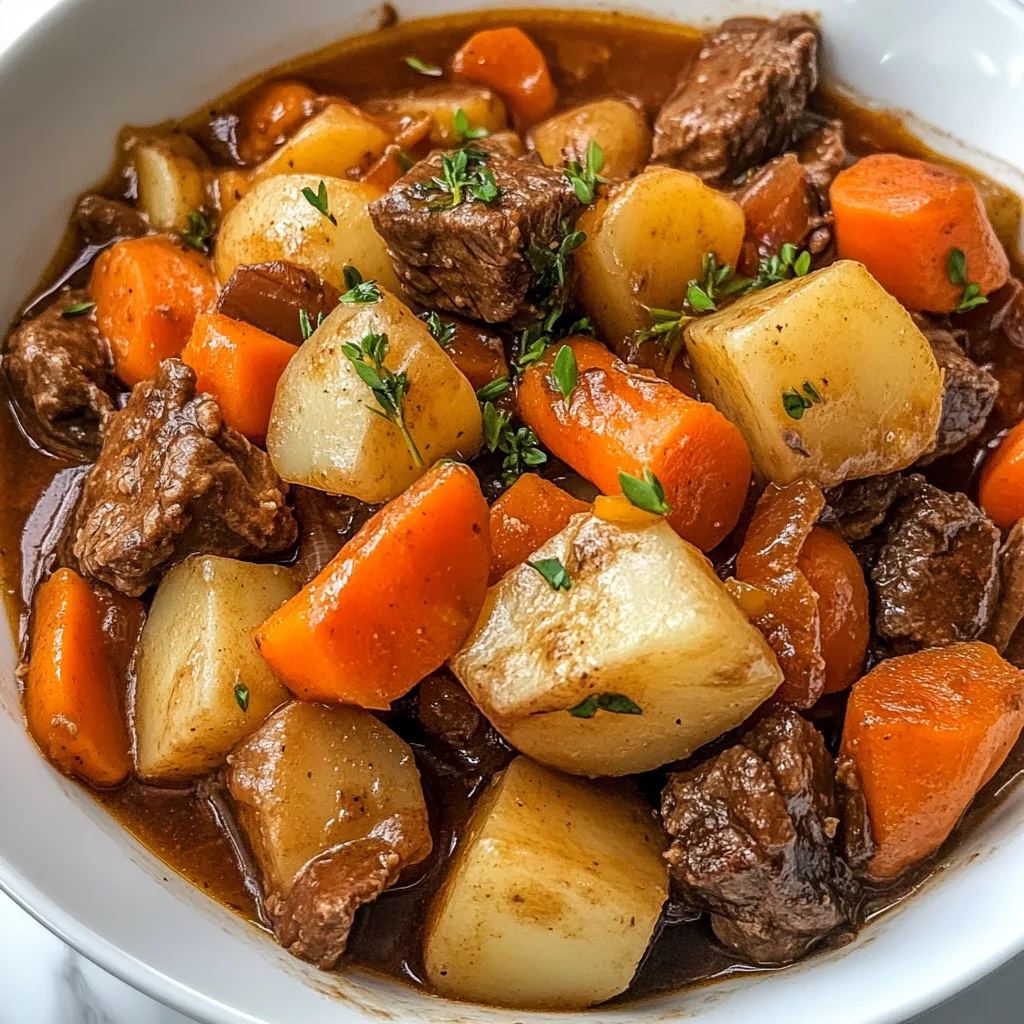
    Instant Pot Beef Stew with Carrots and Potatoes is the ultimate comfort food that warms both body and soul on chilly evenings. There’s something almost magical about the rich aroma that fills your kitchen as tender beef, earthy potatoes, and sweet carrots simmer together in a savory broth. I still remember the first time I made this in my Instant Pot—my kitchen windows fogged up, and my husband came running from the garage asking what smelled so heavenly! This recipe transforms simple ingredients into a hearty masterpiece in a fraction of the traditional cooking time, making it perfect for busy weeknights when you need comfort without compromise.

    Recipe

    Why You’ll Love This Instant Pot Beef Stew with Carrots and Potatoes

    Time-Saving Comfort Food

    The beauty of making beef stew in an Instant Pot lies in its incredible time efficiency. What traditionally takes hours of simmering on the stovetop or in a slow cooker transforms into a weeknight-friendly meal in about 45 minutes total. I used to reserve beef stew for lazy Sunday afternoons, but now it’s become my Wednesday night hero! The pressure cooking method not only speeds up the process but actually intensifies the flavors, forcing the rich broth into every fiber of the meat and vegetables. The carrots maintain their sweet integrity while the potatoes become perfectly tender without turning to mush.

    Rich Depth of Flavor

    The concentrated cooking environment of the Instant Pot creates a flavor explosion that rivals traditional slow-cooking methods. When you sauté the beef using the pot’s built-in function, those gorgeous caramelized bits (the fond) become the foundation of your stew’s complex flavor profile. The sealed pressure environment then traps all the aromatic elements—the sweet onions, earthy herbs, and umami-rich broth—allowing them to meld together rather than evaporate away. I love adding a splash of red wine or a tablespoon of tomato paste for extra depth. The result is a stew with layers of flavor that taste like they’ve been developing for hours, not minutes.

    Essential Tips & Tricks

    Perfect Meat Selection and Preparation

    Choosing the right cut of beef makes all the difference in your Instant Pot stew. Look for chuck roast or beef stew meat, which contains enough marbling to become fork-tender under pressure. Cut your meat into uniform 1½-inch cubes to ensure even cooking. Before adding to the pot, pat the meat completely dry with paper towels—this is non-negotiable! Moist meat will steam rather than brown, robbing your stew of crucial flavor. Season generously with salt and pepper, then brown in batches using the sauté function. Don’t rush this step; proper browning creates the rich foundation that makes your hearty beef and vegetable soup so satisfying.

    Vegetable Timing Secrets

    The key to perfectly cooked vegetables in Instant Pot beef stew is understanding their cooking rates. Carrots and potatoes should be cut into chunks slightly larger than bite-size (about 1-inch pieces) since they’ll continue cooking during the natural pressure release. For firmer vegetables like celery or bell peppers, add them after the pressure cooking cycle when you’re thickening the stew. I learned this the hard way after serving my family mushy, indistinguishable vegetables one too many times! For the potatoes, I prefer Yukon Golds or red potatoes as they hold their shape better than russets. This staggered approach ensures every vegetable maintains its distinct texture and flavor.

    Serving Ideas & Creative Variations

    Perfect Pairings for Your Stew

    Serving this Instant Pot beef stew with the right accompaniments elevates it from merely delicious to absolutely memorable. My family’s favorite is a chunk of crusty sourdough bread for soaking up every last drop of that rich gravy. For a complete meal, consider a simple green salad with a light vinaigrette to cut through the richness of the stew. If you’re hosting guests, serve the stew in hollowed-out bread bowls for a rustic presentation that never fails to impress. For wine lovers, a medium-bodied red like Merlot or Syrah complements the deep flavors beautifully. You could also serve it alongside classic shepherd’s pie for a hearty feast when feeding a crowd.

    Exciting Flavor Variations

    Don’t be afraid to put your personal spin on this classic Instant Pot beef stew recipe! For an Italian twist, add a can of diced tomatoes, a teaspoon of Italian seasoning, and finish with a sprinkle of Parmesan cheese. Craving something with a kick? Try a Southwestern version by adding black beans, corn, and a tablespoon of taco seasoning. I once made a French-inspired variation with herbes de Provence, mushrooms, and a splash of cognac that had my dinner guests raving for weeks! For a heartier winter meal, stir in some barley or farro during the last few minutes of cooking. These grains soak up the flavorful broth while adding satisfying texture.

    Storage & Troubleshooting Guide

    Proper Storage for Maximum Flavor

    Like many stews, this Instant Pot beef stew actually tastes even better the next day after the flavors have had time to meld. Allow the stew to cool completely before transferring to airtight containers. It will keep in the refrigerator for 3-4 days, making it perfect for meal prep. For longer storage, freeze portions in freezer-safe containers or heavy-duty freezer bags for up to 3 months. I like to freeze individual portions for quick lunches—just label with the date! When reheating, thaw overnight in the refrigerator if frozen, then warm gently on the stovetop or microwave until heated through. Add a splash of broth if needed to restore the original consistency.

    Solving Common Stew Problems

    If your Instant Pot beef stew turns out too thin, there’s an easy fix: create a slurry by mixing 1-2 tablespoons of cornstarch with equal parts cold water, then stir it into the hot stew using the sauté function until it reaches your desired thickness. For stew that’s too thick, simply add more beef broth until you reach the perfect consistency. If your meat isn’t tender enough, it likely needs more cooking time—reset the Instant Pot for an additional 5-10 minutes under pressure. Encountering a “burn” notice? This usually happens when there’s not enough liquid or when thick ingredients settle at the bottom. Always deglaze the pot thoroughly after sautéing to prevent this issue.

    Frequently Asked Questions

    Can I use frozen meat in my Instant Pot Beef Stew with Carrots and Potatoes?

    Yes, but skip the browning step and add 10-12 minutes to your cooking time. The flavor won’t be quite as rich, but it’s a great time-saver in a pinch. Remember to ensure you have enough liquid to prevent burning.

    How can I thicken my beef stew if it’s too watery?

    Make a cornstarch slurry with 1-2 tablespoons cornstarch mixed with equal parts cold water. Use the sauté function after pressure cooking and stir in the slurry until it reaches your desired thickness.

    Can I add wine to my Instant Pot beef stew?

    Absolutely! Add ½ cup of red wine after sautéing the meat and vegetables. Let it simmer for 2-3 minutes to cook off the alcohol before adding other liquids. It adds wonderful depth of flavor.

    What’s the best way to avoid mushy vegetables?

    Cut potatoes and carrots into larger chunks (about 1-inch pieces). For very tender vegetables like peas or fresh herbs, stir them in after pressure cooking during the thickening stage.

    How long does Instant Pot beef stew last in the refrigerator?

    Store cooled stew in airtight containers for 3-4 days in the refrigerator. The flavors actually improve overnight, making this perfect for meal prep or make-ahead dinner plans.

    Final Thoughts

    This Instant Pot Beef Stew with Carrots and Potatoes has become my go-to recipe for those evenings when I crave something deeply satisfying without hours of cooking. The magic of pressure cooking transforms humble ingredients into something truly special—tender beef that falls apart with the touch of a fork, sweet carrots, and potatoes that have soaked up all that savory goodness. I love seeing my family’s faces light up when they smell this cooking! For more delicious comfort food recipes, check out my Pinterest board where I’m always adding new favorites. Happy cooking!