Author: Sara Maren

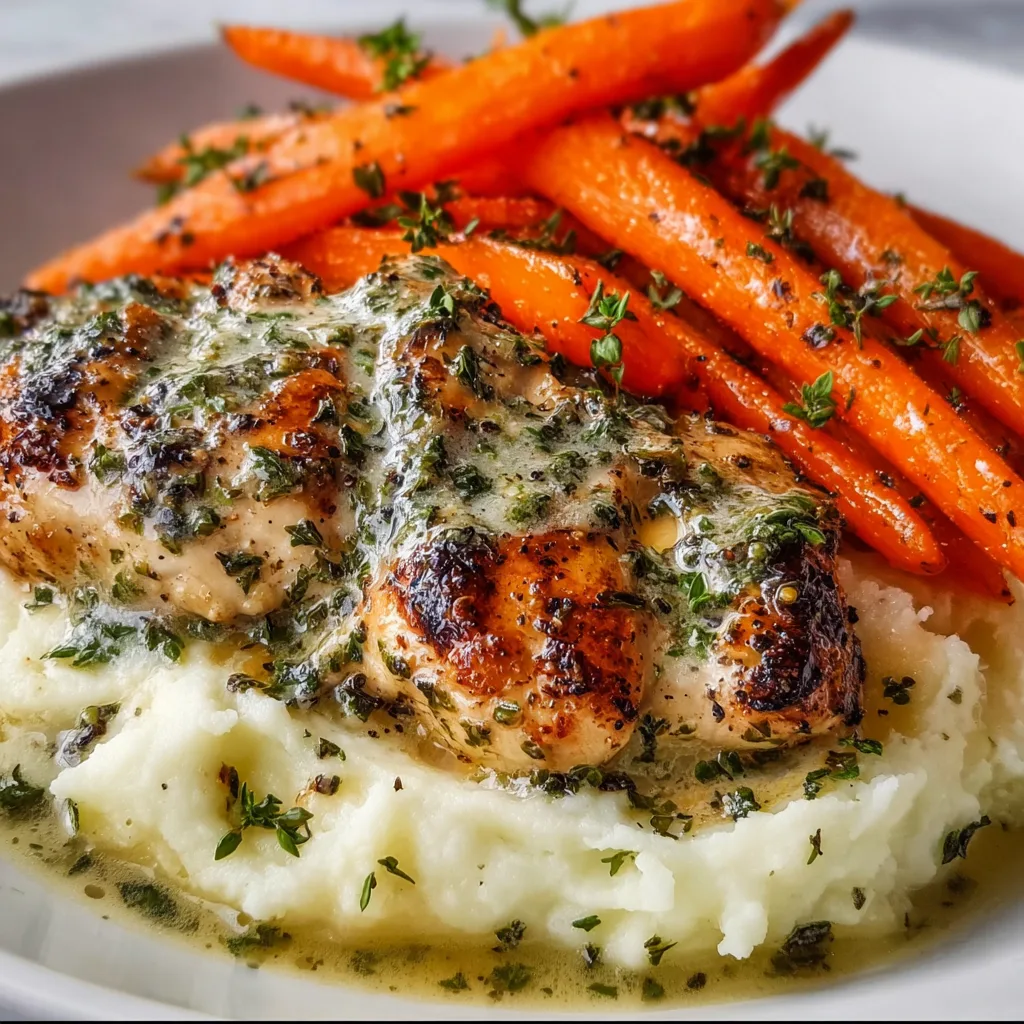
  • Garlic Herb Chicken with Creamy Mash & Roasted Carrots: Irresistible Comfort Meal

    Garlic Herb Chicken with Creamy Mash & Roasted Carrots: Irresistible Comfort Meal

    Garlic Herb Chicken with Creamy Mash & Roasted Carrots: Irresistible Comfort Meal

    There’s something magical about a perfectly roasted Garlic Herb Chicken with Creamy Mash & Roasted Carrots that makes any dinner feel special. The aroma that fills your kitchen as the chicken roasts—fragrant herbs mingling with sweet roasted garlic—is enough to make your mouth water before you even take your first bite. I discovered this recipe during a particularly stressful week when I needed comfort food that didn’t require hours in the kitchen. Now it’s my go-to when I want to impress without the stress. This complete meal delivers everything you crave: tender chicken, velvety potatoes, and caramelized carrots that’ll have everyone asking for seconds.

    Recipe

    Why You’ll Love This Garlic Herb Chicken with Creamy Mash & Roasted Carrots

    Perfect Balance of Flavors and Textures

    The beauty of this Garlic Herb Chicken with Creamy Mash & Roasted Carrots lies in its perfect harmony of flavors. The chicken skin crisps up beautifully while the meat stays incredibly juicy, infused with aromatic herbs and punchy garlic. Meanwhile, the carrots develop a gorgeous caramelization that brings out their natural sweetness. The creamy mashed potatoes act as the perfect canvas for soaking up all those wonderful pan juices. It’s a symphony of textures—crispy, tender, creamy, and soft—that makes every bite satisfying in a different way.

    Impressive Yet Approachable

    Don’t let the elegant appearance fool you—this Garlic Herb Chicken dish is surprisingly simple to prepare. Even on busy weeknights, you can have this on the table in about an hour with minimal hands-on time. The one-pan approach for the chicken and carrots means less cleanup, while the potatoes simmer away without much attention. I’ve served this at everything from casual family dinners to small dinner parties, and it never fails to impress. The presentation looks like you spent hours in the kitchen, but only you’ll know how effortless it really was!

    Essential Tips & Tricks

    Perfecting Your Chicken

    For truly exceptional Garlic Herb Chicken, don’t skip patting the chicken dry before seasoning—this is the secret to crispy skin. Allow your chicken to come to room temperature for about 20 minutes before roasting; this ensures even cooking from surface to center. When making the herb butter, really work it under the skin for maximum flavor infusion. I like to use a combination of rosemary, thyme, and parsley, but feel free to customize based on what you have. And remember, a meat thermometer is your best friend—chicken thighs should reach 175°F while breasts are perfect at 165°F.

    Mastering Mash & Carrots

    The creamiest mashed potatoes start with the right potatoes—Yukon Golds are my go-to for their naturally buttery texture. For an extra luxurious touch, warm your milk and butter before adding them to your potatoes. As for those gorgeous carrots, the key is not overcrowding your roasting pan. Each carrot needs space to caramelize properly rather than steam. A drizzle of honey in the last 10 minutes of roasting adds a beautiful glaze that pairs perfectly with the savory chicken. For more veggie inspiration, check out these crispy garlic air fryer broccoli florets as another side option.

    Serving Ideas & Creative Variations

    Seasonal Adaptations

    This Garlic Herb Chicken with Creamy Mash & Roasted Carrots welcomes seasonal tweaks that keep it fresh year-round. In spring, try adding fresh peas or asparagus to the roasting pan in the last 10 minutes. Summer calls for zucchini or cherry tomatoes alongside the carrots. Fall begs for butternut squash and sage in your herb butter, while winter is perfect for adding parsnips and rosemary. The mashed potatoes can transform too—fold in roasted garlic in winter, fresh chives in spring, or even swap them entirely for a cauliflower mash when you’re craving something lighter.

    Elegant Entertaining Options

    When serving this dish for guests, consider a few special touches that elevate without complicating. A quick pan sauce made from the drippings takes just minutes but adds restaurant-quality flavor. Simply deglaze with white wine, add a splash of cream, and reduce. For a beautiful presentation, serve family-style on a large platter with fresh herb garnishes. This pairs wonderfully with a simple green salad dressed with lemon vinaigrette. For a complete dinner party menu, start with crispy crab cake bites that complement the main course perfectly.

    Storage & Troubleshooting Guide

    Proper Storage & Reheating

    Leftover Garlic Herb Chicken and sides keep beautifully when stored properly. Refrigerate components separately in airtight containers within two hours of cooking for maximum freshness and food safety. They’ll keep well for 3-4 days. When reheating the chicken, cover it loosely with foil and warm in a 300°F oven to prevent drying out. The mashed potatoes benefit from a splash of milk or cream before gentle reheating on the stovetop or microwave. Carrots can be enjoyed cold in salads or warmed in the oven alongside the chicken for about 10 minutes.

    Common Issues & Solutions

    If your chicken skin isn’t crisping properly, try positioning it higher in the oven or finishing with a quick broil—just watch carefully to prevent burning! For mashed potatoes that turned out gluey, you likely overworked them; next time, be gentler and use a ricer or food mill instead of a mixer. If your carrots are cooking unevenly, cut them to more uniform sizes and make sure they’re not overcrowded. And if your herb butter is sliding off the chicken rather than flavoring it, make sure you’re really working it under the skin and creating a pocket between the skin and meat.

    Frequently Asked Questions

    Can I use boneless chicken for this Garlic Herb Chicken recipe?

    Yes! Boneless chicken works great but cooks faster. Reduce cooking time by about 10-15 minutes and use a meat thermometer to ensure it reaches 165°F without overcooking.

    What herbs work best with this dish?

    Rosemary, thyme, and parsley create a classic flavor profile. Sage is wonderful in fall, while tarragon and chives add brightness in spring.

    Can I make components of this meal ahead of time?

    Absolutely! Prepare the herb butter and prep the vegetables up to 24 hours ahead. The mashed potatoes can be made 2 hours ahead and kept warm in a slow cooker.

    How can I make this recipe dairy-free?

    Replace butter with olive oil in the herb mixture and use your favorite plant-based milk and vegan butter for the mashed potatoes. The flavor profile remains delicious!

    What wine pairs well with Garlic Herb Chicken with Creamy Mash & Roasted Carrots?

    A medium-bodied white like Chardonnay or Viognier complements the creamy elements, while a light Pinot Noir works beautifully with the herb-roasted chicken.

    Final Thoughts

    This Garlic Herb Chicken with Creamy Mash & Roasted Carrots has become my definition of perfect comfort food—impressive enough for company yet simple enough for weeknights. There’s something deeply satisfying about creating a complete meal where each component shines while complementing the others. The combination of crispy-skinned, herb-infused chicken alongside creamy potatoes and sweet roasted carrots creates a plate that nourishes both body and soul. I hope this recipe brings as much joy to your table as it has to mine! For more delicious inspiration, visit our Pinterest page where we share new comfort food ideas weekly.


  • Potato Breakfast Casserole: Irresistible Morning Comfort Recipe!

    Potato Breakfast Casserole: Irresistible Morning Comfort Recipe!

    Potato Breakfast Casserole: Irresistible Morning Comfort Recipe!

    This Potato Breakfast Casserole is my ultimate weekend comfort food – a golden, bubbling dish that fills my kitchen with the most incredible aroma. I first created this recipe during a snowy cabin getaway when I needed to feed a hungry crowd with minimal fuss. The crispy potato base, fluffy eggs, and melty cheese combination had everyone asking for seconds! It’s become my go-to for lazy Sunday mornings when I want something hearty that doesn’t keep me trapped in the kitchen. The best part? You can prep it the night before and simply pop it in the oven while you enjoy your coffee.

    Recipe

    Why You’ll Love This Potato Breakfast Casserole

    Perfect Make-Ahead Solution

    If you’re like me and morning coordination isn’t your strong suit, you’ll appreciate how this potato breakfast casserole shines as a make-ahead marvel. I often assemble everything the night before, cover it tightly, and refrigerate. The flavors actually develop beautifully overnight as the potatoes absorb all those savory seasonings. When morning comes, all that’s left is to bake until golden and bubbly. This has saved countless family brunches when I’d rather be enjoying conversation than frantically cooking while guests arrive.

    Customizable for Every Taste

    What makes this potato casserole truly special is how easily it adapts to whatever ingredients you have on hand. The base recipe calls for crispy hash browns, eggs, cheese, and breakfast meat, but I’ve made countless variations. Sometimes I go vegetarian with bell peppers, spinach, and mushrooms. Other times, I spice things up with jalapeños and pepper jack. My husband loves when I add crumbled sausage and cream cheese for extra richness. The potato base provides the perfect canvas for your creativity.

    Essential Tips & Tricks

    Getting the Perfect Texture

    The secret to an exceptional potato breakfast casserole lies in the texture contrast. For crispy edges and a tender center, I pre-cook the hash browns in a bit of butter until golden before adding them to the baking dish. Another game-changer? Squeezing excess moisture from your potatoes using a clean kitchen towel. This simple step prevents that dreaded soggy bottom! I also recommend letting the casserole rest for 10-15 minutes after baking – this helps everything set properly so you get perfect, clean slices.

    Flavor-Boosting Techniques

    Elevating your breakfast casserole is all about building layers of flavor. I always sauté onions until translucent before adding them – the caramelization adds incredible depth. My other non-negotiable? Seasoning each component separately rather than just sprinkling everything on top. The potatoes need their own salt and pepper, as does the egg mixture. For an umami boost, add a dash of Worcestershire sauce to your eggs or sprinkle some garlic powder over your potatoes. These small touches make a remarkable difference.

    Serving Ideas & Creative Variations

    Complementary Side Dishes

    A potato breakfast casserole pairs beautifully with lighter sides that balance its heartiness. I love serving it alongside a simple arugula salad dressed with lemon and olive oil – the peppery greens and bright acidity cut through the richness perfectly. Fresh fruit is another must-have; berries or citrus segments add a sweet-tart contrast. For special occasions, I’ll include warm buttered toast and a pitcher of mimosas. The combination makes for a gorgeous brunch spread that feels both indulgent and balanced.

    Seasonal Adaptations

    One of my favorite things about this casserole is how easily it transitions through the seasons. In spring, I fold in fresh asparagus tips and goat cheese. Summer calls for garden-fresh tomatoes, basil, and mozzarella for a caprese-inspired version. Fall brings sweet potato substitutions with sage and gruyère, while winter means heartier additions like roasted brussels sprouts and smoky bacon. The potato base remains constant, but these seasonal swaps keep the recipe exciting all year round.

    Storage & Troubleshooting Guide

    Proper Storage Methods

    Your potato breakfast casserole will stay fresh in the refrigerator for up to 4 days when stored properly. I recommend cutting it into individual portions before refrigerating – this makes reheating much easier. Always allow the casserole to cool completely before covering with plastic wrap or transferring to airtight containers. For longer storage, you can freeze portions for up to 3 months. I wrap individual slices in plastic, then foil, labeling each with the date for easy tracking.

    Reheating Without Drying Out

    The key challenge when reheating any potato casserole is maintaining moisture while restoring that lovely texture. For refrigerated portions, I microwave at 70% power with a damp paper towel over the top to create steam. For frozen pieces, thaw overnight in the refrigerator first. My preferred method for larger portions is oven reheating at 325°F, covered with foil for the first 15 minutes, then uncovered for 5-10 minutes to crisp up the top. A sprinkle of fresh cheese before the final minutes works wonders!

    Frequently Asked Questions

    Can I use fresh potatoes instead of frozen hash browns?

    Yes! Grate fresh potatoes, rinse under cold water, then thoroughly pat dry. Pre-cook them in a skillet until barely golden to remove excess moisture before assembling your casserole.

    How do I know when my potato breakfast casserole is done?

    The casserole is done when the edges are golden brown, the center is set (not jiggly), and a knife inserted in the middle comes out clean. Internal temperature should reach 160°F.

    Can I assemble this the night before?

    Absolutely! Prepare everything, cover tightly, and refrigerate overnight. Add an extra 10-15 minutes to the baking time since it’ll be cold from the refrigerator.

    What’s the best cheese to use?

    Sharp cheddar provides the best flavor, but a mixture of cheeses like monterey jack, gruyère, or colby creates wonderful complexity. Avoid pre-shredded cheese as it contains anti-caking agents.

    Why is my potato breakfast casserole watery?

    This typically happens when potatoes aren’t properly dried or vegetables release too much moisture. Pre-cook watery vegetables like mushrooms and spinach, and always squeeze excess moisture from potatoes.

    Final Thoughts

    This potato breakfast casserole has become more than just a recipe in my household – it’s a tradition that brings everyone to the table with smiles. The versatility means it never gets boring, while the make-ahead convenience makes it practical for both lazy weekends and special celebrations. I’ve shared this recipe countless times on Pinterest where it’s become a favorite. Whether you’re feeding a crowd or planning breakfast meal-prep for busy mornings, this casserole delivers comfort in every bite.

  • Shrimp Lobster Biscuit Pot Pie: Irresistible Comfort Food Bliss!

    Shrimp Lobster Biscuit Pot Pie: Irresistible Comfort Food Bliss!

    Shrimp Lobster Biscuit Pot Pie: Irresistible Comfort Food Bliss!

    Shrimp Lobster Biscuit Pot Pie combines two of the ocean’s most beloved treasures into one comforting, flaky-topped masterpiece. I discovered this recipe during a rainy weekend at my beach cottage when I craved something that captured both luxury and comfort. The velvety sauce, tender seafood, and buttery biscuit topping create a sensory symphony that’s impossible to resist. Each bite delivers the perfect balance of rich lobster, succulent shrimp, and savory vegetables beneath a golden crown of biscuits. If you’re looking to impress dinner guests or simply treat yourself to something special, this seafood pot pie delivers restaurant-quality flavors with homemade warmth. Check out my other comfort food recipes for more cozy inspiration!

    Recipe

    Why You’ll Love This Shrimp Lobster Biscuit Pot Pie

    The Perfect Balance of Luxury and Comfort

    There’s something magical about transforming premium ingredients into soul-warming comfort food. The combination of sweet lobster meat and plump shrimp creates a luxurious base that feels special, while the creamy sauce and fluffy biscuits bring the familiar comfort we all crave. I love how this dish bridges the gap between elegant dining and homestyle cooking. My husband always says this dish is what would happen if a fancy seafood restaurant and your grandmother’s kitchen had a delicious baby. The velvety sauce, infused with herbs and a hint of sherry, elevates the seafood while keeping everything approachable and utterly satisfying.

    Make-Ahead Friendly for Entertaining

    One of the greatest advantages of this Shrimp Lobster Biscuit Pot Pie is how entertaining-friendly it is. You can prepare the filling up to two days ahead and store it in the refrigerator. The biscuit topping can be mixed, shaped, and refrigerated separately. When guests arrive, simply pour the filling into your baking dish, top with the biscuits, and bake until golden and bubbly. I’ve served this at countless dinner parties, and it never fails to impress. The dramatic moment when you bring it to the table, steam rising from the golden biscuits, creates an instant wow factor that sets the tone for a memorable meal.

    Essential Tips & Tricks

    Perfecting Your Seafood Selection

    The star ingredients in this pot pie deserve careful attention. Look for wild-caught shrimp when possible, and remove both the shell and that dark vein along the back (the digestive tract). For the lobster, pre-cooked tails make this recipe more approachable, but fresh lobster meat will elevate it further. If you’re splurging, ask your fishmonger to steam whole lobsters and extract the meat for you. The sweet knuckle and claw meat are particularly delicious in this dish. I’ve found that a combination of both shrimp and lobster creates the perfect flavor balance, but you could adjust the ratio based on availability and budget.

    Creating the Ultimate Creamy Sauce

    The sauce is the silky foundation that brings everything together in your Shrimp Lobster Biscuit Pot Pie. Start with a roux made from equal parts butter and flour, cooking just until it smells nutty but hasn’t browned. Slowly whisk in warm stock and cream for a lump-free sauce. A splash of sherry or white wine adds complexity, while fresh herbs provide aromatic depth. Season carefully—seafood brings natural saltiness, so taste as you go. For extra richness, I sometimes stir in a spoonful of mascarpone cheese at the end. Remember that the sauce will thicken further as it bakes, so aim for a consistency slightly thinner than you want in the final dish.

    Serving Ideas & Creative Variations

    Perfect Pairings for a Complete Meal

    This Shrimp Lobster Biscuit Pot Pie stands beautifully on its own, but thoughtful sides can create a memorable dining experience. I love serving it with a crisp green salad dressed simply with lemon vinaigrette to cut through the richness. Roasted asparagus or haricots verts also provide a welcome contrast in texture and color. For wine pairings, a buttery Chardonnay or crisp Sauvignon Blanc complements the seafood perfectly. If you’re hosting a special occasion dinner, consider starting with a light appetizer like cucumber canapés or a small cup of chilled corn soup to set the stage without filling guests before the main attraction.

    Seasonal and Dietary Adaptations

    The versatility of this Shrimp Lobster Biscuit Pot Pie makes it perfect for creative customization. In summer, add fresh corn and cherry tomatoes for seasonal brightness. Fall calls for mushrooms and perhaps a touch of thyme. For dietary needs, the biscuit topping can be made gluten-free using a quality cup-for-cup flour blend, while the sauce works beautifully with lactose-free milk or even full-fat coconut milk for a dairy-free option with tropical notes. Pescatarians will love this as-is, but for those avoiding shellfish, a version with chunks of firm white fish and scallops makes a delicious alternative that maintains the spirit of the dish.

    Storage & Troubleshooting Guide

    Proper Storage for Leftovers

    Storing Shrimp Lobster Biscuit Pot Pie requires attention to food safety and texture preservation. Refrigerate leftovers within two hours of cooking, transferring them to shallow airtight containers to cool quickly. Properly stored, the pot pie will keep for 2-3 days in the refrigerator. For reheating, cover with foil and warm in a 325°F oven until the center reaches 165°F—this gentle approach prevents the seafood from becoming rubbery. The microwave works in a pinch, but use 50% power and stir halfway through. I don’t recommend freezing this dish, as the creamy sauce can separate and the seafood texture suffers, but the filling can be frozen before adding the biscuit topping.

    Troubleshooting Common Issues

    Even experienced cooks encounter challenges with Shrimp Lobster Biscuit Pot Pie. If your sauce seems too thin after baking, it likely needs more reduction time on the stovetop before assembly. Conversely, if it’s too thick, a splash of warm stock or cream will adjust the consistency. Biscuits not rising properly? Check your baking powder’s freshness and ensure you’re using cold butter and handling the dough minimally. For biscuits that brown too quickly before the filling bubbles, simply tent with foil partway through baking. And if your seafood turns rubbery, it’s likely overcooked—next time, fold it into the hot (but not boiling) sauce just before assembling, allowing the oven’s heat to finish the cooking process.

    Frequently Asked Questions

    Can I make Shrimp Lobster Biscuit Pot Pie ahead of time?

    Yes! Prepare the filling up to two days ahead and refrigerate. Make and shape the biscuit dough separately, keeping it chilled. Assemble and bake just before serving for the freshest result.

    What can I substitute for lobster if it’s unavailable?

    Crabmeat makes an excellent substitute, offering similar sweetness. Scallops (quartered if large) also work well. For budget options, additional shrimp or even chunks of firm white fish provide delicious alternatives.

    How do I prevent my biscuits from getting soggy?

    Ensure your filling isn’t too wet before topping with biscuits. The filling should be hot when adding biscuits, and bake immediately at a high temperature (425°F) to create a barrier between the dough and filling.

    Can I make this recipe in individual ramekins?

    Absolutely! Divide the filling among oven-safe ramekins and top each with 1-2 smaller biscuits. Reduce baking time by about 5-7 minutes, watching for golden-brown biscuits and bubbly filling.

    Why did my sauce break or curdle?

    Sauces break when heated too quickly or boiled after adding cream. Stabilize by whisking a tablespoon of cornstarch with cold cream before adding to the hot mixture, and never let the sauce boil vigorously.

    Final Thoughts

    This Shrimp Lobster Biscuit Pot Pie has become my go-to recipe when I want to create something truly special without spending hours in the kitchen. The combination of tender seafood, velvety sauce, and flaky biscuits creates a memorable dining experience that feels both indulgent and comforting. I love watching faces light up with that first bite—the moment when the fork breaks through the golden biscuit into the creamy treasure below. Whether for a holiday gathering, dinner party, or simply because you deserve something extraordinary, this seafood pot pie delivers every time. Find more inspiration on Pinterest and make this your next kitchen adventure!

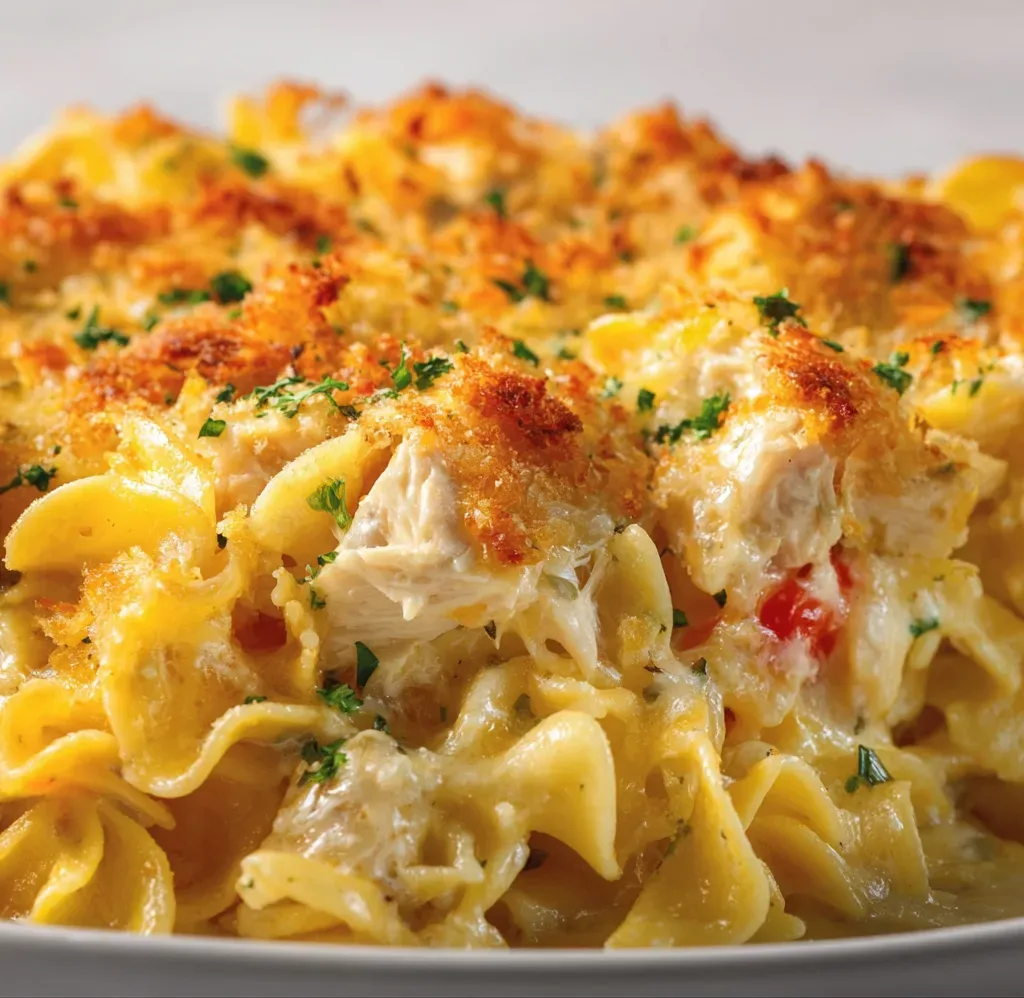
  • Chicken Cheddar Noodle Bake: Irresistibly Cheesy Comfort Food Delight!

    Chicken Cheddar Noodle Bake: Irresistibly Cheesy Comfort Food Delight!

    Chicken Cheddar Noodle Bake: Irresistibly Cheesy Comfort Food Delight!

    This Chicken Cheddar Noodle Bake transforms ordinary ingredients into pure comfort food magic. The first time I made this casserole, my kitchen filled with the most intoxicating aroma of melted cheese and savory herbs that literally pulled my husband in from the garage! There’s something about the combination of tender chicken, al dente egg noodles, and that irresistibly gooey cheddar cheese that makes this dish an instant family favorite. Perfect for busy weeknights when you need something hearty yet simple that everyone will devour. Trust me, this creamy pasta bake will become your new go-to comfort meal!

    Recipe

    Why You’ll Love This Chicken Cheddar Noodle Bake

    Perfect Comfort Food Balance

    This casserole hits all the comfort food notes without being overly heavy. The tender chicken provides satisfying protein while the egg noodles offer that perfect chewy texture that soaks up all the creamy goodness. What I adore most is how the sharp cheddar creates those crispy, bubbly edges that everyone fights over! My daughter always claims the corner piece with the most browned cheese. The beauty lies in its simplicity—familiar ingredients transforming into something that feels like a warm hug on a plate. It’s the dish I turn to when the weather turns chilly or when someone needs a pick-me-up.

    Make-Ahead Miracle Worker

    As a busy mom, I’m always looking for time-saving options, and this Chicken Cheddar Noodle Bake delivers spectacularly. You can prep it entirely the night before—just cover and refrigerate, then bake when you’re ready. The flavors actually deepen overnight, making it even more delicious! I’ve also started portioning it into smaller baking dishes for quick lunches throughout the week. The versatility extends to freezing too—simply assemble, freeze before baking, and you’ve got an emergency meal ready to go. This has saved dinner on countless occasions when life gets chaotic.

    Essential Tips & Tricks

    Perfecting Your Cheese Strategy

    The secret to an exceptional Chicken Cheddar Noodle Bake lies in your cheese approach. Rather than mixing all the cheese into the casserole, reserve about a third for the top. This creates that coveted golden, bubbly crust while ensuring creamy pockets throughout. I prefer using freshly grated cheddar—pre-shredded varieties contain anti-caking agents that prevent proper melting. For extra flavor dimension, try mixing sharp cheddar with a bit of Gruyère or Monterey Jack. And don’t rush the final few minutes of baking! Those last 5 minutes under the broiler transform good into unforgettable.

    Noodle Know-How

    Always cook your egg noodles slightly underdone (about 2 minutes less than package directions). They’ll continue cooking in the oven, and this prevents them from becoming mushy in the final dish. After draining, toss the hot noodles with a tablespoon of butter to prevent sticking and add richness. For a textural contrast similar to my Sour Cream Noodle Bake, consider adding a crispy topping—buttered panko or crushed Ritz crackers work beautifully. And don’t forget to season your noodles with salt while boiling; this is your only chance to flavor them directly!

    Serving Ideas & Creative Variations

    Perfect Pairing Partners

    This Chicken Cheddar Noodle Bake pairs beautifully with bright, acidic sides that cut through the richness. A simple arugula salad with lemon vinaigrette or roasted broccoli with a squeeze of fresh lemon creates perfect balance. For a complete meal that impresses guests, serve alongside Crispy Garlic Air Fryer Broccoli and warm crusty bread for sopping up the sauce. During summer months, I love serving it with a tomato-cucumber salad dressed simply with olive oil and herbs. The temperature and texture contrasts make every bite more exciting.

    Flavor Remix Options

    Don’t be afraid to make this recipe your own with creative twists! Southwestern version? Add a can of diced green chilies, corn, black beans, and swap some cheddar for pepper jack. For an Italian spin, mix in sundried tomatoes, spinach, and Italian seasoning, then top with mozzarella and a sprinkle of Parmesan. My family loves the buffalo chicken variation—add hot sauce to the chicken mixture and top with blue cheese crumbles. For a lighter option, substitute Greek yogurt for some of the cream and increase the vegetables. Each variation keeps this dish exciting week after week!

    Storage & Troubleshooting Guide

    Proper Storage Solutions

    Store leftover Chicken Cheddar Noodle Bake properly to maintain its creamy texture. Refrigerate in an airtight container within two hours of cooking—it keeps beautifully for 3-4 days. For reheating, add a splash of milk or chicken broth before microwaving to revive the sauce. If freezing, I recommend portioning into individual servings for easier thawing. Freeze for up to 3 months in freezer-safe containers. When ready to enjoy, thaw overnight in the refrigerator before reheating. The texture may change slightly after freezing, but the flavor remains delicious!

    Fixing Common Issues

    If your Chicken Cheddar Noodle Bake turns out dry, the likely culprit is overbaked noodles or insufficient sauce. Next time, cook noodles even less or add an extra ¼ cup of liquid to the sauce. For a soupy casserole, let it rest 15 minutes before serving—the sauce will thicken as it stands. If the top browns too quickly before the center is hot, cover with foil for part of the baking time. And if your cheese separates or becomes oily, try using a lower heat setting and different cheese blend next time. Remember that full-fat dairy products generally yield the creamiest results.

    Frequently Asked Questions

    Can I use rotisserie chicken for my Chicken Cheddar Noodle Bake?

    Absolutely! Rotisserie chicken is a perfect time-saver. Simply shred about 3 cups and mix it in. The roasted flavor adds wonderful depth to the casserole.

    Can I make this casserole vegetarian?

    Yes! Substitute the chicken with 2 cups of sautéed mushrooms and 1 cup of diced bell peppers. The earthy mushrooms provide similar satisfaction with a completely different flavor profile.

    What’s the best cheese to use if I don’t have cheddar?

    Monterey Jack, Colby, or Gruyère work beautifully. For extra tang, mix in some cream cheese or a sprinkle of Parmesan on top.

    How can I make this Chicken Cheddar Noodle Bake healthier?

    Use whole wheat noodles, increase the vegetables, substitute half the cheese with nutritional yeast, and use low-fat milk instead of cream.

    Can I freeze individual portions?

    Definitely! Portion into freezer-safe containers, leaving slight headspace. Thaw overnight in the refrigerator and microwave with a splash of milk to refresh.

    Final Thoughts

    This Chicken Cheddar Noodle Bake has earned its place in my family’s regular rotation for good reason. It’s the perfect intersection of convenience and comfort—simple enough for weeknights yet satisfying enough for Sunday dinner. The versatility means it never gets boring, and the make-ahead potential makes it practical for real life. I hope this casserole brings the same warmth and joy to your table that it has to mine! For more comforting recipes, check out my Pinterest collection of family favorites.

  • Loaded Cajun Seafood Stuffed Potatoes That Will Blow Your Mind!

    Loaded Cajun Seafood Stuffed Potatoes That Will Blow Your Mind!

    Loaded Cajun Seafood Stuffed Potatoes That Will Blow Your Mind!

    Loaded Cajun Seafood Stuffed Potatoes combine the hearty comfort of baked potatoes with the vibrant flavors of Louisiana seafood boil. The first time I made these for a family gathering, my kitchen filled with that unmistakable aroma of Cajun spices that instantly transports you to New Orleans. There’s something magical about cutting into a perfectly baked potato and discovering a treasure trove of succulent shrimp, sweet crab meat, and tender crawfish all swimming in a spicy, buttery sauce. If you love the bold flavors of creamy garlic shrimp over mashed potatoes, you’ll adore this elevated seafood-stuffed version.

    Recipe

    Why You’ll Love This Loaded Cajun Seafood Stuffed Potatoes

    Perfect Balance of Flavors and Textures

    The beauty of these stuffed potatoes lies in their perfect contrast of textures—crispy potato skins giving way to fluffy interiors topped with succulent seafood. Each bite delivers a symphony of flavors: the earthy potato, sweet crab, plump shrimp, and that signature Cajun kick. I’ve carefully balanced the spice level to provide warmth without overwhelming the delicate seafood. The melted butter sauce infused with garlic, paprika, and cayenne creates a luxurious coating that seeps into the potato, transforming an ordinary spud into something truly extraordinary that’ll have everyone at the table reaching for seconds.

    Impressive Yet Approachable

    Don’t let the fancy appearance fool you—these loaded potatoes are surprisingly simple to prepare! Even when I’m short on time but craving something special, this recipe delivers restaurant-quality results without the fuss. The components can be prepped ahead, making it perfect for entertaining or weeknight dinners when you want to elevate your meal. I love watching guests’ faces light up when these arrive at the table—they never believe how straightforward they were to make. The combination of everyday ingredients with special seafood creates a dish that feels indulgent yet completely doable for home cooks of any skill level.

    Essential Tips & Tricks

    Selecting and Preparing the Perfect Potatoes

    Start with russet potatoes for their fluffy texture and sturdy skins that crisp up beautifully. I like to rub them with olive oil and a sprinkle of coarse salt before baking—this simple step creates that irresistible crispy exterior. For truly exceptional results, bake potatoes directly on the oven rack rather than on a baking sheet. This allows heat to circulate evenly, resulting in perfectly cooked potatoes every time. The fork test is your best friend here—when a fork slides easily into the center, they’re done. Allow them to cool slightly before handling to prevent burning your fingers while scooping out the centers.

    Seafood Selection and Seasoning Secrets

    The seafood trinity of shrimp, crab, and crawfish creates the most authentic Cajun experience, but don’t stress if you can’t find all three. Even using just shrimp delivers delicious results! When selecting seafood, fresh is ideal, but high-quality frozen works wonderfully too—just thaw completely and pat dry before cooking. The key to flavor lies in my special Cajun butter sauce: melted butter infused with garlic, paprika, cayenne, thyme, and a splash of lemon juice. For an extra dimension of flavor, try adding a tablespoon of authentic Cajun crawfish etouffee sauce to your seafood mixture—it’s a game-changer!

    Serving Ideas & Creative Variations

    Perfect Pairings and Presentation

    These loaded potatoes make a stunning centerpiece for any meal. I love serving them with a crisp side salad dressed with lemon vinaigrette to balance the richness. For presentation, sprinkle with fresh chives, parsley, or green onions for a pop of color against the golden potatoes and pink seafood. A dollop of sour cream on top adds a cool contrast to the spicy filling. For a complete feast, pair with crusty bread for soaking up any extra sauce and a light vegetable side like crispy garlic air fryer broccoli for textural contrast that complements without competing with your showstopping potatoes.

    Creative Twists on the Classic

    While the traditional version is divine, don’t be afraid to put your own spin on these stuffed potatoes. For a lighter option, substitute sweet potatoes for russets—their natural sweetness pairs beautifully with the seafood. Experiment with different cheese toppings: pepper jack adds heat, while smoked gouda brings a wonderful depth. For a deconstructed approach, try making twice-baked potato skins and topping them with the seafood mixture for perfect party appetizers. You can even transform leftovers into an incredible breakfast by topping with a fried egg—the runny yolk creates a luscious sauce that takes this dish to new heights.

    Storage & Troubleshooting Guide

    Proper Storage and Reheating Methods

    These seafood potatoes are best enjoyed fresh, but leftovers can be stored properly for the next day. Place cooled potatoes in an airtight container and refrigerate for up to 2 days. When reheating, avoid the microwave which can make the potatoes gummy and the seafood rubbery. Instead, place them in a 325°F oven, covered with foil, for 15-20 minutes until heated through. The gentle heat preserves the texture of both potato and seafood. For meal prep, you can bake and hollow out the potatoes ahead of time, storing them separately from the prepared seafood mixture, then assemble and heat just before serving.

    Troubleshooting Common Issues

    If your potatoes aren’t crisping up properly, the culprit is often excess moisture. Be sure to thoroughly pat dry the potatoes before oiling and baking. For potatoes that crack too much during baking, try pricking them with a fork before cooking to allow steam to escape evenly. If your seafood filling turns out watery, the seafood likely wasn’t dried well enough after thawing. Always pat seafood completely dry and consider sautéing briefly to remove excess moisture before mixing with other ingredients. For spice balance, remember you can always add more heat with hot sauce at the table, but you can’t take it away—start conservatively with the cayenne if you’re unsure.

    Frequently Asked Questions

    Can I make Loaded Cajun Seafood Stuffed Potatoes ahead of time?

    Yes! Bake and hollow out potatoes up to 2 days ahead. Prepare seafood filling the day of serving. Store separately in the refrigerator, then assemble and bake for 15-20 minutes before serving.

    What’s the best potato variety to use?

    Russet potatoes are ideal due to their starchy, fluffy texture and sturdy skins that crisp beautifully. Their neutral flavor also perfectly complements the bold Cajun seafood filling.

    Can I substitute other seafood in this recipe?

    Absolutely! While shrimp, crab, and crawfish create authentic Cajun flavor, you can use any combination or single seafood. Lobster makes a luxurious substitution, and white fish works well too.

    How spicy is this dish?

    The recipe provides moderate heat that most people enjoy. Adjust cayenne pepper to taste—start with less if you’re sensitive to spice or add more for true Cajun fire.

    Can I freeze leftover stuffed potatoes?

    I don’t recommend freezing the assembled potatoes as the texture suffers significantly. However, you can freeze the seafood filling separately for up to one month in an airtight container.

    Final Thoughts

    These Loaded Cajun Seafood Stuffed Potatoes represent the perfect marriage of comfort food and culinary adventure. They’ve become my go-to when I want to impress without spending hours in the kitchen. The combination of crispy potato, fluffy interior, and that rich, spicy seafood filling creates a memorable dish that bridges everyday cooking with special occasion worthy results. I hope they bring the same joy to your table as they have to mine! For more delicious seafood inspirations, check out my Pinterest collection where I’m always adding new flavor combinations and cooking techniques.

  • Homemade Strawberry Cream Cheese Pound Cake That’ll Melt Your Heart

    Homemade Strawberry Cream Cheese Pound Cake That’ll Melt Your Heart

    Homemade Strawberry Cream Cheese Pound Cake That'll Melt Your Heart

    Homemade Strawberry Cream Cheese Pound Cake has been my secret weapon for Sunday brunches and special occasions for years. There’s something magical about the way the tangy cream cheese balances the sweet, juicy strawberries in each slice. I still remember the first time I made this for my sister’s birthday—the kitchen filled with that buttery, vanilla-scented air that makes everyone drift in asking “what’s that amazing smell?” This pound cake isn’t just dessert; it’s a slice of comfort that somehow tastes like sunshine and celebrations all at once. If you’re looking for a cake that’s both impressive and foolproof, this is the one you need.

    Recipe

    Why You’ll Love This Homemade Strawberry Cream Cheese Pound Cake

    Perfect Texture & Flavor Combination

    The velvety crumb of this pound cake is what sets it apart from ordinary cakes. The cream cheese doesn’t just add tanginess—it creates this incredibly moist texture that somehow stays tender for days. I’m always amazed at how the strawberries don’t sink to the bottom but instead create these gorgeous pockets of jammy sweetness throughout each slice. The vanilla extract amplifies everything, while the slight crust that forms on the outside adds that perfect textural contrast. When you take that first bite, you get this beautiful marriage of buttery richness and bright berry flavor that makes your taste buds dance.

    Simple Ingredients, Extraordinary Results

    What I adore about this Homemade Strawberry Cream Cheese Pound Cake is that it transforms pantry staples into something truly special. You don’t need fancy equipment or obscure ingredients—just good butter, cream cheese at room temperature (this is crucial!), fresh or frozen strawberries, and quality vanilla. I’ve made this cake during strawberry season with just-picked berries, but honestly, it’s nearly as wonderful with frozen berries in the dead of winter. There’s something deeply satisfying about creating something so impressive with ingredients you likely already have on hand. It’s the perfect example of how simple ingredients, treated with care, can become extraordinary.

    Essential Tips & Tricks

    Mastering the Mixing Method

    The secret to perfection lies in how you handle the ingredients. Always—and I mean always—bring your cream cheese, butter, and eggs to room temperature before starting. This isn’t just baking snobbery; it’s chemistry! Room temperature ingredients create that silky, emulsified batter that bakes up perfectly. When creaming the butter and cream cheese, don’t rush. Those 3-4 minutes of beating incorporate air that gives your cake lift. Another game-changer? Tossing your strawberries in a tablespoon of flour before folding them in. This prevents them from sinking and creates the perfect distribution throughout your cake, just like in my other fruit-based recipes.

    Baking & Timing Essentials

    The low and slow approach is non-negotiable for pound cakes. I bake mine at 325°F (165°C) rather than the standard 350°F. This gentler heat allows the cake to rise evenly without developing a too-dark exterior before the center is done. Your kitchen timer is your best friend here—check at 60 minutes, but know that perfection might take up to 75 minutes depending on your oven. The toothpick test doesn’t lie: a few moist crumbs are perfect, but wet batter means more time is needed. And please, resist the urge to open the oven door during the first 45 minutes! That temperature drop can cause your beautiful cake to sink in the middle.

    Serving Ideas & Creative Variations

    Elegant Presentation Options

    Transform this already-stunning cake into a showstopper with thoughtful presentation. A light dusting of powdered sugar creates a snow-kissed look that’s elegant in its simplicity. For dinner parties, I serve slices with a dollop of lightly whipped cream and a few fresh strawberry slices on the side. Want something more dramatic? Try a drizzle of white chocolate ganache that cascades down the sides. The cake also looks beautiful on a vintage cake stand surrounded by edible flowers or fresh mint leaves. For brunch gatherings, I cut smaller slices and arrange them on a tiered platter with other mini treats like my Raspberry Brownie Date Energy Bites for an impressive spread.

    Seasonal & Flavor Adaptations

    The versatility of this pound cake base will amaze you. In summer, swap strawberries for blueberries or blackberries—or go wild with a triple berry mix. Fall calling? Try diced apples with cinnamon and a touch of nutmeg. For winter holidays, cranberries and orange zest create a festive variation that’s gorgeous sliced. You can also play with extracts—almond extract pairs beautifully with cherries, while lemon extract brightens up blueberry versions. For a more decadent twist, fold in white chocolate chips or toasted nuts with your fruit. I’ve even made a marbled version by separating some batter and mixing in cocoa powder before swirling it with the original batter.

    Storage & Troubleshooting Guide

    Keeping Your Pound Cake Fresh

    The cream cheese magic in this recipe means your cake stays moist longer than traditional pound cakes. Store it at room temperature under a cake dome for up to 3 days—the flavor actually improves overnight as the strawberry essence permeates the crumb. For longer storage, wrap individual slices in plastic wrap and freeze for up to 3 months. I always make an extra loaf just for freezing! To revive slightly dried-out cake, warm a slice for 10 seconds in the microwave—it’ll taste nearly freshly baked. For special occasions, I sometimes brush room-temperature slices with a simple syrup infused with vanilla or a splash of liqueur for extra moisture and flavor.

    Fixing Common Pound Cake Problems

    Even experienced bakers encounter the occasional dense bottom or cracked top. If your cake sinks in the middle, your batter was likely overmixed or your oven temperature runs low. Next time, fold ingredients more gently and consider an oven thermometer. Cracks on top are actually characteristic of pound cakes—embrace them as rustic charm! If your strawberries sink despite flouring, they might be too large; try dicing them smaller or using frozen berries, which hold their position better. A too-dark crust while the interior remains underbaked usually means your oven runs hot—cover the cake with foil halfway through baking next time to protect it while the center finishes cooking.

    Frequently Asked Questions

    Can I make this Homemade Strawberry Cream Cheese Pound Cake ahead of time?

    Absolutely! It actually tastes better on day two when the flavors have melded. Bake it up to 2 days ahead and store at room temperature under a cake dome, or freeze for up to 3 months.

    Can I use frozen strawberries instead of fresh?

    Yes! Don’t even thaw them—add them frozen and tossed in flour. This actually helps them distribute more evenly throughout the batter without bleeding color.

    Why did my pound cake crack on top?

    This is completely normal and characteristic of pound cakes! The exterior sets before the interior finishes rising, causing that beautiful crack that shows it’s homemade.

    How do I know when my pound cake is done?

    Insert a toothpick into the center—it should come out with a few moist crumbs but no wet batter. The top should spring back when lightly pressed, and the edges should pull away slightly from the pan.

    Can I make this recipe in a different pan size?

    Yes, but adjust baking times accordingly. Muffin tins take about 20-25 minutes, mini loaves about 35-40 minutes. Always watch for golden edges and do the toothpick test.

    Final Thoughts

    This Homemade Strawberry Cream Cheese Pound Cake has saved countless gatherings and created so many special memories around my table. There’s something deeply satisfying about serving something so beautiful that you made with your own hands. The way people’s eyes light up at that first bite tells me this recipe is doing exactly what good food should—bringing joy and connection. I hope you’ll make this cake part of your own story, adapting it to your tastes and creating your own traditions around it. Don’t forget to share your creations on Pinterest and tag me—I’d love to see how your pound cake turns out!

  • Thai Red Curry Wonton Soup Recipe: Irresistibly Spicy & Comforting!

    Thai Red Curry Wonton Soup Recipe: Irresistibly Spicy & Comforting!

    Thai Red Curry Wonton Soup Recipe: Irresistibly Spicy & Comforting!

    Thai Red Curry Wonton Soup has become my absolute favorite cold-weather comfort food that perfectly balances cozy familiarity with exciting flavors. The first time I made this soup, the fragrant aroma of lemongrass and coconut milk filled my kitchen on a rainy Sunday afternoon, instantly transporting me to the bustling streets of Bangkok. The delicate wontons floating in that velvety red curry broth creates a dish that’s both impressive enough for guests yet simple enough for a weeknight dinner. If you’re craving something that warms you from the inside out while delivering complex flavors, this creamy soup alternative might just become your new obsession too.

    Recipe

    Why You’ll Love This Thai Red Curry Wonton Soup

    A Symphony of Flavors in Every Spoonful

    There’s something magical about the way the rich coconut curry wraps around each delicate wonton in this soup. The broth itself is a beautiful balance of spicy, sweet, tangy, and savory—hitting all those perfect flavor notes that make Thai cuisine so addictive. I love how the red curry paste infuses the coconut milk with its complex spices, while lime juice and fish sauce add that distinctive Thai brightness. The wontons provide a wonderful textural contrast, with their silky wrappers and savory filling creating little pockets of joy that burst with flavor when you bite into them. It’s comfort food with an exciting twist!

    Quick Yet Impressive Weeknight Wonder

    What truly makes this Thai Red Curry Wonton Soup a standout is how it transforms ordinary ingredients into something extraordinary without hours of work. On busy weeknights when I’m craving something special but don’t have hours to spend in the kitchen, this soup comes to my rescue. The broth comes together in about 15 minutes, and if you use store-bought wontons (though homemade are divine if you have time), you can have this restaurant-quality meal on the table in under 30 minutes. My friends always think I’ve spent hours preparing it, but it’s our little secret that it’s actually one of my easiest impressive dishes.

    Essential Tips & Tricks

    Perfecting Your Curry Broth Base

    The soul of this Thai Red Curry Wonton Soup lies in its aromatic broth. For the most authentic flavor, start by “blooming” your curry paste in hot oil before adding other ingredients—this simple step releases all those essential oils and intensifies the flavor dramatically. I learned this trick from a Thai cooking class and it’s been a game-changer. For the coconut milk, use full-fat for that silky texture that makes the soup so luxurious. If you’re sensitive to heat, start with less curry paste—you can always add more, but you can’t take it away! A splash of lime juice at the end brightens everything up beautifully.

    Wonton Wisdom for Beginners

    Making wontons might seem intimidating, but they’re actually quite forgiving for beginners. The key is not to overstuff them—about a teaspoon of filling is perfect. Keep a small bowl of water nearby to seal the edges, and don’t worry if they’re not perfectly shaped; they’ll still taste amazing! If you’re short on time, quality store-bought wontons work wonderfully too. For the filling, I love a mixture of ground pork, shrimp, garlic, ginger, and a touch of sesame oil—but feel free to customize with chicken or make them vegetarian with mushrooms and tofu. The delicate wrappers cook quickly, so add them to the soup just 3-4 minutes before serving.

    Serving Ideas & Creative Variations

    Garnish Like a Pro Chef

    The final presentation of your Thai Red Curry Wonton Soup can elevate it from delicious to absolutely stunning. I love creating a little “garnish bar” when serving this to guests—small bowls of fresh cilantro, thinly sliced Thai chilies, bean sprouts, lime wedges, and chopped scallions. The vibrant colors not only make the soup visually appealing but also allow everyone to customize their bowl. A drizzle of chili oil creates beautiful red swirls on the surface, and a few drops of toasted sesame oil add wonderful aromatic depth. My personal touch is a sprinkle of fried shallots or garlic chips for a crispy textural contrast against the silky broth.

    Global Fusion Adaptations

    Don’t be afraid to play with fusion elements in your Thai Red Curry Wonton Soup! One of my favorite variations includes adding crispy shrimp toast pieces as a garnish instead of traditional wontons—the textural contrast is absolutely divine. For a Japanese-Thai fusion, try adding ramen-style soft-boiled eggs and corn. You can also substitute the traditional wontons with Korean mandu or Chinese soup dumplings for an interesting twist. For a heartier meal, add rice noodles or even cubed sweet potatoes that become wonderfully tender in the fragrant broth. The possibilities are endless once you master the basic recipe!

    Storage & Troubleshooting Guide

    Proper Storage for Maximum Freshness

    To keep your Thai Red Curry Wonton Soup tasting its best, proper storage is essential. The key is to store the broth separately from the wontons whenever possible. The broth will keep beautifully in an airtight container in the refrigerator for up to 3 days, actually developing even deeper flavors overnight. For the wontons, if they’re already cooked, store them in a separate container with a tiny bit of oil to prevent sticking. If you have uncooked wontons, they freeze exceptionally well—just arrange them on a baking sheet so they don’t touch, freeze until solid, then transfer to a freezer bag for up to 3 months.

    Troubleshooting Common Challenges

    Even experienced cooks occasionally encounter issues with Thai Red Curry Wonton Soup, but most problems have simple solutions. If your broth is too spicy, add more coconut milk or a touch of brown sugar to balance the heat. For a broth that’s too thin, simmer it longer to reduce, or add a cornstarch slurry (1 teaspoon cornstarch mixed with 1 tablespoon cold water) for quick thickening. If your wontons are falling apart, the likely culprit is overfilling or not sealing them properly—use less filling and ensure edges are completely sealed with water. For wontons that stick together during cooking, make sure your soup is at a gentle simmer, not a rolling boil.

    Frequently Asked Questions

    Can I make Thai Red Curry Wonton Soup vegetarian?

    Absolutely! Substitute vegetable broth for chicken broth, use mushroom-based wontons, and replace fish sauce with soy sauce or liquid aminos. Add extra vegetables like bok choy and mushrooms for more substance and flavor.

    What’s the best red curry paste to use?

    Mae Ploy and Maesri are excellent authentic brands. For milder flavor, Thai Kitchen works well. Always adjust quantity to your spice preference—you can always add more later.

    How do I prevent my wontons from getting soggy?

    Add wontons to the Thai Red Curry Wonton Soup just 3-4 minutes before serving. For leftovers, store wontons separately from broth and combine only when reheating.

    Can I prepare components ahead for a dinner party?

    Yes! Make the broth up to 2 days ahead and prepare wontons a day before (store uncooked in refrigerator). Reheat broth and cook wontons just before serving for the freshest result.

    Is this soup freezer-friendly?

    Freeze the broth alone for up to 3 months. Uncooked wontons freeze well on a baking sheet until solid, then transfer to freezer bags. Cook frozen wontons directly in hot broth without thawing.

    Final Thoughts

    This Thai Red Curry Wonton Soup has become more than just a recipe in my kitchen—it’s my go-to comfort food with a twist that never fails to impress. There’s something magical about the way the aromatic broth and tender wontons come together to create something greater than the sum of their parts. Whether you’re cooking for yourself on a quiet evening or hosting friends for dinner, this versatile soup adapts beautifully to any occasion. I hope you’ll visit my Pinterest page for more inspired Asian fusion recipes that bring global flavors into your everyday cooking.

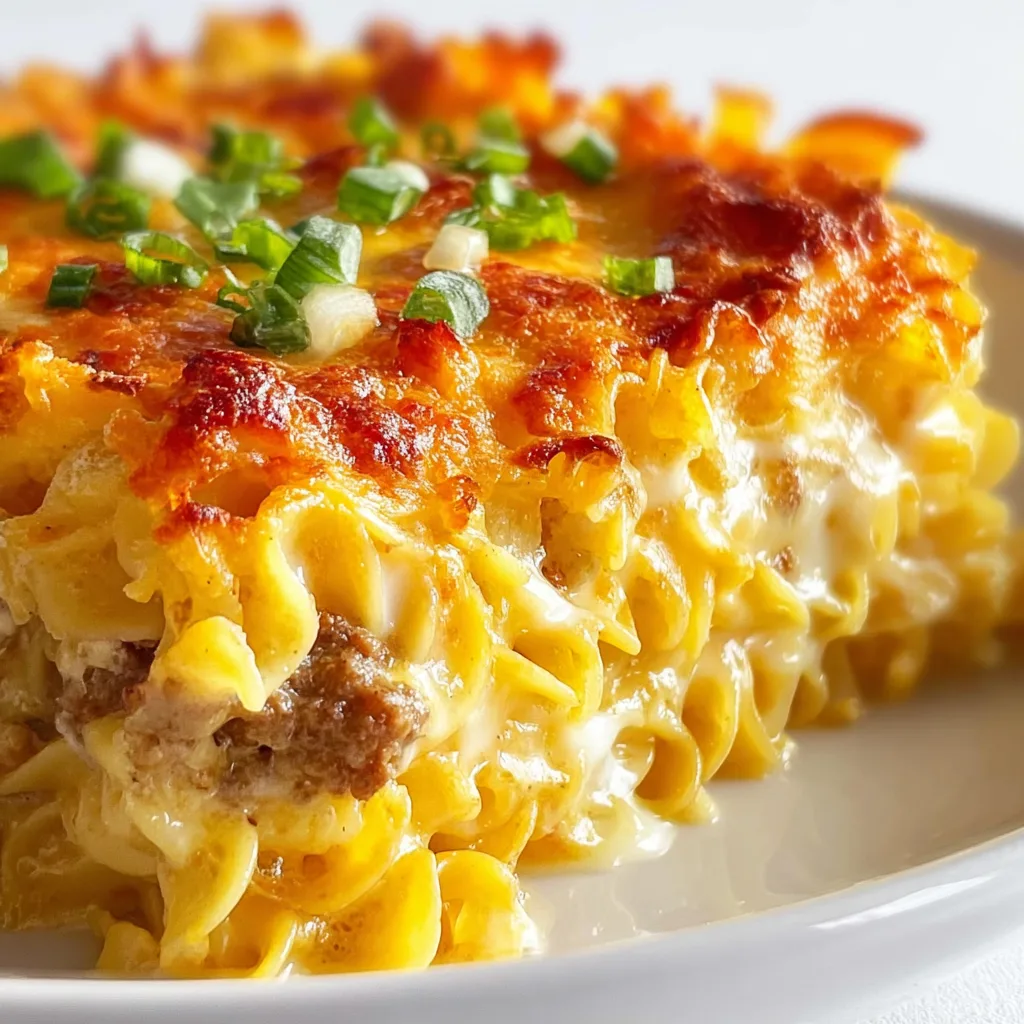
  • Sour Cream Noodle Bake: Irresistibly Creamy & Comforting Delight!

    Sour Cream Noodle Bake: Irresistibly Creamy & Comforting Delight!

    Sour Cream Noodle Bake: Irresistibly Creamy & Comforting Delight!

    Sour Cream Noodle Bake has been my comfort food salvation on countless chilly evenings when nothing else would do. There’s something magical about the way the tangy sour cream melts into those tender egg noodles, creating little pockets of creamy goodness that cradle the savory ground beef. The first time I made this for my family, my kitchen filled with the most inviting aroma of bubbling cheese and herbs. It’s the kind of dish that makes everyone gravitate toward the kitchen, asking “How much longer?” while eyeing the oven timer. This hearty casserole combines simple ingredients into something truly special.

    Recipe

    Why You’ll Love This Sour Cream Noodle Bake

    Perfect Make-Ahead Comfort Food

    This casserole is the ultimate meal prep champion. I often assemble it on Sunday afternoons while my favorite playlist hums in the background, then refrigerate it until Monday’s dinner chaos strikes. The flavors actually deepen overnight, with the tangy sour cream infusing every bite. The beauty lies in its simplicity—just brown some beef, boil noodles, stir together a few creamy ingredients, and layer everything in your baking dish. When life gets hectic, knowing this bubbling dish of goodness awaits in your refrigerator feels like having a secret superpower against weeknight dinner stress.

    Crowd-Pleasing Versatility

    I’ve never met anyone who doesn’t fall for this Sour Cream Noodle Bake. It’s become my go-to potluck dish because it appeals to picky eaters and foodies alike. The creamy texture satisfies comfort food cravings while the savory beef and melty cheese create that irresistible pull-apart moment everyone loves. I’ve served it at everything from casual family gatherings to dinner parties, and the empty casserole dish always comes home with requests for the recipe. The best part? You can easily double it for larger crowds or scale down for a cozy dinner for two.

    Essential Tips & Tricks

    Perfecting Your Noodle Texture

    The secret to success lies in slightly undercooking your egg noodles. I cook them about 2 minutes less than the package directions suggest, aiming for that perfect al dente texture. This prevents them from becoming mushy during baking. Another game-changer? Rinsing the noodles in cold water immediately after draining. This stops the cooking process and removes excess starch, keeping your noodles from clumping together. I learned this the hard way after a few too-soft batches early in my cooking journey. Now my noodles maintain their delightful chew, even after being baked in all that creamy sauce.

    Creating Layers of Flavor

    Don’t rush the beef browning process! Those caramelized bits at the bottom of your pan are flavor gold. I take my time sautéing the onions until they’re translucent, then browning the beef until it develops those crispy edges. Adding a splash of Worcestershire sauce gives it depth, while a pinch of red pepper flakes provides subtle warmth without overwhelming heat. For an extra flavor boost, try adding minced garlic when your beef is almost done. This creates a foundation of savory goodness that balances perfectly with the tangy sour cream layer.

    Serving Ideas & Creative Variations

    Perfect Pairings

    This hearty casserole deserves thoughtful sides to create a balanced meal. I love serving it with a crisp green salad dressed simply with lemon and olive oil—the brightness cuts through the richness beautifully. Roasted vegetables like broccoli or Brussels sprouts add color and texture to your plate. For bread lovers, garlic bread or buttery dinner rolls are perfect for sopping up every last bit of creamy sauce. When entertaining, I sometimes add a colorful vegetable side to brighten the table and balance the meal’s comforting richness.

    Delicious Twists on the Classic

    The basic recipe is wonderful, but sometimes I enjoy adding creative touches. Try swapping ground beef for Italian sausage or ground turkey for a lighter version. Vegetarians can substitute plant-based crumbles or sautéed mushrooms for a meaty texture without the meat. Adding vegetables like spinach, bell peppers, or mushrooms boosts nutrition and adds color. For a Mexican-inspired variation, mix in taco seasoning, black beans, and top with pepper jack cheese. My family loves when I add a layer of caramelized onions between the noodles and beef—it adds incredible sweetness.

    Storage & Troubleshooting Guide

    Proper Storage Solutions

    This Sour Cream Noodle Bake is a meal prep dream that gets even better as leftovers. Once cooled, cover the casserole dish tightly with foil or transfer portions to airtight containers. Refrigerated leftovers stay delicious for 3-4 days, with the flavors melding beautifully. For longer storage, freeze individual portions in freezer-safe containers for up to 3 months. I like labeling them with the date and reheating instructions. To prevent freezer burn, press plastic wrap directly onto the surface before sealing. The texture may change slightly after freezing, but the flavor remains comforting and delicious.

    Fixing Common Issues

    If your casserole turns out too dry, there are easy troubleshooting tricks. Next time, increase the sour cream by ¼ cup or add ¼ cup of chicken broth to the beef mixture. For a casserole that’s too runny, let it rest 15 minutes after baking—it will thicken as it cools. If your cheese isn’t browning nicely, switch to the broiler for the final 2-3 minutes, watching carefully to prevent burning. Bland flavor? Don’t be shy with seasonings! Add more garlic powder, Italian herbs, or even a dash of hot sauce to the beef mixture. These simple adjustments make all the difference.

    Frequently Asked Questions

    Can I make Sour Cream Noodle Bake ahead of time?

    Absolutely! Assemble it up to 24 hours in advance, cover and refrigerate. Add 10-15 minutes to the baking time when cooking from cold. The flavors actually improve with a little time to meld together.

    What can I substitute for sour cream?

    Greek yogurt works beautifully as a tangy, protein-rich alternative. For a richer version, try full-fat cottage cheese blended until smooth. Both options maintain that creamy texture that makes Sour Cream Noodle Bake so comforting.

    Can I use different pasta shapes?

    Yes! While egg noodles are traditional, rotini, penne, or fusilli work well too. Choose shapes that trap the creamy sauce in their nooks and crannies for maximum flavor in every bite.

    Is Sour Cream Noodle Bake freezer-friendly?

    Definitely. Freeze it either before or after baking for up to 3 months. Thaw overnight in the refrigerator before heating. If frozen unbaked, add 15-20 minutes to your cooking time.

    How do I know when my Sour Cream Noodle Bake is done?

    Look for bubbling edges and a golden brown cheese top. The internal temperature should reach 165°F. Let it rest 10 minutes before serving to allow the layers to set properly.

    Final Thoughts

    This Sour Cream Noodle Bake has saved countless dinner times in my home, becoming a beloved recipe that brings everyone to the table with eager anticipation. There’s something special about a dish that combines simple ingredients into something far greater than the sum of its parts. The tangy sour cream, savory beef, and tender noodles create a harmony of flavors that speaks directly to the comfort-food-loving part of our souls. I hope this becomes a treasured recipe in your collection too! For more delicious comfort food inspiration, visit our Pinterest page.