Author: Sara Maren

  • Heavenly Pistachio Raspberry Cake: Irresistibly Delicious & Dreamy!

    Heavenly Pistachio Raspberry Cake: Irresistibly Delicious & Dreamy!

    Heavenly Pistachio Raspberry Cake: Irresistibly Delicious & Dreamy!

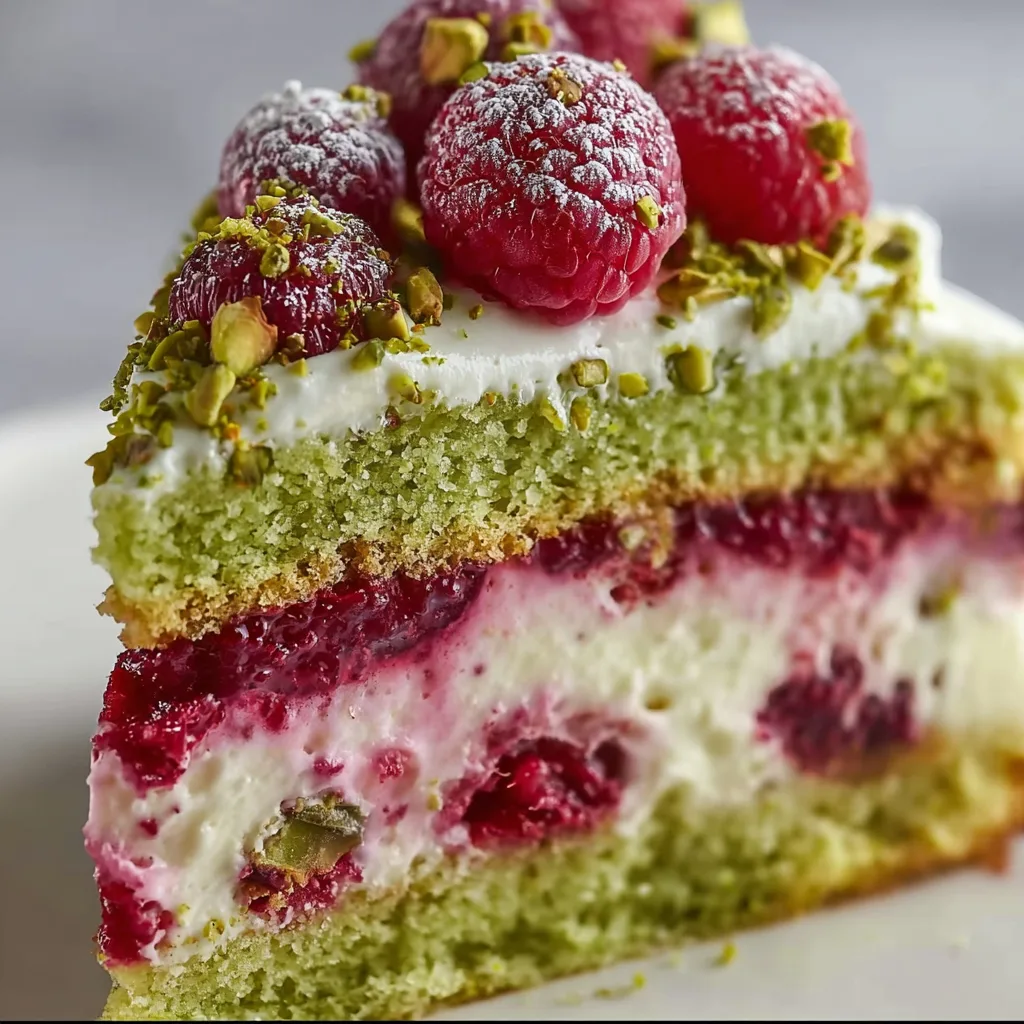
    This heavenly pistachio raspberry cake has become my absolute obsession lately! The moment I pulled it from the oven, my kitchen filled with the most intoxicating aroma of toasted pistachios and sweet raspberry essence. The vibrant green crumb studded with ruby-red berries creates a visual masterpiece that’s almost too pretty to eat. Almost. I’ve served this at three gatherings now, and each time, people practically beg for the recipe before they’ve finished their first bite. If you loved my pink coconut snowball cake bars, this pistachio-raspberry creation takes that delightful texture to new heights with more complex, sophisticated flavors.

    Recipe

    Why You’ll Love This Heavenly Pistachio Raspberry Cake

    Perfect Balance of Flavors and Textures

    The nutty depth of pistachios pairs magically with bright, tangy raspberries—it’s a flavor combination straight from dessert heaven. Each bite delivers that perfect balance between rich, buttery cake and juicy berry bursts. I’ve added a touch of almond extract alongside vanilla to enhance the pistachio flavor profile, creating layers of complexity that make this cake truly special. The texture is what dreams are made of: moist and tender crumb with a slight crunch from the crushed pistachios folded throughout. When those raspberries bake, they create these perfect pockets of jammy goodness.

    Stunning Visual Appeal Without Fuss

    This cake is what I call an effortless showstopper. The natural colors—that lovely pistachio green and the ruby-red raspberry swirls—create a gorgeous presentation without any artificial coloring. The simple dusting of powdered sugar and a crown of fresh raspberries and chopped pistachios makes it Instagram-worthy without requiring professional decorating skills. I served this at my sister’s birthday, and before I even set it down, everyone had their phones out for photos! The contrast between the pale green cake and vibrant berries creates a natural beauty that makes people think you spent hours in the kitchen.

    Essential Tips & Tricks

    Perfecting Your Pistachio Prep

    Getting the pistachio texture just right is crucial for this cake’s signature flavor and appearance. I recommend using unsalted pistachios and toasting them lightly (about 5 minutes at 350°F) before grinding. This simple step intensifies their flavor dramatically. Pulse them in your food processor until they resemble coarse sand—not so long that they turn into butter! Leave some small chunks for texture. For the garnish, chop some by hand for a more rustic look. If you’re short on time, some specialty stores sell pistachio flour, but the flavor is never quite as vibrant as freshly ground nuts.

    Mastering the Raspberry Integration

    The way you handle the raspberries makes all the difference in this cake. For the batter, I fold in frozen raspberries (don’t thaw them!) tossed lightly in flour—this prevents them from sinking and bleeding too much color throughout. For the freshest flavor, I also make a quick raspberry coulis by simmering fresh berries with a touch of sugar and lemon juice, then straining out the seeds. This creates beautiful swirls throughout the cake when you marble it into the batter before baking. Like my raspberry sugar cookies, the key is balancing the fruit’s moisture without making the cake soggy.

    Serving Ideas & Creative Variations

    Elegant Accompaniments

    Elevate this heavenly pistachio raspberry cake with thoughtful accompaniments that complement its sophisticated flavor profile. A dollop of lightly sweetened mascarpone cream adds a luxurious touch that balances the cake’s sweetness perfectly. For dinner parties, I serve thin slices alongside a small glass of Moscato d’Asti—the wine’s subtle sweetness and effervescence create a magical pairing. For afternoon tea, try it with a pistachio-infused whipped cream. The cake also pairs beautifully with a scoop of vanilla bean ice cream for more casual gatherings, where the contrast between warm cake and cold ice cream creates pure bliss.

    Seasonal and Dietary Adaptations

    This versatile cake welcomes creative substitutions while maintaining its charm. In summer, swap raspberries for blackberries or a mix of summer berries. During fall, pears poached in honey make an elegant alternative to the raspberries. For dietary needs, this cake adapts beautifully—use a high-quality cup-for-cup gluten-free flour blend with 1/4 teaspoon xanthan gum added. For dairy-free versions, substitute coconut oil for butter and coconut cream in the frosting. The condensed milk baked rice pudding fans will appreciate how this cake has that same comforting quality while being more sophisticated.

    Storage & Troubleshooting Guide

    Keeping Your Cake Fresh

    Proper storage techniques ensure this cake stays delicious for days. At room temperature, cover it with a cake dome or inverted bowl and consume within 2 days for optimal freshness. In the refrigerator, wrap individual slices in parchment paper, then plastic wrap, extending enjoyment to 5 days—just bring to room temperature before serving to revive the texture and flavors. This cake also freezes beautifully for up to 3 months: wrap slices tightly in plastic wrap, then foil, and thaw overnight in the refrigerator. I’ve found that the pistachio flavor actually deepens after a day, making this a perfect make-ahead dessert for busy hosts.

    Solving Common Baking Challenges

    Even experienced bakers encounter common issues with specialty cakes. If your pistachios turn the batter too green, reduce the amount slightly or mix them with a small portion of almond flour. For sunken raspberries, make sure they’re completely dry and well-coated in flour before folding in. If your cake seems too dense, check your leavening agents’ freshness—baking powder loses potency after 6 months. For a cake that’s browning too quickly, loosely tent with foil halfway through baking. Remember that oven temperatures vary, so start checking for doneness about 5 minutes before the recipe suggests.

    Frequently Asked Questions

    Can I use pistachio pudding mix instead of real pistachios?

    While convenient, pudding mixes contain artificial flavors. For the authentic heavenly pistachio raspberry cake experience, real pistachios provide superior flavor, natural color, and wonderful texture that no mix can replicate.

    How do I prevent my raspberries from sinking to the bottom?

    Toss frozen raspberries in 1-2 tablespoons of flour before folding them gently into the batter. This coating helps them stay suspended during baking rather than sinking.

    Can I make this cake ahead for a special occasion?

    Absolutely! The flavors actually develop beautifully overnight. Bake it a day ahead, store at room temperature under a cake dome, and add any fresh garnishes just before serving.

    What’s the best way to grind pistachios for this recipe?

    Use a food processor and pulse in short bursts until they reach a sandy texture with small chunks remaining. Avoid over-processing, which releases oils and creates pistachio butter.

    Is this cake suitable for beginners?

    Yes! The technique is straightforward—just fold ingredients gently and don’t overmix. The natural beauty of the pistachios and raspberries makes even imperfect attempts look impressive.

    Final Thoughts

    This heavenly pistachio raspberry cake has become my signature dessert for good reason—it strikes that perfect balance between sophisticated and comforting. The contrasting flavors and textures create a memorable experience that keeps friends and family requesting it time and again. What I love most is how the humble pistachio transforms into something truly extraordinary when paired with bright raspberries. Whether for a special celebration or just because it’s Tuesday, this cake brings a moment of pure joy to any table. Find more inspiration for your baking adventures on Pinterest.

  • Butter Toffee Pretzels: Irresistibly Crunchy Sweet & Salty Bliss!

    Butter Toffee Pretzels: Irresistibly Crunchy Sweet & Salty Bliss!

    Butter Toffee Pretzels: Irresistibly Crunchy Sweet & Salty Bliss!

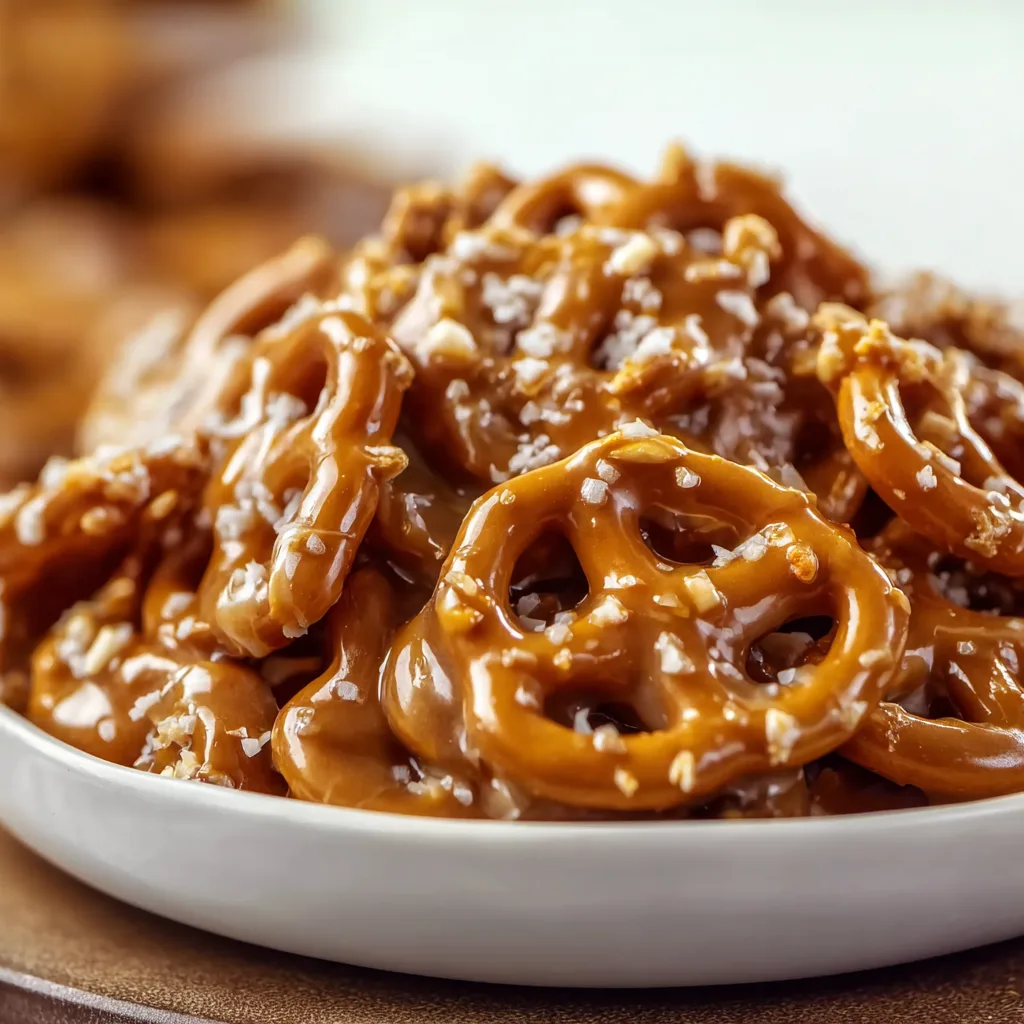
    Butter toffee pretzels are my absolute guilty pleasure when I need something sweet, salty, and utterly irresistible. That perfect crunch followed by buttery caramel notes makes my taste buds dance with joy! I’ve been making these addictive treats for years, and they never fail to disappear within minutes at family gatherings. The beautiful thing about these pretzel bites is how the rich toffee coating creates this gorgeous amber glaze that transforms ordinary pretzels into something magical. If you’ve enjoyed my pecan pie cheesecake bars, you’ll adore this sweet-salty combination too!

    Recipe

    Why You’ll Love These Butter Toffee Pretzels

    Perfect Sweet-Salty Balance

    There’s something absolutely magical about the contrast between salty pretzels and sweet, buttery toffee. Each bite delivers this incredible flavor explosion that satisfies multiple cravings at once! I love how the toffee seeps into every nook and cranny of the pretzels, creating these little pockets of caramelized goodness. The first time I made these for my sister’s birthday gathering, people literally hovered around the bowl, unable to stop reaching for “just one more.” That’s the power of perfectly balanced sweet and salty flavors—they’re genuinely impossible to resist!

    Quick and Impressive Treat

    What I adore most about these butter toffee pretzels is how they transform ordinary ingredients into something that looks and tastes gourmet with minimal effort. In just about 20 minutes of active time, you’ll have a showstopping treat that makes people think you spent hours in the kitchen. The glossy, amber coating catches the light beautifully, making these pretzels look like they came from an expensive specialty shop. I’ve brought these to countless potlucks and always get asked for the recipe—they’re that impressive despite being one of the easiest treats in my repertoire!

    Essential Tips & Tricks

    Mastering the Toffee Consistency

    Getting the perfect toffee consistency is all about timing and temperature. Use a heavy-bottomed pan to prevent burning and stir constantly once the butter and sugar start to bubble. Watch for that gorgeous amber color—too light and your toffee will be soft; too dark and it’ll taste bitter. I learned this the hard way when I got distracted by a phone call and came back to a smoky kitchen! The ideal temperature is around 300°F on a candy thermometer, but you can also test it by dropping a tiny amount into cold water—it should form hard, crunchy threads that snap easily.

    Coating Technique Matters

    The way you coat your pretzels makes a huge difference in the final result. Work quickly once your toffee reaches the right consistency, as it hardens fast! I recommend using two silicone spatulas to gently fold the pretzels into the hot toffee mixture rather than stirring vigorously, which can break the pretzels. For an extra special touch, try my butter pecan cookies technique of sprinkling a tiny bit of flaky sea salt on top while the toffee is still warm—it elevates the flavor profile beautifully and adds that professional touch!

    Serving Ideas & Creative Variations

    Party-Perfect Presentations

    These butter toffee pretzels deserve to be showcased in style! For holiday gatherings, I love arranging them in clear glass containers where the amber-colored coating catches the light beautifully. For a dessert table, try serving them alongside fresh berries for a gorgeous color contrast. My favorite presentation hack is creating little individual portions in cupcake liners—it controls portions and looks adorable! Last Christmas, I paired these with my caramel toffee crunch cheesecake for a toffee-themed dessert spread that had everyone raving!

    Flavor Twists and Add-ins

    Don’t be afraid to experiment with exciting variations that make these butter toffee pretzels uniquely yours! Try adding a teaspoon of vanilla extract or a dash of cinnamon to the toffee mixture for warmth. For chocolate lovers, drizzle melted dark or white chocolate over the cooled pretzels, then sprinkle with crushed nuts or colorful sprinkles. My personal favorite variation includes a light dusting of espresso powder mixed with cocoa for a mocha twist. During fall, I add a pinch of pumpkin spice that transforms these into the perfect autumn treat!

    Storage & Troubleshooting Guide

    Keeping Them Fresh and Crunchy

    The enemy of perfect butter toffee pretzels is humidity! To maintain that satisfying crunch, store them in an airtight container with parchment paper between layers. They’ll stay fresh at room temperature for up to a week, though they rarely last that long in my house! For longer storage, avoid the refrigerator as condensation will make them soggy. Instead, freeze them in a ziplock bag with the air pressed out for up to 3 months. Let them come to room temperature naturally before opening the container to prevent moisture from forming on the surface.

    Fixing Common Toffee Issues

    Even experienced bakers occasionally encounter toffee troubles! If your toffee separates and looks oily, the heat was likely too high—next time, cook on medium-low and stir constantly. For toffee that won’t harden properly, you probably didn’t reach the correct temperature threshold. Use a candy thermometer for precision! If your pretzels clump together in one giant mass, try breaking them apart while still warm or spreading them on parchment paper immediately after coating. Remember that humidity affects candy-making, so avoid making these on particularly rainy days for best results!

    Frequently Asked Questions

    Can I use different types of pretzels for butter toffee pretzels?

    Absolutely! While traditional twisted pretzels work wonderfully, pretzel rods, sticks, or even square grid pretzels create interesting variations. Just adjust cooking time slightly for different sizes.

    Why did my toffee crystallize instead of becoming smooth?

    Crystallization usually happens when sugar crystals form on the sides of the pan. Prevent this by avoiding stirring once the mixture boils and using a pastry brush dipped in water to wash down crystals.

    Can I make these butter toffee pretzels ahead for a party?

    Yes! They actually taste better after 24 hours when the flavors meld. Store in an airtight container and they’ll stay perfect for up to a week.

    How can I make these dairy-free?

    Substitute the butter with coconut oil or a plant-based butter alternative. The flavor profile will change slightly, but they’ll still be delicious with that sweet-salty contrast.

    What’s the best way to break apart pretzels if they stick together?

    If they clump, gently separate them while the toffee is still slightly warm. For fully hardened clumps, a light tap with a kitchen mallet works wonders.

    Final Thoughts

    These butter toffee pretzels have become my signature treat—the one friends request when we gather and family members expect at holiday celebrations. There’s something magical about transforming simple ingredients into something so irresistibly delicious. The beauty is in the contrast: salty and sweet, crunchy and buttery, simple yet sophisticated. I hope you’ll try making these addictive treats and experience the joy of watching them disappear before your eyes! Don’t forget to check out more sweet-and-salty inspiration on Pinterest.

  • Chicken Tzatziki Rice Recipe: Creamy, Flavor-Packed Easy Dinner!

    Chicken Tzatziki Rice Recipe: Creamy, Flavor-Packed Easy Dinner!

    Chicken Tzatziki Rice Recipe: Creamy, Flavor-Packed Easy Dinner!

    Chicken Tzatziki Rice combines the refreshing tang of Greek yogurt with tender chicken and fluffy rice for a Mediterranean-inspired meal that’s both comforting and bright. As I stirred the final touches into this dish last night, the aroma of lemon, dill, and garlic filled my kitchen, instantly transporting me to the sunny shores of Santorini. There’s something magical about how these simple ingredients transform into something so incredibly satisfying. This one-pot wonder has become my go-to for busy weeknights when I crave something nourishing yet exciting. If you’ve been stuck in a dinner rut, this Chicken Tzatziki Rice might just be your new favorite rescue meal.

    Recipe

    Why You’ll Love This Chicken Tzatziki Rice

    Perfect Balance of Flavors and Textures

    The magic of this Chicken Tzatziki Rice lies in its perfect harmony of flavors and textures. The creamy tzatziki sauce coats each grain of rice with cooling cucumber and tangy yogurt, while tender chicken pieces provide satisfying protein. I love how the bright lemon zest cuts through the richness, and fresh dill adds that distinctive Mediterranean flair. What makes this dish truly special is the contrast between the fluffy rice, juicy chicken, and the refreshing crunch of cucumber. It’s like having your favorite Greek restaurant flavors in a comforting one-bowl meal that satisfies all your cravings at once.

    Quick and Versatile Weeknight Solution

    When Thursday evening rolls around and my fridge is looking sparse, this Chicken Tzatziki Rice has saved dinner more times than I can count. It’s a 30-minute meal that delivers restaurant-quality flavor with minimal effort. The beauty lies in its adaptability—use leftover rotisserie chicken to make it even faster, or swap in chickpeas for a vegetarian version. I’ve made this with brown rice when I’m feeling virtuous and orzo when I want something more indulgent. The tzatziki component works with whatever herbs you have on hand—I’ve used mint when dill was nowhere to be found, and it was still delicious!

    Essential Tips & Tricks

    Perfecting Your Rice Texture

    Getting the perfect rice texture is crucial for this dish—you want fluffy, separate grains that will hold up to the tzatziki sauce without becoming mushy. I always rinse my rice thoroughly until the water runs clear, which removes excess starch and prevents clumping. For long-grain rice, maintain a 1:1.5 ratio of rice to water, and resist the urge to peek while it’s cooking! Let it rest covered for 5-10 minutes after cooking before fluffing with a fork. If you’re using brown rice, adjust your cooking time accordingly and expect to add about 20 minutes to the process. The extra time is worth it for the nutty flavor and extra fiber it brings to the dish.

    Mastering Homemade Tzatziki

    The soul of this dish is the authentic tzatziki, and making it from scratch elevates the entire meal. The secret to perfect tzatziki is removing excess moisture from your cucumbers—I grate them, then squeeze them in a clean kitchen towel until they’re nearly dry. This prevents watery sauce that would dilute your flavors. Use full-fat Greek yogurt for the creamiest results, and let your garlic infuse for at least 10 minutes before mixing everything together. I like to prepare the tzatziki while the rice cooks, allowing the flavors to marry as everything comes together. The cooling effect against the warm rice creates a delightful temperature contrast that makes each bite exciting.

    Serving Ideas & Creative Variations

    Mediterranean-Inspired Side Pairings

    This Chicken Tzatziki Rice shines as a complete meal, but thoughtful sides can transform it into a Mediterranean feast. I love serving it with a simple Greek salad—just tomatoes, cucumbers, red onion, and feta with olive oil and oregano. Warm pita triangles drizzled with olive oil and za’atar make perfect scoops for any extra tzatziki. For a more substantial spread, add roasted vegetables like bell peppers, zucchini, or eggplant. A small dish of marinated olives and some hummus completes the experience. These sides complement without competing, letting the bright, tangy flavors of the main dish take center stage.

    Exciting Flavor Twists

    While the classic version is divine, this dish welcomes creative variations that keep it exciting meal after meal. Try a lemon-herb upgrade by adding preserved lemon and fresh oregano for intense citrus notes. For a spicy kick, stir in harissa paste or Aleppo pepper flakes to contrast with the cooling tzatziki. I’ve made a gorgeous “sunset” version using turmeric and smoked paprika in the rice, which turns it a beautiful golden color. For a heartier twist, add roasted chickpeas or toasted pine nuts for extra texture. My personal favorite variation includes crumbled feta folded in at the last minute, creating pockets of salty creaminess throughout the dish.

    Storage & Troubleshooting Guide

    Proper Storage for Maximum Freshness

    To maintain the vibrant flavors of your Chicken Tzatziki Rice, proper storage is essential. Store the tzatziki sauce separately from the rice and chicken mixture—this prevents the rice from becoming soggy. In airtight containers, the chicken and rice will keep for 3-4 days in the refrigerator, while the tzatziki stays fresh for about 2 days before the cucumbers release too much water. I prefer glass containers as they don’t absorb flavors or stain from the yogurt. For meal prep, portion individual servings of rice and chicken, with tzatziki in separate small containers. When ready to eat, allow the rice mixture to come to room temperature before adding the cold tzatziki for the best texture contrast.

    Solving Common Recipe Challenges

    Even experienced cooks occasionally encounter challenges with this dish. If your rice turns out too sticky, it’s likely due to insufficient rinsing or improper water ratio. Next time, rinse thoroughly and try reducing your liquid slightly. For watery tzatziki, the culprit is almost always the cucumber—double down on squeezing out moisture or try salting the cucumber first to draw out water. If your chicken seems bland, marinate it in lemon juice, olive oil, and herbs for 30 minutes before cooking. And if the entire dish needs brightening, a fresh squeeze of lemon juice and a sprinkle of flaky sea salt just before serving works wonders to wake up all the flavors.

    Frequently Asked Questions

    Can I make Chicken Tzatziki Rice ahead of time?

    Yes! Prepare the rice and chicken up to 2 days ahead, but store the tzatziki separately. Combine just before serving for the best texture and flavor contrast. Reheat the rice mixture gently with a splash of water to restore moisture.

    Is Chicken Tzatziki Rice gluten-free?

    This dish is naturally gluten-free as long as you verify your specific yogurt brand doesn’t contain additives with gluten. Always check labels, especially on seasonings or pre-marinated chicken if you’re using those.

    Can I use brown rice instead of white rice?

    Absolutely! Brown rice adds wonderful nutty flavor and extra nutrition. Increase cooking time by about 20 minutes and add approximately ¼ cup more liquid to accommodate the longer cooking process.

    What’s the best way to prevent watery tzatziki?

    The secret is thoroughly draining your grated cucumber. Salt it, let it sit for 10 minutes, then squeeze out moisture using a clean kitchen towel or fine-mesh strainer before adding to the yogurt.

    How can I make a vegetarian version of this dish?

    Replace chicken with roasted chickpeas, grilled halloumi cheese, or marinated tofu. The tzatziki and rice components remain the same, creating an equally satisfying meatless meal.

    Final Thoughts

    This Chicken Tzatziki Rice has become more than just a recipe in my kitchen—it’s a reminder that comfort food can be bright, fresh, and exciting. The way the creamy tzatziki melts into warm, fluffy rice creates something greater than the sum of its parts. I love how it brings Mediterranean sunshine to my table even on the dreariest days. Whether you’re cooking for yourself or sharing with loved ones, this dish offers that rare combination of simplicity and sophistication that makes everyday dining special. Don’t forget to check out more Mediterranean-inspired recipes on Pinterest for your next culinary adventure!

  • High-Protein Veggie Bake That’s Bursting with Flavor & Energy!

    High-Protein Veggie Bake That’s Bursting with Flavor & Energy!

    High-Protein Veggie Bake That’s Bursting with Flavor & Energy!

    This high-protein veggie bake changed my entire meal prep game! I stumbled upon this recipe during a busy week when I needed something nutritious that wouldn’t leave me hungry an hour later. The combination of colorful vegetables, protein-rich beans, and melty cheese creates a hearty casserole that satisfies even the most demanding appetites. What I love most is how the edges get slightly crispy while the center remains tender and flavorful. Trust me, this dish will have everyone at the table reaching for seconds—even the dedicated meat-lovers in my family can’t resist!

    Recipe

    Why You’ll Love This High-Protein Veggie Bake

    Perfect Balance of Nutrition and Flavor

    This isn’t just another bland healthy dish—it’s a flavor powerhouse! Each bite delivers a perfect balance of protein, fiber, and complex carbohydrates that keep you satisfied for hours. The secret lies in layering complementary vegetables with protein-rich ingredients like chickpeas, black beans, and quinoa. I’ve found that adding a touch of smoked paprika creates depth that transforms ordinary veggies into something extraordinary. Plus, the protein content (about 25g per serving) makes this an excellent option for active lifestyles or anyone looking to reduce meat consumption without sacrificing satiety.

    Versatile Make-Ahead Meal Solution

    As someone who values both convenience and nutrition, I appreciate how this bake fits seamlessly into busy schedules. You can prep all components in advance and simply assemble when ready to bake. The flexibility is unmatched—prepare it on Sunday, portion it out, and enjoy stress-free meals throughout the week. I’ve even frozen individual portions that reheat beautifully for those evenings when cooking feels impossible. Unlike many meal-prep options that become tiresome, this veggie bake maintains its appeal with each serving, especially when the cheese gets all bubbly and golden on top!

    Essential Tips & Tricks

    Maximizing Protein Content

    To truly elevate this dish to protein powerhouse status, strategic ingredient selection makes all the difference. I recommend using a combination of legumes (chickpeas, lentils, black beans) alongside quinoa for complementary amino acids. Don’t overlook less obvious protein sources like nutritional yeast (8g protein per 1/4 cup), which adds a cheesy flavor while boosting nutrition. For an extra protein bump, consider folding in some hemp seeds or chopped tempeh before baking. The key is creating layers of protein throughout the dish rather than relying on just one source—similar to how I approach my power-packed cheesy chicken potatoes.

    Perfecting Texture and Moisture Balance

    The difference between a mediocre veggie bake and an exceptional one often comes down to moisture management. I learned this lesson the hard way after creating several soggy disappointments! Pre-roast water-heavy vegetables like zucchini, eggplant, and mushrooms before adding them to your bake. This concentrates their flavor while eliminating excess moisture. For the perfect consistency, include a binding element such as a mixture of Greek yogurt and eggs or silken tofu blended with nutritional yeast. This creates a creamy texture that holds everything together without becoming watery or dry when baked.

    Serving Ideas & Creative Variations

    Complementary Side Dishes

    While this high-protein veggie bake stands beautifully on its own, pairing it with the right sides elevates the entire meal experience. I love serving it with a crisp arugula salad dressed simply with lemon juice and olive oil—the peppery notes and acidity perfectly balance the richness of the bake. For a more substantial meal, consider a side of crusty whole grain bread or garlic knots to soak up any delicious sauces. When entertaining, I arrange the bake alongside roasted asparagus and a fresh Mediterranean spinach-feta dip for an impressive spread that never fails to delight guests.

    Seasonal and Dietary Adaptations

    One of the reasons I return to this recipe throughout the year is its adaptability to seasonal produce and dietary needs. In summer, I load it with zucchini, bell peppers, and fresh herbs from my garden. Come fall, I switch to heartier options like butternut squash, Brussels sprouts, and sage. For those following specific diets, this bake transforms easily: swap in gluten-free grains, use dairy-free cheese alternatives, or add nutrient-dense greens like kale and spinach for extra vitamins. The foundation remains the same, but these thoughtful substitutions keep the dish exciting and aligned with your nutritional goals.

    Storage & Troubleshooting Guide

    Proper Storage for Maximum Freshness

    To maintain the optimal texture and flavor of your high-protein veggie bake, proper storage is essential. After cooling completely, portion leftovers into airtight containers and refrigerate for up to 4 days. For longer storage, wrap individual portions tightly in parchment paper, then foil, before freezing for up to 3 months. I’ve found that adding a small splash of vegetable broth when reheating prevents the dish from drying out. For best results, thaw frozen portions overnight in the refrigerator before reheating at 350°F until the center reaches 165°F—this preserves the moisture without overcooking the vegetables.

    Fixing Common Veggie Bake Problems

    Even experienced cooks occasionally encounter challenges with veggie bakes. If your dish turns out too watery, next time try roasting vegetables separately before assembling or adding 1-2 tablespoons of cornstarch to absorb excess moisture. For a bake that’s too dry, incorporate more binding ingredients like Greek yogurt or ricotta cheese. If you’re finding the flavor lacks depth, don’t underestimate the power of umami-rich additions like sun-dried tomatoes, nutritional yeast, or a splash of soy sauce. I once rescued an underwhelming bake by simply adding a layer of pesto before the final cheese topping—it transformed the entire dish!

    Frequently Asked Questions

    How can I make this high-protein veggie bake vegan?

    Replace dairy cheese with nutritional yeast or plant-based cheese alternatives. Use silken tofu blended with nutritional yeast and a bit of lemon juice as a binding agent instead of eggs. Add extra beans or tempeh for additional protein.

    Can I prepare this dish in advance?

    Absolutely! Assemble the entire bake up to 24 hours ahead and refrigerate covered. Add an extra 10-15 minutes to the baking time if cooking directly from the refrigerator.

    Which vegetables work best in this recipe?

    Focus on vegetables with complementary textures—combine sturdy options like cauliflower and sweet potatoes with softer vegetables like spinach and mushrooms. Avoid very watery vegetables unless pre-roasted.

    How do I prevent the bottom from getting soggy?

    Pre-roast water-heavy vegetables, use a thin layer of breadcrumbs on the bottom of the dish to absorb moisture, and let the bake rest for 10-15 minutes before serving.

    What’s the best way to reheat leftovers?

    For best texture, reheat in a 350°F oven for 15-20 minutes. Microwave reheating works in a pinch—cover with a damp paper towel and heat in 1-minute intervals.

    Final Thoughts

    This high-protein veggie bake has become more than just a recipe in my kitchen—it’s a reliable solution for nourishing meals that never compromise on flavor. The beauty lies in its adaptability and how it welcomes your personal touch. Whether you’re feeding a family, meal prepping for the week, or looking to incorporate more plant-based options, this dish delivers on all fronts. I’d love to see your creations on Pinterest! Remember, the best recipes evolve with each making, so don’t be afraid to experiment and make this veggie bake truly your own.

  • Kentucky Cream Pull Candy: Irresistible Sweetness You Crave!

    Kentucky Cream Pull Candy: Irresistible Sweetness You Crave!

    Kentucky Cream Pull Candy: Irresistible Sweetness You Crave!

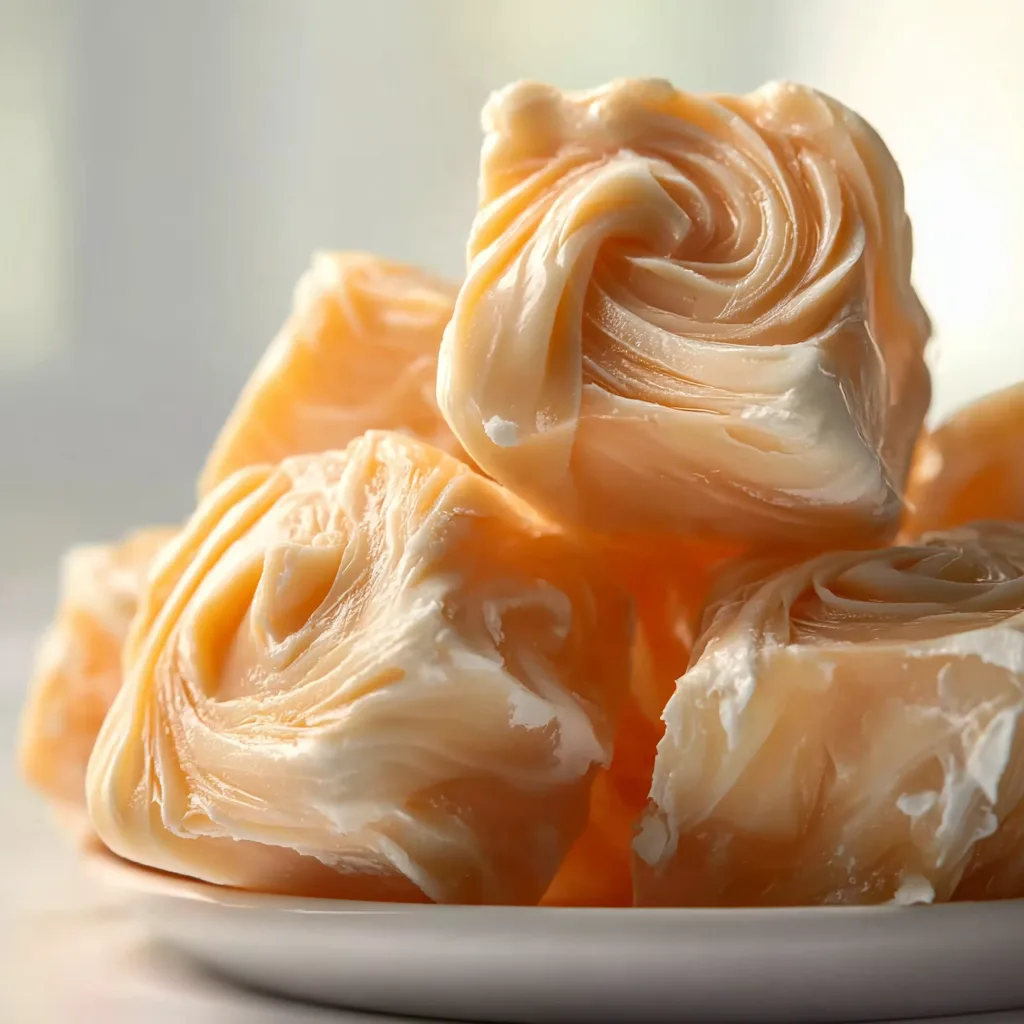
    Kentucky Cream Pull Candy holds a special place in my heart, bringing back memories of my grandmother’s kitchen filled with the sweet aroma of caramelized sugar and vanilla. This classic Southern confection transforms simple ingredients into pillowy clouds of sweetness with a texture that’s uniquely its own. When made properly, Kentucky Cream Pull Candy creates delicate strands that melt in your mouth, delivering that perfect balance of creamy vanilla flavor. I’ve spent years perfecting this recipe, and I’m thrilled to share all my secrets for creating this beloved treat that’s been delighting generations of candy lovers.

    Recipe

    Why You’ll Love This Kentucky Cream Pull Candy

    A Taste of Southern Tradition

    There’s something magical about the way Kentucky Cream Pull Candy connects us to our roots. This isn’t just any sweet treat—it’s a cultural treasure passed down through generations. The first time I successfully pulled the candy to that perfect silky texture, I understood why my grandmother insisted on making it for every holiday. The delicate vanilla notes and cloud-like consistency create an experience unlike any modern candy. Plus, the process itself becomes a cherished ritual, transforming your kitchen into a space where tradition lives on through your fingertips.

    Impressive Yet Accessible

    Don’t let the mystique surrounding Kentucky Cream Pull Candy intimidate you! While it does require attention to detail, the ingredient list is refreshingly simple—sugar, corn syrup, water, and vanilla are the stars here. I used to think candy-making required specialized equipment, but this recipe proves otherwise. The most technical aspect is recognizing when the sugar reaches the right temperature and mastering the pulling technique. The payoff? Gorgeous, professional-looking candy that will have friends asking if you secretly trained as a confectioner.

    Essential Tips & Tricks

    Temperature Matters

    The absolute key to perfect Kentucky Cream Pull Candy lies in temperature control. I learned this the hard way after three batches that either remained sticky or hardened too quickly. Invest in a reliable candy thermometer and aim for exactly 260°F (hard ball stage)—no more, no less. The weather impacts your candy too; humid days can prevent proper setting. I always plan my candy-making for dry days with low humidity. Remember to let the mixture cool slightly before pulling—your hands will thank you! Check out my butter pecan cookies for another temperature-sensitive treat.

    Mastering the Pull

    The pulling technique transforms your candy from ordinary to extraordinary, creating that signature texture Kentucky Cream Pull Candy is famous for. Start by buttering your hands generously—this prevents sticking and makes the process enjoyable rather than frustrating. Pull the candy by folding it over itself repeatedly, stretching it out about 12-18 inches each time. As you continue, you’ll notice the candy becoming lighter in color and increasingly opaque. This indicates air incorporation, which gives the candy its distinctive melt-in-your-mouth quality.

    Serving Ideas & Creative Variations

    Elegant Presentation Options

    Transform your Kentucky Cream Pull Candy into a showstopping gift by wrapping individual pieces in waxed paper with twisted ends. For special occasions, I arrange them in vintage candy dishes or stack them in clear cellophane bags tied with rustic twine. During the holidays, I sometimes dust them lightly with edible pearl dust for a subtle shimmer. These candies make beautiful wedding favors too—I’ve seen them displayed on antique silver trays with custom thank-you tags. The classic white color provides a perfect canvas for any color scheme or holiday theme.

    Flavor Variations

    While traditional Kentucky Cream Pull Candy showcases pure vanilla flavor, I’ve experimented with several delicious variations that respect the classic while offering something new. Try replacing vanilla with maple extract for a cozy autumn twist, or add a teaspoon of bourbon for an adults-only version with Kentucky spirit. Lemon extract creates a bright, refreshing candy perfect for spring gatherings. My personal favorite is adding a teaspoon of rose water for a delicately floral note that pairs beautifully with afternoon tea.

    Storage & Troubleshooting Guide

    Proper Storage Methods

    Kentucky Cream Pull Candy requires thoughtful storage to maintain its perfect texture. After cutting your candy into pieces, allow them to dry completely before storing—usually 12-24 hours depending on humidity levels. Layer the pieces between sheets of waxed paper in an airtight container. Keep them at room temperature in a cool, dry place away from direct sunlight. Properly stored, they’ll maintain their quality for up to three weeks. Avoid refrigeration, as the moisture will cause the candy to become sticky and lose its delightful texture.

    Fixing Common Problems

    Even experienced candy makers encounter challenges with Kentucky Cream Pull Candy. If your candy remains too sticky after cooling, it likely didn’t reach the proper temperature—next time, cook it slightly longer. For candy that’s too hard, you probably exceeded the target temperature; try reducing by 2-3 degrees. If your candy won’t hold its shape, humidity might be the culprit. In this case, try pulling the candy longer to incorporate more air, or save candy-making for a drier day.

    Frequently Asked Questions

    Can I make Kentucky Cream Pull Candy without a candy thermometer?

    While not ideal, you can use the cold water test. Drop a small amount into cold water—it should form a firm ball that doesn’t flatten when removed but remains malleable between your fingers.

    Why did my Kentucky Cream Pull Candy turn grainy?

    Sugar crystals likely formed during cooking. Avoid stirring after the sugar dissolves, and brush down the sides of the pan with water to prevent crystallization.

    How long should I pull the candy?

    Pull for 10-15 minutes or until the candy becomes significantly lighter in color, opaque, and holds its shape when formed.

    Can I add food coloring to Kentucky Cream Pull Candy?

    Yes! Add 2-3 drops of gel food coloring to the mixture just before it reaches temperature for beautiful pastel candies.

    What’s the difference between Kentucky Cream Pull Candy and taffy?

    Kentucky Cream Pull Candy contains no butter and has a drier, more melt-away texture than chewy taffy. The pulling technique is similar but creates a different final product.

    Final Thoughts

    Kentucky Cream Pull Candy represents the perfect balance of simplicity and sophistication—few ingredients transformed through technique into something truly special. There’s something deeply satisfying about connecting with this traditional craft, watching sugar transform through your own hands into pillowy confections. Every time I make this candy, I feel connected to generations of Southern candy-makers who perfected this art. I hope you’ll try making Kentucky Cream Pull Candy and experience the joy of creating this beloved sweet treat. Find more inspiration for homemade treats on Pinterest.

  • Italian Crescent Roll Sandwich Bake: Irresistibly Easy & Delicious!

    Italian Crescent Roll Sandwich Bake: Irresistibly Easy & Delicious!

    Italian Crescent Roll Sandwich Bake: Irresistibly Easy & Delicious!

    Italian Crescent Roll Sandwich Bake transforms simple ingredients into a crowd-pleasing meal that brings everyone to the table with eager anticipation. The first time I made this for my family, the kitchen filled with an irresistible aroma that had everyone hovering nearby, asking when dinner would be ready. There’s something magical about the combination of flaky crescent rolls, savory Italian meats, and melty cheese that creates the perfect comfort food experience. Whether you’re planning a casual weekend lunch or need a quick weeknight dinner solution, this Italian Crescent Roll Sandwich Bake delivers both convenience and flavor in every bite.

    Recipe

    Why You’ll Love This Italian Crescent Roll Sandwich Bake

    A Time-Saving Family Favorite

    This Italian Crescent Roll Sandwich Bake has become my go-to recipe for those hectic evenings when I need something substantial and satisfying without spending hours in the kitchen. The beauty lies in its simplicity—just layer your ingredients, pop it in the oven, and in about 25 minutes, dinner is served! I’ve watched my pickiest eaters clean their plates and ask for seconds, which is the ultimate culinary victory in my book. The combination of familiar flavors with a fun presentation makes this dish particularly appealing to children while still sophisticated enough for adults.

    Versatility That Welcomes Creativity

    What I adore about this Italian Crescent Roll Sandwich Bake is how easily it adapts to whatever ingredients you have on hand. The classic Italian version features pepperoni, salami, and provolone, but I’ve made countless variations based on what’s in my refrigerator. Last week, I substituted turkey and Swiss with a touch of Dijon mustard for a completely different flavor profile. The crescent roll base provides a reliable canvas for culinary experimentation, making this recipe perfect for using up leftover deli meats or that half-block of cheese that’s been waiting for its moment to shine.

    Essential Tips & Tricks

    Perfecting the Layers

    The secret to an exceptional Italian Crescent Roll Sandwich Bake lies in how you build your layers. Start by pressing the crescent dough firmly into your baking dish, making sure to seal all perforations completely—this creates a solid base that holds everything together. When adding your meats and cheeses, slightly overlap each piece for even distribution of flavors in every bite. I like to finish with a light sprinkle of Italian seasoning and a drizzle of olive oil before adding the top layer of dough. This extra step elevates the dish from good to memorably delicious, infusing aromatic herbs throughout the bake.

    Temperature Matters

    I’ve learned through trial and error that temperature plays a crucial role in this recipe’s success. Always let your refrigerated ingredients (like cheese and cold cuts) sit at room temperature for 15 minutes before assembly. This small step makes a significant difference in how evenly everything melts together. Additionally, don’t rush the baking process by increasing the temperature. A steady 375°F allows the crescent rolls to become perfectly golden while ensuring the center is thoroughly heated. If the top browns too quickly, simply cover with foil for the remaining bake time, as I discovered when making my Deep Dish Meat Lovers Pizza Pie.

    Serving Ideas & Creative Variations

    Perfect Pairings

    The Italian Crescent Roll Sandwich Bake pairs beautifully with light, fresh accompaniments that balance its rich flavors. My family’s favorite combination includes a crisp green salad with a simple vinaigrette and a side of marinated cherry tomatoes. For a more substantial meal, consider adding roasted vegetables tossed with garlic and herbs. The slight bitterness of arugula or the sweetness of roasted bell peppers creates a wonderful contrast to the savory bake. During cooler months, I serve this alongside a cup of tomato soup, creating a comforting meal that reminds me of grilled cheese sandwiches but with an Italian twist.

    Seasonal Adaptations

    One of the reasons I return to this Italian Crescent Roll Sandwich Bake throughout the year is how easily it adapts to seasonal ingredients. In summer, I incorporate fresh basil leaves and garden tomatoes between the meat layers, creating a caprese-inspired version that tastes like sunshine. Fall calls for additions like thinly sliced apples with prosciutto and fontina cheese. During the holidays, I make a special cranberry and turkey variation that transforms leftover Thanksgiving ingredients into something entirely new, similar to my approach with the Sausage Ricotta Honey Hot Pizza that repurposes ingredients creatively.

    Storage & Troubleshooting Guide

    Keeping It Fresh

    This Italian Crescent Roll Sandwich Bake maintains its quality remarkably well when properly stored. Allow leftovers to cool completely before refrigerating to prevent condensation that could make the crust soggy. Store in an airtight container for up to three days, though in my house, it rarely lasts that long! To reheat, avoid the microwave which can make the crescent rolls chewy. Instead, cover with foil and warm in a 325°F oven for about 10 minutes until heated through. This preserves the delightful texture contrast between the crisp exterior and soft, flavorful filling.

    Fixing Common Issues

    Even experienced cooks encounter challenges, and this recipe is no exception. If you find your bottom crust underbaked, try par-baking it for 5 minutes before adding fillings. For overly soggy results, consider patting moist ingredients (like fresh tomatoes or roasted peppers) with paper towels before layering. If the filling seems to bubble out during baking, reduce the quantity slightly or ensure your edges are tightly sealed. I once had an epic cheese eruption that created quite the oven mess, but the resulting crispy cheese edges became everyone’s favorite part—sometimes kitchen mistakes lead to delicious discoveries!

    Frequently Asked Questions

    Can I make Italian Crescent Roll Sandwich Bake ahead of time?

    Yes! Assemble up to 24 hours in advance, cover tightly with plastic wrap, and refrigerate. Add an extra 5-7 minutes to the baking time when cooking from cold. The flavors actually meld beautifully during this rest time.

    What’s the best cheese to use in this recipe?

    Provolone offers the perfect melt and authentic Italian flavor, but mozzarella, fontina, or even Swiss work wonderfully. I recommend using sliced cheese rather than shredded for more distinct layers.

    Can I freeze leftovers?

    Absolutely. Wrap individual portions in foil, then place in freezer bags for up to 2 months. Thaw in the refrigerator overnight before reheating in a 325°F oven until warmed through.

    How can I make this recipe vegetarian?

    Replace meats with grilled vegetables like zucchini, eggplant, and bell peppers. Add a layer of pesto or sun-dried tomato spread for extra flavor. Mushrooms provide a satisfying umami element.

    What if my Italian Crescent Roll Sandwich Bake is browning too quickly?

    If the top is browning before the interior is cooked, loosely cover with aluminum foil. This allows the inside to finish cooking while preventing the top from burning.

    Final Thoughts

    This Italian Crescent Roll Sandwich Bake has earned its place in my regular meal rotation because it delivers maximum flavor with minimum fuss. There’s something deeply satisfying about creating a dish that bridges the gap between comfort food and something special enough for company. I find myself returning to this recipe whenever I need a reliable crowd-pleaser that doesn’t demand hours in the kitchen. Whether you follow the classic recipe or make it uniquely yours with creative variations, this versatile bake promises to become a cherished addition to your family’s favorites. Find more inspiration for your next meal on Pinterest.

  • Sour Cream Chicken Bake: Creamy Comfort Food You’ll Crave!

    Sour Cream Chicken Bake: Creamy Comfort Food You’ll Crave!

    Sour Cream Chicken Bake: Creamy Comfort Food You’ll Crave!

    This sour cream chicken bake is the definition of comfort food perfection – tender chicken breasts nestled in a creamy, tangy sauce that transforms into a bubbling masterpiece in your oven. I discovered this recipe during a particularly chilly autumn evening when I needed something that would warm both the kitchen and our spirits. The way the sour cream creates this velvety blanket over the seasoned chicken had my family scraping their plates clean! It’s become our go-to dinner for those nights when we crave something hearty and satisfying without hours of prep work. If you love dishes that combine simplicity with incredible flavor, this chicken bake is about to become your new favorite too.

    Recipe

    Why You’ll Love This Sour Cream Chicken Bake

    Simple Ingredients, Extraordinary Flavor

    This recipe proves that culinary magic happens with just a handful of everyday ingredients. The star of the show is obviously the sour cream, which creates this incredible velvety texture while adding a subtle tanginess that balances the richness perfectly. I love how it transforms in the oven, creating those slightly caramelized edges that we all fight over at the dinner table! The seasoning blend – a mix of garlic powder, paprika, and herbs – infuses the chicken with flavor that penetrates deep into every bite. What makes this truly special is how these simple ingredients work together to create something that tastes like you spent hours in the kitchen.

    Weeknight-Friendly Preparation

    As someone who juggles work, family, and everything in between, I cherish recipes that deliver maximum flavor with minimum effort. This sour cream chicken bake is the epitome of weeknight efficiency – just season the chicken, blend the creamy topping, and let your oven do the heavy lifting. The hands-on time is under 15 minutes, which means I can help with homework or tackle a quick chore while dinner practically makes itself. I’ve prepared this on my busiest days and still managed to serve a meal that makes everyone think I’ve been cooking all afternoon. The beauty is in its simplicity – no complicated techniques or hard-to-find ingredients required!

    Essential Tips & Tricks

    Getting the Perfect Texture

    The key to this dish’s success lies in achieving that golden, slightly crispy topping while keeping the chicken perfectly moist underneath. I’ve found that patting the chicken dry before seasoning makes a world of difference – it helps the seasonings adhere better and prevents excess moisture from thinning out your sour cream mixture. Another game-changer is bringing the sour cream to room temperature before mixing it with the other ingredients. This creates a smoother, more even coating that bakes beautifully. For that irresistible golden finish, I switch to the broiler for the final 2-3 minutes, watching carefully to catch that perfect moment when the top transforms into a delicious crust.

    Flavor Boosting Techniques

    While the basic recipe is delicious on its own, I’ve discovered some flavor-enhancing tweaks that elevate it even further. Adding a tablespoon of Dijon mustard to the sour cream mixture introduces a subtle tangy depth that complements the creaminess beautifully. For a flavor explosion, try marinating the chicken for 30 minutes in a mixture of olive oil, lemon juice, and minced garlic before proceeding with the recipe. I’ve also found that sprinkling fresh herbs like dill or chives over the finished dish brightens everything up wonderfully. These simple additions transform an already delicious sour cream noodle bake into something truly restaurant-worthy without adding much extra work.

    Serving Ideas & Creative Variations

    Perfect Pairings

    This sour cream chicken bake pairs beautifully with so many sides, making it incredibly versatile for meal planning. My family’s favorite combination includes fluffy rice pilaf that soaks up all that creamy sauce – absolute heaven on a plate! For a lighter option, roasted asparagus or a simple green salad with vinaigrette provides the perfect fresh contrast to the rich chicken. When I’m feeling particularly indulgent, I serve it with buttery mashed potatoes and some crusty bread for sauce-mopping purposes. The dish also works wonderfully with wild rice or quinoa if you’re looking for something with more texture and nutritional value. Whatever you choose, make sure there’s something to capture that incredible sauce!

    Exciting Flavor Variations

    One thing I adore about this recipe is how easily it adapts to different flavor profiles. For a Mediterranean twist, mix in some sun-dried tomatoes and crumbled feta cheese to the sour cream before baking. When I’m craving something with a kick, I add a few tablespoons of buffalo sauce and top with blue cheese crumbles during the last five minutes of baking. My husband’s favorite variation includes adding a layer of sautéed mushrooms and onions beneath the chicken before topping with the sour cream mixture. For a heartier meal that still maintains that creamy goodness, try this meatball and mashed potato bake that uses similar techniques but with a completely different flavor profile.

    Storage & Troubleshooting Guide

    Proper Storage Solutions

    This sour cream chicken bake is meal-prep friendly and stores beautifully for those busy weeks when cooking every night isn’t feasible. Once completely cooled, transfer leftovers to an airtight container and refrigerate for up to 3 days. The flavor actually deepens overnight as the seasonings continue to meld! For longer storage, you can freeze individual portions in freezer-safe containers for up to 2 months. I recommend thawing overnight in the refrigerator before reheating. When it’s time to enjoy your leftovers, reheat gently in a 325°F oven covered with foil until warmed through – this preserves the creamy texture much better than microwaving, which can cause the sauce to separate.

    Common Issues & Easy Fixes

    The most common issue with this dish is a watery sauce, usually caused by excess moisture in the chicken. To prevent this, always thoroughly pat dry your chicken before cooking and avoid overcrowding the baking dish, which can create steam instead of allowing proper browning. If your topping isn’t browning nicely, your oven temperature might be too low – try positioning the dish in the upper third of the oven or finishing with a brief broil. For those concerned about calories, you can substitute Greek yogurt for up to half of the sour cream without sacrificing too much creaminess.

    If your sauce curdles during baking, it’s likely due to high heat – next time, try reducing the temperature slightly and extending the cooking time.

    Frequently Asked Questions

    Can I use chicken thighs instead of breasts for this sour cream chicken bake?

    Absolutely! Chicken thighs work beautifully and often result in a more tender, flavorful dish. Just adjust cooking time accordingly – thighs typically need 5-7 minutes longer than breasts.

    Is there a lighter alternative to sour cream I can use?

    Yes! Greek yogurt makes an excellent substitute for part or all of the sour cream. It maintains the tanginess while reducing fat and calories and adding protein.

    Can I prepare this dish ahead of time?

    Definitely. Assemble everything up to 24 hours ahead, cover and refrigerate. Add 5-10 minutes to the baking time when cooking from cold.

    What herbs work best in this recipe?

    Dill, thyme, and chives complement the creamy sauce perfectly. Fresh herbs added after baking provide the brightest flavor and beautiful presentation.

    Why did my sauce separate during baking?

    This usually happens when baked at too high a temperature or when dairy products aren’t at room temperature before mixing. Try lowering the heat by 25°F next time.

    Final Thoughts

    This sour cream chicken bake has earned its place as a staple in my dinner rotation for good reason – it strikes that perfect balance between effortless preparation and impressive results. There’s something magical about pulling a bubbling, golden dish from the oven that fills your kitchen with irresistible aromas. I love how versatile it is, adapting to whatever ingredients I have on hand while maintaining that comforting, creamy essence that makes it so beloved. Whether you’re cooking for a family weeknight dinner or hosting friends for a casual gathering, this dish delivers satisfaction in every bite. Find more delicious recipes on Pinterest!

  • Maple Mustard Beef Tenderloin: Irresistible Flavor Explosion!

    Maple Mustard Beef Tenderloin: Irresistible Flavor Explosion!

    Maple Mustard Beef Tenderloin: Irresistible Flavor Explosion!

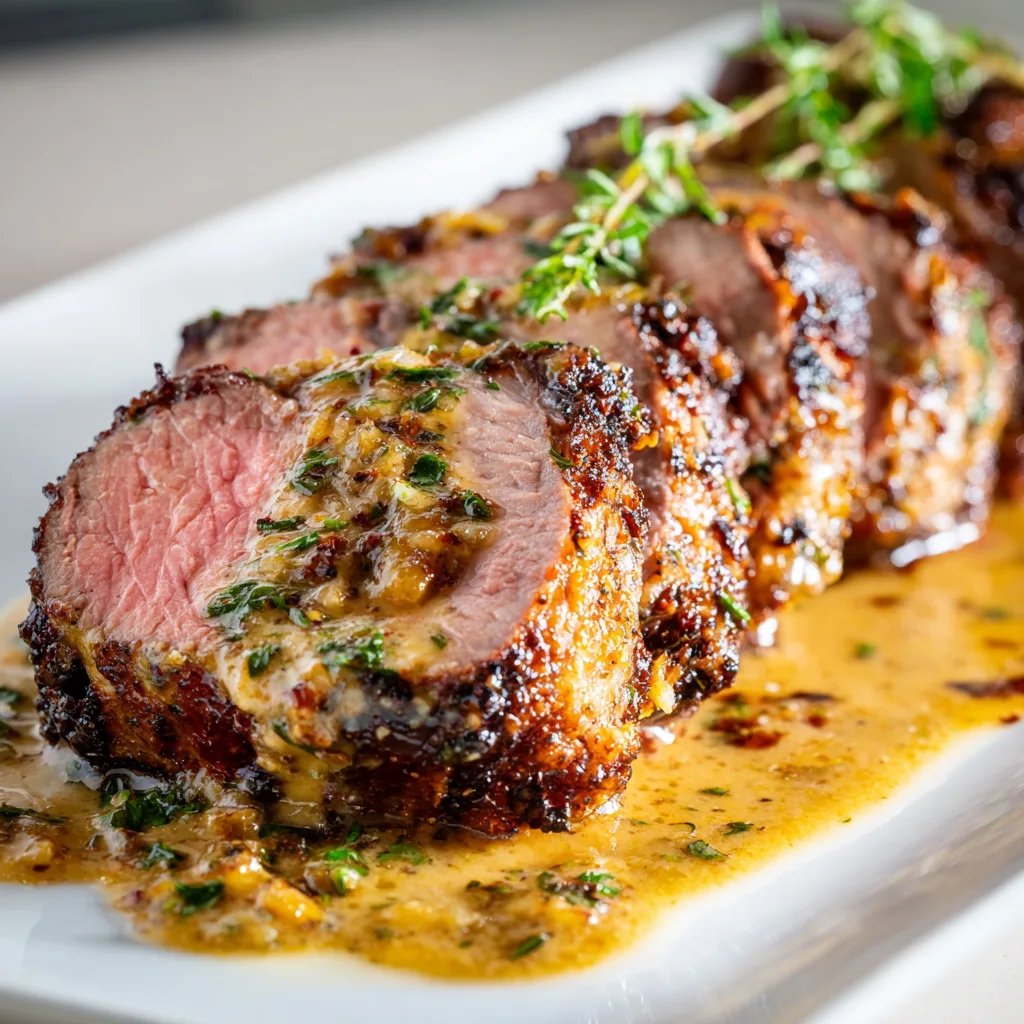
    Maple mustard beef tenderloin transforms an ordinary dinner into something extraordinary. The first time I made this dish, my kitchen filled with the most intoxicating aroma—sweet maple mingling with tangy mustard and rich beef. It was one of those moments where I couldn’t stop peeking into the oven! The outside develops this gorgeous caramelized crust while the inside stays perfectly tender and juicy. If you’ve been searching for that perfect special occasion dish, this maple mustard beef tenderloin delivers impressive results without complicated techniques.

    Recipe

    Why You’ll Love This Maple Mustard Beef Tenderloin

    Perfect Balance of Flavors

    The magic of this recipe lies in the perfect harmony between sweet maple syrup and zesty mustard. These contrasting flavors create a glaze that caramelizes beautifully on the beef, forming a crust that’s simultaneously sweet, tangy, and slightly peppery. I love how the maple’s natural sweetness mellows the mustard’s sharpness while enhancing the beef’s rich flavor. The first time my sister tried it, she immediately asked for the recipe—that’s when I knew this combination was truly special! Each bite delivers a complex flavor profile that feels sophisticated yet comforting.

    Impressive Yet Simple Preparation

    Don’t let the elegant appearance fool you—this maple mustard beef tenderloin is surprisingly straightforward to prepare. The active prep time is minimal, making it perfect for both special occasions and elevated weeknight dinners when you want something special. I remember frantically preparing for a last-minute dinner party and turning to this recipe because it’s reliably impressive without requiring constant attention. The marinade does most of the flavor work for you, and the roasting process is largely hands-off, giving you time to prepare sides or simply enjoy a glass of wine while your kitchen fills with mouthwatering aromas.

    Essential Tips & Tricks

    Selecting and Preparing Your Tenderloin

    Choosing the right cut is crucial for this recipe. Look for a center-cut tenderloin with consistent thickness and good marbling. I prefer asking my butcher to trim and tie it, saving precious preparation time. Before applying the maple-mustard mixture, pat the meat thoroughly dry with paper towels—this ensures proper searing and helps the glaze adhere better. Allow the tenderloin to come to room temperature for about 30 minutes before cooking; this simple step promotes even cooking from edge to center. The difference in texture between a properly prepared tenderloin and one cooked straight from the refrigerator is remarkable!

    Perfecting the Maple Mustard Glaze

    The glaze is where this recipe truly shines. Use pure maple syrup—not pancake syrup—for authentic flavor and better caramelization. Combine with both Dijon and whole grain mustards for complexity. When I’m feeling adventurous, I add a splash of bourbon or a pinch of smoked paprika for depth. Garlic herb chicken has a similar approach to building layers of flavor. Reserve about 2 tablespoons of glaze for basting during cooking, which creates that irresistible caramelized exterior. Apply the initial coating at least 2 hours before cooking (overnight is even better) to allow the flavors to penetrate the meat.

    Serving Ideas & Creative Variations

    Complementary Side Dishes

    This maple mustard beef tenderloin pairs beautifully with sides that complement its sweet-savory profile. Roasted root vegetables like carrots, parsnips, and sweet potatoes echo the maple’s sweetness while adding earthy contrast. For a special occasion, I serve it with creamy mashed potatoes or a wild mushroom risotto to soak up the delicious juices. A simple arugula salad with lemon vinaigrette provides a bright, peppery counterpoint to the rich meat. Last Christmas, I served this tenderloin with crispy hot honey feta chicken as part of a surf-and-turf menu, and my guests were fighting over the last pieces of both!

    Seasonal Adaptations

    One thing I love about this recipe is how easily it adapts to different seasons. In autumn and winter, enhance the glaze with warming spices like cinnamon, cloves, or rosemary for a holiday-worthy centerpiece. For spring gatherings, lighten things up by adding fresh herbs like thyme or tarragon to the glaze and serving with spring vegetables. Summer barbecues? Take this tenderloin to the grill! The maple-mustard mixture caramelizes beautifully over charcoal, creating an irresistible smoky-sweet crust. Just be careful with the direct heat—the sugars in maple syrup can burn quickly, so indirect grilling works best.

    Storage & Troubleshooting Guide

    Proper Storage and Reheating

    Leftover maple mustard beef tenderloin (if you’re lucky enough to have any!) requires proper storage to maintain its quality. Refrigerate promptly in an airtight container for up to 3 days. For reheating, avoid the microwave which can toughen the meat. Instead, slice the tenderloin thinly, wrap loosely in foil with a splash of beef broth, and warm in a 275°F oven just until heated through. This gentle reheating preserves the tenderness. My favorite way to enjoy leftovers is actually cold or at room temperature on a sandwich with arugula and horseradish cream—the flavors meld beautifully overnight!

    Common Mistakes to Avoid

    The most frequent issue when preparing this dish is overcooking. Beef tenderloin is lean and cooks quickly, so using a meat thermometer is essential. Aim for 125°F for rare, 135°F for medium-rare, or 145°F for medium, remembering that temperature will rise 5-10 degrees during resting. Another common mistake is slicing too soon—always rest your tenderloin for at least 10 minutes (I prefer 15) under loose foil to allow juices to redistribute. If your glaze starts to burn during cooking, simply tent with foil to prevent further browning while allowing the meat to finish cooking properly.

    Frequently Asked Questions

    What’s the best internal temperature for maple mustard beef tenderloin?

    For optimal tenderness and flavor, cook to 130-135°F for medium-rare. The temperature will rise another 5-10 degrees while resting. Always use a reliable meat thermometer inserted into the thickest part.

    Can I prepare this recipe in advance?

    Yes! Apply the maple mustard marinade up to 24 hours in advance and refrigerate. Remove from refrigerator 30-45 minutes before cooking to allow the meat to come to room temperature.

    What mustards work best for maple mustard beef tenderloin?

    A combination of Dijon (for tang) and whole grain mustard (for texture) creates the perfect balance. Stone-ground or spicy brown mustard can be substituted based on preference.

    Can I use this same glaze on other meats?

    Absolutely! This versatile maple-mustard glaze works beautifully on pork tenderloin, chicken thighs, or even salmon. Adjust cooking times accordingly for different proteins.

    How do I ensure my tenderloin cooks evenly?

    Tie the tenderloin with kitchen twine at 1-inch intervals to create a uniform shape. This promotes even cooking and helps maintain the meat’s juiciness throughout.

    Final Thoughts

    This maple mustard beef tenderloin has become my go-to recipe when I want to create something truly memorable without spending hours in the kitchen. The contrast between the caramelized exterior and tender, juicy center creates a dining experience that feels special every time. What I love most is watching guests take that first bite—there’s always a moment of quiet appreciation before the compliments begin. Whether for a holiday gathering or date night at home, this dish strikes the perfect balance between impressive and accessible. Give it a try, and I’d love to see your results on Pinterest!