Author: Sara Maren

  • Homemade Beefaroni Recipe That Will Melt Your Heart in Minutes

    Homemade Beefaroni Recipe That Will Melt Your Heart in Minutes

    Homemade Beefaroni Recipe That Will Melt Your Heart in Minutes

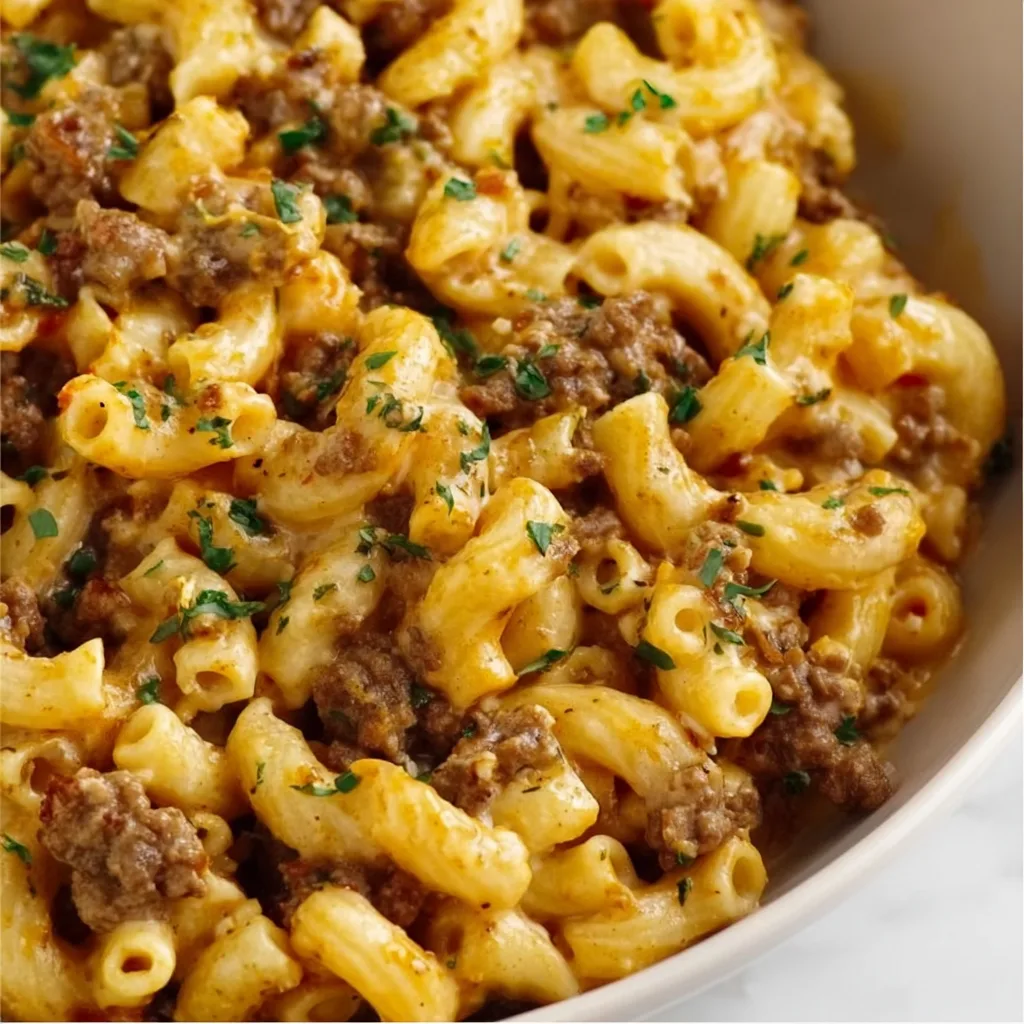
    Homemade Beefaroni Recipe brings back those nostalgic childhood flavors but elevates them with real ingredients and heartwarming homemade goodness. I still remember my mom making this on chilly autumn evenings, the aroma of simmering beef and tomatoes filling our kitchen while I did homework at the counter. There’s something magical about transforming simple pantry staples into a comforting meal that wraps you in a warm hug with every bite. This dish strikes the perfect balance between quick convenience and made-from-scratch satisfaction that even picky eaters will devour.

    Recipe

    Why You’ll Love This Homemade Beefaroni Recipe

    Perfect Weeknight Comfort Food

    This homemade beefaroni recipe is the ultimate time-saving solution for busy evenings when you need dinner on the table without sacrificing flavor. I’ve perfected this one-pot wonder through countless test runs (my kids never complained about being taste-testers!). The rich tomato sauce coats each pasta piece perfectly, while the seasoned ground beef adds satisfying protein. Unlike the canned version, you control the ingredients—meaning deeper flavor, better texture, and the perfect amount of cheese that stretches into those irresistible strands when you take your first bite.

    Budget-Friendly Family Pleaser

    If you’re looking to stretch your grocery budget without compromising on taste, this homemade beefaroni recipe deserves a permanent spot in your meal rotation. It uses affordable ingredients that transform into something truly special. One pound of ground beef easily feeds a family of 4-6, especially when bulked up with pasta and sauce. The leftovers taste even better the next day as the flavors continue to meld overnight in the refrigerator. My family actually requests this meal specifically when we need to tighten our food spending—it’s that satisfying without breaking the bank!

    Essential Tips & Tricks

    Perfecting Your Pasta

    The key secret to exceptional homemade beefaroni is cooking your pasta properly. Always cook it 1-2 minutes less than the package directions suggest since it will continue cooking in the sauce. I’ve learned through many batches that elbow macaroni works best for authentic texture, but small shells or rotini can add fun variety. Salt your pasta water generously—it should taste like the sea! This single step elevates the entire dish by seasoning the pasta from within. Remember to reserve about ½ cup of that starchy pasta water before draining; it contains magic that helps bind your sauce to every noodle.

    Building Flavor Layers

    Don’t rush the flavor-building process when making homemade beefaroni. Start by sautéing diced onions until translucent before adding your ground beef. This creates a foundation of sweetness that balances the acidity of tomatoes. When browning your beef, let it develop some caramelization for deeper flavor—resist the urge to constantly stir! Add minced garlic only for the last 30 seconds to prevent burning. For an elevated touch that reminds me of my grandmother’s Italian recipes, incorporate a tablespoon of tomato paste and let it cook until it darkens slightly before adding your sauce ingredients.

    Serving Ideas & Creative Variations

    Perfect Pairings

    Serve your homemade beefaroni with a simple side salad dressed with vinaigrette to cut through the richness. My family loves it with garlic bread for scooping up extra sauce—I make quick garlic butter by mixing softened butter with minced garlic, parsley, and a pinch of salt. For a complete meal that feels special, roast some broccoli or asparagus with olive oil and lemon while the beefaroni simmers. The slight bitterness of green vegetables provides the perfect contrast to the savory pasta. During summer months, I serve it with sliced fresh tomatoes sprinkled with basil—the cool, bright flavor complements the warm, hearty pasta dish beautifully.

    Creative Twists

    Transform your basic homemade beefaroni recipe into something extraordinary with a few creative additions. Try incorporating a cup of roasted red peppers for sweetness and color, or stir in a handful of baby spinach just before serving for a nutritional boost that wilts perfectly into the hot mixture. For a Mexican-inspired version, add a tablespoon of taco seasoning to the beef and top with avocado and cilantro. My personal favorite variation includes adding mushrooms sautéed with thyme—they add an earthy dimension that elevates the entire dish. For special occasions, consider stirring in some ricotta or cream cheese for an extra creamy texture.

    Storage & Troubleshooting Guide

    Proper Storage Techniques

    Store leftover homemade beefaroni in airtight containers in the refrigerator for up to 4 days. The flavors actually improve overnight as they meld together! For longer storage, freeze in portion-sized containers for up to 3 months—this has saved me on countless busy weeknights. When freezing, slightly undercook the pasta to prevent mushiness when reheating. Allow the dish to cool completely before transferring to storage containers, but don’t leave it at room temperature for more than 2 hours. For meal prep, consider making a double batch specifically for freezing—future you will be incredibly grateful for the homemade convenience food waiting in your freezer.

    Fixing Common Issues

    If your homemade beefaroni sauce seems too watery, don’t panic! Simply simmer uncovered for 5-10 additional minutes to reduce and thicken the sauce. Conversely, if it’s too thick, add a splash of the reserved pasta water or beef broth to thin it to your desired consistency. For pasta that’s slightly overcooked, add a handful of fresh grated cheese and let it sit covered for 5 minutes—the absorption will help improve the texture. If your beefaroni lacks flavor depth, try adding a teaspoon of Worcestershire sauce or a pinch of red pepper flakes to wake up the taste buds. Remember that acidity balances richness, so a small splash of vinegar can revive a flat-tasting sauce.

    Frequently Asked Questions

    Can I make homemade beefaroni in advance?

    Yes! Prepare it up to 2 days ahead and refrigerate. The flavors actually improve overnight. Reheat gently on the stovetop with a splash of broth if needed to restore moisture.

    What pasta shape works best for this recipe?

    Traditional elbow macaroni creates the most authentic homemade beefaroni, but small shells, rotini, or penne work beautifully too. Choose shapes that trap the meaty sauce in their crevices.

    Can I substitute ground turkey for beef?

    Absolutely! Ground turkey, chicken, or even plant-based alternatives work well. If using leaner meats, add 1-2 tablespoons of olive oil to maintain moisture and richness.

    How can I make this recipe healthier?

    Use whole grain pasta, lean ground beef (90/10), and add extra vegetables like diced carrots, bell peppers, or zucchini. Reduce cheese slightly and add nutritional yeast for flavor.

    Can I make this in an Instant Pot?

    Yes! Brown meat using sauté function, add remaining ingredients including uncooked pasta, and cook on high pressure for 4 minutes with quick release. Stir in cheese after cooking.

    Final Thoughts

    This homemade beefaroni recipe represents everything I love about cooking—transforming simple ingredients into something that creates memories around the dinner table. The beauty lies in its versatility; make it exactly as written or customize it to your family’s preferences. I hope this becomes a staple in your meal rotation, bringing the same joy and satisfaction to your home that it has to mine. Don’t forget to share your creations on Pinterest and tag me—I’d love to see your personal spin on this beloved comfort food classic!
  • One Pot Homemade Hamburger Helper Recipe That Will Wow Your Family!

    One Pot Homemade Hamburger Helper Recipe That Will Wow Your Family!

    One Pot Homemade Hamburger Helper Recipe That Will Wow Your Family!

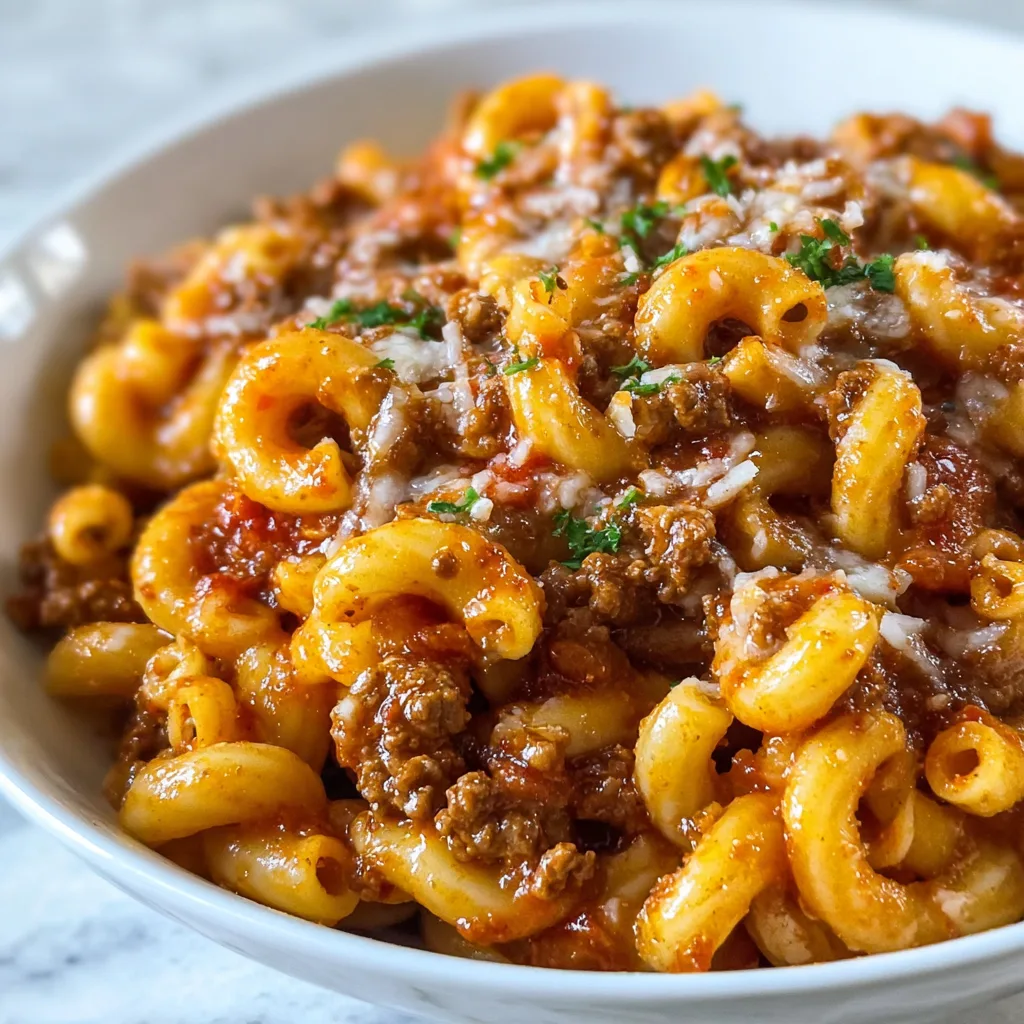
    There’s something deeply comforting about a steaming bowl of One Pot Homemade Hamburger Helper that takes me right back to childhood, but with a grown-up twist that’s infinitely better than the boxed version. The rich, beefy sauce coating every strand of pasta, melded with gooey cheese and savory seasonings – it’s the ultimate weeknight comfort food that comes together in just 30 minutes. I discovered the magic of making this from scratch during my first apartment days when budget was tight but cravings were real. Now it’s my go-to when I need a hug in food form that the whole family devours without complaint. Ready to ditch the box and discover true comfort food bliss?

    Recipe

    Why You’ll Love This One Pot Homemade Hamburger Helper

    Better Flavor, Better Ingredients

    Making Hamburger Helper from scratch means real ingredients and authentic flavors without the mysterious powder packets. I use freshly grated cheddar instead of powdered cheese product, and the difference is mind-blowing. The depth of flavor comes from building layers – starting with caramelized onions, browning the beef properly, and using beef broth instead of water. My husband, who claimed to hate Hamburger Helper, actually went back for seconds and sheepishly asked if there was more. The best part? You control the sodium and avoid preservatives while creating something that tastes like it took hours.

    Quick Cleanup Magic

    The “one pot” in One Pot Homemade Hamburger Helper isn’t just a catchy phrase – it’s the kitchen salvation you need after a long day. Everything cooks in a single dutch oven or deep skillet, including the pasta, which absorbs all those savory flavors while releasing starch that naturally thickens the sauce. I still remember the first time I made this and stood in amazement at my nearly empty sink afterward. No colander, no separate sauce pan, no multiple measuring cups – just one pot to wash. For a busy weeknight when you’re juggling homework help and tomorrow’s lunches, this cleanup simplicity feels like an absolute gift.

    Essential Tips & Tricks

    Perfecting the Pasta Texture

    The trickiest part of any one-pot pasta dish is getting the pasta consistency just right. For perfect One Pot Homemade Hamburger Helper, use slightly less liquid than you think you need – you can always add more. I prefer medium shells or elbow macaroni as they cook evenly and trap the sauce beautifully. Keep the lid off and stir frequently to monitor absorption. The pasta should finish cooking right as the sauce reaches your desired thickness. My personal trick? Pull it from the heat when it’s slightly firmer than you want, as it will continue absorbing sauce as it sits and cools slightly.

    Flavor Boosting Secrets

    The difference between good and incredible One Pot Homemade Hamburger Helper lies in the flavor foundations. Start by properly browning your beef – don’t stir constantly, let it develop a deep crust first. Deglaze with a splash of red wine or even beer before adding your broth for complexity. A tablespoon of Worcestershire sauce adds umami depth, while a teaspoon of dijon mustard brightens everything. I learned from my grandmother to add a pinch of nutmeg to beef dishes – it’s subtle but makes people wonder what your secret ingredient is. These small additions take minimal extra time but maximum flavor impact.

    Serving Ideas & Creative Variations

    Family-Friendly Customizations

    One Pot Homemade Hamburger Helper becomes a crowd-pleaser when you set up a simple topping bar. My kids go crazy for diced avocado, extra cheese, crispy bacon bits, and sliced green onions sprinkled on top. For spice lovers, offer hot sauce or red pepper flakes. The dish itself can be customized too – try ground turkey for a lighter version or plant-based crumbles for vegetarian guests. I’ve found that adding a cup of frozen peas or corn in the last two minutes of cooking adds color, nutrition, and sweetness that balances the savory elements beautifully. Everyone gets exactly what they want without extra cooking.

    Elevated Entertaining Options

    While Hamburger Helper might seem casual, this homemade version can be surprisingly sophisticated for casual entertaining. Serve it in individual crocks topped with toasted panko and broiled for a crispy top. For a fusion twist, add chorizo with the beef and stir in some smoked paprika for Spanish flair. My favorite upgrade is adding sautéed mushrooms and a drizzle of truffle oil for an umami explosion. I once served this at a potluck labeled as “Truffled Beef and Pasta Gratin” and no one guessed its humble origins! Pair with a simple arugula salad and good bread for a cozy dinner party that won’t break your budget.

    Storage & Troubleshooting Guide

    Meal Prep & Leftovers Magic

    One Pot Homemade Hamburger Helper is meal prep perfection since it actually improves with a day in the refrigerator as flavors meld. Store in airtight containers for up to 4 days. When reheating, add a splash of milk or broth to revive the creamy texture, as the pasta will have absorbed more liquid. For freezing, slightly undercook the pasta, cool completely, then portion into freezer containers. Thaw overnight in the refrigerator before reheating. I often make a double batch on Sunday, serving half for dinner and transforming the rest into stuffed peppers or a quick pasta bake later in the week.

    Fixing Common Issues

    Even experienced cooks can encounter texture troubles with one-pot pasta dishes. If your One Pot Homemade Hamburger Helper is too soupy, remove the lid and increase the heat to reduce quickly, or stir in a handful of additional cheese to thicken. Too dry? Add broth or milk a few tablespoons at a time until it reaches your desired consistency. If your pasta isn’t cooking evenly, your heat might be too high – lower it and give a good stir. For gritty cheese sauce, always remove from heat before adding cheese and use freshly grated cheese (pre-shredded contains anti-caking agents that prevent smooth melting).

    Frequently Asked Questions

    Can I make One Pot Homemade Hamburger Helper ahead of time?

    Yes! Prepare up to 2 days ahead, slightly undercooking the pasta. Refrigerate and reheat with a splash of milk or broth to restore creaminess. The flavors actually improve overnight.

    What pasta shapes work best for this recipe?

    Medium shells, elbow macaroni, or rotini work perfectly. They cook evenly and have nooks to capture the sauce. Avoid long pasta like spaghetti or delicate shapes that might overcook.

    How can I make this recipe gluten-free?

    Substitute gluten-free pasta and ensure your broth and Worcestershire sauce are certified gluten-free. Cook the pasta for slightly less time as gluten-free varieties can become mushy quickly.

    What’s the best cheese to use?

    Sharp cheddar provides classic flavor, but a mix with Monterey Jack or Colby adds creaminess. Freshly grate your cheese—pre-shredded contains anti-caking agents that prevent smooth melting.

    Can I double this One Pot Homemade Hamburger Helper recipe?

    Absolutely! Use a larger pot with plenty of surface area. You may need to increase cooking time slightly, and be extra vigilant about stirring to ensure even cooking.

    Final Thoughts

    This One Pot Homemade Hamburger Helper has become more than just a recipe in my household—it’s a solution for hectic weeknights, a nostalgic comfort, and proof that homemade always trumps packaged convenience foods. The beauty lies in its simplicity and adaptability, whether you’re feeding picky children or impressing dinner guests. I hope this becomes your new go-to when you need something satisfying, quick, and made with love. Don’t forget to check out more comfort food inspiration on Pinterest and let me know your favorite variation!

  • Classic Ground Beef & Potatoes Skillet: Easy, Comfort Food Bliss!

    Classic Ground Beef & Potatoes Skillet: Easy, Comfort Food Bliss!

    Classic Ground Beef & Potatoes Skillet: Easy, Comfort Food Bliss!

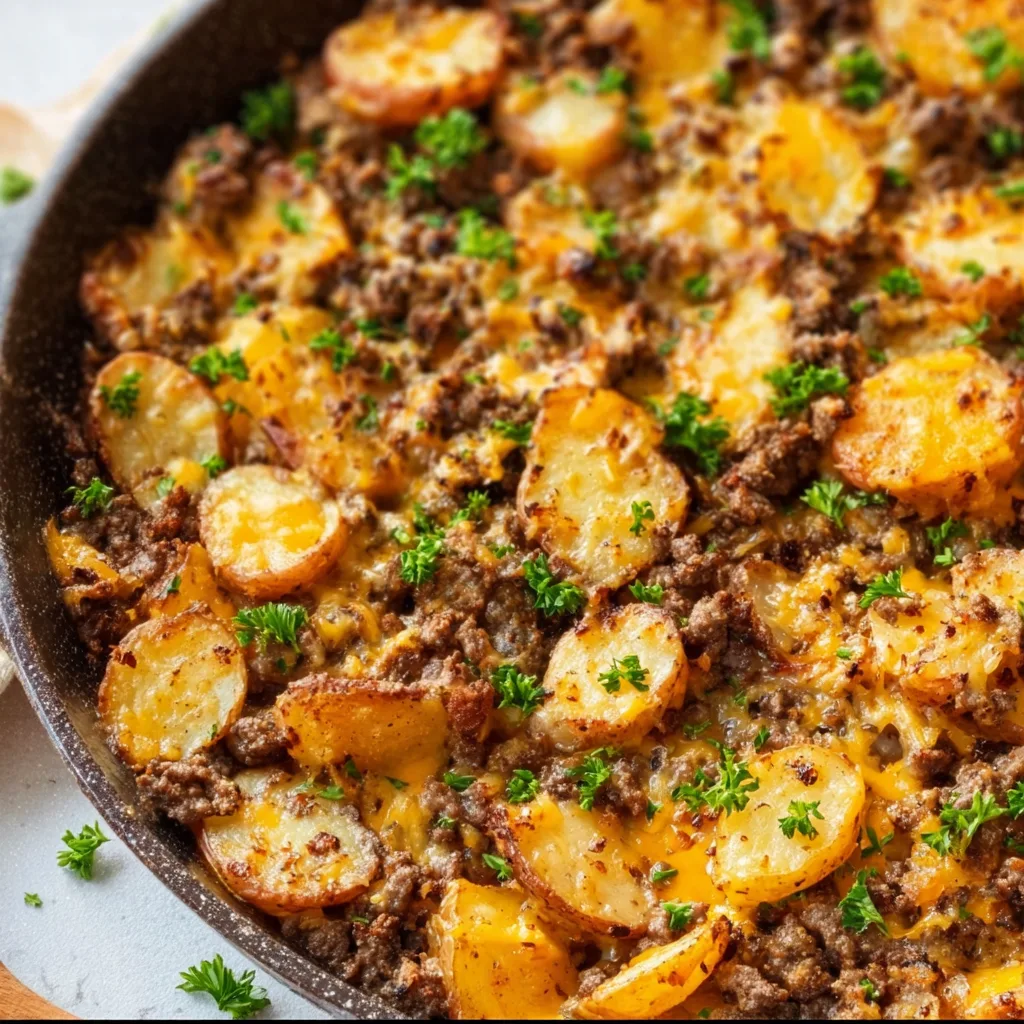
    There’s something undeniably comforting about a Classic Ground Beef and Potatoes Skillet sizzling on the stove. The savory aroma of seasoned beef mingling with golden potatoes takes me back to my grandmother’s kitchen, where this humble dish was always the star of weeknight dinners. I’ve perfected my version over the years, balancing simplicity with flavor that makes this hearty, one-pan wonder a regular in my meal rotation. When the evening chaos hits and I need something reliable that everyone will devour, this skillet recipe never disappoints.

    Recipe

    Why You’ll Love This Classic Ground Beef and Potatoes Skillet

    Perfect Weeknight Solution

    This skillet is the ultimate time-saving champion when life gets hectic. I remember one particularly chaotic Tuesday when school projects, work deadlines, and a surprise visit from neighbors collided—this dish saved dinner in just 30 minutes flat! The beauty lies in its simplicity: brown the beef, add potatoes and seasonings, and let everything cook together until perfectly tender. The rich flavors develop as everything melds together, creating a dish that tastes like it took hours rather than minutes. It’s my go-to when I want maximum flavor with minimal effort.

    Budget-Friendly Satisfaction

    In today’s world of rising grocery prices, this skillet has become my wallet-friendly hero. Ground beef stretches beautifully when paired with potatoes, feeding a family of four for under $15. I’ve found that adding seasonal vegetables—whatever looks good and is on sale—extends the meal even further without compromising flavor. The hearty combination of protein and carbs creates that deeply satisfying fullness that keeps everyone content until morning. Plus, the leftovers (if there are any!) reheat beautifully for lunch the next day.

    Essential Tips & Tricks

    Mastering the Perfect Texture

    The secret to this skillet’s success lies in achieving the perfect potato texture. I dice mine into ½-inch cubes for even cooking—any larger and they’ll still be raw when the beef is done. Start by parcooking the potatoes for about 5 minutes before adding the beef; this head start ensures everything finishes at the same time. I also recommend using a heavy-bottomed skillet (cast iron is my favorite) to create that beautiful caramelization without burning. The slight crust that forms on the potatoes adds incredible depth to the entire dish.

    Flavor-Building Strategy

    Layering flavors transforms this simple dish into something extraordinary. Begin with aromatics like onions and garlic as your flavor foundation. When browning the beef, don’t rush this step—those browned bits on the pan bottom (fond) contain concentrated flavor magic. I always deglaze with a splash of broth or even a tablespoon of Worcestershire sauce to incorporate those caramelized flavors back into the dish. Finish with fresh herbs in the last few minutes of cooking—the warmth releases their oils without destroying their brightness.

    Serving Ideas & Creative Variations

    Family-Style Presentations

    Serving this skillet creates those special gather-around moments that make dinner memorable. I love bringing the entire cast iron skillet to the table, still sizzling slightly, with a trivet underneath. Top with freshly grated cheese that melts into tempting strings when served, and sprinkle with bright green onions for color contrast. For a complete meal, I pair it with a simple side salad dressed with vinaigrette. The combination of hot skillet and cool, crisp greens creates a perfect temperature and texture balance.

    Global Flavor Adaptations

    Transform this classic into a global cuisine adventure with simple flavor swaps. For Mexican night, I add cumin, chili powder, and top with avocado and cilantro. Italian-inspired? Incorporate Italian seasoning, bell peppers, and finish with parmesan. My family’s favorite variation includes smoked paprika, rosemary, and a dollop of sour cream—reminiscent of a deconstructed loaded baked potato. These variations keep the basic recipe exciting week after week, while maintaining its comforting essence and budget-friendly approach.

    Storage & Troubleshooting Guide

    Optimal Leftover Management

    Properly stored leftovers maintain their flavor integrity beautifully for quick meals later in the week. Allow the skillet to cool completely before transferring to airtight containers—this prevents condensation that can make potatoes soggy. Refrigerate for up to 3 days, or freeze in portion-sized containers for up to 2 months. When reheating, add a splash of broth to restore moisture, and consider a fresh sprinkle of herbs or cheese to revive the flavors. I often repurpose leftovers into breakfast hash topped with a fried egg—a completely new meal!

    Common Issues Solved

    Even experienced cooks encounter challenges with this seemingly simple dish. If your potatoes remain firm while the beef overcooks, you’re likely using the wrong cooking sequence. Always give potatoes a head start or cut them smaller. For watery results, avoid overcrowding the pan, which steams rather than browns the ingredients. Cook in batches if necessary. If flavors seem flat, a finishing touch of acid—like a squeeze of lemon juice or splash of vinegar—brightens everything. Remember that salt levels need adjusting based on your choice of broth or additional seasonings.

    Frequently Asked Questions

    Can I use ground turkey instead of beef in this Classic Ground Beef and Potatoes Skillet?

    Absolutely! Ground turkey works wonderfully, though it’s leaner so add an extra tablespoon of oil to prevent sticking. Season more aggressively with herbs and spices as turkey has a milder flavor profile.

    What potatoes work best for this recipe?

    Yukon Golds are my top choice for their buttery flavor and ability to hold shape. Russets work too but may break down more, creating a creamier texture. Red potatoes hold their shape perfectly for a more distinct potato bite.

    Can I make this dish ahead of time?

    Yes! Prepare it up to two days ahead, but slightly undercook the potatoes. Refrigerate, then reheat in a skillet with a splash of broth, covering until hot throughout.

    How can I add more vegetables to this dish?

    Bell peppers, zucchini, corn, and peas all work beautifully. Add firmer vegetables with the potatoes and tender ones in the last 5 minutes of cooking to prevent overcooking.

    What’s the best way to prevent the Classic Ground Beef and Potatoes Skillet from becoming greasy?

    Use lean ground beef (90/10) or drain excess fat after browning. For extra insurance, blot the cooked meat with paper towels before continuing with the recipe.

    Final Thoughts

    This Classic Ground Beef and Potatoes Skillet has earned its place in my regular rotation for good reason. It bridges the gap between comfort food and practical weeknight cooking, proving that delicious meals don’t require complicated techniques or expensive ingredients. I find myself returning to it whenever I need that perfect combination of reliability and satisfaction. Make it once, and I’m confident it will become a cornerstone in your cooking repertoire too. For more inspiration and variations, check out my Pinterest collection of skillet recipes!

  • Cajun Meatball Stew Recipe: Irresistibly Spicy Comfort in a Bowl

    Cajun Meatball Stew Recipe: Irresistibly Spicy Comfort in a Bowl

    Cajun Meatball Stew Recipe: Irresistibly Spicy Comfort in a Bowl

    Cajun Meatball Stew brings the heart and soul of Louisiana straight to your dinner table. There’s something magical about the way those tender, spiced meatballs swim in a rich, roux-darkened broth alongside bell peppers, celery, and onions. I first fell in love with this hearty one-pot wonder during a rainy weekend when comfort food was calling my name. The kitchen filled with aromas of paprika, thyme, and that distinctive Cajun seasoning that makes your nose tingle with anticipation. If you’re craving something that warms you from the inside out, this stew delivers that perfect balance of spice, substance, and Southern charm.

    Recipe

    Why You’ll Love This Cajun Meatball Stew

    A Perfect Balance of Flavors and Textures

    The beauty of Cajun Meatball Stew lies in its remarkable depth of flavor. Each spoonful delivers the perfect harmony between savory meatballs and the slightly spicy, robust broth. The meatballs themselves stay incredibly tender while soaking up all those amazing Cajun spices. Meanwhile, the stew base transforms into this velvety, rich sauce that clings to every bite. I love how the vegetables maintain just enough bite to provide textural contrast against the softness of the meatballs. It’s that magical combination that makes you close your eyes with each spoonful, letting the warmth spread through your entire body.

    A One-Pot Wonder for Busy Weeknights

    There’s something deeply satisfying about a meal that dirties just one pot but delivers restaurant-quality flavor. This Cajun Meatball Stew is exactly that kind of kitchen miracle. I’ve made this on hectic Wednesdays when the last thing I wanted was a sink full of dishes, and it never disappoints. The beauty is in the layering of flavors – starting with browning those meatballs to create a foundation of flavor, then building the stew around them. Everything melds together in a single Dutch oven or heavy pot, meaning less cleanup and more time to actually enjoy your meal. Plus, it reheats beautifully, making tomorrow’s lunch something to look forward to.

    Essential Tips & Tricks

    Perfecting Your Meatball Technique

    The secret to stellar meatballs in this stew is all about gentle handling and proper seasoning. I learned the hard way that overworking the meat mixture leads to tough, dense results. Instead, combine your ingredients with a light touch, almost folding rather than kneading. For the juiciest meatballs, use a mixture of ground meats – I find beef and pork create the perfect balance. And here’s my non-negotiable tip: chill your formed meatballs for 15 minutes before browning them. This helps them hold their shape and creates that beautiful caramelized exterior that adds so much flavor to the Cajun Chicken Alfredo or any stew.

    Mastering the Roux for Authentic Flavor

    A proper Cajun stew begins with a good roux, which is the foundation of authentic flavor. The key is patience – don’t rush this step! I start with equal parts oil and flour in the same pot where I’ve browned the meatballs, stirring constantly until it reaches that beautiful amber color (about 5-7 minutes). This develops the nutty, complex flavor that defines Cajun cooking. Watch carefully, as it can go from perfect to burnt in seconds. Once you’ve achieved that ideal color, immediately add your trinity (onions, celery, bell peppers) to stop the cooking process. This technique creates that distinctive silky texture and depth that makes people ask for your recipe.

    Serving Ideas & Creative Variations

    Perfect Pairings for a Complete Meal

    Cajun Meatball Stew shines brightest when served with the right accompaniments. My absolute favorite pairing is a scoop of fluffy white rice that soaks up all that incredible sauce – there’s something magical about how the grains capture those flavors. For a true Louisiana experience, serve with warm, crusty French bread for dipping into that rich broth. When I’m feeling extra, I’ll whip up a simple side salad with a vinaigrette dressing to cut through the richness. For special occasions, consider starting with Blueberry Brie Jalapeno Poppers for an unexpected but delightful appetizer that complements the Cajun flavors beautifully.

    Regional Twists to Make It Your Own

    The beauty of Cajun cuisine is how adaptable it can be while still honoring its roots. For a coastal twist, add peeled shrimp during the last 5 minutes of cooking – they’ll absorb the flavors while remaining tender. If you’re feeding spice-lovers, increase the cayenne and add sliced andouille sausage alongside the meatballs for an extra kick and smoky depth. For a more Creole interpretation, stir in a can of diced tomatoes and a splash of Worcestershire sauce. My family’s favorite variation includes okra added about 20 minutes before serving – it thickens the stew naturally and adds that distinctive Southern touch.

    Storage & Troubleshooting Guide

    Keeping Your Stew Fresh and Delicious

    Like many stews, Cajun Meatball Stew actually improves with time as the flavors meld together. Store leftovers in an airtight container in the refrigerator for up to 4 days. When reheating, add a splash of chicken broth if it’s thickened too much. For longer storage, this stew freezes beautifully – portion it into freezer-safe containers and freeze for up to 3 months. I often make a double batch specifically to freeze half for busy weeknights. Just thaw overnight in the refrigerator and gently reheat on the stovetop. The meatballs maintain their texture surprisingly well, though the vegetables might soften a bit more upon reheating.

    Fixing Common Stew Problems

    Even experienced cooks encounter issues with stews, but most are easily fixable. If your stew is too thin, create a slurry by mixing 1 tablespoon cornstarch with 2 tablespoons cold water and stir it into the simmering stew. For a stew that’s too thick, simply add more broth until you reach your desired consistency. If you find your meatballs falling apart, they likely needed more binding – next time, add an extra egg or breadcrumbs to hold them together. And if you accidentally over-spiced your stew, don’t panic! Add a tablespoon of brown sugar or a splash of cream to balance the heat without compromising those beautiful Cajun flavors.

    Frequently Asked Questions

    Can I make Cajun Meatball Stew in a slow cooker?

    Absolutely! Brown the meatballs and make the roux on the stovetop first, then transfer everything to your slow cooker. Cook on low for 6-7 hours or high for 3-4 hours until meatballs are tender and flavors have melded.

    What’s the best meat to use for Cajun meatballs?

    A mixture of 70% ground beef and 30% ground pork creates the perfect balance of flavor and juiciness. For leaner options, turkey works well too, but add a tablespoon of olive oil to prevent dryness.

    How spicy is Cajun Meatball Stew typically?

    Traditional Cajun Meatball Stew has a moderate heat that builds pleasantly. Adjust the cayenne pepper to your preference – start with 1/4 teaspoon for mild, or go up to 1 teaspoon for a significant kick.

    Can this stew be made ahead for parties?

    Yes! Cajun Meatball Stew actually improves after a day in the refrigerator as flavors develop. Make it up to 2 days ahead, refrigerate, then gently reheat before serving, adding fresh herbs as garnish.

    What vegetables can I add to my stew?

    Beyond the traditional trinity (onions, celery, bell peppers), okra, corn, diced tomatoes, and even sweet potatoes work beautifully. Add hearty vegetables earlier in cooking and delicate ones in the final 30 minutes.

    Final Thoughts

    This Cajun Meatball Stew has become my go-to recipe when I want to impress without stressing in the kitchen. There’s something deeply satisfying about watching family and friends savor each spoonful, their expressions softening as that first bite of tender meatball and rich sauce hits their palate. The beauty of Cajun cooking lies in its soulful simplicity – humble ingredients transformed through technique and time into something truly extraordinary. I hope this stew brings as much warmth and comfort to your table as it has to mine. For more cozy recipes, visit our Pinterest board where comfort food reigns supreme.

  • Slow Cooker Chicken Spaghetti: Comfort Food That Warms Your Soul

    Slow Cooker Chicken Spaghetti: Comfort Food That Warms Your Soul

    Slow Cooker Chicken Spaghetti: Comfort Food That Warms Your Soul

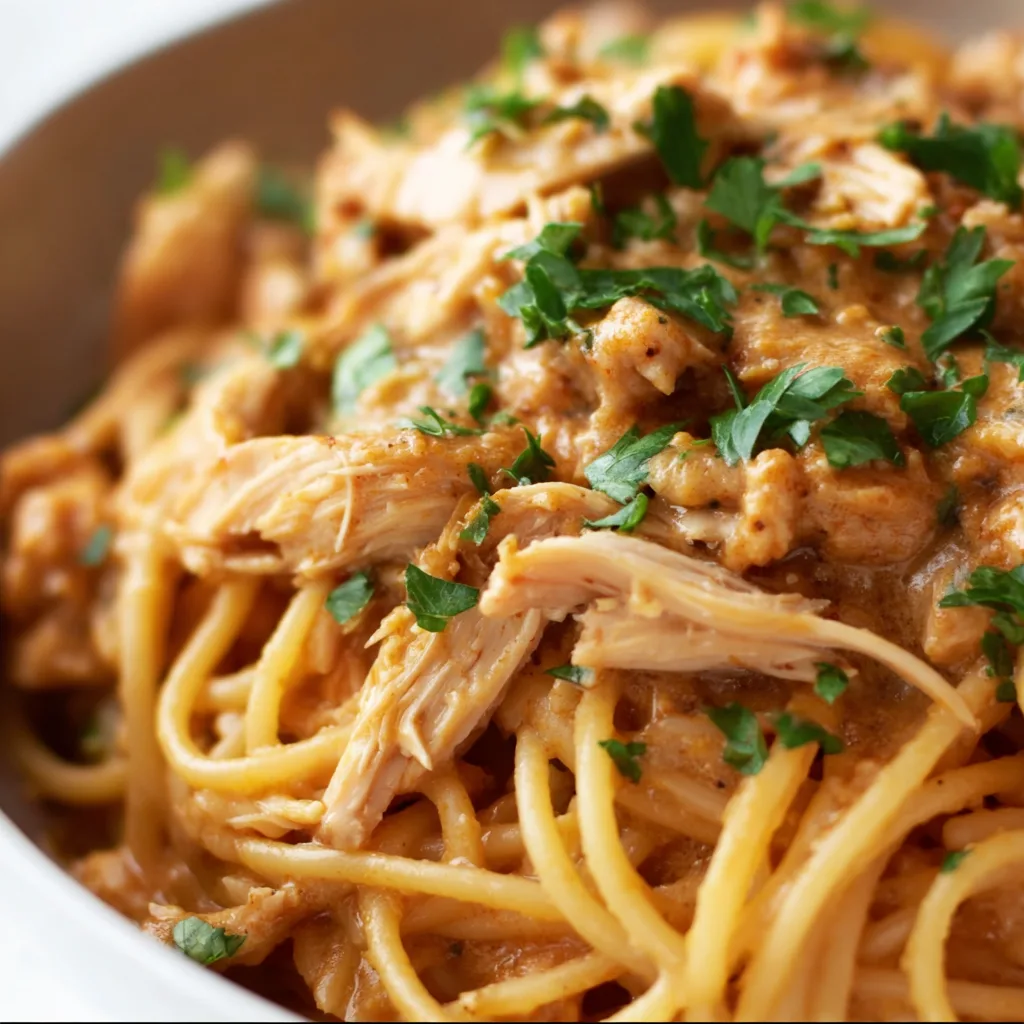
    Slow Cooker Chicken Spaghetti is the ultimate comfort food that practically makes itself! I discovered this recipe during a particularly hectic week when I needed something that would be ready when we walked through the door. The aroma that greeted us was pure magic—tender chicken, melty cheese, and pasta all mingling together in a creamy sauce. It’s become our family’s most requested meal on busy weeknights, and for good reason! This set-it-and-forget-it dish delivers restaurant-quality flavors with minimal effort. Perfect for those evenings when you want something hearty and homemade without the fuss of standing over the stove.

    Recipe

    Why You’ll Love This Slow Cooker Chicken Spaghetti

    Perfect for Busy Weeknights

    There’s something incredibly satisfying about knowing dinner is practically making itself while you’re tackling the day’s to-do list. This Slow Cooker Chicken Spaghetti recipe has saved me countless times when soccer practice runs late or work deadlines pile up. Simply toss everything in before heading out the door, and return to a kitchen filled with mouthwatering aromas. The chicken becomes fall-apart tender, soaking up all those savory flavors while you’re away. No more 5 PM panic about what to feed your hungry family—this dish delivers comfort and convenience in equal measure.

    Crowd-Pleasing Comfort Food

    Every time I serve this Slow Cooker Chicken Spaghetti, bowls are emptied in record time. The creamy sauce with its velvety texture coats each strand of pasta perfectly, while the tender chicken adds satisfying protein. My picky nephew who “doesn’t like casseroles” helped himself to seconds last time he visited! There’s something nostalgic about the combination of pasta, chicken, and cheese that speaks to everyone’s comfort food cravings. I’ve yet to meet someone who can resist the gooey, cheesy goodness—it’s like a warm hug in a bowl on even the chilliest evenings.

    Essential Tips & Tricks

    Ingredient Secrets

    The magic of this dish lies in a few key ingredients that elevate it from good to absolutely crave-worthy. Always opt for chicken thighs instead of breasts—they stay juicier and more flavorful during the long cooking process. Another game-changer is using a combination of cheeses: sharp cheddar for flavor and monterey jack for that perfect melt factor. Don’t skip the cream of chicken soup—it creates that silky base that brings everything together. For an extra flavor boost, add a tablespoon of ranch seasoning mix to the sauce. These simple swaps make all the difference in creating a dish that tastes like you spent hours in the kitchen, not minutes.

    Technique Matters

    The difference between good and great Slow Cooker Chicken Spaghetti comes down to a few simple techniques. First, never overcook the pasta—add it during only the last 30 minutes of cooking time to maintain that perfect al dente texture. Second, shred your own cheese rather than using pre-shredded bags (which contain anti-caking agents that prevent proper melting). When adding the pasta, stir gently to prevent breaking the strands while ensuring even coating. For an extra layer of flavor, consider searing the chicken briefly before adding it to the slow cooker—those caramelized bits make all the difference!

    Serving Ideas & Creative Variations

    Perfect Pairings

    Elevate your Slow Cooker Chicken Spaghetti with thoughtfully chosen sides that complement without overwhelming. A crisp garden salad with a light vinaigrette creates the perfect fresh counterpoint to the rich, creamy pasta. Garlic bread is non-negotiable in my household—those buttery, herb-flecked slices are perfect for sopping up every last bit of sauce. For a complete meal that still feels light, roasted asparagus or broccoli adds color and nutrition. I love setting everything out family-style, creating a cozy dinner table where everyone can help themselves to seconds (and they always do!).

    Delicious Twists

    The beauty of this recipe is how easily it adapts to different flavor profiles and dietary needs. For a Tex-Mex version, add a can of diced green chilies, black beans, and top with crushed tortilla chips. Going low-carb? Substitute the pasta with spiralized zucchini added during the final 10 minutes. For a more sophisticated flavor, incorporate sundried tomatoes, artichoke hearts, and a splash of white wine into the sauce. Vegetarian guests? Replace the chicken with hearty mushrooms and chickpeas. I’ve even created a buffalo version by stirring in hot sauce and blue cheese crumbles that disappeared faster than I could serve it!

    Storage & Troubleshooting Guide

    Keeping It Fresh

    This Slow Cooker Chicken Spaghetti makes fantastic leftovers that might taste even better the next day as the flavors continue to meld. Store in airtight containers in the refrigerator for up to 4 days—perfect for meal prep or quick lunches. For freezing, portion into freezer-safe containers and store for up to 3 months. The key to reheating without drying out is adding a splash of chicken broth or milk before warming gently on the stovetop or microwave. I like to make a double batch specifically to freeze individual portions for those nights when cooking feels impossible.

    Fixing Common Issues

    Even the most foolproof recipes sometimes need troubleshooting. If your sauce seems too thin, remove the lid during the last 30 minutes of cooking to allow excess moisture to evaporate. Conversely, if it’s too thick, stir in a little warm chicken broth to reach your desired consistency. Pasta overcooked? Next time, try a heartier pasta shape like penne that stands up better to slow cooking. If your cheese sauce breaks or looks grainy, lower the heat and gradually stir in a mixture of 1 tablespoon cornstarch dissolved in 2 tablespoons cold water to help re-emulsify everything into creamy perfection.

    Frequently Asked Questions

    Can I use frozen chicken for Slow Cooker Chicken Spaghetti?

    For food safety reasons, it’s best to thaw chicken completely before adding to your slow cooker. Frozen chicken may spend too long in the temperature danger zone, increasing bacteria risk.

    How do I prevent the pasta from getting mushy?

    Add the pasta during only the last 30-45 minutes of cooking time, and choose a sturdier pasta shape like rotini or penne rather than thin spaghetti.

    Can I make this recipe dairy-free?

    Yes! Substitute the cheese with dairy-free alternatives and use coconut cream instead of cream soup. Add nutritional yeast for that cheesy flavor without the dairy.

    What’s the best slow cooker setting for this recipe?

    Cook on low for 6-7 hours or high for 3-4 hours, adding the pasta during the final 30 minutes of cooking time regardless of setting.

    How can I make my Slow Cooker Chicken Spaghetti more flavorful?

    Boost flavor by adding Italian seasoning, red pepper flakes, or fresh herbs like basil and oregano. Sautéing onions and garlic before adding them also intensifies the taste.

    Final Thoughts

    This Slow Cooker Chicken Spaghetti has become more than just a recipe in my household—it’s a reliable friend on hectic days when cooking feels impossible. There’s something deeply satisfying about creating a homemade meal with minimal effort that still brings everyone to the table with excited anticipation. I hope this comfort food classic finds its way into your regular rotation and creates as many happy moments around your table as it has around mine. Don’t forget to check out more slow cooker inspiration on Pinterest for your next culinary adventure!

  • Cajun Chicken Sloppy Joes: Irresistibly Spicy Comfort Food!

    Cajun Chicken Sloppy Joes: Irresistibly Spicy Comfort Food!

    Cajun Chicken Sloppy Joes: Irresistibly Spicy Comfort Food!

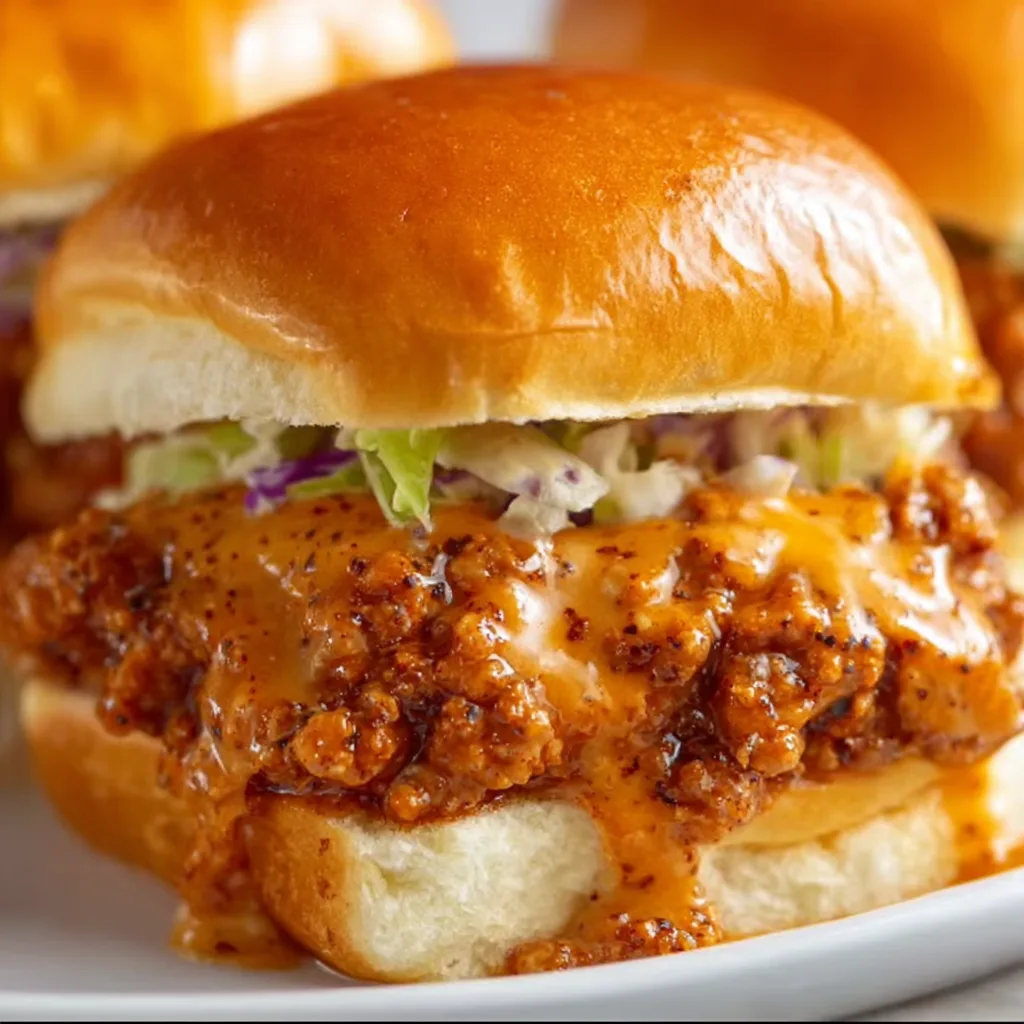
    Cajun Chicken Sloppy Joes bring the perfect balance of Louisiana heat and comfort food nostalgia to your dinner table. I discovered this recipe during a rainy weekend when I was craving something that would warm our kitchen with spicy aromas and satisfy my family’s hunger for bold flavors. The combination of tender chicken, zesty Cajun spices, and that gloriously messy sandwich experience makes this dish an absolute winner. It’s quicker than traditional beef versions but packs even more personality! If you love dishes with a kick like my One-Pot Cajun Chicken Shellbows Pasta, you’ll adore this twisted take on an American classic.

    Recipe

    Why You’ll Love This Cajun Chikcne Sloppy Joes

    Perfect Balance of Heat and Flavor

    These Cajun Chikcne Sloppy Joes deliver that just right level of spice that warms your mouth without overwhelming it. The holy trinity of Cajun cooking—bell peppers, onions, and celery—creates a fragrant base that perfumes your kitchen with irresistible aromas. I’ve carefully balanced the traditional Cajun spices with a touch of sweetness from tomato sauce and brown sugar that helps round out the heat. Even my spice-cautious mother-in-law went back for seconds! The ground chicken soaks up all these flavors beautifully, creating a lighter yet still indulgent sandwich filling.

    Quick Weeknight Wonder

    When the clock is ticking and hungry faces are staring, this recipe is my secret weapon. Unlike beef versions that need longer simmering, these Cajun Chikcne Sloppy Joes come together in just about 25 minutes from start to finish. The chicken cooks quickly while still developing deep flavor thanks to our powerhouse spice blend. I often prep the vegetables on Sunday during my meal prep session, which makes this practically a 15-minute meal on busy weeknights. Plus, the leftovers taste even better the next day as the spices have time to meld and intensify.

    Essential Tips & Tricks

    Mastering the Spice Blend

    Creating the perfect Cajun spice blend is crucial for authentic flavor. I recommend toasting your spices in a dry pan for 30 seconds before adding them to the chicken—this simple step awakens their essential oils and deepens the flavor profile dramatically. Don’t skimp on the paprika (use smoked if you have it) and cayenne, but adjust according to your heat preference. The secret ingredient that many miss is a dash of file powder (ground sassafras) which adds that distinctive earthiness. If you’re sensitive to heat, start with half the cayenne and taste as you go—you can always add more!

    Texture Perfection Techniques

    The ideal Cajun Chikcne Sloppy Joe should be moist and saucy but not swimming in liquid. After browning your chicken, don’t drain completely—those flavorful juices contribute to the final sauce. For perfect texture balance, simmer uncovered for the last 5 minutes to reduce excess moisture. If your mixture looks too dry, add chicken broth a tablespoon at a time. For thicker sauce, try my trick of adding 1-2 tablespoons of crushed crackers or breadcrumbs. This technique works beautifully in my Garlic Butter Steak Bites and Shrimp recipe too!

    Serving Ideas & Creative Variations

    Beyond Basic Buns

    While traditional burger buns work wonderfully, exploring different bread options elevates these Cajun Chikcne Sloppy Joes to new heights. Try brioche buns for a buttery, slightly sweet contrast to the spicy filling, or go for garlic Texas toast for an indulgent twist. For a lower-carb option, butter lettuce cups create a fresh, crunchy vessel. My personal favorite is serving the mixture over creamy grits or mashed potatoes with a sprinkle of green onions—it transforms the dish into a comforting bowl meal that’s perfect for colder evenings.

    Fusion Flavor Adventures

    Don’t be afraid to experiment with fusion elements to create your own unique version. Add creole cream cheese or a dollop of remoulade sauce for authentic Louisiana creaminess. For a Cajun-Asian fusion that my teenagers request weekly, mix in a tablespoon of hoisin sauce and top with quick-pickled vegetables. Mediterranean-inspired versions with feta and olives are surprisingly delicious too! For a complete Cajun feast, serve alongside my Loaded Cajun Seafood Stuffed Potatoes for a meal that’ll transport you straight to New Orleans.

    Storage & Troubleshooting Guide

    Keeping It Fresh

    These Cajun Chikcne Sloppy Joes actually improve with a bit of time as the flavors continue to develop. Store the chicken mixture separately from the buns in an airtight container for up to 4 days in the refrigerator. For longer storage, freeze flat in ziplock bags for up to 3 months—this allows for quick thawing and easy portion control. To reheat, add a splash of chicken broth to maintain moisture and warm slowly on the stovetop. I often make a double batch specifically to freeze half for those hectic nights when cooking from scratch isn’t possible.

    Fixing Common Issues

    If your Cajun Chikcne Sloppy Joes turn out too spicy, don’t panic! Balance the heat by stirring in a tablespoon of honey or a dollop of cooling sour cream right before serving. For mixtures that become too watery, simmer uncovered for a few extra minutes or add a cornstarch slurry (1 teaspoon cornstarch mixed with 1 tablespoon cold water). If the flavor seems flat, a splash of apple cider vinegar or hot sauce can brighten everything up. Remember that ground chicken can sometimes cook faster than beef, so watch carefully to prevent it from becoming dry.

    Frequently Asked Questions

    Can I use ground turkey instead of chicken for Cajun Chikcne Sloppy Joes?

    Absolutely! Ground turkey works beautifully as a substitute. Choose a blend with some dark meat for better moisture and flavor, and you may want to add an extra tablespoon of oil when cooking.

    How can I make this recipe less spicy for my kids?

    Reduce the cayenne pepper by half and omit the hot sauce. You can serve additional hot sauce on the side for adults who prefer more heat. The bell peppers still provide wonderful flavor without the burn.

    Can I make this recipe in a slow cooker?

    Yes! Brown the chicken and vegetables first, then transfer to a slow cooker with remaining ingredients. Cook on low for 3-4 hours. The texture will be slightly different but equally delicious.

    What sides pair well with these sloppy joes?

    Sweet potato fries, coleslaw, or corn on the cob complement these sandwiches perfectly. For a lighter option, a simple green salad with vinaigrette balances the richness of the dish.

    Is there a way to make Cajun Chikcne Sloppy Joes ahead for a party?

    Prepare the filling up to two days ahead and refrigerate. Reheat in a slow cooker on low setting, adding a splash of broth if needed. Serve with warm buns on the side for guests to assemble.

    Final Thoughts

    These Cajun Chikcne Sloppy Joes have become a staple in my meal rotation, bringing Louisiana flair to an American classic. There’s something magical about the way the spicy, savory chicken mixture contrasts with the soft bun, creating that perfect comfort food experience with a sophisticated twist. I love seeing the looks on my guests’ faces when they take their first bite—surprise followed by pure delight! Don’t forget to check out more of my favorite recipes on Pinterest for more inspiration. This Cajun chicken twist might just become your new favorite too!

  • Ina Garten’s Meatloaf Recipe: Comfort Food That Will Melt Your Heart

    Ina Garten’s Meatloaf Recipe: Comfort Food That Will Melt Your Heart

    Ina Garten’s Meatloaf Recipe: Comfort Food That Will Melt Your Heart

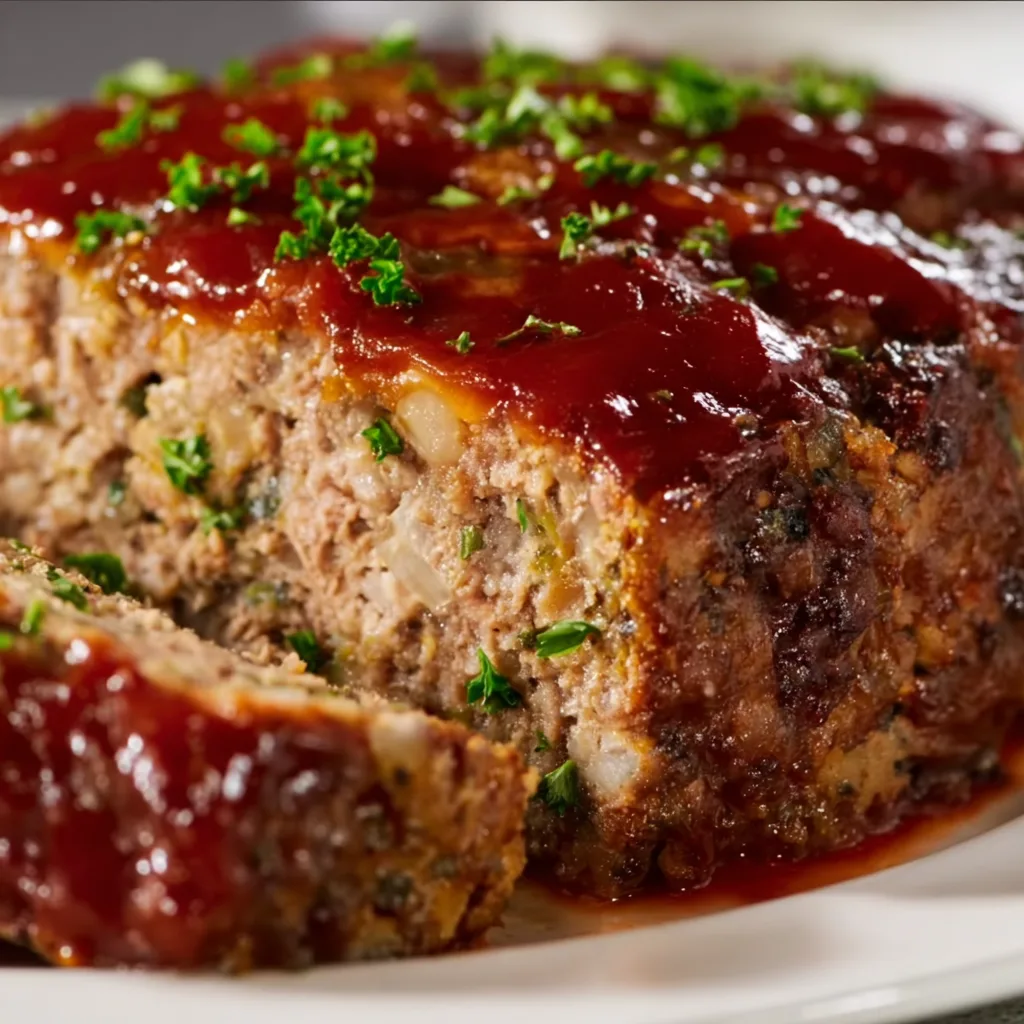
    Ina Garten’s Meatloaf brings comfort food to an entirely new level with its perfect blend of savory flavors and melt-in-your-mouth texture. There’s something magical about the way this classic dish fills your kitchen with those irresistible aromas that take you right back to childhood. I first made this recipe during a particularly chilly autumn evening, and the way it transformed my dining room into a haven of warmth and comfort was nothing short of miraculous.

    The combination of high-quality meats, fresh herbs, and Ina’s signature touch creates a meatloaf that’s elevated yet familiar, making it the perfect centerpiece for any family dinner. If you’re craving a hearty meal that delivers on both flavor and nostalgia, this recipe from our collection is exactly what you need.

    Recipe

    Why You’ll Love This Ina Garten’s Meatloaf

    Perfect Balance of Flavors and Textures

    What sets Ina Garten’s Meatloaf apart is the thoughtful combination of ingredients that create layers of flavor in every bite. The mixture of ground beef and pork provides a rich base, while the sautéed onions and garlic add aromatic depth that transforms an ordinary meatloaf into something extraordinary. I love how the breadcrumbs and eggs work together to create that tender, moist texture that doesn’t crumble when sliced. The touch of thyme and parsley brings a fresh herbaceous note that cuts through the richness, creating that perfect balance that keeps you coming back for another bite. It’s comfort food that doesn’t feel heavy or one-dimensional.

    Make-Ahead Convenience for Busy Schedules

    One of the most beautiful aspects of this meatloaf recipe is how wonderfully it fits into a busy lifestyle. You can prepare the entire mixture the night before, cover it tightly, and refrigerate until you’re ready to bake. I’ve found this actually enhances the flavors as they meld together overnight. On particularly hectic weeknights, I’ll often shape the loaf in the morning, then simply pop it in the oven when I get home. The hands-on time is minimal, yet the results taste like you’ve been cooking all day. This make-ahead flexibility has saved dinner at my house countless times, especially when unexpected guests arrive or work runs late.

    Essential Tips & Tricks

    Selecting the Right Meat Blend

    The foundation of an exceptional meatloaf starts with choosing the right meat. Ina’s recipe calls for a specific ratio of ground beef to pork (usually 80/20 beef with some pork for richness), which creates that perfect balance of flavor and moisture. I’ve learned through many attempts that using meat that’s too lean results in a dry, crumbly loaf. For the juiciest results, don’t shy away from a bit of fat content—it renders during cooking, creating that melt-in-your-mouth texture we all crave. When mixing, handle the meat gently with your fingertips rather than squeezing or compacting it, which keeps the texture light and tender rather than dense and tough.

    Perfecting That Signature Glaze

    The glossy, caramelized glaze on top isn’t just for looks—it’s what gives Ina’s meatloaf that unforgettable tangy-sweet finish. The secret lies in applying it at just the right moment. I brush about half the glaze on after the meatloaf has been cooking for about 30 minutes, allowing it to begin caramelizing, then add the remaining glaze during the final 15 minutes of baking. This double-glazing technique creates layers of flavor and that beautiful shine. For the best results, make sure your glaze ingredients (typically ketchup, brown sugar, and a splash of vinegar) are thoroughly mixed until smooth before applying. This small step makes a significant difference in achieving that picture-perfect finish.

    Serving Ideas & Creative Variations

    Classic Comfort Food Pairings

    Nothing complements Ina Garten’s Meatloaf quite like the right side dishes that enhance its homey appeal. Creamy mashed potatoes are the traditional favorite—the way the gravy or meat juices mingle with those fluffy spuds creates pure comfort on a plate. For a complete meal that balances richness with freshness, I love adding a simple green vegetable like roasted Brussels sprouts or steamed green beans with a touch of butter and lemon. When I’m feeling particularly indulgent, I’ll serve it with my favorite mac and cheese for the ultimate comfort food experience. The key is keeping the sides relatively simple to let the meatloaf remain the star of the show.

    Modern Twists on a Classic Recipe

    While Ina’s classic recipe is perfect as-is, there’s always room for personalization. One of my favorite variations is adding Mediterranean flavors with sun-dried tomatoes, feta cheese, and oregano for an unexpected twist. For a healthier version, you can substitute half the meat with finely chopped mushrooms—they maintain the moisture while adding an earthy depth. I’ve also had great success adding grated carrots and zucchini for extra nutrients that my kids never notice. For a spicy kick, incorporate diced jalapeños and pepper jack cheese into the mixture. These variations maintain the soul of Ina’s recipe while allowing you to tailor it to your family’s preferences or dietary needs.

    Storage & Troubleshooting Guide

    Proper Storage for Optimal Freshness

    To maintain the exceptional flavor and texture of Ina Garten’s Meatloaf, proper storage is essential. Once completely cooled, wrap individual portions in parchment paper first, then aluminum foil, which prevents the meatloaf from absorbing refrigerator odors while maintaining moisture. Refrigerated meatloaf stays at peak quality for 3-4 days. For longer storage, freeze the wrapped portions in a zip-top freezer bag with the air pressed out, where it will keep beautifully for up to 3 months. I’ve found that slicing the meatloaf before freezing makes it easier to thaw just what you need for quick weeknight dinners—simply reheat in a 300°F oven until warmed through.

    Fixing Common Meatloaf Mishaps

    Even experienced cooks occasionally encounter meatloaf challenges, but most are easily remedied. If your meatloaf turns out too crumbly or falls apart when sliced, it likely needs more binding agents—next time, add an extra egg or a quarter cup more breadcrumbs soaked in milk. For a meatloaf that’s too dense or tough, you’re probably overmixing or compacting the meat too firmly in the pan. Remember to mix just until ingredients are combined and shape loosely. If the bottom burns before the center is cooked, place a pan of water on the rack below your meatloaf to create moisture in the oven, and consider tenting with foil for part of the cooking time.

    Frequently Asked Questions

    What makes Ina Garten’s Meatloaf different from traditional recipes?

    Ina’s version uses a specific blend of high-quality meats, fresh herbs instead of dried, and a signature glaze that caramelizes beautifully. She also incorporates sautéed vegetables for moisture and flavor depth that elevates it beyond basic meatloaf.

    Can I make this recipe gluten-free?

    Absolutely! Simply substitute the regular breadcrumbs with gluten-free breadcrumbs or crushed gluten-free crackers. The texture might be slightly different, but the flavor will remain delicious.

    How do I know when my meatloaf is fully cooked?

    Use a meat thermometer inserted into the center—it should read 160°F for beef/pork combinations. The meatloaf should be firm to the touch but not hard, and the glaze should be caramelized.

    Can I use ground turkey instead of beef in Ina Garten’s Meatloaf?

    Yes, though it will change the flavor profile. If using turkey, add a tablespoon of Worcestershire sauce and a bit more fat (like olive oil) to prevent dryness since turkey is leaner.

    What’s the best pan to use for baking meatloaf?

    A standard loaf pan works well, but Ina recommends forming the meatloaf on a parchment-lined sheet pan instead. This allows more surface area for the glaze to caramelize and creates those delicious crispy edges.

    Final Thoughts

    Ina Garten’s Meatloaf represents comfort food at its finest—thoughtfully crafted yet accessible for home cooks of all skill levels. The magic lies in those small details: the perfect meat blend, the double-glazing technique, and the balance of seasonings that create something greater than the sum of its parts. I’ve made this recipe countless times, and it never fails to bring that sense of warmth and connection to my table. Whether you’re cooking for a special occasion or simply craving a hearty meal on a chilly evening, this meatloaf delivers the kind of satisfaction that keeps us coming back to classic recipes. For more comforting dishes, visit our Pinterest collection for inspiration.

  • Bang Bang Shrimp Tacos: Irresistibly Spicy & Crispy Delight!

    Bang Bang Shrimp Tacos: Irresistibly Spicy & Crispy Delight!

    Bang Bang Shrimp Tacos: Irresistibly Spicy & Crispy Delight!

    Bang bang shrimp tacos bring the perfect combination of crispy, spicy, and creamy all wrapped in a soft tortilla. I discovered this recipe during a beach vacation when a tiny seaside shack changed my taco standards forever. The first bite sent waves of tangy heat and sweet creaminess across my taste buds, and I knew I had to recreate this magic at home. These tacos feature perfectly seasoned shrimp with that signature bang bang sauce that’s creamy, sweet, and carries just enough heat to make your lips tingle without overwhelming your palate. Ready in under 30 minutes, they’re perfect for busy weeknights or casual entertaining.

    Recipe

    Why You’ll Love These Bang Bang Shrimp Tacos

    Perfect Balance of Flavors and Textures

    The magic of these tacos lies in their incredible textural contrast. The shrimp develop a delicate crispness on the outside while remaining tender and juicy inside. Each bite delivers a symphony of sensations – the soft tortilla, crunchy cabbage slaw, and that velvety bang bang sauce that ties everything together. I love how the sauce provides a perfect balance of sweet, spicy, and tangy notes that dance across your palate. When you add a squeeze of fresh lime, it brightens everything and cuts through the richness, creating that “just one more bite” experience that keeps you coming back.

    Quick and Impressive Meal Solution

    These tacos are my go-to when I need to impress without stress. The entire dish comes together in about 25 minutes from start to finish, making it perfect for those evenings when you want something special but don’t have hours to spend in the kitchen. The bang bang sauce can be prepared ahead of time, and the shrimp cook in mere minutes. I’ve served these at last-minute dinner gatherings and watched guests’ eyes widen with that first bite. They never guess how simple they were to make! The visual appeal alone – with the pink shrimp, white sauce, and colorful garnishes – makes them look like they came from a restaurant.

    Essential Tips & Tricks

    Perfecting the Shrimp

    The key to exceptional bang bang shrimp tacos is not overcooking the shrimp. They should be just opaque and form a loose “C” shape when properly cooked – if they curl into a tight “O,” they’ve gone too far. I always pat my shrimp completely dry before seasoning, which helps them get that perfect light sear rather than steaming. For maximum flavor penetration, let them sit with the seasoning for about 10 minutes before cooking. A cast-iron skillet gives the best results, but any heavy-bottomed pan works well. Remember that shrimp cook in a flash – usually 2-3 minutes per side is all you need!

    Mastering the Bang Bang Sauce

    The signature sauce is what transforms these from ordinary shrimp tacos into something crave-worthy. The base should be equal parts mayonnaise and sweet chili sauce, with sriracha added to your heat preference. For extra dimension, I add a splash of rice vinegar and a tiny drizzle of honey. The key technique is to reserve half of your sauce for drizzling at the end – this gives you both the flavor-infused shrimp and that fresh, creamy finishing touch. For an extra-special touch, try making your sauce a day ahead to let the flavors meld, similar to how I prepare the sauce for my crispy hot honey feta chicken.

    Serving Ideas & Creative Variations

    Perfect Pairings and Sides

    These bang bang shrimp tacos shine brightest with simple, complementary sides. My favorite pairing is cilantro-lime rice – the bright, zesty notes perfectly balance the creamy richness of the tacos. A simple black bean salad with corn, red onion, and a light vinaigrette adds wonderful texture and makes the meal more substantial. For drinks, nothing beats a classic margarita or a cucumber-jalapeño agua fresca for non-alcoholic options. If you’re hosting a casual gathering, set up a DIY taco bar with all the fixings and let guests build their own. This approach works beautifully alongside other crowd-pleasers like my bang bang salmon for a seafood feast.

    Creative Twists on the Classic

    Don’t be afraid to put your personal spin on these tacos! One of my favorite variations uses grilled shrimp instead of fried for a lighter option that’s perfect for summer. You can also swap the traditional cabbage slaw for a mango-avocado salsa that adds a tropical sweetness. For a fusion twist, try adding Korean gochujang to the bang bang sauce for a deeper, more complex heat. Lettuce wraps make a great low-carb alternative to tortillas, and the filling works beautifully in a rice bowl format too. For special occasions, I’ve even used lobster instead of shrimp – pricier but absolutely divine for celebrations.

    Storage & Troubleshooting Guide

    Proper Storage for Leftovers

    To maintain the quality of your bang bang shrimp tacos, proper storage is essential. Store each component separately – keep the cooked shrimp in an airtight container in the refrigerator for up to 2 days, and the sauce in its own container for up to 5 days. The assembled tacos don’t store well as the tortillas become soggy, so I recommend only assembling what you’ll eat immediately. When reheating the shrimp, use a skillet over medium heat just until warmed through – microwaving will make them tough. For meal prep, you can prepare all components ahead and store them separately, assembling fresh tacos as needed.

    Troubleshooting Common Issues

    If your bang bang sauce is too thin, add more mayonnaise a tablespoon at a time until you reach your desired consistency. Too thick? A splash of water or lime juice will thin it perfectly. If your shrimp turned out rubbery, they were likely overcooked – next time, remove them from the heat when they’re just barely opaque. For soggy tacos, try double-layering your tortillas or briefly toasting them before assembly. If your sauce lacks punch, brighten it with fresh lime juice or increase the sriracha. And if the overall flavor seems flat, a pinch of salt often works wonders to wake up all the other flavors.

    Frequently Asked Questions

    What exactly is bang bang sauce?

    Bang bang sauce is a creamy, sweet-spicy condiment made with mayonnaise, sweet chili sauce, and sriracha. It originated in Chinese-American cuisine and gets its name from the contrasting flavors that “bang” together on your palate.

    Can I make these bang bang shrimp tacos ahead of time?

    Prepare components separately up to a day ahead – cook shrimp, make sauce, and prep toppings. Store refrigerated in separate containers. Assemble just before serving to maintain optimal texture and prevent soggy tacos.

    What’s the best way to warm tortillas for these tacos?

    For authentic flavor, warm tortillas directly over a gas flame for 10-15 seconds per side until lightly charred. Alternatively, heat in a dry skillet or wrap in damp paper towels and microwave for 30 seconds.

    Can I use frozen shrimp for this recipe?

    Absolutely! Thaw frozen shrimp overnight in the refrigerator or under cold running water. Pat them completely dry before seasoning to ensure they sear properly rather than steam.

    What can I substitute for mayonnaise in the bang bang sauce?

    Greek yogurt makes an excellent substitute for a lighter version. You may need to add a touch of honey to balance the tanginess. For dairy-free options, try avocado-based mayonnaise or silken tofu blended with olive oil.

    Final Thoughts

    These bang bang shrimp tacos have become my signature dish for good reason – they deliver restaurant-quality flavor with home-kitchen simplicity. The combination of crispy shrimp, creamy-spicy sauce, and fresh toppings creates a taco experience that’s truly memorable. What I love most is how versatile they are, perfect for everything from Tuesday night dinner to weekend entertaining. Don’t be surprised if friends start requesting your “famous” bang bang shrimp tacos once you’ve served them! For more delicious recipes, check out my Pinterest collection where I’m always adding new inspiration.