Author: Sara Maren

  • Creamy Cheese and Potato Pie Recipe That Will Melt Your Heart!

    Creamy Cheese and Potato Pie Recipe That Will Melt Your Heart!

    Creamy Cheese and Potato Pie Recipe That Will Melt Your Heart!

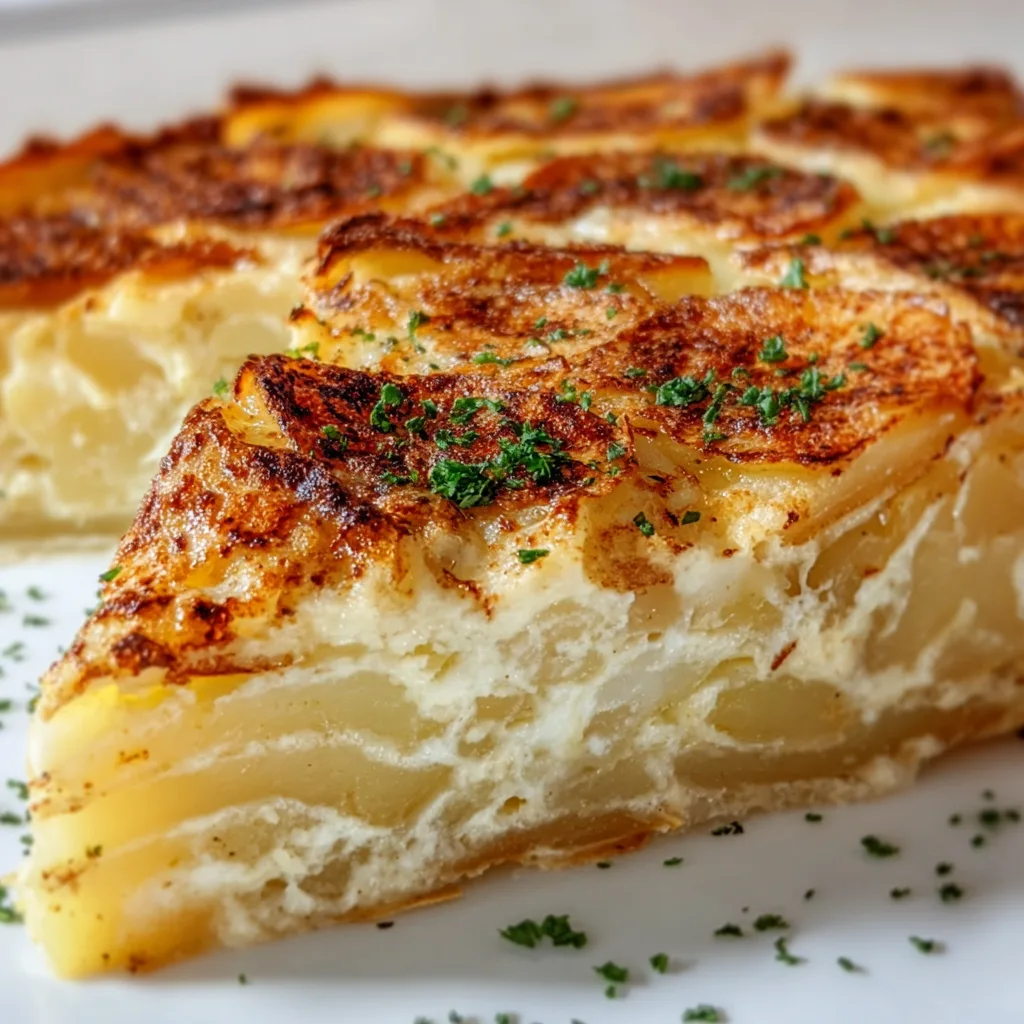
    This Creamy Cheese and Potato Pie is the ultimate comfort food that wraps you in a warm hug with every bite. The first time I made this dish, the aroma of bubbling cheese and herbs filled my kitchen, transporting me back to my grandmother’s farmhouse table. There’s something magical about the way the velvety cheese sauce seeps into layers of thinly sliced potatoes, creating a dish that’s both hearty and elegant. Whether you’re serving it for a cozy family dinner or bringing it to a potluck, this pie never disappoints.

    Recipe

    Why You’ll Love This Creamy Cheese and Potato Pie

    Perfect Comfort Food Balance

    This pie strikes the perfect balance between rustic and refined. The starchy potatoes provide a hearty foundation while the cheese sauce adds luxurious creaminess. I love how the top develops that gorgeous golden crust that makes everyone fight for the corner pieces! The beauty lies in its simplicity—humble ingredients transforming into something spectacular. On chilly evenings when nothing else will do, this pie delivers that deep-down satisfaction that only proper comfort food can provide. The layers of flavor build with each bite, making it impossible to stop at just one serving.

    Versatile for Any Occasion

    I’ve served this Creamy Cheese and Potato Pie for everything from casual weeknight dinners to holiday gatherings, and it always receives rave reviews. It’s wonderfully adaptable to whatever you have on hand—add leftover ham for a complete meal or keep it vegetarian for Meatless Monday. The pie travels well, making it perfect for potlucks or meal trains for new parents. What I appreciate most is how it appeals to both sophisticated palates and picky eaters alike. My nephew who “hates vegetables” somehow manages to clean his plate every time this appears on the table!

    Essential Tips & Tricks

    Perfecting Your Potato Layers

    The secret to an exceptional Creamy Cheese and Potato Pie lies in how you handle those potatoes. I recommend using a mandoline slicer for uniform, thin slices—about 1/8 inch thick is ideal. This ensures even cooking and the perfect texture. Yukon Golds or Russets work beautifully here; Yukons for their buttery flavor, Russets for their fluffiness. Don’t skip the step of patting the slices dry with paper towels before layering—this removes excess starch and prevents a watery pie. I learned this the hard way after one soggy-bottomed disaster! Arranging the potatoes in slightly overlapping circles creates those beautiful defined layers you want when serving.

    Creating the Ultimate Cheese Sauce

    The heart of this pie is undoubtedly the cheese sauce—velvety, rich, and perfectly seasoned. Start with a roux base (equal parts butter and flour) and cook it until it smells slightly nutty but hasn’t browned. This develops flavor while ensuring your sauce won’t taste floury. When adding milk, pour it in gradually while whisking constantly to prevent lumps. For cheese selection, a combination creates the best flavor profile—sharp cheddar for punch, Gruyère for nuttiness, and a touch of Parmesan for depth. Always grate your own cheese rather than using pre-shredded, which contains anti-caking agents that can make your sauce grainy instead of silky smooth.

    Serving Ideas & Creative Variations

    Perfect Pairings

    This Creamy Cheese and Potato Pie shines as both a side dish and a main course. For a complete meal, I love serving it alongside a simple green salad dressed with a bright vinaigrette—the acidity cuts through the richness perfectly. If you’re offering it as a side, it pairs beautifully with roasted chicken or a juicy steak. For brunches, try smaller portions alongside eggs and fresh fruit. The pie also makes a stunning centerpiece for vegetarian gatherings. My favorite unexpected pairing? A dollop of tangy crème fraîche and a sprinkle of chives on top, which adds a fresh contrast to the warm, melty interior.

    Exciting Flavor Twists

    While the classic version is divine, this pie welcomes creative adaptations. Try a Mediterranean twist by adding sun-dried tomatoes, olives, and herbs like oregano and thyme between the layers. For something hearty, incorporate caramelized onions and mushrooms sautéed with a splash of white wine. Feeling adventurous? Add thinly sliced apples and bacon for a sweet-savory combination that’s unexpectedly delicious. My family goes wild for the loaded baked potato version with crispy bacon bits, green onions, and a dollop of sour cream served on each slice. The possibilities are endless—just keep the cheese-to-potato ratio consistent for that perfect creamy texture.

    Storage & Troubleshooting Guide

    Proper Storage Methods

    This Creamy Cheese and Potato Pie stores beautifully, making it perfect for meal prep. Once cooled completely, cover leftovers tightly with plastic wrap or transfer to an airtight container and refrigerate for up to 3 days. For longer storage, the pie freezes surprisingly well—wrap individual portions in plastic, then foil, and freeze for up to 2 months. When reheating from refrigerated, cover with foil and warm in a 350°F oven for about 20 minutes. From frozen, thaw overnight in the refrigerator first for best results. The microwave works in a pinch, but you’ll lose some of that lovely textural contrast between the creamy interior and the slightly crisp top.

    Fixing Common Issues

    If your pie turns out watery, the likely culprit is excess moisture in the potatoes. Next time, be sure to pat them dry thoroughly before assembling. For a sauce that’s broken or grainy, the heat was probably too high—cheese sauces need gentle heat to stay smooth. If your top isn’t browning nicely, switch to the broiler for the final 2-3 minutes, watching carefully to prevent burning. Undercooked potatoes? They were likely sliced too thickly; use a mandoline for consistent thinness. And if your pie sticks to the dish, remember to grease generously before assembling. A quick spritz of cooking spray on your knife also makes for cleaner slices when serving.

    Frequently Asked Questions

    Can I make Creamy Cheese and Potato Pie ahead of time?

    Absolutely! Assemble the pie up to 24 hours in advance, cover with plastic wrap, and refrigerate. Remove from the fridge 30 minutes before baking and add 10-15 minutes to the baking time.

    What’s the best cheese combination for this pie?

    I recommend equal parts sharp cheddar and Gruyère for the perfect balance of flavor and meltability, plus a handful of Parmesan for depth.

    Can I make this pie without heavy cream?

    Yes! Whole milk works well, though the result will be slightly less rich. For a middle ground, use half whole milk and half half-and-half.

    How do I know when my potato pie is done?

    Insert a knife into the center—it should slide through the potatoes easily with no resistance, and the top should be golden brown and bubbling.

    Can I add meat to this Creamy Cheese and Potato Pie?

    Definitely! Cooked bacon, ham, or shredded rotisserie chicken work beautifully. Add between layers or mix directly into the cheese sauce.

    Final Thoughts

    This Creamy Cheese and Potato Pie has become my go-to recipe when I need something that feels like home on a plate. There’s a reason it’s requested at every family gathering—it strikes that perfect balance between sophisticated and comforting. The magic happens in those moments of anticipation as you pull it from the oven, golden and bubbling, filling your kitchen with an irresistible aroma. I hope this pie brings the same joy to your table that it has to mine. For more cozy comfort food inspiration, be sure to check out my Pinterest boards where I’m always sharing new favorites!

  • High Protein Crustless Chicken Pot Pie – Comfort Food Reinvented!

    High Protein Crustless Chicken Pot Pie – Comfort Food Reinvented!

    High Protein Crustless Chicken Pot Pie – Comfort Food Reinvented!

    High protein crustless chicken pot pie brings all the cozy comfort of traditional pot pie without the heavy crust! I discovered this gem on a chilly Sunday when I was craving something warming but didn’t want to derail my protein goals. The kitchen filled with the aroma of herbs and roasted chicken as it baked, and that first spoonful? Pure creamy satisfaction with tender chicken chunks and vegetables in every bite. If you’re looking for a protein-packed dinner that doesn’t sacrifice flavor, this might become your new weeknight staple, just like it did in my home.

    Recipe

    Why You’ll Love This High Protein Crustless Chicken Pot Pie

    Perfect Balance of Nutrition and Comfort

    This dish delivers an impressive protein punch while keeping carbs in check. Each serving packs around 30g of protein from the chicken, cottage cheese, and eggs that form the creamy base. The beauty is how it satisfies that pot pie craving without weighing you down afterward. I love how my family doesn’t even miss the crust—they’re too busy enjoying the savory filling that’s become the star. The blend of herbs infuses every bite with that classic pot pie flavor while keeping the calorie count reasonable for those watching their intake.

    Quick Prep for Busy Weeknights

    Unlike traditional pot pies that require making and rolling dough, this crustless version comes together in about 15 minutes of active prep. I can toss it together after work, pop it in the oven, and have dinner ready in under an hour. The ingredients are pantry and fridge staples I usually have on hand—chicken, frozen vegetables, eggs, and cottage cheese. On particularly hectic evenings, using rotisserie chicken cuts the prep time even further. This has saved dinner at my house countless times when I’m tempted to order takeout but want something nourishing instead.

    Essential Tips & Tricks

    Perfecting the Protein Base

    The secret to the perfect texture lies in how you handle the protein-rich base. Blend the eggs and cottage cheese until completely smooth for a custardy finish that holds everything together. Room temperature eggs incorporate better and prevent the mixture from seizing up when baking. For maximum flavor infusion, don’t rush adding the seasonings—I like to whisk them thoroughly into the egg mixture rather than just sprinkling on top. This ensures every bite has that perfect savory profile that makes you forget you’re eating something so protein-focused.

    Vegetable and Chicken Preparation

    Pre-cooking your vegetables slightly before adding them to the mixture prevents excess water release that could make your pot pie soggy. I give them a quick sauté with a bit of garlic until they’re just tender but still have some bite. For the chicken, shredding or dicing into small, even pieces ensures it distributes well throughout the mixture. Season the chicken separately before adding it to the base—this layering of flavors makes a noticeable difference in the final dish. Pat everything dry with paper towels to remove excess moisture before combining.

    Serving Ideas & Creative Variations

    Complementary Side Dishes

    This high protein crustless chicken pot pie pairs beautifully with light sides that won’t overwhelm its delicate flavors. A simple arugula salad with lemon vinaigrette provides a refreshing contrast to the creamy texture. For a more substantial meal that still keeps the protein focus, add a side of steamed asparagus or green beans tossed with a little olive oil and lemon zest. When I’m serving this for Sunday dinner, I sometimes add roasted sweet potatoes on the side for those family members who want something more filling without compromising the healthier main dish.

    Flavor Variations to Keep It Interesting

    The basic recipe is wonderfully adaptable to different flavor profiles. For a Mediterranean twist, add sun-dried tomatoes, feta, and olives with a sprinkle of oregano. My family loves when I make a Southwest version with bell peppers, corn, black beans, and a dash of cumin and chili powder. For a cozy fall variation, try adding diced butternut squash, sage, and a touch of nutmeg. You can also experiment with different protein sources—ground turkey works beautifully, and I’ve even made a seafood version with shrimp and a hint of Old Bay seasoning that disappeared in minutes.

    Storage & Troubleshooting Guide

    Proper Storage for Meal Prep

    This crustless pot pie is perfect for meal prep as it stores beautifully in both the refrigerator and freezer. Once completely cooled, portion individual servings into airtight containers for grab-and-go lunches throughout the week. It keeps well in the refrigerator for up to 4 days without losing its texture or flavor. For freezing, wrap individual portions tightly in plastic wrap then foil, or use freezer-safe containers. Label with the date and use within 3 months. I like to thaw overnight in the refrigerator before reheating to maintain that perfect creamy consistency.

    Fixing Common Issues

    If your pot pie turns out too watery, the culprit is usually excess moisture in the vegetables. Next time, make sure to pre-cook and drain them thoroughly before adding to the egg mixture. For a pot pie that’s too dry, try increasing the cottage cheese slightly or adding a splash of milk to the base. If the top is browning too quickly before the center is set, simply cover loosely with foil for the remainder of the baking time. For more protein, you can add a scoop of unflavored protein powder to the egg mixture—I’ve done this successfully without affecting the taste.

    Frequently Asked Questions

    Can I make this high protein crustless chicken pot pie ahead of time?

    Absolutely! Prepare the mixture up to 24 hours ahead and refrigerate. Let it sit at room temperature for 15 minutes before baking. The flavors actually develop nicely with a little rest time.

    What can I use instead of cottage cheese?

    Greek yogurt works beautifully as a substitute. You’ll maintain the protein content while getting a similar creamy texture. For a richer version, try ricotta cheese.

    How do I know when it’s fully cooked?

    The pot pie should be set in the center with light golden edges. Insert a knife in the center—it should come out clean. The internal temperature should reach 165°F.

    Can I use plant-based protein instead of chicken?

    Yes! Firm tofu, tempeh, or a combination of beans and lentils work well. Just make sure they’re well-drained and pre-seasoned to infuse flavor throughout the dish.

    Is this recipe suitable for meal prepping?

    This is perfect for meal prep! The crustless pot pie reheats beautifully and maintains its texture. Portion into individual containers for quick, protein-packed lunches all week.

    Final Thoughts

    This high protein crustless chicken pot pie has become a staple in my kitchen for good reason—it delivers comfort food satisfaction while supporting health goals. What I love most is how versatile it is, adapting to whatever vegetables are in season or proteins I have on hand. The way it fills the house with those homey aromas makes even the most ordinary weeknight feel special. Don’t forget to check out more protein-packed comfort food ideas on Pinterest for inspiration! Your journey to delicious, nutritious meals just got a whole lot tastier.

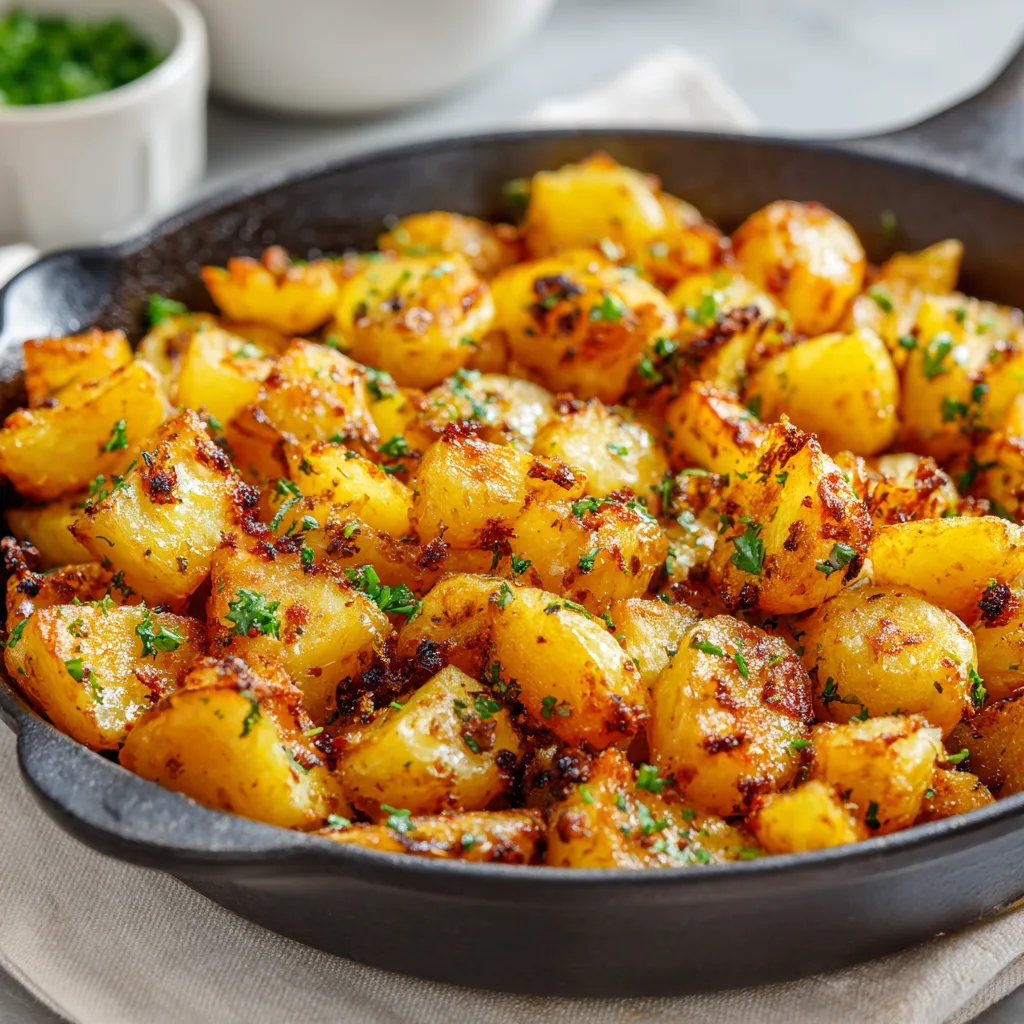
  • Cozy Skillet Fried Potatoes: Crispy Comfort in Every Bite!

    Cozy Skillet Fried Potatoes: Crispy Comfort in Every Bite!

    Cozy Skillet Fried Potatoes: Crispy Comfort in Every Bite!

    Cozy Skillet Fried Potatoes have been my go-to comfort food since I was tall enough to peek over the stove. There’s something magical about the sizzle of potatoes hitting hot oil, the aroma of onions caramelizing, and that first perfectly crispy bite that takes me right back to my grandmother’s kitchen. Whether you’re looking for a hearty breakfast side or a simple dinner companion, these golden-brown beauties deliver warmth in every bite. I’ve perfected my technique over the years, and I’m thrilled to share my secrets for achieving that ideal balance of crispy exteriors and tender, fluffy insides that’ll make your homemade meals feel like a warm hug.

    Recipe

    Why You’ll Love These Cozy Skillet Fried Potatoes

    Perfect Texture Combination

    The magic of properly fried potatoes lies in that irresistible contrast between crispy exteriors and tender insides. I’ve spent years perfecting this balance, discovering that a quick par-boil before frying makes all the difference. The starch on the outside creates that golden crust we all crave, while the inside stays pillowy soft. When you hear that first sizzle as the potatoes hit the hot oil, and that earthy potato aroma fills your kitchen, you’ll understand why this simple dish has stood the test of time as a comfort food staple in homes across the world.

    Simple Ingredients, Maximum Flavor

    What I adore most about Cozy Skillet Fried Potatoes is how they transform humble ingredients into something extraordinary. You likely have everything you need already: potatoes, oil, butter, onions, and seasonings. The real secret is in how these basic elements interact. The butter adds richness, while a touch of garlic powder and paprika elevates the natural potato flavor. Last weekend, I made these for a late breakfast and my kitchen smelled so inviting that my neighbor actually texted to ask what I was cooking! These potatoes don’t just taste like comfort—they create an atmosphere of warmth that draws people together.

    Essential Tips & Tricks

    Choosing and Preparing Your Potatoes

    The foundation of exceptional skillet fried potatoes starts with selecting the right variety. Yukon Golds offer that perfect balance of waxy and starchy properties, creating crispy exteriors while maintaining creamy centers. Russets work beautifully too, yielding extra-crispy results. Whichever you choose, cut them into uniform pieces (about ½-inch cubes or ¼-inch slices) to ensure even cooking. I always soak mine in cold water for 15 minutes, then pat them completely dry before cooking—this removes excess starch that might prevent crisping. This simple step made a dramatic difference when I started doing it consistently.

    Mastering the Cooking Process

    The key to achieving that coveted golden crust is patience and proper heat management. Start with a well-seasoned cast iron skillet heated to medium-high with a generous coating of oil and butter. Once your potatoes hit the pan, resist the urge to stir constantly! Let them develop that beautiful crust before flipping—about 4-5 minutes per side. I learned this lesson the hard way after years of impatient stirring. For extra flavor, add your onions when the potatoes are about halfway done, so they caramelize without burning. This method pairs perfectly with my Irish Colcannon Potatoes for a comforting potato feast.

    Serving Ideas & Creative Variations

    Perfect Pairings

    Cozy Skillet Fried Potatoes shine as both supporting actors and stars of the meal. For breakfast, serve them alongside fried eggs with runny yolks that create a natural sauce when broken over the crispy potatoes—pure morning bliss! They’re equally delicious with a dollop of sour cream and fresh chives for dinner, or tucked into breakfast burritos with scrambled eggs and cheese. My family’s favorite weekend tradition involves these potatoes served with thick-cut bacon and my homemade Strawberry Freezer Jam spread on toast. The sweet-savory combination creates a perfect balance that keeps everyone at the table longer.

    Flavorful Twists

    The beauty of skillet potatoes lies in their versatility as a canvas for countless flavor profiles. For Southwestern flair, add bell peppers, jalapeños, and finish with fresh cilantro and lime zest. Mediterranean-inspired potatoes shine with rosemary, thyme, and a sprinkle of feta cheese in the last few minutes of cooking. My personal favorite variation came from a happy accident—I was out of regular onions and substituted leeks, then added a handful of grated Parmesan at the end. The result was so delicious that it’s now in my regular rotation! Don’t be afraid to experiment with whatever herbs and spices speak to your cravings.

    Storage & Troubleshooting Guide

    Keeping Leftovers Crispy

    While Cozy Skillet Fried Potatoes are best enjoyed fresh from the pan, leftovers can still be delicious with proper handling. Store them in an airtight container in the refrigerator for up to three days, but avoid stacking them if possible to preserve some crispiness. For reheating, skip the microwave which will make them soggy. Instead, spread them on a baking sheet and heat at 375°F for 10-12 minutes until hot and re-crisped. I’ve found adding a light drizzle of olive oil before reheating helps restore some of that fresh-cooked texture. For an extra flavor boost, sprinkle with fresh herbs after reheating.

    Troubleshooting Common Issues

    If your potatoes aren’t crisping properly, a few common culprits might be to blame. First, ensure your potatoes are completely dry before frying—excess moisture creates steam instead of that golden crust we’re after. Second, resist overcrowding the pan, as too many potatoes will lower the oil temperature and cause steaming. Work in batches if needed for a perfectly crispy result. If your potatoes are browning too quickly on the outside while staying raw inside, your heat is too high. Lower it slightly and cover the pan for a few minutes to help them cook through while maintaining that beautiful crust.

    Frequently Asked Questions

    What potatoes work best for skillet fried potatoes?

    Yukon Golds offer the perfect balance of waxy and starchy properties for crispy exteriors and creamy centers. Russets work well too, creating extra-crispy results with fluffy interiors.

    How do I ensure my potatoes get crispy?

    Dry your potatoes thoroughly after cutting, use enough oil in a hot skillet, avoid overcrowding, and resist stirring too frequently to allow a crust to form before flipping.

    Can I make cozy skillet fried potatoes ahead of time?

    While best fresh, you can par-cook them until almost done, then refrigerate. Finish by crisping in a hot skillet for 5-7 minutes just before serving.

    What’s the best fat for frying potatoes?

    A combination of butter and oil gives the best flavor and crisping potential. The butter provides rich flavor while oil allows for higher heat without burning.

    How can I add more flavor to my skillet potatoes?

    Try adding garlic powder, paprika, rosemary, thyme, or smoked paprika. For depth, include caramelized onions, bell peppers, or finish with fresh herbs and cheese.

    Final Thoughts

    These Cozy Skillet Fried Potatoes represent more than just a recipe—they’re a portal to comfort, connection, and countless happy memories around the table. The simple act of transforming humble potatoes into crispy, golden treasures has a way of making any meal feel special. Whether they’re accompanying your morning eggs or sitting alongside your evening roast, these potatoes bring warmth to the plate and heart alike. I hope you’ll make them part of your own cooking repertoire and discover the joy they bring. For more comforting recipes, follow me on Pinterest where I share my favorite cozy creations.

  • Irish Colcannon Potatoes: Creamy, Comfort Food You’ll Love!

    Irish Colcannon Potatoes: Creamy, Comfort Food You’ll Love!

    Irish Colcannon Potatoes: Creamy, Comfort Food You’ll Love!

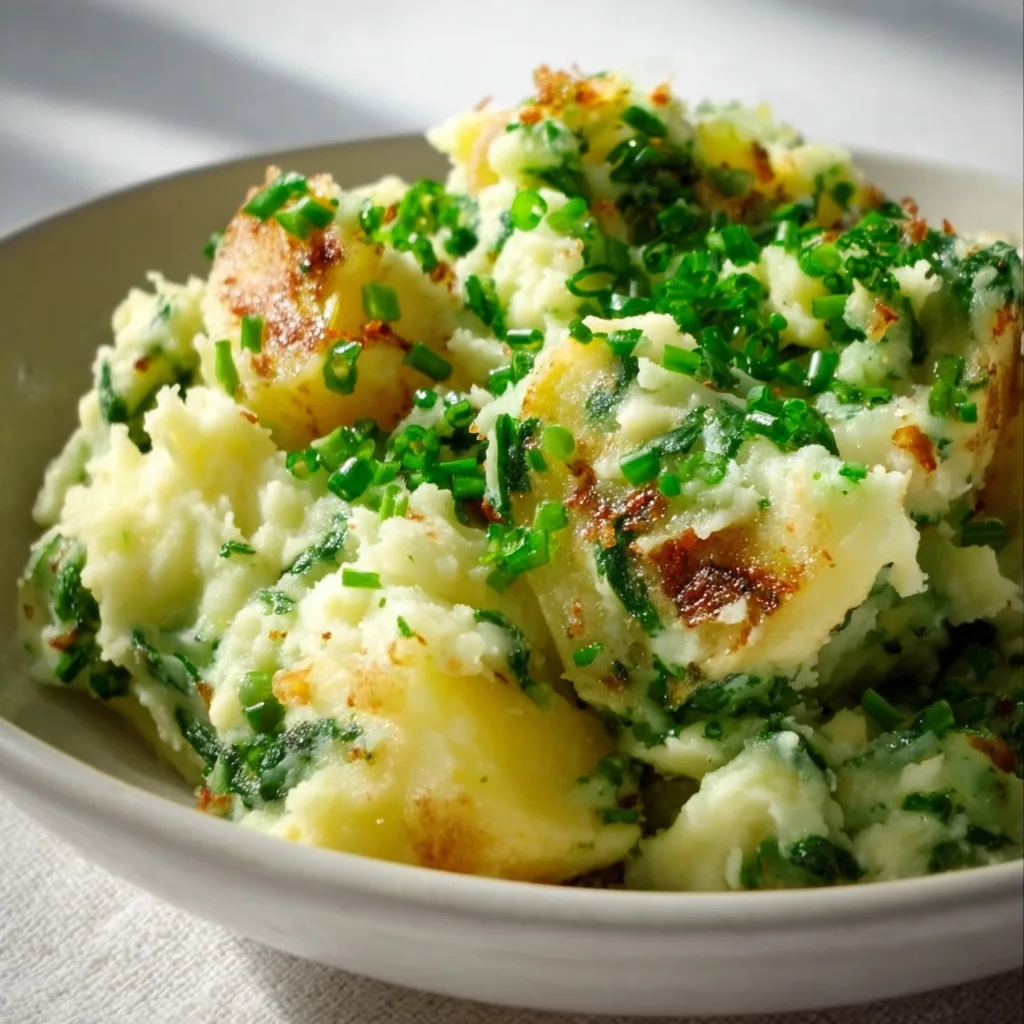
    Irish colcannon potatoes bring the heart of Ireland straight to your dinner table with their creamy, buttery goodness that feels like a warm hug on a chilly evening. The first time I made this traditional Irish dish, the aroma of sautéed cabbage and onions mingling with buttery mashed potatoes transported me straight to a cozy Dublin pub. There’s something magical about how simple ingredients transform into such a comforting side dish. Whether you’re celebrating St. Patrick’s Day or simply craving something hearty, these Irish potato-based delights will become your new comfort food obsession.

    Recipe

    Why You’ll Love This Irish Colcannon Potatoes

    A Perfect Balance of Textures and Flavors

    Colcannon is a beautiful marriage of creamy mashed potatoes and tender sautéed greens. The velvety smoothness of the potatoes creates the perfect backdrop for the slight crunch of cabbage and the subtle bite of green onions. I love how the butter melts into little pools that create pockets of richness throughout. The gentle peppery notes from the cabbage complement the earthy potatoes in a way that’s both familiar and exciting. It’s comfort food that doesn’t overwhelm your palate but rather soothes it with layers of subtle flavors that make you close your eyes with each bite.

    Simple Ingredients, Extraordinary Results

    What amazes me about colcannon is how it transforms humble ingredients into something extraordinary. You only need potatoes, cabbage (or kale), green onions, milk, butter, salt, and pepper. That’s it! I remember making this for my family during a snowstorm when grocery options were limited, and everyone raved about it. The magic happens in how these simple components interact—the starch from the potatoes creates a silky texture, while the greens add brightness and depth. It’s a testament to traditional Irish cooking, where necessity birthed dishes that are greater than the sum of their parts.

    Essential Tips & Tricks

    Choosing and Preparing Your Potatoes

    Selecting the right potatoes makes all the difference in your colcannon. Russets or Yukon Golds are ideal—they deliver that perfect fluffy-yet-creamy texture we’re after. I always leave the skins on for half my potatoes; it adds texture and nutrients. Start by cutting potatoes into even chunks (about 1.5 inches) so they cook uniformly. Salt your cooking water generously—it should taste like seawater. This seasons the potatoes from within rather than trying to add flavor after cooking. When they’re fork-tender, drain thoroughly but save a bit of the cooking water just in case your mash needs adjusting.

    The Perfect Mash Technique

    The secret to silky colcannon lies in the mashing technique. Warm your milk and butter together before adding to the potatoes—cold ingredients make for gluey results. I learned this the hard way at my first dinner party! Use a ricer for ultra-smooth results or a traditional masher for more texture. Never use a food processor or blender, which overworks the starches and creates a gummy mess. Fold in your sautéed cabbage gently rather than stirring vigorously. This preserves the texture contrast that makes colcannon so special. Finally, taste and adjust seasoning before serving—potatoes absorb salt readily.

    Serving Ideas & Creative Variations

    Traditional and Modern Serving Suggestions

    In Ireland, colcannon is traditionally served with a well of melted butter in the center—each person dips their forkful into this golden pool. It’s divine! For a complete meal, serve alongside corned beef, Irish bacon, or sausages. I love pairing it with my melt-in-your-mouth beef short ribs for special occasions. For a vegetarian option, top with a fried egg with a runny yolk that creates a luscious sauce. Don’t forget a sprinkle of fresh herbs like parsley or chives right before serving—that pop of green brightens both the plate and the flavors, making everything feel fresh and inviting.

    Exciting Flavor Twists

    While traditional colcannon is perfect as is, there are delightful ways to put your own spin on this classic dish. Try substituting kale, leeks, or spinach for the cabbage—each brings its own unique character. Add roasted garlic for depth, or fold in crispy bacon bits for a smoky element. My personal favorite twist is adding a handful of sharp Irish cheddar, which melts into pockets of savory goodness. For a fancy version, mix in some caramelized onions and a splash of Irish whiskey. You can even form leftover colcannon into patties and pan-fry them for crispy breakfast cakes that pair beautifully with eggs.

    Storage & Troubleshooting Guide

    Proper Storage and Reheating

    Colcannon stores beautifully, making it perfect for meal prep. Refrigerate leftovers in an airtight container for up to 3 days. The flavors actually develop overnight, making day-two colcannon sometimes even better! When reheating, add a splash of milk or a pat of butter to restore creaminess. I prefer gentle reheating in a covered dish in the oven at 325°F until warmed through, stirring halfway. Microwave reheating works too—just cover and stir halfway. For a crispy treat, form cold colcannon into patties and fry in butter until golden on both sides. Freezing is possible but may slightly alter the texture.

    Common Issues and Solutions

    Even experienced cooks occasionally encounter colcannon challenges. If your potatoes turn out gluey, you likely overworked them or used the wrong variety. Next time, use starchy potatoes and handle them minimally. Too dry? Simply warm a bit more butter and milk and fold in gently. Too wet? Return to low heat, stirring constantly to evaporate excess moisture. If your cabbage is tough, it needs more cooking time—it should be tender but not mushy. Bland results usually indicate insufficient salt or butter. Remember that potatoes absorb a surprising amount of seasoning, so taste and adjust before serving.

    Frequently Asked Questions

    Can I make Irish colcannon potatoes ahead of time?

    Yes! Prepare up to 2 days ahead, refrigerate covered, and reheat gently with a splash of milk and extra butter to refresh the texture and flavor.

    What’s the difference between colcannon and champ?

    Colcannon contains cabbage or kale, while champ features green onions only. Both are creamy mashed potato dishes from Ireland, but colcannon has more texture and complexity.

    Can I use something other than cabbage in colcannon?

    Absolutely! Kale, leeks, spinach, or Swiss chard all work beautifully. Each green brings its own flavor profile while maintaining the spirit of the dish.

    Is colcannon suitable for vegetarians?

    Yes, traditional colcannon is vegetarian when made with butter and milk. For a vegan version, substitute plant-based butter and milk with excellent results.

    What makes authentic Irish colcannon potatoes different from regular mashed potatoes?

    The integration of cooked cabbage or kale and the generous use of butter sets colcannon apart. The greens add texture and nutrition, while creating distinct flavor pockets throughout.

    Final Thoughts

    There’s something deeply satisfying about serving a dish of Irish colcannon potatoes that connects us to generations past. The way the steam rises, carrying the aroma of butter and cabbage, creates an instant feeling of home—regardless of your heritage. I find myself returning to this recipe throughout the year, not just on St. Patrick’s Day, because true comfort food knows no season. Whether you follow the traditional recipe or add your own creative twist, colcannon reminds us that extraordinary meals can come from the simplest ingredients. Find more cozy recipes on Pinterest.

  • Homemade Hawaiian Pizza Recipe That Will Blow Your Mind!

    Homemade Hawaiian Pizza Recipe That Will Blow Your Mind!

    Homemade Hawaiian Pizza Recipe That Will Blow Your Mind!

    Homemade Hawaiian pizza has been my guilty pleasure since college days, when I discovered the magic of sweet pineapple against savory ham on a bed of melty cheese. There’s something about that perfect balance of tangy and savory that makes this controversial pizza style an absolute winner in my kitchen. I still remember the first time I made it from scratch—my tiny apartment filled with the aroma of baking dough while rain pattered against the windows. Whether you’re team pineapple or a curious skeptic, this homemade Hawaiian pizza recipe might just convert you! Let’s create a pizza that would make even the pickiest eaters smile.

    Recipe

    Why You’ll Love This Homemade Hawaiian Pizza

    Perfect Sweet-Savory Balance

    The magic of homemade Hawaiian pizza lies in its perfect flavor harmony. The sweetness of juicy pineapple chunks plays beautifully against salty ham and tangy tomato sauce. I find using fresh pineapple rather than canned makes a world of difference—it caramelizes slightly in the oven, creating little pockets of tropical sweetness. The key is balancing your toppings; too much pineapple overwhelms, while too little leaves you wanting. My trick? Pat the pineapple pieces dry before adding them to prevent a soggy crust. The result is a pizza with distinct flavor zones that dance across your palate with each bite.

    Customizable Family Favorite

    Making homemade Hawaiian pizza turns dinner into an event everyone can participate in. My niece loves arranging pineapple pieces into smiley faces, while my brother insists on extra cheese around the edges. The beauty is how infinitely adaptable this pizza can be. Swap traditional ham for Canadian bacon, prosciutto, or even bacon bits. Add jalapeños for heat, red onions for sharpness, or drizzle with hot honey after baking. For a vegetarian version, substitute ham with roasted red peppers or plant-based alternatives. This flexibility makes homemade Hawaiian pizza perfect for family pizza nights where everyone gets to customize their portion.

    Essential Tips & Tricks

    Dough Perfection

    The foundation of any great homemade Hawaiian pizza is the perfect crust. I prefer a medium-thickness dough that supports the toppings while maintaining a crisp bottom and chewy interior. Let your dough come to room temperature before stretching—cold dough springs back stubbornly. For that authentic pizzeria flavor, brush the edges with olive oil mixed with a touch of garlic powder before baking. If you’re short on time, quality store-bought dough works wonderfully too. My secret weapon is a preheated pizza stone or steel, which mimics the intense heat of professional ovens. This creates that coveted crisp bottom that prevents sogginess from the pineapple’s moisture.

    Topping Strategy

    When assembling your homemade Hawaiian pizza, layering technique matters more than you might think. Start with a thin layer of sauce—too much creates a soupy center. Next, add a base layer of cheese, followed by ham, then another light cheese sprinkle. Place pineapple pieces last, which allows them to caramelize beautifully. For extra flavor, try sprinkling some crushed red pepper flakes between layers for a gentle heat that complements the sweetness. Remember that less is more with toppings—overcrowding leads to uneven cooking and a soggy middle. I always set aside extra pineapple for snacking while the pizza bakes!

    Serving Ideas & Creative Variations

    Perfect Pairings

    Homemade Hawaiian pizza shines brightest with thoughtful accompaniments. I love serving it with a crisp green salad dressed simply with lemon and olive oil—the brightness cuts through the pizza’s richness beautifully. For gatherings, pair with garlic knots or cheesy breadsticks for a complete feast. Beverage-wise, a cold IPA or fruity rosé complements the sweet-savory profile, while pineapple soda offers a fun, alcohol-free alternative that echoes the tropical notes. For dessert, keep the island vibes going with coconut ice cream. I’ve found that serving the pizza on a wooden board with fresh basil scattered over the top adds a restaurant-quality presentation that elevates the whole experience.

    Global Hawaiian Twists

    Take your homemade Hawaiian pizza on a world tour by incorporating international flavors. For a Korean-inspired version, replace tomato sauce with gochujang and top with kimchi alongside the pineapple and ham. A Mexican variation using salsa verde, chorizo instead of ham, and finishing with fresh cilantro creates a fiesta of flavors. My personal favorite is a Caribbean twist with jerk-seasoned chicken replacing the ham, mango joining the pineapple, and a light coconut-infused sauce base. These creative variations maintain the sweet-savory spirit of traditional Hawaiian pizza while introducing exciting new flavor profiles that keep this controversial classic feeling fresh and innovative.

    Storage & Troubleshooting Guide

    Leftover Magic

    Homemade Hawaiian pizza makes excellent leftovers when stored properly. Cool completely before refrigerating to prevent condensation that leads to sogginess. Rather than stacking slices, place them in a single layer in an airtight container, or wrap individually in foil. They’ll keep for up to 3 days. For reheating, skip the microwave which makes the crust chewy. Instead, use a skillet over medium-low heat with a lid to melt the cheese while crisping the bottom, or a 350°F oven for 5-7 minutes. My favorite leftover hack? Chop cold pizza into bite-sized pieces and toss into scrambled eggs for an incredible breakfast that transforms yesterday’s dinner into today’s morning treat.

    Troubleshooting Common Issues

    Even experienced bakers encounter challenges with homemade Hawaiian pizza. If your crust turns out soggy, the likely culprit is excess moisture from the pineapple. Next time, thoroughly drain and pat dry your pineapple, or pre-roast it for 10 minutes to remove excess moisture. For a crust that’s too dense or tough, you might be overworking the dough—handle it gently and allow proper rising time. If cheese browns too quickly before the crust is done, start with the pizza on a lower rack and move it up for the final few minutes. And for those dreaded “topping slides” where everything shifts to one side when cutting, let your pizza rest 3-5 minutes after baking to allow the cheese to set.

    Frequently Asked Questions

    Is fresh or canned pineapple better for homemade Hawaiian pizza?

    Fresh pineapple offers superior flavor and caramelizes beautifully. However, canned works in a pinch—just drain thoroughly and pat dry to prevent soggy crust. I recommend fresh for special occasions and canned for convenience.

    Can I make homemade Hawaiian pizza dough ahead of time?

    Absolutely! Make dough up to 3 days ahead and refrigerate. The slow fermentation actually improves flavor. Bring to room temperature for 1-2 hours before stretching for best results.

    What cheese works best for authentic homemade Hawaiian pizza?

    Traditional mozzarella provides that classic stretch, but I love a blend—80% low-moisture mozzarella with 20% provolone or mild cheddar adds complexity while maintaining meltability.

    How can I prevent my Hawaiian pizza crust from getting soggy?

    Pre-bake your crust for 3-4 minutes before adding toppings. Also, thoroughly drain pineapple, use a moderate amount of sauce, and consider a thin layer of cheese beneath the toppings as a moisture barrier.

    Why do some people dislike pineapple on homemade Hawaiian pizza?

    The controversy stems from mixing sweet fruit with savory elements. Texture differences and temperature contrasts can be divisive. But balanced properly, homemade Hawaiian pizza showcases how opposing flavors can create something magical!

    Final Thoughts

    Creating the perfect homemade Hawaiian pizza is about embracing that delicious tension between sweet and savory. There’s something wonderfully rebellious about loving this controversial pizza style—it’s a reminder that food should be fun, personal, and occasionally divisive! Whether you’re a lifelong fan or a recent convert, homemade Hawaiian pizza brings tropical vibes to your table any day of the week. I hope you’ll share your creations with me on Pinterest and experiment with your own signature touches. The pizza world is divided, but in my kitchen, pineapple will always have a place of honor atop a perfectly cheesy slice.

  • Homemade Chicken Ramen Recipe That Will Warm Your Soul Fast!

    Homemade Chicken Ramen Recipe That Will Warm Your Soul Fast!

    Homemade Chicken Ramen Recipe That Will Warm Your Soul Fast!

    There’s something magical about a steaming bowl of homemade chicken ramen that soothes the soul like nothing else. The first time I made this from scratch, I stood over my stovetop watching the broth transform from simple ingredients into liquid gold, and I knew I’d never go back to those little packets again. This isn’t just soup—it’s a hug in a bowl, with tender chicken, bouncy noodles, and that rich, umami broth that makes you close your eyes with each spoonful. Whether it’s a chilly evening or you’re just craving something deeply satisfying, this ramen will transport you straight to comfort heaven. Ready to create your own bowl of bliss? Let’s dive in!

    Recipe

    Why You’ll Love This Homemade Chicken Ramen

    Depth of Flavor Without Complexity

    The beauty of this homemade chicken ramen lies in its deceptive simplicity. You don’t need a culinary degree to create layers of flavor—just a few key ingredients working their magic together. The chicken bones slowly release their goodness into the broth, while ginger, garlic, and green onions create an aromatic foundation. I love how a splash of soy sauce and a touch of mirin transform ordinary chicken stock into something extraordinary. What might seem intimidating at first becomes an intuitive dance of taste and texture that anyone can master.

    Customizable to Your Taste Buds

    One of my favorite things about making ramen at home is that it becomes your creation. Like it spicy? Add a dollop of chili oil or a sprinkle of togarashi. Craving extra umami? Drop in some dried shiitake mushrooms or a spoonful of miso paste. The toppings bar is where the real fun happens—soft-boiled eggs with jammy centers, crispy garlic chips, fresh herbs, or thinly sliced radishes. My husband prefers his loaded with extra chicken and scallions, while I pile on the vegetables and a drizzle of sesame oil. The possibilities are endless!

    Essential Tips & Tricks

    Building the Perfect Broth

    The soul of ramen is undeniably its broth. For maximum flavor, start with chicken wings or backs—their high collagen content creates that silky mouthfeel we all crave. Don’t rush this step! A gentle simmer for at least 2-3 hours allows all those complex flavors to develop without becoming cloudy. I learned the hard way that boiling too vigorously leaves you with a murky broth. For an extra flavor boost, char your onions and ginger in a dry pan before adding them to the pot. This simple step adds a subtle smokiness that elevates the entire dish.

    Noodle Know-How

    Selecting the right ramen noodles makes all the difference between good and exceptional ramen. Fresh noodles are ideal with their springy texture, but quality dried versions work beautifully too. The key is cooking them separately from your broth and slightly underdone—they’ll continue cooking when you add the hot broth. If you’re feeling adventurous, try making homemade noodles like in my Italian Herbs and Cheese Bread recipe (the technique transfers well!). Always rinse cooked noodles under cold water to stop the cooking process and prevent them from getting gummy.

    Serving Ideas & Creative Variations

    Family-Style Ramen Bar

    Transform dinner into an interactive experience with a DIY ramen bar. Set out bowls of pre-cooked noodles, steaming broth, and an array of toppings. Everyone builds their perfect bowl, making it ideal for picky eaters or dinner parties. My niece and nephew went from “what’s this weird soup?” to requesting “ramen night” every time they visit. Include options like corn, bean sprouts, sliced pork belly, bamboo shoots, and various oils and sauces. It’s similar to how I set up my Chicken Fajitas Bowl with Rice bar—endlessly customizable!

    Seasonal Ramen Variations

    Adapt your homemade chicken ramen to celebrate the seasons. Summer calls for lighter broths with fresh corn, tomatoes, and herbs like basil or cilantro. Fall ramen shines with roasted kabocha squash, mushrooms, and a drizzle of chili oil. Winter versions benefit from hearty additions like slow-cooked chicken thighs and root vegetables. Spring ramen comes alive with tender asparagus, peas, and a squeeze of lemon. I love watching how the same base recipe transforms throughout the year, reflecting what’s fresh and available—it never gets boring!

    Storage & Troubleshooting Guide

    Storing Components Separately

    The secret to leftover ramen that tastes just as amazing the next day? Store everything separately! The broth can be refrigerated for up to 4 days or frozen for 3 months in airtight containers. Cooked noodles should be rinsed with cold water, tossed with a tiny bit of oil to prevent sticking, and stored separately—they’ll last 2-3 days in the refrigerator. Keep toppings in individual containers as well. When ready to enjoy, simply reheat the broth until boiling, warm the noodles briefly in hot water, and assemble your bowl with desired toppings.

    Fixing Common Ramen Problems

    Even experienced cooks encounter ramen challenges! If your broth lacks depth, try adding a piece of kombu (dried kelp) or a tablespoon of white miso paste during the last 30 minutes of simmering. Cloudy broth? Next time, maintain a gentler simmer and skim impurities more frequently. Noodles too soft? Remember to cook them separately and slightly undercooked. Broth too salty? Dilute with unsalted chicken stock or water, then balance with a few drops of rice vinegar. I once rescued an overly salty batch by adding a potato chunk during reheating—it absorbed the excess salt beautifully!

    Frequently Asked Questions

    Can I make homemade chicken ramen ahead of time?

    Absolutely! Prepare the broth up to 3 days ahead or freeze it for 3 months. Store noodles and toppings separately, then assemble just before serving for the freshest experience.

    What’s the best substitute for mirin?

    Mix 1 tablespoon rice vinegar with 1 teaspoon sugar as a quick substitute. Dry sherry or sweet marsala wine also work well in a pinch.

    Can I use rotisserie chicken for homemade chicken ramen?

    Yes! Shred the meat for topping and simmer the bones in your broth for added flavor. It’s a fantastic shortcut that still delivers great results.

    How do I make my ramen broth more flavorful?

    Try adding roasted chicken bones, dried mushrooms, kombu, or a touch of miso paste. Charring your aromatics before adding them to the broth also enhances depth.

    Is homemade chicken ramen healthy?

    It can be! Control sodium by making your own broth, load up on vegetables, use lean protein, and choose whole grain noodles for a nutritious, balanced meal.

    Final Thoughts

    Creating homemade chicken ramen from scratch might seem like a project, but it’s really a journey worth taking. There’s something deeply satisfying about transforming simple ingredients into something so nourishing and complex. The first time you serve this to friends or family and watch their faces light up with that first spoonful, you’ll understand why I’m so passionate about this dish. So put on your favorite music, set aside a lazy afternoon, and give yourself the gift of this culinary adventure. Your taste buds—and anyone lucky enough to share your table—will thank you! Don’t forget to check out more cozy recipes on Pinterest.

  • Southern Fried Cabbage With Shrimp: Irresistible Southern Comfort Feast!

    Southern Fried Cabbage With Shrimp: Irresistible Southern Comfort Feast!

    Southern Fried Cabbage With Shrimp: Irresistible Southern Comfort Feast!

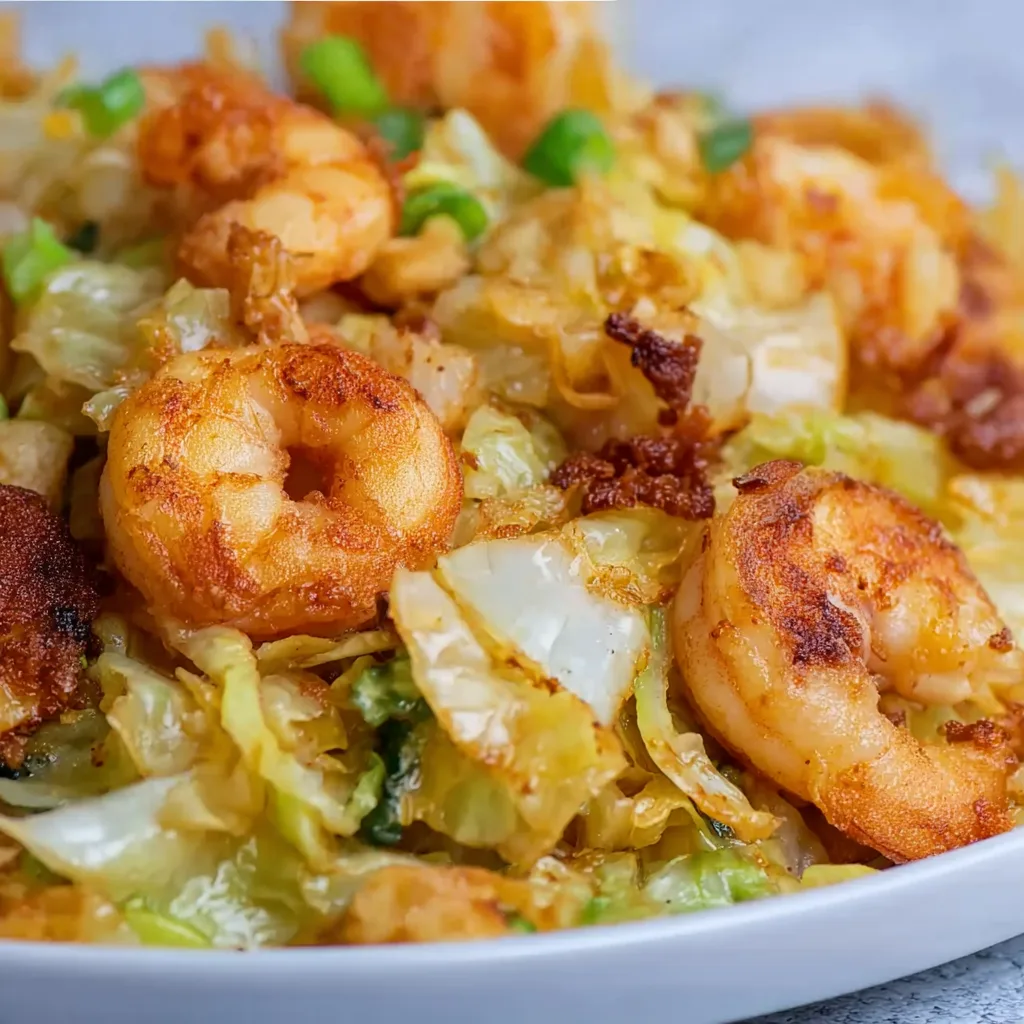
    Southern Fried Cabbage With Shrimp is one of those soul-warming dishes that instantly transports me back to my grandmother’s kitchen, where the aroma of bacon and spices would fill the air. This classic Southern comfort food combines tender cabbage, savory bacon, and plump shrimp for a one-pan wonder that’s both satisfying and surprisingly simple. I’ve been perfecting this recipe for years, and trust me when I say it strikes that perfect balance between hearty and fresh. If you’re looking for a taste of Southern comfort with a seafood twist, you’ll find yourself making this ranch chicken veggie soup next!

    Recipe

    Why You’ll Love This Southern Fried Cabbage With Shrimp

    A Perfect Balance of Flavors and Textures

    There’s something magical about the way the ingredients in Southern Fried Cabbage With Shrimp come together. The cabbage absorbs all the flavors while maintaining a slight crunch, the bacon adds that irresistible smokiness, and the shrimp brings a delicate sweetness that elevates the entire dish. I remember the first time I made this for my family—my husband, who typically wrinkles his nose at cabbage, went back for seconds! The subtle heat from cayenne pepper and the richness from butter create a depth that makes this humble dish feel special enough for company.

    Quick, Budget-Friendly Comfort Food

    What I adore about this dish is how it transforms affordable ingredients into something extraordinary. On busy weeknights when I’m tempted to order takeout, I remind myself that this one-pan meal comes together in under 30 minutes. The cabbage stretches the protein, making it economical while still feeling indulgent. My mom always said good Southern cooking is about making the most of what you have, and this recipe embodies that philosophy perfectly. Plus, the leftovers taste even better the next day as the flavors continue to meld together.

    Essential Tips & Tricks

    Perfecting Your Cabbage Texture

    The secret to amazing Southern Fried Cabbage With Shrimp lies in how you treat the cabbage. Start by slicing it consistently – not too thick (it won’t cook evenly) and not too thin (it’ll turn mushy). I aim for about ¼-inch ribbons. Don’t rush the cooking process; allow the cabbage to soften gradually over medium heat, stirring occasionally. This patience pays off with cabbage that’s tender but still has a pleasant bite. I learned the hard way that high heat creates bitter cabbage, while the gentle approach preserves its natural sweetness and lets it soak up all those amazing bacon drippings.

    Shrimp Cooking Technique

    Nothing ruins this dish faster than overcooked, rubbery shrimp. I always add them at the very end of cooking, when the cabbage is nearly done. Medium-sized shrimp (21-25 count) work perfectly and take just 2-3 minutes to turn pink and opaque. A little tip I picked up from a chef friend: pat your shrimp dry before adding them to the pan to prevent excess moisture that could steam rather than sauté them. This technique works beautifully for other seafood dishes too, like these baked lobster tails with garlic butter that make any meal feel special.

    Serving Ideas & Creative Variations

    Perfect Pairings for a Complete Meal

    Southern Fried Cabbage With Shrimp is versatile enough to stand alone as a one-pot meal, but I love serving it with cornbread to soak up the flavorful juices. For a heartier dinner, pair it with fluffy rice or creamy grits – the contrast of textures is divine! When I’m hosting Sunday dinner, I’ll add a side of collard greens and maybe some mac and cheese for a true Southern feast. The slight acidity of a simple tomato and cucumber salad also complements the richness beautifully. My grandmother always insisted on serving it with a tall glass of sweet tea – and grandmothers are rarely wrong about these things!

    Regional and Seasonal Adaptations

    The beauty of this dish is how easily it adapts to what’s available. In summer, I’ll add fresh sweet corn kernels for a pop of sweetness. During crawfish season, I sometimes substitute crawfish tails for shrimp – a Louisiana twist my New Orleans friend taught me. For a Low Country boil flavor profile, add sliced andouille sausage along with the shrimp and a sprinkle of Old Bay seasoning. Vegetarians in the family? Skip the bacon and shrimp and use smoked paprika and mushrooms for that umami depth. This adaptability reminds me of my chicken cheese steak sandwiches that welcome creative variations while maintaining their comforting essence.

    Storage & Troubleshooting Guide

    Proper Storage for Maximum Freshness

    This Southern Fried Cabbage With Shrimp keeps beautifully when stored properly. Allow leftovers to cool completely before transferring to an airtight container. In the refrigerator, it maintains its quality for up to 3 days. When reheating, add a splash of chicken broth to restore moisture, and warm gently over medium-low heat. I find the microwave works in a pinch, but the stovetop method preserves the texture better. If you’re meal prepping, consider keeping the cooked shrimp separate and adding them only during reheating to prevent them from becoming tough and chewy.

    Fixing Common Issues

    Even experienced cooks occasionally encounter challenges. If your cabbage releases too much liquid, simply increase the heat temporarily to evaporate excess moisture. For cabbage that’s too crunchy, cover the pan for a few minutes to steam it slightly. If the dish lacks flavor, don’t just reach for salt – try a splash of apple cider vinegar or hot sauce to brighten it up. Shrimp turning rubbery? They’re overcooked – next time, remove the pan from heat slightly earlier, as residual heat continues cooking them. Remember that cabbage shrinks dramatically during cooking, so what might seem like too much at first will reduce to the perfect portion.

    Frequently Asked Questions

    Can I use frozen shrimp for Southern Fried Cabbage With Shrimp?

    Yes! Thaw frozen shrimp completely in the refrigerator overnight or under cold running water. Pat them dry thoroughly before adding to prevent excess moisture that could make your dish watery.

    What type of cabbage works best for this recipe?

    Green cabbage is traditional and holds up well to cooking. Red cabbage can work but will change the color of the dish. Savoy cabbage offers a more delicate texture if you prefer that.

    Can I make this dish ahead of time?

    You can prepare the cabbage portion up to a day ahead. When ready to serve, reheat the cabbage and add freshly cooked shrimp at the last minute for the best texture.

    Is this dish spicy?

    The heat level is adjustable. Traditional Southern Fried Cabbage With Shrimp has a mild kick from cayenne or hot sauce, but you can increase or decrease according to your preference.

    What can I substitute for bacon?

    Smoked turkey wings, ham hocks, or even smoked paprika can provide that smoky flavor if you don’t eat pork. For a lighter version, use turkey bacon or olive oil with a dash of liquid smoke.

    Final Thoughts

    Southern Fried Cabbage With Shrimp represents the heart of comfort food cooking—simple ingredients transformed through love and technique into something truly special. I find myself returning to this recipe whenever I need that warm, soul-satisfying meal that connects me to my Southern roots. The way the humble cabbage soaks up the flavors of bacon and spices, complemented by tender shrimp, creates a dish greater than the sum of its parts. Don’t forget to check out more Southern-inspired recipes on Pinterest for your next comfort food craving!

  • French Onion Short Rib Soup with Gruyere Toast – Cozy Comfort Magic!

    French Onion Short Rib Soup with Gruyere Toast – Cozy Comfort Magic!

    French Onion Short Rib Soup with Gruyere Toast – Cozy Comfort Magic!

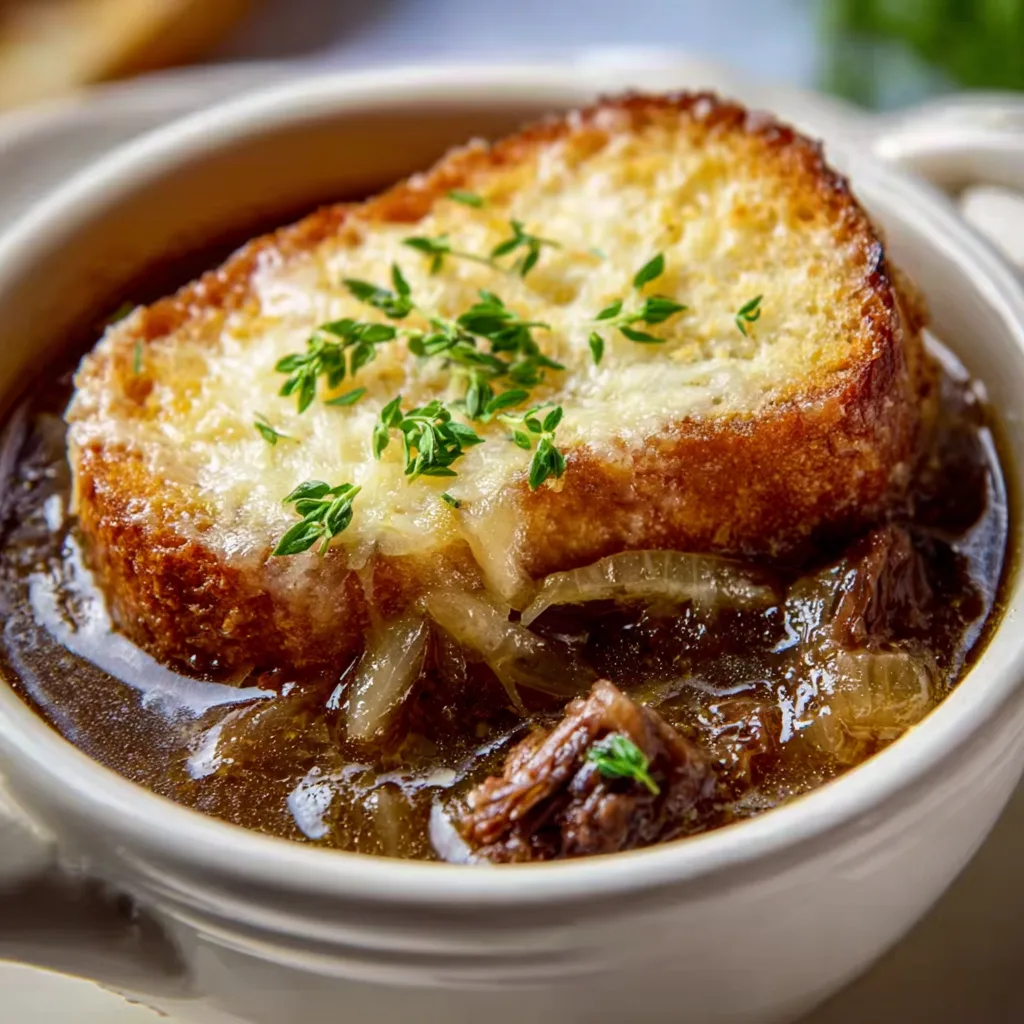
    French Onion Short Rib Soup With Gruyere Toast is the ultimate comfort food marriage – combining the rich, savory depth of slow-cooked short ribs with the classic caramelized sweetness of French onion soup. The first time I made this on a snowy Sunday afternoon, my kitchen filled with an aroma so intoxicating that my neighbor actually texted to ask what I was cooking! There’s something magical about the way the meltingly tender beef mingles with those deeply caramelized onions, all topped with that signature crusty, cheese-smothered toast that makes this dish absolutely irresistible. It’s rustic elegance in a bowl.

    Recipe

    Why You’ll Love This French Onion Short Rib Soup With Gruyere Toast

    Rich Layers of Flavor

    This soup is a flavor powerhouse that builds with each spoonful. The bone-in short ribs release their collagen as they slow-cook, creating a velvety, rich broth that’s impossible to replicate with regular beef cuts. I love watching my guests’ expressions when they take that first bite – there’s always this moment of wide-eyed surprise at the depth of flavor. The sweet caramelized onions provide the perfect counterpoint to the savory meat, while fresh thyme and a splash of good red wine add complexity that makes this soup feel truly special. It’s comfort food elevated to dinner party status.

    Make-Ahead Convenience

    One of the reasons I keep coming back to this recipe is its make-ahead magic. The flavors actually improve when made a day in advance, making it perfect for entertaining without the last-minute kitchen scramble. I’ve served this at three dinner parties this winter, and each time I’ve been able to join my guests for appetizers instead of being stuck in the kitchen. The short ribs become even more tender overnight, and the broth develops an even richer character. Just reheat gently and prepare your Gruyere toasts fresh before serving for that perfect cheese-pull moment everyone loves.

    Essential Tips & Tricks

    Mastering the Onion Caramelization

    The secret to exceptional French onion short rib soup lies in properly caramelizing the onions. This isn’t a step to rush – I dedicate a full 45 minutes to this process alone. Use a heavy-bottomed Dutch oven and keep the heat medium-low to avoid burning. I like to add a pinch of sugar about halfway through to encourage browning and a splash of balsamic vinegar in the final minutes for depth. The patience pays off when those onions transform from sharp and pungent to meltingly sweet with complex caramel notes. This foundation builds the signature flavor that makes this soup so crave-worthy.

    Choosing the Right Cheese Blend

    While traditional Gruyere is non-negotiable for authentic flavor, I’ve found that creating a cheese blend elevates these toasts to extraordinary. I use 80% aged Gruyere for its nutty depth and 20% young fontina for superior meltability. Grate the cheese fresh rather than buying pre-shredded for the best texture and flavor release. For an extra flavor boost, rub each toast with a peeled garlic clove before adding cheese. If you’re looking for another delicious cheesy option, my Chicken Cheese Steak Sandwiches use a similar technique that works wonderfully.

    Serving Ideas & Creative Variations

    Perfect Pairings

    This hearty soup deserves thoughtful accompaniments to create a balanced meal. I love serving it with a crisp green salad dressed simply with lemon and olive oil to cut through the richness. A small board of cornichons, grainy mustard, and thinly sliced apples provides welcome brightness. For wine, choose something with enough structure to stand up to the beef – a medium-bodied Côtes du Rhône or Rioja works beautifully. If you’re looking for another cozy soup option to serve alongside, my Ranch Chicken Veggie Soup offers a lighter counterpoint.

    Seasonal Adaptations

    This soup welcomes seasonal variations that keep it exciting year-round. In spring, I add fresh peas and tender asparagus tips in the final minutes of cooking. Summer calls for a handful of sweet cherry tomatoes and fresh basil. Fall is perfect for adding roasted mushrooms and a touch of cognac, while winter welcomes root vegetables like parsnips and turnips added with the short ribs. The base recipe remains the same, but these thoughtful additions help the soup evolve with your seasonal produce and cravings.

    Storage & Troubleshooting Guide

    Proper Storage Techniques

    To maintain the soup’s quality, cool completely before refrigerating in airtight containers for up to 3 days. The fat will rise and solidify on top – don’t remove this until reheating as it forms a natural seal that preserves flavor. For longer storage, portion the soup (without the toast) into freezer-safe containers, leaving an inch of headspace for expansion. It freezes beautifully for up to 3 months. Always thaw overnight in the refrigerator and reheat gently on the stovetop, adding a splash of fresh broth if needed to adjust consistency.

    Troubleshooting Common Issues

    If your soup seems too greasy, refrigerate it first, then remove the solidified fat layer before reheating. For soup that’s too thin, simmer uncovered for 15-20 minutes to reduce, or create a beurre manié by kneading equal parts butter and flour together, then whisk small amounts into the simmering soup until desired thickness is reached. If your Gruyere toast becomes soggy too quickly, toast the bread more thoroughly before adding cheese, or serve the toast on the side, allowing guests to add it to their bowls just before eating.

    Frequently Asked Questions

    Can I make French Onion Short Rib Soup in a slow cooker?

    Yes! Brown the short ribs and caramelize onions on the stovetop first, then transfer to a slow cooker with remaining ingredients. Cook on low for 7-8 hours until meat falls off the bone. Prepare Gruyere toasts separately.

    What can I substitute for Gruyere cheese?

    Swiss cheese is the closest substitute. Comté, Emmental, or a combination of provolone and parmesan will also work, though each offers slightly different flavor profiles and melting qualities.

    Can I use boneless short ribs instead?

    Yes, boneless short ribs work well but won’t contribute as much richness to the broth. Reduce cooking time by about 30 minutes and consider adding 1-2 cups beef bone broth for depth.

    How do I know when the short ribs are done?

    Short ribs are perfectly cooked when the meat easily pulls away from the bone with light pressure from a fork. They should be tender but not falling apart completely.

    What’s the best bread for the Gruyere toast on French Onion Short Rib Soup?

    Use a sturdy artisan bread like sourdough or French baguette cut ½-inch thick. The bread should be substantial enough to hold up when placed on the soup without immediately disintegrating.

    Final Thoughts

    French Onion Short Rib Soup With Gruyere Toast represents comfort food at its finest – a dish that nourishes both body and soul with every spoonful. There’s something deeply satisfying about transforming humble ingredients into something so extraordinarily delicious through time and technique. I hope this recipe brings the same warmth to your home that it has to mine. For more cozy recipes perfect for any season, visit our collection on Pinterest. This soup reminds us that good things come to those who wait – and this one is absolutely worth waiting for.