Author: Jessica Moore

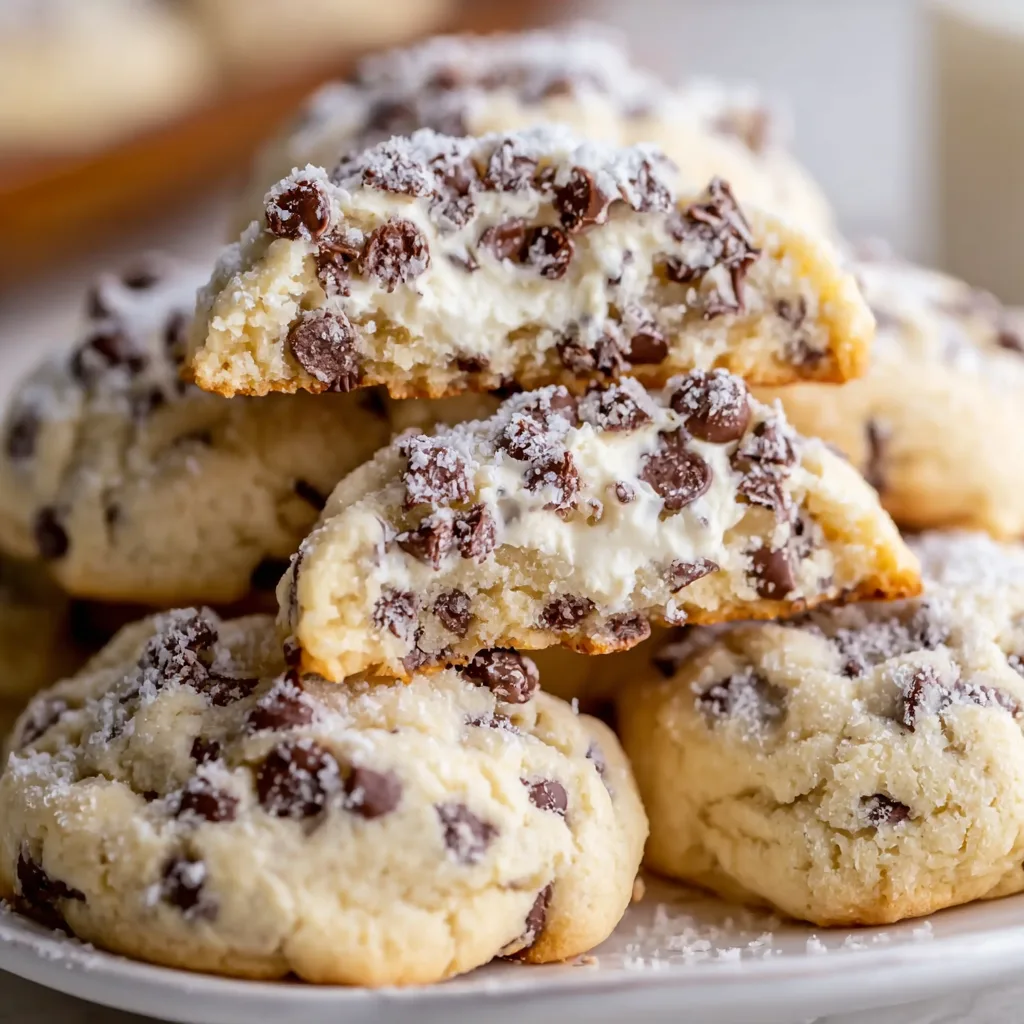
  • Soft Chocolate Chip Cream Cheese Cookies | Irresistibly Soft & Gooey!

    Soft Chocolate Chip Cream Cheese Cookies | Irresistibly Soft & Gooey!

    Soft Chocolate Chip Cream Cheese Cookies | Irresistibly Soft & Gooey!

    Soft Chocolate Chip Cream Cheese Cookies are the ultimate comfort treat that combines the best of both worlds – the familiar warmth of chocolate chip cookies with the rich tanginess of cream cheese. The first time I made these for my family, I watched as everyone’s eyes widened with that first pillowy bite. There’s something magical about how the cream cheese transforms the texture, creating cookies that stay impossibly soft for days. If you’re tired of cookies that harden overnight, this recipe will become your new secret weapon. These treats remind me of those cozy Sunday afternoons when baking something special turns an ordinary day into a memory worth keeping.

    Recipe

    Why You’ll Love These Soft Chocolate Chip Cream Cheese Cookies

    Perfect Texture That Lasts

    The cream cheese magic in these cookies creates a texture that’s unlike any other cookie you’ve tried. Each bite offers a tender, almost cake-like center with just enough structure to hold together beautifully. What I adore most is how they maintain that fresh-baked softness for days – no more rock-hard cookies by morning! The slight tanginess from the cream cheese balances the sweetness perfectly, while creating natural moisture that keeps these treats irresistibly soft. I’ve converted even the crunchiest cookie lovers with this recipe.

    Simple Ingredients, Extraordinary Results

    What makes these cookies special is how they transform everyday pantry staples into something extraordinary. The ingredient list is refreshingly simple – cream cheese, butter, sugar, flour, and chocolate chips form the backbone of this recipe. Nothing fancy or hard to find! I love that I can whip these up on a whim without a special trip to the store. The magic happens in how these basic ingredients interact – the cream cheese acts as both a flavor enhancer and a softening agent that elevates these cookies beyond the ordinary chocolate chip cookie experience.

    Essential Tips & Tricks

    Mastering the Mixing Method

    The room temperature ingredients are absolutely non-negotiable for these cookies. Cold cream cheese will leave you with lumps and uneven texture. I learned this the hard way when I impatiently tried to rush the process! Let your cream cheese and butter sit out for at least an hour before beginning. When creaming them together, watch for that moment when the mixture becomes light and fluffy – it should look almost whipped. This creates air pockets that give your cookies their perfect rise and texture, similar to how it works in my Cinnamon Roll Cookies.

    The Chilling Secret

    Don’t skip the dough chilling step, even when temptation strikes! I know it’s hard to wait when cookie cravings hit, but those 30 minutes in the refrigerator are transformative. Chilling solidifies the fats, preventing over-spreading and creating that perfect dome shape. It also allows the flavors to meld together beautifully. I’ve found that forming the dough balls before chilling saves time and creates more uniform cookies. For extra insurance against flat cookies, I sometimes chill the shaped dough balls on the baking sheets right before they go into the oven.

    Serving Ideas & Creative Variations

    Perfect Pairings for Any Occasion

    These soft treasures deserve to be showcased properly! For casual snacking, stack them on a rustic wooden board with some fresh berries for a beautiful contrast. When serving for guests, I love creating cookie sandwiches by adding a scoop of vanilla ice cream between two cookies – the cold creaminess against the soft cookie is divine! For holiday gifting, package them in parchment-lined tins with a ribbon. They pair wonderfully with coffee, milk, or even a dessert wine. For a complete dessert spread, serve alongside my Tuxedo Cake Triple Chocolate Mousse Cake for chocolate lovers.

    Creative Twists on the Classic

    The versatile base of these cream cheese cookies invites endless variations. Try swapping the chocolate chips for white chocolate and adding dried cranberries for a festive twist. Citrus lovers can add orange or lemon zest to the dough for a bright flavor contrast. For a decadent version, stuff each dough ball with a small piece of caramel or Nutella before baking – the molten center is absolutely worth the extra step! I’ve even added cinnamon and a touch of cayenne for a Mexican hot chocolate inspired version that’s unexpectedly delightful.

    Storage & Troubleshooting Guide

    Keeping That Fresh-Baked Softness

    The airtight container is your best friend for maintaining that signature softness. Store cookies at room temperature with a slice of bread to add moisture – this old baker’s trick works wonders! They’ll stay perfectly soft for up to 5 days, though they rarely last that long in my house. For longer storage, these cookies freeze beautifully for up to 3 months. I like to freeze individual cookie dough balls on a tray, then transfer to a freezer bag – this way, I can bake just a few whenever a craving strikes, adding just 2-3 minutes to the baking time.

    If your cookies spread too much, your butter was likely too warm or you didn’t chill the dough long enough. Pop the remaining dough in the freezer for 10 minutes before continuing. For cookies that don’t spread enough, try gently flattening the dough balls before baking. If your cookies brown too quickly, your oven may run hot – use an oven thermometer to check the actual temperature and try lowering it by 25°F. For cookies that seem too pale, you can brush the tops with a beaten egg before baking for a beautiful golden shine.

    Frequently Asked Questions

    Can I use low-fat cream cheese for Soft Chocolate Chip Cream Cheese Cookies?

    Full-fat cream cheese provides the best texture and moisture. Low-fat versions contain more water and less fat, potentially making your cookies spread too much and lose that signature softness.

    How do I know when these cookies are done baking?

    Look for slightly golden edges while the centers still appear soft and slightly underbaked. They’ll continue cooking on the hot baking sheet after removal from the oven.

    Can I make the dough ahead of time?

    Absolutely! The dough can be refrigerated for up to 3 days or frozen for 3 months. If frozen, thaw overnight in the refrigerator before baking.

    What makes these cookies stay soft longer than regular chocolate chip cookies?

    The cream cheese adds fat and moisture while reducing the protein content compared to an all-butter cookie, resulting in a tender texture that resists drying out.

    Why did my cookies turn out cakey instead of chewy?

    You might have used too much flour. Try measuring flour by spooning it into measuring cups rather than scooping directly from the container, which compacts it.

    Final Thoughts

    These Soft Chocolate Chip Cream Cheese Cookies have become my signature dessert for good reason – they combine familiar comfort with an unexpected twist that keeps everyone coming back for more. The way the cream cheese transforms both texture and flavor creates something truly special that stands out in the crowded world of chocolate chip cookies. I hope you’ll experience the joy of watching someone’s face light up with that first pillowy bite. For more delicious inspiration, check out my other recipes on Pinterest and discover your next favorite treat!
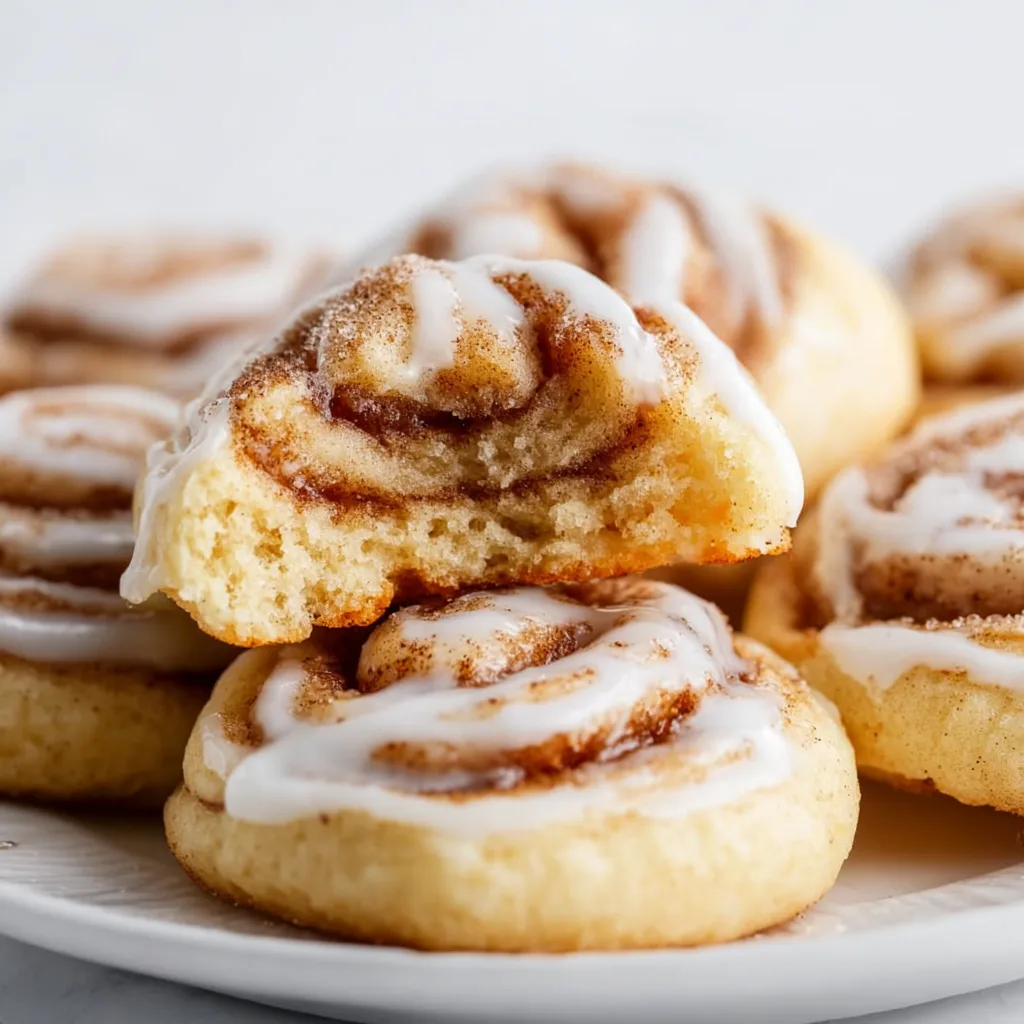
  • Cinnamon Roll Cookies: Irresistibly Gooey, Sweet & Addictive!

    Cinnamon Roll Cookies: Irresistibly Gooey, Sweet & Addictive!

    Cinnamon Roll Cookies: Irresistibly Gooey, Sweet & Addictive!

    Cinnamon roll cookies bring all the warm, swirling comfort of traditional cinnamon rolls into a convenient, handheld treat that’s perfect for holiday cookie exchanges or afternoon tea. I first created these cookies during a snowy weekend when my kitchen became my sanctuary. The aroma of cinnamon and butter wafting through my home instantly transported me back to Sunday mornings at my grandmother’s house. These cookies capture that same nostalgic feeling while being much simpler to make than traditional cinnamon rolls. Let me show you how to create these irresistible spiral cookies that look as beautiful as they taste.

    Recipe

    Why You’ll Love These Cinnamon Roll Cookies

    Perfect Balance of Textures

    These cookies offer the most satisfying textural contrast you can imagine. The edges bake up slightly crisp while the centers remain tender and soft, reminiscent of the middle of a perfect cinnamon roll. I’ve tested countless versions to achieve this balance. The key is proper chilling time between rolling and baking. When you bite into one, you’ll experience that delightful resistance followed by a melt-in-your-mouth softness that makes it nearly impossible to eat just one. The thin layer of glaze adds another dimension, creating a cookie that satisfies every texture craving.

    Make-Ahead Convenience

    One of my favorite aspects of these cinnamon roll cookies is their impressive versatility when it comes to preparation. The dough can be made up to 3 days ahead and kept refrigerated, making them perfect for busy holiday schedules. You can even freeze the rolled, unbaked logs for up to a month! I often prepare several rolls on a quiet Sunday afternoon, then slice and bake them whenever unexpected guests arrive or when I need a quick dessert. The dough actually benefits from resting time, allowing the flavors to develop and making the finished cookies even more delicious.

    Essential Tips & Tricks

    Perfecting the Spiral

    Creating that perfect spiral pattern requires a few technique adjustments that took me several batches to master. Roll your dough into a precise rectangle with even thickness—I recommend using guide sticks or a special rolling pin with thickness rings. Chill the dough before adding the filling to prevent tearing. When rolling up the dough, use the parchment paper as a guide, lifting it slowly to create a tight, even cylinder. For clean slices, use a sharp knife dipped in flour or unwaxed dental floss, pulling it tight around the log and crossing the ends to cut through cleanly.

    Temperature Control Matters

    The secret to cookies that hold their shape lies in temperature management at every stage. Start with butter that’s cool but pliable—not melted or too soft. After rolling the dough into logs, chill them for at least 2 hours or overnight for the best results. When it’s time to bake, slice the cookies while the log is still cold and place them on a parchment-lined baking sheet. If your kitchen is warm, place cut cookies in the refrigerator for 10 minutes before baking. This prevents spreading and ensures those beautiful spirals stay intact during baking.

    Serving Ideas & Creative Variations

    Elegant Presentation Options

    Transform these humble cookies into showstopping treats with thoughtful presentation. For holiday gatherings, arrange them in concentric circles on a cake stand, dusting with powdered sugar for a snow-kissed effect. For gifting, stack them in clear cellophane bags tied with baker’s twine, or place them in vintage tins lined with parchment paper. I love serving them alongside a creamy vanilla custard for dipping at dessert parties. For brunch, arrange them on a tiered stand with fresh berries scattered between layers for a pop of color.

    Flavor Twists and Add-Ins

    While traditional cinnamon filling is divine, these cookies welcome creative flavor adaptations. Add orange zest to the dough for a citrus kick or mix cardamom with the cinnamon for a Swedish-inspired version. For texture, sprinkle finely chopped nuts like pecans or walnuts over the filling before rolling. During the holidays, I add a splash of maple extract to the glaze and a pinch of nutmeg to the filling. For chocolate lovers, try adding mini chocolate chips to the filling or drizzling the finished cookies with melted chocolate instead of the traditional glaze.

    Storage & Troubleshooting Guide

    Keeping Cookies Fresh

    To maintain that perfect texture balance, store baked cookies in an airtight container at room temperature for up to 3 days. Place parchment paper between layers to prevent sticking. For longer storage, these cookies freeze beautifully for up to 2 months—just thaw at room temperature for about an hour before serving. I recommend adding the glaze after thawing rather than before freezing for the best appearance. If you notice your cookies softening too much after storage, pop them in a 300°F oven for 3-5 minutes to refresh that slight exterior crispness.

    Fixing Common Problems

    Even experienced bakers encounter challenges with spiral cookies. If your dough becomes too soft to work with, don’t panic—simply pause and chill. Sticky dough that’s difficult to roll needs 15-20 minutes in the refrigerator. If your spirals unravel during cutting, your log probably needs more chill time. For cookies that spread too much during baking, your oven might be running hot—try reducing the temperature by 25°F. If your filling leaks out during baking, try brushing the dough with a thin layer of egg white before adding the cinnamon mixture to help it adhere.

    Frequently Asked Questions

    Can I make cinnamon roll cookies without a stand mixer?

    Absolutely! While a mixer makes the process easier, you can use a hand mixer or even mix by hand. Just ensure your butter is properly softened and be prepared for a bit more arm workout when incorporating the flour.

    Why did my cinnamon roll cookies unravel during baking?

    This typically happens when the dough isn’t chilled enough before baking. After slicing your cookies, refrigerate them for 15-20 minutes before putting them in the oven to help them maintain their shape.

    Can I use brown sugar instead of white in the filling?

    Yes! Brown sugar creates a more caramel-like flavor in your cinnamon roll cookies. Dark brown sugar will give an even deeper molasses note that pairs beautifully with the cinnamon.

    How far in advance can I prepare the dough?

    The dough can be refrigerated for up to 3 days or frozen for up to 1 month. If frozen, thaw overnight in the refrigerator before slicing and baking.

    What’s the secret to getting even spirals in my cookies?

    Roll the dough into a precise rectangle with even thickness, spread the filling to within ½-inch of edges, and use the parchment paper to help you roll tightly and evenly from the long side.

    Final Thoughts

    These cinnamon roll cookies have become my signature bake for good reason—they combine nostalgic flavors with elegant presentation in a way that delights everyone who tries them. The beautiful swirls make them visually impressive while their familiar flavor offers comfort in every bite. I hope you’ll try them and perhaps start a new tradition in your own kitchen. Don’t forget to share your creations on Pinterest and tag me so I can see your beautiful spirals! These little treasures prove that sometimes the most satisfying treats come in the most perfectly rolled packages.

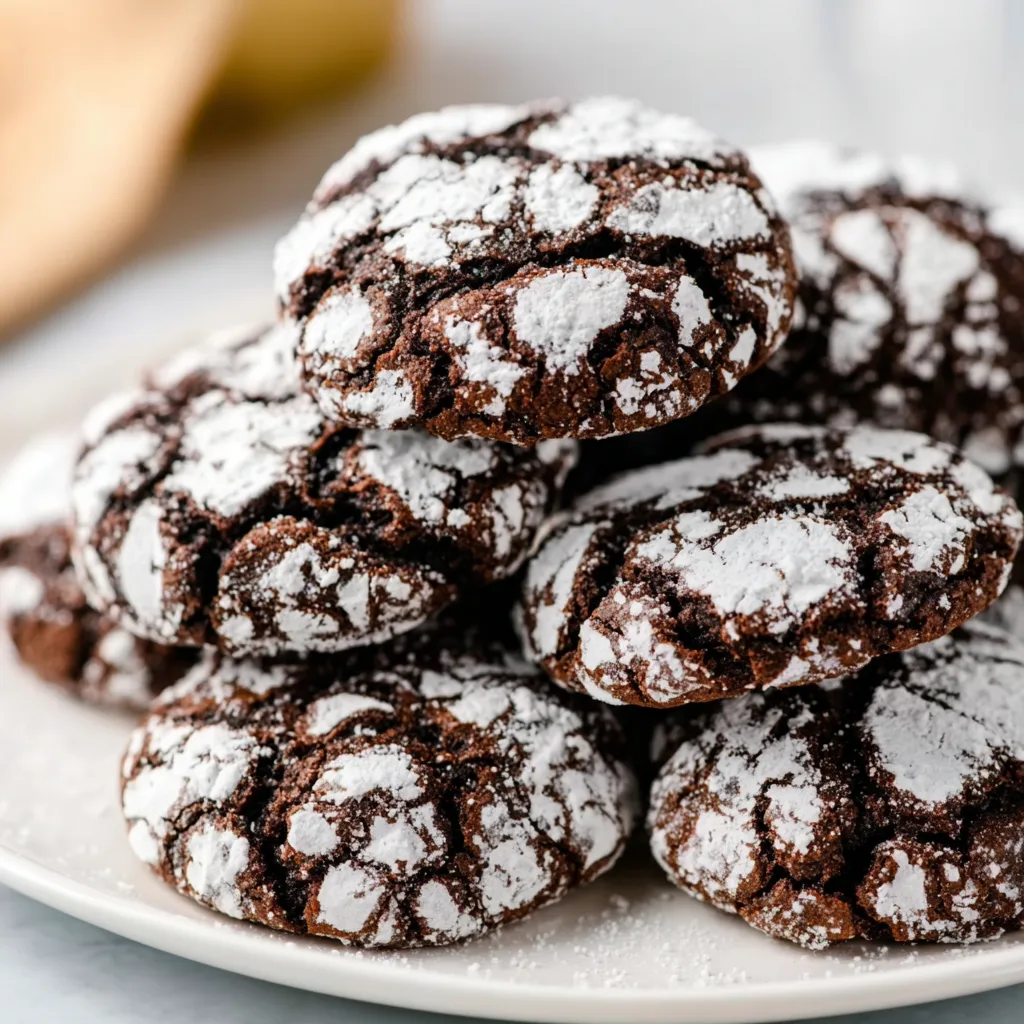
  • Brownie Crinkle Cookies: Irresistibly Gooey, Melt-in-Your-Mouth Bliss!

    Brownie Crinkle Cookies: Irresistibly Gooey, Melt-in-Your-Mouth Bliss!

    Brownie Crinkle Cookies bring together the best of two beloved treats – the fudgy richness of brownies and the crackly top of perfect cookies. The first time I made these for my family, my kitchen filled with that intoxicating chocolate aroma that made everyone hover nearby, waiting impatiently. These cookies have become my go-to when I need something decadently chocolatey but don’t want to wait for brownies to cool. They’re quicker to make than traditional brownies but deliver that same intense chocolate satisfaction you’ll find in my New York Cheesecake with Berry Twist – just in cookie form!

    Recipe

    Why You’ll Love These Brownie Crinkle Cookies

    Perfect Texture Combination

    The magic of these cookies lies in their contrasting textures – crisp, crackly exteriors giving way to soft, fudgy centers that practically melt in your mouth. I still remember the first batch I made; breaking one open while still warm, watching the center stretch like a perfect brownie. The slight resistance from the shiny, crackled top gives way to that dense, chocolatey interior that sticks slightly to your teeth. It’s this textural journey that makes them utterly irresistible and why my cookie jar empties faster with these than any other recipe.

    Quick Brownie Satisfaction

    When brownie cravings hit but you need something faster, these cookies are your answer. They deliver that intense chocolate punch in just 25 minutes from start to finish – no waiting for a pan of brownies to cool! I’ve found myself making these on weeknights when chocolate cravings strike but time is limited. The cookies cool quickly too, allowing you to enjoy that fudgy brownie experience without the wait. Plus, they’re perfectly portioned, giving you the satisfaction of a brownie without committing to cutting a whole pan.

    Essential Tips & Tricks

    Achieving the Perfect Crackle

    The signature crackle top requires attention to a few key details. First, don’t skimp on beating the eggs and sugar – this creates that shiny, crackled surface we’re after. I learned this the hard way after rushing this step once and ending up with flat, dull cookies. Second, chilling the dough is non-negotiable; I recommend at least 30 minutes. Finally, rolling the cookies in powdered sugar right before baking ensures those beautiful cracks form as the cookies spread in the oven, creating that dramatic contrast between dark chocolate and white sugar.

    Chocolate Selection Matters

    The quality of chocolate makes all the difference in these brownie crinkle cookies. I prefer using a combination of high-quality cocoa powder and chopped dark chocolate (60-70% cacao) for depth of flavor. The cocoa powder provides that intense chocolate base, while melted chocolate chunks create the fudgy interior. One winter afternoon, I experimented with adding espresso powder – just a teaspoon – and it amplified the chocolate flavor without tasting like coffee. If you’re feeling adventurous, try different chocolate varieties like bittersweet or even a hint of chili-infused dark chocolate.

    Serving Ideas & Creative Variations

    Elevated Dessert Presentations

    Transform these cookies into spectacular desserts with simple additions. My favorite is creating cookie sundaes by placing a warm cookie in a bowl, adding a scoop of vanilla bean ice cream, and drizzling with warm caramel sauce. For dinner parties, I’ve sandwiched softened coffee ice cream between two cookies for an elevated ice cream sandwich that guests still talk about. You could also crumble them over pudding or Mini Cherry Cheesecakes for a delightful textural contrast that makes everyday desserts feel special.

    Flavor Twists Worth Trying

    While the classic version is perfection, these cookies welcome creative variations. Try adding mint extract (½ teaspoon) and crushed candy canes during the holidays for a festive touch. Orange zest and a splash of Grand Marnier create sophisticated cookies with a subtle citrus brightness. My personal favorite variation came from an accidental pantry shortage – I substituted half the vanilla extract with almond extract, and the nutty undertone was divine. For texture contrast, fold in chocolate chips, chopped nuts, or even crushed pretzels for a sweet-salty balance.

    Storage & Troubleshooting Guide

    Keeping Them Fresh

    To maintain that perfect balance between crisp exterior and fudgy center, proper storage is essential. Store completely cooled cookies in an airtight container at room temperature for up to 4 days. I separate layers with parchment paper to prevent sticking. For longer storage, freeze the cookies in a single layer until solid, then transfer to a freezer bag for up to 3 months. The wonderful thing about these cookies is they thaw quickly – just 20 minutes at room temperature – and still maintain that lovely texture contrast between crisp exterior and fudgy center.

    Fixing Common Problems

    If your cookies spread too much, your dough likely needed more chilling time. Pop the remaining dough in the freezer for 15 minutes before continuing. For cookies that don’t crackle properly, check two things: did you coat them generously in powdered sugar right before baking? And is your oven properly preheated? I once had a batch with minimal crackles and realized my oven temperature was off. Too-flat cookies usually mean the butter was too warm or you used too little flour, while cakey cookies typically result from overmixing after adding the dry ingredients.

    Frequently Asked Questions

    Can I make brownie crinkle cookies ahead of time?

    Yes! Prepare the dough up to 2 days ahead and refrigerate. You can also freeze portioned dough balls (before rolling in sugar) for up to 3 months. Just thaw in the refrigerator overnight before baking.

    Why didn’t my cookies develop cracks?

    Insufficient powdered sugar coating or not chilling the dough long enough are common culprits. Make sure to generously coat cold dough balls in powdered sugar immediately before baking.

    Can I use cocoa powder alone instead of melted chocolate?

    While possible, using only cocoa powder will result in a less fudgy interior. For true brownie-like texture, the melted chocolate is key to achieving that dense, rich center.

    Are brownie crinkle cookies supposed to be soft in the middle?

    Absolutely! The cookies should be set around the edges but still soft in the center when removed from the oven. They’ll continue to set as they cool.

    Can I add nuts or other mix-ins to the dough?

    Certainly! Fold in ½ cup of chopped nuts, chocolate chips, or other mix-ins after combining the wet and dry ingredients. Just avoid overmixing.

    Final Thoughts

    Brownie Crinkle Cookies represent the perfect marriage between cookies and brownies, offering the best qualities of both in one irresistible treat. They’ve become my signature dessert for good reason – they’re impressive enough for special occasions yet simple enough for everyday indulgence. The contrast between the shiny, crackled exterior and the rich, fudgy center creates a textural masterpiece that chocolate lovers can’t resist. I hope these cookies bring as much joy to your kitchen as they have to mine! Find more of my favorite cookie recipes on Pinterest.

  • Iced Almond Flour Orange Cookies That Will Delight Your Tastebuds!

    Iced Almond Flour Orange Cookies That Will Delight Your Tastebuds!

    Iced Almond Flour Orange Cookies That Will Delight Your Tastebuds!

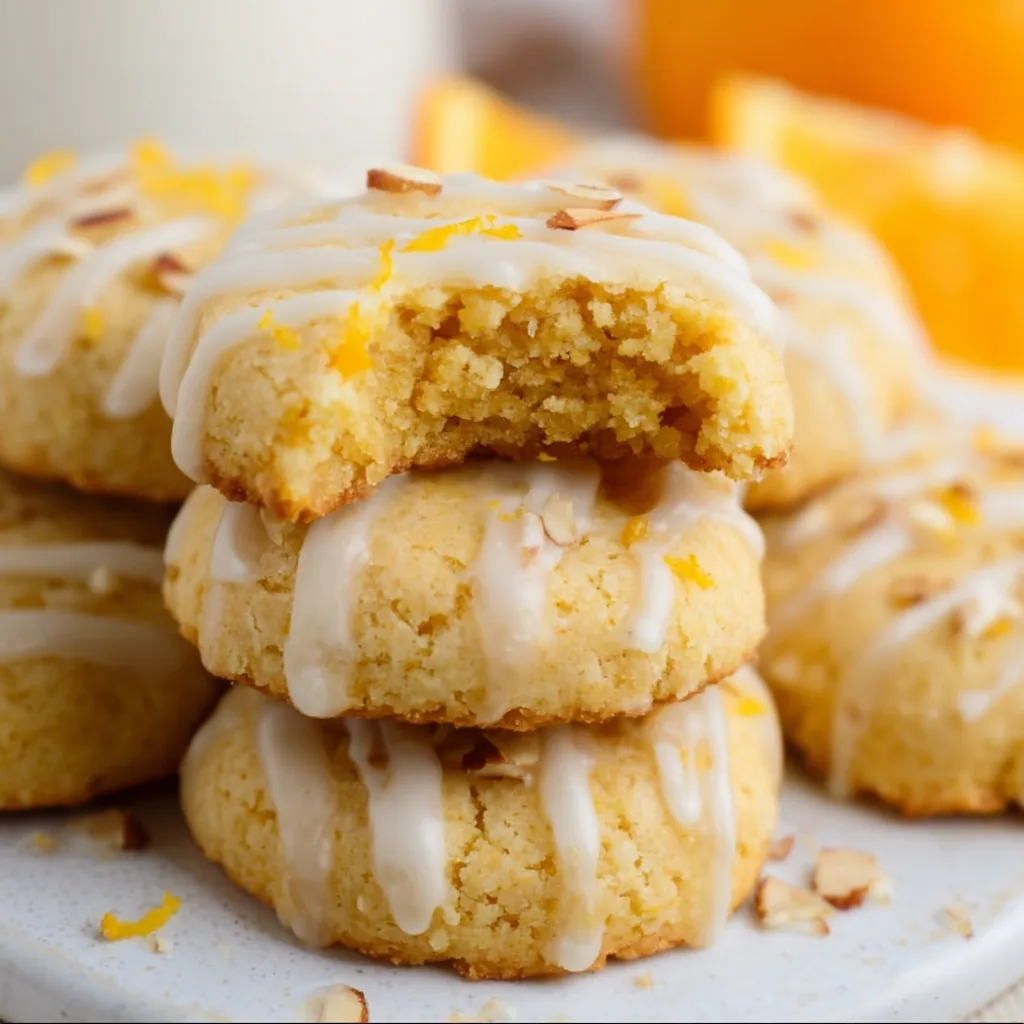
    Iced Almond Flour Orange Cookies have become my absolute obsession this season! There’s something magical about the way the bright citrus aroma fills my kitchen as these delicate, gluten-free treats bake to golden perfection. The first time I made these for my sister’s birthday brunch, everyone kept asking for the recipe before they’d even finished their first cookie! The combination of nutty almond flour and vibrant orange zest creates a flavor symphony that’s both sophisticated and comforting. If you love citrus desserts like my Upside-Down Orange Cake Recipe, these cookies will absolutely steal your heart.

    Recipe

    Why You’ll Love These Iced Almond Flour Orange Cookies

    Perfect Texture & Flavor Balance

    These cookies offer the most delightful textural contrast you can imagine – slightly crisp edges that give way to tender, melt-in-your-mouth centers. The almond flour provides a naturally subtle sweetness and nutty depth that perfectly complements the bright orange flavor. I’ve spent countless test batches getting the balance just right! The orange appears in three glorious ways: zest in the dough, fresh juice in the icing, and candied orange peel as an optional (but highly recommended) garnish. Your taste buds will detect layer after layer of citrus goodness with each bite.

    Simple Ingredients, Impressive Results

    What I adore about these cookies is how they transform pantry staples into something that looks and tastes like it came from a fancy bakery. You’ll need almond flour (the hero ingredient), butter, sugar, eggs, orange zest, vanilla, and a few baking essentials. The icing needs just powdered sugar and fresh orange juice – that’s it! I always keep almond flour on hand for gluten-free baking emergencies, and this recipe has become my go-to when I need something special without a grocery store run. Your friends will think you spent hours on these!

    Essential Tips & Tricks

    Mastering the Dough Consistency

    Getting the right dough texture is crucial for these cookies. Almond flour behaves differently than all-purpose flour – it’s naturally more moist and doesn’t contain gluten to provide structure. After mixing your ingredients, if the dough feels too sticky to handle, refrigerate it for 30 minutes before rolling. I’ve found that using slightly damp hands when forming the cookies prevents sticking. For perfectly uniform cookies (great for gifting!), use a small cookie scoop to portion the dough, then gently flatten each ball to about ½-inch thickness with your fingertips.

    Perfecting the Orange Icing

    The citrus icing is what transforms these cookies from delicious to extraordinary! For the brightest flavor, always use freshly squeezed orange juice – never the bottled stuff. Start with less juice than you think you’ll need, adding it gradually until you reach a consistency that’s thick enough to set but thin enough to drizzle. If you love additional orange flavor, add a few drops of orange extract or a pinch of orange zest to the icing. For a professional-looking finish like in my New York Cheesecake with Berry Twist, let the cookies cool completely before icing.

    Serving Ideas & Creative Variations

    Beautiful Presentation Options

    These cookies make a stunning centerpiece for any dessert table! For an elegant presentation, arrange them on a white porcelain platter with fresh orange slices and mint sprigs. When I serve these at afternoon tea, I place them on a tiered stand with other citrus treats. The bright orange icing makes them naturally eye-catching, but for special occasions, add edible gold leaf flakes or silver dragées on top of the wet icing. For holiday gifts, stack them in clear cellophane bags tied with raffia, adding a small dried orange slice to each package.

    Exciting Flavor Twists

    While the classic orange version is divine, these cookies welcome creative adaptations! My lemon-rosemary variation (swap orange for lemon zest and add 1 teaspoon chopped fresh rosemary) pairs beautifully with afternoon tea. For a sophisticated cocktail party cookie, try blood orange with a splash of Campari in the icing. During the holidays, I add warming spices like cardamom and cinnamon to the dough. For chocolate lovers, fold in mini dark chocolate chips or drizzle with melted chocolate after icing. Check out my White Chocolate Cranberry Cookies for more inspiration!

    Storage & Troubleshooting Guide

    Keeping Cookies Fresh

    These Iced Almond Flour Orange Cookies stay remarkably fresh when stored properly. For maximum flavor and texture, place them in an airtight container with parchment paper between layers to prevent sticking. At room temperature, they’ll maintain their perfect texture for 3-4 days. If you need longer storage, refrigerate for up to a week, though the texture may become slightly firmer. For long-term storage, freeze uniced cookies for up to 3 months in freezer-safe containers. I often make a double batch and freeze half for unexpected guests!

    Solving Common Baking Issues

    If your cookies spread too much during baking, your butter was likely too warm or you didn’t use enough almond flour. The quick fix is chilling the dough for 30 minutes before baking. For cookies that turn out too dry, you might have overbaked them or used too much almond flour – remember that measuring cups can vary, so consider investing in a kitchen scale for precision. If your icing is too runny, add more powdered sugar; if too thick, add orange juice a few drops at a time. For cookies that brown too quickly, place the baking sheet on a higher rack in your oven.

    Frequently Asked Questions

    Can I substitute regular flour for almond flour in these orange cookies?

    No, almond flour has different properties than wheat flour. The recipe would need significant adjustments to moisture and binding ingredients. Stick with almond flour for the intended texture and flavor.

    How do I know when my Iced Almond Flour Orange Cookies are done baking?

    Look for light golden edges while the centers remain slightly soft. They’ll firm up while cooling. Overbaking will result in dry cookies, so err on the side of underbaking.

    Can I make these cookies ahead of time for a party?

    Absolutely! Bake the cookies up to 3 days ahead and store in an airtight container. Ice them the day before or morning of your event for the freshest appearance.

    What’s the secret to getting the brightest orange flavor?

    Use organic oranges for zesting since they’re free from wax coatings. Rub the zest into the sugar before mixing with other ingredients to release the essential oils.

    Are these cookies suitable for people with dietary restrictions?

    These Iced Almond Flour Orange Cookies are naturally gluten-free. For dairy-free versions, substitute coconut oil for butter. They do contain eggs and nuts, so they’re not suitable for those allergies.

    Final Thoughts

    These Iced Almond Flour Orange Cookies have become a signature treat in my baking repertoire. There’s something truly special about the way they bring sunshine to even the gloomiest day with their bright flavor and delicate texture. Whether you’re baking them for a special occasion or simply to enjoy with your afternoon coffee, they’re guaranteed to bring smiles. I’d love to see your creations if you try this recipe – tag me on Pinterest so I can admire your beautiful cookies!

  • Fudgy Cosmic Brownie Cookies That’ll Blow Your Mind!

    Fudgy Cosmic Brownie Cookies That’ll Blow Your Mind!

    Fudgy Cosmic Brownie Cookies That’ll Blow Your Mind!

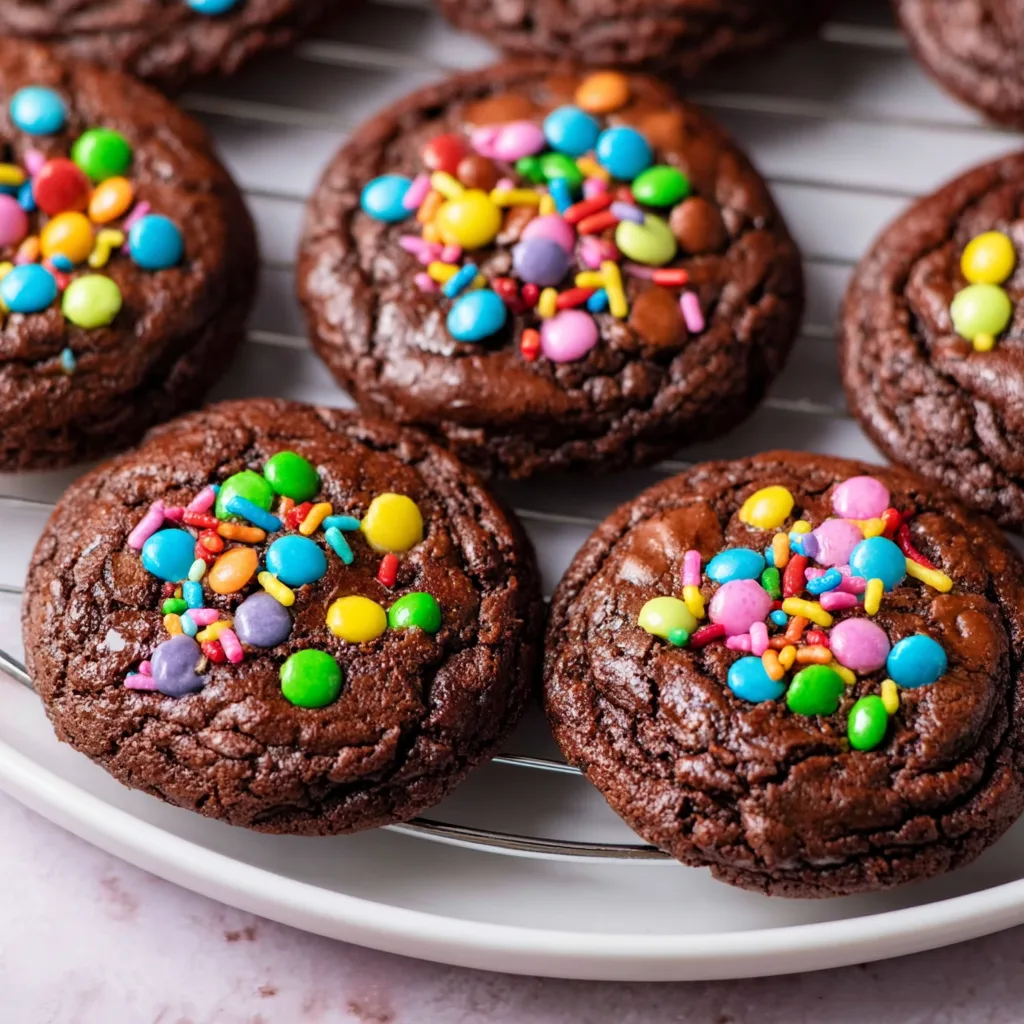
    Fudgy Cosmic Brownie Cookies bring back that nostalgic childhood lunchbox treat in a delicious homemade form! These indulgent cookies combine the best of both worlds – the rich, chocolatey goodness of brownies with the perfect crisp-chewy texture of cookies. I’ve been perfecting this recipe for months, and let me tell you, the combination of that deep chocolate flavor with those colorful rainbow sprinkles creates pure magic on your taste buds. If you love desserts that make you feel like a kid again while satisfying your grown-up chocolate cravings, these cosmic brownie cookies are about to become your new obsession.

    Recipe

    Why You’ll Love These Fudgy Cosmic Brownie Cookies

    Nostalgic Flavor with Gourmet Appeal

    There’s something about biting into these cookies that instantly transports me back to childhood. That first chocolatey bite with the perfect balance of fudgy center and slightly crisp edge creates pure bliss. Unlike store-bought cosmic brownies, these homemade versions have depth of flavor from high-quality cocoa and real chocolate. I’ve added a touch of espresso powder that enhances the chocolate without tasting like coffee. The rainbow candy-coated chocolate chips on top aren’t just for looks – they add a delightful crunch and sweet burst that perfectly complements the rich cookie base.

    Easy to Make with Impressive Results

    Don’t let their fancy appearance fool you – these cookies are surprisingly simple to make! The dough comes together in just one bowl, making cleanup a breeze. Even my 8-year-old niece helped make these last weekend, and they turned out perfectly. The secret technique is chilling the dough, which prevents spreading and ensures that perfect fudgy-yet-chewy texture. I love that these cookies look professionally made with minimal effort. The colorful candy topping creates that iconic cosmic brownie look that will impress everyone at your next gathering without requiring any special decorating skills.

    Essential Tips & Tricks

    Perfecting the Chocolate Base

    Quality ingredients make all the difference in these cookies. Use Dutch-processed cocoa for a deeper, richer chocolate flavor – it’s worth the splurge! When melting the chocolate, go low and slow to prevent burning. I learned this the hard way after ruining an entire batch by rushing this step. For the fudgiest texture, don’t overmix once the flour is added; stop when just combined. The dough will be thick and almost truffle-like. If you’re craving even more chocolate intensity, try adding chocolate chips to the dough for pockets of melty goodness throughout each cookie.

    Mastering the Perfect Shape and Look

    For that authentic cosmic brownie appearance, uniformity is key. I use a cookie scoop to ensure each cookie is exactly the same size. After scooping, roll the dough between your palms to create perfect spheres, then gently flatten them slightly before baking. The rainbow candy topping should be pressed in immediately after removing cookies from the oven while they’re still hot and pliable. Don’t rush the cooling process – these cookies need time to set up properly. I always let them cool completely on the baking sheet for that perfect fudgy center that makes them so irresistible.

    Serving Ideas & Creative Variations

    Elevated Dessert Presentations

    Transform these cookies into spectacular desserts that will wow your guests! Create cookie sandwiches by adding a scoop of vanilla ice cream between two completely cooled cookies. The contrast between the cold, creamy ice cream and rich chocolate cookies is divine. For a dinner party finale, stack them in a pyramid, dust with powdered sugar, and serve with fresh berries and whipped cream. I recently served these alongside my New York Cheesecake with Berry Twist for a dessert buffet that had everyone coming back for seconds.

    Seasonal and Flavor Adaptations

    These versatile cookies can be customized for any occasion! For holiday versions, swap the rainbow chips for seasonal colors – red and green for Christmas, orange and black for Halloween, or pastels for Easter. Add a teaspoon of peppermint extract to the dough for a chocolate-mint variation that’s perfect for winter. For a grown-up twist, try adding a tablespoon of bourbon to the dough and topping with flaky sea salt instead of candy. My personal favorite variation includes a tablespoon of orange zest in the dough for a chocolate-orange combination that’s absolutely heavenly.

    Storage & Troubleshooting Guide

    Keeping Cookies Fresh and Delicious

    To maintain that perfect fudgy texture, store these cookies in an airtight container at room temperature for up to 5 days. Place a slice of bread in the container to keep them soft and prevent them from drying out. For longer storage, these cookies freeze beautifully! Layer them between parchment paper in a freezer-safe container and freeze for up to 3 months. I often make a double batch specifically to freeze, so I always have a treat ready for unexpected guests or chocolate emergencies. Allow frozen cookies to thaw at room temperature for about an hour before serving.

    Fixing Common Baking Issues

    If your cookies spread too much during baking, your dough likely wasn’t cold enough. Chill thoroughly for at least 2 hours, or even overnight for best results. For cookies that turn out too dry, you may have overbaked them or used too much flour. Remember that these cookies will look slightly underdone in the center when you remove them from the oven – that’s what gives them their fudgy texture! If your candy toppings are melting too much, try waiting 1-2 minutes after removing cookies from the oven before adding them, or use candy-coated chocolates that hold their shape better under heat.

    Frequently Asked Questions

    Can I make Fudgy Cosmic Brownie Cookies ahead of time?

    Absolutely! The dough can be made up to 3 days in advance and stored in the refrigerator. You can also freeze the shaped dough balls for up to 3 months and bake directly from frozen (just add 1-2 minutes to the baking time).

    What’s the best chocolate to use in these cookies?

    I recommend using a high-quality semi-sweet or dark chocolate in the 60-70% cocoa range. Brands like Ghirardelli or Guittard work beautifully and melt smoothly without graininess.

    Can I make these cookies gluten-free?

    Yes! Replace the all-purpose flour with a 1:1 gluten-free baking blend. I’ve tested this with Bob’s Red Mill and King Arthur’s gluten-free flours with excellent results.

    Why did my cookies turn out cakey instead of fudgy?

    Too much flour or over-mixing can create a cakey texture. Measure flour by spooning it into measuring cups rather than scooping, and mix just until ingredients are combined.

    How do I know when these cookies are done baking?

    The edges should be set but the centers will look slightly underdone and soft. They’ll continue cooking on the hot baking sheet after removal from the oven.

    Final Thoughts

    These Fudgy Cosmic Brownie Cookies have become my signature dessert for good reason – they’re the perfect balance of nostalgic charm and sophisticated flavor. The combination of that intensely chocolatey, brownie-like texture with playful rainbow toppings creates something truly special. I love watching people’s faces light up when they take their first bite! Whether you’re baking for a special occasion or simply treating yourself after a long day, these cookies deliver pure joy in every bite. Don’t forget to check out more of my favorite chocolate creations on Pinterest for endless dessert inspiration!

  • White Chocolate Cranberry Cookies: Irresistibly Sweet & Tangy Treats!

    White Chocolate Cranberry Cookies: Irresistibly Sweet & Tangy Treats!

    White Chocolate Cranberry Cookies: Irresistibly Sweet & Tangy Treats!

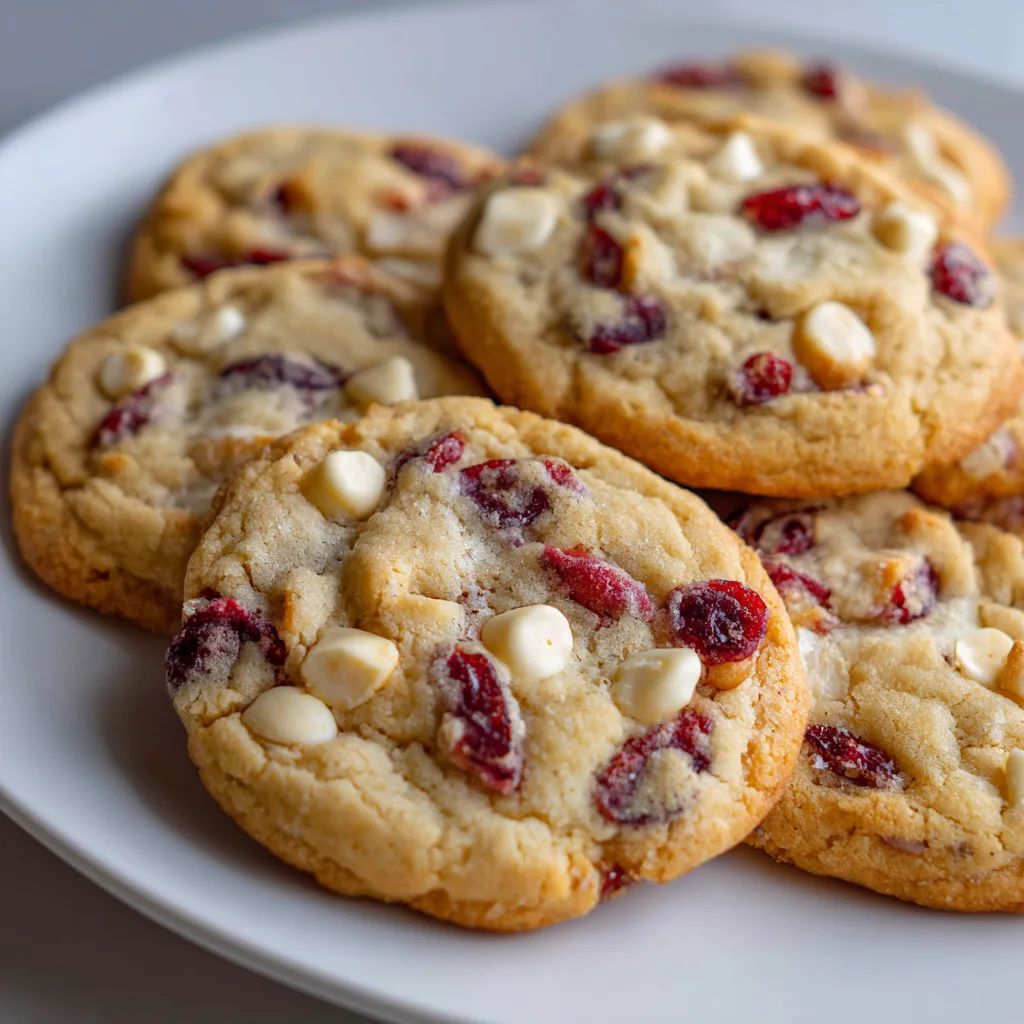
    White Chocolate Cranberry Cookies are the perfect holiday treat that brings together sweet, creamy white chocolate chunks and tart, chewy cranberries in every delightful bite. I discovered this recipe during my first Christmas away from family, when I was desperate for something that would fill my apartment with that warm, nostalgic aroma of home. The moment these cookies started baking, the buttery vanilla scent wafting through my tiny kitchen instantly transported me back to my grandmother’s holiday baking marathons. If you’re looking for a cookie that balances indulgence and comfort with a festive touch, you’ve found your new favorite recipe.

    Recipe

    Why You’ll Love These White Chocolate Cranberry Cookies

    Perfect Balance of Flavors and Textures

    These cookies are a sensory delight from the first bite to the last crumb. The rich buttery base creates a canvas for the star ingredients to shine. White chocolate doesn’t just melt—it creates pockets of creamy sweetness that contrast beautifully with the tart cranberries. I love how the edges develop a slight crispness while the centers remain soft and chewy. The cranberries plump slightly during baking, releasing their natural tanginess that cuts through the sweetness perfectly. It’s like having a little flavor party in each bite!

    Make-Ahead Friendly for Holiday Prep

    As someone who gets overwhelmed by last-minute holiday preparations, I adore how these cookies fit seamlessly into busy schedules. The dough can be made up to 3 days ahead and refrigerated until needed, making them perfect for holiday planning. You can even portion the dough into balls and freeze them for up to three months, baking just what you need when unexpected guests arrive. Nothing impresses like freshly baked cookies in minutes! Plus, they maintain their texture for days, making them ideal for cookie exchanges or gift boxes.

    Essential Tips & Tricks

    Ingredient Selection Matters

    Don’t skimp on quality when gathering ingredients for these special cookies. Use real butter (never margarine) for that rich, irreplaceable flavor foundation. For white chocolate, choose premium chips or chop a high-quality bar—they melt differently than the artificially flavored baking chips. For cranberries, I prefer using dried ones that still have a bit of moisture and chewiness rather than the super dry variety. If yours are too dry, soak them in warm water for 10 minutes, then pat dry before folding into your dough for a more tender texture in the finished cookie.

    Perfecting the Technique

    The secret to these cookies’ perfect texture lies in not overmixing the dough and properly chilling it before baking. Cream the butter and sugars just until light and fluffy—about 2-3 minutes maximum. Once you add the flour, mix just until combined. Overmixed dough leads to tough cookies! After folding in the white chocolate and cranberries, chill the dough for at least 30 minutes (overnight is even better). This prevents excessive spreading and allows the flavors to meld beautifully, similar to what happens with my Blueberry Swirl Sugar Cookies.

    Serving Ideas & Creative Variations

    Elegant Presentation Options

    Transform these already beautiful cookies into showstoppers with simple presentation tweaks. Press a few extra white chocolate chips and cranberries on top of each dough ball before baking for a bakery-worthy appearance. For holiday gatherings, arrange them on a wooden board with sprigs of rosemary and cinnamon sticks for a rustic, festive look. I love serving them slightly warm alongside mugs of hot chocolate or spiced cider. For an extra special touch, drizzle cooled cookies with melted white chocolate and a light dusting of orange zest to enhance the cranberry flavor.

    Delicious Flavor Twists

    While the classic recipe is perfection, I’ve experimented with several variations that are equally delightful. Add 1/2 teaspoon of orange zest to the dough for a citrus-infused version that brightens the cranberry flavor. For a nutty dimension, fold in 1/2 cup of chopped macadamia nuts or pistachios. During the holidays, I sometimes add 1/4 teaspoon of cinnamon or a pinch of cardamom for warm spice notes. For chocolate lovers, try using half white chocolate and half dark chocolate chips, creating a beautiful contrast similar to my Peanut Butter Chocolate Cupcakes.

    Storage & Troubleshooting Guide

    Keeping Cookies Fresh

    To maintain that perfect balance between chewy centers and crisp edges, proper storage is essential. Once completely cooled, store your cookies in an airtight container at room temperature with a slice of bread to maintain moisture. They’ll stay deliciously fresh for up to 5 days this way. For longer storage, freeze baked cookies in single layers separated by parchment paper for up to 3 months. To refresh slightly stale cookies, pop them in the microwave for 10 seconds before serving—they’ll taste nearly freshly baked with that warm, gooey white chocolate.

    If your cookies spread too much during baking, your dough likely wasn’t chilled enough or your butter was too warm. Next time, refrigerate the dough balls for at least 1 hour before baking. For cookies that don’t spread enough, try slightly flattening the dough balls before baking. If your cranberries are burning on the cookie surface, gently push any exposed fruits into the dough before baking. And remember, cookies continue to set as they cool—remove them from the oven when the edges are golden but the centers still look slightly underdone for that perfect chewy texture.

    Frequently Asked Questions

    Can I use fresh cranberries instead of dried in White Chocolate Cranberry Cookies?

    Fresh cranberries are too tart and wet for this recipe. Stick with dried cranberries, which provide concentrated flavor and won’t add excess moisture to your dough.

    How do I prevent the white chocolate from burning?

    Fold the chips completely into the dough rather than leaving them exposed on top. If adding decorative chips, press them in slightly and watch baking time carefully.

    Can I make these cookies gluten-free?

    Yes! Substitute a 1:1 gluten-free flour blend that contains xanthan gum. The texture will be slightly different but still delicious.

    Why did my cookies turn out too flat?

    Your butter was likely too warm or you didn’t chill the dough enough. Always start with cool room temperature butter and refrigerate the dough for at least 30 minutes.

    The dough can be refrigerated for up to 3 days or frozen for 3 months. If frozen, thaw overnight in the refrigerator before baking.

    Final Thoughts

    These White Chocolate Cranberry Cookies have become my signature holiday offering, requested by friends and family year after year. There’s something magical about the way the tart cranberries and sweet white chocolate play together against the buttery cookie canvas. I find myself making them well beyond the holiday season whenever I need a little comfort or have something to celebrate. They’re impressive enough for gifting but simple enough for everyday baking. Share your creations with me on Pinterest – I’d love to see how your White Chocolate Cranberry Cookies turn out!

  • Blueberry Swirl Sugar Cookies: Irresistibly Soft & Bursting with Flavor!

    Blueberry Swirl Sugar Cookies: Irresistibly Soft & Bursting with Flavor!

    Blueberry Swirl Sugar Cookies: Irresistibly Soft & Bursting with Flavor!

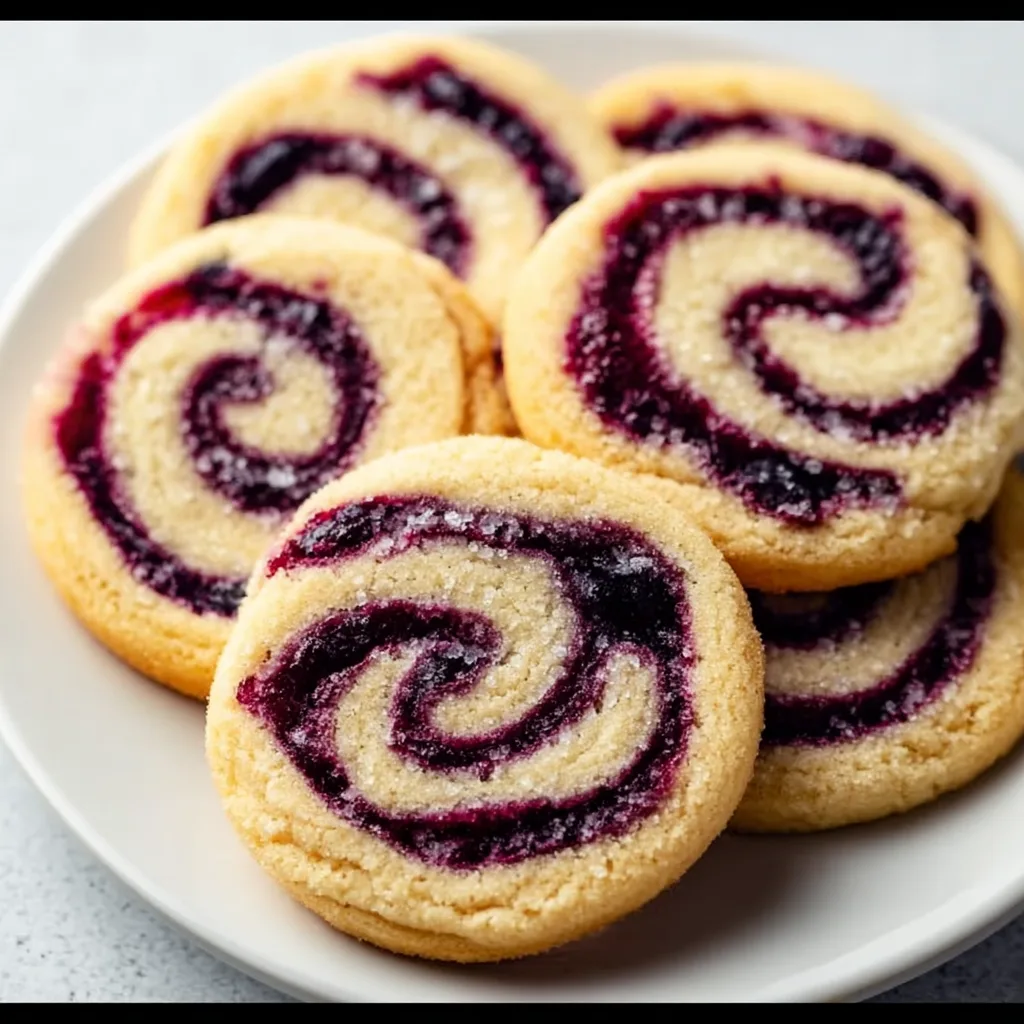
    These Blueberry Swirl Sugar Cookies transform the classic sugar cookie into something magical. The first time I pulled a batch from my oven, the kitchen filled with the sweet aroma of vanilla and warm berries that instantly transported me back to summer afternoons at my grandmother’s. The delicate swirls of vibrant purple-blue against the golden cookie create a treat that’s as beautiful as it is delicious. I’ve perfected this recipe through countless test batches (my neighbors never complained!), ensuring these cookies strike that perfect balance between buttery crispness at the edges and a tender center that melts in your mouth. Ready to create some cookie magic?

    Recipe

    Why You’ll Love These Blueberry Swirl Sugar Cookies

    A Perfect Balance of Flavors

    There’s something undeniably special about the combination of classic sugar cookies and fresh blueberries. The buttery, vanilla-forward base provides the perfect canvas for those bright, jammy blueberry swirls. Unlike artificial flavors, real blueberries bring a natural tartness that cuts through the sweetness, creating a sophisticated flavor profile that appeals to both kids and adults. I’ve found that reducing the blueberries first intensifies their flavor, giving you that perfect berry punch in every bite without making the cookies soggy. The subtle hint of lemon zest brightens everything up, making these cookies taste like sunshine.

    Instagram-Worthy Without the Fuss

    Let’s be honest—we all love cookies that look as good as they taste. These swirled beauties create a stunning marble effect that looks like you spent hours perfecting your technique, when in reality, it’s surprisingly simple. The vibrant purple-blue streaks against the golden cookie base create an eye-catching treat that’s perfect for social media posts, holiday cookie exchanges, or impressive dinner party desserts. I’ve brought these to countless gatherings, and they’re always the first to disappear from the plate. The best part? The marbling technique is actually forgiving and fun—each cookie becomes a unique work of art!

    Essential Tips & Tricks

    Mastering the Perfect Swirl

    Creating those beautiful blueberry ribbons is easier than it looks! The secret lies in the consistency of your blueberry reduction—it should be thick like jam but still spreadable. After chilling your cookie dough, roll it out to about ¼-inch thickness, then dollop small amounts of the blueberry mixture across the surface. Use a toothpick or skewer to create swirls, being careful not to overmix (which can turn your cookies purple instead of marbled). I learned the hard way that less is more when it comes to swirling—just 3-4 gentle passes create the most striking patterns. For extra definition, chill the swirled dough again for 15 minutes before cutting your cookies.

    Temperature Control Is Key

    Nothing ruins a beautiful cookie faster than spreading in the oven, which is why temperature management is crucial for these cookies. Start with properly chilled dough—I recommend at least 2 hours in the refrigerator after mixing and another 30 minutes after cutting the shapes. Your butter should be cool but slightly soft when making the dough, never melted or too warm. I always place cut cookies back in the refrigerator while the oven preheats. For the baking itself, maintain a consistent temperature of 350°F and avoid overcrowding the pan, which can create hot spots. These temperature controls help preserve those gorgeous swirls you worked so hard to create! Looking for another sweet treat with berries?

    Serving Ideas & Creative Variations

    Elegant Presentation Options

    These statement cookies deserve a special presentation! For afternoon tea or brunch gatherings, arrange them on a tiered stand alternating with fresh blueberries and sprigs of mint for a pop of color. For gift-giving, stack 3-4 cookies in clear cellophane bags tied with purple ribbon and a sprig of dried lavender. I love serving these slightly warm with a scoop of vanilla bean ice cream between two cookies for an elevated ice cream sandwich. For special occasions, dust the edges with a shimmer of edible pearl dust—it catches the light beautifully and makes the blueberry swirls look even more vibrant against the golden cookie base.

    Seasonal Adaptations

    While blueberries create the classic version of these cookies, the swirl technique works beautifully with other fruit reductions too! In fall, try a cinnamon-apple swirl with a sprinkle of turbinado sugar on top. For winter holidays, cranberry swirls with orange zest create a festive red and white pattern. Summer brings opportunities for strawberry or raspberry variations, while spring calls for lemon curd swirls with a touch of thyme. The cookie base itself can be infused with different extracts—try almond with the blueberry for a sophisticated flavor combination, or coconut extract for a tropical twist. These adaptations make this recipe a year-round favorite! For another delicious fruit-forward dessert, check out this recipe.

    Storage & Troubleshooting Guide

    Keeping Cookies Fresh

    Maintaining the perfect texture of these blueberry swirl cookies requires proper storage. Once completely cooled, store them in an airtight container at room temperature with parchment paper between layers to prevent sticking and color transfer. They’ll stay fresh for 3-4 days this way. For longer storage, these cookies freeze beautifully—place them in a single layer until frozen solid, then transfer to a freezer container with parchment between layers. They’ll maintain their flavor and appearance for up to 3 months. When ready to enjoy, thaw them at room temperature for about 30 minutes—never microwave them, as this will make them soggy and dull the vibrant swirl colors.

    Fixing Common Issues

    Even experienced bakers encounter challenges! If your swirls are bleeding too much, your blueberry reduction is likely too thin—cook it longer next time or add ½ teaspoon of cornstarch while it’s hot. For cookies that spread too much, the dough temperature is the usual culprit. Ensure it’s properly chilled and your baking sheets aren’t warm from previous batches. If your cookies lack that beautiful golden edge, try brushing the tops with a whisked egg white before baking. For cookies that seem too dry, reduce your baking time by 1-2 minutes—they should look just set in the center but not browned at the edges. Remember that these cookies will continue to firm up as they cool.

    Frequently Asked Questions

    Can I use frozen blueberries for the Blueberry Swirl Sugar Cookies?

    Yes! Frozen blueberries work perfectly. Don’t thaw them first—cook them directly from frozen until they break down and thicken. You’ll need to simmer them slightly longer than fresh berries to evaporate the extra moisture.

    How far in advance can I make the dough?

    The cookie dough can be prepared up to 3 days ahead and refrigerated, or frozen for up to 2 months. Thaw overnight in the refrigerator before rolling, swirling, and cutting.

    Why did my swirls disappear during baking?

    This typically happens when the blueberry reduction is too thin. Cook it until it’s thick like jam, and make sure to create defined swirls rather than mixing the reduction completely into the dough.

    Can I make these cookies without refined sugar?

    Yes, you can substitute coconut sugar for the granulated sugar in the cookie base. For the blueberry swirl, use honey or maple syrup to sweeten if desired, but reduce the amount by about 25%.

    Are these cookies suitable for shipping?

    These cookies ship well when packed carefully. Place them in a single layer with parchment between each cookie, then wrap tightly in plastic wrap before boxing. Add padding to prevent movement during transit.

    Final Thoughts

    These Blueberry Swirl Sugar Cookies have become my signature dessert for good reason—they combine simplicity with a touch of elegance that never fails to impress. The contrast between the buttery cookie base and vibrant blueberry swirls creates a treat that’s both visually stunning and deliciously satisfying. Whether you’re an experienced baker or trying your hand at decorated cookies for the first time, this recipe offers that perfect balance of approachable technique and impressive results. I hope these cookies bring as much joy to your kitchen as they have to mine! Don’t forget to check out more of my recipes on Pinterest.

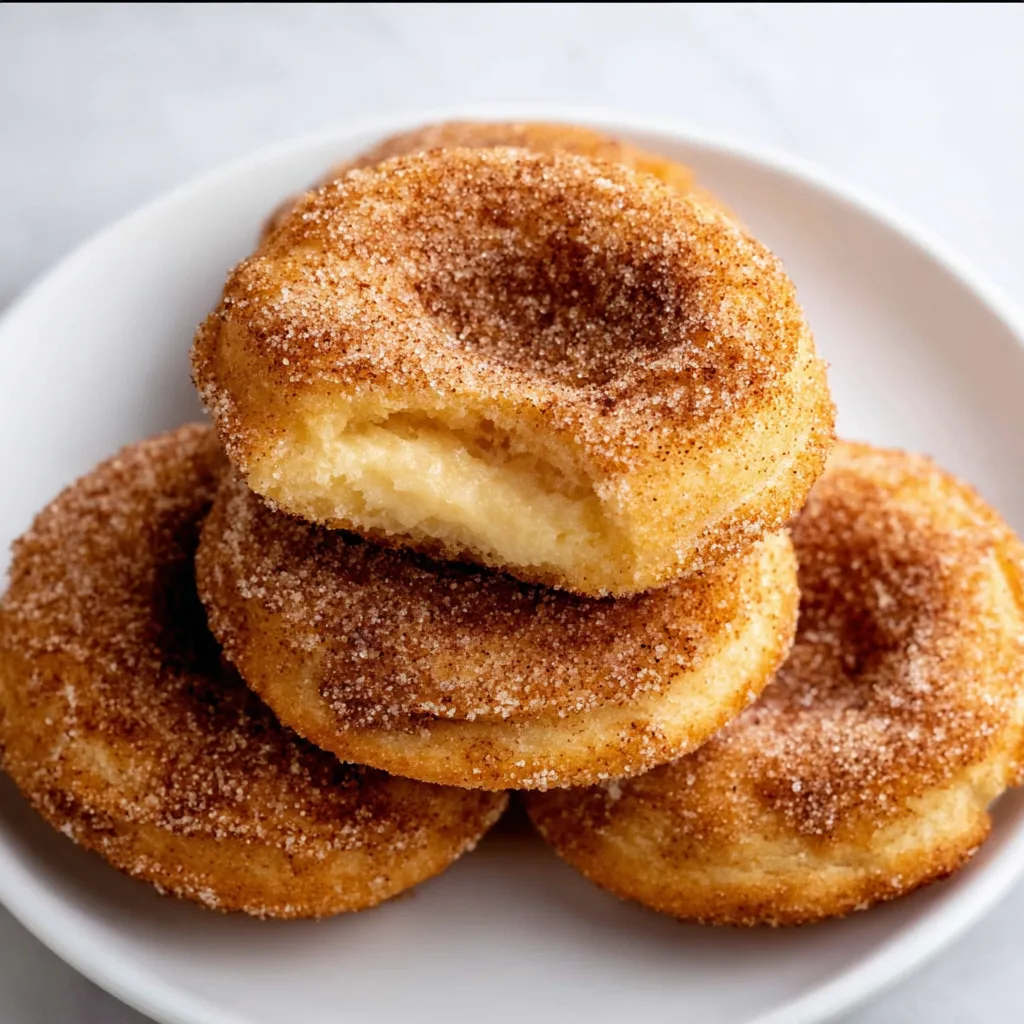
  • Churro Cheesecake Cookies: Irresistibly Gooey & Viral Treat!

    Churro Cheesecake Cookies: Irresistibly Gooey & Viral Treat!

    Churro Cheesecake Cookies: Irresistibly Gooey & Viral Treat!

    Churro Cheesecake Cookies are where my two dessert obsessions collide in the most magnificent way. The moment these cinnamon-sugar coated treasures exit the oven, my kitchen transforms into a Spanish bakery, with that unmistakable scent of warm churros dancing through the air. But hidden inside? A creamy cheesecake filling that makes these cookies absolutely irresistible. I first created these for my sister’s Cinco de Mayo party, and now they’re requested at every family gathering. Trust me, once you bite into that crispy exterior giving way to a velvety center, you’ll understand why these cookies have become legendary in my household.

    Recipe

    Why You’ll Love These Churro Cheesecake Cookies

    Perfect Texture Combination

    The magic of these Churro Cheesecake Cookies lies in their contrasting textures. The exterior delivers that signature churro crunch from a generous coating of cinnamon sugar that caramelizes slightly during baking. Meanwhile, the interior stays tender and soft, with pockets of creamy cheesecake filling that melt in your mouth. I’ve tested countless batches to achieve this balance—not too cakey, not too crisp. The slight chew as you bite through the cinnamon-sugar shell gives way to that rich, tangy filling that makes these cookies truly special.

    Make-Ahead Convenience

    These cookies are a busy baker’s dream because the dough can be prepped up to three days ahead and stored in the refrigerator. I often make the dough on Friday morning, then bake them fresh for weekend gatherings. The chilled dough actually improves the texture, allowing the flavors to meld beautifully. You can also freeze the shaped cookie dough balls for up to a month—just add 2-3 minutes to the baking time when cooking from frozen. This make-ahead flexibility has saved me countless times when unexpected guests drop by!

    Essential Tips & Tricks

    Perfecting the Filling

    The cheesecake filling is the star of these cookies, so temperature control is crucial. Make sure your cream cheese is at room temperature before mixing to avoid lumps. I like to take mine out at least an hour before baking. For extra flavor dimension, add a tiny splash of vanilla to the filling and a pinch of salt to enhance the tanginess. When forming the cookies, don’t overfill—about 1 teaspoon of filling per cookie is perfect. If you go overboard, the filling might leak during baking and compromise the perfect texture.

    Mastering the Cinnamon Sugar Coating

    The cinnamon-sugar mixture needs to be perfectly balanced for authentic churro flavor. I use a 4:1 ratio of sugar to cinnamon, which provides that classic taste without overwhelming the delicate cheesecake filling. Roll the cookies generously in this mixture before baking, pressing gently to help it adhere. For an extra touch of decadence, I sometimes add a pinch of cardamom or nutmeg to the mix. After baking, while the cookies are still warm (but not hot), you can give them a second light roll in fresh cinnamon sugar for maximum churro authenticity.

    Serving Ideas & Creative Variations

    Elegant Presentation Options

    Transform these Churro Cheesecake Cookies into an impressive dessert by creating a cookie sandwich. Simply place a small scoop of vanilla ice cream between two cooled cookies for a next-level treat. For dinner parties, I arrange them on a rustic wooden board with fresh berries and a drizzle of caramel sauce. A light dusting of powdered sugar just before serving adds visual appeal. These cookies also make beautiful gifts—stack them in a clear cellophane bag tied with raffia for a thoughtful homemade present that everyone will appreciate.

    Flavor Adaptations

    While the classic cinnamon-sugar combination is timeless, these cookies welcome creative twists. Try adding orange zest to the dough for a subtle citrus note that complements the cinnamon beautifully. For chocolate lovers, fold mini chocolate chips into the cheesecake filling or drizzle cooled cookies with melted chocolate. During fall, I add a pinch of pumpkin spice to the cinnamon-sugar mixture for seasonal flair. For a Mexican hot chocolate variation, add a tiny pinch of cayenne to the coating—the subtle heat creates an intriguing contrast with the sweet, creamy filling.

    Storage & Troubleshooting Guide

    Optimal Storage Methods

    To maintain the perfect texture of your Churro Cheesecake Cookies, store them in an airtight container at room temperature for up to 3 days. The cinnamon-sugar coating helps preserve their exterior crunch. For longer storage, refrigerate for up to a week, but allow them to come to room temperature before serving to restore their texture. If you notice the cookies softening, place them on a baking sheet in a 300°F oven for 3-5 minutes to refresh the exterior crunch without melting the filling.

    Fixing Common Issues

    If your cookies spread too much during baking, the dough was likely too warm. Always chill the dough for at least 30 minutes before baking. For cookies that crack excessively, your oven might be too hot—invest in an oven thermometer for accuracy. If the filling leaks, you may have used too much or not sealed the dough properly around it. When this happens, simply embrace the rustic look! For cookies that are too dry, reduce the baking time by 1-2 minutes next batch, as ovens vary significantly in temperature regulation.

    Frequently Asked Questions

    Can I make Churro Cheesecake Cookies ahead of time for a party?

    Absolutely! Make the dough up to 3 days ahead and refrigerate, or freeze the shaped cookies for a month. Bake them fresh the day of your event for the best texture and aroma.

    How do I know when the cookies are perfectly baked?

    Look for golden edges and a slightly cracked top. The centers should appear just set but still soft—they’ll firm up as they cool while keeping that creamy interior.

    Can I use low-fat cream cheese for the filling?

    I don’t recommend it. Full-fat cream cheese provides the rich, stable texture needed. Low-fat versions contain more water and can make the filling runny.

    What’s the best way to fill the cookies evenly?

    Use a small cookie scoop or melon baller for the dough, and a teaspoon measure for the filling. This ensures consistent sizing for even baking.

    Why did my Churro Cheesecake Cookies flatten too much?

    Likely causes include warm dough, not enough flour, or overbeating the butter. Chill the dough thoroughly and measure ingredients precisely for perfect results.

    Final Thoughts

    These Churro Cheesecake Cookies represent everything I love about baking—creativity, comfort, and the joy of sharing something truly special. The way the cinnamon-sugar coating creates that authentic churro experience while hiding a creamy surprise inside makes these cookies uniquely satisfying. I find myself making them whenever I need a guaranteed smile-maker. Whether for casual gatherings or special celebrations, these treats bridge cultures and create moments of pure delight. Don’t forget to check out more of my cookie creations on Pinterest!