Author: Jessica Moore

  • Banana Pudding Brownies: Irresistibly Gooey + Easy Dessert Bliss

    Banana Pudding Brownies: Irresistibly Gooey + Easy Dessert Bliss

    Banana Pudding Brownies: Irresistibly Gooey + Easy Dessert Bliss

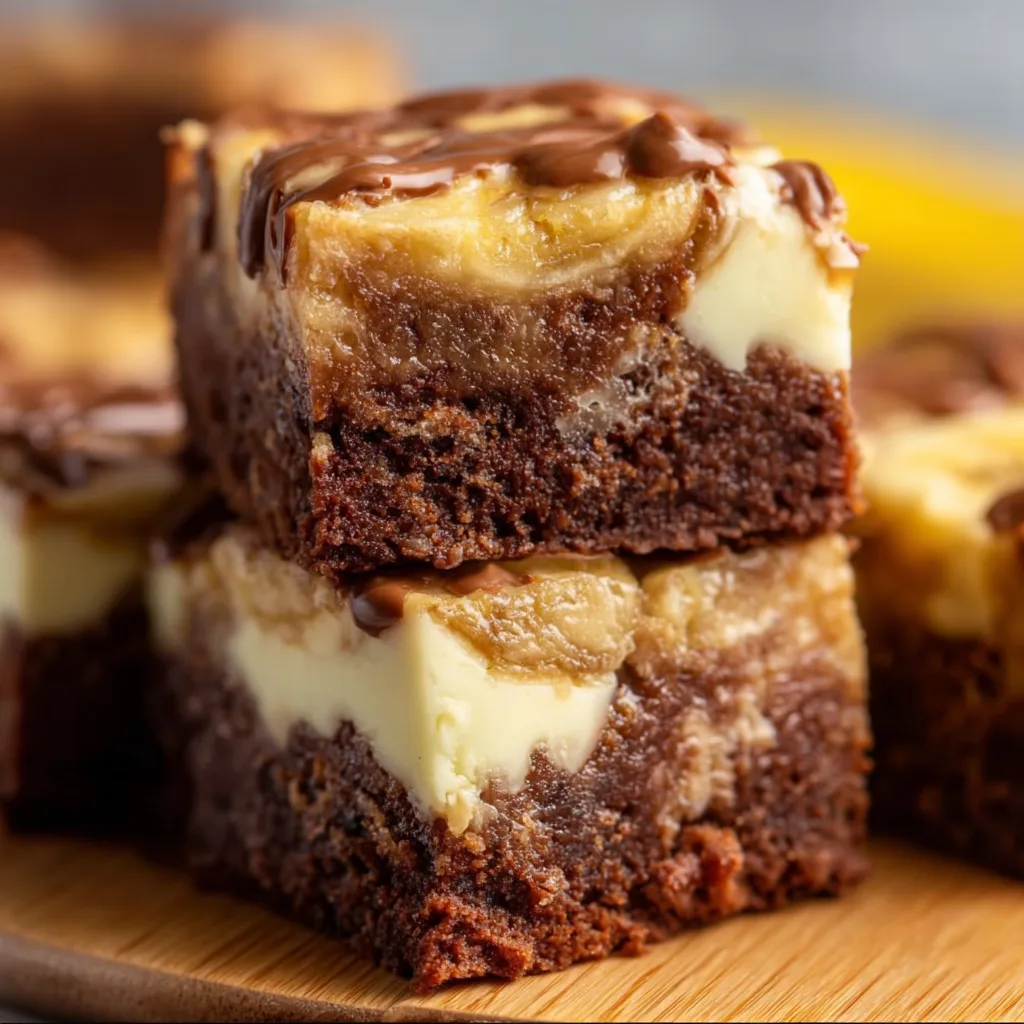
    Banana Pudding Brownies are what happens when two beloved desserts collide in the most magnificent way possible. The first time I made these for my sister’s birthday gathering, the pan was empty before I even had a chance to snap a photo! There’s something magical about the way the fudgy chocolate base mingles with creamy banana pudding layers and those nostalgic vanilla wafers. These brownies deliver all the comfort of traditional banana pudding but with an indulgent chocolate twist that’ll have everyone asking for your secret recipe. Trust me, these aren’t just brownies—they’re a sensation worth sharing at your next family get-together.

    Recipe

    Why You’ll Love This Banana Pudding Brownies

    Perfect Texture Combination

    The contrasting textures in these banana pudding brownies create an experience that’s nothing short of heavenly. The dense, fudgy brownie base provides that satisfying chew we all crave, while the silky banana pudding layer melts in your mouth with each bite. I love how the crushed vanilla wafers add just the right amount of crunch throughout. My neighbor Jen actually gasped when she first tried them, saying the texture was like nothing she’d experienced before. The slight firmness of the chilled pudding against the soft brownie creates that perfect balance that makes you close your eyes with each forkful.

    Make-Ahead Convenience

    One of my favorite things about these banana pudding brownies is how they actually improve with time. The flavors meld together beautifully as they rest, making them the perfect make-ahead dessert for busy hosts. I often prepare them the night before a gathering, which not only saves me time but results in a more developed flavor profile. The brownie layer absorbs subtle hints of banana, while the pudding takes on notes of chocolate. This dessert saved me during last-minute hosting duties when my in-laws surprised us with a visit—I simply pulled them from the refrigerator and became an instant dessert hero!

    Essential Tips & Tricks

    Achieving the Perfect Brownie Base

    The foundation of exceptional banana pudding brownies starts with a properly executed brownie layer. For that signature fudginess, be careful not to overmix the batter once you add the dry ingredients—just stir until barely combined. I learned this the hard way after creating accidental cake-like brownies during my first attempt! Another game-changer is pulling them from the oven when the center still looks slightly underdone. The residual heat will continue cooking them to perfection while cooling. For an extra depth of flavor, try browning your butter before adding it to the mixture—this small step creates caramel notes that complement the banana beautifully.

    Pudding Layer Perfection

    The key to an irresistible pudding layer lies in both ingredients and technique. Always use ripe bananas with plenty of brown spots for the most robust flavor—those yellow-green ones simply won’t deliver the same intensity. When preparing the pudding, constant whisking prevents lumps and ensures silky smoothness. My secret weapon is chilling the pudding for 30 minutes before spreading it over the cooled brownies. This creates cleaner layers and prevents unwanted mixing. For an elevated twist that impressed even my dessert-snob cousin, try folding in 1/4 cup of mascarpone cheese to the pudding for an ultra-luxurious mouthfeel.

    Serving Ideas & Creative Variations

    Elegant Presentation Options

    Transform these homey banana pudding brownies into showstopping desserts worthy of any special occasion with thoughtful presentation. Try cutting them into perfect squares and placing each on a small pool of chocolate ganache with a light dusting of cocoa powder. For dinner parties, I serve individual portions in clear glass tumblers, creating visible layers that guests can’t stop admiring. Add a fresh banana slice and a mini vanilla wafer as garnish, perhaps with a tiny mint leaf for color contrast. Last Christmas, I arranged them on a tiered stand with fairy lights woven around the base—the sparkle against the creamy yellow pudding created a magical display.

    Flavor Twist Inspirations

    While the classic version is divine, experimenting with flavor variations keeps this dessert exciting each time you make it. Try adding a layer of salted caramel between the brownie and pudding—the sweet-salty interplay is absolutely transformative. For a tropical version that transported my book club to vacation mode, fold diced mango and toasted coconut into the pudding layer. Coffee lovers might appreciate a teaspoon of espresso powder in the brownie batter, which intensifies the chocolate without tasting obviously like coffee. For a grown-up twist, consider soaking the vanilla wafers in a splash of bourbon before layering them throughout the dessert.

    Storage & Troubleshooting Guide

    Proper Storage Methods

    Keeping your banana pudding brownies fresh is essential for maintaining their delightful texture and preventing soggy disappointment. Store them in an airtight container in the refrigerator, where they’ll stay perfect for up to 4 days. I like to place a sheet of parchment between layers if stacking to prevent sticking. For longer storage, these brownies freeze surprisingly well—wrap individual portions tightly in plastic wrap, then foil, and freeze for up to 2 months. Allow them to thaw overnight in the refrigerator for best results. I learned through trial and error that room temperature storage is a no-go—the pudding layer becomes unstable after just a few hours.

    Fixing Common Issues

    Even experienced bakers encounter challenges, but most banana pudding brownie problems have simple solutions. If your pudding layer turns out too runny, refrigerate it longer before assembly or add an extra tablespoon of cornstarch to the mixture next time. For brownies that came out too dry, brush the top with simple syrup before adding the pudding layer—this rescue technique saved my dessert when I accidentally overbaked the base. Wafers losing their crunch? Try adding them just before serving rather than during assembly. And if your banana flavor isn’t pronounced enough, next time mash one extra overripe banana and fold it into the prepared pudding for intensified flavor.

    Frequently Asked Questions

    Can I use instant pudding mix instead of making pudding from scratch?

    Yes, you can use instant banana pudding for a shortcut version. Prepare according to package directions but use only 1½ cups milk instead of the recommended amount for a firmer texture that works better in layered desserts.

    How ripe should the bananas be for banana pudding brownies?

    The best bananas for this recipe are very ripe with numerous brown spots or even mostly brown skin. These provide the sweetest, most intense banana flavor for your pudding brownies.

    Can I make these banana pudding brownies gluten-free?

    Absolutely! Substitute a 1:1 gluten-free flour blend in the brownie base and use gluten-free vanilla cookies instead of traditional vanilla wafers. The pudding portion is naturally gluten-free.

    Why did my brownie layer come out too cakey?

    Over-mixing the brownie batter or adding too much flour can create a cakey texture. Mix just until ingredients are combined and measure flour by spooning into measuring cups rather than scooping directly.

    How far in advance can I make these for a party?

    These brownies actually improve with time! You can make them up to 2 days before your event and store covered in the refrigerator. Add any final garnishes just before serving.

    Final Thoughts

    These Banana Pudding Brownies represent the perfect marriage of two beloved desserts, creating something greater than the sum of its parts. I’ve watched skeptics become converts with just one bite of these indulgent layered treats. Whether you’re serving them at a casual backyard gathering or an elegant dinner party, they bring that special touch that makes memories around the table. Don’t forget to share your creations on Pinterest – I’d love to see your personal spin on this recipe that brings together chocolate decadence and creamy banana comfort!
  • Coconut Cheesecake Bread Pudding That Will Blow Your Mind!

    Coconut Cheesecake Bread Pudding That Will Blow Your Mind!

    Coconut Cheesecake Bread Pudding That Will Blow Your Mind!

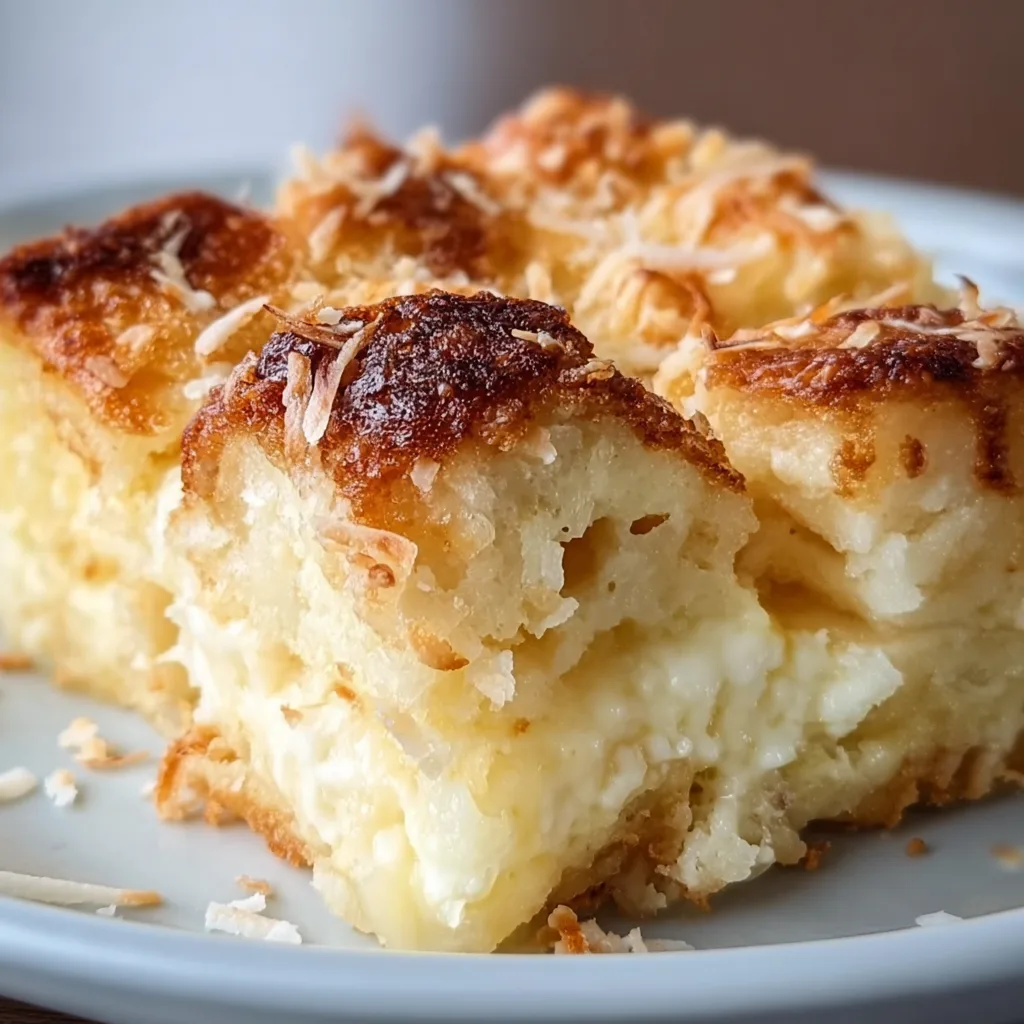
    Coconut Cheesecake Bread Pudding combines two beloved desserts into one heavenly creation that’s both comforting and indulgent. The first time I made this for my family, the kitchen filled with the sweet aroma of toasted coconut and vanilla, instantly transporting us to a tropical paradise. There’s something magical about the way the creamy cheesecake swirls melt into soft, custard-soaked bread, creating pockets of velvety sweetness in every bite. If you’re craving something that feels like a warm hug in dessert form, this recipe is about to become your new favorite.

    Recipe

    Why You’ll Love This Coconut Cheesecake Bread Pudding

    Perfect Balance of Flavors and Textures

    This dessert is a textural wonderland that satisfies all your cravings at once. The bread soaks up the rich custard while maintaining just enough structure, creating that perfect bread pudding base. But it’s the contrast between the creamy cheesecake pockets and the slightly crisp, toasted coconut topping that makes this truly special. I love how the subtle tang from the cream cheese balances the sweetness, while the coconut adds a tropical note that elevates the entire dessert. The first forkful delivers that perfect combination of soft, creamy, and just a touch of crunch.

    Make-Ahead Friendly for Effortless Entertaining

    One thing I absolutely adore about this Coconut Cheesecake Bread Pudding is how entertaining-friendly it is. You can assemble it the night before, letting the bread fully absorb all those luscious flavors overnight. This not only saves you precious time when hosting but actually improves the final result! The bread has more time to soak up the custard, and the cheesecake mixture melds beautifully with the other ingredients. I’ve served this at countless brunches and dinner parties, and guests always think I’ve spent hours in the kitchen that morning.

    Essential Tips & Tricks

    Choosing the Right Bread

    The foundation of any great bread pudding is, of course, the bread itself. For this Coconut Cheesecake Bread Pudding, I recommend using slightly stale brioche or challah for their buttery richness and ability to hold structure. Day-old bread works perfectly because it absorbs the custard without becoming too soggy. If you only have fresh bread, don’t worry! Just cube it, spread it on a baking sheet, and dry in a 275°F oven for about 10 minutes. This simple step ensures your pudding has that perfect texture—custardy inside with slightly crisp edges, just like in my pecan bourbon bread pudding.

    Perfecting the Cheesecake Swirl

    The cheesecake element is what makes this bread pudding truly special, but it requires a gentle touch. Make sure your cream cheese is completely softened to avoid lumps—I leave mine out for at least an hour before mixing. When swirling the cheesecake mixture into the soaked bread, use a light hand and don’t overmix. You want distinct pockets of cheesecake throughout rather than a uniform mixture. My favorite technique is using the back of a spoon to create little divots in the bread mixture, filling them with the cheesecake batter, then lightly swirling with a knife.

    Serving Ideas & Creative Variations

    Warm vs. Chilled Presentations

    While traditionally served warm, this Coconut Cheesecake Bread Pudding offers delightful versatility in how you can present it. For a cozy winter dessert, serve it warm from the oven with a scoop of vanilla ice cream that melts into all the nooks and crannies. In summer months, I actually prefer it chilled—the flavors concentrate and the texture becomes more like a traditional cheesecake. For an elegant brunch option, try serving individual portions in ramekins topped with fresh berries and a light dusting of powdered sugar. The contrast of the bright fruit against the creamy pudding is both visually stunning and delicious.

    Flavor Variations to Try

    The beauty of this recipe is how easily it adapts to different flavor profiles while maintaining its creamy essence. For a tropical twist, add diced mango or pineapple to the mixture before baking. Chocolate lovers can fold in white or dark chocolate chips for melty pockets of goodness throughout. During fall, I love adding cinnamon, nutmeg, and diced apples for a seasonal variation that reminds me of my blueberry cheesecake cookies but in warm pudding form. For an adult version, try soaking the bread in rum-infused custard—the alcohol cooks off, leaving behind a complex caramel-like flavor.

    Storage & Troubleshooting Guide

    Proper Storage for Maximum Freshness

    To maintain the perfect texture of your Coconut Cheesecake Bread Pudding, proper storage is essential. For leftovers (if you’re lucky enough to have any!), cool the pudding completely before covering with plastic wrap directly touching the surface—this prevents a skin from forming. Refrigerate for up to 4 days. When ready to enjoy again, reheat individual portions in the microwave for 30-45 seconds, or place the whole dish, covered with foil, in a 325°F oven for about 15 minutes. The bread pudding actually develops deeper flavors after a day in the refrigerator, making it perfect for meal prep.

    Fixing Common Issues

    Even experienced bakers can encounter texture troubles with bread pudding. If your pudding seems too dry, it likely needed more custard or less baking time. Next time, ensure your bread is properly soaked, and check for doneness earlier. For a pudding that’s too soggy in the center, it needed more baking time—remember that it should be set but still have a slight jiggle in the center. If your cheesecake swirls sink to the bottom, try chilling the cheesecake mixture before swirling, or dollop it on top during the last 15 minutes of baking for a beautiful marbled effect.

    Frequently Asked Questions

    Can I make Coconut Cheesecake Bread Pudding ahead of time?

    Absolutely! Assemble it up to 24 hours in advance and refrigerate unbaked. Let it sit at room temperature for 30 minutes before baking, or add 10-15 minutes to the baking time if cooking directly from the refrigerator.

    What type of coconut works best in this recipe?

    Use sweetened shredded coconut for the custard mixture and toasted unsweetened coconut flakes for topping. This combination provides the perfect balance of sweetness and texture without becoming overpowering.

    Can I freeze leftover bread pudding?

    Yes! Portion it into individual servings, wrap tightly in plastic wrap and foil, then freeze for up to 3 months. Thaw overnight in the refrigerator and reheat gently for best results.

    What can I substitute for cream cheese?

    Mascarpone makes a luxurious substitute with a milder flavor. For a lighter version, try Greek yogurt cream cheese, though the texture will be slightly different.

    Why did my Coconut Cheesecake Bread Pudding come out soggy?

    This usually happens when the bread-to-custard ratio is off. Make sure your bread is slightly stale and that you’ve allowed enough time (at least 30 minutes) for the bread to absorb the liquid before baking.

    Final Thoughts

    This Coconut Cheesecake Bread Pudding represents everything I love about comfort food with a creative twist. It’s the dessert I turn to when I want to impress without spending hours in the kitchen, and the one friends always request for gatherings. The combination of tropical coconut, creamy cheesecake swirls, and custardy bread creates something truly magical that works year-round. I hope you’ll try it and experience the joy of watching someone take that first bite and close their eyes in pure dessert bliss. Don’t forget to check out more of my favorite dessert creations on Pinterest!

  • Dark Chocolate Bread Pudding: Irresistibly Decadent & Comforting Treat

    Dark Chocolate Bread Pudding: Irresistibly Decadent & Comforting Treat

    Dark Chocolate Bread Pudding: Irresistibly Decadent & Comforting Treat

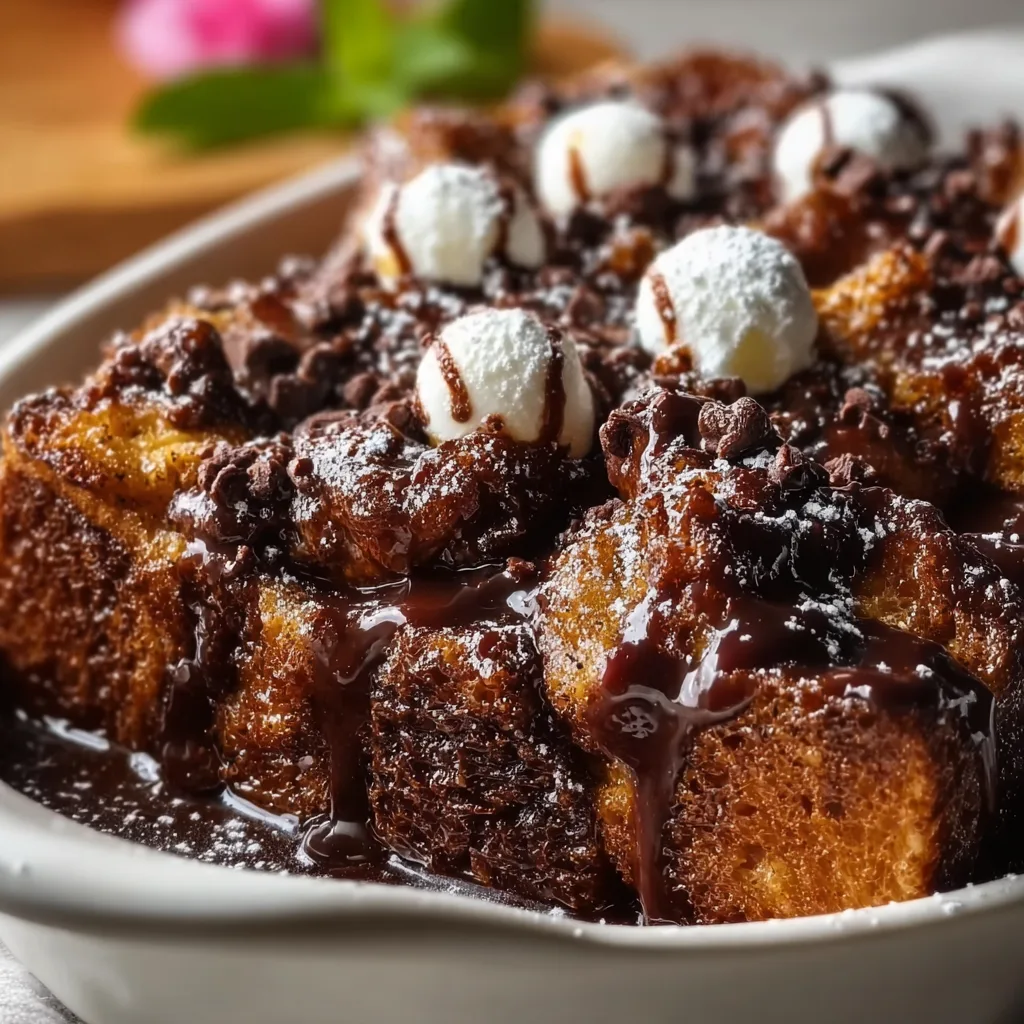
    Dark Chocolate Bread Pudding transforms humble ingredients into pure magic—rich, velvety, and utterly indulgent. I discovered this recipe during a rainy Sunday when nothing but chocolate would cure my blues. The moment the warm, intoxicating aroma filled my kitchen, I knew this would become my go-to comfort dessert. There’s something about the way the dark chocolate melts between layers of custard-soaked bread that feels like a warm hug from the inside. Trust me, this isn’t just dessert—it’s therapy in a baking dish that’ll have everyone asking for seconds.

    Recipe

    Why You’ll Love This Dark Chocolate Bread Pudding

    A Perfect Balance of Textures

    The contrasting textures are what make this dark chocolate bread pudding truly special. The crispy, caramelized top gives way to a pillowy center that’s somehow both light and decadent. I love how the edges become slightly chewy while the middle stays deliciously moist. The bread soaks up the custard like a dream, creating pockets of melted chocolate throughout. It’s this beautiful dance between soft and firm that makes each bite an adventure. When warm, the chocolate stays slightly molten, creating that perfect spoonable consistency that’s impossible to resist.

    Rich Flavor Without Overwhelming Sweetness

    Unlike many desserts that leave you with sugar overload, this dark chocolate bread pudding offers complex flavor depth that’s sophisticated yet comforting. The bittersweet notes of high-quality dark chocolate balance perfectly with the subtle vanilla-infused custard. I’ve carefully calibrated the sweetness so the chocolate’s natural character shines through. There’s a hint of warmth from cinnamon and a whisper of salt that elevates the entire experience. It’s indulgent without being cloying—the kind of dessert that satisfies your craving without sending you into a sugar coma.

    Essential Tips & Tricks

    Choosing the Right Bread

    The foundation of exceptional dark chocolate bread pudding is, unsurprisingly, the bread itself. I’ve experimented extensively and found that slightly stale brioche or challah creates the perfect structure—rich enough to stand up to the custard but tender enough to meld beautifully with the chocolate. Day-old bread works wonders as it absorbs more custard without falling apart. Avoid pre-sliced sandwich bread which tends to disintegrate. Instead, tear rustic bread into irregular chunks for more interesting texture variation. This approach creates those delightful crispy peaks and custardy valleys that make bread pudding with vanilla sauce so irresistible.

    Perfecting Your Custard Base

    The custard is where the magic happens, so don’t rush this step! For silky-smooth results, warm your milk and cream mixture just until steaming—never boiling. This gentle approach prevents the eggs from scrambling when combined. I always whisk my eggs with sugar until slightly pale before slowly incorporating the warm dairy. Adding a splash of espresso (optional but recommended) intensifies the chocolate flavor without making it taste like coffee. Let the bread soak for at least 30 minutes, occasionally pressing down gently to ensure even absorption. This patience pays off with a perfectly unified texture throughout.

    Serving Ideas & Creative Variations

    Elegant Presentation Options

    Elevate your dark chocolate bread pudding from homey comfort food to dinner party showstopper with thoughtful presentation. Individual ramekins create a sophisticated plated dessert—try dusting with cocoa powder and adding a small gold leaf for special occasions. For family-style serving, a drizzle of warm ganache creates dramatic flair as it cascades down each portion. Fresh raspberries or pomegranate seeds provide beautiful color contrast and bright flavor balance. Mint leaves add a pop of green and aromatic freshness. For height, consider a delicate chocolate curl or pirouette cookie standing upright in a dollop of whipped cream.

    Creative Flavor Combinations

    While classic dark chocolate bread pudding is divine, experimenting with complementary flavors takes it to new heights. Try adding orange zest to the custard for a chocolate-orange variation that’s reminiscent of those holiday chocolate balls. Cinnamon and cayenne create a Mexican chocolate profile with gentle warmth. For something truly decadent, fold in crushed butter toffee pretzels for salty-sweet crunch. White chocolate chunks create beautiful marbling and flavor contrast. During fall, pumpkin purée and warming spices transform this into a seasonal treat. My personal favorite: adding a layer of peanut butter between the bread for a nostalgic twist.

    Storage & Troubleshooting Guide

    Proper Storage for Maximum Freshness

    To maintain the perfect texture of your dark chocolate bread pudding, proper storage is crucial. Once completely cooled, cover tightly with plastic wrap directly touching the surface to prevent a skin from forming. Refrigerate for up to 3 days—though it rarely lasts that long in my house! For reheating, individual portions warm beautifully in the microwave for 20-30 seconds. For whole puddings, cover with foil and warm in a 300°F oven for about 15 minutes. If freezing (yes, you can!), wrap tightly in plastic, then foil, and freeze for up to 1 month. Thaw overnight in the refrigerator before reheating.

    Troubleshooting Common Issues

    Even experienced bakers encounter challenges with bread pudding. If your pudding seems too soggy in the center, it likely needs more baking time—cover with foil to prevent over-browning while the center sets. Conversely, if it’s dry, you may have used too little custard or overbaked. Next time, ensure bread is fully submerged and check earlier. For uneven chocolate distribution, try layering half the bread, then chocolate, then remaining bread before pouring custard. If your pudding puffed dramatically then collapsed, don’t worry—this is normal! A water bath can help prevent this if it bothers you aesthetically.

    Frequently Asked Questions

    Can I make dark chocolate bread pudding ahead of time?

    Absolutely! Prepare it up to 24 hours in advance, refrigerate unbaked, then bring to room temperature for 30 minutes before baking. The extra soaking time actually improves the texture.

    What’s the best dark chocolate to use?

    Use chocolate with 60-70% cacao content for the perfect balance. Chips work, but chopped bar chocolate melts more evenly and creates better pockets of chocolate throughout.

    Can I make this recipe gluten-free?

    Yes! Substitute gluten-free brioche or challah, ensuring it’s slightly stale. The structure may be slightly different, but the flavor remains delicious.

    How do I know when my bread pudding is done?

    The pudding is ready when the center reaches 160°F or a knife inserted comes out mostly clean with a few moist crumbs. The top should be set but still have slight jiggle.

    Can I reduce the sugar in this dark chocolate bread pudding?

    You can reduce sugar by up to 25% without affecting texture. Consider using a slightly less bitter chocolate (around 55% cacao) to maintain balance.

    Final Thoughts

    This dark chocolate bread pudding has been my secret weapon for years—whether I’m nursing a broken heart or celebrating life’s victories. There’s something profoundly satisfying about transforming simple ingredients into something so extraordinarily comforting. The beauty lies in its adaptability and forgiving nature, perfect for both novice bakers and seasoned pros. I hope this recipe brings the same joy to your kitchen as it has to mine. Don’t forget to check out more indulgent desserts on Pinterest for your next baking adventure!

  • Pecan Bourbon Bread Pudding Recipe That Will Melt Your Heart

    Pecan Bourbon Bread Pudding Recipe That Will Melt Your Heart

    Pecan Bourbon Bread Pudding Recipe That Will Melt Your Heart

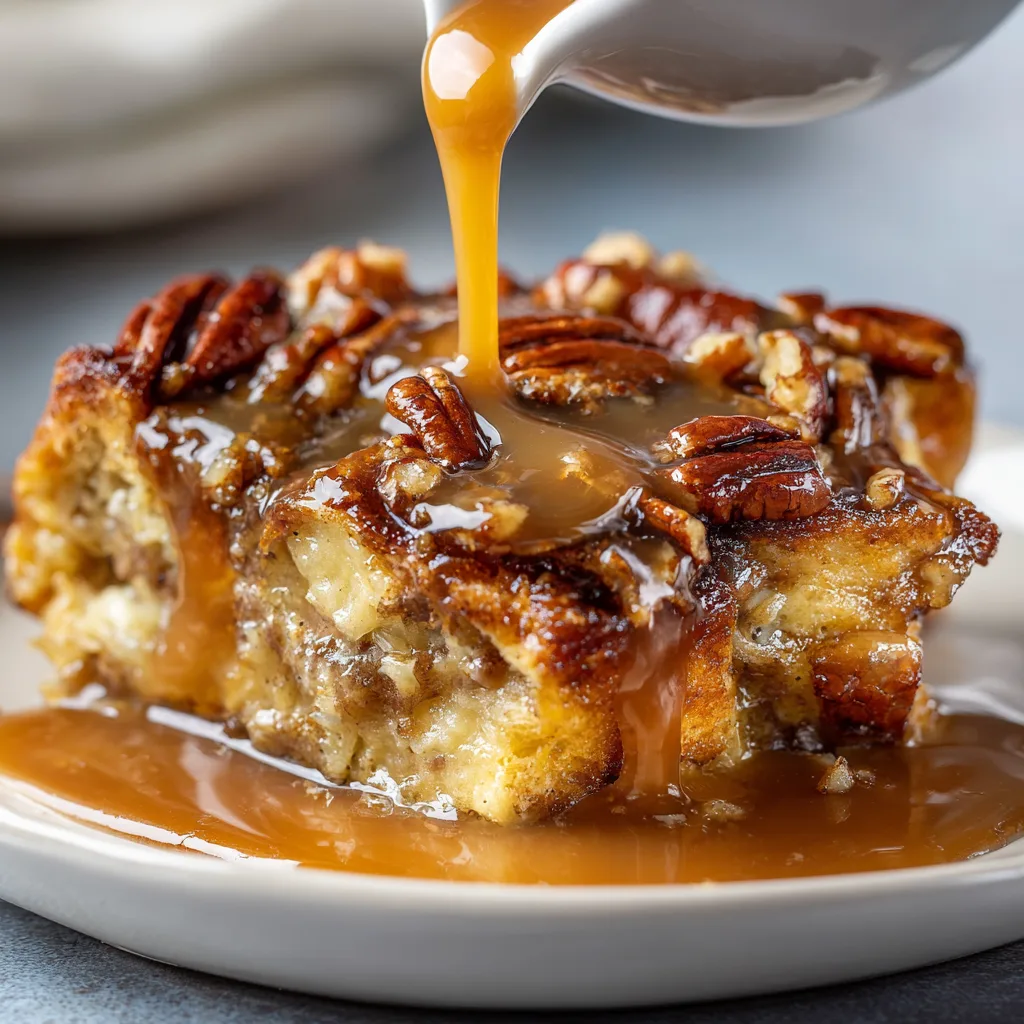
    Pecan Bourbon Bread Pudding with Sauce is the ultimate comfort dessert that transforms humble ingredients into something truly magical. The first time I made this for Sunday dinner, my kitchen filled with the intoxicating aroma of caramelizing sugar, toasted pecans, and that unmistakable bourbon warmth. There’s something about the way the crusty bread soaks up the custard, creating those perfect crispy edges while maintaining a velvety center. This isn’t just dessert—it’s a hug in a baking dish that’ll have everyone lingering at the table, scraping their spoons for one more bite of that buttery bourbon sauce.

    Recipe

    Why You’ll Love This Pecan Bourbon Bread Pudding with Sauce

    A Perfect Balance of Textures and Flavors

    The magic of this bread pudding lies in its contrasts—crispy, caramelized edges giving way to a custard-soaked center that melts in your mouth. The pecans add a delightful crunch while the bourbon infuses everything with its warm, vanilla-caramel notes. I still remember my neighbor Jen’s face when she first tasted it—eyes closed, spoon hovering mid-air—that moment of pure bliss. The bread soaks up the custard mixture like a dream, creating pockets of rich creaminess between the chunks of bread. It’s indulgent without being heavy, complex without being complicated.

    Make-Ahead Convenience for Stress-Free Entertaining

    One of my favorite things about this Pecan Bourbon Bread Pudding is how entertaining-friendly it is. I’ve made it countless times for dinner parties, always preparing it the day before. The flavors actually deepen overnight, making it even more delicious. Just reheat it before serving and warm up that bourbon sauce. Your guests will think you’ve been slaving away all day, when really, you’ve been relaxing with a cup of coffee. This dessert has saved me during last-minute dinner invitations—it’s impressive enough for company but simple enough for a cozy night in.

    Essential Tips & Tricks

    Choosing the Right Bread for Perfect Results

    The foundation of exceptional bread pudding starts with the bread itself. I’ve learned through many batches that day-old bread works best—it absorbs the custard without dissolving into mush. Brioche, challah, or French bread are my top choices for their structure and subtle sweetness. Tear rather than cut your bread for irregular pieces that create more texture. Let those bread chunks sit out uncovered for a few hours (or overnight) to dry slightly. This extra step might seem fussy, but I promise it makes the difference between good bread pudding and one that’s transcendent.

    Mastering the Bourbon Sauce

    The sauce is where this dessert truly shines—rich, buttery, and kissed with just enough bourbon to make it interesting without overwhelming. The key is adding the bourbon off-heat to preserve its complex flavor notes. I once made the mistake of boiling it too long and lost all that beautiful bourbon character! Start with quality bourbon (doesn’t have to be expensive, just decent), and remember that a little goes a long way. For a non-alcoholic version, bourbon extract works surprisingly well. Always serve the sauce warm, drizzling it over individual portions rather than the entire pudding to maintain those lovely textural contrasts.

    Serving Ideas & Creative Variations

    Seasonal Adaptations That Wow

    This versatile dessert transforms beautifully with the seasons. In summer, I fold in fresh berries and serve with a scoop of vanilla ice cream that melts into all the crevices. Fall calls for diced apples sautéed with cinnamon before mixing in. Winter holidays? Add crushed peppermint and a drizzle of chocolate sauce. Spring brings lemon zest and a dollop of whipped mascarpone. The bourbon sauce pairs wonderfully with each variation, though you can adjust the spices accordingly. My family has come to expect a new twist each time, making it our most anticipated dessert tradition.

    Elegant Presentation Techniques

    Transform this humble comfort dessert into a showstopper with thoughtful presentation. Individual ramekins create an elegant plated dessert—I brush their rims with sugar before baking for a caramelized edge. For dinner parties, I use a springform pan lined with parchment, creating a tall, cake-like presentation that slices beautifully. Garnish with candied pecans, a dusting of powdered sugar, or fresh mint. For the ultimate indulgence, place the warm sauce in a small pitcher alongside, allowing guests to pour as much or little as they desire. The ritual of the pour adds to the experience.

    Storage & Troubleshooting Guide

    Proper Storage for Leftovers

    Storing this bread pudding properly ensures you can enjoy its deliciousness for days. Refrigerate leftovers within two hours of baking, covering tightly with plastic wrap or in an airtight container. It keeps beautifully for up to 4 days. The sauce should be stored separately in its own container. When reheating, add a splash of cream or milk to the pudding to restore moisture, then warm in a 300°F oven for about 15 minutes until heated through. Microwave individual portions for 30-45 seconds. I’ve found that a quick toast under the broiler revives that lovely caramelized top.

    Fixing Common Bread Pudding Problems

    Even experienced bakers encounter challenges with bread pudding. If yours turns out too dry, your bread likely absorbed too much liquid before baking—next time, reduce soaking time or add more custard. Too soggy? Your bread pieces might have been too fresh or small. The pudding should jiggle slightly in the center when done but not slosh. If your sauce separates, whisk vigorously off heat or add a splash of cream to re-emulsify. For a sauce that’s too thin, simmer a bit longer; too thick, add a tablespoon of cream. Remember that bread pudding continues to set as it cools.

    Frequently Asked Questions

    Can I make Pecan Bourbon Bread Pudding with Sauce ahead of time?

    Absolutely! Prepare it up to 24 hours ahead, cover and refrigerate unbaked. Let it come to room temperature for 30 minutes before baking. The sauce can be made 3 days ahead and gently reheated before serving.

    What’s the best bourbon to use in this recipe?

    A mid-range bourbon works perfectly—Maker’s Mark, Buffalo Trace, or Knob Creek are excellent choices. You’ll want something smooth with vanilla and caramel notes, but save your top-shelf bottles for sipping.

    Can I freeze leftovers?

    Yes! Freeze individual portions without sauce for up to 3 months. Thaw overnight in the refrigerator and reheat in a 325°F oven until warm. Make fresh sauce or freeze it separately in an ice cube tray.

    How do I know when my bread pudding is done?

    The pudding should be golden brown on top with a slight jiggle in the center. A knife inserted comes out mostly clean but still moist. Internal temperature should reach 160°F for food safety.

    Can I make this recipe without alcohol?

    Definitely! Replace bourbon with apple juice, vanilla extract, or bourbon extract for the flavor without alcohol. You’ll still get a delicious caramel sauce that complements the pudding perfectly.

    Final Thoughts

    This Pecan Bourbon Bread Pudding with Sauce has become my signature dessert for good reason—it transforms simple ingredients into something extraordinary that creates lasting memories around the table. There’s something magical about watching someone take their first bite, eyes widening as they taste those layers of flavor. Whether you’re making it for a special occasion or just because it’s Tuesday, this bread pudding brings a touch of Southern comfort to any meal. I’d love to see your creations on Pinterest—tag me when you make your own version!

  • Boston Cream Pie Cookies: Irresistible Treats You’ll Crave Instantly

    Boston Cream Pie Cookies: Irresistible Treats You’ll Crave Instantly

    Boston Cream Pie Cookies: Irresistible Treats You’ll Crave Instantly

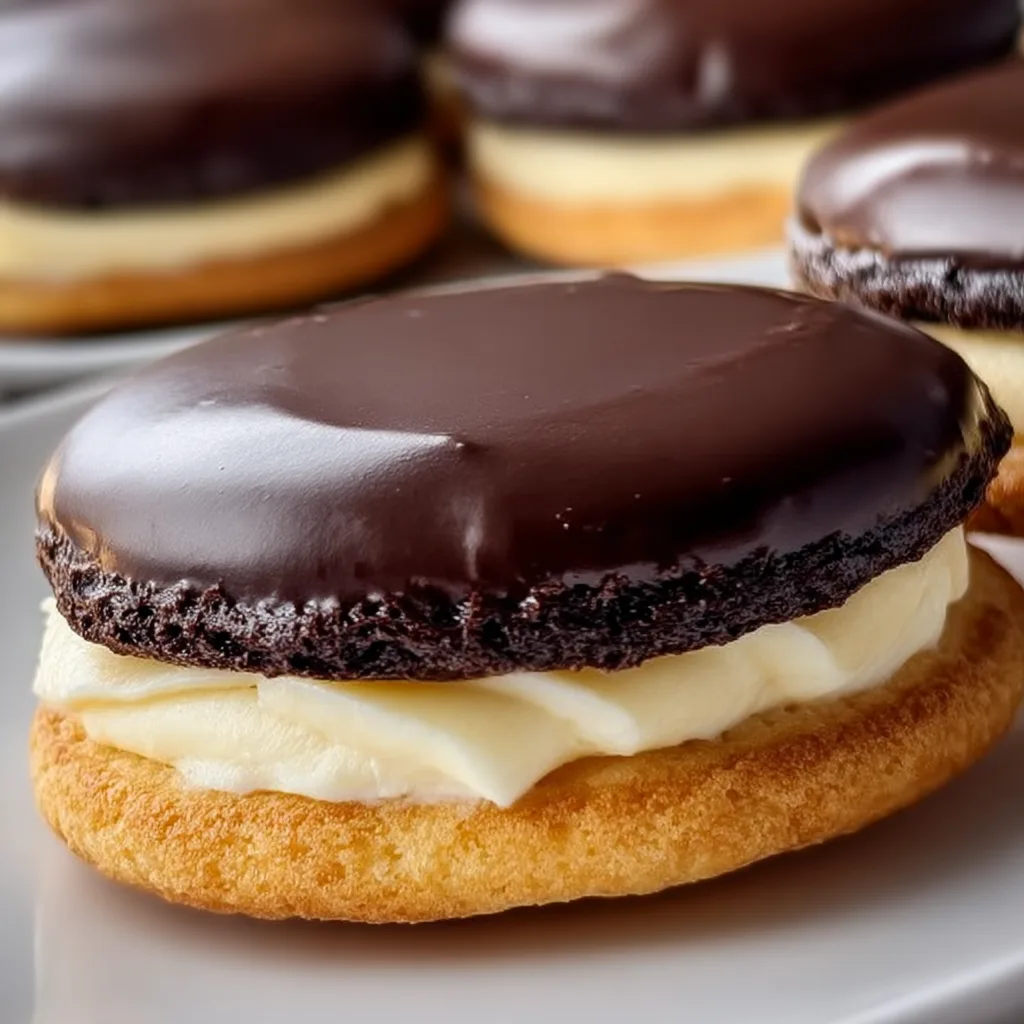
    Boston Cream Pie Cookies transform the classic dessert into perfect, portable treats that capture all the magic of the original. The first time I made these for my sister’s birthday gathering, they disappeared within minutes! There’s something irresistibly nostalgic about that combination of soft vanilla cookies, creamy custard filling, and rich chocolate glaze that makes everyone reach for seconds. These little gems deliver all the decadent flavors of traditional Boston cream pie but in an adorable cookie form that’s perfect for sharing at parties or tucking into lunchboxes. If you love creative twists on classic desserts like my chocolate chip cookie dough brownie bites, these cookies will absolutely steal your heart.

    Recipe

    Why You’ll Love These Boston Cream Pie Cookies

    Perfect Balance of Flavors and Textures

    These Boston Cream Pie Cookies are a sensory delight from the first bite to the last. The vanilla cookie base provides just the right amount of sweetness and structure without overpowering the star attractions. When you bite into one, the velvety custard filling oozes slightly, creating that moment of pure joy that makes you close your eyes and savor. The glossy chocolate ganache on top adds the perfect finishing touch, creating that iconic Boston cream pie flavor profile that’s been beloved for generations. The contrast between the tender cookie, silky filling, and smooth chocolate is absolutely magical.

    Make-Ahead Convenience

    One thing I absolutely adore about these Boston Cream Pie Cookies is how perfect they are for planning ahead. You can bake the cookie bases up to three days before assembly and store them in an airtight container. The custard filling can be made a day ahead and kept refrigerated until you’re ready to assemble. This time-saving approach makes them ideal for busy holiday seasons or when you’re hosting a gathering. I often prep components during my Sunday baking session and assemble them for Tuesday book club meetings. Everyone thinks I’ve spent hours in the kitchen that day!

    Essential Tips & Tricks

    Perfecting the Custard Filling

    The heart of any Boston Cream Pie Cookie is its custard filling, and getting it just right makes all the difference. Use whole milk for the richest flavor, and be sure to temper your eggs properly by slowly adding the hot milk mixture while whisking constantly. This prevents scrambling and ensures silky smoothness. Don’t rush the cooking process—the custard needs to reach the right thickness where it coats the back of a spoon and holds a line when you run your finger through it. For extra insurance against lumps, strain the finished custard through a fine-mesh sieve before chilling.

    For cookie bases that perfectly complement the Boston cream pie experience, aim for a texture that’s soft yet sturdy enough to hold the filling. Room temperature butter is non-negotiable here—cold butter won’t cream properly, and melted butter will change your cookie structure. When measuring flour, use the spoon-and-level method rather than scooping directly with the measuring cup to avoid dense cookies. If you’re looking for other delicious cookie ideas, my butter pecan cookies use similar techniques for achieving that perfect texture. Don’t overbake—they should be set but not browned.

    Serving Ideas & Creative Variations

    Elegant Presentation Options

    Transform these Boston Cream Pie Cookies into showstoppers with a few simple presentation touches. Arrange them on a tiered cake stand for afternoon tea or special gatherings—the elevation makes them look even more special. For an extra touch of elegance, dust the edges with a bit of gold luster dust or add tiny chocolate curls on top. I love serving them alongside espresso in demitasse cups for dinner parties; the coffee complements the chocolate beautifully. For birthdays, arrange them in a circle on a cake plate with candles in the center for a unique “cookie cake” alternative.

    Flavor Twists and Variations

    While classic Boston Cream Pie Cookies are divine, don’t be afraid to play with variations. Add a splash of orange extract to the custard for a citrus twist that brightens the entire cookie. For chocolate lovers, try adding cocoa powder to the cookie base for a chocolate-on-chocolate experience. Coffee-infused ganache adds sophisticated depth—just dissolve a teaspoon of espresso powder in the hot cream before pouring over chocolate. For a festive holiday version, add a drop of peppermint extract to the chocolate topping, similar to the flavor profile in my caramel swirl cheesecake but with a minty twist.

    Storage & Troubleshooting Guide

    Proper Storage for Maximum Freshness

    Once assembled, Boston Cream Pie Cookies should be stored in the refrigerator in an airtight container with parchment paper between layers to prevent sticking. They’ll maintain peak freshness for 2-3 days, though the cookie base may soften slightly from the moisture in the custard—many people (including me!) actually prefer this texture. For longer storage, you can freeze the unfilled cookie bases for up to 3 months. I don’t recommend freezing assembled cookies as the texture of the custard can become grainy upon thawing.

    Fixing Common Issues

    If your custard turns out lumpy, don’t panic! Simply push it through a fine-mesh sieve while still warm to remove any cooked egg bits. For custard that’s too thin, whisk in a cornstarch slurry (1 teaspoon cornstarch mixed with 1 tablespoon cold water) and heat gently until thickened. If chocolate ganache seizes or becomes grainy, whisk in a few drops of warm cream until it returns to a smooth consistency. For cookies that spread too much during baking, chill the dough for 30 minutes before baking the next batch, and make sure your oven temperature is accurate.

    Frequently Asked Questions

    Can I make Boston Cream Pie Cookies ahead of time?

    Yes! Bake cookie bases up to 3 days ahead, prepare custard 1 day ahead, and store separately refrigerated. Assemble with chocolate topping within 4 hours of serving for best results.

    How do I prevent the custard from making my cookies soggy?

    Create a slight “well” in each cookie, apply a thin layer of melted chocolate as a barrier, let it set, then add custard. This creates a moisture barrier between cookie and filling.

    While homemade custard provides the best flavor and texture, instant vanilla pudding mix prepared with 25% less milk than package directions can work as a time-saving alternative.

    Why did my chocolate topping become dull after setting?

    Chocolate can lose its shine if it gets too hot or cools too quickly. For glossy topping, heat cream just until steaming, not boiling, and let ganache cool slightly before spreading.

    What’s the best way to fill Boston Cream Pie Cookies neatly?

    Use a piping bag fitted with a medium round tip to pipe custard onto cookies. This gives you precise control and creates a neater presentation than spooning.

    Final Thoughts

    Boston Cream Pie Cookies bring together everything we love about the classic dessert in a perfectly portable package. The combination of tender vanilla cookies, silky custard, and glossy chocolate creates an irresistible treat that’s both nostalgic and fresh. I find myself making these whenever I need a dessert that’s guaranteed to impress without requiring hours in the kitchen. Whether you’re serving them at a special gathering or simply treating yourself to something delicious, these cookies deliver pure joy in every bite. Don’t forget to share your creations on Pinterest – I’d love to see your Boston Cream Pie Cookie masterpieces!

  • Blueberry Cheesecake Cookies: Irresistibly Soft & Bursting with Flavor!

    Blueberry Cheesecake Cookies: Irresistibly Soft & Bursting with Flavor!

    Blueberry Cheesecake Cookies: Irresistibly Soft & Bursting with Flavor!

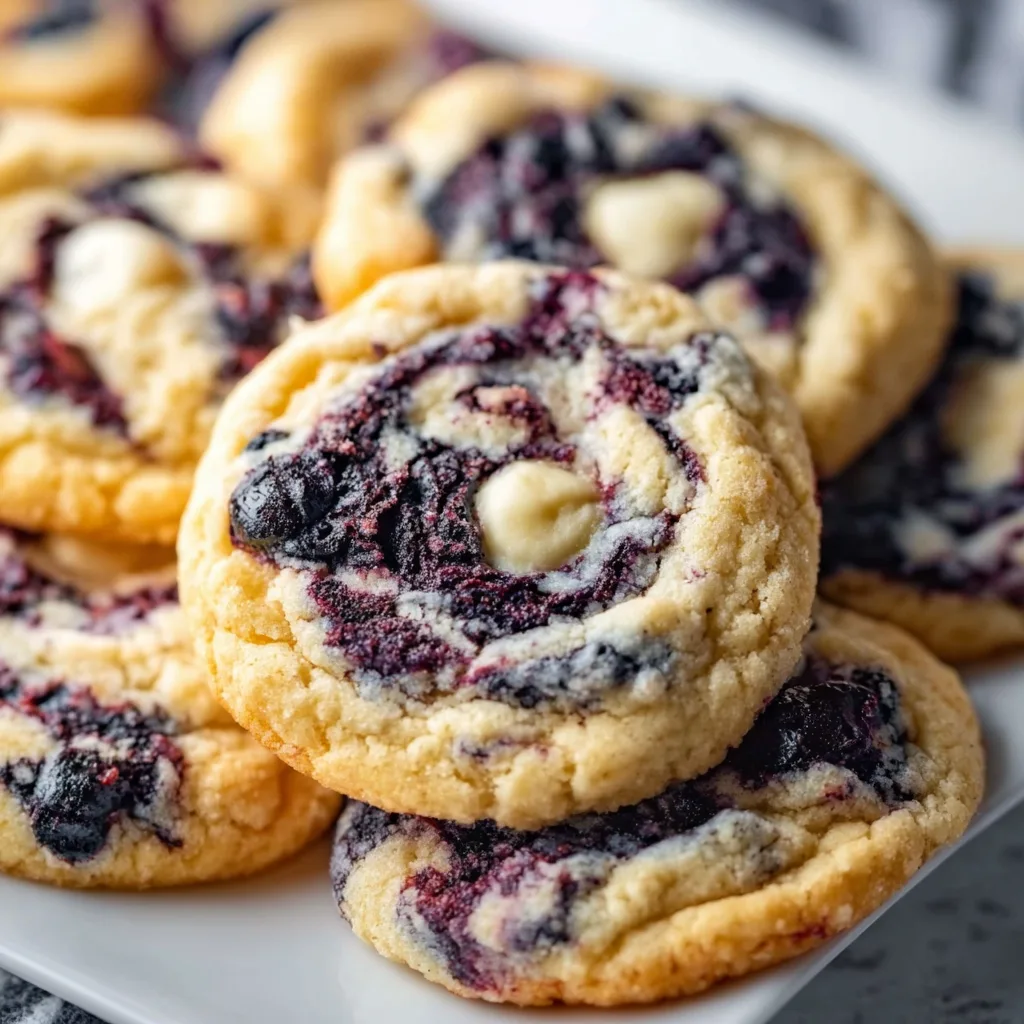
    Blueberry Cheesecake Cookies are my absolute obsession right now—where have these been all my life? Imagine the perfect marriage of buttery cookie base, tangy cream cheese, and bursts of sweet-tart blueberries in every bite. The first time I made these for my sister’s birthday brunch, everyone went completely silent as they took their first bite. That moment of pure cookie bliss? Priceless. These cookies capture everything I love about cheesecake but in a convenient, hand-held treat that’s both impressive and surprisingly simple to make.

    Recipe

    Why You’ll Love These Blueberry Cheesecake Cookies

    Perfect Texture Combination

    There’s something magical about the textural contrast in these cookies that makes them utterly irresistible. The edges bake up slightly crisp while the centers remain soft and tender with pockets of gooey cream cheese. I’ve tested these cookies at least seven times to get the perfect ratio of chewy to creamy. When you bite into one still slightly warm from the oven, you’ll experience that lovely melt-in-your-mouth moment as the cookie gives way to jammy blueberry pockets. It’s like having a miniature cheesecake wrapped in a cookie—pure heaven!

    Make-Ahead Convenience

    One of my favorite things about this recipe is how wonderfully adaptable it is to busy schedules. The dough actually benefits from chilling, which means you can prep everything the night before and bake fresh cookies in the morning—I’ve done this for surprise weekend visitors more times than I can count! You can also freeze the shaped cookie dough for up to three months, giving you the luxury of freshly baked blueberry cheesecake cookies whenever the craving strikes. There’s nothing quite like the sweet aroma filling your kitchen as they bake.

    Essential Tips & Tricks

    Ingredient Temperature Matters

    Getting the cream cheese element just right depends entirely on room temperature ingredients. Cold cream cheese will leave you with unwanted lumps instead of that silky, smooth texture we’re after. I learned this the hard way during a midnight baking session when impatience got the better of me! Let your cream cheese and butter sit out for at least an hour before beginning. For the blueberries, I find that gently folding them in at the very end prevents them from breaking and turning your dough purple—unless that’s the look you’re going for!

    The secret to picture-perfect cookies lies in the chilling process. After mixing your dough, refrigerate it for at least 2 hours—this prevents excessive spreading and concentrates the flavors. I like using a medium cookie scoop (about 1.5 tablespoons) for uniform sizing, then rolling the dough between my palms to create smooth balls. For that classic crinkle top effect, gently press each ball with the bottom of a glass before baking. Don’t skip the light dusting of sugar on top—it creates a subtle sparkle and delicate crunch!

    Serving Ideas & Creative Variations

    Elegant Presentation Options

    Transform these cookies into a showstopping dessert by creating simple cookie sandwiches with a dollop of lemon-infused whipped cream between two cookies. When I hosted a summer garden party last year, I stacked them in tiers on a cake stand, garnished with fresh blueberries and mint leaves—guests were snapping photos before even tasting them! For individual servings, try placing a warm cookie at the bottom of a small dessert bowl and topping it with a scoop of vanilla bean ice cream. The contrast of temperatures creates a delightful sensory experience.

    Seasonal Flavor Twists

    While blueberries are the star here, this versatile recipe welcomes creative flavor adaptations throughout the year. In autumn, try substituting dried cranberries and orange zest for a holiday twist. During summer, fresh raspberries or chopped strawberries work beautifully—I’ve even used chocolate chips and crushed graham crackers for a s’mores-inspired version! Add a teaspoon of cinnamon or cardamom for warm spice notes, or incorporate lemon or lime zest for a bright citrus accent that complements the cheesecake flavor perfectly.

    Storage & Troubleshooting Guide

    Maintaining Freshness

    To preserve the perfect texture balance of these cookies, store them in an airtight container with parchment paper between layers. At room temperature, they’ll maintain their best quality for 2-3 days, though the blueberry flavor actually intensifies slightly overnight! For longer storage, refrigeration works wonderfully—up to a week—just bring them to room temperature before serving. I like to microwave refrigerated cookies for about 8 seconds to restore that fresh-baked softness. The subtle warmth reactivates the gooey cream cheese pockets.

    Fixing Common Issues

    If your cookies spread too much during baking, the likely culprit is butter temperature. The dough should feel cool to the touch before going into the oven. Pop the shaped cookies into the freezer for 10 minutes before baking if your kitchen is warm. For cookies that come out too dry, try reducing the baking time by 1-2 minutes—they should look slightly underdone in the center when you remove them from the oven. If your blueberries sink to the bottom, try tossing them in a light coating of flour before folding them into the dough.

    Frequently Asked Questions

    Can I use frozen blueberries for Blueberry Cheesecake Cookies?

    Yes! Don’t thaw them first—add them frozen directly to the dough. This prevents the color from bleeding too much and maintains better texture during baking.

    How do I know when these cookies are done baking?

    Look for golden edges with slightly pale centers. They’ll appear underdone but will firm up as they cool. Overbaking will lose the cheesecake-like texture in the middle.

    Can I make these cookies gluten-free?

    Absolutely! Substitute a 1:1 gluten-free flour blend. Add ¼ teaspoon xanthan gum if your blend doesn’t already contain it for the perfect chewy texture.

    What makes the cheesecake flavor in these cookies?

    The combination of cream cheese, vanilla extract, and a touch of lemon juice creates that authentic cheesecake flavor profile. Don’t skip the lemon juice!

    Can I prepare the dough ahead of time?

    Definitely! The dough can be refrigerated for up to 3 days or frozen for 3 months. Thaw overnight in the refrigerator before baking.

    Final Thoughts

    These Blueberry Cheesecake Cookies have become my signature dessert for good reason—they strike that perfect balance between familiar comfort and unexpected delight. The way the tangy cream cheese plays against sweet blueberries creates something truly special. I love watching people’s expressions as they take that first bite, eyes widening with surprise and pleasure. Whether you’re baking for a special occasion or simply treating yourself after a long day, these cookies deliver a moment of pure joy. Find more of my cookie creations on Pinterest and happy baking!

  • Pecan Pie Bread Pudding That Will Melt Your Heart Instantly

    Pecan Pie Bread Pudding That Will Melt Your Heart Instantly

    Pecan Pie Bread Pudding That Will Melt Your Heart Instantly

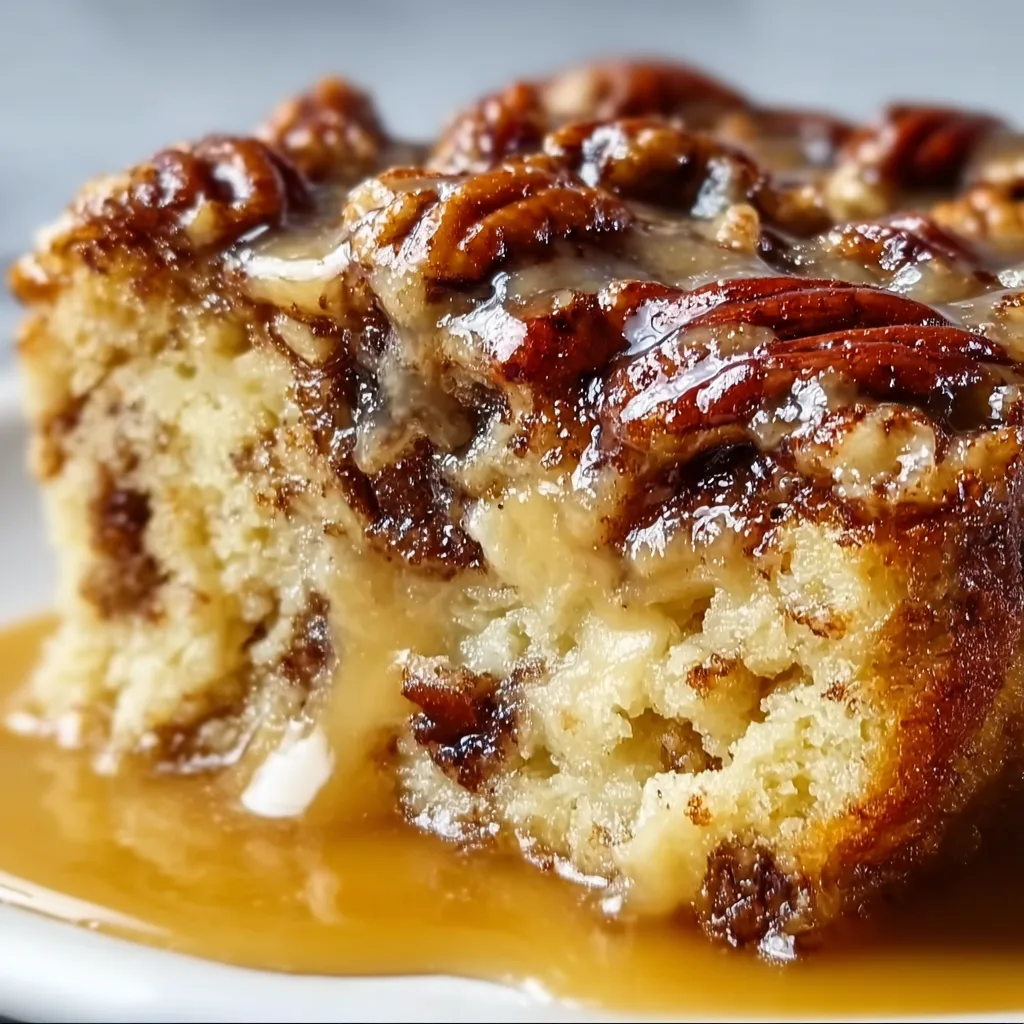
    Pecan Pie Bread Pudding combines two beloved desserts into one heavenly creation that’ll make your kitchen smell like a Southern bakery. The first time I made this for my family, my sister declared it “better than Grandma’s pecan pie”—which is saying something! This rich, custardy bread pudding gets transformed with the gooey caramel and nutty crunch of classic pecan pie. It’s the dessert I bring when I want people to beg for the recipe, and trust me, they always do. Perfect for holiday gatherings or anytime you need a show-stopping sweet treat.

    Recipe

    Why You’ll Love This Pecan Pie Bread Pudding

    The Perfect Balance of Textures

    There’s something magical about the textural contrast in this dessert. The bread soaks up the rich custard, creating a soft, pudding-like base, while the pecans form a crunchy, caramelized top layer that shatters slightly when your spoon breaks through. I love watching people take their first bite—there’s always that moment of closed eyes and a little sigh. The crispy edges get slightly chewy, like the corner pieces of brownies that everyone fights over. And that middle section? Pure custardy heaven that melts in your mouth.

    Make-Ahead Convenience

    One of my favorite things about this Pecan Pie Bread Pudding is how beautifully it fits into a busy schedule. You can prep the entire thing the night before, let the bread soak up all those wonderful flavors overnight, and simply bake it the next day. This makes it perfect for entertaining when you don’t want to be scrambling in the kitchen. I’ve served this at countless brunches and holiday gatherings, and it’s always a hit. The flavors actually develop and deepen as it sits, making it even better the next day.

    Essential Tips & Tricks

    Choosing the Right Bread

    The foundation of any great bread pudding is, well, the bread! For this pecan pie version, you want something substantial enough to hold up to the rich custard without disintegrating. Day-old challah or brioche works beautifully—their buttery nature complements the pecan pie flavors. I once made the mistake of using fresh bread and ended up with mush! Allow your bread to sit out for several hours or even overnight to dry slightly. If you’re in a hurry, a 10-minute toast in a low oven works too. Check out my cinnamon bread pudding recipe for more bread selection tips!

    Perfecting the Custard Mixture

    The custard is where the magic happens in this dessert. For the richest flavor, use a combination of whole milk and heavy cream—I promise the splurge is worth it. When mixing your custard, add the eggs one at a time, whisking gently between each addition to avoid incorporating too much air. The temperature matters too! Let your dairy ingredients come to room temperature before mixing, and never pour boiling hot liquid directly onto eggs (unless scrambled eggs are your goal!). A touch of bourbon or rum adds incredible depth without tasting boozy.

    Serving Ideas & Creative Variations

    Complementary Toppings

    While this Pecan Pie Bread Pudding is absolutely divine on its own, adding the right topping can elevate it to new heights. My personal favorite is a bourbon-spiked whipped cream that melts slightly over the warm pudding. A scoop of vanilla bean ice cream creates a heavenly hot-cold contrast that makes everyone swoon. For a breakfast-worthy version, try a dollop of Greek yogurt with a drizzle of maple syrup. When I served this at my last holiday gathering, I set up a little topping bar so guests could customize their own servings—it was a huge hit! These butter pecan cookies make a perfect accompaniment.

    Seasonal Adaptations

    One of the joys of this recipe is how easily it adapts to different seasons and flavor preferences. In summer, I love adding fresh peaches or berries between the layers for a fruity twist. For fall, a handful of diced apples and extra cinnamon creates a caramel apple version that’s irresistible. During the holidays, I’ll add a sprinkle of orange zest and cranberries for a festive touch. And for chocolate lovers in your life (we all know at least one!), folding in some chocolate chunks creates a turtle-inspired variation that disappears in minutes.

    Storage & Troubleshooting Guide

    Proper Storage Methods

    To keep your Pecan Pie Bread Pudding at its best, proper storage is key. Once completely cooled, cover it tightly with plastic wrap or transfer to an airtight container and refrigerate for up to 4 days. The flavors actually develop beautifully overnight, making this a perfect make-ahead dessert. For longer storage, you can freeze individual portions wrapped in plastic and foil for up to 3 months. When reheating, I find that a gentle warm-up in a 300°F oven works better than the microwave, which can make the texture uneven. Just cover with foil to prevent over-browning.

    Fixing Common Issues

    Even experienced bakers sometimes encounter challenges! If your bread pudding seems too dry, it likely needed more soaking time—next time, press the bread gently into the custard and let it rest longer before baking. For a pudding that’s too wet in the center, it simply needs more baking time. Cover the top with foil if it’s already golden brown to prevent burning while the center finishes cooking. If your pecan topping starts to get too dark before the pudding is done, a loose foil tent works wonders. Remember that bread pudding will firm up slightly as it cools.

    Frequently Asked Questions

    Can I make Pecan Pie Bread Pudding ahead of time?

    Absolutely! Prepare it up to 24 hours in advance, cover and refrigerate unbaked. Let it sit at room temperature for 30 minutes before baking for the best results.

    What’s the best bread to use?

    Challah, brioche, or French bread work best. The key is using slightly stale bread that will absorb the custard without falling apart.

    Can I make this Pecan Pie Bread Pudding gluten-free?

    Yes! Substitute your favorite gluten-free bread, but add an extra 30 minutes of soaking time as gluten-free breads often need longer to absorb the custard.

    How do I know when it’s done baking?

    The pudding is ready when it’s puffed, golden brown, and a knife inserted in the center comes out mostly clean with just a few moist crumbs.

    Can I reduce the sugar?

    You can reduce the sugar by about 25% without dramatically affecting the texture, though it will be less like traditional pecan pie flavor.

    Final Thoughts

    This Pecan Pie Bread Pudding has become my signature dessert for good reason—it combines comfort, elegance, and indulgence in every bite. There’s something about the way the custardy bread melds with the caramelized pecan topping that feels like a warm hug on a plate. I hope this recipe brings the same joy to your kitchen that it has to mine. Don’t forget to check out more delicious dessert ideas on Pinterest for creative variations on this classic!

  • Cozy Gilmore Girls Coffee Cake Cookies You’ll Crave Instantly

    Cozy Gilmore Girls Coffee Cake Cookies You’ll Crave Instantly

    Cozy Gilmore Girls Coffee Cake Cookies You’ll Crave Instantly

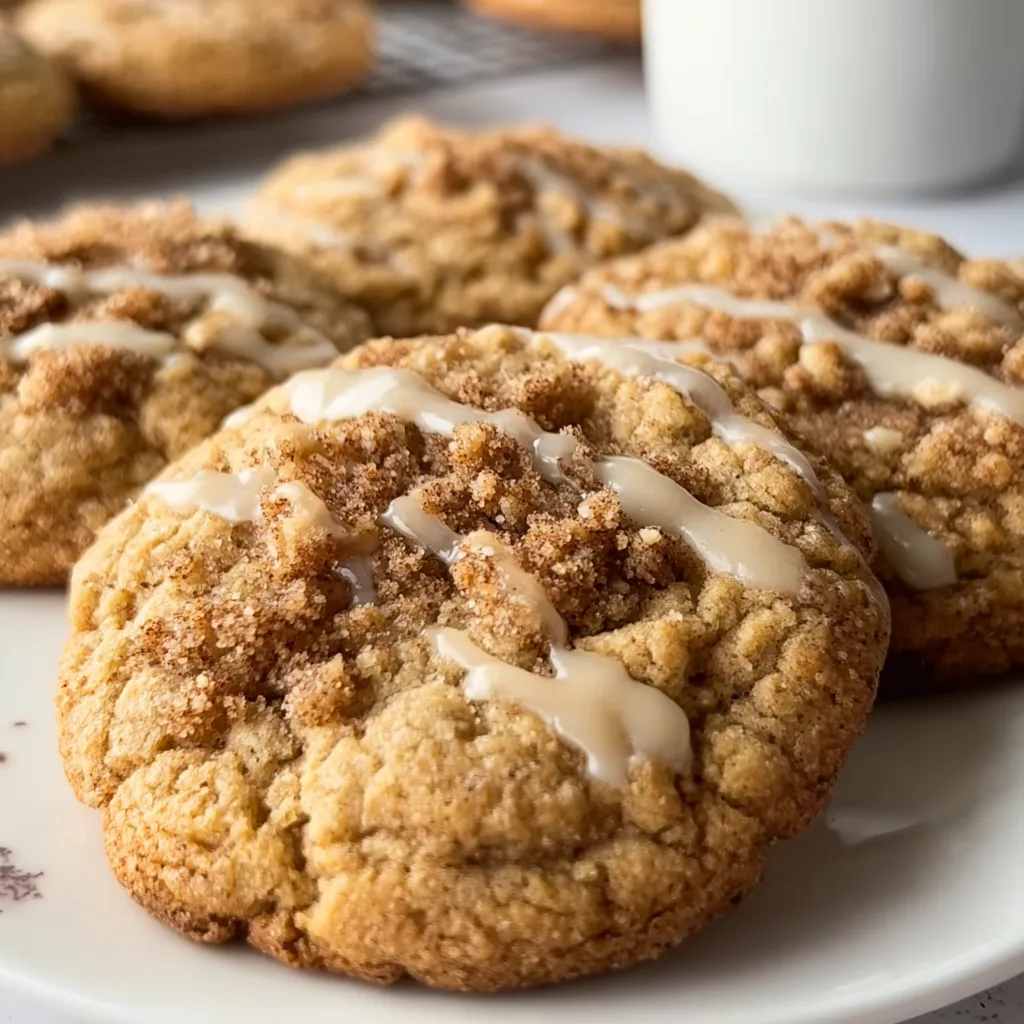
    Cozy Gilmore Girls Coffee Cake Cookies are like a warm hug on a crisp autumn evening in Stars Hollow. As I pulled my first batch from the oven, the aroma of cinnamon and brown sugar swirled through my kitchen, instantly transporting me to Luke’s Diner. There’s something magical about these cookies that capture the essence of those comforting mother-daughter moments over coffee. Each bite delivers the perfect balance of tender cookie base and crumbly streusel topping that would make Lorelai and Rory reach for seconds (or thirds!). If you’re craving a taste of that small-town charm with a sweet twist, these cookies are your perfect companion for a Gilmore Girls marathon.

    Recipe

    Why You’ll Love These Cozy Gilmore Girls Coffee Cake Cookies

    Perfect Balance of Flavors and Textures

    These cookies capture everything wonderful about coffee cake but in an adorable, portable form. The cookie base is buttery and tender with hints of vanilla, while the streusel topping delivers that signature cinnamon-brown sugar crunch. What makes these truly special is the subtle tang from sour cream in the dough – it’s the secret ingredient that keeps them moist for days (though they rarely last that long in my house!). I love how the flavors deepen overnight, making them even better the next morning with your coffee, just like Lorelai would appreciate.

    Quick Prep for Spontaneous Movie Nights

    Unlike traditional coffee cake that requires significant baking time, these cookies come together in a flash – perfect for those impromptu Gilmore Girls marathons! The dough requires no chilling time, meaning you can go from craving to enjoying in under 30 minutes. I’ve made these countless times when friends text they’re coming over for a TV night. The simple ingredients are pantry staples I always have on hand, and the assembly is straightforward enough that even cooking novices (looking at you, Lorelai) could master these on the first try.

    Essential Tips & Tricks

    Perfecting the Streusel Topping

    The streusel magic happens when you achieve the perfect crumbly texture – not too dry, not too wet. Mix your cold butter into the cinnamon-sugar mixture with a fork or your fingertips until it resembles coarse crumbs with some pea-sized bits remaining. This variation in size creates those delightful crunchy pockets throughout the topping. For an authentic Stars Hollow touch, add a pinch of cardamom or nutmeg to your streusel – it’s subtle but adds that special something that will have everyone asking for your secret, just like Sookie’s mysterious recipes at the Dragonfly Inn.

    The key to these cookies’ perfect texture is not overmixing the dough. Stop mixing as soon as the ingredients are combined – this keeps them tender rather than tough. When adding the sour cream, fold it in gently with a spatula rather than beating vigorously. Another pro tip: use room temperature ingredients (especially eggs and sour cream) for a smoother incorporation. For extra softness, I sometimes add a tablespoon of cornstarch to the flour – it’s my little secret for cookies that stay pillowy-soft for days, even Lorelai would approve!

    Serving Ideas & Creative Variations

    Gilmore-Worthy Pairings

    Serve these cookies slightly warm with a giant mug of coffee (Luke’s style) for the full Gilmore experience. They’re also divine alongside a scoop of vanilla ice cream or with a drizzle of maple glaze if you’re feeling particularly indulgent. For brunch, arrange them on a tiered stand with fresh berries and whipped cream – even Emily Gilmore would approve of this elegant presentation! These cookies are substantial enough to be dessert but light enough to enjoy as a sweet breakfast treat, making them perfect for weekend brunches or afternoon coffee breaks.

    Seasonal Stars Hollow Twists

    Channel different Stars Hollow festivals by adapting these cookies throughout the year! For autumn variations, fold in diced apples and increase the cinnamon for a harvest festival feel. During winter, add white chocolate chips and a hint of peppermint extract for a snowy Stars Hollow Christmas vibe. Spring calls for lemon zest and dried cranberries, while summer shines with fresh blueberries mixed into the dough. My personal favorite is adding maple extract to the base and topping with crushed pecans – it reminds me of those New England autumn episodes where the town square is covered in colorful leaves.

    Storage & Troubleshooting Guide

    Keeping Your Cookies Fresh

    These cookies stay wonderfully moist for 3-4 days when stored properly in an airtight container at room temperature. The sour cream in the dough helps them retain moisture longer than typical cookies. For the freshest taste, place a slice of bread in the container – it’s an old trick my grandmother taught me that works wonders! If you need to store them longer, they freeze beautifully for up to 3 months. I like to freeze them individually on a baking sheet first, then transfer to a freezer bag – this prevents them from sticking together and lets you grab just one when a Gilmore-sized craving hits.

    If your cookies spread too much during baking, your butter was likely too warm. Pop the dough in the refrigerator for 15-20 minutes before baking. For crumbly streusel that won’t stick, try pressing it firmly into the cookie tops before baking or adding a tiny bit more butter to help it adhere. If your cookies turn out too dry, you likely used too much flour – I always recommend measuring flour by weight or using the spoon-and-level method. And if the bottoms brown too quickly, try using parchment paper and moving the rack up one position in your oven.

    Frequently Asked Questions

    Can I make these Cozy Gilmore Girls Coffee Cake Cookies ahead of time?

    Absolutely! The dough can be refrigerated for up to 2 days or frozen for 3 months. The streusel can be made 3 days ahead and stored separately in the refrigerator.

    What’s the best substitute for sour cream?

    Greek yogurt works beautifully as a 1:1 substitute. For a dairy-free version, try coconut yogurt, though the texture will be slightly different.

    Can I make these gluten-free?

    Yes! Use a 1:1 gluten-free flour blend with xanthan gum. The texture might be slightly different, but they’ll still have that coffee cake charm.

    How do I know when they’re perfectly baked?

    Look for golden edges with a slightly soft center. They’ll continue firming up as they cool, so don’t overbake if you want that perfect chewy texture.

    What makes these authentic Gilmore Girls cookies?

    The combination of coffee cake flavors in cookie form captures the cozy Stars Hollow vibe, perfect for enjoying during those famous rapid-fire dialogue scenes!

    Final Thoughts

    These Cozy Gilmore Girls Coffee Cake Cookies bring together the comfort of Stars Hollow with the convenience of a handheld treat. There’s something magical about biting into that perfect combination of soft cookie and crumbly cinnamon topping that makes you want to curl up with a good show and forget about the outside world. Whether you’re a die-hard fan or just love a good coffee-friendly cookie, this recipe delivers both nostalgia and flavor in equal measure. Find more cozy inspiration on our Pinterest for your next baking adventure!