Author: Jessica Moore

  • Peach Fluff Recipe That’s Irresistibly Light & Creamy!

    Peach Fluff Recipe That’s Irresistibly Light & Creamy!

    Peach Fluff Recipe That’s Irresistibly Light & Creamy!

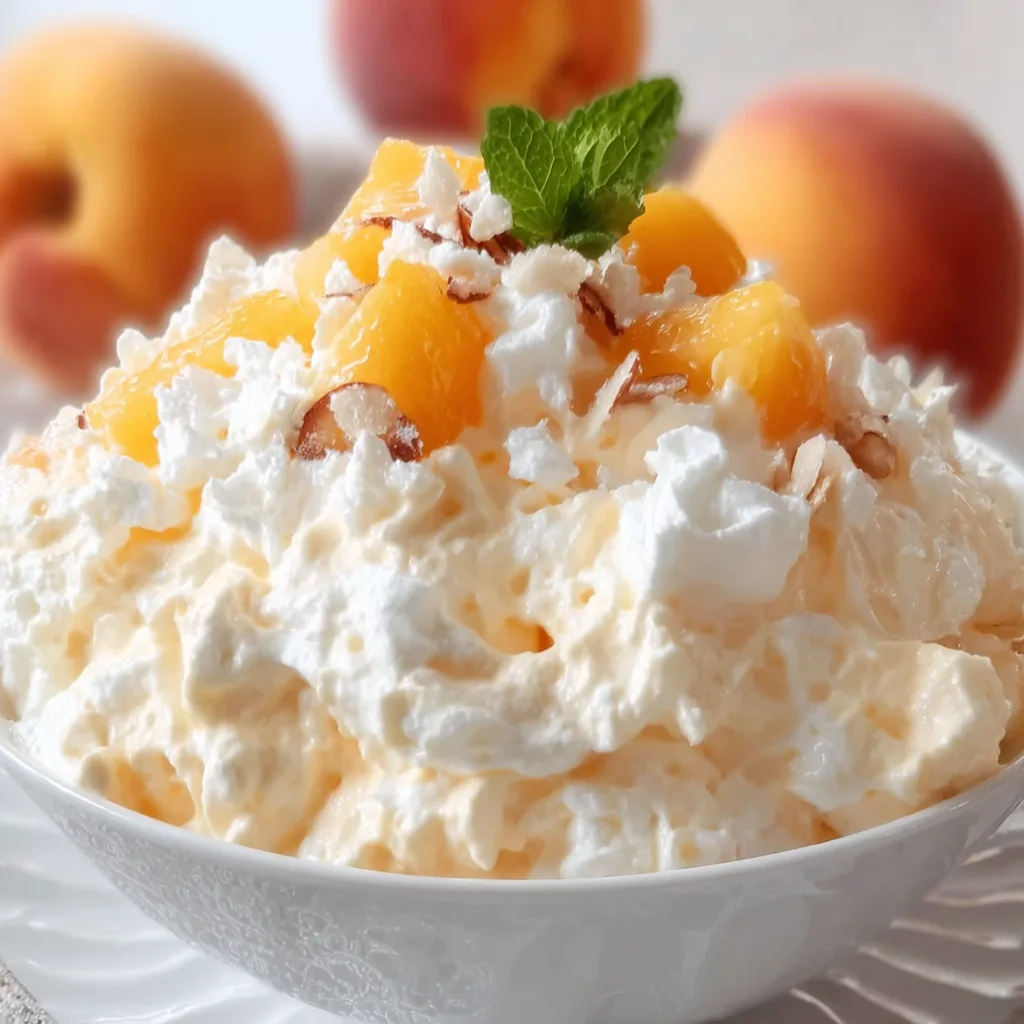
    Peach Fluff is summer’s dreamiest no-bake dessert that combines juicy peaches, fluffy whipped topping, and just the right amount of sweetness. Every spoonful feels like capturing sunshine in a bowl! I first made this for a backyard gathering when the temperature hit 95°F, and nobody wanted to turn on the oven. The creamy texture and bright peach flavor had everyone asking for the recipe before they’d even finished their first serving. This effortless treat takes just minutes to prepare but delivers the kind of satisfaction that makes people think you spent hours in the kitchen. Perfect for those days when you crave something sweet but don’t want to fuss with complicated techniques or hot ovens.

    Recipe

    Why You’ll Love This Peach Fluff

    Perfect Balance of Flavors and Textures

    There’s something magical about the way the tangy peaches mingle with the cloud-like whipped topping in this dessert. Each bite delivers a perfect balance of fruity brightness and creamy indulgence that dances on your tongue. The subtle vanilla notes complement the natural sweetness of the peaches without overwhelming them. I love how the tiny bursts of fruit pieces create textural interest against the pillowy fluff base. It’s like eating a peach-flavored cloud that somehow manages to be both substantial and light as air at the same time.

    Quick Preparation for Maximum Impact

    This Peach Fluff requires just 5 minutes of active preparation time, making it the ultimate last-minute dessert hero. On busy weeknights when the kids are demanding something sweet or when unexpected guests arrive, this recipe has saved me countless times. The simple folding technique requires no special skills or equipment beyond a mixing bowl and spoon. I love watching people’s expressions when they taste something so delicious and then learn how ridiculously easy it was to make. Sometimes the simplest recipes truly deliver the most satisfaction.

    Essential Tips & Tricks

    Choosing and Preparing Your Peaches

    The quality of your peaches makes all the difference in this dessert. During peak season (July through September), fresh ripe peaches will give you the most vibrant flavor. Look for fruits that yield slightly to gentle pressure and have a sweet fragrance. For the best texture, peel them before dicing—the easiest method is to score an X at the bottom, blanch for 30 seconds in boiling water, then transfer to an ice bath. The skins will slip right off! If fresh peaches aren’t available, well-drained canned peaches or thawed frozen peaches work beautifully as convenient alternatives.

    Achieving the Perfect Consistency

    The secret to irresistible Peach Fluff lies in its airy texture. Start with well-chilled ingredients—even your mixing bowl can be placed in the freezer for 10 minutes beforehand. When folding ingredients together, use a gentle hand with a spatula rather than aggressive stirring to maintain maximum fluffiness. If your mixture seems too thick, add a tablespoon of peach juice. Too thin? Fold in additional whipped topping or a few tablespoons of instant vanilla pudding mix. Allow the finished fluff to chill for at least one hour before serving to let the flavors meld perfectly.

    Serving Ideas & Creative Variations

    Elegant Presentation Options

    Transform this simple Peach Fluff into an impressive dessert worthy of special occasions by thinking beyond the basic serving bowl. Layer it in clear glass trifle dishes or stemmed glasses to showcase the beautiful peachy color. Add visual appeal with a sprinkle of crushed graham crackers, toasted coconut, or finely chopped pistachios on top. For individual servings that wow, pipe the fluff into dessert shells, hollowed strawberries, or mini phyllo cups. A fresh mint leaf or edible flower adds a professional finishing touch that elevates this humble dessert to restaurant quality.

    Flavor Twists and Add-ins

    While perfect in its classic form, Peach Fluff welcomes creative variations to suit your taste preferences. For a tropical twist, fold in diced mango or pineapple alongside the peaches. Craving something more decadent? Add white chocolate chips or crushed shortbread cookies for delightful pops of sweetness and texture. Spice lovers can incorporate a pinch of cardamom, ginger, or cinnamon. For a more substantial dessert, layer the fluff with angel food cake cubes or ladyfingers. My personal favorite variation includes a handful of fresh blueberries for a color contrast that’s as beautiful as it is delicious.

    Storage & Troubleshooting Guide

    Proper Storage for Maximum Freshness

    Keep your Peach Fluff at its best quality by storing it properly. Always use an airtight container to prevent it from absorbing refrigerator odors or forming a skin on top. The dessert will maintain optimal texture and flavor for up to 3 days when refrigerated. If you notice slight separation after storage, simply give it a gentle stir before serving. While technically safe to eat beyond three days, the texture begins to deteriorate as the whipped topping starts to deflate. For the freshest presentation at parties, prepare the base up to 24 hours ahead, then fold in the fruit just before serving.

    Fixing Common Issues

    Even the simplest recipes can sometimes present challenges, but most Peach Fluff problems have easy solutions. If your mixture turns out too runny, refrigerate for 30 minutes, then fold in 2-3 tablespoons of instant pudding mix. For a fluff that’s too firm, incorporate additional peach juice one tablespoon at a time. Discoloration from oxidizing peaches? Add a teaspoon of lemon juice to brighten both color and flavor. If the sweetness level isn’t right, adjust with a touch of honey (for more sweetness) or a pinch of salt (to tone down sweetness). Remember that the flavor develops after chilling, so taste again before making major adjustments.

    Frequently Asked Questions

    Can I make Peach Fluff with canned peaches?

    Absolutely! Drain canned peaches well and pat dry with paper towels to remove excess moisture. The convenient option works perfectly year-round when fresh peaches aren’t in season.

    How far in advance can I prepare Peach Fluff?

    For best results, prepare up to 24 hours ahead. The texture remains perfect, and the flavors actually improve after a few hours of chilling time.

    Is there a dairy-free option for making Peach Fluff?

    Yes! Substitute coconut cream whipped with a tablespoon of powdered sugar for the traditional whipped topping. The slight coconut flavor pairs beautifully with peaches.

    Can I freeze leftover Peach Fluff?

    I don’t recommend freezing this dessert as it will separate and become watery upon thawing. It’s best enjoyed fresh within 3 days.

    What makes Peach Fluff different from regular fruit salad?

    Peach Fluff has a creamy, mousse-like consistency thanks to the whipped topping base, while fruit salad typically features fresh fruit pieces in juice or light syrup.

    Final Thoughts

    This Peach Fluff has become my summer signature dessert—the one friends request by name when they know I’m bringing something sweet. There’s something deeply satisfying about creating something so delicious with so little effort. The bright, sunny flavor captures everything wonderful about peach season in a dessert that feels both nostalgic and fresh. Whether you’re serving it at a backyard barbecue or enjoying a quiet weeknight treat, this versatile recipe delivers pure joy in every spoonful. Find more delicious inspiration on Pinterest and discover why Peach Fluff deserves a permanent place in your dessert rotation.
  • Raspberry Cookies with Lemon Glaze – Irresistibly Tangy & Sweet Treat!

    Raspberry Cookies with Lemon Glaze – Irresistibly Tangy & Sweet Treat!

    Raspberry Cookies with Lemon Glaze – Irresistibly Tangy & Sweet Treat!

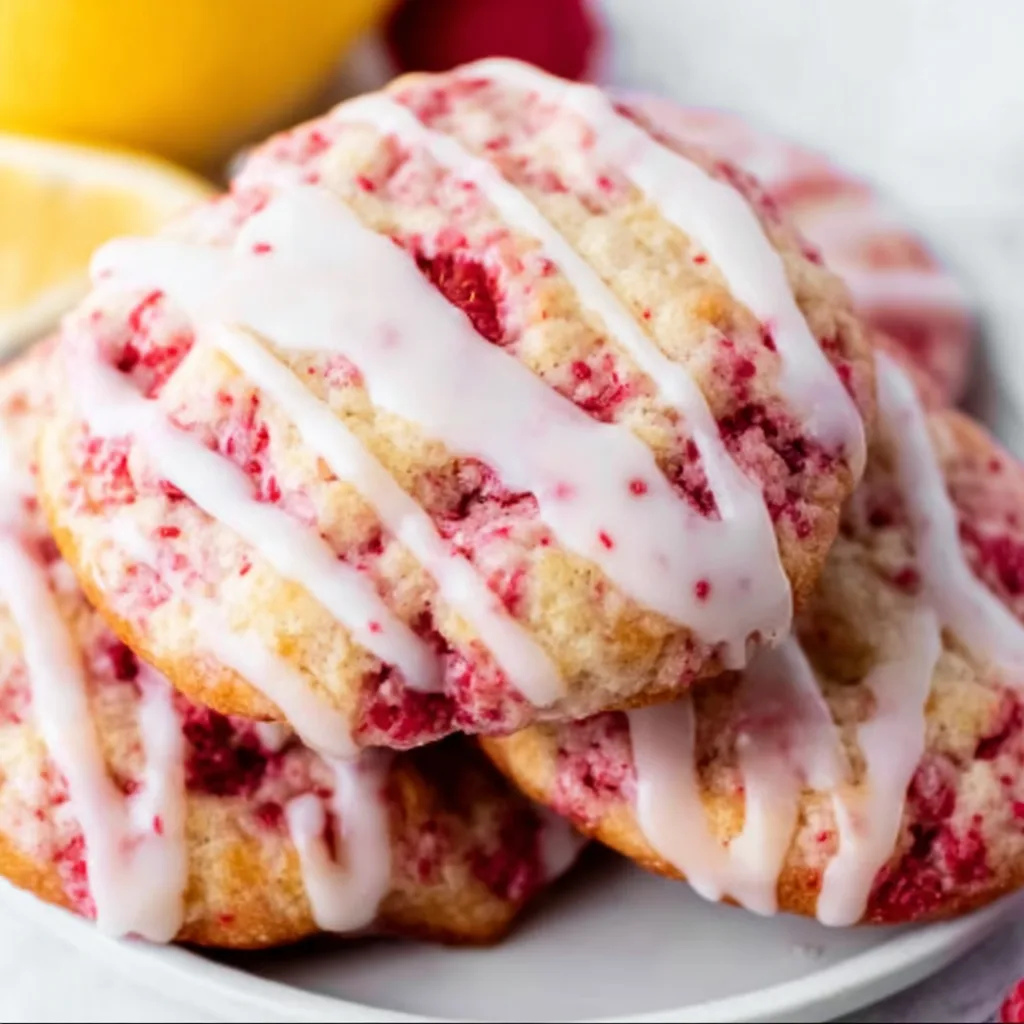
    These Raspberry Cookies with Lemon Glaze are the perfect balance of sweet, tart, and utterly irresistible. I’ve been baking these gems for years, and they never fail to brighten even the gloomiest afternoon. The tender, buttery cookies studded with fresh raspberries create the perfect canvas for that zingy lemon glaze that hardens just enough to give you that satisfying little crack when you bite in. They remind me of summer afternoons on my grandmother’s porch, where the tangy-sweet treats would disappear almost as quickly as she could plate them. If you love easy cinnamon swirl cookies, these will be your new favorite!

    Recipe

    Why You’ll Love These Raspberry Cookies with Lemon Glaze

    Perfect Balance of Flavors

    These cookies hit all the right notes with their sweet-tart balance that keeps you coming back for more. The buttery cookie base provides the perfect backdrop for the bright pops of fresh raspberry, which add little bursts of jammy goodness throughout. Then comes that lemon glaze—oh my goodness—it’s the crown jewel that ties everything together with its citrusy zing. I’ve watched people who claim they “don’t have a sweet tooth” reach for seconds and thirds of these beauties. The flavors dance together in perfect harmony without any single element overwhelming the others.

    Simple Yet Impressive

    Don’t let their elegant appearance fool you—these cookies are surprisingly beginner-friendly! The dough comes together in minutes with basic pantry ingredients, and the fresh raspberries fold in beautifully without any special technique. I’ve made these cookies with my niece who’s only eight, and she handled the process like a pro. The lemon glaze is equally straightforward—just powdered sugar and fresh lemon juice whisked to silky perfection. These cookies look like they came from a fancy bakery, but the process is simple enough for even novice bakers to master confidently.

    Essential Tips & Tricks

    Handling the Raspberry Dough

    The secret to perfect raspberry cookies is in how you handle the berries. Rather than mixing them directly into the dough (which can turn your cookies pink and soggy), gently fold them in at the very end using a silicone spatula. I learned this the hard way after a memorable baking disaster that resulted in sad pink puddles! Keep your raspberries cold until the last minute, and don’t worry if they break a little—those juicy pockets create delicious flavor bursts. For the best texture, chill the dough for at least 30 minutes before baking to prevent excessive spreading.

    Perfecting the Lemon Glaze

    The lemon glaze might seem simple, but a few tricks will take it from good to absolutely magnificent. Always use fresh lemon juice—the bottled stuff just doesn’t compare in flavor. Start with less liquid than you think you need and add more drop by drop until you reach that perfect consistency: thick enough to set properly but thin enough to drizzle. I like to add a tiny pinch of salt and a drop of vanilla to my glaze for depth. Let your cookies cool completely before glazing, or you’ll end up with a thin, runny mess instead of that beautiful bakery-style finish you’re aiming for.

    Serving Ideas & Creative Variations

    Perfect Pairings

    These raspberry cookies with lemon glaze shine brightest when served with the right accompaniments. I love offering them alongside a pot of Earl Grey tea, where the bergamot notes complement the lemon beautifully. For summer gatherings, serve them with sparkling lemonade or prosecco for an elegant touch. They make a stunning addition to brunch spreads or afternoon tea parties. For a truly decadent experience, sandwich a small scoop of vanilla bean ice cream between two cookies for an impromptu ice cream sandwich that will have everyone talking!

    Seasonal Adaptations

    While raspberries are the star of the original recipe, these cookies welcome seasonal variations. In late summer, substitute blackberries or blueberries for equally delicious results. During fall, try adding a pinch of cinnamon to the dough and a splash of maple syrup to the glaze. Winter holidays call for cranberries with orange zest in place of the lemon. For spring celebrations, I’ve even used chopped strawberries with a touch of rosewater in the glaze. The cookie base is wonderfully adaptable—just like my triple Reese’s peanut butter cookies that transform with different mix-ins.

    Storage & Troubleshooting Guide

    Keeping Them Fresh

    To maintain the perfect texture, store glazed cookies in a single layer in an airtight container at room temperature for up to 3 days. Place parchment paper between layers if you must stack them. The glaze will soften slightly over time but remains delicious. For longer storage, freeze unglazed cookies for up to 3 months, then thaw at room temperature and add fresh glaze before serving. I’ve found that storing them with a slice of bread helps keep them soft and prevents them from drying out—a trick my grandmother taught me that works wonders!

    Fixing Common Issues

    Even experienced bakers encounter challenges! If your cookies spread too much, your butter was likely too warm or you didn’t chill the dough long enough. Quick fix: refrigerate the remaining dough for an additional 30 minutes. If your raspberries are making the dough too wet, pat them dry with paper towels before folding in. For glaze that won’t set properly, it’s usually too thin—add more powdered sugar tablespoon by tablespoon. And if your cookies brown too quickly on the bottom, try using parchment paper and moving the rack up one position in your oven.

    Frequently Asked Questions

    Can I use frozen raspberries for these cookies?

    Yes, but thaw them first and pat thoroughly dry with paper towels to remove excess moisture. Frozen berries release more liquid, so you might need to add 1-2 extra tablespoons of flour to compensate.

    How do I know when my Raspberry Cookies with Lemon Glaze are done baking?

    Look for light golden edges while the centers still appear slightly soft. They’ll continue firming up as they cool. Overbaking will result in dry cookies that lose their tender texture.

    Can I make the dough ahead of time?

    Absolutely! The dough can be refrigerated for up to 2 days or frozen for 3 months. If frozen, thaw overnight in the refrigerator before baking.

    Why did my glaze soak into the cookies?

    The cookies were likely still warm when glazed. Always cool cookies completely on a wire rack before applying glaze to achieve that beautiful finish.

    Can I make these cookies gluten-free?

    Yes, substitute a 1:1 gluten-free flour blend. The texture may be slightly different, but they’ll still be delicious with all the raspberry and lemon flavors.

    Final Thoughts

    These Raspberry Cookies with Lemon Glaze have become my signature dessert for good reason—they’re the perfect balance of simplicity and sophistication. The bright raspberry flavor nestled in buttery cookies and topped with that zingy lemon finish creates something truly special. I’ve watched these cookies bring smiles at summer picnics and cozy winter gatherings alike. They’re the kind of treat that feels both nostalgic and fresh at the same time. Don’t be surprised when friends start requesting “those amazing raspberry cookies” at every gathering! Find more delicious inspiration on Pinterest.

  • Triple Reese’s Peanut Butter Cookies: Irresistibly Gooey, Perfectly Crunchy!

    Triple Reese’s Peanut Butter Cookies: Irresistibly Gooey, Perfectly Crunchy!

    Triple Reese’s Peanut Butter Cookies: Irresistibly Gooey, Perfectly Crunchy!

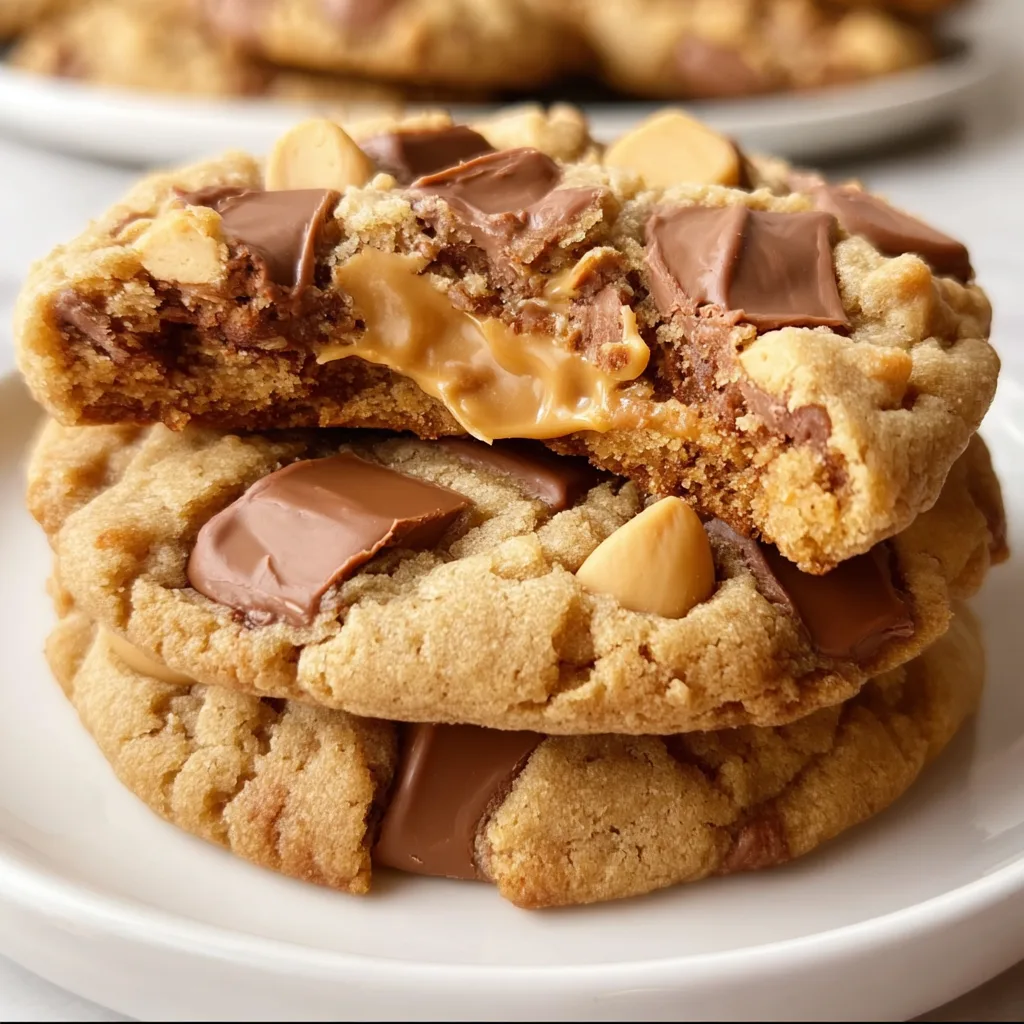
    Triple Reese’s Peanut Butter Cookies are a dream come true for anyone who believes there’s no such thing as too much peanut butter. As someone who could practically live on Reese’s cups, I created this recipe during a particularly stressful finals week in college when only the richest, most decadent comfort food would do. These cookies combine peanut butter dough, Reese’s pieces, and chopped peanut butter cups for a triple threat that makes your kitchen smell like heaven and your taste buds dance with joy. They’re crisp at the edges, perfectly chewy in the center, and absolutely impossible to eat just one.

    Recipe

    Why You’ll Love These Triple Reese’s Peanut Butter Cookies

    Perfect Texture Combination

    These cookies hit that magical sweet spot between crispy and chewy that makes them utterly irresistible. The edges develop a delicate crispness while the centers remain tender and soft, creating that perfect cookie texture we all crave. I’ve found that using both brown and white sugar creates this ideal balance—the brown sugar adds moisture and chewiness while the white sugar encourages those crispy edges. The generous amount of peanut butter in the dough itself adds richness without making the cookies too dense or dry.

    Make-Ahead Convenience

    One thing I absolutely adore about this recipe is how well the dough freezes. I often make a double batch and freeze cookie dough balls for emergency dessert situations (which happen more often than I’d like to admit). The frozen dough can go straight from freezer to oven with just a couple extra minutes of baking time. This has saved countless dinner parties and impromptu coffee dates when I needed something homemade but didn’t have time to start from scratch. The cookies actually develop even deeper flavor when the dough rests!

    Essential Tips & Tricks

    Temperature Matters

    Getting the temperature right is crucial for perfect Triple Reese’s Peanut Butter Cookies. Always start with room temperature butter and eggs—this creates a properly emulsified dough that bakes evenly. I learned this the hard way after a batch of cookies spread into one giant cookie puddle! Another temperature tip: chill the dough for at least 30 minutes before baking. This prevents excessive spreading and concentrates the flavors. For the chewiest centers, slightly underbake the cookies and let them finish setting on the hot baking sheet.

    Mixing Method Secrets

    The way you incorporate ingredients makes a huge difference in the final texture. Cream the butter and sugars until truly light and fluffy—this takes about 3-4 minutes, not the quick mix many of us do. When adding the flour mixture, use a gentle touch and mix just until combined. Overmixing develops gluten, which makes cookies tough instead of tender. For the ultimate texture contrast, I hand-chop the peanut butter cups rather than using pre-chopped pieces, creating varied chunks that create pockets of melty goodness, similar to my Chewy Chocolate Chip Walnut Cookies.

    Serving Ideas & Creative Variations

    Elevated Dessert Presentations

    Transform these cookies into spectacular desserts that will impress any guest. My favorite way is creating cookie ice cream sandwiches with vanilla bean or chocolate ice cream. For extra decadence, roll the edges in more chopped Reese’s pieces! Another stunning presentation is creating a trifle with crumbled cookies, chocolate pudding, and whipped cream layers. For a dinner party finale, serve warm cookies with a tiny shot glass of cold milk or a scoop of coffee ice cream for a sophisticated twist on milk and cookies.

    Flavor Variations

    While the classic recipe is perfect, experimenting with variations keeps things exciting! Try adding a swirl of Nutella to the dough for a chocolate-hazelnut dimension. For a salty-sweet masterpiece, sprinkle flaky sea salt on top before baking. Around the holidays, I add crushed candy canes for a festive peppermint twist. For true chocolate lovers, try dipping half the cookie in melted dark chocolate after baking. These variations pair beautifully with my Crispy Cranberry Cobbler for a dessert spread that covers all flavor bases.

    Storage & Troubleshooting Guide

    Perfect Storage Methods

    To maintain that perfect chewy-crisp balance, proper storage is essential. Store completely cooled cookies in an airtight container with parchment paper between layers. For maximum freshness, add a slice of bread to the container—the cookies will absorb moisture from the bread rather than drying out. At room temperature, they’ll stay fresh for 4-5 days. For longer storage, freeze baked cookies in a single layer, then transfer to a container once frozen solid. They thaw quickly at room temperature when the cookie craving strikes!

    Fixing Common Issues

    Even experienced bakers encounter cookie problems! If your cookies spread too much, your butter was likely too warm or you used too little flour. The fix? Chill the dough longer next time—even overnight works wonderfully. For cookies that don’t spread enough and stay puffy, try slightly flattening the dough balls before baking and using a bit less flour in the next batch. If your cookies brown too quickly on the bottom, use a light-colored baking sheet or line with parchment paper, and position the rack in the upper third of the oven.

    Frequently Asked Questions

    Can I use natural peanut butter for Triple Reese’s Peanut Butter Cookies?

    I don’t recommend it. Natural peanut butter’s oils separate and create unpredictable results. Stick with commercial brands like Jif or Skippy for consistent texture and sweetness.

    How do I know when the cookies are done baking?

    Look for golden brown edges while the centers still appear slightly underdone. They’ll continue cooking on the hot baking sheet after removal from the oven.

    Can I make these cookies gluten-free?

    Absolutely! Replace the all-purpose flour with a 1:1 gluten-free baking blend. The high peanut butter content helps maintain moisture even with gluten-free flour.

    Why did my cookies turn out dry?

    Likely overbaking or too much flour. Measure flour by spooning into measuring cups rather than scooping directly, and watch baking time carefully.

    How many Reese’s cups do I need for one batch?

    For a standard batch (24 cookies), you’ll need about 12-15 miniature peanut butter cups, chopped, plus about 1/2 cup of Reese’s Pieces.

    Final Thoughts

    These Triple Reese’s Peanut Butter Cookies have become my signature dessert for good reason. They balance nostalgic comfort with impressive flavor complexity that makes everyone ask for the recipe. The triple peanut butter elements create depth that ordinary cookies just can’t match. Whether you’re baking for a special occasion or simply treating yourself after a long day, these cookies deliver that perfect moment of sweet joy. Share your creations with me on Pinterest – I love seeing your baking adventures!

  • Cinnamon Roll Banana Bread: Irresistibly Soft & Heavenly Sweet!

    Cinnamon Roll Banana Bread: Irresistibly Soft & Heavenly Sweet!

    Cinnamon Roll Banana Bread: Irresistibly Soft & Heavenly Sweet!

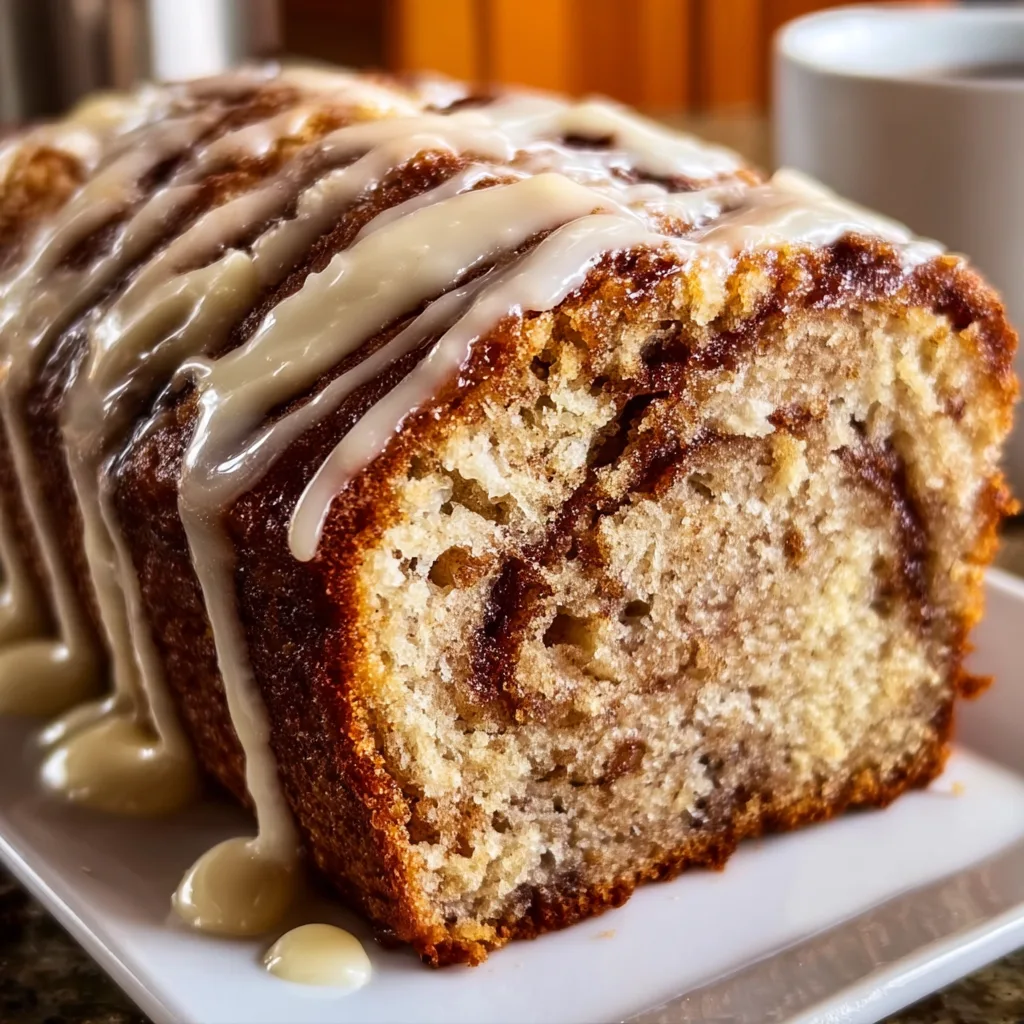
    The aroma of cinnamon swirls through my kitchen, mingling with the sweet scent of ripe bananas as my Cinnamon Roll Banana Bread bakes to golden perfection. This hybrid treat combines two comfort classics into one irresistible loaf that’s moist, tender, and swirled with cinnamon-sugar ribbons. I created this recipe after finding myself torn between making banana bread or cinnamon rolls one rainy Sunday morning. Why choose when you can have both? The result is a breakfast delight that’s perfect with coffee and guaranteed to make your kitchen the coziest spot in the house. If you love creative baking projects, you’ll also enjoy my Chocolate Chip Vanilla Custard Brioche for another sweet treat.

    Recipe

    Why You’ll Love This Cinnamon Roll Banana Bread

    Perfect Texture & Flavor Balance

    The magic happens when ripe, mashed bananas meet a buttery, cinnamon-sugar swirl. Each slice delivers that classic banana bread moistness with pockets of melty cinnamon goodness reminiscent of your favorite cinnamon roll. I’ve tested this recipe countless times to ensure the perfect balance—not too sweet, not too dense. The banana flavor shines through while the cinnamon swirl adds complexity that regular banana bread just doesn’t have. My neighbor literally gasped when she took her first bite, then immediately asked for the recipe. That’s when I knew this one was special.

    Simple Ingredients, Impressive Results

    You won’t need to hunt down specialty items for this recipe—everything comes straight from your pantry. Overripe bananas (those spotty ones you were about to toss), flour, butter, eggs, sugar, and cinnamon are the stars here. The wow factor comes from the technique, not fancy ingredients. I love recipes that transform humble components into something spectacular. The cinnamon-sugar mixture creates beautiful swirls throughout the loaf that look impressive but require minimal effort. It’s the perfect recipe for bakers of all skill levels who want maximum flavor with minimum fuss.

    Essential Tips & Tricks

    Mastering the Swirl Technique

    Getting those perfect cinnamon swirls is easier than you might think! After pouring half the banana bread batter into your loaf pan, sprinkle the cinnamon-sugar mixture evenly, leaving a small border around the edges. Then add the remaining batter and use a butter knife to create figure-eight motions through the entire loaf. The key is not to over-swirl—about 5-6 passes through the batter is perfect. I once made the mistake of excessive swirling and ended up with a uniform brown loaf instead of those beautiful ribbons. Remember, we want distinct swirls, not complete mixing!

    Banana Selection & Preparation

    The ripeness of your bananas makes all the difference in this recipe. Look for bananas with dark spots covering at least 50% of the peel—they should feel soft but not mushy. For the most intense flavor, let them ripen until they’re nearly black. I keep a “banana bread bag” in my freezer where I toss overripe bananas for future baking. When you’re ready to bake, thaw them completely and drain off any excess liquid before mashing. This prevents your batter from becoming too wet. For the best texture in your Cinnamon Roll Banana Bread, mash with a fork rather than a blender for some small banana chunks.

    Serving Ideas & Creative Variations

    Warm Serving Suggestions

    Serve this bread slightly warm with a smear of cream cheese or a drizzle of maple glaze for an elevated experience. I love cutting thick slices and giving them a quick toast before adding a pat of salted butter that melts into all the cinnamon crevices. For weekend brunches, try making French toast with day-old slices—the cinnamon swirl creates caramelized edges that are absolutely divine. My family’s favorite way to enjoy it is warm from the oven with a scoop of vanilla ice cream for an indulgent dessert. The contrast between warm bread and cold ice cream creates a sensory experience you won’t forget.

    Seasonal & Dietary Adaptations

    This versatile recipe welcomes creative twists throughout the year. In fall, add a handful of chopped walnuts or pecans for crunch. During summer, fold in fresh blueberries or strawberries for bursts of fruity brightness. For a tropical variation, substitute coconut oil for butter and add shredded coconut to the batter. Need a gluten-free version? Simply swap in your favorite cup-for-cup gluten-free flour blend. You can also make this vegan by using flax eggs and plant-based butter. For more seasonal inspiration, check out my Raspberry Cream Cheese Coffee Cake that uses similar swirling techniques with different flavors.

    Storage & Troubleshooting Guide

    Keeping It Fresh

    To maintain maximum moisture and flavor, store your cooled Cinnamon Roll Banana Bread in an airtight container at room temperature for up to 3 days. For longer storage, wrap individual slices in plastic wrap, then aluminum foil, and freeze for up to 3 months. When you’re ready to enjoy a slice, thaw at room temperature or microwave for 20-30 seconds. I’ve found that adding a paper towel to the storage container helps absorb excess moisture, keeping the bread from getting soggy. If you notice the bread drying out after a day, warm it slightly before serving to revive that fresh-baked texture.

    Common Issues & Solutions

    If your bread sinks in the middle, you likely used bananas that were too wet or underbaked the loaf. Ensure you’re testing for doneness by inserting a toothpick into the center—it should come out with a few moist crumbs but no wet batter. For cracking on top, your oven might be too hot—try reducing the temperature by 25°F and baking slightly longer. If your cinnamon swirl sinks to the bottom, your batter may be too thin. Try adding an extra tablespoon of flour to the base recipe. I once had all my cinnamon sink, creating a delicious but unexpected caramelized bottom layer—happy accidents sometimes lead to delightful discoveries!

    Frequently Asked Questions

    Can I make Cinnamon Roll Banana Bread without eggs?

    Yes! Replace each egg with ¼ cup unsweetened applesauce or a flax egg (1 tablespoon ground flaxseed mixed with 3 tablespoons water, let sit for 5 minutes). The texture will be slightly denser but still delicious.

    How ripe should bananas be for the best flavor?

    Very ripe! Look for bananas with dark spots covering most of the peel. They should be soft but not completely mushy. The riper they are, the sweeter and more flavorful your bread will be.

    Can I add nuts or chocolate chips?

    Absolutely! Fold in ½ cup of chopped walnuts, pecans, or chocolate chips to the base batter before adding the cinnamon swirl layer for extra texture and flavor.

    Why did my cinnamon swirl disappear?

    If your swirl disappeared, you likely over-mixed the batter after adding the cinnamon mixture. Use a light hand when creating swirls—just 5-6 passes with a knife is sufficient.

    Can this recipe be made as muffins instead of a loaf?

    Yes! Pour the batter into a lined muffin tin, add cinnamon swirl, and bake at 350°F for 18-22 minutes. This makes about 12 muffins with the perfect portion size for grab-and-go breakfasts.

    Final Thoughts

    This Cinnamon Roll Banana Bread has become my signature bake—the one friends request when they visit and family members hint at during holidays. There’s something magical about the marriage of these two classic comfort foods that creates something greater than the sum of its parts. The ribbons of cinnamon weaving through moist banana bread create a sensory experience that’s both familiar and exciting. I hope this recipe finds a permanent place in your baking rotation, filling your home with warmth and creating memories around your table. Don’t forget to share your creations on Pinterest for baking inspiration!

  • Crispy Cranberry Cobbler: Irresistibly Sweet & Perfectly Crunchy!

    Crispy Cranberry Cobbler: Irresistibly Sweet & Perfectly Crunchy!

    Crispy Cranberry Cobbler: Irresistibly Sweet & Perfectly Crunchy!

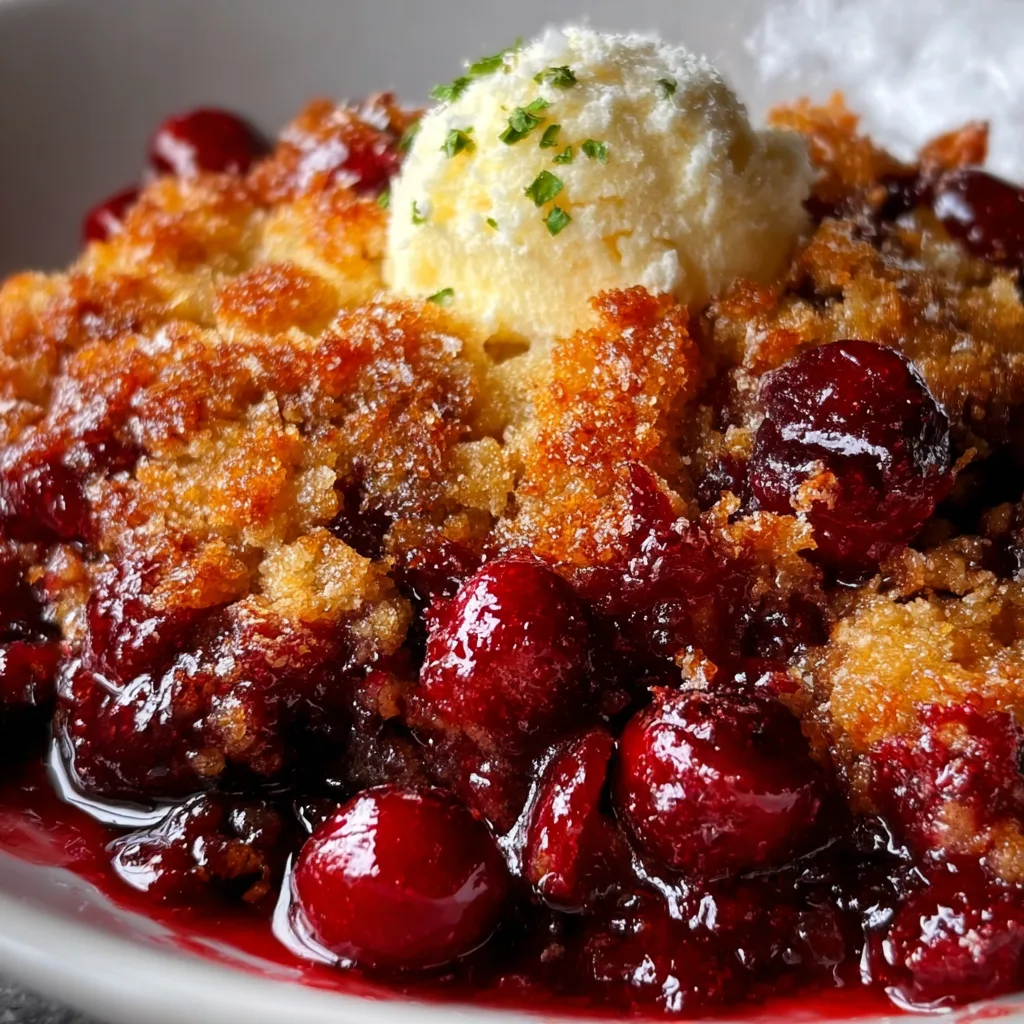
    Crispy Cranberry Cobbler has become my ultimate holiday comfort dessert. The contrast between the tart cranberries and sweet, buttery topping creates pure magic in every bite. I discovered this recipe during a snowy weekend at my grandmother’s cabin, where we baked it in her cast-iron skillet while sharing stories by the fireplace. The bubbling crimson filling and golden-brown crust made the entire cabin smell like heaven. If you love desserts that balance sweet and tart perfectly, you’ll adore this cobbler that’s both rustic and elegant enough for any gathering. Check out my strawberry dump cake for another fruity treat!

    Recipe

    Why You’ll Love This Crispy Cranberry Cobbler

    Perfect Balance of Flavors

    The magic of this Crispy Cranberry Cobbler lies in its perfect flavor harmony. Fresh cranberries bring a bright, tangy punch that cuts through the sweetness of the buttery topping. I’ve carefully balanced the sugar to let the cranberries’ natural tartness shine without overwhelming your taste buds. The hints of orange zest and vanilla extract add warmth and complexity that make this dessert truly special. When the juices bubble up through the crispy topping, they create these incredible pockets of jammy goodness that will have everyone scraping their plates for the last bite.

    Simple Yet Impressive

    Don’t let its gorgeous appearance fool you—this Crispy Cranberry Cobbler is surprisingly easy to prepare. The filling requires just a handful of ingredients that you simply toss together. The topping comes together in minutes with pantry staples like flour, sugar, and butter. I love how this dessert looks rustic yet elegant when it emerges from the oven with that golden, crackly crust. It’s my go-to when I need to impress guests but don’t have hours to spend in the kitchen. The hands-on time is minimal, but the “oohs” and “aahs” when you serve it are guaranteed!

    Essential Tips & Tricks

    Perfecting the Filling

    For the absolute best Crispy Cranberry Cobbler, use fresh cranberries whenever possible. They maintain their shape better and provide that signature pop of tartness. In a pinch, frozen works too—just don’t thaw them first! Add them straight from the freezer to prevent excess moisture. I like to mix in a handful of diced apples or pears for textural contrast and natural sweetness. The secret to balancing the tartness is a touch of orange zest and a splash of vanilla. These aromatic additions transform the filling from simply tart to wonderfully complex without masking the cranberry’s natural brightness.

    Creating That Perfect Crispy Top

    The key to achieving that irresistible crispy topping is cold butter and proper baking technique. Cut your butter into small cubes and keep it refrigerated until the last possible moment. Work it into the dry ingredients using your fingertips until you have pea-sized crumbles—don’t overmix! For extra crunch, try adding a handful of chopped pecans or a sprinkle of turbinado sugar before baking. I’ve found that baking at a slightly higher temperature (375°F) for the first 15 minutes creates that beautiful golden crust, then reducing to 350°F allows the filling to bubble without burning the top. Check out my blueberry bread pudding for another dessert with perfect texture contrast!

    Serving Ideas & Creative Variations

    Perfect Pairings

    Serve your Crispy Cranberry Cobbler warm from the oven for the ultimate comfort experience. A scoop of vanilla ice cream melting into the hot cobbler creates a heavenly temperature contrast that’s simply irresistible. For a more sophisticated touch, try serving it with a dollop of lightly sweetened mascarpone or crème fraîche. During holiday gatherings, I love to pair this with a mug of spiced cider or a glass of dessert wine. The cobbler also makes a delightful breakfast treat when topped with a spoonful of Greek yogurt—I won’t tell if you don’t!

    Seasonal Adaptations

    While classic Crispy Cranberry Cobbler shines during fall and winter, you can adapt this recipe year-round with seasonal fruits. In summer, try substituting half the cranberries with fresh raspberries or blackberries for a brighter flavor profile. For a cozy autumn variation, mix in diced pears and a sprinkle of crystallized ginger. Winter calls for adding warming spices like cinnamon, nutmeg, and cloves to the filling. You can even transform it into a spring dessert by combining cranberries with strawberries and a hint of lemon zest. Check out my cherry cranberry energy bites for another versatile cranberry treat!

    Storage & Troubleshooting Guide

    Keeping It Fresh

    Your Crispy Cranberry Cobbler will stay delicious for 3-4 days when properly stored. Once completely cooled, cover it loosely with foil rather than plastic wrap to preserve the topping’s crispness. If refrigerating, bring it to room temperature before serving, or warm individual portions in the microwave for 20-30 seconds. For longer storage, this cobbler freezes beautifully—portion it into airtight containers and freeze for up to 3 months. The texture of the topping may change slightly after freezing, but a few minutes in a 350°F oven will restore its crispness.

    Troubleshooting Common Issues

    If your Crispy Cranberry Cobbler filling is too runny, try adding an extra tablespoon of cornstarch to the fruit mixture next time. For overly tart results, increase the sugar by 2-3 tablespoons or add a tablespoon of honey to mellow the acidity. If your topping isn’t crisping up, check your oven temperature with an oven thermometer—it might be running cool. Alternatively, try moving the cobbler to a higher rack for the last 10 minutes of baking. For a soggy bottom crust, pre-bake the fruit filling for 10 minutes before adding the topping, which gives excess moisture a chance to evaporate.

    Frequently Asked Questions

    Can I make Crispy Cranberry Cobbler ahead of time?

    Yes! Prepare the filling and topping separately up to 2 days ahead. Store them in the refrigerator, then assemble and bake just before serving for the crispiest results.

    How do I know when my cobbler is done baking?

    Look for a golden-brown topping and bubbling fruit around the edges. The filling should be thick and jammy, not watery, which typically takes 45-50 minutes.

    Can I use dried cranberries instead of fresh?

    While fresh cranberries are ideal for Crispy Cranberry Cobbler, you can use dried in a pinch. Rehydrate them by simmering in water or juice for 15 minutes, then drain before using.

    What’s the difference between a cobbler and a crisp?

    Cobblers have a biscuit-like or cake-like topping, while crisps feature a streusel topping with oats. This recipe creates a hybrid with the best qualities of both!

    Is this recipe gluten-free?

    The standard Crispy Cranberry Cobbler contains wheat flour, but you can easily substitute a 1:1 gluten-free flour blend in the topping for a gluten-free version.

    Final Thoughts

    This Crispy Cranberry Cobbler has become more than just a dessert in my kitchen—it’s a tradition that marks the changing seasons and brings comfort to any table. The contrast between the tart cranberries and sweet, buttery topping creates a dessert that feels both nostalgic and exciting. I hope you’ll make this recipe your own, perhaps adding your family’s favorite spices or serving it in a way that becomes your signature. The beauty of this cobbler is in its simplicity and adaptability. Find more inspiration for seasonal treats on my Pinterest!

  • No-Bake Layered Strawberry Tiramisu That Will Steal Hearts!

    No-Bake Layered Strawberry Tiramisu That Will Steal Hearts!

    No-Bake Layered Strawberry Tiramisu That Will Steal Hearts!

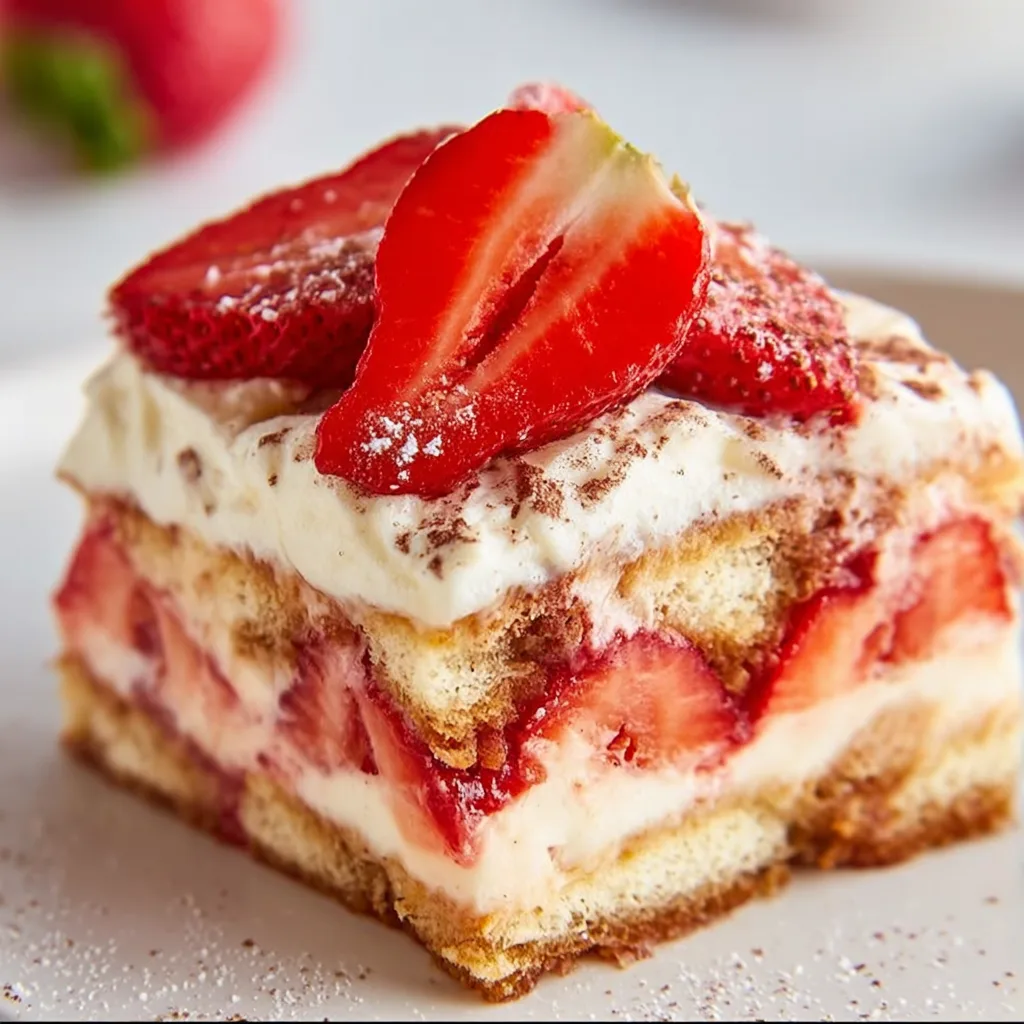
    This No-Bake Layered Strawberry Tiramisu is a dream come true for anyone who loves the classic Italian dessert but craves a fruity twist! The first time I made this for my family, the layers of juicy strawberries, mascarpone cream, and delicate ladyfingers disappeared before I could even snap a photo. There’s something magical about the way the bright berry flavor mingles with the rich creaminess – it’s like summer and comfort had a beautiful dessert baby. Trust me, this no-fuss recipe will become your go-to impressive dessert that nobody will believe took you just minutes to assemble!

    Recipe

    Why You’ll Love This No-Bake Layered Strawberry Tiramisu

    Perfect for Any Occasion

    This No-Bake Layered Strawberry Tiramisu is the ultimate crowd-pleaser that works for literally everything. I’ve served it at baby showers, summer dinner parties, and even as a “just because it’s Tuesday” treat! The pretty pink layers create an impressive presentation without any complicated techniques. What I adore most is how it bridges seasons – it’s refreshing enough for summer gatherings but comforting enough for holiday tables. Plus, since there’s no baking involved, you won’t heat up your kitchen when temperatures soar.

    Quick and Simple Preparation

    One of the biggest selling points of this strawberry tiramisu is how ridiculously easy it is to put together. The entire dessert comes together in about 20 minutes of active prep time, and then your refrigerator does the rest of the work! The make-ahead nature means it’s perfect for busy hosts who want to prepare dessert the day before. I’ve found myself making this on hectic weeknights when I need something special but don’t have hours to spend in the kitchen. Just layer, chill, and serve – it’s practically foolproof!

    Essential Tips & Tricks

    Mastering the Perfect Texture

    The secret to an exceptional No-Bake Layered Strawberry Tiramisu lies in getting the texture just right. When dipping your ladyfingers, aim for a quick dunk rather than a prolonged soak – about 2-3 seconds per side is perfect. This ensures they’ll soften without turning to mush. For the creamiest mascarpone filling, make sure all your dairy ingredients are room temperature before mixing. This prevents those annoying lumps that can ruin the smooth texture. If you’re short on time, check out my strawberry dump cake for another quick dessert option!

    Selecting and Preparing Strawberries

    Not all strawberries are created equal when it comes to this tiramisu! Look for berries that are vibrantly red throughout with no white shoulders – these will have the sweetest flavor. I like to hull and slice most berries, but save a few perfect specimens for decorating the top. For maximum juiciness, macerate half your sliced strawberries with a tablespoon of sugar for 15-20 minutes before layering. This creates a gorgeous natural syrup that will infuse throughout the dessert as it chills, adding incredible depth of flavor.

    Serving Ideas & Creative Variations

    Elegant Presentation Options

    Elevate your No-Bake Layered Strawberry Tiramisu with thoughtful presentation touches that make it truly memorable. I love serving individual portions in clear glass trifle cups to showcase the beautiful layers. For a dinner party wow-factor, try assembling in a springform pan, then garnish with fresh strawberry roses, mint leaves, and a light dusting of freeze-dried strawberry powder. The contrast between the vibrant red berries and creamy layers creates a stunning visual that’s perfect for special occasions. Don’t forget a drizzle of strawberry coulis around each plate for restaurant-worthy presentation!

    Exciting Flavor Twists

    While the classic version is divine, experimenting with flavor variations keeps this dessert exciting all year round. Try adding a tablespoon of orange liqueur to your dipping liquid for a sophisticated citrus note. For chocolate lovers, fold mini chocolate chips into the mascarpone mixture or layer in some chocolate shavings. My family goes wild for the white chocolate version where I incorporate melted and cooled white chocolate into the cream layer. During summer, I’ll sometimes swap half the strawberries for fresh peaches – the combination is absolutely heavenly!

    Storage & Troubleshooting Guide

    Proper Storage Methods

    To maintain the perfect texture of your No-Bake Layered Strawberry Tiramisu, proper storage is essential. Always keep it refrigerated in an airtight container to prevent it from absorbing other flavors from your fridge. The dessert actually improves after 4-6 hours of chilling as the flavors meld together beautifully. While it’s best enjoyed within 2 days, I’ve stretched it to 3 days with minimal texture changes. For individual portions, cover each serving with plastic wrap pressed directly onto the surface to prevent a skin from forming on the creamy layers.

    Troubleshooting Common Issues

    Even experienced bakers encounter challenges! If your tiramisu seems too runny, the most likely culprit is over-soaked ladyfingers. The fix is simple – next time, aim for a quicker dip or use slightly stale cookies that absorb less liquid. If your mascarpone mixture becomes grainy, it’s usually because the cheese was too cold when mixed. Salvage it by gently warming the bowl over simmering water while whisking continuously until smooth. For soggy bottom issues, try creating a protective first layer of ladyfingers that are barely moistened to act as a sturdy base.

    Frequently Asked Questions

    Can I make No-Bake Layered Strawberry Tiramisu ahead of time?

    Absolutely! This dessert actually improves with 8-24 hours of refrigeration, making it perfect for advance preparation. The flavors meld beautifully and the textures soften to perfection.

    What can I substitute for mascarpone cheese?

    In a pinch, use 8 oz cream cheese mixed with 2 tablespoons each of heavy cream and sour cream. The flavor profile will be slightly different but still delicious.

    Can I use frozen strawberries in this recipe?

    Fresh strawberries work best for texture and appearance. If using frozen, thaw completely, drain excess liquid, and pat dry before using to prevent a watery tiramisu.

    Is there a non-alcoholic version of this recipe?

    Yes! Simply replace the liqueur with strawberry juice, strawberry syrup, or even a splash of vanilla extract mixed with fruit juice for a family-friendly version.

    How do I prevent my No-Bake Layered Strawberry Tiramisu from becoming soggy?

    Dip ladyfingers quickly (1-2 seconds per side), use room temperature mascarpone for a thicker cream, and avoid over-macerating strawberries to maintain the perfect texture.

    Final Thoughts

    This No-Bake Layered Strawberry Tiramisu has become my signature dessert for good reason – it strikes that perfect balance between impressive and achievable that we all crave in our recipes. The bright strawberry flavor transforms the traditional dessert into something fresh and unexpected, while still honoring what makes tiramisu so beloved. Whether you’re a seasoned baker or just starting your culinary journey, this recipe proves that sometimes the most memorable treats are the ones that don’t require turning on the oven. For more delicious inspiration, follow me on Pinterest!

  • Chewy Chocolate Chip Walnut Cookies That Will Melt Your Heart!

    Chewy Chocolate Chip Walnut Cookies That Will Melt Your Heart!

    Chewy Chocolate Chip Walnut Cookies That Will Melt Your Heart!

    Chewy chocolate chip walnut cookies have been my weekend salvation for as long as I can remember. There’s something almost magical about that first bite—where the edges are perfectly crisp but the center remains deliciously soft and gooey. The contrast between melty chocolate and buttery crunch of walnuts creates pure bliss in cookie form. When my kitchen fills with that warm, vanilla-tinged aroma, even my teenager abandons their phone to investigate! These cookies remind me of Sunday afternoons at my grandmother’s house, where we’d dunk them in cold milk and share stories around her worn kitchen table. Ready to create your own cookie memories? Let’s get baking!

    Recipe

    Why You’ll Love These Chewy Chocolate Chip Walnut Cookies

    Perfect Texture Balance

    The secret to truly exceptional chewy chocolate chip walnut cookies lies in achieving that perfect texture balance. These cookies offer crispy golden edges that gradually give way to soft, tender centers that practically melt in your mouth. I’ve tested countless variations to get this just right—adjusting butter temperature, experimenting with brown-to-white sugar ratios, and finding the ideal baking time. The walnuts add wonderful textural contrast with their subtle crunch, while the chocolate chips create pockets of gooey richness throughout. It’s this interplay of textures that makes these cookies completely irresistible!

    Rich Flavor Complexity

    These aren’t your ordinary cookies—they deliver complex flavor layers that evolve with each bite. The brown sugar provides deep caramel notes that complement the buttery richness of the dough. Meanwhile, high-quality vanilla extract adds warmth and depth. The slightly bitter edge of walnuts creates a sophisticated counterpoint to the sweet chocolate, preventing these treats from becoming one-dimensional. I add a touch of sea salt to enhance all these flavors and create that addictive sweet-salty combination that keeps you reaching for “just one more.” Trust me—once you try these, standard chocolate chip cookies will never quite satisfy you again!

    Essential Tips & Tricks

    Ingredient Temperature Matters

    Never underestimate how much ingredient temperature affects your chewy chocolate chip walnut cookies! Room temperature butter (soft enough to dent when pressed but not melting) creates the perfect cookie structure. Cold butter won’t cream properly, while overly soft butter makes flat cookies. Similarly, using room temperature eggs helps them incorporate evenly into the dough. I learned this lesson the hard way after ruining three batches with straight-from-the-fridge ingredients! For extra flavor development, try toasting your walnuts before adding them—just 8 minutes in a 350°F oven until they’re fragrant. The difference is subtle but remarkable, like upgrading from regular bread pudding to brioche bread pudding.

    Proper Mixing Technique

    The way you combine ingredients dramatically impacts your final cookies. Cream the butter and sugars thoroughly until light and fluffy—this incorporates air that helps create that perfect chewy texture. However, once you add flour, mix just until combined and no more. Overmixing develops gluten, resulting in tough cookies rather than tender ones. When incorporating chocolate chips and walnuts, use a gentle folding motion rather than aggressive stirring. I always reserve a handful of chocolate chips to press into the tops of the cookies before baking—this creates those beautiful bakery-style pools of chocolate that make everyone swoon!

    Serving Ideas & Creative Variations

    Beyond Basic Serving

    Elevate your chewy chocolate chip walnut cookies from simple treats to memorable dessert experiences with thoughtful serving presentations. Try warming them for 10 seconds in the microwave before serving—this reactivates the melty chocolate magic, even days after baking. Create mini ice cream sandwiches by placing a small scoop of vanilla bean ice cream between two cookies. For dinner parties, arrange them on a wooden board with fresh berries, honey drizzle, and mint leaves for an impressive dessert platter. My personal favorite? Crumbling them over warm blueberry bread pudding for a delightful textural contrast that guests always rave about.

    Flavor Twist Options

    While classic chewy chocolate chip walnut cookies are perfection, exciting variations can keep your baking adventures fresh! Substitute dark chocolate chunks for standard chips and add orange zest for sophisticated flavor complexity. For holiday versions, incorporate dried cranberries and white chocolate with the walnuts. Coffee lovers might appreciate a tablespoon of espresso powder added to the dough—it intensifies the chocolate flavor without making the cookies taste like coffee. Feeling adventurous? Try browning the butter before using it in the recipe for nutty, caramelized undertones. My family’s current obsession is adding toffee bits alongside the chocolate chips for extra buttery sweetness!

    Storage & Troubleshooting Guide

    Optimal Storage Methods

    Preserving the perfect chewy texture requires proper storage techniques. Store completely cooled cookies in an airtight container at room temperature with a slice of bread—the bread maintains moisture levels, keeping cookies soft for up to 5 days. For longer storage, freeze unbaked cookie dough balls on a baking sheet, then transfer to freezer bags once solid. These will keep for 3 months and can be baked straight from frozen (just add 2-3 minutes to baking time). Already baked cookies freeze beautifully too—layer them between parchment paper in airtight containers. I always make double batches specifically to freeze, ensuring we have emergency cookies ready for unexpected guests!

    Common Problems Solved

    Even experienced bakers encounter cookie challenges! If your cookies spread too much, your butter was likely too warm or you used too little flour. Try chilling the dough for 30 minutes before baking or adding an extra tablespoon of flour. Cookies too thick? Gently flatten the dough balls before baking. For uneven baking, rotate your pan halfway through the baking time. If your cookies brown too quickly on the bottom, try using parchment paper and positioning the rack in the upper third of your oven. Walnuts tasting bitter? They might be rancid—always store nuts in the freezer and taste before using!

    Frequently Asked Questions

    Can I substitute other nuts in these chewy chocolate chip walnut cookies?

    Absolutely! Pecans work beautifully as a direct substitute. For a more subtle flavor, try hazelnuts or macadamias. Just maintain the same quantity to preserve the cookie’s texture balance.

    How do I know when the cookies are perfectly done?

    Look for golden brown edges while the centers still appear slightly underdone. They’ll continue cooking on the hot baking sheet after removal from the oven, achieving that perfect chewy texture.

    Can I use salted butter instead of unsalted?

    Yes, but reduce the added salt in the recipe by ¼ teaspoon. Salted butter varies in sodium content between brands, so taste the dough before baking and adjust accordingly.

    Why did my cookies turn out cakey instead of chewy?

    Too much flour is usually the culprit. Measure flour by spooning it into measuring cups rather than scooping directly. Also, avoid overmixing after adding dry ingredients.

    How can I make these cookies gluten-free?

    Replace all-purpose flour with a high-quality 1:1 gluten-free baking blend. Add ¼ teaspoon xanthan gum if your blend doesn’t include it to help with binding and chewiness.

    Final Thoughts

    Creating truly exceptional chewy chocolate chip walnut cookies isn’t just about following a recipe—it’s about understanding the little details that transform good cookies into unforgettable ones. The interplay between quality ingredients, proper technique, and creative presentation makes all the difference. I hope these tips inspire you to experiment with your own variations while maintaining that perfect chewy texture we all crave. There’s something deeply satisfying about sharing homemade cookies that reflect your personal touch. Happy baking, and don’t forget to check out more delicious inspiration on Pinterest!

  • Classic Baked Milk Pudding Recipe That Will Melt Your Heart!

    Classic Baked Milk Pudding Recipe That Will Melt Your Heart!

    Classic Baked Milk Pudding Recipe That Will Melt Your Heart!

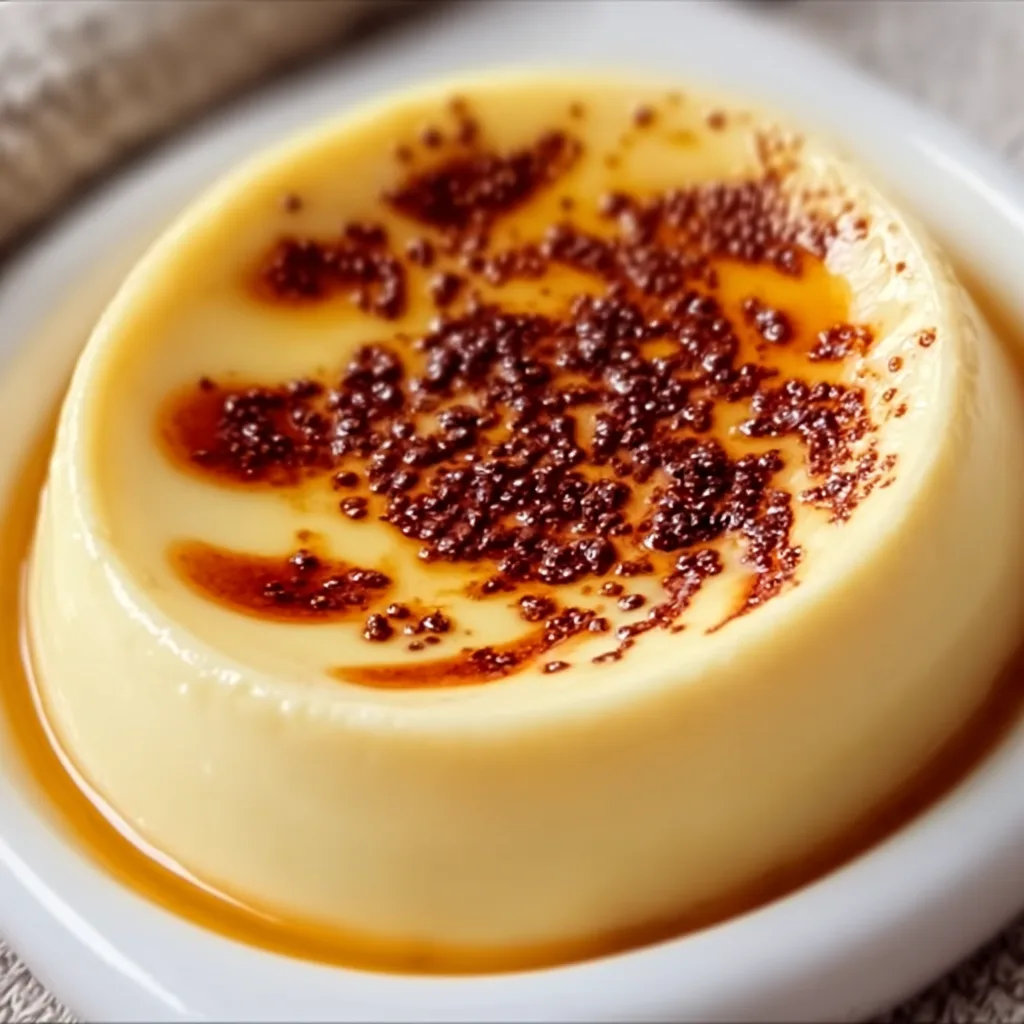
    There’s something incredibly comforting about a Classic Baked Milk Pudding that takes me back to my grandmother’s kitchen. The silky, creamy texture and gentle vanilla aroma filling the house always signaled that something special was in the oven. This timeless dessert strikes the perfect balance between simple ingredients and luxurious results. With just milk, eggs, sugar, and a hint of vanilla, you can create a velvety custard that’s both humble and elegant. I’ve perfected this recipe over years of Sunday family gatherings, and now I’m excited to share my foolproof method with you at Recipes Darleen.

    Recipe

    Why You’ll Love This Classic Baked Milk Pudding

    Simplicity Meets Elegance

    This Classic Baked Milk Pudding requires just a handful of pantry staples, yet delivers restaurant-worthy results. The magic happens when these humble ingredients transform in the oven, creating layers of creamy texture and subtle caramelization. I love how it’s fancy enough for company but simple enough for a weeknight treat. The gentle wobble when perfectly baked brings me so much joy—it’s that sweet spot between custard and cake that makes this dessert truly special. Your kitchen will fill with the most heavenly vanilla aroma as it bakes.

    Versatility for Every Season

    One of the things I cherish most about this Classic Baked Milk Pudding is how it adapts to any season. In summer, I serve it chilled with fresh berries and a light dusting of powdered sugar. Come fall, I add warming spices like cinnamon and nutmeg to the base. Winter calls for a drizzle of caramel sauce and a sprinkle of sea salt. Spring brings opportunities for floral notes like lavender or rose water. This chameleon-like quality makes it my go-to dessert year-round, always feeling fresh and appropriate for whatever produce is at its peak.

    Essential Tips & Tricks

    Perfecting Your Pudding Texture

    The secret to achieving that dreamy, silky Classic Baked Milk Pudding texture is all in the baking method. Always use a water bath (bain-marie) to ensure gentle, even heating that prevents curdling and creates that perfect custard consistency. I learned the hard way that direct heat leads to a rubbery result! Strain your mixture before baking to remove any egg bits that might disrupt the smooth texture. And remember—patience is key. The pudding should still have a slight wobble in the center when done, as it will continue to set as it cools, just like in this Custard Bread Pudding.

    Temperature Control Matters

    Getting the temperature right is crucial for Classic Baked Milk Pudding success. Start with room temperature ingredients—cold eggs or milk can cause the mixture to separate. Heat your milk slowly until it’s steaming but not boiling (around 180°F if you have a thermometer). When adding hot milk to eggs, temper gradually by whisking a small amount of milk into eggs first, then slowly incorporate the rest. This prevents scrambled eggs in your pudding! Bake at a low temperature (around 325°F) and check frequently toward the end. The edges should be set but the center should still quiver slightly when gently shaken.

    Serving Ideas & Creative Variations

    Seasonal Toppings to Elevate Your Pudding

    The beauty of a Classic Baked Milk Pudding lies in its versatility as a canvas for seasonal toppings. In summer, I love crowning it with macerated berries—strawberries, blueberries, or raspberries tossed with a touch of sugar and lemon zest. Fall brings opportunities for spiced apple compote or poached pears. Winter calls for citrus segments with honey and pistachios. A dollop of lightly whipped cream is always welcome, regardless of season. For special occasions, I’ll add a brûléed sugar top, creating a delightful textural contrast similar to my Crème Brûlée Macarons that guests absolutely adore.

    Global Flavor Inspirations

    Take your Classic Baked Milk Pudding on a world tour by incorporating international flavor profiles. For a Mediterranean twist, infuse the milk with orange blossom water and top with crushed pistachios and honey. Channel Latin flavors by adding cinnamon and a touch of dulce de leche. For an Asian-inspired version, incorporate coconut milk and top with mango and toasted coconut flakes. A British approach might include a splash of tea-infused milk and a side of shortbread. I love how these variations maintain the pudding’s comforting essence while offering exciting new taste experiences that reflect diverse culinary traditions.

    Storage & Troubleshooting Guide

    Keeping Your Pudding Perfect

    Classic Baked Milk Pudding stores beautifully when handled properly. Once completely cooled, cover with plastic wrap pressed directly onto the surface to prevent a skin from forming. Refrigerate for up to 3 days while maintaining that silky texture. If you notice any condensation forming, gently blot it with a paper towel before serving. For the best flavor experience, remove from the refrigerator about 20 minutes before serving to take the chill off. Individual portions in ramekins store particularly well and make for elegant pre-portioned desserts that can be quickly dressed up with toppings just before serving.

    Fixing Common Pudding Problems

    Even experienced bakers encounter issues with Classic Baked Milk Pudding occasionally. If your pudding develops a grainy texture, it likely overcooked or the eggs curdled. Next time, use a gentler heat and be vigilant about your water bath. Weeping or separation indicates the pudding was baked at too high a temperature—lower by 25°F in your next attempt. For a pudding that didn’t set properly, it likely needed more time in the oven. Remember that it should still have a slight wobble when done. If your pudding develops a tough skin despite your best efforts, simply peel it away before serving or embrace it as a rustic touch!

    Frequently Asked Questions

    Can I make Classic Baked Milk Pudding ahead of time?

    Absolutely! It actually improves with a day in the refrigerator as the flavors meld beautifully. Make it up to 2 days ahead and store covered in the refrigerator until ready to serve.

    What’s the difference between milk pudding and flan?

    While both are egg-based custards, Classic Baked Milk Pudding has a softer, creamier texture without caramel. Flan typically features a caramelized sugar layer on top and has a firmer consistency.

    Can I use non-dairy milk for this recipe?

    Yes, but results will vary. Full-fat coconut milk works best as an alternative, producing a rich texture. Almond and oat milk create a lighter pudding but may require additional thickening.

    Why did my pudding crack on top?

    Cracking usually occurs from overbaking or baking at too high a temperature. Always use a water bath and check for doneness when the center still has a slight wobble.

    How do I know when my Classic Baked Milk Pudding is perfectly done?

    The edges should be set but the center should jiggle slightly when gently shaken, similar to a just-set gelatin. It will continue firming up as it cools.

    Final Thoughts

    This Classic Baked Milk Pudding has been my faithful companion through countless family gatherings and quiet evenings alike. Its ability to transform simple ingredients into something truly special reminds me why I fell in love with baking in the first place. There’s a certain magic in creating something so silky and comforting with just a few basic ingredients. Whether you’re making it for a special occasion or simply because you deserve a little sweetness, I hope this pudding brings you the same joy and comfort it has always brought to my table. Don’t forget to check out more delicious ideas on my Pinterest!