Author: Jessica Moore

  • Lemon Crinkle Cookies: Irresistibly Zesty & Soft Delight!

    Lemon Crinkle Cookies: Irresistibly Zesty & Soft Delight!

    Lemon Crinkle Cookies: Irresistibly Zesty & Soft Delight!

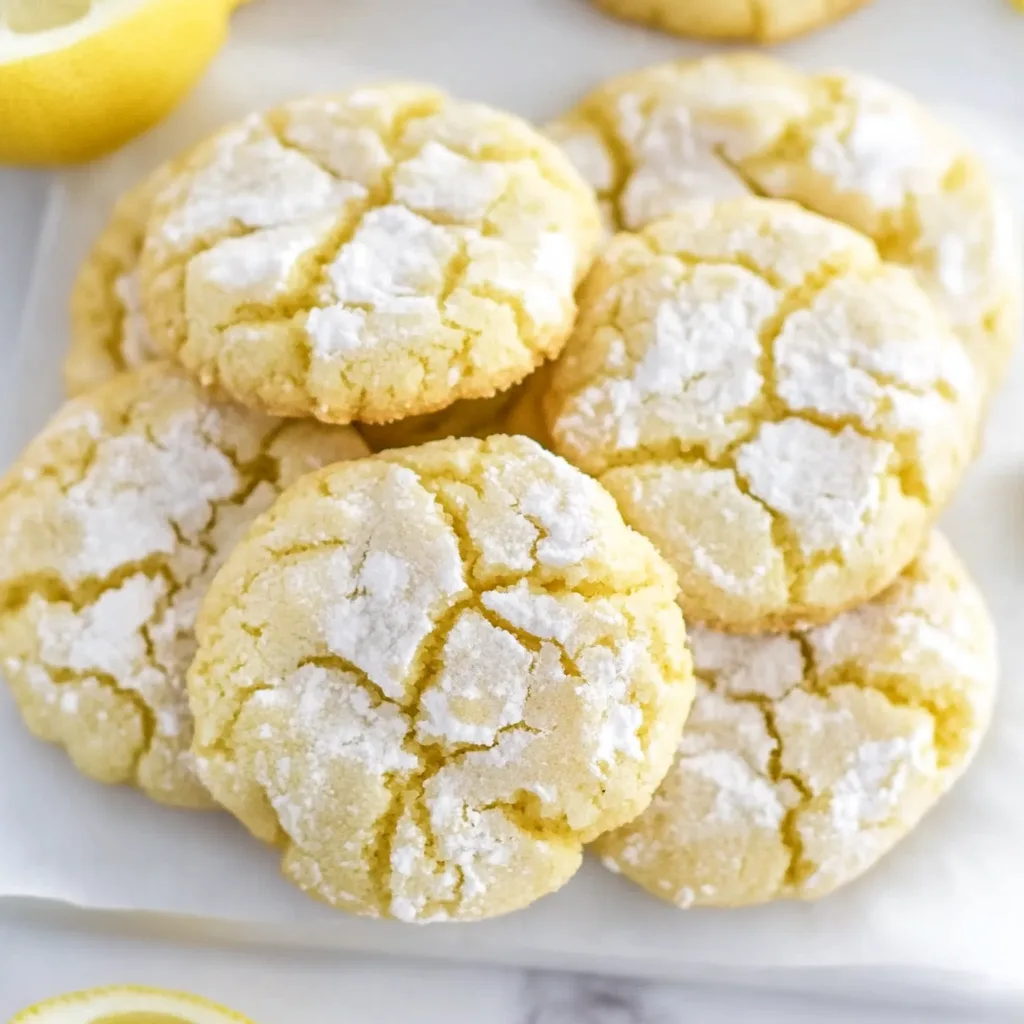
    Lemon Crinkle Cookies are a little piece of sunshine in cookie form. The first time I made these bright, zesty treats, the kitchen filled with the most incredible citrus aroma that instantly transported me to warm summer afternoons. There’s something magical about how these cookies crackle on top while staying soft and chewy inside. The perfect balance of sweetness and tanginess makes them utterly irresistible – just like those thick and creamy tomato soups we crave on chilly days. If you’re looking for a cookie that’s both refreshing and comforting, these lemon crinkle cookies will quickly become your new favorite.

    Recipe

    Why You’ll Love These Lemon Crinkle Cookies

    Perfect Texture Combination

    These lemon crinkle cookies offer the most delightful textural experience – crisp edges with soft, tender centers that practically melt in your mouth. The exterior develops those beautiful characteristic cracks during baking, creating a slight crunch that gives way to pillowy softness. I’m particularly fond of how the powdered sugar creates this sweet, delicate coating that contrasts beautifully with the bright lemon flavor. The dough comes together easily and holds its shape wonderfully while baking, ensuring each cookie maintains that perfect dome shape rather than spreading too thin.

    Bright, Vibrant Flavor

    The zesty punch of fresh lemon in these cookies is absolutely transformative. Using both lemon zest and juice creates layers of citrus flavor that brighten every bite. What makes these cookies special is how the tanginess cuts through the sweetness, creating a perfectly balanced treat that isn’t cloying. I remember bringing these to a summer potluck and watching faces light up with surprise at that first bite – there’s something unexpected and delightful about a cookie that tastes like sunshine. The vibrant yellow color also makes them visually appealing and perfect for spring gatherings.

    Essential Tips & Tricks

    Perfecting the Crinkle Effect

    The signature crackled top of lemon crinkle cookies requires a few key techniques. First, chill the dough thoroughly – at least one hour, but preferably two. This prevents spreading and helps maintain that beautiful domed shape. Before rolling in powdered sugar, I form the dough into perfect balls using a small cookie scoop for consistency. Then comes the crucial step: roll each ball generously in powdered sugar, ensuring complete coverage. For the most dramatic crinkles, don’t shake off excess sugar! This thick coating creates those beautiful creamy white contrasting cracks as the cookies expand in the oven.

    Getting the Lemon Flavor Just Right

    For truly exceptional lemon crinkle cookies, the quality and quantity of lemon ingredients matter tremendously. Always use fresh lemons rather than bottled juice – the difference is remarkable. When zesting, take only the yellow outer layer, avoiding the bitter white pith beneath. For maximum flavor, rub the zest into the sugar before mixing with other ingredients; this releases the essential oils and intensifies the citrus notes. If you prefer an even stronger lemon flavor, add a quarter teaspoon of lemon extract. Test one cookie first before baking the entire batch to ensure the lemon intensity suits your taste.

    Serving Ideas & Creative Variations

    Perfect Pairings

    Lemon crinkle cookies shine brightest when paired with complementary beverages and desserts. Serve alongside a cup of Earl Grey tea – the bergamot notes create a beautiful citrus harmony. For summer gatherings, these cookies make an unexpected but delightful companion to a scoop of vanilla bean ice cream or alongside fresh berries and whipped cream. I love setting these out during afternoon tea with friends, where they provide a refreshing counterpoint to richer treats like chocolate marshmallow swirl cookies. The bright lemon flavor also makes these cookies a welcome palate cleanser after a hearty meal.

    Delicious Twists on the Classic

    While traditional lemon crinkle cookies are perfect on their own, several variations can create exciting new flavor profiles. Try adding fresh blueberries to the dough for beautiful pops of color and juicy sweetness. White chocolate chips melt into pockets of creamy richness that balance the citrus tang beautifully. For a sophisticated twist, incorporate 1-2 teaspoons of culinary lavender into the sugar mixture before adding other ingredients. During holiday seasons, I sometimes add a teaspoon of rosemary for an unexpected herbaceous note that guests always comment on. Each variation maintains the essential character while offering a new experience.

    Storage & Troubleshooting Guide

    Keeping Cookies Fresh

    To maintain the perfect texture of your lemon crinkle cookies, proper storage is essential. Once completely cooled, store them in an airtight container at room temperature, where they’ll stay fresh for up to 5 days. For longer storage, separate layers with parchment paper to prevent sticking and preserve that beautiful powdered sugar coating. The cookies actually improve slightly after a day as the flavors meld together. If you notice them beginning to harden, add a slice of bread to the container – it will release moisture and keep your cookies soft. Avoid refrigeration, as it can make them tough and diminish the bright lemon flavor.

    Solving Common Baking Issues

    If your lemon crinkle cookies aren’t developing those signature cracks, a few adjustments can help. The most common issue is oven temperature – too low and the cookies spread before cracking; too high and they set too quickly. Invest in an oven thermometer for accuracy. If cookies spread too much, your dough was likely too warm or contained too little flour. Conversely, if they remain ball-shaped without cracking, try slightly flattening the dough balls before baking. For cookies that seem too dry, reduce baking time by 1-2 minutes. Remember that humidity affects flour absorption, so you may need slight adjustments to the recipe depending on your climate.

    Frequently Asked Questions

    Can I make lemon crinkle cookies without fresh lemons?

    While fresh is best, you can substitute 2 tablespoons bottled juice and 1 teaspoon lemon extract for the zest and juice. The flavor won’t be quite as vibrant, but they’ll still be delicious.

    Why didn’t my cookies develop cracks on top?

    Insufficient powdered sugar coating or dough that’s too warm are the most common culprits. Make sure to chill the dough thoroughly and coat generously with powdered sugar before baking.

    Absolutely! Roll the dough into balls, freeze on a baking sheet, then transfer to a freezer bag. When ready to bake, thaw slightly, roll in powdered sugar, and add 1-2 minutes to baking time.

    How do I know when my lemon crinkle cookies are done?

    Look for edges that are just set but centers that still appear slightly soft. They’ll firm up while cooling but remain chewy inside. Overbaking will result in crisp cookies.

    What makes lemon crinkle cookies crack on top?

    The contrast between the hot exterior that sets quickly and the cooler interior that continues to expand creates those beautiful cracks in lemon crinkle cookies.

    Final Thoughts

    These lemon crinkle cookies have become my go-to recipe whenever I need a bright, cheerful treat that never fails to impress. The way they balance sweetness and tanginess while offering that perfect textural contrast makes them truly special. I find myself returning to this recipe in every season – they’re as welcome at summer picnics as they are alongside hot cocoa in winter. Whether you’re an experienced baker or just starting out, these cookies offer a foolproof way to bring a little sunshine to your day. Find more delightful recipes on Pinterest and keep baking with joy!
  • Gluten-Free Chocolate Chip Bread Pudding with Irresistible Caramel!

    Gluten-Free Chocolate Chip Bread Pudding with Irresistible Caramel!

    Gluten-Free Chocolate Chip Bread Pudding with Irresistible Caramel!

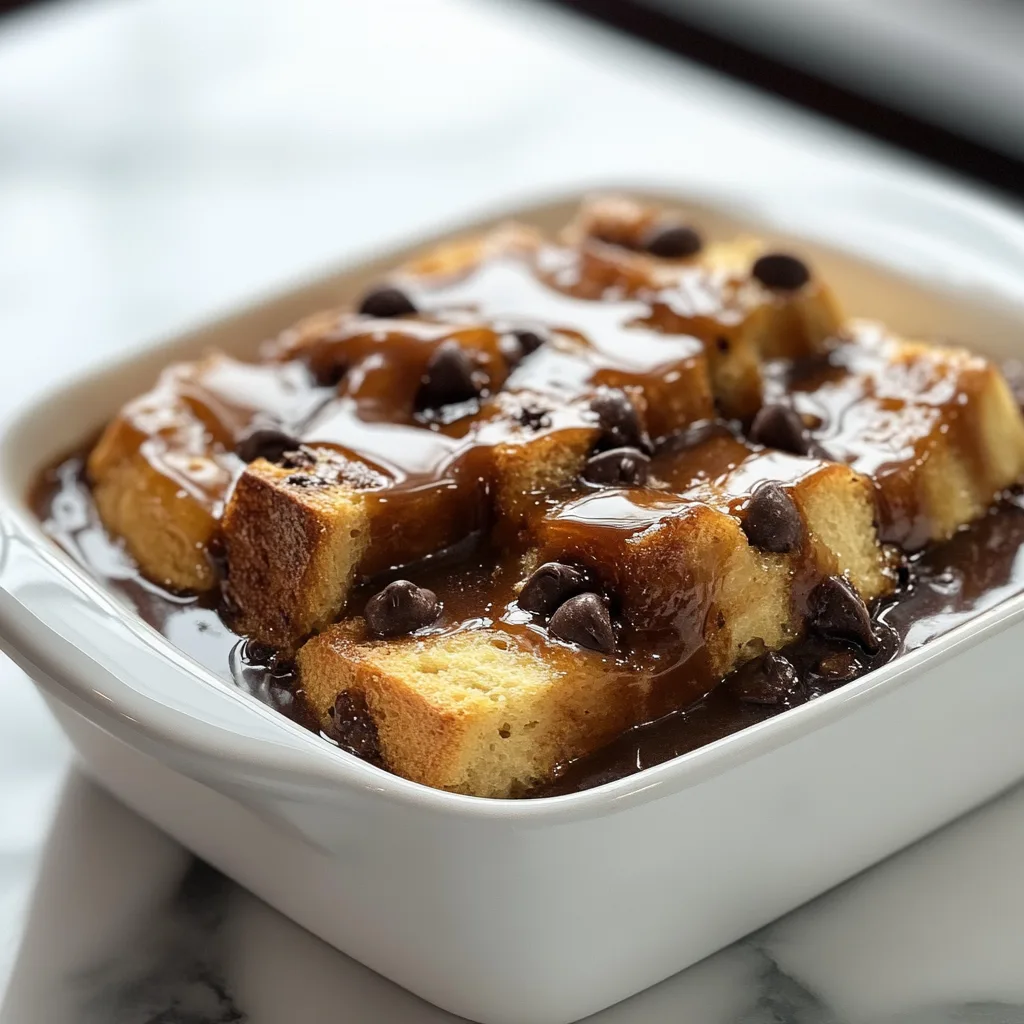
    Gluten-Free Chocolate Chip Bread Pudding with Caramel Sauce has become my weekend ritual whenever I need a little comfort that doesn’t upset my stomach. There’s something magical about the way those melty chocolate chips nestle between cubes of gluten-free bread, all bathed in a custard that’s somehow both rich and delicate. The first time I made this for my sister’s birthday brunch, everyone asked for seconds—nobody even realized it was gluten-free! When that warm caramel sauce cascades over the top, creating little rivers of sweetness… pure bliss. Let me show you how to create this cozy masterpiece that’s become a staple in my recipe collection.

    Why You’ll Love This Gluten-Free Chocolate Chip Bread Pudding with Caramel Sauce

    Perfect Texture Every Time

    The secret to this gluten-free bread pudding is all about balance. Using day-old gluten-free bread actually works better than regular bread because it absorbs the custard without becoming mushy. I’ve found that letting the bread soak for at least 30 minutes creates the perfect custardy texture while maintaining distinct bread pieces. The chocolate chips create these pockets of melty goodness that contrast beautifully with the tender bread. My neighbor Jane (who’s celiac) says this is the first bread pudding that actually reminds her of the ones her grandmother made—high praise indeed!

    Luxurious Homemade Caramel Sauce

    The caramel sauce isn’t just a topping—it’s what transforms this dessert from delicious to unforgettable. Made with just butter, brown sugar, cream, and a pinch of salt, this velvety sauce develops complex flavors as it simmers. I love adding a splash of vanilla at the end for warmth. The slight bitterness of the caramelized sugar perfectly balances the sweetness of the pudding. When I serve this at gatherings, people always dip their spoons back into the sauce bowl when they think no one’s looking!

    Essential Tips & Tricks

    Choosing the Right Bread

    Not all gluten-free breads are created equal for this recipe. Look for a hearty loaf with a good crumb structure—avoid the super soft sandwich varieties that can turn to mush. I’ve had amazing results with gluten-free sourdough or artisan-style loaves. Cut the bread into 1-inch cubes and let them dry out for a few hours (or overnight) before using. This extra step ensures they’ll soak up the custard without dissolving. When I’m in a hurry, I toast the bread cubes for 10 minutes at 300°F, which works beautifully too.

    Perfecting the Custard Mixture

    The custard is the soul of any bread pudding, and this one strikes the perfect balance between rich and light. Whisk together eggs, milk (I use full-fat for creaminess), sugar, vanilla, and a pinch of cinnamon until completely smooth. For an extra layer of flavor, try adding a tablespoon of bourbon or rum to the custard mixture. Make sure the custard fully saturates every bread cube by gently pressing the bread down as it soaks. I like to sprinkle extra chocolate chips on top just before baking for those irresistible melty pockets.

    Serving Ideas & Creative Variations

    Seasonal Adaptations

    This gluten-free chocolate chip bread pudding with caramel sauce welcomes seasonal twists that keep it fresh year-round. In fall, I add diced apples and a pinch of warming spices like nutmeg and allspice. Summer calls for fresh berries folded in just before baking—the way they burst creates beautiful pockets of tartness. During the holidays, I love adding orange zest and cranberries for a festive touch. The caramel sauce can be infused with different flavors too—try adding a cinnamon stick or star anise while it simmers for a subtle aromatic note.

    Elegant Presentation Options

    Transform this cozy dessert into a showstopper with thoughtful presentation. Serve individual portions in vintage teacups or small ramekins for an elegant brunch. For dinner parties, I create a beautiful dessert bar with the warm bread pudding as the centerpiece, surrounded by toppings like toasted nuts, whipped cream, and extra caramel sauce. For a truly spectacular finish, try flambéing a little rum over the top just before serving—the blue flames make for an unforgettable presentation that caramelizes the surface beautifully.

    Storage & Troubleshooting Guide

    Proper Storage Methods

    This gluten-free chocolate chip bread pudding stores surprisingly well, making it perfect for make-ahead entertaining. Refrigerate leftovers in an airtight container for up to 3 days—the flavors actually develop beautifully overnight. To reheat, cover with foil and warm in a 300°F oven for about 15 minutes, or microwave individual portions for 30-45 seconds. Store the caramel sauce separately in a jar in the refrigerator; it will solidify but returns to pourable perfection after 30 seconds in the microwave. For longer storage, freeze portions for up to 2 months in freezer-safe containers.

    Solving Common Issues

    Even experienced bakers encounter challenges, but these simple fixes ensure perfect results every time. If your pudding seems too dry, your bread might have been too dry initially—next time, reduce the bread’s drying time or add an extra ¼ cup of milk to the custard. For a pudding that’s too wet, extend the baking time by 5-10 minutes and check for a slight jiggle in the center. If your caramel sauce crystallizes, add a tablespoon of hot water and gently reheat, stirring constantly until smooth. Remember that gluten-free bread absorbs moisture differently than regular bread, so adjustments may be needed.

    Frequently Asked Questions

    Can I make this Gluten-Free Chocolate Chip Bread Pudding with Caramel Sauce ahead of time?

    Absolutely! Prepare it up to 24 hours ahead, cover and refrigerate unbaked. Let it come to room temperature for 30 minutes before baking. The caramel sauce can be made 3 days ahead and gently reheated before serving.

    What type of chocolate chips work best?

    Semi-sweet chocolate chips provide the perfect balance, but dark chocolate creates a more sophisticated flavor. For a sweeter version, try milk chocolate chips or a combination. Choose high-quality chips that melt smoothly.

    Can I make this dairy-free as well?

    Yes! Substitute the milk with coconut milk or almond milk, and use dairy-free butter and chocolate chips. The caramel sauce works beautifully with coconut cream instead of heavy cream for a slight tropical note.

    Why did my caramel sauce turn grainy?

    Crystallization happens when sugar crystals form. Prevent this by not stirring once the sugar begins to boil, adding a teaspoon of corn syrup to the mixture, or brushing the pan sides with water to dissolve sugar crystals.

    How do I know when the bread pudding is perfectly done?

    The pudding is done when the center is set but still slightly jiggly, similar to a cheesecake. A knife inserted comes out mostly clean with perhaps a bit of custard (but no raw egg). The top should be golden brown.

    Final Thoughts

    This Gluten-Free Chocolate Chip Bread Pudding with Caramel Sauce has become my go-to when I need something that feels both special and comforting. There’s something about the warm, custardy center studded with melty chocolate that makes any day better. I love how it brings people together—whether it’s family gathering around the table or friends stopping by for coffee. Don’t forget to check out more of my favorite gluten-free desserts on Pinterest for inspiration! The beauty of this recipe is that it’s both impressive and approachable, proving that gluten-free desserts can be the star of any table.

  • Chocolate Marshmallow Swirl Cookies: Irresistible Sweet Treats!

    Chocolate Marshmallow Swirl Cookies: Irresistible Sweet Treats!

    Chocolate Marshmallow Swirl Cookies: Irresistible Sweet Treats!

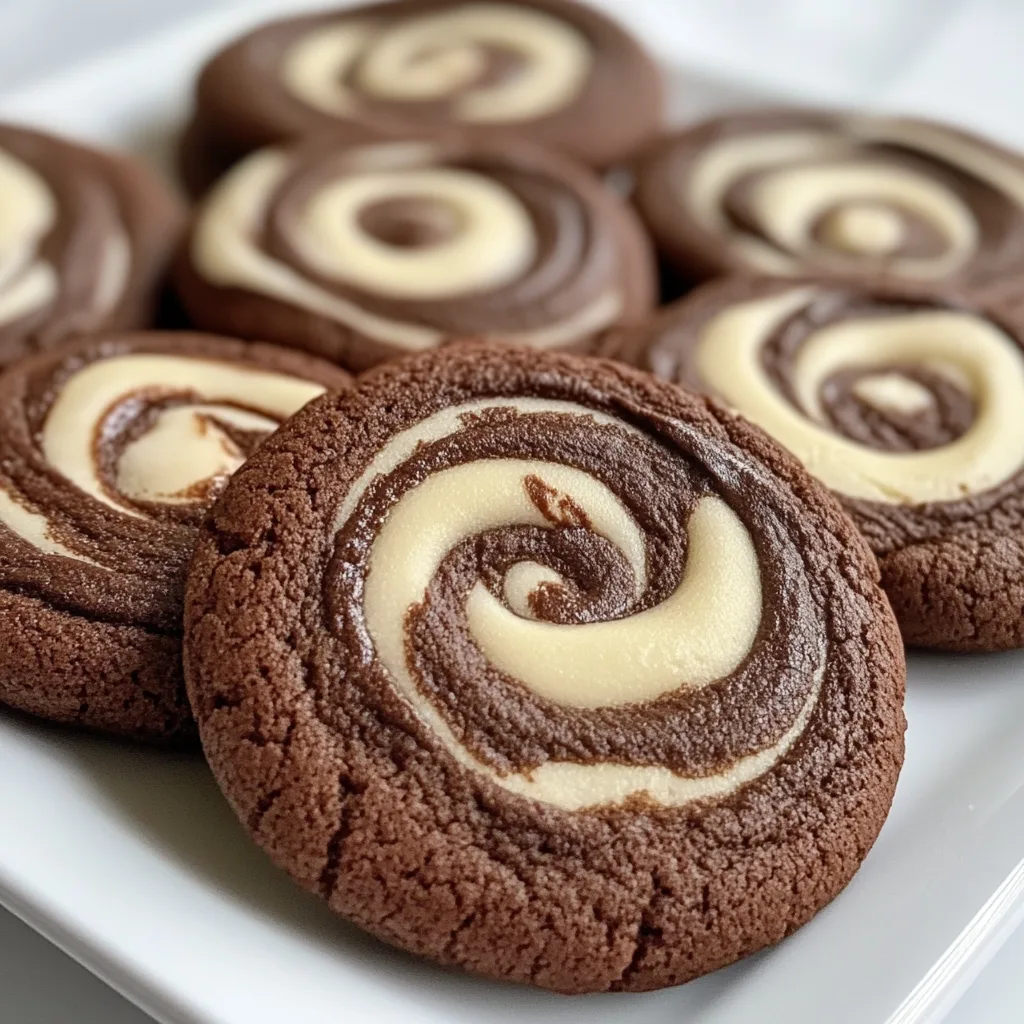
    Chocolate Marshmallow Swirl Cookies are the ultimate indulgence for those moments when you need a little extra comfort in your life. I first made these cookies during a particularly snowy weekend when the kids were bouncing off the walls with cabin fever. The rich chocolate base with swirls of gooey marshmallow created such magic that even my pickiest eater asked for seconds! These cookies strike the perfect balance between chewy edges and soft centers with pockets of melted marshmallow that create the most satisfying pull-apart texture. If you love these, you might also enjoy my Brown Butter Skillet Chocolate Chip Cookie for another cozy treat!

    Recipe

    Why You’ll Love These Chocolate Marshmallow Swirl Cookies

    Perfect Texture Combination

    There’s something almost magical about the textural contrast in these cookies. The cookie base has that ideal chewy-crisp edge that gradually gives way to a fudgy center. When you bite into a pocket of marshmallow, it creates this delightful stretchy pull that makes my heart happy every single time. I’ve tested these cookies at least seven times to get the ratio just right—enough marshmallow to create beautiful swirls and pockets of gooey goodness, but not so much that they become overly sweet or lose their shape during baking.

    Crowd-Pleasing Appeal

    These cookies have become my secret weapon for potlucks and school bake sales. Last month, I brought them to my daughter’s soccer team celebration, and they disappeared faster than any other dessert! The visual wow factor of the marshmallow swirls makes them instantly appealing, while the rich chocolate flavor satisfies even the most discerning chocolate lovers. They’re sophisticated enough for adults but playful enough for kids, making them the ultimate crowd-pleaser for any gathering.

    Essential Tips & Tricks

    Mastering the Marshmallow Swirl

    The key to perfect swirls is all in the timing and temperature. Always use room-temperature marshmallow cream (not marshmallows) for the smoothest incorporation. After folding it into your chocolate cookie dough, resist the urge to overmix! Three or four gentle folds with a rubber spatula creates those beautiful marbled streaks without fully incorporating the marshmallow. If you mix too much, you’ll lose the distinct swirl effect that makes these cookies so special and Instagram-worthy.

    Perfecting the Bake

    Finding the sweet spot for baking these cookies took me several attempts! The marshmallow components caramelize faster than the cookie base, so watch them carefully after the 8-minute mark. Look for slightly underbaked centers with set edges—they’ll continue cooking on the hot baking sheet after removal. For extra gooey centers like in my Gluten-Free Double Chocolate Cookies, let them cool on the sheet for exactly 5 minutes before transferring to a wire rack. This prevents overbaking while ensuring they set properly.

    Serving Ideas & Creative Variations

    Transform these cookies into an unforgettable dessert by serving them warm with a scoop of vanilla ice cream on top. The contrast between the warm, gooey cookie and cold ice cream creates a sensory delight that’s simply irresistible. For dinner parties, I like to stack three smaller cookies with layers of chocolate ganache between them, then add a light dusting of cocoa powder and a few fresh raspberries. The presentation looks fancy, but it takes just minutes to assemble!

    Seasonal Adaptations

    These versatile cookies welcome creative twists throughout the year. During winter holidays, I add a drop of peppermint extract and crushed candy canes on top for a festive touch. For summer gatherings, try incorporating graham cracker pieces for a s’mores-inspired variation that pairs beautifully with my Crockpot Smores Chocolate Cake. Fall calls for cinnamon and a touch of espresso powder to enhance the chocolate’s depth, while spring welcomes white chocolate chips and dried strawberry pieces for a fruity twist.

    Storage & Troubleshooting Guide

    Keeping Cookies Fresh

    These Chocolate Marshmallow Swirl Cookies maintain their best texture when stored in an airtight container at room temperature for up to 3 days. Place a slice of bread in the container to help maintain moisture—a trick my grandmother taught me that works wonders! For longer storage, these cookies freeze beautifully for up to 2 months. I recommend freezing them in a single layer until solid, then transferring to a freezer bag with parchment between layers to prevent sticking.

    Fixing Common Issues

    If your cookies spread too much during baking, your dough was likely too warm. Pop the shaped dough balls in the refrigerator for 20 minutes before baking to help them hold their shape. For cookies that turn out too dry, you may have overbaked them or used too much flour. Remember that visual cues trump timing—look for set edges with slightly soft centers rather than relying solely on the timer. If your marshmallow disappears completely, try using larger dollops and a gentler folding technique next time.

    Frequently Asked Questions

    Can I use regular marshmallows instead of marshmallow cream?

    Regular marshmallows won’t create the same swirl effect. If you must substitute, chop mini marshmallows and fold them in at the very end, but expect a more spotted appearance rather than beautiful swirls.

    How do I know when my Chocolate Marshmallow Swirl Cookies are done?

    Look for set edges with slightly underbaked centers—about 9-11 minutes at 350°F. They’ll continue firming up as they cool but maintain that perfect chewy texture.

    Can I make the dough ahead of time?

    Absolutely! The dough can be refrigerated for up to 3 days or frozen for 3 months. Just add 1-2 minutes to the bake time if cooking from cold.

    Why did my marshmallow disappear during baking?

    If your marshmallow cream disappeared, you likely mixed it too thoroughly into the dough. Use gentle folding and larger dollops for visible swirls.

    Are these cookies gluten-free?

    The standard recipe isn’t gluten-free, but you can substitute a 1:1 gluten-free flour blend with excellent results. Just add ¼ teaspoon xanthan gum if your blend doesn’t include it.

    Final Thoughts

    These Chocolate Marshmallow Swirl Cookies have become one of my family’s most requested treats, combining rich chocolate with gooey marshmallow in perfect harmony. There’s something deeply satisfying about watching someone take their first bite—that moment when their eyes widen at the unexpected marshmallow pull. Whether you’re baking them for a special occasion or simply because it’s Tuesday, these cookies deliver a little moment of joy with every bite. Find more inspiration for your baking adventures on Pinterest!

  • Gluten-Free Double Chocolate Cookies That Will Melt Your Heart!

    Gluten-Free Double Chocolate Cookies That Will Melt Your Heart!

    Gluten-Free Double Chocolate Cookies That Will Melt Your Heart!

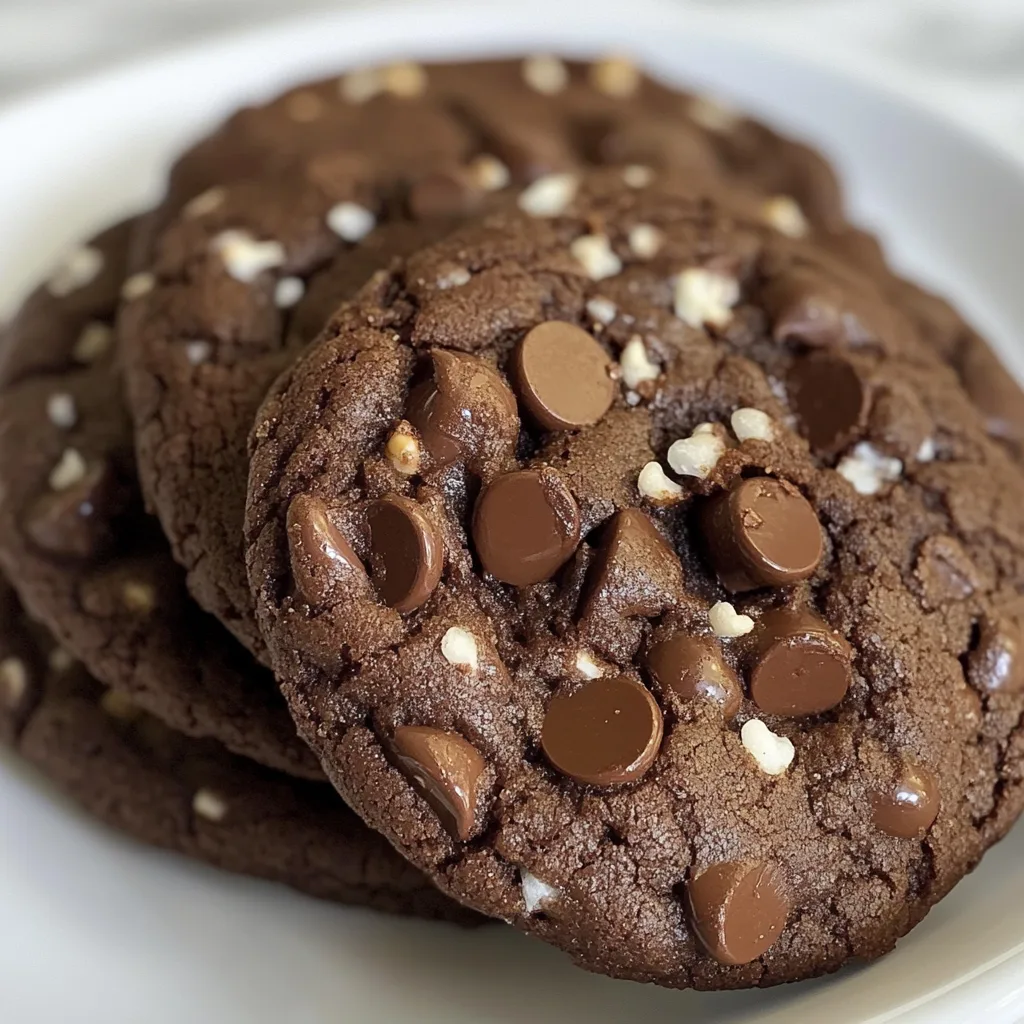
    These Gluten-Free Double Chocolate Cookies are what chocolate dreams are made of – rich, fudgy centers with a perfect crackly top that will make you forget they’re gluten-free! I discovered this recipe during a rainy weekend when my niece with celiac disease was visiting. The look on her face when she bit into these decadent treats was pure magic. With a double dose of chocolate from both cocoa powder and chunks, these cookies deliver an intensely satisfying experience similar to my Gluten-Free Brownies with Fudgy Centers but in perfect cookie form.

    Recipe

    Why You’ll Love These Gluten-Free Double Chocolate Cookies

    Perfect Texture Without the Gluten

    The secret to these cookies lies in the perfect blend of gluten-free flours that create that ideal chewy center and slightly crisp edge. I’ve tested countless combinations, and this one delivers cookies that don’t crumble or feel gritty like some gluten-free treats. The melted chocolate incorporated into the batter adds moisture that helps bind everything together, creating that fudgy brownie-like interior that stays soft for days. Even my husband, who typically turns his nose up at gluten-free baked goods, couldn’t tell the difference!

    Rich Chocolate Flavor That Satisfies

    These cookies pack a serious chocolate punch with two forms of chocolate. The cocoa powder provides that deep, rich base flavor, while the chocolate chunks create pockets of melty goodness in every bite. I recommend using high-quality dark chocolate (at least 60% cacao) for the chunks to balance the sweetness and add complexity. The slight bitterness from the dark chocolate enhances the overall flavor profile, making these cookies sophisticated enough for adults but still irresistible to kids. It’s chocolate nirvana in cookie form!

    Essential Tips & Tricks

    The key to magnificent gluten-free cookies is in the resting time. After mixing your dough, let it sit for at least 30 minutes before baking. This allows the gluten-free flours to hydrate properly and the flavors to develop. Another game-changer is using room temperature eggs – they incorporate much better than cold ones, creating a smoother dough. I learned this the hard way after numerous batches of cookies that spread too much. Don’t skip the xanthan gum if your flour blend doesn’t already include it; it’s essential for the structure these Gluten-Free Molasses Cookies need.

    Baking Techniques for Perfect Results

    Pay close attention to your baking time – these cookies go from perfect to overdone in a matter of minutes. The ideal cookie should look slightly underbaked in the center when you remove it from the oven. They’ll continue cooking on the hot baking sheet after you take them out. For that beautiful crackly top, don’t forget to bang the baking sheet on the counter halfway through baking and again right after they come out of the oven. This creates those lovely cracks while also helping the cookies settle into that perfect thickness.

    Serving Ideas & Creative Variations

    Elegant Serving Suggestions

    Transform these cookies into a show-stopping dessert by serving them warm with a scoop of vanilla ice cream on top. The contrast between the warm, gooey cookie and cold, creamy ice cream creates a sensory experience that’s absolutely divine. For a dinner party, try arranging them on a wooden board with fresh berries and mint sprigs for a pop of color. These cookies also make a lovely gift – stack them in a clear cellophane bag tied with ribbon, and you have a thoughtful homemade present that rivals anything from Brown Butter Skillet Chocolate Chip Cookie.

    Exciting Flavor Twists

    Get creative with these versatile cookies by adding different flavor elements. Stir in a teaspoon of espresso powder to intensify the chocolate flavor without adding coffee taste. For a holiday version, add a quarter teaspoon of peppermint extract and crushed candy canes on top. My personal favorite variation includes a tablespoon of orange zest and a splash of Grand Marnier for sophisticated chocolate-orange cookies. You can also experiment with different mix-ins like toasted nuts, dried cherries, or even caramel chunks for a new flavor experience each time.

    Storage & Troubleshooting Guide

    Keeping Your Cookies Fresh

    Store these gluten-free delights in an airtight container at room temperature for up to 5 days. The trick to maintaining their perfect texture is to place a small piece of bread in the container – it keeps the cookies from drying out without making them soggy. For longer storage, these cookies freeze beautifully for up to 3 months. I like to individually wrap them in plastic wrap before placing in a freezer bag. This way, I can grab just one or two whenever a chocolate craving strikes. Let them thaw at room temperature for about 30 minutes before enjoying.

    If your cookies spread too much, your dough might be too warm. Try chilling the dough for 30 minutes before baking. Conversely, if they don’t spread enough, gently flatten the dough balls before baking. For cookies that turn out too dry, you might have over-measured the flour – remember to spoon and level rather than scooping directly from the bag. And if your cookies lack that shiny, crackly top, make sure you’re not skimping on the sugar – it’s crucial for that characteristic brownie-like finish that makes these cookies so visually appealing.

    Frequently Asked Questions

    Can I make these Gluten-Free Double Chocolate Cookies ahead of time?

    Absolutely! The dough can be refrigerated for up to 3 days. Just bring it to room temperature for about 30 minutes before baking for best results.

    What’s the best gluten-free flour to use?

    I recommend a high-quality 1:1 gluten-free baking flour that contains xanthan gum. Bob’s Red Mill and King Arthur both make excellent versions that perform reliably in this recipe.

    Can I make these dairy-free as well?

    Yes! Substitute the butter with coconut oil or a plant-based butter, and use dairy-free chocolate chips. The texture will be slightly different but still delicious.

    Why did my cookies turn out flat?

    This usually happens when butter is too warm or there’s not enough flour. Make sure ingredients are properly measured and consider chilling the dough if your kitchen is warm.

    How can I tell when they’re perfectly baked?

    Look for set edges with a slightly soft center. They should have a crackly top but still look a bit underdone in the middle – they’ll firm up as they cool.

    Final Thoughts

    These Gluten-Free Double Chocolate Cookies have become my go-to recipe when I need something foolproof yet impressive. There’s something magical about watching someone’s face light up when they realize gluten-free can be this indulgent. Whether you’re baking for someone with dietary restrictions or simply craving an exceptional chocolate cookie experience, this recipe delivers every time. Don’t forget to check out more of my favorite recipes on Pinterest for more gluten-free inspiration!

  • Caramel Pecan Bread Pudding with Salted Caramel Drizzle — Irresistibly Gooey!

    Caramel Pecan Bread Pudding with Salted Caramel Drizzle — Irresistibly Gooey!

    Caramel Pecan Bread Pudding with Salted Caramel Drizzle — Irresistibly Gooey!

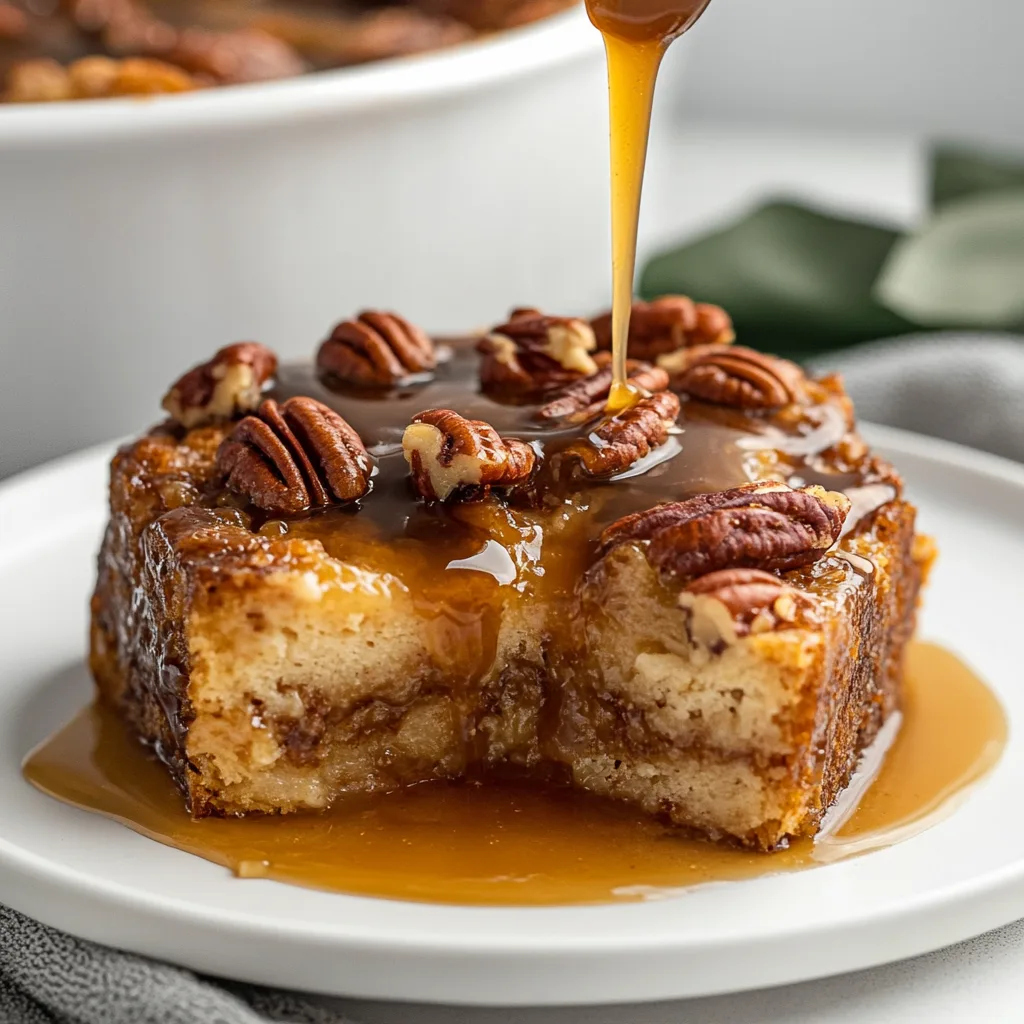
    There’s something magical about the way Caramel Pecan Bread Pudding with Salted Caramel Drizzle fills your kitchen with the aroma of sweet caramel and toasted pecans. I discovered this recipe on a chilly autumn evening when I was craving something comforting yet decadent. The first time I pulled it from the oven, watching that caramel sauce bubble around the edges, I knew this would become a family favorite. This bread pudding strikes the perfect balance between crispy edges and a custardy center, with pecans adding delightful crunch throughout. If you love creamy rice pudding, you’ll adore this elevated dessert experience.

    Recipe

    Why You’ll Love This Caramel Pecan Bread Pudding with Salted Caramel Drizzle

    A Symphony of Textures and Flavors

    This bread pudding is a texture lover’s dream with its crispy top, soft custard-soaked bread middle, and crunchy pecans scattered throughout. The caramel flavor infuses every bite, while the hint of salt in the drizzle creates that perfect sweet-savory balance that keeps you coming back for more. I love how the edges get slightly caramelized and chewy while the center remains pillowy soft. The fragrance alone—warm vanilla, toasted pecans, and buttery caramel—will have everyone gathering in your kitchen before you even call them to the table.

    Perfect for Any Occasion

    Whether it’s a cozy family dinner or an elegant dinner party finale, this bread pudding fits perfectly. I’ve served it at holiday gatherings where it disappeared within minutes, and I’ve made it for quiet Sunday evenings when comfort food was calling. The best part? It’s impressive enough for special occasions but simple enough for weeknight cravings. I remember making this for my in-laws’ first visit—they were so enchanted by the presentation and flavor that they asked for the recipe before they even finished their portions!

    Essential Tips & Tricks

    Choosing the Right Bread

    The foundation of exceptional bread pudding starts with the right bread choice. Day-old bread works best as it absorbs the custard mixture without becoming soggy. I prefer using brioche or challah for their buttery richness, though a good quality French bread also works beautifully. Allow your bread to sit out overnight or toast it lightly if you’re in a hurry. Cutting uniform 1-inch cubes ensures even soaking and baking. I once tried making this with fresh bread and learned the hard way that patience pays off—the texture was nowhere near as delightful as when using properly dried bread.

    Perfecting the Caramel Drizzle

    The salted caramel drizzle elevates this dessert from delicious to extraordinary. Watch your caramel carefully as it cooks—it can go from perfect to burned in seconds! I recommend using a heavy-bottomed pan and swirling rather than stirring to prevent crystallization. For the salt element, flaky sea salt sprinkled on top gives better texture and visual appeal than mixing table salt into the caramel. If you’re new to caramel-making, check out my Brown Butter Skillet Cookie recipe for more caramelization tips that apply here too.

    Serving Ideas & Creative Variations

    Complementary Accompaniments

    Serve your bread pudding warm from the oven for the most heavenly experience. A scoop of vanilla bean ice cream creates the perfect hot-and-cold contrast as it melts into the warm pudding. For an extra-special touch, warm additional caramel sauce to pour tableside, allowing guests to add as much or as little as they desire. Whipped cream with a dusting of cinnamon also pairs beautifully. I love setting up a little “bread pudding bar” when hosting, with different toppings for everyone to customize their serving.

    Seasonal and Dietary Adaptations

    This versatile dessert welcomes creative twists throughout the year. In fall, add diced apples and extra cinnamon. Summer calls for fresh berries folded in before baking. For a boozy adult version, add 2 tablespoons of bourbon to the custard mixture. Need a gluten-free option? My Gluten-Free Sticky Toffee Pudding techniques work well here too—just substitute your favorite gluten-free bread and ensure your other ingredients are certified gluten-free. The caramel-pecan combination remains delicious in any adaptation!

    Storage & Troubleshooting Guide

    Proper Storage Methods

    Store leftover bread pudding in an airtight container in the refrigerator for up to 3 days. The flavors actually develop beautifully overnight, making it a perfect make-ahead dessert. For longer storage, portion and freeze for up to 2 months. Thaw overnight in the refrigerator before reheating. To revive the texture when reheating, warm individual portions in the microwave for 30-45 seconds, then finish in a 325°F oven for 5-10 minutes to restore some crispness to the top. I always make a full batch even for small gatherings because the leftovers are something to look forward to!

    Common Issues and Solutions

    If your bread pudding seems too dry, it likely needed more soaking time before baking. Next time, let the bread sit in the custard mixture for at least 30 minutes, occasionally pressing down to ensure even absorption. For a too-wet pudding, your bread was likely too fresh or the ratio of custard to bread was off. Add a few more bread cubes or extend the baking time by 5-10 minutes. If your caramel sauce crystallizes, add a tablespoon of water and gently reheat until smooth. Remember, bread pudding should be moist but not soggy—like a delicate French toast.

    Frequently Asked Questions

    Can I make Caramel Pecan Bread Pudding with Salted Caramel Drizzle ahead of time?

    Absolutely! Prepare it up to 24 hours ahead, refrigerate unbaked, then bring to room temperature before baking. The flavors actually develop beautifully with time, making it perfect for entertaining.

    What’s the best bread to use for this recipe?

    Brioche or challah provide the best richness and texture. Day-old bread works best as it absorbs the custard mixture without becoming soggy.

    Can I use store-bought caramel sauce instead of making my own?

    Yes! While homemade has better flavor, a good-quality store-bought caramel sauce works in a pinch. Warm it slightly and add a pinch of flaky sea salt before serving.

    How do I know when the bread pudding is done baking?

    The top should be golden brown and slightly crisp, while the center should be set but still moist. A knife inserted in the center should come out mostly clean with no liquid custard.

    Can I make this recipe dairy-free?

    Yes, substitute plant-based milk and butter. Coconut milk creates a rich custard, while almond milk provides a lighter option. Ensure your dairy-free butter is suitable for baking.

    Final Thoughts

    This Caramel Pecan Bread Pudding with Salted Caramel Drizzle has become my go-to dessert when I want to create something truly special without spending hours in the kitchen. The combination of custardy bread, crunchy pecans, and that irresistible salted caramel creates a dessert that feels like a warm hug on a plate. I’ve shared this recipe with countless friends who now make it for their own families, creating their own sweet memories around the table. For more delicious dessert inspiration, follow me on Pinterest where I’m always pinning new comfort food ideas!

  • Gluten-Free Sticky Toffee Pudding: Irresistibly Gooey & Delicious!

    Gluten-Free Sticky Toffee Pudding: Irresistibly Gooey & Delicious!

    Gluten-Free Sticky Toffee Pudding: Irresistibly Gooey & Delicious!

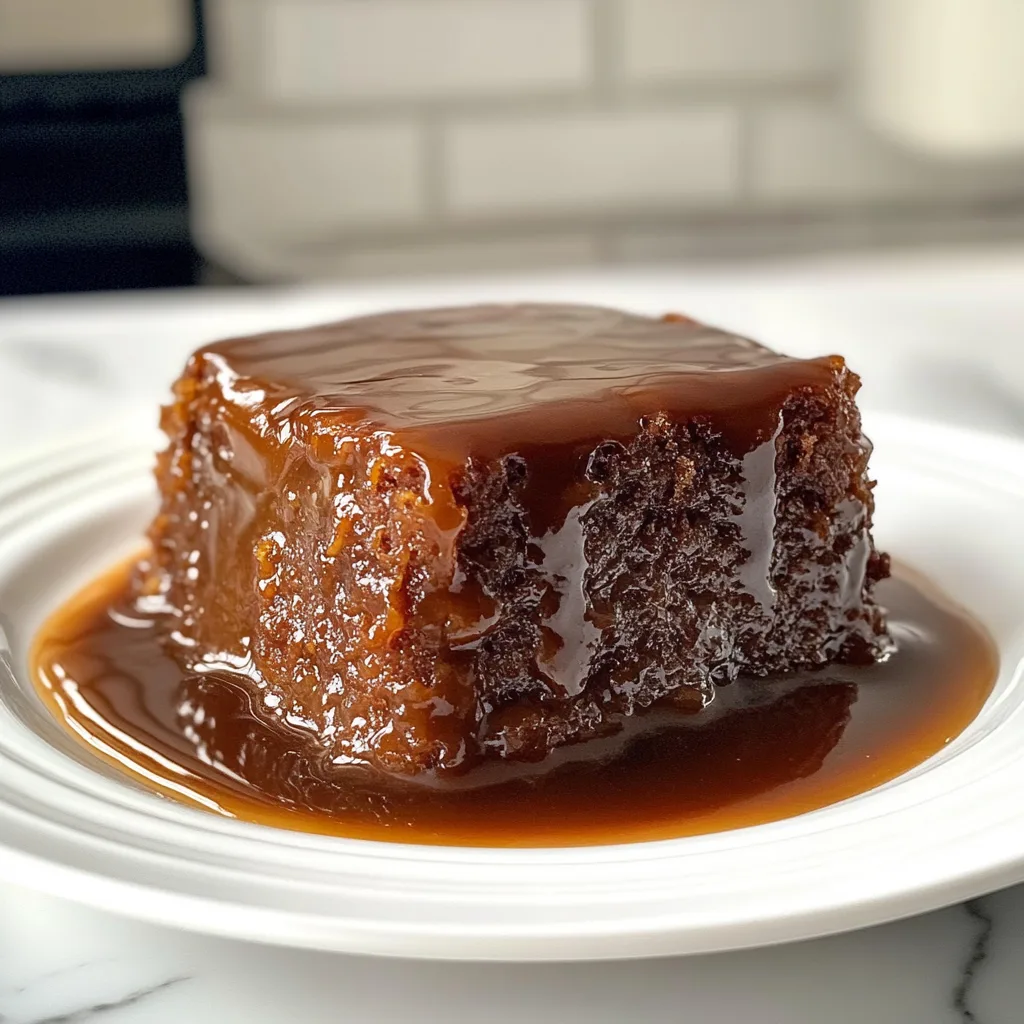
    Gluten-Free Sticky Toffee Pudding has been my holiday obsession since I discovered it at a tiny British café last winter. The way the warm, date-studded cake soaks up that buttery toffee sauce is pure magic – and yes, completely gluten-free! I’ve spent countless evenings perfecting this recipe, making sure it delivers all the gooey richness of the traditional version without a speck of gluten. My kitchen still smells like caramelized sugar and warm spices from my latest batch. Trust me, this dessert will become your new cold-weather tradition.

    Recipe

    Why You’ll Love This Gluten-Free Sticky Toffee Pudding

    Perfect Texture Every Time

    The biggest challenge with gluten-free baking is achieving that perfect, moist crumb that doesn’t fall apart or feel gritty. This recipe solves that problem beautifully! The pureed dates not only provide natural sweetness but also create an incredibly moist texture that holds together wonderfully. I’ve tested this recipe with multiple gluten-free flour blends, and the results are consistently amazing. The cake portion rises beautifully and maintains that slightly dense, pudding-like consistency that makes sticky toffee pudding so irresistible.

    Rich Toffee Flavor Without Compromise

    Let’s talk about that toffee sauce – it’s absolutely divine! Made with real butter, brown sugar, and a splash of heavy cream, it creates a velvety blanket of caramel goodness that seeps into every bite. I remember serving this at a dinner party where one guest actually gasped when taking their first bite. The sauce develops those complex, butterscotch notes that make sticky toffee pudding so special. And since the sauce is naturally gluten-free, you’re getting the full, authentic experience without any substitutions or compromises.

    Essential Tips & Tricks

    Mastering the Date Mixture

    The foundation of any great sticky toffee pudding is perfectly prepared dates. I recommend using Medjool dates for their natural caramel flavor and soft texture. Remove the pits carefully, then soak them in hot water with a teaspoon of baking soda for at least 10 minutes. This softening process is crucial! The baking soda helps break down the dates, making them easier to puree into that smooth consistency we need. Don’t rush this step – properly prepared dates create that signature dark, rich base that makes gluten-free molasses cookies and this pudding so irresistible.

    The Right Flour Blend Matters

    Not all gluten-free flour blends perform the same way in this recipe. Look for a high-quality blend that contains xanthan gum, which helps mimic gluten’s binding properties. My favorite is a rice flour-based blend with potato starch and tapioca starch. Measure by weight if possible (130g per cup) for the most accurate results. The batter should be pourable but thick – similar to a traditional cake batter. If it seems too thick, add a tablespoon of milk at a time until you reach the right consistency. This attention to detail makes all the difference.

    Serving Ideas & Creative Variations

    Elegant Presentation Options

    Sticky toffee pudding deserves a beautiful presentation! Serve individual portions in vintage teacups or small ramekins for a charming touch. I love to pour extra warm toffee sauce over each serving, then add a small scoop of vanilla ice cream that slowly melts into the warm cake. For special occasions, try a dusting of powdered sugar and a few edible gold flakes. My family goes crazy for this dessert when I serve it alongside a selection of creamy rice pudding with cinnamon and raisins for a cozy dessert buffet.

    Seasonal Twists and Add-Ins

    While traditional sticky toffee pudding is perfect as is, I love creating seasonal variations. For autumn, add 1/2 teaspoon of pumpkin pie spice to the batter and garnish with candied pecans. During winter holidays, try adding orange zest and a splash of bourbon to the toffee sauce for a sophisticated twist. You can also fold in 1/4 cup of finely chopped crystallized ginger to the batter for a warming, spicy kick. For chocolate lovers, add 2 tablespoons of cocoa powder to the batter and chocolate chips to the sauce for a decadent variation.

    Storage & Troubleshooting Guide

    Perfect Make-Ahead Dessert

    One of the things I adore about this gluten-free sticky toffee pudding is how well it stores. The cake portion can be made up to three days ahead and kept in an airtight container at room temperature. The toffee sauce keeps beautifully in the refrigerator for up to a week – just warm it gently before serving. You can even freeze individual portions of the cake for up to two months! To serve from frozen, thaw overnight in the refrigerator, then warm in the microwave for 20-30 seconds before adding hot toffee sauce.

    Solving Common Problems

    If your cake turns out too dry, it’s likely that your gluten-free flour absorbed more moisture than expected. Next time, try adding an extra tablespoon of butter or reducing the baking time by 5 minutes. For sauce that’s too thin, simmer it a bit longer until it reaches your desired consistency. If it’s too thick, add a splash of cream or milk. And if your cake sinks in the middle, your oven temperature might be too high – invest in an oven thermometer for more accurate baking. Remember that gluten-free baked goods often need a slightly lower temperature.

    Frequently Asked Questions

    Can I make this sticky toffee pudding dairy-free as well as gluten-free?

    Yes! Replace butter with coconut oil or vegan butter, and use coconut cream instead of heavy cream in the sauce. The flavor profile will change slightly but remains delicious.

    How do I know when my Gluten-Free Sticky Toffee Pudding is fully baked?

    A toothpick inserted in the center should come out mostly clean with a few moist crumbs. The top should spring back when lightly pressed.

    Can I use a food processor instead of a blender for the dates?

    Absolutely! A food processor works well for pureeing the dates, just be sure to scrape down the sides to ensure a smooth consistency.

    Why did my toffee sauce crystallize?

    Crystallization usually happens if sugar crystals form on the sides of the pan. Brush the sides with water while cooking and avoid stirring too much.

    Can I make mini versions for a party?

    Definitely! Bake in a muffin tin for 15-18 minutes. Reduce the sauce slightly for a thicker consistency that won’t run off the mini cakes.

    Final Thoughts

    This Gluten-Free Sticky Toffee Pudding has become my signature winter dessert, the one friends and family request by name. There’s something magical about serving something so traditionally British that’s been thoughtfully adapted for those avoiding gluten. The rich, caramel notes and that impossibly moist texture make every bite feel like a special occasion. I hope this recipe brings the same joy to your table that it has to mine. For more delicious gluten-free desserts, follow me on Pinterest where I share new discoveries weekly!

  • Gluten-Free Molasses Cookies Recipe That Will Melt Your Heart!

    Gluten-Free Molasses Cookies Recipe That Will Melt Your Heart!

    Gluten-Free Molasses Cookies Recipe That Will Melt Your Heart!

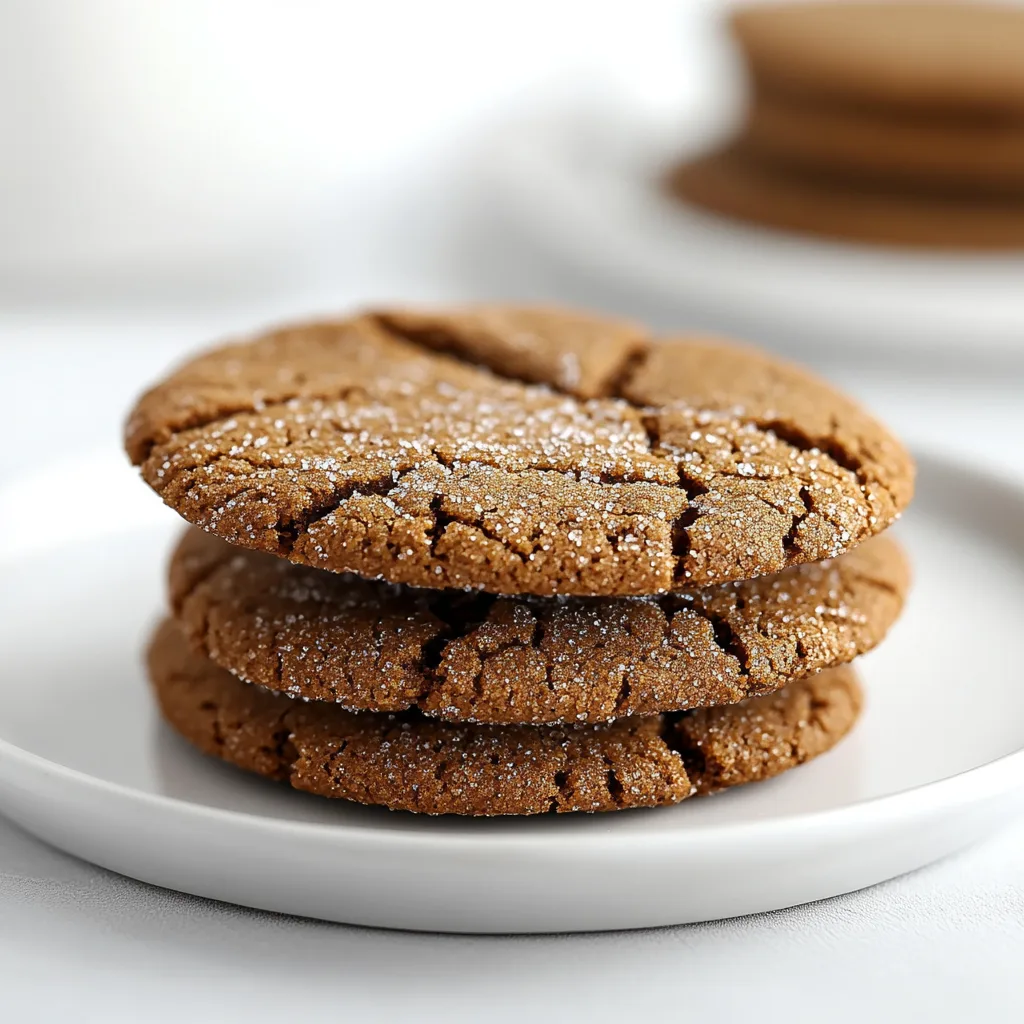
    The aroma of Gluten-Free Molasses Cookies baking in my oven instantly transports me back to my grandmother’s kitchen on snowy December afternoons. There’s something magical about that rich, spicy scent that fills every corner of the house with warmth. These cookies strike the perfect balance between chewy centers and slightly crisp edges, with deep molasses flavor complemented by warming spices. Whether you’re gluten-intolerant or simply looking for a delicious cookie that everyone can enjoy, this recipe delivers all the traditional flavor without the gluten. Let me show you how to create these irresistible treats that taste just like the classics.

    Recipe

    Perfect Texture Every Time

    The biggest challenge with gluten-free baking is achieving that perfect texture, but these molasses cookies nail it. The combination of brown rice flour and tapioca starch creates a beautiful crackly top while maintaining a chewy interior. I spent months perfecting this recipe after my sister was diagnosed with celiac disease, testing countless flour combinations until I found one that didn’t have that telltale “gluten-free taste.” The molasses provides both moisture and that distinctive deep flavor that makes these cookies so addictive. Even my gluten-loving friends request these by name!

    Simple Ingredients, Complex Flavor

    What makes these cookies special is how ordinary pantry ingredients transform into something extraordinary. The rich molasses combines with warm cinnamon, ginger, and a hint of cloves to create a complex flavor profile that tastes like it took hours to develop. I love that these cookies don’t require any unusual ingredients you’ll only use once. Everything works together harmoniously—the brown sugar adds caramel notes while a touch of black pepper (my secret ingredient!) enhances the spices without making the cookies actually spicy. It’s a beautiful balance that keeps you coming back for more.

    Essential Tips & Tricks

    Mastering the Dough Consistency

    The key to perfect gluten-free molasses cookies lies in the dough temperature and resting time. Unlike regular cookie dough, this one needs at least 30 minutes in the refrigerator to hydrate the gluten-free flours properly. Last Christmas, I rushed this step and ended up with cookies that spread too much—lesson learned! The dough should feel tacky but not sticky when you roll it into balls. If it’s too wet, add a tablespoon of rice flour; if too dry, a teaspoon of water. Don’t skip rolling the dough balls in sugar before baking—it creates that beautiful crackly exterior that makes these cookies so visually appealing.

    Baking for Perfect Results

    The baking time is crucial for achieving that ideal chewy-yet-crisp texture. Start checking at 9 minutes—the cookies should look slightly underdone in the center with set edges. They’ll continue cooking on the hot baking sheet after you remove them from the oven. I always rotate my baking sheet halfway through to ensure even browning. Let the cookies cool on the sheet for exactly 5 minutes before transferring to a wire rack—this timing makes all the difference in texture development. For extra decadence, sprinkle the cookies with coarse sugar while they’re still warm for a subtle sparkle and sweet crunch.

    Serving Ideas & Creative Variations

    Seasonal Pairings & Presentations

    These gluten-free molasses cookies shine when paired with the right accompaniments. During fall and winter, I serve them alongside a mug of hot apple cider or spiced chai for the ultimate cozy experience. The warm spices complement each other beautifully. For holiday gatherings, arrange them on a rustic wooden board with sliced pears and a small bowl of mascarpone cheese drizzled with honey—the creamy-sweet combination is divine. These cookies also make gorgeous gifts; stack them in a clear cellophane bag tied with twine and a sprig of rosemary for an effortlessly elegant presentation that anyone would be thrilled to receive.

    Exciting Flavor Twists

    While the classic recipe is perfect, I love experimenting with variations that highlight the molasses depth in different ways. Try adding finely chopped crystallized ginger for bursts of sweet heat throughout the cookie. For a more adult version, mix in a tablespoon of finely grated orange zest and replace the vanilla with two teaspoons of bourbon—the citrus brightens while the bourbon enhances the molasses complexity. Another favorite variation is adding 1/3 cup of mini chocolate chips and a pinch of cayenne for a Mexican chocolate-inspired twist. The possibilities are endless, and each variation still honors the original’s wonderful molasses foundation.

    Storage & Troubleshooting Guide

    Keeping Cookies Fresh

    The moisture retention in these gluten-free molasses cookies actually helps them stay fresh longer than many gluten-free baked goods. Store them in an airtight container at room temperature with a slice of bread to maintain softness—they’ll keep perfectly for up to 5 days. For longer storage, these cookies freeze beautifully for up to 3 months. I like to place them in a single layer on a baking sheet to freeze individually before transferring to a freezer bag—this prevents them from sticking together. Let them thaw at room temperature for about 30 minutes before serving, or warm them in a 300°F oven for 3-4 minutes for that fresh-baked taste.

    Solving Common Baking Issues

    If your cookies spread too much during baking, the butter was likely too warm or the dough wasn’t chilled enough. Next time, refrigerate the dough longer or add an extra tablespoon of gluten-free flour blend. For cookies that don’t spread enough, try flattening the dough balls slightly before baking and make sure your oven is properly preheated. If the cookies seem dry, they were likely overbaked—remember that they’ll continue to set as they cool. For cookies lacking that signature crackle, make sure you’re rolling them in granulated sugar before baking and that your baking powder is fresh—I learned this the hard way after using baking powder that had been in my pantry too long!

    Frequently Asked Questions

    Can I substitute blackstrap molasses in these gluten-free molasses cookies?

    I don’t recommend it. Blackstrap molasses is more bitter and less sweet than regular molasses. Stick with unsulphured molasses for the best flavor balance and authentic cookie taste.

    How can I make these cookies dairy-free as well?

    Simply substitute the butter with solid coconut oil or a plant-based butter stick (not spread). The texture will be slightly different but still delicious, with a subtle coconut undertone.

    Why did my gluten-free molasses cookies turn out hard instead of chewy?

    Likely overbaking. Gluten-free cookies firm up significantly as they cool, so remove them from the oven when the edges are set but centers still look slightly underdone.

    Can I make the dough ahead of time?

    Absolutely! The dough can be refrigerated for up to 3 days or frozen for 2 months. If frozen, thaw overnight in the refrigerator before baking.

    What’s the best way to ship these cookies as gifts?

    Pack cooled cookies in alternating layers with parchment paper in a sturdy container. Add bubble wrap to prevent movement and ship early in the week to avoid weekend delays.

    Final Thoughts

    These Gluten-Free Molasses Cookies have become my signature holiday treat, requested by friends and family regardless of their dietary needs. There’s something deeply satisfying about creating a cookie that honors tradition while making it accessible to everyone at the table. The rich molasses flavor, perfect chewy texture, and warming spices create a truly special cookie experience that bridges dietary differences. I hope you’ll try them and discover why they’ve earned a permanent place in my recipe collection—and perhaps they’ll find a home in yours too. For more gluten-free inspiration, follow me on Pinterest.

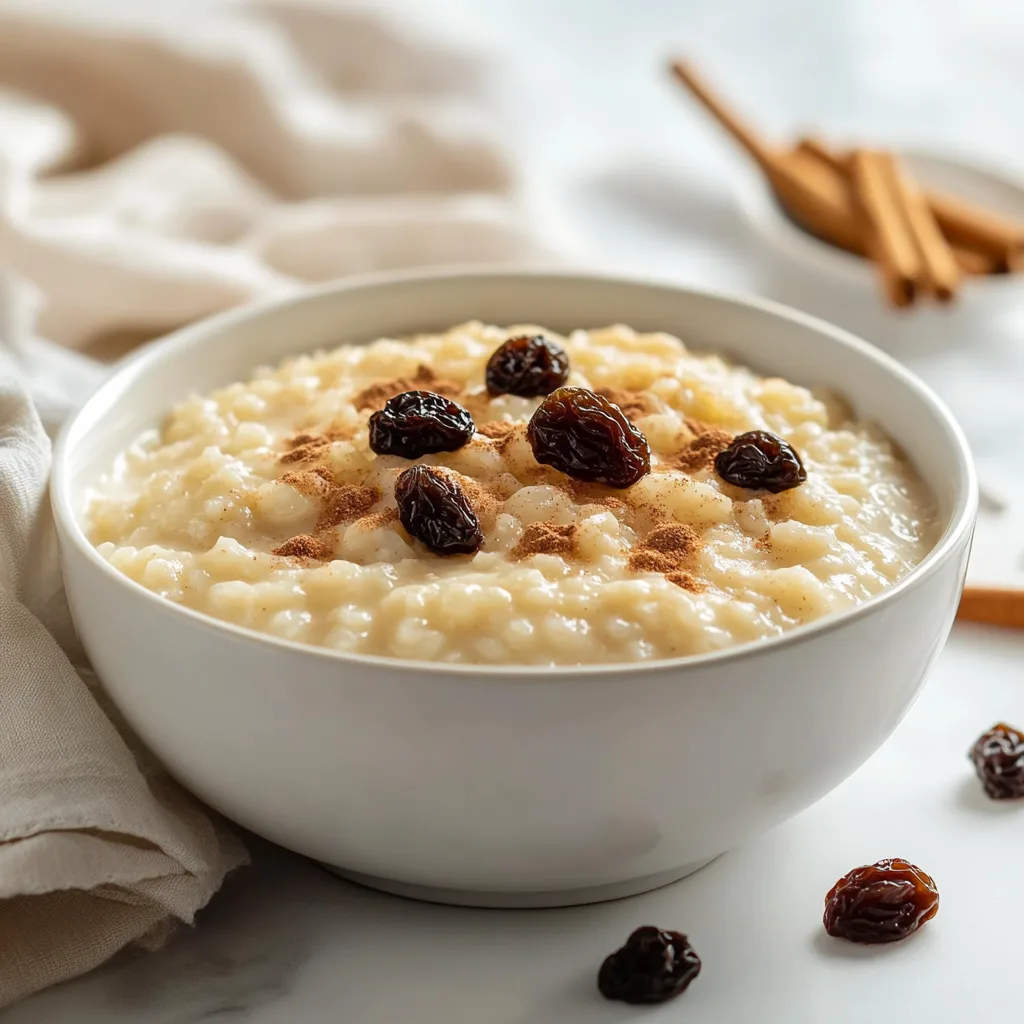
  • Creamy Rice Pudding with Cinnamon & Raisins That Warm Your Soul

    Creamy Rice Pudding with Cinnamon & Raisins That Warm Your Soul

    Creamy Rice Pudding with Cinnamon & Raisins That Warm Your Soul

    There’s something undeniably magical about a bowl of Creamy Rice Pudding with Cinnamon and Raisins on a chilly evening. The way the warm, vanilla-scented rice cradles those plump raisins, all dusted with fragrant cinnamon, takes me right back to my grandmother’s kitchen. I still remember watching her stir the pot with patience, explaining that “good rice pudding can’t be rushed.” Now when I make this comforting classic in my own home, that rich, creamy texture becomes a canvas for memories while creating new ones with my family. If you’re craving a dessert that feels like a warm hug, this recipe is exactly what you need.

    Recipe

    Why You’ll Love This Creamy Rice Pudding with Cinnamon and Raisins

    Perfect Balance of Textures and Flavors

    The beauty of this creamy rice pudding lies in its perfect textural contrast – tender rice grains suspended in silky, vanilla-infused cream, punctuated by the chewy sweetness of raisins. Each spoonful delivers a gentle sweetness that’s never cloying, balanced by warm notes of cinnamon that dance across your palate. I love how the milk slowly transforms into a velvety custard as it cooks, creating that signature richness that makes rice pudding so irresistible. The aroma alone is enough to draw everyone to the kitchen, wondering what that heavenly scent could possibly be.

    Simple Ingredients, Extraordinary Results

    What makes this recipe truly special is how ordinary pantry staples transform into something extraordinary. You’ll need just medium-grain rice, milk, sugar, eggs, vanilla, cinnamon, and raisins – ingredients you likely already have on hand! There’s something deeply satisfying about creating such a comforting dessert without needing to run to specialty stores. I’ve made this on snow days when we couldn’t leave the house, and it always feels like a small miracle how these simple elements come together. The process itself is wonderfully meditative – the gentle stirring becomes almost therapeutic.

    Essential Tips & Tricks

    Mastering the Perfect Consistency

    The secret to achieving that dreamy, spoonable texture lies in understanding your rice. Medium-grain varieties like Arborio or Calrose work beautifully because they release just the right amount of starch. Start with a lower heat than you might think necessary – patience truly pays off here. I learned this the hard way after scorching more than one batch by rushing! The pudding will continue to thicken as it cools, so remove it from heat when it’s slightly thinner than your desired final consistency. For an ultra-creamy finish, try folding in a splash of heavy cream right at the end.

    Elevating with Thoughtful Add-ins

    While the classic combination of cinnamon and raisins creates that nostalgic flavor profile, don’t be afraid to personalize your pudding. Plump your raisins in hot water (or rum for adults!) before adding them – this simple step transforms them into juicy flavor bombs. For the cinnamon, freshly grating a stick provides a more vibrant aroma than pre-ground. Consider adding a pinch of cardamom or nutmeg alongside the cinnamon for complexity. A touch of orange or lemon zest brightens everything beautifully. My family loves when I stir in a spoonful of good quality maple syrup just before serving.

    Serving Ideas & Creative Variations

    Warm vs. Chilled Presentations

    This versatile dessert shines whether served warm or cold, each offering a distinctly different experience. Warm pudding feels like the ultimate comfort food, especially with a small pat of butter melting on top and an extra dusting of cinnamon. For chilled presentations, the flavors meld and intensify overnight, making it perfect for make-ahead entertaining. I love serving individual portions in vintage teacups or small mason jars, creating an elegant dessert that’s both nostalgic and modern. For brunch gatherings, try layering the chilled pudding with fresh berries in clear glasses for a beautiful parfait-style presentation.

    Global Inspirations to Try

    Take your rice pudding on a culinary journey by exploring international variations. Mexican-inspired horchata rice pudding incorporates cinnamon sticks and a hint of almond extract. Scandinavian rice pudding often includes a dollop of tart lingonberry jam. Indian kheer introduces cardamom, saffron, and pistachios for an aromatic twist. Persian rice pudding features rose water and a scatter of pomegranate seeds. My personal favorite variation includes coconut milk, a splash of dark rum, and toasted coconut flakes – reminiscent of a tropical vacation. These global inspirations keep this classic dessert feeling fresh and exciting.

    Storage & Troubleshooting Guide

    Proper Storage for Maximum Freshness

    To maintain that creamy dreaminess, store your rice pudding in an airtight container in the refrigerator for up to 5 days. Place plastic wrap directly on the surface before sealing to prevent that unappetizing skin from forming. The pudding will thicken considerably when chilled, so don’t worry if it seems too loose when you first refrigerate it. If you’re planning to freeze portions (yes, it freezes beautifully!), use individual containers for easier thawing. Allow frozen pudding to thaw overnight in the refrigerator. When reheating, add a splash of milk and warm gently on the stovetop or microwave, stirring frequently.

    Fixing Common Rice Pudding Problems

    Even experienced cooks occasionally encounter texture troubles with rice pudding. If your pudding seems too thin, continue cooking a bit longer, remembering it will thicken as it cools. For pudding that’s too thick, simply whisk in additional warm milk until you reach your desired consistency. Scorched bottom? Don’t stir it in! Carefully transfer the unburned portion to a clean pot and continue cooking. If your rice remains too firm, add a splash more liquid and extend the cooking time. For lumpy pudding, a vigorous whisk or even a quick blend with an immersion blender (for serious emergencies only!) can smooth things out.

    Frequently Asked Questions

    Can I make Creamy Rice Pudding with Cinnamon and Raisins ahead of time?

    Absolutely! It actually improves after resting overnight in the refrigerator. The flavors meld beautifully, and the texture becomes even creamier. Just give it a gentle stir before serving.

    What’s the best rice to use for rice pudding?

    Medium-grain rice varieties like Arborio, Valencia, or Calrose work best. They release just enough starch to create that perfect creamy texture without becoming mushy.

    Can I make this recipe dairy-free?

    Yes! Substitute the milk with coconut milk, almond milk, or oat milk. Coconut milk creates an especially rich and flavorful variation that pairs wonderfully with the cinnamon.

    My rice pudding seems too runny. What did I do wrong?

    Remember that rice pudding thickens significantly as it cools. If it’s still too thin after cooling, you likely needed to cook it longer to reduce more liquid and activate the rice’s starch.

    How do I know when my rice pudding is done cooking?

    The pudding is ready when the rice is tender and the mixture coats the back of a spoon. It should be slightly looser than your desired final consistency, as it will thicken while cooling.

    Final Thoughts

    There’s something profoundly comforting about a well-made Creamy Rice Pudding with Cinnamon and Raisins that transcends being just another dessert. It connects us to generations past, to kitchens filled with love and patience. Whether you’re making this as a special treat or a simple weeknight dessert, the ritual of stirring and tasting becomes its own reward. I hope this recipe brings the same warmth and joy to your home that it has to mine. For more cozy dessert inspirations, be sure to follow us on Pinterest where we share our favorite comfort food creations.