Author: Jessica Moore

  • Fudgy Red Velvet Crinkle Cookies | Festive, Chewy, and Easy

    Fudgy Red Velvet Crinkle Cookies | Festive, Chewy, and Easy

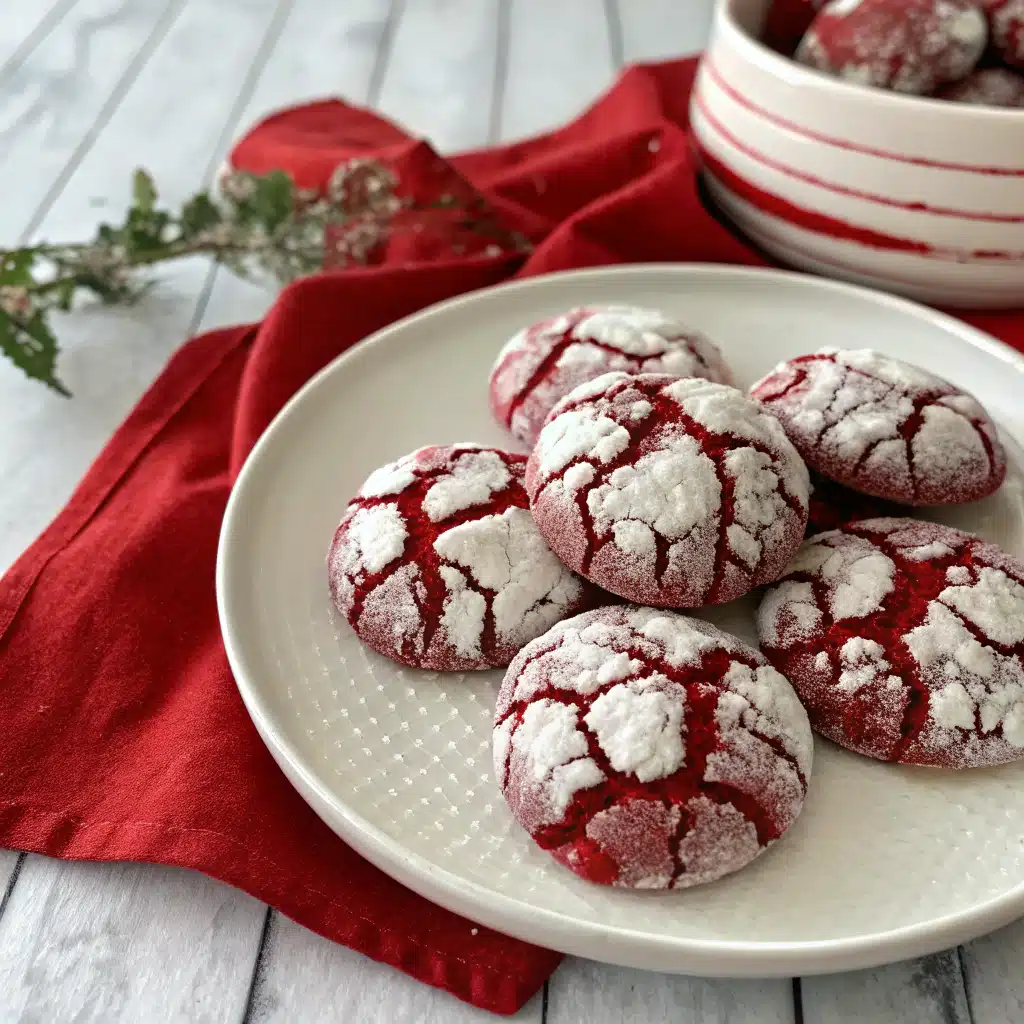
    Every December, I bake a parade of cookies for our neighborhood swap, but these fudgy red velvet crinkle cookies always disappear first. They’re deeply cocoa-kissed with that classic red velvet tang and a soft, brownie-like center that makes everyone reach for seconds. The snow-dusted finish looks dramatic without any fuss, so the cookies feel special even on a busy weeknight. Over the years, I’ve perfected a few tricks—chilling the dough, a double sugar coat, and a careful bake—that guarantee bold crinkles and tender chew. This is the festive cookie you’ll be proud to gift, plate up for parties, and sneak from the cooling rack before they’re even cool.
    Fudgy Red Velvet Crinkle Cookies | Festive, Chewy, and Easy

    ???? Recipe Card

    Why These Fudgy Red Velvet Crinkle Cookies Steal the Holiday Spotlight

    There’s a reason red velvet bakes dominate during the holidays: they’re equal parts cozy nostalgia and show-stopping color. These Red Velvet Crinkle Cookies bring everything you love about red velvet cake—gentle cocoa, vanilla warmth, and that signature tang—into a fudgy, handheld bite that’s tailor-made for cookie exchanges and dessert boards. The hallmark of a great crinkle cookie is contrast: a soft, brownie-like center surrounded by dramatic, snow-like fissures of powdered sugar. This recipe maximizes those crinkles with a few key techniques and ingredients that keep the cookies plush without sacrificing structure.

    The flavor base starts with unsweetened cocoa powder for depth, vanilla to round things out, and a touch of distilled white vinegar—an essential red velvet element that adds a subtle tang and helps the leaveners lift. To achieve the fudgiest texture, we use both softened butter and a bit of neutral oil; the butter brings flavor while the oil keeps the crumb moist for days.

    Color matters for visual impact. A gel or concentrated liquid food coloring yields a deep crimson hue that won’t fade while baking. Don’t worry: the coloring won’t affect flavor when used as directed. And because red velvet loves a creamy counterpart, a handful of white chocolate chips is optional but delightful—melty pools that punctuate the cocoa and vanilla.

    The snowcapped look comes from rolling well-chilled dough balls first in granulated sugar and then in confectioners’ sugar. The granulated sugar creates a thin barrier that helps the powdered sugar sit on top without dissolving, so your cookies emerge with dramatic cracks instead of a muted dusting.

    On a festive dessert tray, these cookies shine alongside classics like peppermint bark or simple fudge. If you want an easy candy to pair with your cookie tins, try this no-fuss 3-Ingredient Candy Cane Fudge. Together, they make a polished, giftable duo with big holiday flavor and a fraction of the effort.

    Step-by-Step: How to Make Red Velvet Crinkle Cookies with Perfect Cracks

    Set yourself up for success by starting with room-temperature ingredients. When butter and eggs are slightly warm, they emulsify more smoothly, which leads to a uniform crumb and even rise. A kitchen scale is helpful for accuracy, especially with flour and cocoa.

    1) Whisk your dry mix: In a medium bowl, whisk all-purpose flour, unsweetened cocoa powder, baking powder, a pinch of baking soda, and salt. Cocoa can clump; take a few extra seconds to break it up thoroughly for an even bake.

    2) Cream with intention: In a large bowl, beat softened unsalted butter with granulated sugar and light brown sugar until pale and fluffy, about 2–3 minutes. This step traps air, helping your cookies puff and crackle properly. Beat in a splash of neutral oil. The oil adds moisture that keeps the centers fudgy after cooling.

    3) Layer flavor: Beat in eggs one at a time until fully incorporated, then add vanilla and a teaspoon of distilled white vinegar. The vinegar brightens the cocoa and works with the leaveners to create that pillowy, crinkled top.

    4) Color control: Add red gel food coloring a little at a time until you reach a vibrant, deep red. Gel coloring is potent, so you’ll use less for stronger results than with standard liquid color.

    5) Combine with care: Add the dry ingredients to the wet on low speed until just combined; overmixing can toughen the cookie. Fold in white chocolate chips if using. The dough should be soft but workable.

    6) Chill for confidence: Cover the bowl and chill for at least 45 minutes (or up to 48 hours). Chilling firms the dough, prevents excessive spreading, and deepens the flavors. If you chill overnight, let the dough sit at room temperature for 10–15 minutes to become scoopable again.

    7) Double-coat for dramatic crinkles: Prepare two shallow bowls—one with granulated sugar and the other with confectioners’ sugar. Scoop dough into 1.5-tablespoon portions (a #40 scoop works well), roll each into a ball, coat generously in granulated sugar, then coat thoroughly in confectioners’ sugar. A thick powdered sugar layer is key to bold, lasting contrast.

    8) Bake precisely: Arrange on a parchment-lined baking sheet, spacing well. Bake in a 350°F (175°C) oven for 10–12 minutes. Look for edges that are set and centers that are puffed and slightly underdone; the crinkles should be prominent. Avoid overbaking—cookies continue to set as they cool, and overbaking erases that brownie-like center.

    9) Cool with patience: Let cookies rest on the sheet for 5 minutes, then transfer to a rack to cool completely. If needed, dust with additional confectioners’ sugar after cooling.

    Pro tips for consistent results:
    – Flour matters: Spoon and level flour into the cup or use a scale to avoid dry, cakey cookies.
    – Pans count: Light-colored aluminum sheets and parchment promote even baking and cleaner bottoms.
    – Batch timing: Work in small batches, keeping unbaked dough covered and chilled so it stays firm for rolling and coating.
    – Visual cues over time: Ovens vary. Your first batch is a test—aim for cookies that are just set at the edges with soft centers and defined cracks.

    Variations, Make-Ahead, and Storage Tips for Busy Festive Schedules

    One recipe, many moods—that’s the beauty of red velvet cookies. Once you master the base, small tweaks deliver fresh flavors and textures.

    Flavor twists to try:


    – Peppermint White Chocolate: Swap in peppermint chips or add 1/2 teaspoon peppermint extract. Finish with crushed candy cane for sparkle.
    – Cream Cheese Glaze: Whisk softened cream cheese with confectioners’ sugar, a pinch of salt, and a splash of milk until drizzly. Drizzle over cooled cookies for that classic red velvet–cream cheese pairing.
    – Mocha Velvet: Add 1 teaspoon instant espresso powder to the dry ingredients to deepen the cocoa notes.
    – Beets for Color: For a natural hue, use beet powder (1–2 teaspoons) along with a touch of gel color if needed. You’ll get a more muted, earthy red with zero bitterness.
    – Gluten-Free Swap: Use a quality 1:1 gluten-free baking blend and let the dough rest in the fridge for an extra 15–20 minutes to hydrate the starches.

    Make-ahead plans that work:
    – Chill the Dough: The dough keeps covered in the fridge for up to 48 hours. Scoop directly from chilled and roll in sugars right before baking so the coating stays bright.
    – Freeze the Dough Balls: Scoop and roll dough into balls, freeze on a tray until firm, then store in a zip-top bag up to 2 months. Roll in granulated and powdered sugar straight from frozen and add 1–2 minutes to the bake time.
    – Bake and Freeze: Baked cookies freeze beautifully. Cool completely, layer with parchment in an airtight container, and freeze up to 2 months. Thaw at room temperature and re-dust with confectioners’ sugar if needed.

    Creative serving and gifting:
    – Sandwich Cookies: Pair two cookies with a thin layer of buttercream, marshmallow fluff, or thick caramel. A slow-cooker caramel is especially simple—make a batch of slow cooker dulce de leche and spread a teaspoon between two cookies for an irresistible treat.
    – Cookie Charcuterie Boards: Arrange your crinkles with a mix of textures—crisp biscotti, chewy ginger cookies, and a few dipped fruits—so every bite on the board feels intentional. Include a small sifter of powdered sugar to refresh the look just before serving.

    Storage guidelines:
    – Room Temperature: Store cookies in an airtight container at cool room temperature for 4–5 days. Slip in a piece of parchment to prevent sticking if the environment is humid.
    – Humidity Control: To protect the powdered sugar finish, add a small packet of food-safe desiccant or a teaspoon of dry rice wrapped in cheesecloth to the container.
    – Re-Crinkle Trick: If the tops look dull after storage, dust lightly with confectioners’ sugar just before serving for a fresh “snow” effect.

    Serving Ideas, Pairings, and Troubleshooting for Bakery-Style Results

    Setting a festive scene is half the joy of holiday baking. These cookies are naturals on a dessert table with hot cocoa, coffee, or even a celebratory glass of bubbly. For New Year’s gatherings, I like to plate them with tart berries (raspberries or pomegranate arils) to contrast the sweetness and accent the red hue. On game days or casual potlucks, balance the dessert spread with a few savory crowd-pleasers; a warm, creamy option like this slow cooker jalapeño corn dip keeps the table interesting and rounds out your menu.

    Troubleshooting common issues:
    – Cookies Spread Too Much: Your dough was likely too warm or under-measured on flour. Chill the dough longer and confirm your flour measurement. If still spreading, add 1–2 tablespoons flour and test another cookie.
    – Crinkles Don’t Show: The powdered sugar may be dissolving. Be sure to double-coat—first in granulated sugar, then a heavy layer of confectioners’ sugar—and bake immediately after coating. Work with chilled dough and avoid overcrowding the pan.
    – Dry or Cakey Texture: Overbaking is the usual culprit. Pull the cookies when edges are just set and centers are soft and puffy. Measure flour carefully and don’t overmix once the flour goes in.
    – Bitter Flavor: Using too much liquid food coloring can leave a harsh aftertaste. Switch to gel color and add gradually. Also check your cocoa—Dutch-process will taste smoother, while some natural cocoas can lean sharper.
    – Flat Tops, Minimal Lift: Cream your butter and sugars fully to incorporate air, and make sure your baking powder and baking soda are fresh. The vinegar + leavener combo needs active agents to do its job.

    Scaling for crowds and timing:
    – Double the Recipe: Mix in a large bowl and chill the dough in two shallow containers for faster cooling. Bake on two racks, rotating halfway, to keep batches uniform.
    – Smart Staging: Scoop the next tray while one is in the oven, keeping the remaining dough covered and chilled so every batch crinkles the same.

    Presentation polish:
    – Sift-and-Serve: Right before serving, give cookies a quick snowfall of sugar to revive that fresh-baked, high-contrast look.
    – Color Coordination: Plate on matte white or slate boards so the crimson pops. Add rosemary sprigs or edible gold stars for instant holiday elegance without extra sweetness.

    Conclusion

    Fudgy Red Velvet Crinkle Cookies bring timeless holiday charm in a format that’s easy to bake, stunning to serve, and guaranteed to draw compliments. With a balanced cocoa profile, a whisper of tang, and brownie-soft centers, they’re everything you want from a celebration cookie. The method—chill, double-coat, bake just until set—delivers those sought-after crinkles every time. Whether you’re packing tins, building a dessert board, or sneaking a warm cookie with your evening cocoa, this recipe will become your festive classic for years to come.

    If you made these Fudgy Red Velvet Crinkle Cookies, leave a rating and a comment to share your tips and twists. Snap a photo and tag your bake—your holiday board might inspire someone else’s new favorite cookie! For more cozy, time-saving recipes, subscribe to get new ideas delivered to your inbox.

    FAQ

    Can I make these cookies without food coloring? Yes. The flavor won’t change if you omit the food coloring. For a natural alternative, try beet powder for a muted red or simply enjoy them as cocoa crinkle cookies.

    How do I keep the powdered sugar from melting into the cookies? Work with well-chilled dough, roll first in granulated sugar, then generously in confectioners’ sugar, and bake immediately after coating. Store in a cool, dry container and re-dust before serving if needed.

    Can I freeze the dough or baked cookies? Absolutely. Freeze portioned dough balls up to 2 months and bake from frozen, adding 1–2 minutes. Baked cookies also freeze well; thaw at room temperature and re-dust with sugar before serving.

    Why add vinegar to red velvet cookies? Vinegar adds classic red velvet tang and reacts with baking soda for lift, helping create puffy centers and pronounced crinkles without making the cookies taste acidic.
  • Maple Pumpkin Cookies: 9 Secrets That Will Blow Your Mind

    Maple Pumpkin Cookies: 9 Secrets That Will Blow Your Mind

    Maple Pumpkin Cookies used to sound like something you’d find at a bake sale wrapped in plastic—forgettable and overly sweet. But let me tell you, I was so wrong. These are the cookies that changed my mind—and my fall baking game. Hey! I’m Darleen Vamce—34, Salt Lake City native, and a woman who once thought slow cookers were only good for potlucks and mushy stews. Then came “The Great Mealtime Struggle”: three hungry kids, a relentless job, and a kitchen that always seemed to mock me. One chaotic morning, I tossed together pumpkin, maple syrup, and spices while holding a baby on my hip. What came out of the oven? Magic. Now, this humble cookie is a fall tradition—soft, spiced, and finished with a kiss of maple glaze. It’s the kind of treat that makes your family think you’re a baking genius… even if you’re running on caffeine and dry shampoo.

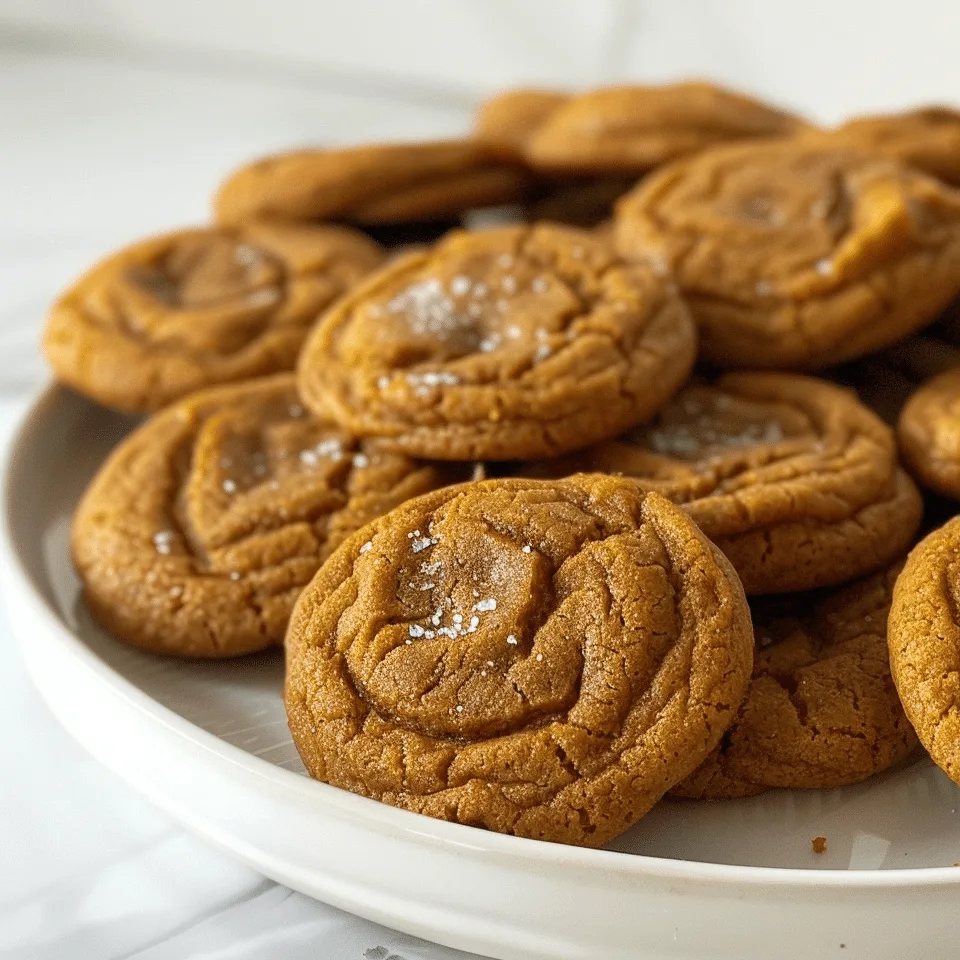
    Maple pumpkin cookies on a rustic table with fall decor

    Recipe

    Maple Pumpkin Cookies That Taste Like Fall in Every Bite

    These maple pumpkin cookies are soft, chewy, and everything you love about autumn. Blending warm pumpkin spice with the deep richness of maple syrup, they’re the kind of homemade fall treats that disappear fast. Whether you’re baking for a Thanksgiving dessert tray or a cozy Sunday afternoon, these cookies deliver every time. The best part? You don’t need fancy tools or hours in the kitchen. Just real ingredients and a little mixing magic.

    The Secret to Soft, Chewy Pumpkin Cookies

    Texture makes or breaks a cookie. And with pumpkin in the mix, things can get cakey fast. The secret here is moisture balance. Too much pumpkin purée? You get muffins. Too little? They dry out. This recipe hits the sweet spot—resulting in perfectly moist pumpkin cookies with just the right amount of chew. A touch of brown sugar adds richness, while a blend of cinnamon, nutmeg, and cloves keeps every bite cozy and spiced.

    Why Maple Glaze Makes Them Unforgettable

    You could stop at the cookie, but the maple glaze takes things to a new level. It’s smooth, naturally sweet, and soaks into the warm cookies like a dream. This isn’t just a drizzle—it’s a finishing touch that adds depth and dimension. When the glaze cools, it creates a delicate crust over the top, giving every bite a balance of softness and a slight snap. Pair that with the earthy notes of real maple syrup, and you’ve got yourself an easy pumpkin dessert that feels gourmet.

    Bake These Maple Pumpkin Cookies Like a Pro

    You don’t need to be a professional baker to make maple pumpkin cookies that taste bakery-worthy. This recipe is designed for real kitchens, real people, and real life. With a few smart tips and pantry staples, you’ll be pulling perfectly soft, chewy, and spiced cookies from the oven every time.

    Your Pantry Might Already Have Everything You Need

    One reason I keep coming back to this recipe? It’s built on simple, affordable ingredients. You’ll need flour, canned pumpkin, real maple syrup, brown sugar, and the holy trinity of fall spices: cinnamon, nutmeg, and cloves. Add in an egg, vanilla, baking soda, and butter, and you’re ready. If you’ve made homemade fall treats before, chances are everything you need is already on your shelf. These cookies are the definition of a quick and easy pumpkin dessert, perfect for last-minute guests or late-night cravings.

    For more cozy cookie inspiration, check out this slow cooker pumpkin butter recipe—it’s a game-changer in fall baking and can even be swirled into your next batch of cookies.

    Tips to Nail That Signature Maple Pumpkin Flavor

    Balance is key. Too much spice can overwhelm the pumpkin; too little, and you lose that autumn essence. What makes these maple pumpkin cookies stand out is how the maple doesn’t fight with the spice—it smooths it out. It complements the pumpkin instead of competing. Try to use real maple syrup if you can—it’s worth it. If you’re looking for more depth, a pinch of flaky sea salt on top before baking makes the flavors pop.

    These are not your average pumpkin spice cookies. They’re layered, rich, and built to impress—without being fussy.

    How to Make Maple Pumpkin Cookies Everyone Remembers

    You know those recipes that show up once and suddenly become tradition? That’s exactly what happened with these maple pumpkin cookies. They hit the table once—and now, I’m not allowed to skip them. They’re the kind of fall cookie recipe that gets asked about even when it’s not fall.

    Prep Like a Weeknight Pro (Even If You’re Not One)

    You don’t need hours to make something great. These cookies are a 15-minute prep win. First, combine wet ingredients: butter, maple syrup, pumpkin purée, vanilla, and egg. Then mix the dry: flour, baking soda, salt, and all those classic pumpkin spice cookie flavors. Fold everything together just until mixed. That’s it. Chill for 30 minutes if you want thicker cookies, or bake right away if you’re after that golden-edge softness.

    One shortcut I love? I sometimes double the batch and freeze half the dough. That way, I’ve always got a stash of homemade fall treats ready for any occasion—or emergency sweet tooth moment.

    Looking for a bakery-style twist on pumpkin treats? Don’t miss these Pumpkin Cinnamon Roll Muffins—they’re fluffy, sweet, and absolutely worth waking up for.

    Serving and Storing Tips That Actually Work

    Let cookies cool fully before storing. If you glaze them while warm, the maple topping will melt into the cookie, which some folks love—but if you want that glossy finish, wait until they cool. Store in an airtight container for up to 4 days at room temp or freeze them (unglazed) for up to 2 months.

    And pro tip? Reheat them for 5 seconds in the microwave to bring back that warm, just-baked magic. These chewy pumpkin cookies were made to be enjoyed warm with a cup of coffee or cider in hand.

    Maple Pumpkin Cookies That Feel Like a Cozy Hug

    The beauty of maple pumpkin cookies isn’t just the flavor—it’s the moment they create. These cookies bring the kind of comfort that makes your kitchen feel like fall, even if it’s 85 degrees outside. They’re soft, fragrant, and rich enough to feel indulgent but simple enough to make on a Wednesday.

    Add Your Own Fall-Inspired Twist

    Want to make these cookies your own? Try folding in chopped pecans or white chocolate chips. Both bring texture and added sweetness that plays well with the earthy pumpkin. For a deeper autumn vibe, sprinkle with cinnamon sugar right before baking. These kinds of little touches turn a basic batch into your signature treat.

    If you love spicing up your fall baking game, check out these Pumpkin Brownies. They’ve got that same bold flavor with a fudgy finish that’s impossible to resist.

    You can even sandwich a spoonful of cream cheese frosting between two cookies for the ultimate fall dessert upgrade. Whatever version you choose, these cookies are built to be customized—and shared.

    Why These Cookies Deserve a Spot in Your Fall Lineup

    Every year, we all get bombarded with pumpkin-flavored everything. But these maple pumpkin cookies don’t feel gimmicky. They feel homemade. Real. Cozy. And more than anything, they taste like the kind of recipe that’ll show up in your family binder for years.

    Whether you’re baking for a party, prepping for a bake sale, or just trying to create a calm moment in a hectic season, these cookies deliver. They’re soft, warm, and finished with that maple glaze that pulls everything together. One bite in, and you’ll understand why these aren’t just cookies—they’re a tradition waiting to happen.

    Glazed maple pumpkin cookies cooling on a rack

    Conclusion: Bake the Cookies, Keep the Magic

    These maple pumpkin cookies aren’t just another fall treat—they’re the kind of cozy, flavor-packed dessert that brings people back to your kitchen year after year. With warm spices, chewy texture, and a drizzle of maple glaze, they turn even the most hectic day into a little seasonal celebration.

    So, what are you waiting for? Try them at home, and when your family raves (they will), tag me on Facebook with your batch! Let’s make this your new favorite fall tradition.

    FAQs About Maple Pumpkin Cookies

    How do I keep maple pumpkin cookies soft for days?

    The key is moisture. Store your maple pumpkin cookies in an airtight container with a slice of bread or a piece of parchment between layers. This helps retain softness without making them soggy. These cookies naturally stay chewy thanks to the pumpkin, so they’re perfect for make-ahead fall baking.

    Can I freeze maple pumpkin cookie dough?

    Absolutely. Maple pumpkin cookies freeze beautifully. Scoop the dough into balls and freeze on a baking sheet, then transfer to a zip-top bag. When ready to bake, add 2–3 minutes to the cook time without thawing. It’s a great way to always have a batch of cozy cookies ready to go.

    What’s the best maple syrup for these cookies?

    Use pure maple syrup—not pancake syrup. Grade A dark amber syrup gives your maple pumpkin cookies a deep, rich flavor that stands up to the spices and pumpkin. The maple glaze especially benefits from a quality syrup, adding real depth and that signature fall taste.

    Can I make these maple pumpkin cookies gluten-free?

    Yes! Simply swap the flour with a 1:1 gluten-free baking blend. Many readers also love pairing this with oat flour for a slightly nuttier texture. Just keep an eye on moisture—gluten-free flours can behave differently, but the pumpkin helps keep everything tender.

  • 3-Ingredient Pumpkin Oatmeal Cookies To Love

    3-Ingredient Pumpkin Oatmeal Cookies To Love

    Pumpkin oatmeal cookies 3 ingredients—that’s all it took to change the way I thought about baking on busy weekdays.

    Hey! I’m Darleen Vance—34, Salt Lake City native, mom of three, and a former skeptic of anything that sounded too “shortcut-y” to be homemade.

    I used to think baking meant flour everywhere and hours I didn’t have.

    But during what I lovingly call “The Great Mealtime Struggle,” I tossed oats, pumpkin, and a swirl of maple syrup into a bowl—baby on hip, laptop still open—and hoped for the best.

    What came out of the oven? Warm, chewy, spiced cookies that made the whole house smell like fall… and made me feel like I had it all together.

    Spoiler: I didn’t. But these cookies helped.

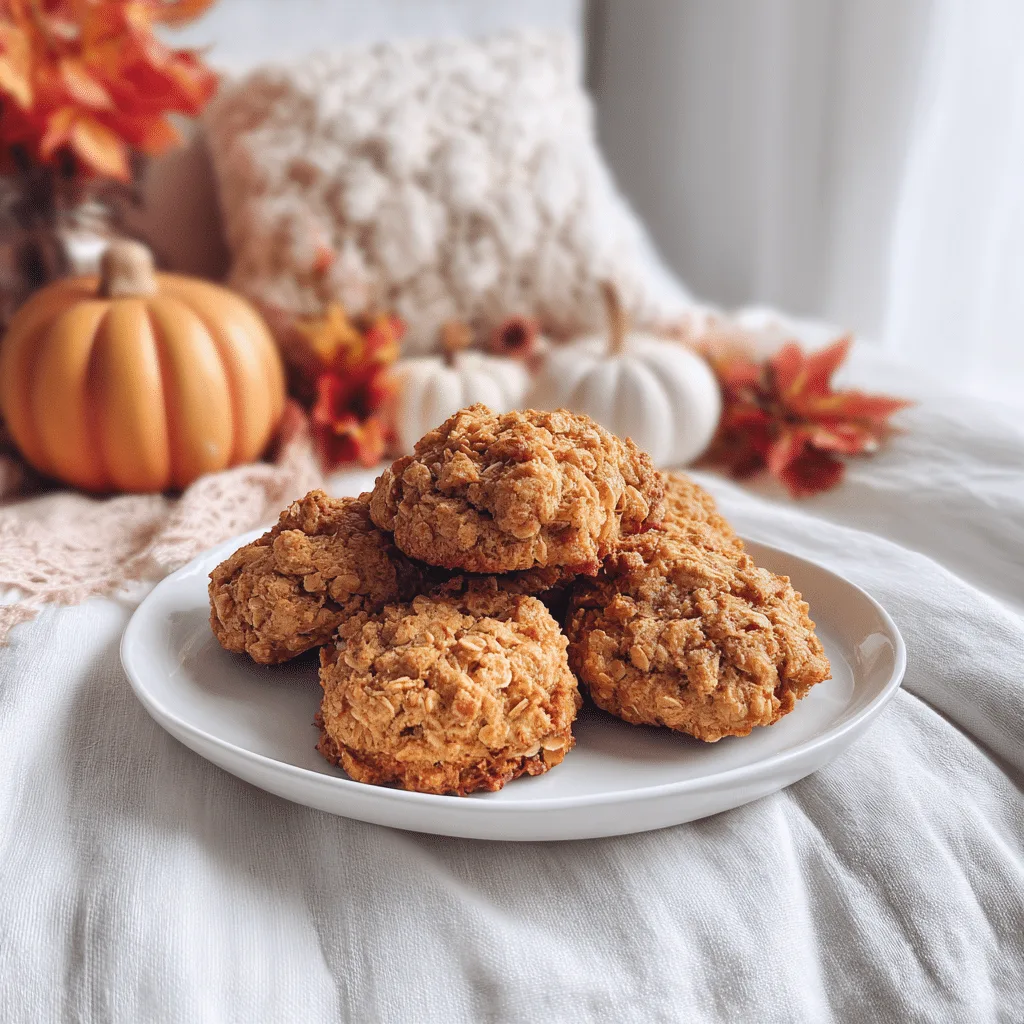
    Pumpkin oatmeal cookies made with 3 ingredients on a baking tray
    Table of Contents

    Recipe

    Why Pumpkin Oatmeal Cookies Are the Perfect Fall Treat

    Minimal Ingredients, Maximum Comfort

    Pumpkin oatmeal cookies 3 ingredients—that’s the kind of headline I would’ve scrolled past years ago. But let me tell you, this is one of those recipes that proves simple doesn’t mean boring. With just oats, pumpkin puree, and a touch of maple syrup or nut butter, you get a cookie that’s soft, hearty, and naturally sweet.

    These are not your bakery-style, sugar-loaded treats. They’re soft pumpkin oat cookies that feel like a warm blanket on a chilly morning. You can enjoy them for dessert, tuck them into lunchboxes, or grab one with coffee as a quick pumpkin cookie recipe that’s actually good for you.

    They’re also naturally egg-free and gluten-free when you use certified oats, which makes them a win for almost every diet.

    From Breakfast to After-School Snack

    These flourless pumpkin oatmeal cookies pull double duty. They’re just sweet enough for a treat but packed with fiber and real ingredients that make them feel substantial. In our house, we call them “breakfast cookies” because they check all the boxes—quick, clean, and kid-approved.

    They also store well and freeze even better. I’ll often make a double batch, let them cool, and keep half in the freezer for those weeks when life just gets ahead of me.

    So yes, pumpkin oatmeal cookies 3 ingredients is more than just a recipe. It’s a way to simplify your fall routine without giving up the comfort food vibes we all crave this time of year.

    What You’ll Need and Why It Works

    Just Three Pantry Staples

    If you’ve got pumpkin oatmeal cookies 3 ingredients on your mind, you’re in luck—you likely already have everything you need. This recipe is built on simplicity and real food.

    Here’s what you’ll need:

    • 1 cup pumpkin puree
    • 1 ¾ cups quick oats
    • ¼ cup maple syrup or nut butter

    That’s it. No flour, no eggs, no sugar. The oats bring texture and heartiness, the pumpkin adds moisture and natural sweetness, and the syrup or nut butter holds everything together.

    You can add a dash of cinnamon or pumpkin pie spice if you want a little extra flavor, but it’s not required. This is a one-bowl pumpkin cookie recipe that doesn’t need frills to shine.

    Why It’s Foolproof and Flexible

    These healthy pumpkin cookies are what I call beautifully predictable. The ingredients are forgiving, and the method is even easier. No chilling. No creaming. No fancy tools. Just mix, scoop, and bake.

    Because they’re made without refined sugar or dairy, they also work for a variety of eating styles—vegan, gluten-free (if using certified oats), and naturally low in fat. That makes them a perfect choice for sharing, especially during the fall season when food allergies and preferences are all over the map.

    Whether you’re making breakfast pumpkin cookies or a simple after-school snack, these come through every time.

    How to Make Pumpkin Oatmeal Cookies (3 Ingredients)

    Simple Steps with Big Flavor

    One reason pumpkin oatmeal cookies 3 ingredients has become a go-to in my kitchen is because the prep is as easy as it gets. You don’t need a mixer. You don’t need to measure with precision. And you don’t need to worry about overmixing. This is one of those rare cookie recipes that gives you confidence, not stress.

    Start by preheating your oven to 350°F. In a large mixing bowl, combine pumpkin puree, quick oats, and your sweetener of choice—either maple syrup or almond butter. Stir until the mixture is well combined and thick.

    Scoop small spoonfuls onto a parchment-lined baking sheet. Flatten each slightly with the back of a spoon. Bake for 12–15 minutes or until the edges are firm and the tops look set.

    That’s it. You’ve just made soft pumpkin oat cookies with zero refined sugar, no dairy, and absolutely no fuss.

    Optional Add-ins That Keep It Simple

    While the base for pumpkin oatmeal cookies 3 ingredients is perfection on its own, you can customize them easily. Add-ins like dark chocolate chips, chopped nuts, or a handful of raisins won’t throw off the texture. You can also sprinkle cinnamon or nutmeg into the mix for deeper fall flavor.

    These no sugar pumpkin cookies bake up soft and chewy, not crisp. If you like a firmer cookie, simply let them cool on the pan for a few extra minutes after baking.

    And don’t worry—they store well in a sealed container or can be frozen for grab-and-go breakfasts or snacks. This is simple baking, made even better.

    When to Serve Pumpkin Oatmeal Cookies (3 Ingredients)

    Stack of pumpkin oatmeal cookies with coffee and fall decor

    Great Any Time of Day

    One of the best parts about pumpkin oatmeal cookies 3 ingredients is how versatile they are. You can serve them fresh out of the oven on a cozy fall morning, as an after-school snack, or pack them as a quick breakfast cookie when life is full-speed. Because they’re made with real, nourishing ingredients like oats and pumpkin, they fill you up without the sugar crash.

    They’re soft, naturally sweet, and portable—just right for lunchboxes or work snacks. I’ve even crumbled a couple over Greek yogurt and called it breakfast. No shame here. If you like soft, hearty, fall-flavored bakes, you might also love these moist pumpkin chocolate chip bread hacks.

    There’s a reason pumpkin oatmeal cookies 3 ingredients has become a favorite in so many kitchens. It’s not just about how few ingredients it takes—it’s about how good the results are. With no flour, eggs, or sugar, this recipe is naturally vegan, gluten-free (with the right oats), and allergy-friendly.

    They’re also perfect for baking with kids or prepping ahead. You can make a batch in ten minutes and have a week’s worth of healthy pumpkin cookies on hand.

    Looking for another fast and cozy fall recipe? These 10-minute Greek yogurt pumpkin muffins are another one of our go-tos—same cozy flavor, different format.

    There’s something about pumpkin oatmeal cookies 3 ingredients that just works. They’re quick, healthy, and packed with that fall comfort we all crave—without the guilt or the hassle.

    You don’t need a mixer. You don’t need specialty ingredients. Just three pantry staples and about 20 minutes of your time. The result? A soft, chewy cookie that tastes like autumn and fits perfectly into real life.

    So grab a bowl, scoop some dough, and see for yourself why this recipe is one of my all-time favorites. Tried it? I’d love to see your version! Snap a pic of your pumpkin oatmeal cookies and share it with me on Facebook—just tag @RecipesDarleen or drop it in the comments. Let’s celebrate fall baking, one cozy cookie at a time.

    Frequently Asked Questions

    Can I use rolled oats in pumpkin oatmeal cookies 3 ingredients?

    Yes, but quick oats are best for texture. Rolled oats make the cookies chewier and less uniform. For soft pumpkin oat cookies, stick with quick oats if possible.

    How long do pumpkin oatmeal cookies 3 ingredients stay fresh?

    They stay fresh for 4–5 days in an airtight container at room temperature. For longer storage, freeze them and defrost as needed for quick snacks or breakfasts.

    Are pumpkin oatmeal cookies 3 ingredients vegan?

    Yes, they are naturally vegan—no eggs, no dairy, and no honey. Just pumpkin puree, oats, and a binder like maple syrup or almond butter.

    Can I add mix-ins to pumpkin oatmeal cookies 3 ingredients?

    Absolutely. Raisins, chocolate chips, chopped walnuts, or even pumpkin seeds work well. Just don’t overload the dough—keep it simple and balanced.
  • Amazing 3-Ingredient Pumpkin Cookies To Try Now

    Amazing 3-Ingredient Pumpkin Cookies To Try Now

    Amazing 3-ingredient pumpkin cookies changed the way I bake forever. Hey there—I’m Darleen Vamce, a 34-year-old mom from Salt Lake City who once believed slow cookers and shortcuts were just for potlucks or last-minute meals. That myth shattered one chaotic autumn afternoon during what my family now calls “The Great Mealtime Struggle.”

    Three hungry kids. One crying baby. Zero time. I grabbed a box of spice cake mix, a can of pumpkin, and chocolate chips—tossed it all together, crossed my fingers, and hoped for something edible.

    What came out of the oven? Soft, gooey magic. And just like that, these cookies earned a permanent spot in our fall baking lineup.

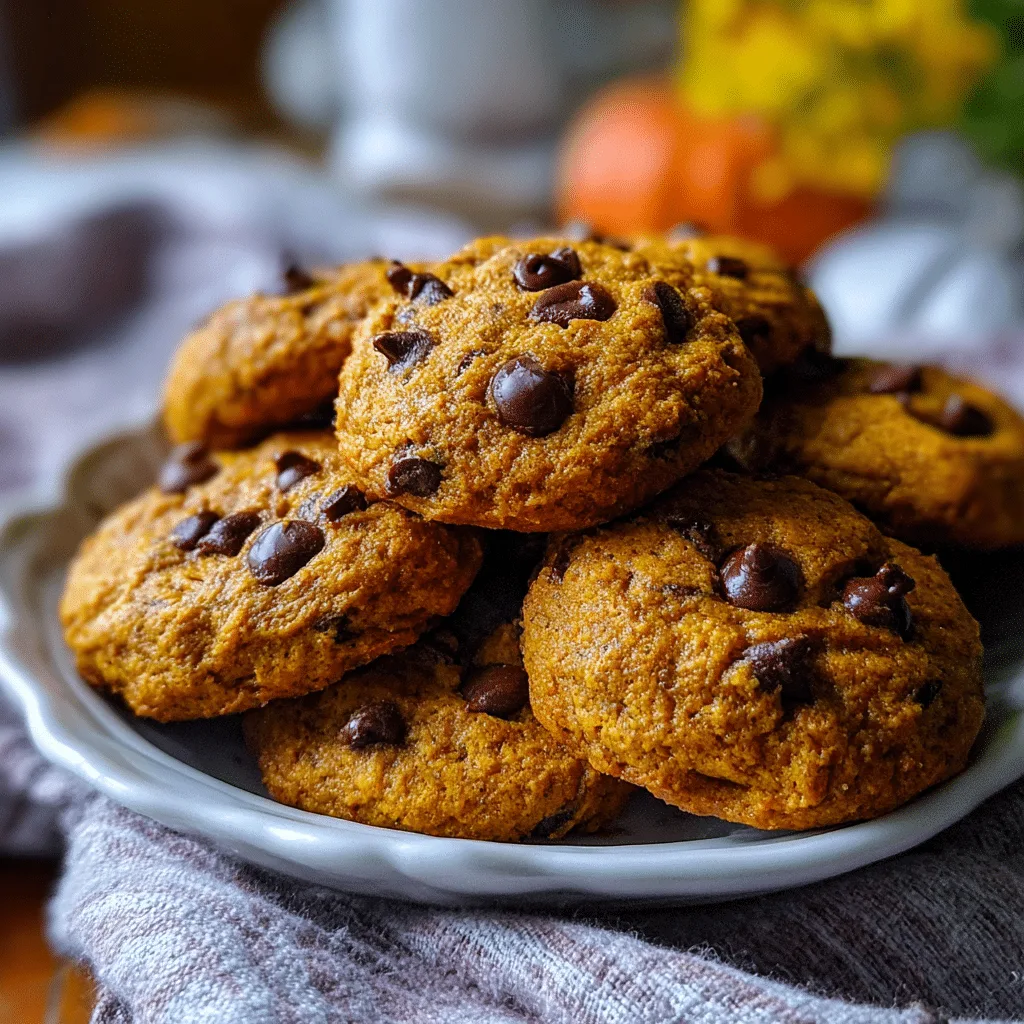
    Amazing 3-ingredient pumpkin cookies with chocolate chips
    Table of Contents

    Recipe

    Why These Amazing 3-Ingredient Pumpkin Cookies Are a Must-Try

    There’s something special about fall baking—the cozy smells, the golden spices, the warmth of the oven. But what if you could capture all that comfort without the fuss? That’s where these amazing 3-ingredient pumpkin cookies come in. Whether you’re juggling a busy weekday or hosting a last-minute gathering, this recipe delivers every single time.

    The beauty is in the simplicity: pumpkin puree, spice cake mix, and chocolate chips. That’s it. No eggs. No oil. Just three pantry-friendly ingredients that combine into soft, chewy, flavor-packed cookies in under 20 minutes.

    And don’t let the ease fool you. These aren’t “good for being easy” cookies. They’re just plain good. The kind that disappear before they’ve even cooled.

    If you’ve ever searched for easy pumpkin cookie recipes and ended up with dry, crumbly disappointments, you’re not alone. These are different. The pumpkin puree keeps the texture soft and moist, while the cake mix adds just enough spice and structure.

    The best part? You can toss in your favorite extras—white chocolate chips, chopped nuts, or even a swirl of cream cheese frosting if you’re feeling fancy. But honestly, they’re perfect as-is. Sweet, simple, and the definition of quick pumpkin desserts.

    Whether you’re new to baking or just need something beginner-friendly that still feels homemade, this is the kind of treat that makes you look like you planned it—even when you didn’t.

    What Makes These Pumpkin Cookies Perfect for Fall

    Fall is when our kitchen turns into a scent-sational wonderland. Cinnamon, nutmeg, and warm vanilla fill the air, and these amazing 3-ingredient pumpkin cookies slide right into that autumn vibe. They’re basically the cookie version of your coziest sweater and a warm mug of cider.

    These cookies are more than just quick—they’re seasonal stars. With just a can of pumpkin and a box of spice cake mix, you’re already halfway to making the best fall cookie recipe you’ll come across. No mixer, no chill time, no stress. Just mix, scoop, and bake.

    Even better? They’re naturally egg-free and oil-free. If you’ve been searching for no egg pumpkin cookies that actually taste amazing, this is it.

    The Texture: Soft, Chewy, and Just the Right Amount of Melt

    The texture is what really sets these cookies apart. They’re soft pumpkin cookies with a cakey bite—almost like a muffin top, but with melty chocolate chips woven in. They stay moist for days (if they last that long).

    Even picky eaters—yes, including toddlers—can’t get enough. And if you want to impress someone with minimal effort, this is your go-to.

    Bake them for school events, Halloween parties, or just a Tuesday when you’re craving something sweet but don’t want to wreck the kitchen.

    How to Make Amazing 3-Ingredient Pumpkin Cookies in Minutes

    Let’s talk prep. These amazing 3-ingredient pumpkin cookies are so simple, you can mix them with one hand while holding a toddler in the other—ask me how I know.

    All you need is one bowl, one spoon, and three simple ingredients:

    • 1 box of spice cake mix
    • 1 can of pumpkin puree
    • 1 cup of chocolate chips

    That’s it. No melting butter, no separating eggs, no need for fancy mixers. Just scoop out heaping spoonfuls onto a baking sheet, pop them in the oven, and in about 12–14 minutes you’ll have warm, canned pumpkin cookies that taste like you’ve been working all day.

    Want even more effortless ideas? I often prep these alongside my 10-minute Greek yogurt pumpkin muffins for a double batch of fall goodness.

    Freshly baked 3-ingredient pumpkin cookies
    Soft pumpkin cookies ready in just 14 minutes

    This base dough is a blank canvas. Try white chocolate chips, chopped walnuts, or even swirl in some peanut butter. It’s also a great way to use up that extra can of pumpkin left over from making slow cooker pumpkin pie oatmeal.

    That’s the joy of 3 ingredient cookie ideas—you get to be creative without complicating the recipe. Whether you’re prepping a treat for guests or just looking for fast quick pumpkin desserts, these cookies always deliver.

    Tips to Make the Best 3-Ingredient Pumpkin Cookies Ever

    The beauty of these amazing 3-ingredient pumpkin cookies is that they’re nearly impossible to mess up—but I’ve learned a few tricks to make them even better. After making dozens of batches (and eating most of them), I’ve fine-tuned the little details that take these cookies from great to unforgettable.

    First, don’t overbake. These cookies don’t brown much, so watch the clock instead of the color. Pull them out when they look just barely set. Let them rest on the baking sheet for a few minutes before moving to a rack—they’ll finish cooking without drying out.

    Want extra flavor? Add a pinch of pumpkin pie spice or cinnamon. Even though the spice cake mix already brings warmth, a little extra spice makes a big difference.

    Who These Cookies Are Perfect For

    These amazing 3-ingredient pumpkin cookies are a total gift for new bakers. They fall firmly under the category of beginner cookie recipes—meaning you don’t need skills, fancy tools, or even a lot of confidence. Just stir, scoop, and smile.

    They’re also perfect if you’re short on time but still want to serve something seasonal and sweet. Whether you’re prepping the best cookies for fall, or you need something fast for an office party, this recipe saves the day.

    No matter who you’re baking for—your family, your coworkers, or just your future snack-craving self—these cookies check every box: fast, soft, delicious, and satisfying. Definitely one of the easiest and most loved quick pumpkin desserts I’ve ever made.

    Final Thoughts on These Amazing 3-Ingredient Pumpkin Cookies

    By now, you’ve seen just how simple—and how magical—these amazing 3-ingredient pumpkin cookies really are. They’re the kind of recipe that rescues busy weekdays, satisfies last-minute cravings, and fills your kitchen with the scent of fall.

    Whether you’re brand new to baking or just love a good shortcut, these cookies prove you don’t need a long ingredient list to make something memorable. They’re soft, sweet, filled with melty chocolate, and endlessly versatile. It’s no wonder they’ve become one of my go-to quick pumpkin desserts every year.

    ????‍???? Your Turn!

    Try these cookies at home and tag me @recipesdarleen on Instagram—I’d love to see your batch! Share them with friends, neighbors, or just keep them all to yourself (I won’t tell).

    Frequently Asked Questions About Amazing 3-Ingredient Pumpkin Cookies

    Are these really just three ingredients?

    Yes! These amazing 3-ingredient pumpkin cookies only need canned pumpkin, spice cake mix, and chocolate chips. That’s it. No oil, no eggs, no butter—just mix and bake. It’s one of the simplest beginner cookie recipes you’ll ever try.

    Can I use yellow or vanilla cake mix instead?

    You can, but the flavor won’t be quite the same. Spice cake mix brings that signature cozy fall flavor. If you only have yellow cake mix, add a teaspoon of pumpkin pie spice to mimic the flavor in these quick pumpkin desserts.

    How should I store these cookies?

    Store these amazing 3-ingredient pumpkin cookies in an airtight container at room temperature for up to 3 days. They stay soft thanks to the pumpkin! For longer storage, pop them in the freezer for up to 2 months.

    Can I make them gluten-free?

    Absolutely! Just use a gluten-free spice cake mix. Everything else is naturally gluten-free. You’ll still get the soft, chewy magic that makes these some of the best cookies for fall—no one will notice the difference.