Author: Lily Bennett

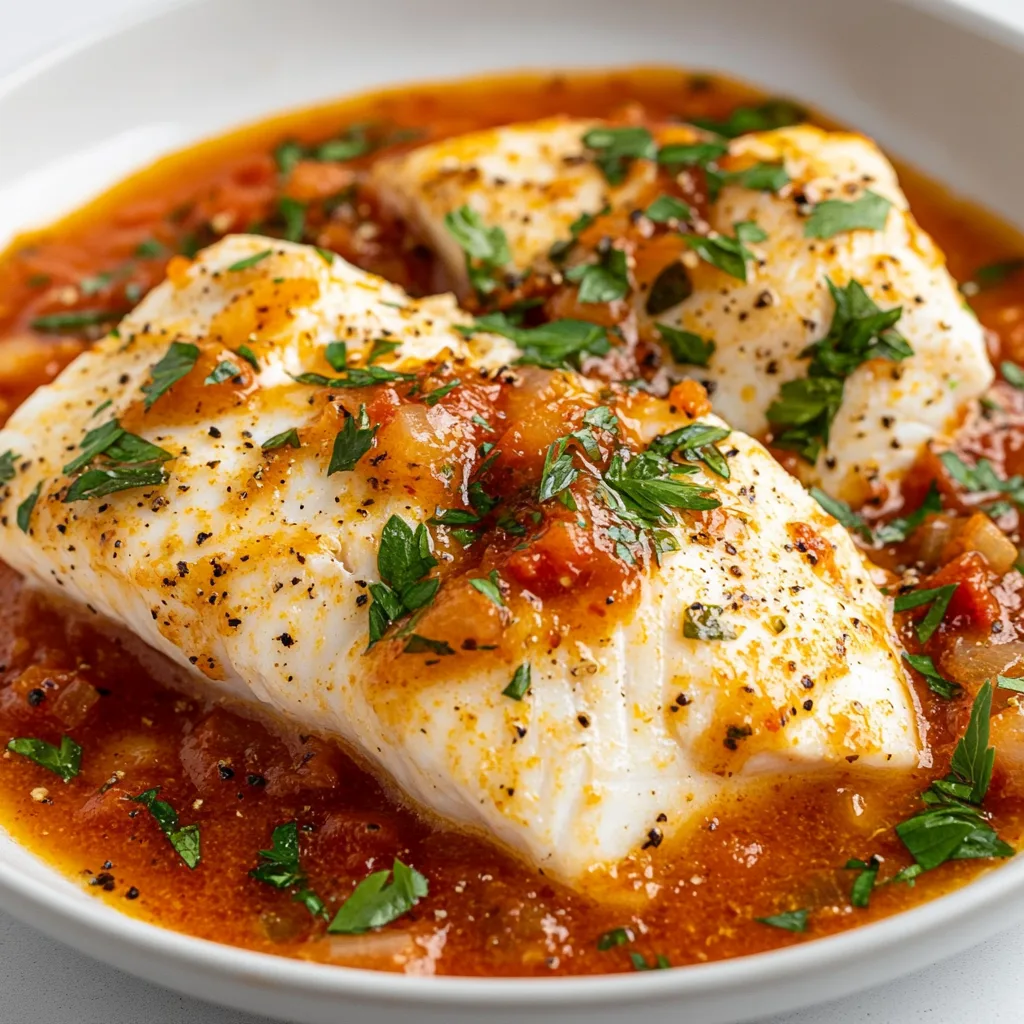
  • Slow Cooker White Fish in Tomato Garlic Sauce – Easy, Flavorful Bliss!

    Slow Cooker White Fish in Tomato Garlic Sauce – Easy, Flavorful Bliss!

    Slow Cooker White Fish in Tomato Garlic Sauce - Easy, Flavorful Bliss!

    Slow Cooker White Fish in Tomato Garlic Sauce is one of those magical recipes that feels like cheating at dinner. On busy weeknights when I’m juggling deadlines and my kids’ homework, I simply layer delicate white fish fillets in my trusty crockpot, pour over a vibrant tomato garlic sauce, and walk away. Hours later, the kitchen fills with an aroma that transports me straight to a coastal Italian village. The fish becomes perfectly tender while soaking up all those Mediterranean flavors—no babysitting required! If you’re craving a restaurant-quality seafood dish with minimal effort, this recipe from RecipesDarleen is about to become your new favorite.

    Recipe

    Why You’ll Love This Slow Cooker White Fish in Tomato Garlic Sauce

    Perfect for Busy Weeknights

    There’s something deeply satisfying about preparing dinner in the morning and having it ready exactly when you need it. This slow cooker fish recipe requires just 15 minutes of prep time—slice some vegetables, mix the sauce ingredients, and layer everything in your crockpot. I love that I can assemble it during my morning coffee ritual, then return home to a kitchen filled with mouthwatering aromas. The gentle, low-temperature cooking creates fish that’s impossibly tender and flavorful without any risk of overcooking, making this perfect for those evenings when you’re too exhausted to stand over a stove.

    Healthy Yet Incredibly Flavorful

    This dish strikes that elusive balance between nutritious and delicious. The tomato-based sauce is packed with antioxidants, while the lean white fish provides high-quality protein without excessive calories. What I adore most is how the slow cooking allows the garlic to mellow into sweet, aromatic notes that infuse every bite. The Mediterranean flavor profile—featuring olive oil, herbs, and a splash of white wine—creates depth without heavy cream or butter. Last week, my normally fish-hesitant husband actually requested seconds, which tells you everything about how satisfying this healthier option truly is!

    Essential Tips & Tricks

    Choosing the Right Fish

    Selecting the perfect white fish makes all the difference in this slow cooker recipe. I recommend firm-textured varieties like cod, halibut, or mahi-mahi that can withstand longer cooking times without falling apart. Thicker fillets (at least 1-inch thick) work best, as thinner cuts might become too delicate. Always opt for fresh fish when possible—the translucent flesh should spring back when pressed gently. If using frozen, thaw completely and pat dry to prevent excess moisture from diluting your beautiful sauce. This preparation method truly transforms even budget-friendly fish into something that tastes luxurious and special. Check out our comforting crockpot fish chowder for another delicious seafood option.

    Layering for Perfect Results

    The secret to success lies in how you arrange ingredients in your slow cooker. Start with a base layer of sliced onions, bell peppers, and perhaps some thinly sliced potatoes—they create a protective bed that prevents the fish from sticking while absorbing excess moisture. Season your fish fillets generously before placing them atop this vegetable foundation. Pour your tomato garlic sauce around (not directly on) the fish to maintain its integrity. I learned through trial and error that adding delicate herbs like basil or parsley in the last 30 minutes preserves their bright flavors, while hardier herbs like thyme or oregano can go in from the beginning.

    Serving Ideas & Creative Variations

    Perfect Pairings

    This versatile main dish shines alongside simple accompaniments that complement without competing. My family’s favorite pairing is a crusty whole grain bread for soaking up every drop of that glorious sauce—nothing goes to waste! A light side salad with lemon vinaigrette or steamed asparagus adds freshness and color to your plate. For a heartier meal, serve over fluffy quinoa, which soaks up the sauce beautifully, or try cauliflower rice for a lower-carb option. When entertaining, I elevate the presentation with a sprinkle of fresh herbs and lemon wedges, making it dinner-party worthy without extra effort. For more seafood inspiration, check out our slow cooker Mediterranean fish stew.

    Creative Flavor Twists

    Don’t hesitate to make this recipe your own with exciting variations. For a Spanish-inspired version, add a pinch of saffron and smoked paprika to the tomato sauce, then stir in some green olives and capers before serving. Craving something spicier? Incorporate minced jalapeños or a dash of red pepper flakes for gentle heat that builds with each bite. One of my favorite adaptations uses coconut milk instead of wine, with ginger, lime, and cilantro for a Thai-inspired profile. You can also experiment with different seafood—adding a handful of shrimp or scallops during the final 30 minutes creates a luxurious mixed seafood dish that feels special enough for celebrations.

    Storage & Troubleshooting Guide

    Proper Storage Techniques

    Leftover Slow Cooker White Fish in Tomato Garlic Sauce should be handled carefully to maintain food safety and quality. Allow it to cool completely before transferring to airtight containers, but don’t leave it at room temperature for more than two hours. Properly stored in the refrigerator, this dish keeps beautifully for up to three days, with the flavors often deepening overnight. For reheating, gentle methods work best—I prefer using a covered skillet on low heat with a tablespoon of water to prevent drying. Microwaving is convenient but use 50% power in short intervals, checking frequently to avoid overcooking the already tender fish.

    Fixing Common Issues

    Even experienced cooks encounter occasional challenges, but most are easily remedied with simple adjustments. If your sauce seems too watery, remove the fish carefully and reduce the liquid on the stovetop, or stir in a cornstarch slurry during the last 30 minutes of cooking. For fish that’s breaking apart too easily, next time choose thicker fillets or reduce the cooking time by 30-60 minutes. If the flavors seem flat, brighten with fresh lemon juice, a splash of vinegar, or extra fresh herbs just before serving. And for those rare occasions when the garlic tastes bitter rather than sweet, counter it with a teaspoon of honey or a pinch of sugar to restore balance.

    Frequently Asked Questions

    Can I use frozen fish in my slow cooker?

    Yes, but thaw it completely first and pat dry with paper towels. Frozen fish adds excess moisture that can dilute your sauce and affect the cooking time.

    How do I know when the Slow Cooker White Fish in Tomato Garlic Sauce is done?

    The fish should flake easily with a fork but still hold its shape. For most white fish varieties, this takes 2-3 hours on low depending on thickness.

    Can I prep this recipe ahead of time?

    Absolutely! Prepare the tomato garlic sauce up to two days ahead and store in the refrigerator. Assemble everything in the slow cooker the morning you plan to serve.

    What if I don’t have white wine for the sauce?

    Substitute with fish stock, chicken broth, or even water with a squeeze of lemon juice. Each creates a slightly different flavor profile but works beautifully.

    Is this recipe suitable for meal prep?

    Yes, though fish is best enjoyed fresh. If meal prepping, slightly undercook the fish, then portion with sauce into containers and refrigerate for up to 3 days.

    Final Thoughts

    This Slow Cooker White Fish in Tomato Garlic Sauce has become my secret weapon for those nights when I want something that feels special without the fuss. There’s something magical about transforming simple ingredients into a dish that tastes like it came from a seaside restaurant. The gentle heat of the slow cooker creates perfectly tender fish while allowing the aromatic sauce to develop deep, complex flavors. Whether you’re cooking for picky eaters or sophisticated palates, this adaptable recipe delivers restaurant-quality results with minimal effort. Don’t forget to check out more delicious recipes on our Pinterest page!
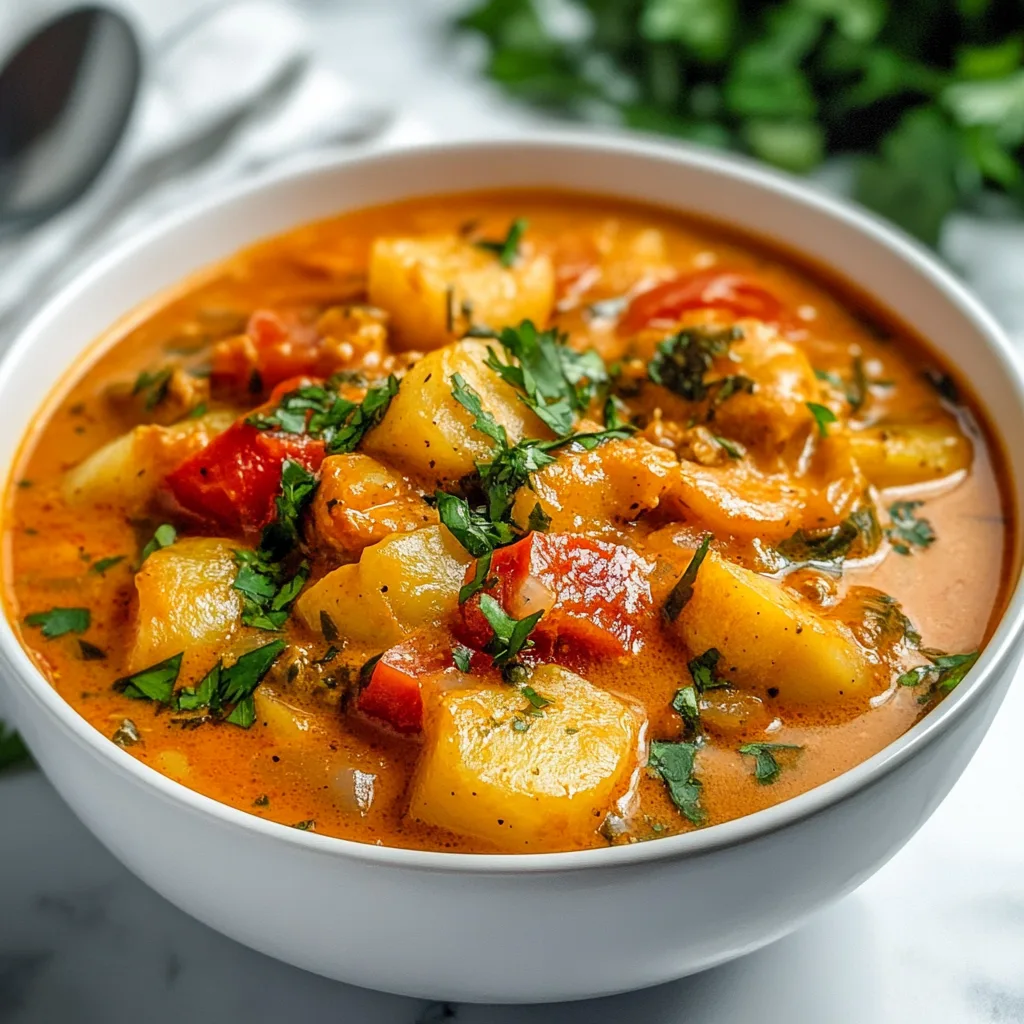
  • Healthy Slow Cooker Brazilian Moqueca: Irresistibly Flavorful & Easy!

    Healthy Slow Cooker Brazilian Moqueca: Irresistibly Flavorful & Easy!

    Healthy Slow Cooker Brazilian Moqueca: Irresistibly Flavorful & Easy!

    Healthy Slow Cooker Brazilian Moqueca transforms humble ingredients into a vibrant, nutrient-packed seafood stew that’s as nourishing as it is delicious. The first time I made this coastal Brazilian treasure, the aroma of coconut milk and paprika filled my kitchen, transporting me straight to seaside Salvador. What makes this dish special is how the slow cooker gently melds the flavors while preserving the delicate texture of the fish. If you’re craving a taste of international comfort food without hours of active cooking, this moqueca is your perfect weeknight solution.

    Why You’ll Love This Healthy Slow Cooker Brazilian Moqueca

    A Nutritional Powerhouse with Minimal Effort

    This moqueca delivers serious nutrition without demanding serious kitchen time. The combination of lean white fish and bell peppers provides ample protein and vitamin C, while coconut milk adds healthy fats that keep you satisfied. I love how the slow cooker method preserves more nutrients than high-heat cooking methods. On busy days, I simply layer everything in the morning, set the timer, and return to a meal that’s both nourishing and comforting. The gentle cooking process allows the fish to absorb all those healing spices without drying out.

    Authentic Flavors Without Complicated Techniques

    Traditional moqueca requires careful stovetop attention, but this slow cooker version captures the authentic flavor profile while eliminating the fuss. The key ingredients—paprika, coconut milk, lime, and cilantro—create that distinctive Brazilian taste without requiring specialty items. I was skeptical at first that a slow cooker could replicate the depth of flavor, but the low, steady heat actually enhances how the spices infuse into the broth. My Brazilian neighbor gave this version her enthusiastic approval, which felt like winning a culinary gold medal!

    Essential Tips & Tricks

    Choosing and Preparing the Perfect Fish

    Selecting the right fish makes all the difference in your moqueca. Firm white fish like cod, halibut, or mahi-mahi works best as they hold their shape during slow cooking. Cut pieces into 2-inch chunks and add them during the final hour of cooking to prevent them from becoming mushy. I learned this timing trick the hard way after once adding the fish too early! A light salt brine (1 tablespoon salt in 4 cups water for 15 minutes) before cooking helps the fish maintain its texture and enhances its natural flavor in the finished dish.

    Layering Ingredients for Maximum Flavor

    The layering order in your slow cooker significantly impacts the final taste. Start with onions, peppers, and garlic on the bottom where they’ll caramelize slightly and release their flavors. Place tomatoes in the middle layer to create a protective barrier for the fish. The coconut milk should be poured in last, allowing it to seep through and connect all the flavors. I always wait to add fresh herbs until serving—the heat of the stew will release their aromatic oils without cooking away their brightness. This simple technique preserves each ingredient’s integrity.

    Serving Ideas & Creative Variations

    Traditional and Modern Accompaniments

    Serve your moqueca with traditional sides like white rice, farofa (toasted cassava flour), or plantains for an authentic experience. For a lighter meal, cauliflower rice makes an excellent low-carb alternative that still soaks up the flavorful broth. I love setting out small bowls of additional toppings—fresh lime wedges, extra cilantro, and thinly sliced chiles—so everyone can customize their bowl. The contrast between the hot stew and cool, fresh garnishes creates a wonderful sensory experience that elevates the entire meal.

    Regional Adaptations and Dietary Modifications

    This recipe welcomes creative adaptations based on your preferences and dietary needs. For a Bahian twist, add a tablespoon of palm oil and increase the hot peppers. Make it heartier by including shrimp or scallops alongside the fish. For plant-based diets, substitute firm tofu or hearts of palm for the fish, adding them in the last 30 minutes of cooking. I’ve made a vegetarian version using butternut squash and chickpeas that was surprisingly satisfying. The coconut base is naturally dairy-free, making this dish perfect for entertaining guests with various dietary restrictions.

    Storage & Troubleshooting Guide

    Proper Storage for Maximum Freshness

    Store leftover moqueca in airtight containers in the refrigerator for up to three days. The flavors actually intensify overnight, making this dish perfect for meal prep. For freezing, I recommend removing the fish portions first, as they can become grainy when frozen in the broth. Freeze the base separately for up to three months, then add fresh fish when reheating. When warming leftovers, use gentle heat—either a low stovetop setting or microwave at 50% power—to prevent the coconut milk from separating and the fish from becoming tough.

    Fixing Common Issues Before They Happen

    The most common moqueca mishaps have simple solutions. If your stew seems too watery, remove the lid for the last 30 minutes of cooking to reduce the liquid. For a thicker consistency, stir in a tablespoon of cassava or tapioca flour mixed with water. If the coconut milk separates (appears grainy), whisk in a tablespoon of room-temperature coconut cream. Too bland? A splash of hot sauce or additional lime juice brightens everything. I once salvaged an underseasoned batch by stirring in a teaspoon of fish sauce—an unconventional fix that added the perfect depth.

    Frequently Asked Questions

    Can I use frozen fish for Healthy Slow Cooker Brazilian Moqueca?

    Yes, but thaw it completely first and pat dry with paper towels to remove excess moisture. Add it during the final 45 minutes of cooking to prevent it from becoming mushy.

    How spicy is traditional moqueca?

    Authentic moqueca has a mild to medium heat level. Adjust the spice by controlling the amount of hot peppers or hot sauce you add to suit your preference.

    Can I make this in an Instant Pot instead?

    Absolutely! Use the sauté function for the vegetables first, then pressure cook on HIGH for 3 minutes. Add the fish afterward using the residual heat.

    Is this recipe suitable for meal prep?

    Yes! Prepare the base without fish and refrigerate for up to 3 days. Add fresh fish when reheating for the best texture and flavor.

    What makes a good substitute for coconut milk?

    For a lighter version, use light coconut milk. For dairy-tolerant diets, a mixture of half-and-half and fish stock can work, though it changes the traditional flavor profile.

    Final Thoughts

    This Healthy Slow Cooker Brazilian Moqueca brings exotic comfort food to your table with minimal effort and maximum nutrition. I’m constantly amazed at how this dish manages to be both deeply satisfying and light at the same time. The slow cooker method makes this traditionally complex recipe accessible for weeknight cooking while preserving all the vibrant flavors that make Brazilian cuisine so special. Whether you’re cooking for a family dinner or meal prepping for the week ahead, this moqueca delivers both nourishment and culinary adventure. Find more inspiration for your slow cooker adventures on Pinterest.

  • Slow Cooker Lemon-Garlic Salmon and Baby Potatoes – Easy, Zesty Delight!

    Slow Cooker Lemon-Garlic Salmon and Baby Potatoes – Easy, Zesty Delight!

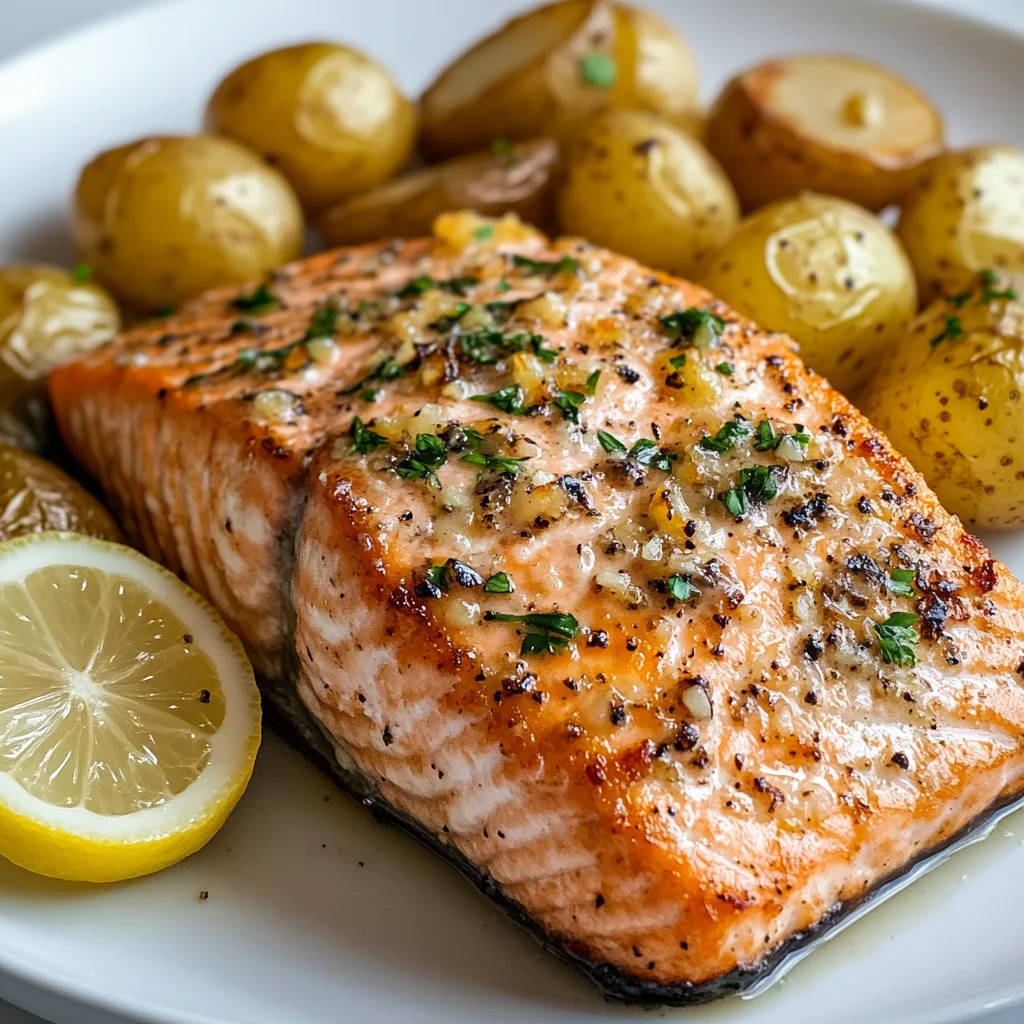
    The aroma of citrus and garlic wafting through my kitchen on a chilly evening is pure comfort, especially when it’s coming from this Slow Cooker Lemon-Garlic Salmon and Baby Potatoes. There’s something magical about letting the slow cooker do all the work while those bright, zesty flavors meld with buttery salmon. Last weekend, I prepared this for my sister’s visit – she walked through the door, took one deep breath, and immediately asked for the recipe before even tasting it! The tender fish flakes beautifully against the backdrop of perfectly cooked potatoes, creating a one-pot meal that feels both elegant and effortless.

    Slow Cooker Lemon-Garlic Salmon & Baby Potatoes – Easy, Zesty Delight!

    Recipe

    Why You’ll Love This Slow Cooker Lemon-Garlic Salmon and Baby Potatoes

    Perfect Texture Every Time

    The gentle, consistent heat of the slow cooker creates salmon that’s impossibly tender – never dry or overcooked. I’ve tried countless methods for cooking salmon, but this slow cooker technique has become my foolproof favorite. The baby potatoes absorb all those gorgeous flavors while maintaining their shape and developing a buttery softness that practically melts in your mouth. There’s something so satisfying about cutting into that perfectly cooked fish and watching it flake effortlessly with just the touch of your fork. It’s restaurant-quality results without the fuss!

    Bright, Balanced Flavors

    The vibrant combination of fresh lemon and garlic creates a flavor profile that’s both bold and delicate. The citrus cuts through the richness of the salmon, while the garlic adds depth without overpowering. I love how the herbs – whether you choose dill, thyme, or rosemary – infuse everything with their aromatic essence. The potatoes act like little flavor sponges, soaking up the lemon-garlic butter sauce. My kitchen smells absolutely heavenly while this cooks, with layers of citrus, herbs, and that unmistakable garlic perfume filling the air.

    Essential Tips & Tricks

    Selecting the Perfect Ingredients

    Choosing the right salmon fillets makes all the difference in this recipe. Look for pieces that are uniform in thickness to ensure even cooking – I prefer center-cut portions with the skin on to help maintain moisture. For baby potatoes, the smaller varieties like Yukon Gold or red potatoes work beautifully, as they cook at the perfect rate alongside the fish. Fresh lemons and garlic are non-negotiable here – their bright flavors are the heart of this dish. When I’m feeling fancy, I’ll add a splash of white wine to the cooking liquid for extra depth.

    Timing and Temperature Control

    The biggest secret to perfect slow-cooker salmon is not overcooking it. Unlike tougher cuts of meat that benefit from all-day cooking, salmon needs just 1-2 hours on low, depending on your slow cooker’s temperature. I always use a digital meat thermometer to check for doneness – 145°F is the magic number for perfectly cooked salmon. Layer your potatoes on the bottom since they need more time to become tender. The salmon should rest on top, where it can gently steam to perfection while still absorbing all those wonderful flavors.

    Serving Ideas & Creative Variations

    Complementary Side Dishes

    This Slow Cooker Lemon-Garlic Salmon and Baby Potatoes pairs wonderfully with bright, fresh sides that complement its flavors. I love serving it with a simple arugula salad dressed with lemon vinaigrette – the peppery greens balance the rich salmon beautifully. Steamed asparagus or roasted Brussels sprouts add a nice textural contrast. For a more substantial meal, consider adding a creamy soup starter like a light cucumber or avocado soup. The smooth, cool flavors provide a lovely counterpoint to the warm, aromatic main dish.

    Exciting Flavor Twists

    While the classic lemon-garlic combination is divine, don’t be afraid to experiment with variations. Try adding capers and olives for a Mediterranean twist that brings briny notes to the dish. For something bolder, incorporate a tablespoon of whole-grain mustard and a drizzle of honey for sweet-tangy complexity. My personal favorite variation includes a sprinkle of smoked paprika and a few sun-dried tomatoes – it adds a gorgeous color and subtle smoky depth. You can also swap the traditional herbs for Thai basil and lemongrass for an Asian-inspired version.

    Storage & Troubleshooting Guide

    Proper Storage Solutions

    Leftover salmon can be delicate to store properly, but done right, it makes for wonderful next-day meals. Allow everything to cool completely before transferring to airtight containers. Separate the salmon from the potatoes if possible – this prevents the fish from becoming overly soft. Refrigerate for up to 2 days; beyond that, the texture begins to suffer. When reheating, do so gently – microwave at 50% power in short bursts or warm in a low oven covered with foil. I often enjoy the leftovers cold in a salad to avoid the reheating issue altogether!

    Common Issues and Solutions

    If your salmon turns out too dry, it’s likely been overcooked – next time, check it earlier or reduce the cooking temperature. For watery sauce, try placing a clean kitchen towel under the lid during cooking to absorb excess moisture, or reduce the sauce in a small saucepan after cooking. If your potatoes aren’t tender enough while the salmon is done, simply remove the fish and continue cooking the potatoes. Too much lemon flavor? Balance it with a touch of honey or brown sugar. Remember that slow cookers vary significantly in temperature, so make notes about your specific model for future reference.

    Frequently Asked Questions

    Can I use frozen salmon for this slow cooker recipe?

    Fresh is best, but you can use thawed frozen salmon. Make sure it’s completely defrosted and patted dry before cooking to prevent excess moisture from diluting the flavors.

    How do I prevent my Slow Cooker Lemon-Garlic Salmon and Baby Potatoes from becoming too watery?

    Line the bottom of your slow cooker with lemon slices to elevate the ingredients slightly, and avoid adding extra liquid beyond what the recipe calls for.

    Can I prep this dish ahead of time?

    You can prep all ingredients the night before and store separately in the refrigerator. Combine everything in the slow cooker just before cooking for the freshest results.

    What’s the best way to tell when the salmon is perfectly cooked?

    The salmon should flake easily with a fork and reach an internal temperature of 145°F. It should look opaque but still be moist and slightly translucent in the center.

    Is this recipe suitable for meal prep?

    While best enjoyed fresh, you can portion the cooled salmon and potatoes into containers for 1-2 days of meal prep. Reheat gently or enjoy cold in salads.

    Final Thoughts

    This Slow Cooker Lemon-Garlic Salmon and Baby Potatoes has become my go-to for those evenings when I want something that feels special without hours of active cooking. There’s something truly magical about the way the bright citrus notes and aromatic garlic transform simple ingredients into a meal that feels like a warm hug. Whether you’re cooking for family or hosting friends, this dish strikes that perfect balance of impressive yet approachable. I’d love to see your versions of this recipe – tag me on Pinterest when you make it!

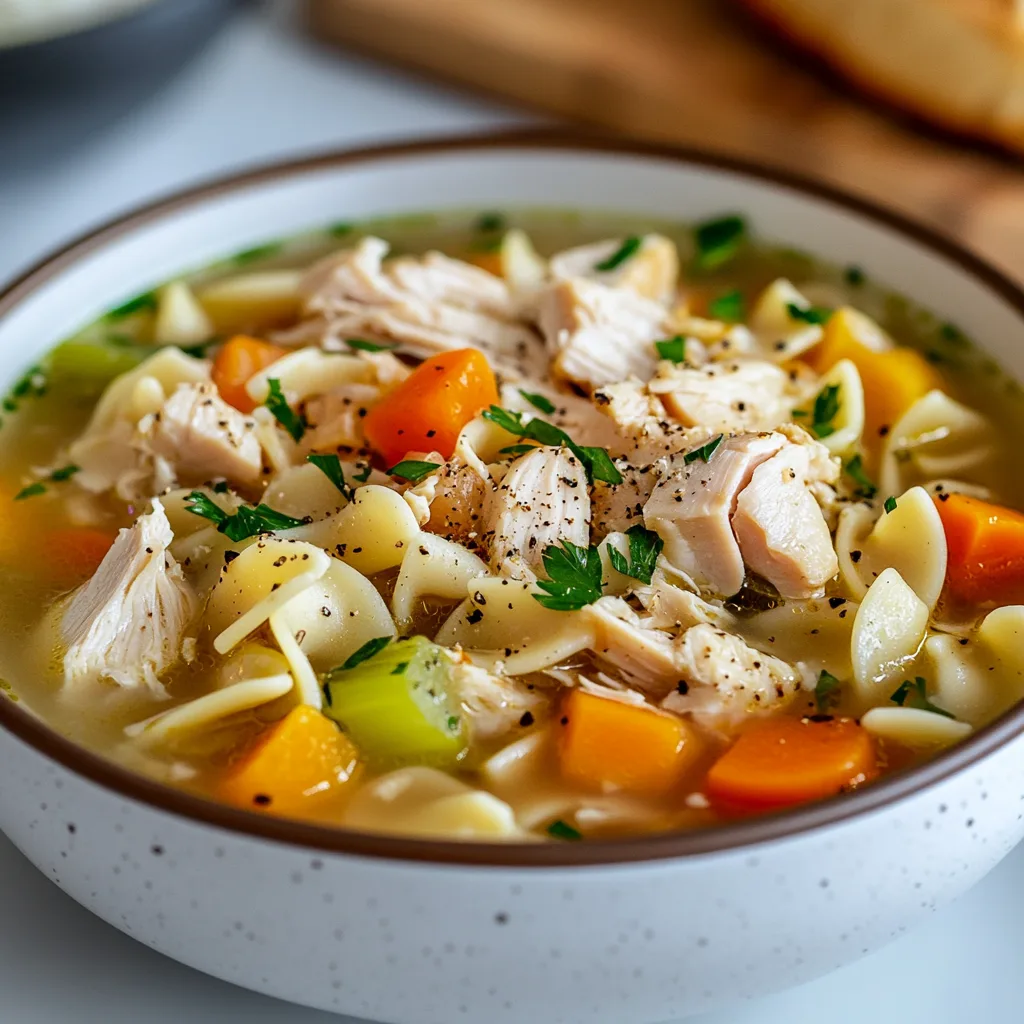
  • Chicken Noodle Soup Recipe: 7 Easy Steps with Rotisserie Chicken

    Chicken Noodle Soup Recipe: 7 Easy Steps with Rotisserie Chicken

    Chicken noodle soup with rotisserie chicken is my ultimate comfort food hack when I need something soothing but don’t have hours to simmer a broth from scratch. There’s something magical about the way the savory broth wraps around tender shreds of pre-cooked chicken and hearty noodles. On chilly evenings when my kitchen windows fog up, I love how this soup fills my home with aromas that remind me of my grandmother’s kitchen. The beauty lies in its simplicity—store-bought rotisserie chicken does the heavy lifting, while you get all the credit for a homemade meal that tastes like it simmered all day. Let me show you how to make this cozy classic with a shortcut that doesn’t sacrifice flavor.

    Chicken Noodle Soup Recipe: 7 Easy Steps with Rotisserie Chicken

    Recipe

    Why You’ll Love This Chicken Noodle Soup with Rotisserie Chicken

    Time-Saving Convenience with Homemade Flavor

    When life gets hectic, this soup is my secret weapon. Using rotisserie chicken cuts your cooking time in half while still delivering that slow-simmered taste. I remember making this after a particularly exhausting Monday when my daughter had dance class, and I needed dinner in 30 minutes. The pre-cooked chicken means you’re essentially just building a flavorful broth and adding ingredients—no raw meat handling or wondering if your chicken is cooked through. The meat stays incredibly tender and absorbs all the aromatic flavors of your broth, making everyone think you spent hours in the kitchen.

    Nutrient-Dense and Customizable

    This soup isn’t just delicious—it’s a nutritional powerhouse disguised as comfort food. The chicken provides lean protein, while carrots, celery, and onions deliver essential vitamins. Last winter, when everyone around me was sniffling, I loaded mine with extra garlic and ginger for an immune boost. You can easily adjust the sodium levels by using low-sodium broth or amplify the flavor with fresh herbs. For picky eaters, it’s perfect because you can customize each bowl—my husband likes his with extra noodles, while I prefer more vegetables. The rotisserie chicken’s rich flavor means you need fewer additives to make it taste amazing.

    Essential Tips & Tricks

    Maximizing Rotisserie Chicken Flavor

    The secret to exceptional soup lies in how you handle that rotisserie chicken. Remove the skin (save it for crisping up as a garnish!) and shred both white and dark meat for the best flavor balance. I always take an extra minute to scrape those browned bits from the container—they’re packed with umami goodness! For an extra flavor boost, simmer the chicken carcass in your broth for 20 minutes before straining and proceeding with the recipe. This mini-stock makes a remarkable difference in depth of flavor, transforming your soup from good to “can I please have the recipe?”

    Perfecting Your Noodle Game

    Noodle selection and timing make or break your soup. I learned this lesson the hard way after once ending up with a pot of mushy pasta. Choose egg noodles for their texture and ability to hold up in broth, or go for heartier options like rotini that maintain their bite. The golden rule: cook noodles separately and add them to individual serving bowls, then ladle hot soup over them. This prevents the pasta from absorbing all your precious broth during storage. For gluten-free options, rice noodles work beautifully but require even more careful timing—I undercook them slightly since they’ll continue softening in the hot soup.

    Serving Ideas & Creative Variations

    Elevated Garnishes for Restaurant-Quality Presentation

    Transform your homemade soup into a restaurant-worthy experience with thoughtful garnishes. A drizzle of good olive oil creates beautiful golden pools on the surface, while fresh dill or chives add bright color and flavor. My family went crazy for the soup when I started adding a squeeze of lemon just before serving—it cuts through the richness and makes the flavors pop. For texture contrast, try topping with homemade croutons, crispy fried shallots, or those chicken skin crisps I mentioned. A sprinkle of finishing salt and cracked black pepper makes each spoonful slightly different and more interesting.

    Global Flavor Twists on the Classic

    While traditional chicken noodle soup is comforting, adding global influences creates exciting variations. Try a Thai-inspired version with coconut milk, lime, and red curry paste—the rotisserie chicken works perfectly here too. For a Mexican twist, add cumin, oregano, diced tomatoes and finish with avocado, cilantro and lime. My unexpected favorite is a Greek variation with lemon, dill, and orzo instead of egg noodles, finished with a dollop of yogurt. The rotisserie chicken adapts beautifully to these flavor profiles while maintaining that comforting essence that makes chicken soup so beloved in every culture.

    Storage & Troubleshooting Guide

    Proper Storage for Maximum Freshness

    Store your chicken noodle soup properly to enjoy it for days. The key is keeping the noodles separate from the broth whenever possible. Refrigerate cooled soup in airtight containers for 3-4 days—I like using glass containers that won’t absorb flavors or stain. For freezing, portion into freezer-safe bags or containers without noodles (they’ll turn mushy when thawed). Leave an inch of headspace for expansion and freeze flat for easy storage and quicker thawing. When reheating, do it gently on the stovetop rather than microwaving to maintain texture and prevent the chicken from becoming rubbery.

    Troubleshooting Common Soup Problems

    Even simple recipes can go sideways sometimes. If your soup lacks flavor, try adding a splash of acid like lemon juice or a few drops of vinegar—this instantly brightens the taste. Too salty? Add a peeled, quartered potato to absorb excess salt (remove before serving) or dilute with unsalted broth and a touch of cream. For greasy broth, chill it until fat solidifies on top, then remove with a spoon. If your vegetables are too firm or too mushy, remember the order matters—add carrots first, celery next, and delicate greens last. For cloudy broth, try straining through a coffee filter or cheesecloth for that crystal-clear restaurant quality.

    Frequently Asked Questions

    Can I use leftover roast chicken instead of rotisserie chicken?

    Absolutely! Any pre-cooked chicken works beautifully. Just make sure it’s not heavily seasoned with competing flavors that might clash with your soup seasonings.

    How do I make chicken noodle soup with rotisserie chicken more flavorful?

    Add fresh herbs like thyme and parsley, use better-quality broth, or simmer the chicken carcass in your stock first. A splash of white wine or dash of fish sauce adds surprising depth.

    Can I make this soup in a slow cooker?

    Yes! Add everything except noodles and cook on low for 4-6 hours. Stir in separately cooked noodles before serving for perfect texture.

    Is chicken noodle soup healthy?

    It’s packed with protein, vegetables, and hydrating broth. Control sodium by making your own stock or choosing low-sodium options, and add extra vegetables for more nutrients.

    How can I thicken my chicken noodle soup?

    For slightly thicker soup, whisk 1 tablespoon cornstarch with cold broth, then stir into simmering soup. Or mash some of the cooked vegetables against the pot side.

    Final Thoughts

    Chicken noodle soup with rotisserie chicken represents what I love most about cooking—finding clever shortcuts that don’t compromise on flavor. There’s something deeply satisfying about transforming a simple supermarket chicken into a nourishing meal that feels like a warm hug in a bowl. I hope these tips help you create a version that becomes your own family favorite. Whether you’re fighting off winter chills or simply craving comfort, this soup delivers every time. For more cozy recipes that make the most of grocery shortcuts, check out my Pinterest collection where I share my favorite comfort food hacks.

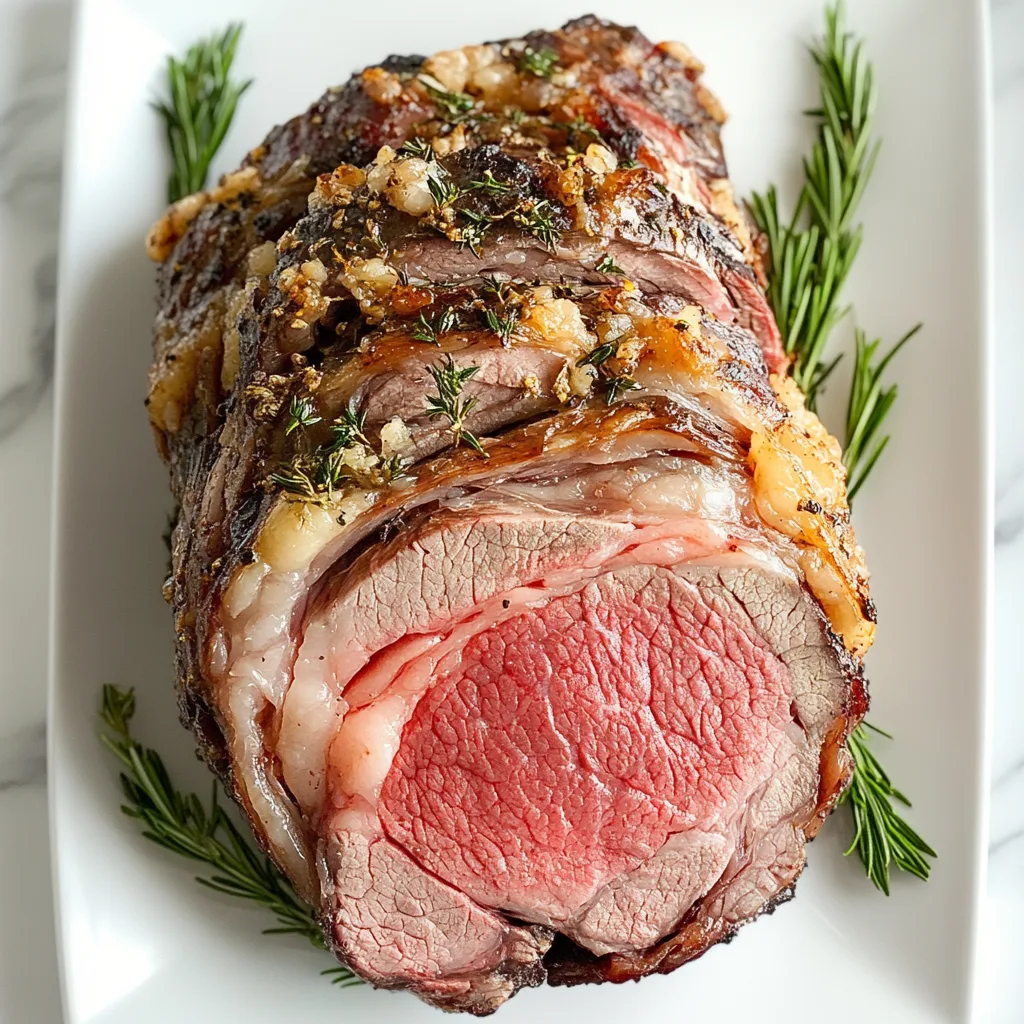
  • Ultimate Easy Prime Rib: 5 Secrets for Juicy, Perfect Roast

    Ultimate Easy Prime Rib: 5 Secrets for Juicy, Perfect Roast

    The Ultimate Easy Prime Rib is a showstopper that deserves a spot at your holiday table. I still remember my first attempt—hands shaking as I placed that expensive cut into the oven, praying I wouldn’t ruin it. Fast forward to today, and I’ve mastered a foolproof method that delivers juicy, tender results every single time. The best part? It’s surprisingly simple! The rich aroma that fills your home as it roasts is pure magic—like a warm hug on a cold winter evening. Whether you’re hosting a special celebration or simply treating yourself, this prime rib recipe will have everyone thinking you spent all day in the kitchen.

    Ultimate Easy Prime Rib: 5 Secrets for Juicy, Perfect Roast

    Recipe

    Why You’ll Love This Ultimate Easy Prime Rib

    Perfect for Special Occasions

    There’s something undeniably impressive about presenting a perfectly cooked prime rib at your dinner table. The rich marbling throughout the meat ensures exceptional flavor and tenderness that simply can’t be matched. I love serving this for Christmas dinner—the moment I bring it to the table, everyone’s eyes widen with anticipation. The beautiful pink center surrounded by a savory herb crust creates that restaurant-quality presentation that makes guests feel truly special. And despite its impressive appearance, the actual hands-on time is minimal, giving you more opportunity to enjoy your company instead of being stuck in the kitchen.

    Foolproof Method for Beginners

    Don’t let the premium cut intimidate you! This Ultimate Easy Prime Rib recipe is designed with beginner cooks in mind. The method relies on precise temperature control rather than complicated techniques. I remember feeling so nervous the first time I made prime rib, checking the oven every five minutes. Now I know that the secret is simply letting the meat come to room temperature before cooking and using a reliable meat thermometer. The reverse-sear technique—starting low and slow, then finishing with high heat—creates that perfect edge-to-edge doneness with a beautiful crust. Trust the process and you’ll be amazed at what you can create!

    Essential Tips & Tricks

    Selecting the Perfect Cut

    Choosing the right piece of meat is half the battle when making Ultimate Easy Prime Rib. Look for a bone-in roast with generous marbling throughout—those white streaks of fat mean flavor and juiciness! I prefer asking my butcher for a cut from the smaller end (ribs 10-12), which tends to be more tender and evenly shaped. Don’t shy away from requesting that they trim and tie it for you; this ensures even cooking and a beautiful presentation. For a standard dinner party, plan on about ¾ pound per person with the bone in, or ½ pound for boneless cuts. Remember, quality matters here—this is one dish where splurging on prime grade is truly worth it.

    Temperature Control Secrets

    The difference between a good prime rib and an exceptional one comes down to temperature management. Always let your roast sit at room temperature for at least 2 hours before cooking—this helps ensure even cooking throughout. I learned the hard way that a cold roast straight from the refrigerator cooks unevenly! For perfect medium-rare, aim for an internal temperature of 120-125°F before resting, as it will continue cooking to reach 130-135°F. Your meat thermometer becomes your most valuable tool, so insert it into the thickest part without touching bone. And don’t skip the resting period—at least 20-30 minutes tented with foil allows those flavorful juices to redistribute throughout the meat.

    Serving Ideas & Creative Variations

    Classic Accompaniments

    Nothing complements the rich flavors of Ultimate Easy Prime Rib quite like traditional sides. Creamy horseradish sauce provides that perfect peppery contrast that cuts through the richness of the beef. I love setting up a little sauce station with both mild and spicy options so guests can choose their preference. Crispy roasted potatoes with rosemary make the perfect vehicle for soaking up those flavorful meat juices, while a simple green vegetable like roasted asparagus or Brussels sprouts adds color and freshness to the plate. For a truly special touch, Yorkshire puddings baked in the drippings create that authentic steakhouse experience right at home.

    Ultimate Easy Prime Rib: 5 Secrets for Juicy, Perfect Roast

    Modern Twists on Tradition

    While classic preparations are always a hit, don’t be afraid to experiment with new flavor profiles for your Ultimate Easy Prime Rib. Try a coffee-rubbed crust with brown sugar for a modern twist that creates an incredible caramelized exterior. The slight bitterness of the coffee enhances the meat’s natural flavors in surprising ways. Another favorite variation is incorporating Mediterranean elements—a crust of fresh herbs, lemon zest, and garlic creates a bright, aromatic profile. For serving, consider slicing it thinly and arranging it on a large wooden board with various accompaniments for an interactive dining experience. This approach feels less formal but equally special, perfect for gathering around the table with loved ones.

    Storage & Troubleshooting Guide

    Proper Storage Methods

    Leftover prime rib is a luxury worth preserving properly! Store any uneaten portions in airtight containers in the refrigerator for up to 4 days. I like to slice only what we’ll eat for the initial meal, keeping the remaining roast whole to retain moisture. For longer storage, wrap individual portions tightly in plastic wrap, then foil, before freezing for up to 2 months. When reheating, avoid the microwave which can toughen the meat. Instead, bring slices to room temperature, then warm gently in a 250°F oven with a splash of beef broth until just heated through—about 15-20 minutes. This low-and-slow approach preserves the roast’s tender texture and prevents it from cooking further.

    Common Mistakes to Avoid

    Even experienced cooks can encounter challenges with prime rib. The most common mistake is overcooking, which turns this premium cut into an expensive disappointment. Always use a thermometer rather than relying on time alone. If your roast is browning too quickly, loosely tent it with foil to slow the process. Conversely, if you’re not achieving that beautiful crust, try patting the exterior completely dry before seasoning and consider a brief stint under the broiler at the end. Remember that carving against the grain is essential for tenderness. If you’ve accidentally overcooked your prime rib, all is not lost—thinly slice it and serve with extra au jus or transform it into magnificent sandwiches with caramelized onions and good mustard.

    Frequently Asked Questions

    What’s the best cooking temperature for Ultimate Easy Prime Rib?

    Start at 225°F until the internal temperature reaches 120°F (for medium-rare), then rest for 20-30 minutes. Finish with a quick 500°F blast for 5-8 minutes to create a beautiful crust.

    Should I remove the bones before cooking?

    No need! Cook with the bones attached for maximum flavor, then remove them for easier carving after resting. You can even ask your butcher to cut and tie them back on.

    How much prime rib should I buy per person?

    Plan for ¾ pound per adult for bone-in cuts (½ pound for boneless). This accounts for shrinkage during cooking and ensures everyone gets their fill.

    Can I prepare any parts of this recipe ahead of time?

    Absolutely! Season your roast up to 24 hours in advance and refrigerate uncovered. This creates a dry exterior for better browning and allows the seasonings to penetrate.

    What’s the best way to check if my prime rib is done?

    Always use a reliable meat thermometer inserted into the thickest part. For medium-rare, remove at 120-125°F as it will continue cooking during rest time.

    Final Thoughts

    Creating the Ultimate Easy Prime Rib doesn’t require professional culinary training—just attention to detail and quality ingredients. The magic happens in that perfect balance of a seasoned crust and tender, juicy interior that simply melts in your mouth. I’ve found that this dish creates more than just a meal; it creates memories around the table as everyone savors each bite. There’s something deeply satisfying about mastering this classic centerpiece that has intimidated home cooks for generations. So gather your loved ones, uncork a special bottle of wine, and enjoy the well-deserved compliments as you serve this magnificent roast. For more delicious recipe inspirations, visit our Pinterest page and discover your next culinary adventure.

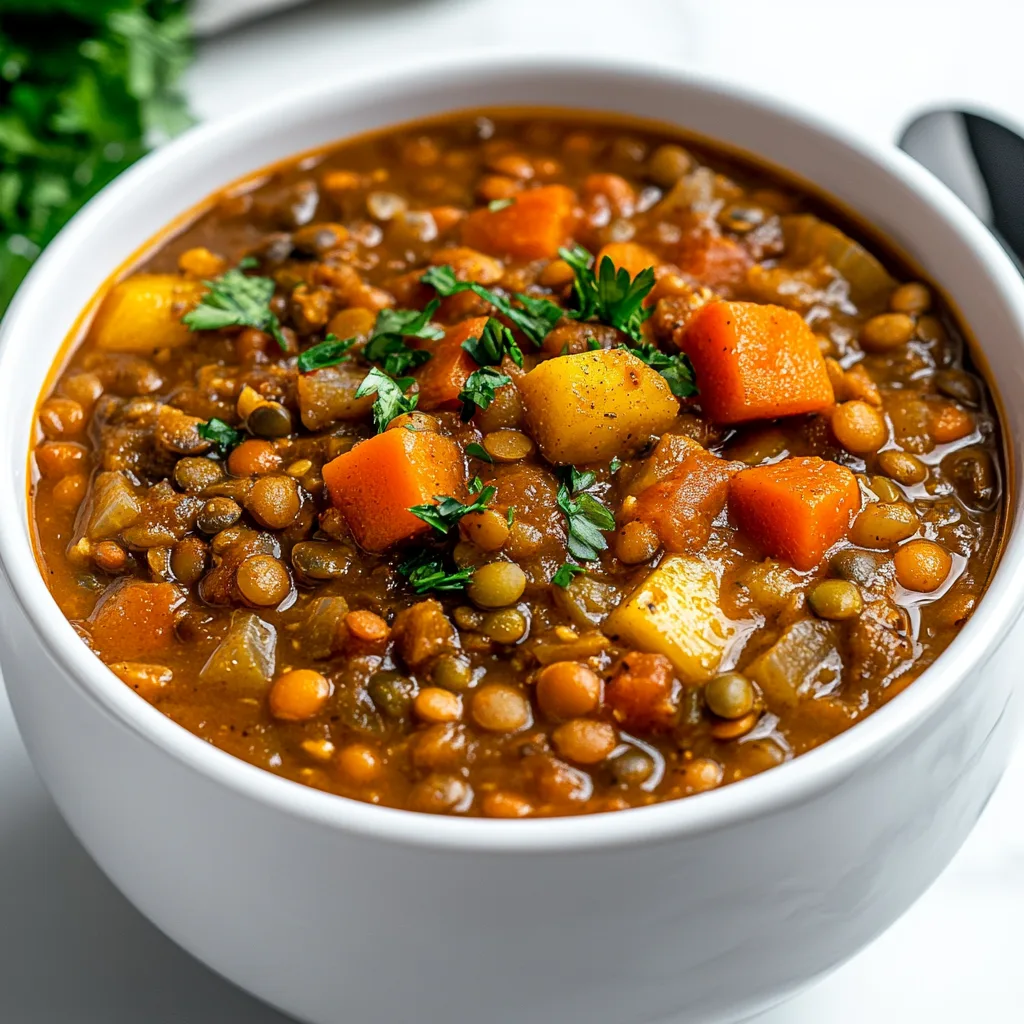
  • The Best Crockpot Lentil Soup Recipe | Easy & Delicious Slow Cooker Soup

    The Best Crockpot Lentil Soup Recipe | Easy & Delicious Slow Cooker Soup

    The Best Crockpot Lentil Soup is one of those magical recipes that transforms humble ingredients into something extraordinary with almost no effort. On chilly evenings when I’m craving something hearty yet healthy, this is my go-to recipe that never disappoints. The beauty lies in its simplicity – just toss everything into your slow cooker, set it, and return to a kitchen filled with the most comforting aroma imaginable. What I love most is how these tiny legumes absorb all the savory flavors while creating a satisfying texture that feels like a warm hug in a bowl.

    The Best Crockpot Lentil Soup Recipe | Easy & Delicious Slow Cooker Soup

    Recipe

    Why You’ll Love This The Best Crockpot Lentil Soup

    Perfect Balance of Flavor and Nutrition

    This soup strikes that elusive balance between deeply satisfying and genuinely nourishing. Lentils pack an impressive nutritional punch with plant-based protein and fiber that keeps you full for hours. I’ve perfected the seasoning blend over countless winter evenings – just enough herbs to enhance the earthy lentils without overwhelming them. The slow cooking process allows every ingredient to release its full flavor potential, creating layers of taste that simply can’t be rushed. When my daughter first tried this soup, she declared it “tastes like comfort feels” – perhaps the best compliment a soup could receive!

    Set-It-and-Forget-It Convenience

    There’s something almost magical about recipes that require minimal effort yet deliver maximum results. This lentil soup epitomizes that effortless luxury. On busy weekdays, I simply spend 10 minutes chopping vegetables in the morning, then let the crockpot work its slow-cooking alchemy all day. The transformation is remarkable – firm lentils and raw vegetables meld into a velvety, cohesive soup with complex flavors that belie its simple preparation. No stirring, no monitoring, no fuss – just return home to a kitchen filled with an aroma that instantly melts away the day’s stress.

    Essential Tips & Tricks

    Ingredient Selection Matters

    The quality of your ingredients makes a significant difference in this simple soup. Always opt for fresh aromatics – onions, carrots, celery, and garlic form the flavor foundation. For lentils, I recommend French green or brown varieties as they hold their shape beautifully during long cooking, unlike red lentils which break down completely. The broth choice is equally important – a good vegetable or chicken stock elevates the entire dish. My secret ingredient? A splash of balsamic vinegar added in the last hour of cooking. This subtle acid brightens the flavors and adds remarkable depth that makes people wonder what your special touch is. Trust me on this one!

    Perfect Timing and Texture Control

    Achieving the ideal consistency requires understanding how lentils behave in a slow cooker. For a soup with distinct lentils that retain their shape, cook on low for 7-8 hours. For a creamier, more homogeneous texture, extend cooking time to 9 hours or gently mash some lentils against the side of the pot before serving. The beauty of this slow cooker recipe is its forgiveness – an extra hour won’t ruin it. If you prefer a thicker soup, leave the lid ajar for the final 30 minutes to allow some evaporation, or if too thick, simply add additional warm broth until you reach your desired consistency.

    Serving Ideas & Creative Variations

    Elevate Your Bowl with Toppings

    Transform your basic lentil soup into a showstopping meal with thoughtfully chosen toppings. My family’s favorite combination includes a dollop of tangy Greek yogurt, fresh herbs (cilantro or parsley work beautifully), a sprinkle of toasted pumpkin seeds for crunch, and a drizzle of good olive oil that creates gorgeous golden pools on the surface. For a heartier meal, try adding diced avocado or crispy roasted chickpeas. When entertaining, I serve the soup in shallow bowls with topping options arranged in small dishes, allowing guests to customize their experience. This interactive serving style always sparks conversation and appreciation around the table.

    The Best Crockpot Lentil Soup Recipe | Easy & Delicious Slow Cooker Soup

    Global Flavor Adventures

    One soup, endless possibilities! Adapt this basic recipe to create international variations that keep your menu exciting. For a Moroccan twist, add a cinnamon stick, cumin, and dried apricots during cooking, then finish with preserved lemon and harissa. Mediterranean-inspired? Include oregano, olives, and finish with crumbled feta and lemon zest. For Indian flavors similar to my popular Slow Cooker Chicken Korma, incorporate curry powder, coconut milk, and finish with fresh cilantro and lime. The versatility of lentils makes them perfect for absorbing whatever flavor profile you’re craving, turning one simple recipe into a global culinary adventure.

    Storage & Troubleshooting Guide

    Maximize Leftovers Potential

    This soup actually improves with time as the flavors continue to develop, making it perfect for batch cooking. Store cooled soup in airtight containers in the refrigerator for up to 5 days. For freezing, leave a half-inch headspace in containers to allow for expansion, and freeze for up to 3 months. I often freeze individual portions in silicone muffin cups, then transfer the frozen “pucks” to freezer bags for quick single servings. When reheating, add a splash of fresh broth or water as the soup tends to thicken considerably after refrigeration. A squeeze of lemon juice brightens the flavors of reheated soup beautifully.

    Troubleshooting Common Issues

    Even the simplest recipes occasionally need adjustments. If your soup lacks flavor depth, try adding a flavor booster like a parmesan rind, nutritional yeast, or a splash of soy sauce during cooking. For soup that’s too watery, remove some liquid and blend it with a portion of the soup before returning it to the pot – this creates a thicker base without changing the overall texture. If lentils remain firm after the recommended cooking time, your lentils might be older (they dry out with age). Simply continue cooking until tender, adding more liquid if necessary. And remember, acid ingredients like tomatoes can prevent lentils from softening, so always add these later in the cooking process.

    Frequently Asked Questions

    Can I use red lentils instead of green or brown?

    Red lentils cook much faster and break down completely, creating a creamier texture. If using red lentils, reduce cooking time to 4-5 hours on low or they’ll disintegrate entirely.

    Is The Best Crockpot Lentil Soup freezer-friendly?

    Absolutely! This soup freezes beautifully for up to 3 months. Cool completely before freezing in portion-sized containers, leaving room for expansion.

    Can I make this soup on the stovetop instead?

    Yes! Sauté aromatics first, add remaining ingredients, and simmer for about 45 minutes until lentils are tender, stirring occasionally to prevent sticking.

    How can I make this soup more filling?

    Add protein with browned sausage or shredded chicken. For a vegetarian option, stir in cooked quinoa or serve with crusty whole grain bread.

    My lentils aren’t softening. What went wrong?

    Older lentils take longer to cook. Also, acidic ingredients (tomatoes, vinegar) can prevent softening, so add these in the final hour of cooking.

    Final Thoughts

    The Best Crockpot Lentil Soup has become my kitchen hero – economical, nutritious, and adaptable to whatever flavors I’m craving. There’s something deeply satisfying about creating such a nourishing meal with minimal effort, especially when it fills your home with comforting aromas all day long. I encourage you to make this recipe your own by experimenting with different herbs, spices, and toppings. Whether you’re feeding a family or meal prepping for one, this soup proves that the simplest foods often bring the greatest comfort. Don’t forget to check out more cozy recipes on our Pinterest for endless inspiration!

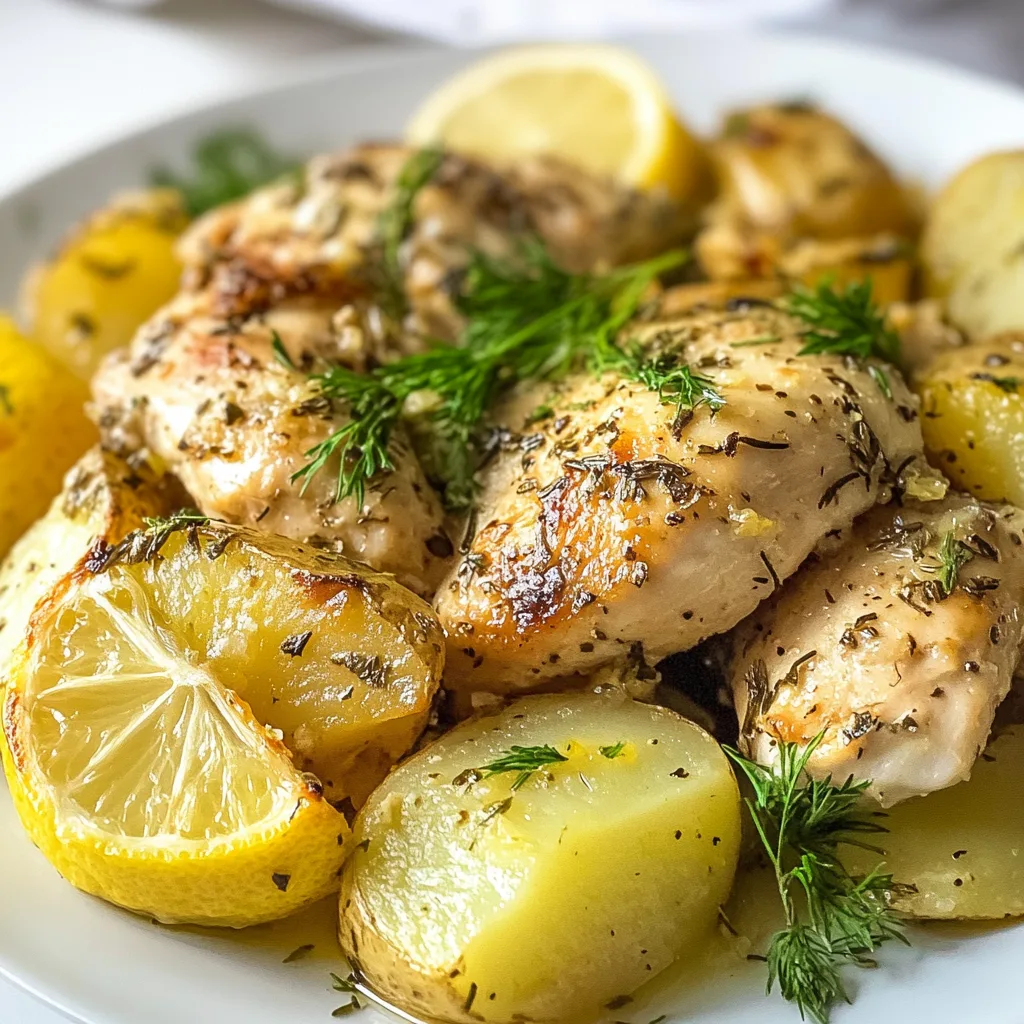
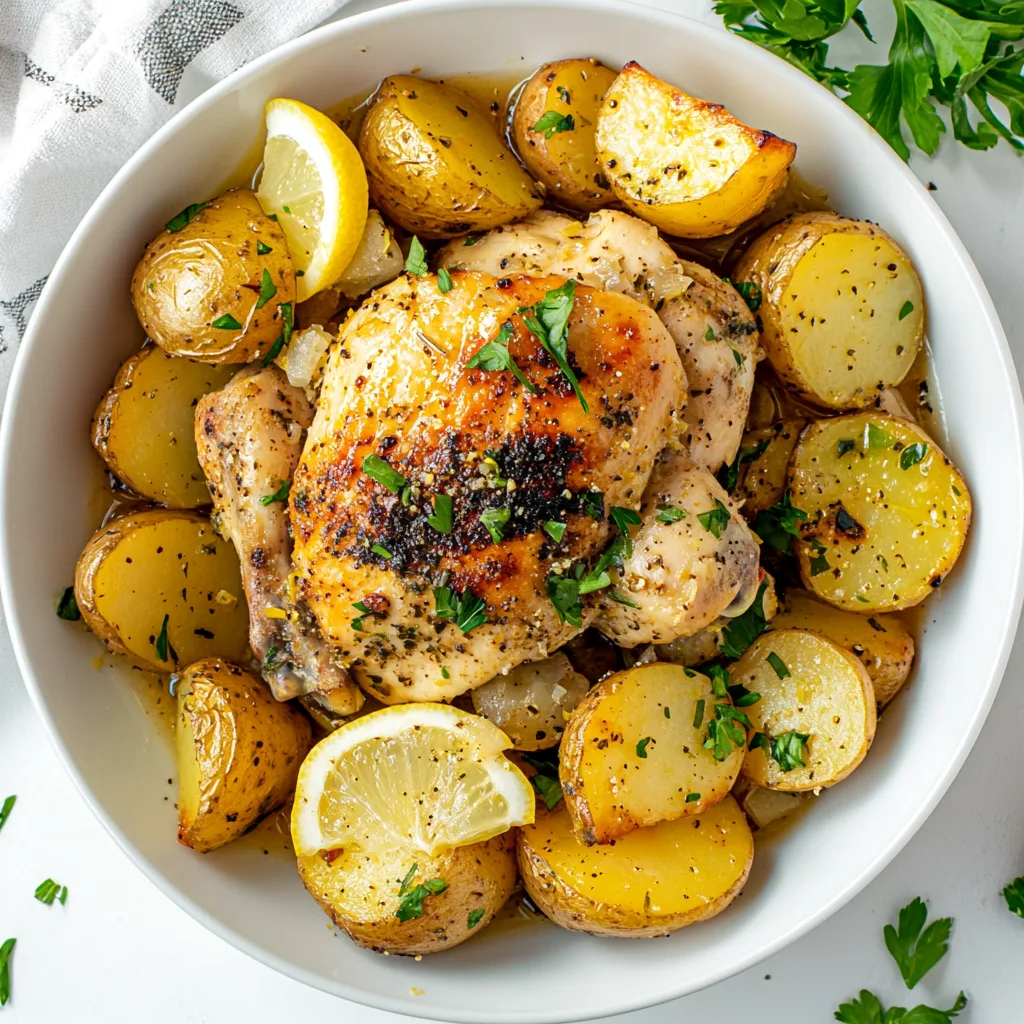
  • Greek Slow Cooker Lemon Chicken and Potatoes Recipe | Easy Mediterranean Meal

    Greek Slow Cooker Lemon Chicken and Potatoes Recipe | Easy Mediterranean Meal

    There’s something magical about Greek Slow Cooker Lemon Chicken and Potatoes that transforms ordinary ingredients into a feast of Mediterranean flavors. The first time I made this dish, the aroma of lemon, oregano, and garlic filled my kitchen, transporting me straight to a seaside taverna in Santorini. As the chicken slowly tenderizes and the potatoes soak up all those bright, zesty flavors, something truly special happens. This set-it-and-forget-it meal delivers that perfect balance of comfort and sophistication that makes weeknight dinners feel special without the fuss. Trust me, this might become your new family favorite!

    Greek Slow Cooker Lemon Chicken and Potatoes Recipe | Easy Mediterranean Meal

    Recipe

    Why You’ll Love This Greek Slow Cooker Lemon Chicken and Potatoes

    Perfect Flavor Balance

    The beauty of this Greek Slow Cooker Lemon Chicken and Potatoes lies in its perfect harmony of flavors. Bright, zesty lemons cut through the richness of the chicken, while oregano, garlic, and olive oil create that authentic Mediterranean profile that’s both bold and comforting. I love how the slow cooking process allows the chicken to absorb every bit of flavor while remaining incredibly tender. The potatoes, nestled beneath the chicken, transform into little flavor sponges, soaking up all those amazing juices. It’s that beautiful balance of tangy and savory that makes Greek cuisine so irresistible, all achieved with minimal effort on your part.

    Make-Ahead Convenience

    As a busy mom, I’ve come to worship the time-saving magic of slow cooker recipes. This Greek chicken can be prepped in just 15 minutes in the morning, then left to work its magic while you tackle your day. All the ingredients can be prepped the night before—just slice those lemons, chop the potatoes, and measure out your seasonings. Store everything in separate containers in the fridge, then simply layer in your slow cooker when you’re ready. The hands-off cooking means you can focus on other priorities knowing dinner is taking care of itself. I’ve even assembled everything in the slow cooker insert and refrigerated overnight for truly effortless mornings.

    Essential Tips & Tricks

    Choosing the Right Ingredients

    Starting with high-quality ingredients makes all the difference in this simple recipe. Opt for bone-in, skin-on chicken thighs which stay juicier and more flavorful than breasts in the slow cooker. The fat renders beautifully, creating a self-basting effect. For potatoes, I recommend Yukon Golds for their buttery texture and ability to hold shape during long cooking. Always use fresh lemons rather than bottled juice—the oils in the zest add incredible dimension. When it comes to olive oil, this is the time to use that good bottle you’ve been saving; its fruity notes will shine through in the finished dish. Fresh oregano is wonderful if you have it, but dried works beautifully too.

    Perfect Texture Every Time

    Achieving that ideal texture can be tricky in slow cookers, but I’ve found a few foolproof techniques. Layer your potatoes on the bottom of the cooker, which elevates the chicken and allows for better heat circulation. Cut potatoes into uniform 1.5-inch chunks so they cook evenly. For extra crispy chicken skin (my favorite part!), consider a quick broil after slow cooking. Simply transfer the chicken to a baking sheet, brush with a little olive oil, and broil for 2-3 minutes until golden. This step is optional but adds that restaurant-quality finish that makes the dish truly special. Remember to rest the chicken for 5-10 minutes before serving for maximum juiciness.

    Serving Ideas & Creative Variations

    Mediterranean Inspired Sides

    Elevate your Greek Slow Cooker Lemon Chicken and Potatoes with complementary sides that enhance its Mediterranean charm. A simple Greek salad with cucumbers, tomatoes, red onions, kalamata olives, and feta cheese adds fresh crunch and vibrant color. Warm pita bread is perfect for sopping up those incredible lemon-infused juices—I’ve seen my family practically fighting over the last drops! For a lighter option, try a side of steamed green beans tossed with lemon zest and toasted pine nuts. My personal favorite pairing is a cooling tzatziki sauce served alongside for dipping both the chicken and potatoes. The creamy yogurt base with cucumber and dill creates a beautiful temperature and texture contrast.

    Greek Slow Cooker Lemon Chicken and Potatoes Recipe | Easy Mediterranean Meal

    Exciting Flavor Twists

    While the classic recipe is divine, I love experimenting with creative variations that keep this dish in regular rotation without boredom. Try adding artichoke hearts and olives during the last hour of cooking for a Greek-inspired twist. Crumbled feta cheese sprinkled over the finished dish adds a salty, tangy dimension that’s absolutely mouthwatering. For a spicier version inspired by my trip to Cyprus, add a teaspoon of red pepper flakes and a splash of honey to create a sweet-heat balance. You can also swap the chicken thighs for a whole cut-up chicken to please dark and white meat lovers alike. These simple tweaks transform the same base recipe into something that feels brand new.

    Storage & Troubleshooting Guide

    Proper Storage Methods

    Proper storage techniques ensure this delicious meal can be enjoyed beyond just dinner night. Allow leftovers to cool completely before transferring to airtight containers—I separate the chicken and potatoes to maintain their distinct textures. Refrigerated, they’ll keep beautifully for 3-4 days, with the flavors actually improving overnight as they continue to meld. For longer storage, freeze portions in freezer-safe containers for up to 3 months. When reheating, I recommend thawing overnight in the refrigerator, then warming gently in a 325°F oven covered with foil to prevent drying out. For a quick microwave reheat, add a tablespoon of water or chicken broth to maintain moisture and heat on medium power, stirring the potatoes occasionally.

    Common Issues & Solutions

    Even experienced cooks encounter occasional challenges with slow cooker recipes. If your chicken skin turns out rubbery rather than crisp, that’s actually normal for slow cooking—use the broiler method I mentioned earlier for that perfect finish. Potatoes still firm after cooking? They might be cut too large; next time ensure uniform, smaller pieces. For too-soupy results, remove the lid during the final 30 minutes of cooking to allow some liquid to evaporate, or transfer the juices to a small saucepan and reduce into a more concentrated sauce.

    If your dish lacks flavor intensity, try adding a splash of fresh lemon juice and a sprinkle of flaky sea salt just before serving to brighten all the flavors. Remember that slow cookers vary in temperature, so adjust cooking times accordingly.

    Frequently Asked Questions

    Can I use boneless chicken instead?

    Yes, boneless chicken thighs work well but reduce cooking time by 1-2 hours. Boneless breasts tend to dry out, so if using them, check for doneness at the 3-hour mark on low setting.

    How can I make this Greek Slow Cooker Lemon Chicken and Potatoes more garlicky?

    Double the garlic and add half at the beginning and half during the last 30 minutes of cooking for a more pronounced garlic flavor without bitterness.

    Can I add vegetables besides potatoes?

    Absolutely! Bell peppers, zucchini, or cherry tomatoes work beautifully. Add firmer vegetables halfway through cooking and delicate ones during the final hour.

    What if I don’t have fresh lemons?

    While fresh is best, in a pinch, use 3 tablespoons of bottled lemon juice plus 1 teaspoon of lemon zest (or ¼ teaspoon lemon extract) to approximate the fresh lemon flavor.

    Is this recipe gluten-free?

    Yes, this recipe is naturally gluten-free, making it perfect for those with gluten sensitivities. Just ensure your chicken broth and any added seasonings are certified gluten-free.

    Final Thoughts

    This Greek Slow Cooker Lemon Chicken and Potatoes has become my go-to for both busy weeknights and casual entertaining. There’s something deeply satisfying about creating such bold, authentic flavors with so little active work. I love watching guests’ faces light up with their first bite, that moment of surprise that something so complex-tasting could come from a slow cooker. The bright lemon, fragrant herbs, and tender chicken create a meal that feels like a warm Mediterranean hug. Whether you’re cooking for a family dinner or meal prepping for the week ahead, this dish delivers comfort and sophistication in equal measure. Don’t forget to check out more of my slow cooker favorites on Pinterest!

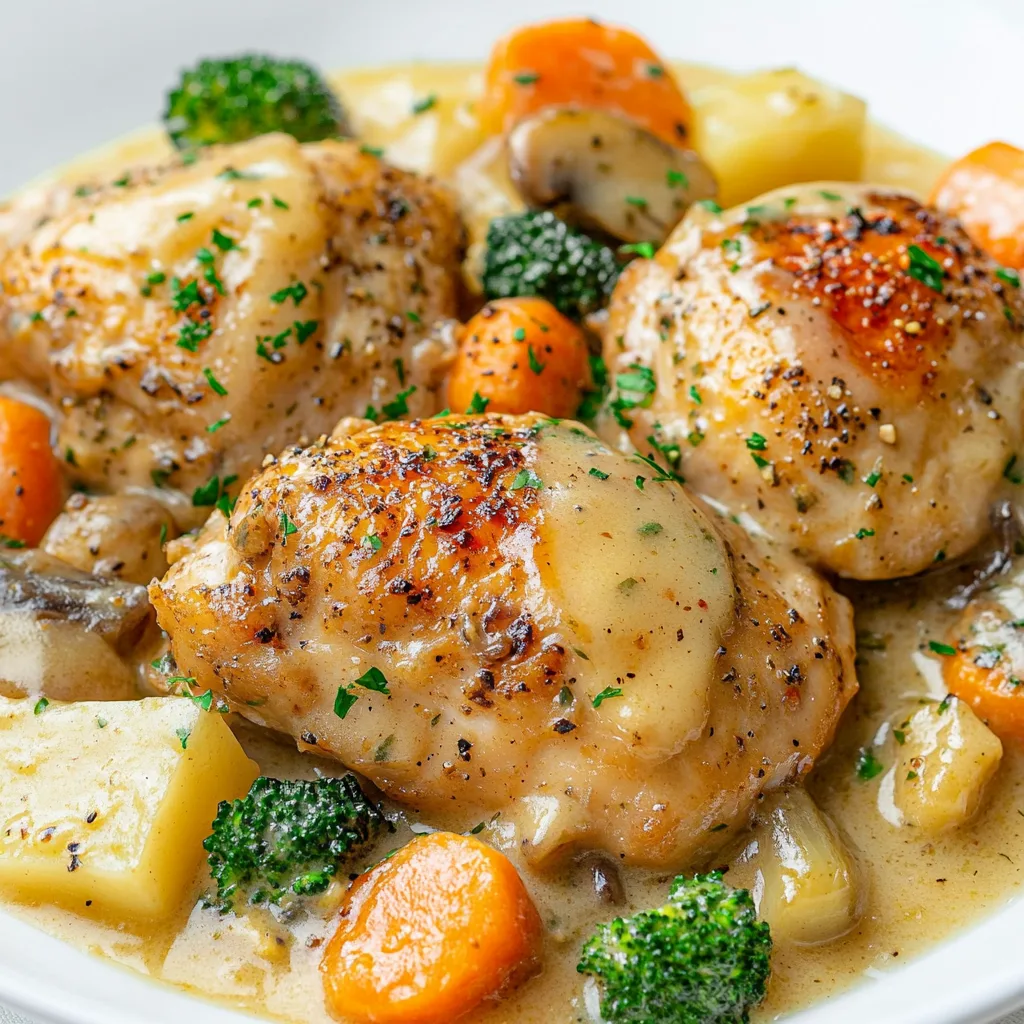
  • Crockpot Creamy Garlic Chicken and Veggies Recipe | Easy Slow Cooker Meal

    Crockpot Creamy Garlic Chicken and Veggies Recipe | Easy Slow Cooker Meal

    On those busy weeknights when time is short but cravings for comfort food are strong, this Crockpot Creamy Garlic Chicken and Veggies becomes my kitchen hero. There’s something magical about walking through the door after a long day to be greeted by the rich, aromatic scent of garlic and herbs simmering away.

    I first created this recipe during a particularly chaotic week when my sister’s family was visiting, and I needed something that would please everyone while letting me actually enjoy their company instead of being stuck in the kitchen. The tender chicken, velvety sauce, and perfectly cooked vegetables create a meal that feels like a warm hug on a plate – exactly what we all need when life gets hectic. Let’s dive into this simple yet satisfying dish that might just become your new weeknight favorite.

    Crockpot Creamy Garlic Chicken and Veggies Recipe | Easy Slow Cooker Meal

    Recipe

    Why You’ll Love This Crockpot Creamy Garlic Chicken and Veggies

    Perfect for Busy Families

    This recipe is a genuine time-saver for those days when you’re juggling work, kids’ activities, and everything in between. I remember the Wednesday when I had three Zoom meetings, a dentist appointment, and my daughter’s soccer practice – this meal saved my sanity! Simply prep everything in the morning (which takes less than 15 minutes), set your crockpot, and return to a complete dinner that tastes like you’ve been cooking all day. The hands-off cooking method means you’re free to tackle your to-do list while dinner practically makes itself. Plus, the one-pot approach means fewer dishes to wash, which is always a win in my book.

    Customizable to Your Preferences

    What I adore about this dish is how easily it adapts to what you have on hand or your family’s preferences. The versatile base of creamy garlic sauce works beautifully with whatever vegetables are in season or lurking in your crisper drawer. When my picky nephew visited, I used his favorites – carrots and potatoes. For my veggie-loving husband, I load it with bell peppers, mushrooms, and zucchini. You can adjust the garlic level (I’m firmly in the “more is better” camp), swap chicken thighs for breasts if you prefer, or even make it dairy-free with coconut cream instead of heavy cream. It’s essentially a choose-your-own-adventure dinner that never disappoints.

    Essential Tips & Tricks

    Browning for Maximum Flavor

    Don’t skip the initial browning step for the chicken, even when you’re in a rush! I’ve tested this recipe both ways, and those few extra minutes create a depth of flavor that transforms the entire dish. One chilly Sunday, I was tempted to just dump everything in the pot, but taking five minutes to sear the chicken first created those beautiful caramelized bits that infuse the sauce with richness. Season the chicken generously with salt and pepper before browning, and if time allows, let it come to room temperature first for more even cooking. This simple step elevates the dish from good to “can I please have the recipe?” territory.

    Timing is Everything

    The key to perfectly cooked vegetables is adding them at the right moment in the cooking process. Hard vegetables like carrots, potatoes, and winter squash can go in at the beginning, but tender veggies like zucchini, bell peppers, or asparagus should be added during the last 30-60 minutes to prevent them from becoming mushy. I learned this the hard way when I once added broccoli too early and ended up with a rather sad, olive-colored result! For a beautiful meal with varied textures, consider a slow cooker with a timer function that allows you to program when additional ingredients should be added, even if you’re not at home.

    Serving Ideas & Creative Variations

    Perfect Pairings

    While this creamy chicken dish is certainly hearty enough on its own, I love serving it with simple sides that complement the rich flavors. A crusty artisan bread is perfect for soaking up every last drop of that velvety sauce – my family practically fights over who gets to wipe the plate! For a lighter option, a simple green salad with a bright vinaigrette provides a refreshing contrast. When I’m craving extra comfort, I serve it over buttery mashed potatoes, fluffy rice, or al dente pasta. For a low-carb alternative, try cauliflower rice or zucchini noodles. The versatility means it works beautifully for both casual family dinners and when you’re entertaining guests.

    Crockpot Creamy Garlic Chicken and Veggies Recipe | Easy Slow Cooker Meal

    Exciting Flavor Twists

    Don’t be afraid to experiment with different flavor profiles to keep this recipe in regular rotation without boredom setting in. My Italian-inspired version includes sun-dried tomatoes, spinach, and a sprinkle of Parmesan cheese. For a French countryside feel, add herbs de Provence and finish with a splash of white wine. When we’re craving something with a kick, I incorporate smoked paprika and a pinch of red pepper flakes. You could even take it in an Asian direction with ginger, a splash of soy sauce, and a finish of toasted sesame oil. For a Mediterranean-inspired twist, add olives, artichoke hearts, and finish with fresh lemon zest.

    Storage & Troubleshooting Guide

    Making the Most of Leftovers

    This dish actually gets better overnight as the flavors have time to meld together, making it perfect for meal prep. Store leftovers in airtight containers in the refrigerator for up to 4 days. When reheating, add a splash of chicken broth or cream if the sauce has thickened too much. For busy weeks, I often double the recipe and freeze half in portion-sized containers for up to 3 months. To prevent the cream sauce from separating when frozen, I cool it completely before freezing and reheat gently on the stovetop rather than in the microwave. Leftover chicken and vegetables can also be repurposed into incredible pot pies, creamy soups, or stuffed into baked potatoes.

    Fixing Common Issues

    If your sauce turns out too thin, don’t panic! Create a quick slurry solution by mixing 1 tablespoon cornstarch with 2 tablespoons cold water, then stir it into the crockpot during the last 30 minutes of cooking with the lid off. For sauce that’s too thick, simply thin it with additional broth or cream until you reach your desired consistency.

    If your chicken seems dry, it may have cooked too long – next time, check for doneness earlier or use chicken thighs which are more forgiving. For vegetables that cook unevenly, try cutting them into uniform sizes. And remember, if your garlic flavor isn’t pronounced enough, you can always boost it by stirring in some fresh minced garlic or garlic powder during the last 15 minutes.

    Frequently Asked Questions

    Can I use frozen chicken for this Crockpot Creamy Garlic Chicken and Veggies recipe?

    For food safety reasons, I don’t recommend using frozen chicken directly in the slow cooker. Thaw it completely first to ensure it reaches a safe temperature quickly enough during cooking.

    How can I make this recipe dairy-free?

    Substitute the heavy cream with full-fat coconut milk or your favorite dairy-free cream alternative. The coconut adds a subtle sweetness that works beautifully with the garlic and herbs.

    Can I prep this the night before?

    Absolutely! Brown the chicken and chop all vegetables, then refrigerate separately overnight. In the morning, just add everything to your crockpot and turn it on.

    What’s the best way to thicken the sauce if it’s too runny?

    Create a cornstarch slurry (1 tablespoon cornstarch mixed with 2 tablespoons cold water) and stir it into the crockpot during the last 30 minutes with the lid off.

    How do I prevent my vegetables from getting mushy?

    Add firmer vegetables like carrots and potatoes at the beginning, but save tender vegetables like zucchini or bell peppers for the last 30-60 minutes of cooking time.

    Final Thoughts

    This Crockpot Creamy Garlic Chicken and Veggies has become a cornerstone in my meal rotation for good reason. It strikes that perfect balance between effortless preparation and impressive results that make everyday dinners feel special. I’ve served it on hectic weeknights and for impromptu gatherings, always with clean plates and requests for seconds.

    The flexibility to adapt it to what’s in season or on hand means it never feels repetitive, while the comforting flavors satisfy even the pickiest eaters. Whether you’re cooking for a busy family or meal prepping for one, this recipe delivers that homemade warmth we all crave without hours in the kitchen. I’d love to see your versions of this dish – share them with me on Pinterest and let me know what creative twists you’ve added!