Author: Lily Bennett

  • Honey Garlic Slow Cooker Chicken Thighs Recipe | Easy & Delicious Meal

    Honey Garlic Slow Cooker Chicken Thighs Recipe | Easy & Delicious Meal

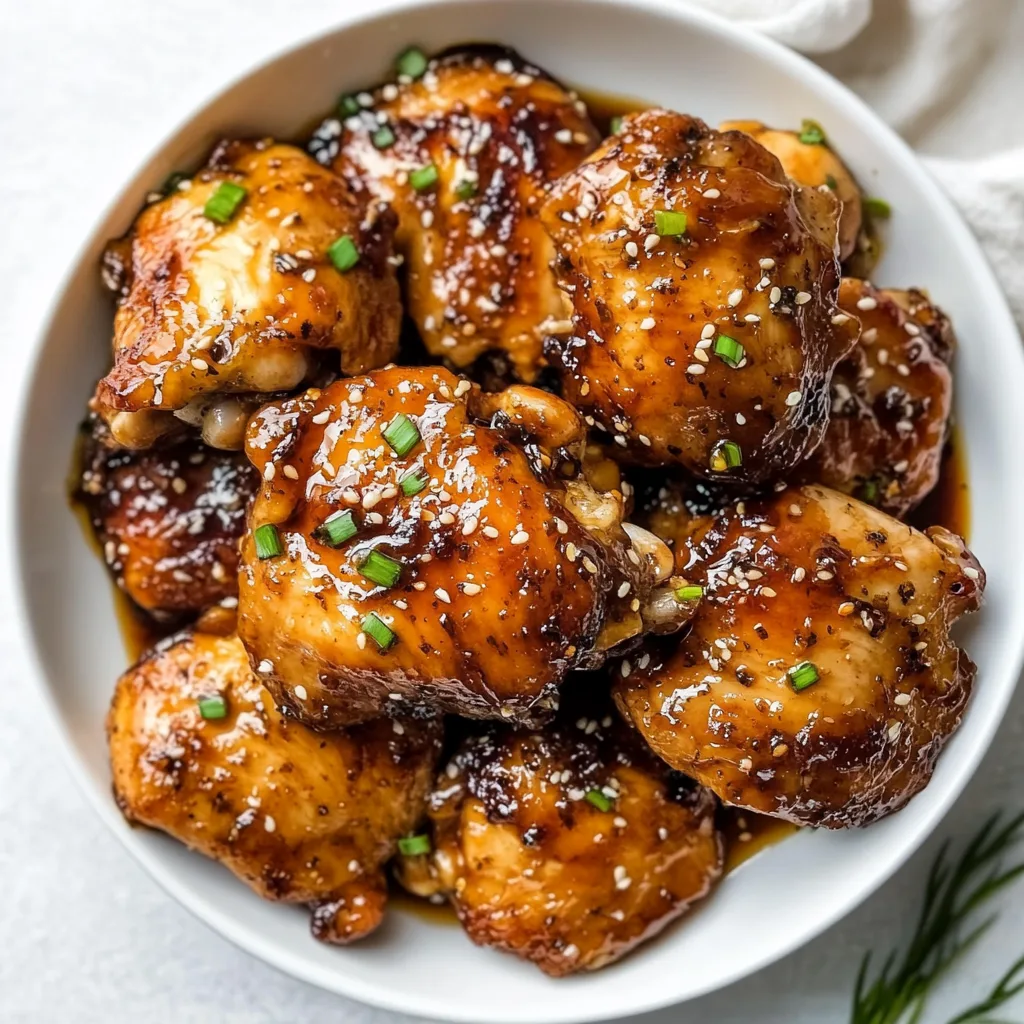
    There’s something magical about coming home to the rich, sweet-savory aroma of Honey Garlic Slow Cooker Chicken Thighs wafting through the house. I’ll never forget the first time I made this dish—it was during a particularly hectic week when I desperately needed a dinner win. The moment I lifted that slow cooker lid and saw those glistening, caramelized thighs bathed in that sticky, amber sauce,

    I knew I’d found a keeper. This recipe combines the perfect balance of sweet honey, pungent garlic, and savory soy sauce that transforms humble chicken thighs into something truly special—with barely any effort from you. The slow cooker does all the heavy lifting, creating fall-off-the-bone tender chicken that’s perfect for busy weeknights or weekend gatherings.
    Honey Garlic Slow Cooker Chicken Thighs Recipe | Easy & Delicious Meal

    Recipe

    Why You’ll Love This Honey Garlic Slow Cooker Chicken Thighs

    Perfect for Busy Weeknights

    If you’re like me, weeknight cooking needs to be as stress-free as possible. These honey garlic chicken thighs practically cook themselves! Just 10 minutes of morning prep—measuring a few ingredients, whisking them together, and placing everything in the slow cooker—rewards you with an incredible dinner hours later. The sauce requires no pre-cooking or complicated steps. I love that I can toss everything in before work and come home to a meal that tastes like I’ve been slaving away all day. The combination of minimal hands-on time and maximum flavor payoff makes this recipe my secret weapon for those days when I just can’t face complicated cooking.

    Budget-Friendly Comfort Food

    Chicken thighs are not only more flavorful than chicken breasts, but they’re also typically more affordable, making this recipe a budget-conscious choice. The remaining ingredients are likely already in your pantry—honey, soy sauce, ketchup, and garlic—nothing fancy required! When food prices keep climbing, I find myself returning to this recipe again and again. The slow cooking process breaks down the connective tissues in the thighs, resulting in incredibly tender meat that’s infused with that sweet-savory sauce. It’s the kind of humble comfort food that feels like a warm hug at the end of a long day, without putting a dent in your wallet.

    Essential Tips & Tricks

    Choosing & Preparing Your Chicken

    For the most flavorful results, use bone-in, skin-on chicken thighs. The bones add richness to the sauce, while the skin renders its fat during cooking, creating that irresistible flavor. Before adding to your slow cooker, take a few minutes to brown the skin in a hot skillet. This optional step creates a beautiful color and deeper flavor profile. If you’re watching calories, you can certainly use skinless thighs, but I’d still recommend bone-in for maximum flavor. Don’t skip trimming excess fat—this prevents your sauce from becoming too greasy. For even cooking, choose thighs of similar size and arrange them in a single layer in your slow cooker.

    Perfecting That Sticky Sauce

    The magic of this dish is in that glossy, sticky sauce that coats each bite. For the best results, use real honey rather than honey-flavored syrup—the flavor difference is noticeable. Low-sodium soy sauce gives you better control over the saltiness of the final dish. If your sauce seems too thin after cooking, there’s an easy fix: remove the chicken, transfer the liquid to a saucepan, and simmer for 5-10 minutes until reduced and thickened. For an even quicker solution, mix 1 tablespoon cornstarch with 1 tablespoon cold water and stir this slurry into the hot liquid in the slow cooker during the last 30 minutes of cooking.

    Serving Ideas & Creative Variations

    Perfect Pairing Suggestions

    These honey garlic chicken thighs are incredibly versatile when it comes to side dishes. My family’s favorite pairing is fluffy jasmine rice that soaks up all that delicious sauce—I always make extra rice because everyone wants seconds! For a lower-carb option, try cauliflower rice or a simple side of roasted broccoli. The sweet-savory flavor profile also pairs beautifully with a crisp Asian slaw or a simple cucumber salad dressed with rice vinegar. For a complete meal with minimal effort, toss some baby carrots or quartered red potatoes into the slow cooker alongside the chicken. They’ll absorb all those wonderful flavors as they cook, giving you a true one-pot dinner.

    Honey Garlic Slow Cooker Chicken Thighs Recipe | Easy & Delicious Meal

    Exciting Flavor Twists

    While the classic recipe is perfect as is, don’t be afraid to make it your own! For a spicy kick, add 1-2 teaspoons of sriracha or red pepper flakes to the sauce. Craving something more complex? Try adding a tablespoon of grated ginger alongside the garlic for an aromatic twist. Pineapple lovers can toss in some chunks of fresh pineapple during the last hour of cooking for a tropical variation. For an elevated finish, sprinkle toasted sesame seeds and sliced green onions over the chicken before serving. My personal favorite variation is adding a splash of fresh orange juice and a teaspoon of five-spice powder to the sauce for a Chinese-inspired flavor that’s absolutely incredible.

    Storage & Troubleshooting Guide

    Proper Storage & Reheating

    These honey garlic chicken thighs actually taste even better the next day, making them perfect for meal prep! Store leftovers in an airtight container in the refrigerator for up to 4 days. The sauce will thicken considerably when chilled—this is completely normal. For the best reheating results, warm the chicken and sauce gently in a covered skillet over medium-low heat, adding a splash of water if needed to thin the sauce. Microwaving works in a pinch, but can sometimes toughen the meat. For longer storage, freeze portions in freezer-safe containers for up to 3 months. I like to freeze individual portions with rice for grab-and-go lunches that taste homemade even weeks later.

    Fixing Common Issues

    If your chicken turns out dry, it was likely overcooked. Dark meat is forgiving, but even it has limits—aim for an internal temperature of 175°F for perfectly tender thighs. Next time, check for doneness earlier or add a bit more liquid to the pot. If your sauce is too thin, try the cornstarch slurry method mentioned earlier. Too thick?

    Simply stir in a few tablespoons of chicken broth. If the sauce tastes too sweet, balance it with a splash of rice vinegar or a squeeze of fresh lemon juice. Too salty? Add a drizzle of honey and a pat of butter to mellow it out. Remember that slow cooker sizes vary—a larger cooker might evaporate more liquid, intensifying flavors, so adjust accordingly.

    Frequently Asked Questions

    Can I use chicken breasts instead of thighs?

    Yes, but reduce cooking time to 3-4 hours on low since breasts dry out more easily than thighs. Add a bit more liquid to the sauce and check earlier for doneness.

    Is this recipe gluten-free?

    Not by default, but it’s easily adapted by substituting tamari or coconut aminos for the soy sauce. Double-check all other ingredients for hidden gluten.

    Can I make Honey Garlic Slow Cooker Chicken Thighs in an Instant Pot?

    Absolutely! Use the sauté function to brown the chicken first, then pressure cook on high for 12 minutes with natural release for similar results in less time.

    How can I make this recipe healthier?

    Use skinless thighs, reduce honey by half, and substitute low-sugar ketchup. Add extra vegetables like bell peppers and snap peas during the last hour.

    What if I don’t have 6-8 hours for slow cooking?

    For a quicker version, cook on high for 3-4 hours instead. The chicken won’t be quite as tender but still delicious.

    Final Thoughts

    These Honey Garlic Slow Cooker Chicken Thighs have become a cornerstone recipe in my household for good reason. They embody everything I love about cooking—simplicity, affordability, and that magical transformation of basic ingredients into something truly special. The combination of tender chicken bathed in that sticky-sweet garlic sauce creates a meal that feels both comforting and slightly indulgent. Whether you’re feeding a family on a busy weeknight or meal prepping for the days ahead, this recipe delivers satisfaction every time. I hope it brings as much joy to your table as it has to mine! For more slow cooker inspiration, check out my Pinterest boards where I’m always sharing new comfort food favorites.
  • Easy Slow-Roasted Prime Rib Recipe | Perfect Tender & Juicy Roast

    Easy Slow-Roasted Prime Rib Recipe | Perfect Tender & Juicy Roast

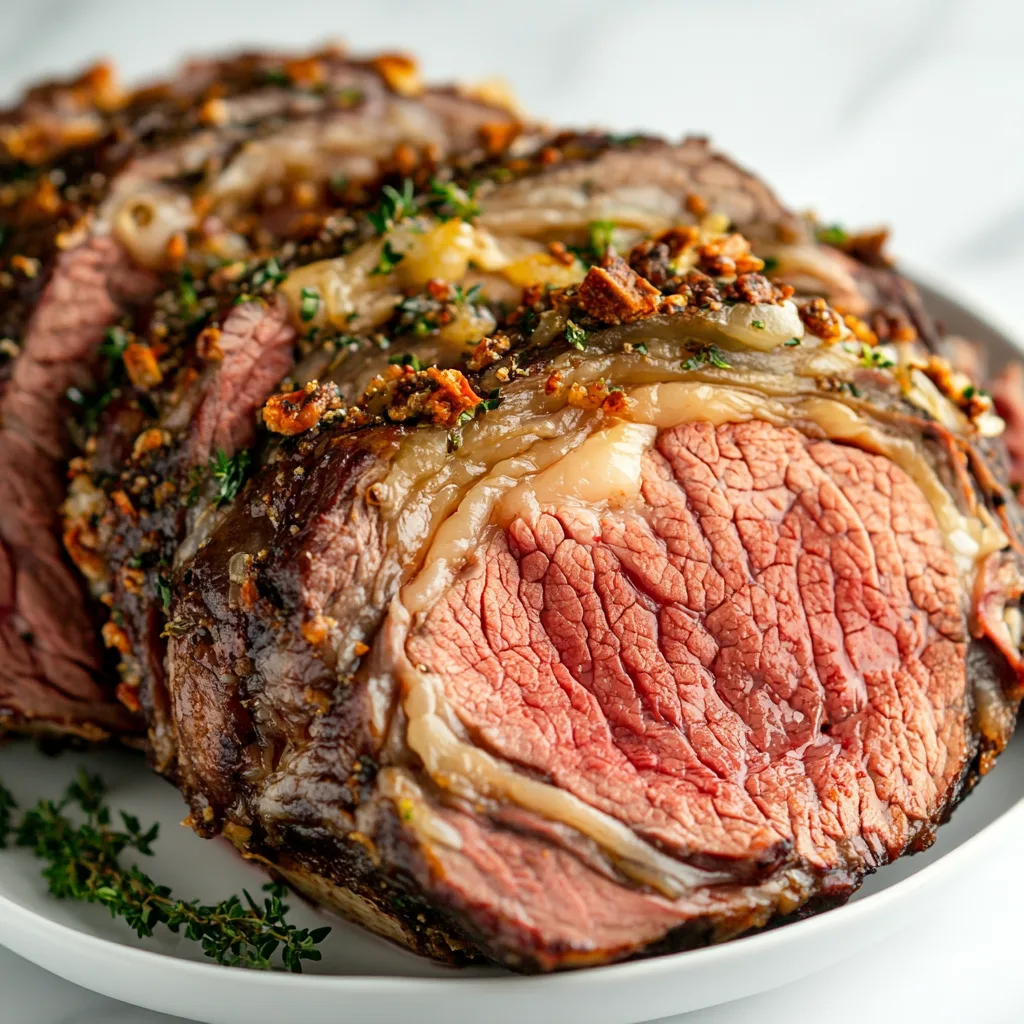
    There’s something almost magical about a perfectly cooked Easy Slow-Roasted Prime Rib. The moment that knife slides through the butter-soft meat, revealing that perfect pink center surrounded by a deeply seasoned crust—it’s pure culinary poetry. I’ll never forget the first time I attempted this showstopper for my family’s holiday gathering. What seemed intimidating turned into the most rewarding cooking experience when I saw their faces light up at the first bite. Today, I’m sharing my foolproof method for creating this centerpiece that looks impressive but requires surprisingly little hands-on work. The slow-roasting technique creates the most tender, flavorful prime rib you’ve ever tasted, guaranteed to make any gathering feel special.

    Easy Slow-Roasted Prime Rib Recipe | Perfect Tender & Juicy Roast

    Recipe

    Why You’ll Love This Easy Slow-Roasted Prime Rib

    Perfect for Special Occasions

    There’s something undeniably impressive about presenting a beautifully roasted prime rib at the center of your table. This recipe shines during holiday gatherings and special celebrations when you want to create memories around food. The beauty of slow-roasting is that it transforms even moderately-priced cuts into something extraordinary. I love how this method allows me to prepare most of the work ahead of time, so I can actually enjoy my guests instead of being trapped in the kitchen. The gorgeous presentation—that moment when you slice into the roast revealing the perfect doneness—creates an instant wow factor that elevates any occasion from ordinary to unforgettable.

    Surprisingly Simple Technique

    Don’t let the impressive results fool you—this recipe is remarkably straightforward to execute. Unlike many showstopper dishes that require culinary school skills, slow-roasting prime rib is mostly about patience rather than technique. The method relies on a low, consistent temperature that gently brings the meat to perfection while you’re free to focus on other things. I was honestly shocked at how forgiving this cooking method is, especially for someone who used to panic about overcooking expensive cuts. The long, gentle cook creates a wide window of doneness, meaning you don’t need split-second timing to achieve excellent results. Even first-timers can nail this recipe with the right guidance.

    Essential Tips & Tricks

    Choosing and Preparing Your Roast

    Selecting the right cut is your first step toward prime rib perfection. Look for a well-marbled roast with the bones still attached—this provides better flavor and more even cooking. Ask your butcher for a cut from the “first cut” or the loin end for the tenderest meat. Before cooking, let your roast sit at room temperature for about 2 hours. This crucial step ensures even cooking from edge to center. I always pat my roast completely dry with paper towels before seasoning, which helps create that gorgeous exterior crust we’re after. For seasoning, keep it classic with a generous coating of kosher salt, freshly ground black pepper, and garlic. The slow roast will intensify these flavors beautifully.

    Temperature Control is Everything

    The secret to perfect prime rib lies in precise temperature management. Invest in a good digital meat thermometer with a probe you can leave in while cooking—this single tool has transformed my roasting results. Start with a hot oven (450°F) for the first 15 minutes to develop a flavorful crust, then reduce to a low 250°F for the remainder of cooking. This gentle heat prevents the dreaded gray ring of overcooked meat around the edges. For medium-rare perfection, remove the roast when the internal temperature reaches 120-125°F, as it will continue cooking during rest. If you’re making sides like Cauliflower Cheese Gratin, this resting period gives you the perfect window to finish them in the oven.

    Serving Ideas & Creative Variations

    Classic Accompaniments

    The beauty of prime rib lies in its rich, beefy flavor that pairs wonderfully with both simple and elaborate sides. Traditional horseradish cream sauce provides the perfect peppery counterpoint to the rich meat—just mix prepared horseradish with sour cream, a touch of Dijon, and lemon juice. For sides, I love serving Yorkshire puddings that capture the flavorful drippings, along with roasted potatoes crisped in some of that rendered beef fat. A bright, acidic element like a simple arugula salad with lemon vinaigrette helps cut through the richness. Don’t forget about au jus—those natural cooking juices, lightly seasoned and strained, create a light sauce that enhances rather than masks the meat’s natural flavors.

    Unexpected Flavor Directions

    While traditional preparations are timeless, I love experimenting with different flavor profiles for my prime rib. Try a herb-forward crust using rosemary, thyme, and sage mixed with olive oil and applied before roasting—it creates an aromatic experience that’s especially lovely for winter gatherings. For something unexpected, consider a coffee and brown sugar rub that creates a deep, complex crust with subtle sweetness. You could also explore international flavors like a gremolata topping (lemon zest, parsley, and garlic) served over the sliced meat for a bright Italian twist. For a complete meal experience, pair your prime rib with Slow Cooker Sweet Potato Casserole for a sweet counterpoint to the savory meat.

    Easy Slow-Roasted Prime Rib Recipe | Perfect Tender & Juicy Roast

    Storage & Troubleshooting Guide

    Making the Most of Leftovers

    Prime rib leftovers are a luxury that deserve special treatment. Store any uneaten roast in an airtight container in the refrigerator for up to 4 days. The key to maintaining quality is proper reheating—avoid the microwave which will continue cooking the meat. Instead, slice the cold beef thinly and warm it gently in beef broth just until heated through. Leftover prime rib makes incredible sandwiches on crusty bread with horseradish sauce and arugula. You can also transform it into luxurious hash with potatoes and onions for breakfast, or slice it paper-thin for quick beef stroganoff. Don’t discard the bones—they make exceptional stock that can be the foundation for French onion soup or risotto.

    Solving Common Problems

    Even with the most careful preparation, challenges can arise. If your prime rib develops a dark crust too quickly, tent it loosely with foil to prevent burning while allowing continued cooking. For undercooked sections (particularly near the bone), you can slice those portions and briefly sear them in a hot pan—much better than returning the entire roast to the oven. If your roast seems tough, it’s likely undercooked rather than overcooked, as prime rib gets more tender as it reaches medium-rare. Temperature variations in your oven can affect cooking times significantly, so always rely on your meat thermometer rather than just time. Remember that different ovens can vary by as much as 50 degrees from their stated temperature.

    Frequently Asked Questions

    How much prime rib should I buy per person?

    Plan for about ¾ pound per person for bone-in prime rib (or ½ pound for boneless). This accounts for shrinkage during cooking and provides for some leftovers, which are always appreciated!

    Can I prepare Easy Slow-Roasted Prime Rib in advance?

    You can season the roast up to 24 hours ahead and refrigerate uncovered. Let it come to room temperature for 2 hours before roasting for the best results.

    What’s the difference between prime rib and ribeye?

    Prime rib is a larger cut that includes the ribeye muscle and bone, roasted whole. Ribeye is a steak cut from the same muscle area but without bones, typically cooked individually.

    How long should prime rib rest after cooking?

    Allow at least 20-30 minutes of resting time under loose foil. For larger roasts (5+ pounds), extend this to 30-45 minutes for optimal juice redistribution.

    What wine pairs best with prime rib?

    Bold reds with good structure complement prime rib beautifully. Try Cabernet Sauvignon, Malbec, or Syrah for their ability to stand up to the rich, beefy flavors.

    Final Thoughts

    Creating an Easy Slow-Roasted Prime Rib might seem like a culinary mountain to climb, but I hope I’ve shown you that it’s actually quite approachable. There’s something deeply satisfying about mastering this classic centerpiece—watching your guests’ eyes widen as you present it, then seeing them savor each bite in appreciative silence.

    The beauty of this dish lies in its simplicity: quality ingredients, proper seasoning, and patient cooking. Whether for a holiday gathering or simply to elevate a weekend dinner, this recipe delivers restaurant-quality results in your own kitchen. I encourage you to try it just once, and I suspect it will become part of your special occasion repertoire for years to come. For more holiday inspiration, check out my Pinterest collection of celebration-worthy recipes.

  • Slow Cooker Texas-Style Chili Recipe | Easy & Authentic Chili Cooking Guide

    Slow Cooker Texas-Style Chili Recipe | Easy & Authentic Chili Cooking Guide

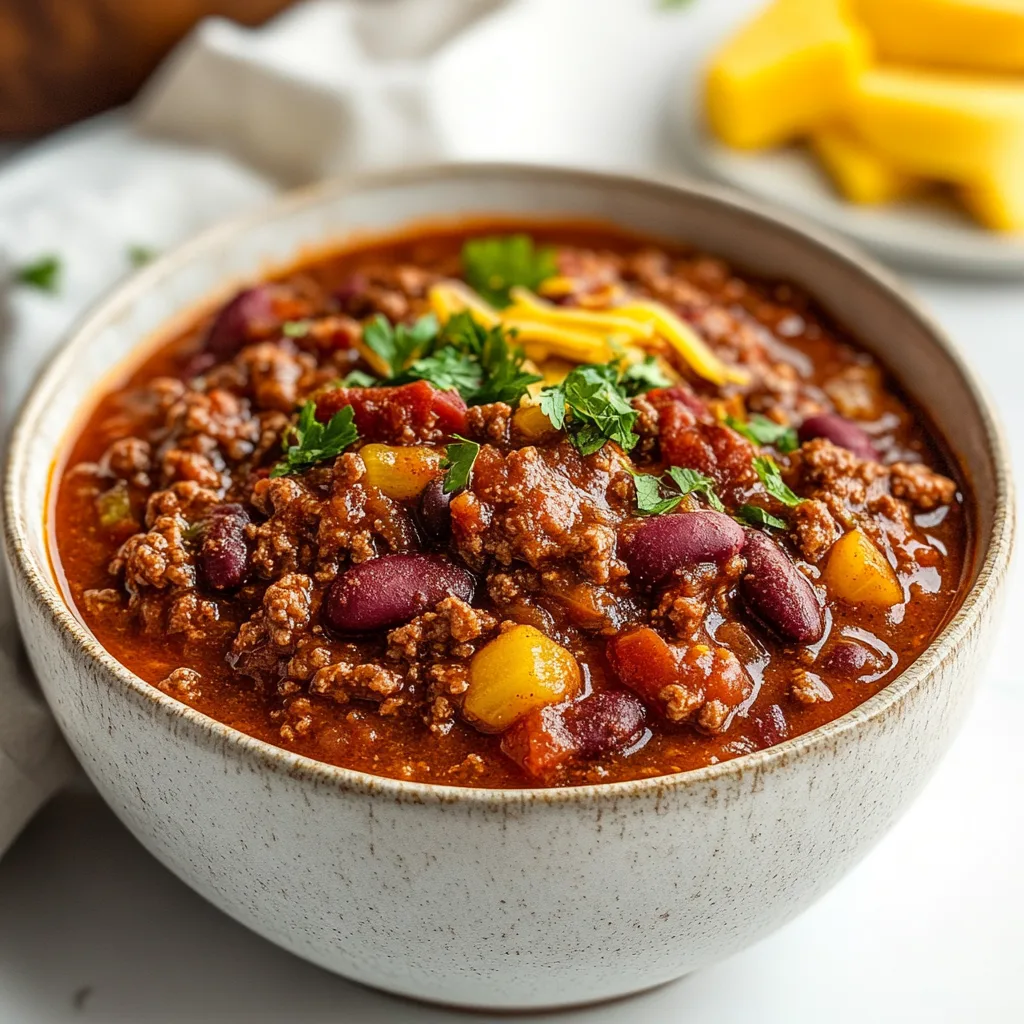
    There’s something magical about walking through the door after a long day to the rich, spicy aroma of Slow Cooker Texas-Style Chili simmering away. I’ve been perfecting this recipe for years, and it’s become my family’s most requested comfort food when temperatures drop. The beauty lies in its simplicity—just toss everything in your slow cooker, set it, and forget it until dinner time.

    Unlike some chili recipes that rely on beans for bulk, authentic Texas-style chili celebrates bold beef flavor and a complex blend of spices that develop into something truly extraordinary over hours of gentle cooking. If you’re looking for a hands-off meal that delivers maximum flavor, this hearty slow cooker recipe is about to become your new favorite.

    Slow Cooker Texas-Style Chili Recipe | Easy & Authentic Chili Cooking Guide

    Recipe

    Why You’ll Love This Slow Cooker Texas-Style Chili

    Perfect Balance of Flavors and Textures

    This isn’t just any chili—it’s a carefully crafted symphony of flavors that dance on your tongue with each spoonful. The chuck roast breaks down into tender, melt-in-your-mouth morsels after its long simmer, absorbing all those gorgeous spices. I’ve found the perfect balance between smoky, spicy, and rich—using a blend of ancho, chipotle, and regular chili powders alongside cumin and a hint of cinnamon. What makes this truly special is the unexpected depth from a splash of strong coffee and a square of dark chocolate stirred in during the final hour. These secret ingredients don’t make it taste like mocha; they add mysterious richness that makes guests wonder what your secret is.

    Authentic Texas Technique with Modern Convenience

    True Texas chili purists will tell you “no beans allowed,” and this recipe honors that tradition while making it weeknight-friendly. I’ve stayed true to the authentic Texas technique of focusing on meat and spices, but adapted it for our busy modern lives. Instead of standing over a pot for hours, your slow cooker does all the work. The key is taking just 10 minutes at the beginning to brown your meat in batches—this simple step creates those wonderful caramelized flavors that make all the difference.

    I love that I can prep this before work and come home to dinner that tastes like I’ve been cooking all day. The slow, gentle heat breaks down tough collagen in the beef, resulting in that silky, rich texture that’s impossible to achieve with quick-cooking methods.

    Essential Tips & Tricks

    Choosing and Preparing Your Meat

    The foundation of exceptional Texas-style chili begins with the right cut of beef. I strongly recommend using chuck roast rather than ground beef—it has the perfect fat content and connective tissue that transforms into something magical during slow cooking. Cut it into 1-inch cubes (not smaller!) for the perfect texture.

    Take the extra five minutes to brown your meat in batches before adding it to the slow cooker; this creates the Maillard reaction that adds incredible depth. A tip I learned from my Texan friend Maria: pat the meat completely dry with paper towels before browning and season it generously with salt and pepper. This ensures beautiful caramelization instead of steaming. For an extra layer of smokiness, try substituting a portion of the beef with smoked brisket like they do in this amazing slow cooker beef ragu.

    Mastering the Chili Paste

    The heart and soul of Texas chili is its complex spice blend, and creating a proper chili paste (instead of just sprinkling in powder) makes all the difference. Toast your dried chiles and spices in a dry skillet for 30-60 seconds until fragrant—this wakes up their essential oils. Then blend them with a bit of beef broth to create a smooth paste before adding to your slow cooker.

    This technique distributes the flavors more evenly throughout the dish. My secret weapon? A tablespoon of tomato paste added to the paste mixture and briefly caramelized in the same pan you browned the meat in. This adds a subtle sweetness that balances the heat. For heat control, remove the seeds from your dried chiles for milder flavor, or leave some in if you prefer more kick. Remember that spices bloom and intensify during long cooking, so it’s better to start conservative.

    Serving Ideas & Creative Variations

    Classic Garnishes with a Twist

    The beauty of this Slow Cooker Texas-Style Chili lies in its versatility when serving. While purists might enjoy it simply in a bowl with nothing more than a spoon, I love setting up a toppings bar that lets everyone customize their experience. Shredded sharp cheddar, diced white onions, sliced jalapeños, and fresh cilantro are classics for good reason. But try some unexpected additions: crispy fried shallots add amazing texture, a dollop of Mexican crema brings cooling richness, or pickled red onions contribute bright acidity that cuts through the richness.

    My personal favorite is adding a few slices of avocado and a squeeze of lime—the creamy, citrusy notes perfectly complement the deep flavors of the chili. For an extra indulgent touch, serve it over a small square of warm cornbread in the bottom of the bowl.

    Beyond the Bowl: Creative Serving Ideas

    Don’t limit this magnificent chili to just bowls! Once you’ve mastered the basic recipe, it becomes an incredibly versatile base for other meals. Transform it into epic loaded chili fries by pouring it over crispy baked potatoes or sweet potato wedges. Use it as a topping for baked potatoes with all the fixings for a complete meal. One of my family’s favorites is chili-stuffed poblano peppers—simply roast halved peppers, fill with chili, top with cheese and broil until bubbly.

    For game day, nothing beats chili cheese nachos with this authentic Texas version as the star. The leftovers actually improve overnight as flavors meld, making this perfect for meal prep. I often make a double batch specifically to freeze in individual portions for quick weeknight meals when time is tight.

    Slow Cooker Texas-Style Chili Recipe | Easy & Authentic Chili Cooking Guide
    Hearty and flavorful Slow Cooker Texas-Style Chili made with tender beef, bold spices, and rich tomato sauce, perfect for an easy, comforting meal.

    Storage & Troubleshooting Guide

    Proper Storage for Maximum Flavor

    Like many slow-simmered dishes, this Slow Cooker Texas-Style Chili actually tastes even better the next day after the flavors have had time to meld. Store leftovers in airtight containers in the refrigerator for up to 4 days—I prefer glass containers as they won’t absorb the chili’s color or flavors. For freezing, allow the chili to cool completely before portioning into freezer-safe containers or heavy-duty freezer bags. Leave a little headspace for expansion and squeeze out excess air.

    Label with the date and contents (trust me on this—all frozen chilis look alike after a month!). Frozen chili maintains its quality for about 3 months. When reheating, I find adding a splash of beef broth helps refresh the texture, and a pinch of fresh spices can brighten the flavors that may have mellowed during storage.

    Troubleshooting Common Issues

    Even experienced cooks occasionally encounter challenges with slow cooker recipes. If your chili turns out too thin, there’s an easy fix: remove the lid during the final 30-60 minutes of cooking to allow excess liquid to evaporate. Alternatively, make a quick slurry by mixing 1 tablespoon of cornstarch with 2 tablespoons of cold water and stir it into the hot chili. For chili that’s too thick, simply add beef broth a quarter cup at a time until you reach your desired consistency.

    If you find the flavor isn’t as deep as you’d like, try adding a teaspoon of fish sauce or Worcestershire sauce—these umami boosters work wonders without adding fishy or sweet flavors. And if you accidentally over-spiced? Don’t panic! A tablespoon of honey or brown sugar can help balance excessive heat, as can serving with cooling toppings like sour cream or avocado.

    Frequently Asked Questions

    Is authentic Texas-style chili really made without beans?

    Yes! Traditional Slow Cooker Texas-Style Chili (also called “bowl of red”) contains no beans or tomatoes. It focuses on beef and chiles, though modern adaptations sometimes include small amounts of tomato products for acidity and depth.

    Can I make this recipe in an Instant Pot instead?

    Absolutely. Brown the meat using the sauté function, then pressure cook on high for 35 minutes with natural release. The flavor won’t be quite as developed as slow cooking, but it’s still delicious.

    What’s the best cut of meat for Texas chili?

    Chuck roast is ideal because it has the perfect amount of fat and connective tissue that breaks down during slow cooking. Cut it into 1-inch cubes for the best texture.

    Can I prep this the night before cooking?

    Yes! Brown the meat, prepare the chili paste, and refrigerate both separately overnight. In the morning, combine everything in your slow cooker and start cooking.

    How can I adjust the spice level?

    Control heat by adjusting the amount of cayenne pepper and keeping or removing seeds from dried chiles. Start with less—you can always add more heat later with hot sauce.

    Final Thoughts

    This Slow Cooker Texas-Style Chili has become my signature dish for good reason. It’s the perfect blend of authentic flavor and modern convenience—rich, complex, and deeply satisfying without requiring constant attention. I love that it works equally well for casual family dinners and special gatherings where I want to impress without being trapped in the kitchen. The way it fills your home with mouthwatering aromas is almost as rewarding as that first spoonful.

    Whether you’re a chili purist or new to Texas-style cooking, this recipe offers both tradition and flexibility. Make it once, and I promise it will earn a permanent place in your comfort food rotation. For more cozy slow cooker recipes, be sure to check out my Pinterest collection where I share all my favorite comfort foods.

  • Slow Cooker Beef Ragu with Pappardelle | Easy Hearty Italian Pasta Recipe

    Slow Cooker Beef Ragu with Pappardelle | Easy Hearty Italian Pasta Recipe

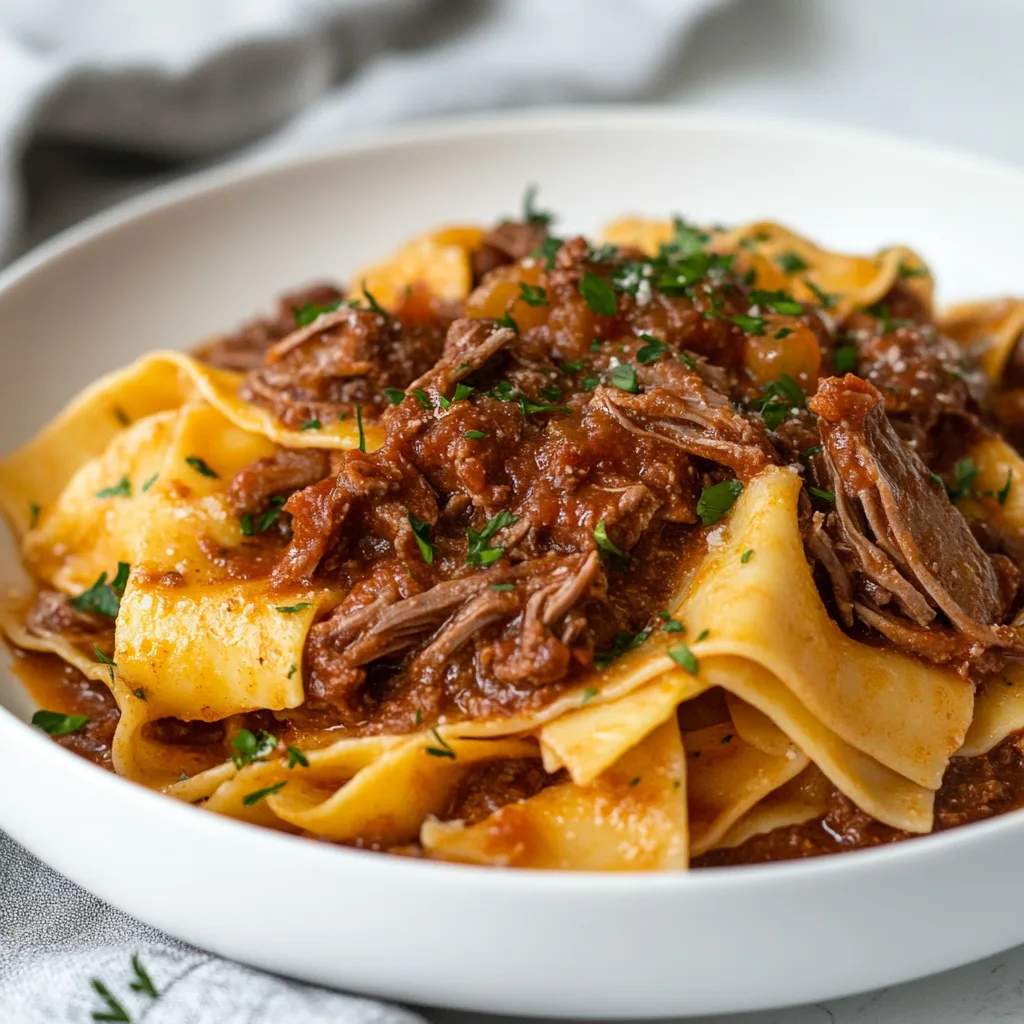
    There’s something magical about walking into a home filled with the rich aroma of Slow Cooker Beef Ragu with Pappardelle that’s been simmering all day. I discovered this recipe during a particularly cold winter when I craved something that would warm both my kitchen and soul. The tender beef falling apart with the slightest touch, the deep tomato sauce infused with herbs, and the wide pappardelle noodles that cradle every bit of that delicious sauce – it’s the ultimate comfort food that requires minimal effort but delivers maximum flavor. If you’re looking for a meal that practically makes itself while filling your home with mouthwatering aromas, this slow cooker recipe is about to become your new favorite.

    Slow Cooker Beef Ragu with Pappardelle | Easy Hearty Italian Pasta Recipe

    Recipe

    Why You’ll Love This Slow Cooker Beef Ragu with Pappardelle

    Perfect for Busy Days

    This beef ragu is my go-to recipe when life gets hectic but I still want to serve something that tastes like I’ve been cooking all day. The beauty lies in its set-it-and-forget-it nature – just 15 minutes of morning prep yields a restaurant-quality dinner. I remember frantically assembling this on a Wednesday morning before a day full of meetings, and coming home to what smelled like I had a personal chef. The slow cooker transforms tough beef cuts into melt-in-your-mouth tenderness while you’re away, breaking down the connective tissues and infusing the meat with the rich flavors of wine, tomatoes, and herbs. It’s truly kitchen magic at its finest.

    Budget-Friendly Elegance

    One of the things I adore about this recipe is how it transforms inexpensive cuts of beef into something that feels utterly luxurious. Chuck roast or beef brisket – cuts that would be tough if quickly cooked – become velvety and tender after hours in the slow cooker. I once made this for a dinner party and my guests were convinced I’d splurged on prime cuts! The slow cooking process extracts deep flavor from affordable ingredients, making this ragu perfect for feeding a crowd without breaking the bank. Plus, it’s one of those meals that actually tastes better the next day, making it perfect for meal prep and stretching your grocery budget even further.

    Essential Tips & Tricks

    The Perfect Sear

    Don’t skip browning the meat – this 5-minute step creates the rich foundation that makes this ragu extraordinary. I learned this the hard way after once rushing and skipping this step, and while the result was still good, it lacked that deep, complex flavor. Heat your pan until it’s smoking hot, then sear the seasoned beef chunks in batches until they develop a dark brown crust. This caramelization creates the Maillard reaction – the scientific process that develops hundreds of flavor compounds. After searing, deglaze the pan with a splash of wine to capture every bit of those browned bits (what chefs call fond) – they’re concentrated flavor bombs that will elevate your sauce from good to unforgettable.

    Layering Aromatics

    The secret to restaurant-quality depth in this ragu lies in properly layering aromatics. Start by sautéing onions until translucent, then add garlic just until fragrant (about 30 seconds) to prevent bitterness from overcooked garlic. I like to add a finely diced carrot and celery stalk too – they practically melt away during cooking while adding subtle sweetness.

    A game-changing trick I learned from an Italian grandmother is to add a parmesan rind to the slow cooker – it imparts an incredible umami richness without overwhelming the sauce. For an elevated finish, try adding fresh herbs in two stages: woody herbs like rosemary and thyme go in at the beginning, while delicate herbs like basil or parsley should be stirred in just before serving, like in this creamy butternut squash and sage gratin.

    Serving Ideas & Creative Variations

    Perfect Pasta Pairings

    While traditional pappardelle is the classic choice for beef ragu, don’t feel limited if you can’t find it. The key is choosing pasta with nooks and ridges to capture the sauce. Tagliatelle, fettuccine, or even rigatoni work beautifully. I’ve even served it over creamy polenta on particularly cold nights for the ultimate comfort meal. The crucial technique is to finish cooking your pasta directly in the sauce – reserve about ½ cup of starchy pasta water, then add your al dente pasta to the ragu and toss for 1-2 minutes.

    This allows the pasta to absorb the flavors while the starchy water helps the sauce cling to every strand. A final sprinkle of fresh parsley and grated Parmesan brings brightness and sharpness that cuts through the richness.

    Slow Cooker Beef Ragu with Pappardelle | Easy Hearty Italian Pasta Recipe

    Global Flavor Twists

    While this classic Italian-inspired ragu is perfect as-is, I love experimenting with different flavor profiles. For a Spanish twist, add smoked paprika, a pinch of saffron, and substitute sherry for the wine. A Greek variation with oregano, cinnamon, and a touch of orange zest creates an entirely different experience with the same basic technique.

    My personal favorite variation came about when I was out of wine but had leftover coffee in the pot – the depth it added was remarkable! You could even take inspiration from slow cooker Korean BBQ beef by adding gochujang, soy sauce, and a touch of honey for a fusion version. The slow cooker method works beautifully with these variations, allowing the flavors to meld and develop complexity.

    Storage & Troubleshooting Guide

    Freezing & Reheating

    This ragu is perfect for batch cooking since it freezes beautifully for up to 3 months. I always make a double batch and freeze half in portion-sized containers for emergency dinners. The key to successful freezing is cooling the ragu completely before transferring to freezer-safe containers, leaving about an inch of headspace for expansion. For best flavor, thaw overnight in the refrigerator rather than using the microwave defrost function. When reheating, add a splash of beef broth or water if the sauce has thickened too much. I find the flavor actually improves after freezing – something about the time allows the ingredients to meld even more beautifully, making this perfect for meal prep or preparing for future dinner parties.

    Fixing Common Issues

    If your ragu seems too thin after cooking, there’s an easy fix: remove the lid for the last 30-60 minutes of cooking time to allow excess liquid to evaporate. Alternatively, you can create a slurry with 1 tablespoon each of cornstarch and cold water, then stir it into the hot ragu and cook for an additional 15 minutes. For ragu that’s too thick, simply add beef stock, tomato sauce, or even a splash of red wine to reach your desired consistency.

    If you find the flavor needs more depth, try adding a teaspoon of umami boosters like Worcestershire sauce, soy sauce, or anchovy paste – these ingredients won’t make the dish taste like their source, but will add that elusive depth that makes restaurant dishes so satisfying.

    Frequently Asked Questions

    Can I make Slow Cooker Beef Ragu with Pappardelle in an Instant Pot?

    Yes! Brown the meat using the sauté function, then pressure cook for 45 minutes with natural release. The flavor won’t be quite as developed as the slow-cooked version, but it’s delicious for last-minute dinners.

    What’s the best cut of beef for ragu?

    Chuck roast is ideal because it has the perfect fat-to-meat ratio that becomes tender and juicy when slow-cooked. Beef brisket, short ribs, or stewing beef are excellent alternatives.

    Can I make this recipe ahead of time?

    Absolutely! The flavor actually improves after 1-2 days in the refrigerator. Store the ragu separate from pasta and reheat gently on the stovetop with a splash of broth if needed.

    Is this recipe gluten-free?

    The ragu itself is gluten-free, but traditional pappardelle contains gluten. Serve with gluten-free pasta or polenta for a completely gluten-free meal.

    Can I add vegetables to make it healthier?

    Definitely! Finely diced carrots, celery, and mushrooms blend seamlessly into the sauce. Add diced bell peppers or zucchini during the last hour of cooking for more texture.

    Final Thoughts

    There’s something profoundly satisfying about creating a Slow Cooker Beef Ragu with Pappardelle that tastes like it came from an Italian grandmother’s kitchen with just minutes of active cooking time. I’ve made this recipe countless times, tweaking it slightly each round, and it never fails to bring comfort and joy to my table. The combination of tender beef, rich sauce, and perfectly cooked pasta creates a meal that feels like a warm hug on a plate. Whether you’re cooking for family, entertaining guests, or simply treating yourself, this dish delivers restaurant-quality results with minimal effort. For more cozy comfort food recipes, check out my collection on Pinterest where I’m always adding new slow cooker favorites.

  • Delicious Smoked Salmon Bagels Recipe | Easy & Healthy Breakfast Idea

    Delicious Smoked Salmon Bagels Recipe | Easy & Healthy Breakfast Idea

    There’s something magical about Smoked Salmon Bagels that transforms an ordinary breakfast into something extraordinary. The velvety texture of cream cheese against the delicate smokiness of the salmon creates a symphony of flavors that never fails to make my taste buds dance. I discovered this perfect pairing during a rainy Sunday morning in Seattle, where the misty air seemed to enhance every bite. The beauty of these bagels lies in their simplicity—just a few quality ingredients coming together to create something truly special. Whether you’re hosting brunch or treating yourself to a luxurious breakfast, these smoked salmon bagels deliver restaurant-quality flavor with minimal effort.

    Delicious Smoked Salmon Bagels Recipe | Easy & Healthy Breakfast Idea

    Recipe

    Why You’ll Love This Smoked Salmon Bagels

    Perfect Balance of Flavors and Textures

    The magic of smoked salmon bagels lies in the contrasting elements that somehow create perfect harmony. The chewy bagel provides the ideal foundation for the creamy spread and buttery salmon. I love how the tanginess of cream cheese cuts through the rich smokiness of the salmon, while capers add little bursts of briny goodness that wake up your palate. The first time I served these at a family gathering, my brother-in-law (who claims to dislike seafood) couldn’t stop reaching for seconds. That’s the transformative power of perfectly balanced flavors—they can convert even the most stubborn taste preferences!

    Quick and Impressive Breakfast Option

    On busy mornings when I need something substantial yet quick, smoked salmon bagels are my go-to solution. The entire assembly takes less than 5 minutes but delivers a breakfast that feels luxurious and intentional. I keep quality smoked salmon in my refrigerator specifically for those mornings when I need to feel put-together without the fuss. The visual appeal alone—those gorgeous pink ribbons of salmon against the white cream cheese—makes this simple breakfast feel like a special occasion. And when unexpected guests arrive, I can quickly transform basic ingredients into an impressive spread that makes everyone feel pampered.

    Essential Tips & Tricks

    Selecting Quality Ingredients

    The secret to exceptional smoked salmon bagels starts with choosing premium ingredients. For the salmon, look for deep coral-pink color and avoid pieces with dry edges or excessive white lines (which indicate higher fat content). I prefer cold-smoked salmon for its buttery texture and delicate flavor that doesn’t overpower the other components. For bagels, freshness is key—slightly toasted to enhance the exterior crunch while maintaining a chewy interior. The cream cheese should be full-fat and at room temperature for easy spreading. I learned this the hard way after tearing countless bagels with refrigerator-cold cream cheese! For more breakfast inspiration, check out my spinach and feta egg casserole for another protein-packed option.

    Proper Assembly Technique

    The layering sequence makes a significant difference in both flavor distribution and structural integrity. Start by toasting your bagel just until it’s warm and slightly crisp—never until it’s hard. Spread cream cheese generously but evenly on both halves, creating a protective barrier that prevents the bagel from becoming soggy. Layer the salmon in loose folds rather than flat pieces to create pockets that catch other ingredients. I arrange thin slices of cucumber, red onion, and capers strategically between salmon folds for balanced flavor in every bite. For special occasions, I add a light sprinkle of fresh dill and a squeeze of lemon just before serving for brightness that elevates the entire experience.

    Serving Ideas & Creative Variations

    Elegant Brunch Presentations

    Transform simple smoked salmon bagels into an impressive spread by creating a DIY bagel bar. I arrange various bagel flavors (plain, everything, sesame) on a wooden board surrounded by small bowls of toppings—capers, diced red onion, sliced cucumber, lemon wedges, and fresh herbs. For special touches, include flavored cream cheeses like chive or dill alongside the traditional plain. The interactive nature of this presentation encourages conversation and customization. For holiday brunches, I add festive elements like pomegranate seeds and microgreens for color. This pairs beautifully with my holiday red green veggie strata for a complete brunch experience that balances rich and fresh flavors.

    Delicious Smoked Salmon Bagels Recipe | Easy & Healthy Breakfast Idea

    Unexpected Flavor Combinations

    While traditional toppings are delicious, experimental pairings can elevate your smoked salmon bagels to new heights. Try swapping regular cream cheese for whipped goat cheese with honey for a sweet-savory contrast that complements the salmon beautifully. Add thinly sliced green apple for unexpected crunch and tartness. My personal favorite discovery was adding a light spread of fig jam beneath the cream cheese—the subtle sweetness creates a magnificent counterpoint to the salty salmon. For heat lovers, mix horseradish into the cream cheese or add paper-thin jalapeño slices. These creative variations maintain the essence of the classic while introducing exciting new flavor dimensions.

    Storage & Troubleshooting Guide

    Keeping Ingredients Fresh

    Proper storage techniques ensure your smoked salmon bagel ingredients maintain optimal flavor and texture. Store unopened smoked salmon in the coldest part of your refrigerator (usually the back) where it will keep for up to two weeks. Once opened, wrap tightly in plastic and consume within three days. I place a paper towel in with my fresh herbs to absorb excess moisture, extending their life significantly. For bagels, avoid refrigeration as it accelerates staleness—instead, keep them in a paper bag at room temperature for 1-2 days or freeze for longer storage. When freezing bagels, slice them first so you can pop them directly into the toaster without thawing.

    Fixing Common Problems

    Even the most experienced cooks encounter bagel assembly challenges. If your cream cheese is tearing the bagel, let it warm to room temperature for 15 minutes before spreading. For soggy bagels, toast them slightly longer and apply cream cheese immediately after toasting to create a moisture barrier. If your salmon tastes too salty, soak thin slices in cold water for 10 minutes before patting dry. When dealing with overly chewy bagels, sprinkle them with water before reheating in a 350°F oven for 5 minutes. I once saved a brunch by microwaving stale bagels for 10 seconds before toasting—they regained their perfect texture and nobody suspected they were a day old!

    Frequently Asked Questions

    What’s the best type of bagel for smoked salmon?

    Everything bagels provide the perfect flavor foundation with their savory seed mix. However, plain or sesame bagels let the salmon shine as the star. For a twist, try pumpernickel or onion bagels for deeper flavor complexity.

    How much smoked salmon should I buy per person?

    Plan for 2-3 ounces of smoked salmon per person for a main course serving. For appetizers or as part of a larger brunch spread, 1-1.5 ounces per person is sufficient.

    Can I prepare smoked salmon bagels ahead of time?

    Prepare components separately but assemble just before serving. Pre-assembled smoked salmon bagels become soggy quickly. For parties, create a DIY bagel bar instead of pre-assembling.

    What’s the difference between lox and smoked salmon?

    Lox is salt-cured but not smoked, giving it a saltier, more delicate flavor. Smoked salmon is cured then cold-smoked, resulting in a more complex, smoky flavor profile with firmer texture.

    How do I know if smoked salmon has gone bad?

    Fresh smoked salmon should have a pleasant smell and moist appearance. If it develops a strong fishy odor, slimy texture, or dull color, it’s past its prime and should be discarded.

    Final Thoughts

    Smoked Salmon Bagels represent the perfect intersection of simplicity and luxury—an everyday indulgence that feels special without requiring culinary expertise. The key lies in quality ingredients, thoughtful assembly, and the willingness to experiment with flavors that speak to your personal taste. I find myself returning to this recipe whenever I need a moment of culinary joy in my day. Whether you’re preparing a quick breakfast for yourself or hosting an elaborate weekend brunch, these bagels deliver satisfaction and elegance in equal measure. For more inspiration, browse my collection on Pinterest where I’m constantly adding new flavor combinations and presentation ideas.

  • Sausage Breakfast Casserole – Cozy, Irresistibly Easy

    Sausage Breakfast Casserole – Cozy, Irresistibly Easy

    Sausage Breakfast Casserole saved my Saturday. I, Darleen Vance, dropped the pepper mill into the egg bowl while the dog taste-tested a rogue crouton. I whisked, laughed, and baked anyway. The golden, bubbling Sausage Breakfast Casserole came out fragrant with cheddar and spice, and the chaos turned into quiet bites and happy faces at the table. It’s that kind of dish—reliable comfort, even when your kitchen stars don’t align. If you love make-ahead magic and melty cheese, this one is for you.

    Sausage Breakfast Casserole

    Recipe

    Why You’ll Love This Sausage Breakfast Casserole

    What Makes This Sausage Breakfast Casserole So Irresistible

    I once filmed a quick video of this Sausage Breakfast Casserole for my sister and, of course, spilled cheese down the oven door. Worth it. Sausage Breakfast Casserole is the dependable, homemade hero that turns a sleepy morning into an easy dinner vibe or the coziest brunch. The comfort food factor is sky-high, and the one-pan meal cleanup is tiny. When you want a Sausage Breakfast Casserole that satisfies without fuss, this is it—simple, hearty, and completely crowd-approved.

    • Quick prep: simple whisk-and-bake process that’s an easy recipe even on busy days.
    • Make-ahead friendly: assemble the night before; bake fresh in the morning.
    • Flexible base: use bread or hash browns for a homemade version that fits your pantry.
    • Family-friendly comfort food: savory sausage, melty cheddar, soft custard-like center.
    • One-pan meal: minimal mess, maximum flavor.

    Whether you serve this Sausage Breakfast Casserole for brunch, meal prep, or breakfast-for-dinner, it’s all cozy flavor and zero stress. Ready to bake?

    Between busy mornings and weekends packed with guests, Sausage Breakfast Casserole is trending because it solves the “what’s for breakfast” question fast. It’s a reliable, easy dinner stand-in and a social-media-friendly bake that looks gorgeous, slices cleanly, and tastes like home. Serve it alongside something sweet like my Panettone French Toast for a dreamy brunch spread or pair it with a bright veg side such as Green Beans with Garlic and Almonds. This is comfort food built for sharing.

    Tips, Tricks & Expert Secrets for Sausage Breakfast Casserole

    Chef Tips for Perfect Sausage Breakfast Casserole Every Time

    In my first cooking class, I learned the magic of resting time—and my Sausage Breakfast Casserole never rushed again. A tiny pause leads to a clean slice and a custardy center. This cooking tip alone can transform your easy recipe into a pro-level, homemade version.

    • Toast your bread: lightly toast cubes in a 350°F oven for 8–10 minutes so they absorb the custard without going soggy.
    • Season the custard: whisk Dijon and a pinch of smoked paprika into the eggs for depth and quick fix savoriness.
    • Rest before slicing: let the Sausage Breakfast Casserole stand 5–10 minutes after baking to set the texture.
    • Cheese strategy: fold most into the casserole for meltiness and keep a bit for a golden, bubbly top.

    Smart Ingredient Swaps & Practical Cooking Advice

    • Gluten-free: swap the bread for 20–24 oz shredded hash browns (no need to toast). Reduce milk by 1/4 cup to maintain structure.
    • Lighter option: use turkey sausage and 1% milk; add 1 extra egg for stability and protein.
    • Vegetarian: replace sausage with sautéed mushrooms + spinach and a dash of soy sauce for umami.
    • What not to do: don’t overmix once the bread is added—gentle folding keeps the Sausage Breakfast Casserole tender, not dense.

    With these practical tweaks, you’ll get repeatable, delicious results every time you bake a Sausage Breakfast Casserole—weekday-fast, weekend-special.

    Serving Ideas & Creative Variations

    How to Serve Sausage Breakfast Casserole for Maximum Enjoyment

    When friends drop by, I plate Sausage Breakfast Casserole in neat squares, drizzle a little hot honey, and add a crisp salad—simple, bright, and inviting. For serving ideas, think balance: fatty, salty, and creamy need something fresh or sweet. Pair it with a citrusy fruit salad, a tangy salsa, or garlicky greens. A carafe of coffee and a pitcher of orange juice never hurt either.

    • Pairings: garlicky green beans, fresh arugula salad, or roasted tomatoes.
    • Drizzles: hot sauce, chive sour cream, or a spoon of salsa verde.
    • Beverages: strong coffee, cold brew, or a light brunch spritz.

    For guests who love a variety, round out your table with my festive Holiday Red & Green Veggie Strata or the playful Wreath Crescent Roll Breakfast Ring. They complement the savory richness of Sausage Breakfast Casserole and make plating suggestions easy and colorful for photos.

    Make-Ahead Breakfast Casserole – Warm & Delicious

    Flavor Twists and Seasonal Variations

    • Southwest: add green chiles, pepper jack, and cilantro; serve with avocado and pico.
    • Autumn Harvest: fold in diced roasted butternut and sage with sharp white cheddar.
    • Italian-Style: swap in Italian sausage, mozzarella, and sun-dried tomatoes; finish with basil.

    These flavor variations keep your Sausage Breakfast Casserole fresh through every season. For more cozy sides, try my winter-friendly Creamy Butternut Squash and Sage Gratin—a seasonal twist that loves brunch.

    Storage & Troubleshooting Guide

    How to Store and Reheat Sausage Breakfast Casserole

    Leftovers are my weekday breakfast gold. I portion Sausage Breakfast Casserole into squares, wrap them snugly, and stash them for quick reheat wins. This storage advice keeps every bite tasting fresh.

    • Room temp: keep Sausage Breakfast Casserole out no longer than 2 hours.
    • Fridge: store airtight for 3–4 days; glass containers help maintain texture.
    • Freezer: wrap slices tightly and freeze up to 2 months; thaw overnight in the fridge.
    • Reheat: oven at 325°F for 12–15 minutes (best texture); air fryer at 300°F for 6–8 minutes; microwave 60–90 seconds for a quick fix.

    Troubleshooting Common Sausage Breakfast Casserole Issues

    • Too watery: bake 5–10 minutes longer; next time, toast bread or reduce milk by 1/4 cup.
    • Too dry: pull earlier; cover with foil for last 10 minutes; add an extra egg next time for richer custard.
    • Uneven texture: cut bread uniformly and rest the Sausage Breakfast Casserole before slicing.
    • Overbrowned top: tent with foil halfway through to protect the cheese while the center sets.

    With the right store-and-reheat plan, your Sausage Breakfast Casserole stays moist, flavorful, and ready when you are. You’ve got this—cozy breakfasts are officially on repeat.

    FAQs

    Can I assemble Sausage Breakfast Casserole the night before?

    Yes. Assemble, cover, and refrigerate up to 24 hours. Bake straight from the fridge, adding 5–10 minutes to the cook time if needed.

    Can I use hash browns instead of bread?

    Absolutely. Use 20–24 oz shredded hash browns and reduce milk by about 1/4 cup to keep the custard set. No need to toast potatoes first.

    How do I keep Sausage Breakfast Casserole from getting soggy?

    Lightly toast bread cubes so they absorb custard without collapsing. Bake until the center is just set and let it rest 5–10 minutes before slicing.

    What cheese works best?

    Sharp cheddar is classic for Sausage Breakfast Casserole. Pepper jack, Gruyère, or fontina also melt beautifully and add distinct flavor.

    Conclusion

    Sausage Breakfast Casserole is the dependable, homemade comfort food you can pull off any day of the week. With quick prep, flexible ingredients, and that cozy, melty center, this easy recipe is an instant crowd-pleaser and a one-pan meal that feels special. Whether you bake it for brunch, meal prep, or an easy dinner, Sausage Breakfast Casserole delivers satisfying flavor and reliable results. If you love warming casseroles, explore more on my site, including make-ahead favorites and bright sides at recipesdarleen. Try it at home and tag me—I can’t wait to see your bubbly, golden pans and creative spins!

  • Crustless Quiche – Cozy and Irresistibly Easy

    Crustless Quiche – Cozy and Irresistibly Easy

    Crustless Quiche saved my Tuesday. I’d promised brunch-for-dinner, my whisk went missing, and the cat sat on the spinach—yet this Crustless Quiche still came out silky, golden, and wildly comforting. I’m Darleen Vance, and my kitchen chaos is real, but this easy dinner is my quick fix that feels homemade and special. When the day runs long, I grab eggs, a handful of cheese, whatever veggies are left, and bake a one-pan meal that tastes like a cozy café. No crust, no stress, all comfort food vibes.

    Crustless Quiche saved my Tuesday.

    Recipe

    Why You’ll Love This Crustless Quiche

    What Makes This Crustless Quiche So Irresistible

    If you’ve ever wondered how to get café-style comfort food with hardly any effort, Crustless Quiche is your answer. The first time I served it to friends, I forgot the pie crust and pretended it was “intentional.” We all agreed the no-crust, homemade version was lighter, richer, and more satisfying. That’s the charm of Crustless Quiche—it’s the easy recipe that turns eggs, cheese, and veggies into a cozy, one-pan meal. It’s weeknight-fast, brunch-worthy, and endlessly adaptable.

    • Quick prep: Whisk, pour, and bake—simple steps for a stress-free, easy dinner.
    • Comforting texture: Creamy center, golden top, and savory, homemade flavor.
    • Flexible add-ins: Use leftover veggies, cooked bacon, ham, or mushrooms.
    • One-pan meal: Minimal dishes and quick cleanup.
    • Make-ahead friendly: Bake now, reheat later—perfect for meal prep and busy mornings.

    With Crustless Quiche, you’ll get a reliable, family-friendly staple that’s as good for brunch as it is for a cozy dinner. Ready to bake the best homemade quiche without the fuss? Let’s get whisking.

    Beyond being a quick fix and a comfort-food classic, Crustless Quiche has become a favorite because it effortlessly fits into today’s flexible cooking style. It’s naturally lower in carbs, easy to customize, and tastes like a café breakfast with minimal effort. People love that it looks polished for guests, but it’s weeknight simple. If you’re leaning into easy, healthy-ish, and flavorful recipes, this is the one to keep on repeat.

    Crustless Quiche Tips, Tricks & Expert Secrets

    Chef Tips for Perfect Crustless Quiche Every Time

    During a cooking lesson years ago, I asked a chef why my Crustless Quiche sometimes turned spongy. He grinned and said, “It’s a custard, not an omelet—treat it gently.” That changed everything. This easy recipe loves a light touch, and with a few cooking tips, your homemade version will be soft, custardy, and beautifully set.

    • Mind the ratio: A classic base is about 6 large eggs to 1 cup milk or half-and-half. This creates a creamy set without going rubbery.
    • Pre-cook wet veggies: Sauté mushrooms and spinach to remove moisture, preventing a watery quiche.
    • Season the custard: Whisk salt, pepper, a pinch of nutmeg, and garlic into the egg mixture for even seasoning.
    • Low and steady: Bake at 350°F until just set; overbaking causes a dry texture and weeping.

    Smart Ingredient Swaps & Practical Cooking Advice

    • Dairy options: Use 2% milk for lighter results, or half-and-half for a richer bite. A splash of cream adds luxe texture.
    • Cheese picks: Gruyère, cheddar, or goat cheese each bring a different flavor profile; combine for depth.
    • Gluten-free friendly: Since it’s a Crustless Quiche, it’s naturally gluten-free—just ensure mix-ins (like ham) are certified gluten-free.
    • Vegetarian swap: Skip the bacon and load up on roasted peppers, caramelized onions, or broccoli.
    • Vegan approach: Try a tofu “quiche” base blended with plant milk, nutritional yeast, and seasonings—different but delicious.
    • What not to do: Don’t overmix the eggs; vigorous whisking adds air and can lead to a spongy, uneven texture. Stir gently.

    With these cooking tips and quick fixes, your Crustless Quiche will bake up reliably golden and tender every time.

    Crustless Quiche – Cozy and Irresistibly Easy

    Serving Ideas & Creative Variations for Crustless Quiche

    How to Serve Crustless Quiche for Maximum Enjoyment

    I love presenting Crustless Quiche like a café plate: a warm, custardy slice with something bright and crunchy on the side. When I set it out for guests, I’ll slice it into neat wedges and add a simple salad or roasted veg for color and contrast. A little plating suggestion: cut clean slices with a sharp knife, wipe between cuts, and let it rest five minutes before serving for photo-ready edges.

    Flavor Twists and Seasonal Variations

    • Spring market: Asparagus tips, peas, and goat cheese with dill.
    • Summer garden: Cherry tomatoes, basil, and mozzarella—Caprese-inspired.
    • Autumn cozy: Caramelized onions, mushrooms, and Gruyère with thyme.
    • Holiday twist: Roasted red peppers, spinach, and feta for a festive look.

    For content creators, bright natural light and a slice lifted slightly from the pan gives irresistible dimension. A sprinkle of fresh herbs and a drizzle of olive oil photograph beautifully and make your Crustless Quiche pop on Pinterest and Instagram.

    Storage & Troubleshooting Guide for Crustless Quiche

    How to Store and Reheat Crustless Quiche

    When I make a double batch, I label wedges so my family doesn’t “sample” every flavor in one sitting. Crustless Quiche is an easy dinner star and a great make-ahead breakfast—here’s how to keep it fresh.

    • Room temperature: Keep up to 2 hours for serving. After that, refrigerate.
    • Refrigerator: Store slices in airtight containers up to 4 days. Separate layers with parchment.
    • Freezer: Wrap slices tightly in plastic, then foil, or use freezer-safe containers. Freeze up to 2–3 months. Thaw overnight in the fridge.
    • Reheat: Oven at 325°F for 10–12 minutes; air fryer at 300°F for 5–7 minutes; or a covered skillet over low heat until warmed through. Avoid microwaving too hot or too long to keep texture tender.

    Troubleshooting Common Crustless Quiche Issues

    • Watery quiche: Pre-cook high-moisture veggies and squeeze thawed spinach dry. Reduce dairy slightly if using very juicy fillings.
    • Dry texture: Bake just until the center is set with a slight jiggle. Too high heat or overbaking causes dryness.
    • Uneven set: Whisk the custard gently but thoroughly and distribute fillings evenly in the pan.
    • Eggy flavor: Add a pinch of salt, pepper, garlic, and nutmeg to balance richness. Cheese also deepens flavor.

    With a few storage tips and quick fixes, your Crustless Quiche will keep fresh, reheat beautifully, and satisfy from brunch to dinner.

    FAQs

    Can I make Crustless Quiche ahead of time?

    Yes. Bake, cool, and refrigerate up to 4 days. Reheat gently in a 325°F oven until warmed through.

    How do I prevent a watery Crustless Quiche?

    Pre-cook wet veggies like mushrooms and spinach, squeeze out moisture, and avoid overloading the pan with juicy add-ins.

    Can I use non-dairy milk?

    Yes. Unsweetened almond or oat milk works, but add extra seasoning and a richer cheese to balance flavor and texture.

    What pan should I use?

    A 9-inch pie dish or 9-inch deep-dish pan works best. Grease well, and don’t overfill to ensure even baking.

    Conclusion

    Crustless Quiche is the cozy, homemade classic that turns a few simple ingredients into a golden, satisfying meal. It’s an easy dinner, a brunch hero, and a one-pan meal you can customize endlessly. Whether you pair it with bright greens or hearty roasted veggies, it brings comfort food magic without the fuss of a crust. Bake it for guests, save slices for weekday breakfasts, or add a seasonal twist and share your creation. I’m thrilled to see how you make this Crustless Quiche your own—try it at home and tag me! For more comforting sides to round out your plate, explore my latest recipes or serve it with winter greens for a fresh finish.

  • Spinach and Feta Egg Casserole – Cozy, Irresistible & Easy

    Spinach and Feta Egg Casserole – Cozy, Irresistible & Easy

    Spinach and Feta Egg Casserole saved my Sunday. I, Darleen Vance, had a full house, a missing whisk, and a toddler wearing oven mitts like boxing gloves. Spinach and Feta Egg Casserole to the rescue: a dump, whisk, and bake miracle that didn’t mind my improvised fork-whisk. By the time the feta melted into creamy pockets and the spinach turned silky, the kitchen chaos turned to silence—well, satisfied silence. A slice for me, a second slice for my husband, and a smug little nod from the toddler. That’s a win in my book.

    Spinach and Feta Egg Casserole

    Recipe

    WHY YOU’LL LOVE THIS RECIPE

    What Makes This Spinach and Feta Egg Casserole So Irresistible

    I first made this Spinach and Feta Egg Casserole on a morning when my timer decided to speak only in beeps and my coffee machine staged a rebellion. Yet the Spinach and Feta Egg Casserole came out fluffy, fragrant with dill, and sparkling with salty feta—proof that this easy dinner-slash-brunch hero forgives kitchen chaos. It’s the ultimate homemade one-pan meal that tastes like comfort food but feels light and energizing. The creamy eggs hug silky spinach while lemon zest brightens each bite. It’s simple, it’s satisfying, and it always disappears.

    • Quick prep: minimal chopping and a straightforward whisk-and-bake method.
    • Comforting, homemade flavor: feta pockets, fresh dill, and a golden, tender top.
    • One-pan meal: fewer dishes and an easy recipe that fits busy mornings or weeknights.
    • Family-friendly: mild, savory, and customizable for picky eaters.
    • Make-ahead friendly: bakes beautifully and reheats without turning rubbery.

    Whether you serve it as an easy dinner with a salad or a brunch centerpiece, this homemade casserole delivers reliable results and big flavor. Ready to cook? Let’s get to the recipe card below.

    Social feeds love dishes that balance comfort food with fresh, feel-good ingredients. This casserole nails the vibe: a vibrant, homemade version of a diner favorite that’s naturally low carb, gluten-free, and packed with protein. The combination of spinach, feta, and dill is timeless, yet the lemony lift gives it modern brightness. It checks every box for an easy dinner or brunch: batch-friendly, budget-friendly, and company-worthy in under an hour. No surprise it’s trending—this is the kind of cozy, reliable bake people crave and share.

    TIPS, TRICKS & EXPERT SECRETS

    Chef Tips for Perfect Spinach and Feta Egg Casserole Every Time

    Years ago in a cooking class, I whisked eggs like a maniac and baked a very enthusiastic sponge. Lesson learned: gentle mixing equals tender eggs. With this Spinach and Feta Egg Casserole, a few cooking tips and quick fixes guarantee a silky, set slice every single time.

    • Season smartly: feta is salty, so taste the mixture after adding feta before boosting the salt.
    • Drain spinach well: sauté just until wilted and squeeze out excess moisture to avoid a watery bake.
    • Whisk, don’t whip: combine eggs and dairy until smooth, but avoid frothy bubbles to keep the texture delicate.
    • Check for doneness early: at 28 minutes, look for a gentle jiggle in the center that firms as it rests.

    Smart Ingredient Swaps & Practical Cooking Advice

    • Low-fat option: use 2% milk and nonfat Greek yogurt; bake a couple minutes less to prevent dryness.
    • Dairy-free/vegan approach: swap eggs with your favorite plant-based egg substitute and choose a vegan feta; add 1 tablespoon nutritional yeast for savory depth.
    • Herb flexibility: no dill? Try parsley, basil, or oregano—this easy recipe loves fresh herbs.
    • What not to do: don’t overmix or overbake; both lead to tough, spongy eggs instead of creamy, custardy slices.

    These cooking tips make your homemade version consistent and stress-free. For more cozy bakes and veggie-forward sides, try my Winter Greens with Pine Nuts and Garlic or classic Roasted Brussels Sprouts.

    SERVING IDEAS & CREATIVE VARIATIONS

    How to Serve Spinach and Feta Egg Casserole for Maximum Enjoyment

    I once hosted brunch with this casserole cut into neat squares perched on a wood board—tiny dill sprigs, a swoosh of yogurt sauce, and lemon wedges for a fresh pop. Guests eyed the platter like it was a bakery window. For beautiful plating suggestions and serving ideas, keep it bright and simple.

    • Pair with a crisp salad of cucumbers, tomatoes, and olives tossed in lemony vinaigrette.
    • Add roasted veggies on the side for color and crunch—try these Pomegranate-Glazed Roasted Vegetables.
    • Beverage buddies: a citrusy mimosa, strong coffee, or iced mint tea.

    Flavor Twists and Seasonal Variations

    • Greek market twist: add chopped roasted red peppers and a few olives for briny brightness.
    • Spring garden: fold in asparagus tips and chives; finish with a sprinkle of fresh dill.
    • Hearty winter: add sautéed mushrooms and a pinch of nutmeg for earthy depth.

    For creators, a quick styling tip: slice cleanly after a 10-minute rest, then stack slightly offset squares. Add a lemon wedge, a few feta crumbles, and a scatter of dill for a Pinterest-ready shot. If your table needs a second main, my colorful Holiday Red Green Veggie Strata plays beautifully with this dish.

    STORAGE & TROUBLESHOOTING GUIDE

    How to Store and Reheat Spinach and Feta Egg Casserole

    I’m a big fan of next-day brunch, so I make this Spinach and Feta Egg Casserole on Friday and coast through the weekend. To keep it fresh and delicious, follow this storage advice.

    • Room temperature: keep out for serving up to 1–2 hours.
    • Refrigerator: store slices in airtight containers 3–4 days; separate with parchment to prevent sticking.
    • Freezer: wrap individual slices tightly, then place in a freezer bag for up to 2 months.
    • Reheat: oven at 325°F (163°C) for 10–15 minutes; air fryer at 300°F for 6–8 minutes; or skillet with a lid over low heat until warmed through. Avoid microwaving on high—use 50% power to keep the texture tender.

    Troubleshooting Common Spinach and Feta Egg Casserole Issues

    • Too watery: drain sautéed spinach well; reduce added liquid by 2 tablespoons next time.
    • Too dry/overcooked: bake less—pull when the center barely jiggles and let carryover heat finish the job.
    • Uneven texture: whisk until smooth but not foamy; foam creates pockets and uneven set.
    • Flat or dense: use the correct pan size (9×13-inch) and don’t overload with fillings.

    With a little know-how, this easy recipe stays creamy, flavorful, and ready when you are. You’ve got this—leftovers will taste as cozy as day one.

    FAQs

    Can I make Spinach and Feta Egg Casserole ahead?

    Yes. Assemble, cover, and refrigerate up to 12 hours. Bake straight from the fridge, adding 3–5 minutes if needed.

    Do I have to sauté the spinach first?

    Yes, for best results. Sautéing removes moisture so the casserole sets creamy, not watery.

    Can I use frozen spinach?

    Absolutely. Thaw completely and squeeze very dry; use about 10 ounces after draining.

    How do I keep it fluffy and not rubbery?

    Don’t overmix or overbake. Pull when the center is just set and let it rest 5–10 minutes before slicing.

    Conclusion

    This Spinach and Feta Egg Casserole is the cozy, homemade answer to easy brunch and effortless weeknight comfort food. With bright lemon, fresh dill, and creamy feta, it’s a one-pan meal that tastes special yet comes together fast. Whether you slice it for a protein-packed breakfast, pair it with greens for an easy dinner, or share it at brunch, you’ll love how reliable and flavorful it is. Try this Spinach and Feta Egg Casserole at home, snap a photo, and tag me so I can cheer you on!