Author: Lily Bennett

  • Creamy Fruit Salad Rollups: Irresistibly Delicious & Easy Snack!

    Creamy Fruit Salad Rollups: Irresistibly Delicious & Easy Snack!

    Creamy Fruit Salad Rollups: Irresistibly Delicious & Easy Snack!

    Creamy Fruit Salad Rollups are my latest obsession, combining the refreshing sweetness of fresh fruits with velvety cream cheese in a portable, picnic-perfect package. I discovered this delightful treat during a summer gathering when my neighbor brought something similar, and I’ve been tweaking the recipe ever since. The tender tortillas wrap around a luscious filling that balances tangy cream cheese with honey-kissed fruits for a bite that’s both satisfying and light. Perfect for breakfast on-the-go or a sweet afternoon snack, these rollups have become a staple in my kitchen, especially when I’m craving something like my Easy Banana Cream Pie but want something more portable.

    Recipe

    Why You’ll Love These Creamy Fruit Salad Rollups

    Perfect Balance of Flavors and Textures

    There’s something magical about the way the creamy filling contrasts with the fresh fruit in these rollups. Each bite delivers a perfect harmony of smooth cream cheese, juicy berries, and tender tortilla. I love how the slight tanginess of the cream cheese balances the natural sweetness of ripe strawberries and blueberries. The honey drizzle adds just enough sweetness without overwhelming the fresh fruit flavors. And that moment when you bite through the soft tortilla into the cool, creamy center? Pure bliss! These rollups satisfy both sweet cravings and hunger in a way that feels indulgent yet light.

    Quick and Customizable for Any Occasion

    What I adore most about these Creamy Fruit Salad Rollups is their versatility and ease. You can whip these up in under 15 minutes when unexpected guests arrive or prep them the night before for a grab-and-go breakfast. Switch up the fruits based on what’s in season – peaches in summer, apples in fall, or citrus in winter. The filling can be adjusted to suit different dietary needs too. Need dairy-free? Use coconut cream cheese. Want extra protein? Add a sprinkle of chopped nuts. I’ve even made a savory version with herbs and cucumber that disappeared at a baby shower faster than my Creamy Cheese and Potato Pie.

    Essential Tips & Tricks

    Mastering the Perfect Filling Consistency

    The secret to success with these rollups lies in the cream cheese texture. I learned this the hard way after creating a too-runny filling that escaped from every end! Let your cream cheese come to room temperature before mixing, but don’t let it get too soft. Beat it just until smooth and spreadable – think frosting consistency. Pat your fruit dry with paper towels to remove excess moisture that could make your rollups soggy. For extra stability, I sometimes add a tablespoon of Greek yogurt which adds tanginess while helping the filling stay put. This creates that perfect creamy base that holds everything together.

    Rolling Technique for Picture-Perfect Results

    Trust me, there’s definitely a technique to creating beautiful rollups without filling squishing out everywhere. Start with room temperature tortillas – cold ones will crack! Spread the filling evenly, leaving a half-inch border around the edges. Don’t overfill; a thin, even layer works best. Place larger fruit pieces in a line about one-third from the bottom edge, then fold the bottom over the fruit and roll tightly. For clean slices, refrigerate the rolled tortillas for at least 30 minutes before cutting with a sharp knife. I sometimes use a bit of honey at the final edge as “glue” to keep everything sealed.

    Serving Ideas & Creative Variations

    Elegant Presentation for Gatherings

    Transform these simple rollups into party-worthy treats with minimal effort. For brunch gatherings, I arrange the colorful slices in a spiral on a white platter, sprinkle with mint leaves, and place a small bowl of honey or maple syrup in the center for dipping. For kids’ parties, I cut them into smaller “sushi” bites and provide colorful toothpicks. Create a stunning dessert board by pairing these rollups with my Marshmallow Fruit Dip and an assortment of fresh berries. The vibrant colors make for Instagram-worthy photos while the handheld format means less mess for guests.

    Sweet and Savory Flavor Combinations

    Don’t limit yourself to just sweet versions! The flavor possibilities are endless when you start experimenting. My tropical variation with mango, pineapple and coconut-infused cream cheese transports me to vacation mode instantly. For a fall twist, try apple-cinnamon with a sprinkle of granola for crunch. Chocolate lovers in my family go crazy for banana-Nutella rollups drizzled with peanut butter. On the savory side, cucumber-dill cream cheese with thin strawberry slices creates an unexpectedly refreshing appetizer. I’ve even created a “dessert taco” version by using cinnamon tortillas and a cheesecake-inspired filling that rivals my favorite Fluffy Yogurt Cloud Dessert.

    Storage & Troubleshooting Guide

    Keeping Rollups Fresh and Preventing Sogginess

    The biggest challenge with these Creamy Fruit Salad Rollups is maintaining that perfect texture over time. Store them in an airtight container lined with paper towels to absorb excess moisture. They’ll keep in the refrigerator for up to 2 days, though they’re best enjoyed within 24 hours. If making ahead for a party, consider wrapping the whole rolled tortillas in plastic wrap without slicing until serving time. For lunchboxes, wrap individual slices in parchment paper before placing in containers. If your rollups do get slightly soggy, a quick 10 seconds in the microwave can help revive the tortilla texture.

    Rescuing Common Rollup Mishaps

    Even I have rollup disasters sometimes! If your filling is too runny, fold in 1-2 tablespoons of whipped cream cheese to thicken it up. Tortilla cracked while rolling? Warm it for 10 seconds in the microwave to make it more pliable. If your rollups unravel when cutting, try chilling them longer or securing with toothpicks before slicing. Filling oozing out the sides? You likely overfilled – scrape some out and start again. For fruit that’s too juicy, toss it with a teaspoon of cornstarch before adding to the filling. Remember that even “ugly” rollups taste delicious, so don’t stress too much about appearance!

    Frequently Asked Questions

    Can I make Creamy Fruit Salad Rollups ahead of time?

    Yes! Prepare them up to 24 hours in advance. Store whole unsliced rolls wrapped in plastic wrap in the refrigerator, and slice just before serving for the freshest results.

    What’s the best tortilla to use for fruit rollups?

    Flour tortillas in the 8-inch size work best. Choose soft, fresh ones labeled “burrito style” for easier rolling. Flavored varieties like spinach or sun-dried tomato can add interesting flavor dimensions.

    Can I freeze these rollups?

    I don’t recommend freezing as the fruit will release moisture when thawed, making the tortillas soggy. These are best enjoyed fresh within 1-2 days of preparation.

    How do I prevent my Creamy Fruit Salad Rollups from getting soggy?

    Pat fruits dry thoroughly before adding them to the cream cheese mixture. Also, create a moisture barrier by spreading a thin layer of cream cheese on the tortilla before adding juicier fruits.

    What are good substitutes for cream cheese in this recipe?

    Mascarpone offers a richer, sweeter alternative. Greek yogurt cream cheese provides more protein. For dairy-free options, try almond-based or coconut-based cream cheese alternatives.

    Final Thoughts

    These Creamy Fruit Salad Rollups have become my go-to for everything from rushed weekday breakfasts to elegant brunches with friends. There’s something wonderfully satisfying about transforming simple ingredients into something that feels special yet requires minimal effort. The joy on people’s faces when they bite into these colorful spirals makes all the difference. Whether you stick to classic strawberry-banana or venture into exotic flavor territories, these rollups offer endless possibilities for customization. I hope these Creamy Fruit Salad Rollups bring as much happiness to your kitchen as they have to mine! Find more inspiration for fruity treats on my Pinterest board.

  • Creamy Ranch Turkey & Veggie Skillet: Easy, Comfort Food Bliss!

    Creamy Ranch Turkey & Veggie Skillet: Easy, Comfort Food Bliss!

    Creamy Ranch Turkey & Veggie Skillet: Easy, Comfort Food Bliss!

    This Creamy Ranch Turkey & Veggie Skillet has become my weeknight salvation when I’m craving something hearty yet nutritious. There’s something magical about the way the tender turkey mingles with crisp vegetables in that velvety ranch sauce. I discovered this recipe during a particularly hectic week when I needed to use up leftover turkey, and it’s been on regular rotation ever since. The aroma that fills my kitchen—garlic, herbs, and that unmistakable ranch tang—never fails to make my mouth water. If you’re looking for a quick dinner solution, this skillet has your name all over it.

    Recipe

    Why You’ll Love This Creamy Ranch Turkey & Veggie Skillet

    Perfect Balance of Flavor and Nutrition

    This skillet dish strikes that elusive balance between comfort food and healthy eating. The lean turkey provides ample protein while the colorful medley of vegetables adds essential vitamins and fiber. I love how the creamy ranch sauce coats everything with just enough indulgence without overwhelming the dish. My husband, who typically raises an eyebrow at “healthier” recipes, asks for seconds every time. The flavors meld together beautifully, creating a dish that satisfies cravings while keeping nutritional goals in check—a true weeknight victory.

    Quick and Adaptable for Busy Days

    One of the greatest strengths of this Creamy Ranch Turkey & Veggie Skillet is how incredibly versatile it is. I’ve made this on chaotic weeknights when I had just 25 minutes to get dinner on the table. The basic formula—protein, veggies, creamy sauce—allows you to swap ingredients based on what’s in your fridge. Have chicken instead of turkey? Perfect! Bell peppers looking sad? Use zucchini! The cooking process is straightforward enough that I can help with homework while stirring occasionally. It’s become my secret weapon for those “I don’t know what to make” evenings.

    Essential Tips & Tricks

    Mastering the Perfect Texture

    The key to an exceptional Creamy Ranch Turkey & Veggie Skillet lies in the cooking sequence. Always start by sautéing your aromatics (onions and garlic) until fragrant, then add the turkey to brown properly before introducing vegetables. I’ve learned through trial and error to add firmer vegetables like carrots first, followed by quicker-cooking ones like bell peppers. This prevents the dreaded mushy veggie syndrome! For the creamiest texture, reduce your heat to medium-low when adding the ranch elements and let it simmer gently. This patience results in a sauce that’s velvety smooth rather than broken or grainy.

    Flavor-Building Secrets

    The difference between a good skillet and an unforgettable one comes down to layering flavors. I always deglaze the pan with a splash of chicken broth after browning the turkey, scraping up those golden bits (fond) that contain concentrated flavor. For an extra dimension, add dried herbs early in the cooking process, but save fresh herbs for the final minutes. My secret weapon? A teaspoon of Dijon mustard whisked into the ranch mixture—it adds a subtle tang that balances the richness. Don’t forget that final touch of freshly ground black pepper just before serving to wake up all the flavors.

    Serving Ideas & Creative Variations

    Perfect Pairings for Every Occasion

    This Creamy Ranch Turkey & Veggie Skillet shines as a standalone dish, but it truly excels when thoughtfully paired. For everyday dinners, I serve it over fluffy rice or quinoa to soak up that delicious sauce. When entertaining, I’ve spooned it over baked potatoes with a sprinkle of extra cheese for a crowd-pleasing presentation. For lighter meals, try it alongside a simple green salad dressed with lemon vinaigrette—the brightness cuts through the creamy richness beautifully. When I’m feeling extra, I serve it with crusty homemade bread for dipping into that irresistible sauce.

    Exciting Flavor Twists

    Don’t be afraid to put your personal stamp on this Creamy Ranch Turkey & Veggie Skillet with some creative adaptations. For a Southwestern spin, add a diced jalapeño, swap the ranch for a chipotle ranch, and finish with cilantro and lime. Mediterranean lovers can incorporate artichoke hearts, olives, and sun-dried tomatoes, finishing with crumbled feta. I once made an Asian-inspired version using snow peas, water chestnuts, and a touch of ginger in the sauce. For a lower-carb option, serve the mixture over cauliflower rice or zucchini noodles. Each variation maintains the comforting essence while offering a new flavor adventure.

    Storage & Troubleshooting Guide

    Proper Storage for Maximum Freshness

    This Creamy Ranch Turkey & Veggie Skillet makes excellent leftovers when stored properly. Allow the dish to cool completely before transferring to airtight containers—I prefer glass containers to prevent staining and odor absorption. In the refrigerator, it maintains peak quality for 3-4 days. For longer storage, portion the cooled skillet into freezer-safe containers, leaving some headspace for expansion. When reheating from frozen, thaw overnight in the refrigerator for best results. I find that adding a splash of milk or broth when reheating prevents the sauce from becoming too thick or separating.

    Fixing Common Cooking Challenges

    Even experienced cooks encounter hiccups with creamy skillet dishes. If your sauce looks curdled or separated, lower the heat immediately and whisk in a tablespoon of cold cream cheese to re-emulsify. For a sauce that’s too thin, create a slurry with a teaspoon of cornstarch dissolved in cold water and simmer until thickened. Too thick? A splash of broth or milk will adjust the consistency. If vegetables release too much water, making your sauce watery, try roasting them separately before adding to the skillet. For bland results, a squeeze of lemon juice or dash of hot sauce can brighten all the flavors.

    Frequently Asked Questions

    Can I use ground turkey instead of turkey breast in this Creamy Ranch Turkey & Veggie Skillet?

    Absolutely! Ground turkey works wonderfully and often cooks faster. Just be sure to drain any excess fat after browning before adding your vegetables and sauce components.

    What vegetables work best in this recipe?

    The most reliable performers are bell peppers, zucchini, carrots, broccoli, and mushrooms. Choose vegetables with similar cooking times or add them in stages based on firmness.

    Can I make this dairy-free?

    Yes! Substitute coconut cream for heavy cream and use a dairy-free ranch seasoning blend. Nutritional yeast can provide that cheesy flavor without actual cheese.

    Is this recipe meal-prep friendly?

    Definitely! It reheats beautifully and tastes even better the next day as flavors continue to develop. Portion into individual containers for grab-and-go lunches.

    How can I make this spicier?

    Add red pepper flakes when sautéing the aromatics, use pepper jack instead of regular cheese, or stir in a tablespoon of hot sauce when adding the ranch components.

    Final Thoughts

    This Creamy Ranch Turkey & Veggie Skillet has earned its place in my recipe collection by consistently delivering comfort, nutrition, and flavor without complicated techniques or hard-to-find ingredients. The way the creamy sauce brings everything together creates a dish that feels special enough for company yet simple enough for Monday nights. I love how it transforms ordinary ingredients into something truly crave-worthy. Whether you follow the recipe exactly or use it as a template for your own creative variations, this skillet is bound to become a family favorite. For more delicious dinner ideas, check out my Pinterest collection of comforting weeknight meals!

  • Easy Banana Cream Pie Recipe That Will Melt Your Heart!

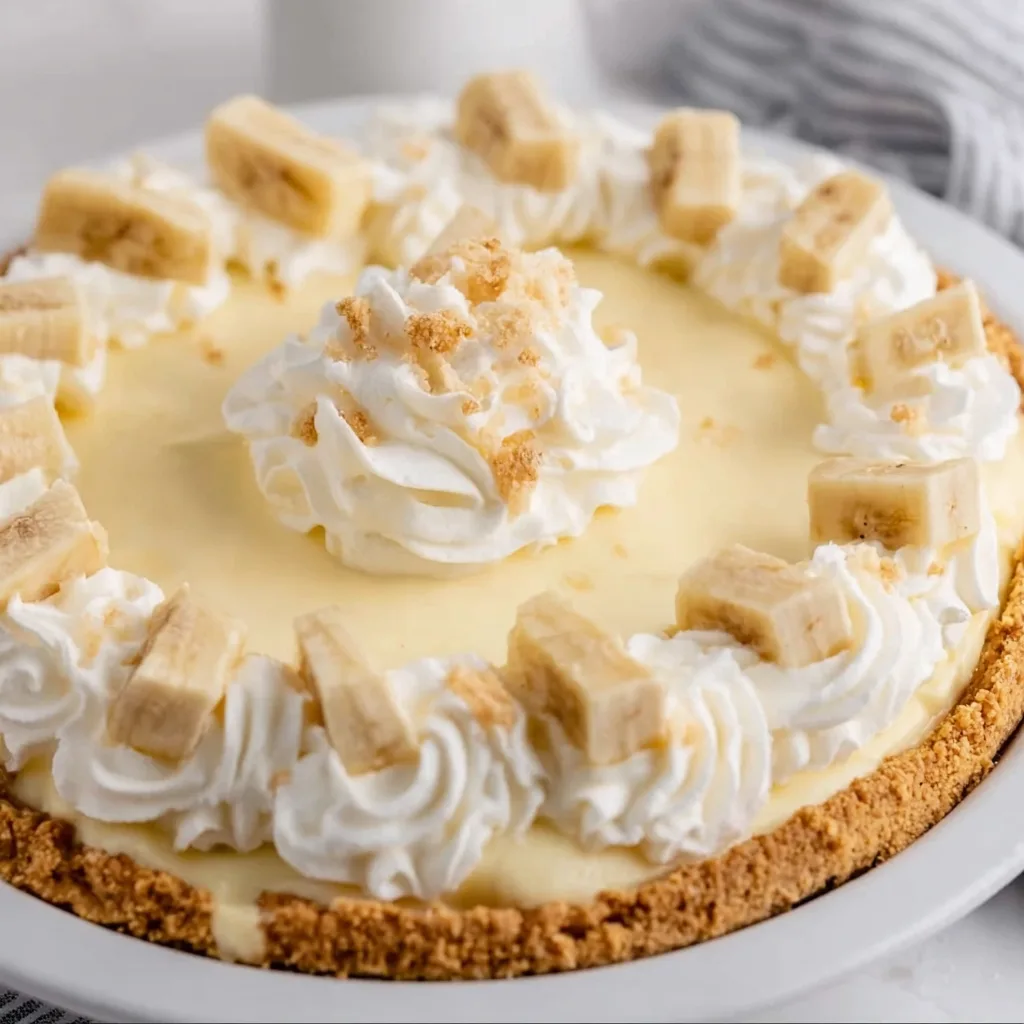
    Easy Banana Cream Pie Recipe That Will Melt Your Heart!

    Easy Banana Cream Pie Recipe That Will Melt Your Heart! 🍌❤️

    This Easy Banana Cream Pie is the dessert your soul has been craving! Creamy, dreamy layers of vanilla pudding, fresh bananas, and billowy whipped cream nestled in a buttery graham cracker crust. I first made this pie for my sister’s birthday, and the way her eyes lit up at first bite told me everything. There’s something magical about the way those velvety layers melt together. The best part? You don’t need to be a pastry chef to create this show-stopping dessert that looks like it came from a fancy bakery. Let me show you how to make this no-fuss banana cream pie that will have everyone asking for seconds.

    Recipe

    Why You’ll Love This Easy Banana Cream Pie

    Perfect Balance of Flavors and Textures

    This pie hits all the right notes with its perfect harmony of textures and flavors. The crumbly graham cracker crust provides a satisfying contrast to the silky smooth pudding. Fresh banana slices add natural sweetness and that unmistakable tropical flavor that makes this dessert so special. I love how the cool, creamy filling melts in your mouth while the crust offers that delightful crunch. It’s this beautiful dance of textures that makes banana cream pie so universally loved—soft meets crisp, sweet meets buttery, and every bite is pure bliss.

    Make-Ahead Convenience

    One of the greatest joys of this Easy Banana Cream Pie is its make-ahead magic. You can prepare this dessert a day before your gathering, letting it chill and set up perfectly in the refrigerator overnight. This has saved me countless times when hosting dinner parties! The flavors actually develop and deepen as it chills, making it taste even better the next day. Just add the final whipped cream topping and any garnishes right before serving. Your future self will thank you when you’re calmly pulling a gorgeous, ready-to-serve dessert from the fridge instead of frantically baking.

    Essential Tips & Tricks

    Banana Selection and Preparation

    The secret to a perfect banana cream pie lies in choosing perfectly ripe bananas—yellow with just a few brown speckles. They should be firm but not hard, sweet but not mushy. I learned the hard way that green bananas lack flavor while overripe ones turn brown too quickly. To prevent browning, toss your banana slices in a little lemon juice before arranging them in the pie. For the prettiest presentation, save a few banana slices to decorate the top just before serving. This small step makes a huge difference in both the visual appeal and the fresh flavor of your Easy Banana Cream Pie.

    Pudding Perfection

    Achieving silky-smooth pudding is crucial for this pie’s luxurious texture. Whether using instant pudding or making it from scratch, whisk vigorously to eliminate any lumps. My favorite trick is to strain the pudding through a fine-mesh sieve for ultra-smoothness. Allow the pudding to cool slightly before folding in whipped cream—this creates that cloud-like texture that makes banana cream pie so heavenly. For extra richness, use whole milk or even substitute part of the milk with heavy cream. The pudding layer is the star of the show, so taking these extra steps ensures perfection every time.

    Serving Ideas & Creative Variations

    Elegant Toppings and Garnishes

    Transform your Easy Banana Cream Pie into a show-stopping centerpiece with thoughtful garnishes. Dust the top with cocoa powder or sprinkle with chocolate shavings for a sophisticated touch. I love arranging thin banana slices in a spiral pattern and drizzling with caramel sauce for special occasions. Toasted coconut flakes add wonderful texture and tropical flavor, while crushed vanilla wafers echo the crust’s sweetness. For a truly indulgent presentation, pipe whipped cream rosettes around the edge and place a chocolate-dipped strawberry between each one. These simple additions elevate this classic dessert to restaurant quality.

    Flavor Twists and Variations

    While traditional banana cream pie is perfection, don’t be afraid to experiment with delicious variations. Add a layer of chocolate ganache over the crust before the filling for a chocolate-banana combination that’s utterly irresistible. For a tropical twist, mix in some toasted coconut or a splash of rum to the pudding. Peanut butter lovers will swoon over a thin layer of peanut butter between the crust and bananas—it tastes like a deconstructed banana sandwich in pie form! During fall, try adding warm spices like cinnamon and nutmeg to the pudding for a cozy seasonal flavor profile that complements the bananas beautifully.

    Storage & Troubleshooting Guide

    Proper Storage for Maximum Freshness

    To keep your Easy Banana Cream Pie at its peak deliciousness, proper storage is essential. Always refrigerate the pie within two hours of making it, covered loosely with plastic wrap. For the best texture and flavor, consume within 2-3 days—though in my house, it rarely lasts that long! The bananas will gradually darken over time, which doesn’t affect taste but might impact appearance. If you need to make components ahead, prepare the crust and pudding separately, then assemble with fresh bananas the day you plan to serve. This strategy gives you convenience without sacrificing that fresh-made quality everyone loves.

    Fixing Common Problems

    Even experienced bakers encounter occasional pie predicaments, but they’re easily fixed! If your pudding layer seems too runny, refrigerate it longer or add an extra tablespoon of cornstarch next time. For a soggy crust, try brushing it with melted white chocolate to create a moisture barrier before adding fillings. If your whipped cream starts to weep or deflate, stabilize it with a teaspoon of unflavored gelatin or powdered sugar. Bananas turning brown too quickly? Brush them with a mixture of honey and water—it prevents oxidation and adds a subtle sweetness. Remember, even an imperfect banana cream pie is still delicious!

    Frequently Asked Questions

    Can I use a store-bought graham cracker crust for this Easy Banana Cream Pie?

    Absolutely! Store-bought crusts work perfectly and save time. For extra flavor, brush the crust with melted butter and bake for 5 minutes before filling.

    How do I prevent my bananas from turning brown?

    Toss banana slices in lemon juice or pineapple juice before adding to the pie. The citric acid prevents oxidation without affecting flavor significantly.

    Can I make this pie without pudding mix?

    Yes! Make homemade vanilla pudding with 2 cups milk, ½ cup sugar, ¼ cup cornstarch, 2 egg yolks, and 1 teaspoon vanilla. Cook until thickened, then cool before using.

    Is it possible to make this pie dairy-free?

    Definitely. Use coconut milk pudding and coconut whipped cream as substitutes. The tropical notes actually complement the banana flavor beautifully.

    How far in advance can I make banana cream pie?

    For best results, make the pie base up to 24 hours ahead, but add the final whipped cream topping and banana garnishes just 1-2 hours before serving.

    Final Thoughts

    This Easy Banana Cream Pie has become my go-to dessert for gatherings because it consistently delivers smiles and empty plates. There’s something wonderfully nostalgic about the combination of creamy pudding, fresh bananas, and billowy whipped cream that speaks to both kids and adults. The fact that it’s simple to make yet looks so impressive is just a bonus! I hope you’ll try this recipe and experience the joy of creating something so deliciously satisfying with minimal effort. Don’t forget to check out more delightful dessert ideas on Pinterest for your next sweet adventure!

  • Triffle Easter Dessert Showstopper: Irresistible & Easy Recipe!

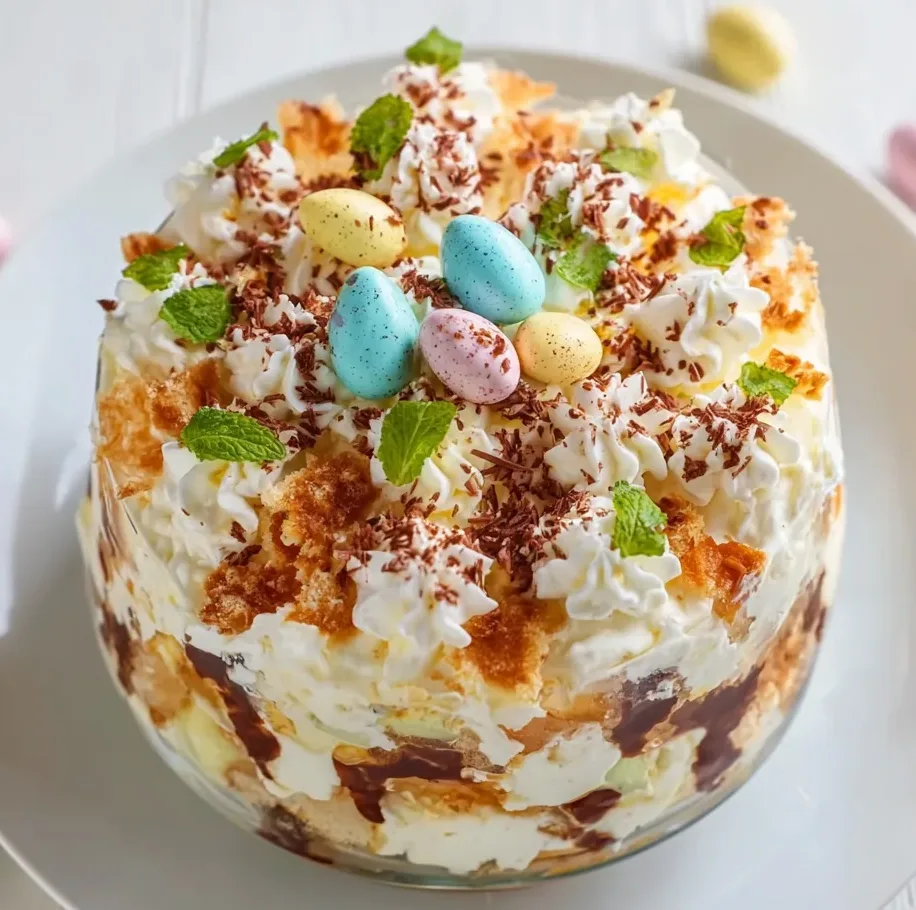
    Triffle Easter Dessert Showstopper: Irresistible & Easy Recipe!

    Triffle Easter Dessert Showstopper: Irresistible & Easy Recipe!

    This Triffle Easter Dessert Showstopper combines layers of moist cake, creamy custard, and fresh berries for a stunning centerpiece that’ll have everyone reaching for seconds. The beauty of this dessert lies in its impressive appearance despite being surprisingly simple to create. I first made this for my family’s Easter gathering three years ago, and it’s become our most requested holiday tradition. The colorful layers catch the light through a glass trifle bowl, creating that perfect moment when guests gasp before they’ve even tasted a bite! If you’re looking to elevate your Easter dessert game, this trifle delivers both spectacular presentation and delicious flavors.

    Recipe

    Why You’ll Love This Triffle Easter Dessert Showstopper

    A Feast for the Eyes and Palate

    This trifle is the definition of sensory delight. Each spoonful delivers contrasting textures—from pillowy cake to silky custard to juicy berries—that dance across your taste buds. The visual impact is equally impressive with distinct colorful layers that showcase your attention to detail. I love watching guests’ faces light up when I bring this to the table! The balance of sweet and tart flavors keeps everyone coming back for more, while the make-ahead nature means you can actually enjoy your own Easter celebration instead of being stuck in the kitchen.

    Stress-Free Elegance for Busy Hosts

    What makes this trifle truly special is how it transforms simple ingredients into something extraordinary without requiring professional baking skills. You can use store-bought pound cake or angel food cake as your base, instantly cutting prep time in half. The assembly process is forgiving—even if layers aren’t perfectly even, the final result still looks stunning. I’ve made this while juggling other Easter preparations, and it’s never failed to impress. Plus, it actually improves with a few hours in the refrigerator, allowing flavors to meld beautifully.

    Essential Tips & Tricks

    Perfecting Your Layers

    Creating distinct layers is key to that wow-factor presentation. I recommend chilling your custard thoroughly before assembly to prevent it from soaking into the cake too quickly. When adding fruit layers, place some berries against the glass bowl first, then fill in the center—this creates that gorgeous visual effect from the outside. Pat your berries dry with paper towels to prevent excess juice from bleeding into other layers. For the ultimate shortcut, check out my Easter Egg Cheesecake Jars for inspiration on creating perfect layers.

    Flavor Boosting Secrets

    The difference between a good trifle and an unforgettable one comes down to a few flavor-enhancing techniques. Lightly brush each cake layer with a simple syrup (equal parts sugar and water with a splash of liqueur for adults-only versions). This adds moisture and an extra dimension of flavor. For the custard layer, add a teaspoon of pure vanilla extract and a pinch of salt to enhance sweetness without adding more sugar. I also recommend macerating your berries with a tablespoon of sugar for 15 minutes before adding them—this draws out their natural juices and intensifies flavor.

    Serving Ideas & Creative Variations

    Presentation Perfection

    Serving this trifle becomes a memorable moment when you pay attention to the final touches. Just before bringing it to the table, add a fresh garnish of mint leaves and a light dusting of powdered sugar for that professional finish. Serve in a clear glass trifle bowl to showcase all your beautiful layers, and use a deep serving spoon to ensure guests get every layer in each portion. For individual servings that create the same impact, check out these adorable Easter Mini Egg Cheesecakes that apply the same layering principles on a smaller scale.

    Seasonal Adaptations

    While traditional trifle flavors are delicious, don’t be afraid to experiment seasonally. For a spring-inspired Easter variation, try incorporating lemon curd layers and fresh blueberries for bright, seasonal flavors. Create a chocolate lover’s version with chocolate cake, chocolate pudding, and chocolate shavings topped with Easter candy. My family’s favorite twist includes a layer of crushed mini eggs between the custard and berries for a festive Easter crunch. The versatility of this dessert means you can adapt it to any holiday by changing up colors and flavors.

    Storage & Troubleshooting Guide

    Make-Ahead Magic

    One of this dessert’s greatest advantages is its make-ahead potential. Prepare your trifle up to 24 hours before serving, keeping it covered in the refrigerator. The flavors actually improve as they meld together overnight! If you’re concerned about certain elements getting soggy, assemble most layers ahead of time but add the final whipped cream layer and decorative toppings just before serving. For longer storage, keep individual components separate in the refrigerator and assemble up to 3 hours before your event.

    Rescuing Common Issues

    Even experienced bakers encounter trifle troubles! If your custard layer turns out too thin, whisk in a tablespoon of cornstarch mixed with cold milk, then heat gently until thickened. For a quick fix to soggy cake layers, try using slightly stale cake which absorbs less moisture. If your whipped cream begins to weep or deflate, stabilize it by adding a tablespoon of instant vanilla pudding powder while whipping. And remember—if something doesn’t look perfect, a strategic placement of fresh berries or Easter decorations on top can disguise almost any imperfection!

    Frequently Asked Questions

    Can I make this Triffle Easter Dessert Showstopper without dairy?

    Absolutely! Substitute the custard with coconut milk pudding and use dairy-free whipped topping. The cake can be any dairy-free variety, and the result is just as impressive with minimal flavor difference.

    How far in advance can I make this trifle?

    For best results, prepare up to 24 hours ahead and store covered in the refrigerator. Add any delicate toppings like whipped cream or chocolate shavings just before serving.

    What’s the best cake to use as the base?

    Pound cake provides stability and doesn’t get soggy quickly. Angel food cake offers a lighter option, while sponge cake absorbs flavors beautifully. Choose based on your preference for texture and sweetness.

    Can I use frozen berries instead of fresh?

    Yes, but thaw them completely and drain excess liquid before using. Pat them dry with paper towels to prevent color bleeding into your beautiful white layers.

    How do I transport my trifle to an Easter gathering?

    Assemble in a trifle bowl with a tight-fitting lid or plastic wrap secured with rubber bands. Transport in a box lined with a non-slip mat to prevent shifting during the journey.

    Final Thoughts

    This Triffle Easter Dessert Showstopper embodies everything special about holiday gatherings—it’s beautiful, delicious, and brings people together around the table. The joy on everyone’s faces when they see those perfect layers is worth every minute spent creating it. I find myself looking forward to making this trifle each Easter almost as much as my family looks forward to eating it! For more seasonal inspiration, follow me on Pinterest where I share new Easter dessert ideas throughout the spring season.

  • Easy No Bake Easter Dirt Cake Casserole – Ultimate Crowd-Pleaser!

    Easy No Bake Easter Dirt Cake Casserole – Ultimate Crowd-Pleaser!

    Easy No Bake Easter Dirt Cake Casserole - Ultimate Crowd-Pleaser!

    This Easy No Bake Easter Dirt Cake Casserole has become my absolute springtime salvation! When the Easter weekend chaos hits and I’m juggling family visits, egg hunts, and dinner preparations, this delightful no-bake dessert swoops in to save the day. I first made this when my niece begged for “something with bunnies” and now it’s our most-requested holiday treat. The combination of creamy pudding layers, crushed cookies, and adorable Easter decorations creates a show-stopping dessert that looks like you spent hours in the kitchen—when really, it took just minutes to assemble. Trust me, this will become your new Easter tradition!

    Recipe

    Why You’ll Love This Easy No Bake Easter Dirt Cake Casserole

    Perfect for Busy Holiday Gatherings

    This no-bake wonder is truly a lifesaver when your holiday schedule is packed tighter than an Easter basket! I’ve made this while simultaneously dyeing eggs with the kids and prepping Sunday dinner—that’s how effortlessly simple it is. The layers come together in minutes, requiring zero oven time and minimal cleanup. Last Easter, my sister-in-law was convinced I’d spent hours on this dessert when in reality, I assembled it during my morning coffee! The convenience factor alone makes this a recipe you’ll reach for again and again, not just for Easter but anytime you need a quick, impressive treat.

    Kid-Friendly Fun with Grown-Up Appeal

    There’s something magical about watching children’s eyes light up when they see this playful dessert with its garden of treats on top! My nephew Jake spent a full five minutes just admiring all the candy decorations before diving in. But don’t be fooled—adults devour this just as enthusiastically! The creamy texture and rich flavor profile satisfy sophisticated palates while the nostalgic cookie “dirt” brings everyone back to childhood. I’ve served this at multi-generational gatherings where it disappeared faster than any other dessert, with requests for the recipe coming from both the kids’ table and the grandparents!

    Essential Tips & Tricks

    Perfecting the Layers

    Getting those picture-perfect layers is easier than you might think! The secret lies in chilling between layers to allow each one to set properly. I learned this the hard way after my first attempt resulted in a delicious but visually muddled creation. Use a clear glass dish to showcase your handiwork—I prefer my 9×13 trifle dish that I also use for my Strawberry Cheesecake Dump. When crushing the cookies, aim for a mix of fine crumbs and small pieces for textural interest. And don’t rush the final chill time—at least 4 hours creates that perfect sliceable consistency that makes serving a breeze.

    Decoration Strategies That Won’t Fail

    Creating that enchanting Easter scene on top doesn’t require artistic talent—just a few strategic placements! Position your decorations after the final chilling to prevent them from sinking. I arrange chocolate bunnies and colorful eggs in little groupings rather than scattering them randomly, creating intentional focal points. For an extra special touch, add edible spring flowers or green-tinted coconut “grass” around the edges. If you’re making this with children, designate a small section for each child to decorate—they’ll be thrilled to showcase their creativity, and you’ll avoid the inevitable disagreements over who gets to place what!

    Serving Ideas & Creative Variations

    Seasonal Adaptations Year-Round

    While Easter may be the obvious occasion, this versatile dirt cake casserole transforms beautifully for any season with simple tweaks! For summer, create a beach theme with blue gelatin “water,” graham cracker “sand,” and teddy graham “swimmers.” Fall calls for candy pumpkins and autumn-colored sprinkles. Winter holidays shine with crushed peppermint and mini marshmallow “snowballs.” I’ve even made a Halloween version with gummy worms and candy headstones that was a massive hit at our neighborhood party! The basic recipe remains your faithful canvas—just like my Easy No Bake Grinch Pie that works wonders for Christmas gatherings.

    Dietary Modifications Made Simple

    Adapting this crowd-pleaser for various dietary needs is surprisingly straightforward! For gluten-sensitive guests, substitute traditional Oreos with gluten-free chocolate cookies. Lactose concerns? Swap in dairy-free pudding mixes and plant-based cream cheese—the taste difference is barely noticeable! I’ve created a lower-sugar version using sugar-free pudding and reduced-fat cream cheese that my diabetic uncle thoroughly enjoyed. For a more sophisticated adult version, try adding a tablespoon of coffee liqueur to the pudding mixture. The versatility of this basic recipe means everyone can enjoy a serving regardless of dietary restrictions.

    Storage & Troubleshooting Guide

    Keeping It Fresh Beyond Day One

    This dessert maintains its delightful texture remarkably well when stored properly! Cover tightly with plastic wrap (not aluminum foil, which can react with the dairy) and refrigerate for up to 4 days. I’ve found the flavor actually improves on day two as the cookies soften slightly and the flavors meld together. If you’re planning ahead, you can prepare the base layers up to 48 hours in advance and add the decorative elements just before serving. For family gatherings, I often make individual portions in clear cups with lids—they store beautifully in the fridge and make for easy grab-and-go treats that my nieces and nephews absolutely adore!

    Solving Common Texture Issues

    Even experienced bakers occasionally encounter a too-soft or too-firm dirt cake! If your mixture seems excessively runny, it’s likely due to pudding that hasn’t set completely. Pop it in the freezer for 20-30 minutes before continuing to layer. Conversely, if it’s too stiff to spread, let the cream cheese mixture stand at room temperature for 10 minutes or gently fold in 1-2 tablespoons of milk. For cookies that seem to get soggy too quickly, try a light sprinkle of cocoa powder between layers to create a moisture barrier. Remember that temperature matters—ingredients should be cool but not ice-cold when mixing to achieve that perfect, creamy consistency.

    Frequently Asked Questions

    Can I make this Easy No Bake Easter Dirt Cake Casserole ahead of time?

    Absolutely! Prepare it up to 48 hours in advance and keep refrigerated. Add decorative toppings like candy eggs and bunnies just before serving for the freshest appearance.

    What’s the best container to use for this dessert?

    A clear glass trifle dish or 9×13 baking dish works perfectly. The transparent sides showcase the beautiful layers, creating that wow factor when you bring it to the table.

    Can I freeze leftovers?

    I don’t recommend freezing this dessert as the texture suffers upon thawing. The pudding and cream cheese mixture tends to separate, and the cookies become mushy rather than pleasantly soft.

    How do I prevent my decorations from sinking?

    Place decorative elements after the final chilling period, when the top layer is firm enough to support them. For heavier items like chocolate bunnies, add a small cookie “platform” underneath.

    What’s a good substitute for chocolate cookies if someone doesn’t like chocolate?

    Golden sandwich cookies make an excellent alternative! They create a “sandy” appearance rather than dirt and pair wonderfully with vanilla pudding for a lighter flavor profile.

    Final Thoughts

    This Easy No Bake Easter Dirt Cake Casserole has saved countless holiday gatherings for me, delivering maximum impact with minimal effort. There’s something truly special about watching faces light up when you bring this whimsical creation to the table. Whether you’re a seasoned baker or kitchen-shy, this forgiving recipe welcomes all skill levels with open arms. Make it your own with personal touches, adapt it to fit any dietary needs, and watch it become a treasured tradition in your home just as it has in mine. For more seasonal inspiration, visit our Pinterest page where holiday magic happens year-round!

  • Easter No Bake Oreo Balls: Irresistibly Easy & Delicious Treats!

    Easter No Bake Oreo Balls: Irresistibly Easy & Delicious Treats!

    Easter No Bake Oreo Balls: Irresistibly Easy & Delicious Treats!

    Easter No Bake Oreo Balls have become my absolute favorite last-minute treat when I need something festive that doesn’t require turning on the oven. The first time I made these for my family’s Easter gathering, they disappeared faster than the hidden eggs in our annual hunt! There’s something magical about the combination of crushed Oreos and cream cheese, rolled into perfect little spheres and decorated with pastel-colored white chocolate. They’re decadently rich yet so simple to make, making them the perfect addition to your holiday dessert spread.

    Recipe

    Why You’ll Love These Easter No Bake Oreo Balls

    Perfect for Busy Holiday Schedules

    These no bake treats are a lifesaver during the hectic Easter season. When I’m juggling egg hunts, family dinners, and spring cleaning, the last thing I want is a complicated dessert. These Oreo balls require just 15 minutes of active time and can be made days ahead. The simple process of crushing cookies, mixing with cream cheese, and dipping in chocolate is almost therapeutic. I love that I can prepare them while catching up with family in the kitchen—no hot ovens or precise timing needed!

    Crowd-Pleasing Flavor Everyone Loves

    There’s a reason Oreo balls have stood the test of time—they’re absolutely irresistible! The combination of chocolate cookies with tangy cream cheese creates a truffle-like texture that melts in your mouth. I’ve never met anyone who could stop at just one. Even my picky nephew, who claims to “not like desserts,” requested these for his birthday after trying them at Easter. The familiar Oreo flavor appeals to kids while the rich, creamy texture satisfies sophisticated adult palates, making them the perfect cross-generational treat.

    Essential Tips & Tricks

    Getting the Perfect Consistency

    The secret to amazing Oreo balls lies in achieving that perfect texture. I’ve found that using a food processor creates the most consistent crumb, but a zip-top bag and rolling pin works wonderfully too—plus it’s a great way to release some stress! Make sure your cream cheese is properly softened (I leave mine out for at least 30 minutes), as cold cream cheese will leave lumps. When mixing, you’re looking for a play-dough consistency that holds together without being sticky. If your mixture seems too wet, add a few more crushed Oreos; too dry, add a tiny bit more cream cheese.

    Mastering the Chocolate Coating

    The chocolate coating can make or break your Easter No Bake Oreo Balls. I learned the hard way that proper chocolate melting is crucial! Use good quality white chocolate (or candy melts for vibrant Easter colors) and melt it slowly—either in 30-second microwave intervals or with a double boiler. The game-changer for me was adding a teaspoon of coconut oil to the melted chocolate, which creates a smoother consistency that’s easier to work with. Keep your Oreo balls chilled until the moment you’re ready to dip them, and use a fork to gently lower them into the chocolate for the most even coating.

    Serving Ideas & Creative Variations

    Festive Easter Decorations

    Transform these simple treats into showstopping Easter delights with creative decorations! I love using pastel-colored white chocolate with contrasting drizzles for a spring vibe. Edible decorations like small sugar flowers, bunny sprinkles, or even crushed freeze-dried strawberries create beautiful pops of color. For my niece’s Easter party, I arranged the Oreo balls in a nest of edible Easter grass with some mini chocolate eggs scattered around—the presentation was so adorable that guests were taking photos before diving in! Consider placing each ball in mini cupcake liners for easy serving.

    Flavor Twists for Every Preference

    While classic Oreos are divine, experimenting with different flavor combinations takes these treats to new heights! For Easter, I often make a variety pack: mint Oreos dipped in dark chocolate, golden Oreos with white chocolate and lemon zest, and birthday cake Oreos with pastel sprinkles. Adding a drop of peppermint extract to the chocolate coating or mixing in a tablespoon of peanut butter to the filling creates delightful variations. My personal favorite is using the coconut Oreos with a hint of lime zest in the filling—they taste like spring in a bite!

    Storage & Troubleshooting Guide

    Keeping Your Oreo Balls Fresh

    These Easter No Bake Oreo Balls stay perfectly fresh when stored properly. After they’ve set completely, place them in an airtight container with parchment paper between layers to prevent sticking. They’ll keep in the refrigerator for up to two weeks, though they rarely last that long in my house! For longer storage, you can freeze them for up to three months. I like to make a double batch and freeze half—they thaw beautifully in the refrigerator overnight. Just be aware that if you’ve used sprinkles or delicate decorations, freezing might affect their appearance.

    Fixing Common Problems

    Even experienced bakers encounter issues sometimes! If your Oreo balls are too soft to roll, simply refrigerate the mixture for 15-20 minutes to firm it up. Chocolate coating cracking? That’s usually because the balls were too cold when dipped—let them warm slightly at room temperature. If your chocolate seizes or becomes too thick, gently stir in a teaspoon of coconut oil to restore a smooth consistency. For balls that are rolling unevenly, try using a small cookie scoop to portion the mixture, then roll between your palms for perfect spheres. Remember, even imperfect Oreo balls are delicious!

    Frequently Asked Questions

    Can I make Easter No Bake Oreo Balls ahead of time?

    Absolutely! These treats can be made up to 5 days in advance when stored in the refrigerator. The flavors actually develop nicely over time, making them perfect for holiday prep.

    What’s the best way to crush Oreos for this recipe?

    A food processor creates the finest, most consistent crumb. If you don’t have one, place cookies in a ziplock bag and crush with a rolling pin until you achieve a fine powder.

    Can I use reduced-fat cream cheese?

    Yes, but the texture will be slightly different. Full-fat cream cheese creates a richer, more truffle-like consistency, while reduced-fat makes a slightly firmer ball.

    How do I prevent my hands from getting messy while rolling?

    Lightly coat your hands with cooking spray or a tiny bit of coconut oil before rolling. Alternatively, wearing food-safe gloves makes the process much cleaner.

    Why are my Easter No Bake Oreo Balls too sticky to roll?

    Your mixture may be too warm or have too much cream cheese. Refrigerate for 20-30 minutes to firm up, or gradually add more crushed Oreos until you reach a rollable consistency.

    Final Thoughts

    These Easter No Bake Oreo Balls have become a beloved tradition in my home—the perfect blend of simplicity and indulgence for spring celebrations. There’s something magical about watching family members’ eyes light up when they spot the colorful platter of treats. Whether you’re a seasoned baker or someone looking for an easy yet impressive dessert, these no-bake delights deliver every time. I hope these Oreo balls bring as much joy to your Easter gathering as they have to mine! Don’t forget to share your creations on Pinterest to inspire others.

  • No-Bake Easter Fudge: Irresistibly Creamy & Easy Delight!

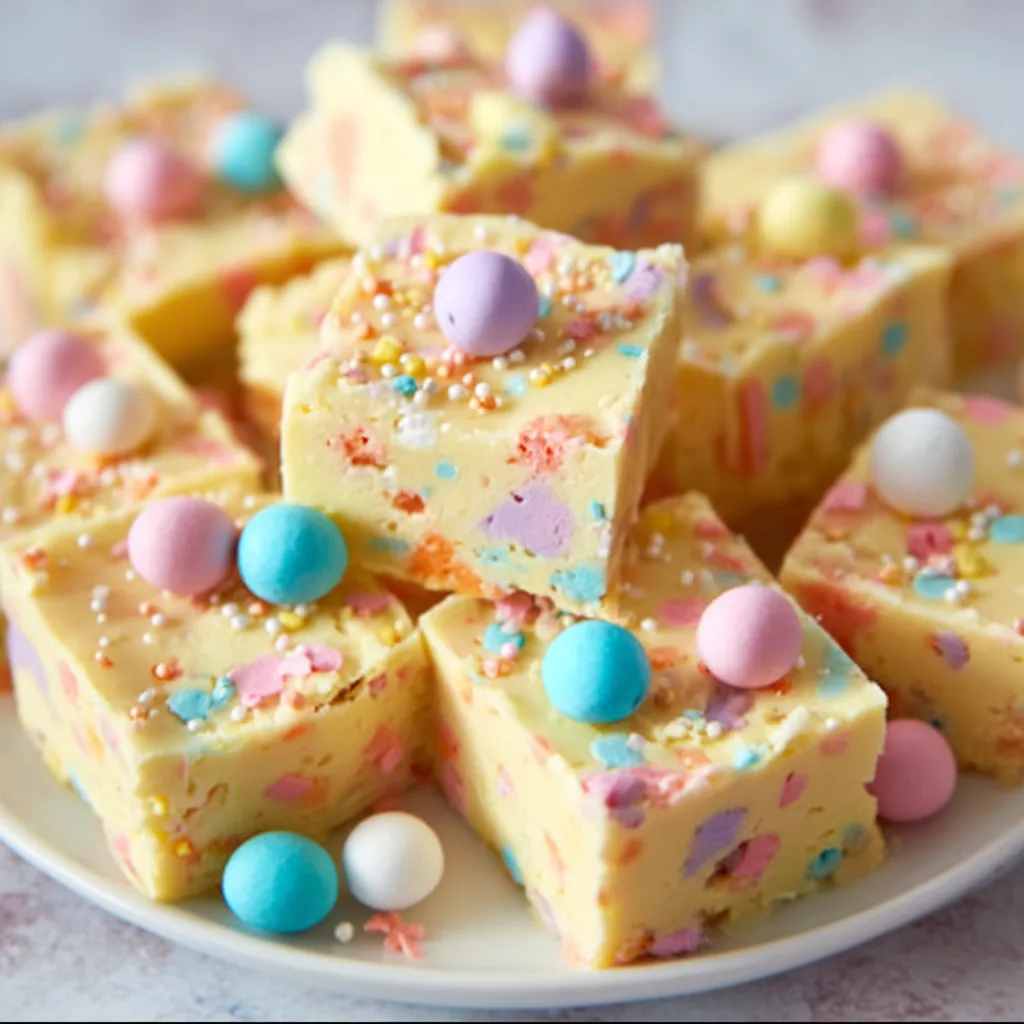
    No-Bake Easter Fudge: Irresistibly Creamy & Easy Delight!

    No-Bake Easter Fudge: Irresistibly Creamy & Easy Delight!

    There’s something magical about no-bake Easter Fudge that brings the spring celebration to life without turning on your oven. As someone who cherishes creating sweet memories during holidays, I’ve found this creamy, colorful treat strikes the perfect balance between festive and fuss-free. The pastel colors remind me of those Sunday morning Easter egg hunts from my childhood, where the excitement of discovering something sweet hidden in the grass made the day special. This recipe captures that same joy in every bite, with layers of velvety chocolate and spring-inspired toppings that will delight everyone at your Easter gathering.

    Recipe

    Why You’ll Love This no-bake Easter Fudge

    Perfect for Busy Holiday Preparations

    When Easter weekend arrives, the last thing you need is another complicated recipe competing for oven space. This no-bake Easter Fudge saves the day by requiring zero baking time! I remember last Easter when my sister dropped by unexpectedly with her kids—I whipped this up while we caught up over coffee, and it set in time for an afternoon treat. The simple preparation means you can focus on other holiday activities while still presenting a showstopping dessert that looks like you spent hours in the kitchen. The quick set time makes it perfect for last-minute gatherings.

    Customizable for Everyone’s Tastes

    One of my favorite things about this no-bake Easter Fudge is how easily it adapts to different preferences. Whether you’re serving chocolate purists or candy enthusiasts, this recipe welcomes creativity. The basic fudge base stays the same, but you can personalize with white chocolate, dark chocolate, or milk chocolate layers. Last year, I made a batch with a section of peanut butter fudge for the adults and a colorful sprinkle section that my niece still talks about. Add Easter candies, crushed cookies, or pastel sprinkles to create a dessert that’s uniquely yours.

    Essential Tips & Tricks

    Achieving the Perfect Fudge Texture

    The secret to silky-smooth no-bake Easter Fudge lies in how you handle the chocolate. I learned this the hard way after a batch turned grainy when I rushed the process. Always melt chocolate slowly over low heat or in short microwave bursts, stirring frequently. The condensed milk should be at room temperature before mixing to prevent temperature shock. When folding ingredients together, use gentle motions rather than vigorous stirring, which can introduce air bubbles. For multi-layered fudge, allow each layer to set slightly before adding the next—about 15 minutes in the refrigerator works perfectly.

    Preventing Common Mistakes

    Even the simplest recipes have pitfalls, and no-bake Easter Fudge is no exception. The most common issue I’ve encountered is fudge that’s too soft or won’t set properly. The culprit is usually added liquid from extracts or food coloring. Always use gel food coloring rather than liquid versions to maintain the proper consistency. Line your pan with parchment paper with overhang for easy removal—nothing ruins beautiful fudge faster than struggling to get it out of the pan! If adding candies or decorations, press them in gently while the fudge is still slightly soft but not completely liquid, similar to my approach with no-bake Grinch pie.

    Serving Ideas & Creative Variations

    Festive Presentation Techniques

    Transform your no-bake Easter Fudge from delicious to unforgettable with thoughtful presentation. I love arranging square fudge pieces in Easter baskets lined with colorful tissue paper for gifting. For serving at home, try creating a dessert board with the fudge as the centerpiece, surrounded by fresh berries, cookies, and chocolate eggs. Last Easter, I used a small bunny-shaped cookie cutter for some pieces and left others as squares, creating a playful mixed arrangement on my grandmother’s vintage cake stand. The contrast of shapes made the display so much more interesting without any extra work.

    Seasonal Flavor Combinations

    While traditional chocolate fudge is always a hit, seasonal flavors can make your no-bake Easter Fudge truly memorable. Try a lemon-white chocolate layer with crushed lemon cookies for a spring-inspired variation. Coconut cream with a drop of almond extract creates a delicate flavor reminiscent of Easter coconut cakes. For chocolate lovers, consider a chocolate-strawberry combination that echoes chocolate-covered strawberries, similar to the flavor pairing in my easy chocolate cream pie. The freshness of fruit flavors balances the richness of the fudge, making it perfect for spring celebrations.

    Storage & Troubleshooting Guide

    Keeping Fudge Fresh

    Proper storage ensures your no-bake Easter Fudge stays delicious for days after making it. Store it in an airtight container with parchment paper between layers to prevent sticking. At room temperature, it will maintain its texture for 3-4 days, though I find the flavor actually improves after the first day as the ingredients meld together. For longer storage, refrigerate for up to two weeks, but bring to room temperature before serving to restore that melt-in-your-mouth quality. If you’re planning far ahead, you can even freeze the fudge for up to three months—just wrap individual pieces tightly in plastic wrap before placing in a freezer container.

    Rescuing Less-Than-Perfect Results

    Even experienced bakers sometimes end up with fudge that’s too soft or too firm. If your no-bake Easter Fudge is too soft after chilling, it likely needs more time in the refrigerator—give it at least 4 hours or overnight. For extremely soft fudge, try freezing it for firmer texture. If it’s too hard or grainy, let it come to room temperature, then gently warm and re-whip with a small amount of cream. Don’t worry about appearance flaws—strategically placed toppings like Easter sprinkles or candy can disguise any surface imperfections while adding festive charm.

    Frequently Asked Questions

    Can I make no-bake Easter Fudge ahead of time?

    Absolutely! This fudge actually benefits from being made 1-2 days in advance. The flavors meld together beautifully, and it stays fresh in an airtight container in the refrigerator for up to two weeks.

    How can I make this recipe vegan?

    Substitute the condensed milk with coconut condensed milk and use dairy-free chocolate chips. The setting process works the same way, and most guests won’t notice the difference in the final product.

    Why did my fudge not set properly?

    Improper setting usually happens when there’s too much liquid or the chocolate-to-condensed milk ratio is off. Make sure to use exact measurements and allow sufficient chilling time (at least 4 hours, preferably overnight).

    What’s the best chocolate to use for no-bake Easter Fudge?

    High-quality chocolate chips or bars with 50-60% cocoa content work best. They melt smoothly and set with the perfect fudgy texture without being too soft or too brittle.

    Can I freeze leftover fudge?

    Yes! Wrap individual pieces tightly in plastic wrap, then store in an airtight container. Freeze for up to 3 months and thaw in the refrigerator overnight before serving.

    Final Thoughts

    This no-bake Easter Fudge has become my holiday tradition for good reason—it delivers maximum joy with minimum effort. The combination of creamy texture, customizable flavors, and festive appearance makes it perfect for Easter celebrations of any size. Whether you’re making it as a last-minute dessert or planning ahead for gifts, this recipe proves that sometimes the simplest treats create the strongest memories. I hope this fudge brings as much sweetness to your Easter gathering as it has to mine! Don’t forget to check out more seasonal inspiration on Pinterest.

  • Quick Chicken Zucchini Stir Fry: Easy, Delicious & Ready Fast!

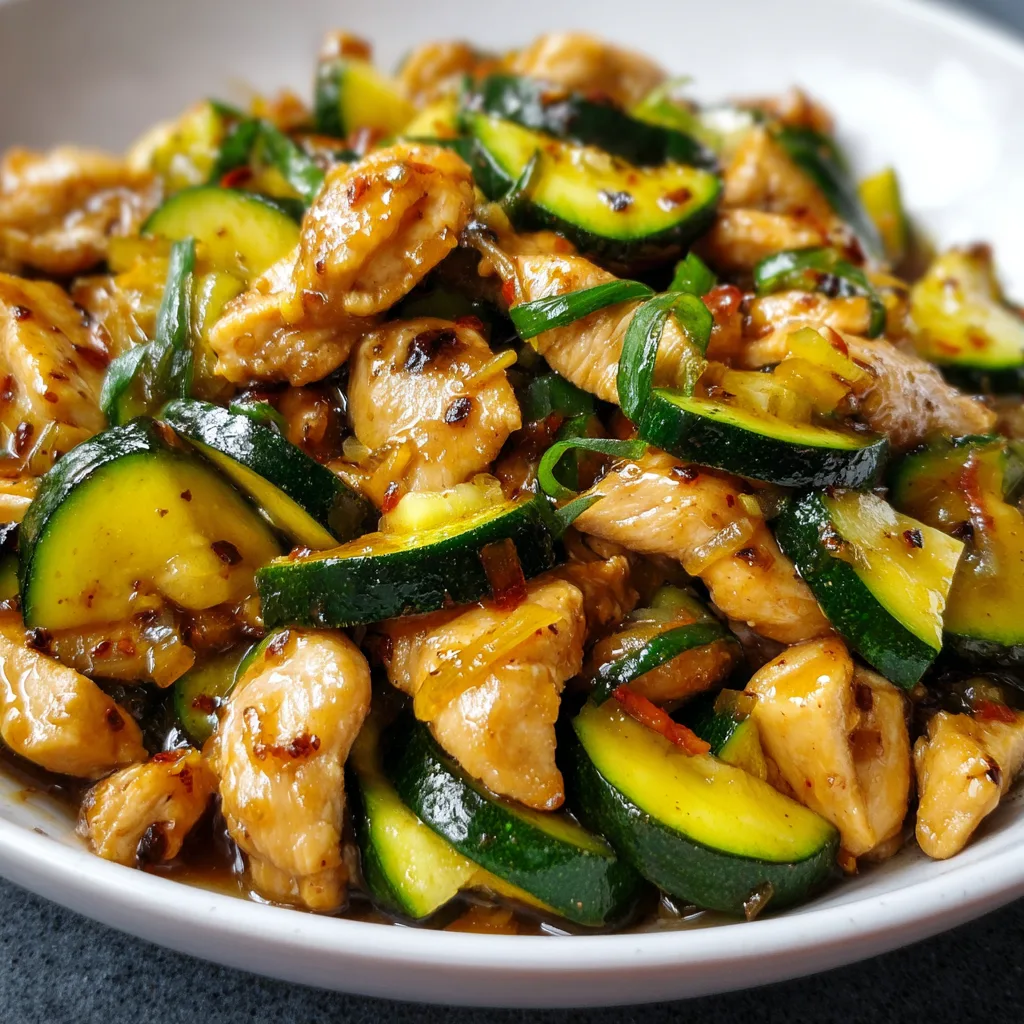
    Quick Chicken Zucchini Stir Fry: Easy, Delicious & Ready Fast!

    Quick Chicken Zucchini Stir Fry: Easy, Delicious & Ready Fast!

    This Quick Chicken Zucchini Stir Fry saved my Thursday night dinner last week when I was staring at the clock—already 6:30 and nothing planned. I grabbed the chicken from the fridge, spotted two forgotten zucchinis, and within 20 minutes, we were sitting down to a meal that made my husband ask, “Did you order takeout?” The secret lies in the simple sauce that transforms these everyday ingredients into something restaurant-worthy. If you’re looking for a weeknight dinner hero that’s healthy, fast, and bursting with flavor, this stir fry might just become your new go-to recipe, just like it’s become mine at Recipes Darleen.

    Recipe

    Why You’ll Love This Quick Chicken Zucchini Stir Fry

    Perfect for Busy Weeknights

    There’s something magical about a meal that comes together in under 30 minutes but tastes like you spent hours in the kitchen. This Quick Chicken Zucchini Stir Fry is my weeknight secret weapon—just slice, dice, and you’re halfway there! The chicken cooks in minutes, the zucchini stays perfectly crisp-tender, and the sauce thickens to glossy perfection right before your eyes. I love how the kitchen fills with that savory-sweet aroma that makes everyone suddenly appear at the dinner table without being called. It’s become my reliable answer to “What’s for dinner?” when time isn’t on my side.

    Healthy Yet Satisfying

    What I adore about this stir fry is how it manages to be both nutritious and crave-worthy at the same time. The lean chicken breast provides plenty of protein-packed goodness while the zucchini adds fiber, vitamins, and that fresh element that makes everything feel lighter. Unlike takeout that leaves you feeling heavy, this homemade version gives you control over the sodium and oil. I’ve served this to my health-conscious sister and my “where’s the real food?” brother-in-law, and both went back for seconds. It’s that rare unicorn of a meal that satisfies everyone without compromising on nutrition.

    Essential Tips & Tricks

    Mastering the High-Heat Technique

    The true secret to restaurant-quality stir fry isn’t fancy ingredients—it’s all about technique and timing. Get your pan screaming hot before adding anything to it. I learned this lesson the hard way after years of soggy stir fries! A carbon steel wok is ideal, but any large skillet works if you don’t crowd it. Cook your chicken in batches if needed—overcrowding causes steaming instead of searing. That golden-brown color on your chicken? That’s pure flavor developing. The zucchini should only cook for 2-3 minutes to maintain that perfect crisp-tender bite that makes this Quick Chicken Zucchini Stir Fry so addictive.

    Creating the Perfect Sauce Balance

    The sauce is where your stir fry transforms from basic to brilliant. The magic formula combines salty (soy sauce), sweet (honey or brown sugar), acid (rice vinegar), and umami (garlic and ginger). I always mix my sauce ingredients in a small bowl before cooking begins—this ensures everything incorporates evenly when that sizzling hot pan demands your full attention. My personal touch is adding a teaspoon of sesame oil at the very end, off heat. It creates that authentic aroma that makes everyone ask what smells so amazing. Remember to reserve a tablespoon of cornstarch slurry to thicken the sauce just right.

    Serving Ideas & Creative Variations

    Beyond Basic Rice

    While steamed jasmine rice makes a perfect bed for this stir fry, don’t stop there! I’ve discovered that this Quick Chicken Zucchini Stir Fry pairs beautifully with so many grain alternatives. Try cauliflower rice for a lower-carb option, or quinoa for extra protein. My personal favorite is serving it over rice noodles—they soak up that delicious sauce in the most satisfying way. For a complete meal makeover, try wrapping everything in lettuce cups topped with crushed peanuts and extra sriracha. It’s reminiscent of those fancy Asian Dumpling Lasagna flavors but comes together in half the time.

    Customizing Your Protein and Vegetables

    The beauty of this recipe lies in its flexible foundation. Swap chicken for thinly sliced beef, shrimp, or even tofu for a vegetarian version—just adjust cooking times accordingly. The vegetable possibilities are endless too! I often add bell peppers, snap peas, or broccoli florets when they need using up. My daughter’s favorite version includes thinly sliced carrots and baby corn. For a spicier kick, add sliced fresh chilies or a dollop of chili crisp oil. Sometimes I’ll toss in a handful of cashews or water chestnuts for added crunch. Each variation feels like a completely different meal while using the same cooking method.

    Storage & Troubleshooting Guide

    Making It Last (And Taste Great)

    This Quick Chicken Zucchini Stir Fry is a meal-prep champion that actually improves overnight as the flavors meld. Store leftovers in airtight containers in the refrigerator for up to 3 days. I recommend slightly undercooking the zucchini if you know you’ll be reheating, as it continues to soften. For reheating, a quick minute in the microwave works, but for best results, toss it in a hot skillet with a splash of water to revive the sauce. If freezing (yes, you can!), freeze the chicken and sauce separately from the zucchini, then combine after thawing for the freshest texture.

    Fixing Common Stir Fry Problems

    Even experienced cooks encounter stir fry challenges. If your sauce is too thin, mix an additional teaspoon of cornstarch with cold water and stir it in while the pan is still hot. Conversely, if it’s too thick, add a tablespoon of chicken broth or water. Dealing with soggy vegetables? That usually means your pan wasn’t hot enough or you overcrowded it. Next time, try cooking in smaller batches. If your chicken turned out tough, it was likely overcooked—remember that it continues cooking slightly in the hot sauce. A meat thermometer showing 165°F is your best friend for perfectly juicy chicken every time.

    Frequently Asked Questions

    Can I make this Quick Chicken Zucchini Stir Fry ahead of time?

    Yes! Prep all ingredients and mix the sauce up to 24 hours ahead. Store everything separately in the refrigerator, then cook just before serving for the freshest texture and flavor—the actual cooking takes less than 10 minutes.

    What’s the best way to slice zucchini for stir fry?

    For quick, even cooking, slice zucchini into half-moons about ¼-inch thick. If using larger zucchini, quarter them lengthwise first, then slice to avoid waterlogged pieces in your stir fry.

    Can I use frozen vegetables instead of fresh?

    Absolutely! Thaw completely and pat dry before adding to the pan. Frozen vegetables are already partially cooked, so add them toward the end of cooking time to prevent mushiness.

    How do I prevent my chicken from sticking to the pan?

    Ensure your pan is properly heated before adding oil, then let the oil heat until it shimmers. Don’t move the chicken pieces for the first 1-2 minutes to allow a proper sear to form.

    Is this recipe gluten-free?

    Not as written, but easily adaptable! Simply substitute regular soy sauce with tamari or coconut aminos, and verify your other condiments are certified gluten-free for a delicious gluten-free meal.

    Final Thoughts

    This Quick Chicken Zucchini Stir Fry has become my reliable lifesaver on busy nights when I need something nutritious, delicious, and fast. What I love most is watching my family devour vegetables without a single complaint—a minor miracle in my household! The beauty of this dish lies in its adaptability and simplicity. Once you master the basic technique, you’ll find yourself creating endless variations based on what’s in your fridge. For more quick dinner inspiration that transforms simple ingredients into memorable meals, check out our Pinterest collection of weeknight wonders!