Author: Lily Bennett

  • Quick Mediterranean Chicken Tenders: Irresistibly Crisp & Flavor-Packed!

    Quick Mediterranean Chicken Tenders: Irresistibly Crisp & Flavor-Packed!

    Quick Mediterranean Chicken Tenders: Irresistibly Crisp & Flavor-Packed!

    Quick Mediterranean Chicken Tenders are my absolute lifesaver on those evenings when I want something delicious but don’t have hours to spend in the kitchen. I still remember the first time I made these – my kitchen filled with the aromatic blend of herbs and lemon while my family gathered around, drawn by the irresistible scent. These tender, juicy chicken strips coated in Mediterranean flavors transform an ordinary weeknight dinner into something special in just 20 minutes. Perfect for busy parents or anyone craving a flavorful protein without the fuss!

    Recipe

    Why You’ll Love This Quick Mediterranean Chicken Tenders

    Perfect Balance of Flavors and Simplicity

    There’s something magical about the combination of oregano, garlic, and lemon that transports you straight to a seaside taverna. I adore how these Mediterranean flavors infuse the chicken so quickly, making this recipe perfect for those “I need dinner now!” moments. The first time my daughter tried these, she declared them “fancy restaurant chicken,” which made me laugh – our little secret is how ridiculously simple they are to prepare! The tender texture comes from a quick marinade that works its magic in just minutes, not hours.

    Weeknight-Friendly and Versatile

    On busy Tuesdays when soccer practice runs late and homework awaits, these tenders have become my secret weapon. The entire dish comes together in about 20 minutes flat, from prep to plate. I’ve made these with both chicken breast strips and thighs – both work beautifully! What I particularly love is how adaptable they are; sometimes I’ll add a sprinkle of sumac or za’atar when I want to change things up, or a touch of honey for a subtle sweetness. They’re equally delicious hot from the pan or chilled for lunch the next day.

    Essential Tips & Tricks

    Perfecting the Marinade

    The real magic happens in the marinade, even though it’s quick! I’ve found that using fresh lemon juice rather than bottled makes a noticeable difference in brightness. For maximum flavor infusion, make sure to massage the marinade into the chicken with your hands (messy but worth it!). Don’t skip the olive oil – it helps carry the flavors into the meat and keeps everything juicy. If you have an extra five minutes, letting the chicken sit with the marinade while you prep other ingredients allows the flavors to deepen without adding much time.

    Cooking for Maximum Juiciness

    The biggest mistake I made when I first started cooking chicken tenders was overcooking them. Now I know the secret is a hot, quick sear followed by a brief rest. Heat your pan until it’s properly hot before adding the chicken – you want to hear that satisfying sizzle! For perfectly juicy tenders, cook just until they reach 165°F internal temperature. I love serving these alongside my Broccoli with Garlic Butter and Cashews for a complete meal that comes together in minutes.

    Serving Ideas & Creative Variations

    Family-Friendly Serving Suggestions

    These tenders are incredibly versatile when it comes to serving options. My personal favorite is to slice them and stuff them into warm pita pockets with crisp lettuce, juicy tomatoes, and a generous drizzle of tzatziki sauce. For a lower-carb option, I’ll often serve them atop a Greek salad with plenty of feta cheese and kalamata olives. When my niece and nephew visit (my toughest food critics!), I serve the tenders with simple dipping sauces – honey mustard for him and garlic yogurt for her – alongside some quick-roasted potatoes.

    Creative Twists and Variations

    Don’t be afraid to play with this recipe! I’ve created a lemon-dill variation by swapping the oregano for fresh dill that was absolutely divine. For a spicier kick, add a pinch of red pepper flakes or a dash of harissa to the marinade. When I’m feeling extra fancy, I’ll add some crumbled feta on top of the hot tenders so it gets slightly melty. These also work beautifully in meal prep – I often make a double batch to use in Quick and Easy Creamy Mushroom Soup for lunch the next day, creating a completely different meal with minimal effort.

    Storage & Troubleshooting Guide

    Proper Storage and Reheating

    These Mediterranean chicken tenders maintain their delicious flavor when stored properly. Place cooled leftovers in an airtight container and refrigerate for up to three days. For reheating, avoid the microwave if possible – it tends to dry them out. Instead, I place them in a covered skillet with a tablespoon of water and warm over medium-low heat until just heated through. This gentle method preserves their moisture and flavor. If you’re meal prepping, consider slicing the cooled tenders before storing to make them even more versatile for salads and wraps later in the week.

    Common Issues and Simple Fixes

    If your tenders are coming out dry, you’re likely cooking them too long – chicken tenders need just 3-4 minutes per side. Another common issue is bland flavor, which usually means you need more salt in the marinade or a longer marinating time. If your pan isn’t hot enough when you add the chicken, you’ll miss that beautiful golden sear that locks in juices. For those times when the chicken sticks to the pan (we’ve all been there!), make sure you’re using enough oil and that your pan is properly preheated. A well-seasoned cast iron or quality non-stick pan makes a world of difference.

    Frequently Asked Questions

    Can I make Quick Mediterranean Chicken Tenders in the air fryer?

    Absolutely! Preheat your air fryer to 380°F and cook for 8-10 minutes, flipping halfway through. They’ll come out beautifully crisp on the outside while staying juicy inside.

    How can I make this recipe spicier?

    Add 1/2 teaspoon of crushed red pepper flakes to the marinade or serve with a side of harissa paste for dipping. Cayenne pepper works well too if you prefer a more intense heat.

    Can I use chicken thighs instead of tenders?

    Yes! Boneless, skinless chicken thighs work beautifully. They’ll need about 2-3 minutes longer cooking time but offer even more juiciness and flavor.

    Is this recipe gluten-free?

    Yes, this recipe is naturally gluten-free as written. Just be careful with store-bought seasoning blends if you use them, as some may contain gluten as a filler.

    How do I know when the chicken tenders are done cooking?

    Chicken tenders are done when they reach an internal temperature of 165°F or when the meat is opaque throughout with no pink remaining.

    Final Thoughts

    Quick Mediterranean Chicken Tenders have truly been a game-changer in my kitchen routine. There’s something special about a recipe that delivers such bright, satisfying flavors with so little effort. I find myself returning to this dish again and again, not just for convenience but because everyone at my table genuinely enjoys it. Whether you’re serving them with a simple salad, stuffed in a pita, or as part of a larger Mediterranean feast, these tenders bring a touch of sunshine to any meal. Check out more of my favorite quick dinner ideas on Pinterest!

  • Quick & Easy Creamy Mushroom Soup: Comfort in Every Spoon!

    Quick & Easy Creamy Mushroom Soup: Comfort in Every Spoon!

    Quick & Easy Creamy Mushroom Soup: Comfort in Every Spoon!

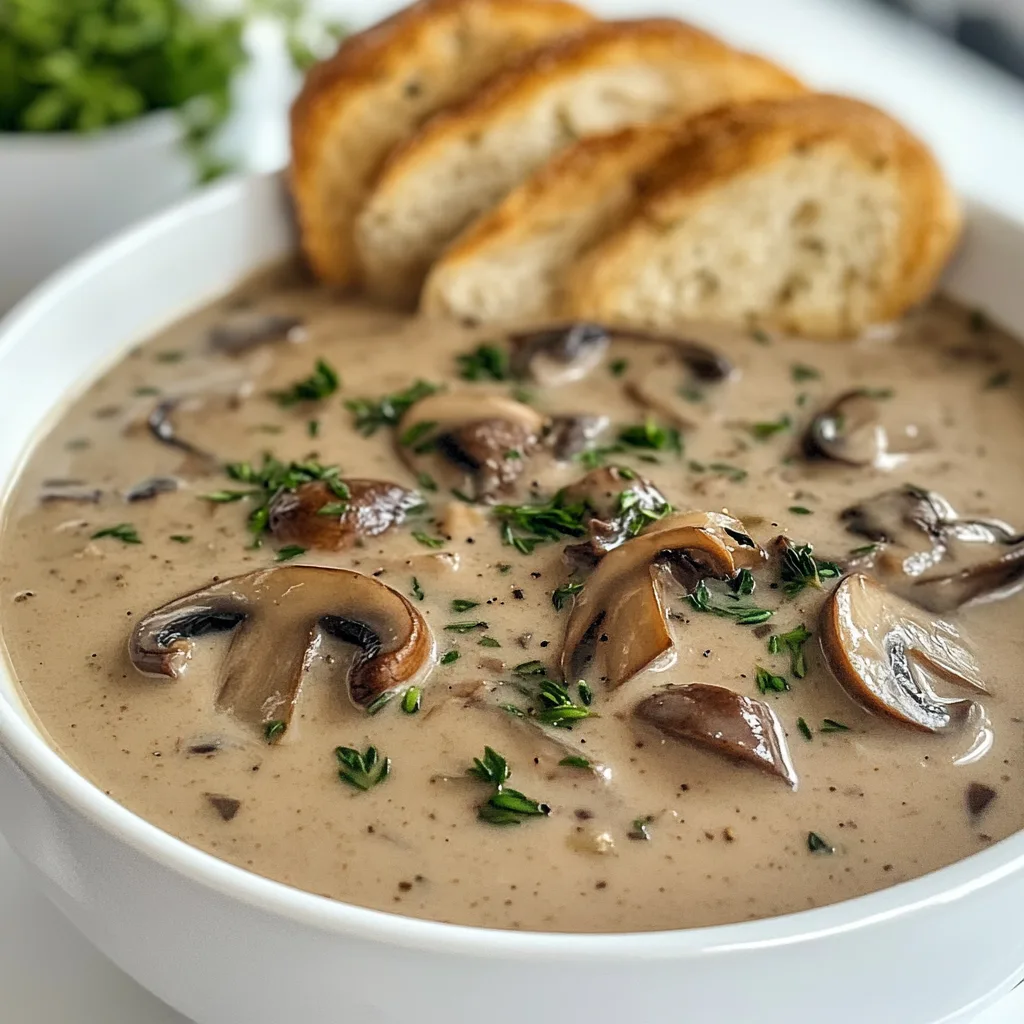
    Quick and Easy Creamy Mushroom Soup is my absolute go-to comfort food when the weather turns chilly. There’s something magical about the earthy aroma that fills my kitchen as those mushrooms simmer away with herbs and cream. Last autumn, when my sister visited during a particularly rainy weekend, I whipped this up in just 30 minutes, and we both sat wrapped in blankets, savoring each velvety spoonful. This soup strikes that perfect balance between luxurious and effortless – rich enough to feel special but simple enough for any weeknight. If you love creamy soups like I do, you’ll want to add this to your regular rotation alongside my Thick and Creamy Tomato Soup.

    Recipe

    Why You’ll Love This Quick and Easy Creamy Mushroom Soup

    Perfect Balance of Flavors and Textures

    This Quick and Easy Creamy Mushroom Soup delivers an incredible depth of flavor that belies its simple preparation. The earthiness of the mushrooms combines beautifully with aromatic garlic and herbs, while a splash of sherry adds that je ne sais quoi that elevates it beyond ordinary. The texture is silky smooth yet substantial enough to feel satisfying. I love how the cream mellows everything into velvety perfection without overwhelming the mushroom flavor. Even my husband, who typically reaches for heartier stews, requests this regularly – it’s that good at hitting those comfort food notes while still feeling somewhat light.

    Ready in Under 30 Minutes

    When life gets hectic (and when doesn’t it?), this Quick and Easy Creamy Mushroom Soup becomes a true kitchen hero. From start to finish, you’ll have it on the table in under 30 minutes, making it perfect for busy weeknights or impromptu gatherings. I’ve made this countless times when friends drop by unexpectedly or when I’m simply too tired to tackle anything complex. The hands-on time is minimal – just some quick chopping and occasional stirring. The soup develops such rich flavor in that short time that guests always think it’s been simmering all day. It’s my secret weapon for appearing effortlessly put-together when I’m actually scrambling!

    Essential Tips & Tricks

    Choosing and Preparing Your Mushrooms

    The foundation of any amazing Quick and Easy Creamy Mushroom Soup starts with the mushrooms themselves. I recommend using a mix of varieties – cremini for earthiness, shiitake for depth, and button mushrooms for their mild appeal. This combination creates layers of flavor that a single variety simply can’t achieve. When cleaning, resist the urge to rinse them under water; instead, gently wipe with a damp paper towel to preserve their flavor. For texture contrast, try slicing some mushrooms thinly and chopping others chunkier. And don’t rush the initial sauté – those few extra minutes developing that golden-brown color will pay off enormously in the final soup.

    Achieving the Perfect Creamy Consistency

    The secret to that velvety texture in your Quick and Easy Creamy Mushroom Soup lies in how you incorporate the cream and build the base. Start with a proper roux (equal parts butter and flour) to give your soup body without heaviness. When adding cream, reduce the heat and pour slowly while stirring to prevent curdling. For a lighter version that maintains creaminess, substitute half the heavy cream with evaporated milk or cashew cream. An immersion blender works wonders if you prefer a smoother consistency – just pulse gently, leaving some mushroom pieces intact for textural interest. Check out my Creamy Cowboy Soup for more tips on perfecting creamy textures.

    Serving Ideas & Creative Variations

    Perfect Pairings and Garnishes

    Elevate your Quick and Easy Creamy Mushroom Soup from simple to spectacular with thoughtful serving choices. A crusty artisan bread for dipping is non-negotiable in my house – something with a chewy interior and crackling crust that can stand up to the creamy soup. For garnishes, try a swirl of truffle oil, fresh thyme leaves, or crispy fried shallots for contrasting texture. I love serving this soup in wide, shallow bowls to allow it to cool slightly and let the flavors bloom. For a complete meal, pair with a bright Broccoli with Garlic Butter and Cashews salad to balance the richness with something fresh and crunchy.

    Exciting Flavor Twists

    While the classic version is divine, this Quick and Easy Creamy Mushroom Soup welcomes creative variations. For an Asian-inspired twist, add lemongrass, ginger, and coconut milk instead of cream, finishing with a squeeze of lime and fresh cilantro. A Scandinavian version incorporates dill, a touch of mustard, and a dollop of sour cream. For extra umami depth, stir in a spoonful of miso paste or rehydrated dried porcini mushrooms with their soaking liquid. Wine lovers can deglaze the pot with marsala or madeira instead of sherry for a different flavor profile. My personal favorite variation adds roasted garlic and a hint of smoked paprika for a subtle warmth that’s perfect on snowy evenings.

    Storage & Troubleshooting Guide

    Proper Storage and Reheating

    This Quick and Easy Creamy Mushroom Soup actually improves with time, making it perfect for meal prep. Store in airtight containers in the refrigerator for up to 4 days, allowing the flavors to meld and deepen. When reheating, do so gently over low heat, stirring occasionally to prevent the cream from separating. Add a splash of broth or milk if it’s thickened too much during storage. For freezing, I recommend doing so before adding the cream – simply freeze the mushroom base, then thaw, reheat, and add fresh cream when serving. Portion into individual containers for quick lunches or emergency comfort food when you don’t feel like cooking.

    Fixing Common Soup Issues

    Even experienced cooks occasionally encounter challenges with creamy soups. If your Quick and Easy Creamy Mushroom Soup turns out too thin, make a slurry of 1 tablespoon cornstarch mixed with 2 tablespoons cold water and stir it in while the soup simmers. For soup that’s too thick, gradually whisk in warm broth until you reach your desired consistency. If the cream separates or curdles, try whisking in a spoonful of cold cream off the heat. Bland flavor? Add a splash of soy sauce or Worcestershire for umami depth without overwhelming mushroom flavor. For gritty texture, your roux might have been rushed – next time, cook the flour and butter together longer before adding liquids.

    Frequently Asked Questions

    Can I make this Quick and Easy Creamy Mushroom Soup vegetarian?

    Absolutely! Use vegetable broth instead of chicken stock and ensure your Worcestershire sauce is vegetarian (or substitute with soy sauce and a tiny splash of vinegar). The mushrooms provide plenty of umami flavor to compensate.

    What’s the best way to blend this soup while maintaining some texture?

    Use an immersion blender and pulse briefly, or blend only half the soup in a standard blender and combine with the unblended portion. This creates the perfect balance of creaminess with delightful mushroom pieces.

    Can I use dried mushrooms instead of fresh?

    Yes! Rehydrate dried mushrooms in hot water for 20 minutes, then use both the mushrooms and the strained soaking liquid (which adds incredible flavor) in your soup.

    How can I make this soup dairy-free?

    Replace butter with olive oil, use coconut cream instead of heavy cream, and ensure your broth is dairy-free. The coconut adds a subtle sweetness that complements the earthiness of mushrooms beautifully.

    What herbs work best in mushroom soup?

    Thyme is classic with mushrooms, but rosemary, sage, or tarragon also work wonderfully. Start with one herb to avoid overwhelming the delicate mushroom flavor.

    Final Thoughts

    This Quick and Easy Creamy Mushroom Soup has become my reliable kitchen companion through countless rainy days, impromptu gatherings, and quiet evenings when comfort is needed. What makes it truly special is how it transforms humble ingredients into something that feels like a warm hug in a bowl. I hope you’ll make this recipe your own, experimenting with different mushroom varieties and seasonings to suit your taste. For more cozy inspiration, follow my seasonal soup collection on Pinterest. Remember that the best soups, like this one, are those that bring both nourishment and joy to your table.

  • Easy Frosted Texas Brownies: Irresistibly Gooey & Delicious!

    Easy Frosted Texas Brownies: Irresistibly Gooey & Delicious!

    Easy Frosted Texas Brownies: Irresistibly Gooey & Delicious!

    These Easy Frosted Texas Brownies bring me back to my grandmother’s kitchen every single time I make them. There’s something magical about that glossy chocolate frosting poured over the warm, cake-like brownie base that makes everyone’s eyes light up. I discovered this recipe during a particularly rough week, and the simple joy of making these brownies turned everything around. The beauty of these Texas brownies is their simplicity – one pan, straightforward ingredients, and absolutely irresistible results that’ll have everyone asking for the recipe. If you’re looking for a foolproof dessert that delivers maximum comfort with minimal effort, these brownies are exactly what you need.

    Recipe

    Why You’ll Love These Easy Frosted Texas Brownies

    Perfect Texture Every Time

    Texas brownies have a unique texture that sets them apart from traditional fudgy brownies. They’re lighter, more cake-like, but still incredibly moist and tender. The secret lies in the quick boil of butter and water before mixing in the dry ingredients, creating that distinctive Texas brownie crumb. I love how they hold up perfectly when cut into squares – no crumbling or falling apart! The frosting creates this delicate crackly top that gives way to the soft brownie beneath. When you bite in, there’s this beautiful contrast between the silky frosting and the fluffy brownie that makes my taste buds dance every single time.

    Simple Ingredients, Extraordinary Results

    What I adore about these Easy Frosted Texas Brownies is that they use pantry staples you likely already have on hand. No special chocolate bars or fancy extracts needed! Just basic baking ingredients transformed into something spectacular. The frosting comes together with just cocoa powder, powdered sugar, butter, milk, and vanilla – but tastes like something from a high-end bakery. I’ve made these on busy weeknights when a chocolate craving hits, and they never disappoint. There’s something deeply satisfying about creating something so delicious from such humble ingredients. The simplicity means less shopping and more enjoying!

    Essential Tips & Tricks

    Mastering the Perfect Frosting

    The signature element of Easy Frosted Texas Brownies is that glossy, pourable chocolate frosting that sets into a perfect sheen. The key is timing – you want to pour it while the brownies are still warm (but not hot) and while the frosting is still fluid. I find that letting the brownies cool for about 10 minutes gives the perfect result. Another trick: sift your powdered sugar to avoid any lumps in the frosting. If your frosting starts to thicken too quickly, place it back over low heat for just a few seconds, or add a tiny splash of hot water. This creates that bakery-perfect finish that makes these brownies absolutely irresistible.

    Baking Pan Considerations

    The traditional sheet pan is what gives Texas brownies their characteristic thin, uniform shape. I recommend using a 15×10-inch jelly roll pan for authentic results, but a 9×13-inch pan works too (they’ll just be a bit thicker and need a few extra minutes in the oven). Whatever pan you choose, line it with parchment paper with overhang on the sides – this makes removing and cutting the brownies infinitely easier. Also, don’t overbake! These should remain moist, so when a toothpick inserted comes out with a few moist crumbs (not wet batter), they’re done. The residual heat will continue cooking them slightly as they cool.

    Serving Ideas & Creative Variations

    Elevated Serving Suggestions

    Transform these Easy Frosted Texas Brownies into a show-stopping dessert by serving them slightly warm with a scoop of vanilla ice cream. The contrast between the cool, creamy ice cream and the rich, chocolatey brownie is absolutely divine! For dinner parties, I cut them into smaller squares and arrange them on a tiered serving plate with fresh berries scattered between layers. A light dusting of powdered sugar adds an elegant touch. During the holidays, I add a tiny sprinkle of flaky sea salt on top – the salt enhances the chocolate flavor in the most magical way and gives them that gourmet touch that impresses guests every time.

    Exciting Flavor Twists

    While the classic Easy Frosted Texas Brownies are perfect as is, I love experimenting with seasonal variations. For fall, try adding 1/2 teaspoon of cinnamon to both the batter and frosting for a Mexican chocolate vibe. During the holidays, a few drops of peppermint extract in the frosting creates a festive treat. For coffee lovers, dissolve 1 tablespoon of espresso powder in the hot water for a mocha version. My personal favorite variation is adding 1/2 cup of toasted chopped pecans to the batter – the nutty crunch against the soft brownie is absolutely heavenly! These brownies are the perfect canvas for your creativity.

    Storage & Troubleshooting Guide

    Keeping Brownies Fresh

    These Easy Frosted Texas Brownies stay remarkably fresh when stored properly. Once completely cooled, store them in an airtight container at room temperature for up to 3 days. I like to place a piece of wax paper between layers to prevent sticking. For longer storage, refrigerate for up to a week – just let them come to room temperature before serving for the best texture and flavor. They also freeze beautifully! Wrap individual portions in plastic wrap, then foil, and freeze for up to 3 months. I often make a double batch specifically to freeze some for emergency chocolate cravings or last-minute guests.

    Solving Common Problems

    If your Easy Frosted Texas Brownies aren’t turning out perfectly, a few simple adjustments can help. Dry brownies usually mean they’ve been overbaked – remember, they continue cooking slightly after removal from the oven. For frosting that’s too thick to spread, add warm milk a teaspoon at a time until you reach the right consistency. If your frosting has small lumps, simply warm it gently while whisking continuously. For brownies that stick to the pan, remember that parchment paper is your best friend! And if your brownies sink slightly in the middle, it’s likely from opening the oven door too early in the baking process – try to resist peeking until they’re almost done.

    Frequently Asked Questions

    What makes Texas brownies different from regular brownies?

    Texas brownies are typically thinner, more cake-like in texture, and always include a poured frosting. They’re baked in a sheet pan rather than a square pan, creating their distinctive shape and texture.

    Can I make Easy Frosted Texas Brownies without cocoa powder?

    No, cocoa powder is essential for both the brownie and frosting. It provides the chocolate flavor and cannot be substituted without significantly changing the recipe.

    How do I know when my brownies are done baking?

    Insert a toothpick in the center – it should come out with a few moist crumbs, not wet batter. The edges will begin to pull away slightly from the sides of the pan.

    Can I add nuts to these brownies?

    Absolutely! Stir 1/2 to 1 cup of chopped pecans, walnuts, or even toasted hazelnuts into the batter before baking for a delicious nutty variation.

    Why did my Easy Frosted Texas Brownies turn out dry?

    Overbaking is usually the culprit. Check them early, and remember they continue cooking slightly after removal from the oven. Measuring flour incorrectly can also cause dryness.

    Final Thoughts

    These Easy Frosted Texas Brownies have become my go-to dessert for everything from casual family nights to impressive dinner parties. There’s something wonderfully nostalgic yet timeless about them – they remind me of childhood bake sales while still feeling special enough for any occasion. The simplicity of the recipe combined with the spectacular results makes them truly unbeatable. I hope these brownies bring as much joy to your kitchen as they have to mine! Don’t forget to check out more delicious recipes on Pinterest for more inspiration to satisfy your sweet tooth.

  • Slow Cooker Corned Beef and Cabbage: Easy, Tender, Comfort Meal!

    Slow Cooker Corned Beef and Cabbage: Easy, Tender, Comfort Meal!

    Slow Cooker Corned Beef and Cabbage: Easy, Tender, Comfort Meal!

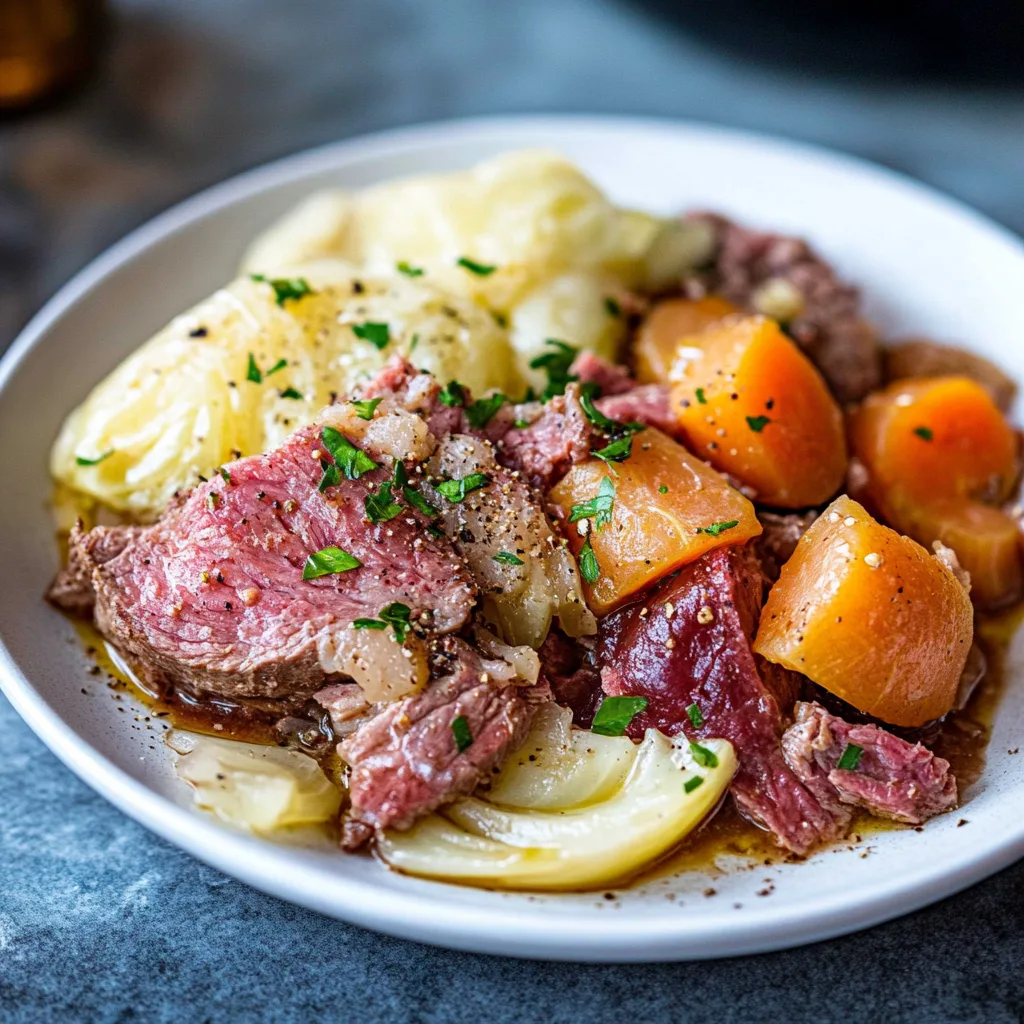
    Slow cooker corned beef and cabbage brings the luck of the Irish to your kitchen with minimal effort and maximum flavor. The gentle, steady heat transforms tough brisket into melt-in-your-mouth tender meat while infusing the vegetables with savory goodness. I discovered this recipe years ago when hosting my first St. Patrick’s Day gathering, and it’s become my go-to method ever since. There’s something magical about lifting the lid after hours of cooking to reveal a complete, aromatic meal that tastes like it took all day to prepare—because it did, just without you hovering over it! If you’re looking for a hearty, comforting dish that practically makes itself, this Irish classic deserves a spot in your recipe collection.

    Recipe

    Why You’ll Love This Slow Cooker Corned Beef and Cabbage

    Perfect for Busy Weeknights and Special Occasions

    This slow cooker corned beef and cabbage recipe is the definition of set-it-and-forget-it cooking. I love that I can spend just 15 minutes prepping in the morning, then return hours later to a house filled with mouthwatering aromas and dinner ready to serve. The meat develops an incredible tenderness that simply can’t be rushed—the collagen breaks down slowly, creating that signature fork-tender texture we all crave. Plus, the vegetables absorb all those savory flavors while maintaining their integrity. It’s perfect for St. Patrick’s Day celebrations, Sunday family dinners, or anytime you want a cozy meal waiting for you after a busy day.

    Budget-Friendly Comfort Food

    One thing I adore about slow cooker corned beef and cabbage is how it transforms inexpensive ingredients into something truly special. Corned beef brisket is typically quite affordable, especially around St. Patrick’s Day when it’s often on sale. The humble cabbage, potatoes, and carrots that round out the dish cost just pennies per serving. My grandmother always said the best meals come from simple ingredients cooked with love and time—and this recipe proves her right. I’ve served this to guests who were amazed at how luxurious it tastes, never guessing it’s actually one of the most economical meals in my rotation.

    Essential Tips & Tricks

    Selecting and Preparing Your Ingredients

    Choosing the right cut of corned beef is crucial for this slow cooker masterpiece. Look for a flat cut brisket if you prefer neat, uniform slices, or a point cut if you don’t mind some extra fat for added flavor. Don’t rinse away the spice packet that comes with your corned beef—those aromatic seeds and spices are essential for authentic flavor! For the vegetables, choose firm cabbage heads and waxy potatoes like Yukon Golds that hold their shape during long cooking. I’ve learned from experience to cut the vegetables into larger chunks than you might for other recipes—about 2-inch pieces work perfectly, preventing them from becoming mushy after hours in the slow cooker.

    Layering and Timing Secrets

    The layering order in your slow cooker makes all the difference in the final texture of this dish. Place the corned beef fat-side up on the bottom, surrounded by onions and garlic. This allows the fat to render down, basting the meat naturally. Add potatoes and carrots next, as they need the most cooking time, and save the cabbage for last or add it during the final 1-2 hours. This staggered approach prevents vegetable overcooking while ensuring the meat reaches that perfect fall-apart tenderness. For a more concentrated flavor, reduce the cooking liquid on the stovetop after removing the meat and vegetables—it makes an incredible natural sauce!

    Serving Ideas & Creative Variations

    Traditional and Modern Accompaniments

    While slow cooker corned beef and cabbage is a complete meal on its own, a few thoughtful sides can elevate the experience. Serve with a side of stone-ground mustard or a tangy mustard sauce for dipping—the sharp flavor beautifully cuts through the richness of the meat. Warm, buttered rye bread makes the perfect vehicle for sopping up the flavorful cooking juices. For a truly authentic Irish-American experience, add a pint of Guinness or a slice of Irish soda bread to complete your feast. My family loves when I set out small dishes of horseradish cream, pickled beets, and fresh parsley for everyone to customize their plates.

    Exciting Twists on the Classic

    Don’t be afraid to put your own spin on slow cooker corned beef and cabbage! I sometimes add parsnips or turnips alongside the traditional vegetables for earthy sweetness. For a hint of brightness, toss in a tablespoon of whole peppercorns and a bay leaf, or try adding a splash of apple cider for subtle sweetness. Feeling adventurous? Replace half the cooking water with dark beer for incredible depth of flavor. Leftovers transform beautifully into corned beef hash for breakfast, hearty sandwiches on rye, or even corned beef tacos with quick-pickled cabbage slaw. The possibilities are endless once you master this versatile base recipe!

    Storage & Troubleshooting Guide

    Proper Storage and Delicious Leftovers

    Leftover slow cooker corned beef and cabbage might be even better the next day as the flavors continue to meld. Store everything in airtight containers in the refrigerator for up to 4 days. I recommend keeping the meat separate from the vegetables to prevent them from becoming waterlogged. For longer storage, freeze the sliced corned beef in its cooking liquid for up to 3 months—the liquid prevents freezer burn and keeps the meat moist. When reheating, add a splash of water or broth to prevent drying, and warm gently in the microwave or on the stovetop until just heated through. Overheating will toughen the meat, so patience is key.

    Common Problems and Easy Solutions

    If your corned beef turns out tough, it likely needed more time—this cut requires low, slow cooking to break down the connective tissues. Simply return it to the slow cooker with some additional liquid and cook for 1-2 more hours. For vegetables that have become too soft, try cooking them separately next time or adding them later in the cooking process. If your dish tastes too salty (a common issue with corned beef), balance it by serving with unsalted sides or add a quartered potato to the slow cooker for the last hour to absorb some salt. Remember that corned beef will shrink during cooking, so start with a slightly larger cut than you think you’ll need.

    Frequently Asked Questions

    Can I cook slow cooker corned beef and cabbage on high instead of low?

    Yes, you can cook on high for 4-5 hours instead of low for 8-10 hours. However, cooking on low produces more tender meat and better flavor development. If time allows, the low setting is always preferable.

    Do I need to add water to the slow cooker?

    Add just enough liquid (water or broth) to cover the bottom inch of the slow cooker. The meat and vegetables will release their own juices during cooking, creating a flavorful broth.

    Can I add the cabbage at the beginning with everything else?

    It’s best to add cabbage during the last 1-2 hours of cooking. Adding it too early will result in overly soft cabbage that loses its texture and vibrant color.

    What’s the difference between corned beef brisket and regular brisket?

    Corned beef is brisket that has been cured in a salt solution with spices. Regular brisket is the same cut but uncured. They are not interchangeable in this recipe.

    How do I slice slow cooker corned beef and cabbage properly?

    Allow the meat to rest for 15 minutes before slicing against the grain into thin pieces. This ensures tender, non-stringy portions that showcase the meat’s texture perfectly.

    Final Thoughts

    Slow cooker corned beef and cabbage embodies everything I love about comfort food—it’s unpretentious, deeply satisfying, and brings people together. The way the meat becomes fork-tender while the vegetables soak up all those savory flavors creates a harmonious dish that feels like a warm hug. I hope this recipe becomes a tradition in your home as it has in mine, whether for St. Patrick’s Day celebrations or simply when you crave a hearty, soul-warming meal. Don’t forget to check out more of my favorite slow cooker recipes on Pinterest for year-round inspiration!

  • Beef and Onion Stir Fry Recipe: Quick, Juicy, and Irresistible!

    Beef and Onion Stir Fry Recipe: Quick, Juicy, and Irresistible!

    Beef and Onion Stir Fry Recipe: Quick, Juicy, and Irresistible!

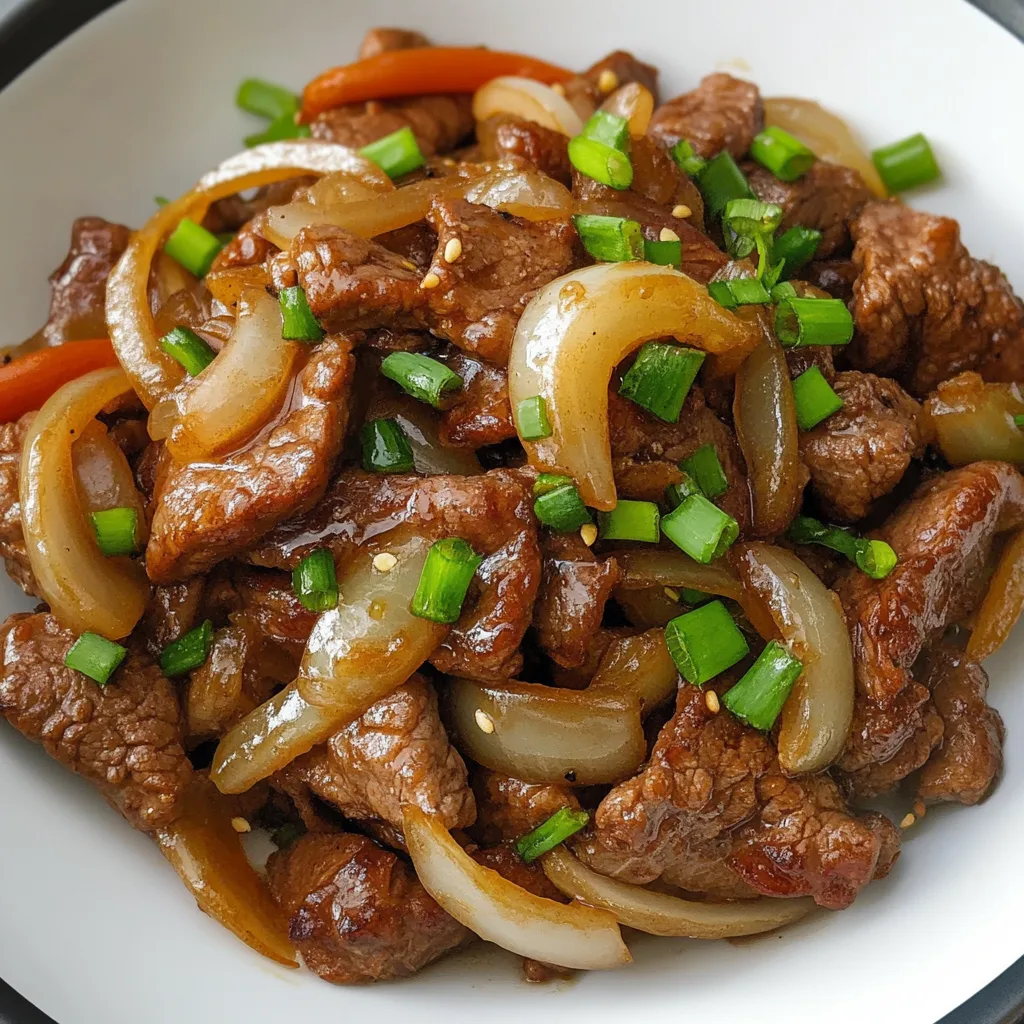
    My beef and onion stir fry has become my weeknight hero—ready in just 20 minutes with that perfect balance of savory flavors and tender textures. I discovered this recipe during a particularly chaotic Tuesday when I had exactly 30 minutes between getting home from work and heading out to book club. The fragrant combination of sizzling beef and caramelized onions filled my kitchen, and I’ve been making it regularly ever since. It’s simple enough for beginners but packed with those deep, satisfying flavors we all crave after a long day. Let me share how this delicious dish comes together!

    Recipe

    Why You’ll Love This Beef and Onion Stir Fry

    Quick Preparation with Maximum Flavor

    This beef and onion stir fry delivers incredible taste with minimal effort. The magic happens when those thinly sliced onions caramelize alongside strips of marinated beef, creating a natural sweetness that balances the savory soy sauce. I love how the onions transform—going from sharp and pungent to meltingly sweet in just minutes. The beef gets a quick marinade in soy sauce, garlic, and a touch of brown sugar, which helps it develop that gorgeous caramelized exterior while staying tender inside. Even on my busiest nights, I can have this on the table in 20 minutes flat.

    Versatile and Budget-Friendly

    What I adore about this recipe is how adaptable it is to whatever you have on hand. Working with a budget? You can use more affordable cuts like flank or round steak—the quick cooking method keeps them tender. The onions are the star alongside the beef, but I’ve tossed in bell peppers, mushrooms, or snow peas when I have them. The sauce works with whatever vegetables you add, coating everything in that rich umami flavor. I’ve served this to picky eaters and food enthusiasts alike, and the clean plates speak for themselves. It’s comfort food that doesn’t break the bank.

    Essential Tips & Tricks

    Perfecting the Beef

    The secret to tender beef in your stir fry is all in the prep work. Slice your beef against the grain into thin strips—this cuts through the muscle fibers and ensures tenderness. I like to place my beef in the freezer for about 15-20 minutes before slicing, which firms it up just enough to make those thin cuts easier. The quick marinade isn’t just for flavor—the soy sauce contains enzymes that help tenderize the meat. Make sure your wok or pan is screaming hot before adding the beef, and cook it in batches if necessary. Overcrowding the pan causes steaming rather than searing, and you’ll miss out on that beautiful caramelization that makes this dish special.

    Mastering the Cooking Process

    Timing is everything with this beef and onion stir fry. I start by cooking my onions until they’re just beginning to soften before adding the beef—this ensures everything finishes cooking at the same time. Keep everything moving in the pan with a wooden spoon or spatula to prevent burning. If you’re looking for more sauce, you can check out my Creamy Garlic Butter Steak with Parmesan Cream Sauce for inspiration on creating richer sauces. The final trick is to remove from heat while the vegetables still have some bite—they’ll continue cooking from residual heat, giving you that perfect tender-crisp texture that makes stir-fries so satisfying.

    Serving Ideas & Creative Variations

    Perfect Pairings

    This beef and onion stir fry sits beautifully atop a bed of steamed jasmine rice, which soaks up all those savory juices. For a lower-carb option, cauliflower rice works wonderfully too. When I’m feeling extra hungry, I love serving it alongside some simple steamed broccoli or a crisp cucumber salad dressed with rice vinegar for contrast. For a complete Asian-inspired feast, pair it with my Honey Garlic Shrimp as an additional protein option. The contrasting flavors complement each other beautifully. Don’t forget a sprinkle of toasted sesame seeds and sliced green onions on top for that professional-looking finish and added texture.

    Exciting Flavor Twists

    While the classic beef and onion stir fry is perfect as is, I love experimenting with different flavor profiles. For a spicy kick, add a tablespoon of gochujang or sriracha to the sauce. Craving something sweeter? A tablespoon of hoisin sauce or a drizzle of honey creates a lovely glaze. One of my favorite variations includes adding thinly sliced fresh ginger and a splash of rice wine for a more aromatic profile. For a citrusy brightness, finish with a squeeze of lime and some zest just before serving. These small tweaks can transform your stir fry into something new each time, keeping the recipe exciting even when it’s in your regular rotation.

    Storage & Troubleshooting Guide

    Proper Storage Techniques

    Your beef and onion stir fry will keep beautifully in an airtight container in the refrigerator for up to 3 days. I find it actually tastes even better the next day as the flavors have time to meld together. For reheating, a quick minute or two in a hot skillet works better than the microwave—it helps maintain the texture of both the beef and vegetables. If you want to prep ahead, you can slice your beef and onions the night before and store them separately in the refrigerator. The marinade can also be mixed ahead of time, but I recommend only adding it to the beef about 30 minutes before cooking for the best texture and flavor.

    Common Issues and Solutions

    If your beef turns out tough in your stir fry, it’s likely due to overcooking or slicing with the grain instead of against it. Remember that beef continues cooking even after you remove it from heat. For next time, try cutting thinner slices and cooking for less time at a higher heat. If your stir fry seems too dry, add a tablespoon or two of water or broth to the pan and cover for 30 seconds—this creates steam that helps moisten everything. Too salty? Balance it with a touch of brown sugar or a splash of rice vinegar. And if your onions are burning instead of caramelizing, lower your heat slightly and stir more frequently.

    Frequently Asked Questions

    What’s the best cut of beef for beef and onion stir fry?

    Flank steak, sirloin, or ribeye work beautifully. Look for good marbling for flavor, and always slice against the grain for tenderness. In a pinch, pre-sliced stir-fry beef from the grocery store works too.

    Can I make beef and onion stir fry ahead of time?

    Yes! You can prep all ingredients a day ahead and store separately. The dish reheats well but is best enjoyed fresh for optimal texture. If making ahead, slightly undercook the vegetables.

    How can I make this recipe gluten-free?

    Simply swap regular soy sauce for tamari or coconut aminos. Double-check any other bottled sauces for hidden gluten, and serve with rice or rice noodles instead of wheat noodles.

    What vegetables pair well with beef and onion stir fry?

    Bell peppers, mushrooms, snow peas, and broccoli all complement the flavors beautifully. Add quick-cooking vegetables in the last 2-3 minutes to maintain their crispness and vibrant colors.

    How spicy is this dish typically?

    The basic recipe is mild and family-friendly. Add heat with sriracha, red pepper flakes, or fresh chilies to taste. Start with a small amount—you can always add more but can’t take it away!

    Final Thoughts

    This beef and onion stir fry has saved countless weeknight dinners in my home, combining simplicity with incredible flavor. What I love most is how it transforms humble ingredients into something truly crave-worthy in minutes. The sweet caramelized onions against the savory beef create a perfect harmony that never disappoints. I encourage you to make this recipe your own—adjust the seasonings, try different vegetables, or experiment with the sauce. For more delicious recipes and inspiration, follow me on Pinterest. Your kitchen will soon be filled with the irresistible aroma of sizzling beef and sweet onions!

  • Easy Ground Beef Enchiladas Recipe: Irresistibly Delicious & Quick!

    Easy Ground Beef Enchiladas Recipe: Irresistibly Delicious & Quick!

    Easy Ground Beef Enchiladas Recipe: Irresistibly Delicious & Quick!

    The search for perfect Easy Ground Beef Enchiladas ends here! As someone who’s tested countless recipes, I’ve finally perfected this crowd-pleasing dish that brings authentic flavors to your table in under an hour. The combination of seasoned ground beef, melty cheese, and zesty enchilada sauce wrapped in soft tortillas creates a comfort food masterpiece that’s both satisfying and simple. My family requests these enchiladas almost weekly now, and I’m thrilled to share my foolproof method that delivers restaurant-quality results with everyday ingredients. Get ready to make this your new go-to dinner!

    Recipe

    Why You’ll Love These Easy Ground Beef Enchiladas

    Perfect for Busy Weeknights

    These Easy Ground Beef Enchiladas are a true time-saver when life gets hectic. I first discovered this recipe during a particularly chaotic week when my kids had after-school activities every evening. The simple prep work takes just 15 minutes, and while they bake, you can help with homework or take a moment for yourself. The ground beef mixture can even be prepared ahead and refrigerated, making assembly lightning-fast when you’re ready to cook. Plus, the ingredients are pantry staples you likely already have on hand!

    Customizable for Every Taste

    What makes these Easy Ground Beef Enchiladas special is their incredible versatility. My husband prefers extra spice, so I add jalapeños to half the batch. For the kids, I keep things milder with just a touch of cumin. You can adjust the heat level by choosing mild, medium, or hot enchilada sauce, or customize the filling with black beans, corn, or diced bell peppers. The recipe works beautifully with flour or corn tortillas depending on your preference, and you can even create a “build your own” enchilada bar for family dinners!

    Essential Tips & Tricks

    Perfecting the Filling

    The secret to exceptional Easy Ground Beef Enchiladas lies in properly seasoning the meat mixture. I always drain the beef thoroughly after browning to prevent soggy tortillas. A game-changing discovery was adding a tablespoon of tomato paste to the ground beef—it creates a richer, more developed flavor that tastes like it simmered for hours. Don’t rush the onions; letting them become translucent before adding the beef makes a noticeable difference. For extra flavor depth, toast your spices in the pan for 30 seconds before adding the meat.

    Mastering the Assembly Process

    After years of making these enchiladas, I’ve learned that warming the tortillas before filling is non-negotiable. Cold tortillas crack, but 15 seconds in the microwave makes them perfectly pliable. I like to set up an assembly line: tortillas, meat mixture, cheese, and baking dish. Dipping each tortilla in enchilada sauce before filling creates flavor throughout, not just on top. For picture-perfect enchiladas like those in my Oven Baked Cheesy Tacos, spread a thin layer of sauce on the bottom of your baking dish first to prevent sticking.

    Serving Ideas & Creative Variations

    Perfect Pairings

    These Easy Ground Beef Enchiladas deserve complementary sides that enhance their rich flavors. My family’s favorite combination is cilantro-lime rice and a simple black bean salad with corn. A cool, creamy avocado salad provides wonderful temperature contrast to the hot enchiladas. For an impressive spread, add a bowl of tortilla chips with homemade pico de gallo. When entertaining, I sometimes serve these alongside my Garlic Chicken Wraps for guests who prefer chicken over beef, creating a Mexican-inspired feast that always earns rave reviews!

    Exciting Flavor Twists

    Don’t be afraid to reimagine these Easy Ground Beef Enchiladas with creative variations! My favorite twist is adding a layer of green chiles and pepper jack cheese for a spicy kick. For a fusion approach, try incorporating taco seasoning and topping with crushed Doritos before baking. Vegetarians can substitute the beef with a mixture of sautéed mushrooms, black beans, and walnuts that mimics the texture perfectly. For a breakfast version, add scrambled eggs to the filling and top with sliced avocado and a dollop of sour cream.

    Storage & Troubleshooting Guide

    Make-Ahead and Freezing Instructions

    Easy Ground Beef Enchiladas are perfect for meal prep. Assemble them up to 24 hours ahead and refrigerate, covered with plastic wrap, adding an extra 10 minutes to the baking time. For freezing, I recommend assembling but not baking them first. Place in a freezer-safe container, separating layers with parchment paper, and freeze for up to 3 months. Thaw overnight in the refrigerator before baking. You can also freeze individual portions of baked enchiladas—perfect for quick lunches! Just microwave for 2-3 minutes or reheat in a 350°F oven until warmed through.

    Solving Common Problems

    Even experienced cooks encounter issues with enchiladas. If your tortillas are cracking during assembly, they’re likely too cold or too dry. Warm them slightly and keep a damp paper towel over the stack while working. Soggy enchiladas usually result from excess liquid in the filling—ensure your ground beef is well-drained and don’t oversaturate with sauce. If the tops are browning too quickly, loosely cover with foil for the last 10 minutes of baking. For enchiladas that hold their shape better when serving, let them rest for 5-10 minutes after removing from the oven.

    Frequently Asked Questions

    Can I use corn tortillas instead of flour for Easy Ground Beef Enchiladas?

    Absolutely! Corn tortillas provide more authentic flavor but need extra warming to prevent cracking. Quickly dip each in warm enchilada sauce before filling for best results.

    How spicy are these enchiladas?

    The spice level is completely customizable. Use mild enchilada sauce and omit the cayenne pepper for a family-friendly version, or add diced jalapeños for heat lovers.

    Can I prepare these enchiladas ahead of time?

    Yes! Assemble up to 24 hours in advance and refrigerate. Add 10 minutes to the baking time if cooking straight from the refrigerator.

    What’s the best cheese to use?

    A combination of sharp cheddar and Monterey Jack provides the perfect balance of flavor and meltability. Pre-shredded cheese works but freshly grated melts more smoothly.

    How do I prevent my enchiladas from getting soggy?

    Drain the ground beef thoroughly after cooking, don’t oversaturate with sauce, and allow the enchiladas to rest 5-10 minutes after baking before serving.

    Final Thoughts

    These Easy Ground Beef Enchiladas have become my family’s definition of comfort food—reliable, delicious, and always satisfying. The beauty of this recipe lies in its simplicity and adaptability. Whether you’re cooking for picky eaters, entertaining guests, or simply craving something hearty and flavorful, these enchiladas deliver every time. I hope they bring as much joy to your table as they have to mine! Don’t forget to check out more of my favorite comfort food recipes on Pinterest for endless inspiration.

  • High Protein Unstuffed Peppers: Easy, Healthy & Delicious Boost!

    High Protein Unstuffed Peppers: Easy, Healthy & Delicious Boost!

    High Protein Unstuffed Peppers: Easy, Healthy & Delicious Boost!

    These High Protein Unstuffed Peppers have become my weeknight salvation! When I’m craving comfort food but don’t want the fuss of traditional stuffed peppers, this deconstructed version delivers all the flavor with half the effort. The first time I made this dish, my kitchen filled with the most intoxicating aroma of sweet bell peppers and savory ground turkey. My husband wandered in from his home office, following his nose like a cartoon character! With protein-packed ingredients and colorful veggies, this one-pan wonder has earned its permanent spot in my meal planning rotation.

    Recipe

    Why You’ll Love This High Protein Unstuffed Peppers

    Perfect Balance of Nutrition and Flavor

    This dish strikes the ideal balance between being nutritionally dense and incredibly satisfying. Each serving of high protein unstuffed peppers delivers approximately 25-30 grams of protein, making it perfect for active lifestyles or anyone looking to increase their protein intake. The combination of lean ground meat, beans, and quinoa creates a complete protein profile that keeps you full for hours. I love how the sweet bell peppers caramelize slightly during cooking, creating pockets of natural sweetness that complement the savory seasonings perfectly.

    Quick and Convenient One-Pan Wonder

    Unlike traditional stuffed peppers that require precooking, stuffing, and baking, these high protein unstuffed peppers come together in one skillet in about 30 minutes. On busy weeknights when I’m juggling work deadlines and family commitments, this efficiency is a lifesaver. The deconstructed approach means everything cooks evenly and quickly, with the peppers maintaining their vibrant color and slight crunch. Plus, cleanup is minimal—just one pan to wash instead of multiple dishes and baking sheets.

    Essential Tips & Tricks

    Choosing and Preparing Your Peppers

    For the most colorful and flavorful high protein unstuffed peppers, use a variety of bell peppers—red, yellow, orange, and green create a beautiful rainbow effect and each brings a slightly different flavor profile. Slice them into uniform pieces (about 1-inch squares) to ensure even cooking. I find that removing the white ribs inside the peppers prevents any bitter notes from sneaking into the dish. If you’re sensitive to spice, make sure to remove all seeds thoroughly, or keep some for a pleasant heat if that’s your preference.

    Protein Selection and Preparation

    The beauty of high protein unstuffed peppers lies in their versatility. Ground turkey or chicken creates a lighter dish, while lean ground beef offers richer flavor. For plant-based options, a combination of black beans and chickpeas works beautifully. Whatever protein you choose, be sure to brown it thoroughly before adding other ingredients. This develops a deeper flavor base and improves the final texture. For an extra protein boost, add a sprinkle of hemp hearts or nutritional yeast in the last few minutes of cooking.

    Serving Ideas & Creative Variations

    Complementary Side Dishes

    These high protein unstuffed peppers are substantial enough to serve as a complete meal, but pairing them with simple sides elevates the experience. A crisp green salad with lemon vinaigrette provides refreshing contrast to the hearty main dish. For a more substantial meal, consider cauliflower rice for a low-carb option or a slice of crusty whole grain bread to soak up the flavorful sauce. On chilly evenings, I love serving this with a small cup of clear broth on the side—the combination is wonderfully warming.

    Global Flavor Variations

    The basic recipe for high protein unstuffed peppers serves as a fantastic canvas for global flavor profiles. For Mediterranean flair, add olives, feta, and oregano. Create a Mexican-inspired version with corn, black beans, and chili powder, topped with avocado and lime. For an Asian twist, incorporate ginger, garlic, and a splash of coconut aminos, finishing with sesame seeds and green onions. My family’s favorite is an Italian variation with sun-dried tomatoes, basil, and a sprinkle of Parmesan that melts beautifully into the hot dish.

    Storage & Troubleshooting Guide

    Proper Storage and Reheating

    High protein unstuffed peppers actually improve in flavor after a day in the refrigerator, making them perfect for meal prep. Store cooled leftovers in airtight containers for up to 4 days. For freezing, slightly undercook the peppers, cool completely, then freeze in portion-sized containers for up to 3 months. When reheating, add a splash of broth or water to maintain moisture, and heat gently on the stovetop or microwave until just hot through—overheating can make the peppers mushy.

    Fixing Common Issues

    If your high protein unstuffed peppers turn out too watery, simmer uncovered for a few extra minutes to reduce excess liquid, or add a tablespoon of tomato paste to thicken the sauce. For a dish that’s too dry, add a splash of broth or diced tomatoes with their juice. If you find the flavor lacking depth, a teaspoon of Worcestershire sauce or balsamic vinegar can work wonders. For peppers that remain too firm, cover the pan and cook on low heat for 5-7 additional minutes to soften them without burning the other ingredients.

    Frequently Asked Questions

    Can I make high protein unstuffed peppers vegetarian?

    Absolutely! Replace meat with a combination of lentils, quinoa, and beans for a protein-rich vegetarian version. Add nutritional yeast for a cheesy flavor without dairy, and a splash of soy sauce for umami depth.

    How can I boost the protein content even further?

    Mix in cottage cheese or Greek yogurt after cooking (once slightly cooled), add hemp seeds, or incorporate protein powder into your grain component. You can also top with a sprinkle of nuts or seeds before serving.

    What’s the best grain to use in unstuffed peppers?

    Quinoa offers the highest protein content, but brown rice, farro, or bulgur work wonderfully too. For low-carb options, try riced cauliflower or skip grains entirely and increase the meat/bean ratio.

    Can I make this recipe in advance for meal prep?

    Yes! It stores beautifully for 3-4 days and actually improves in flavor. Portion into containers and refrigerate for quick grab-and-go meals throughout the week.

    How spicy are high protein unstuffed peppers?

    The spice level is entirely customizable. For mild versions, use only sweet bell peppers and mild seasonings. For heat, add diced jalapeños, red pepper flakes, or hot sauce to taste.

    Final Thoughts

    These high protein unstuffed peppers have become a staple in my kitchen for good reason—they’re adaptable, nutritious, and deeply satisfying without being complicated. I love how this dish transforms humble ingredients into something special that pleases both health-conscious eaters and comfort food lovers alike. Whether you’re meal prepping for a busy week or serving a casual dinner, this recipe delivers big on flavor while keeping preparation simple. For more protein-packed recipes, check out my Pinterest collection of family favorites!

  • Crockpot Honey Mustard Chicken: Juicy, Easy & Irresistibly Delicious!

    Crockpot Honey Mustard Chicken: Juicy, Easy & Irresistibly Delicious!

    Crockpot Honey Mustard Chicken: Juicy, Easy & Irresistibly Delicious!

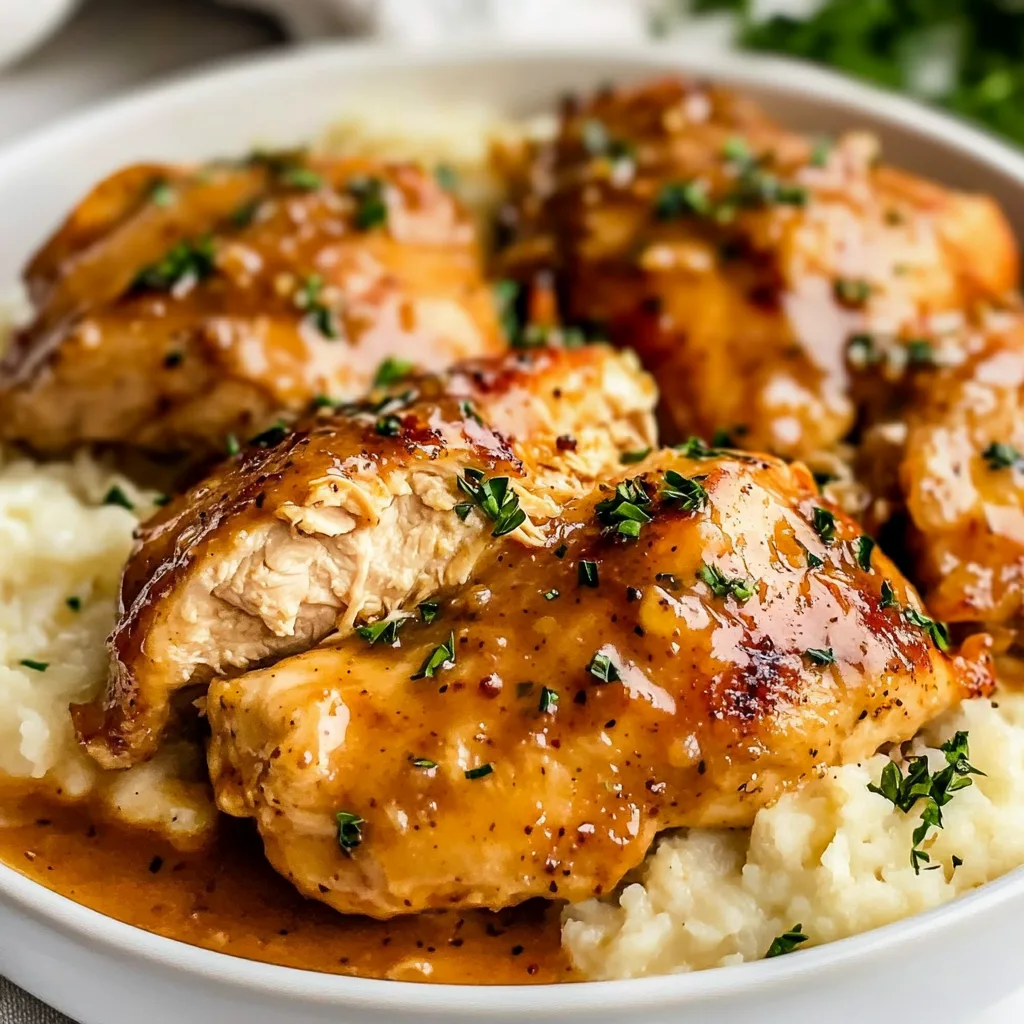
    Crockpot Honey Mustard Chicken is one of those magical recipes that transforms simple ingredients into something extraordinary with almost zero effort. I discovered this gem during a particularly hectic week when my kitchen creativity was at an all-time low. The tangy-sweet sauce created in the slow cooker is absolutely divine – it coats every piece of chicken with a glossy finish that looks like it came from a restaurant kitchen. If you’re looking for a dinner solution that practically makes itself while filling your home with mouthwatering aromas, this recipe from Darleen’s kitchen deserves a permanent spot in your meal rotation.

    Recipe

    Why You’ll Love This Crockpot Honey Mustard Chicken

    Perfect Balance of Flavors

    There’s something magical about the combination of honey and mustard that creates an irresistible flavor profile. The natural sweetness from the honey balances perfectly with the tangy kick from Dijon mustard, creating a sauce that’s neither too sweet nor too sharp. I love how the slow cooking process allows these flavors to meld together and intensify. The chicken absorbs all these wonderful flavors while remaining incredibly tender. When you take that first bite, you’ll experience a perfect harmony of sweet, tangy, and savory notes that dance across your palate. It’s comfort food that feels sophisticated.

    Effortless Preparation

    One of the greatest joys of this Crockpot Honey Mustard Chicken is how ridiculously easy it is to prepare. On busy mornings, I can literally toss everything into the slow cooker in under 10 minutes, then walk away. No browning, no sautéing, just simple ingredients coming together beautifully. The slow cooker does all the heavy lifting while you go about your day. When dinner time rolls around, you’ll be greeted by perfectly cooked chicken swimming in a sauce that tastes like you spent hours in the kitchen. For busy weeknights or when entertaining guests, this minimal-effort maximum-reward recipe is absolute gold.

    Essential Tips & Tricks

    Choosing the Right Chicken

    Selecting the right cut of chicken makes a significant difference in this recipe. I’ve found that boneless, skinless chicken thighs work beautifully because they stay moist and tender during the long cooking process. Their slightly higher fat content means they won’t dry out like breasts sometimes can. If you do prefer white meat, boneless chicken breasts work too – just be careful not to overcook them. For a family-style presentation, you could even use a mix of bone-in pieces, though you’ll need to adjust the cooking time. Whatever cut you choose, make sure to arrange them in a single layer for even cooking.

    Perfecting the Sauce

    The secret to an incredible honey mustard sauce lies in the balance of ingredients. I recommend using a good quality Dijon mustard rather than yellow mustard for a more complex flavor. For extra depth, add a splash of apple cider vinegar and a touch of garlic powder. If you prefer a thicker sauce, you can always remove the chicken once cooked and whisk a cornstarch slurry into the liquid, then cook on high for 10-15 minutes. This creates a glossy, restaurant-quality finish that’s perfect for spooning over the chicken and sides. For a creamier variation, try adding a splash of heavy cream during the last 30 minutes of cooking, similar to my Creamy Tuscan Tortellini Soup.

    Serving Ideas & Creative Variations

    Complementary Side Dishes

    This Crockpot Honey Mustard Chicken pairs beautifully with a variety of side dishes that can soak up that delicious sauce. Fluffy rice or buttery mashed potatoes make perfect companions, but don’t overlook other options like creamy polenta or crusty bread. For a lighter meal, I love serving it with roasted vegetables – the sweetness of carrots or butternut squash complements the tangy chicken wonderfully. A simple green salad with a light vinaigrette provides a refreshing contrast to the rich main dish. When I’m feeling extra indulgent, I serve this chicken over buttered egg noodles, which catch every bit of that amazing sauce.

    Flavor Variations to Try

    While the classic recipe is fantastic, don’t be afraid to customize it to suit your taste preferences. Adding a tablespoon of whole grain mustard alongside the Dijon creates wonderful texture and visual appeal. For a hint of sweetness with depth, substitute maple syrup for some of the honey. Herbs like fresh rosemary or thyme infuse the sauce with aromatic notes, while a dash of smoked paprika adds a subtle smokiness. For an Asian-inspired twist, try incorporating a little soy sauce and ginger, similar to my Honey Garlic Shrimp recipe. These simple adjustments allow you to enjoy this versatile dish in many different ways.

    Storage & Troubleshooting Guide

    Proper Storage and Reheating

    Leftover Crockpot Honey Mustard Chicken might be even better the next day as the flavors continue to develop. Store any leftovers in an airtight container in the refrigerator for up to 4 days. This dish also freezes beautifully – portion it into freezer-safe containers and freeze for up to 3 months. When reheating, add a splash of chicken broth to keep things moist and prevent the sauce from becoming too thick. For best results, reheat gently on the stovetop over medium-low heat, stirring occasionally. If using a microwave, cover the dish and use 50% power in short intervals, stirring between each to ensure even warming.

    Troubleshooting Common Issues

    Even the simplest recipes can sometimes present challenges. If your sauce is too thin or watery, there are easy fixes. The most common cause is excess moisture released from the chicken during cooking. To thicken the sauce, remove the chicken once it’s done, then whisk a mixture of 1 tablespoon cornstarch and 2 tablespoons cold water into the liquid and cook on high for 15 minutes. If your sauce is too thick, simply add a bit of chicken broth to thin it. For chicken that seems dry, it was likely cooked too long – next time, check for doneness earlier or use chicken thighs instead of breasts for more forgiving results.

    Frequently Asked Questions

    Can I use frozen chicken for this Crockpot Honey Mustard Chicken recipe?

    For food safety reasons, it’s best to thaw chicken before adding it to the slow cooker. Frozen chicken may spend too long in the temperature danger zone, increasing bacteria risk. Always start with thawed chicken for best results.

    How can I make this recipe healthier?

    Use skinless chicken breasts instead of thighs, reduce the honey by half, and add a tablespoon of orange juice for sweetness. Serve with steamed vegetables instead of starchy sides for a lighter meal.

    Can I make this recipe dairy-free?

    Absolutely! The base recipe is naturally dairy-free. Just be sure to check your mustard ingredients and avoid adding any cream or butter to the sauce during cooking.

    What’s the minimum cooking time for this recipe?

    On high, the chicken needs at least 3-4 hours to cook through and develop flavors. On low, allow 6-7 hours. Use a meat thermometer to confirm it’s reached 165°F internal temperature.

    Can I add vegetables to the crockpot with the chicken?

    Yes! Hardy vegetables like carrots, potatoes, and onions work well. Add them at the beginning. Quicker-cooking vegetables like bell peppers or zucchini should be added during the last 30-60 minutes.

    Final Thoughts

    This Crockpot Honey Mustard Chicken has become one of my most reliable recipes for those days when I need dinner to practically make itself. There’s something deeply satisfying about setting up the slow cooker in the morning and coming home to a meal that tastes like it required far more effort than it actually did. The sweet-tangy sauce, the tender chicken, and the versatility of serving options make this a true keeper. I hope you’ll give it a try and discover why this simple yet flavorful dish deserves a regular spot in your meal planning. Find more of my favorite recipes on Pinterest!