Author: Lily Bennett

  • Garlic Chicken Wraps: Irresistibly Delicious & Easy to Make!

    Garlic Chicken Wraps: Irresistibly Delicious & Easy to Make!

    Garlic Chicken Wraps: Irresistibly Delicious & Easy to Make!

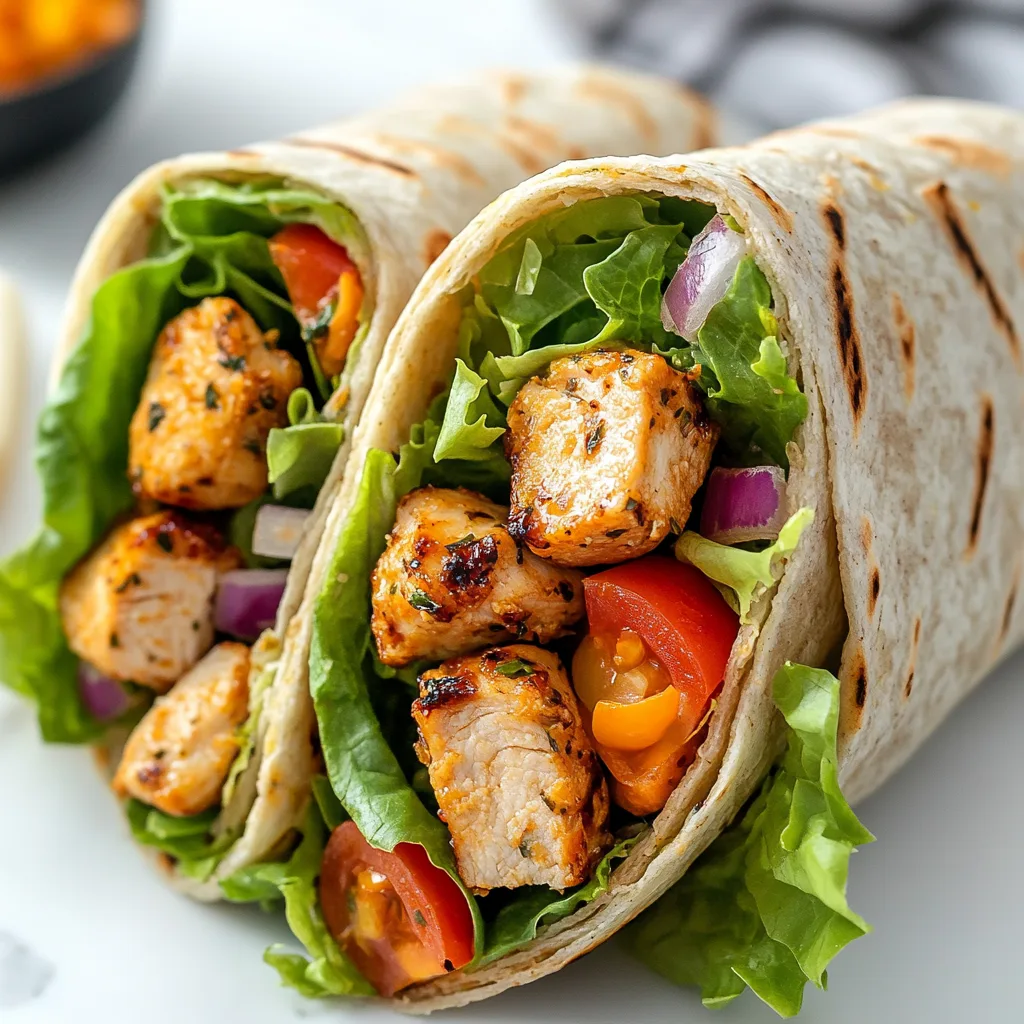
    There’s something magical about Garlic Chicken Wraps that makes them my go-to dinner when life gets hectic. The fragrant aroma of garlic-infused chicken sizzling in the pan instantly transforms my kitchen into a cozy haven. I discovered this recipe during my first apartment days when cooking space was limited but my appetite for flavor wasn’t. These wraps strike that perfect balance between convenience and satisfaction – tender chicken with that irresistible garlic punch, wrapped in a warm tortilla with crisp veggies and a creamy sauce that ties everything together. Let me share this simple yet spectacular meal that’s become a staple in my home kitchen.

    Recipe

    Why You’ll Love These Garlic Chicken Wraps

    Perfect Balance of Flavor and Convenience

    These Garlic Chicken Wraps deliver restaurant-quality taste with minimal effort. The marinade infuses the chicken with deep garlic flavor that’s punchy without overwhelming your palate. I love how the marinade works its magic in just 30 minutes, though I often prepare it in the morning so the chicken soaks up even more flavor throughout the day. The beauty lies in the simplicity – basic ingredients transform into something extraordinary when combined. Plus, the entire meal comes together in under 30 minutes, making it perfect for those evenings when you want something delicious without spending hours in the kitchen.

    Customizable for Every Palate

    What makes these wraps truly special is how easily they adapt to different preferences. My husband loves extra garlic and a spicy kick, while I prefer mine loaded with fresh herbs and avocado. The basic recipe serves as a perfect foundation that welcomes creativity. Swap chicken thighs for breasts, add roasted red peppers for sweetness, or include hummus for a Mediterranean twist. They’re also wonderfully accommodating for dietary needs – use gluten-free wraps or lettuce cups instead of tortillas, or substitute the chicken with chickpeas for a vegetarian version that still delivers that garlicky goodness.

    Essential Tips & Tricks

    Mastering the Marinade

    The secret to exceptional Garlic Chicken Wraps lies in the marinade. I recommend using fresh garlic cloves rather than pre-minced for the most vibrant flavor. Crush them with a little salt to create a paste that distributes more evenly throughout the marinade. Don’t skimp on the olive oil – it helps carry the flavors and keeps the chicken moist. For maximum flavor infusion, score your chicken pieces lightly with a knife before marinating. If you’re short on time, a quick 15-minute marinade at room temperature works better than 30 minutes in the refrigerator, as the cold slows down the flavor absorption process.

    Perfect Cooking Technique

    The cooking method makes all the difference in these wraps. For the juiciest results, cook your marinated chicken over medium-high heat to get a beautiful sear without drying it out. Don’t overcrowd the pan – work in batches if needed to ensure each piece gets properly browned. Let the chicken rest for 5 minutes before slicing to keep all those flavorful juices locked inside. For the tortillas, I’ve found that warming them in a dry skillet for 10-15 seconds per side makes them pliable without becoming brittle. This small step prevents tearing when you’re assembling and creates that lovely contrast between the warm wrap and cool toppings.

    Serving Ideas & Creative Variations

    Perfect Pairings for a Complete Meal

    Transform your Garlic Chicken Wraps into a feast by adding thoughtfully chosen sides. I love serving them with a simple Greek salad – the tangy feta and olives complement the garlic perfectly. For something heartier, try Cajun Potato Soup for a warming side that adds a different flavor dimension. Sweet potato fries with a sprinkle of cinnamon make a surprisingly delicious accompaniment, creating a sweet-savory contrast. For a lighter option, cucumber sticks with tzatziki provide a cooling element that balances the garlic’s intensity. When entertaining, I arrange a DIY wrap station with various toppings so everyone can customize their perfect combination.

    Global Flavor Inspirations

    Take your wraps on a world tour by incorporating international flavors. For Mediterranean-inspired wraps, add feta, olives, and a drizzle of tahini sauce. Asian-fusion wraps come alive with a splash of soy sauce in the marinade, sliced water chestnuts, and a sriracha mayo. My personal favorite is a Mexican twist with avocado, black beans, and lime-cilantro sour cream. For an Indian variation, incorporate some garam masala into your marinade and serve with a side of mango chutney. These global adaptations keep the basic recipe exciting week after week, ensuring your garlic chicken wraps never become boring even in regular rotation.

    Storage & Troubleshooting Guide

    Make-Ahead and Meal Prep Strategies

    Garlic Chicken Wraps are perfect for meal planning. Marinate the chicken up to 24 hours in advance for deeper flavor – just store it in an airtight container in the refrigerator. You can also cook the chicken ahead of time and refrigerate for up to three days. When preparing for meal prep, keep the components separate – store the cooked chicken, prepared veggies, and sauces in individual containers. This prevents soggy wraps and allows for quick assembly throughout the week. For an ultra-convenient option, assemble entire wraps (minus wet ingredients like tomatoes) and wrap tightly in parchment paper before placing in a ziplock bag.

    Solving Common Wrap Challenges

    Even the most experienced home cooks encounter wrap issues occasionally. If your tortillas are cracking, they’re likely too cold or dry – warm them slightly and cover with a damp paper towel before using. For wraps that won’t stay closed, try spreading a thin layer of hummus or cream cheese along the edge as “glue.” If your chicken turned out dry, remedy it by tossing the sliced meat with a tablespoon of chicken broth and a drizzle of olive oil before assembling. Too much garlic bite? Balance it with something sweet like honey in your sauce or caramelized onions in your filling.

    Frequently Asked Questions

    Can I make Garlic Chicken Wraps ahead of time?

    Yes! Prepare components separately and store refrigerated for up to 3 days. Keep wet ingredients separate and assemble just before eating for best texture. For grab-and-go options, wrap in parchment paper and refrigerate overnight.

    How can I make these wraps healthier?

    Use whole grain tortillas, increase the vegetable ratio, and opt for Greek yogurt instead of mayo in your sauce. You can also use less oil in the marinade by substituting some with lemon juice.

    What’s the best way to warm leftover chicken for these wraps?

    Microwave with a damp paper towel covering the chicken for 30-45 seconds, or warm in a skillet with a tablespoon of water to restore moisture without overcooking.

    Can I freeze Garlic Chicken Wraps?

    Freeze the cooked chicken and tortillas separately. Avoid freezing assembled wraps as vegetables and sauces will become watery when thawed, resulting in soggy wraps.

    What’s the secret to perfectly balanced garlic flavor in chicken wraps?

    Balance is key! Use half fresh garlic and half roasted garlic in your marinade. The fresh provides punch while roasted adds sweetness without overwhelming. Let marinate at least 30 minutes.

    Final Thoughts

    These Garlic Chicken Wraps have become my kitchen savior on countless occasions, proving that spectacular flavor doesn’t require complicated techniques or exotic ingredients. The beauty lies in their adaptability – dress them up for dinner guests or simplify for quick lunches. I find myself returning to this recipe whenever I need a reliable meal that delivers on taste without demanding too much time. Whether you follow my recipe exactly or use it as inspiration for your own creation, I hope these wraps bring the same joy to your table that they’ve brought to mine. Don’t forget to check out more wrap inspiration on Pinterest!
  • Sheet Pan Fajita Chicken with Charred Veggies – Easy, Flavorful!

    Sheet Pan Fajita Chicken with Charred Veggies – Easy, Flavorful!

    Sheet Pan Fajita Chicken with Charred Veggies – Easy, Flavorful!

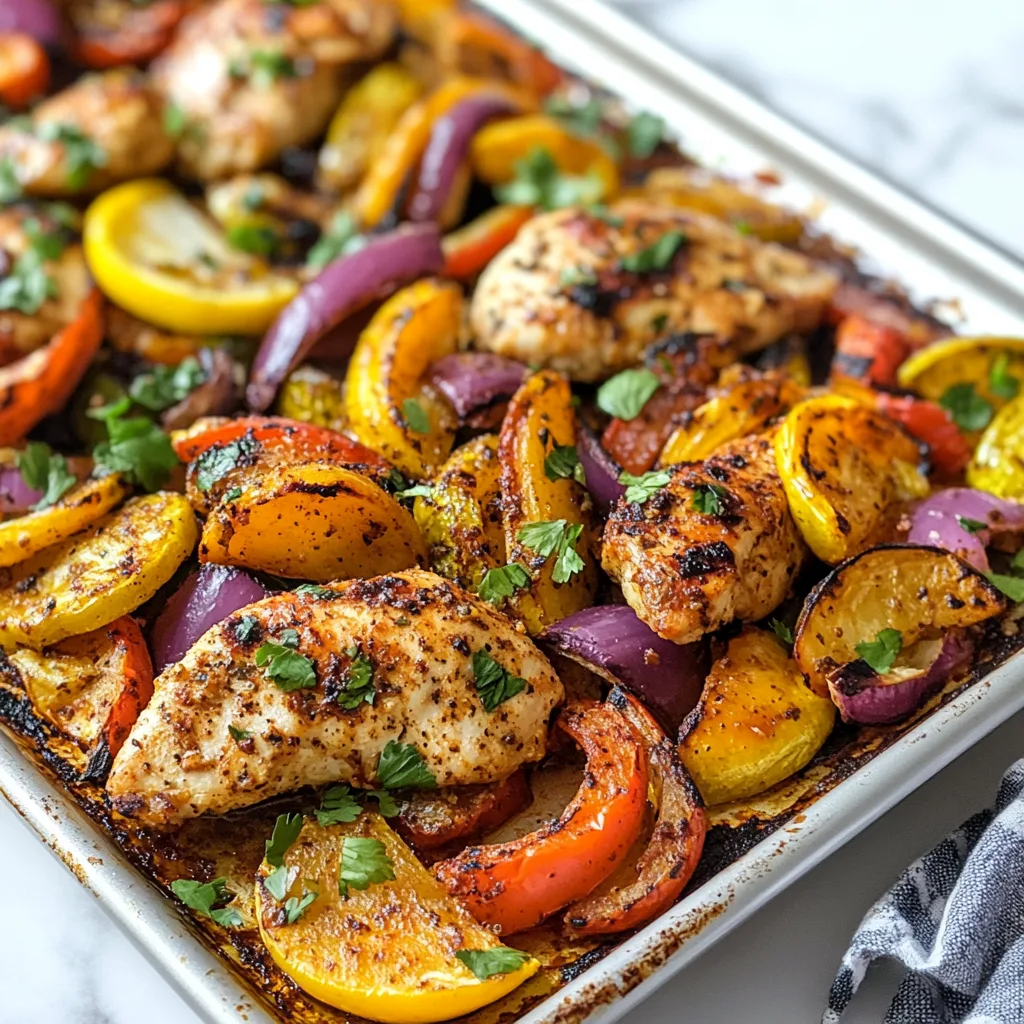
    There’s something magical about Sheet Pan Fajita Chicken with Charred Vegetables that makes weeknight dinners feel special without the fuss. The sizzling sound as the chicken and veggies hit the hot pan takes me back to my grandmother’s kitchen, where the aroma of smoky spices would fill every corner. This one-pan wonder combines juicy chicken thighs with rainbow-bright bell peppers and onions, all caramelized to perfection. I love how the edges get that beautiful char that mimics restaurant-style fajitas, but with half the effort and all the flavor. Trust me, this recipe will become your new weeknight hero.

    Recipe

    Why You’ll Love This Sheet Pan Fajita Chicken with Charred Vegetables

    Perfect for Busy Weeknights

    Sheet Pan Fajita Chicken with Charred Vegetables is the answer to that eternal question: “What can I make that’s quick but doesn’t taste rushed?” The beauty lies in its simplicity—just toss everything with zesty fajita seasoning, spread it on a pan, and let your oven do the heavy lifting. I’ve made this countless times after long workdays when cooking feels impossible, yet I still want something homemade. The minimal prep (about 10 minutes) and easy cleanup make this a true sanity-saver. Plus, the hands-off cooking time gives you a moment to unwind with a glass of wine or help with homework.

    A Flavor Explosion in Every Bite

    The magic of Sheet Pan Fajita Chicken happens when the vegetables begin to caramelize and the chicken develops that irresistible golden crust. The natural sugars in the bell peppers and onions concentrate as they roast, creating sweet, smoky notes that balance perfectly with the spicy, savory chicken. I’m always amazed at how the simple act of high-heat roasting transforms ordinary ingredients into something extraordinary. The charred edges of the vegetables bring that authentic fajita experience right to your dining table. My family actually prefers this to restaurant versions now—they say the flavors are more intense!

    Essential Tips & Tricks

    Mastering the Perfect Char

    To achieve that coveted restaurant-style char on your Sheet Pan Fajita Chicken with Charred Vegetables, temperature and spacing are key. Always preheat your sheet pan in the oven before adding ingredients—this creates immediate searing when food hits the surface. Arrange ingredients in a single layer with some breathing room; overcrowding causes steaming instead of charring. I learned this the hard way after several soggy attempts! For extra color, switch to broil for the final 2-3 minutes, watching carefully. This technique creates those beautiful blackened edges that make fajitas so irresistible, just like my favorite Mexican restaurant serves.

    Seasoning Secrets for Maximum Flavor

    The difference between good and mind-blowing Sheet Pan Fajita Chicken lies in the seasoning. While store-bought fajita mix works in a pinch, making your own blend with smoked paprika, cumin, chili powder, and a touch of brown sugar creates deeper, more complex flavors. Don’t be shy with lime juice—add some before cooking and squeeze fresh lime over everything right after it comes out of the oven. The acid brightens all the flavors and cuts through the richness. My secret ingredient? A tablespoon of orange juice in the marinade. It adds subtle sweetness and helps caramelize the chicken edges beautifully without burning the spices.

    Serving Ideas & Creative Variations

    Beyond Traditional Tortillas

    While warm flour tortillas are the classic vehicle for Sheet Pan Fajita Chicken with Charred Vegetables, thinking outside the tortilla opens up endless possibilities. Try serving over cilantro-lime rice for a hearty bowl meal, or atop crisp lettuce for a refreshing fajita salad. One of my favorite discoveries was using the mixture to stuff baked sweet potatoes—the sweetness pairs beautifully with the spicy chicken. For a low-carb option, butter lettuce cups create perfect little fajita boats. My kids love when I serve this as a “build-your-own” bar with different bases and toppings. It’s similar to how I approach my Creamy Coconut Milk Chicken—versatile enough for everyone to customize.

    Creative Protein Swaps

    While chicken thighs are my go-to for Sheet Pan Fajita Chicken with Charred Vegetables, this recipe welcomes experimentation with different proteins. Flank steak sliced thinly against the grain creates a delicious beef version—just reduce cooking time to avoid toughness. Shrimp works beautifully too, added in the last 5-7 minutes of cooking. For plant-based options, try extra-firm tofu or portobello mushrooms, which develop amazing meaty texture when roasted. My vegetarian sister raves about my chickpea version—they get wonderfully crispy edges while staying tender inside. The key is adjusting cooking times for each protein while keeping the vegetable preparation consistent.

    Storage & Troubleshooting Guide

    Meal Prep and Leftovers

    Sheet Pan Fajita Chicken with Charred Vegetables makes exceptional leftovers that actually improve overnight as the flavors meld. Store in airtight containers in the refrigerator for up to 4 days. For best results, reheat in a skillet rather than microwave to maintain those crispy edges. This dish freezes surprisingly well too—portion into freezer bags, removing as much air as possible. Thaw overnight before reheating. I often double the recipe specifically for meal prep, creating grab-and-go lunches for the week. Pro tip: store the components separately from tortillas or other bases to prevent sogginess, assembling just before eating.

    Fixing Common Fajita Fails

    Even experienced cooks sometimes encounter issues with Sheet Pan Fajita Chicken with Charred Vegetables. If your vegetables are turning out soggy instead of charred, your oven may be too cool or the pan overcrowded. Try increasing temperature by 25°F and using two sheet pans if needed. For chicken that’s dry, check that you’re using thighs rather than breasts (which have less fat), or try marinating the meat longer—even 15 minutes helps. If spices are burning before vegetables caramelize, mix spices with a bit more oil to protect them from direct heat. And remember that different ovens vary significantly—get to know yours and adjust accordingly.

    Frequently Asked Questions

    Can I use chicken breasts instead of thighs for Sheet Pan Fajita Chicken?

    Yes, but reduce cooking time to about 18-20 minutes and consider slicing them into strips first. Chicken breasts cook faster and can dry out more easily than thighs, so watch them carefully for doneness.

    How do I prevent vegetables from getting soggy?

    Ensure your oven is fully preheated, use a large enough pan to prevent overcrowding, and pat vegetables dry before adding oil and seasonings. The high heat (425°F minimum) is essential for proper charring.

    Can I prepare this recipe ahead of time?

    Absolutely! Slice all vegetables and chicken up to 24 hours ahead, storing them separately in the refrigerator. You can even mix the seasoning in advance, but toss everything together just before cooking.

    What’s the best way to warm tortillas for serving?

    Wrap a stack of tortillas in foil and place in the oven during the last 5 minutes of cooking time. Alternatively, char them directly over a gas flame for 10-15 seconds per side for authentic flavor.

    How can I make Sheet Pan Fajita Chicken spicier?

    Add 1/4-1/2 teaspoon of cayenne pepper to your seasoning mix, include sliced jalapeños with your vegetables, or serve with hot sauce on the side. Chipotle powder also adds heat with smoky depth.

    Final Thoughts

    Sheet Pan Fajita Chicken with Charred Vegetables has saved countless dinner times in my home, bringing restaurant-quality flavors to my table with minimal effort. There’s something deeply satisfying about creating a meal that looks and tastes impressive while being wonderfully straightforward. The versatility means it never gets boring—switch up your proteins, play with toppings, or change how you serve it. I encourage you to make this recipe your own. And don’t forget to share your creations on Pinterest for inspiration! This dish proves that sometimes the simplest cooking methods deliver the most spectacular results.

  • Sourdough Discard Cinnamon Quick Bread: Irresistibly Soft & Cozy!

    Sourdough Discard Cinnamon Quick Bread: Irresistibly Soft & Cozy!

    Sourdough Discard Cinnamon Quick Bread: Irresistibly Soft & Cozy!

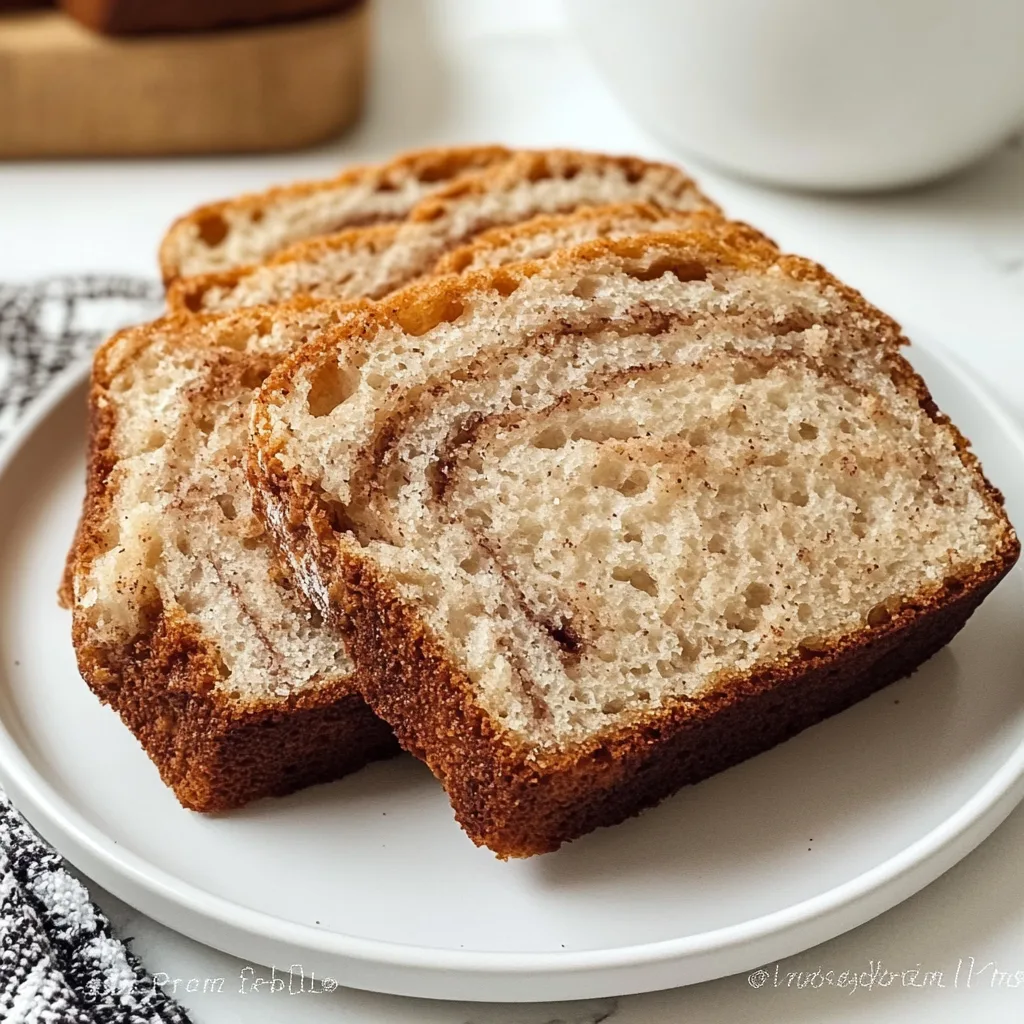
    Sourdough discard cinnamon quick bread has become my absolute salvation on those chilly mornings when I’m craving something warm and spiced but don’t have the patience for a full-on yeast bread. There’s something magical about the tangy depth that sourdough discard brings to this tender loaf, creating layers of flavor you simply can’t achieve with regular quick bread recipes. I discovered this recipe during my pandemic baking adventures when my counter was perpetually cluttered with a bubbling starter and I couldn’t bear to waste another gram of discard. The aroma that fills your kitchen as this bread bakes is nothing short of heavenly – cinnamon, vanilla, and that distinctive sourdough tang creating a symphony of cozy scents.

    Recipe

    Why You’ll Love This Sourdough Discard Cinnamon Quick Bread

    Perfect Balance of Flavors

    The beauty of this sourdough discard cinnamon quick bread lies in its perfect balance of sweet and tangy notes. The discard adds a subtle complexity that elevates this beyond your standard cinnamon bread. I love how the fermented notes play with the warm cinnamon and brown sugar, creating something that feels both familiar and excitingly different. My neighbor actually knocked on my door the first time I made this, drawn by the irresistible aroma wafting through our shared hallway! The texture strikes that ideal balance too – tender and moist with a slightly tight crumb that makes each slice perfect for toasting.

    No-Waste Baking Solution

    If you maintain a sourdough starter, you know the guilt of tossing discard. This sourdough discard cinnamon quick bread transforms that potential waste into something spectacular! I used to feel a pang of regret each time I discarded excess starter, but now I actively look forward to it. Each cup of discard becomes an opportunity rather than a burden. The acidity in the discard also helps activate the baking soda, contributing to a beautiful rise without needing buttermilk or yogurt. Plus, there’s something deeply satisfying about creating a delicious treat from something that would otherwise go straight to the compost.

    Essential Tips & Tricks

    Getting the Perfect Texture

    The key to achieving that ideal texture in your sourdough discard cinnamon quick bread is not overmixing the batter. I learned this the hard way after creating a few dense, tunnel-filled loaves! Mix just until the ingredients are combined – those few streaks of flour you see? They’ll disappear during baking. Another game-changer is using room temperature ingredients. Cold discard straight from the fridge can cause the melted butter to solidify, creating an uneven texture. I like to pull my discard out about 30 minutes before baking, similar to how I prepare for making those delicious snickerdoodle cobbler treats everyone loves.

    Enhancing the Cinnamon Flavor

    To create a truly memorable sourdough discard cinnamon quick bread, don’t skimp on quality cinnamon. I recommend using Ceylon cinnamon for its complex, warm flavor rather than the sharper cassia variety commonly found in supermarkets. For an even more pronounced cinnamon presence, try creating a swirl: mix 2 tablespoons of cinnamon with 1/4 cup of sugar, then layer it between portions of batter in your loaf pan. This creates beautiful ribbons of intense cinnamon flavor throughout the bread. For extra decadence, sprinkle turbinado sugar on top before baking for a sweet, crunchy crust that contrasts beautifully with the tender interior.

    Serving Ideas & Creative Variations

    Perfect Pairings

    Sourdough discard cinnamon quick bread shines as both a breakfast treat and afternoon snack. My favorite way to serve it is lightly toasted with a generous smear of salted butter that melts into all the nooks and crannies. For a more decadent option, try it with cream cheese or a drizzle of local honey. It pairs beautifully with coffee or tea, making it perfect for slow weekend mornings. For a special brunch, serve alongside fresh fruit and yogurt, similar to how I present my creme brulee French toast for guests – it’s always a hit and disappears quickly!

    Seasonal Adaptations

    One thing I love about this sourdough discard cinnamon quick bread is how easily it adapts to seasonal flavors. In fall, add 1/2 cup of diced apples and a handful of chopped walnuts for a harvest-inspired variation. Winter calls for orange zest and cranberries, while spring feels right with lemon zest and blueberries folded into the batter. Summer? Try adding fresh peaches and a touch of ginger. The tangy sourdough base complements all these fruits beautifully, and the cinnamon provides a warm backbone regardless of the season. Each variation feels like a completely new recipe while using the same trusted base.

    Storage & Troubleshooting Guide

    Keeping Your Bread Fresh

    To maintain that just-baked quality, store your sourdough discard cinnamon quick bread properly. Once completely cooled, wrap it tightly in plastic wrap or place in an airtight container. At room temperature, it stays fresh for 2-3 days. For longer storage, refrigeration extends freshness to about a week. The bread also freezes beautifully – I slice the entire loaf before freezing, allowing me to thaw individual portions as needed. Just wrap slices in plastic wrap, then aluminum foil, and freeze for up to 3 months. When ready to enjoy, thaw at room temperature or pop frozen slices directly in the toaster.

    Fixing Common Issues

    If your sourdough discard cinnamon quick bread isn’t turning out perfectly, a few simple adjustments can help. For a loaf that’s too dense, check your leavening agents – baking powder loses potency over time, so replace it every six months. If your bread is sinking in the middle, your oven temperature might be off (consider an oven thermometer), or you might be opening the oven door too early in the baking process. For bread that’s too dry, try reducing the baking time by 5 minutes or adding an extra tablespoon of oil to your next batch.

    Frequently Asked Questions

    Can I use fresh sourdough starter instead of discard?

    Yes, but fresh starter is more active and less acidic. Reduce the baking soda slightly (by about 1/4 teaspoon) and expect a slightly different flavor profile with less tang.

    How long will my sourdough discard cinnamon quick bread stay fresh?

    When properly stored in an airtight container, it remains fresh for 2-3 days at room temperature, up to a week refrigerated, and up to 3 months frozen.

    Can I make this recipe gluten-free?

    Absolutely! Use gluten-free sourdough discard and replace the all-purpose flour with a 1:1 gluten-free baking blend that contains xanthan gum for structure.

    What if my sourdough discard is very liquid?

    If your discard has high hydration (very runny), reduce other liquid ingredients in the recipe by 2-3 tablespoons to maintain the proper batter consistency.

    Is sourdough discard cinnamon quick bread healthier than regular quick bread?

    The fermentation process in sourdough can make nutrients more bioavailable and easier to digest, potentially making this bread somewhat easier on your digestive system than traditional quick breads.

    Final Thoughts

    This sourdough discard cinnamon quick bread has become a staple in my baking rotation, transforming what was once waste into something truly spectacular. There’s something deeply satisfying about the process – watching humble ingredients and discard combine to create something so aromatic and delicious. I hope you’ll experience the same joy as the sweet-spicy scent of cinnamon fills your kitchen and that first warm slice melts in your mouth. Be sure to share your creations on Pinterest to inspire other bakers to give their discard new life!

  • Tuscan Shrimp with Spinach: Irresistibly Flavorful & Easy!

    Tuscan Shrimp with Spinach: Irresistibly Flavorful & Easy!

    Tuscan Shrimp with Spinach: Irresistibly Flavorful & Easy!

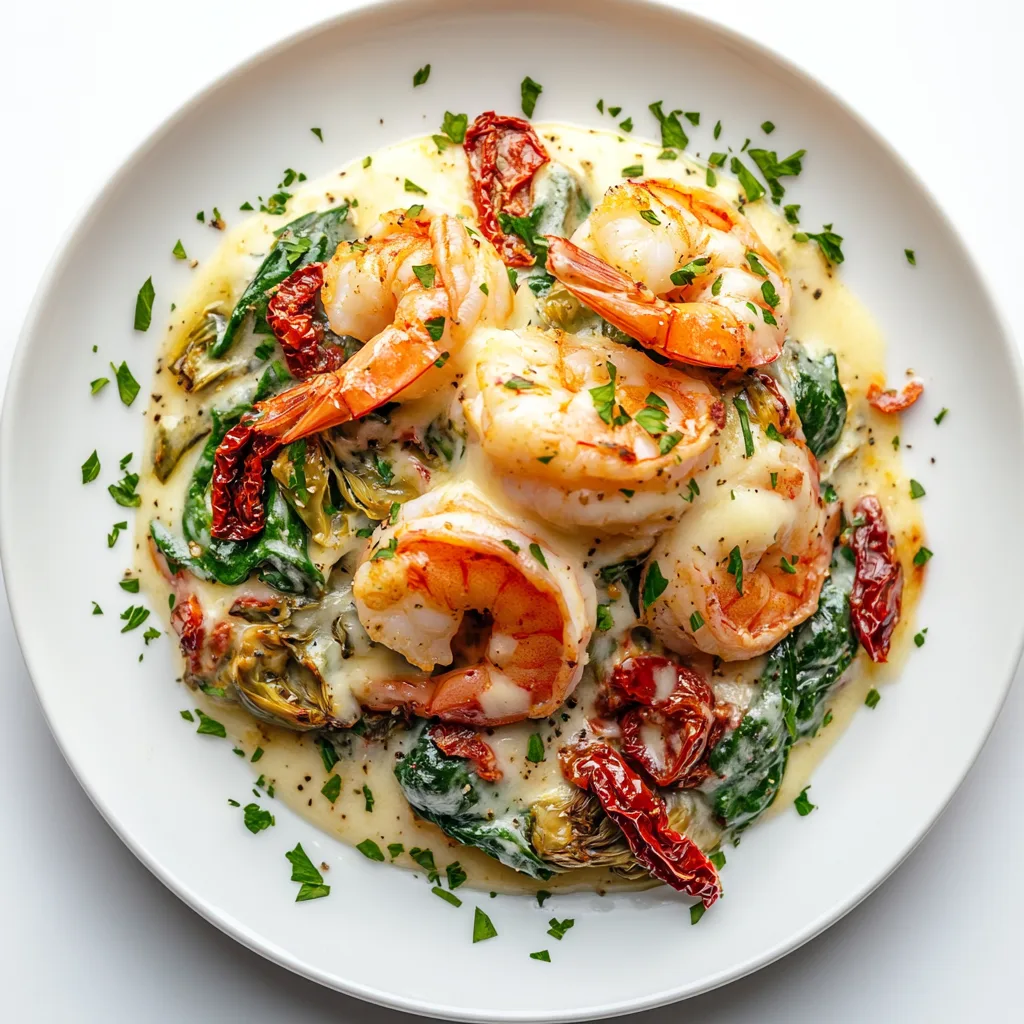
    Tuscan Shrimp with Spinach, Artichokes, Sun-Dried Tomatoes is one of those magical dishes that transports me straight to the Italian countryside with just one bite. The first time I made this, my kitchen filled with the most intoxicating aroma of garlic and herbs that had my husband wandering in from the garage asking what smelled so heavenly. There’s something about the combination of plump shrimp, vibrant spinach, tender artichokes, and sweet-tart sun-dried tomatoes that creates the perfect balance of flavors. If you’re looking for a restaurant-worthy meal that comes together in under 30 minutes, this creamy Tuscan-inspired dish is about to become your new weeknight hero.

    Recipe

    Why You’ll Love This Tuscan Shrimp with Spinach, Artichokes, Sun-Dried Tomatoes

    A Quick Yet Impressive Meal

    This dish has saved me countless times when unexpected dinner guests arrive. The beauty lies in its deceptive simplicity – it looks and tastes like you’ve spent hours in the kitchen, but it’s ready in less than 30 minutes! The rich, creamy sauce coats each succulent shrimp perfectly, while the spinach wilts just enough to retain its vibrant color. I love how the artichokes add a subtle tanginess that balances the sweet notes from the sun-dried tomatoes. When life gets hectic but you still want to put something special on the table, this recipe delivers both convenience and wow-factor.

    A Perfect Balance of Flavors and Textures

    What makes this Tuscan shrimp truly special is the harmonious interplay of flavors and textures. The tender shrimp provide a delicate sweetness, while the sun-dried tomatoes add chewy bits of intense umami goodness. The artichokes contribute their unique earthy notes, and the spinach brings freshness to every bite. I particularly love the moment when the cream sauce meets the natural juices from the shrimp – it creates this velvety consistency that’s absolutely divine. The garlic and Italian herbs tie everything together, creating a dish that feels both sophisticated and comforting at once.

    Essential Tips & Tricks

    Selecting and Preparing Your Ingredients

    When making Tuscan shrimp, ingredient quality makes all the difference. Look for large, firm shrimp (16-20 count per pound works beautifully) and take time to devein them properly. I learned the hard way that frozen artichoke hearts work better than canned ones, which can be too briny for this delicate dish. For sun-dried tomatoes, I prefer the oil-packed variety – they’re more tender and the infused oil adds another layer of flavor. Pat your shrimp completely dry before cooking to ensure they sear rather than steam, which gives them that perfect golden exterior that’s key to building flavor in this dish.

    Mastering the Cooking Technique

    The secret to success with this dish is proper heat management and timing. Start with a hot pan to get a beautiful sear on your shrimp, but don’t overcook them – they’ll continue cooking slightly in the sauce. I always remove the shrimp after the initial sear and add them back at the end to prevent them from becoming rubbery. When creating the sauce, let the cream reduce just enough to coat the back of a spoon before adding the spinach. If you’re like me and enjoy sticky garlic chicken noodles, you’ll appreciate how this dish uses similar techniques to build layers of flavor quickly.

    Serving Ideas & Creative Variations

    Perfect Pairings for a Complete Meal

    This Tuscan shrimp dish shines when served over the right base. My family’s favorite is al dente linguine that catches all that luscious sauce, but it’s equally delicious over creamy polenta or fluffy rice. For a lighter option, try zucchini noodles or cauliflower rice. A simple side salad with lemon vinaigrette provides a refreshing contrast to the richness of the dish. For special occasions, I serve this alongside crusty garlic bread for soaking up every last drop of that heavenly sauce. The versatility reminds me of my creamy Tuscan tortellini soup – both dishes are endlessly adaptable.

    Creative Twists on the Classic Recipe

    Don’t be afraid to make this recipe your own with some thoughtful substitutions. For a lighter version, swap half the cream with chicken broth. Add a pinch of red pepper flakes for a gentle heat that wakes up all the flavors. Sometimes I mix in different proteins – scallops work beautifully, or try Italian sausage for a heartier variation. Mushrooms make a wonderful addition, especially cremini or shiitake varieties that add earthy depth. For a special touch, finish with a sprinkle of toasted pine nuts or a drizzle of high-quality balsamic glaze to elevate the dish even further.

    Storage & Troubleshooting Guide

    Proper Storage and Reheating

    This Tuscan shrimp dish keeps remarkably well, making it perfect for meal prep or planned leftovers. Store in an airtight container in the refrigerator for up to 2 days. When reheating, do so gently over low heat, adding a splash of cream or broth to revive the sauce. I’ve found that microwaving at 70% power helps prevent the shrimp from becoming tough. The flavors actually develop beautifully overnight, making day-two leftovers something to look forward to! If you’re planning to make this ahead for guests, I recommend cooking the sauce and preparing the shrimp separately, then combining them just before serving.

    Common Issues and Easy Fixes

    Even experienced cooks encounter challenges, but most problems with this dish have simple solutions. If your sauce is too thin, let it simmer uncovered for a few extra minutes until it reaches your desired consistency. Conversely, if it’s too thick, a splash of chicken broth will thin it perfectly. Shrimp turned out tough? They were likely overcooked – next time, remove them from the pan as soon as they turn pink and opaque. If your sauce breaks or looks curdled, lower the heat immediately and whisk in a tablespoon of cold cream. For bland results, don’t underestimate the power of finishing with fresh herbs and an extra squeeze of lemon.

    Frequently Asked Questions

    Can I use frozen shrimp for Tuscan Shrimp with Spinach, Artichokes, Sun-Dried Tomatoes?

    Absolutely! Thaw them completely and pat dry with paper towels before cooking. I often keep frozen shrimp on hand specifically for this recipe when I need a quick but impressive dinner option.

    What can I substitute for heavy cream to make this lighter?

    Try half-and-half or a mixture of milk and Greek yogurt. For dairy-free options, full-fat coconut milk works beautifully, adding a subtle sweetness that complements the Mediterranean flavors.

    Can I prepare any components of this dish ahead of time?

    Yes! Clean and devein shrimp, chop garlic, and measure other ingredients the day before. The sauce can even be partially prepared and refrigerated, just add the spinach and shrimp when reheating.

    Is this dish gluten-free?

    The Tuscan shrimp itself is naturally gluten-free, just be careful about what you serve it with. Choose gluten-free pasta or rice instead of regular wheat pasta for a completely gluten-free meal.

    How do I know when the shrimp are perfectly cooked?

    Look for shrimp that have turned pink with opaque (not translucent) flesh and have curled into a loose “C” shape. If they’ve curled into a tight “O,” they’re overcooked.

    Final Thoughts

    This Tuscan Shrimp with Spinach, Artichokes, Sun-Dried Tomatoes has become my go-to recipe when I want to impress without stress. There’s something magical about how these simple ingredients transform into such an elegant, crave-worthy meal. I’ve served it for casual family dinners and special celebrations alike, always to rave reviews. The combination of tender shrimp, vibrant vegetables, and that silky sauce creates a dish that feels like a warm hug at the end of a long day. For more delicious inspiration, check out my Pinterest boards where I share all my favorite comfort food creations.

  • Sticky Garlic Chicken Noodles Recipe – Irresistibly Delicious & Easy!

    Sticky Garlic Chicken Noodles Recipe – Irresistibly Delicious & Easy!

    Sticky Garlic Chicken Noodles Recipe - Irresistibly Delicious & Easy!

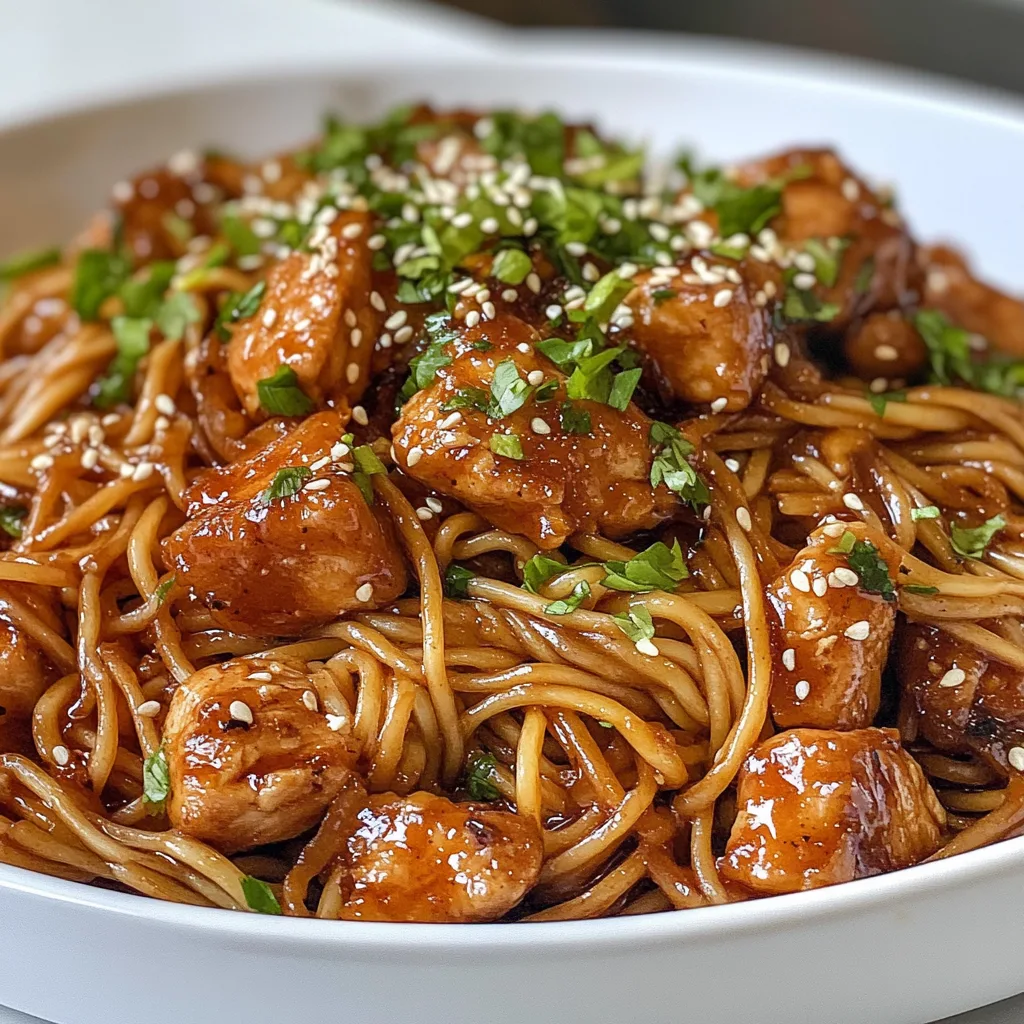
    Sticky Garlic Chicken Noodles are the ultimate comfort food that combines tender chicken, slurpy noodles, and a glossy sauce that clings to every bite with perfect harmony. When I first made this dish on a rainy Sunday afternoon, the aroma of sizzling garlic filled my kitchen and instantly lifted my mood. There’s something magical about how the sauce caramelizes slightly, creating that irresistible sticky texture that makes you reach for “just one more bite.” If you love flavor-packed Asian-inspired meals that come together quickly, this recipe will soon become your new weeknight favorite.

    Recipe

    Why You’ll Love This Sticky Garlic Chicken Noodles

    Perfect Balance of Flavors

    The secret magic of these noodles lies in the perfect balance between sweet, savory, and garlicky notes. The sauce combines honey, soy sauce, and a generous amount of minced garlic that caramelizes slightly as it cooks. I love how the brown sugar creates that signature stickiness while rice vinegar adds just enough tanginess to keep it from being too sweet. When you twirl those noodles around your fork and get that perfect bite with a piece of chicken, you’ll understand why I make this recipe at least twice a month!

    Quick Weeknight Wonder

    On those evenings when cooking feels like a chore, this 30-minute meal comes to the rescue. The chicken cooks quickly in a hot pan, and while your noodles boil, you can prepare the simple sauce that transforms everything. I’ve made this after long workdays when my energy was depleted, and the minimal prep work (just some chopping and measuring) makes it manageable even when you’re tired. The impressive flavor-to-effort ratio is what makes these sticky garlic chicken noodles a permanent fixture in my dinner rotation.

    Essential Tips & Tricks

    Noodle Know-How

    Choosing the right noodles makes a significant difference in this dish. While I typically use egg noodles for their ability to hold that sticky sauce, rice noodles work beautifully for a gluten-free option. The key is not to overcook them—aim for al dente since they’ll continue cooking slightly when tossed with the hot sauce. I once made the mistake of fully cooking the noodles and then letting them sit too long, resulting in a clumpy mess. Now I time it so the noodles finish just as my sauce and chicken are ready for the grand union.

    Sauce Secrets

    The velvety texture of the sauce depends on proper thickening. I mix cornstarch with cold water before adding it to create that perfect consistency that clings to every strand of noodle. When adding the sauce to your hot pan, it will thicken quickly, so have everything ready to toss together immediately. For an extra layer of flavor, try adding a splash of chicken broth to the sauce—it adds depth without overpowering the garlic. Remember that the sauce continues to thicken as it cools, so it’s better to err on the slightly thinner side.

    Serving Ideas & Creative Variations

    Perfect Pairings

    These sticky garlic chicken noodles shine as a complete meal, but I love serving them with simple sides that complement without competing. A crisp cucumber salad with rice vinegar dressing offers a refreshing contrast to the rich noodles. For added color and nutrition, steamed broccoli or snap peas work beautifully—the sauce clings to them deliciously! When I’m hosting friends, I place the noodles in a large serving bowl and surround it with small dishes of toppings like sliced green onions, crushed peanuts, and extra chili flakes for a DIY noodle bar that always impresses.

    Exciting Flavor Twists

    Don’t be afraid to customize this versatile recipe! For a spicy kick, add sriracha or sambal oelek to the sauce—start with a teaspoon and adjust to your heat preference. Swapping chicken for shrimp creates an equally delicious variation that cooks even faster. My personal favorite twist is adding thinly sliced bell peppers and mushrooms that caramelize alongside the chicken. For a vegetarian version, replace the chicken with crispy tofu or simply double up on colorful vegetables. The sticky garlic sauce works its magic on virtually anything you pair it with.

    Storage & Troubleshooting Guide

    Keeping It Fresh

    These noodles make excellent leftovers when stored properly. Transfer cooled noodles to an airtight container and refrigerate for up to 3 days. When reheating, add a splash of water or chicken broth to loosen the sauce, as it will have thickened considerably in the fridge. I find that a quick zap in the microwave with a damp paper towel on top helps maintain moisture. For meal prep, you can store the sauce separately from the noodles and chicken, then combine when reheating for the freshest texture.

    Fixing Common Issues

    If your sauce isn’t thickening properly, the most likely culprit is heat that’s too low. The sauce needs to bubble gently to activate the cornstarch. Conversely, if your sauce becomes too thick and gloopy, simply add a tablespoon of water or broth and stir until you reach your desired consistency. For noodles that clump together, a drizzle of sesame oil tossed through immediately after draining works wonders. And if your garlic starts to burn (which can make it bitter), lower the heat immediately and add a splash of broth to cool the pan down.

    Frequently Asked Questions

    Can I make Sticky Garlic Chicken Noodles ahead of time?

    Yes! Prepare components separately and store in the refrigerator for up to 2 days. When ready to serve, reheat the chicken and sauce together, then toss with freshly cooked noodles for best texture.

    What’s the best type of noodle to use?

    Egg noodles are traditional, but rice noodles, udon, or even spaghetti work well. Choose based on your preference and dietary needs—they all beautifully capture the sticky garlic sauce.

    How can I make this recipe gluten-free?

    Use rice noodles instead of egg noodles and substitute regular soy sauce with tamari or coconut aminos. Double-check that your other sauce ingredients are certified gluten-free.

    Can I use pre-minced garlic from a jar?

    Fresh garlic provides the best flavor for Sticky Garlic Chicken Noodles, but jarred garlic works in a pinch. Use 1/2 teaspoon of jarred garlic for each clove called for in the recipe.

    How do I prevent the noodles from sticking together?

    Rinse cooked noodles briefly with cool water, then toss with a teaspoon of sesame oil. Don’t let them sit too long before adding to the sauce—timing is key!

    Final Thoughts

    There’s something incredibly satisfying about twirling these Sticky Garlic Chicken Noodles around your fork and experiencing that perfect balance of flavors in each bite. The dish has become my go-to recipe when I need comfort food that doesn’t require hours in the kitchen. I love seeing the smiles when I serve this to family and friends—it’s the kind of meal that creates memories around the table. For more delicious recipes like this one, visit our Pinterest page where you’ll find endless inspiration for your next cooking adventure.

  • Crockpot Thai Peanut Chicken: Easy, Creamy, Flavor-Packed Meal!

    Crockpot Thai Peanut Chicken: Easy, Creamy, Flavor-Packed Meal!

    Crockpot Thai Peanut Chicken: Easy, Creamy, Flavor-Packed Meal!

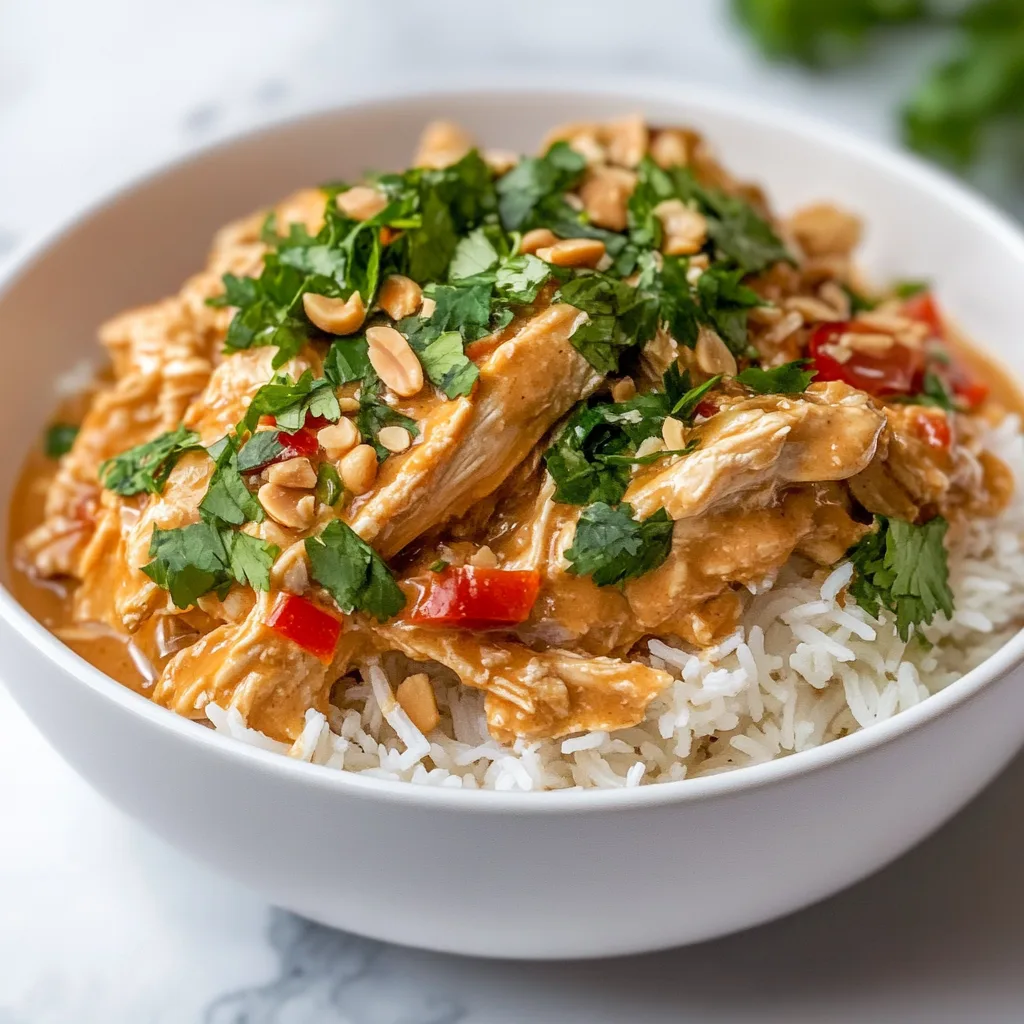
    Crockpot Thai Peanut Chicken is the ultimate comfort food that combines creamy peanut sauce with tender chicken for a meal that practically makes itself. I discovered this recipe during a particularly hectic week when I needed dinner to be ready when I walked through the door. The aroma that filled my kitchen that evening—rich peanut butter mingling with ginger and lime—instantly transported me somewhere far more peaceful than my chaotic day. If you love hearty, flavor-packed meals that require minimal effort, this slow cooker sensation is about to become your new weeknight hero.

    Recipe

    Why You’ll Love This Crockpot Thai Peanut Chicken

    Perfect Balance of Flavors

    There’s something magical about the combination of creamy peanut butter, tangy lime, and savory soy sauce that makes this dish irresistible. The slow cooking process allows these flavors to meld together, creating layers of taste that would be impossible to achieve with quick cooking methods. I love how the ginger and garlic infuse the sauce without overwhelming it, while the red pepper flakes add just enough heat to wake up your taste buds without setting them on fire. Every bite delivers that perfect sweet-savory-spicy balance that makes Thai-inspired cuisine so craveable.

    Effortless Preparation

    What truly makes this Crockpot Thai Peanut Chicken a weeknight winner is how ridiculously simple it is to prepare. Just whisk together the sauce ingredients, pour over chicken, and let your slow cooker do all the heavy lifting. I often prep everything the night before, store the crock in the refrigerator, and simply pop it into the heating element before heading out the door in the morning. There’s something incredibly satisfying about knowing dinner is practically making itself while you’re tackling your day. The hands-on time is minimal—about 10 minutes—but the flavor payoff is enormous.

    Essential Tips & Tricks

    Choosing the Right Ingredients

    The quality of your peanut butter makes a significant difference in this recipe. I recommend using natural, creamy peanut butter without added sugars or oils for the most authentic flavor. If you’re watching sodium, choose low-sodium soy sauce or coconut aminos as a substitute. Fresh lime juice is non-negotiable here—the bottled stuff simply doesn’t deliver the same bright acidity that balances the rich peanut sauce. For the chicken, boneless skinless thighs work beautifully as they stay tender during the long cooking process, but breasts can work too if you reduce the cooking time.

    Perfecting the Texture

    The consistency of your Thai peanut sauce is crucial to this dish’s success. If it’s too thick after cooking, whisk in a tablespoon or two of chicken broth or coconut milk until you reach your desired consistency. Conversely, if your sauce is too thin, mix a tablespoon of cornstarch with equal parts cold water and stir it into the hot sauce. Let it cook for an additional 15-20 minutes with the lid off. For maximum flavor absorption, I like to shred the chicken directly in the sauce and let it sit for 5 minutes before serving, allowing each piece to soak up the delicious flavors.

    Serving Ideas & Creative Variations

    Complementary Side Dishes

    This Crockpot Thai Peanut Chicken shines when served over a bed of fluffy jasmine rice that soaks up all that glorious sauce. For a lower-carb option, try cauliflower rice or zucchini noodles. I love adding color and freshness with a side of steamed broccoli or snap peas. A simple cucumber salad with rice vinegar dressing provides a cool contrast to the warm, rich chicken. For special occasions, I pair this with my Spinach Artichoke Dip as an appetizer and suddenly my weeknight dinner feels like a restaurant-worthy feast that impresses everyone at the table.

    Creative Twists

    Don’t be afraid to make this recipe your own with personal touches. Add a tablespoon of red curry paste to the sauce for deeper flavor and color. For a fruitier profile, mix in a few tablespoons of mango chutney or pineapple chunks during the last 30 minutes of cooking. Vegetarians can substitute chickpeas and firm tofu for the chicken—just reduce cooking time to 4 hours on low. My favorite variation includes adding a can of coconut milk for a creamier sauce and throwing in some bell peppers and snow peas during the final hour of cooking for a complete one-pot meal.

    Storage & Troubleshooting Guide

    Proper Storage Methods

    This Crockpot Thai Peanut Chicken is meal-prep friendly and actually tastes even better the next day as the flavors continue to develop. Store leftovers in airtight containers in the refrigerator for up to 4 days. For freezing, cool the chicken completely before transferring to freezer-safe containers, leaving some room for expansion. The sauce might separate slightly upon thawing, but a good stir while reheating will bring it back together. I like to portion individual servings for quick lunches—just grab, microwave for 2-3 minutes, and enjoy a homemade meal that puts sad desk lunches to shame.

    Common Problems & Solutions

    If your sauce has separated or looks curdled after cooking, don’t panic! This can happen if the heat was too high or due to the acidity in the lime juice. Simply whisk vigorously while the mixture is still hot, and it should come back together. If your chicken turned out dry, it was likely cooked too long—next time, check it earlier or use chicken thighs instead of breasts. For sauce that’s too salty, add a splash of coconut milk and a squeeze of lime juice to balance the flavors. Too spicy? A dollop of plain yogurt or a drizzle of honey can help tame the heat.

    Frequently Asked Questions

    Can I make Crockpot Thai Peanut Chicken with frozen chicken?

    For food safety reasons, I don’t recommend starting with frozen chicken. Thaw it completely first to ensure it cooks evenly and reaches a safe temperature throughout the cooking process.

    Is this recipe gluten-free?

    Not automatically, but it’s easily adapted by substituting tamari or coconut aminos for the soy sauce and checking that your peanut butter doesn’t contain hidden gluten ingredients.

    How spicy is this Crockpot Thai Peanut Chicken?

    As written, it has a mild to medium heat. Adjust the red pepper flakes to your preference—omit them entirely for no spice or double for a more pronounced kick.

    Can I cook this on high instead of low?

    Yes, you can cook on high for 3-4 hours instead of 6-8 on low, but the chicken may not be quite as tender and the flavors less developed.

    What vegetables work best with this recipe?

    Bell peppers, snow peas, broccoli, and carrots complement the flavors beautifully. Add sturdy vegetables during the last hour of cooking to maintain their texture.

    Final Thoughts

    This Crockpot Thai Peanut Chicken has become my go-to recipe for those days when I want something deeply satisfying without the fuss. There’s something truly magical about walking through the door after a long day to be greeted by those aromatic Thai-inspired scents. I’ve shared this recipe with countless friends who now make it regularly in their own homes. Don’t forget to check out more of my slow cooker creations on Pinterest for your next culinary adventure. Your crockpot is about to become your favorite kitchen companion!

  • Shrimp Dirty Rice Recipe: Irresistibly Flavorful & Easy to Make!

    Shrimp Dirty Rice Recipe: Irresistibly Flavorful & Easy to Make!

    Shrimp Dirty Rice Recipe: Irresistibly Flavorful & Easy to Make!

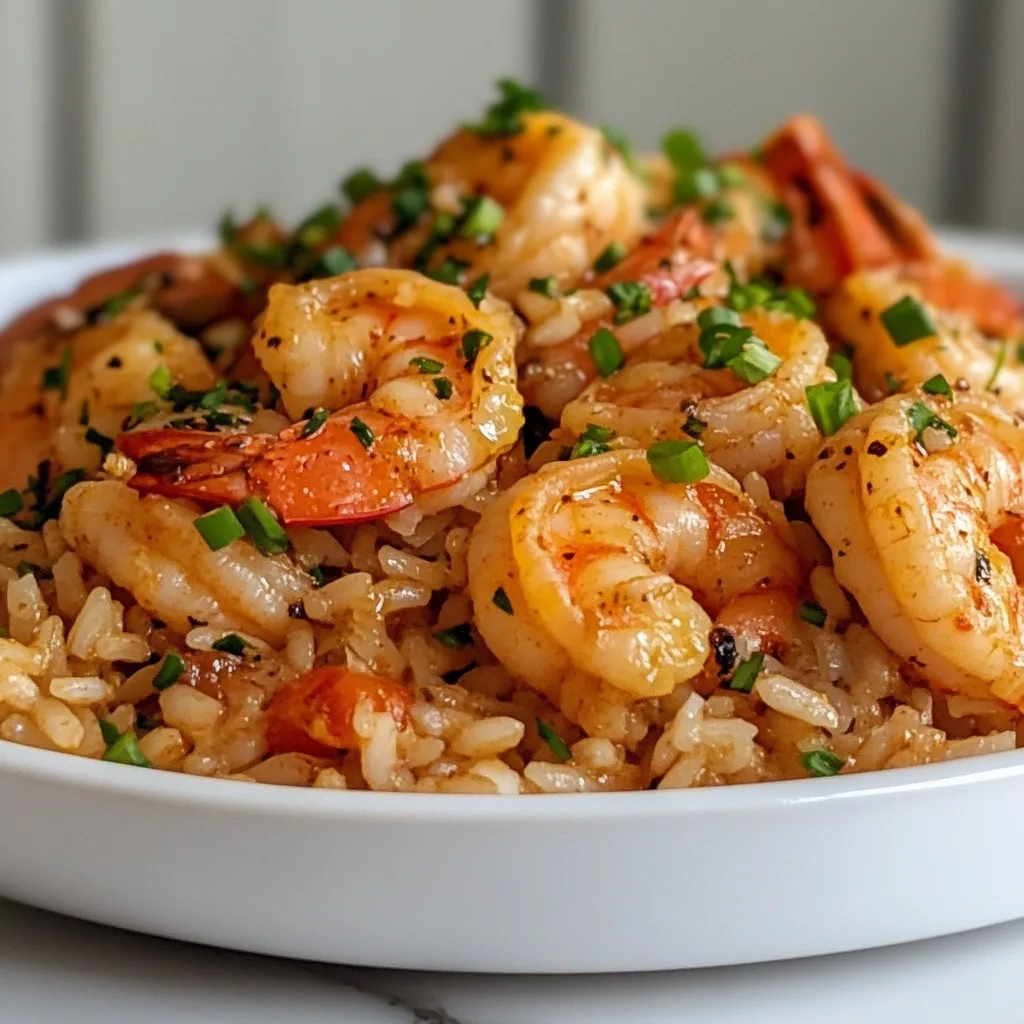
    Shrimp Dirty Rice brings the heart of Louisiana straight to your dinner table with its bold, spicy flavors and satisfying texture. The first time I made this dish, the aroma of sautéed bell peppers, onions, and celery (the holy trinity of Cajun cooking) filled my kitchen and transported me straight to New Orleans. There’s something magical about watching plump shrimp turn pink as they nestle into that flavorful rice speckled with herbs and spices. This one-pot wonder has become my go-to when I want to impress guests without spending hours in the kitchen—just like my Creamy Tuscan Tortellini Soup for those cooler evenings.

    Recipe

    Why You’ll Love This SHRIMP DIRTY RICE

    Perfect Balance of Flavors and Textures

    The magic of Shrimp Dirty Rice lies in its perfect balance of flavors—spicy, savory, and slightly smoky all at once. The tender shrimp provide a delicate sweetness that contrasts beautifully with the kick from cayenne and paprika. I love how the rice soaks up all those amazing flavors while maintaining just the right amount of bite. And those little bits of browned vegetables and meat that give dirty rice its name? They create these incredible pockets of intensified flavor that make each forkful slightly different from the last. It’s comfort food with character!

    Quick One-Pot Convenience

    On busy weeknights when I’m tempted to order takeout, this one-pot wonder saves the day. Everything cooks in a single skillet, meaning fewer dishes and less cleanup—music to my ears! The whole dish comes together in about 30 minutes, making it faster than delivery and infinitely more satisfying. I’ve found that prepping the vegetables ahead of time (maybe during weekend meal prep) makes this even speedier. The rice and shrimp cook together, allowing the seafood to infuse the grains with its sweet, briny essence that simply can’t be replicated any other way.

    Essential Tips & Tricks

    Perfecting Your Rice Base

    The foundation of exceptional Shrimp Dirty Rice is getting the rice texture just right. I always rinse my rice thoroughly until the water runs clear—this removes excess starch and prevents gumminess. For authentic flavor, toast the rice in a bit of butter before adding liquid; those few extra minutes develop a nutty depth that elevates the entire dish. Use chicken broth instead of water for richer flavor, and resist the urge to peek while it’s cooking! Every time you lift that lid, precious steam escapes and can result in unevenly cooked rice. Trust the process and let it do its thing.

    Shrimp Selection and Cooking

    Choosing the right shrimp makes all the difference in this dish. I prefer medium-sized shrimp (21-25 count per pound) because they cook quickly without becoming tough. Always look for shrimp that smells fresh and briny—never fishy. When cooking, remember that shrimp transforms from raw to overcooked in the blink of an eye! I add them to the rice during the final few minutes of cooking, just like in my Slow Cooker Mediterranean Fish Stew. They’re done when they’ve just turned pink and opaque, with a slight C-shape rather than tightly curled (which indicates overcooking).

    Serving Ideas & Creative Variations

    Perfect Pairings and Garnishes

    Shrimp Dirty Rice is a meal in itself, but a few thoughtful accompaniments can take it to new heights. I love serving it with crusty bread for sopping up those flavorful juices—there’s something deeply satisfying about that final swipe across the plate. A simple side salad with vinaigrette provides a bright, acidic contrast that cuts through the richness. For garnishes, don’t skip fresh green onions and a squeeze of lemon! The citrus brightens everything up, while the onions add a fresh crunch that plays beautifully against the tender rice and shrimp. A sprinkle of fresh parsley adds both color and a herbaceous note.

    Creative Twists on the Classic

    While traditional Shrimp Dirty Rice is divine, I love playing with regional variations to keep things interesting. For a Creole twist, add diced tomatoes and a splash of Worcestershire sauce for depth. Feeling bold? Throw in some andouille sausage alongside the shrimp for a surf-and-turf approach that’s reminiscent of my Cheesy Beef and Rice Casserole. For a lighter version, swap white rice for brown or cauliflower rice (adjusting cooking times accordingly). And don’t be afraid to play with heat levels—crystal hot sauce at the table lets everyone customize their own experience.

    Storage & Troubleshooting Guide

    Proper Storage and Reheating

    Leftover Shrimp Dirty Rice can be just as delicious the next day if stored properly. Allow it to cool completely before transferring to airtight containers to prevent condensation that could make the rice soggy. It keeps well in the refrigerator for up to three days, though the shrimp is best within the first two. When reheating, add a small splash of broth or water to revive the rice, and warm it gently—either in the microwave at 50% power with occasional stirring, or in a skillet over medium-low heat. This prevents the shrimp from becoming rubbery while ensuring the rice doesn’t dry out.

    Troubleshooting Common Issues

    Even experienced cooks occasionally encounter challenges with Shrimp Dirty Rice. If your rice turns out too wet, simply remove the lid and cook over low heat for a few additional minutes to evaporate excess moisture. Conversely, if it’s too dry, add a splash of hot broth and gently fold it in. For bland results, don’t be shy with your seasonings—this dish should have personality! A dash of hot sauce, extra Cajun seasoning, or even a splash of Worcestershire sauce can rescue underseasoned rice. And if your shrimp end up overcooked, quickly remove them from the hot rice and fold them back in just before serving.

    Frequently Asked Questions

    Can I make Shrimp Dirty Rice ahead of time?

    Yes! Prepare the rice base up to a day ahead, then reheat and add fresh-cooked shrimp just before serving. This maintains the perfect texture of both components while saving time.

    Is Shrimp Dirty Rice spicy?

    Traditional Shrimp Dirty Rice has a moderate kick, but you can easily adjust the cayenne pepper and hot sauce to suit your preference. Start with less if you’re heat-sensitive.

    Can I use frozen shrimp?

    Absolutely! Thaw completely and pat dry before cooking to prevent excess moisture from making your rice soggy. This ensures your Shrimp Dirty Rice maintains its ideal texture.

    What’s the difference between dirty rice and jambalaya?

    Dirty rice gets its name from the small bits of meat and vegetables that “dirty” the rice. Jambalaya typically includes tomatoes and a wider variety of proteins in a more stew-like consistency.

    Can I substitute the protein in this recipe?

    Certainly! Chicken, crawfish, or even andouille sausage work beautifully in place of or alongside shrimp. Just adjust cooking times accordingly for each protein.

    Final Thoughts

    There’s something deeply comforting about a well-made Shrimp Dirty Rice that brings people together around the table. The complex flavors belie how simple it is to prepare, making it perfect for both weeknight dinners and special occasions. I hope you’ll make this recipe your own, adjusting the seasonings and ingredients to suit your family’s tastes. It’s become a staple in my kitchen—a dish that feels like home even when you’re trying it for the first time. For more delicious recipes, follow me on Pinterest where I’m always sharing new favorites!

  • One-Pan Creamy Garlic Butter Chicken & Rice – Irresistibly Easy!

    One-Pan Creamy Garlic Butter Chicken & Rice – Irresistibly Easy!

    One-Pan Creamy Garlic Butter Chicken & Rice – Irresistibly Easy!

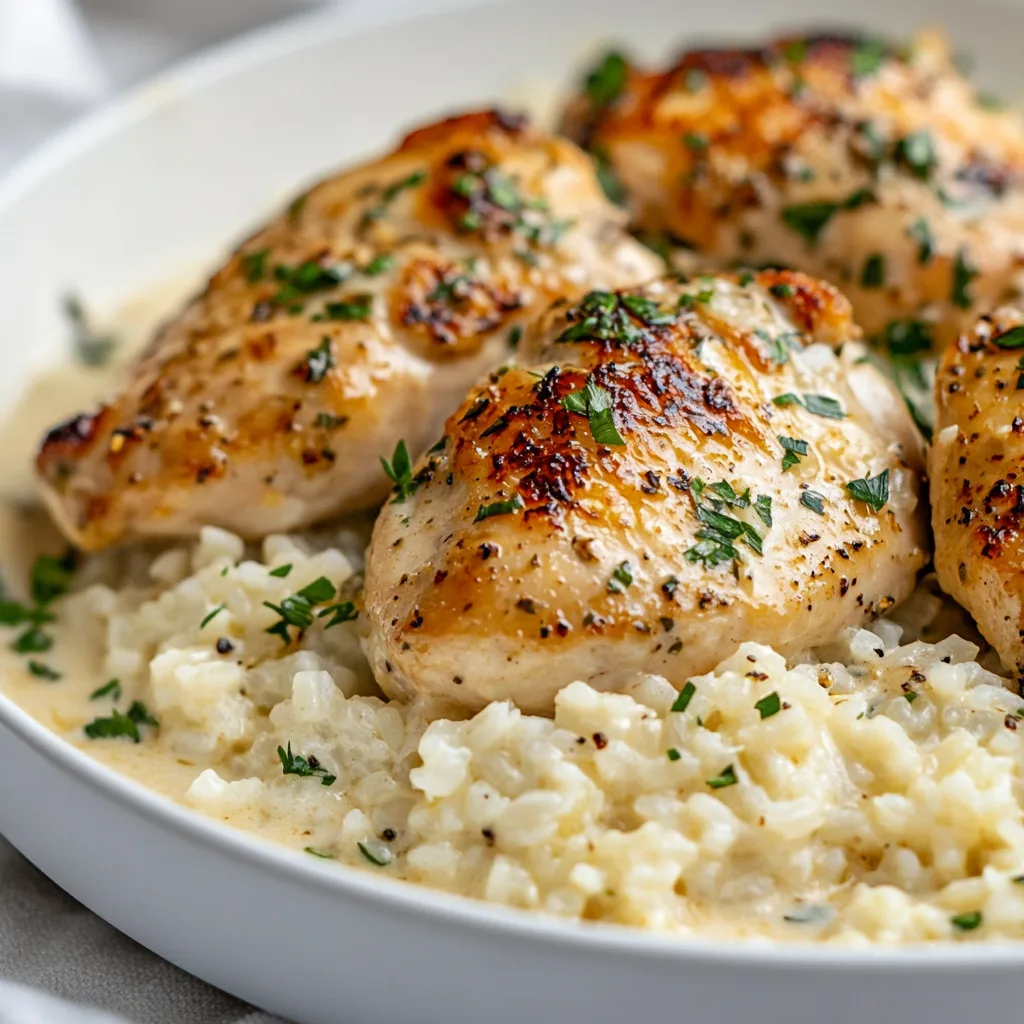
    One-Pan Creamy Garlic Butter Chicken and Rice has become my absolute go-to recipe for those evenings when I want something utterly comforting but don’t have the energy for a kitchen full of dirty pots and pans. The first time I made this dish, the aroma of garlic and butter wafting through my kitchen instantly transported me back to my grandmother’s cozy dining room. There’s something magical about how the chicken becomes tender while the rice soaks up all those incredible flavors. If you’re looking for a simple yet impressive dinner that delivers big on flavor, this one-pan wonder is exactly what you need.

    Recipe

    Why You’ll Love This One-Pan Creamy Garlic Butter Chicken and Rice

    Perfect Balance of Flavors and Textures

    The magic of this dish lies in its perfect harmony of creamy richness and savory depth. The garlic butter creates this velvety base that coats each grain of rice, while the chicken adds a satisfying heartiness. I love how the edges of the rice get slightly crispy while the center remains tender and creamy. The first time my husband tried this, he closed his eyes and just savored the moment—that’s when I knew this recipe was a keeper! The combination of herbs and that touch of lemon zest brightens everything up, creating a dish that feels both indulgent and somehow light at the same time.

    Ultimate Convenience Factor

    Let’s be honest—after a long day, the last thing any of us wants is to juggle multiple pots and pans. This recipe is a true kitchen savior because everything cooks together in perfect harmony. I’ve lost count of how many times I’ve made this on hectic weeknights when I’m helping with homework while trying to get dinner on the table. The prep is straightforward: just season the chicken, sauté it with garlic and butter, add rice and broth, and let it all simmer together. The cleanup is minimal (just one pan!), but the results are anything but basic. It’s the kind of efficiency that makes weeknight cooking feel manageable again.

    Essential Tips & Tricks

    Getting the Rice Perfectly Cooked

    The secret to perfectly tender rice that’s neither mushy nor undercooked is all about timing and liquid ratio. I’ve found that medium-grain rice works beautifully here—it absorbs the flavors while maintaining its structure. Start by toasting the rice in the butter for about 2 minutes before adding your liquid; this simple step creates a protective coating that prevents the rice from becoming gummy. Another game-changer is using warm broth instead of cold, which helps maintain an even cooking temperature. If you notice the liquid absorbing too quickly, don’t hesitate to add an extra splash of broth. Trust your instincts—the rice should be tender but still have a slight bite to it.

    Achieving Perfectly Juicy Chicken

    Nothing ruins this dish faster than dry, overcooked chicken. The trick I’ve learned is to use boneless, skin-on chicken thighs for the best flavor and moisture retention. Season them generously with salt and pepper at least 15 minutes before cooking to enhance their natural flavor.

    When searing, give them space in the pan and resist the urge to move them around—that golden crust is flavor gold! I always check for doneness with a meat thermometer (165°F is perfect) rather than cutting into the meat and losing those precious juices. If you’re using chicken breasts instead, consider cutting them into even-sized pieces to ensure they cook at the same rate as your rice—similar to how I prepare my Slow Cooker Chicken Cacciatore.

    Serving Ideas & Creative Variations

    Perfect Pairings for a Complete Meal

    This one-pan wonder stands beautifully on its own, but I love adding a few thoughtful sides to round out the meal. A simple arugula salad with lemon vinaigrette provides a peppery freshness that cuts through the richness. For a more substantial dinner, roasted asparagus or broccolini takes just minutes in a hot oven and adds vibrant color and nutrition. When I’m hosting friends, I serve this with warm crusty bread for soaking up every last bit of that creamy sauce—no one can resist! For wine lovers, a crisp Pinot Grigio or unoaked Chardonnay complements the buttery notes perfectly. The beauty is that the main dish requires so little effort that you can focus on these simple extras.

    Exciting Flavor Twists to Try

    The beauty of this recipe is how easily it adapts to different flavor profiles. For a Mediterranean twist, add sun-dried tomatoes, olives, and crumbled feta in the last few minutes of cooking. My family loves when I do a mushroom variation with wild mushrooms and a splash of white wine for depth. For heat lovers, incorporate diced jalapeños and smoked paprika for a Spanish-inspired kick.

    You can even swap the chicken for shrimp (add them in the last 5 minutes to avoid overcooking) or go vegetarian with hearty mushrooms and extra vegetables. For a cozy fall version, try adding butternut squash cubes and sage—it’s similar to my Slow Cooker Tuscan Fish Stew in terms of seasonal comfort but with a completely different flavor profile.

    Storage & Troubleshooting Guide

    Proper Storage for Leftovers

    This dish makes fantastic leftovers that actually improve overnight as the flavors meld together. Store any remaining portions in airtight containers in the refrigerator for up to 3 days. When reheating, add a splash of chicken broth or even a little cream to revitalize the sauce, as the rice tends to absorb liquid as it sits. I like to microwave it at 70% power, stirring halfway through, to prevent the chicken from becoming tough. For meal prep, portion individual servings into microwave-safe containers for grab-and-go lunches. If you want to freeze portions, do so before adding any fresh herbs or garnishes, and use within 2 months for the best quality.

    Fixing Common Issues

    Even experienced cooks occasionally run into challenges with one-pan dishes. If your rice is still firm but the liquid has evaporated, simply add ¼ cup more warm broth or water, cover tightly, and cook on low heat for an additional 5 minutes. For sauce that’s too thin, a quick fix is removing the chicken temporarily and simmering the sauce uncovered for a few minutes until it reduces to your desired consistency. If the bottom is browning too quickly, lower the heat immediately and place a diffuser beneath your pan if you have one. And for those times when the garlic threatens to burn, adding a splash of white wine or broth will instantly cool the pan while adding flavor depth.

    Frequently Asked Questions

    Can I use brown rice instead of white rice?

    Yes, but brown rice requires more liquid (about ½ cup extra) and longer cooking time (approximately 15-20 minutes more). Start the chicken later in the process to prevent overcooking it while the brown rice finishes.

    What’s the best chicken cut for One-Pan Creamy Garlic Butter Chicken and Rice?

    Boneless, skin-on chicken thighs offer the best flavor and moisture. They’re more forgiving than breasts if slightly overcooked and contribute richer flavor to the finished dish.

    Can I make this dairy-free?

    Absolutely! Substitute the butter with olive oil and replace cream with full-fat coconut milk or your favorite plant-based cooking cream. The flavor profile will change slightly but remain delicious.

    How can I add more vegetables to this dish?

    Stir in quick-cooking vegetables like spinach, peas, or cherry tomatoes during the final 5 minutes. For harder vegetables like broccoli, briefly steam them separately before adding to preserve their texture.

    What if I don’t have a large enough pan?

    If your largest pan isn’t sufficient, you can transfer everything to a casserole dish after the initial sautéing steps, cover with foil, and finish cooking in a 375°F oven for about 25 minutes.

    Final Thoughts

    This One-Pan Creamy Garlic Butter Chicken and Rice has become more than just a recipe in my household—it’s a reliable solution for those nights when I want to put something special on the table without spending hours in the kitchen. The combination of tender chicken, creamy rice, and that irresistible garlic butter sauce creates a meal that feels like a warm hug at the end of a long day. I’d love to see how you make this recipe your own! Share your creations with me on Pinterest and let me know what creative twists you’ve added to make it uniquely yours.