Author: Lily Bennett

  • Cheesy Shrimp Scampi Pasta Bake – Irresistibly Easy & Delicious!

    Cheesy Shrimp Scampi Pasta Bake – Irresistibly Easy & Delicious!

    Cheesy Shrimp Scampi Pasta Bake – Irresistibly Easy & Delicious!

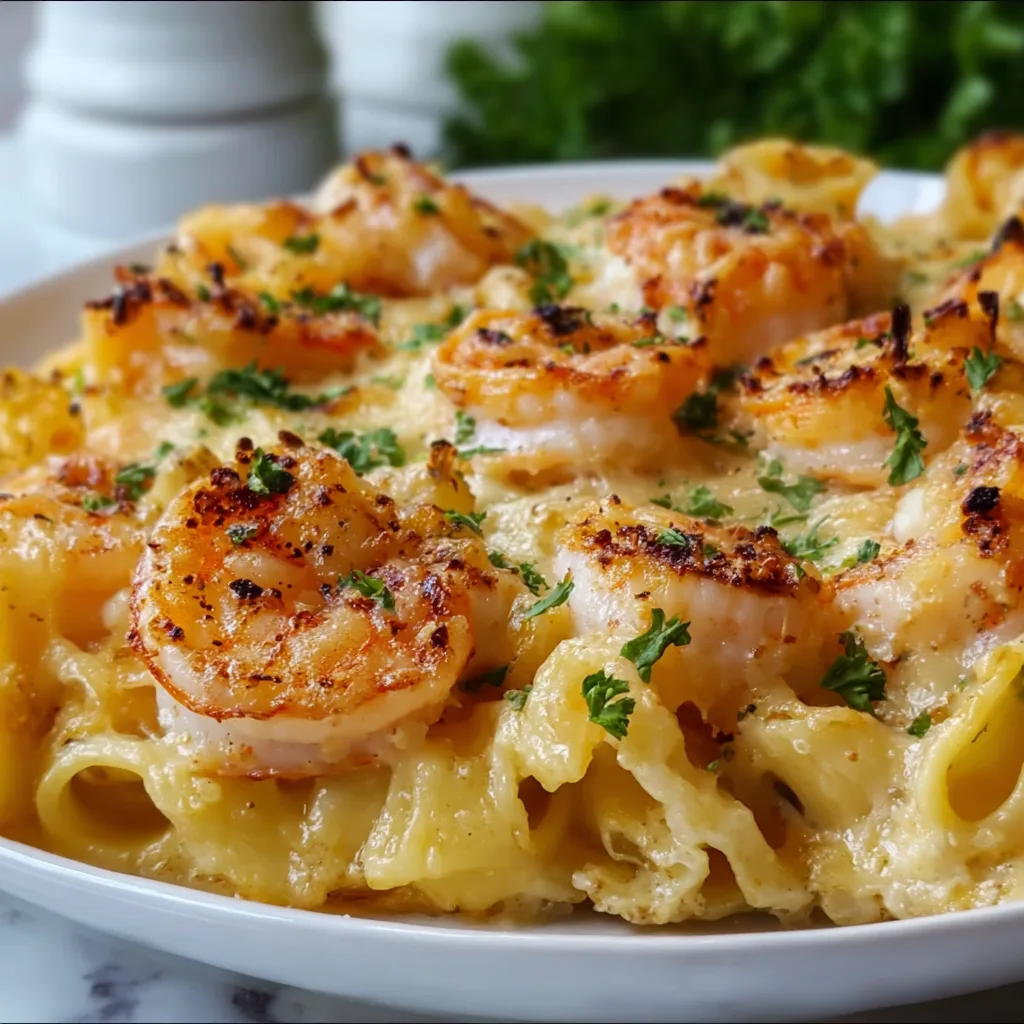
    This Cheesy Shrimp Scampi Pasta Bake transforms classic shrimp scampi into a comforting, shareable casserole that’s perfect for both weeknight dinners and special occasions. The first time I made this dish, my kitchen filled with the intoxicating aroma of garlic butter and herbs that had my family hovering around the oven before I could even call them for dinner. There’s something magical about how the tender shrimp, al dente pasta, and bubbling cheese come together under a golden, crispy topping. If you love the bright flavors of traditional scampi but crave something more substantial, this baked version delivers all that and more.

    Recipe

    Why You’ll Love This Cheesy Shrimp Scampi Pasta Bake

    Perfect Balance of Flavors and Textures

    This dish hits all the right notes with its harmonious blend of flavors and textures. The garlicky butter sauce infuses every bite, while fresh lemon brightens the richness. What makes this truly special is how the pasta absorbs the sauce as it bakes, becoming incredibly flavorful rather than just a vehicle for the other ingredients. The contrast between the tender shrimp, al dente pasta, and that irresistible cheesy crust creates a multidimensional experience that’s both comforting and exciting. I love watching people’s expressions when they take that first bite—it’s pure culinary bliss!

    Make-Ahead Convenience

    One of the greatest advantages of this Cheesy Shrimp Scampi Pasta Bake is its make-ahead potential. You can assemble the entire dish up to a day before, cover it tightly, and refrigerate until you’re ready to bake. This has saved me countless times when hosting dinner parties or during busy weeknights when I need something delicious but don’t have time to cook from scratch. The flavors actually develop and improve as they meld in the refrigerator, making this not just convenient but potentially even more delicious when prepared in advance!

    Essential Tips & Tricks

    Selecting and Preparing the Shrimp

    Choosing the right shrimp is crucial for this dish. I recommend medium to large shrimp (21-25 count) for the perfect bite size that won’t get lost among the pasta. Fresh is wonderful, but quality frozen shrimp, properly thawed, works beautifully too. The key is not to overcook them before adding to the casserole—they should be just barely pink since they’ll continue cooking in the oven. I always pat my shrimp completely dry before sautéing to ensure they get a nice sear rather than steam, which makes all the difference in developing those rich, caramelized flavors that elevate the entire dish.

    Creating the Ultimate Cheese Blend

    The cheese selection can transform this dish from good to unforgettable. I recommend a three-cheese approach: sharp white cheddar for tang, mozzarella for that stretchy pull, and a bit of Parmesan for nutty depth. Grate your cheese fresh rather than using pre-shredded varieties, which contain anti-caking agents that prevent proper melting. For an extra-special touch, try mixing in some fontina or gruyère, which melt beautifully and add sophisticated flavor notes. For more cheesy inspiration, check out my French Onion Potato Bake which uses a similar approach to cheese layering.

    Serving Ideas & Creative Variations

    Perfect Pairings for a Complete Meal

    This Cheesy Shrimp Scampi Pasta Bake shines as the star of your dinner table, but the right accompaniments can elevate the entire meal. I love serving it with a crisp green salad dressed simply with lemon vinaigrette to cut through the richness. Garlic bread might seem redundant with the pasta, but trust me—it’s perfect for soaking up every last bit of that incredible sauce! For a lighter option, roasted asparagus or broccolini adds a wonderful contrast in both color and texture. During summer months, I sometimes pair this with my Honey Garlic Butter Roasted Carrots for a beautiful and delicious plate.

    Exciting Twists on the Classic Recipe

    Don’t be afraid to make this recipe your own with creative variations. For a seafood extravaganza, add lump crab meat or scallops alongside the shrimp. Craving some heat? Incorporate red pepper flakes or a diced jalapeño into the sauce. For a Mediterranean spin, mix in artichoke hearts, sun-dried tomatoes, and olives before baking. Vegetable lovers can add sautéed mushrooms, spinach, or roasted cherry tomatoes. You can even experiment with different pasta shapes—orecchiette catches the sauce beautifully, while cavatappi adds a playful twist that kids especially love.

    Storage & Troubleshooting Guide

    Proper Storage and Reheating Methods

    This Cheesy Shrimp Scampi Pasta Bake stores beautifully, making leftovers something to look forward to. Refrigerate any leftovers in an airtight container for up to 3 days. When reheating, add a splash of chicken broth or even a little cream to revive the sauce, as pasta tends to absorb liquid over time. For best results, reheat covered in a 325°F oven until warmed through, then uncover for the last few minutes to re-crisp the top. Avoid microwaving if possible, as it can make the shrimp tough, but if you’re in a hurry, use 50% power and heat in short intervals, stirring between each.

    Troubleshooting Common Issues

    Even experienced cooks encounter challenges sometimes. If your sauce seems too watery after baking, let the dish rest for 10-15 minutes before serving—it will thicken naturally as it cools slightly. For a sauce that’s too thick, a splash of pasta water or cream can thin it to the perfect consistency. If your top isn’t browning enough, switch to the broiler for the final 1-2 minutes, watching carefully to prevent burning. And if your shrimp turn out rubbery, remember for next time to add them to the pasta mixture when they’re just barely cooked through, as they’ll continue cooking in the oven.

    Frequently Asked Questions

    Can I use pre-cooked shrimp for this Cheesy Shrimp Scampi Pasta Bake?

    Yes, but add them at the very end of the preparation process. Fold pre-cooked shrimp into the pasta mixture just before baking, and reduce your baking time by about 5 minutes to prevent them from becoming tough.

    What’s the best pasta shape to use?

    Medium pasta shapes like penne, fusilli, or shells work best as they capture the sauce well. Avoid long pasta like spaghetti or delicate shapes like angel hair, which can become mushy during baking.

    Can I make this dish gluten-free?

    Absolutely! Simply substitute your favorite gluten-free pasta and ensure your breadcrumbs are also gluten-free. The sauce naturally contains no gluten, so no other adjustments are necessary.

    How can I make this recipe lighter?

    Use half-and-half instead of heavy cream, reduce the cheese by about 25%, and increase the amount of vegetables like spinach, tomatoes, or zucchini to add volume with fewer calories.

    Can I freeze this casserole?

    Yes, but freeze it unbaked. Assemble completely, cover tightly, and freeze for up to 1 month. Thaw overnight in the refrigerator before baking as directed, adding 10-15 minutes to the baking time.

    Final Thoughts

    This Cheesy Shrimp Scampi Pasta Bake has become one of my signature dishes for good reason. It transforms simple ingredients into something truly special that brings people together around the table. The combination of succulent shrimp, aromatic garlic, bright lemon, and melty cheese creates a dish that feels both comforting and elegant. Whether you’re cooking for a quiet family dinner or hosting friends, this versatile recipe delivers impressive results with manageable effort. I hope it brings as much joy to your table as it has to mine! For more delicious recipes, check out my collections on Pinterest.
  • Quick & Flavorful Pepper Steak: Irresistibly Juicy, Ready Fast!

    Quick & Flavorful Pepper Steak: Irresistibly Juicy, Ready Fast!

    Quick & Flavorful Pepper Steak: Irresistibly Juicy, Ready Fast!

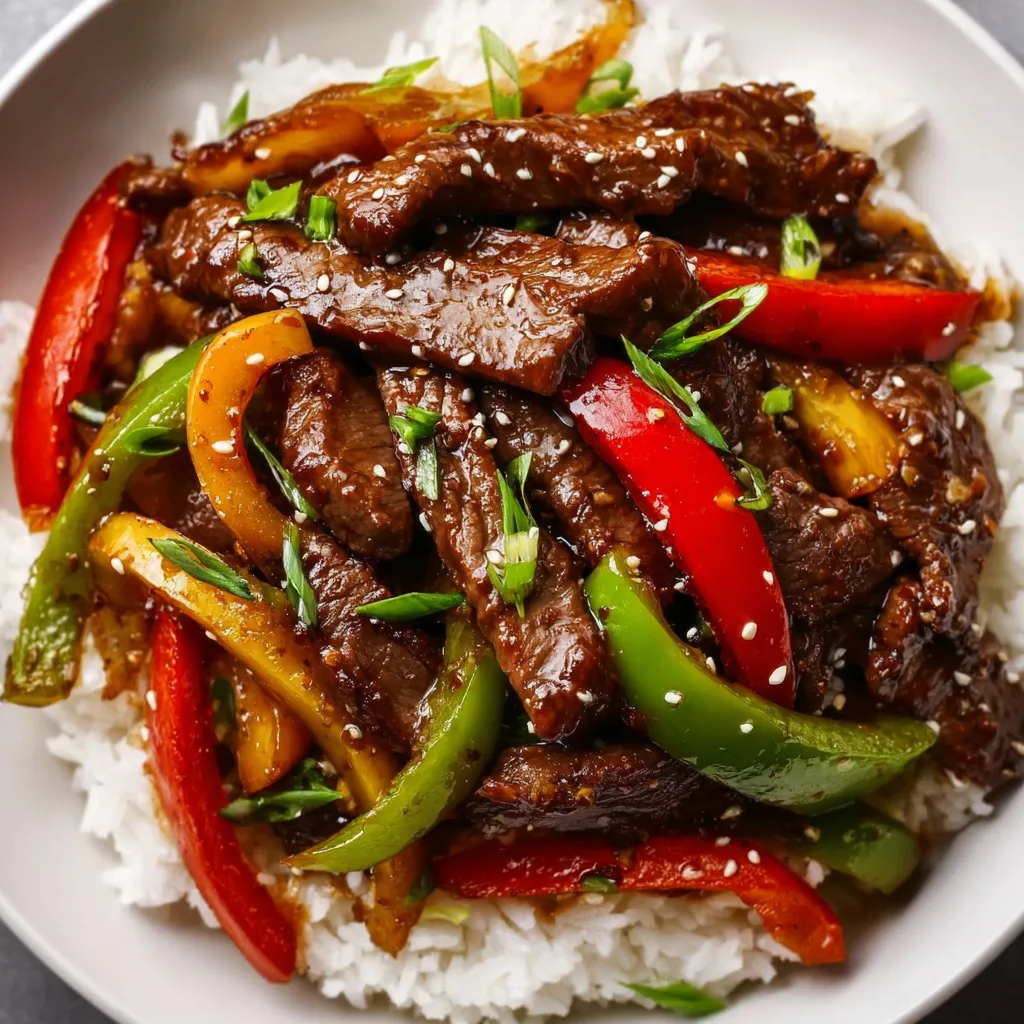
    Quick & Flavorful Pepper Steak has been my weeknight savior more times than I can count! There’s something magical about those tender strips of beef mingling with crisp, colorful bell peppers in that savory sauce that just hits all the right notes. I first discovered this recipe during a particularly hectic week when I needed something that delivered big flavor without keeping me chained to the stove. The sizzle of beef hitting the hot pan and that aromatic blend of garlic and ginger still makes my kitchen feel like the coziest place on earth. Ready in just 30 minutes, this easy weeknight wonder will become your new go-to dinner solution!

    Recipe

    Why You’ll Love This Quick & Flavorful Pepper Steak

    A Perfect Balance of Flavors and Textures

    The magic of this Quick & Flavorful Pepper Steak lies in its beautiful contrasts. Tender, umami-rich beef plays against the sweet crunch of bell peppers, while the sauce brings everything together with its perfect balance of savory, sweet, and tangy notes. I love how the peppers retain just enough bite to add textural interest without being raw. The sauce—oh, that sauce!—coats everything in a silky glaze that’s just thick enough to cling to your rice without being gloopy. When those flavors meld together, it creates comfort food that feels both satisfying and fresh.

    Ready in 30 Minutes or Less

    On those evenings when I’m watching the clock and hunger is setting in fast, this dish is my reliable hero. From counter to table in under half an hour, it’s faster than takeout and infinitely more satisfying. The prep is straightforward—just slice your beef thinly (the freezer trick works wonders here!), chop those vibrant peppers, and mix your sauce ingredients. Once everything is prepped, the cooking happens in a flash. I’ve made this on busy weeknights when my energy was flagging, and still managed to get a colorful, protein-packed dinner that made everyone think I’d spent hours in the kitchen.

    Essential Tips & Tricks

    Selecting and Preparing the Perfect Beef

    For truly tender beef strips, choose the right cut and slicing technique. I prefer using flank steak, sirloin, or ribeye for their flavor and texture. The game-changer? Pop your steak in the freezer for 15-20 minutes before slicing—this firms it up just enough to make cutting paper-thin slices against the grain much easier. Remember that “against the grain” isn’t just chef-speak; it actually shortens the muscle fibers, ensuring your beef melts in your mouth rather than giving your jaw a workout. A quick marinade with baking soda (just ¼ teaspoon per pound) can also transform even budget cuts into restaurant-quality tender beef.

    The Secret to Perfect Peppers

    The key to perfect pepper steak lies in how you handle those colorful bell peppers. For the best texture and flavor, aim for that sweet spot of tender-crisp rather than soft and mushy. I achieve this by cooking them at high heat for just 2-3 minutes—they should still have a slight bite. Using a variety of colored peppers (red, yellow, orange, green) not only creates a gorgeous rainbow in your pan but also brings different flavor notes: red peppers are sweetest, while green ones offer a slightly bitter, fresh contrast. Always pat your peppers dry after washing to ensure they sear rather than steam.

    Serving Ideas & Creative Variations

    Perfect Pairings for a Complete Meal

    Serve your Quick & Flavorful Pepper Steak over fluffy jasmine rice to soak up that incredible sauce—it’s the traditional choice for good reason! For a lower-carb option, cauliflower rice works beautifully without sacrificing the experience. I love adding a side of simple steamed broccoli or honey garlic butter roasted carrots for extra color and nutrition. For a fun twist, serve in lettuce cups for an interactive dinner, or spoon over noodles instead of rice. A sprinkle of toasted sesame seeds and sliced green onions adds that perfect finishing touch that makes the dish feel special even on an ordinary Tuesday.

    Exciting Flavor Variations to Try

    While the classic version is unbeatable, I love experimenting with this versatile recipe. Add a Thai-inspired twist with a tablespoon of red curry paste and a splash of coconut milk for creaminess. For a spicy kick, incorporate sliced fresh jalapeños or a generous squirt of sriracha. Mushroom lovers can add sliced shiitakes or baby bellas for an earthy dimension. Sometimes I’ll throw in snow peas or water chestnuts for extra crunch, or pineapple chunks for a sweet-savory balance. My family’s favorite variation includes a tablespoon of hoisin sauce and a sprinkle of Chinese five-spice powder for deeper, more complex flavors.

    Storage & Troubleshooting Guide

    Proper Storage and Reheating Methods

    This Quick & Flavorful Pepper Steak actually tastes amazing the next day as the flavors continue to develop. Store leftovers in an airtight container in the refrigerator for up to 3 days. When reheating, add a small splash of water or beef broth to revive the sauce, as it tends to thicken when chilled. For best texture, reheat gently in a skillet over medium-low heat rather than microwaving, which can make the beef tough. If you’re meal prepping, consider slightly undercooking the peppers initially so they don’t become mushy when reheated. For longer storage, this dish freezes well for up to 2 months—just thaw overnight in the refrigerator before reheating.

    Troubleshooting Common Issues

    If your beef turns out tough, it’s likely either sliced with (instead of against) the grain or overcooked. Remember that thin strips cook incredibly quickly—just 1-2 minutes per side. For sauce that’s too thin, mix 1 teaspoon cornstarch with 1 tablespoon cold water and stir it in, simmering until thickened. Conversely, if your sauce over-reduces, simply add a splash of beef broth. Peppers turning out soggy? You’re probably overcrowding the pan—cook in batches if needed and use high heat for a quick sear. And if your dish lacks flavor, don’t be shy with the aromatics—fresh ginger and garlic make all the difference.

    Frequently Asked Questions

    What cut of beef works best for Quick & Flavorful Pepper Steak?

    Flank steak and sirloin are my top choices for their tenderness and flavor. Ribeye is luxurious if you’re splurging, while flat iron steak offers great value. Always slice thinly against the grain for the most tender results.

    Can I make this recipe ahead of time?

    Absolutely! You can prep all ingredients the day before and store separately. For best results, cook just before serving, though leftovers reheat beautifully within 2-3 days when stored properly in the refrigerator.

    How can I make this recipe gluten-free?

    Simply substitute regular soy sauce with tamari or certified gluten-free soy sauce. Double-check your oyster sauce label (if using) and replace with a gluten-free alternative or more GF soy sauce with a pinch of sugar.

    What vegetables can I substitute for bell peppers?

    Snow peas, broccoli florets, sliced carrots, mushrooms, or asparagus all work wonderfully. Just adjust cooking times accordingly—harder vegetables need a bit longer, while tender ones should be added toward the end.

    Is there a way to make vegetarian pepper “steak”?

    Yes! Substitute the beef with extra-firm tofu (pressed and sliced), tempeh, or seitan. Marinate your protein choice in the same sauce ingredients for maximum flavor absorption before cooking.

    Final Thoughts

    This Quick & Flavorful Pepper Steak has saved countless dinners in my home, and I hope it becomes a treasured recipe in yours too. There’s something deeply satisfying about creating such big flavors in so little time, watching those colorful peppers and savory beef strips come together in a dance of textures and tastes. The beauty of this dish lies in its adaptability—make it your own with different vegetables or spice levels. For more delicious dinner ideas, follow me on Pinterest where I’m always sharing new inspirations!

  • Crispy Chicken Parmesan Zucchini Boats: Irresistibly Delicious & Easy!

    Crispy Chicken Parmesan Zucchini Boats: Irresistibly Delicious & Easy!

    Crispy Chicken Parmesan Zucchini Boats: Irresistibly Delicious & Easy!

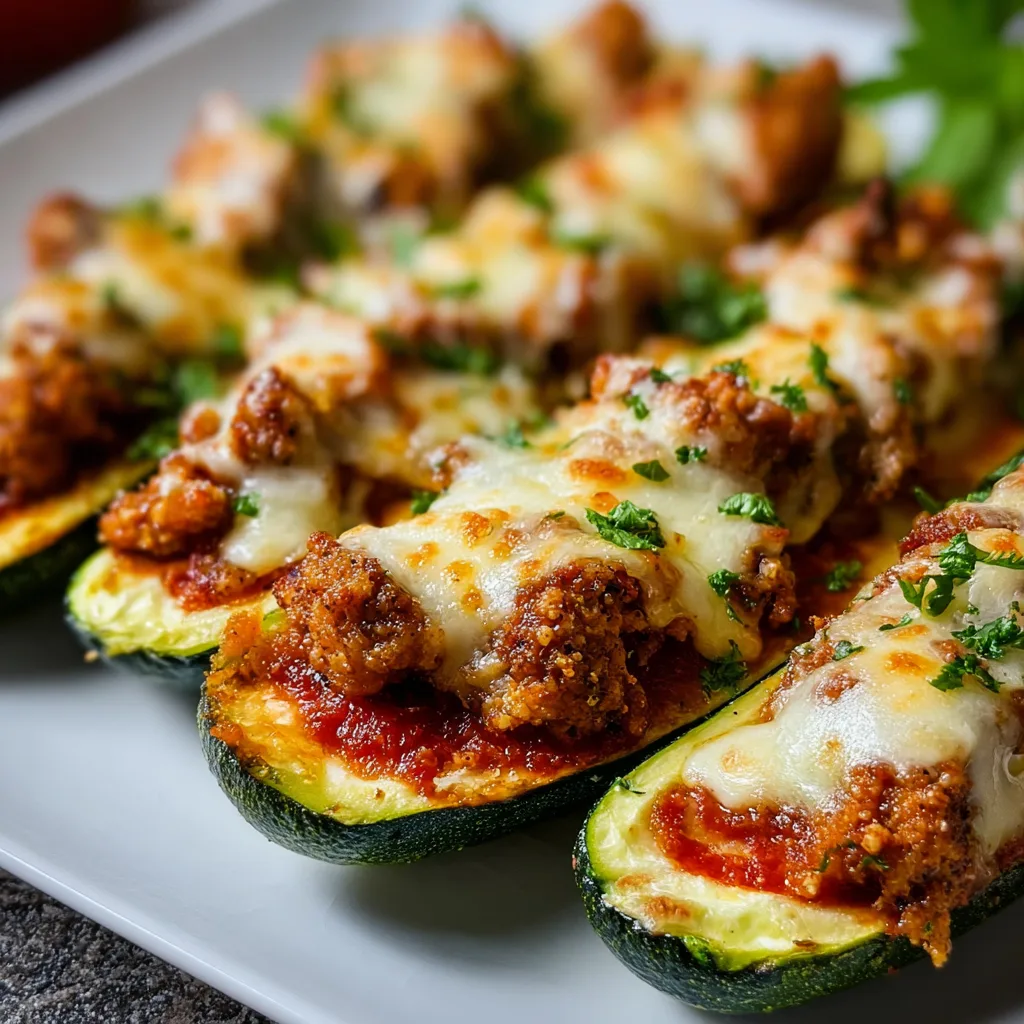
    Crispy Chicken Parmesan Zucchini Boats are the ultimate comfort food makeover that brings together two beloved classics in one irresistible dish. I’ve been obsessed with these little vessels of flavor ever since my sister-in-law brought them to our summer potluck last year. The tender zucchini cradles a perfect blend of crispy chicken, melted cheese, and robust marinara that satisfies without weighing you down. Perfect for those nights when you’re craving something indulgent but still want to sneak in some veggies. Trust me, these boats will sail straight into your regular dinner rotation!

    Recipe

    Why You’ll Love This Crispy Chicken Parmesan Zucchini Boats

    A Perfect Balance of Healthy and Indulgent

    There’s something magical about that first bite when the golden-brown breadcrumb topping gives way to juicy chicken and tender zucchini. I love how these boats deliver all the flavors of traditional chicken parm without the heaviness. The zucchini adds a subtle sweetness that perfectly complements the savory chicken and tangy marinara. Plus, you’re getting a generous serving of vegetables while still enjoying what feels like an indulgent meal. It’s that rare dish where healthy eating doesn’t feel like a compromise—my husband even requests these over traditional pasta dishes now!

    Quick Weeknight Wonder

    These zucchini boats have saved my weeknight dinner plans more times than I can count. The prep takes just 15 minutes, and while they bake, you can toss together a simple salad or set the table. I often use rotisserie chicken to make the process even faster. The versatility is another bonus—you can prep them ahead and just pop them in the oven when you’re ready. When life gets hectic (like when I’m also making Cinnamon Swirl Cookies for my daughter’s bake sale), having this reliable, crowd-pleasing recipe in my back pocket is a true sanity-saver.

    Essential Tips & Tricks

    Perfect Zucchini Prep

    Choosing the right zucchini makes all the difference in this recipe. Look for medium-sized ones that are firm and unblemished—about 7-8 inches long is ideal. Too small and they won’t hold enough filling; too large and they can be watery and bitter. When hollowing them out, leave about ¼-inch thickness around the edges to maintain structural integrity. I learned this the hard way after my first attempt collapsed mid-bake! Pat the hollowed boats dry with paper towels before filling to prevent soggy results. This simple step ensures that crispy, perfect texture we’re all craving.

    Achieving That Perfect Crispy Topping

    The secret to truly crispy chicken parmesan zucchini boats lies in the breading and baking technique. Mix your panko breadcrumbs with a touch of olive oil before sprinkling on top—this helps them brown beautifully without drying out. For extra flavor, add a tablespoon of grated parmesan to the breadcrumb mixture. Position your oven rack in the upper third of the oven and finish with a quick broil (just 1-2 minutes!) to get that restaurant-quality golden crust. Watch carefully though—I once got distracted by a phone call and ended up with charcoal instead of crunch! For more delicious crispy recipes, check out these Honey Garlic Butter Roasted Carrots.

    Serving Ideas & Creative Variations

    Perfect Pairings

    These Crispy Chicken Parmesan Zucchini Boats are a meal in themselves, but the right sides can elevate the experience even further. I love serving them with a simple arugula salad dressed with lemon and olive oil—the peppery greens and bright acidity cut through the richness perfectly. For heartier appetites, a side of garlic bread or cauliflower rice works beautifully. When entertaining, I arrange the boats on a large platter with fresh basil scattered on top and lemon wedges around the edges. The presentation always gets “oohs” and “aahs” from my guests before they’ve even taken a bite!

    Exciting Flavor Twists

    Don’t be afraid to put your own spin on these versatile boats! Swap the chicken for turkey meatballs or crumbled Italian sausage for a different protein experience. For a Mediterranean twist, use feta instead of mozzarella and add olives and roasted red peppers to the filling. My vegetarian friends love when I make these with seasoned chickpeas or lentils instead of chicken. You can even go Mexican-inspired with taco-seasoned chicken, pepper jack cheese, and salsa instead of marinara. For more creative meal ideas that transform classics, check out Mexican Corn Chicken Soup for another family favorite.

    Storage & Troubleshooting Guide

    Make-Ahead and Storage Solutions

    These zucchini boats are perfect for meal prep and actually taste amazing as leftovers. You can prepare the entire dish up to 24 hours ahead and refrigerate unbaked until you’re ready to cook. For longer storage, freeze the assembled boats (before baking) on a baking sheet until solid, then transfer to an airtight container. They’ll keep for up to 3 months! When reheating leftovers, cover with foil for the first 10 minutes to prevent over-browning, then uncover for the last 5 minutes to recrisp the top. I often make a double batch on Sunday for easy lunches throughout the week.

    Troubleshooting Common Issues

    If your zucchini boats turn out watery, there are a few easy fixes for next time. First, make sure to thoroughly scoop out the seedy middle portion, as that’s where most moisture hides. After hollowing, sprinkle the inside with a little salt and let sit for 10 minutes—this draws out excess moisture. Pat dry before filling. If your breadcrumbs aren’t crisping up, make sure your oven is fully preheated and consider placing the baking dish on the upper rack. For filling that keeps falling out, create a deeper channel in your zucchini while still maintaining sturdy walls, and pack the filling in more firmly.

    Frequently Asked Questions

    Can I use yellow squash instead of zucchini for these Crispy Chicken Parmesan Zucchini Boats?

    Absolutely! Yellow squash works beautifully as a substitute. The cooking time and technique remain the same, though yellow squash can sometimes be slightly sweeter than zucchini.

    How do I prevent my zucchini boats from becoming soggy?

    Salt the hollowed zucchini boats and let them sit for 10 minutes before patting dry. Pre-baking the empty boats for 5 minutes before adding filling also helps remove excess moisture.

    Can I make these vegetarian?

    Yes! Replace chicken with plant-based protein like chickpeas, lentils, or crumbled tofu. Season well with Italian herbs and add extra veggies like mushrooms for depth of flavor.

    What’s the best cheese to use for maximum meltiness?

    Fresh mozzarella provides the best melt and stretch. For extra flavor, use a combination of mozzarella, provolone, and freshly grated parmesan on top.

    How can I tell when my Crispy Chicken Parmesan Zucchini Boats are done?

    They’re ready when the zucchini is tender (but not mushy) when pierced with a fork, the filling is heated through, and the breadcrumb topping is golden brown.

    Final Thoughts

    These Crispy Chicken Parmesan Zucchini Boats have become my go-to recipe when I want to impress without spending hours in the kitchen. They bring together the comforting flavors we all crave with a lighter, veggie-forward approach that feels good to serve. Whether you’re cooking for picky eaters, health-conscious friends, or just treating yourself to something special, these boats deliver every time. Don’t forget to check out more delicious recipes on Pinterest for endless inspiration. Here’s to meals that make us feel like culinary stars without the celebrity chef effort!

  • Easy Paleo Chicken Teriyaki Recipe: Irresistibly Delicious & Quick!

    Easy Paleo Chicken Teriyaki Recipe: Irresistibly Delicious & Quick!

    Easy Paleo Chicken Teriyaki Recipe: Irresistibly Delicious & Quick!

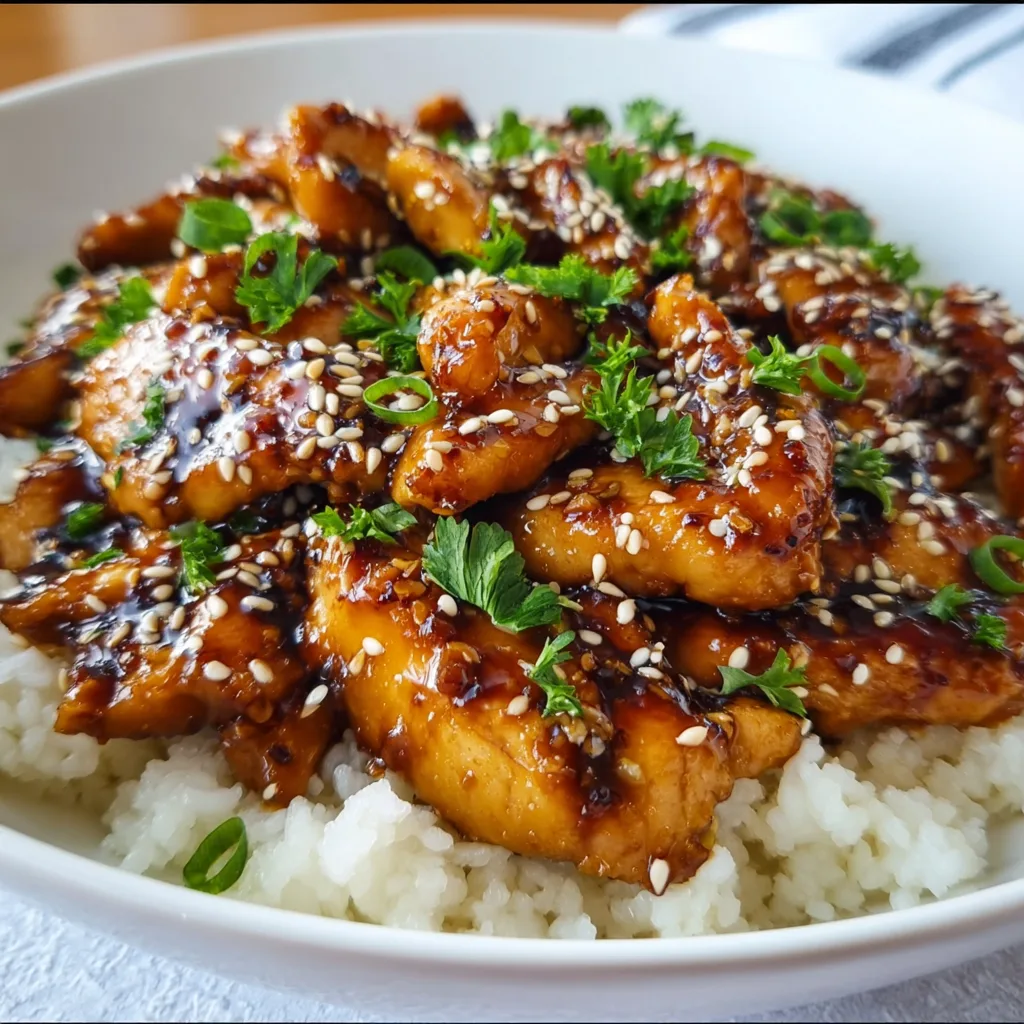
    Easy Paleo Chicken Teriyaki has completely transformed my weeknight dinner routine! There’s something magical about that perfect balance of savory, sweet, and umami flavors that makes this dish irresistible. What I love most is how this paleo-friendly version delivers all the traditional teriyaki goodness without any refined sugars or soy. The tender chicken pieces bathed in that glossy, sticky sauce bring me right back to my favorite Japanese restaurant, but I can enjoy it guilt-free at home in under 30 minutes. Ready to discover your new favorite healthy weeknight meal?

    Recipe

    Why You’ll Love This Easy Paleo Chicken Teriyaki

    Perfect Balance of Flavors

    The magic of this Easy Paleo Chicken Teriyaki lies in its perfectly balanced sauce. Unlike store-bought versions loaded with refined sugars and preservatives, this paleo-friendly sauce uses coconut aminos instead of soy sauce and natural sweeteners like honey or maple syrup. The result is a deliciously authentic teriyaki experience without the inflammatory ingredients. I was genuinely surprised at how the ginger and garlic infuse the sauce with such depth—creating that umami-rich flavor profile that makes you close your eyes with each bite. Your taste buds won’t even notice it’s paleo!

    Quick and Versatile Weeknight Solution

    This dish has saved me on countless busy evenings when I need something impressive but don’t have hours to spend in the kitchen. From start to finish, you’ll have this Easy Paleo Chicken Teriyaki ready in about 25 minutes. The versatility is another game-changer—use chicken thighs for juicier results or breast for leaner options. I’ve even made this with shrimp when that’s all I had in the freezer! It pairs beautifully with cauliflower rice for a fully paleo meal, or serve it with stir-fried vegetables for extra nutrients and color on your plate.

    Essential Tips & Tricks

    Perfecting Your Paleo Teriyaki Sauce

    The heart of any great teriyaki dish is the sauce, and getting it right makes all the difference. For the perfect consistency, simmer it until it coats the back of a spoon—this usually takes about 3-4 minutes. If you prefer a thicker sauce, add an extra teaspoon of arrowroot powder mixed with cold water. Never add thickener directly to hot liquid, or you’ll end up with lumps! For maximum flavor infusion, let the minced ginger and garlic bloom in the hot oil for 30 seconds before adding other ingredients. This releases their aromatic oils and creates a deeper flavor profile that elevates the entire dish.

    Chicken Cooking Techniques

    The secret to juicy, tender chicken in your Easy Paleo Chicken Teriyaki is all in the technique. Cut your chicken into uniform pieces (about 1-inch cubes) to ensure even cooking. Don’t overcrowd your pan—cook in batches if necessary, giving each piece room to sear rather than steam. This creates that beautiful caramelization that adds depth to the dish. I learned the hard way that high heat isn’t always best; medium-high heat allows the chicken to cook through without burning the outside. Let the chicken rest for a minute before tossing with the sauce to help it retain its moisture and absorb flavors more effectively.

    Serving Ideas & Creative Variations

    Complementary Side Dishes

    The versatility of Easy Paleo Chicken Teriyaki means it pairs beautifully with countless sides. For a complete paleo meal, serve over cauliflower rice which soaks up the delicious sauce—I like to add a touch of lime zest to brighten it up! Steamed broccoli or sautéed bok choy make perfect vegetable companions, adding color and nutrients. For something heartier, roasted sweet potato chunks offer a lovely contrast to the savory teriyaki flavors. When I’m entertaining, I love serving this family-style with a variety of sides so everyone can create their perfect plate. The Honey Garlic Butter Roasted Carrots from my collection make an exceptional pairing!

    Exciting Flavor Variations

    Don’t be afraid to put your own spin on this Easy Paleo Chicken Teriyaki! Add red pepper flakes or a drizzle of sriracha for a spicy kick that balances the sweetness perfectly. For a citrus twist, mix in some orange zest and a squeeze of fresh juice during the final minute of cooking. I recently discovered that adding a tablespoon of tahini creates a nutty depth that’s absolutely divine. For a tropical variation, try incorporating pineapple chunks—they caramelize beautifully and complement the teriyaki flavors. If you’re feeling adventurous, a sprinkle of toasted sesame seeds and sliced green onions adds both texture and a fresh finish.

    Storage & Troubleshooting Guide

    Proper Storage and Reheating

    Your Easy Paleo Chicken Teriyaki stores beautifully, making it perfect for meal prep! Store leftovers in an airtight container in the refrigerator for up to 3 days. The flavors actually deepen overnight, making day-two teriyaki sometimes even better than fresh. When reheating, add a splash of water or chicken broth to revitalize the sauce, as it tends to thicken when chilled. Microwave in 30-second intervals, stirring between each, to prevent overcooking the chicken. For best results, I prefer reheating in a skillet over medium-low heat—it maintains the texture better and allows you to refresh the sauce with a little extra coconut aminos if needed.

    Troubleshooting Common Issues

    If your sauce is too thin, the most likely culprit is not simmering it long enough. Simply mix ½ teaspoon arrowroot with 1 teaspoon cold water and stir it into the simmering sauce. Conversely, if your sauce is too thick, add a tablespoon of water or chicken broth until you reach your desired consistency. Should your chicken turn out tough, it’s probably overcooked—next time, remove it from heat when it’s just cooked through. For sauce that’s too sweet, balance it with a splash of rice vinegar or a squeeze of fresh lime. If you find it’s not sweet enough, add a tiny bit more honey or a sprinkle of coconut sugar to adjust to your taste.

    Frequently Asked Questions

    Is this Easy Paleo Chicken Teriyaki really soy-free?

    Absolutely! This recipe uses coconut aminos instead of soy sauce, giving you that umami flavor without soy. It’s perfect for those with soy allergies or following strict paleo guidelines.

    Can I make this recipe ahead of time?

    Yes! You can prepare the sauce up to 3 days in advance and store it in the refrigerator. For complete meal prep, cook everything and store in airtight containers for up to 3 days.

    What’s the best cut of chicken to use?

    Boneless, skinless chicken thighs provide the juiciest result, but chicken breast works well too if you prefer leaner meat. Just be careful not to overcook breast meat.

    How can I make this recipe Whole30 compliant?

    Substitute the honey or maple syrup with date paste (puréed soaked dates) and ensure your coconut aminos contain no added sugar. Check that your arrowroot powder is Whole30 approved.

    Can I freeze leftovers of this teriyaki chicken?

    Yes! Freeze in airtight containers for up to 2 months. Thaw overnight in the refrigerator and reheat gently, adding a splash of water to revitalize the sauce.

    Final Thoughts

    This Easy Paleo Chicken Teriyaki has become a staple in my kitchen for good reason—it delivers restaurant-quality flavor while keeping things healthy and simple. I love that I can satisfy my teriyaki cravings without compromising my paleo lifestyle. The combination of tender chicken pieces and that glossy, flavorful sauce never fails to impress both family and guests. Whether you’re strictly paleo or just looking for a healthier alternative to takeout, this recipe deserves a permanent spot in your dinner rotation. Don’t forget to check out more of my favorite paleo-friendly recipes on Pinterest!

  • No-Bake Grinch Pie Recipe: Irresistibly Easy & Festive Delight!

    No-Bake Grinch Pie Recipe: Irresistibly Easy & Festive Delight!

    No-Bake Grinch Pie Recipe: Irresistibly Easy & Festive Delight!

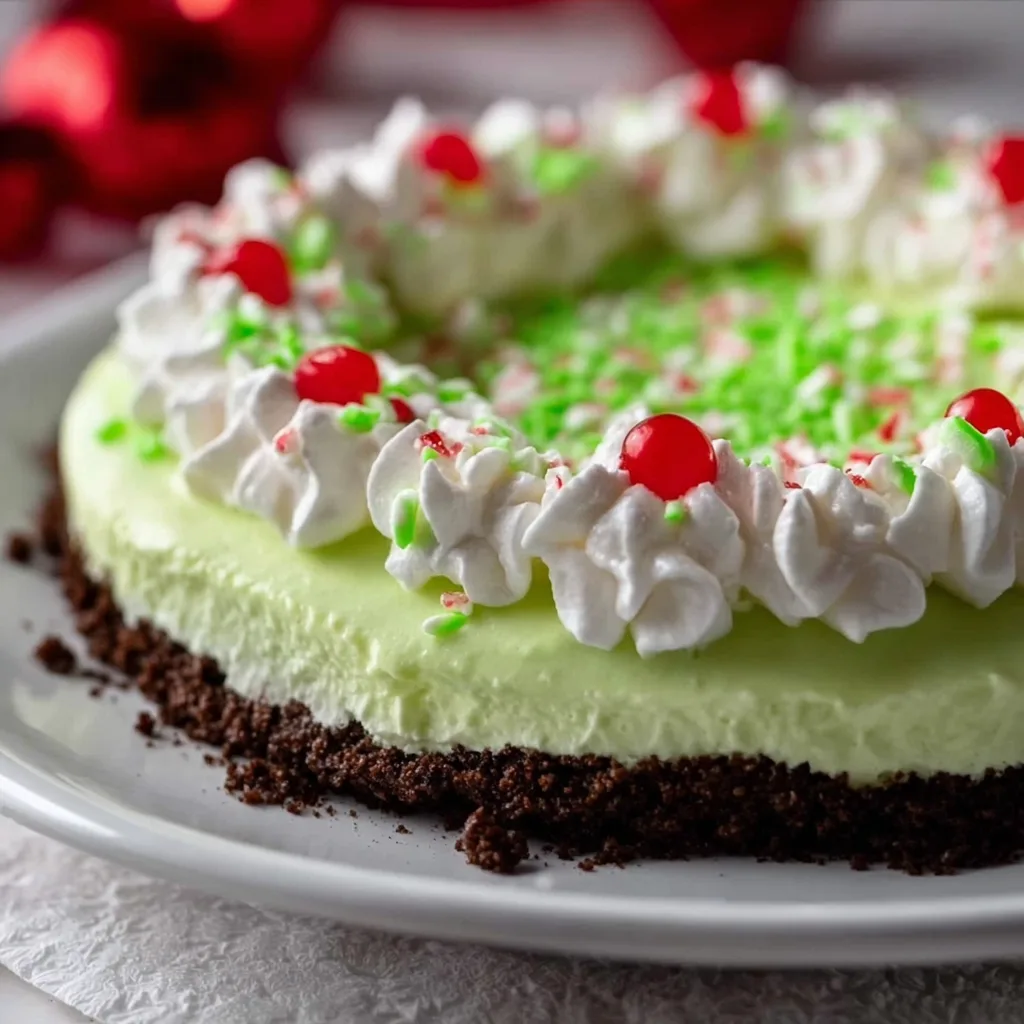
    This no-bake Grinch Pie is a whimsical holiday treat that captures all the magic of Dr. Seuss’s beloved character in a deliciously creamy dessert. With its vibrant green filling, ruby red garnishes, and a chocolate cookie crust that mimics the Grinch’s furry exterior, it’s a showstopper that requires zero oven time! I first made this for my niece’s Christmas movie night, and watching her eyes light up when I unveiled this colorful creation made my heart grow three sizes. Perfect for busy holiday gatherings when you need something festive but don’t want to fuss with baking.

    Recipe

    Why You’ll Love This no-bake Grinch Pie

    A Festive Time-Saver

    This no-bake wonder is your holiday hero when the oven is occupied with savory dishes or when temperatures are soaring during southern Christmas celebrations. The preparation takes just 20 minutes of active time, with the freezer doing the heavy lifting. I love that I can make this a day ahead when hosting our annual neighborhood Christmas party, giving me precious time to focus on other details. The vibrant green color comes from white chocolate and a touch of food coloring—no artificial flavors needed!

    Kid-Friendly Fun Factor

    Children absolutely adore this dessert—not just for its taste but for its connection to the beloved holiday character. The whimsical presentation with its heart-shaped strawberry (representing the Grinch’s growing heart) makes it an instant favorite. My friend’s daughter insisted on helping decorate last year, carefully placing each candy heart around the edge with the concentration of a surgeon. The pie’s smooth, creamy texture is balanced with just enough sweetness to please both young palates and adults looking for something festive.

    Essential Tips & Tricks

    Perfecting the Crust

    The foundation of this no-bake masterpiece starts with the perfect chocolate cookie crust. I’ve found that using chocolate sandwich cookies with the filling intact creates the richest base—no need to scrape out centers! Pulse them until they resemble fine sand, then mix with melted butter until it feels like wet sand. The secret technique is pressing firmly using the bottom of a measuring cup, creating an even layer that won’t crumble when sliced. Chill the crust for at least 15 minutes before adding filling for best results.

    Achieving That Grinch-Green Color

    Getting that perfect Grinch-green shade requires some finesse. Start with high-quality white chocolate for the smoothest melting experience and best flavor. Add gel food coloring rather than liquid—it provides vibrant color without affecting the texture. I learned the hard way that adding coloring to hot chocolate can cause it to seize, so always let it cool slightly first! For a natural alternative, try a combination of matcha powder and spirulina for a gorgeous green that’s reminiscent of these blueberry swirl cookies but with a festive twist.

    Serving Ideas & Creative Variations

    Festive Presentation Options

    Transform your Grinch Pie into an unforgettable centerpiece by creating a Whoville-inspired landscape around it. Use whipped cream “snow drifts,” mint sprigs for evergreen trees, and candy cane pieces for North Pole markers. For individual servings, consider making mini versions in clear cups, creating visible layers that showcase the vibrant colors. I once served these at my daughter’s school party with tiny printable Grinch flags, and they disappeared faster than presents from Whoville! The contrast of the bright green against white serving plates creates a stunning visual impact.

    Flavor Twists and Adaptations

    While the classic version features a mild mint flavor that complements the white chocolate base, this pie welcomes creative adaptations. Try a zesty lime variation by adding fresh lime juice and zest to the filling for a tangy twist. For chocolate lovers, swirl in melted dark chocolate for a marbled effect that’s both beautiful and delicious. My personal favorite is adding a layer of peanut butter between the crust and filling—the salty-sweet combination is absolutely divine. For adults, a splash of crème de menthe liqueur adds sophisticated flavor.

    Storage & Troubleshooting Guide

    Keeping It Fresh

    This no-bake delight stores beautifully in the refrigerator for up to 3 days when covered properly. Use plastic wrap pressed directly onto the surface to prevent a skin from forming or condensation from dripping. For longer storage, the pie freezes exceptionally well for up to a month—a lifesaver for advance holiday prep! To serve from frozen, allow 20-30 minutes at room temperature for the perfect sliceable consistency. I’ve found that storing individual slices in airtight containers makes for easy grab-and-go treats during busy holiday weeks.

    Fixing Common Issues

    If your filling develops tiny lumps, your white chocolate likely seized during melting. Save it by whisking in 1-2 teaspoons of warm heavy cream until smooth. For a too-soft filling that won’t set properly, the likely culprit is overheated ingredients or incorrect measurements. Fix this by adding an extra ounce of melted white chocolate or a tablespoon of softened cream cheese. If your crust crumbles when cutting, it needed more butter or pressing. Create a quick fix by serving it parfait-style in glasses with the crust as a delicious base layer.

    Frequently Asked Questions

    Can I make this no-bake Grinch Pie without food coloring?

    Absolutely! Use 1-2 tablespoons of matcha powder for a natural green color. The flavor pairs wonderfully with the white chocolate base, adding a subtle earthiness that balances the sweetness.

    How far in advance can I prepare this dessert?

    You can make the entire pie up to 3 days ahead and refrigerate it, or freeze for up to a month. Just add any fresh fruit garnishes right before serving for the best appearance.

    Can I use regular chocolate instead of white chocolate?

    Yes, but you’ll lose the vibrant green color. If using milk or dark chocolate, consider calling it “Grinch’s Furry Coat Pie” and use red decorations to represent his heart.

    Is this recipe gluten-free?

    Not with standard chocolate cookies, but you can easily make it gluten-free by substituting gluten-free chocolate cookies for the crust while keeping the filling ingredients the same.

    What’s the best way to slice this no-bake Grinch Pie neatly?

    Dip a sharp knife in hot water, wipe it dry, and slice. Repeat between cuts for clean edges. Chilling the pie thoroughly (at least 4 hours) also ensures cleaner slices.

    Final Thoughts

    This no-bake Grinch Pie isn’t just a dessert—it’s a holiday memory in the making. The combination of its playful appearance, delicious taste, and the fact that it doesn’t require precious oven space makes it a holiday hero for busy families. Every time I serve it, conversations pause, smiles spread, and the magic of the season feels a little stronger. Whether you’re a seasoned baker or kitchen novice, this whimsical treat deserves a spot in your holiday tradition. Find more festive inspiration on Pinterest.

  • Easy Spinach Stuffed Chicken Breast Recipe That Will WOW Your Family!

    Easy Spinach Stuffed Chicken Breast Recipe That Will WOW Your Family!

    Easy Spinach Stuffed Chicken Breast Recipe That Will WOW Your Family!

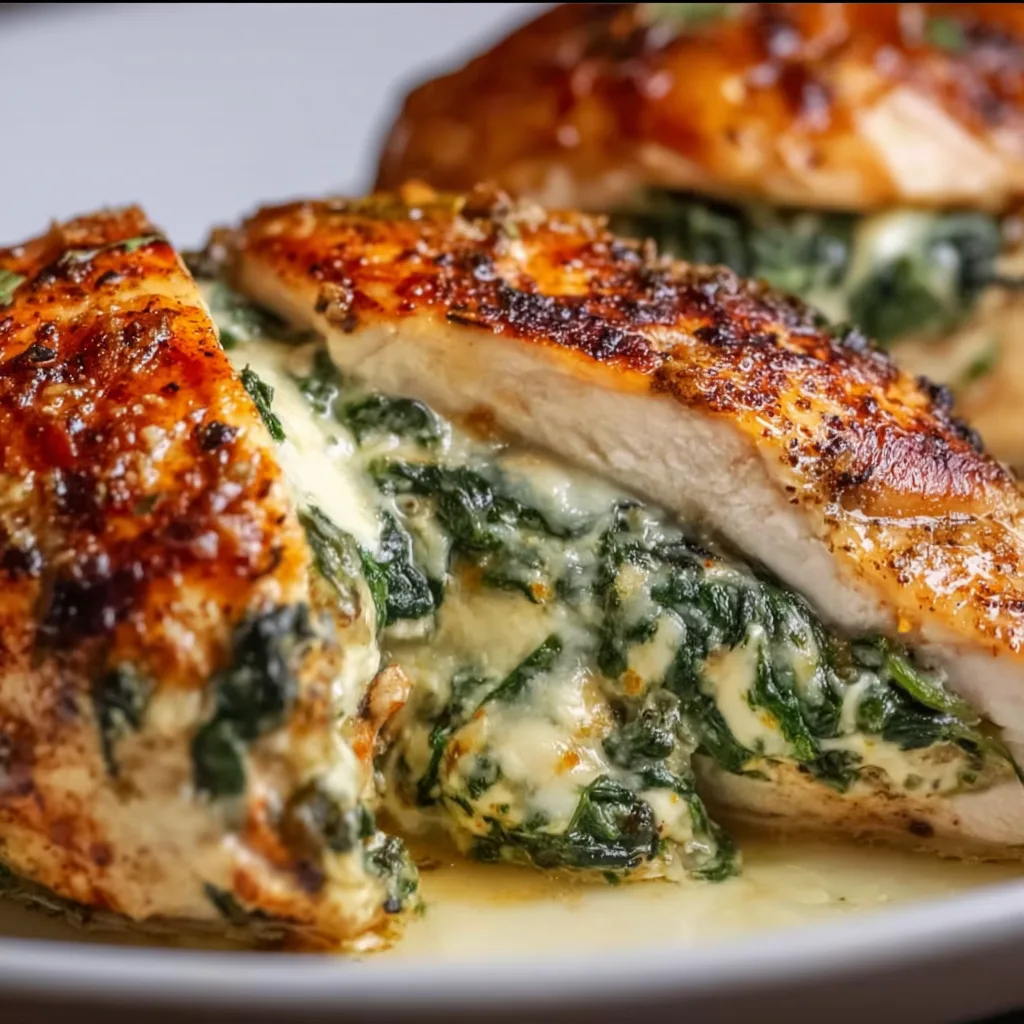
    This Easy Spinach Stuffed Chicken Breast recipe has become my weeknight savior—juicy chicken pockets filled with creamy spinach and melted cheese that look fancy but come together in just 30 minutes. The first time I made this, my kitchen filled with that irresistible aroma of garlic and herbs as the chicken sizzled in the pan. I watched my family’s eyes widen with that “you made this on a Tuesday?” expression. Trust me, this dish delivers restaurant-quality results with minimal effort, perfect for those nights when you want something special without the fuss.

    Recipe

    Why You’ll Love This Easy Spinach Stuffed Chicken Breast

    Perfect Balance of Flavors and Textures

    There’s something magical about cutting into perfectly cooked chicken and watching melted cheese and spinach ooze out. Each bite delivers juicy chicken with a creamy, savory center that’s simply irresistible. I love how the spinach adds earthy depth while the cheese brings rich creaminess. The golden-brown exterior creates a delightful textural contrast to the tender interior. My daughter, who typically pushes green vegetables around her plate, actually asks for seconds when I make this—a true testament to how this dish transforms simple ingredients into something extraordinary.

    Quick Yet Impressive Results

    Despite looking like something from a fancy restaurant menu, this dish requires just 15 minutes of prep time. The chicken breasts cook in about 20 minutes, meaning dinner is ready in under 40 minutes total. I remember making this for unexpected dinner guests one evening, panicking about what to serve. The looks on their faces when I presented these stuffed chicken breasts—you’d have thought I’d been cooking all day! It’s become my go-to for impressing company without stressing myself out, similar to my Slow Cooker Chicken Tortellini Soup when I need something comforting but hands-off.

    Essential Tips & Tricks

    Mastering the Perfect Pocket

    Creating the right chicken pocket makes all the difference. Use a sharp knife to cut horizontally into the thickest part of the breast, being careful not to slice all the way through. Think of it as creating a book that opens and closes. I’ve found that placing your hand gently on top of the chicken while cutting helps control the depth. For even cooking, pound the chicken slightly to even out the thickness before stuffing. This simple step ensures your chicken cooks evenly and prevents the dreaded dry-on-the-outside, raw-on-the-inside problem.

    Preventing Filling Leakage

    Nothing’s more disappointing than watching your delicious filling escape during cooking! To keep everything neatly inside, make sure to seal the edges properly. After stuffing, secure with toothpicks placed parallel to the opening. Another trick I’ve discovered: chill the stuffed breasts for 15 minutes before cooking. This firms up the filling and makes it less likely to leak. Also, avoid overstuffing—it’s tempting to add more of that delicious mixture, but a moderate amount stays put better. For a foolproof seal, you can also dredge the stuffed chicken in flour before searing, creating a light barrier.

    Serving Ideas & Creative Variations

    Perfect Pairings for a Complete Meal

    This versatile dish works beautifully with so many sides. My family’s favorite pairing is garlic roasted potatoes and steamed asparagus—the potatoes can roast while the chicken cooks, timing everything perfectly. For a lighter option, serve with a lemony arugula salad or cauliflower rice. The chicken also pairs wonderfully with a simple pasta tossed in olive oil and herbs. When I’m feeling extra, I make a quick pan sauce with the chicken drippings, a splash of white wine, and a touch of cream—it elevates the entire meal to restaurant quality, similar to the rich flavors in my Creamy Tuscan Tortellini Soup.

    Exciting Flavor Variations

    While the classic spinach and cheese filling is divine, don’t be afraid to experiment! Try Mediterranean-inspired stuffing with feta, sun-dried tomatoes, and olives for a tangy twist. For a spicy kick, add diced jalapeños and pepper jack cheese to the mixture. My husband loves when I make a caprese version with fresh mozzarella, basil, and cherry tomatoes. You can also swap the spinach for other greens like kale or Swiss chard. Recently, I tried adding chopped artichoke hearts to the classic filling—it was so good that it’s now in regular rotation.

    Storage & Troubleshooting Guide

    Proper Storage and Reheating

    These stuffed chicken breasts maintain their deliciousness as leftovers when stored properly. Refrigerate in an airtight container for up to 3 days. For reheating, avoid the microwave which can make the chicken rubbery. Instead, place in a 300°F oven, covered with foil, for about 15 minutes until warmed through. This gentle reheating preserves the moisture and texture. You can also slice leftover chicken cold for salads or sandwiches. If you want to prepare ahead, you can stuff the chicken and refrigerate uncooked for up to 24 hours—perfect for getting a head start on dinner parties.

    Fixing Common Problems

    If your chicken is browning too quickly but still raw inside, the heat is likely too high. The solution is to lower the temperature and cover the pan for a few minutes to cook through. For chicken that’s cooked but appears pale, finish with a quick broil for color. If your filling keeps leaking despite your best efforts, try freezing the filling for 10 minutes before stuffing—this firms it up significantly. Another common issue is dry chicken, which usually means it’s overcooked. An instant-read thermometer is your best friend here—remove the chicken at 165°F for perfect doneness every time.

    Frequently Asked Questions

    Can I make Easy Spinach Stuffed Chicken Breast ahead of time?

    Yes! You can prepare and stuff the chicken up to 24 hours ahead. Store covered in the refrigerator and bring to room temperature for 20 minutes before cooking for best results.

    What cheese works best for the filling?

    Cream cheese creates a creamy base, while mozzarella adds stretch and mild flavor. Parmesan adds sharpness. Feel free to substitute with fontina, gouda, or gruyere for different flavor profiles.

    Can I use frozen spinach instead of fresh?

    Absolutely! Thaw completely and squeeze out excess moisture first. Use about 1/2 cup of thawed frozen spinach to replace 2 cups of fresh spinach.

    How do I know when the chicken is fully cooked?

    Use an instant-read thermometer inserted into the thickest part of the chicken (not the filling). It should register 165°F. The juices should also run clear when pierced.

    Can I make this recipe in the air fryer?

    Yes! Cook stuffed chicken breasts in an air fryer at 375°F for 15-18 minutes, flipping halfway through. This creates an extra crispy exterior while keeping the inside juicy.

    Final Thoughts

    This Easy Spinach Stuffed Chicken Breast recipe proves that impressive, flavorful meals don’t require culinary school or hours in the kitchen. I love how it transforms ordinary chicken into something special enough for celebrations yet simple enough for weeknights. The combination of juicy chicken, creamy spinach filling, and melted cheese creates a dish that satisfies both comfort food cravings and healthier eating goals. Give it a try, and I’m confident it will earn a permanent spot in your recipe collection, just as it has in mine. Don’t forget to check out more of my favorite chicken recipes on Pinterest!

  • Easy Cinnamon Swirl Cookies Recipe – Irresistibly Soft & Chewy Treats!

    Easy Cinnamon Swirl Cookies Recipe – Irresistibly Soft & Chewy Treats!

    Easy Cinnamon Swirl Cookies Recipe – Irresistibly Soft & Chewy Treats!

    This Easy Cinnamon Swirl Cookies Recipe transforms your kitchen into a cozy haven of warmth and spice. The moment these cookies hit the oven, that unmistakable cinnamon aroma wraps around you like a soft blanket on a chilly afternoon. I discovered this recipe during a particularly stressful week when I needed something simple yet comforting. The first bite—crisp edges giving way to tender, swirled centers—instantly became my go-to comfort bake. These cookies strike that perfect balance between effortless preparation and impressive results, making them ideal for both novice bakers and seasoned pros looking for a quick, soul-warming treat.

    Recipe

    Why You’ll Love This Easy Cinnamon Swirl Cookies Recipe

    Perfect Texture Combination

    The contrasting textures in these cookies create a truly magical eating experience. The edges develop a slight crispness that gives way to a tender, almost melt-in-your-mouth center where the cinnamon swirl creates pockets of spiced softness. I love watching people’s expressions when they take their first bite—that moment of surprise when they discover the perfect balance between cookie and cinnamon roll. The dough itself has just enough structure to hold those beautiful swirls while remaining delicate enough to create that signature softness that makes you reach for just one more.

    Simple Ingredients, Extraordinary Results

    What makes this recipe truly special is how it transforms pantry staples into something extraordinary. You’ll need just butter, sugar, flour, eggs, vanilla, and of course, cinnamon—ingredients you likely already have on hand. I remember once making these on a snowy afternoon when going to the store wasn’t an option, and they saved a family movie night! The magic happens in how these humble ingredients come together, creating complex flavors that taste like you spent hours in the kitchen. The brown sugar caramelizes slightly during baking, enhancing the cinnamon’s natural warmth.

    Essential Tips & Tricks

    Mastering the Perfect Swirl

    The secret to those gorgeous cinnamon spirals lies in properly chilling your dough. After rolling it out and adding your cinnamon-sugar mixture, pop it in the refrigerator for 15-20 minutes before attempting to roll it up. This prevents the butter from melting too quickly and helps maintain those distinct layers. I learned this the hard way when I rushed the process once—my swirls completely disappeared! Also, use a light touch when rolling; pressing too firmly can cause the layers to merge. For picture-perfect slices, use a sharp knife dipped in hot water between cuts to create clean edges.

    Temperature Control Matters

    Pay close attention to butter consistency throughout the process—it’s truly the key to success. Start with butter that’s softened but still cool to the touch; you should be able to make a slight indentation with your finger, but it shouldn’t be melty. When baking, watch for that golden edge while maintaining a slightly paler center. I always set my timer for 2 minutes less than the recipe suggests, as these cookies can go from perfect to overdone quickly. The residual heat from the baking sheet will continue cooking them slightly after removal, so don’t wait until they look completely done.

    Serving Ideas & Creative Variations

    These cinnamon swirl cookies shine brightest when served slightly warm, allowing their aromatic spices to reach their full potential. I love pairing them with a scoop of vanilla bean ice cream for an elevated dessert—the warm cookie against the cold, creamy ice cream creates a heavenly contrast. For morning gatherings, serve alongside a strong coffee with a splash of cream to complement the cinnamon notes. During holiday seasons, I arrange them on a tiered stand with other treats, and these are always the first to disappear! The visual appeal of those perfect swirls makes them centerpiece-worthy.

    Seasonal Twists and Variations

    Adapt this versatile recipe throughout the year with seasonal additions that complement the cinnamon base. In fall, I add finely chopped apples and a pinch of nutmeg to the filling for an apple pie-inspired version. Winter calls for orange zest and a touch of cardamom mixed into the dough. Spring cookies benefit from a light lemon glaze drizzled over the top, while summer versions are wonderful with a handful of finely chopped toasted pecans added to the filling. My family’s favorite variation includes a thin layer of cream cheese spread over the dough before adding the cinnamon mixture.

    Storage & Troubleshooting Guide

    Keeping Cookies Fresh

    Preserve that just-baked quality by storing your cookies in an airtight container with a slice of bread tucked inside—a trick my grandmother taught me that works wonders for maintaining moisture. At room temperature, they’ll stay delicious for 3-4 days. For longer storage, freeze baked cookies in a single layer until solid, then transfer to a freezer bag where they’ll keep for up to 3 months. I often make double batches and freeze half the dough pre-sliced, so I can bake just a few at a time whenever the craving strikes. Just add 1-2 minutes to the baking time when cooking from frozen.

    Fixing Common Issues

    Even experienced bakers encounter challenges with swirled cookies. If your swirls unravel during baking, your dough was likely too warm—next time, chill the rolled cookies for 15 minutes before baking. For cookies that spread too much, your butter might have been too soft; try refrigerating the dough longer before baking. If the cinnamon filling leaks out and burns, you may have used too much butter in your filling mixture. I once salvaged a batch by quickly transferring them to a fresh parchment sheet midway through baking when I noticed the filling starting to caramelize too quickly.

    Frequently Asked Questions

    Can I make this Easy Cinnamon Swirl Cookies Recipe ahead of time?

    Absolutely! Prepare the dough up to 3 days ahead and refrigerate tightly wrapped, or freeze the sliced unbaked cookies for up to 2 months. This makes them perfect for unexpected guests or cookie emergencies.

    What’s the best way to get even slices?

    Use dental floss! Slide unflavored floss under your rolled dough, cross the ends at the top, and pull tight to create perfectly even slices without squishing your beautiful swirls.

    Can I use alternative sweeteners in this recipe?

    Yes, but with adjustments. Coconut sugar works well as a 1:1 replacement for brown sugar, though it creates a slightly drier cookie. Liquid sweeteners like honey require reducing other liquids in the recipe.

    Why did my cinnamon filling leak out during baking?

    Too much butter in your filling can cause leakage. Keep the butter-to-sugar ratio balanced, and make sure to roll the dough tightly without stretching it to prevent gaps where filling can escape.

    How do I know when the cookies are perfectly done?

    Look for light golden edges with centers that appear set but not browned. They’ll feel slightly soft when touched but will firm up as they cool on the baking sheet.

    Final Thoughts

    This Easy Cinnamon Swirl Cookies Recipe has become my reliable kitchen companion for creating moments of joy with minimal effort. The simplicity of ingredients combined with the impressive spiral design makes these cookies both accessible and special. Whether you’re baking for a holiday gathering, weekend treat, or simply because Tuesday needs something sweet, these cinnamon-laced delights deliver comfort in every bite. I hope they bring the same warmth to your kitchen as they have to mine. For more cozy baking inspiration, visit our Pinterest board where we’re constantly adding new seasonal favorites.

  • Cheesy Garlic Chicken Wraps: Irresistibly Delicious & Easy to Make!

    Cheesy Garlic Chicken Wraps: Irresistibly Delicious & Easy to Make!

    Cheesy Garlic Chicken Wraps: Irresistibly Delicious & Easy to Make!

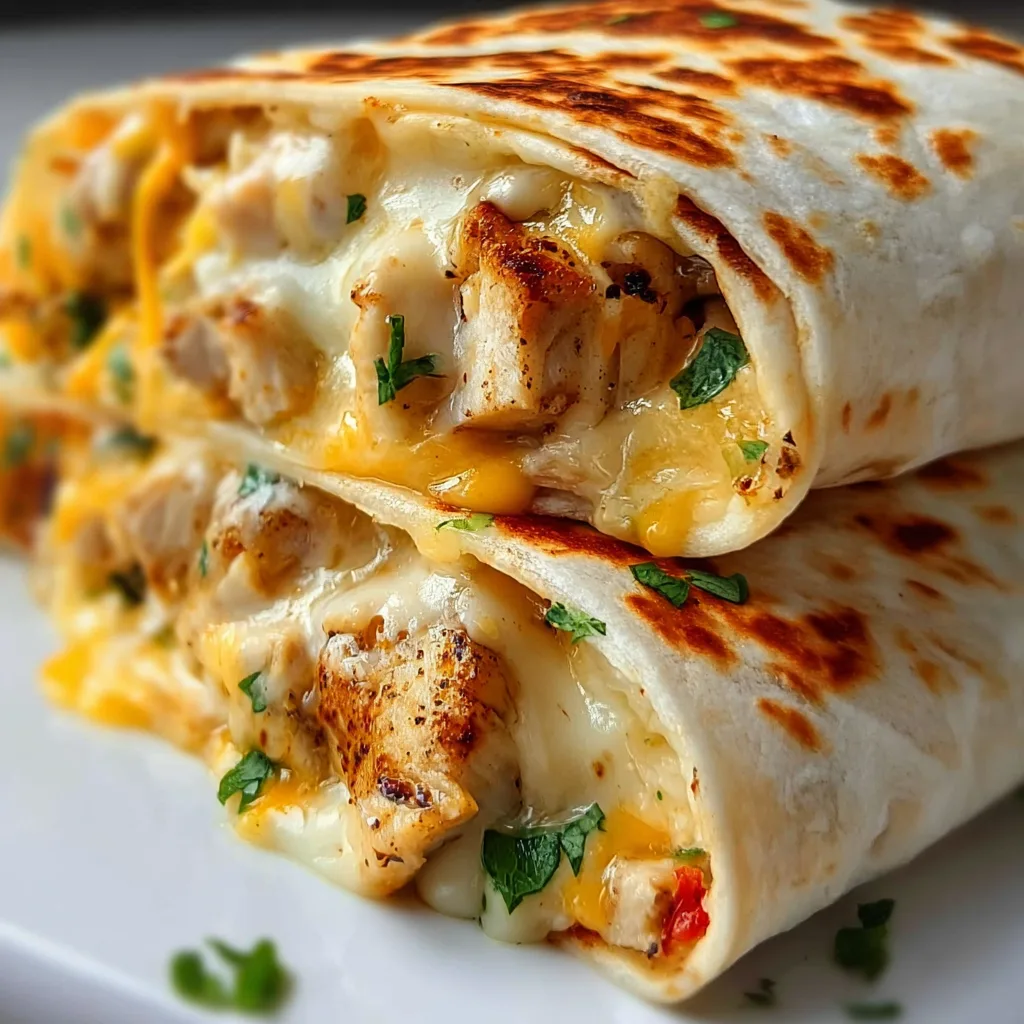
    These Cheesy Garlic Chicken Wraps have become my absolute go-to for those hectic weeknights when I need something delicious without the fuss. There’s something magical about the combination of tender chicken, melted cheese, and that perfect garlic punch that makes everyone at my table fall silent (except for the occasional “mmm”). I first created these wraps when my sister dropped by unexpectedly with her hungry teenagers in tow. The way their eyes lit up with that first bite told me I had a winner on my hands. These wraps strike that perfect balance between comfort food and a meal you can feel good about serving to your family.

    Recipe

    Why You’ll Love These Cheesy Garlic Chicken Wraps

    Quick & Convenient Meal Solution

    Let me tell you, on those days when I’ve been running errands and suddenly realize it’s already 5:30, these wraps are my saving grace. They come together in under 20 minutes from start to finish, which feels like a small miracle. The beauty lies in their simplicity – tender chicken strips seasoned with a perfect blend of garlic, herbs, and spices, then wrapped in a warm tortilla with melty cheese that stretches with each bite. I love that I can prep the chicken mixture ahead of time and simply assemble when hunger strikes. There’s something deeply satisfying about creating something this delicious with so little effort.

    Customizable for Every Palate

    What I adore about these Cheesy Garlic Chicken Wraps is how easily they adapt to everyone’s preferences. My husband loves extra cheese and jalapeños for heat, while my niece prefers hers with extra avocado and no tomatoes. The basic formula remains the same, but the possibilities are endless. You can go Mediterranean with feta and olives, Tex-Mex with salsa and corn, or even Italian with mozzarella and pesto. I’ve made these for picky eaters and food enthusiasts alike, and the clean plates speak volumes. The garlic-infused chicken creates such a flavorful base that even simple additions shine.

    Essential Tips & Tricks

    Perfecting the Chicken

    The secret to these wraps is getting the chicken just right – tender and flavorful through every bite. I always slice my chicken against the grain into thin strips that cook quickly and evenly. For maximum flavor, let your chicken marinate in the garlic mixture for at least 15 minutes if you have time – even this short rest makes a noticeable difference. When cooking, use medium-high heat and don’t overcrowd the pan; you want a slight golden color without drying the meat. If you’re really pressed for time, rotisserie chicken works beautifully too – just warm it with the garlic butter sauce for a few minutes before assembling your wraps. The aroma that fills my kitchen is always worth the effort.

    Cheese Selection & Melting Technique

    The cheese is truly the heart of these Cheesy Garlic Chicken Wraps, and selecting the right type makes all the difference. I’ve found that a combination of sharp cheddar for flavor and mozzarella for that Instagram-worthy cheese pull creates the perfect balance. For the best melt, grate your cheese fresh rather than using pre-shredded (which contains anti-caking agents). My foolproof method is to sprinkle cheese directly onto the warm tortilla, add the hot chicken mixture, then top with more cheese before folding. This creates pockets of melty goodness throughout. For an extra-crispy exterior like those you’d find at our local Mexican restaurant, give your assembled wrap a quick toast in a dry skillet.

    Serving Ideas & Creative Variations

    Perfect Pairings

    These Cheesy Garlic Chicken Wraps shine brightest when paired with the right sides. My family goes wild when I serve them alongside a bright, tangy slaw that cuts through the richness of the cheese. The cool crunch creates such a satisfying contrast with the warm, soft wrap. For a heartier meal, a simple Creamy Tomato Soup makes the perfect dunking companion. When I’m entertaining, I often slice the wraps into pinwheels and serve them with a selection of dipping sauces – cilantro lime crema, spicy mayo, or even a simple garlic yogurt. The colorful presentation always earns compliments, and they disappear faster than I can set them down.

    Seasonal Adaptations

    One thing I love about these wraps is how easily they evolve with the seasons. In summer, I fold in fresh garden tomatoes and basil from my porch planters, creating a caprese-inspired version that tastes like sunshine. Come fall, I’ll add roasted sweet potatoes and a drizzle of maple sriracha sauce for a sweet-spicy kick that warms you from the inside. Winter calls for heartier additions like roasted red peppers and spinach, while spring brings asparagus and lemon zest to brighten things up. I’ve even made a breakfast version with scrambled eggs and bacon that my nephew requests every time he visits. The garlic chicken base works beautifully with whatever produce is looking best at the market.

    Storage & Troubleshooting Guide

    Make-Ahead & Freezing Tips

    These wraps are perfect for meal prep, and I often make a double batch on Sundays. The key to keeping them fresh is to store the components separately when possible. The seasoned chicken mixture stays good for 3-4 days refrigerated in an airtight container, and reheats beautifully in a skillet with a splash of water to restore moisture. For fully assembled wraps, wrap tightly in foil and refrigerate for up to 2 days. To freeze, I wrap each one individually in parchment then foil, and they keep for about a month. The secret to reheating without sogginess is to thaw in the refrigerator overnight, then crisp in a dry skillet over medium heat until golden and warmed through.

    Solving Common Issues

    Even though these Cheesy Garlic Chicken Wraps are pretty foolproof, I’ve encountered a few challenges over the years. If your wraps are falling apart, the likely culprit is overfilling – I’ve learned this lesson the hard way! Start with about ¾ cup filling per standard tortilla and fold tightly, tucking in the sides as you roll. If your tortillas are cracking, try warming them for 10-15 seconds in the microwave between damp paper towels to make them more pliable.

    For wraps that seem dry after reheating, a simple garlic butter drizzle works wonders to restore richness. And if the cheese isn’t melting properly, make sure your filling is piping hot when you assemble, as the residual heat should melt the cheese without making the wrap soggy.

    Frequently Asked Questions

    Can I make these Cheesy Garlic Chicken Wraps vegetarian?

    Absolutely! Substitute the chicken with chickpeas, black beans, or grilled portobello mushrooms. Season them with the same garlic butter mixture for that signature flavor profile. The cheese and veggies will still make it satisfying and delicious.

    What’s the best type of tortilla to use?

    I prefer large (10-inch) flour tortillas for their pliability and mild flavor. Whole wheat works well for extra nutrition, while low-carb or gluten-free options can be substituted if needed. Just warm them slightly before filling for best results.

    How can I make these wraps spicier?

    Add diced jalapeños, a sprinkle of red pepper flakes, or a dash of hot sauce to the chicken mixture. You can also include pepper jack cheese instead of cheddar for a kick that builds with each bite.

    Can I use pre-cooked chicken to save time?

    Yes! Rotisserie chicken or leftover grilled chicken works beautifully. Simply shred or dice it, then warm it in a skillet with the garlic butter mixture until heated through before assembling your wraps.

    How do I keep my Cheesy Garlic Chicken Wraps from getting soggy?

    Pat all ingredients dry before assembling, especially tomatoes or watery vegetables. If making ahead, consider keeping wet ingredients separate until serving time, or lightly toast the assembled wrap in a dry skillet.

    Final Thoughts

    These Cheesy Garlic Chicken Wraps have saved countless dinners in my home, transforming ordinary evenings into something special with minimal effort. There’s something almost magical about how a few simple ingredients can come together to create something so satisfying. Whether you’re feeding a hungry family, meal prepping for the week ahead, or looking for a crowd-pleasing party option, these wraps deliver every time. I hope they bring as much joy to your table as they have to mine. If you try them, I’d love to see your creations over on Pinterest!