Blog

  • Ultimate Dark Chocolate Cake: Irresistibly Rich & Moist Delight!

    Ultimate Dark Chocolate Cake: Irresistibly Rich & Moist Delight!

    Ultimate Dark Chocolate Cake: Irresistibly Rich & Moist Delight!

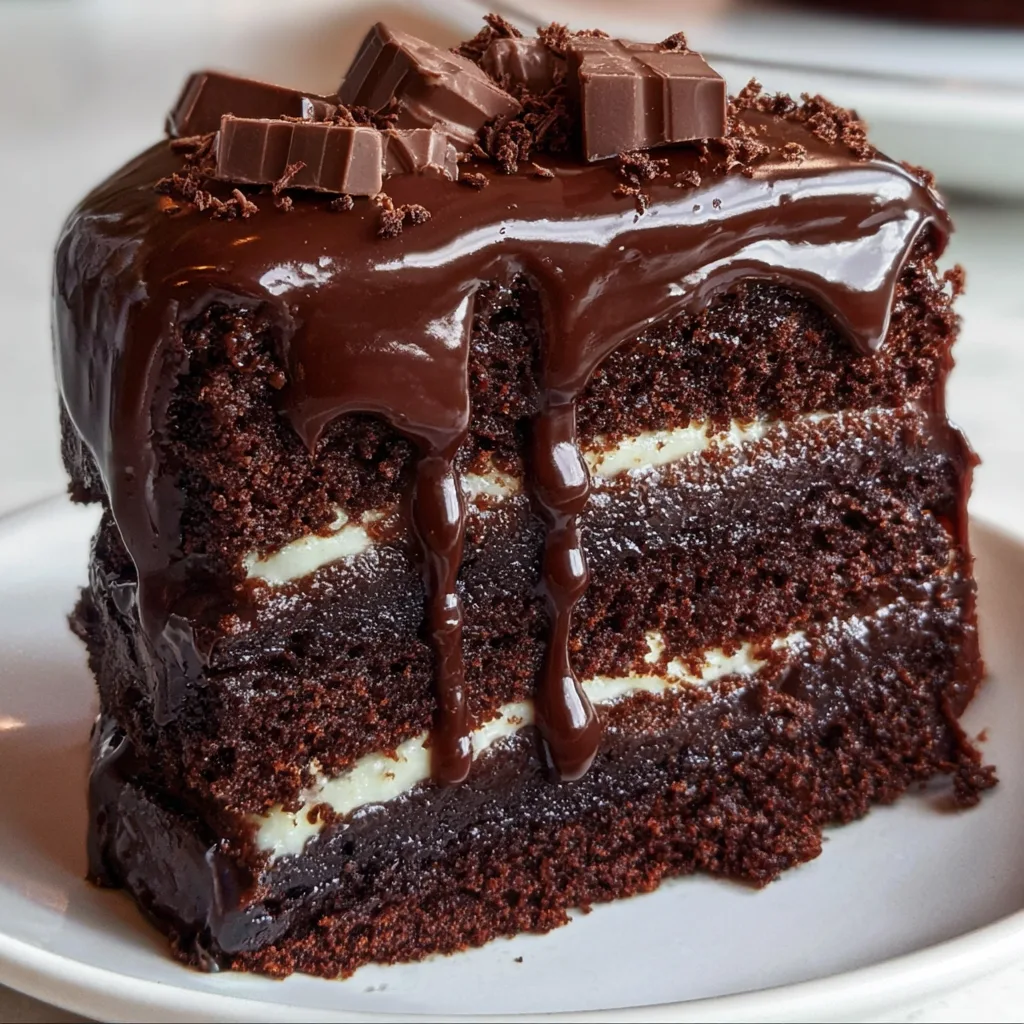
    The Ultimate Dark Chocolate Cake is the kind of dessert that makes time stand still. That first bite—where the fork sinks through layers of moist, intensely chocolatey cake and silky frosting—is pure magic. I’ve baked this cake for countless birthdays, dinner parties, and those nights when only chocolate could mend a rough day. The deep cocoa flavor, balanced with just enough sweetness, creates what I believe is the perfect chocolate cake experience. Whether you’re a seasoned baker or trying your hand at homemade cakes for the first time, this recipe promises to deliver that “close your eyes and savor” moment.

    Recipe

    Why You’ll Love This Ultimate Dark Chocolate Cake

    Rich Flavor Profile That Impresses Everyone

    This cake isn’t just chocolate—it’s a chocolate revelation. Using high-quality dark cocoa powder creates depth that milk chocolate simply can’t match. I’ve watched friends who claimed they “weren’t dessert people” close their eyes in bliss after tasting it. The slight bitterness of dark chocolate balances perfectly with the sweetness, creating a sophisticated flavor that’s never cloying. What makes it truly special is how it pairs with everything from coffee to red wine, making it versatile enough for any occasion from casual gatherings to elegant dinner parties.

    Perfect Texture That Stays Moist for Days

    The velvety crumb of this cake is what keeps people coming back for seconds (and thirds). Unlike some chocolate cakes that dry out overnight, this one stays impossibly moist for days—if it lasts that long in your home! The secret lies in the combination of buttermilk and coffee, which not only enhances the chocolate flavor but also creates that tender texture that melts in your mouth. I’ve had guests text me three days after a party to tell me they’re still enjoying leftover slices. The frosting forms a slight crust while staying creamy underneath, creating a textural experience that’s simply divine.

    Essential Tips & Tricks

    Getting the Perfect Chocolate Flavor

    The quality of cocoa makes all the difference in this Ultimate Dark Chocolate Cake. I learned this lesson the hard way after once using cheap cocoa powder that left the cake tasting flat. Invest in Dutch-processed cocoa for that deep, complex flavor. Another game-changer? Adding a tablespoon of instant espresso powder to the batter—you won’t taste coffee, but it magically intensifies the chocolate notes. Don’t skip the vanilla either; it rounds out the flavor beautifully. For an extra dimension, try adding a splash of bourbon or a teaspoon of orange zest to the batter. Check out my New York Cheesecake with Berry Twist for more flavor-boosting techniques.

    Mastering the Mixing Method

    The room temperature ingredients rule isn’t just baking snobbery—it’s science! Cold eggs or butter can cause the batter to separate or become lumpy. I set everything out about an hour before I start baking. When mixing, resist the urge to overbeat the batter after adding flour, as this develops gluten and results in a tougher cake. Instead, mix just until the ingredients are incorporated—a few tiny lumps are actually good! For the silkiest frosting, beat the butter for a full 3-5 minutes before adding other ingredients. This creates tiny air pockets that make the frosting light and spreadable while still rich.

    Serving Ideas & Creative Variations

    Seasonal Twists to Keep It Fresh

    Transform this versatile base recipe with seasonal additions that highlight the dark chocolate flavor. In summer, I love serving it with fresh raspberries or a tart cherry compote that cuts through the richness. Fall calls for warming spices—try adding cinnamon and a touch of cayenne to the batter for a Mexican chocolate variation that’s cozy and complex. Winter holidays? Add crushed peppermint to the frosting for a festive touch. Spring brings opportunities for floral notes—a touch of lavender in the frosting or a side of candied violets elevates this cake to something truly special. Just like my Easy Chocolate Cream Pie, these seasonal adaptations keep familiar recipes exciting.

    Presentation Ideas That Wow

    Even a simple chocolate cake becomes a showstopper with thoughtful presentation. For casual gatherings, I dust the top with cocoa powder through a doily for an elegant pattern that takes seconds. For special occasions, try a dramatic drip effect with ganache poured over the frosted cake. Chocolate curls made by dragging a vegetable peeler across a chocolate bar create beautiful decoration with minimal effort. Individual mini cakes served on vintage plates make dinner guests feel extra special. Don’t underestimate the power of a cake stand—elevating your creation (literally) signals to everyone that something extraordinary is about to be enjoyed.

    Storage & Troubleshooting Guide

    Keeping Your Cake Fresh

    The proper storage of this Ultimate Dark Chocolate Cake ensures every slice tastes as good as the first. At room temperature, use a cake dome or inverted bowl to protect it for up to 3 days. The frosting actually creates a seal that helps preserve moisture. For longer storage, refrigeration works beautifully—just bring slices to room temperature before serving to revive the flavors and texture. If freezing (yes, it freezes wonderfully!), wrap individual slices in plastic wrap, then foil, for up to 3 months. This method has saved me countless times when unexpected guests arrive and I need an impressive dessert in minutes.

    Fixing Common Baking Issues

    Even experienced bakers encounter troubleshooting moments. If your cake sinks in the middle, your oven temperature might be off—invest in an oven thermometer for accuracy. Cakes that stick to the pan despite greasing? Try lining with parchment paper as insurance. For frosting that’s too soft to work with, a quick 10-minute chill in the refrigerator firms it up perfectly. If your cake layers bake unevenly, use cake strips (or make your own from damp kitchen towels wrapped in foil) around the pans. These simple solutions have rescued many of my baking projects from disaster to delight.

    Frequently Asked Questions

    Can I make this Ultimate Dark Chocolate Cake ahead of time?

    Absolutely! The cake actually improves with 1-2 days of rest as flavors deepen. Make it up to 3 days ahead and store at room temperature under a cake dome, or freeze frosted or unfrosted layers for up to 3 months.

    What’s the best cocoa powder to use?

    Dutch-processed cocoa gives the richest flavor and darkest color. Brands like Valrhona, Guittard, or Droste are excellent choices. Natural cocoa works too but produces a slightly different flavor profile and lighter color.

    Can I make this cake without coffee?

    Yes! While coffee enhances chocolate flavor without adding coffee taste, you can substitute hot water or hot chai tea for a different flavor dimension. The hot liquid is what helps bloom the cocoa powder.

    Is this cake too rich for children?

    Most children love this cake despite the dark chocolate. The sweetness balances the intensity perfectly. For younger palates, consider a milk chocolate frosting instead of dark chocolate.

    How can I make this recipe gluten-free?

    Replace all-purpose flour with a 1:1 gluten-free baking blend containing xanthan gum. The texture will be slightly different but still delicious—just be careful not to overmix.

    Final Thoughts

    This Ultimate Dark Chocolate Cake has been my go-to recipe for over a decade, earning its place as the most requested dessert in my repertoire. There’s something almost magical about how a few simple ingredients transform into something so spectacular. The deep chocolate flavor, tender crumb, and silky frosting create an experience that transcends ordinary dessert. Whether you’re celebrating something special or simply treating yourself because chocolate is always a good idea, this cake delivers pure joy with every bite. Find more of my favorite desserts on Pinterest.


  • Mozzarella-Stuffed Pizza Burgers: Irresistible Melted Cheese Explosion!

    Mozzarella-Stuffed Pizza Burgers: Irresistible Melted Cheese Explosion!

    Mozzarella-Stuffed Pizza Burgers: Irresistible Melted Cheese Explosion!

    Mozzarella-stuffed pizza burgers combine two of America’s favorite foods into one irresistible handheld meal that’s perfect for summer cookouts or weeknight dinners. The first time I made these for my family, my teenage son declared them “life-changing” – and honestly, I couldn’t disagree! There’s something magical about that first bite when the melted mozzarella stretches between your lips and the savory pizza flavors burst across your tongue. If you’re looking to elevate your burger game, these stuffed sensations will become your new go-to recipe that everyone will beg you to make again and again. Check out my chicken caesar sandwiches for another family favorite!

    Recipe

    Why You’ll Love These Mozzarella-Stuffed Pizza Burgers

    Perfect Flavor Fusion

    These burgers deliver the ultimate comfort food mashup that satisfies both pizza and burger cravings simultaneously. The ground beef patties are seasoned with Italian herbs, garlic, and a splash of Worcestershire sauce, creating a flavor base that’s reminiscent of your favorite pizzeria. I love adding a pinch of crushed red pepper for a subtle heat that wakes up your taste buds without overwhelming them. The magic happens when you bite through the seasoned beef into that pocket of molten mozzarella cheese – it’s like hitting the culinary jackpot! My husband says these remind him of the pizza burgers from his childhood, but “a million times better.”

    Simple Yet Impressive

    Don’t let their gourmet appearance fool you – these mozzarella-stuffed pizza burgers are surprisingly easy to make! The secret is in the simple technique of sealing cheese inside each patty, which takes just seconds to master. I remember frantically searching for a showstopper recipe when my in-laws announced a last-minute visit, and these burgers saved the day. Even kitchen novices can create these impressive stuffed patties with minimal effort. The best part? The prep work can be done ahead of time, allowing you to enjoy the company of your guests instead of being stuck in the kitchen. Just form the patties in the morning, refrigerate, and they’ll be ready to grill when hunger strikes.

    Essential Tips & Tricks

    Perfecting the Cheese Pocket

    Creating the perfect cheese pocket is crucial for these mozzarella-stuffed pizza burgers. Start with cold ingredients – refrigerated ground beef and cheese are easier to work with and help prevent cheese leakage during cooking. I learned this the hard way after my first attempt resulted in a spectacular cheese explosion on the grill! Divide your beef mixture into eight equal portions, flatten each into a thin disc, and place a cube of mozzarella in the center of four discs. Top with remaining beef discs and pinch the edges firmly to seal completely. Press gently to flatten slightly while maintaining that precious cheese pocket. For extra insurance against cheese leaks, chill the formed patties for 20 minutes before cooking.

    Cooking for Success

    The key to perfect mozzarella-stuffed pizza burgers is temperature control. Cook these beauties over medium heat rather than high to ensure the beef cooks through before the cheese has a chance to escape. I once rushed the cooking process at a backyard barbecue and ended up with burgers that were charred outside but still raw near the cheese – lesson learned! For stovetop preparation, a cast-iron skillet works wonders, providing even heat distribution.

    Resist the urge to press down on the burgers while cooking, as this will surely force out that precious cheese filling. Instead, flip gently just once, and allow about 4-5 minutes per side for medium doneness. Try serving with garlic butter parmesan knots for the ultimate pizza-inspired meal!

    Serving Ideas & Creative Variations

    Build-Your-Own Burger Bar

    Transform dinner into an interactive experience with a build-your-own mozzarella-stuffed pizza burger bar! Set out an array of pizza-inspired toppings like pepperoni, sautéed mushrooms, roasted red peppers, caramelized onions, and fresh basil leaves. I did this for my daughter’s graduation party, and it was the hit of the evening – everyone loved customizing their own creation! Offer various sauces beyond traditional marinara, such as pesto, garlic aioli, or spicy arrabbiata. Don’t forget different cheese options for topping (provolone, fresh mozzarella slices, or parmesan crisps) and an assortment of buns including ciabatta rolls, garlic toast, or even mini focaccia squares. This approach turns a simple meal into a memorable dining experience that accommodates everyone’s preferences.

    Global Pizza Burger Inspirations

    Take your mozzarella-stuffed pizza burgers on a world tour by incorporating international flavors! For a Greek-inspired version, mix feta into your beef and top with tzatziki, cucumber, and Kalamata olives. My personal favorite is the Mexican variation where I add taco seasoning to the meat, stuff with pepper jack cheese instead of mozzarella, and top with guacamole and pico de gallo. For an Asian twist, try mixing teriyaki sauce into the beef, stuffing with mozzarella, and topping with a quick slaw dressed in sesame oil.

    The Italian version gets elevated with sun-dried tomatoes and basil mixed into the patties, then topped with roasted tomato salsa and fresh arugula for a gourmet experience that will transport your taste buds straight to Italy.

    Storage & Troubleshooting Guide

    Make-Ahead and Storage Solutions

    These mozzarella-stuffed pizza burgers are perfect for meal prep and can be prepared in advance in several ways. Form the raw patties up to 24 hours ahead, placing them on a parchment-lined tray with slight indentations between each to prevent sticking, then cover tightly with plastic wrap and refrigerate. I’ve found this to be a lifesaver for busy weeknights! Cooked burgers can be refrigerated for up to 3 days – just wrap individually in foil and reheat in a 350°F oven for about 10 minutes.

    They also freeze beautifully; double-wrap cooled patties in plastic wrap and foil, then freeze for up to 2 months. For best results when reheating from frozen, thaw overnight in the refrigerator, then warm in a covered skillet with a tablespoon of water to create steam that revives the juiciness.

    Troubleshooting Common Issues

    The most frequent challenge with mozzarella-stuffed pizza burgers is cheese leakage during cooking. If this happens, ensure you’re using cheese cubes rather than shredded cheese, which tends to melt too quickly. My neighbor taught me to freeze the cheese cubes for 15 minutes before stuffing, which works wonders! If your patties are falling apart, the mixture might be too wet – add a tablespoon of breadcrumbs to absorb excess moisture.

    For burgers that shrink too much during cooking, make a slight indentation in the center of each patty with your thumb before grilling. And if your burgers are cooking unevenly, they may be too thick in the center – aim for even thickness throughout, with special attention to sealing the edges where the two beef discs meet.

    Frequently Asked Questions

    Can I use turkey instead of beef for mozzarella-stuffed pizza burgers?

    Absolutely! Ground turkey works beautifully, though I recommend using 85/15 rather than lean turkey to maintain juiciness. Add 1 tablespoon olive oil per pound of turkey to enhance moisture and flavor.

    How do I prevent the cheese from leaking out?

    Ensure your beef discs are thin but without holes, seal edges completely with a pinching motion, and chill formed patties for 20 minutes before cooking. Cook over medium heat rather than high.

    Can I make these mozzarella-stuffed pizza burgers in the oven?

    Yes! Bake on a parchment-lined sheet at 375°F for about 15-18 minutes. This method actually helps prevent cheese leakage since there’s no flipping required.

    What’s the best type of mozzarella to use?

    Low-moisture mozzarella works best as it melts beautifully without releasing excess liquid. Cut into ½-inch cubes rather than using fresh mozzarella, which contains too much moisture.

    Can I prepare the patties ahead of time?

    Definitely! Form patties up to 24 hours in advance, place on a parchment-lined tray with divots between them, cover tightly, and refrigerate until ready to cook.

    Final Thoughts

    These mozzarella-stuffed pizza burgers have become my secret weapon for gathering friends and family around the table with minimal effort but maximum impact. There’s something undeniably satisfying about watching someone take that first bite and experience the surprise of melted cheese stretching from burger to mouth! I’ve served these at casual weeknight dinners and fancy backyard parties alike, and they never fail to impress. The versatility of these burgers means you can customize them endlessly to suit any taste preference or dietary need. Whether you’re a cooking novice or seasoned chef, these stuffed sensations deserve a permanent spot in your recipe collection. Find more of my recipes on Pinterest!

  • Street Corn Chicken Rice Bowl – Irresistible Flavor Explosion!

    Street Corn Chicken Rice Bowl – Irresistible Flavor Explosion!

    Street Corn Chicken Rice Bowl – Irresistible Flavor Explosion!

    Street Corn Chicken Rice Bowl is my absolute summer-to-fall transition comfort meal that brings all the vibrant flavors of Mexican street corn to a hearty, protein-packed bowl. The first time I made this, my kitchen filled with the aroma of charred corn and lime, instantly transporting me to those perfect summer evenings at food festivals. There’s something magical about the combination of sweet corn kernels, creamy sauce, and perfectly seasoned chicken that makes this bowl irresistible. If you’re looking for a meal that balances fresh and comforting, this recipe is your new weeknight hero.

    Recipe

    Why You’ll Love This Street Corn Chicken Rice Bowl

    A Perfect Balance of Flavors and Textures

    Every bite of this Street Corn Chicken Rice Bowl delivers a symphony of flavors that dance across your palate. The charred corn brings a subtle smokiness that pairs beautifully with the tangy lime-infused crema. I love how the juicy chicken, seasoned with chili powder and cumin, adds a savory depth that complements the sweetness of the corn. The fluffy rice soaks up all those incredible flavors while providing a neutral base. What makes this bowl truly special is the textural contrast – creamy sauce against tender chicken, with pops of corn and the occasional crunch from fresh garnishes. It’s comfort food with personality!

    Quick and Nutritionally Balanced

    On those hectic weeknights when cooking feels like a chore, this Street Corn Chicken Rice Bowl comes to the rescue in just 30 minutes. I’ve lost count of how many times this has saved me from ordering takeout! The protein-packed chicken keeps you satisfied, while the vegetables add essential nutrients without feeling like “health food.” Each component comes together effortlessly, making this a realistic option even when you’re exhausted. What I appreciate most is how it satisfies those comfort food cravings while still feeling light and energizing – no food coma afterward! Perfect for meal prep too, as the flavors actually improve overnight.

    Essential Tips & Tricks

    Perfecting Your Corn

    The soul of this dish lies in how you prepare the corn. For that authentic street corn flavor, don’t skip the char! If using fresh corn, remove kernels from 3-4 cobs and sauté in a cast iron skillet until you see those beautiful dark spots appearing. This caramelization creates that distinctive sweet-smoky flavor that makes street corn so addictive. In winter months, frozen corn works beautifully – just make sure to pat it dry before hitting the hot pan. A tiny sprinkle of sugar helps achieve caramelization if your corn isn’t naturally sweet. For an extra flavor dimension, try grilling your corn on the cob first, then slicing off the kernels to capture that irresistible smoky flavor.

    Mastering the Creamy Sauce

    The tangy crema brings everything together in this Street Corn Chicken Rice Bowl, so don’t rush this component! Start with a base of mayonnaise and sour cream (or Mexican crema if you can find it), then brighten with fresh lime juice and zest. The secret ingredient? A touch of honey balances the acidity perfectly. For authentic flavor, incorporate crumbled cotija cheese – though feta makes a great substitute in a pinch. My personal touch is adding a roasted garlic clove to the sauce for subtle depth. Adjust the consistency with a splash of milk if needed – you want it pourable but not watery. Let it sit for 10 minutes before serving to allow flavors to meld.

    Serving Ideas & Creative Variations

    Customizable Toppings Bar

    Transform dinner into an interactive experience by setting up a toppings station with colorful bowls of garnishes. I love offering diced avocado, thinly sliced radishes, pickled red onions, and fresh cilantro for everyone to customize their own bowl. A small dish of extra lime wedges and another with crumbled cotija encourage personalization. Toasted pepitas add wonderful crunch, while sliced jalapeños satisfy heat-seekers. This approach is perfect for family dinners where everyone has different preferences – my picky nephew even tried avocado for the first time this way! For a fun twist, include some crispy tortilla strips or crushed tortilla chips for added texture.

    Creative Protein and Base Swaps

    While chicken is the classic protein choice, this versatile bowl welcomes delicious substitutions. Grilled shrimp cooks even faster and brings a lovely sweetness that complements the corn. For vegetarians, black beans and roasted sweet potatoes create a satisfying alternative with similar flavor profiles. The rice base can easily transform too – try cilantro lime rice for extra zing, or cauliflower rice for a lower-carb option. Quinoa adds protein and a pleasant nuttiness that works beautifully with the other components. My personal favorite variation uses half rice, half greens as the base, which lightens the dish while maintaining its satisfying nature. For meal prep, these swaps keep things interesting all week!

    Storage & Troubleshooting Guide

    Proper Storage for Maximum Freshness

    To maintain the vibrant flavors of your Street Corn Chicken Rice Bowl, proper storage is essential. The assembled bowls will keep in airtight containers in the refrigerator for up to 3 days, though I recommend storing components separately for the best texture. Keep the crema sauce in its own container and the corn mixture separate from the rice to prevent sogginess. When reheating, sprinkle a few drops of water over the rice before microwaving to restore moisture. For meal prep, portion everything except the cold toppings into microwave-safe containers. Fresh elements like avocado and cilantro should always be added just before eating to prevent browning and wilting.

    Fixing Common Issues

    Even experienced cooks encounter challenges, but these simple fixes will rescue your Street Corn Chicken Rice Bowl. If your corn lacks that caramelized flavor, try increasing your pan heat and ensuring you’re not overcrowding the skillet – corn needs space to char properly. Dealing with dry chicken? Slice it thinly against the grain and toss with a splash of chicken broth before serving to restore moisture. If your sauce breaks or seems too thin, whisk in a teaspoon of mayo to re-emulsify. Too spicy? Add more crema or a dollop of plain Greek yogurt to balance the heat. Rice clumping together? Fluff with a fork and drizzle with a little olive oil to separate the grains beautifully.

    Frequently Asked Questions

    Can I make Street Corn Chicken Rice Bowl ahead of time?

    Absolutely! Prepare components separately up to 3 days ahead. Store the sauce, chicken, corn mixture, and rice in separate containers. Reheat the chicken and rice together, then add corn mixture and fresh toppings just before serving.

    What’s the best cheese for authentic street corn flavor?

    Cotija cheese is traditional and offers the perfect salty, crumbly texture. If unavailable, substitute with feta cheese or even grated parmesan in a pinch. The key is finding a cheese that’s dry and slightly salty.

    How can I make this Street Corn Chicken Rice Bowl vegetarian?

    Replace chicken with black beans, roasted chickpeas, or grilled portobello mushrooms. The corn mixture and sauce remain the same. Add extra avocado for additional creaminess and satisfying healthy fats.

    Can I use brown rice instead of white rice?

    Definitely! Brown rice adds nutty flavor and extra fiber. Adjust cooking time according to package directions (typically 35-45 minutes instead of 15-20). The heartier texture pairs beautifully with the other components.

    What’s the best way to char corn if I don’t have a grill?

    Use a cast-iron skillet on high heat for 3-4 minutes without stirring to develop char marks. Alternatively, spread corn on a baking sheet and broil for 3-5 minutes, watching carefully to prevent burning.

    Final Thoughts

    This Street Corn Chicken Rice Bowl has become my go-to recipe when I want to impress without spending hours in the kitchen. There’s something deeply satisfying about creating a meal that balances complex flavors so effortlessly. The way the sweet corn plays against the tangy sauce, complemented by perfectly seasoned chicken and fluffy rice – it’s a combination that never fails to bring smiles around my table. I hope this bowl brings the same joy to your kitchen! For more delicious recipe inspiration, check out my Pinterest board where I’m always adding new flavor combinations and cooking techniques.

  • Beef Bulgogi Bowls: Irresistible Flavor Explosion You Must Try!

    Beef Bulgogi Bowls: Irresistible Flavor Explosion You Must Try!

    Beef Bulgogi Bowls: Irresistible Flavor Explosion You Must Try!

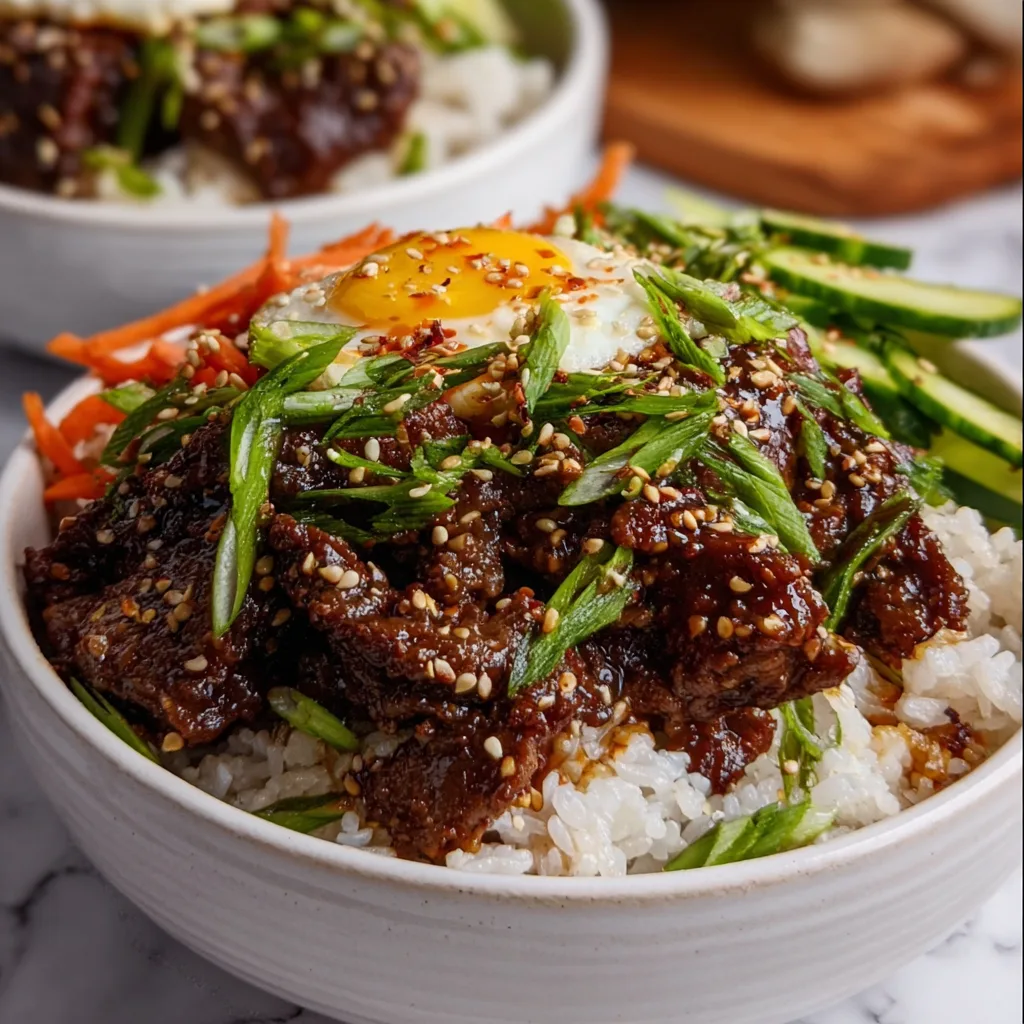
    Beef Bulgogi Bowls have completely transformed my weeknight dinner routine, and I’m thrilled to share this game-changer with you! The first time I made these colorful bowls, the sweet-savory aroma of marinated beef sizzling in the pan transported me straight to my favorite Korean restaurant. There’s something magical about the combination of tender beef strips caramelized to perfection, served over fluffy rice with vibrant veggies. This 30-minute meal balances complex flavors while being surprisingly simple to prepare. If you’re looking for a restaurant-quality dinner that will have everyone at the table asking for seconds, you’ve found it!

    Recipe

    Why You’ll Love This Beef Bulgogi Bowls

    Perfect Balance of Flavors and Textures

    The true magic of these Beef Bulgogi Bowls lies in their incredible flavor harmony. The marinade combines soy sauce, brown sugar, sesame oil, and ginger into a sweet-savory symphony that transforms ordinary beef into something extraordinary. I still remember my daughter’s face lighting up at her first bite—that perfect balance of tender meat against the slight crunch of vegetables. The beef develops those irresistible caramelized edges while staying juicy inside, creating a textural contrast that makes each bite more exciting than the last. It’s comfort food with a sophisticated edge that feels special without being fussy.

    Quick and Adaptable for Busy Weeknights

    What initially made me fall in love with Beef Bulgogi Bowls was discovering I could have such incredible flavor on the table in under 30 minutes. The meal prep flexibility is a game-changer—marinate the beef in the morning, and dinner practically makes itself when you get home. I’ve made these on chaotic Wednesdays when everyone has different activities and on lazy Sundays when we want something special without the effort. You can easily customize the veggie selection based on what’s in your fridge, making this recipe perfect for those “what can I make with what I have?” moments. It’s become my reliable solution for satisfying meals without stress.

    Essential Tips & Tricks

    Mastering the Marinade

    The heart and soul of authentic Beef Bulgogi lies in its marinade magic. For the most tender results, slice your beef against the grain as thinly as possible—partially freezing it for 30 minutes makes this much easier! I learned the hard way that rushing the marinating time cuts the flavor impact dramatically; aim for at least 1 hour, though overnight creates the most flavorful results. The marinade’s sweetness helps create those caramelized edges, but watch it carefully when cooking as the sugar can burn quickly. For an extra layer of flavor, add a tablespoon of grated Asian pear or kiwi to the marinade—the enzymes naturally tenderize the meat beautifully.

    Perfecting the Cooking Technique

    The secret to restaurant-quality Beef Bulgogi is achieving that perfect caramelization without overcooking the meat. I’ve found that cooking in small batches is absolutely essential—overcrowding the pan steams rather than sears the beef, robbing you of those flavorful browned edges. Use a heavy-bottomed pan or cast iron skillet on medium-high heat, and resist the urge to constantly stir! Allow each piece to develop a beautiful crust before flipping. For a traditional approach similar to my Korean BBQ Steak Rice Bowls, cook the beef just until it’s no longer pink—about 2-3 minutes per batch—to maintain its juicy tenderness.

    Serving Ideas & Creative Variations

    Building the Perfect Bowl

    Creating a visually stunning Beef Bulgogi Bowl is all about thoughtful assembly and color contrast. Start with a base of fluffy white rice (though brown rice works beautifully for a nuttier flavor). Arrange your beef slightly off-center, then add small piles of quick-pickled vegetables in contrasting colors—I love cucumber, carrots, and radishes for their crunch and vibrant hues. A sprinkle of sesame seeds adds visual interest and texture, while a perfectly soft-boiled egg creates a luxurious sauce when the yolk breaks. For a finishing touch that ties everything together, drizzle with extra bulgogi sauce and a zigzag of sriracha mayo for both beauty and flavor balance.

    Exciting Twist Options

    While traditional Beef Bulgogi Bowls are incredible, I love experimenting with creative variations that keep this recipe exciting in our weekly rotation. For a low-carb option, swap the rice base for cauliflower rice or spiralized zucchini noodles—it’s lighter but still satisfying. Taking inspiration from my Spicy Keto Korean Beef with Cucumber Salad, you can add gochujang for a spicy kick that transforms the flavor profile. For a fusion approach, try serving the beef in lettuce wraps with kimchi and avocado slices, or use it as a filling for Korean-inspired tacos topped with quick-pickled red onions and cilantro.

    Storage & Troubleshooting Guide

    Meal Prep and Storage Solutions

    These Beef Bulgogi Bowls are meal prep champions that actually taste better the next day as the flavors continue to develop. Store the components separately for best results—beef in one container, rice in another, and fresh vegetables separately to maintain their crunch. The cooked beef will keep beautifully in the refrigerator for up to 4 days, making it perfect for planned leftovers. I often double the recipe specifically for lunches throughout the week! For longer storage, the cooked beef freezes surprisingly well for up to 3 months. Just thaw overnight in the refrigerator and quickly reheat in a hot skillet to restore some of that caramelized texture.

    Solving Common Challenges

    Even experienced cooks occasionally encounter challenges with Beef Bulgogi. If your beef turns out tough, it’s likely either sliced with (instead of against) the grain or overcooked—next time, slice thinner and cook for less time. For flavor balance issues, remember the marinade should taste slightly stronger than you think necessary, as it will mellow when cooked. If your sauce is too salty, balance it with a touch more brown sugar or mirin. Not getting enough caramelization? Make sure your pan is hot enough before adding the beef, and don’t overcrowd it. For meal prep, keep sauce separate until serving to prevent sogginess, and add fresh elements like green onions just before eating.

    Frequently Asked Questions

    What cut of beef works best for Beef Bulgogi Bowls?

    Ribeye and sirloin are ideal choices due to their marbling and tenderness. Flank steak is a more economical option that works well when sliced thinly against the grain and not overcooked. The key is thin slicing regardless of cut.

    Can I make Beef Bulgogi Bowls ahead of time?

    Absolutely! Marinate the beef up to 24 hours ahead, and prepare the rice and vegetables separately. Store components in the refrigerator and assemble just before serving for the freshest experience.

    How can I make these Beef Bulgogi Bowls spicier?

    Add gochujang (Korean chili paste) or sriracha to the marinade for heat that permeates the meat. Alternatively, serve with kimchi or a side of sliced fresh jalapeños for customizable spice levels.

    What are good vegetable options for Beef Bulgogi Bowls?

    Traditional options include spinach, bean sprouts, carrots, and cucumber. I also love adding quick-pickled radishes, sautéed mushrooms, or blanched broccoli for extra nutrition and texture variety.

    Can I substitute ground beef for sliced beef in Bulgogi Bowls?

    Yes! Ground beef makes a quick alternative that absorbs the marinade beautifully. Cook it with the same sauce ingredients until caramelized, breaking it into small pieces for the perfect bowl topping.

    Final Thoughts

    These Beef Bulgogi Bowls have become more than just a dinner option in my home—they’re our go-to celebration meal that somehow works for both special occasions and busy weeknights. The beauty of this dish lies in its perfect balance: complex flavors achieved through simple techniques, a meal that feels indulgent while actually being nutritious. I find myself craving these colorful, flavor-packed bowls at least once a week, and judging by how quickly they disappear from the table, I’m not alone! Be sure to check out more Asian-inspired recipes on my Pinterest board for your next culinary adventure.

  • Shrimp Orzo in Lemon Garlic Sauce | Irresistibly Zesty & Quick!

    Shrimp Orzo in Lemon Garlic Sauce | Irresistibly Zesty & Quick!

    Shrimp Orzo in Lemon Garlic Sauce | Irresistibly Zesty & Quick!

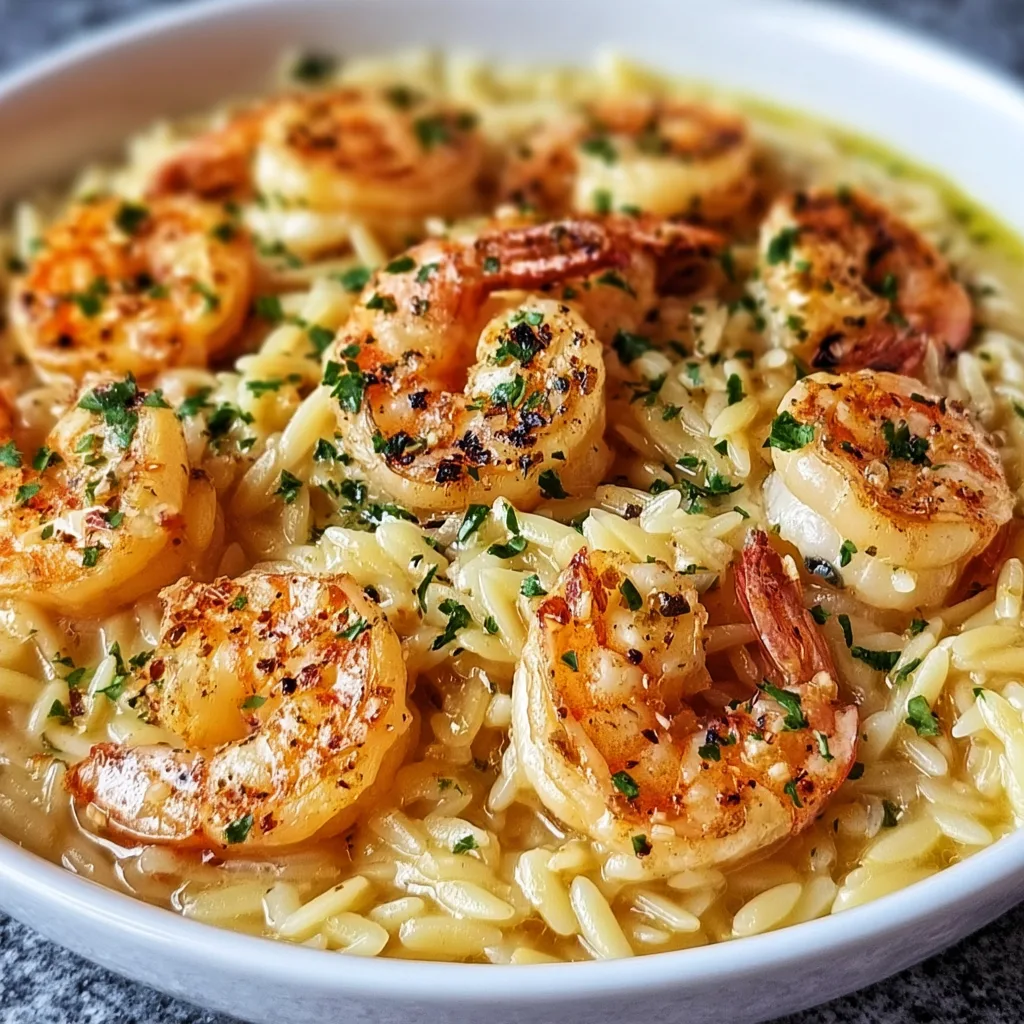
    Shrimp Orzo in Lemon Garlic Sauce is the perfect balance of comfort and sophistication that I’m absolutely obsessed with lately. Picture this: plump, juicy shrimp nestled among tender orzo pasta, all bathed in a silky lemon garlic sauce that hits every perfect note – bright, creamy, and utterly craveable. I first created this dish on a rainy Sunday when I needed something that felt special but didn’t require hours in the kitchen. The way the sauce clings to each piece of orzo makes every bite a little moment of joy. Trust me, this is about to become your new weeknight favorite that feels anything but ordinary. Let me show you how to make magic happen in just one pan.

    Recipe

    Recipe

    Why You’ll Love This Shrimp Orzo in Lemon Garlic Sauce

    Perfect Balance of Flavors

    There’s something almost magical about the combination of zesty lemon and aromatic garlic in this dish. The brightness cuts through the richness, creating this perfect harmony that dances on your tongue. I love how the lemon juice adds that perfect zing without overwhelming the delicate sweetness of the shrimp. The garlic infuses the entire dish with a warm, inviting aroma that fills your kitchen and makes everyone ask “what smells so amazing?” It’s the kind of dish that feels sophisticated enough for company but simple enough for a Tuesday night when you need something comforting after a long day.

    One-Pan Simplicity

    As someone who values both flavor and efficiency, I’m all about one-pan wonders that deliver maximum impact with minimal cleanup. This shrimp orzo comes together in just one skillet, where each ingredient builds upon the last, creating layers of flavor that taste like you’ve been cooking all day. The orzo absorbs all those gorgeous flavors as it cooks directly in the sauce, becoming plump and tender. I’ve found this method actually creates a creamier texture than boiling the pasta separately. Plus, on busy nights, knowing I’ll only have one pan to wash makes me much more likely to cook something delicious rather than ordering takeout.

    Essential Tips & Tricks

    Perfecting Your Shrimp

    The key to restaurant-quality shrimp is avoiding overcooking at all costs! I always pat my shrimp completely dry with paper towels before seasoning – this ensures they get that beautiful golden sear rather than steaming. Cook them just until they turn pink and opaque (about 2 minutes per side), then remove them from the pan while you prepare the sauce and orzo. This two-stage cooking method prevents rubbery, tough shrimp. Remember that they’ll continue cooking slightly when added back to the hot pasta, so it’s better to undercook them initially. The perfect shrimp should have a slight C shape – if they curl into tight O shapes, they’re overcooked.

    Creating a Silky Sauce

    The velvety texture of this sauce comes from a few simple techniques that make all the difference. Start by deglazing the pan with a splash of white wine to release those flavorful browned bits from cooking the shrimp. When adding lemon juice, incorporate the zest too – it contains the aromatic oils that give depth beyond just acidity. For extra creaminess without heaviness, try stirring in a tablespoon of cream cheese or a splash of half-and-half in the final minute of cooking. My favorite trick is adding a knob of cold butter right at the end with the heat off – this creates a glossy, restaurant-worthy finish that elevates the entire dish.

    Serving Ideas & Creative Variations

    Perfect Pairings

    This shrimp orzo deserves to be the star of your table, but a few simple sides can complete the meal beautifully. I love serving it with a crisp side salad dressed with just olive oil and lemon to echo the flavors in the main dish. For a heartier option, some garlic bread is perfect for soaking up every last drop of that incredible sauce. When entertaining, I start with a light appetizer like marinated olives or a small cheese plate. This dish pairs wonderfully with a chilled Pinot Grigio or Sauvignon Blanc that complements the citrus notes. For a non-alcoholic option, sparkling water with a squeeze of lemon and sprig of basil is refreshingly perfect.

    Exciting Twists

    Don’t be afraid to make this recipe your own with some creative variations! For a Mediterranean twist, add halved cherry tomatoes, crumbled feta, and fresh dill in the last few minutes of cooking. Seafood lovers can turn this into a mixed seafood delight by adding scallops, mussels, or pieces of firm white fish alongside the shrimp. For a touch of heat, red pepper flakes or a dash of cayenne wake up all the flavors. When I’m craving extra vegetables, I fold in fresh spinach or asparagus pieces right at the end until just wilted. For a heartier version perfect for cooler months, try adding roasted cherry tomatoes and Italian sausage for a delicious twist.

    Storage & Troubleshooting Guide

    Proper Storage

    This shrimp orzo makes fantastic leftovers when stored properly. Transfer any remaining portions to an airtight container and refrigerate for up to 2 days. The flavors actually continue to develop overnight, making next-day lunch something to look forward to! When reheating, add a splash of chicken broth or water to loosen the sauce, as the orzo will continue absorbing liquid. I prefer gentle reheating in a covered skillet over medium-low heat rather than the microwave, which can make the shrimp tough. If you’re meal prepping, consider keeping the cooked shrimp separate and adding them only during reheating to prevent them from becoming overcooked.

    Common Issues Solved

    If your sauce seems too thin or watery, don’t worry – simply simmer uncovered for a few extra minutes to reduce and thicken. Conversely, if it’s too thick, add small amounts of broth until you reach your desired consistency. For orzo that’s undercooked or too firm, add ¼ cup more liquid and continue cooking, checking every 2 minutes until perfect. If your shrimp release too much liquid and dilute the flavor, increase seasoning and add a squeeze of fresh lemon to brighten everything back up. Remember that the sauce will thicken as it cools, so it’s better to err on the slightly thinner side when serving. Trust your taste buds – they’re your best guide!

    Frequently Asked Questions

    Can I use frozen shrimp for this Shrimp Orzo in Lemon Garlic Sauce?

    Absolutely! Thaw completely and pat very dry before cooking. I actually keep frozen shrimp on hand specifically for quick meals like this when I don’t have time to shop for fresh.

    What can I substitute for orzo pasta?

    Any small pasta works beautifully – try small shells, ditalini, or even Israeli couscous. Adjust cooking time according to package directions since they may differ slightly from orzo.

    Is this dish spicy?

    Not as written, but it’s easy to add heat! Red pepper flakes, cayenne pepper, or a dash of hot sauce can be added to taste for those who enjoy some spice.

    Can I make this dairy-free?

    Yes! Skip the butter and Parmesan, using olive oil instead. For creaminess, try coconut cream or a splash of your favorite plant-based cream alternative.

    How do I prevent the orzo from sticking to the pan?

    Stir frequently, especially during the first few minutes of cooking. Using a non-stick pan or well-seasoned cast iron skillet also helps prevent sticking issues.

    Final Thoughts

    This Shrimp Orzo in Lemon Garlic Sauce has become my go-to dish when I want to impress without stress. There’s something about the combination of tender shrimp, perfectly cooked orzo, and that bright, velvety sauce that feels like a warm hug at the end of a long day. I hope you’ll give this recipe a try and make it your own – it’s flexible enough to adapt to what you have on hand while still delivering that restaurant-quality experience right at your kitchen table. Don’t forget to check out more seafood inspiration on my Pinterest boards for your next cooking adventure!

  • Garlic Butter Chicken Broccoli That Will Blow Your Taste Buds Away!

    Garlic Butter Chicken Broccoli That Will Blow Your Taste Buds Away!

    Garlic Butter Chicken Broccoli That Will Blow Your Taste Buds Away!

    Garlic Butter Chicken Broccoli is the ultimate weeknight dinner savior that’s transformed my busy evenings into something I actually look forward to. There’s something magical about the way the rich garlic butter coats every bite, making both the tender chicken and crisp broccoli absolutely irresistible. I discovered this recipe during a particularly hectic week when I needed something quick but refused to compromise on flavor. The combination of juicy chicken and nutritious broccoli in that velvety sauce has become my go-to when I want comfort food without the guilt. Trust me, this one-pan wonder might just become your new family favorite too!

    Recipe

    Why You’ll Love This Garlic Butter Chicken Broccoli

    Perfect Balance of Flavor and Nutrition

    This dish strikes that elusive sweet spot between utterly delicious and actually good for you. The garlic butter sauce creates this luxurious coating that transforms ordinary chicken and broccoli into something crave-worthy. I love how the broccoli florets soak up all that buttery goodness while still maintaining their nutritional value. My picky nephew who normally pushes vegetables around his plate actually asked for seconds! It’s become my secret weapon for getting more greens into family meals without complaints. Plus, the protein from the chicken keeps everyone satisfied long after dinner’s over.

    Quick and Versatile One-Pan Wonder

    On nights when I’m racing against the clock, this dish saves me every time. It comes together in just 30 minutes from start to finish, and the cleanup is minimal since everything cooks in one pan. I’ve made this on busy weeknights, for impromptu dinner guests, and even meal prepped it for lunches. The ingredients are pantry staples I almost always have on hand, which means no special shopping trips. I’ve swapped chicken thighs for breasts, added different vegetables based on what’s in my fridge, and played with the seasonings countless times. It’s practically impossible to mess up!

    Essential Tips & Tricks

    Perfecting the Chicken

    The secret to juicy, tender chicken starts with even-sized pieces. I cut mine into 1-inch cubes so they cook quickly and uniformly. Don’t rush the initial searing – those golden brown edges are flavor bombs! I season the chicken generously with salt and pepper before it hits the pan, then let it develop a nice crust before moving it around. Another game-changer? Letting the chicken rest for a minute after cooking before combining it with the broccoli. This helps the juices redistribute, keeping everything moist and flavorful. For an extra flavor boost, try marinating the chicken in a bit of garlic and olive oil for 15 minutes before cooking, just like in these white cheddar spinach chicken burgers.

    Mastering the Garlic Butter Sauce

    The velvety sauce is what elevates this dish from basic to brilliant. I always use fresh garlic – at least 4 cloves, minced or pressed – for the most vibrant flavor. Let the butter brown slightly before adding the garlic to develop nutty undertones. Keep the heat medium-low when adding garlic to prevent burning (burnt garlic turns bitter instantly). For extra richness, I finish the sauce with a splash of heavy cream or a tablespoon of cream cheese. A squeeze of lemon brightens everything up beautifully. Don’t forget to scrape up those delicious browned bits from the pan – they’re packed with flavor that will infuse your sauce!

    Serving Ideas & Creative Variations

    Perfect Pairings

    This garlic butter chicken broccoli shines brightest when served over a bed of fluffy rice that soaks up all that incredible sauce. Cauliflower rice makes a fantastic low-carb alternative that still captures all the flavors. For something heartier, try serving it over buttered egg noodles or alongside crusty bread for sauce-mopping purposes. I’ve served this with a simple side salad dressed with lemon vinaigrette for a complete meal that feels special enough for company. For an extra special touch, try pairing it with parmesan garlic rice for a double dose of garlic goodness that will have everyone asking for your secret recipe.

    Exciting Flavor Twists

    When I’m in the mood to switch things up, I love adding sun-dried tomatoes and a sprinkle of feta cheese for Mediterranean flair. For a spicy kick, red pepper flakes or a drizzle of hot honey transforms the dish entirely. Mushrooms make a wonderful addition – they soak up the garlic butter magnificently. Sometimes I’ll toss in spinach during the last minute of cooking for extra greens that wilt perfectly into the sauce. My favorite weekend variation includes a splash of white wine in the sauce and a handful of toasted pine nuts sprinkled on top. The possibilities are endless, and each variation feels like a brand new dish!

    Storage & Troubleshooting Guide

    Proper Storage and Reheating

    This dish maintains its deliciousness as leftovers for up to 4 days when stored in an airtight container in the refrigerator. The flavors actually deepen overnight, making next-day lunch something to look forward to! When reheating, add a splash of chicken broth or a small pat of butter to revitalize the sauce that may have thickened in the fridge. Microwave in 30-second intervals, stirring between each, to prevent the chicken from becoming rubbery. For best results, I prefer reheating in a skillet over medium-low heat. If you’re meal prepping, slightly undercook the broccoli initially so it doesn’t become mushy when reheated.

    Solving Common Challenges

    If your sauce breaks or looks curdled, don’t panic! Lower the heat immediately and whisk in a teaspoon of cold butter to re-emulsify everything. For sauce that’s too thin, simmer it a bit longer or add a cornstarch slurry (½ teaspoon cornstarch mixed with 1 tablespoon cold water). If it’s too thick, thin it with a splash of chicken broth. Broccoli turning out mushy? You’re likely overcooking it – it needs just 3-4 minutes to become tender-crisp. Chicken turning out dry? It’s probably overcooked – use a meat thermometer to pull it at exactly 165°F. Remember that residual heat continues cooking food even after removing it from heat.

    Frequently Asked Questions

    Can I use frozen broccoli for garlic butter chicken broccoli?

    Yes! Thaw it first and pat dry with paper towels to remove excess moisture. Add it later in the cooking process since it’s already partially cooked. It won’t be quite as crisp as fresh, but still delicious.

    How can I make this dish dairy-free?

    Substitute the butter with olive oil or a plant-based butter alternative. The flavor profile will change slightly, but you’ll still get a delicious garlic-infused sauce that coats the chicken and broccoli beautifully.

    What’s the best cut of chicken to use?

    Boneless, skinless chicken thighs provide the juiciest results, but chicken breasts work wonderfully too. Just be careful not to overcook breast meat as it can dry out more quickly.

    Can I make this dish spicy?

    Absolutely! Add red pepper flakes, cayenne pepper, or a drizzle of hot sauce to the garlic butter sauce. For a more complex heat, try adding a diced jalapeño when sautéing the garlic.

    How do I prevent the garlic from burning?

    Add garlic after the pan has cooled slightly from searing the chicken, or cook it for just 30-60 seconds before adding other liquids. Burnt garlic becomes bitter and can ruin the entire dish.

    Final Thoughts

    This Garlic Butter Chicken Broccoli has become more than just a recipe in my household—it’s a reliable friend that shows up on nights when cooking feels impossible but takeout isn’t an option. There’s something deeply satisfying about creating such bold flavors with simple ingredients. I love watching people’s faces light up with that first buttery, garlicky bite, knowing I’ve spent minimal effort for maximum impact. Whether you’re cooking for picky eaters, health-conscious family members, or just yourself after a long day, this dish delivers comfort and nourishment in equal measure. Don’t forget to check out more delicious recipes on Pinterest!

  • Garlic Butter Steak & Cheddar Potato Bake That Will Wow Your Taste Buds!

    Garlic Butter Steak & Cheddar Potato Bake That Will Wow Your Taste Buds!

    Garlic Butter Steak & Cheddar Potato Bake That Will Wow Your Taste Buds!

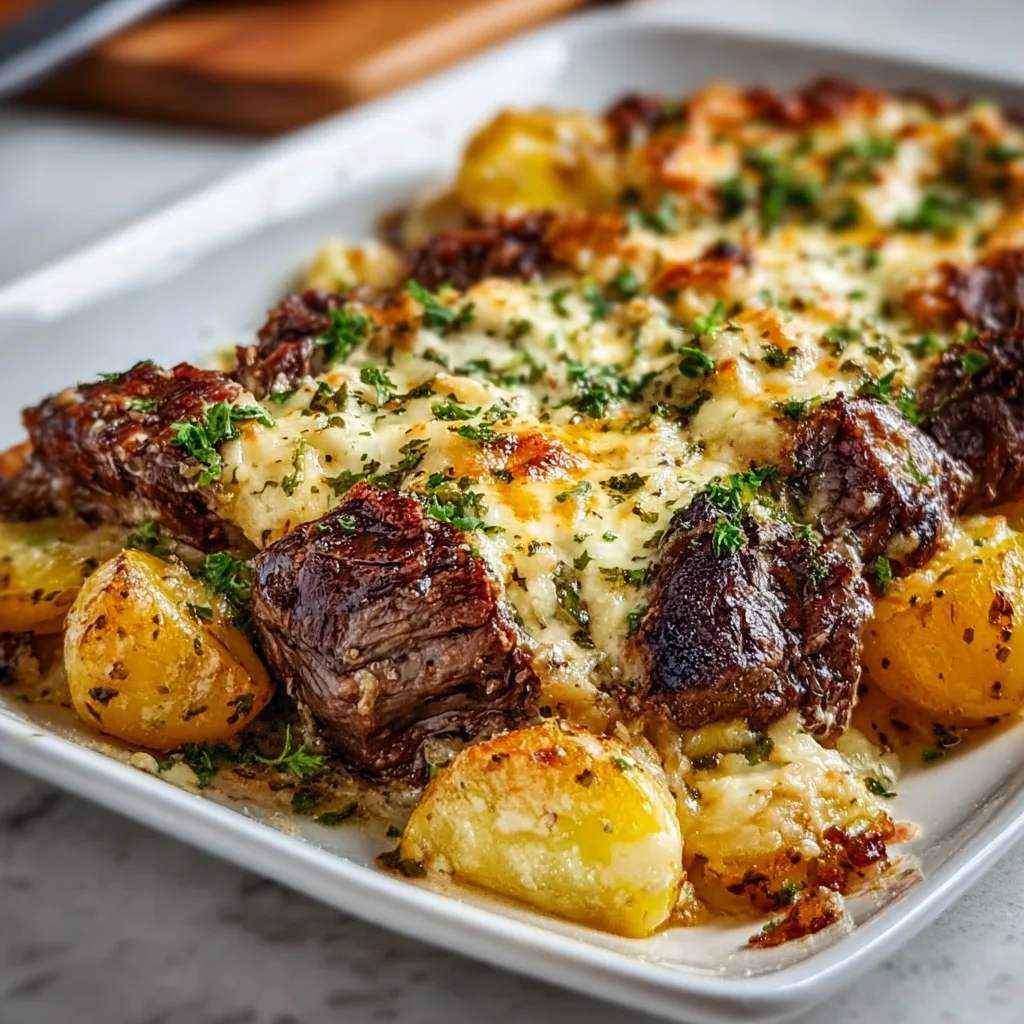
    There’s something undeniably magical about the combination of garlic butter steak & cheddar potato bake that just speaks to my soul. The first time I made this dish, my kitchen filled with an aroma so intoxicating that my neighbor actually texted to ask what I was cooking! This one-pan wonder combines juicy steak bites, golden potatoes, and melty cheddar cheese – all enveloped in a garlicky butter sauce that will have you scraping the pan for every last drop. It’s comfort food elevated to an art form, perfect for those evenings when you crave something hearty yet impressively delicious.

    Recipe

    Why You’ll Love This Garlic Butter Steak & Cheddar Potato Bake

    Perfect One-Pan Convenience

    Let’s be honest – after a long day, the last thing any of us wants is a sink full of dishes. That’s why I’m obsessed with this one-pan masterpiece. Everything cooks together, allowing the potatoes to soak up all those incredible steak juices and garlic butter flavors. The potatoes develop this incredible crispy exterior while staying creamy inside, and the steak gets a beautiful sear while remaining tender. I love how the cheese creates these irresistible crispy edges around the pan that my family literally fights over. Weeknight dinners just got a serious upgrade!

    Balanced Flavor Profile

    The magic of this dish lies in its perfect balance of flavors and textures. The rich garlic butter creates this velvety coating that clings to both the steak and potatoes, infusing everything with aromatic goodness. Meanwhile, the sharp cheddar adds that tangy, savory depth that complements the beef beautifully. I’ve found that adding a touch of fresh herbs right at the end – rosemary or thyme work wonders – brings a brightness that cuts through the richness. When you get that perfect bite with crispy potato, juicy steak, and melted cheese… pure heaven!

    Essential Tips & Tricks

    Selecting & Preparing Ingredients

    The quality of your ingredients makes all the difference in this garlic butter steak & cheddar potato bake. Choose a well-marbled cut like ribeye or sirloin for the juiciest results – I’ve found that pre-cutting into bite-sized pieces before cooking ensures maximum flavor absorption. For potatoes, Yukon Golds are my go-to because they hold their shape while getting beautifully creamy inside. Don’t skimp on the cheese either! A good aged cheddar creates those gorgeous crispy edges that make this dish extraordinary. For an even more flavorful experience, try combining cheddar with a bit of parmesan garlic rice on the side.

    Mastering the Cooking Process

    Temperature control is absolutely critical for this dish. Start with a screaming hot pan to get that beautiful sear on your steak pieces, but then reduce the heat when adding the potatoes to ensure they cook through without burning. I learned this the hard way after one smoky kitchen disaster! Par-boiling your potatoes for about 5 minutes before adding them to the pan gives them a head start and ensures they’ll cook evenly. And here’s my secret weapon: let everything rest for 5 minutes after coming out of the oven. This allows the juices to redistribute and the cheese to set slightly for the perfect texture.

    Serving Ideas & Creative Variations

    Complementary Side Dishes

    While this garlic butter steak & cheddar potato bake is certainly hearty enough on its own, I love serving it with something fresh to balance the richness. A simple arugula salad with lemon vinaigrette cuts through the buttery goodness perfectly. For something warm, roasted asparagus or Brussels sprouts add a wonderful earthy element that complements the savory flavors. If you’re really looking to impress, try serving alongside my crispy baked chicken wings for an epic feast! Just a drizzle of balsamic glaze over the entire dish before serving adds a touch of acidity that makes all the flavors pop.

    Exciting Flavor Twists

    The beauty of this dish is how adaptable it is to different flavor profiles. For a spicy southwestern version, add diced jalapeños, swap the cheddar for pepper jack, and finish with fresh cilantro. Craving something Mediterranean? Try adding sun-dried tomatoes, olives, and feta instead of cheddar, with a sprinkle of oregano. My personal favorite variation includes adding mushrooms to the pan – they soak up all that garlic butter and add an amazing umami depth. For a luxurious upgrade, try finishing with a drizzle of truffle oil or a sprinkle of blue cheese for an unexpected flavor bomb.

    Storage & Troubleshooting Guide

    Proper Storage Methods

    This garlic butter steak & cheddar potato bake stores surprisingly well, though I rarely have leftovers! For best results, cool completely before transferring to an airtight container – this prevents condensation that can make things soggy. It’ll keep in the refrigerator for up to 3 days. When reheating, avoid the microwave if possible as it can make the steak tough. Instead, place in a covered oven-safe dish at 325°F for about 15 minutes. The cheese won’t be quite as gooey as fresh, but the flavors actually develop beautifully overnight. For meal prep, you can pre-cut all ingredients and store separately until ready to cook.

    Common Issues & Solutions

    The most frequent issue I’ve encountered is potatoes that aren’t quite done while the steak is perfectly cooked. The solution? Par-boil those potatoes first! Just 5-7 minutes in salted water gives them the head start they need. If your dish is coming out too greasy, try using half the butter in the cooking process and then adding a small pat of compound butter on top after baking – you’ll get all the flavor with less oil. Cheese burning? Cover loosely with foil for part of the baking time, removing for the last few minutes to get that perfect golden top. Remember that different ovens vary, so keep an eye on your dish the first time you make it.

    Frequently Asked Questions

    What’s the best cut of steak for Garlic Butter Steak & Cheddar Potato Bake?

    Ribeye or sirloin work beautifully for their marbling and flavor. Strip steak is also excellent, while budget-conscious cooks can use flank steak cut against the grain for tenderness. Just ensure pieces are uniform for even cooking.

    Can I make this dish ahead of time?

    You can prep all components separately up to a day ahead. Par-boil potatoes, cut steak, and prepare garlic butter, then store separately. Assemble and bake just before serving for the best texture and flavor.

    How can I ensure my potatoes cook through without overcooking the steak?

    Par-boil potatoes for 5-7 minutes before adding to the pan. Alternatively, give potatoes a 10-minute head start in the oven before adding seasoned steak pieces for the remaining cooking time.

    What cheese alternatives work well?

    Gruyère offers nutty richness, while fontina melts beautifully. Gouda adds smokiness, and a blue cheese crumble creates tangy pockets. For milder flavor, try Monterey Jack or a young Havarti.

    Can I make this dish without an oven?

    Absolutely! Use a large skillet with a lid. Cook potatoes first until almost tender, add steak, then cover and reduce heat. Add cheese last, cover until melted. The texture differs slightly but remains delicious.

    Final Thoughts

    This garlic butter steak & cheddar potato bake has become my go-to dish whenever I want to impress without spending hours in the kitchen. There’s something profoundly satisfying about creating such bold flavors with simple ingredients. The way the garlic butter infuses everything with richness, how the cheese creates those irresistible crispy edges, and the perfect harmony between tender steak and golden potatoes – it’s comfort food at its finest. I hope this dish brings as much joy to your table as it has to mine! Don’t forget to check out more comfort food inspiration on Pinterest.

  • Sweet Potato Croquettes with Burrata & Pistachio Dip – Irresistibly Crispy!

    Sweet Potato Croquettes with Burrata & Pistachio Dip – Irresistibly Crispy!

    Sweet Potato Croquettes with Burrata & Pistachio Dip – Irresistibly Crispy!

    Sweet Potato Croquettes with Burrata Dip & Pistachio – a match made in appetizer heaven! The first time I served these at a dinner party, my guests literally fought over the last one. There’s something magical about the crispy exterior giving way to that creamy, spiced sweet potato filling. And when you dip them into that cloud-like burrata sauce? Pure bliss. I’ve tested countless versions in my kitchen (much to my husband’s delight), and this recipe has been perfected to deliver that perfect balance of texture and flavor every single time. If you love creative appetizers like my Hot Honey Salmon Bites, these croquettes will become your new obsession.

    Recipe

    Why You’ll Love These Sweet Potato Croquettes with Burrata Dip & Pistachio

    The Perfect Balance of Flavors and Textures

    These croquettes are a sensory delight from first bite to last. The sweet earthiness of the potatoes pairs beautifully with warming spices like cinnamon and nutmeg, while a hint of cayenne adds just enough heat to keep things interesting. The exterior develops a golden, crispy shell that makes the most satisfying crunch when you bite into it. Meanwhile, the interior stays creamy and light. And let’s not forget the burrata dip – cool, silky, and punctuated with fresh herbs that cut through the richness. The crushed pistachios add that final textural element that takes these from good to unforgettable.

    Impressive Yet Surprisingly Simple

    Don’t let their elegant appearance fool you – these croquettes are actually quite approachable to make. The sweet potato mixture can be prepared a day ahead, making these perfect for entertaining. The rolling technique is forgiving and becomes almost meditative once you get into a rhythm. I remember being nervous the first time I made these for my sister’s birthday, but everyone thought I’d spent hours in the kitchen! The truth is, most of the time is hands-off while the potatoes cool. The burrata dip comes together in minutes, and the entire dish can be partially prepped ahead, making your final assembly a breeze.

    Essential Tips & Tricks

    Mastering the Perfect Croquette Texture

    The secret to croquettes that hold together beautifully lies in two key steps. First, thoroughly drain your cooked sweet potatoes – excess moisture is the enemy of a good croquette. I place mine in a fine-mesh strainer and press gently with a wooden spoon. Second, chill the mixture for at least 30 minutes before shaping. This firms everything up and makes rolling infinitely easier. When coating, use one hand for the egg wash and the other for breadcrumbs to avoid the dreaded “breadcrumb fingers.” For the crispiest exterior, make sure your oil temperature stays steady at 350°F – I use a candy thermometer clipped to the side of my pan.

    Elevating Your Burrata Dip to Perfection

    The burrata dip is deceptively simple but requires a gentle touch. Room temperature burrata is essential – cold cheese won’t break down properly into that silky texture we’re after. When mixing, use a fork rather than a blender to maintain some of that gorgeous texture. A splash of lemon juice brightens everything up, but add it gradually to taste. The herbs should be added just before serving to maintain their vibrant color and fresh flavor. For an extra layer of complexity, try adding a drizzle of high-quality olive oil over the finished dip – the grassiness pairs beautifully with the sweet potato and pistachio elements.

    Serving Ideas & Creative Variations

    Elegant Presentation Strategies

    Presentation elevates these croquettes from delicious to showstopping. Arrange them on a large wooden board with the burrata dip in a shallow bowl at the center. Scatter additional crushed pistachios around the platter and garnish with micro greens or edible flowers for a pop of color. Serve the croquettes warm, standing upright in the dip for a dramatic effect. For individual servings, place two croquettes on small plates with a dollop of dip and a light dusting of sumac for color. I love serving these alongside my Corn Fritters with Whipped Feta for an impressive appetizer spread that always gets compliments.

    Exciting Flavor Variations to Try

    While the classic recipe is divine, don’t be afraid to experiment with flavors. For a Mediterranean twist, add crumbled feta and chopped olives to the sweet potato mixture, then serve with a tzatziki dip instead of burrata. For something spicier, incorporate harissa paste and toasted cumin seeds, paired with a cooling yogurt dip. Swap the pistachios for walnuts and add a touch of maple syrup to the sweet potatoes for a fall-inspired variation. The burrata dip can be customized too – try adding roasted garlic, sun-dried tomatoes, or even a drizzle of truffle honey for special occasions.

    Storage & Troubleshooting Guide

    Proper Storage for Maximum Freshness

    These croquettes maintain their quality surprisingly well when stored properly. Refrigerate leftover cooked croquettes in an airtight container for up to 3 days. To reheat, avoid the microwave which will make them soggy. Instead, place them on a baking sheet in a 350°F oven for 8-10 minutes until heated through and crisp again. The burrata dip is best consumed fresh but can be refrigerated for up to 2 days. If you want to work ahead, the uncooked shaped croquettes can be refrigerated for 24 hours or frozen for up to a month – just thaw in the refrigerator before frying.

    Solving Common Croquette Challenges

    If your croquettes are falling apart during frying, the mixture is likely too wet. Fix this by adding more breadcrumbs to the sweet potato mixture, one tablespoon at a time, until it holds its shape. If they’re browning too quickly but remaining raw inside, your oil is too hot – reduce the temperature and make the croquettes slightly smaller. For burrata dip that’s too thick, thin it with a splash of heavy cream or milk. If the dip separates, gently whisk in a teaspoon of warm water. Remember that sweet potatoes vary in moisture content, so be flexible with your breadcrumb amount to achieve the perfect consistency.

    Frequently Asked Questions

    Can I bake these Sweet Potato Croquettes with Burrata Dip & Pistachio instead of frying?

    Yes! Arrange them on a parchment-lined baking sheet, spray with cooking oil, and bake at 425°F for 20-25 minutes, flipping halfway through. They’ll be slightly less crispy but still delicious.

    What can I substitute for burrata if I can’t find it?

    Fresh mozzarella mixed with a little cream cheese works beautifully. Alternatively, try ricotta or even a Greek yogurt base with herbs for a lighter option.

    Can I make these ahead for a party?

    Absolutely! Prepare the croquette mixture and shape them up to 24 hours ahead. Store covered in the refrigerator, then bread and fry just before serving for the best texture.

    Are these gluten-free?

    Not as written, but you can easily substitute gluten-free breadcrumbs and check that your spices are certified gluten-free to make them suitable for gluten-sensitive guests.

    How spicy are these croquettes?

    The cayenne adds just a mild warmth that balances the sweetness. For a kid-friendly version, omit it entirely, or double it if you prefer more heat.

    Final Thoughts

    These Sweet Potato Croquettes with Burrata Dip & Pistachio represent everything I love about cooking – simple ingredients transformed into something extraordinary through thoughtful preparation. The contrast between the crispy exterior and creamy center, complemented by the luscious burrata dip and crunchy pistachios, creates a truly memorable bite. Whether served as an elegant starter for a dinner party or as part of a casual gathering, they never fail to impress. I’d love to see your creations on Pinterest if you give them a try! Trust me, once you master these croquettes, they’ll become a signature dish in your entertaining repertoire.