Blog

  • 20 Minute Ground Turkey Bang Bang Rice | Easy, Flavor-Packed Feast!

    20 Minute Ground Turkey Bang Bang Rice | Easy, Flavor-Packed Feast!

    20 Minute Ground Turkey Bang Bang Rice | Easy, Flavor-Packed Feast!

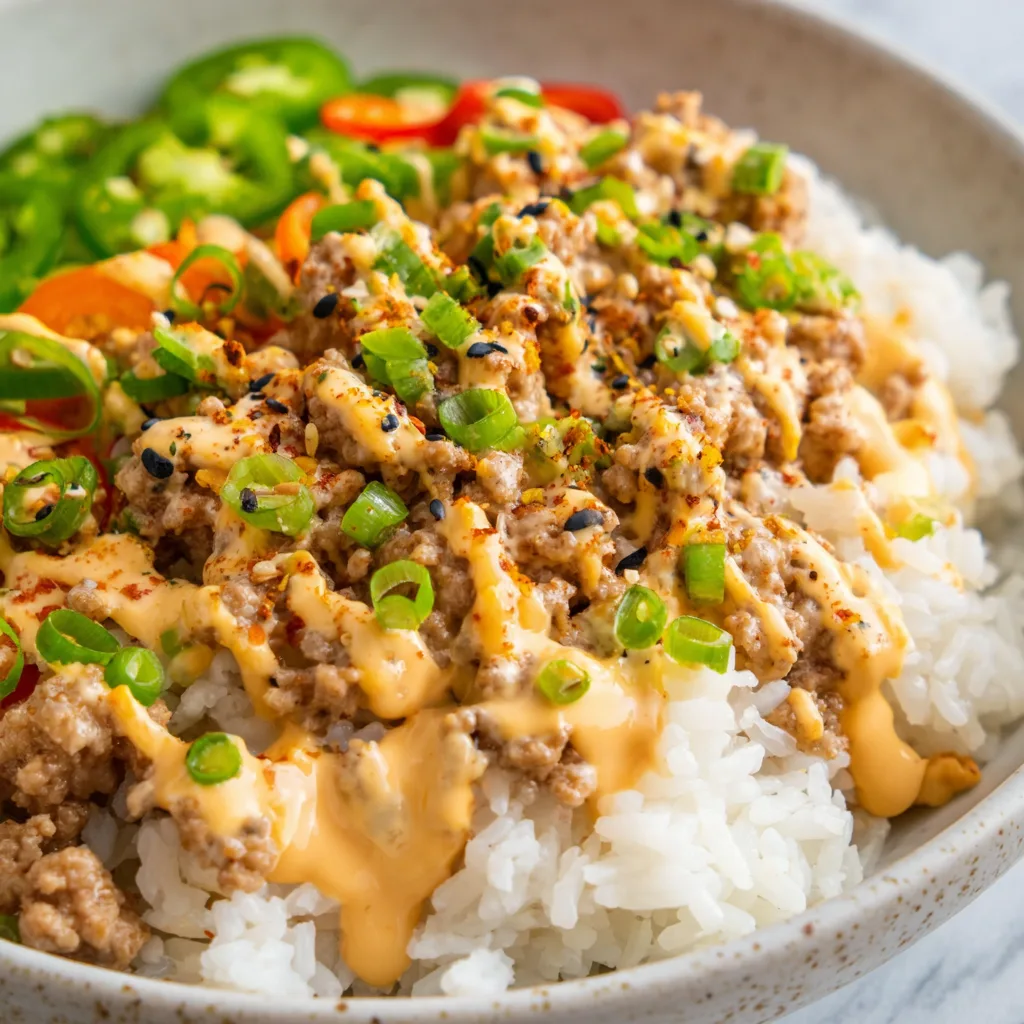
    20 Minute Ground Turkey Bang Bang Rice is about to become your new weeknight hero! This dish has saved me countless times when I’m staring into my fridge at 6 PM wondering what magic I can conjure up. The first time I made this, my kitchen filled with the most intoxicating aroma of sweet-spicy sauce meeting freshly cooked rice. My partner literally wandered in from the other room asking, “What smells so amazing?” The best part? It delivers big flavor with minimal effort. If you love quick meals with a flavor punch like my Bang Bang Salmon, you’ll adore this turkey version.

    Recipe

    Why You’ll Love This 20 Minute Ground Turkey Bang Bang Rice

    Perfect Weeknight Solution

    This 20 Minute Ground Turkey Bang Bang Rice truly lives up to its name—start to finish in 20 minutes! On busy weeknights when I’m exhausted but still craving something satisfying, this dish is my go-to. The ground turkey cooks quickly, absorbing all those delicious bang bang sauce flavors. I love that it’s protein-packed but doesn’t feel heavy. The sauce brings that perfect balance of creamy, sweet, and spicy notes that make your taste buds dance. Plus, everything comes together in a single pan, which means minimal cleanup—music to my ears after a long day!

    Crowd-Pleasing Flavor Profile

    The magic of this dish lies in that irresistible bang bang sauce—creamy, sweet, and just the right amount of heat. I’ve served this to picky eaters and food enthusiasts alike, and it’s always met with empty plates and requests for seconds. The sauce coats each grain of rice and bit of turkey with its velvety goodness. What I particularly love is how the sauce’s slight heat builds gradually rather than overwhelming your palate. It’s comfort food with personality! Even my spice-cautious friends find themselves reaching for more, which is always the ultimate compliment.

    Essential Tips & Tricks

    Perfecting Your Rice

    Getting the rice-to-sauce ratio just right makes all the difference in this 20 Minute Ground Turkey Bang Bang Rice. I recommend using jasmine rice for its fragrant quality and ability to stay fluffy. For maximum flavor absorption, cook your rice in broth instead of water—this simple swap creates an amazing foundation. Let your rice rest covered for 5 minutes after cooking; this allows the grains to finish steaming and separate beautifully. If you’re really pressed for time, quality microwave rice works wonderfully too! I’ve made this countless times with both methods, and while freshly cooked is my preference, both deliver delicious results.

    Sauce Secrets Revealed

    The bang bang sauce is the heart and soul of this dish! For the creamiest texture, use full-fat mayo and make sure your sweet chili sauce is the thick, sticky kind rather than the watery variety. I always add the sauce to the turkey off the heat to prevent separation. My personal touch? A splash of rice vinegar for brightness and balance. If you love spice like I do, add a drizzle of hot honey for complexity. Remember to reserve a little sauce for drizzling on top just before serving—this final touch makes the flavors pop and gives that restaurant-quality presentation.

    Serving Ideas & Creative Variations

    Perfect Pairings

    This 20 Minute Ground Turkey Bang Bang Rice pairs beautifully with fresh, crisp vegetables that balance the rich sauce. I love serving it with a simple cucumber salad dressed with rice vinegar and sesame oil—the cool crunch against the warm rice is divine! For a complete meal, steamed broccoli or roasted bok choy makes an excellent side. When I’m feeling fancy, I’ll add some quick-pickled vegetables for a tangy contrast. If you’re entertaining, serve this alongside my Asian Garlic Shrimp for an impressive spread that comes together in under 30 minutes. The complementary flavors will have everyone thinking you spent hours in the kitchen!

    Mix It Up

    Don’t be afraid to customize this versatile dish! My favorite variation swaps ground turkey for ground chicken or even crumbled tofu for a vegetarian option. The sauce works beautifully with any protein. Sometimes I stir in shredded carrots and peas during the last few minutes of cooking for added nutrition and color. For a lower-carb version, try cauliflower rice—it soaks up the sauce just as well. When I’m craving extra texture, I’ll sprinkle toasted sesame seeds or crushed peanuts on top. The beauty of this recipe is its flexibility—it welcomes your creativity while maintaining that irresistible bang bang flavor profile.

    Storage & Troubleshooting Guide

    Make-Ahead & Storage Tips

    This 20 Minute Ground Turkey Bang Bang Rice makes excellent leftovers that often taste even better the next day! Store in airtight containers in the refrigerator for up to 3 days. When reheating, add a splash of water or broth to revive the sauce’s creaminess and prevent the rice from drying out. For meal prep, I sometimes portion it into individual containers with steamed veggies for grab-and-go lunches. You can even freeze portions for up to 2 months—just thaw overnight in the fridge before reheating. The sauce might look slightly separated after freezing, but a good stir while warming will bring it back together.

    Common Issues Solved

    If your sauce seems too thick or thin, there’s an easy fix! For sauce that’s too thick, add a tablespoon of water or chicken broth until you reach your desired consistency. If it’s too thin, a teaspoon of mayo or even a sprinkle of cornstarch mixed with water can thicken it right up. Sometimes the rice might absorb too much sauce—simply make a half batch more of the bang bang sauce to refresh the dish. If you accidentally overcooked your turkey and it seems dry, folding in the sauce while the meat is still hot and letting it rest covered for 5 minutes works wonders to restore moisture.

    Frequently Asked Questions

    Can I make 20 Minute Ground Turkey Bang Bang Rice ahead of time?

    Absolutely! It stores beautifully for 3 days in the refrigerator. The flavors actually deepen overnight, making it perfect for meal prep. Just reheat with a splash of water to refresh the sauce.

    Is this dish spicy?

    The heat level is customizable. As written, it has a mild-to-medium kick. Adjust the sriracha up or down to suit your preference, or substitute with gochujang for a different spice profile.

    Can I use brown rice instead of white?

    Yes, though it will increase your cooking time. I recommend cooking the brown rice separately first, then combining with the turkey and sauce at the end.

    What vegetables work best with this dish?

    Broccoli, bell peppers, snap peas, and bok choy all complement the flavors beautifully. Add them during the last few minutes of cooking for perfect texture.

    How can I make this dish healthier?

    Try using cauliflower rice, light mayo in the sauce, and adding extra vegetables. You can also use ground turkey breast for a leaner protein option.

    Final Thoughts

    This 20 Minute Ground Turkey Bang Bang Rice has become a staple in my kitchen for good reason—it delivers maximum flavor with minimum effort. There’s something magical about how a few simple ingredients transform into such a satisfying meal. I find myself craving that perfect balance of creamy, sweet and spicy bang bang sauce at least once a week! Whether you’re cooking for yourself, your family, or friends, this dish is guaranteed to impress while keeping your sanity intact. Don’t forget to share your creations on Pinterest!

  • 20-Minute One-Pan Turkey Egg Roll Recipe That Will Wow You!

    20-Minute One-Pan Turkey Egg Roll Recipe That Will Wow You!

    20-Minute One-Pan Turkey Egg Roll Recipe That Will Wow You!

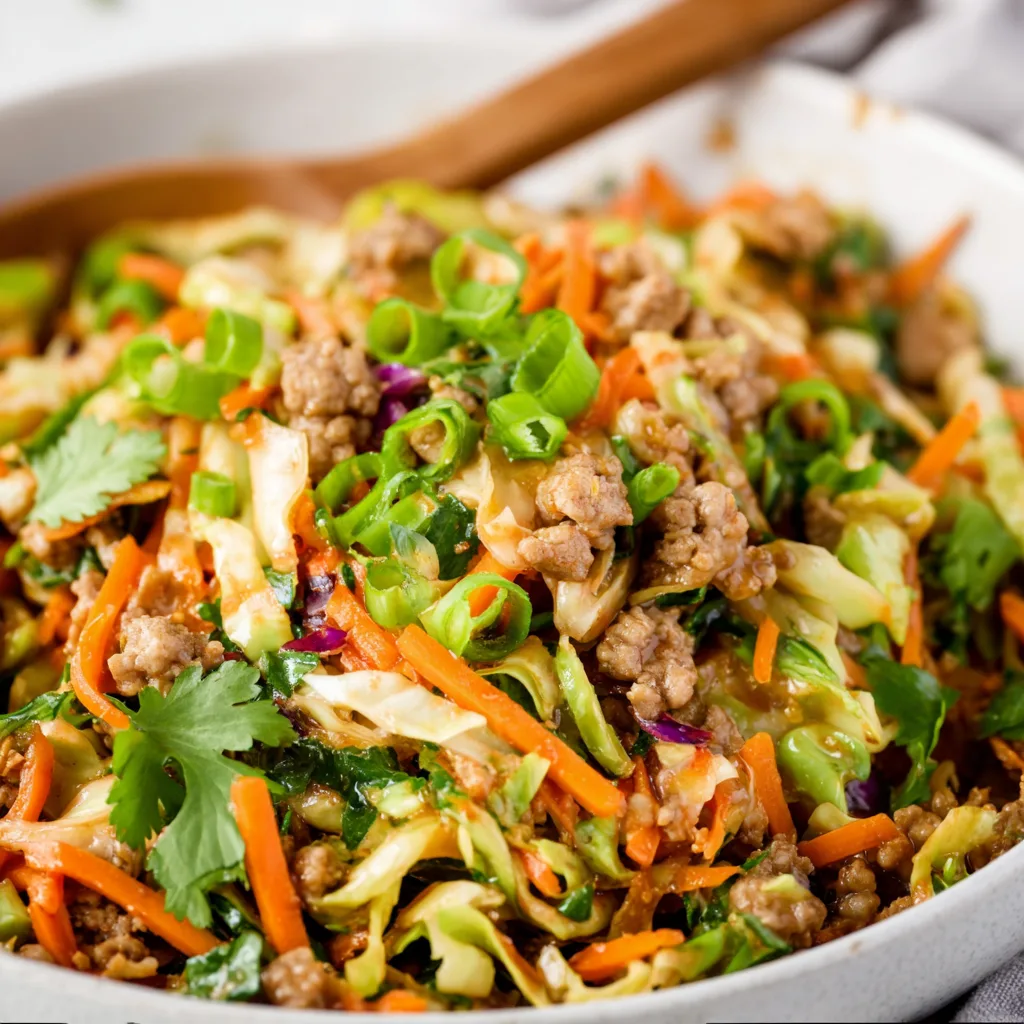
    This 20-Minute One-Pan Turkey Egg Roll is the weeknight dinner solution you’ve been searching for! On those evenings when time is tight but you’re craving something satisfying and flavorful, this dish delivers big time. I discovered this recipe during a particularly hectic week when takeout was tempting me daily. The sizzle of ground turkey hitting the hot pan, the aromatic blend of ginger and garlic, and the crisp vegetables coming together in minutes – it’s pure dinnertime magic that feels like a restaurant-quality meal without the wait or the guilt. Let me show you how this simple dish can transform your busy weeknights!

    Recipe

    Why You’ll Love This 20-Minute One-Pan Turkey Egg Roll

    Perfect Weeknight Time-Saver

    There’s something incredibly satisfying about creating a complete meal in just one pan. As a busy mom who values both flavor and efficiency, I’ve made this 20-Minute One-Pan Turkey Egg Roll part of my regular rotation because it truly delivers on its time-saving promise. The prep work is minimal – just some quick chopping of cabbage and carrots if you don’t buy pre-shredded. While everything cooks, I can help with homework or tidy up the kitchen, making this the ultimate multitasking meal. The best part? The entire process from start to finish takes less time than delivery would!

    Healthier Than Takeout Alternative

    When takeout cravings hit, this dish satisfies without the guilt. Using lean ground turkey instead of traditional pork cuts down on saturated fat while still delivering satisfying protein. The abundance of vegetables – crisp cabbage, sweet carrots, and tender onions – provides fiber and nutrients that typical fried egg rolls lack. I love that I can control the sodium and oil levels, unlike restaurant versions that often leave me feeling bloated. My family gets all the familiar flavors they crave with ingredients I feel good about serving, making this a win-win for everyone at the table.

    Essential Tips & Tricks

    Mastering the Perfect Texture

    The secret to this dish is achieving the right texture balance – vegetables that maintain a slight crispness while being tender enough to enjoy. I’ve learned through trial and error that high heat is your friend here! Start with a very hot pan before adding your turkey to get a nice browning effect. When adding the cabbage, don’t overcrowd the pan – work in batches if needed. The cabbage should wilt but still have a slight crunch when done. If you prefer softer vegetables, simply add 1-2 tablespoons of water and cover for 1-2 minutes toward the end of cooking, similar to how I prepare my Baked Lemon Garlic Tilapia.

    Flavor-Boosting Ingredients

    The signature flavor of this dish comes from a perfect balance of savory, sweet, and umami elements. Don’t skip the fresh ginger and garlic – they create the aromatic foundation that makes this dish special. For an authentic taste, use both soy sauce and sesame oil in the sauce mixture. The sesame oil especially adds that distinctive egg roll flavor that ties everything together. I always keep a bottle of chili garlic sauce in my refrigerator to add a customizable heat level at the table. For a flavor variation, try adding hoisin sauce or a tablespoon of rice vinegar to the mix.

    Serving Ideas & Creative Variations

    Family-Style Presentation Options

    Transform this simple dish into a complete meal with thoughtful presentation. I love serving it in lettuce cups for a fresh, handheld option that my kids actually enjoy. For a more substantial dinner, serve over steamed jasmine rice or cauliflower rice for a low-carb alternative. To make it restaurant-worthy, garnish with sliced green onions, sesame seeds, and lime wedges arranged on a large platter. This presentation style works wonderfully alongside my Asian Garlic Shrimp for an impressive Asian-inspired feast that looks like you spent hours in the kitchen.

    Creative Ingredient Swaps

    Don’t be afraid to make this recipe your own with smart substitutions. Ground chicken works beautifully in place of turkey, or try crumbled tofu for a vegetarian version. The vegetable mix is incredibly flexible – add shredded brussels sprouts, bell peppers, or mushrooms based on what’s in your refrigerator. For a different flavor profile, swap the soy-based sauce for teriyaki or sweet chili sauce. My favorite variation includes adding crushed peanuts and chopped cilantro for a Thai-inspired twist. These simple changes keep the dish exciting even when it appears on your table weekly.

    Storage & Troubleshooting Guide

    Make-Ahead and Leftover Solutions

    This dish is a meal-prep champion that actually improves with time as the flavors meld together. Store leftovers in airtight containers for up to 4 days in the refrigerator. For easy lunches, portion into individual containers alongside some rice or greens. When reheating, add a splash of water to prevent drying out, and a fresh squeeze of lime will brighten all the flavors. You can also freeze portions for up to 3 months – I suggest slightly undercooking the vegetables if you know you’ll be freezing some, as they’ll soften further when reheated.

    Fixing Common Issues

    Even the simplest recipes can sometimes need troubleshooting. If your dish turns out too watery, remember that cabbage releases moisture as it cooks. The solution is to cook uncovered and increase heat to evaporate excess liquid. If it’s too dry, add a tablespoon of chicken broth or water. For flavor balance, keep low-sodium soy sauce and honey on hand – add more soy for saltiness or a drizzle of honey for sweetness. If the turkey seems bland, make sure you’re seasoning it well before adding other ingredients, and don’t be shy with garlic and ginger for that authentic egg roll flavor.

    Frequently Asked Questions

    Can I make this 20-Minute One-Pan Turkey Egg Roll vegetarian?

    Absolutely! Substitute the ground turkey with crumbled extra-firm tofu or tempeh. Press the tofu well before crumbling to remove excess moisture, and consider adding an extra teaspoon of soy sauce for flavor depth.

    What’s the best type of cabbage to use?

    Green cabbage works best for its crisp texture and mild flavor. Napa cabbage is a great alternative for a softer texture. Pre-shredded coleslaw mix works perfectly when you’re really pressed for time.

    Can I prepare components ahead of time?

    Yes! Chop all vegetables and mix the sauce ingredients up to 2 days ahead. Store separately in the refrigerator. The actual cooking should be done just before serving for optimal texture.

    How can I make this spicier?

    Add red pepper flakes during cooking or drizzle with sriracha before serving. For deeper heat, include a minced jalapeño or serrano pepper with the garlic and ginger.

    What’s the best pan to use for this recipe?

    A large, wide skillet or wok works best. Cast iron or stainless steel pans help achieve better browning. Avoid non-stick pans if you want the turkey to develop a flavorful crust.

    Final Thoughts

    This 20-Minute One-Pan Turkey Egg Roll has become my reliable solution for those evenings when time is short but I refuse to compromise on flavor or nutrition. There’s something deeply satisfying about transforming simple ingredients into a meal that satisfies cravings while nourishing my family. The versatility of this dish means it never gets boring, and the quick cleanup afterward is the final gift it keeps giving. I hope this becomes a treasured recipe in your collection too! For more quick dinner ideas, follow me on Pinterest where I share my latest kitchen inspirations.

  • Irish Bangers & Mash Cups: Irresistible Comfort Food Bites!

    Irish Bangers & Mash Cups: Irresistible Comfort Food Bites!

    Irish Bangers & Mash Cups: Irresistible Comfort Food Bites!

    Irish Bangers & Mash Cups transform the beloved pub classic into adorable, portable bites perfect for entertaining! These delightful little cups feature savory sausage nestled in creamy mashed potatoes and baked until golden. The first time I made these for a St. Patrick’s Day gathering, my guests couldn’t stop raving about them. There’s something magical about how the edges of the mashed potatoes get slightly crispy while the centers stay velvety smooth. If you love traditional comfort food with a twist, these Irish Bangers & Mash Cups will quickly become your new favorite party appetizer.

    Recipe

    Why You’ll Love These Irish Bangers & Mash Cups

    Perfect Portable Comfort Food

    These little cups deliver all the cozy satisfaction of traditional bangers and mash in a convenient, handheld format. I adore how they solve the classic problem of serving mashed potatoes at parties—no more awkward balancing acts with plates! Each bite offers the perfect ratio of creamy potatoes to savory sausage, and the slight crispness around the edges adds a textural element you don’t get with the traditional version. Plus, they’re substantial enough to be filling without weighing guests down.

    Make-Ahead Friendly for Entertaining

    One of my favorite things about these Irish Bangers & Mash Cups is their party-perfect timing. You can prep nearly everything in advance—cook and crumble the sausage, prepare the mashed potatoes, and even assemble the cups in muffin tins. Simply refrigerate until about 25 minutes before serving, then pop them in the oven. This make-ahead magic means I can actually enjoy my own gatherings instead of being stuck in the kitchen! The cups reheat beautifully, maintaining their creamy centers and crispy edges.

    Essential Tips & Tricks

    Choosing the Right Ingredients

    The secret to exceptional Irish Bangers & Mash Cups lies in quality ingredients. Use authentic Irish sausages if possible—they contain a distinctive blend of seasonings and have that signature snap when you bite into them. For the mashed potatoes, Yukon Golds create the creamiest texture, but russets work beautifully too. Don’t skimp on butter and a splash of cream! For an extra flavor boost, fold some caramelized onions into your mash, similar to what I do in my Garlic Butter Parmesan Knots recipe for that extra depth of flavor.

    Perfecting the Texture

    The key to the perfect cup structure is achieving the right potato consistency. Too loose, and your cups won’t hold their shape; too stiff, and they’ll be dense and heavy. Add an egg to your mashed potatoes—it helps them set while baking without drying out. For the sausage filling, a medium crumble works best. Too fine, and you lose the meaty texture; too chunky, and the cups become difficult to eat. A light sprinkle of cheese on top creates that irresistible golden crust that makes everyone reach for seconds.

    Serving Ideas & Creative Variations

    Complementary Sides and Sauces

    These Irish Bangers & Mash Cups pair beautifully with tangy accompaniments that cut through their richness. I love serving them with a small dish of grainy mustard or a quick onion gravy for dipping. For a complete meal, add a simple green salad with a light vinaigrette or some roasted Brussels sprouts. The slight bitterness of the vegetables balances the savory cups perfectly. For a truly Irish-inspired spread, serve alongside some Corn Fritters with Whipped Feta for a delightful contrast in flavors and textures.

    Exciting Flavor Twists

    While traditional is delicious, these cups welcome creative adaptations. Try incorporating different cheese varieties—sharp cheddar, smoked gouda, or blue cheese all add wonderful complexity. For a breakfast version, use breakfast sausage and fold some scrambled eggs into the potato mixture. Vegetarian guests? Substitute the meat with sautéed mushrooms and leeks. I’ve even made a spicy version with chorizo and pepper jack cheese that disappeared in minutes at my last gathering! The versatility of this recipe makes it perfect for customizing to your taste preferences.

    Storage & Troubleshooting Guide

    Proper Storage Methods

    These Irish Bangers & Mash Cups maintain their delicious quality remarkably well when stored properly. Refrigerate leftovers in an airtight container for up to 3 days. For best results when reheating, avoid the microwave which can make them soggy. Instead, place them on a baking sheet in a 350°F oven for about 10 minutes until heated through. You can also freeze the baked cups for up to 2 months—simply wrap individually in plastic wrap, then foil, and store in a freezer bag. Thaw overnight in the refrigerator before reheating.

    Common Issues and Solutions

    If your cups aren’t holding their shape, the potato mixture is likely too wet. The fix? Chill assembled cups in the muffin tin for 15-20 minutes before baking to help them set. Brown edges but cold centers? Your oven temperature may be too high—try reducing by 25°F and baking slightly longer. For cups that stick to the pan, be generous with the non-stick spray or butter before adding the potato mixture. And if your cups seem bland, remember that potatoes need plenty of seasoning—don’t be shy with salt, pepper, and herbs!

    Frequently Asked Questions

    What are the best sausages to use for Irish Bangers & Mash Cups?

    Traditional Irish bangers or Cumberland sausages work best. If unavailable, any high-quality pork sausage with minimal fillers will create delicious results. Remove casings before cooking for easier integration into the cups.

    Can I make these Irish Bangers & Mash Cups vegetarian?

    Absolutely! Substitute the sausage with a plant-based alternative or sautéed mushrooms seasoned with sage and thyme. The cups will still be delicious and satisfying.

    How far in advance can I prepare these for a party?

    You can assemble the cups up to 24 hours ahead and refrigerate. Add an extra 5-7 minutes to the baking time if cooking directly from the refrigerator.

    Why are my cups falling apart when removed from the pan?

    Allow the cups to cool for 5 minutes before attempting to remove them. This cooling period helps them set properly and maintain their structure.

    Can I use leftover mashed potatoes for this recipe?

    Yes! Leftover mashed potatoes work wonderfully. Just bring to room temperature, add an egg to help binding, and proceed with the recipe as directed.

    Final Thoughts

    These Irish Bangers & Mash Cups have become my go-to recipe whenever I want to impress guests without spending hours in the kitchen. The combination of crispy-edged potatoes and savory sausage creates an irresistible bite that everyone loves. What makes them truly special is how they transform a humble pub classic into an elegant, portable treat. Whether for St. Patrick’s Day celebrations or casual gatherings, these little cups bring comfort and joy to any table. Don’t forget to check out more festive ideas on Pinterest for your next Irish-inspired feast!

  • High-Protein Strawberry Dip Recipe That Will Wow Your Taste Buds!

    High-Protein Strawberry Dip Recipe That Will Wow Your Taste Buds!

    High-Protein Strawberry Dip Recipe That Will Wow Your Taste Buds!

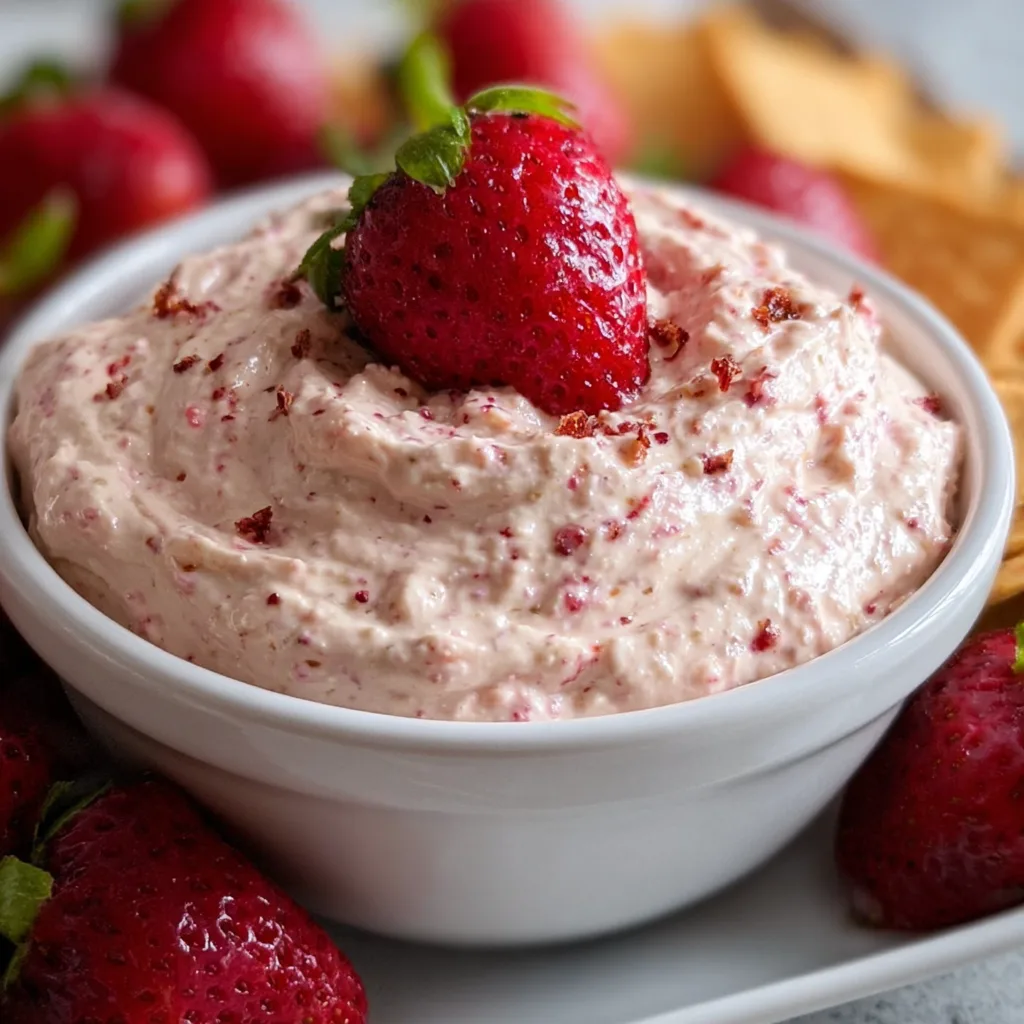
    This High-Protein Strawberry Dip transformed my afternoon snack game completely! I discovered this recipe during my post-workout hunger panic (you know the one—where you’re ready to eat the kitchen cabinet itself). The creamy, protein-packed base blends perfectly with sweet strawberries for a dip that satisfies both my sweet cravings and protein needs. The vibrant pink color makes it Instagram-worthy, while the nutritional profile keeps me feeling energized. It’s become my go-to for entertaining too—my friends always hover around this dip at gatherings, asking for the recipe before they’ve even finished their first scoop! Check out my other protein-packed recipes for more inspiration.

    Recipe

    Why You’ll Love This High-Protein Strawberry Dip

    Perfect Balance of Nutrition and Flavor

    This dip isn’t just pretty—it’s a nutritional powerhouse disguised as a treat. Each serving packs about 10g of protein (depending on your yogurt choice), making it perfect for post-workout recovery or an energizing afternoon snack. The natural sweetness from fresh strawberries means you need minimal added sugar, while the creamy texture feels indulgent without heavy calories. I love how it satisfies my sweet tooth while keeping my nutrition goals on track. The tanginess from the Greek yogurt balances perfectly with the berries, creating that magical sweet-tart combination that keeps you coming back for more.

    Quick Prep for Busy Days

    On those mornings when I’m rushing out the door, this High-Protein Strawberry Dip is my saving grace. It takes just 5 minutes to whip together—literally blend and go! I often make it the night before, which actually improves the flavor as the strawberry essence infuses throughout. The simple ingredient list means I almost always have everything on hand. No complicated techniques or specialty equipment required—just a blender or food processor and a few basic ingredients. This has become my secret weapon for last-minute hosting too—guests never guess how little effort it took!

    Essential Tips & Tricks

    Choosing the Right Ingredients

    The quality of yogurt makes a tremendous difference in this dip. I recommend using a thick Greek yogurt with at least 2% fat for the creamiest texture—non-fat versions can sometimes taste too tangy. For strawberries, fresh is best during peak season, but good-quality frozen berries work wonderfully too (just thaw and drain excess liquid first). If using protein powder, opt for an unflavored or vanilla variety that doesn’t contain artificial sweeteners, which can overpower the natural strawberry flavor. A touch of real maple syrup or honey adds depth that refined sugar simply can’t match. Your dip will only be as good as your ingredients!

    Achieving the Perfect Consistency

    Finding that ideal texture took me a few attempts—too thick and it breaks your crackers, too thin and it slides right off! The secret is adding liquid gradually. Start with the thicker base ingredients, then add your liquid (milk or cream) one tablespoon at a time until you reach your desired consistency. For a fluffier dip, try whipping the yogurt component separately before folding in the strawberry mixture. Temperature matters too—cold ingredients straight from the refrigerator won’t blend as smoothly as those at room temperature. For serving, I love to drizzle a bit of honey on top for that perfect finishing touch.

    Serving Ideas & Creative Variations

    Perfect Pairings for Any Occasion

    This High-Protein Strawberry Dip transforms ordinary snacks into something special. For everyday enjoyment, serve with fresh fruit slices—apple, pear, and banana all work beautifully. When entertaining, I arrange it in a pretty bowl surrounded by graham crackers, vanilla wafers, and pretzel thins for that sweet-salty contrast. For brunch gatherings, it’s divine with mini waffles or pancakes used as dippers! The vibrant color makes it perfect for holiday tables too—Valentine’s Day, Easter, or summer celebrations. I recently served it at my daughter’s birthday alongside chocolate-dipped pretzels, and the kids couldn’t get enough!

    Creative Flavor Twists

    While the classic version is divine, I love experimenting with seasonal variations. In summer, try adding fresh basil or mint for an herbal note that’s unexpectedly refreshing. For fall, a pinch of cinnamon and nutmeg creates a cozy flavor profile. Chocolate lovers can add a tablespoon of cocoa powder for a chocolate-covered strawberry effect that’s absolutely dreamy. For a tropical twist, substitute half the strawberries with mango or pineapple. You can even make it more dessert-like by folding in mini chocolate chips or crushed graham crackers just before serving. The possibilities are endless!

    Storage & Troubleshooting Guide

    Keeping Your Dip Fresh

    This High-Protein Strawberry Dip maintains its optimal freshness for up to three days when stored properly. Always use an airtight container and place it toward the back of your refrigerator where temperatures remain most consistent. A thin layer of plastic wrap pressed directly onto the surface prevents that unappetizing skin from forming. If you notice slight separation after storage, simply give it a quick stir before serving. For meal prep, I portion individual servings into small containers with separate dippers for grab-and-go snacks. The dip may thicken slightly overnight—just add a splash of milk and stir to refresh.

    Common Issues and Easy Fixes

    Even with foolproof recipes, sometimes things don’t go as planned. If your dip turns out too runny, add more Greek yogurt or cream cheese one tablespoon at a time until you reach your desired thickness. Too thick? A splash of milk or cream works wonders. If you find it’s not sweet enough, honey or maple syrup can be added gradually—remember, you can always add more, but you can’t take it away! Experiencing graininess? That’s likely from protein powder not fully incorporating. The fix: blend longer or try mixing the powder with a little liquid first before adding to other ingredients.

    Frequently Asked Questions

    Can I make this High-Protein Strawberry Dip dairy-free?

    Absolutely! Substitute Greek yogurt with coconut yogurt or silken tofu. Add an extra tablespoon of protein powder to compensate for the lower protein content in plant-based alternatives.

    How can I increase the protein content even more?

    Mix in additional unflavored protein powder (start with 1 tablespoon) or replace part of the yogurt with cottage cheese that’s been blended until smooth for extra protein without changing the flavor significantly.

    Will frozen strawberries work in this recipe?

    Yes! Thaw completely and drain excess liquid before using. Frozen strawberries are actually ideal when fresh aren’t in season, as they’re picked at peak ripeness.

    How do I prevent the dip from becoming too watery?

    If using fresh strawberries, hull and slice them, then let sit on paper towels for 10 minutes to remove excess moisture. For frozen berries, thaw in a strainer to drain liquid.

    Can I prepare this dip in advance for a party?

    Definitely! Make it up to 24 hours ahead. The flavors actually develop nicely with time. Give it a quick stir before serving to refresh the consistency.

    Final Thoughts

    This High-Protein Strawberry Dip has become more than just a recipe in my kitchen—it’s a solution for healthy snacking, quick entertaining, and satisfying sweet cravings without derailing my nutrition goals. The versatility means it works for everything from kids’ lunchboxes to elegant brunches. I love watching friends’ faces light up when they taste it for the first time! For more delicious inspiration, follow me on Pinterest where I share new protein-packed recipes weekly. What will you serve with your strawberry dip first?

  • Fluffy Garlic Butter Bread Rolls That Melt Hearts Instantly

    Fluffy Garlic Butter Bread Rolls That Melt Hearts Instantly

    Fluffy Garlic Butter Bread Rolls That Melt Hearts Instantly

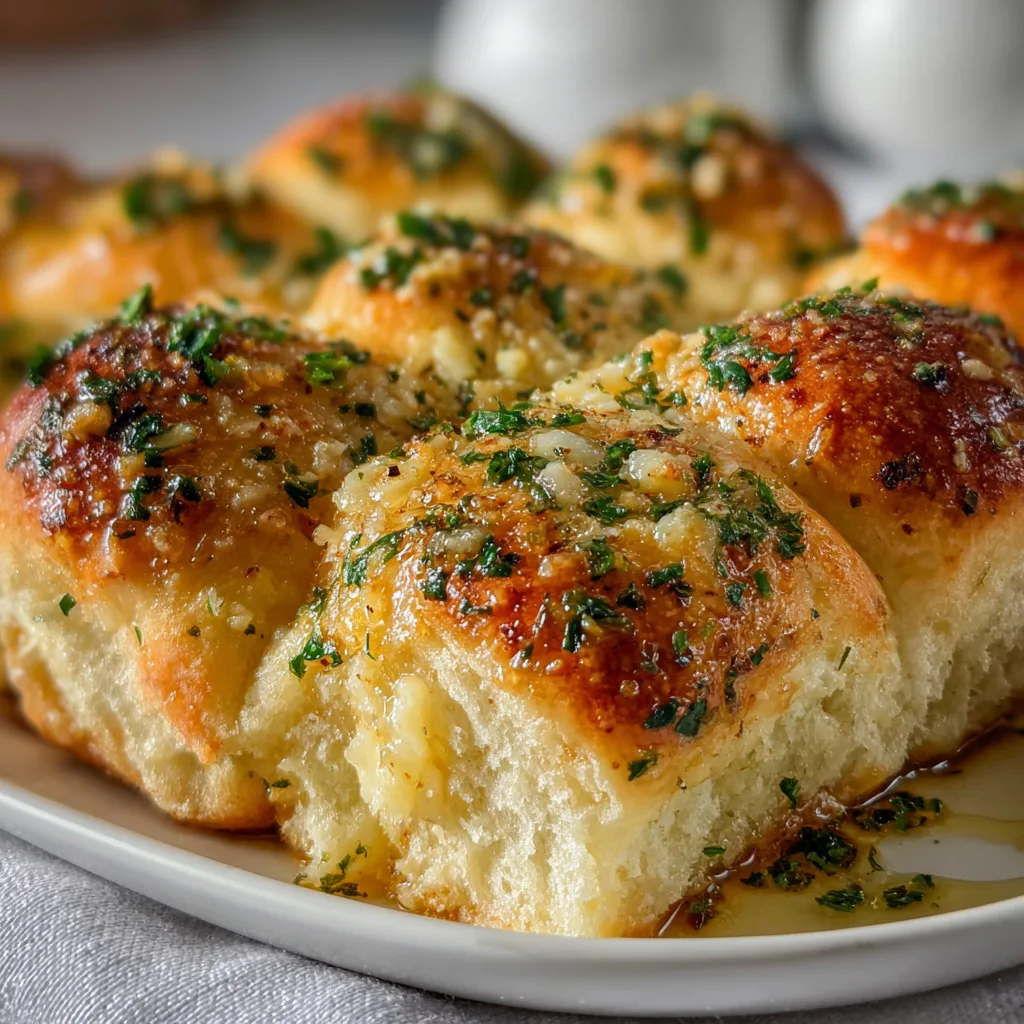
    Fluffy Garlic Butter Bread Rolls have completely transformed my weekend dinner gatherings. There’s something almost magical about pulling apart a warm, pillowy roll and watching that melted garlic butter stretch between the pieces. The heavenly aroma fills my kitchen, making everyone gravitate toward the dining table before I’ve even called them! These rolls strike that perfect balance between soft interior and slightly crisp exterior, with a rich buttery flavor that pairs beautifully with practically any meal. Trust me, once you’ve mastered these homemade rolls, store-bought versions will never satisfy again.

    Recipe

    Why You’ll Love These Fluffy Garlic Butter Bread Rolls

    Perfect Texture Every Time

    The secret to these rolls lies in their cloud-like texture that somehow manages to be both substantial and light as air. I spent months perfecting this recipe, testing different flour-to-liquid ratios until I found the sweet spot. The dough develops just enough gluten to create structure but remains tender through careful handling. When you tear into one, you’ll notice those beautiful stretchy layers inside – that’s the sign of perfectly developed dough. The exterior browns to a gorgeous golden shade while the interior stays pillowy and moist. It’s this textural contrast that makes them utterly irresistible.

    Flavor That Elevates Any Meal

    These aren’t just any dinner rolls – they’re a flavor experience. The garlic butter doesn’t just sit on top but infuses throughout each roll, creating pockets of savory goodness. I use a combination of fresh garlic for punch and roasted garlic for depth, creating a complex flavor profile that’s never overwhelming. A touch of herbs (I love rosemary and thyme) adds an aromatic quality that makes these rolls distinctive. The slight sweetness in the dough balances the savory elements perfectly. These rolls don’t just accompany your meal – they elevate everything on the plate.

    Essential Tips & Tricks

    Mastering the Dough

    Achieving that perfect pillowy texture starts with proper technique. I always bring my ingredients to room temperature – cold eggs or milk can inhibit yeast activity. When kneading, look for the “window pane test” – stretch a small piece of dough until it’s thin enough to see light through without tearing. This indicates well-developed gluten. Don’t rush the rise times! Those bubbles create the airy texture we’re after. I place my dough in a warm (not hot) spot, around 75°F. If your kitchen is cool, try placing the bowl near (not on) a preheating oven or use the proofing setting if your oven has one.

    The Perfect Garlic Butter Finish

    The garlic butter topping is what transforms good rolls into unforgettable ones. I melt unsalted butter (always unsalted – it gives you control over the final flavor) and add minced garlic while it’s still warm but not hot enough to burn the garlic. Let this mixture infuse for 5-10 minutes before brushing on the rolls. Apply butter twice – once before baking and once immediately after they come out of the oven. That second application is crucial as it soaks into the warm rolls, creating that signature moist, flavorful finish. A final sprinkle of flaky salt adds the perfect textural contrast and flavor pop.

    Serving Ideas & Creative Variations

    Perfect Pairings

    These rolls are versatile enough to complement almost any meal. They’re particularly magical alongside hearty soups where they can soak up all those delicious flavors – I especially love them with my Thick and Creamy Tomato Soup. For holiday dinners, they’re substantial enough to stand up to gravies and sauces without falling apart. They also make incredible sandwich buns for leftover roasted meats – slice them horizontally and toast lightly. For a simple but impressive appetizer, serve warm with a dish of seasoned olive oil for dipping. The slight sweetness in the dough makes them equally at home with savory and sweet accompaniments.

    Exciting Flavor Twists

    While the classic garlic butter version is my go-to, these rolls welcome creative variations. For a cheesy version, fold grated parmesan or asiago into the dough and sprinkle more on top before baking. Herb lovers can add chopped fresh herbs like rosemary, thyme, or chives directly into the dough. For a sweeter take, brush with honey butter instead of garlic butter – perfect for breakfast. My family goes wild for the everything bagel version where I brush with butter and sprinkle with everything bagel seasoning. You can even stuff them with cheese cubes before the second rise for an indulgent surprise center.

    Storage & Troubleshooting Guide

    Keeping Rolls Fresh

    To maintain that just-baked quality, store completely cooled rolls in an airtight container at room temperature for up to 3 days. For longer storage, freeze them! I place cooled rolls in a ziplock bag, remove as much air as possible, and freeze for up to 3 months. To reheat, wrap frozen rolls in foil and warm in a 300°F oven for about 10-15 minutes until heated through. For the freshest taste, I sometimes freeze the shaped dough before the second rise, then thaw overnight in the refrigerator and let rise at room temperature before baking. This gives you that magical fresh-baked experience without starting from scratch.

    Solving Common Problems

    If your rolls aren’t as fluffy as expected, there are several potential fixes. Dense rolls usually mean insufficient rising time or inactive yeast – always test your yeast in warm water with a pinch of sugar before starting. If the rolls are spreading too much rather than rising upward, your dough might be too wet; add a tablespoon of flour at a time until it feels tacky but not sticky. For rolls that brown too quickly before cooking through, tent them with foil halfway through baking. If your garlic butter burns, reduce the oven temperature slightly and place the rolls on a higher rack away from the heating element.

    Frequently Asked Questions

    Can I make these Fluffy Garlic Butter Bread Rolls ahead of time?

    Absolutely! Prepare the dough through shaping, then refrigerate overnight for the second rise. The next day, bring to room temperature for 30 minutes before baking for fresh rolls without the wait.

    Can I use instant yeast instead of active dry?

    Yes! Use the same amount but skip the proofing step. Add instant yeast directly to your dry ingredients and proceed with the recipe as written.

    Why didn’t my rolls rise properly?

    Your yeast might be old, or your liquid was too hot and killed it. Also check your rising environment—yeast loves a warm (not hot) spot around 75-80°F.

    How can I make these rolls dairy-free?

    Replace butter with olive oil or plant-based butter, and substitute the milk with almond or oat milk. The texture will be slightly different but still delicious.

    Can I freeze the dough instead of baked rolls?

    Yes! Freeze after shaping but before the second rise. Thaw overnight in the refrigerator, then let rise at room temperature before baking.

    Final Thoughts

    These Fluffy Garlic Butter Bread Rolls have become my signature contribution to family gatherings, with relatives requesting them by name. There’s something deeply satisfying about watching people close their eyes with that first warm, buttery bite. The recipe strikes that perfect balance between impressive and achievable – fancy enough for special occasions yet simple enough for weekend dinners. I hope these rolls bring the same joy to your table as they have to mine. Don’t forget to share your creations on Pinterest – I’d love to see your beautiful golden rolls!

  • Chocolate-Dipped Strawberry Graham Sandwiches: Irresistibly Delicious Treats!

    Chocolate-Dipped Strawberry Graham Sandwiches: Irresistibly Delicious Treats!

    Chocolate-Dipped Strawberry Graham Sandwiches: Irresistibly Delicious Treats!

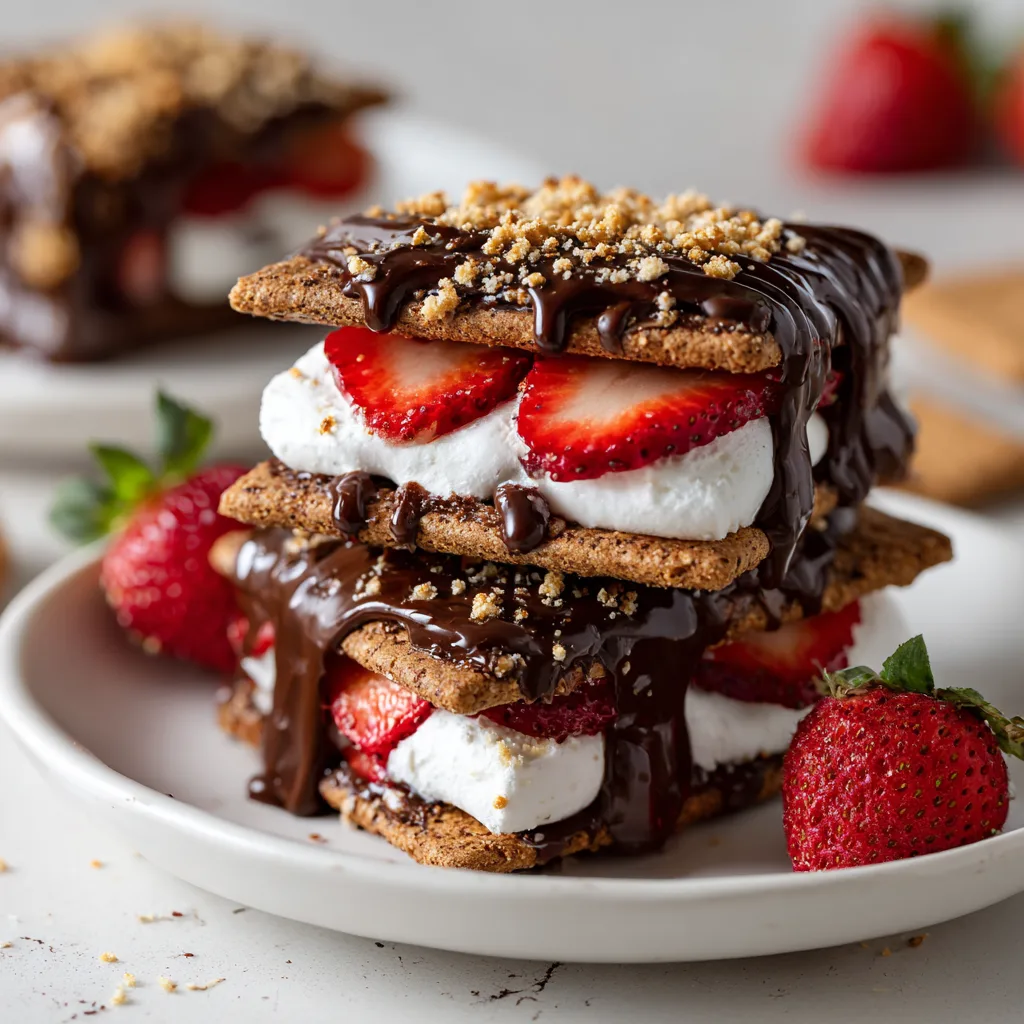
    Chocolate-Dipped Strawberry Graham Sandwiches are my summer obsession, combining the perfect trio of juicy strawberries, creamy filling, and chocolate decadence. These adorable little treats remind me of the strawberry shortcake bars I’d beg for from the ice cream truck, but with a homemade touch that makes them even more special. The first time I made these for a backyard gathering, they disappeared faster than I could refill the platter! There’s something magical about the way the chocolate shell cracks open to reveal the sweet berry treasure inside. If you love easy no-bake desserts that still feel fancy, you need to try these strawberry shortcake cheesecake bars too!

    Recipe

    Why You’ll Love These Chocolate-Dipped Strawberry Graham Sandwiches

    Perfect Balance of Flavors and Textures

    These little sandwich treats hit all the right notes – the crumbly graham crackers provide that perfect cookie-like base while the chocolate coating adds a satisfying snap. What I adore most is how the strawberry juice slowly softens the graham crackers just enough without making them soggy. The contrast between the cool, juicy strawberry and the sweet chocolate coating creates this perfect summer bite. I’ve caught guests closing their eyes with each bite – they’re that good! The creamy filling adds another dimension that brings everything together in perfect harmony.

    Impressive Yet Incredibly Simple

    Don’t let their elegant appearance fool you – these treats require zero baking skills! All you need is about 20 minutes of active prep time and some patience during the chilling process. The assembly process is actually therapeutic, and I often enlist my nieces to help dip them in chocolate. They’re perfect for summer gatherings when you don’t want to turn on the oven, yet they look like you spent hours crafting them. Your guests will think you’re a dessert genius while you secretly know how effortless they were to make.

    Essential Tips & Tricks

    Perfecting the Chocolate Coating

    The secret to a flawless chocolate coating is all in the temperature and consistency. I recommend using high-quality chocolate melting wafers rather than chocolate chips, as they’re designed to melt smoothly without requiring tempering. If the chocolate seems too thick for dipping, add 1-2 teaspoons of coconut oil or shortening to thin it out. For that professional-looking finish, let excess chocolate drip off completely before placing on parchment paper. A fork works perfectly for dipping, allowing excess to flow through the tines. Try these techniques with my easy chocolate cream pie for equally impressive results!

    Strawberry Selection and Preparation

    Not all strawberries are created equal for this recipe! Look for medium-sized berries that are bright red throughout with no white shoulders. They should be firm but fragrant – those pale, giant strawberries often lack flavor. Before slicing, ensure berries are completely dry by gently patting with paper towels. Any moisture will prevent the filling from adhering properly. I like to slice them about ¼-inch thick, which gives the perfect berry-to-cracker ratio. For consistent sizing, use a strawberry huller to remove the stems without wasting any precious fruit.

    Serving Ideas & Creative Variations

    Presentation That Wows

    Transform these simple treats into an Instagram-worthy dessert board! Arrange your chocolate-dipped strawberry graham sandwiches in concentric circles on a round platter, or create a stunning dessert tower by stacking them pyramid-style. For special occasions, dust with edible gold shimmer or drizzle with white chocolate in contrasting patterns. I love serving them alongside fresh mint sprigs and extra berries for a pop of color. At my last summer party, I created individual dessert plates with a sandwich, a scoop of vanilla bean ice cream, and a light drizzle of hot honey for an unexpected sweet-heat finish.

    Flavor Twists and Adaptations

    While the classic version is divine, don’t be afraid to experiment! Try infusing the cream with lavender, orange zest, or even a splash of bourbon for sophisticated flavor notes. For a tropical twist, substitute sliced mangoes or pineapple for strawberries and add toasted coconut to the outer chocolate coating. A mint-chocolate version with fresh mint leaves tucked inside is refreshing for summer. For a decadent holiday adaptation, try adding crushed peppermint to the coating or swapping in cranberry slices with white chocolate. The basic technique remains the same while the flavor possibilities are endless.

    Storage & Troubleshooting Guide

    Keeping Them Fresh and Perfect

    These treats are at their absolute best when enjoyed within 4-6 hours of assembly. The graham crackers will gradually soften as they absorb moisture from the filling and strawberries. To store leftovers, place them in a single layer in an airtight container in the refrigerator for up to 24 hours. I don’t recommend freezing them, as the strawberries will release too much moisture upon thawing. If you need to make components ahead, prepare the filling up to 2 days in advance and keep the chocolate coating at room temperature, reheating gently when ready to dip.

    Fixing Common Issues

    If your chocolate coating cracks or appears dull, the temperature was likely too high during melting. Next time, use the double-boiler method and remove from heat while a few chocolate pieces remain, letting residual heat finish the melting process. For sandwiches that fall apart during dipping, try freezing them for 10 minutes first to firm up the filling. If your filling is too runny, whip it longer or add an extra tablespoon of powdered sugar. For strawberries that release too much juice, try the blotting technique: place sliced berries on paper towels for 5 minutes before assembly to wick away excess moisture.

    Frequently Asked Questions

    Can I make Chocolate-Dipped Strawberry Graham Sandwiches ahead of time?

    For best results, assemble no more than 4-6 hours before serving. The graham crackers will gradually soften from the strawberry moisture, changing the texture over time.

    What’s the best chocolate to use for dipping?

    High-quality chocolate melting wafers work best as they’re formulated for smooth melting and set with a nice snap. Ghirardelli or Merckens brands are my favorites.

    Can I use frozen strawberries for this recipe?

    I don’t recommend frozen strawberries as they release too much moisture when thawed, making the crackers soggy and the filling runny.

    How do I keep the filling from squeezing out when I bite into them?

    Chill the assembled sandwiches for 15-20 minutes before dipping in chocolate. This firms up the filling and helps everything stay together.

    What can I substitute for graham crackers?

    Digestive biscuits, shortbread cookies, or vanilla wafers all work beautifully as alternatives to graham crackers in this recipe.

    Final Thoughts

    These Chocolate-Dipped Strawberry Graham Sandwiches have become my signature summer dessert for good reason. They capture everything wonderful about the season – fresh berries, no-bake convenience, and that perfect balance of indulgence and lightness. What I love most is watching people’s faces light up when they take that first bite and discover all the layers of flavor and texture. Whether you’re hosting a backyard barbecue or just treating yourself on a warm evening, these little treasures bring pure joy in every bite. Don’t forget to check out more delicious treats on Pinterest for year-round inspiration!

  • Fresh Thai Peanut Chicken Wrap – Irresistibly Bold & Tasty!

    Fresh Thai Peanut Chicken Wrap – Irresistibly Bold & Tasty!

    Fresh Thai Peanut Chicken Wrap – Irresistibly Bold & Tasty!

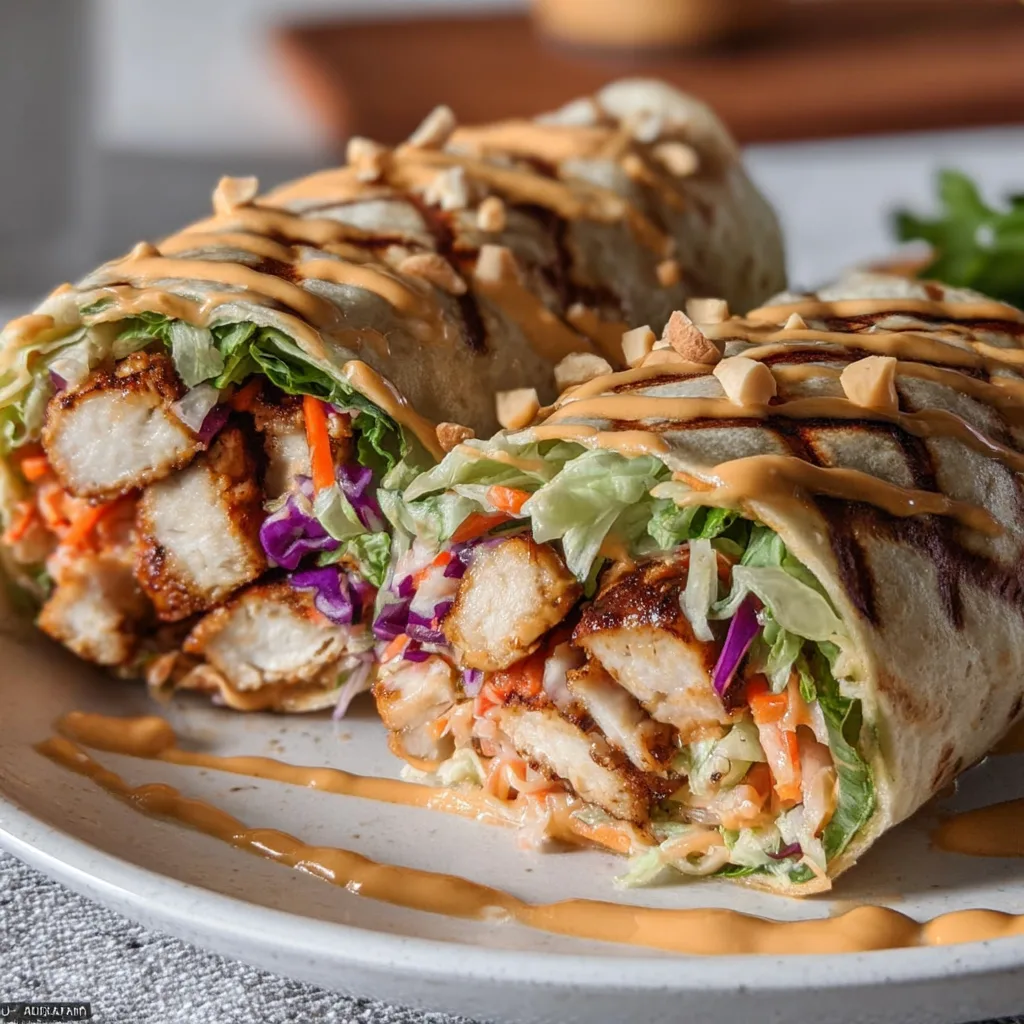
    Fresh Thai Peanut Chicken Wrap has become my absolute go-to lunch when I’m craving something vibrant yet satisfying. The first time I made these wraps, the aromatic blend of peanut sauce and lime instantly transported me to the bustling streets of Bangkok. There’s something magical about the combination of tender chicken, crunchy vegetables, and that creamy, slightly spicy peanut sauce that makes each bite a perfect balance of textures and flavors. If you’ve been stuck in a lunch rut lately, these wraps are your delicious escape from the ordinary. They’re quick enough for busy weekdays but impressive enough for weekend gatherings with friends who appreciate good food with bold flavors.

    Recipe

    Why You’ll Love This Fresh Thai Peanut Chicken Wrap

    Perfect Balance of Flavors and Textures

    What makes these Fresh Thai Peanut Chicken Wraps truly special is the harmonious dance of flavors and textures in every bite. The creamy peanut sauce delivers that perfect balance of sweet, savory, and spicy notes that Thai cuisine is famous for. I love how the crunch of fresh vegetables contrasts with the tender chicken and soft wrap. The first time I served these at a family gathering, my brother-in-law (who claims to dislike “fancy food”) asked for seconds and then the recipe! That’s when I knew these wraps were something special – they’re sophisticated enough to impress food lovers but accessible enough for everyone to enjoy.

    Quick and Customizable Meal Solution

    These wraps have saved my weeknight dinner plans more times than I can count! In just 20 minutes, you can have a complete meal that feels thoughtful and nourishing. I keep cooked chicken and pre-chopped veggies in my fridge specifically for these wraps. The beauty lies in their adaptability – swap in rotisserie chicken when you’re extra pressed for time, or use tofu for a vegetarian version that’s equally delicious. My daughter prefers hers less spicy, while my husband adds extra sriracha. The wraps become a canvas for personal preference while maintaining that distinctive Thai-inspired flavor profile that makes them special.

    Essential Tips & Tricks

    Perfecting Your Peanut Sauce

    The secret to exceptional Thai peanut chicken wraps lies in the sauce! For the smoothest texture, I recommend using natural creamy peanut butter without added sugar. Warm it slightly before mixing with other ingredients – this prevents that frustrating clumping that can happen with cold peanut butter. Don’t skip the lime juice; it cuts through the richness and brightens everything. I learned this trick from a Thai cooking class: add the soy sauce gradually while tasting. This way, you’ll achieve the perfect balance of salty, sweet, and tangy notes that make these wraps irresistible. Similar to my Chicken Shawarma with Yogurt Sauce, the sauce makes all the difference.

    Prep Strategies for Maximum Flavor

    For truly exceptional wraps, marinate your chicken in a tablespoon of the peanut sauce for at least 15 minutes before cooking. This infuses the protein with flavor from the inside out. When slicing vegetables, aim for uniform, matchstick cuts – they wrap more easily and provide consistent texture in each bite. I like to slightly warm my tortillas or wraps before assembling; this makes them more pliable and prevents tearing. If preparing for a crowd, set up a DIY wrap station with all components separately. This not only looks impressive but allows everyone to customize their wrap with exactly what they love, making the meal interactive and fun!

    Serving Ideas & Creative Variations

    Perfect Pairings for a Complete Meal

    These Fresh Thai Peanut Chicken Wraps shine as a standalone meal, but thoughtful sides can elevate the experience. I love serving them with a simple cucumber salad dressed with rice vinegar and a touch of honey – the cooling crunch complements the wraps beautifully. For a heartier meal, coconut rice makes an excellent accompaniment, soaking up any extra peanut sauce that escapes. When entertaining, I arrange the wraps on a platter surrounded by fresh lime wedges, chopped cilantro, and extra sauce for dipping. For an impressive spread, consider adding my Roasted Tomato Salsa as an additional dipping option – the acidity cuts through the richness of the peanut sauce perfectly.

    Exciting Flavor Variations to Try

    Don’t be afraid to experiment with these versatile wraps! My favorite variation adds thinly sliced mango for a sweet-savory contrast that’s absolutely divine. For a seafood twist, substitute the chicken with grilled shrimp – the sweetness of shrimp pairs wonderfully with the peanut sauce. Vegetarians can enjoy these wraps with crispy tofu or tempeh instead of chicken. For extra texture, try adding crushed peanuts, fried shallots, or even crispy wonton strips. When I’m feeling adventurous, I’ll incorporate lemongrass or Thai basil into the sauce for an authentic street food flavor. The beauty of these wraps is their flexibility – they’re a perfect canvas for culinary creativity!

    Storage & Troubleshooting Guide

    Keeping Components Fresh for Meal Prep

    For meal prep success, store the components of your Thai peanut chicken wraps separately. The peanut sauce will keep in an airtight container in the refrigerator for up to 5 days – just give it a good stir before using, as natural separation may occur. If it thickens too much, add a splash of warm water to restore the creamy consistency. Cooked chicken stays fresh for 3-4 days when properly refrigerated. I like to prep all my vegetables at once but store them separately to maintain their distinct textures. Bell peppers and carrots will stay crisp for days, while cucumber and leafy greens are best prepared closer to serving time to prevent wilting.

    Solving Common Wrap Challenges

    The most common issue with these wraps is overfilling, which leads to tearing and difficult eating. The solution is simple: use slightly less filling than you think you need and fold tightly but gently. If your wraps are still tearing, try double-wrapping with two tortillas or using slightly warmed wraps for more flexibility. For sauce that’s too thick, add a tablespoon of warm water at a time until you reach your desired consistency. Too thin? Add more peanut butter. If your sauce lacks punch, a splash of rice vinegar or extra lime juice will brighten the flavors. And remember – if your wrap completely falls apart, simply serve the components as a delicious Thai chicken bowl instead!

    Frequently Asked Questions

    Can I make Fresh Thai Peanut Chicken Wraps ahead of time?

    Yes! Prepare the peanut sauce and cook the chicken up to 3 days ahead. Store components separately and assemble just before eating to prevent soggy wraps. For grab-and-go lunches, wrap tightly in parchment paper then foil.

    What’s the best wrap to use for these?

    Large flour tortillas work perfectly, but rice paper wrappers offer an authentic Southeast Asian twist. Lettuce leaves create a lighter, low-carb option, while spinach or herb tortillas add extra flavor and visual appeal.

    How can I make these wraps vegetarian?

    Substitute the chicken with firm tofu (pressed and pan-fried until crispy), tempeh, or roasted chickpeas. The peanut sauce is already vegetarian-friendly and provides plenty of protein and flavor.

    Are these wraps spicy?

    The spice level is customizable. For mild wraps, omit the sriracha in the peanut sauce. For extra heat, add more sriracha or include thinly sliced fresh jalapeños in your vegetable mix.

    Can I freeze components of these wraps?

    The peanut sauce freezes well for up to 3 months in ice cube trays for portion control. Cooked chicken can also be frozen, but fresh vegetables should always be prepared just before assembly.

    Final Thoughts

    The Fresh Thai Peanut Chicken Wrap has become more than just a recipe in my kitchen—it’s a reliable solution for flavorful, balanced meals that never disappoint. What I love most is how these wraps bring a touch of culinary adventure to everyday eating without requiring complicated techniques or hard-to-find ingredients. They remind us that delicious, globally-inspired food can be accessible and quick. Whether you’re meal prepping for the week ahead or looking to impress dinner guests, these wraps deliver big on flavor while keeping preparation simple. For more inspiration, check out my other recipes on Pinterest and keep exploring the wonderful world of fusion flavors!

  • Baked BBQ Sausages in Oven – Juicy, Easy & Irresistible!

    Baked BBQ Sausages in Oven – Juicy, Easy & Irresistible!

    Baked BBQ Sausages in Oven – Juicy, Easy & Irresistible!

    Baked BBQ Sausages in the oven have become my go-to dinner solution on those evenings when I’m craving something hearty but don’t have the energy for anything complicated. There’s something magical about the way the oven transforms those humble links into caramelized, juicy morsels of deliciousness. I first discovered this method during a rainy Sunday when grilling outside wasn’t an option, and honestly? The oven-baked version might be even better! The edges get perfectly crisp while the inside stays tender and bursting with flavor. If you’ve been looking for a foolproof way to cook sausages, this method from my kitchen collection is about to become your new favorite.

    Recipe

    Why You’ll Love These Baked BBQ Sausages in Oven

    Perfect Texture Every Time

    The magic of oven-baking sausages lies in the consistent heat that surrounds them, creating that ideal balance of crispy exterior and juicy interior. Unlike pan-frying, where I always struggled with uneven cooking or burned spots, the oven method delivers perfection every time. I still remember serving these at a family gathering and watching my brother-in-law’s eyes widen with that first bite. The gentle heat allows the fat to render slowly, basting the sausages from within while the BBQ sauce caramelizes into a sticky, flavorful glaze. Trust me, once you try this method, you’ll never go back to standing over a splattering stovetop.

    Minimal Effort, Maximum Flavor

    What truly won me over about these BBQ sausages is how ridiculously easy they are to prepare. On busy weeknights when I’m juggling work emails and helping with homework, I can simply line a baking sheet, arrange the sausages, brush with sauce, and let the oven work its magic. No constant flipping or monitoring required! The hands-off cooking time gives me precious minutes to throw together a quick side dish or simply catch my breath. And the flavor payoff? Absolutely worth the minimal effort. The BBQ sauce concentrates and caramelizes, creating deep, complex flavors that taste like you’ve been cooking all day.

    Essential Tips & Tricks

    Choosing the Right Sausages

    The foundation of amazing baked sausages starts with selecting the right variety. I’ve experimented with everything from spicy Italian to sweet apple varieties, and they all work beautifully with this method. For the richest flavor, look for sausages with at least 15-20% fat content – this keeps them juicy during the baking process. My personal favorite? A good quality pork and fennel sausage that pairs perfectly with sweet BBQ sauce. Fresh sausages will always give you the best texture, but even pre-cooked varieties benefit from this baking method. Just remember to reduce the cooking time slightly if using pre-cooked options to prevent them from drying out.

    Perfecting Your BBQ Glaze

    The secret to truly exceptional oven-baked sausages lies in the BBQ glaze. While store-bought sauce works perfectly, I love to doctor mine up with a tablespoon of honey and a splash of apple cider vinegar for that perfect sweet-tangy balance. Apply your sauce in layers – start with a light coating before baking, then add a second layer halfway through cooking for maximum flavor impact. For an extra special touch that I learned from my Baked Chicken Kabobs recipe, try mixing in a teaspoon of smoked paprika or a dash of bourbon to your BBQ sauce. These little tweaks elevate the humble sausage into something truly crave-worthy.

    Serving Ideas & Creative Variations

    Family-Friendly Meal Pairings

    These BBQ sausages are incredibly versatile when it comes to creating complete meals. My family’s favorite pairing is with creamy mashed potatoes that soak up all that delicious sauce – I’ve literally seen my kids use their potatoes as a vehicle to scoop up every last bit from their plates! For a lighter option, try serving alongside a crisp coleslaw with a tangy dressing to cut through the richness. Roasted vegetables like bell peppers and zucchini complement the smoky flavors beautifully, or go classic with some Parmesan Garlic Rice for a crowd-pleasing combination. Don’t forget some crusty bread to mop up those irresistible pan juices!

    Exciting Flavor Twists

    While classic BBQ sauce is always a winner, these oven-baked sausages are the perfect canvas for flavor experimentation. For an Asian-inspired version, try glazing with a mixture of hoisin sauce, ginger, and a drizzle of honey. Mediterranean flavors work beautifully too – a combination of oregano, lemon zest, and olive oil creates a bright, herbaceous profile. My personal favorite twist came from a happy accident when I was out of BBQ sauce – I used a blend of maple syrup, Dijon mustard, and a pinch of cayenne pepper. The sweet-heat combination was so good it’s now in regular rotation! Don’t be afraid to customize based on what your family loves.

    Storage & Troubleshooting Guide

    Proper Storage Solutions

    Storing leftover baked sausages properly ensures they remain just as delicious the next day. Allow them to cool completely before transferring to an airtight container – this prevents condensation that can make them soggy. They’ll keep beautifully in the refrigerator for up to 3 days. For longer storage, these sausages freeze surprisingly well! I often make a double batch specifically for freezing. Wrap individual sausages in parchment paper before placing in a freezer bag to prevent them from sticking together. When reheating, avoid the microwave if possible – a few minutes in a 350°F oven will restore their delicious texture without drying them out.

    Fixing Common Issues

    Even the simplest recipes can sometimes go awry, but most BBQ sausage mishaps are easily fixed. If your sausages are browning too quickly but aren’t cooked through, simply lower the oven temperature by 25 degrees and cover loosely with foil to prevent further browning. For sausages that burst during cooking (releasing all those precious juices), try pricking them lightly with a fork before baking next time. If your BBQ glaze is burning rather than caramelizing, it likely contains too much sugar – try mixing your sweet sauce with a bit of broth or water to dilute it slightly. Remember that different ovens vary in temperature, so your first batch may require some timing adjustments.

    Frequently Asked Questions

    What temperature should I bake sausages in the oven?

    For perfect baked BBQ sausages in the oven, preheat to 400°F (200°C). This temperature creates the ideal balance of caramelized exterior while ensuring the inside cooks through properly without drying out.

    How long do sausages take to cook in the oven?

    Fresh sausages typically need 25-30 minutes at 400°F, turning halfway through. Thicker sausages may require up to 35 minutes. Always check for an internal temperature of 160°F to ensure they’re fully cooked.

    Can I use frozen sausages for this recipe?

    Yes! Add 5-10 minutes to the cooking time and skip the initial sauce application. Apply BBQ sauce only after the first 15 minutes when they’ve thawed in the oven.

    What’s the best way to prevent sausages from drying out?

    Avoid pricking the sausages before baking to keep juices inside. Place them on a rack over a baking sheet so they cook in their own fat, and don’t overcook beyond 160°F internal temperature.

    Can I make these sausages ahead for a party?

    Absolutely! Bake them 80% of the way through, then refrigerate. Before serving, finish in a 375°F oven for 10-15 minutes with a fresh application of BBQ sauce for a perfect glaze.

    Final Thoughts

    These baked BBQ sausages in the oven have truly become a staple in my cooking repertoire – the perfect balance of effortless preparation and impressive results. There’s something deeply satisfying about pulling a tray of gorgeously caramelized sausages from the oven, knowing that such minimal effort produced something so delicious. Whether you’re feeding a hungry family on a weeknight or entertaining friends on the weekend, this method delivers consistent, crave-worthy results. I hope you’ll give these oven-baked sausages a try and discover just how simple and rewarding they can be! For more delicious inspiration, check out my Pinterest collection.