Blog

  • Crispy Homemade Chicken Spring Rolls: Irresistibly Crunchy & Juicy!

    Crispy Homemade Chicken Spring Rolls: Irresistibly Crunchy & Juicy!

    Crispy Homemade Chicken Spring Rolls: Irresistibly Crunchy & Juicy!

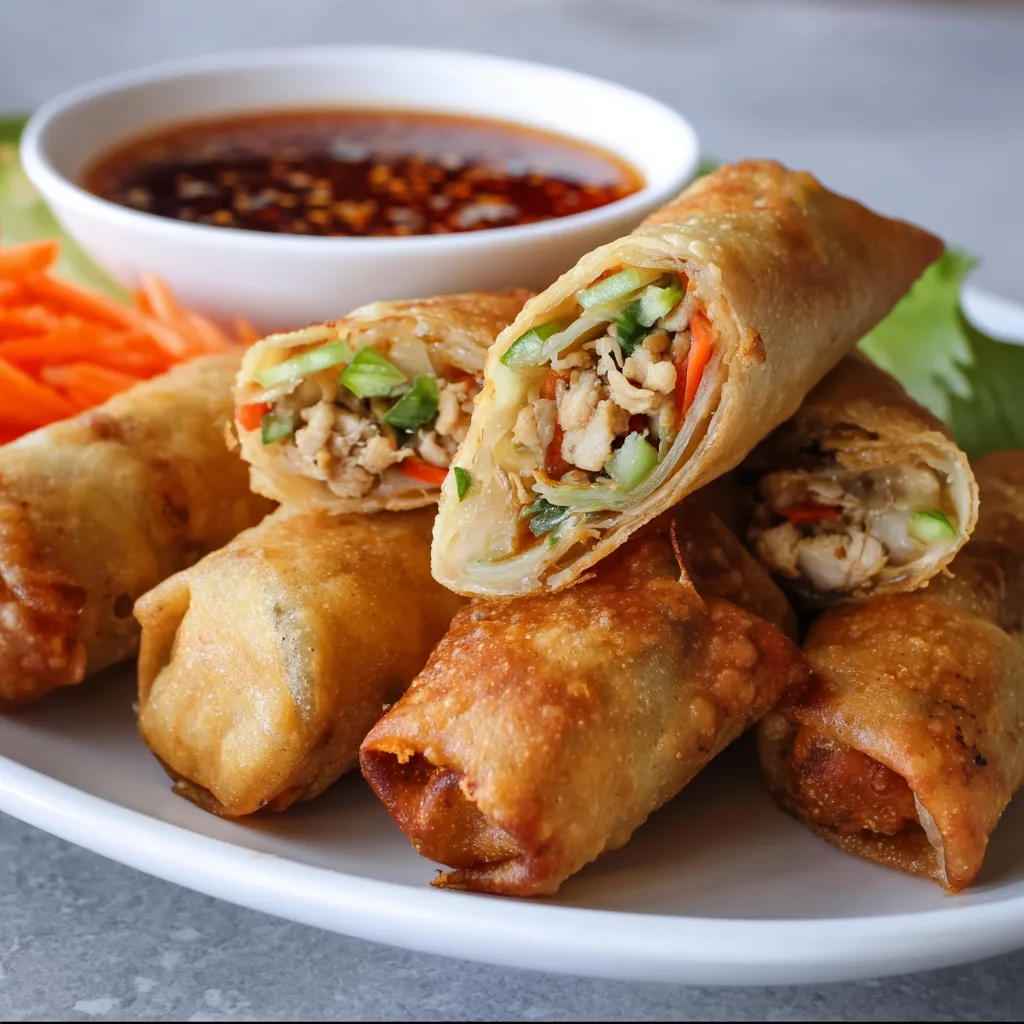
    Crispy Homemade Chicken Spring Rolls are the ultimate crowd-pleaser that brings restaurant-quality appetizers right to your kitchen. The moment that golden, crackling wrapper meets your lips, releasing a burst of savory chicken and vegetable filling – pure magic! I discovered my love for making these at home during a rainy weekend when takeout wasn’t an option. Now they’ve become my go-to for everything from casual family dinners to fancy gatherings. The best part? You can customize them endlessly while mastering a technique that will make you feel like a culinary rock star. Let’s dive into this irresistible recipe!

    Recipe

    Why You’ll Love These Crispy Homemade Chicken Spring Rolls

    Perfect Texture Combination

    The contrast of textures is what makes these spring rolls absolutely irresistible. The wrappers transform into a shatteringly crisp shell while protecting the juicy, tender chicken filling inside. I love hearing that distinctive crunch when someone takes their first bite! The vegetables maintain just enough bite to add freshness and structure. When you achieve that perfect golden-brown exterior – not too dark, not too pale – you’ll feel a little surge of pride. Trust me, that moment when you slice one open to reveal the colorful filling is pure kitchen satisfaction.

    Make-Ahead Convenience

    These spring rolls are a meal-prep dream come true. You can prepare the filling up to two days ahead and store it in the refrigerator, making assembly a breeze when you’re ready. I often roll them all in the morning, refrigerate them covered with a damp paper towel, then fry just before serving. The uncooked rolls even freeze beautifully for up to three months – just add an extra minute to the cooking time. This flexibility has saved me countless times when unexpected guests arrive or when I’m too exhausted to start cooking from scratch.

    Essential Tips & Tricks

    Wrapper Mastery

    Handling spring roll wrappers requires a gentle touch and a few key techniques. Always keep unused wrappers covered with a damp cloth to prevent them from drying out and cracking. When rolling, fold firmly but not too tight – you want to avoid tearing while ensuring no air pockets remain that could cause them to burst during frying. I learned the hard way that overstuffing leads to disaster! For the perfect seal, dab a little beaten egg or cornstarch slurry along the final edge. This creates a foolproof bond that won’t unravel in hot oil, giving you that professional finish every time.

    Oil Temperature Control

    The secret to perfectly crispy spring rolls without greasiness lies in maintaining the right oil temperature. Use a thermometer to keep your oil between 350-375°F (175-190°C). Too cool, and they’ll absorb excess oil and become soggy; too hot, and they’ll brown before the filling cooks through. Work in small batches – overcrowding the pan causes temperature drops. I always test with one roll first, adjusting as needed. After frying, drain them on a wire rack set over paper towels, not directly on paper, which traps steam and softens that beautiful crisp exterior you worked so hard to achieve.

    Serving Ideas & Creative Variations

    Dipping Sauce Pairings

    The right dipping sauce elevates these spring rolls from delicious to unforgettable. Classic sweet chili sauce offers the perfect balance of sweet and spicy, while a tangy nuoc cham (Vietnamese dipping sauce) brings bright citrus notes that cut through the richness. For something creamy, try a peanut sauce with a hint of lime and sriracha. I love setting up a little dipping station with 2-3 options in small bowls. My family’s favorite is a quick sauce I make with soy sauce, rice vinegar, a touch of honey, and toasted sesame oil. These sauces also pair beautifully with Asian Garlic Shrimp for a complete feast.

    Filling Variations

    While the classic chicken filling is fantastic, don’t be afraid to experiment with alternatives. Swap the chicken for ground pork with a touch of five-spice powder, or try shrimp chopped into small pieces with some minced lemongrass. For vegetarian options, crumbled tofu seasoned well works beautifully, as does a mushroom medley with glass noodles. Add unexpected elements like diced water chestnuts for crunch or kimchi for a spicy Korean twist. My personal favorite variation includes a bit of cream cheese mixed into the filling – it creates pockets of creamy richness that contrast wonderfully with the crisp exterior.

    Storage & Troubleshooting Guide

    Keeping Them Crispy

    Maintaining that signature crispness is the biggest challenge with leftovers. For best results, cool completely before storing in a container lined with paper towels, with additional paper towels between layers. Refrigerate for up to 3 days. To reheat, avoid the microwave, which will make them soggy. Instead, place them on a wire rack in a 350°F (175°C) oven for 8-10 minutes until heated through and crisp again. If you’re serving them at a party, keep freshly fried rolls warm in a 200°F (95°C) oven on a wire rack, but serve within an hour for optimal texture.

    Fixing Common Problems

    Even experienced cooks encounter spring roll challenges. If your rolls are splitting during frying, your oil is likely too hot or you’ve overfilled them. If they’re browning unevenly, they may be touching in the pan – ensure they have space to float freely. Soggy rolls usually mean the oil temperature was too low or they weren’t drained properly. If your filling is watery, try pre-cooking vegetables longer to remove excess moisture and always cool filling completely before rolling. When wrappers tear during rolling, they’re either too dry (mist with water) or you’re handling them too roughly.

    Frequently Asked Questions

    Can I bake these Crispy Homemade Chicken Spring Rolls instead of frying?

    Yes! Brush them lightly with oil and bake at 425°F (220°C) for 15-20 minutes, turning halfway through. They won’t be quite as crispy as fried, but still delicious with significantly less oil.

    How do I prevent my spring rolls from becoming soggy?

    Ensure your filling is cool and not watery before rolling. Drain cooked vegetables well and pat dry if needed. Fry at the correct temperature (350-375°F) and drain on a wire rack, not directly on paper towels.

    Can I make these ahead for a party?

    Absolutely! Roll them up to 24 hours ahead and refrigerate uncooked, covered with a damp cloth. You can also fry them 2-3 hours before serving and reheat in a 350°F oven for 8-10 minutes.

    What’s the best oil for frying spring rolls?

    Use a neutral oil with a high smoke point like vegetable, canola, or peanut oil. These oils won’t impart strong flavors and can withstand the high temperatures needed for crispy results.

    How fine should I chop the filling ingredients?

    Aim for small, uniform pieces (about ¼-inch dice) for even cooking and easy rolling. Large chunks can tear the wrapper and make rolling difficult.

    Final Thoughts

    These Crispy Homemade Chicken Spring Rolls have become my signature appetizer for good reason – they’re impressive yet approachable, and the process of making them is almost as enjoyable as eating them. There’s something deeply satisfying about creating these golden, crunchy parcels from scratch and watching friends’ faces light up at first bite. Whether you’re making them for a special occasion or a cozy night in, they bring that perfect blend of restaurant quality with homemade love. Be sure to check out more appetizer inspiration on Pinterest and prepare to add this recipe to your regular rotation!

  • Italian Chopped Salad: Fresh, Crunchy & Irresistibly Delicious!

    Italian Chopped Salad: Fresh, Crunchy & Irresistibly Delicious!

    Italian Chopped Salad: Fresh, Crunchy & Irresistibly Delicious!

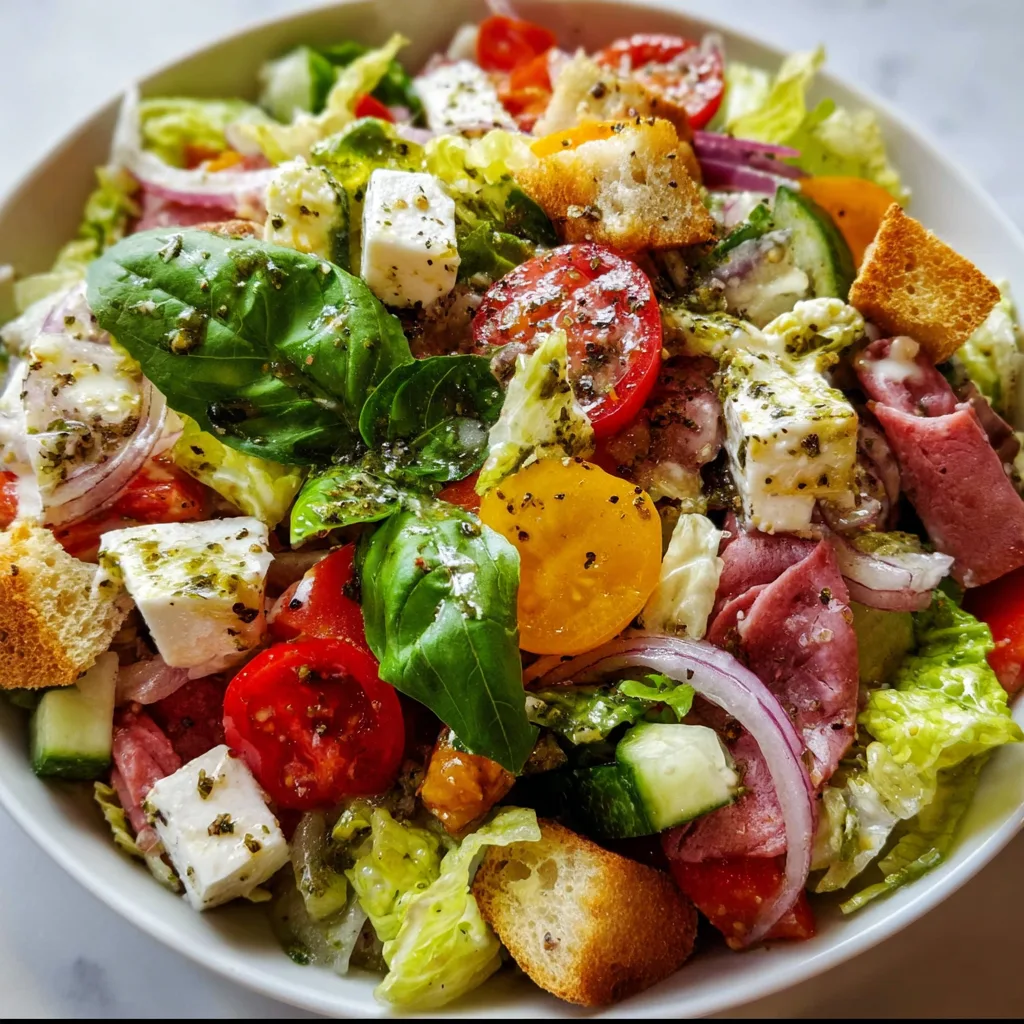
    This Italian Chopped Salad has completely transformed my weeknight dinner routine! There’s something magical about the perfect balance of crisp vegetables, savory meats, tangy cheese, and that zippy Italian dressing that makes every bite a celebration. I first discovered this recipe during a summer gathering at my neighbor’s house, and I’ve been obsessed ever since. The beauty of this salad is its versatility—it works as a hearty main dish or a show-stopping side. Let me show you how to create this colorful, texture-rich salad that will have everyone asking for seconds!

    Recipe

    Why You’ll Love This Italian Chopped Salad

    A Perfect Meal Prep Solution

    This Italian Chopped Salad has become my go-to for busy weeks when I need something that stays fresh and delicious for days. The hearty ingredients hold up beautifully in the refrigerator, unlike delicate greens that wilt at the first sign of dressing. I love preparing all the components on Sunday—dicing crisp romaine, slicing pepperoncini, cubing salami and provolone—then assembling fresh portions throughout the week. The flavors actually deepen and meld together over time, making each serving more delicious than the last. It’s meal prep that doesn’t feel like a compromise!

    Customizable for Every Diet

    What I adore about this salad is how easily it adapts to different dietary needs without losing its essential Italian character. Vegetarian? Skip the salami and add extra chickpeas or white beans for protein. Watching carbs? Focus on the vegetables and proteins while reducing the garbanzo beans. Need more substance? Add some cooked farro or orzo pasta. My sister follows a dairy-free diet, so when she visits, I simply omit the provolone and add extra olives for that briny flavor dimension. The robust Italian dressing ties everything together beautifully regardless of your modifications.

    Essential Tips & Tricks

    Mastering the Perfect Chop

    The secret to an authentic Italian Chopped Salad lies in the technique—everything should be cut to similar, bite-sized pieces. I use my favorite chef’s knife to create uniform cubes of vegetables, meats, and cheeses, typically aiming for ¼-inch pieces. This consistent size ensures you get a perfect blend of flavors and textures in every forkful. I’ve found that taking the extra minute to properly chop makes all the difference! For ingredients like red onions, I’ll often soak them in ice water for 10 minutes after chopping to maintain their crunch while reducing their bite.

    Dressing Dos and Don’ts

    The dressing can make or break your salad, so don’t rush this crucial component! I always mix my homemade Italian dressing in a mason jar, combining red wine vinegar, extra virgin olive oil, Dijon mustard, and dried Italian herbs with a vigorous shake. Let it sit for at least 30 minutes before using to allow the flavors to marry beautifully. A common mistake is overdressing—start with less than you think you need and add more as desired. For make-ahead preparation, store the dressing separately and combine just before serving to maintain that perfect crunch.

    Serving Ideas & Creative Variations

    Entertaining with Italian Flair

    This Italian Chopped Salad has saved countless dinner parties for me! I love serving it as part of a Mediterranean-inspired buffet alongside crispy chicken parmesan and garlic bread. For an elegant presentation, try arranging the salad on a large wooden board with the ingredients in colorful rows before tossing tableside. Add small bowls of extra toppings like pine nuts, fresh basil, or additional dressing so guests can customize their portions. For summer gatherings, I serve it with chilled Prosecco—the bubbles perfectly complement the tangy, savory flavors.

    Seasonal Adaptations

    One of my favorite aspects of this recipe is how beautifully it transitions through the seasons. In summer, I add juicy heirloom tomatoes and fresh corn kernels. Fall calls for roasted butternut squash cubes and toasted walnuts. Winter versions get brightened with segmented blood oranges and fennel. Spring brings tender asparagus tips and fresh peas. The classic Italian base remains constant—romaine, salami, provolone, chickpeas, and that vibrant dressing—while seasonal produce keeps the salad exciting year-round. This approach ensures you’re always working with ingredients at their peak flavor.

    Storage & Troubleshooting Guide

    Keeping It Fresh

    Proper storage is essential for maintaining the crisp texture of your Italian Chopped Salad. If preparing components ahead, store them separately in airtight containers—vegetables in one, proteins in another, and dressing in a jar. When storing dressed salad, use a container with a tight seal and place a paper towel on top to absorb excess moisture. Properly stored, undressed components will last 3-5 days. I’ve found that sturdy romaine holds up much better than delicate greens, making this salad a rare exception to the “dress right before eating” rule.

    Reviving Wilted Ingredients

    Even the most carefully prepared salad can sometimes lose its vibrancy. If your Italian Chopped Salad has wilted slightly, don’t panic! For limp lettuce, a 10-minute ice bath works wonders—just submerge the greens, then thoroughly pat dry. If your dressed salad has become soggy, try adding fresh romaine and a squeeze of lemon juice to brighten flavors. Too dry? A drizzle of olive oil and a splash of vinegar will refresh it instantly. Remember that this hearty salad is forgiving by nature—its robust ingredients maintain integrity longer than most salads.

    Frequently Asked Questions

    Can I make Italian Chopped Salad ahead of time?

    Yes! Prep components separately up to 3 days ahead. Store dressing separately and combine everything 30 minutes before serving to allow flavors to meld while maintaining texture.

    What’s the best cheese substitute for a dairy-free version?

    Try dairy-free mozzarella shreds or add extra olives and a sprinkle of nutritional yeast for that savory, umami quality that cheese provides.

    How can I turn this into a complete meal?

    Add grilled chicken, shrimp, or white beans for extra protein. You can also serve it with crusty bread or add cooked farro for a heartier dish.

    What’s the key difference between Italian Chopped Salad and other salads?

    Italian Chopped Salad features uniformly diced ingredients, Italian cured meats, cheeses, and a vinaigrette-style dressing with classic Italian herbs and seasonings.

    Can I use bottled Italian dressing?

    Absolutely! While homemade dressing offers better flavor, a high-quality store-bought Italian dressing works well when you’re short on time.

    Final Thoughts

    This Italian Chopped Salad has become more than just a recipe in my kitchen—it’s a reliable friend that shows up for quick lunches, impressive dinner parties, and everything in between. The vibrant colors, bold flavors, and satisfying textures make it a crowd-pleaser every single time. I hope you’ll experiment with your own variations and discover why this classic has stood the test of time. For more Mediterranean-inspired recipes, check out my Pinterest board where I’m always adding new ideas!

  • Puff Pastry Cinnamon Rolls with Maple Icing That Will Melt Hearts!

    Puff Pastry Cinnamon Rolls with Maple Icing That Will Melt Hearts!

    Puff Pastry Cinnamon Rolls with Maple Icing That Will Melt Hearts!

    Puff Pastry Cinnamon Rolls with Maple Icing are the ultimate breakfast hack that delivers all the warm, spicy comfort of traditional cinnamon rolls without the hours of work. The first time I made these for my family on a chilly Sunday morning, the kitchen filled with that irresistible cinnamon aroma that somehow makes everything feel right in the world. There’s something magical about the way the buttery layers of puff pastry create the perfect vehicle for that classic brown sugar-cinnamon filling. Topped with a silky maple icing that slowly melts into each swirl, these rolls have become my go-to when I want to impress without the stress.

    Recipe

    Why You’ll Love This Puff Pastry Cinnamon Rolls with Maple Icing

    Quick and Easy Shortcut Method

    Let’s be honest—traditional cinnamon rolls, while delicious, can be a time commitment that busy mornings simply don’t allow. These puff pastry cinnamon rolls are a game-changer for those of us who crave homemade goodness without the wait. The store-bought puff pastry does all the heavy lifting, creating those perfectly flaky layers that mimic the texture of yeasted dough. In just 30 minutes, you can have warm, spiral-shaped treats that look like you’ve been up since dawn. I’ve made these on weekday mornings before school drop-offs, and they never fail to make my kids think I’m some sort of breakfast wizard.

    Irresistible Flavor Combination

    The magic of these rolls lies in the perfect balance of flavors and textures. The buttery puff pastry becomes golden and crisp on the outside while staying tender within. Each bite delivers that warm cinnamon spice wrapped in caramelized brown sugar that creates those delicious sticky pockets throughout the rolls. But what truly elevates these treats is the maple icing—not too sweet, with a complex woodsy note that plain powdered sugar glaze simply can’t match. I’ve had friends literally close their eyes while eating these, savoring that perfect bite where the maple icing meets the cinnamon filling.

    Essential Tips & Tricks

    Mastering the Puff Pastry

    Working with puff pastry requires a few key techniques to achieve those beautiful, defined swirls. First, keep the pastry cold until you’re ready to use it—warm pastry becomes sticky and difficult to roll. However, if it’s too cold and stiff, let it sit at room temperature for about 10 minutes until pliable. When rolling the filled pastry, apply gentle, even pressure to create a tight cylinder without squeezing out the filling. For clean cuts, use a sharp serrated knife or unflavored dental floss, which slices through without compressing those beautiful layers. I learned this the hard way after squashing my first batch with a dull knife!

    Perfecting the Maple Icing

    The maple icing is what transforms these rolls from delicious to absolutely crave-worthy, so getting it right matters. Use pure maple syrup rather than artificial maple flavoring—the depth of flavor is incomparable. For the perfect consistency, start with less liquid than you think you need, then add more drops of milk until it reaches that sweet spot: thick enough to stay put but thin enough to drizzle. If you want a more pronounced maple flavor, add a tiny pinch of salt to enhance it. This icing pairs beautifully with other breakfast treats too, like my Cinnamon Roll Muffins when you’re in the mood for variety.

    Serving Ideas & Creative Variations

    Perfect Pairings for Breakfast and Brunch

    These puff pastry cinnamon rolls shine as the centerpiece of any breakfast spread. Serve them alongside fresh fruit to balance the sweetness, or with a savory egg casserole for a complete brunch experience. For special occasions, I love to create a cinnamon roll board—arrange the rolls on a wooden serving platter with small bowls of additional toppings like chopped nuts, chocolate chips, and fresh berries for guests to customize their rolls. A pot of strong coffee or creamy hot chocolate makes the perfect beverage pairing. My family particularly loves these with a side of crispy Spinach Feta Egg Muffins for a sweet and savory combination.

    Exciting Flavor Twists

    While the classic cinnamon-brown sugar filling is timeless, these rolls are incredibly versatile and welcome creative adaptations. Try adding finely chopped apples and a pinch of nutmeg to the filling for an autumn-inspired version. For chocolate lovers, sprinkle mini chocolate chips over the cinnamon mixture before rolling. Orange zest in both the filling and icing brings a bright, citrusy note that’s especially welcome during winter months. My personal favorite variation includes a thin layer of cream cheese spread on the pastry before adding the cinnamon filling—it creates pockets of creamy goodness that contrast beautifully with the flaky pastry.

    Storage & Troubleshooting Guide

    Keeping Them Fresh

    To maintain that perfect texture, store any leftover rolls properly. For short-term storage (1-2 days), place the completely cooled rolls in an airtight container at room temperature. If you need to keep them longer, refrigeration is your friend—just warm them for 10-15 seconds in the microwave before serving to restore that fresh-baked softness. For make-ahead convenience, freeze the unbaked, sliced rolls on a baking sheet, then transfer to a freezer bag once solid. This way, you can bake just what you need whenever the craving strikes. I often prepare a double batch on weekends and freeze half for emergency sweet tooth situations!

    Fixing Common Issues

    Even with the simplicity of this recipe, occasional hiccups can happen. If your rolls unravel during baking, it likely means the cylinder wasn’t rolled tightly enough. Next time, apply slightly more pressure when rolling and chill the rolled log for 15 minutes before slicing. If your icing is too runny and slides right off, simply add more powdered sugar, a tablespoon at a time. Conversely, if it’s too thick, thin it with tiny amounts of milk. For rolls that brown too quickly, loosely cover with foil halfway through baking to protect that golden top while allowing the center to finish cooking.

    Frequently Asked Questions

    Can I make Puff Pastry Cinnamon Rolls with Maple Icing ahead of time?

    Absolutely! Prepare and slice the rolls, then refrigerate overnight. In the morning, let them sit at room temperature for 15 minutes before baking. You can also freeze the unbaked rolls for up to a month.

    What’s the best way to reheat leftover rolls?

    Microwave individual rolls for 10-15 seconds or warm several in a 300°F oven for 5-7 minutes. Add a fresh drizzle of maple icing for that just-baked experience.

    Can I use homemade puff pastry instead of store-bought?

    Yes! Homemade puff pastry works beautifully and adds an extra layer of flavor. Just ensure it’s rolled to the same thickness as store-bought (about 1/8 inch).

    How do I know when the rolls are perfectly baked?

    Look for golden-brown edges and a slightly puffed appearance. The centers should feel set when gently pressed, and you’ll see some of the filling bubbling around the edges.

    Is there a dairy-free alternative for the maple icing?

    Certainly! Substitute plant-based butter and non-dairy milk in the icing. Coconut milk creates an especially rich and complementary flavor with the maple syrup.

    Final Thoughts

    These Puff Pastry Cinnamon Rolls with Maple Icing have become my secret weapon for turning ordinary mornings into something special without spending hours in the kitchen. They strike that perfect balance between impressive and achievable that makes home cooking so rewarding. Whether you’re serving them at a holiday breakfast, weekend brunch, or surprising your family on a random Tuesday, these rolls bring a moment of sweet connection to the table. I’d love to see your creations if you try this recipe—tag me on Pinterest and share your maple-glazed masterpieces!

  • No-Bake Mini Biscoff Cheesecakes with Cookie Butter Whip – Irresistible!

    No-Bake Mini Biscoff Cheesecakes with Cookie Butter Whip – Irresistible!

    No-Bake Mini Biscoff Cheesecakes with Cookie Butter Whip – Irresistible!

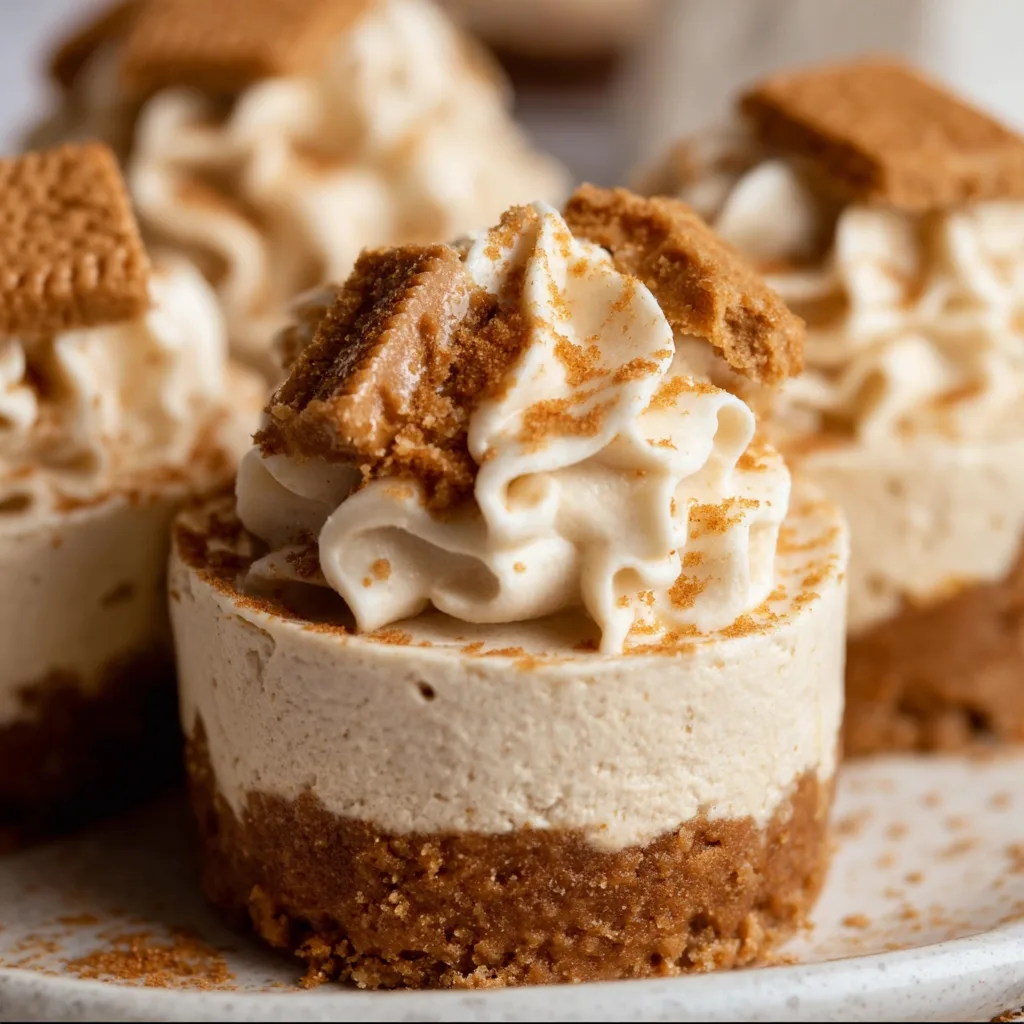
    No-Bake Mini Biscoff Cheesecakes with Cookie Butter Whipped Cream have become my absolute obsession this season! There’s something magical about the spiced caramel notes of Biscoff cookies paired with velvety cream cheese that makes my heart skip a beat. The first time I made these for my sister’s birthday gathering, everyone fell silent mid-conversation—that’s how good they are! These adorable individual cheesecakes require zero oven time but deliver maximum flavor with their cookie butter infusion and cloud-like whipped cream topping. Perfect for when you’re craving something special but don’t want to heat up the kitchen like with a traditional New York cheesecake.

    Recipe

    Perfect Make-Ahead Dessert

    These mini cheesecakes are a busy host’s dream come true! I’ve made them up to two days before a dinner party, and they still tasted absolutely divine. The flavor actually deepens overnight as the Biscoff cookie crust melds with the creamy filling. What I love most is how these little treats hold their shape beautifully when unmolded, creating an impressive presentation with minimal effort. The contrast between the crunchy cookie base and silky cheesecake filling creates that perfect textural balance that makes guests think you spent hours in the kitchen.

    No Baking Required

    Let me tell you about last summer when my AC broke during a heatwave—these cheesecakes saved my dessert reputation! With zero oven time needed, they’re perfect for hot summer days or when your oven is occupied with other dishes. The hands-on time is surprisingly brief—just about 20 minutes of active preparation, then the refrigerator does all the heavy lifting. The hardest part is waiting for them to set! I love that the only heat involved is briefly melting butter for the crust, making this an ideal project to make with kids or when you’re short on time but still want something spectacular.

    Essential Tips & Tricks

    Getting the Perfect Texture

    The secret to silky-smooth cheesecake filling is all in the temperature of your ingredients. I learned this the hard way after creating lumpy disasters until I started bringing my cream cheese to room temperature at least an hour before mixing. Press it with your finger—it should yield easily without resistance. When incorporating the cookie butter, fold gently rather than aggressively mixing to maintain air in the batter. For the crust, pulse the cookies until they resemble fine sand, then add just enough melted butter so the mixture clumps when pressed between your fingers—too much makes a greasy base.

    Make-Ahead Strategies

    These mini cheesecakes are perfect for planning ahead, which saved me during last year’s holiday season! For best results, make the cheesecakes up to 48 hours in advance and store them in the refrigerator, covered but without the whipped cream topping. I recommend adding the cookie butter whipped cream no more than 4 hours before serving to maintain its fluffy texture. If you’re really in a time crunch, you can freeze the completed cheesecakes (without topping) for up to a month—just thaw in the refrigerator overnight before garnishing and serving. They pair beautifully with hot beverages like coffee for a cozy dessert moment.

    Serving Ideas & Creative Variations

    Elegant Presentation Options

    Transform these mini cheesecakes into showstoppers with thoughtful presentation! I love serving them on a vintage cake stand with fresh berries scattered around for a pop of color. For dinner parties, place each cheesecake on a small plate with a drizzle of caramel sauce creating an artistic pattern. Try piping the cookie butter whipped cream using a star tip for bakery-worthy swirls, then dust with crushed Biscoff cookies or a light sprinkle of cinnamon. For summer gatherings, I’ve served these alongside small glasses of iced coffee, creating an interactive dessert station that guests absolutely adored.

    Flavor Twists

    While the classic recipe is divine, experimenting with flavors has led to some delightful discoveries! My personal favorite variation is adding dark chocolate chips to the filling and a tablespoon of espresso powder for a mocha-Biscoff fusion that coffee lovers go crazy for. For a fruity twist, try folding fresh raspberries into the filling or adding a layer of berry compote between the crust and cheesecake mixture. During fall, I love incorporating a teaspoon of pumpkin spice into the filling and topping with candied pecans. These variations pair beautifully with seasonal desserts like mini cherry cheesecakes for an impressive dessert spread.

    Storage & Troubleshooting Guide

    Proper Storage Methods

    Keeping these cheesecakes fresh is surprisingly simple! Store fully set cheesecakes in an airtight container in the refrigerator for up to 5 days. Place a sheet of parchment between layers if stacking is necessary. I’ve found that the crust can soften slightly after day three, but the flavor remains delicious. For longer storage, freeze the cheesecakes without the whipped cream topping by placing them on a baking sheet until solid, then wrapping individually in plastic wrap and storing in a freezer bag. This method has saved me countless times when preparing for large gatherings!

    Common Issues & Solutions

    Even experienced bakers encounter challenges! If your filling seems too soft, it’s likely that the cream cheese was overmixed or too warm. Fix this by refrigerating the mixture for 15-20 minutes before portioning into cups. For a crust that crumbles when serving, the likely culprit is too little butter—add an extra teaspoon and remix. If your whipped cream deflates quickly, try stabilizing it with a teaspoon of unflavored gelatin bloomed in cold water, then melted and cooled slightly before adding to the cream. I once salvaged a batch by re-whipping with this method just an hour before guests arrived!

    Frequently Asked Questions

    Yes! Substitute with Nutella, peanut butter, or dulce de leche for the filling. For the whipped cream, vanilla extract works beautifully if cookie butter isn’t available.

    How far in advance can I make these cheesecakes?

    The cheesecakes can be made up to 2 days ahead and stored in the refrigerator. Add the whipped cream topping within 4 hours of serving for best results.

    Can I use different cookies for the crust?

    Absolutely! Graham crackers, gingersnaps, or chocolate sandwich cookies all make delicious alternatives to Biscoff cookies while maintaining that perfect crunchy base.

    Are these cheesecakes freezer-friendly?

    Yes! Freeze them without the whipped cream topping for up to a month. Thaw overnight in the refrigerator and add fresh topping before serving.

    What can I use instead of heavy cream for the topping?

    Coconut cream (chilled overnight) makes a delicious dairy-free alternative. Whip it with powdered sugar and cookie butter just as you would heavy cream.

    Final Thoughts

    These No-Bake Mini Biscoff Cheesecakes with Cookie Butter Whipped Cream have become my signature dessert for good reason. They strike that perfect balance between impressive and achievable, letting the distinctive Biscoff flavor shine while keeping preparation stress-free. I love watching friends take that first bite, eyes widening at the contrast between crunchy crust and silky filling. Whether for casual gatherings or special celebrations, these little treats never fail to bring smiles. For more dessert inspiration, check out my Pinterest board where I’m always adding new favorite recipes!

  • Brownie Crinkle Cookies: Irresistibly Gooey, Melt-in-Your-Mouth Bliss!

    Brownie Crinkle Cookies: Irresistibly Gooey, Melt-in-Your-Mouth Bliss!

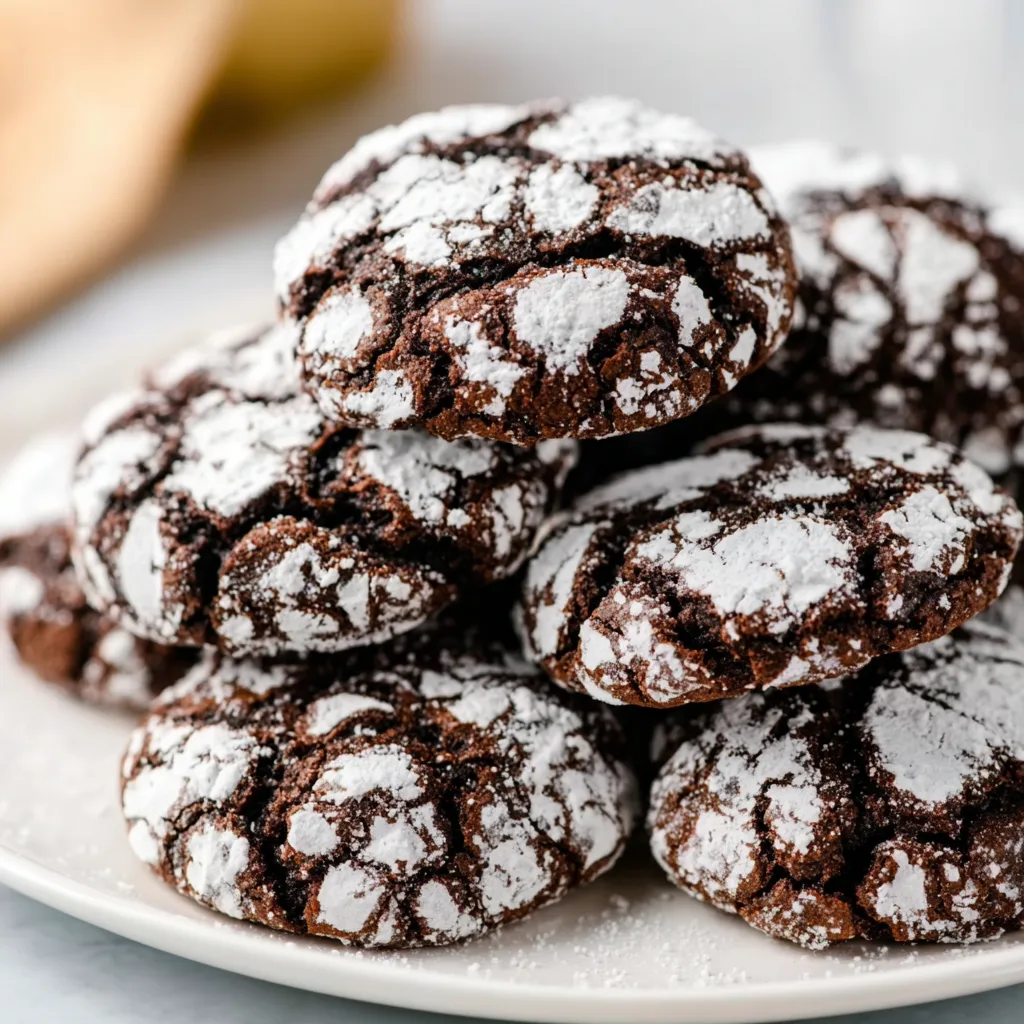
    Brownie Crinkle Cookies bring together the best of two beloved treats – the fudgy richness of brownies and the crackly top of perfect cookies. The first time I made these for my family, my kitchen filled with that intoxicating chocolate aroma that made everyone hover nearby, waiting impatiently. These cookies have become my go-to when I need something decadently chocolatey but don’t want to wait for brownies to cool. They’re quicker to make than traditional brownies but deliver that same intense chocolate satisfaction you’ll find in my New York Cheesecake with Berry Twist – just in cookie form!

    Recipe

    Why You’ll Love These Brownie Crinkle Cookies

    Perfect Texture Combination

    The magic of these cookies lies in their contrasting textures – crisp, crackly exteriors giving way to soft, fudgy centers that practically melt in your mouth. I still remember the first batch I made; breaking one open while still warm, watching the center stretch like a perfect brownie. The slight resistance from the shiny, crackled top gives way to that dense, chocolatey interior that sticks slightly to your teeth. It’s this textural journey that makes them utterly irresistible and why my cookie jar empties faster with these than any other recipe.

    Quick Brownie Satisfaction

    When brownie cravings hit but you need something faster, these cookies are your answer. They deliver that intense chocolate punch in just 25 minutes from start to finish – no waiting for a pan of brownies to cool! I’ve found myself making these on weeknights when chocolate cravings strike but time is limited. The cookies cool quickly too, allowing you to enjoy that fudgy brownie experience without the wait. Plus, they’re perfectly portioned, giving you the satisfaction of a brownie without committing to cutting a whole pan.

    Essential Tips & Tricks

    Achieving the Perfect Crackle

    The signature crackle top requires attention to a few key details. First, don’t skimp on beating the eggs and sugar – this creates that shiny, crackled surface we’re after. I learned this the hard way after rushing this step once and ending up with flat, dull cookies. Second, chilling the dough is non-negotiable; I recommend at least 30 minutes. Finally, rolling the cookies in powdered sugar right before baking ensures those beautiful cracks form as the cookies spread in the oven, creating that dramatic contrast between dark chocolate and white sugar.

    Chocolate Selection Matters

    The quality of chocolate makes all the difference in these brownie crinkle cookies. I prefer using a combination of high-quality cocoa powder and chopped dark chocolate (60-70% cacao) for depth of flavor. The cocoa powder provides that intense chocolate base, while melted chocolate chunks create the fudgy interior. One winter afternoon, I experimented with adding espresso powder – just a teaspoon – and it amplified the chocolate flavor without tasting like coffee. If you’re feeling adventurous, try different chocolate varieties like bittersweet or even a hint of chili-infused dark chocolate.

    Serving Ideas & Creative Variations

    Elevated Dessert Presentations

    Transform these cookies into spectacular desserts with simple additions. My favorite is creating cookie sundaes by placing a warm cookie in a bowl, adding a scoop of vanilla bean ice cream, and drizzling with warm caramel sauce. For dinner parties, I’ve sandwiched softened coffee ice cream between two cookies for an elevated ice cream sandwich that guests still talk about. You could also crumble them over pudding or Mini Cherry Cheesecakes for a delightful textural contrast that makes everyday desserts feel special.

    Flavor Twists Worth Trying

    While the classic version is perfection, these cookies welcome creative variations. Try adding mint extract (½ teaspoon) and crushed candy canes during the holidays for a festive touch. Orange zest and a splash of Grand Marnier create sophisticated cookies with a subtle citrus brightness. My personal favorite variation came from an accidental pantry shortage – I substituted half the vanilla extract with almond extract, and the nutty undertone was divine. For texture contrast, fold in chocolate chips, chopped nuts, or even crushed pretzels for a sweet-salty balance.

    Storage & Troubleshooting Guide

    Keeping Them Fresh

    To maintain that perfect balance between crisp exterior and fudgy center, proper storage is essential. Store completely cooled cookies in an airtight container at room temperature for up to 4 days. I separate layers with parchment paper to prevent sticking. For longer storage, freeze the cookies in a single layer until solid, then transfer to a freezer bag for up to 3 months. The wonderful thing about these cookies is they thaw quickly – just 20 minutes at room temperature – and still maintain that lovely texture contrast between crisp exterior and fudgy center.

    Fixing Common Problems

    If your cookies spread too much, your dough likely needed more chilling time. Pop the remaining dough in the freezer for 15 minutes before continuing. For cookies that don’t crackle properly, check two things: did you coat them generously in powdered sugar right before baking? And is your oven properly preheated? I once had a batch with minimal crackles and realized my oven temperature was off. Too-flat cookies usually mean the butter was too warm or you used too little flour, while cakey cookies typically result from overmixing after adding the dry ingredients.

    Frequently Asked Questions

    Can I make brownie crinkle cookies ahead of time?

    Yes! Prepare the dough up to 2 days ahead and refrigerate. You can also freeze portioned dough balls (before rolling in sugar) for up to 3 months. Just thaw in the refrigerator overnight before baking.

    Why didn’t my cookies develop cracks?

    Insufficient powdered sugar coating or not chilling the dough long enough are common culprits. Make sure to generously coat cold dough balls in powdered sugar immediately before baking.

    Can I use cocoa powder alone instead of melted chocolate?

    While possible, using only cocoa powder will result in a less fudgy interior. For true brownie-like texture, the melted chocolate is key to achieving that dense, rich center.

    Are brownie crinkle cookies supposed to be soft in the middle?

    Absolutely! The cookies should be set around the edges but still soft in the center when removed from the oven. They’ll continue to set as they cool.

    Can I add nuts or other mix-ins to the dough?

    Certainly! Fold in ½ cup of chopped nuts, chocolate chips, or other mix-ins after combining the wet and dry ingredients. Just avoid overmixing.

    Final Thoughts

    Brownie Crinkle Cookies represent the perfect marriage between cookies and brownies, offering the best qualities of both in one irresistible treat. They’ve become my signature dessert for good reason – they’re impressive enough for special occasions yet simple enough for everyday indulgence. The contrast between the shiny, crackled exterior and the rich, fudgy center creates a textural masterpiece that chocolate lovers can’t resist. I hope these cookies bring as much joy to your kitchen as they have to mine! Find more of my favorite cookie recipes on Pinterest.

  • Italian Sausage Pasta Bake: Irresistibly Cheesy & Comforting Feast!

    Italian Sausage Pasta Bake: Irresistibly Cheesy & Comforting Feast!

    Italian Sausage Pasta Bake: Irresistibly Cheesy & Comforting Feast!

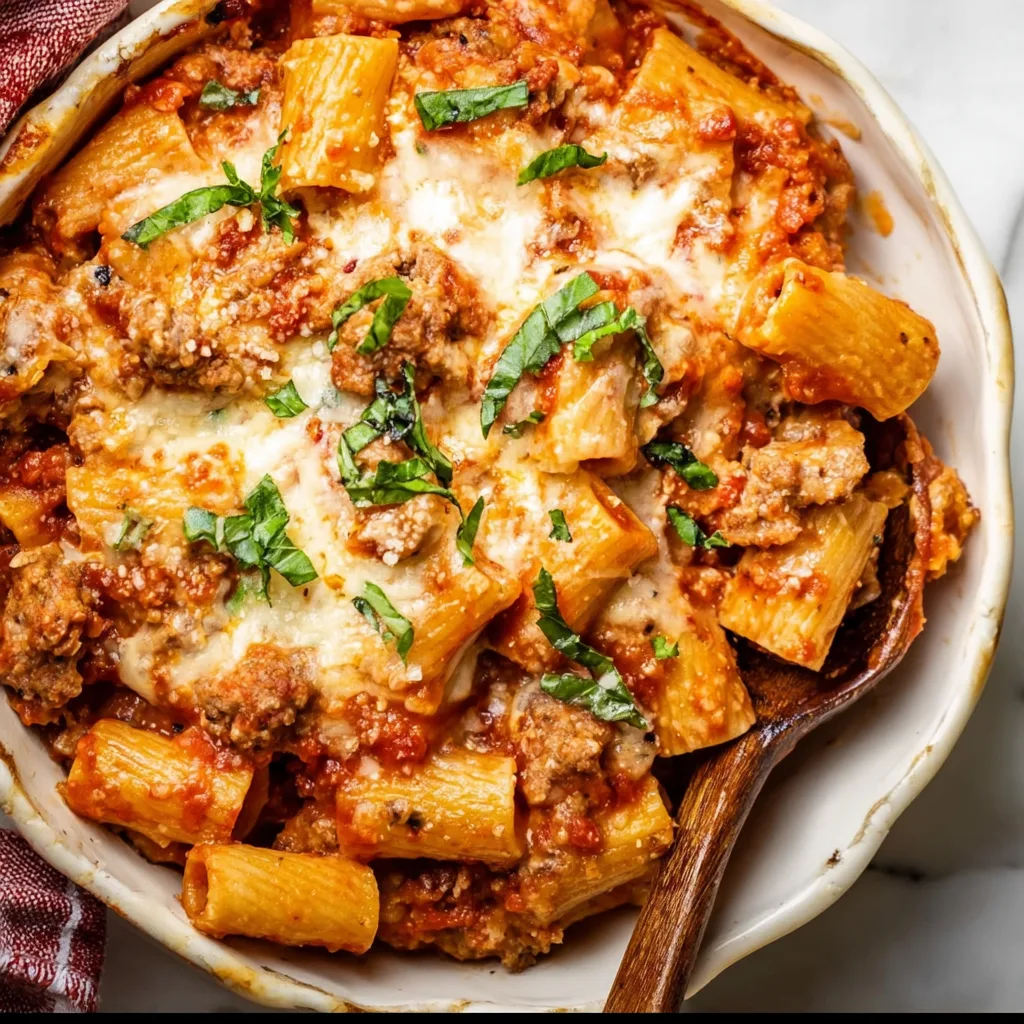
    This Italian Sausage Pasta Bake transforms ordinary pasta night into something extraordinary. The first time I made this bubbling masterpiece, my kitchen filled with an aroma that literally pulled my husband from his home office—nose first! There’s something magical about the way the spicy Italian sausage mingles with sweet tomatoes and melty cheese, creating comfort in casserole form. If you’re looking for a crowd-pleasing dish that delivers big flavor with minimal fuss, this recipe deserves a permanent spot in your dinner rotation. It’s become my go-to when hosting friends who appreciate hearty, homemade meals.

    Recipe

    Why You’ll Love This Italian Sausage Pasta Bake

    Perfect Make-Ahead Miracle

    This pasta bake is my secret weapon for busy weeks. I often assemble it on Sunday, refrigerate, and then bake it fresh on Monday evening when cooking feels like climbing Mount Everest. The flavors actually intensify overnight as the sauce permeates the pasta and the herbs bloom. Plus, there’s something deeply satisfying about coming home to a ready-to-bake dish after a long day. Just pop it in the oven, kick off your shoes, and pour a glass of wine while the cheese bubbles to golden perfection. The anticipation is almost as delicious as the meal itself!

    One-Dish Wonder for Every Occasion

    Whether it’s Tuesday dinner or Saturday with friends, this pasta bake rises to the occasion. The versatile nature of this dish means it works for casual family meals and impressive entertaining alike. I’ve served it at potlucks where it disappeared faster than anything else on the table, and for dinner parties where guests requested the recipe before dessert was served. The combination of zesty sausage, al dente pasta, and that irresistible cheese pull creates a comfort food experience that resonates with everyone. It’s hearty enough to stand alone yet plays well with simple sides.

    Essential Tips & Tricks

    Perfecting Your Pasta

    The foundation of an exceptional pasta bake lies in properly cooking your pasta. Always boil it for 2 minutes less than the package directions suggest—this slight undercooking ensures it won’t turn mushy during baking. Last Christmas, I overcooked the pasta and ended up with something resembling baby food rather than the textural delight it should have been! Salt your pasta water generously (it should taste like seawater) to season the pasta from within. And please, don’t rinse after draining—those starches help the sauce cling beautifully to each piece of pasta, creating that perfect creamy texture we’re aiming for.

    Layering Flavors Strategically

    Building depth in your Italian Sausage Pasta Bake happens in stages, not all at once. Start by properly browning the sausage until it develops those caramelized edges that contain concentrated flavor bombs. Don’t rush this step! Remove the sausage before sautéing your aromatics in the flavorful fat left behind. This layering technique ensures every bite delivers maximum impact. I learned this the hard way after once throwing everything in at once and ending up with a one-dimensional dish. The magic happens when each ingredient gets its moment to shine before joining the ensemble.

    Serving Ideas & Creative Variations

    Complementary Side Dishes

    The right sides elevate this pasta bake from delicious to memorable. My go-to pairing is a crisp green salad with a bright lemon vinaigrette that cuts through the richness of the bake. For something heartier, try garlic bread for sopping up extra sauce—my husband has been known to make “pasta bake sandwiches” with leftovers! Roasted vegetables like Brussels sprouts with balsamic pecans offer beautiful contrast in both flavor and texture. Remember that simple sides often work best, allowing the pasta bake to remain the undisputed star of your dinner table.

    Exciting Flavor Twists

    While the classic version is divine, don’t be afraid to make this recipe your own. Swap sweet Italian sausage for spicy chorizo for a Spanish-inspired variation with extra heat. Add a layer of sautéed mushrooms for earthy depth, or stir in a handful of fresh spinach just before baking for color and nutrition. My personal favorite twist involves adding a dollop of ricotta between layers for pockets of creamy goodness. During summer, I fold in fresh cherry tomatoes and basil from my garden. Each variation creates a slightly different experience while maintaining the comforting essence of the original.

    Storage & Troubleshooting Guide

    Proper Storage for Maximum Enjoyment

    Leftover pasta bake—if you’re lucky enough to have any—needs proper storage to maintain its deliciousness. Allow it to cool completely before refrigerating in an airtight container for up to 4 days. For freezing, portion into individual servings, wrap tightly in plastic, then foil, and freeze for up to 3 months. The individual portions are my weekday lunch salvation! When reheating, add a tablespoon of water before microwaving to revive the sauce, or cover with foil and reheat in a 350°F oven until the center reaches 165°F. The texture won’t be identical to fresh, but the flavors often deepen beautifully.

    Fixing Common Pitfalls

    Even experienced cooks encounter issues with pasta bakes. If your dish seems dry, you likely need more sauce—pasta continues absorbing liquid as it bakes. A good rule is making the mixture look slightly too wet before baking. For soggy results, your pasta was probably overcooked initially or you used too much sauce. Balance is key! If your cheese burns before the center heats through, cover with foil for most of the baking time, removing for the final 10 minutes to achieve that golden top. And remember, resting for 10-15 minutes after baking isn’t just for flavor development—it helps the bake set properly.

    Frequently Asked Questions

    Can I make Italian Sausage Pasta Bake vegetarian?

    Absolutely! Substitute the Italian sausage with plant-based sausage alternatives or use a combination of mushrooms and walnuts sautéed with Italian seasonings for a meaty texture without the meat.

    How can I make this recipe gluten-free?

    Simply swap regular pasta for your favorite gluten-free variety, checking that your Italian sausage is also gluten-free (some contain fillers with gluten). The rest of the ingredients are naturally gluten-free.

    Can I assemble this pasta bake ahead of time?

    Yes! Prepare everything up to 24 hours in advance, cover with plastic wrap, and refrigerate. Add an extra 10-15 minutes to the baking time when cooking directly from the refrigerator.

    What’s the best pasta shape for this bake?

    Medium shapes that trap sauce work best—penne, rigatoni, and fusilli are my favorites for Italian Sausage Pasta Bake. Avoid tiny pasta like orzo or long pasta like spaghetti.

    Can I use turkey sausage instead?

    Definitely! Turkey Italian sausage creates a lighter version with less fat. You might want to add a splash more olive oil when browning to compensate for the reduced fat content.

    Final Thoughts

    This Italian Sausage Pasta Bake represents everything I love about home cooking—it’s adaptable, forgiving, and brings people together around the table. The combination of zesty sausage, tender pasta, and molten cheese creates something greater than the sum of its parts. I’ve watched this dish bridge generations at family gatherings and spark conversation among new friends. It’s comfort food that doesn’t sacrifice flavor for convenience. Whether you follow my recipe exactly or add your personal touch, I hope this pasta bake brings as much joy to your table as it has to mine. Find more inspiration for your next meal on Pinterest.

  • Iced Almond Flour Orange Cookies That Will Delight Your Tastebuds!

    Iced Almond Flour Orange Cookies That Will Delight Your Tastebuds!

    Iced Almond Flour Orange Cookies That Will Delight Your Tastebuds!

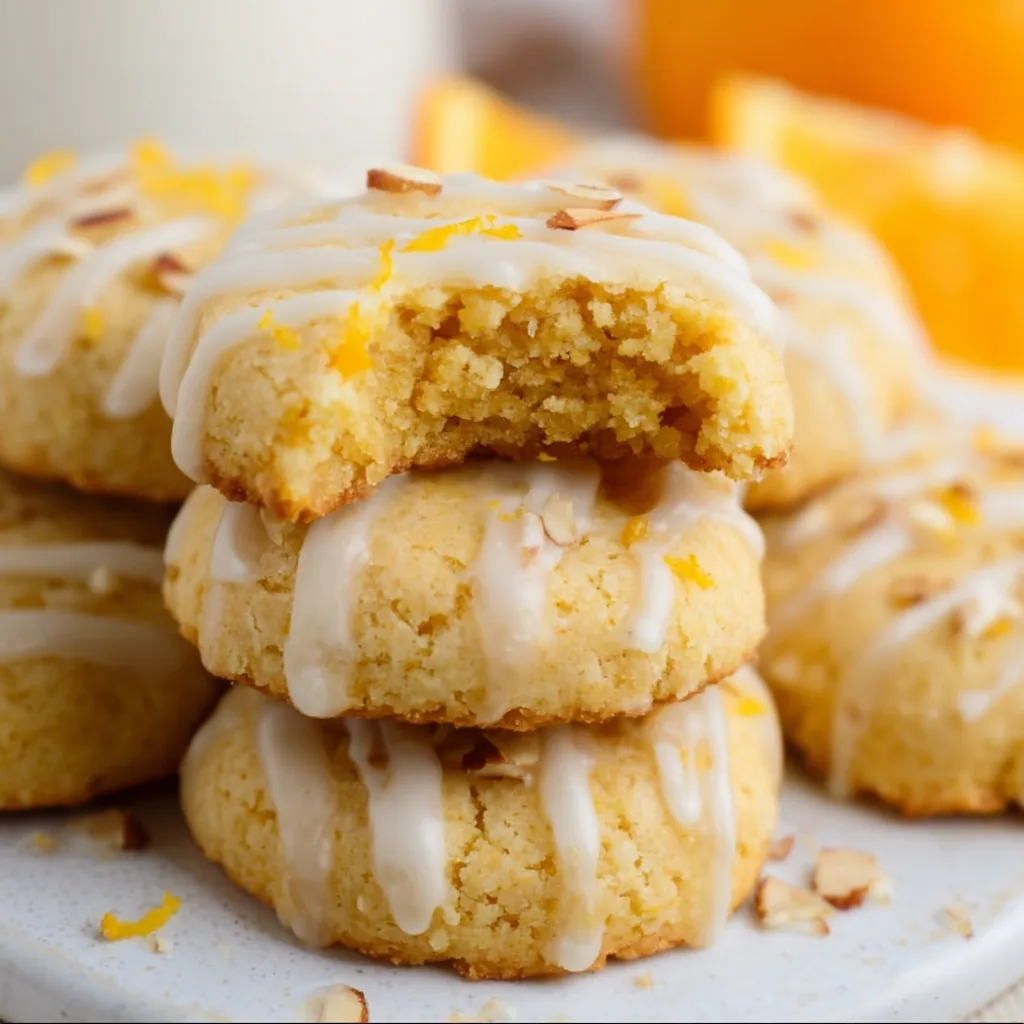
    Iced Almond Flour Orange Cookies have become my absolute obsession this season! There’s something magical about the way the bright citrus aroma fills my kitchen as these delicate, gluten-free treats bake to golden perfection. The first time I made these for my sister’s birthday brunch, everyone kept asking for the recipe before they’d even finished their first cookie! The combination of nutty almond flour and vibrant orange zest creates a flavor symphony that’s both sophisticated and comforting. If you love citrus desserts like my Upside-Down Orange Cake Recipe, these cookies will absolutely steal your heart.

    Recipe

    Why You’ll Love These Iced Almond Flour Orange Cookies

    Perfect Texture & Flavor Balance

    These cookies offer the most delightful textural contrast you can imagine – slightly crisp edges that give way to tender, melt-in-your-mouth centers. The almond flour provides a naturally subtle sweetness and nutty depth that perfectly complements the bright orange flavor. I’ve spent countless test batches getting the balance just right! The orange appears in three glorious ways: zest in the dough, fresh juice in the icing, and candied orange peel as an optional (but highly recommended) garnish. Your taste buds will detect layer after layer of citrus goodness with each bite.

    Simple Ingredients, Impressive Results

    What I adore about these cookies is how they transform pantry staples into something that looks and tastes like it came from a fancy bakery. You’ll need almond flour (the hero ingredient), butter, sugar, eggs, orange zest, vanilla, and a few baking essentials. The icing needs just powdered sugar and fresh orange juice – that’s it! I always keep almond flour on hand for gluten-free baking emergencies, and this recipe has become my go-to when I need something special without a grocery store run. Your friends will think you spent hours on these!

    Essential Tips & Tricks

    Mastering the Dough Consistency

    Getting the right dough texture is crucial for these cookies. Almond flour behaves differently than all-purpose flour – it’s naturally more moist and doesn’t contain gluten to provide structure. After mixing your ingredients, if the dough feels too sticky to handle, refrigerate it for 30 minutes before rolling. I’ve found that using slightly damp hands when forming the cookies prevents sticking. For perfectly uniform cookies (great for gifting!), use a small cookie scoop to portion the dough, then gently flatten each ball to about ½-inch thickness with your fingertips.

    Perfecting the Orange Icing

    The citrus icing is what transforms these cookies from delicious to extraordinary! For the brightest flavor, always use freshly squeezed orange juice – never the bottled stuff. Start with less juice than you think you’ll need, adding it gradually until you reach a consistency that’s thick enough to set but thin enough to drizzle. If you love additional orange flavor, add a few drops of orange extract or a pinch of orange zest to the icing. For a professional-looking finish like in my New York Cheesecake with Berry Twist, let the cookies cool completely before icing.

    Serving Ideas & Creative Variations

    Beautiful Presentation Options

    These cookies make a stunning centerpiece for any dessert table! For an elegant presentation, arrange them on a white porcelain platter with fresh orange slices and mint sprigs. When I serve these at afternoon tea, I place them on a tiered stand with other citrus treats. The bright orange icing makes them naturally eye-catching, but for special occasions, add edible gold leaf flakes or silver dragées on top of the wet icing. For holiday gifts, stack them in clear cellophane bags tied with raffia, adding a small dried orange slice to each package.

    Exciting Flavor Twists

    While the classic orange version is divine, these cookies welcome creative adaptations! My lemon-rosemary variation (swap orange for lemon zest and add 1 teaspoon chopped fresh rosemary) pairs beautifully with afternoon tea. For a sophisticated cocktail party cookie, try blood orange with a splash of Campari in the icing. During the holidays, I add warming spices like cardamom and cinnamon to the dough. For chocolate lovers, fold in mini dark chocolate chips or drizzle with melted chocolate after icing. Check out my White Chocolate Cranberry Cookies for more inspiration!

    Storage & Troubleshooting Guide

    Keeping Cookies Fresh

    These Iced Almond Flour Orange Cookies stay remarkably fresh when stored properly. For maximum flavor and texture, place them in an airtight container with parchment paper between layers to prevent sticking. At room temperature, they’ll maintain their perfect texture for 3-4 days. If you need longer storage, refrigerate for up to a week, though the texture may become slightly firmer. For long-term storage, freeze uniced cookies for up to 3 months in freezer-safe containers. I often make a double batch and freeze half for unexpected guests!

    Solving Common Baking Issues

    If your cookies spread too much during baking, your butter was likely too warm or you didn’t use enough almond flour. The quick fix is chilling the dough for 30 minutes before baking. For cookies that turn out too dry, you might have overbaked them or used too much almond flour – remember that measuring cups can vary, so consider investing in a kitchen scale for precision. If your icing is too runny, add more powdered sugar; if too thick, add orange juice a few drops at a time. For cookies that brown too quickly, place the baking sheet on a higher rack in your oven.

    Frequently Asked Questions

    Can I substitute regular flour for almond flour in these orange cookies?

    No, almond flour has different properties than wheat flour. The recipe would need significant adjustments to moisture and binding ingredients. Stick with almond flour for the intended texture and flavor.

    How do I know when my Iced Almond Flour Orange Cookies are done baking?

    Look for light golden edges while the centers remain slightly soft. They’ll firm up while cooling. Overbaking will result in dry cookies, so err on the side of underbaking.

    Can I make these cookies ahead of time for a party?

    Absolutely! Bake the cookies up to 3 days ahead and store in an airtight container. Ice them the day before or morning of your event for the freshest appearance.

    What’s the secret to getting the brightest orange flavor?

    Use organic oranges for zesting since they’re free from wax coatings. Rub the zest into the sugar before mixing with other ingredients to release the essential oils.

    Are these cookies suitable for people with dietary restrictions?

    These Iced Almond Flour Orange Cookies are naturally gluten-free. For dairy-free versions, substitute coconut oil for butter. They do contain eggs and nuts, so they’re not suitable for those allergies.

    Final Thoughts

    These Iced Almond Flour Orange Cookies have become a signature treat in my baking repertoire. There’s something truly special about the way they bring sunshine to even the gloomiest day with their bright flavor and delicate texture. Whether you’re baking them for a special occasion or simply to enjoy with your afternoon coffee, they’re guaranteed to bring smiles. I’d love to see your creations if you try this recipe – tag me on Pinterest so I can admire your beautiful cookies!

  • Fudgy Cosmic Brownie Cookies That’ll Blow Your Mind!

    Fudgy Cosmic Brownie Cookies That’ll Blow Your Mind!

    Fudgy Cosmic Brownie Cookies That’ll Blow Your Mind!

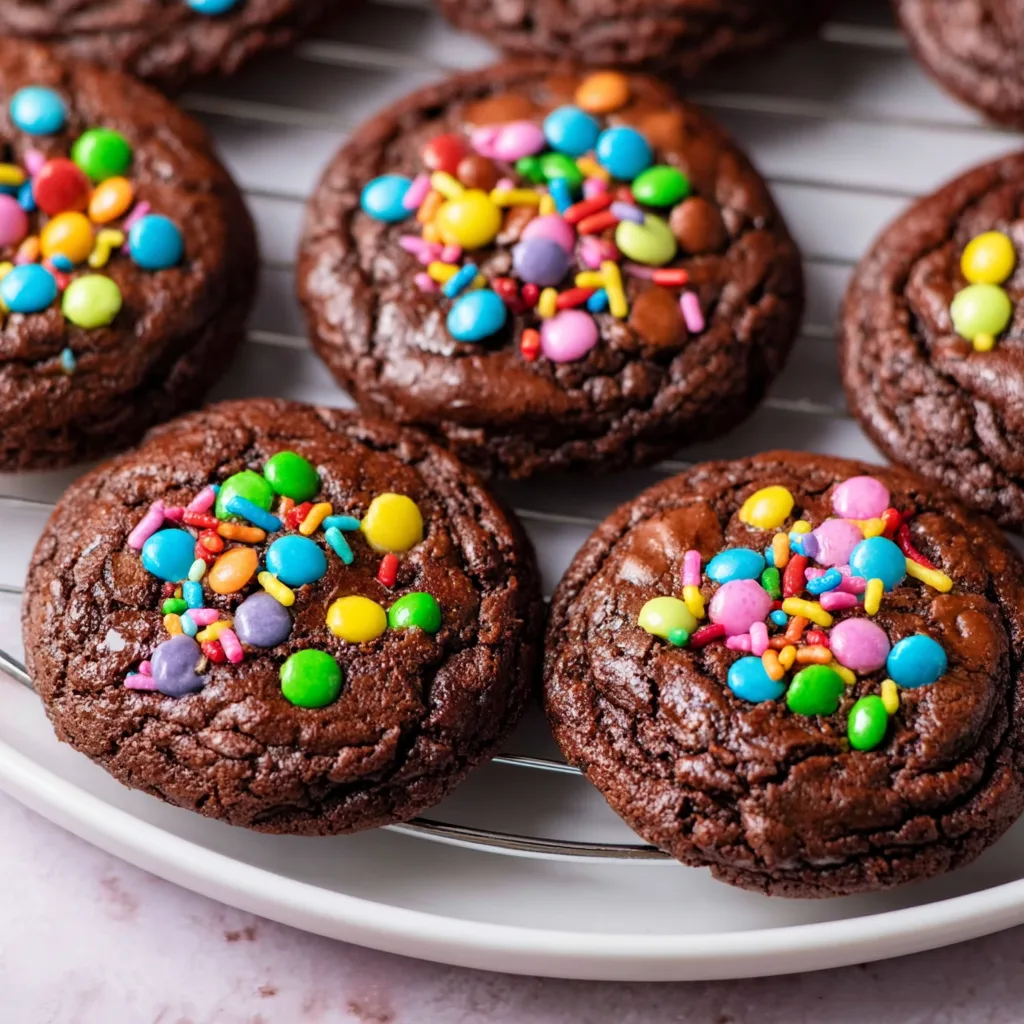
    Fudgy Cosmic Brownie Cookies bring back that nostalgic childhood lunchbox treat in a delicious homemade form! These indulgent cookies combine the best of both worlds – the rich, chocolatey goodness of brownies with the perfect crisp-chewy texture of cookies. I’ve been perfecting this recipe for months, and let me tell you, the combination of that deep chocolate flavor with those colorful rainbow sprinkles creates pure magic on your taste buds. If you love desserts that make you feel like a kid again while satisfying your grown-up chocolate cravings, these cosmic brownie cookies are about to become your new obsession.

    Recipe

    Why You’ll Love These Fudgy Cosmic Brownie Cookies

    Nostalgic Flavor with Gourmet Appeal

    There’s something about biting into these cookies that instantly transports me back to childhood. That first chocolatey bite with the perfect balance of fudgy center and slightly crisp edge creates pure bliss. Unlike store-bought cosmic brownies, these homemade versions have depth of flavor from high-quality cocoa and real chocolate. I’ve added a touch of espresso powder that enhances the chocolate without tasting like coffee. The rainbow candy-coated chocolate chips on top aren’t just for looks – they add a delightful crunch and sweet burst that perfectly complements the rich cookie base.

    Easy to Make with Impressive Results

    Don’t let their fancy appearance fool you – these cookies are surprisingly simple to make! The dough comes together in just one bowl, making cleanup a breeze. Even my 8-year-old niece helped make these last weekend, and they turned out perfectly. The secret technique is chilling the dough, which prevents spreading and ensures that perfect fudgy-yet-chewy texture. I love that these cookies look professionally made with minimal effort. The colorful candy topping creates that iconic cosmic brownie look that will impress everyone at your next gathering without requiring any special decorating skills.

    Essential Tips & Tricks

    Perfecting the Chocolate Base

    Quality ingredients make all the difference in these cookies. Use Dutch-processed cocoa for a deeper, richer chocolate flavor – it’s worth the splurge! When melting the chocolate, go low and slow to prevent burning. I learned this the hard way after ruining an entire batch by rushing this step. For the fudgiest texture, don’t overmix once the flour is added; stop when just combined. The dough will be thick and almost truffle-like. If you’re craving even more chocolate intensity, try adding chocolate chips to the dough for pockets of melty goodness throughout each cookie.

    Mastering the Perfect Shape and Look

    For that authentic cosmic brownie appearance, uniformity is key. I use a cookie scoop to ensure each cookie is exactly the same size. After scooping, roll the dough between your palms to create perfect spheres, then gently flatten them slightly before baking. The rainbow candy topping should be pressed in immediately after removing cookies from the oven while they’re still hot and pliable. Don’t rush the cooling process – these cookies need time to set up properly. I always let them cool completely on the baking sheet for that perfect fudgy center that makes them so irresistible.

    Serving Ideas & Creative Variations

    Elevated Dessert Presentations

    Transform these cookies into spectacular desserts that will wow your guests! Create cookie sandwiches by adding a scoop of vanilla ice cream between two completely cooled cookies. The contrast between the cold, creamy ice cream and rich chocolate cookies is divine. For a dinner party finale, stack them in a pyramid, dust with powdered sugar, and serve with fresh berries and whipped cream. I recently served these alongside my New York Cheesecake with Berry Twist for a dessert buffet that had everyone coming back for seconds.

    Seasonal and Flavor Adaptations

    These versatile cookies can be customized for any occasion! For holiday versions, swap the rainbow chips for seasonal colors – red and green for Christmas, orange and black for Halloween, or pastels for Easter. Add a teaspoon of peppermint extract to the dough for a chocolate-mint variation that’s perfect for winter. For a grown-up twist, try adding a tablespoon of bourbon to the dough and topping with flaky sea salt instead of candy. My personal favorite variation includes a tablespoon of orange zest in the dough for a chocolate-orange combination that’s absolutely heavenly.

    Storage & Troubleshooting Guide

    Keeping Cookies Fresh and Delicious

    To maintain that perfect fudgy texture, store these cookies in an airtight container at room temperature for up to 5 days. Place a slice of bread in the container to keep them soft and prevent them from drying out. For longer storage, these cookies freeze beautifully! Layer them between parchment paper in a freezer-safe container and freeze for up to 3 months. I often make a double batch specifically to freeze, so I always have a treat ready for unexpected guests or chocolate emergencies. Allow frozen cookies to thaw at room temperature for about an hour before serving.

    Fixing Common Baking Issues

    If your cookies spread too much during baking, your dough likely wasn’t cold enough. Chill thoroughly for at least 2 hours, or even overnight for best results. For cookies that turn out too dry, you may have overbaked them or used too much flour. Remember that these cookies will look slightly underdone in the center when you remove them from the oven – that’s what gives them their fudgy texture! If your candy toppings are melting too much, try waiting 1-2 minutes after removing cookies from the oven before adding them, or use candy-coated chocolates that hold their shape better under heat.

    Frequently Asked Questions

    Can I make Fudgy Cosmic Brownie Cookies ahead of time?

    Absolutely! The dough can be made up to 3 days in advance and stored in the refrigerator. You can also freeze the shaped dough balls for up to 3 months and bake directly from frozen (just add 1-2 minutes to the baking time).

    What’s the best chocolate to use in these cookies?

    I recommend using a high-quality semi-sweet or dark chocolate in the 60-70% cocoa range. Brands like Ghirardelli or Guittard work beautifully and melt smoothly without graininess.

    Can I make these cookies gluten-free?

    Yes! Replace the all-purpose flour with a 1:1 gluten-free baking blend. I’ve tested this with Bob’s Red Mill and King Arthur’s gluten-free flours with excellent results.

    Why did my cookies turn out cakey instead of fudgy?

    Too much flour or over-mixing can create a cakey texture. Measure flour by spooning it into measuring cups rather than scooping, and mix just until ingredients are combined.

    How do I know when these cookies are done baking?

    The edges should be set but the centers will look slightly underdone and soft. They’ll continue cooking on the hot baking sheet after removal from the oven.

    Final Thoughts

    These Fudgy Cosmic Brownie Cookies have become my signature dessert for good reason – they’re the perfect balance of nostalgic charm and sophisticated flavor. The combination of that intensely chocolatey, brownie-like texture with playful rainbow toppings creates something truly special. I love watching people’s faces light up when they take their first bite! Whether you’re baking for a special occasion or simply treating yourself after a long day, these cookies deliver pure joy in every bite. Don’t forget to check out more of my favorite chocolate creations on Pinterest for endless dessert inspiration!