Blog

  • Nashville Hot Chicken Sandwiches That Ignite Your Taste Buds!

    Nashville Hot Chicken Sandwiches That Ignite Your Taste Buds!

    Nashville Hot Chicken Sandwiches That Ignite Your Taste Buds!

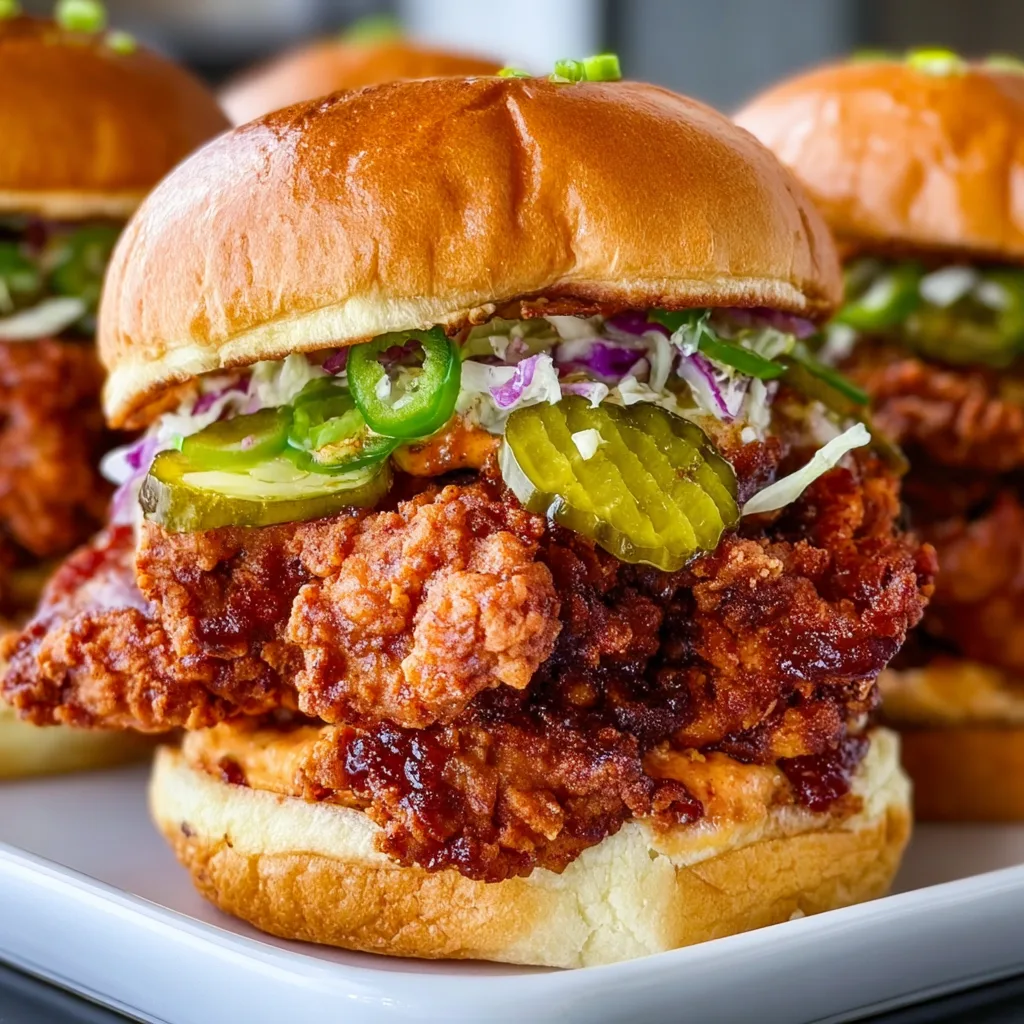
    Nashville Hot Chicken Sandwiches have completely transformed my weeknight dinner game. There’s something magical about that perfect balance of crispy, spicy chicken nestled between soft buns with cool, creamy slaw that makes my taste buds dance with joy. I’ll never forget the first time I made these for my family—my husband’s eyes widened with that first bite, and he declared them “better than any restaurant version.” Today, I’m sharing my foolproof recipe that delivers that authentic Nashville heat with a touch of sweetness that’ll have everyone asking for seconds. Ready to bring some Southern comfort to your dinner table? Let’s get cooking!

    Recipe

    Why You’ll Love This Nashville Hot Chicken Sandwiches

    The Perfect Balance of Heat and Flavor

    These Nashville Hot Chicken Sandwiches deliver that signature fiery kick without overwhelming your palate. I’ve perfected the spice blend with the ideal ratio of cayenne, paprika, and a touch of brown sugar that creates that authentic Nashville flavor profile. What makes these sandwiches truly special is how the heat builds gradually rather than hitting you all at once. The buttermilk marinade ensures your chicken stays incredibly juicy inside while developing that gorgeous crispy exterior. Trust me, even heat-sensitive family members will find themselves reaching for seconds!

    Quick and Customizable for Any Occasion

    What I adore about these Nashville Hot Chicken Sandwiches is their incredible versatility. You can adjust the spice level to suit everyone at your table—from mild for the kiddos to five-alarm fire for heat enthusiasts. The basic recipe comes together in under 45 minutes, making it perfect for busy weeknights, but it’s impressive enough for weekend gatherings too. I’ve served these at everything from casual family dinners to backyard parties, and they’re always the first thing to disappear. Plus, the components can be prepped ahead, allowing you to assemble fresh sandwiches in minutes when guests arrive.

    Essential Tips & Tricks

    Perfecting the Crispy Coating

    The secret to that irresistible crunch lies in double-dredging your chicken. First, pat your chicken breasts completely dry before starting the breading process. Then dip in buttermilk, coat in seasoned flour, back into buttermilk, and into the flour again. This creates those craggy edges that crisp up beautifully and hold onto the spicy oil. For extra crispiness, add a tablespoon of cornstarch to your flour mixture. Let the coated chicken rest on a wire rack for 10 minutes before frying—this helps the coating adhere properly and prevents it from sliding off during cooking.

    Mastering the Signature Hot Oil

    The defining feature of authentic Nashville Hot Chicken Sandwiches is that spiced oil brushed over the fried chicken. Heat your oil to exactly 350°F before adding your spices—too hot and they’ll burn, too cool and they won’t infuse properly. I like to bloom my spices in the hot oil for 30 seconds to release their full flavor potential. Use a heatproof pastry brush to generously coat each piece of chicken immediately after frying. For the most authentic experience, save some of the frying oil and use it as the base for your spice mixture—it carries the essence of the chicken and adds incredible depth.

    Serving Ideas & Creative Variations

    Perfect Pairings and Sides

    Nashville Hot Chicken Sandwiches shine brightest with the right accompaniments. A cooling cucumber slaw provides the perfect temperature contrast to the spicy chicken—I make mine with thinly sliced cucumbers, cabbage, a touch of mayo, and apple cider vinegar. For sides, classic Parmesan Garlic Rice makes an unexpected but delicious pairing that soaks up any extra spicy drippings. Sweet potato fries, macaroni salad, or pickled vegetables all complement these sandwiches beautifully. Don’t forget to serve with plenty of napkins and maybe some cooling ranch or blue cheese dip on the side!

    Global Fusion Twists

    Take your Nashville Hot Chicken Sandwiches on a world tour with these creative variations! For an Asian-inspired version, add gochujang to your hot oil and top with kimchi slaw. My family goes crazy for the “Mediterranean Hot Chicken” where I incorporate za’atar into the flour coating and serve it on pita with tzatziki instead of traditional slaw. For a Mexican fusion approach, spike your hot oil with chipotle powder and top with avocado crema and pickled jalapeños. These variations maintain the spirit of Nashville heat while introducing exciting new flavor dimensions that keep this recipe in regular rotation at our house.

    Storage & Troubleshooting Guide

    Make-Ahead and Leftover Strategies

    To maintain that perfect crispiness, store leftover fried chicken separate from buns and toppings in an airtight container in the refrigerator for up to 3 days. Reheat in a 350°F oven for 10-15 minutes until heated through—never microwave, as it’ll turn your crispy coating soggy! For make-ahead prep, you can marinate the chicken up to 24 hours in advance and mix the dry spices ahead of time. The spicy oil can be made up to a week ahead and gently reheated before using. For ultimate convenience, prepare extra chicken and freeze it after cooling completely—it reheats beautifully for quick weeknight sandwiches.

    Solving Common Challenges

    If your coating is falling off during frying, your oil temperature is likely too high or too low. Maintain a steady 350°F throughout cooking using a reliable thermometer. For chicken that’s burning on the outside but raw inside, your pieces are probably too thick—pound them to an even ¼-inch thickness before breading. If your spice level is overwhelming, serve with honey on the side—it’s traditional in Nashville and wonderfully tames the heat while adding delicious complexity. For soggy bottomed sandwiches, try toasting your buns and adding a thin layer of mayo to create a moisture barrier before assembling.

    Frequently Asked Questions

    How spicy are authentic Nashville Hot Chicken Sandwiches?

    Traditional Nashville Hot Chicken Sandwiches pack serious heat! The authentic version uses generous amounts of cayenne pepper. Start with half the cayenne if you’re heat-sensitive, then gradually increase in future batches to find your perfect spice level.

    Can I bake these instead of frying?

    Yes! Spray breaded chicken with cooking oil and bake at 425°F for 20-25 minutes until crispy and cooked through. The texture won’t be identical to fried, but you can still brush with the signature spicy oil for authentic flavor.

    What’s the best bread for Nashville Hot Chicken Sandwiches?

    Traditional Nashville Hot Chicken Sandwiches are served on plain white bread or potato buns. The soft, slightly sweet bread provides the perfect contrast to the spicy chicken. Brioche buns are my personal favorite upgrade!

    How do I make these gluten-free?

    Substitute the all-purpose flour with a cup-for-cup gluten-free flour blend. Add 1 tablespoon cornstarch to improve crispiness. Ensure your spices are certified gluten-free and serve on gluten-free buns or lettuce wraps.

    Can I prepare the Nashville Hot Chicken Sandwiches in an air fryer?

    Absolutely! Spray the breaded chicken with oil and air fry at 390°F for 12-15 minutes, flipping halfway through. Brush with the hot oil mixture immediately after cooking for that authentic Nashville flavor.

    Final Thoughts

    These Nashville Hot Chicken Sandwiches have become a beloved staple in my household for good reason—they deliver restaurant-quality flavor with home-cooked love in every bite. The beauty of this recipe lies in its adaptability; whether you’re a spice enthusiast or prefer a milder approach, you can craft the perfect sandwich to suit your taste. I hope these tips and tricks help you create a memorable meal that brings a touch of Nashville’s famous culinary tradition to your table. Don’t forget to share your creations on Pinterest and tag me—I’d love to see your spicy masterpieces!
  • Chicken Udon Soup Recipe: Cozy, Delicious, and Easy to Make!

    Chicken Udon Soup Recipe: Cozy, Delicious, and Easy to Make!

    Chicken Udon Soup Recipe: Cozy, Delicious, and Easy to Make!

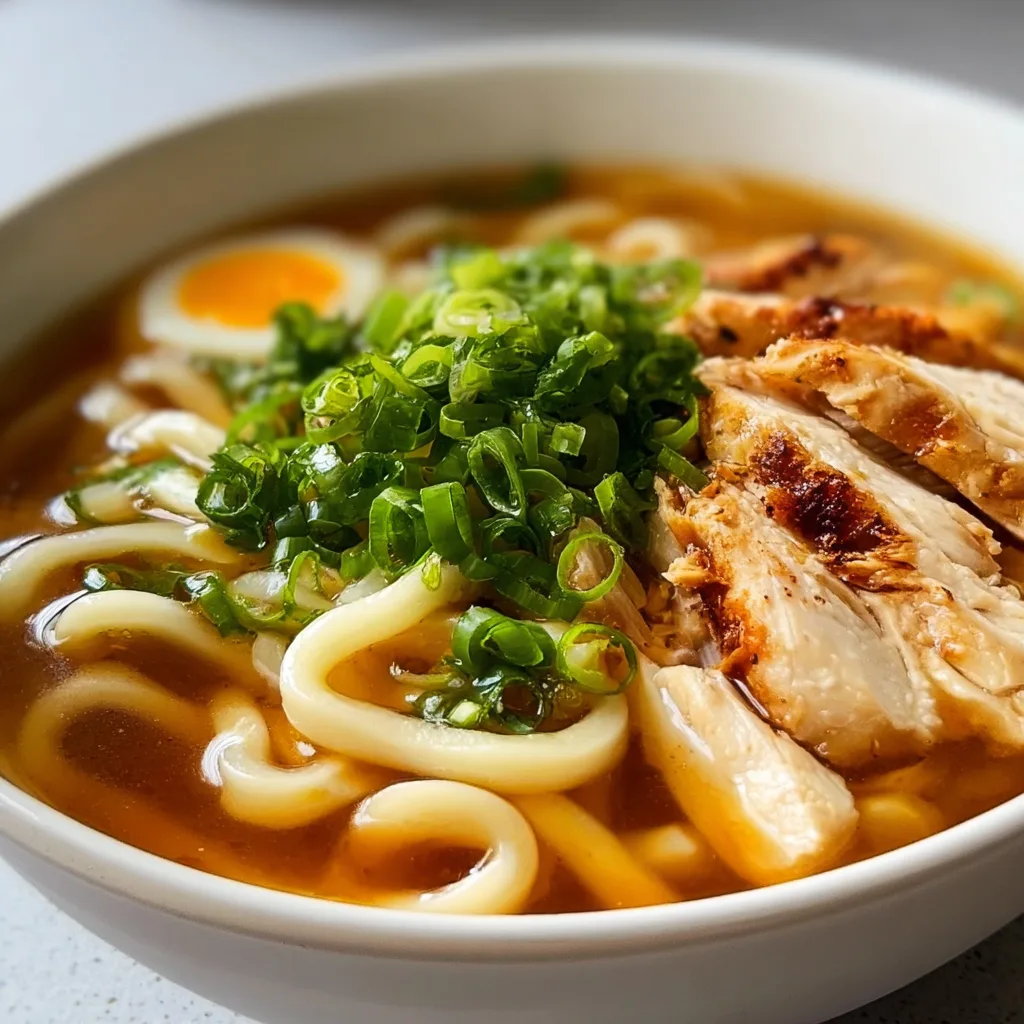
    Chicken Udon Soup is my ultimate comfort food on those days when the rain taps against my kitchen window and all I want is something warm and nourishing. The first time I made this soup, the rich umami broth and chewy udon noodles instantly transported me back to that tiny ramen shop I discovered during my trip to Japan. There’s something magical about how the tender chicken, springy noodles, and savory broth come together in perfect harmony. If you’re craving a bowl of something that feels like a warm hug, this recipe is exactly what you need in your life.

    Recipe

    Why You’ll Love This Chicken Udon Soup

    Simple Yet Satisfying

    This Chicken Udon Soup strikes the perfect balance between simplicity and flavor. Unlike some complex Asian recipes that require a day’s worth of preparation, this soup comes together in about 30 minutes. The beauty lies in how a handful of ingredients—ginger, garlic, soy sauce, and mirin—transform ordinary chicken broth into something extraordinary. I love how the kitchen fills with an aromatic cloud that makes everyone ask, “What smells so amazing?” It’s the kind of recipe that delivers impressive results without demanding professional culinary skills.

    Customizable Comfort

    What makes this soup truly special is how easily you can adapt it to your preferences or whatever ingredients you have on hand. The foundational broth works beautifully with any protein—swap chicken for shrimp, tofu, or thinly sliced beef. Vegetable options are endless too. I’ve made this with baby bok choy during spring, sweet corn in summer, and hearty mushrooms in fall. My husband prefers his spicy with a generous dollop of chili oil, while I sometimes add a soft-boiled egg for extra richness. It’s comfort food that evolves with your cravings.

    Essential Tips & Tricks

    Broth Building Basics

    The secret to exceptional udon soup lies in building layers of flavor in your broth. Start by properly browning your aromatics—ginger and garlic should sizzle until fragrant but not burnt. This creates the foundation that carries through the entire dish. Don’t rush adding your liquids; give those aromatics time to release their essential oils. For an authentic touch, use both soy sauce and mirin, which creates that distinctive Japanese umami profile. If you’re feeling ambitious, a dash of dashi powder takes this broth from delicious to restaurant-quality. The broth is where the magic happens!

    Noodle Know-How

    Udon noodles require special attention to achieve that perfect chewy texture we all love. The most common mistake I see is overcooking them to mushiness. Whether using dried, frozen, or fresh udon, always cook them separately from your broth and slightly undercook them—they’ll continue softening in the hot soup. For dried udon, rinse them in cold water after cooking to remove excess starch and stop the cooking process. This technique is similar to what I use in my Spinach Mushroom Spaghetti, ensuring the noodles maintain their integrity rather than turning to mush.

    Serving Ideas & Creative Variations

    Topping Combinations

    The beauty of Chicken Udon Soup lies in its versatility as a canvas for creative toppings. My favorite combination includes thinly sliced scallions, a sprinkle of toasted sesame seeds, and a few drops of chili oil for heat. For a more substantial meal, try adding a soft-boiled egg with that perfectly jammy center—just six minutes in boiling water followed by an ice bath. Crispy fried shallots add wonderful texture contrast against the silky broth. When entertaining, I set up a topping bar so guests can customize their bowls, which always sparks conversation about favorite combinations.

    Global Fusion Twists

    Don’t be afraid to break tradition and create fusion versions of this classic soup. One of my favorite variations incorporates coconut milk and red curry paste for a Thai-inspired twist that’s absolutely divine. For a Korean touch, add kimchi and gochujang for tangy spice. Mexican-inspired udon with lime, avocado, and cilantro brings unexpected freshness. These cross-cultural experiments remind me of my Chicken Lo Mein recipe—traditional at heart but open to creative interpretation. The beauty of home cooking is making recipes truly your own through playful experimentation.

    Storage & Troubleshooting Guide

    Proper Storage Solutions

    For the best leftover experience, store the components of your Chicken Udon Soup separately whenever possible. The broth with chicken and vegetables will keep beautifully in an airtight container for up to 4 days in the refrigerator. However, cooked udon noodles should be stored separately to prevent them from absorbing all the liquid and becoming soggy. If you’re meal prepping, consider keeping the noodles completely uncooked until you’re ready to serve. For freezing, only freeze the broth portion—fresh noodles can be quickly cooked when you’re ready to enjoy your soup again.

    Fixing Common Issues

    Even experienced cooks occasionally encounter soup challenges. If your broth lacks depth, try adding a splash of fish sauce or a spoonful of miso paste—both are umami bombs that instantly elevate flavor. Bland soup usually needs more salt or acid; a squeeze of lime can work wonders. If your noodles turned mushy, don’t despair—transform the dish into a casserole by adding cheese and baking until bubbly. Too spicy? A drizzle of honey or a dollop of coconut milk can tame the heat while adding complexity. Remember that cooking is about adaptation and problem-solving on the fly.

    Frequently Asked Questions

    Can I make Chicken Udon Soup ahead of time?

    Yes! Make the broth with chicken and vegetables up to 3 days ahead. Store separately from noodles and cook fresh noodles just before serving for the best texture and flavor.

    What’s the best substitute for udon noodles?

    Soba noodles offer a nutty flavor alternative, while ramen provides a similar chew. In a pinch, linguine or fettuccine can work—cook them al dente for a closer texture match.

    How do I make my Chicken Udon Soup more flavorful?

    Add umami boosters like miso paste, fish sauce, or dried mushrooms. A dash of rice vinegar adds brightness, while sesame oil creates richness and depth.

    Can I make this soup vegetarian?

    Absolutely! Substitute vegetable broth and replace chicken with tofu, tempeh, or additional vegetables like shiitake mushrooms and baby corn for heartiness.

    How do I prevent the noodles from getting soggy in my Chicken Udon Soup?

    Cook noodles separately and slightly undercook them. Add them to individual serving bowls and pour hot broth over top rather than storing them together.

    Final Thoughts

    This Chicken Udon Soup has become my go-to recipe when I need something restorative yet impressive enough for company. There’s a beautiful simplicity in how a few quality ingredients transform into something so nourishing. I find myself returning to this recipe through every season, adapting it to what’s available and what my body craves. Whether you’re fighting a cold, comforting a friend, or simply treating yourself to a bowl of happiness, this soup delivers every time. Find more comforting recipes on Pinterest to pair with your new favorite Chicken Udon Soup!

  • Chicken & Sweet Potato Rice Bowl: Irresistible Comfort Food You’ll Crave!

    Chicken & Sweet Potato Rice Bowl: Irresistible Comfort Food You’ll Crave!

    Chicken & Sweet Potato Rice Bowl: Irresistible Comfort Food You’ll Crave!

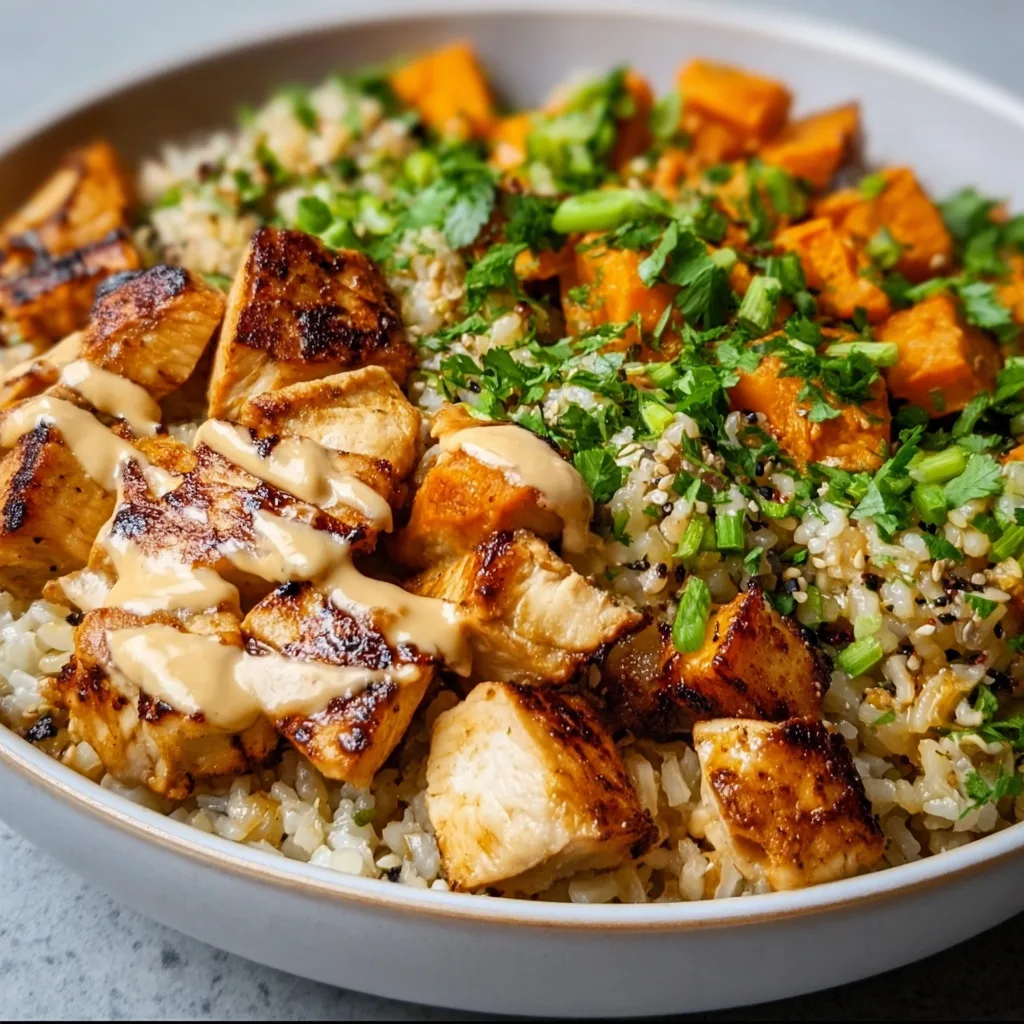
    The Chicken & Sweet Potato Rice Bowl has become my ultimate weeknight savior—a colorful harmony of tender chicken, caramelized sweet potatoes, and fluffy rice that feels like a warm hug in a bowl. I first created this recipe during a particularly hectic week when I needed something nourishing but didn’t have time for complicated cooking. The sweet-savory balance hits just right, with a gentle kick from the spices that transforms simple ingredients into something truly special. If you’re looking for a complete meal that delivers on both comfort and nutrition, this bowl has your name written all over it, much like my Parmesan Garlic Rice but with a protein-packed twist.

    Recipe

    Why You’ll Love This Chicken & Sweet Potato Rice Bowl

    Perfect Balance of Flavors and Textures

    The magic of this Chicken & Sweet Potato Rice Bowl lies in its contrasting textures—tender chunks of chicken against slightly crispy sweet potatoes, all nestled on a bed of fluffy rice. I love how the natural sweetness of the potatoes plays against the savory seasonings on the chicken. The slight char on the sweet potatoes adds a caramelized depth that elevates the entire dish. When you get that perfect bite with all the components together, it’s like a symphony of flavors that somehow manages to be both comforting and exciting at the same time.

    Meal-Prep Champion

    This bowl has saved my sanity during busy weeks as it’s a meal-prep superstar. I can prepare a batch on Sunday, portion it into containers, and have satisfying lunches ready to go. The flavors actually develop beautifully overnight, making day two and three even tastier than the first. What I particularly appreciate is how the components maintain their distinct textures even after refrigeration—the sweet potatoes don’t turn mushy, and the chicken stays juicy. It’s rare to find a meal that reheats this beautifully.

    Essential Tips & Tricks

    Perfecting Your Sweet Potatoes

    The key to exceptional sweet potatoes is giving them enough space on the baking sheet—overcrowding is the enemy of caramelization. I learned this the hard way after years of impatient cooking! Make sure to cut them into uniform cubes (about 3/4-inch works perfectly) so they cook evenly. A drizzle of maple syrup in the last five minutes of roasting creates an irresistible glaze that elevates the entire dish. The slight char on the edges provides that perfect textural contrast against the tender chicken and soft rice.

    Chicken Cooking Technique

    For juicy, flavorful chicken every time, I’ve found that a quick marinade (even just 15 minutes) makes all the difference. A simple mix of olive oil, garlic, smoked paprika, and a touch of cumin creates depth without overwhelming the dish. Rather than stirring constantly, let the chicken pieces develop a golden crust by leaving them undisturbed for the first few minutes in the pan. This technique, which I also use in my Chicken Fajita Casserole, creates those delicious caramelized bits that carry so much flavor.

    Serving Ideas & Creative Variations

    Family-Style Presentation

    Serving this Chicken & Sweet Potato Rice Bowl family-style creates an impressive presentation that encourages everyone to customize their portions. I arrange the components in sections over the rice on a large platter, then surround it with small bowls of toppings—think sliced avocado, cilantro, lime wedges, and perhaps some crumbled feta. This approach transforms a simple meal into an interactive dining experience. My kids love building their own bowls, and I’ve noticed they’re more likely to try everything when presented this way.

    Global Flavor Variations

    The beauty of this bowl is how easily it adapts to different flavor profiles. For a Mediterranean twist, swap the spices for oregano and lemon zest, then top with olives and feta. An Asian-inspired version works wonderfully with ginger, garlic, and soy sauce on the chicken, finished with sesame seeds and green onions. My personal favorite variation uses a Korean BBQ inspired marinade on the chicken with a sprinkle of toasted sesame seeds—the sweet-savory balance with the sweet potatoes is absolutely divine.

    Storage & Troubleshooting Guide

    Perfect Meal Prep Containers

    For optimal storage, invest in divided containers that keep components separate until serving time. This prevents the rice from absorbing too much moisture from the other ingredients. Cool everything completely before refrigerating to prevent condensation that could make your rice soggy. When reheating, sprinkle a few drops of water over the rice before microwaving, and add fresh toppings like avocado or cilantro after heating for the best texture contrast and brightest flavors.

    Rescuing Common Issues

    If your sweet potatoes turned out too soft, transform them into a quick mash to create a base layer under the rice—this happy accident often becomes a family favorite! For dry chicken, a quick sauce drizzled over the top works wonders—mix Greek yogurt with lime juice and a touch of honey for a tangy finish. If your rice clumps together after refrigeration, a fork fluffing with a splash of broth while reheating will revive its texture. These simple fixes have saved many meal-prep batches in my kitchen.

    Frequently Asked Questions

    Can I make this Chicken & Sweet Potato Rice Bowl ahead of time?

    Absolutely! Prepare all components up to 3 days ahead. Store separately in airtight containers and assemble just before serving for the freshest experience. The flavors actually develop nicely over time.

    What’s the best rice to use for this recipe?

    Jasmine or basmati rice works beautifully for their fragrance and fluffiness. Brown rice adds a nutty flavor and extra fiber, though you’ll need to adjust cooking time accordingly.

    Can I substitute the chicken with something else?

    Definitely! Try firm tofu, shrimp, or chickpeas for delicious alternatives. Just adjust cooking times—shrimp cooks in minutes, while chickpeas just need warming through.

    How do I prevent the sweet potatoes from getting mushy?

    Roast at high heat (425°F) and don’t overcrowd the pan. The space allows moisture to evaporate, creating caramelization instead of steaming.

    What’s the best way to reheat leftover Chicken & Sweet Potato Rice Bowl?

    Microwave with a damp paper towel over the bowl for 1-2 minutes. This creates steam that revives the rice without drying out the chicken.

    Final Thoughts

    This Chicken & Sweet Potato Rice Bowl has become more than just a recipe in my household—it’s a reliable solution for those nights when I want something nutritious yet comforting. The balance of protein, complex carbs, and vibrant flavors makes it satisfying in a way that few simple dishes achieve. I find myself returning to it season after season, tweaking the spices and toppings to match my mood. Whether you’re meal prepping for a busy week or serving a casual dinner, this bowl delivers both nourishment and joy in equal measure. Find more of my favorite bowl recipes on Pinterest.

  • Grilled Chicken with Zucchini & Creamy Herb Sauce—Irresistibly Delicious!

    Grilled Chicken with Zucchini & Creamy Herb Sauce—Irresistibly Delicious!

    Grilled Chicken with Zucchini & Creamy Herb Sauce—Irresistibly Delicious!

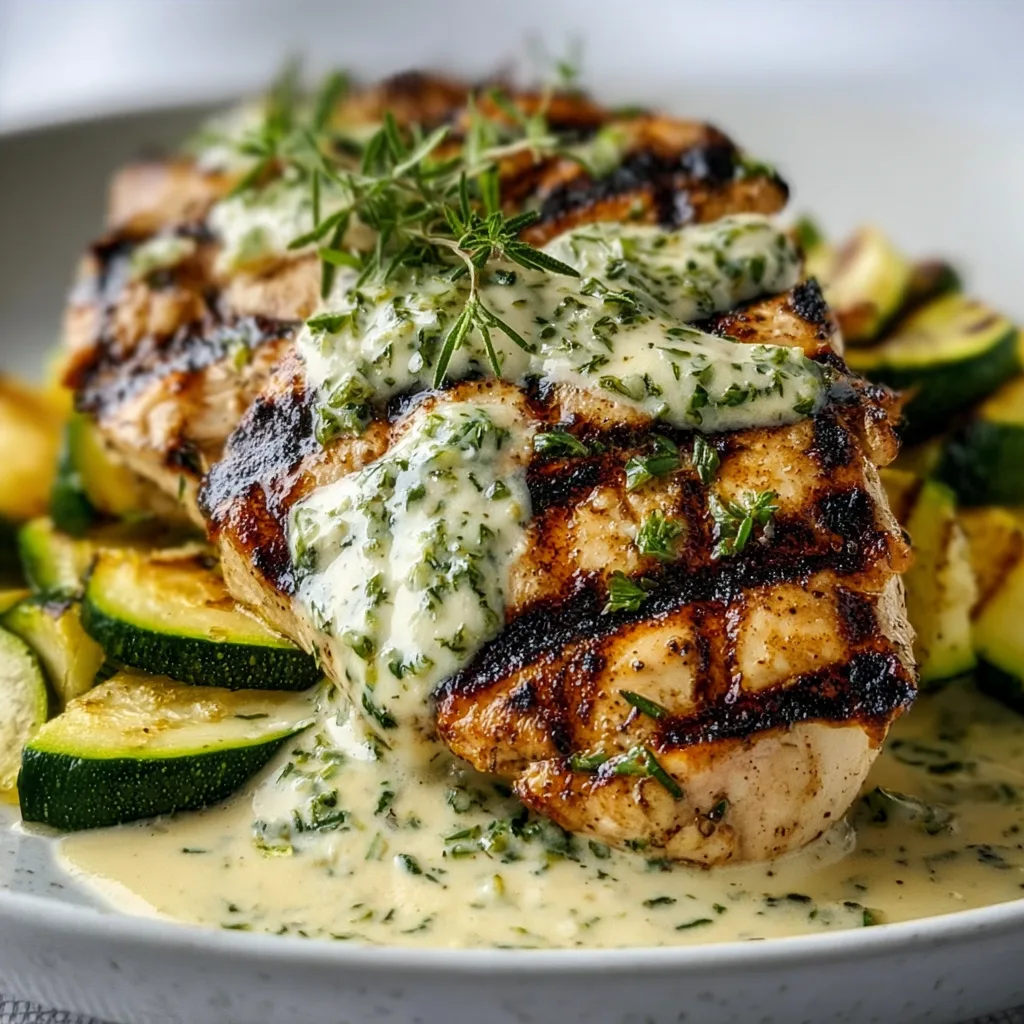
    Grilled Chicken with Zucchini & Creamy Herb Sauce is my summer salvation on those evenings when the kitchen feels too hot but my craving for something satisfying won’t quit. The first time I made this dish, the aroma of herbs and garlic wafting through my backyard had my neighbor peeking over the fence asking what I was cooking. There’s something magical about the way the char marks on both the chicken and zucchini create the perfect canvas for that silky herb sauce to cling to. It’s simple enough for weeknights but impressive enough for company – my kind of cooking balance! If you love easy but flavor-packed meals, this recipe is about to become your new favorite.

    Recipe

    Why You’ll Love This Grilled Chicken with Zucchini & Creamy Herb Sauce

    Perfect Balance of Flavors and Textures

    The beauty of this Grilled Chicken with Zucchini & Creamy Herb Sauce lies in its harmonious contrasts. The smoky char from the grill creates a delicious crust on both the juicy chicken and tender zucchini, while the creamy herb sauce adds a cooling, aromatic element that ties everything together. I love how the zucchini caramelizes slightly on the edges but stays tender-crisp in the center. The sauce – oh, that sauce! – combines fresh herbs, tangy yogurt, and a hint of lemon that brightens every bite. It’s that perfect balance that makes this dish impossible to resist.

    Quick and Healthy Weeknight Solution

    When life gets hectic (which seems like always lately), this dish is my saving grace. From start to finish, you can have Grilled Chicken with Zucchini & Creamy Herb Sauce on the table in under 30 minutes. The lean protein from the chicken paired with nutrient-rich zucchini makes this a balanced meal without feeling like “diet food.” I’ve made this on busy weeknights when I’m tempted to order takeout, and it always reminds me that homemade can be just as quick and infinitely more satisfying. Plus, the active cooking time is minimal – the grill does most of the work while you mix up that dreamy sauce.

    Essential Tips & Tricks

    Mastering the Marinade

    The secret to truly exceptional Grilled Chicken with Zucchini & Creamy Herb Sauce starts with a proper marinade. Even 15 minutes makes a difference, but if you can plan ahead, let that chicken bathe in those flavors for 2-4 hours. I use a simple blend of olive oil, lemon juice, garlic, and herbs, but the acid-to-oil ratio is crucial – too much lemon and the chicken texture changes. For the zucchini, I keep it separate with just olive oil, salt, and pepper so its delicate flavor doesn’t get overwhelmed. When I’m really pressed for time, I’ve even used this quick marinade technique where you score the chicken slightly to help the flavors penetrate faster.

    Grilling Temperature Control

    Nothing ruins this dish faster than chicken that’s charred on the outside but raw inside, or zucchini that’s turned to mush. The key is temperature zones on your grill – medium-high heat (around 375-400°F) for the chicken and medium for the more delicate zucchini. I learned this the hard way after serving blackened-yet-undercooked chicken to my in-laws (mortifying!). Use a meat thermometer to ensure chicken reaches 165°F internally, and watch those zucchini planks carefully – they need just 2-3 minutes per side until they develop grill marks while maintaining their structure. Remember, they’ll continue cooking slightly after removal.

    Serving Ideas & Creative Variations

    Complementary Side Dishes

    While Grilled Chicken with Zucchini & Creamy Herb Sauce is practically a complete meal on its own, I love adding a starch to round things out. A simple herb-flecked rice soaks up that extra sauce beautifully, while a crusty baguette is perfect for more casual dining. For a lower-carb option, try cauliflower rice or a butter lettuce salad with a light vinaigrette. When I’m entertaining, I’ll often add these garlic butter parmesan knots on the side – they’re always a hit and complement the Mediterranean flavors perfectly. For a complete color palette, consider adding something red like roasted cherry tomatoes or a quick bell pepper sauté.

    Flavor Twists and Adaptations

    Don’t be afraid to play with the flavor profile of this versatile dish! My Mediterranean version uses fresh dill, parsley, and oregano in the sauce, but you could easily pivot to a Mexican-inspired meal with cilantro, lime, and a touch of cumin. For an Italian twist, use basil and oregano, then top with a sprinkle of Parmesan. The protein is flexible too – swap chicken for salmon, shrimp, or even firm tofu for vegetarians. I’ve made this with different summer vegetables like bell peppers, eggplant, or asparagus depending on what looks fresh at the market. The creamy sauce works with virtually any grilled protein and vegetable combination.

    Storage & Troubleshooting Guide

    Proper Storage and Reheating

    Grilled Chicken with Zucchini & Creamy Herb Sauce makes fantastic leftovers when stored properly. Keep the components separate if possible – store cooled chicken and zucchini in an airtight container in the refrigerator for up to 3 days, with the sauce in a separate container. When reheating, the microwave works in a pinch, but for best results, I warm the chicken in a 300°F oven covered with foil to prevent drying out. The zucchini is best at room temperature or just slightly warmed. Never boil the sauce when reheating – gentle heat is key, or it might separate. I often make extra sauce specifically for leftovers!

    Common Problems and Solutions

    If your Grilled Chicken with Zucchini & Creamy Herb Sauce isn’t turning out perfectly, a few troubleshooting tips can help. Dry chicken is usually from overcooking – invest in an instant-read thermometer and remove the chicken at 160°F as it will continue cooking to 165°F while resting. If your zucchini is getting soggy, it’s likely cut too thin or cooked too long – aim for ½-inch planks and watch them carefully. For a broken or thin sauce, whisk in a teaspoon of mayo or an extra spoonful of Greek yogurt to re-emulsify. And if your grill is flaring up, causing burning, create a temporary cool zone by turning off one burner.

    Frequently Asked Questions

    Can I make Grilled Chicken with Zucchini & Creamy Herb Sauce without a grill?

    Absolutely! Use a grill pan or cast iron skillet over medium-high heat. You’ll still get nice sear marks, though you might miss some of that smoky flavor. A quick broil at the end can help mimic the charred finish.

    What herbs work best in the creamy sauce?

    Fresh herbs make all the difference – dill, parsley, chives, and basil are my favorites. Use at least two different herbs for complexity, and add them at the very end to preserve their bright flavor and color.

    How can I make this recipe dairy-free?

    Replace the Greek yogurt in the Grilled Chicken with Zucchini & Creamy Herb Sauce with dairy-free yogurt or a blend of dairy-free mayo and a splash of lemon juice. Coconut cream also works beautifully for a slightly sweeter profile.

    Can I prep any components ahead of time?

    Yes! Marinate the chicken up to 24 hours ahead, and the sauce can be made up to 2 days in advance. Just slice the zucchini shortly before grilling to prevent it from releasing too much moisture.

    What’s the best thickness to cut the zucchini?

    Aim for ½-inch planks cut lengthwise. This thickness stands up to grilling without falling apart but cooks through quickly. If your zucchini are large, halve them lengthwise first, then cut into planks.

    Final Thoughts

    This Grilled Chicken with Zucchini & Creamy Herb Sauce has become my summer signature dish for good reason. It transforms simple ingredients into something that feels special without hours of effort. I love how it showcases seasonal produce while delivering big on flavor. There’s something deeply satisfying about serving a meal that’s nutritious, delicious, and brings people together around the table. Whether you’re cooking for family on a weeknight or friends on the weekend, this recipe adapts to your needs while always delivering on taste. Find more seasonal inspiration on my Pinterest boards where I’m constantly adding new ideas!

  • Jalapeño Chicken Sandwich with Creamy Sauce | Irresistibly Spicy!

    Jalapeño Chicken Sandwich with Creamy Sauce | Irresistibly Spicy!

    Jalapeño Chicken Sandwich with Creamy Sauce | Irresistibly Spicy!

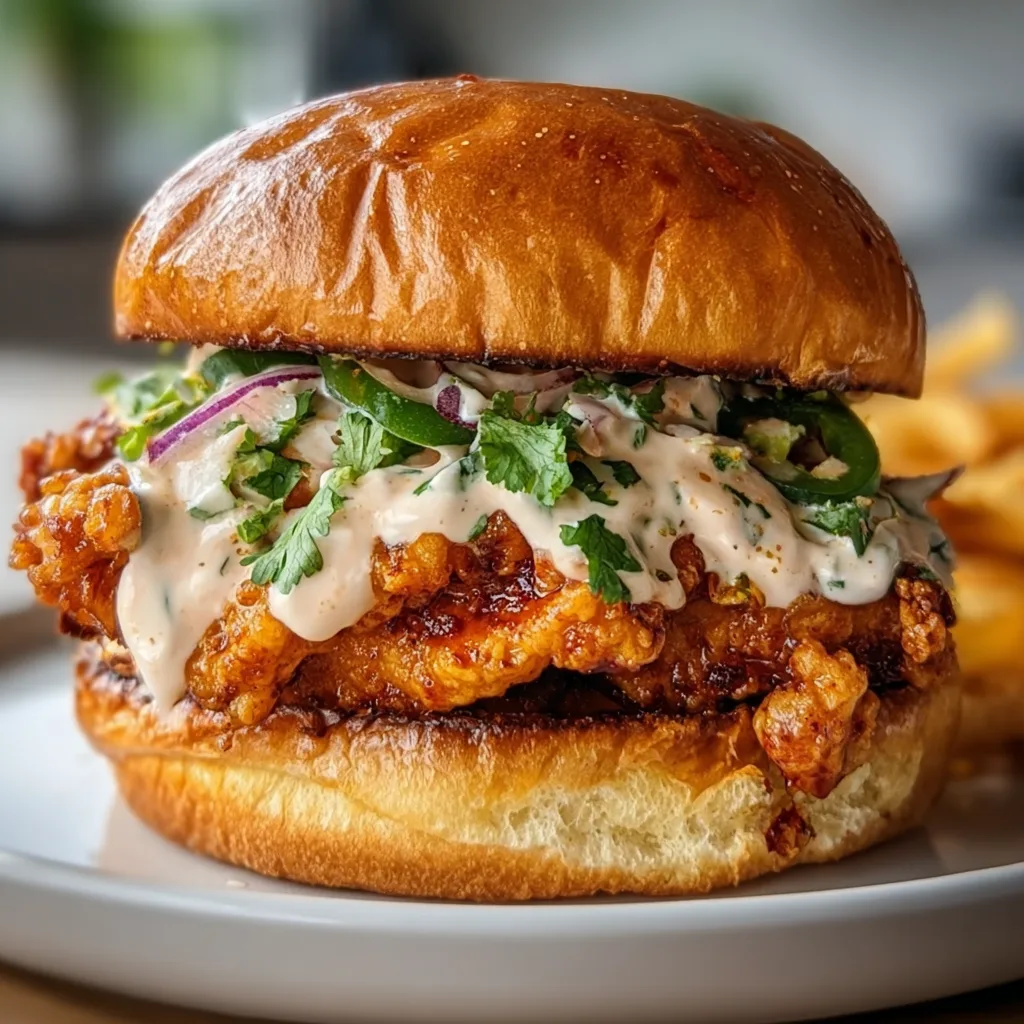
    My Jalapeños Chicken Sandwich with Creamy Sauce brings together crispy chicken, spicy jalapeños, and a velvety sauce that’ll make your taste buds dance! I created this recipe after a weekend farmers’ market trip where I found the most gorgeous, plump jalapeños. The combination of heat and creaminess creates such a perfect balance that I now make these sandwiches at least twice a month. The secret lies in marinating the chicken just long enough to infuse flavor without making the texture mushy. Trust me, once you bite into this sandwich, regular chicken sandwiches will never quite satisfy you the same way again!

    Recipe

    Why You’ll Love This Jalapeños Chicken Sandwich with Creamy Sauce

    Perfect Balance of Heat and Flavor

    This sandwich hits all the right notes with its carefully balanced heat level that won’t overwhelm your palate. The jalapeños bring just enough kick while the creamy sauce cools things down at just the right moment. I’ve found that removing some (but not all) of the jalapeño seeds creates that perfect middle ground of spiciness. What makes this truly special is how the chicken absorbs the subtle lime and garlic notes from the marinade. It reminds me of the first time I tried authentic street food in Austin – that moment when you realize simple ingredients can create something extraordinary when paired thoughtfully.

    Quick and Satisfying Meal

    From start to finish, you can have these sandwiches ready in about 30 minutes, making them perfect for busy weeknights or impromptu gatherings. The make-ahead potential is fantastic too – marinate the chicken overnight and prep the sauce in advance for an even quicker assembly. I love how substantial these sandwiches feel without being heavy. The protein-packed chicken keeps me satisfied for hours, unlike some lighter lunches that leave me hungry again by mid-afternoon. Plus, they’re endlessly customizable depending on what’s in your fridge – similar to my White Cheddar Spinach Chicken Burgers that adapt to whatever toppings you have on hand.

    Essential Tips & Tricks

    Perfecting the Chicken

    The key to exceptional chicken in this sandwich is in the preparation technique. Pound the chicken breasts to an even thickness (about ½ inch) before marinating – this ensures quick, even cooking and tender meat throughout. For maximum flavor penetration, score the surface of the chicken lightly with a knife before adding it to the marinade. I learned this trick from my grandmother, who always made the most flavorful chicken despite using simple ingredients. Let the chicken marinate for at least 30 minutes, but no more than 8 hours – the acidity in the marinade can break down the proteins too much if left too long.

    Mastering the Creamy Sauce

    The sauce is what transforms this from a good sandwich to an unforgettable one. The secret ingredient is a tablespoon of pickle juice, which adds brightness and complexity without overwhelming the other flavors. Make sure all ingredients are at room temperature before mixing to ensure a smooth, well-incorporated sauce. For an extra layer of flavor, roast one of your jalapeños before adding it to the sauce – this adds a subtle smokiness that complements the fresh heat from the raw jalapeños. I discovered this technique by accident when I had a roasted pepper leftover from another recipe, and now it’s non-negotiable! Check out my Roasted Tomato Salsa for more ideas on incorporating roasted elements.

    Serving Ideas & Creative Variations

    Perfect Pairings

    These sandwiches pair beautifully with sides that complement their bold flavors. My favorite combination is with sweet potato fries tossed in a light dusting of chili powder – the sweetness balances the heat perfectly. For a refreshing contrast, serve with a simple slaw dressed in lime and honey. On hot summer days, I love adding a side of chilled cucumber spears sprinkled with tajin seasoning. The cooling crunch provides such welcome relief between bites of the spicy sandwich. For an impressive spread, serve alongside my Crispy Baked Chicken Wings for a restaurant-worthy feast that’ll have everyone asking for your recipes.

    Exciting Variations

    The basic recipe is fantastic, but don’t be afraid to make it your own with creative twists. For a tropical variation, add grilled pineapple slices and substitute part of the mayonnaise with coconut cream in the sauce. Craving something heartier? Add crispy bacon and avocado slices for a California-inspired version that’s absolutely decadent. One of my family’s favorites is the “breakfast sandwich” variation – topped with a fried egg and served on a toasted English muffin. The runny yolk creates an additional sauce that’s simply divine. For vegetarians, marinated and grilled portobello mushrooms make an excellent substitute for chicken while maintaining that satisfying umami flavor.

    Storage & Troubleshooting Guide

    Proper Storage Techniques

    To keep your sandwich components fresh, store them separately whenever possible. The cooked chicken will stay good in an airtight container in the refrigerator for up to 3 days. The creamy sauce can be refrigerated for up to 5 days – just give it a good stir before using as separation is natural. If you need to store assembled sandwiches (perhaps for lunch meal prep), wrap them tightly in parchment paper, then aluminum foil, keeping the lettuce and tomato separate to prevent sogginess. I learned this the hard way after one too many sad, soggy work lunches! For best results, toast the bread right before assembly, even if using pre-cooked chicken.

    Troubleshooting Common Issues

    If your chicken turns out dry, the likely culprit is overcooking. Next time, use an instant-read thermometer and remove the chicken from heat when it reaches 160°F – it will continue cooking to the safe 165°F as it rests. For sauce that’s too thin, add more mayonnaise one tablespoon at a time until you reach your desired consistency. If the sauce lacks punch, a splash of hot sauce or extra lime juice can brighten it up. Finding your jalapeños aren’t spicy enough? This happens often with store-bought peppers. Try adding a pinch of cayenne to the sauce or using a serrano pepper instead. Remember that heat levels vary greatly between individual peppers, so always taste and adjust accordingly.

    Frequently Asked Questions

    Can I make this jalapeños chicken sandwich ahead of time?

    Yes! Marinate the chicken and prepare the creamy sauce up to 24 hours in advance. Store separately in the refrigerator. Cook the chicken just before serving for the best texture and assemble sandwiches fresh.

    How can I adjust the spice level?

    Control the heat by adjusting the amount of jalapeño seeds you include. For milder flavor, remove all seeds and membranes. For maximum heat, keep them all. You can also substitute poblanos (milder) or serranos (hotter).

    What bread works best for this sandwich?

    Brioche buns are my favorite for their slight sweetness and soft texture, but ciabatta rolls, sourdough, or potato rolls also work beautifully. Choose something sturdy enough to hold all the fillings without falling apart.

    Can I use chicken thighs instead of breasts?

    Absolutely! Boneless, skinless chicken thighs work wonderfully and often result in juicier sandwiches. They may need an extra 2-3 minutes of cooking time compared to pounded chicken breasts.

    Is there a way to make this jalapeños chicken sandwich dairy-free?

    Yes, simply substitute the mayonnaise in the creamy sauce with a plant-based mayo and omit any cheese toppings. The sandwich will still be delicious with all the jalapeño flavor coming through beautifully.

    Final Thoughts

    This Jalapeños Chicken Sandwich with Creamy Sauce has become my go-to recipe when I want to impress without spending hours in the kitchen. The combination of spicy, creamy, and savory elements creates a crave-worthy meal that feels special enough for company yet simple enough for weeknights. I love seeing friends’ expressions when they take their first bite – that moment of surprise when they realize this isn’t just any chicken sandwich. Don’t forget to check out more of my recipes on Pinterest for more inspiration that brings together bold flavors with approachable techniques!

  • Grilled Steak Bowl Bliss: Juicy, Saucy & Zucchini-Perfect!

    Grilled Steak Bowl Bliss: Juicy, Saucy & Zucchini-Perfect!

    Grilled Steak Bowl Bliss: Juicy, Saucy & Zucchini-Perfect!

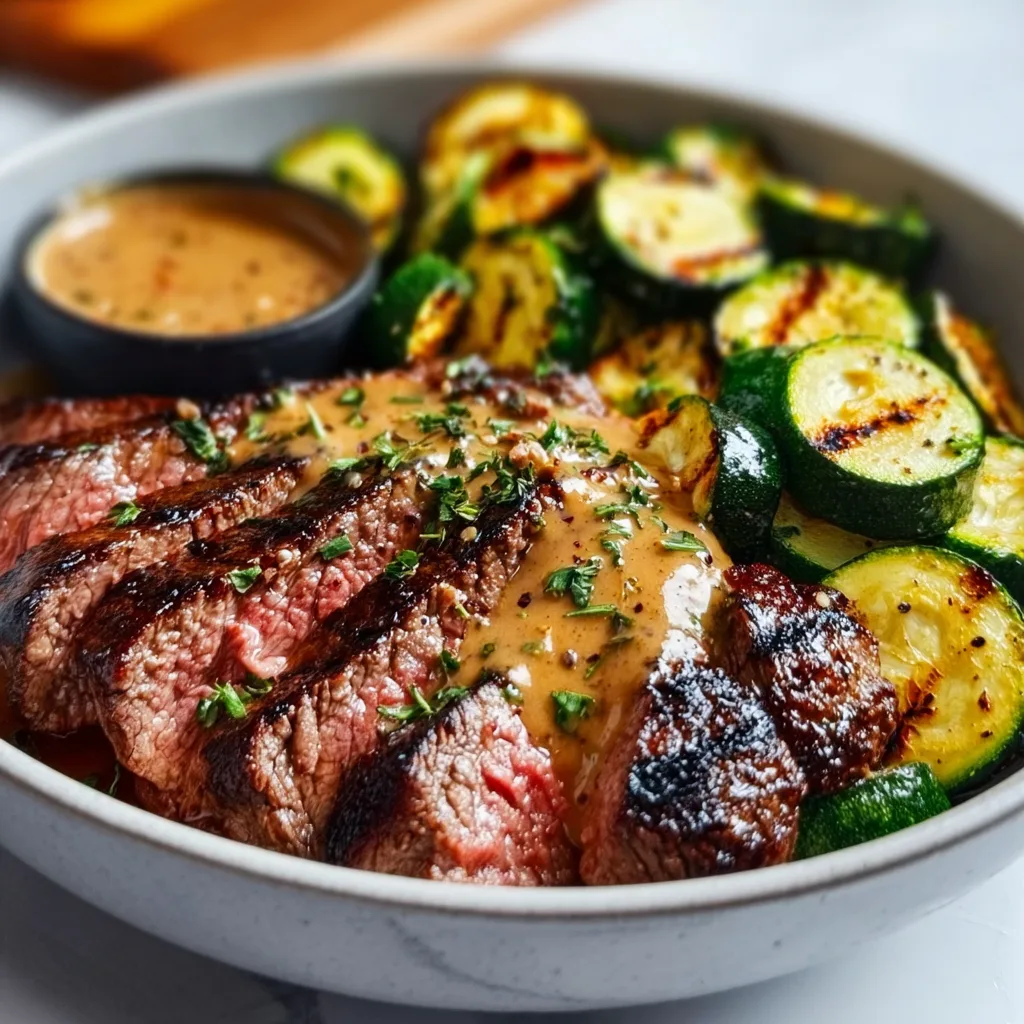
    This Grilled Steak Bowl with Sauce & Grilled Zucchini has become my absolute weeknight savior! There’s something magical about the combination of perfectly seared steak strips nestled alongside charred zucchini, all drizzled with a sauce that makes your taste buds dance. I discovered this recipe during a particularly hectic week when I needed something that felt special without requiring hours in the kitchen. The sizzle of the steak hitting the grill pan instantly transforms my kitchen into a little oasis of delicious aromas that make even the most exhausting day fade away. If you’re looking for a restaurant-quality meal that comes together quickly, this bowl is about to become your new favorite too.

    Recipe

    Why You’ll Love This Grilled Steak Bowl with Sauce & Grilled Zucchini

    A Complete Meal in One Bowl

    There’s something deeply satisfying about a well-composed bowl where every element plays its part perfectly. The juicy, protein-packed steak delivers that savory satisfaction we crave, while the grilled zucchini adds a smoky sweetness that balances the richness. I love how the sauce ties everything together, coating each bite with flavor. On busy nights when I want something nutritionally complete without washing multiple pots and pans, this recipe is my go-to solution. The contrasting textures—tender steak, slightly crisp vegetables, and the smooth sauce—create an experience that feels far more sophisticated than the minimal effort required.

    Quick Yet Impressive Results

    Don’t you just love recipes that look like you spent hours in the kitchen but actually come together in under 30 minutes? That’s exactly what this steak bowl delivers! The high-heat cooking method creates those gorgeous grill marks and caramelization that signal a restaurant-quality meal. I’ve served this to impromptu dinner guests who were genuinely impressed, never guessing how simple it was to prepare. The marinade does much of the heavy lifting flavor-wise, infusing the steak with depth while you attend to other things. When life gets hectic but you refuse to compromise on a delicious dinner, this recipe strikes that perfect balance between convenience and wow-factor.

    Essential Tips & Tricks

    Selecting and Preparing the Perfect Steak

    Choosing the right cut makes all the difference in this recipe. I recommend flank or skirt steak for their beautiful marbling and how quickly they cook. Before grilling, let your steak come to room temperature for about 20 minutes—this ensures even cooking and maximum tenderness. Pat the meat dry with paper towels before adding your marinade; this seemingly small step dramatically improves searing. When slicing, remember to cut against the grain at a slight angle, creating those perfect, tender strips that make this bowl so satisfying. If you’re looking for extra flavor inspiration, check out these Korean BBQ Steak Rice Bowls for a delicious variation on marinades.

    Mastering the Grilled Zucchini

    Zucchini can quickly go from perfectly charred to sadly soggy, so timing is everything. Cut your zucchini into consistent thickness (about ½-inch planks) to ensure even cooking. A screaming hot grill or cast iron pan creates those beautiful char marks while keeping the interior slightly crisp. I like to season zucchini simply with olive oil, salt, and pepper just before grilling—adding herbs or garlic powder afterward prevents burning. The zucchini should take just 2-3 minutes per side; you’re looking for slight tenderness while maintaining structure. This technique works beautifully with other vegetables too, making it easy to adapt based on what’s in season.

    Serving Ideas & Creative Variations

    Building Your Bowl Base

    The foundation of your steak bowl can completely transform the eating experience. While fluffy jasmine rice is my go-to for its aromatic quality and how beautifully it soaks up the sauce, don’t feel limited! Quinoa adds protein and a pleasant nuttiness, while cauliflower rice keeps things lighter for low-carb preferences. I sometimes use warm farro or barley for a chewier texture that stands up wonderfully to the juicy steak. Consider adding a thin layer of baby spinach beneath your warm grains for an extra nutrition boost that wilts perfectly from the residual heat. For a similar approach with different proteins, my Hot Honey Salmon Bites use this same bowl-building philosophy.

    Customizing Your Sauce Profile

    The sauce is where you can really make this recipe your own! My classic version combines Greek yogurt, lime juice, and chipotle for a creamy, tangy drizzle with gentle heat. For an Asian-inspired variation, try mixing soy sauce, rice vinegar, honey, and sesame oil with a touch of ginger. When I’m craving something herbaceous, a quick blend of cilantro, parsley, olive oil, and lemon creates a bright chimichurri that cuts through the richness of the steak. Keep a few sauce components ready in your refrigerator, and you can create entirely different flavor profiles throughout the week while using the same cooking technique.

    Storage & Troubleshooting Guide

    Meal Prep and Storage Solutions

    This recipe is perfect for intentional leftovers that transform into multiple meals. Store the steak, zucchini, and base separately in airtight containers for up to 3 days. The sauce will keep for about 5 days in a sealed jar—just give it a quick whisk before using if separation occurs. When reheating, I prefer to use a skillet over medium heat rather than the microwave to maintain the steak’s texture. For meal prep, consider slightly undercooking the zucchini so it doesn’t become too soft when reheated. I love preparing double batches on Sunday, creating a foundation for quick lunches that feel intentional rather than like sad leftovers.

    Fixing Common Cooking Challenges

    Even experienced cooks sometimes encounter issues with steak or grilled vegetables. If your steak turns out tougher than desired, try slicing it thinner and adding extra sauce to compensate. For next time, consider using a meat thermometer—medium-rare (130-135°F) typically yields the most tender results for these cuts. If your zucchini releases too much water and becomes soggy, try salting it 15 minutes before cooking, then patting dry to draw out excess moisture. For a grill that’s not hot enough to create proper char marks, finishing the vegetables under a broiler for 1-2 minutes can achieve that desired caramelization without overcooking.

    Frequently Asked Questions

    What’s the best cut of steak for this Grilled Steak Bowl with Sauce & Grilled Zucchini?

    Flank, skirt, or flat iron steak work best due to their flavor and quick cooking time. For budget options, sirloin tips can also work well when sliced thinly against the grain.

    Can I make this recipe ahead of time?

    Absolutely! Prepare all components separately and store refrigerated for up to 3 days. Keep the sauce separate and assemble just before serving for the freshest experience.

    How can I make this recipe dairy-free?

    Replace the yogurt-based sauce with a blend of avocado, lime juice, and herbs, or use coconut yogurt as your creamy base with the same seasonings.

    What vegetables can I substitute for zucchini?

    Bell peppers, eggplant, asparagus, or yellow squash all grill beautifully. Choose vegetables with similar cooking times or adjust grilling duration accordingly.

    Is there a way to make this vegetarian?

    Replace the steak with grilled portobello mushrooms marinated in the same seasonings, or try firm tofu that’s been pressed and marinated for at least 30 minutes before grilling.

    Final Thoughts

    This Grilled Steak Bowl with Sauce & Grilled Zucchini has saved countless weeknight dinners in my home while still making mealtime feel special. The beauty lies in its adaptability—switch up your base, try different sauces, or swap vegetables based on what’s in season. I find myself returning to this recipe whenever I need that perfect balance of nourishing, satisfying, and quick. The next time you’re tempted to order takeout, give this bowl a try instead. Your taste buds (and budget) will thank you for creating this restaurant-worthy meal right in your own kitchen. Find more inspiration for your meal planning on Pinterest.

  • Bang Bang Salmon: Mouthwatering Flavor Explosion You Can’t Miss!

    Bang Bang Salmon: Mouthwatering Flavor Explosion You Can’t Miss!

    Bang Bang Salmon: Mouthwatering Flavor Explosion You Can't Miss!

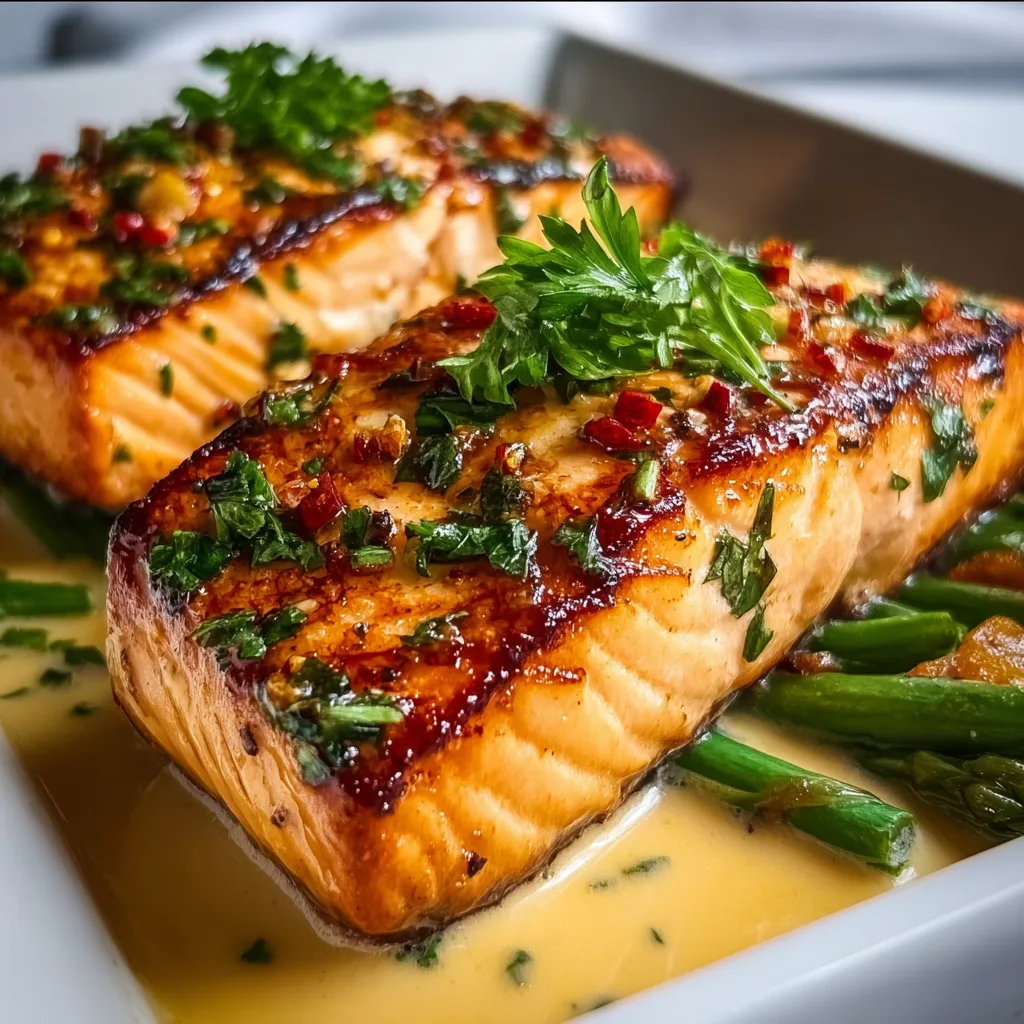
    Bang Bang Salmon brings together tender salmon fillets with a creamy, sweet-spicy sauce that’s absolutely irresistible. Every time I make this dish, the kitchen fills with a tantalizing aroma that draws everyone in like a magnet. The combination of crispy-edged salmon and that signature bang bang sauce—with its perfect balance of heat and sweetness—creates a restaurant-quality meal that’s surprisingly simple to prepare. I first tried making this after a busy week when I needed something special but quick, and it’s been in my regular rotation ever since. Ready in under 30 minutes, this Bang Bang Salmon will become your new favorite weeknight dinner sensation.

    Recipe

    Why You’ll Love This Bang Bang Salmon

    Perfect Balance of Flavors and Textures

    The magic of Bang Bang Salmon lies in its incredible contrast of textures and flavors. The salmon develops a beautiful golden crust while staying moist and tender inside—a perfect canvas for the creamy, spicy-sweet sauce. Each bite delivers a harmonious blend of rich salmon, creamy mayo, the subtle sweetness of honey, and that signature kick from sriracha. I love how the sauce clings to the fish, creating little pockets of flavor that burst with each bite. The slight tang from the lime juice brightens everything up, making each mouthful a perfect balance of indulgence and freshness.

    Quick and Impressive Dinner Solution

    When you need a showstopper meal but don’t have hours to spend in the kitchen, Bang Bang Salmon comes to the rescue. It takes just 25 minutes from start to finish, yet looks and tastes like something from a high-end restaurant. I’ve served this to last-minute dinner guests who couldn’t believe it wasn’t a complicated recipe. The sauce comes together in seconds while the salmon cooks, making this perfect for busy weeknights when you want something special without the fuss. Plus, it’s naturally gluten-free and can be adjusted to suit different heat preferences.

    Essential Tips & Tricks

    Selecting and Preparing the Perfect Salmon

    Choosing the right salmon is the foundation of success for this recipe. Look for center-cut salmon fillets of even thickness (about 1-1.5 inches) to ensure they cook evenly. I prefer skin-on fillets as they help protect the delicate flesh during cooking, though you can easily eat around the skin later. Pat the salmon completely dry before seasoning—this is crucial for achieving that beautiful sear. Season with salt and pepper just before cooking, not in advance, as salt draws out moisture. For the best flavor, bring salmon to room temperature for 15 minutes before cooking to promote even heat distribution.

    Mastering the Bang Bang Sauce

    The signature sauce is what transforms this dish, so getting it right matters! For the perfect consistency, combine mayo, sweet chili sauce, sriracha, and honey in a small bowl, whisking until completely smooth. Adjust the sriracha to your heat preference—start with less if you’re sensitive to spice. The sauce can be made up to 3 days ahead and stored in the refrigerator, which actually allows the flavors to meld beautifully. For an extra layer of flavor, add a teaspoon of roasted garlic to the sauce. Don’t forget that final squeeze of fresh lime juice just before serving—it brightens everything up wonderfully.

    Serving Ideas & Creative Variations

    Complementary Side Dishes

    Bang Bang Salmon pairs beautifully with light, fresh sides that balance its rich flavors. My favorite combination is steamed jasmine rice with thinly sliced cucumbers dressed simply with rice vinegar and sesame seeds. The cool crunch against the warm salmon creates a delightful contrast. Roasted broccoli or asparagus with a light drizzle of sesame oil makes another excellent accompaniment. For a complete Asian-inspired meal, serve with crispy garlic rice and quick-pickled vegetables. On warmer evenings, I love serving this salmon over a bed of mixed greens with avocado for a substantial salad that feels like a treat.

    Exciting Flavor Twists

    While the classic Bang Bang Salmon is perfect as is, there are several delicious variations worth trying. For a tropical twist, add a tablespoon of finely diced pineapple to the sauce—the sweet-tangy notes complement the spice beautifully. Coconut lovers can replace half the mayo with coconut cream for a subtle island flavor. For an extra umami dimension, add a teaspoon of miso paste to the sauce mixture. If you enjoy herbs, finishing the dish with fresh cilantro, Thai basil, or mint adds a wonderful aromatic element. For special occasions, I sometimes add a tablespoon of tobiko (flying fish roe) on top for a stunning presentation and delightful pop.

    Storage & Troubleshooting Guide

    Proper Storage and Reheating

    Leftover Bang Bang Salmon will keep well when properly stored in an airtight container in the refrigerator for up to 2 days. I recommend storing the salmon and any remaining sauce separately to prevent the fish from becoming soggy. When reheating, do so gently to avoid drying out the salmon. The microwave works in a pinch (30-second intervals at 50% power), but for best results, reheat in a covered skillet over low heat with a splash of water to create steam. Cold leftover salmon is also delicious flaked over a salad or wrapped in lettuce leaves with avocado for a light lunch option.

    Solving Common Challenges

    The most common issue with Bang Bang Salmon is sauce separation or salmon that sticks to the pan. If your sauce looks broken or thin, whisk in an additional teaspoon of mayo to re-emulsify it. For salmon that sticks, ensure your pan is properly preheated before adding oil, and don’t try to flip the fish too early—it will release naturally when ready. If your sauce is too spicy, balance it with an extra drizzle of honey and a dollop of mayo. For salmon that’s not crispy enough, try patting it extremely dry and using a cast iron skillet for better heat retention.

    Frequently Asked Questions

    What exactly is Bang Bang Salmon?

    Bang Bang Salmon features salmon fillets topped with a creamy, sweet-spicy sauce made from mayo, sweet chili sauce, and sriracha. The dish gets its name from the popular “bang bang” sauce that delivers a perfect balance of heat and sweetness.

    Can I make Bang Bang Salmon ahead of time?

    You can prepare the sauce up to 3 days ahead and store it in the refrigerator. The salmon itself is best cooked just before serving, though leftovers can be enjoyed cold in salads.

    What can I substitute for sriracha in the sauce?

    Any hot sauce works well, though the flavor profile will change slightly. Gochujang (Korean chili paste) makes an excellent substitute with a deeper, more complex heat.

    Is Bang Bang Salmon spicy?

    The spice level is completely customizable. Start with less sriracha for a milder version, or add more for extra heat. The sweet chili sauce and mayo help balance the spiciness.

    Can I use frozen salmon for this recipe?

    Yes, but thaw it completely in the refrigerator overnight and pat it very dry before cooking. Frozen-then-thawed salmon releases more moisture, so extra drying time is important.

    Final Thoughts

    Bang Bang Salmon transforms an everyday protein into a memorable meal that feels special without requiring complicated techniques. I love how this dish bridges the gap between quick weeknight cooking and impressive entertaining with minimal effort. The vibrant flavors and beautiful presentation make it a recipe I return to again and again. Whether you’re cooking for yourself, your family, or guests, this Bang Bang Salmon delivers maximum flavor impact with minimum kitchen stress. Try it once, and I guarantee it will earn a permanent spot in your recipe collection.

    For more delicious salmon recipes and cooking inspiration, visit our Pinterest page.

  • Spicy Keto Korean Beef with Cucumber Salad – Explosive Flavor Boost!

    Spicy Keto Korean Beef with Cucumber Salad – Explosive Flavor Boost!

    Spicy Keto Korean Beef with Cucumber Salad – Explosive Flavor Boost!

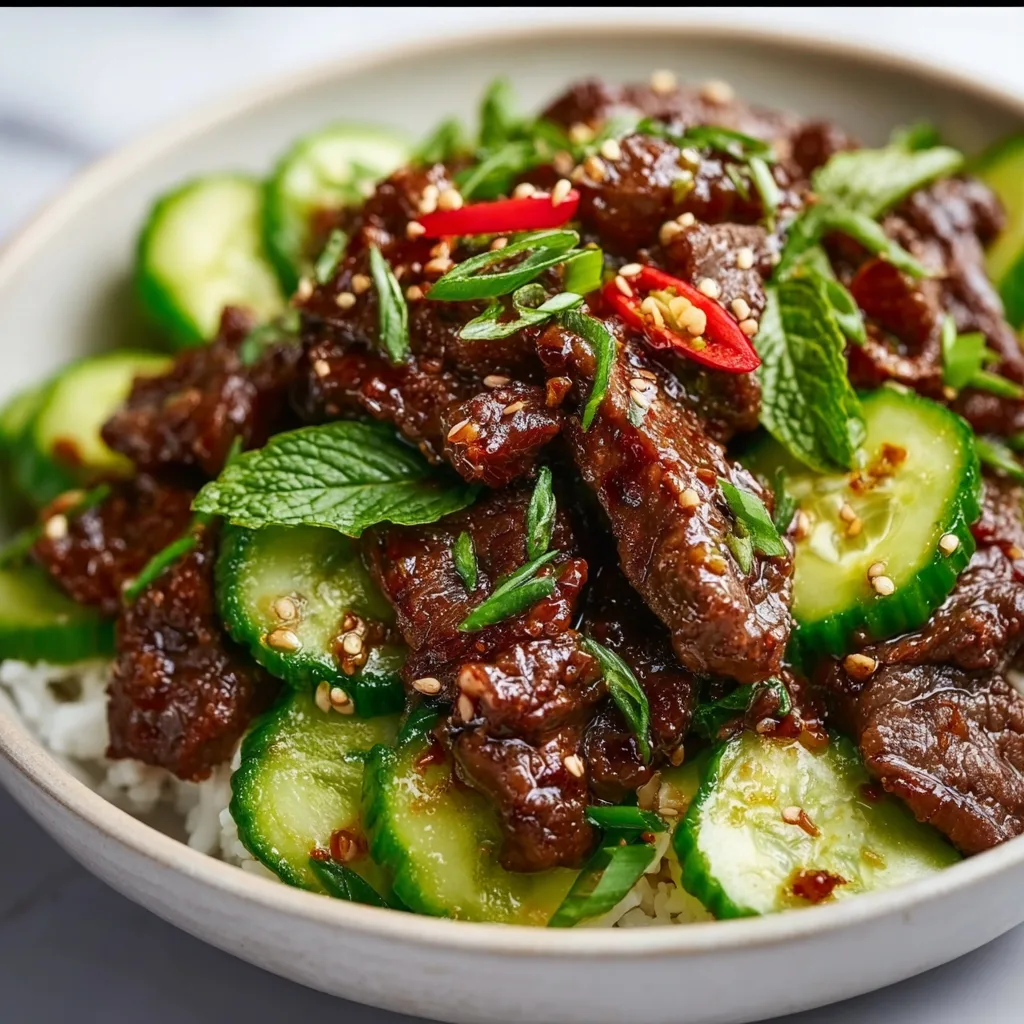
    Spicy Keto Korean Beef with Cucumber Salad has become my absolute weeknight savior! There’s something magical about the combination of tender beef strips coated in that sweet-spicy gochujang sauce that makes my taste buds dance. I discovered this recipe during my keto journey last year, and it’s been on regular rotation ever since. The cool, crisp cucumber salad provides the perfect counterbalance to the heat, creating a symphony of flavors that’s both satisfying and carb-conscious. If you’re looking for a Korean-inspired meal that won’t derail your keto goals, this dish delivers all the comfort without the guilt.

    Recipe

    Recipe

    Why You’ll Love This Spicy Keto Korean Beef with Cucumber Salad

    Perfect Balance of Flavors and Textures

    This dish is a masterclass in contrast – fiery beef meets cooling cucumber in perfect harmony. The gochujang paste (which we’ll adapt to be keto-friendly) brings that distinctive Korean flavor profile without the sugar overload. I love how the beef gets that gorgeous caramelized exterior while staying tender inside. The cucumber salad adds a refreshing crunch that cuts through the richness. Last week, my husband actually licked the plate clean and declared it “restaurant quality,” which might be the highest compliment he’s ever given my cooking! The umami depth combined with bright acidity creates a meal that feels indulgent while keeping carbs in check.

    Quick and Weeknight Friendly

    From start to finish, this 30-minute meal fits perfectly into busy schedules without sacrificing flavor. The beef marinates while you prep the cucumber salad, making the workflow seamless. I’ve made this on countless Monday nights when my energy is low but my craving for something delicious is high! The ingredients list isn’t intimidating either – most items are pantry staples if you cook Asian-inspired dishes regularly. What I particularly appreciate is how this recipe scales easily for meal prep. Double the batch and you’ll have lunch sorted for days, with the beef and cucumber stored separately to maintain those perfect textures. It’s efficient cooking that doesn’t feel like a compromise.

    Essential Tips & Tricks

    Selecting and Preparing the Beef

    The right cut makes all the difference in this recipe. Ribeye offers amazing flavor, but I often use sirloin for a more budget-friendly option without sacrificing too much tenderness. The key technique is slicing the beef against the grain into thin strips – this breaks up the muscle fibers and ensures each bite practically melts in your mouth. For extra ease, freeze the beef for about 20 minutes before slicing; the slight firmness makes achieving those thin cuts much simpler. I’ve found that marinating for at least 15 minutes works, but if you can plan ahead, giving it 2-4 hours in the fridge allows those flavors to really penetrate and transform the meat into something extraordinary.

    Perfecting Your Keto-Friendly Sauce

    Traditional gochujang contains sugar, but there are several ways to create a keto-adapted version without sacrificing that signature flavor. I combine a small amount of gochujang (the carbs are minimal when distributed) with sugar-free sweetener, coconut aminos (instead of soy sauce), and a touch of almond butter for thickness. The secret ingredient I discovered through much experimentation is a dash of fish sauce – it adds incredible depth that compensates for the reduced gochujang. When cooking, let the sauce reduce until it’s glossy and coats the back of a spoon. This concentration of flavors creates that addictive sticky quality that clings beautifully to each slice of beef. For extra heat lovers, a sprinkle of Korean chili flakes works wonders.

    Serving Ideas & Creative Variations

    Complementary Side Dishes

    While this dish stands beautifully on its own, pairing it with the right sides elevates the entire meal. My go-to is cauliflower rice seasoned with sesame oil and scallions – it mimics traditional rice while soaking up all that glorious sauce. For added nutrition, I’ll often include a side of blanched bok choy or spinach with a light drizzle of sesame oil and a sprinkle of everything bagel seasoning. When I’m feeling extra fancy, I’ll serve small dishes of kimchi (watch the carbs on store-bought versions) and sliced avocado alongside. The combination of the spicy beef, cooling cucumber, creamy avocado, and fermented kimchi creates a Korean-inspired feast that hits every flavor note while keeping carbs impressively low.

    Protein and Flavor Swaps

    Don’t feel limited to beef – this recipe welcomes creative protein substitutions. Chicken thighs work beautifully, developing a wonderful caramelization while staying juicy. For a seafood twist, large shrimp cook even faster and absorb the marinade brilliantly. My vegetarian friends enjoy this same sauce with extra-firm tofu that’s been pressed and pan-fried until crispy before being coated in the sauce. As for the cucumber salad, try playing with different vinegars – rice vinegar is traditional, but white wine vinegar or apple cider vinegar bring interesting nuances. Sometimes I’ll add thinly sliced radishes or daikon for extra crunch and a peppery bite that complements the cool cucumber beautifully.

    Storage & Troubleshooting Guide

    Proper Storage for Maximum Freshness

    For optimal results, store the beef and cucumber components separately. The cooked beef keeps well in an airtight container in the refrigerator for up to 3 days. When reheating, a quick sizzle in a hot pan works better than microwave – this revitalizes the caramelization without overcooking the meat. The cucumber salad is best consumed within 24 hours, as it continues to release moisture and can become soggy. If you’re meal prepping, I recommend making extra marinade and storing it separately, then preparing fresh cucumber salad as needed. For freezing, the marinated raw beef freezes beautifully for up to 3 months – just thaw overnight in the refrigerator for a quick-start meal when you’re short on time.

    Troubleshooting Common Issues

    If your beef isn’t developing that beautiful caramelization, your pan likely isn’t hot enough. I preheat my cast iron until it’s almost smoking before adding the beef in a single layer – overcrowding causes steaming instead of searing. Another common issue is sauce that’s too thin; the fix is simple patience. Let it reduce further, keeping in mind it will thicken slightly as it cools. For cucumber salad that’s too watery, try salting the sliced cucumbers and letting them sit in a colander for 15 minutes before patting dry and mixing with the dressing.

    If you accidentally over-salted, adding a squeeze of fresh lime juice can help balance the flavors, while a touch more sweetener can rescue a sauce that’s too spicy.

    Frequently Asked Questions

    Is this Spicy Keto Korean Beef really keto-friendly?

    Absolutely! By using sugar-free sweeteners and limiting the gochujang paste, each serving contains approximately 6g net carbs, making it perfect for keto meal plans while maintaining authentic Korean flavors.

    Can I make this dish less spicy?

    Yes! Reduce the amount of gochujang paste and omit the optional chili flakes. The dish will still have wonderful Korean flavors without overwhelming heat.

    How do I know when the beef is perfectly cooked?

    For medium-rare, cook the thin strips for just 1-2 minutes per side. They should have a caramelized exterior but still be slightly pink inside for maximum tenderness.

    What’s the best type of cucumber for the salad?

    English or Persian cucumbers work best as they have thinner skin and fewer seeds. Their crisp texture holds up well against the dressing without becoming soggy.

    Can I prepare any components ahead of time?

    Absolutely! Marinate the beef and prepare the cucumber salad dressing up to 24 hours ahead. Slice the cucumbers and combine with the dressing just before serving.

    Final Thoughts

    This Spicy Keto Korean Beef with Cucumber Salad has become more than just a recipe in my kitchen – it’s proof that keto eating can be vibrant, exciting, and full of bold flavors. I love watching friends’ surprised expressions when I tell them it’s low-carb after they’ve cleared their plates! The combination of sizzling, spicy beef with cool, crisp cucumber creates a meal that satisfies on multiple levels. Don’t forget to check out more of my recipes on Pinterest for more keto-friendly international dishes that never compromise on flavor. Your taste buds (and your waistline) will thank you!