Blog

  • Maple Dijon Roasted Vegetables: Irresistibly Sweet & Tangy Delight!

    Maple Dijon Roasted Vegetables: Irresistibly Sweet & Tangy Delight!

    Maple Dijon Roasted Vegetables: Irresistibly Sweet & Tangy Delight!

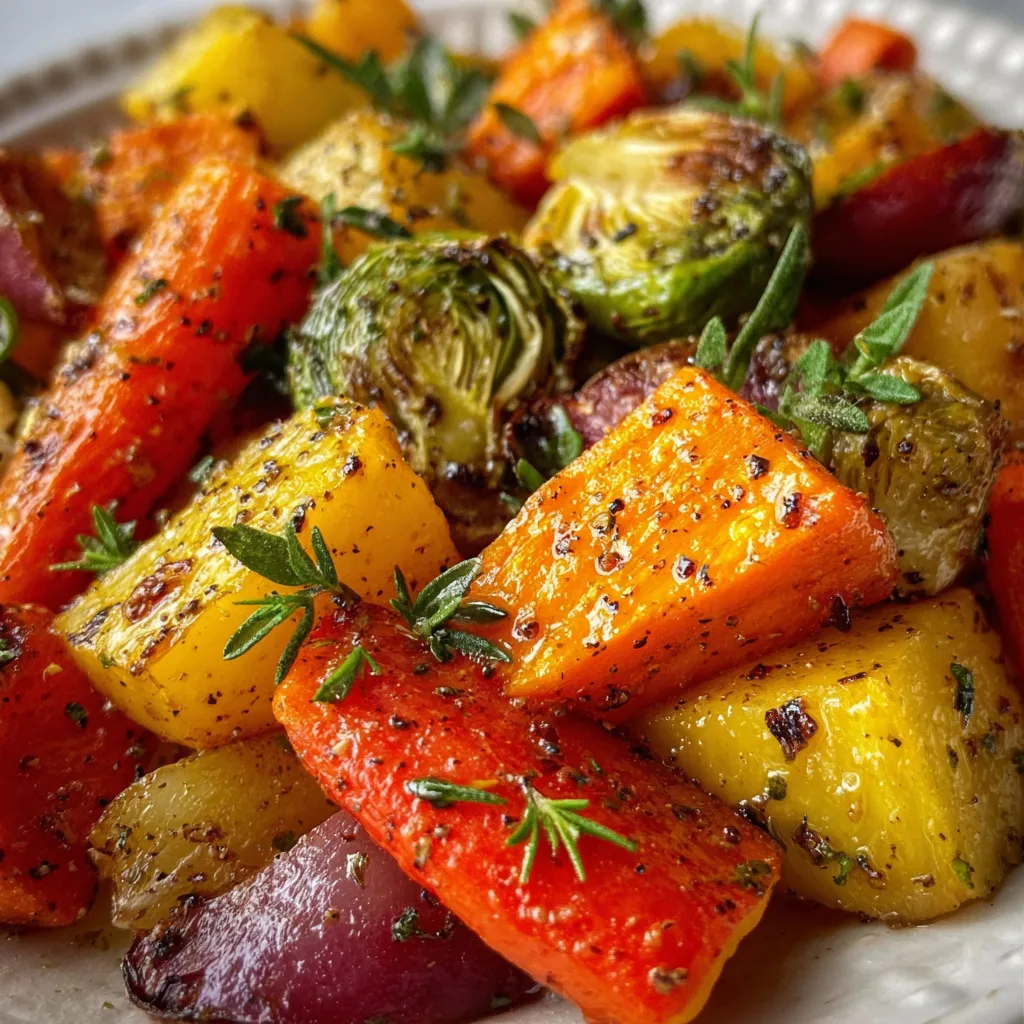
    Maple Dijon Roasted Vegetables have become my absolute go-to side dish for both weeknight dinners and special occasions. There’s something magical about the way the sweet maple syrup caramelizes with the tangy Dijon mustard, creating this irresistible glaze that transforms ordinary vegetables into something extraordinary. I discovered this combination last fall when I was desperately trying to get my nephew to eat something—anything—green, and now it’s requested at nearly every family gathering. The perfect balance of sweet and savory flavors with minimal effort makes this recipe a true kitchen hero.

    Recipe

    Why You’ll Love This Maple Dijon Roasted Vegetables

    Perfect Flavor Balance

    The genius of these Maple Dijon Roasted Vegetables lies in the contrasting flavors that somehow work in perfect harmony. The natural sweetness from the maple syrup doesn’t overwhelm—instead, it enhances the earthiness of root vegetables while the Dijon adds that sophisticated tang that keeps you coming back for more. I love how the edges get slightly crispy and caramelized while the centers remain tender. The first time I made this, my kitchen filled with this warm, inviting aroma that had everyone wandering in asking, “What smells so amazing?” It’s comfort food that somehow feels both indulgent and nourishing.

    Versatile and Adaptable

    What makes this recipe truly special is how incredibly adaptable it is to whatever vegetables you have on hand. Sweet potatoes, Brussels sprouts, and carrots are my personal favorites, but I’ve thrown in everything from parsnips to cauliflower with equally delicious results. The maple-Dijon mixture works beautifully with virtually any vegetable, making it perfect for using up whatever’s in your produce drawer. Last week, I was convinced I had nothing for dinner until I discovered some forgotten butternut squash and bell peppers—thirty minutes later, we had a restaurant-worthy side dish that elevated our simple chicken dinner.

    Essential Tips & Tricks

    Temperature and Timing Secrets

    Getting the perfect caramelization without burning is all about temperature control. I’ve found that starting at 425°F for the first 15 minutes helps kickstart that beautiful browning process, then reducing to 375°F for the remainder ensures even cooking without scorching the sugars in the maple syrup. Another game-changing tip: don’t overcrowd your baking sheet! I learned this the hard way when I tried to cram too many vegetables onto one pan, resulting in steamed rather than roasted veggies. For best results, give each piece space to breathe—just like we all need sometimes! This approach works beautifully with roasted red pepper hummus as a delicious dipping option.

    Prep Work That Makes a Difference

    The secret to truly exceptional Maple Dijon Roasted Vegetables starts before they even hit the oven. Uniform cutting ensures everything cooks at the same rate—I aim for 1-inch pieces for most vegetables. Another non-negotiable: thoroughly drying your vegetables after washing. Extra moisture is the enemy of crispiness! I keep a dedicated kitchen towel just for this purpose. For maximum flavor absorption, toss your vegetables in the maple-Dijon mixture and let them marinate for 15-20 minutes before roasting if you have time. This small step makes a noticeable difference in how deeply the flavors penetrate, especially with denser vegetables like sweet potatoes or butternut squash.

    Serving Ideas & Creative Variations

    Perfect Pairings

    These Maple Dijon Roasted Vegetables shine as a versatile side dish that complements almost any protein. They’re particularly magical alongside a simple roasted chicken or pork tenderloin, where the sweet-savory glaze creates a beautiful flavor bridge. For a complete meal that feels special but requires minimal effort, I love serving them with my maple mustard beef tenderloin—the similar flavor profiles create a cohesive meal that feels thoughtfully planned. These vegetables also transform into an impressive holiday side dish when sprinkled with pomegranate seeds and toasted pecans just before serving, adding festive color and textural contrast that makes everyone reach for seconds.

    Exciting Flavor Twists

    While the classic maple-Dijon combination is perfect on its own, I love playing with additional flavor elements to keep things interesting. Adding a tablespoon of balsamic vinegar to the glaze creates a deeper, more complex sweetness. For a hint of warmth, a pinch of cinnamon or smoked paprika works wonders—especially with sweet potatoes or butternut squash. When I’m feeling adventurous, I’ll add a teaspoon of miso paste to the mixture, which introduces an umami element that’s absolutely addictive. My latest obsession is finishing the roasted vegetables with a sprinkle of fresh herbs like thyme or rosemary in the last five minutes of cooking, which infuses them with an aromatic quality that elevates the entire dish.

    Storage & Troubleshooting Guide

    Keeping Leftovers Fresh

    Properly stored Maple Dijon Roasted Vegetables make fantastic leftovers that can transform your meals throughout the week. Allow them to cool completely before transferring to an airtight container—this prevents condensation that can make them soggy. They’ll keep beautifully in the refrigerator for 3-4 days. The microwave works in a pinch for reheating, but I find that 5-7 minutes in a 350°F oven restores much of their original texture. My favorite weekday lunch hack: cold leftover roasted vegetables tossed with quinoa, feta, and a squeeze of lemon juice make an instant grain bowl that tastes intentional rather than like repurposed leftovers!

    Fixing Common Issues

    Even the simplest recipes can sometimes go sideways, but most problems with Maple Dijon Roasted Vegetables have easy solutions. If your vegetables are turning out too soft without caramelizing, your oven temperature might be too low or your pan might be overcrowded. Conversely, if they’re burning before cooking through, your pieces might be cut unevenly or your oven runs hot. When the glaze burns on the pan but the vegetables are perfect, line your baking sheet with parchment paper next time. And if the maple-Dijon flavor isn’t pronounced enough, don’t be afraid to toss the hot roasted vegetables with an additional teaspoon of the mixture right after roasting—this final flavor boost makes all the difference.

    Frequently Asked Questions

    Can I make Maple Dijon Roasted Vegetables ahead of time?

    Yes! Roast them until they’re almost done (about 5 minutes short), then refrigerate. Reheat at 375°F for 10 minutes before serving for that fresh-roasted texture and flavor.

    What’s the best maple syrup to use?

    Pure maple syrup (not pancake syrup) yields the best results. The darker the grade, the stronger the maple flavor, so choose according to your preference.

    Can I substitute honey for maple syrup?

    Absolutely! Honey creates a different but equally delicious flavor profile. Use the same amount as the maple syrup called for in the recipe.

    How do I prevent my Maple Dijon Roasted Vegetables from sticking to the pan?

    Line your baking sheet with parchment paper or give your vegetables a thorough coating of oil before adding the maple-Dijon mixture.

    What vegetables work best with the maple Dijon flavor combination?

    Root vegetables like carrots, sweet potatoes, and parsnips caramelize beautifully, while Brussels sprouts, cauliflower, and butternut squash also pair wonderfully with these flavors.

    Final Thoughts

    These Maple Dijon Roasted Vegetables have earned their place as a staple in my kitchen for good reason. They strike that perfect balance between sophisticated flavor and comforting familiarity that makes everyone feel like they’re enjoying something special. I love how they transform ordinary weeknight dinners but are equally at home on a holiday table. There’s something deeply satisfying about a dish that’s both nourishing and crave-worthy, proving that healthy eating doesn’t have to be boring. Find more of my favorite recipes on Pinterest!
  • Loaded Cheddar Ranch Beef & Sweet Corn Rotini Bake That Wow!

    Loaded Cheddar Ranch Beef & Sweet Corn Rotini Bake That Wow!

    Loaded Cheddar Ranch Beef & Sweet Corn Rotini Bake That Wow!

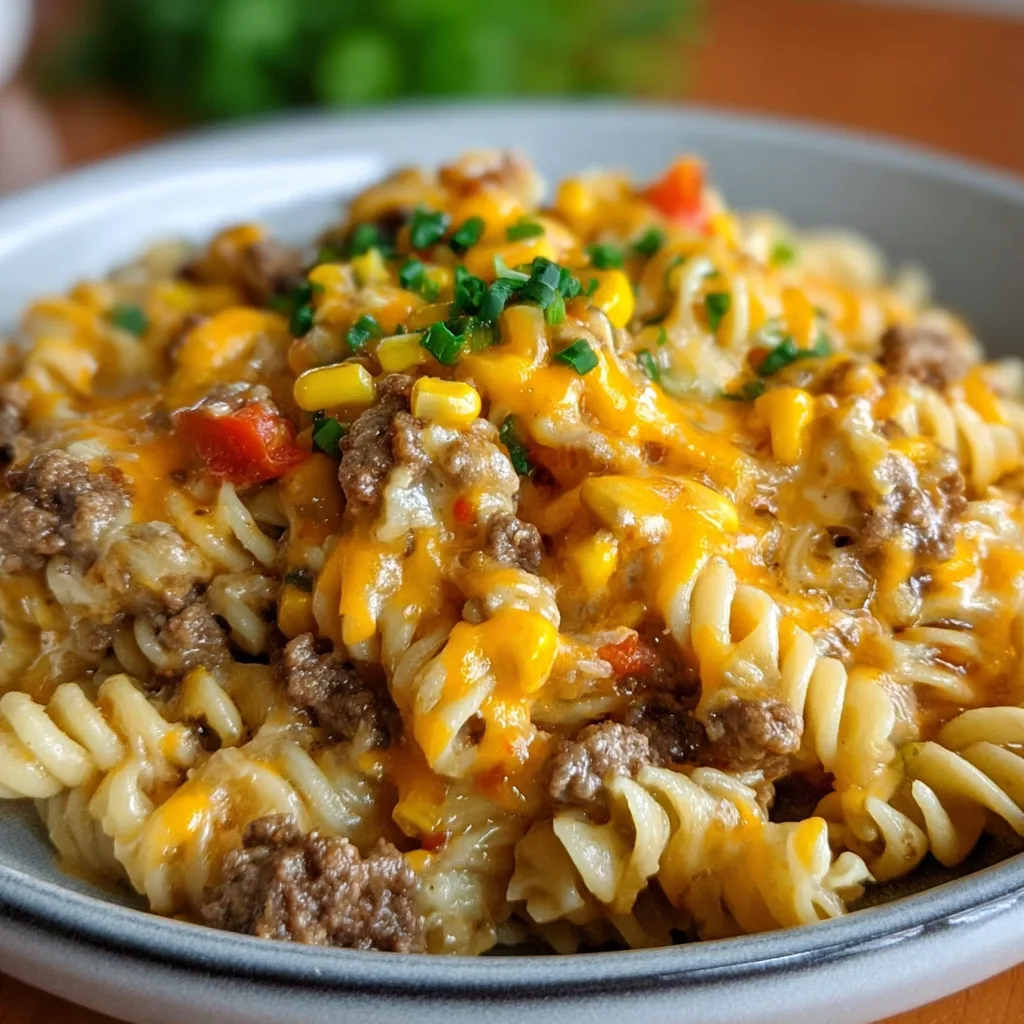
    My Loaded Cheddar Ranch Beef and Sweet Corn Rotini Baket is the ultimate comfort food mashup that’ll make your taste buds dance! The first time I made this for my family, my kitchen filled with the irresistible aroma of bubbling cheese and savory beef, and everyone literally raced to the table. This hearty pasta bake combines al dente rotini with seasoned ground beef, sweet corn kernels, and a creamy ranch-infused sauce that wraps everything in velvety goodness. It’s become our go-to dinner for those evenings when we need something substantial but don’t want to spend hours in the kitchen. Check out my Creamy Cowboy Butter Chicken Pasta for another crowd-pleasing option!

    Recipe

    Why You’ll Love This Loaded Cheddar Ranch Beef and Sweet Corn Rotini Baket

    Perfect Balance of Flavors and Textures

    The magic of this dish lies in its perfect balance of flavors and textures. The sweetness from the corn plays beautifully against the savory beef, while the tangy ranch seasoning adds depth that elevates the entire dish. I love how the rotini pasta captures pockets of the creamy sauce in its spirals, ensuring every bite delivers maximum flavor. The golden, slightly crispy cheese topping creates that irresistible textural contrast against the creamy interior that makes you want to scrape every last bit from the corners of the baking dish. It’s comfort food perfection in every forkful!

    One-Dish Wonder for Busy Weeknights

    This Loaded Cheddar Ranch Beef and Sweet Corn Rotini Baket is a true weeknight hero that saves me whenever time is tight but I still want something homemade and satisfying. Everything comes together in one baking dish, minimizing cleanup and maximizing flavor. I’ve made this on hectic Wednesdays when the kids have after-school activities, and it still feels like I’ve created something special. The hands-off baking time gives me precious minutes to help with homework or simply catch my breath. Plus, it reheats beautifully, making it perfect for meal prep or planned leftovers for busy families.

    Essential Tips & Tricks

    Pasta Perfection Techniques

    Always slightly undercook your rotini pasta before adding it to the bake—aim for about 2 minutes less than the package directions. This prevents the pasta from becoming mushy during baking. I learned this the hard way after one too many soggy pasta bakes! For maximum flavor infusion, toss your hot drained pasta with a tablespoon of ranch seasoning before mixing with other ingredients. This simple step ensures the flavor penetrates the pasta itself, not just the sauce. For an extra flavor boost, use the pasta cooking water to thin your sauce if needed—it contains starches that help everything bind together beautifully.

    Cheese Selection and Layering Strategy

    The cheese strategy makes or breaks this dish! I recommend using a combination of sharp cheddar for flavor and mozzarella for that Instagram-worthy cheese pull. Grate your cheese fresh rather than using pre-shredded varieties, which contain anti-caking agents that prevent proper melting. For the perfect texture, layer your cheeses strategically: mix some into the pasta mixture for melty pockets throughout, then save a generous portion for the top. For a golden, slightly crispy top, broil for the final 2-3 minutes, but watch it carefully—the difference between perfectly golden and burnt is mere seconds! Try this technique with my Buffalo Chicken Bowls too.

    Serving Ideas & Creative Variations

    Complementary Side Dishes

    This hearty pasta bake pairs beautifully with lighter sides that balance its richness. My family loves it with a simple arugula salad dressed with lemon juice and olive oil—the peppery greens and bright acidity cut through the creamy pasta perfectly. For a more substantial meal, try roasted broccoli or asparagus with a sprinkle of lemon zest. The slight char from roasting adds wonderful dimension against the creamy pasta. During summer months, I serve it with sliced tomatoes from my garden, drizzled with balsamic glaze and fresh basil—the cool, fresh flavors complement the warm, cheesy bake beautifully.

    Creative Twist Suggestions

    Don’t be afraid to put your own signature spin on this versatile recipe! Swap ground beef for Italian sausage or ground turkey for completely different flavor profiles. For a spicy kick, add diced jalapeños or a few dashes of hot sauce to the mixture. My vegetarian friends love it with black beans and extra corn instead of beef. For a more sophisticated version, try adding caramelized onions and mushrooms—the deep umami flavors take it to restaurant-quality levels! For more inspiration on creative pasta dishes, check out my Garlic Butter Steak Bites Shell Pasta.

    Storage & Troubleshooting Guide

    Proper Storage and Reheating Methods

    To maintain the quality of leftovers, cool the pasta bake completely before storing in airtight containers. It keeps well in the refrigerator for up to 3 days. For reheating, add a splash of milk or chicken broth to restore creaminess, then cover with foil and warm in a 325°F oven until heated through (about 20 minutes). This gentle reheating prevents the pasta from drying out. For single servings, microwave on 70% power with a damp paper towel over the top. The pasta bake also freezes surprisingly well—portion it into freezer-safe containers and thaw overnight in the refrigerator before reheating for quick future meals.

    Troubleshooting Common Issues

    If your pasta bake turns out too dry, you likely need more sauce or your pasta absorbed too much liquid. Next time, increase the sauce ingredients by about 25% or reduce your baking time. For a too-soupy result, let the bake rest longer before serving—it will continue to thicken as it cools. If your cheese topping isn’t browning properly, make sure it’s not too far from the heating element and finish with a brief broil. For gummy pasta, remember that crucial undercooking step! And if your flavors seem bland, don’t be shy with seasonings—pasta dishes generally need more salt than you might think, and a final touch of fresh herbs just before serving brightens everything up.

    Frequently Asked Questions

    Can I make Loaded Cheddar Ranch Beef and Sweet Corn Rotini Baket ahead of time?

    Absolutely! Assemble the entire dish up to 24 hours ahead, cover and refrigerate. Add an extra 10-15 minutes to the baking time if cooking straight from the refrigerator. The flavors actually develop nicely with a little rest time.

    What can I substitute for ranch seasoning?

    If you don’t have ranch seasoning, mix 1 teaspoon each of dried dill, garlic powder, onion powder, and dried parsley with ½ teaspoon each of salt, pepper, and dried chives for a homemade alternative that works beautifully.

    Can I use a different pasta shape?

    Yes! Any medium pasta shape with ridges or curves works well. Penne, shells, or farfalle are excellent alternatives as they all capture the creamy sauce effectively. Just adjust cooking times according to package instructions.

    Is there a way to make this recipe lighter?

    Definitely! Use lean ground beef or turkey, reduced-fat cheese, and whole grain pasta. You can also replace half the pasta with roasted cauliflower florets for a lower-carb version that’s still satisfying.

    How can I add more vegetables to this dish?

    Diced bell peppers, zucchini, spinach, or peas blend seamlessly into this recipe. Add heartier vegetables with the beef during cooking, and more delicate ones like spinach just before baking.

    Final Thoughts

    This Loaded Cheddar Ranch Beef and Sweet Corn Rotini Baket has become a cornerstone in my dinner rotation because it hits all the right notes—comforting, flavorful, and adaptable to whatever ingredients I have on hand. There’s something magical about pulling a bubbling, golden-topped pasta bake from the oven that makes everyone feel instantly at home. The way the cheese stretches between servings, the savory aroma filling the kitchen, and those first creamy, satisfying bites create the kind of dinner table moments that turn an ordinary Wednesday into something special. I hope it brings the same joy to your table! Find more of my recipes on Pinterest.

  • Thai Stir-Fried Noodles That’ll Ignite Your Taste Buds Instantly!

    Thai Stir-Fried Noodles That’ll Ignite Your Taste Buds Instantly!

    Thai Stir-Fried Noodles That’ll Ignite Your Taste Buds Instantly!

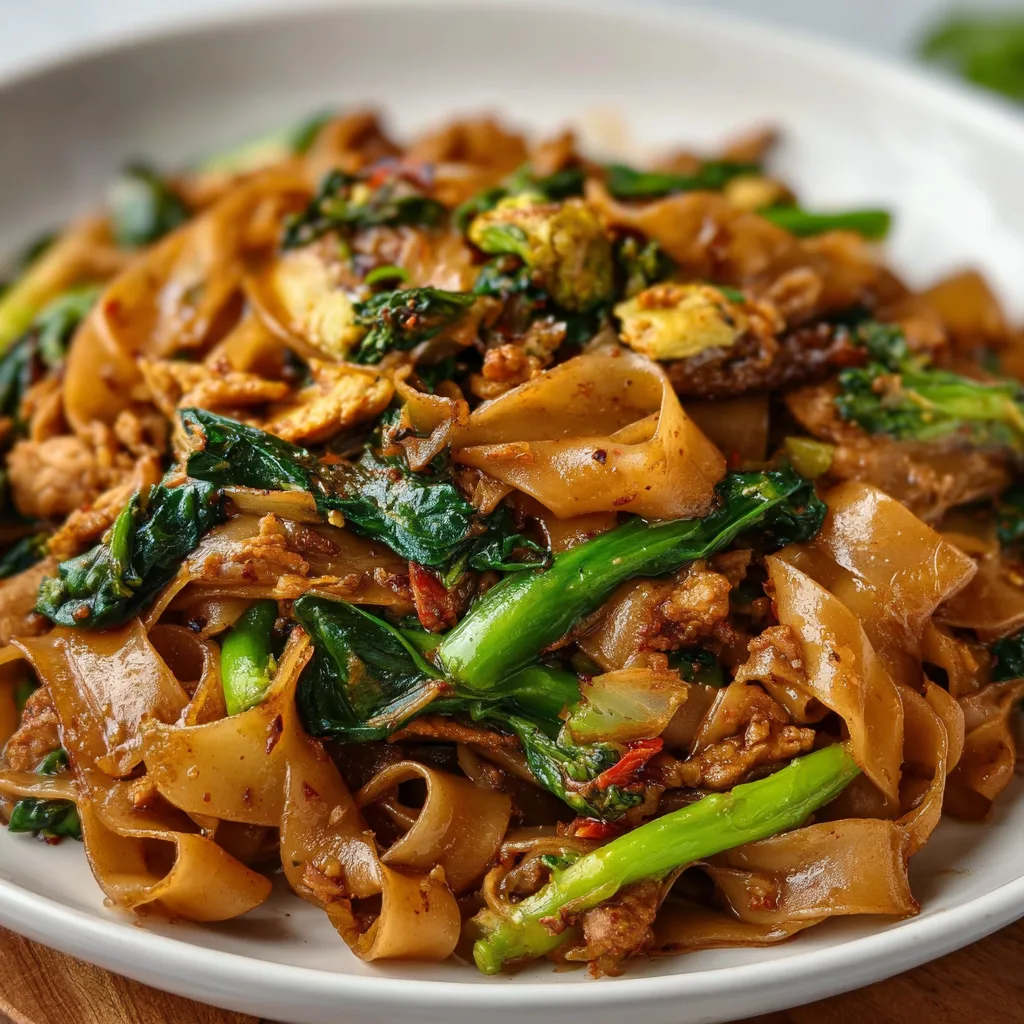
    Thai stir-fried noodles bring me back to that tiny street food stall in Bangkok where I first tasted the perfect balance of sweet, salty, and tangy flavors dancing together in one glorious dish. There’s something magical about the way these noodles transform in a sizzling wok, absorbing all those incredible aromatics while maintaining that perfect chewy texture. Whether you’re craving a quick weeknight dinner or looking to impress weekend guests, this recipe delivers restaurant-quality results with surprisingly little effort. Trust me, once you master these Thai stir-fried noodles, you’ll find yourself craving them constantly.

    Recipe

    Why You’ll Love These Thai Stir-Fried Noodles

    Perfect Balance of Flavors and Textures

    The beauty of Thai stir-fried noodles lies in their perfect harmony of contrasting elements. Each bite delivers that satisfying chewy noodle texture against crisp-tender vegetables and your protein of choice. The sauce—oh, that sauce!—coats everything in a glossy embrace of umami, sweetness, and subtle heat that makes your taste buds dance. I love how the edges of the noodles get those slightly caramelized bits when they touch the hot wok. The fragrance alone, with fresh garlic, ginger, and lime, will have everyone wandering into your kitchen asking what smells so incredible.

    Quick and Customizable for Any Diet

    One of my favorite things about Thai stir-fried noodles is how incredibly adaptable they are. Vegetarian? Swap in tofu and extra veggies. Gluten-free? Use rice noodles and tamari instead of soy sauce. Need a protein boost? Double the chicken, shrimp, or beef. The basic technique stays the same, but you can completely transform the dish based on what you have on hand. Plus, once your ingredients are prepped (which takes just minutes), the actual cooking flies by in under 10 minutes. It’s my go-to when I need something impressive but don’t have hours to spend in the kitchen.

    Essential Tips & Tricks

    Mastering the Noodle Prep

    The secret to perfect noodles starts before they even hit the wok. Different types require different preparation—rice noodles typically need soaking rather than boiling, while egg noodles require a quick cook. Whichever you choose, always rinse them under cold water after cooking to stop the process and remove excess starch. This prevents clumping and gives you that ideal texture. I learned the hard way that slightly undercooking them is key since they’ll continue cooking in the wok. Toss them with a tiny splash of oil after draining to keep them separate and ready for their flavor transformation in the hot wok.

    The Art of High-Heat Wok Cooking

    Thai stir-fried noodles require blazing hot heat to develop those authentic flavors without turning mushy. Get your wok or large skillet screaming hot before adding oil—you should see a slight shimmer or even wisps of smoke. Work in batches if needed; overcrowding the pan reduces temperature and steams rather than sears your ingredients. My technique is to cook proteins first, remove them, then vegetables, then combine everything at the end with the sauce. Keep everything moving constantly with a spatula or tongs. That sizzling sound? That’s the beautiful wok hei—the “breath of the wok” that gives authentic stir-fries their distinctive flavor.

    Serving Ideas & Creative Variations

    Perfect Pairings and Garnishes

    Elevate your Thai stir-fried noodles with thoughtful garnishes that add both visual appeal and flavor complexity. A scatter of chopped peanuts or cashews brings delightful crunch, while fresh herbs like cilantro, Thai basil, or mint add bright, aromatic notes. I always serve lime wedges alongside for that crucial hit of acidity that makes the flavors pop. For a complete meal, pair with a simple cucumber salad dressed with rice vinegar and a touch of sugar, or crispy spring rolls for a restaurant-style experience. Don’t forget those little dishes of chili oil or sambal for heat-lovers to customize their spice level.

    Regional and Seasonal Adaptations

    The beauty of Thai stir-fried noodles is their endless versatility across seasons and regions. In summer, I love incorporating fresh mango slices, bell peppers, and herbs from my garden. Come fall, butternut squash and shiitake mushrooms add earthy depth. You can also explore regional variations—northern Thai style uses less sauce and more aromatics, while southern Thai versions might incorporate coconut milk for richness. For a fusion twist, try adding kimchi for Korean flair or chorizo for Spanish-Thai fusion. My family goes wild for my “clean out the fridge Friday” version where I use whatever vegetables are left from the week.

    Storage & Troubleshooting Guide

    Proper Storage and Reheating Methods

    Thai stir-fried noodles actually make fantastic leftovers when stored properly. Allow the dish to cool completely before transferring to airtight containers—this prevents condensation that can make noodles soggy. They’ll keep in the refrigerator for 3-4 days, though the texture is best within the first 48 hours. When reheating, add a small splash of water or broth to restore moisture, then heat in a hot skillet rather than microwave to maintain texture. For meal prep, I often keep the components separate—cooked noodles, protein, vegetables, and sauce—then combine and heat just before serving for the freshest possible result.

    Solving Common Noodle Problems

    Even experienced cooks occasionally encounter noodle challenges, but they’re easy to fix. If your noodles clump together, a quick rinse under warm water followed by a toss with a teaspoon of oil works wonders. Too soggy? Next time, reduce soaking time and ensure your wok is hot enough to quickly evaporate moisture. Too dry? Keep a small bowl of reserved noodle-cooking water nearby to add moisture as needed. If your sauce isn’t coating evenly, try adding it to the center of the wok, letting it bubble for 15 seconds to thicken slightly before tossing with noodles. And remember—if noodles stick to your pan, it’s usually because the pan wasn’t hot enough before ingredients were added.

    Frequently Asked Questions

    What are the best noodles for authentic Thai stir-fried noodles?

    Rice noodles (like pad thai noodles) are traditional and naturally gluten-free. Medium thickness (about ¼ inch) works best as they hold up to stir-frying without breaking. Egg noodles or even linguine can work in a pinch, though the texture will differ slightly.

    Can I make Thai stir-fried noodles ahead of time?

    Yes! Prep all ingredients and store separately in the refrigerator for up to 2 days. The sauce can be made 3-4 days ahead. For best results, cook just before serving, as noodles tend to absorb sauce and soften when stored together.

    How do I adjust the spice level?

    Start with less heat and adjust upward. For mild flavor, omit fresh chilies completely. For medium heat, remove seeds from chilies. For authentic Thai heat, use bird’s eye chilies with seeds intact. Always offer chili oil or flakes at the table.

    Why are my noodles sticking together?

    This usually happens when noodles aren’t rinsed after cooking or when they sit too long before stir-frying. Rinse well with cold water after cooking, toss with a little oil, and spread them out if there will be a delay before cooking.

    What’s the secret to restaurant-quality Thai stir-fried noodles at home?

    The key is extremely high heat, cooking in batches to maintain that heat, and having all ingredients prepped before you start. Use a wok if possible, and don’t be afraid of that sizzling sound—it’s creating the authentic flavor profile you want.

    Final Thoughts

    Thai stir-fried noodles have become my kitchen superpower—the dish I turn to when I want to transform ordinary ingredients into something extraordinary. There’s a reason this humble yet complex dish has captivated food lovers worldwide. The balance of sweet, sour, salty, and spicy elements creates a symphony of flavors that’s both comforting and exciting. Whether you’re cooking for one or feeding a crowd, these noodles bring a touch of Thai street food magic to your table. So grab your wok, crank up the heat, and prepare for a sensory adventure that might just become your new favorite weeknight tradition. Find more of my Thai-inspired recipes on Pinterest.

  • One Pot Shrimp and Sausage Jambalaya You’ll Crave Tonight!

    One Pot Shrimp and Sausage Jambalaya You’ll Crave Tonight!

    One Pot Shrimp and Sausage Jambalaya You’ll Crave Tonight!

    One Pot Shrimp and Sausage Jambalaya brings the heart of New Orleans straight to your dinner table with minimal fuss and maximum flavor. The first time I made this dish, the rich aroma of Cajun spices filled my kitchen, instantly transporting me to the vibrant streets of Louisiana. There’s something magical about watching rice soak up that tomato-based broth, gradually transforming into a colorful medley studded with plump shrimp and smoky sausage. This comforting one-pot wonder strikes the perfect balance between convenience and authentic flavor—making it my go-to when I’m craving something hearty and satisfying.

    Recipe

    Why You’ll Love This One Pot Shrimp and Sausage Jambalaya

    A Complete Meal in One Pot

    You know those evenings when you’re craving something deeply satisfying but the thought of washing multiple pots and pans makes you reach for the takeout menu? This jambalaya recipe is your solution. Everything—from the initial sautéing of the “holy trinity” (onions, bell peppers, and celery) to the final simmer with shrimp—happens in a single pot. The flavors build and meld together, creating layers of complexity that belie how simple the cooking process actually is. I love how the rice absorbs all those savory juices, making each grain burst with Cajun goodness.

    Ready in Under an Hour

    Despite its rich, developed flavor profile, this jambalaya doesn’t demand hours of your time. From prep to table in about 45 minutes, it’s perfect for weeknight dinners when you want something impressive without the time investment. The key is the sequence—sautéing aromatics first to release their flavors, then adding the sausage to render its smoky goodness, followed by the rice to toast slightly before introducing the liquid. Finally, the shrimp goes in just minutes before serving, ensuring they remain perfectly tender rather than overcooked and rubbery.

    Essential Tips & Tricks

    Selecting the Right Ingredients

    The soul of jambalaya lies in its ingredients. Choose andouille sausage for authentic flavor—its smoky, slightly spicy profile is traditional to Cajun cooking. If unavailable, smoked kielbasa makes a decent substitute. For shrimp, opt for large (21-25 count) and buy them peeled and deveined to save time. The freshness matters more than size. Rice selection is crucial too—long-grain white rice works best as it maintains its structure without becoming mushy. Avoid instant rice at all costs! Finally, don’t skip the Cajun seasoning—it provides that characteristic heat and depth.

    Mastering the Cooking Technique

    Achieving the perfect jambalaya texture requires attention to a few details. First, toast the rice for 1-2 minutes before adding liquid—this develops nutty flavors and helps maintain grain integrity. Second, resist the urge to stir constantly. Once you’ve added the broth, give it just one good stir, then reduce heat and cover. Let it do its thing! Lifting the lid releases steam and disrupts cooking. Finally, add shrimp only in the last 5 minutes of cooking. They need minimal time to turn pink and opaque. Overcooking makes them tough and rubbery—the most common mistake in seafood jambalaya.

    Serving Ideas & Creative Variations

    Complementary Side Dishes

    While jambalaya stands proudly as a complete meal, a few thoughtful sides can elevate your dining experience. A simple side of crusty French bread is perfect for sopping up the flavorful sauce—I always warm mine slightly in the oven first. A crisp green salad with a light vinaigrette provides refreshing contrast to the rich, spicy main dish. For a truly authentic touch, serve with a side of simple collard greens or cornbread. When I’m hosting guests, I like to start with a small cup of gumbo as an appetizer for a complete New Orleans-inspired feast.

    Delicious Jambalaya Variations

    The beauty of jambalaya lies in its adaptability. For a heartier version, add cubed chicken thighs when you cook the sausage. For a vegetarian twist, omit the meats and double up on bell peppers, add mushrooms, and use vegetable broth instead. Seafood lovers can enhance the oceanic flavors by adding scallops or chunks of firm white fish alongside the shrimp. Spice levels are entirely customizable—add extra cayenne for heat seekers or dial it back for sensitive palates. My personal favorite variation includes a handful of okra added with the rice, providing both flavor and a slight thickening to the final dish.

    Storage & Troubleshooting Guide

    Proper Storage and Reheating

    Jambalaya actually improves with time as flavors continue to meld, making it perfect for meal prep. Store leftovers in airtight containers in the refrigerator for up to 3 days. When reheating, add a splash of chicken broth or water to restore moisture, as the rice will have absorbed most of the liquid. Microwave on medium power, stirring halfway through, or gently reheat on the stovetop. For freezing, portion into freezer-safe containers and store for up to 2 months. Thaw overnight in the refrigerator before reheating. I find the texture of shrimp can change slightly after freezing, but the flavor remains delicious.

    Fixing Common Jambalaya Problems

    Even experienced cooks occasionally encounter jambalaya issues. If your rice is still crunchy when the liquid has been absorbed, add ¼ cup more broth, cover, and cook an additional 5 minutes. For too-soupy jambalaya, remove the lid and simmer uncovered until excess liquid evaporates. If your dish lacks flavor, don’t just add more Cajun seasoning—enhance with a splash of Worcestershire sauce or hot sauce, which adds depth without overwhelming. And if you’ve accidentally overcooked your shrimp to rubbery disappointment, quickly pick them out, sauté fresh ones separately, and fold them in just before serving.

    Frequently Asked Questions

    Can I make One Pot Shrimp and Sausage Jambalaya ahead of time?

    Yes! Prepare everything except the shrimp, refrigerate, then reheat and add fresh shrimp 5 minutes before serving for the best texture and flavor.

    What’s the difference between jambalaya and gumbo?

    Jambalaya is a rice-based dish where rice cooks directly in the flavorful liquid, while gumbo is a stew typically served over separately cooked rice.

    Can I use frozen shrimp?

    Absolutely! Thaw completely first, pat dry with paper towels to remove excess moisture, and add during the last 5 minutes of cooking.

    Is jambalaya supposed to be spicy?

    Traditional jambalaya has a moderate kick, but you can easily adjust the heat level by increasing or decreasing the Cajun seasoning and cayenne pepper.

    What type of pot works best for One Pot Shrimp and Sausage Jambalaya?

    A heavy-bottomed Dutch oven or deep skillet with a tight-fitting lid works best for even heat distribution and proper steam retention.

    Final Thoughts

    This One Pot Shrimp and Sausage Jambalaya captures the essence of Louisiana cooking—bold flavors, comforting textures, and the beautiful simplicity of a meal that brings people together. There’s something deeply satisfying about creating such a flavorful, complete dish in just one pot. Whether you’re cooking for a weeknight family dinner or entertaining friends, this jambalaya delivers both convenience and that wonderful “made with love” quality that keeps everyone coming back for more. Find more of my favorite comfort food recipes on Pinterest.

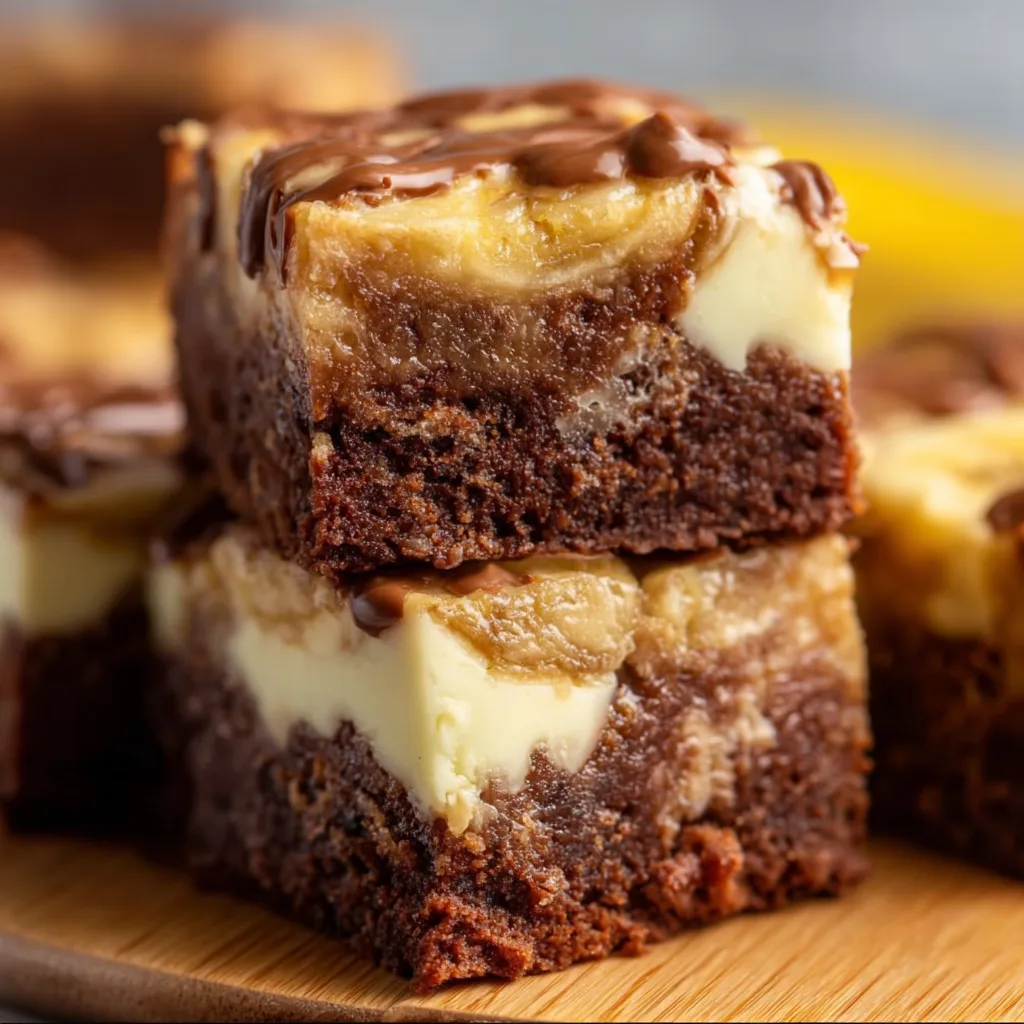
  • Banana Pudding Brownies: Irresistibly Gooey + Easy Dessert Bliss

    Banana Pudding Brownies: Irresistibly Gooey + Easy Dessert Bliss

    Banana Pudding Brownies: Irresistibly Gooey + Easy Dessert Bliss

    Banana Pudding Brownies are what happens when two beloved desserts collide in the most magnificent way possible. The first time I made these for my sister’s birthday gathering, the pan was empty before I even had a chance to snap a photo! There’s something magical about the way the fudgy chocolate base mingles with creamy banana pudding layers and those nostalgic vanilla wafers. These brownies deliver all the comfort of traditional banana pudding but with an indulgent chocolate twist that’ll have everyone asking for your secret recipe. Trust me, these aren’t just brownies—they’re a sensation worth sharing at your next family get-together.

    Recipe

    Why You’ll Love This Banana Pudding Brownies

    Perfect Texture Combination

    The contrasting textures in these banana pudding brownies create an experience that’s nothing short of heavenly. The dense, fudgy brownie base provides that satisfying chew we all crave, while the silky banana pudding layer melts in your mouth with each bite. I love how the crushed vanilla wafers add just the right amount of crunch throughout. My neighbor Jen actually gasped when she first tried them, saying the texture was like nothing she’d experienced before. The slight firmness of the chilled pudding against the soft brownie creates that perfect balance that makes you close your eyes with each forkful.

    Make-Ahead Convenience

    One of my favorite things about these banana pudding brownies is how they actually improve with time. The flavors meld together beautifully as they rest, making them the perfect make-ahead dessert for busy hosts. I often prepare them the night before a gathering, which not only saves me time but results in a more developed flavor profile. The brownie layer absorbs subtle hints of banana, while the pudding takes on notes of chocolate. This dessert saved me during last-minute hosting duties when my in-laws surprised us with a visit—I simply pulled them from the refrigerator and became an instant dessert hero!

    Essential Tips & Tricks

    Achieving the Perfect Brownie Base

    The foundation of exceptional banana pudding brownies starts with a properly executed brownie layer. For that signature fudginess, be careful not to overmix the batter once you add the dry ingredients—just stir until barely combined. I learned this the hard way after creating accidental cake-like brownies during my first attempt! Another game-changer is pulling them from the oven when the center still looks slightly underdone. The residual heat will continue cooking them to perfection while cooling. For an extra depth of flavor, try browning your butter before adding it to the mixture—this small step creates caramel notes that complement the banana beautifully.

    Pudding Layer Perfection

    The key to an irresistible pudding layer lies in both ingredients and technique. Always use ripe bananas with plenty of brown spots for the most robust flavor—those yellow-green ones simply won’t deliver the same intensity. When preparing the pudding, constant whisking prevents lumps and ensures silky smoothness. My secret weapon is chilling the pudding for 30 minutes before spreading it over the cooled brownies. This creates cleaner layers and prevents unwanted mixing. For an elevated twist that impressed even my dessert-snob cousin, try folding in 1/4 cup of mascarpone cheese to the pudding for an ultra-luxurious mouthfeel.

    Serving Ideas & Creative Variations

    Elegant Presentation Options

    Transform these homey banana pudding brownies into showstopping desserts worthy of any special occasion with thoughtful presentation. Try cutting them into perfect squares and placing each on a small pool of chocolate ganache with a light dusting of cocoa powder. For dinner parties, I serve individual portions in clear glass tumblers, creating visible layers that guests can’t stop admiring. Add a fresh banana slice and a mini vanilla wafer as garnish, perhaps with a tiny mint leaf for color contrast. Last Christmas, I arranged them on a tiered stand with fairy lights woven around the base—the sparkle against the creamy yellow pudding created a magical display.

    Flavor Twist Inspirations

    While the classic version is divine, experimenting with flavor variations keeps this dessert exciting each time you make it. Try adding a layer of salted caramel between the brownie and pudding—the sweet-salty interplay is absolutely transformative. For a tropical version that transported my book club to vacation mode, fold diced mango and toasted coconut into the pudding layer. Coffee lovers might appreciate a teaspoon of espresso powder in the brownie batter, which intensifies the chocolate without tasting obviously like coffee. For a grown-up twist, consider soaking the vanilla wafers in a splash of bourbon before layering them throughout the dessert.

    Storage & Troubleshooting Guide

    Proper Storage Methods

    Keeping your banana pudding brownies fresh is essential for maintaining their delightful texture and preventing soggy disappointment. Store them in an airtight container in the refrigerator, where they’ll stay perfect for up to 4 days. I like to place a sheet of parchment between layers if stacking to prevent sticking. For longer storage, these brownies freeze surprisingly well—wrap individual portions tightly in plastic wrap, then foil, and freeze for up to 2 months. Allow them to thaw overnight in the refrigerator for best results. I learned through trial and error that room temperature storage is a no-go—the pudding layer becomes unstable after just a few hours.

    Fixing Common Issues

    Even experienced bakers encounter challenges, but most banana pudding brownie problems have simple solutions. If your pudding layer turns out too runny, refrigerate it longer before assembly or add an extra tablespoon of cornstarch to the mixture next time. For brownies that came out too dry, brush the top with simple syrup before adding the pudding layer—this rescue technique saved my dessert when I accidentally overbaked the base. Wafers losing their crunch? Try adding them just before serving rather than during assembly. And if your banana flavor isn’t pronounced enough, next time mash one extra overripe banana and fold it into the prepared pudding for intensified flavor.

    Frequently Asked Questions

    Can I use instant pudding mix instead of making pudding from scratch?

    Yes, you can use instant banana pudding for a shortcut version. Prepare according to package directions but use only 1½ cups milk instead of the recommended amount for a firmer texture that works better in layered desserts.

    How ripe should the bananas be for banana pudding brownies?

    The best bananas for this recipe are very ripe with numerous brown spots or even mostly brown skin. These provide the sweetest, most intense banana flavor for your pudding brownies.

    Can I make these banana pudding brownies gluten-free?

    Absolutely! Substitute a 1:1 gluten-free flour blend in the brownie base and use gluten-free vanilla cookies instead of traditional vanilla wafers. The pudding portion is naturally gluten-free.

    Why did my brownie layer come out too cakey?

    Over-mixing the brownie batter or adding too much flour can create a cakey texture. Mix just until ingredients are combined and measure flour by spooning into measuring cups rather than scooping directly.

    How far in advance can I make these for a party?

    These brownies actually improve with time! You can make them up to 2 days before your event and store covered in the refrigerator. Add any final garnishes just before serving.

    Final Thoughts

    These Banana Pudding Brownies represent the perfect marriage of two beloved desserts, creating something greater than the sum of its parts. I’ve watched skeptics become converts with just one bite of these indulgent layered treats. Whether you’re serving them at a casual backyard gathering or an elegant dinner party, they bring that special touch that makes memories around the table. Don’t forget to share your creations on Pinterest – I’d love to see your personal spin on this recipe that brings together chocolate decadence and creamy banana comfort!

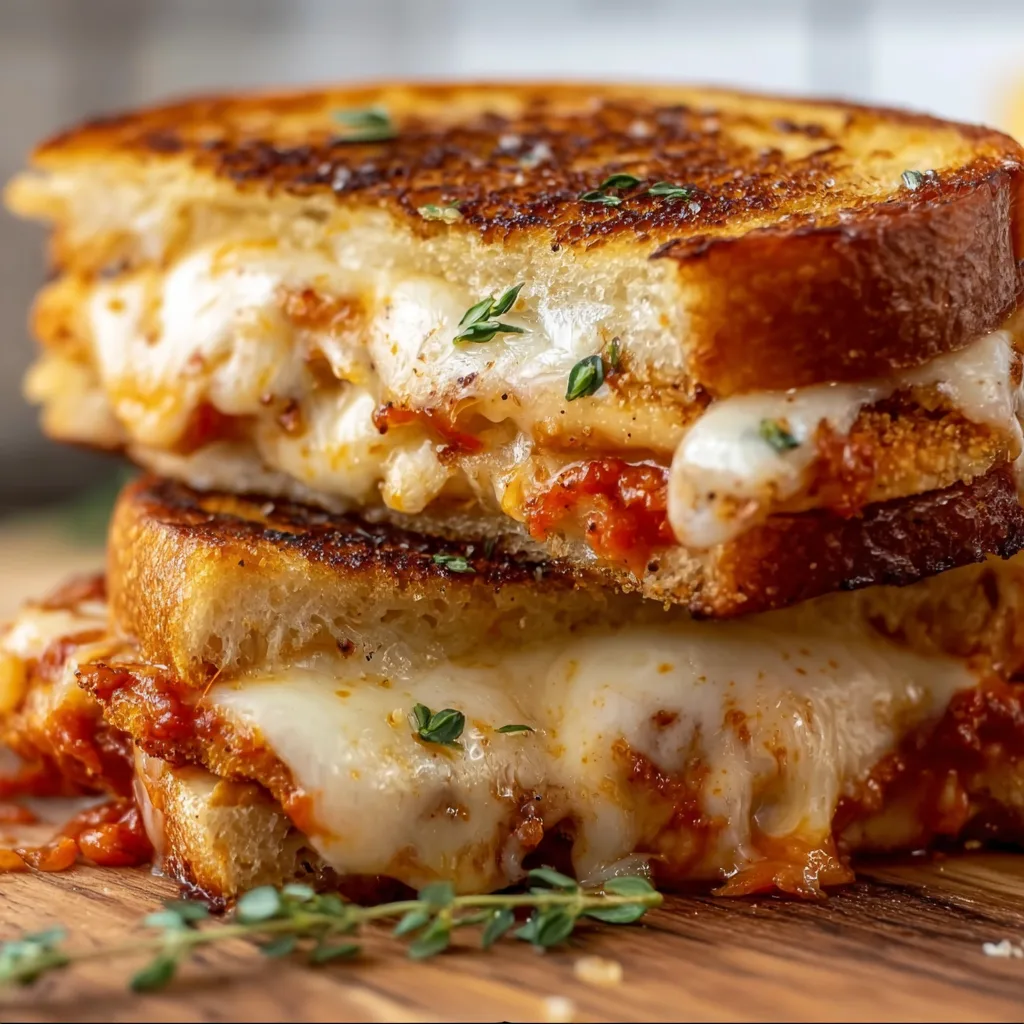
  • Chicken Parmesan Grilled Cheese: Irresistibly Cheesy & Crispy Delight!

    Chicken Parmesan Grilled Cheese: Irresistibly Cheesy & Crispy Delight!

    Chicken Parmesan Grilled Cheese: Irresistibly Cheesy & Crispy Delight!

    Chicken Parmesan Grilled Cheese is what happens when two comfort food classics collide in the most delicious way possible. I first created this sandwich on a rainy Sunday afternoon when I couldn’t decide between Italian night and my go-to grilled cheese. The result? Pure magic that combines crispy, buttery bread with gooey mozzarella, savory marinara, and perfectly seasoned chicken. It’s become my family’s most-requested sandwich, and I’m betting it will become yours too. This elevated grilled cheese brings all the flavors of chicken parmesan but in a handheld, melty package that’s ready in minutes.

    Recipe

    Why You’ll Love This Chicken Parmesan Grilled Cheese

    The Perfect Balance of Flavors and Textures

    There’s something almost magical about that first bite—the way the buttery, toasted bread gives way to layers of melted cheese and savory chicken. I love how the tangy marinara cuts through the richness, while the herbs add freshness to every mouthful. The contrast between the crispy exterior and the gooey interior creates a textural symphony that keeps you coming back for more. What makes this sandwich special is how each element shines without overwhelming the others. It’s comfort food elevated to an art form, yet simple enough for a weeknight dinner.

    Quick and Adaptable for Any Occasion

    When life gets hectic (and when doesn’t it?), this sandwich is my secret weapon. It takes just 15 minutes from start to finish, making it perfect for those evenings when cooking feels overwhelming. I’ve made these for everything from casual movie nights to impromptu gatherings where friends stopped by unexpectedly. The beauty lies in its adaptability—use leftover chicken, rotisserie chicken from the store, or even those chicken tenders sitting in your freezer. It’s fancy enough for company but easy enough for a Tuesday night when you’re running on empty but still craving something that feels like a treat.

    Essential Tips & Tricks

    Mastering the Perfect Cheese Melt

    The secret to that Instagram-worthy cheese pull lies in the layering technique. Start with a thin spread of marinara on the bread (too much makes it soggy), then add a layer of mozzarella, followed by chicken, a touch more sauce, and finish with another layer of cheese. This sandwich-style encapsulation keeps everything melty and contained. I learned the hard way that patience is key—medium-low heat allows the cheese to melt completely while giving the bread time to develop that golden-brown crust. For an extra-special touch, mix your mozzarella with a bit of provolone or fontina for complexity that will make your taste buds sing.

    Bread and Butter Fundamentals

    Don’t underestimate the foundation of your sandwich—the bread choice makes or breaks this recipe. I prefer sourdough for its slight tang and sturdy structure, but a good Italian bread or Texas toast works beautifully too. Whatever you choose, make sure it’s sliced thick enough to hold up to the fillings. As for the butter, salted butter spread all the way to the edges creates that perfect golden crust. For an elevated twist that will make you feel like a gourmet chef, try mixing softened butter with a pinch of garlic powder and Italian herbs before spreading it on the bread. It’s similar to the magic I create in my garlic parmesan cheeseburger bombs.

    Serving Ideas & Creative Variations

    Perfect Pairings to Complete Your Meal

    This sandwich shines as the star of your meal, but the right side dish elevates the entire experience. A simple arugula salad with lemon vinaigrette cuts through the richness perfectly. On chilly evenings, I pair it with a small cup of tomato soup for the ultimate comfort food duo—there’s something nostalgic about dipping the crispy corners into warm soup that takes me back to childhood. For a lighter option, roasted vegetables with a balsamic drizzle complement the sandwich beautifully. And if you’re feeling indulgent, crispy air fryer parmesan crusted chicken wings make a fantastic appetizer to kick off your meal.

    Creative Twists on the Classic

    The beauty of this sandwich lies in its versatility. For a spicy version, add thinly sliced jalapeños or a sprinkle of red pepper flakes to the cheese layer. My family goes wild for the “deluxe” version with thin slices of prosciutto and fresh basil leaves added just before serving. For a vegetarian option, substitute the chicken with grilled eggplant or portobello mushrooms marinated in balsamic vinegar. I’ve even created a breakfast variation using leftover chicken, mozzarella, and a fried egg on top—the runny yolk creates a decadent sauce that’s perfect for weekend brunch. Each variation maintains the soul of the original while offering a new experience.

    Storage & Troubleshooting Guide

    Making Ahead and Reheating Tips

    While this sandwich is best enjoyed fresh off the griddle, there are ways to prep ahead when time is tight. The chicken component can be prepared up to three days in advance—just store it in an airtight container in the refrigerator. For busy weeknights, I assemble several sandwiches (without buttering the outside), wrap them individually in parchment paper, and refrigerate for up to 24 hours. When it’s time to eat, just butter the outside and grill as usual. If you need to reheat a fully cooked sandwich, avoid the microwave which will make it soggy.

    Instead, wrap it loosely in foil and warm in a 300°F oven for 10 minutes, then unwrap for the final 2 minutes to crisp up.

    Troubleshooting Common Issues

    Even the most experienced sandwich makers encounter challenges. If your bread is browning too quickly before the cheese melts, your heat is too high—immediately lower the temperature and continue cooking. Soggy sandwiches usually mean too much marinara sauce; keep it to just 1-2 tablespoons per sandwich and drain your chicken well before adding it. If your cheese isn’t melting properly, try grating it instead of using slices—the finer texture melts more quickly and evenly. For sandwiches that fall apart during flipping, try using a second spatula for support or secure with toothpicks (just remember to remove them before eating!). Patience is key—rushing the process almost always leads to less-than-perfect results.

    Frequently Asked Questions

    Can I use different cheeses for my Chicken Parmesan Grilled Cheese?

    Absolutely! While mozzarella is traditional, provolone, fontina, or even a mix with a little parmesan creates wonderful flavor variations. Just ensure your cheese melts well for that perfect pull-apart texture.

    How do I prevent my sandwich from becoming soggy?

    Use marinara sauce sparingly (1-2 tablespoons max), ensure your chicken is well-drained, and cook on medium-low heat to allow moisture to evaporate while cooking.

    Can I make this sandwich ahead of time for a party?

    Yes! Assemble sandwiches without buttering the outside, wrap individually, and refrigerate. When ready to serve, butter the outside and grill fresh for best results.

    What’s the best bread for this sandwich?

    Sourdough, Italian bread, or Texas toast work best as they’re sturdy enough to hold fillings without falling apart. Avoid very soft or thinly sliced breads.

    Is there a way to make Chicken Parmesan Grilled Cheese healthier?

    Try whole grain bread, reduced-fat cheese, and grilled chicken breast. You can also add vegetables like spinach or roasted red peppers for extra nutrition.

    Final Thoughts

    The Chicken Parmesan Grilled Cheese represents what I love most about cooking—taking familiar favorites and transforming them into something extraordinary. It’s a testament to how simple ingredients can create something truly memorable when combined with a little creativity and care. Whether you’re cooking for your family on a busy weeknight or impressing friends at a casual gathering, this sandwich delivers maximum flavor with minimal effort. I’d love to see your creations on Pinterest when you try this recipe—each person’s version becomes uniquely their own, and that’s the true beauty of cooking.

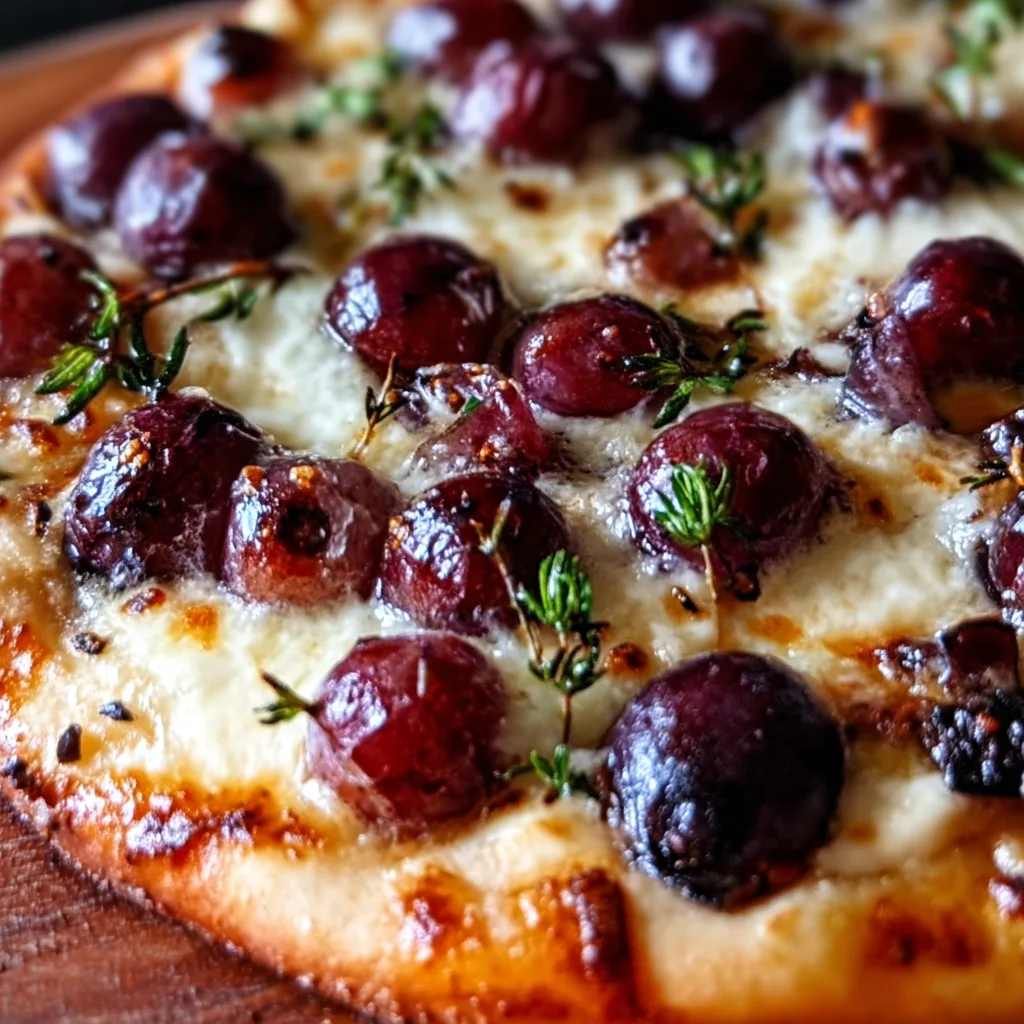
  • Roasted Red Grape Pizza: Irresistible Sweet & Savory Flavor Burst!

    Roasted Red Grape Pizza: Irresistible Sweet & Savory Flavor Burst!

    Roasted Red Grape Pizza: Irresistible Sweet & Savory Flavor Burst!

    Roasted Red Grape Pizza transforms an ordinary pizza night into something extraordinary. The first time I tried this sweet-savory combination, I was skeptical—grapes on pizza? But that first bite changed everything. The burst of juicy grapes against creamy cheese and crispy crust creates a flavor profile that’s unexpectedly perfect. There’s something magical about how roasting intensifies the grapes’ natural sweetness, creating little pockets of jammy goodness across your pizza. If you’re looking to elevate your homemade pizza game, this recipe belongs in your rotation alongside classics like my Buffalo Chicken Mozzarella Sticks. Trust me, this isn’t just pizza—it’s an experience.

    Recipe

    Why You’ll Love This Roasted Red Grape Pizza

    A Perfect Balance of Flavors

    The magic of this Roasted Red Grape Pizza lies in its contrasting elements. Sweet roasted grapes create bursts of jammy goodness that perfectly balance the salty cheese and savory base. I love watching guests’ expressions when they take their first bite—skepticism transforms into pure delight! The grapes caramelize slightly in the oven, concentrating their natural sugars while maintaining that perfect juicy pop. Meanwhile, the cheese (I recommend a combination of mozzarella and goat cheese) provides a creamy backdrop that ties everything together. It’s one of those unexpected combinations that just works on every level.

    Quick and Impressive Entertaining Option

    When I need to impress dinner guests without spending hours in the kitchen, this Roasted Red Grape Pizza is my secret weapon. It looks sophisticated but comes together in under 30 minutes, making it perfect for impromptu gatherings. The vibrant purple-red grapes create a stunning visual against the golden crust and white cheese. I’ve served this at everything from casual Friday night get-togethers to fancier dinner parties, and it consistently earns rave reviews. The combination feels special and unique without requiring complicated techniques or hard-to-find ingredients—just everyday items transformed into something extraordinary.

    Essential Tips & Tricks

    Selecting and Preparing the Grapes

    Choosing the right grapes makes all the difference in this pizza. Look for firm, seedless red grapes with tight skin—they’ll hold their shape better during roasting. I prefer darker varieties like Concord or Black Monukka for their deeper flavor, but any seedless red grape works beautifully. Before adding them to your pizza, give them a quick toss in olive oil, salt, and a touch of honey. This simple step enhances caramelization and prevents them from drying out. For the best texture contrast, slice about half your grapes in half and leave the rest whole—this creates varied pockets of juiciness throughout your pizza.

    Perfecting the Cheese Combination

    The cheese blend on this Roasted Red Grape Pizza deserves special attention. I’ve found that a three-cheese approach yields the most balanced flavor profile. Start with a base of low-moisture mozzarella for that essential stretchy texture, then add crumbled goat cheese for tanginess that complements the sweet grapes. Finish with a light dusting of aged Parmesan or Pecorino Romano for a salty depth. Apply the cheese in layers—some beneath and some on top of the grapes—rather than piling it all on top. This technique ensures proper melting and prevents the grapes from rolling off during baking.

    Serving Ideas & Creative Variations

    Seasonal Pairings and Garnishes

    Elevate your Roasted Red Grape Pizza with thoughtful seasonal garnishes that complement its sweet-savory profile. In summer, I love finishing it with fresh basil leaves and a drizzle of honey for brightness. Fall calls for a sprinkle of toasted walnuts and fried sage leaves, while winter versions shine with a balsamic glaze reduction and fresh thyme. Just before serving, add a light shower of flaky sea salt to heighten all the flavors. For a complete meal, pair with a simple arugula salad dressed in lemon and olive oil—the peppery greens provide the perfect counterpoint to the pizza’s sweetness.

    Global-Inspired Variations

    Transform your Roasted Red Grape Pizza with international flavor profiles that showcase this versatile concept. For a Mediterranean twist, add thin lemon slices, pistachios, and za’atar spice blend alongside the grapes. A French-inspired version works beautifully with caramelized onions, thyme, and Gruyère replacing some of the mozzarella. For something unexpected, try a Mexican-inspired variation with mild chorizo, queso fresco, and a light sprinkle of tajin seasoning after baking—similar to the flavor-forward approach in my Cajun Chicken Alfredo but with a completely different palette of ingredients.

    Storage & Troubleshooting Guide

    Proper Storage and Reheating

    Storing Roasted Red Grape Pizza properly ensures you’ll enjoy those same delicious flavors the next day. Allow leftover pizza to cool completely before refrigerating to prevent sogginess. Rather than stacking slices, store them in a single layer in an airtight container for up to 3 days. When reheating, skip the microwave—it makes the crust rubbery and the grapes mushy. Instead, place cold slices on a preheated baking sheet in a 350°F oven for 5-7 minutes until the cheese just begins to bubble. For the crispiest results, try reheating in a covered skillet over medium-low heat for 2-3 minutes.

    Solving Common Problems

    Even experienced pizza makers encounter challenges with Roasted Red Grape Pizza. If your grapes release too much moisture and make the center soggy, try this pre-roasting technique: roast halved grapes separately at 400°F for 10 minutes before adding them to your pizza. For crust that’s undercooked in the center, parbake your dough for 3-4 minutes before adding toppings. If your grapes burn before the crust is done, position your rack lower in the oven and consider covering just the top with foil for the final few minutes of baking. Remember that every oven has hot spots, so rotate your pizza halfway through cooking for even browning.

    Frequently Asked Questions

    Can I use green grapes instead of red for Roasted Red Grape Pizza?

    Yes! Green grapes work beautifully but offer a tangier flavor profile. They pair wonderfully with sharper cheeses like aged white cheddar or Gruyère instead of the traditional mozzarella base.

    How do I prevent my Roasted Red Grape Pizza from getting soggy?

    Pre-roast halved grapes for 10 minutes before adding them to your pizza. Also, don’t overload with toppings and ensure your oven is fully preheated to at least 450°F.

    What cheeses work best with the roasted grapes?

    Soft cheeses with tangy profiles complement grapes perfectly. Try combinations of mozzarella, goat cheese, brie, or mascarpone for creaminess, with a light sprinkle of Parmesan for depth.

    Can I make this pizza with a gluten-free crust?

    Absolutely! The sweet-savory flavor profile works with any base. Just follow your gluten-free crust recipe’s specific baking instructions, as they often require different temperatures.

    Is Roasted Red Grape Pizza better served hot or at room temperature?

    Both ways offer different experiences. Hot from the oven highlights the melty cheese, while room temperature enhances the wine-like complexity of the roasted grapes. Try both to find your preference!

    Final Thoughts

    This Roasted Red Grape Pizza represents everything I love about cooking—simple ingredients transformed into something unexpectedly delightful. The contrast between juicy, sweet grapes and savory, melty cheese creates a memorable experience that challenges what we think pizza “should” be. It’s become my go-to recipe when I want to impress without complicated techniques. Don’t be surprised when friends request “that grape pizza” at your next gathering! For more creative recipes that play with sweet and savory combinations, visit our Pinterest page where we’re always sharing new inspirations.

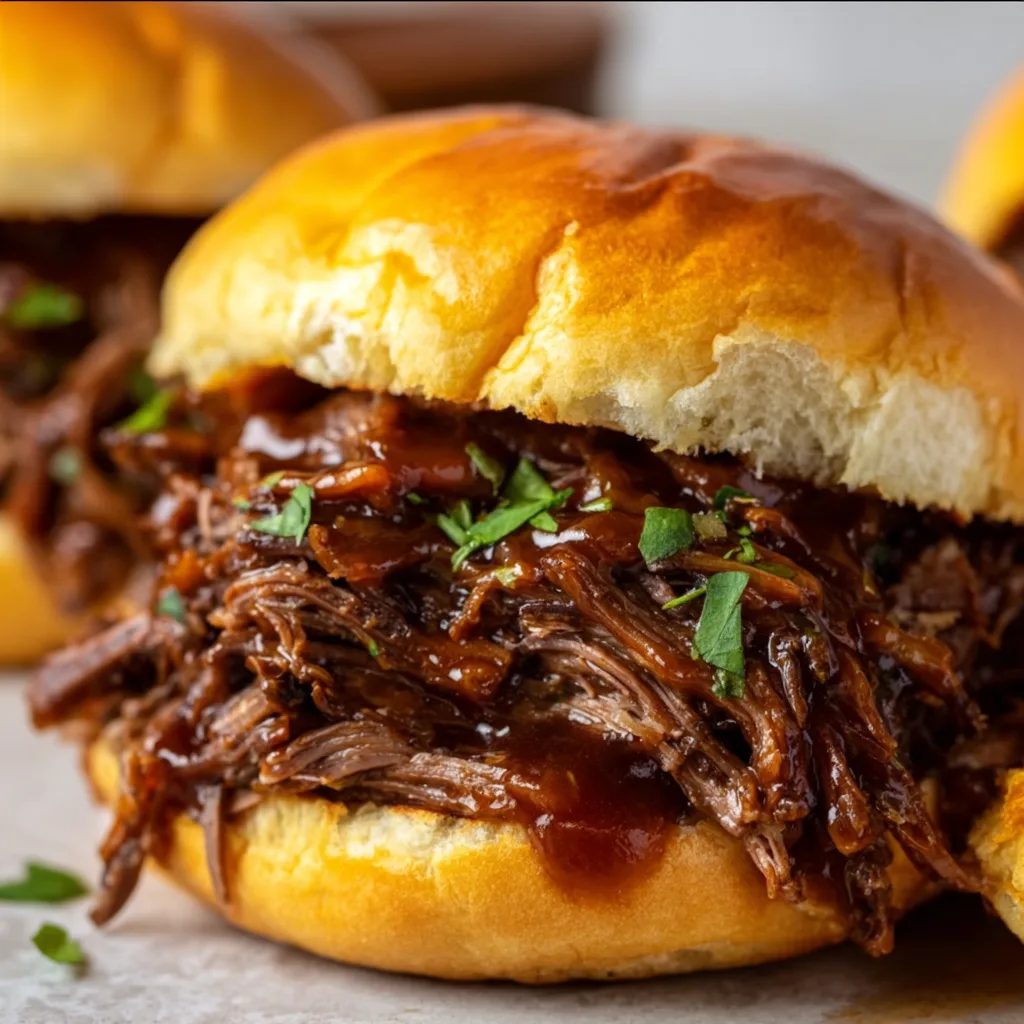
  • Slow Cooker Shredded Beef Sandwiches That Melt Hearts Fast!

    Slow Cooker Shredded Beef Sandwiches That Melt Hearts Fast!

    Slow Cooker Shredded Beef Sandwiches That Melt Hearts Fast!

    Slow Cooker Shredded Beef Sandwiches have completely transformed my weeknight dinner game. There’s something magical about walking through the door after a long day and being greeted by the rich, savory aroma of beef that’s been simmering away for hours. The first time I made these for my family, my kitchen filled with that cozy, homey scent that just says “comfort food is coming.” These fork-tender sandwiches deliver maximum flavor with minimal effort – exactly what we all need on busy days when cooking feels like one more thing on an endless to-do list. Trust me, this recipe will quickly become your new go-to for both family dinners and casual entertaining.

    Recipe

    Why You’ll Love These Slow Cooker Shredded Beef Sandwiches

    Perfect Make-Ahead Meal Solution

    These shredded beef sandwiches are a true lifesaver when life gets chaotic. I remember throwing this together one morning before a particularly hectic workday, and coming home to dinner practically ready to serve was nothing short of miraculous. The slow cooker does all the heavy lifting, transforming an inexpensive cut of beef into something extraordinarily tender and flavorful. Plus, the beef actually tastes even better the next day, making it perfect for meal prep. You can easily double the recipe and enjoy various meals throughout the week – from sandwiches to tacos to loaded baked potatoes.

    Crowd-Pleasing Flavor Profile

    The beauty of these sandwiches lies in their rich depth of flavor that develops during the slow cooking process. The beef absorbs all the savory goodness from the broth, onions, and seasonings, creating a mouthwatering combination that pleases even picky eaters. What I love most is how the meat develops those delicious crispy edges when you sear it beforehand, while the inside stays incredibly juicy. The slight tanginess from the added vinegar balances the richness perfectly, creating that craveable flavor that has my family asking for these sandwiches again and again. It’s comfort food elevated.

    Essential Tips & Tricks

    Choosing and Preparing the Right Cut

    Selecting the perfect cut of beef makes all the difference in this recipe. Chuck roast is my go-to because it has beautiful marbling that melts into the meat as it cooks, creating that melt-in-your-mouth texture we’re after. Before it goes into the slow cooker, don’t skip the browning step! Those few extra minutes create a beautiful crust that adds incredible flavor dimension. I learned this the hard way after making a bland version without searing first. Cut your roast into large chunks rather than one whole piece – this increases the surface area for browning and helps it cook more evenly, resulting in that perfect shreddable texture every time.

    Mastering the Liquid Ratio

    The liquid balance in your slow cooker is crucial for perfect shredded beef. Too much and you’ll end up with soggy meat; too little and it might dry out. I aim for the liquid to come about 1/3 of the way up the sides of the meat – never fully submerged. For extra flavor, I replace half the beef broth with a good quality dark beer or red wine (like I do in my Potsticker Noodle Bowl with Beef Cabbage Slaw). Adding aromatics like bay leaves, garlic, and fresh herbs creates layers of flavor that make these sandwiches truly special. Remember to taste and adjust seasonings after shredding but before returning the meat to the juices.

    Serving Ideas & Creative Variations

    Building the Ultimate Sandwich

    Creating sandwich perfection starts with the right bread – I prefer sturdy brioche buns or pretzel rolls that can stand up to the juicy meat without falling apart. Before assembling, toast your buns with a light brush of butter for that extra touch that makes all the difference. For toppings, I love the classic combination of melted provolone, caramelized onions, and a horseradish mayo that adds a pleasant kick. Crisp pickles provide the perfect contrasting crunch against the tender beef. For a restaurant-quality finish, serve with a small cup of the strained cooking liquid on the side for dipping, similar to how I serve my Cajun Chicken Sandwiches with Garlic Aioli.

    Global-Inspired Flavor Twists

    The beauty of this slow cooker beef is its versatility as a blank canvas for different flavor profiles. For a Mexican-inspired meal, I add chipotle peppers, cumin, and oregano to the cooking liquid, then serve the shredded beef in warm tortillas with avocado and lime. Asian flavors work beautifully too – try adding soy sauce, ginger, and a touch of five-spice powder, then pile the meat onto steamed buns with quick-pickled vegetables. For an Italian twist, incorporate balsamic vinegar, rosemary, and garlic into the cooking process, then serve on crusty ciabatta with melted fontina cheese and roasted red peppers. Each variation feels like an entirely new meal!

    Storage & Troubleshooting Guide

    Proper Storage for Maximum Freshness

    Keeping your shredded beef at peak deliciousness is simple with the right storage approach. Always cool the meat in its juices before refrigerating – this prevents it from drying out and actually enhances the flavor as it sits. Store in airtight containers for up to 4 days in the refrigerator, or freeze flat in ziplock bags for up to 3 months. The flat freezing method allows for quick thawing and saves freezer space. For meal prep, portion the meat into individual servings before freezing. When reheating, adding a splash of beef broth helps restore moisture, and a quick trip under the broiler creates those delicious crispy edges that make the leftovers taste fresh.

    Solving Common Problems

    Even experienced cooks occasionally encounter troubleshooting moments with slow cooker recipes. If your beef isn’t tender enough after the cooking time, it likely needs more time – tough connective tissue breaks down slowly, so add another hour and check again. For beef that seems dry, the solution is simple: return it to the strained cooking liquid after shredding and let it absorb the moisture. If your cooking liquid is too watery, remove the meat, then simmer the liquid on the stovetop to reduce and concentrate the flavors before returning the shredded beef. Remember that different slow cookers can vary in temperature, so you may need to adjust cooking times based on your specific model.

    Frequently Asked Questions

    What’s the best cut of beef for slow cooker shredded beef sandwiches?

    Chuck roast is ideal due to its marbling and connective tissue that breaks down during slow cooking, creating tender, flavorful meat. Brisket and bottom round also work well if you prefer alternatives.

    How long should I cook the beef?

    For a 3-pound roast, cook on low for 8-10 hours or high for 5-6 hours. The meat should easily shred with two forks when properly cooked. Larger cuts may require additional time.

    Can I make this recipe ahead of time?

    Absolutely! The flavor actually improves after a day in the refrigerator. Make it up to 3 days ahead, then reheat gently with a splash of beef broth to maintain moisture.

    Is this recipe freezer-friendly?

    Yes! Freeze the cooled shredded beef in its juices in airtight containers for up to 3 months. Thaw overnight in the refrigerator and reheat slowly for best results.

    Can I use this slow cooker shredded beef for other dishes besides sandwiches?

    Definitely! Use it in tacos, quesadillas, nachos, stuffed potatoes, rice bowls, or even as a pizza topping. The versatility makes it perfect for multiple meals from one cooking session.

    Final Thoughts

    These Slow Cooker Shredded Beef Sandwiches represent what I love most about cooking – creating something truly spectacular with minimal effort. There’s a special kind of satisfaction that comes from transforming simple ingredients into a meal that brings everyone to the table with eager anticipation. The slow cooker magic happens while you’re off living your life, and that’s a beautiful thing. I hope this recipe brings as much comfort and joy to your kitchen as it has to mine. For more delicious recipes that make mealtime special, visit us at Pinterest for endless inspiration.