Easy 3-Ingredient Cake Mix Cookies are the ultimate shortcut to homemade cookie bliss! When my schedule gets hectic (which seems like always these days), these miraculous little treats have saved countless family dessert nights. The beauty lies in their simplicity—just grab a box of cake mix, some oil, and eggs, and you’re minutes away from warm, soft-centered cookies with crispy edges. I first discovered this hack during a late-night baking emergency when my daughter announced she needed cookies for school… tomorrow. Now they’re my secret weapon for last-minute entertaining and satisfying those unstoppable sweet cravings!
Recipe
Why You’ll Love These Easy 3-Ingredient Cake Mix Cookies
Perfect for Busy Bakers
Let’s be honest—sometimes we want homemade cookies without the measuring marathon. These cake mix cookies are the answer to your time-crunched prayers! The boxed cake mix does all the heavy lifting by providing pre-measured dry ingredients, perfectly balanced flavors, and consistent results. I’ve made these with my 8-year-old nephew, and even he couldn’t mess them up! The prep takes literally 5 minutes, and you’ll have warm cookies in under 30 minutes total. For those chaotic weeknights when you need something sweet right now, nothing beats this foolproof method.
Endlessly Customizable
The true magic of these cookies lies in their versatility. Start with any cake mix flavor as your base—chocolate, vanilla, strawberry, lemon, spice cake—and build from there. While technically only three ingredients, you can fold in chocolate chips, sprinkles, nuts, or crushed candies if you’re feeling fancy. Last Christmas, I made red velvet cake mix cookies with white chocolate chips that disappeared faster than Santa down the chimney! The texture is consistently soft and chewy in the center with slightly crisp edges that make them irresistible for dunking in milk or coffee.
Essential Tips & Tricks
Perfecting the Texture
The key to bakery-quality cake mix cookies is getting the texture just right. I’ve learned through many batches that chilling the dough for 15-20 minutes before baking makes a huge difference—it prevents excessive spreading and creates that perfect dome shape. Another game-changer is using a cookie scoop for uniform size (I prefer a 1½ tablespoon scoop). Don’t overbake these beauties! They should look slightly underdone in the center when you pull them out, as they’ll continue cooking on the hot baking sheet. This technique gives you that coveted soft center that melts in your mouth.
Troubleshooting Common Issues
Even with a recipe this simple, little adjustments can make a big difference. If your cookies spread too much, your dough might be too warm or your oven temperature might be off.
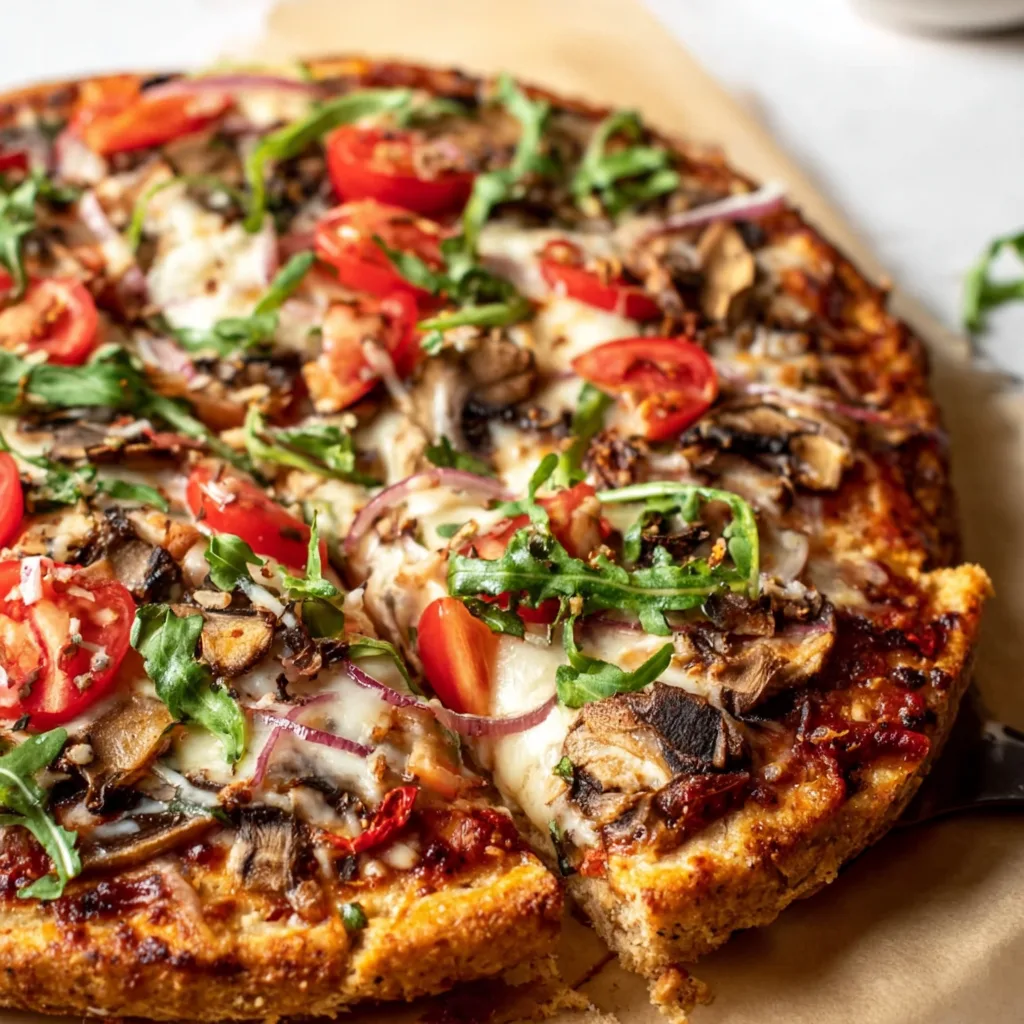
This 20-Minute Healthy Pizza revolutionized my weeknight dinner routine! I used to think “healthy” and “pizza” were contradictory terms until I discovered this game-changing recipe. The first time I made it, my kitchen filled with that irresistible aroma of herbs and melting cheese, and I knew I’d found my new go-to meal. Perfect for busy evenings when you’re craving something satisfying without the guilt, this pizza delivers all the flavor with none of the fuss. Trust me, once you try this quick and nutritious alternative, you’ll never look back at delivery menus the same way again!
Recipe
Why You’ll Love This 20-Minute Healthy Pizza
Nutrition Without Sacrifice
This 20-Minute Healthy Pizza packs a serious nutritional punch while keeping your taste buds dancing. The whole grain crust provides fiber and complex carbs that keep you fuller longer, while the lean protein toppings support muscle recovery. I was genuinely surprised how satisfying it felt compared to traditional pizza! The vibrant vegetables add essential vitamins and antioxidants, creating that perfect balance of nutrition and indulgence. My favorite part? The reduced-fat cheese still melts beautifully, giving you that stretchy, Instagram-worthy cheese pull without excess calories.
Quick Prep, Minimal Cleanup
On nights when cooking feels impossible, this 20-Minute Healthy Pizza is truly a lifesaver. The streamlined process eliminates unnecessary steps—I’ve timed it, and you can genuinely have this on the table in under 20 minutes! I love that it requires just one baking sheet and minimal prep tools, meaning fewer dishes to wash afterward. The assembly-line approach works beautifully: prep your veggies while the crust pre-bakes, then top and finish cooking. This efficiency factor alone makes it my Wednesday night hero when I’m exhausted but still want something homemade and delicious.
Essential Tips & Tricks
Perfecting Your Crust
The foundation of any great 20-Minute Healthy Pizza is a properly prepared crust. For the crispiest bottom, preheat your baking sheet or pizza stone for at least 10 minutes before adding your dough. This creates that restaurant-quality crunch that’s often missing from homemade pizzas. I learned this trick after several soggy-centered disappointments! When using whole grain alternatives, a light brush of olive oil helps achieve that golden edge. Don’t skip the 5-minute pre-bake before adding toppings—this simple step prevents the dreaded soggy middle and ensures even cooking throughout.
Strategic Topping Application
Mastering the art of topping distribution transforms good pizza into great pizza. Start with a thin layer of low-sodium sauce spread to within half an inch of the edge. This creates the perfect sauce-to-crust ratio without sogginess. When adding vegetables, consider their moisture content—I pre-cook mushrooms and zucchini briefly to release excess water. Place heavier ingredients like chicken or bell peppers under the cheese to prevent them from rolling off during serving. For maximum flavor with minimal calories, use strong-flavored ingredients sparingly—a little feta, olives, or sun-dried tomatoes goes a long way!
Serving Ideas & Creative Variations
Family-Friendly Customization
Transform pizza night into an interactive family experience by setting up a DIY topping station. I prepare individual mini crusts and let everyone create their personal masterpiece—my daughter always goes heavy on the pineapple while my husband loads up on jalapeños! This approach ensures everyone gets exactly what they want while still maintaining the healthy foundation. For picky eaters, try “sneaky” nutrition boosters like pureed spinach mixed into the sauce or finely diced vegetables that blend with the cheese. Pair with a simple side salad dressed with balsamic vinaigrette for a complete meal that satisfies everyone.
Global Flavor Adventures
Take your 20-Minute Healthy Pizza on a worldwide tour by experimenting with international flavor profiles. My current obsession is Mediterranean-style with hummus instead of tomato sauce, topped with olives, artichokes, and a sprinkle of za’atar. For Asian inspiration, try a teriyaki base with thinly sliced bell peppers, pineapple, and a light drizzle of sriracha yogurt after baking. Mexican night? Use salsa as your base, add black beans, corn, and finish with fresh avocado and cilantro. These variations keep the concept fresh and exciting while maintaining the quick preparation time and nutritional benefits that make this recipe so valuable for busy weeknights.
Storage & Troubleshooting Guide
Proper Leftover Management
Storing your 20-Minute Healthy Pizza properly ensures it remains delicious for days. Allow leftovers to cool completely before refrigerating to prevent condensation that leads to sogginess. I prefer stacking slices with parchment paper between them rather than placing them flat in a container—this preserves the crust integrity much better! Refrigerated pizza stays fresh for up to 3 days. For longer storage, wrap individual slices tightly in plastic wrap followed by foil, then freeze for up to 1 month. The microwave works in a pinch, but for that just-baked texture, reheat on a preheated baking sheet at 350°F for 5-7 minutes until the cheese bubbles.
Troubleshooting Common Issues
Even the most experienced home cooks encounter pizza problems occasionally. If your crust turns out too soft in the middle, your toppings likely contained excess moisture—next time, pre-cook water-heavy vegetables and pat them dry before adding. Burnt edges but undercooked center? Your oven temperature may be too high; try reducing by 25°F and positioning the rack in the middle. For cheese that separates or becomes oily, you’re likely using pre-shredded varieties with anti-caking agents—switch to block cheese that you grate yourself. If your pizza sticks to the pan despite oiling, try parchment paper underneath for foolproof release every time.
Frequently Asked Questions
Can I make this 20-Minute Healthy Pizza gluten-free?
Absolutely! Substitute a pre-made gluten-free crust or cauliflower base. Just adjust the initial baking time as gluten-free crusts often need a few extra minutes to crisp up properly.
How can I boost the protein content?
Add lean protein toppings like grilled chicken, turkey pepperoni, or chickpeas. For vegetarians, a sprinkle of hemp seeds or nutritional yeast adds protein while enhancing flavor.
Can I prepare components ahead of time?
Yes! Pre-chop all vegetables and store in airtight containers. You can even pre-bake crusts for 3-4 minutes, cool completely, and freeze them for ultra-quick assembly later.
What’s the best cheese alternative for dairy-free diets?
Cashew-based cheese substitutes melt beautifully, or try nutritional yeast mixed with a little olive oil for a cheesy flavor without dairy. Avocado slices add creaminess too!
How do I know when my pizza is perfectly done?
Look for a golden-brown crust edge, bubbling cheese, and slight caramelization on vegetable toppings. The bottom should be firm when you lift a corner with a spatula.
Final Thoughts
This 20-Minute Healthy Pizza has become my reliable solution for those evenings when time is short but I refuse to compromise on nutrition or flavor. The versatility means it never gets boring, while the quick preparation fits seamlessly into even the busiest schedules. I love watching friends’ surprise when they discover it’s both healthy and delicious! Whether you’re cooking for one or feeding a family, this recipe deserves a permanent spot in your meal rotation. Find more inspiration for quick, nutritious meals on Pinterest and revolutionize your weeknight dinners starting tonight!
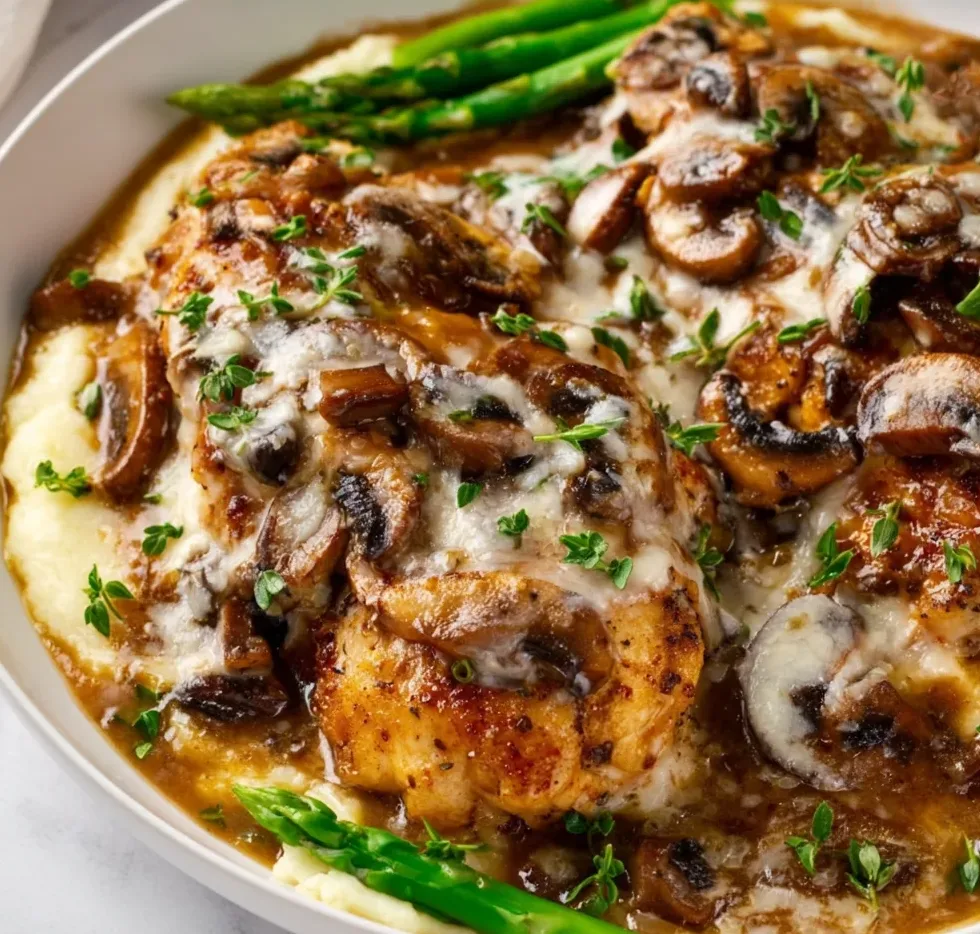
Copycat Cheesecake Factory Chicken Madeira has been my secret weapon for dinner parties for years. There’s something magical about that rich, wine-infused sauce cascading over perfectly seared chicken breasts and melty mozzarella that makes everyone think I’m a culinary genius. I still remember the first time I recreated this dish at home—my kitchen filled with the earthy aroma of mushrooms and Madeira wine, and my husband declaring it better than the restaurant version! This recipe captures all the signature flavors of the beloved Cheesecake Factory classic while letting you enjoy it in your cozy home setting.
Recipe
Why You’ll Love This Copycat Cheesecake Factory Chicken Madeira
Restaurant-Quality Results at Home
This copycat recipe delivers that authentic restaurant experience without the hefty price tag or wait times. The combination of tender chicken breasts, savory mushrooms, and that signature Madeira wine sauce creates layers of flavor that rival the original. I’ve spent years perfecting this recipe, adjusting proportions and techniques until it tastes just like what you’d order at The Cheesecake Factory. The best part? You can make it in your pajamas while sipping a glass of the same Madeira wine you’re cooking with—something you definitely can’t do at the restaurant!
Simple Yet Impressive
Don’t let the elegant results fool you—this dish is surprisingly approachable. With just a handful of quality ingredients and some basic techniques, you’ll create something truly spectacular. The chicken breasts are simply seasoned before being seared to golden perfection. The mushrooms need nothing more than a good caramelization to release their earthy goodness. And that signature sauce? It’s mostly hands-off simmering. The entire dish comes together in about 45 minutes, making it perfect for both special occasions and elevated weeknight dinners when you want to treat yourself.
Essential Tips & Tricks
Mastering the Madeira Sauce
The soul of this dish is undoubtedly the rich Madeira sauce. For authentic flavor, use actual Madeira wine—not cooking wine from the grocery store. The alcohol cooks off, leaving behind a complex sweetness that defines this dish. Let the sauce reduce properly; patience here pays off in flavor concentration. A properly reduced sauce should coat the back of a spoon with a silky sheen. If you’re making this for a family dinner, try pairing it with my Mediterranean Spinach Feta Crisps as an appetizer for a complete restaurant experience.
Perfect Chicken Technique
For restaurant-quality results, pound your chicken breasts to an even 1/2-inch thickness before cooking. This ensures they cook evenly and remain tender throughout. Season generously with salt and pepper, and don’t rush the searing process—a proper golden crust adds tremendous flavor. Once you’ve added the mozzarella, cover the pan briefly to help it melt perfectly without overcooking the chicken. Remember that the chicken will continue cooking slightly as it rests, so remove it from the heat when it reaches 160°F, as it will climb to the safe 165°F while resting.
Serving Ideas & Creative Variations
Classic Pairings
Serve your Copycat Cheesecake Factory Chicken Madeira with creamy mashed potatoes to soak up every drop of that magnificent sauce. The restaurant typically includes sautéed asparagus, which provides a perfect fresh counterpoint to the richness of the dish. For a complete experience, warm some crusty bread for sauce-dipping purposes—I promise no one will judge you for wiping your plate clean! For more delicious chicken recipes that impress dinner guests, check out my Marry Me Chicken Creamy Parmesan which has a similar “wow” factor.
Exciting Twists
While the classic recipe is perfect, don’t be afraid to make it your own. Try using portobello mushrooms for a meatier texture, or add a handful of sun-dried tomatoes for a tangy twist. For a lighter version, substitute chicken thighs with turkey cutlets and serve over cauliflower mash instead of potatoes. You can even transform this into a pasta dish by slicing the chicken and mushrooms, tossing with the sauce, and serving over fettuccine. The versatility of these flavors means you can reinvent this dish multiple ways without losing its essence.
Storage & Troubleshooting Guide
Proper Storage Solutions
This Chicken Madeira stores beautifully, making it perfect for meal prep or leftovers. Refrigerate in an airtight container for up to 3 days. The flavors actually develop overnight, making day-two Madeira sometimes even better than day one! To reheat, use a covered skillet over medium-low heat with a splash of chicken broth to revive the sauce. Avoid microwaving if possible, as it can toughen the chicken. If you want to freeze portions, do so before adding the cheese, then add fresh mozzarella when reheating for best texture.
Common Issues & Fixes
If your sauce is too thin, don’t panic—simply simmer it longer to reduce, or whisk in a cornstarch slurry (1 teaspoon cornstarch mixed with 1 tablespoon cold water). If your sauce broke or separated, lower the heat and whisk in a pat of cold butter to re-emulsify. Overcooked chicken is a common pitfall—invest in a meat thermometer and remove the chicken at 160°F for perfect doneness. If your mushrooms released too much liquid and didn’t brown properly, next time use a hotter pan and avoid overcrowding, cooking them in batches if necessary.
Frequently Asked Questions
What exactly is Madeira wine and can I substitute it?
Madeira is a fortified Portuguese wine with a unique sweet-yet-tangy profile. While you can substitute marsala or dry sherry, the authentic Cheesecake Factory flavor comes from real Madeira. The alcohol cooks off, leaving only the complex flavor.
How do I ensure my Copycat Cheesecake Factory Chicken Madeira has tender chicken?
Pound chicken to even thickness, don’t overcook (use a thermometer), and let it rest after cooking. The gentle simmer in the sauce also helps maintain moisture in the meat.
Can I make this recipe ahead of time?
Yes! Prepare everything except adding the cheese up to 24 hours ahead. Reheat gently on the stovetop, then add cheese and broil briefly before serving.
What mushrooms work best in this recipe?
Button or cremini mushrooms are traditional, but a mix including shiitake adds wonderful depth. Slice them evenly (not too thin) so they don’t disappear during cooking.
Is this recipe gluten-free?
The original Copycat Cheesecake Factory Chicken Madeira is naturally gluten-free as long as you verify your chicken broth is gluten-free. No flour is needed for thickening the signature sauce.
Final Thoughts
This Copycat Cheesecake Factory Chicken Madeira recipe brings restaurant luxury to your dinner table with surprisingly little effort. I love how the rich, velvety sauce transforms simple ingredients into something that feels special enough for celebrations yet accessible enough for a random Tuesday. The way the mushrooms absorb all those wonderful flavors while the chicken stays tender and juicy is nothing short of culinary magic. Don’t forget to share your creations on Pinterest – I’d love to see your version of this beloved classic!
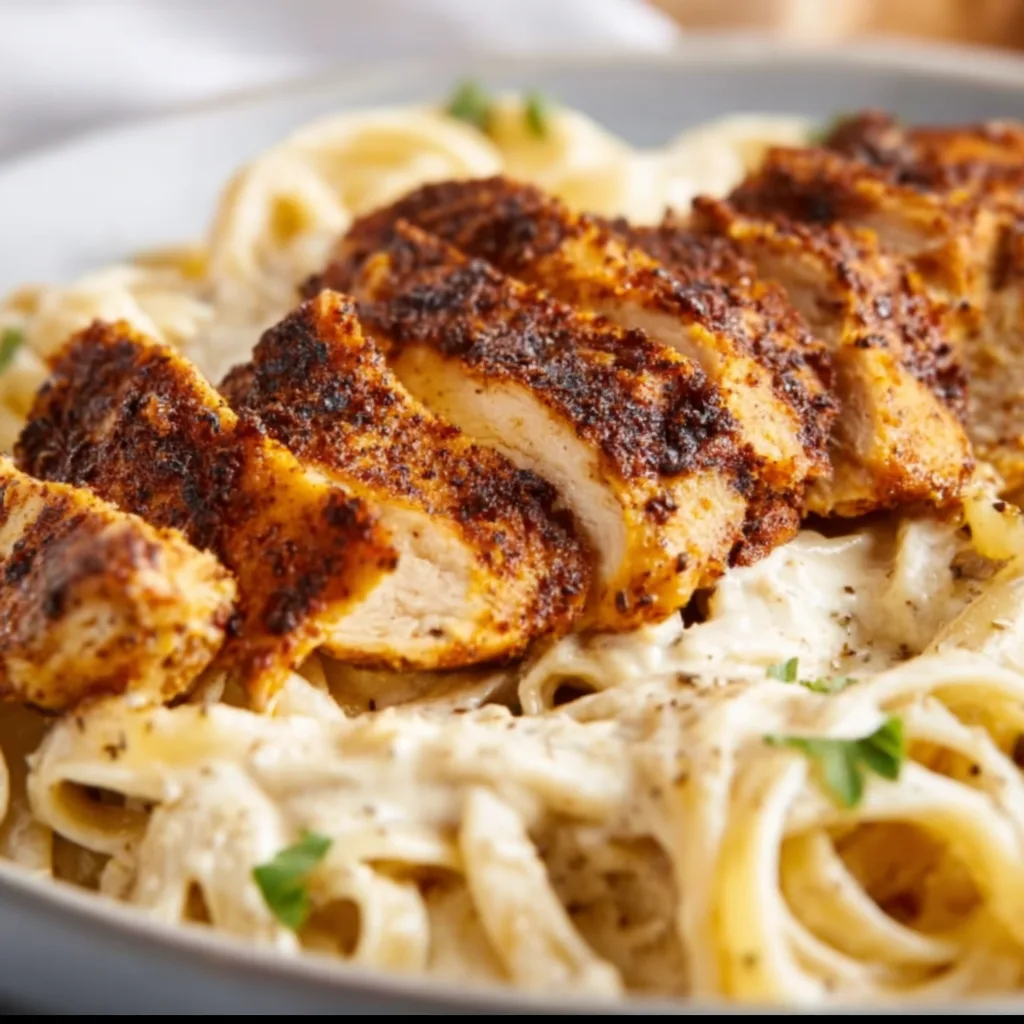
Creamy Blackened Chicken Alfredo Pasta is the ultimate comfort food that brings restaurant-quality elegance to your dinner table with minimal effort. The first time I made this dish, my kitchen filled with the intoxicating aroma of blackened spices and rich garlic butter that had my family hovering nearby, asking when dinner would be ready. The contrast between the spicy, charred chicken and the silky, indulgent alfredo sauce creates a flavor explosion that’s impossible to resist. This dish has become my go-to when I want to impress without spending hours in the kitchen, just like my Creamy Cowboy Butter Chicken Pasta.
Recipe
Why You’ll Love This Creamy Blackened Chicken Alfredo Pasta
Perfect Balance of Flavors and Textures
There’s something magical about the way the blackening spices create a spicy, smoky crust on tender chicken breast while the creamy alfredo sauce cools everything down with its velvety richness. I love how each bite delivers contrasting sensations – the slight char of the blackened exterior giving way to juicy chicken, all coated in that silky sauce that clings perfectly to al dente pasta. The addition of freshly grated Parmesan adds a salty, nutty dimension that ties everything together, creating a dish that feels indulgent yet perfectly balanced.
Quick Weeknight Luxury
Despite its impressive appearance, this dish comes together in about 30 minutes, making it perfect for those evenings when you crave something special but simple. The multitasking approach – blackening chicken while your pasta cooks and the sauce simmers – means dinner arrives at the table efficiently. I’ve made this on busy weeknights and for impromptu dinner guests with equal success. The look of delight when people take their first bite makes the minimal effort completely worthwhile. It’s become my secret weapon for turning an ordinary Monday into something memorable.
Essential Tips & Tricks
Mastering the Blackening Technique
The key to perfect blackened chicken lies in two critical elements: a properly heated pan and the right spice blend. I learned through trial and error that a cast-iron skillet works best, heated until it’s just beginning to smoke. Pat your chicken completely dry before coating with spices – any moisture will steam rather than blacken. For the spice mix, balance is everything: paprika, cayenne, oregano, thyme, garlic powder, onion powder, salt, and pepper create that authentic flavor. Don’t flip the chicken too early; let it develop that beautiful crust before turning.
Creating Silky Alfredo Sauce
The secret to a restaurant-quality alfredo sauce is starting with a quality heavy cream and real butter – this is not the place for substitutions! Begin by gently sautéing minced garlic in butter until fragrant but not brown, then slowly whisk in the cream. The key mistake many make is rushing the process or cranking the heat too high. Keep your sauce at a gentle simmer, never a boil, which causes separation. Add the Parmesan cheese in batches, allowing each addition to fully melt before adding more for the smoothest texture.
Serving Ideas & Creative Variations
Perfect Pairings
This rich pasta dish pairs beautifully with bright, acidic sides that cut through the creaminess. I love serving it with a simple arugula salad dressed with lemon vinaigrette or roasted asparagus with a squeeze of fresh lemon. For a complete meal that won’t overwhelm, warm garlic bread with a crispy crust provides the perfect vehicle for sopping up extra sauce. If you’re entertaining, start with something light like my Roasted Red Pepper Hummus with fresh vegetables to balance the richness of the main course.
Exciting Flavor Twists
While the classic version is divine, this dish welcomes creative adaptations. For a seafood variation, substitute blackened shrimp or add them alongside the chicken for a surf and turf approach. Sundried tomatoes and spinach folded in at the last minute add color, nutrition, and a pleasant tanginess. For heat lovers, stir in a spoonful of cajun seasoning to the alfredo sauce or add red pepper flakes. My personal favorite twist is adding caramelized onions and mushrooms sautéed with a splash of white wine for an earthy dimension that complements the creamy sauce beautifully.
Storage & Troubleshooting Guide
Proper Storage Methods
To maintain the quality of leftover Creamy Blackened Chicken Alfredo Pasta, cool completely before transferring to airtight containers. The pasta will absorb sauce as it sits, so I recommend storing them separately when possible. Refrigerate for up to 3 days for optimal flavor and texture. When reheating, add a splash of milk or cream to restore the sauce’s silkiness. For longer storage, this dish can be frozen for up to 1 month, though the texture of the sauce may change slightly. Always thaw overnight in the refrigerator rather than using the microwave defrost function.
Fixing Common Issues
If your alfredo sauce breaks or becomes grainy, don’t panic! Lower the heat immediately and whisk in 1-2 tablespoons of cold heavy cream to re-emulsify the sauce. For sauce that’s too thick, gradually add warm milk until you reach your desired consistency. If too thin, a slurry of cornstarch and cold water can help thicken it without affecting flavor. Blackened chicken turning out too charred? Your pan was likely too hot – next time, reduce the heat slightly and watch carefully. Remember that pasta continues cooking in hot sauce, so always aim for slightly firmer than al dente when boiling.
Frequently Asked Questions
Can I use pre-cooked chicken for this Creamy Blackened Chicken Alfredo Pasta?
Yes, though you’ll sacrifice some flavor. Toss pre-cooked chicken with blackening seasoning and quickly sear in a hot pan just to develop the crust before adding to your finished alfredo sauce.
What’s the best pasta shape for alfredo sauce?
Fettuccine is traditional, but any pasta with ridges or texture works well. Penne, rigatoni, or linguine all hold the creamy sauce beautifully and pair wonderfully with the chicken pieces.
Can I make this dish lighter?
You can substitute half-and-half for heavy cream and reduce butter slightly, though the sauce won’t be as rich. Adding extra garlic and herbs helps maintain flavor complexity when reducing fat.
Is this recipe spicy?
The blackening seasoning provides moderate heat that’s balanced by the creamy sauce. Adjust cayenne pepper in your blackening mix to control spiciness according to your preference.
How do I prevent my alfredo sauce from separating?
Keep heat low and never let the sauce boil. Add cheese gradually off the heat, and if reheating, do so gently with a splash of cream while whisking constantly.
Final Thoughts
This Creamy Blackened Chicken Alfredo Pasta represents comfort food at its finest – sophisticated enough for special occasions yet simple enough for weeknight dinners. I find myself returning to this recipe whenever I need a foolproof dish that delivers both impressive presentation and incredible flavor. The contrast between spicy blackened chicken and velvety alfredo sauce creates a memorable meal that feels like a restaurant experience at your own table. For more delicious pasta inspirations, follow me on Pinterest where I’m always sharing new comfort food creations!
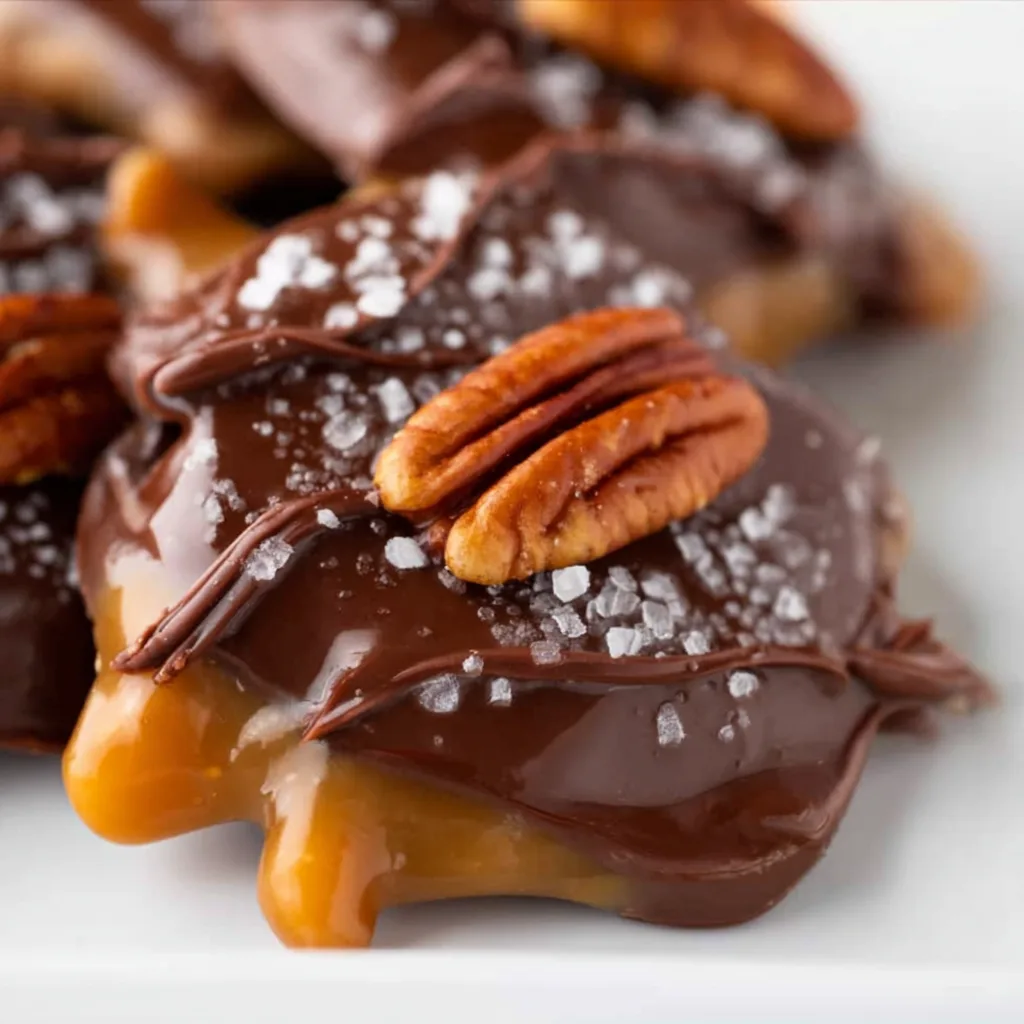
Chocolate Caramel and Pecan Turtle Candy has been my secret weapon for holiday gifting and dessert tables for years. There’s something magical about the way buttery caramel embraces crunchy pecans, all enrobed in glossy chocolate that sets with the perfect snap. The first time I made these for my sister’s birthday gathering, they disappeared within minutes, leaving nothing but sticky fingers and requests for the recipe. These little bites of heaven strike the perfect balance between homemade charm and gourmet indulgence, making them impossible to resist. Let me show you how to create these irresistible treats that will have everyone begging for more.
Recipe
Why You’ll Love This Chocolate Caramel and Pecan Turtle Candy
Perfect Balance of Flavors and Textures
The magic of turtle candy lies in its contrasting elements working in perfect harmony. The buttery caramel slowly melts on your tongue while the pecans provide a satisfying crunch that keeps you coming back for more. That rich chocolate shell adds the final decadent note that makes these treats so special. I love watching people take their first bite—there’s always that moment of closed eyes and a little smile that tells me everything. The slight hint of salt in the caramel elevates all the flavors, creating that addictive sweet-salty combination that makes it nearly impossible to eat just one.
Impressive Yet Surprisingly Simple
Don’t let their elegant appearance fool you—these turtle candies are remarkably straightforward to make. With just a handful of quality ingredients and no specialized equipment required, you’ll create something that looks like it came from an upscale chocolatier. I remember being intimidated the first time I attempted them, nervously watching caramel temperatures and fussing over chocolate tempering. Now they’re my go-to when I need something impressive but don’t have hours to spend in the kitchen. The prep work is minimal, and most of the time involved is just waiting for layers to set. Perfect for busy holiday seasons!
Essential Tips & Tricks
Caramel Success Strategies
The key to perfect turtle candy lies in mastering the caramel layer. Use a heavy-bottomed saucepan to prevent burning, and never step away while it’s cooking—caramel can go from perfect to scorched in seconds! I learned this the hard way during a distracted phone call that ended with a smoky kitchen. Keep a candy thermometer handy and aim for 245°F (firm ball stage) for that ideal chewy-but-not-sticky consistency. If you’re new to caramel making, try the water test: drop a small amount into cold water; it should form a firm but pliable ball. For an extra dimension of flavor, try adding a splash of vanilla or a pinch of sea salt right at the end.
Chocolate Handling Techniques
Properly tempered chocolate makes all the difference in creating turtle candy with a professional-looking finish and satisfying snap. I recommend using good quality chocolate chips or bars chopped into small pieces for even melting. Microwave in 30-second intervals, stirring between each, or use a double boiler for more control. The secret is keeping the temperature below 90°F for dark chocolate (slightly lower for milk or white). Last Christmas, I rushed this step and ended up with bloomed chocolate that looked dull and grainy—a mistake I won’t repeat! If tempering seems intimidating, try adding a teaspoon of coconut oil to your melted chocolate for a similar glossy finish. Check out these cheesecake brownie bites for another delicious chocolate treat.
Serving Ideas & Creative Variations
Elegant Presentation Options
Transform your turtle candy into an impressive dessert worthy of special occasions with thoughtful presentation. Arrange them on a white ceramic platter with a light dusting of cocoa powder for a sophisticated look, or stack them in clear gift boxes tied with ribbon for heartfelt homemade gifts. I love creating a dessert board with turtle candies as the centerpiece, surrounded by fresh berries, small cookies, and perhaps some cheese for contrast. For an extra touch of elegance, try drizzling white chocolate in delicate patterns across the tops or adding a tiny gold leaf accent. These little details elevate your turtle candy from simple treats to memorable indulgences that guests will photograph before devouring.
Flavor Twists and Additions
While classic turtle candy is perfection, experimenting with flavor variations keeps things exciting. Try swapping pecans for toasted walnuts, macadamias, or a mixed nut medley for different texture profiles. Last Valentine’s Day, I added a sprinkle of pink Himalayan salt on top and a dash of bourbon to the caramel—my husband declared it the best version yet! For a spicy-sweet combination, incorporate a pinch of cayenne or cinnamon into your chocolate. White chocolate lovers can create a reverse turtle with dark chocolate pecans and caramel topped with creamy white chocolate. For a festive touch similar to my banana pudding brownies, try adding seasonal sprinkles or colored drizzles to match your celebration theme.
Storage & Troubleshooting Guide
Keeping Turtles Fresh and Perfect
Proper storage techniques ensure your turtle candy maintains its delicious qualities for weeks. Store in an airtight container with parchment paper between layers to prevent sticking. At room temperature, they’ll stay fresh for up to two weeks, though I doubt they’ll last that long! In summer months or warmer climates, refrigeration is best—just bring them to room temperature before serving to allow the caramel to soften perfectly. For longer storage, these treats freeze beautifully for up to three months. I make double batches in November, freezing half for last-minute holiday gatherings. The key is protecting them from moisture and strong odors that chocolate readily absorbs.
Fixing Common Candy Issues
Even experienced candy makers encounter challenges, but most turtle troubles have simple solutions. If your caramel is too soft and doesn’t hold its shape, it likely didn’t reach a high enough temperature—reheat it slowly until it reaches firm ball stage. Conversely, if it’s too hard, incorporate a tablespoon of cream and warm gently. For chocolate that refuses to set properly, pop the turtles in the refrigerator for 10 minutes. Grainy chocolate usually indicates it was overheated—next time, melt it more slowly and stir frequently. I once rescued a batch with bloomed chocolate by gently remelting and adding a teaspoon of neutral oil to restore the shine.
Frequently Asked Questions
Can I use store-bought caramel instead of making it from scratch?
Yes! Unwrap soft caramel candies and melt them with 1-2 tablespoons of heavy cream in the microwave, stirring every 30 seconds until smooth. This shortcut works beautifully when you’re short on time but still want homemade Chocolate Caramel and Pecan Turtle Candy.
How do I prevent the pecans from burning?
Toast pecans at 325°F for just 5-7 minutes, watching carefully and shaking the pan halfway through. They should smell fragrant but not dark. Remove immediately from the hot pan to stop the cooking process.
Can I make these without a candy thermometer?
Absolutely. Use the cold water test—drop a small amount of caramel into ice water. When it forms a firm ball that holds its shape but remains pliable when pressed, it’s ready (around 245°F).
My chocolate seized up. Can I fix it?
Sometimes! Add 1 teaspoon of neutral oil (like vegetable or coconut) and gently warm while stirring constantly. If it’s severely seized, you may need to start with fresh chocolate.
How far in advance can I make turtle candy for gifting?
These keep beautifully for up to 2 weeks in airtight containers at room temperature, or 3 months frozen. Make them 2-3 days ahead for peak freshness when gifting.
Final Thoughts
Chocolate Caramel and Pecan Turtle Candy represents everything I love about homemade treats—simple ingredients transformed into something truly special through a bit of care and attention. There’s a reason these little morsels of goodness have stood the test of time, appearing at gatherings generation after generation. Whether you’re making them as gifts, for a special dessert, or simply to satisfy your own sweet tooth, these turtles deliver pure joy in every bite. I hope you’ll try them and experience that magical moment when chocolate, caramel, and pecans come together in perfect harmony. Find more inspiration for your sweet creations on our Pinterest page.
Fluffy Twice Baked Potatoes are the ultimate comfort food that combines crispy potato skins with a cloud-like, creamy interior that melts in your mouth. I discovered these little gems during a snowy weekend at my grandmother’s farmhouse, where she taught me that the secret lies in whipping the potato filling until it’s as light as air. The contrast between the crispy exterior and the pillowy center creates a texture that’s simply irresistible. Whether you’re hosting a dinner party or craving a cozy side dish for a weeknight meal, these twice baked potatoes will elevate any dining experience with minimal effort.
Recipe
Why You’ll Love This Fluffy Twice Baked Potatoes
Perfect Texture Combination
The magic of fluffy twice baked potatoes lies in their contrasting textures. The outer shell maintains that satisfying crispness that gives way to an incredibly light, whipped interior. I’ve found that using russet potatoes works best because of their high starch content, which creates that perfect fluffiness. The first bake ensures the skin gets nice and crispy, while the second bake melds all the flavors together. When you take that first bite, you’ll experience the delightful crunch followed by the most cloud-like potato filling that practically dissolves on your tongue. It’s a textural paradise!
Endless Customization Options
What I absolutely adore about fluffy twice baked potatoes is their versatility. The basic recipe is delicious on its own, but it also serves as the perfect canvas for creativity. You can fold in roasted garlic for a mellow, aromatic flavor or add crispy bacon bits for a smoky punch. Experiment with different cheese combinations—sharp cheddar, tangy goat cheese, or nutty gruyère. For an herbal note, try chives, rosemary, or thyme. My family goes wild when I add caramelized onions and blue cheese! The possibilities are truly endless, making this recipe one you’ll never tire of making or eating.
Essential Tips & Tricks
Achieving Maximum Fluffiness
The key to creating the fluffiest potatoes possible is in the technique. After the first bake, let the potatoes cool just enough to handle, then scoop out the flesh leaving a ¼-inch border to maintain structural integrity. For cloud-like texture, use a ricer or food processor instead of a masher—this removes all lumps. Warm your dairy ingredients (butter, sour cream, milk) before adding them; cold ingredients can make the potatoes gummy. Whip the mixture with an electric mixer for 1-2 minutes until light and airy. This extra step makes all the difference between good and extraordinary twice baked potatoes!
Perfecting the Twice Baked Process
Timing is everything when creating fluffy twice baked potatoes. For the initial bake, preheat your oven to 400°F and cook potatoes for 45-60 minutes until fork-tender. After filling the shells, the second bake should be at 375°F for just 15-20 minutes—enough to melt the cheese and heat through without drying out. For that beautiful golden top, switch to broil for the final 2-3 minutes, but watch carefully! They can go from perfectly browned to burnt in seconds. If preparing ahead, complete all steps except the final bake, refrigerate, then add 10 minutes to the second bake time when ready to serve.
Serving Ideas & Creative Variations
Perfect Pairings for Any Occasion
Fluffy twice baked potatoes work beautifully as both elegant sides and hearty mains. For dinner parties, serve them alongside a perfectly seared steak or roasted chicken—their creamy texture complements proteins wonderfully. For casual gatherings, pair with a simple green salad dressed with vinaigrette for a refreshing contrast. They’re substantial enough to be a vegetarian main course when topped with broccoli and extra cheese. I love serving them at brunch with poached eggs and hollandaise! The versatility of these potatoes means they’re appropriate for everything from holiday feasts to Tuesday night dinners with easy honey sesame chicken.
Innovative Flavor Combinations
Take your fluffy twice baked potatoes to the next level with unexpected ingredients. Try a Mediterranean version with sun-dried tomatoes, feta, and olives folded into the filling. For a southwestern twist, add corn, black beans, jalapeños, and top with avocado after baking. My personal favorite is a loaded baked potato version with sharp cheddar, crispy bacon, chives, and a dollop of sour cream. For something truly special, try a truffle-infused filling with wild mushrooms and gruyère cheese. The humble potato becomes extraordinary when you think outside the traditional flavor profiles!
Storage & Troubleshooting Guide
Proper Storage and Reheating Methods
Fluffy twice baked potatoes are perfect for meal prep because they store and reheat beautifully. After cooling completely, wrap individual potatoes in plastic wrap and refrigerate for up to 3 days. For longer storage, freeze them on a baking sheet until solid, then transfer to freezer bags for up to 2 months. When reheating from refrigerated, bake at 350°F for 15-20 minutes. From frozen, don’t thaw first—bake at 350°F for 30-35 minutes until heated through. For the best texture when reheating, sprinkle with a little extra cheese on top to prevent drying out.
Solving Common Potato Problems
Even experienced cooks encounter issues with twice baked potatoes. If your potatoes are too dense, you likely overworked the filling or used cold dairy. Next time, warm your milk and sour cream and mix gently. For potatoes that won’t crisp up, try brushing the skins with olive oil and salt before the first bake. If the filling is too runny, fold in a tablespoon of instant potato flakes to absorb excess moisture. For potatoes that collapse, you’ve likely scooped too much flesh out—always leave that ¼-inch border. Remember that different potato varieties have different moisture levels, so adjust your recipe accordingly.
Frequently Asked Questions
What makes twice baked potatoes so fluffy?
The secret to fluffy twice baked potatoes is using a ricer or food processor instead of a masher, warming dairy ingredients before adding them, and whipping the mixture with an electric mixer for 1-2 minutes until light and airy.
Can I make fluffy twice baked potatoes ahead of time?
Absolutely! Prepare everything except the final bake, refrigerate for up to 3 days, then bake for 25-30 minutes at 375°F when ready to serve. They can also be frozen for up to 2 months.
What’s the best potato variety to use?
Russet potatoes are ideal because their high starch content creates the fluffiest interior. Their sturdy skins also hold up well to twice baking.
How can I make these potatoes healthier?
Use Greek yogurt instead of sour cream, reduce cheese, add steamed broccoli or spinach to the filling, and top with herbs instead of bacon for a lighter version that’s still delicious.
Can I make mini fluffy twice baked potatoes as appetizers?
Yes! Use small potatoes like fingerlings or baby reds, reduce baking times accordingly, and serve as elegant bite-sized appetizers at your next gathering.
Final Thoughts
Fluffy twice baked potatoes have become my go-to recipe when I want to impress without spending hours in the kitchen. There’s something magical about that moment when your fork breaks through the crispy top into the cloud-like interior—it’s comfort food perfection. I encourage you to make this recipe your own by experimenting with different fillings and toppings. The techniques you’ll learn creating these fluffy twice baked potatoes will elevate your potato game forever. For more delicious recipes and inspiration, follow me on Pinterest where I’m always sharing new comfort food ideas.
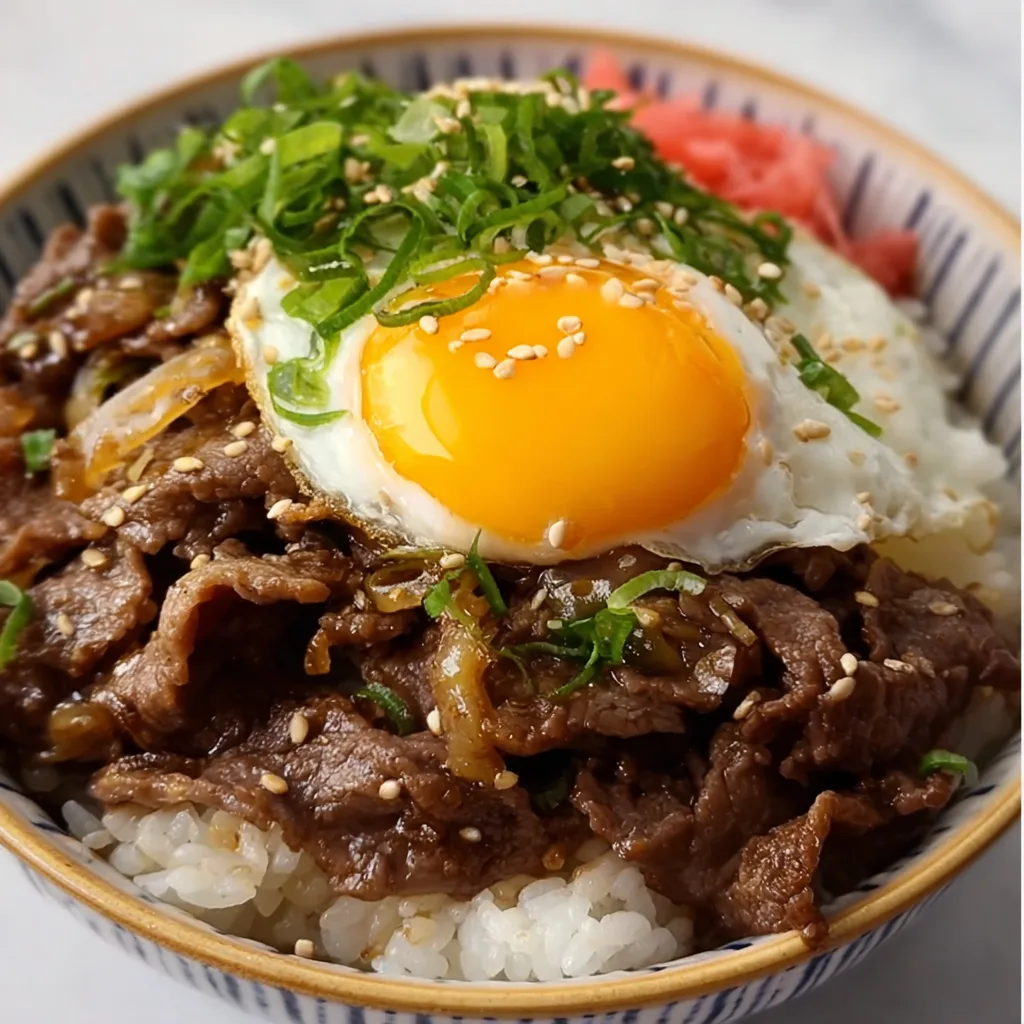
Gyudon (Japanese Beef Rice Bowl) transports me to the bustling streets of Tokyo with just one aromatic bite. There’s something magical about thinly sliced beef and onions simmered in a sweet-savory sauce, all served over a steaming bowl of fluffy rice. The first time I made this comfort dish during a rainy Sunday afternoon, the rich umami aroma filled my tiny apartment, and I was instantly hooked. This traditional Japanese favorite strikes the perfect balance between convenience and flavor, making it an ideal weeknight dinner that feels like a warm hug in bowl form.
Recipe
Why You’ll Love This Gyudon (Japanese Beef Rice Bowl)
Quick Comfort Food with Authentic Flavor
Gyudon is the ultimate 30-minute meal that doesn’t sacrifice flavor for speed. The tender beef absorbs the sweet-savory sauce, creating a perfect harmony that feels both indulgent and nourishing. I love how the thinly sliced onions practically melt into the sauce, adding natural sweetness. The combination of soy sauce, mirin, and a touch of sugar creates that distinctive Japanese flavor profile that makes you close your eyes with each bite. My husband now requests this dish weekly, claiming it’s better than our local Japanese restaurant!
Simple Ingredients, Maximum Impact
What makes gyudon truly special is how it transforms basic ingredients into something extraordinary. You’ll need just thinly sliced beef (ribeye or chuck works beautifully), onions, soy sauce, mirin, sake (or a substitute), sugar, and dashi powder. That’s it! The magic happens when these humble components simmer together, creating a glossy sauce that coats each piece of meat perfectly. I keep these pantry staples on hand specifically for those evenings when I crave something comforting but don’t have the energy for an elaborate meal.
Essential Tips & Tricks
Mastering the Perfect Beef Slice
The secret to authentic gyudon lies in the paper-thin beef slices. Ask your butcher to slice ribeye or chuck extremely thin (almost shaved), or partially freeze your meat at home for about 30 minutes before slicing it yourself with a sharp knife. This technique ensures the beef cooks quickly and remains tender. I learned this trick from my Japanese neighbor who watched me struggling with thick-cut beef one afternoon and kindly showed me how a quick freeze makes all the difference in achieving that melt-in-your-mouth texture that makes gyudon so irresistible.
Balancing the Signature Sauce
Creating the perfect gyudon sauce requires a delicate balance of flavors. The ideal ratio is 3 parts soy sauce, 3 parts mirin, 1 part sake, and 1 part sugar, plus a teaspoon of dashi powder for depth. If your sauce tastes too sweet, add a splash more soy sauce. Too salty? A drizzle of mirin or a pinch more sugar will balance it out. Don’t rush the simmering process—allow the sauce to reduce slightly until it coats the back of a spoon. This creates that glossy finish that makes restaurant-quality gyudon so special.
Serving Ideas & Creative Variations
Traditional and Modern Accompaniments
Serve your gyudon with classic Japanese pickles (tsukemono) for a bright, acidic contrast to the rich beef. A soft-poached egg on top creates a luxurious sauce when the yolk breaks into the meat. For a complete meal, add a side of miso soup and steamed vegetables. My personal touch is adding a sprinkle of togarashi (Japanese chili pepper) and thinly sliced scallions for color and freshness. These simple additions transform a humble bowl into something that feels like it came from a cozy Japanese izakaya.
Regional and Dietary Adaptations
Gyudon welcomes creative adaptations while maintaining its soul. For a Kansai-style version, add dashi-simmered thin slices of konnyaku (yam cake) for texture. Going low-carb? Serve over cauliflower rice or alongside steamed vegetables instead. Vegetarians can substitute thinly sliced portobello mushrooms or plant-based beef alternatives—the key is maintaining those thin slices to absorb the flavorful sauce. I’ve even made a spicy version by adding gochujang (Korean chili paste) that creates a delicious fusion variation my spice-loving friends request repeatedly.
Storage & Troubleshooting Guide
Proper Storage for Maximum Freshness
Gyudon stores beautifully, making it perfect for meal prep. Store the beef mixture separately from rice in airtight containers in the refrigerator for up to 3 days. The flavors actually develop and improve overnight! For freezing, cool the beef mixture completely, then portion into freezer-safe containers for up to 2 months. Thaw overnight in the refrigerator before gently reheating on the stovetop with a splash of water to restore the sauce’s consistency. Always prepare fresh rice when serving leftovers for the best texture.
Fixing Common Gyudon Challenges
If your beef turns out tough, it’s likely either sliced too thick or overcooked. Remember that thin slices cook in just 1-2 minutes. For overly salty sauce, add a quartered potato during simmering (remove before serving) to absorb excess salt, or balance with a teaspoon of sugar. If your sauce is too thin, mix 1 teaspoon cornstarch with 1 tablespoon cold water and stir into the simmering mixture. Too thick? Add a splash of dashi or water. These simple fixes ensure your gyudon turns out perfectly every time.
Frequently Asked Questions
What cut of beef is best for gyudon?
Ribeye or chuck work best for gyudon because they offer a good balance of fat and meat. Have your butcher slice it paper-thin, or partially freeze it at home before slicing for that authentic melt-in-your-mouth texture.
Can I make gyudon without sake?
Absolutely! Substitute sake with dry sherry, Chinese rice wine, or even a mixture of 3 parts water to 1 part rice vinegar. The flavor will be slightly different but still delicious.
How do I achieve restaurant-quality gyudon at home?
The secret lies in paper-thin beef slices and allowing your sauce to reduce properly. Don’t rush the simmering process, and finish with a sprinkle of togarashi and green onions for that authentic presentation.
Is gyudon healthy?
Gyudon can be part of a balanced diet. Use leaner beef cuts, reduce the sugar slightly, and serve with plenty of vegetables for a more nutritious meal that still delivers on flavor.
Can I prepare components of gyudon in advance?
Yes! Slice your beef and onions up to a day ahead, and mix your sauce ingredients in advance. This makes weeknight assembly incredibly quick while preserving the dish’s fresh-cooked quality.
Final Thoughts
Gyudon (Japanese Beef Rice Bowl) exemplifies how simple ingredients can create something truly extraordinary when treated with care. There’s a reason this dish has been beloved in Japan for generations—it offers comfort and satisfaction in every bite while being accessible enough for any home cook to master. I find myself returning to this recipe again and again, not just for its ease but for how it transforms an ordinary evening into something special. Find more inspiration for your kitchen adventures at Pinterest.
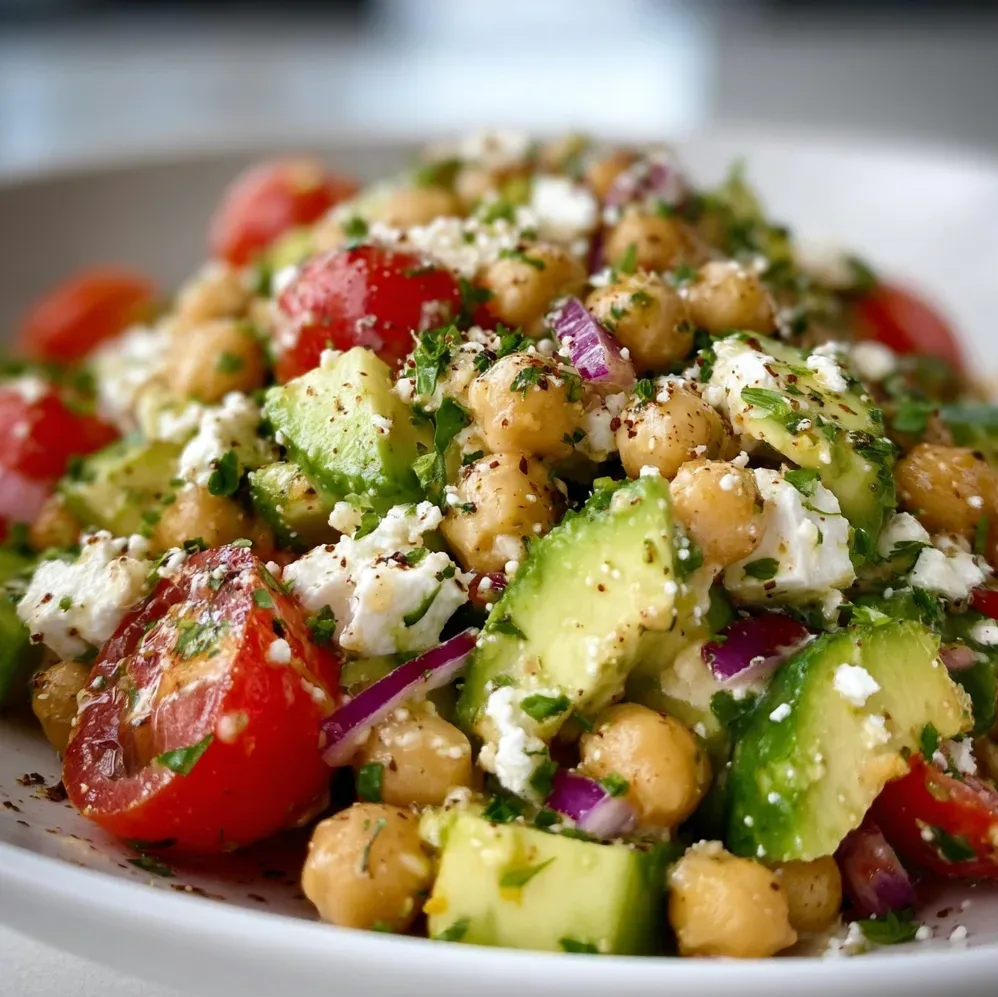
This Chickpea Feta Avocado Salad is my go-to recipe when I want something that’s both satisfying and nourishing. The first time I made it, I was standing in my kitchen on a sweltering summer afternoon, desperately seeking something that wouldn’t require turning on the oven. The combination of creamy avocado, tangy feta, and hearty chickpeas created such a perfect harmony that it’s become a staple in my weekly meal prep. The textures and flavors complement each other beautifully, creating a dish that’s simple yet sophisticated enough for any occasion. Check out my Glow Bowl Recipe for another nutritious option!
Recipe
Why You’ll Love This Chickpea Feta Avocado Salad
Perfect Balance of Flavors and Textures
There’s something magical about the way the creamy avocado melts against the salty punch of feta cheese in this salad. The chickpeas provide a satisfying heartiness that makes this dish feel substantial rather than just a side. I love how the red onions add a gentle bite while the lemon dressing brings everything together with its bright acidity. When you take that first forkful, you’ll experience a symphony of textures – the soft avocado, the firm chickpeas, and the crumbly feta create a mouthfeel that keeps you coming back for more.
Quick and Nutritious Meal Solution
This salad has saved me countless times when I needed a nutrient-dense meal in minutes. It takes just about 15 minutes to throw together, making it perfect for busy weeknights or impromptu lunch guests. The protein from the chickpeas combined with healthy fats from the avocado and olive oil makes this incredibly satisfying. I’ve brought this to office potlucks and weekend picnics, and it always disappears first. The best part? You’ll feel energized rather than sluggish after enjoying this colorful bowl of goodness.
Essential Tips & Tricks
Ingredient Selection Matters
The quality of ingredients makes all the difference in this simple salad. Look for firm avocados with just a slight give when gently pressed – too soft and they’ll turn mushy in the salad. For chickpeas, I prefer using canned ones rinsed thoroughly, but cooking dried chickpeas gives them an even better texture if you have the time. The feta is another crucial element – choose a block packed in brine rather than pre-crumbled for the best flavor and texture. I once made this with a cheap pre-crumbled feta, and the difference was immediately noticeable. Fresh herbs are non-negotiable here!
Perfecting the Dressing Ratio
The dressing is what ties this Chickpea Feta Avocado Salad together, and getting the proportions right is key. I use a 2:1 ratio of olive oil to lemon juice as the base, then add a small clove of minced garlic and a teaspoon of Dijon mustard to emulsify everything. Don’t skimp on seasoning – a generous pinch of flaky sea salt and freshly ground black pepper makes all the flavors pop. If you’re feeling adventurous, a pinch of sumac or za’atar adds a wonderful Middle Eastern twist that complements the chickpeas beautifully.
Serving Ideas & Creative Variations
Meal Prep and Serving Suggestions
This salad is incredibly versatile for serving. For an elegant presentation, try serving it in avocado halves with an extra sprinkle of feta on top. If meal prepping, keep the dressing separate and add the avocado just before eating to prevent browning. I love serving this alongside Garlic Butter Cod Bites for a complete meal that impresses guests. For a portable lunch option, stuff the salad into pita pockets with some extra greens. The salad also makes a beautiful addition to a Mediterranean-inspired grazing board.
Seasonal Adaptations and Substitutions
Don’t be afraid to adapt this salad throughout the year with seasonal produce. In summer, I add cherry tomatoes and cucumber for extra freshness. Fall calls for roasted sweet potato cubes and a sprinkle of pepitas. Winter versions work beautifully with segments of blood orange and a handful of arugula. If you’re dairy-free, substitute the feta with a firm cashew cheese or simply add extra avocado. Vegans can enjoy this with marinated tofu cubes instead of feta. The chickpeas can be swapped for white beans or lentils depending on what you have on hand.
Storage & Troubleshooting Guide
Keeping It Fresh
The biggest challenge with this salad is maintaining the avocado’s freshness. If storing leftovers, press plastic wrap directly onto the surface of the salad to minimize air exposure, which causes browning. A squeeze of extra lemon juice over the top also helps preserve the avocado’s color. Store in an airtight container in the refrigerator for up to 24 hours. For meal prep, store all components separately – chickpeas with herbs and feta in one container, diced avocado (with lemon juice) in another, and dressing in a small jar – then combine when ready to eat.
Rescuing Common Issues
If your salad seems too dry after being refrigerated, simply drizzle a little extra olive oil and lemon juice to refresh it. Found yourself with underripe avocados? Dice them smaller and let them sit in the dressing for 10 minutes before adding other ingredients – the acid helps soften them slightly. If your salad lacks flavor, don’t immediately add more salt; try a pinch of red pepper flakes or a drizzle of honey to balance the flavors. Soggy herbs can be revived by plunging them briefly in ice water before patting dry.
Frequently Asked Questions
Can I make Chickpea Feta Avocado Salad ahead of time?
Yes, but store components separately. Combine chickpeas, feta, and vegetables with dressing up to 24 hours ahead, but add diced avocado just before serving to prevent browning.
Is this salad suitable for vegans?
Not as written, but you can easily substitute the feta with firm tofu marinated in lemon juice, nutritional yeast, and herbs for a vegan version that maintains the texture contrast.
How can I make this salad more filling?
Add cooked quinoa or farro for extra protein and fiber. You could also include roasted vegetables or grilled chicken if you want a more substantial meal.
What herbs work best in this recipe?
Fresh mint, parsley, dill, and basil all work beautifully. I recommend using at least two different herbs for complexity of flavor.
Can I use dried chickpeas instead of canned?
Absolutely! Cook dried chickpeas until tender but still firm. They’ll have better texture and flavor, though they require advance planning for soaking and cooking time.
Final Thoughts
This Chickpea Feta Avocado Salad has become more than just a recipe in my kitchen—it’s a solution for healthy eating that doesn’t sacrifice flavor or satisfaction. The way the ingredients come together creates something greater than the sum of its parts. I find myself craving the bright, fresh flavors and contrasting textures regularly. Whether you’re looking for a quick lunch, a side dish, or a light dinner, this versatile salad delivers every time. Don’t forget to check out more of my favorite recipes on Pinterest!