Blog

  • Pecan Bourbon Bread Pudding Recipe That Will Melt Your Heart

    Pecan Bourbon Bread Pudding Recipe That Will Melt Your Heart

    Pecan Bourbon Bread Pudding Recipe That Will Melt Your Heart

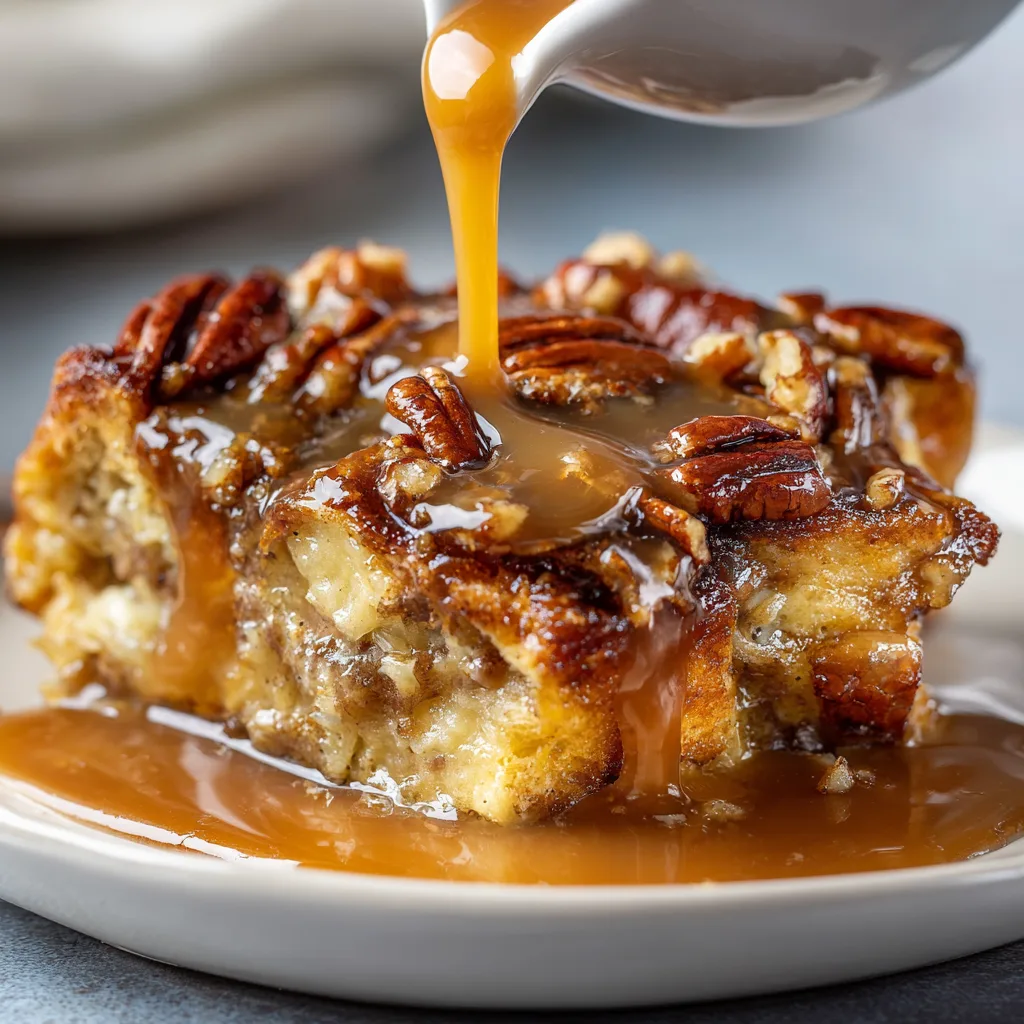
    Pecan Bourbon Bread Pudding with Sauce is the ultimate comfort dessert that transforms humble ingredients into something truly magical. The first time I made this for Sunday dinner, my kitchen filled with the intoxicating aroma of caramelizing sugar, toasted pecans, and that unmistakable bourbon warmth. There’s something about the way the crusty bread soaks up the custard, creating those perfect crispy edges while maintaining a velvety center. This isn’t just dessert—it’s a hug in a baking dish that’ll have everyone lingering at the table, scraping their spoons for one more bite of that buttery bourbon sauce.

    Recipe

    Why You’ll Love This Pecan Bourbon Bread Pudding with Sauce

    A Perfect Balance of Textures and Flavors

    The magic of this bread pudding lies in its contrasts—crispy, caramelized edges giving way to a custard-soaked center that melts in your mouth. The pecans add a delightful crunch while the bourbon infuses everything with its warm, vanilla-caramel notes. I still remember my neighbor Jen’s face when she first tasted it—eyes closed, spoon hovering mid-air—that moment of pure bliss. The bread soaks up the custard mixture like a dream, creating pockets of rich creaminess between the chunks of bread. It’s indulgent without being heavy, complex without being complicated.

    Make-Ahead Convenience for Stress-Free Entertaining

    One of my favorite things about this Pecan Bourbon Bread Pudding is how entertaining-friendly it is. I’ve made it countless times for dinner parties, always preparing it the day before. The flavors actually deepen overnight, making it even more delicious. Just reheat it before serving and warm up that bourbon sauce. Your guests will think you’ve been slaving away all day, when really, you’ve been relaxing with a cup of coffee. This dessert has saved me during last-minute dinner invitations—it’s impressive enough for company but simple enough for a cozy night in.

    Essential Tips & Tricks

    Choosing the Right Bread for Perfect Results

    The foundation of exceptional bread pudding starts with the bread itself. I’ve learned through many batches that day-old bread works best—it absorbs the custard without dissolving into mush. Brioche, challah, or French bread are my top choices for their structure and subtle sweetness. Tear rather than cut your bread for irregular pieces that create more texture. Let those bread chunks sit out uncovered for a few hours (or overnight) to dry slightly. This extra step might seem fussy, but I promise it makes the difference between good bread pudding and one that’s transcendent.

    Mastering the Bourbon Sauce

    The sauce is where this dessert truly shines—rich, buttery, and kissed with just enough bourbon to make it interesting without overwhelming. The key is adding the bourbon off-heat to preserve its complex flavor notes. I once made the mistake of boiling it too long and lost all that beautiful bourbon character! Start with quality bourbon (doesn’t have to be expensive, just decent), and remember that a little goes a long way. For a non-alcoholic version, bourbon extract works surprisingly well. Always serve the sauce warm, drizzling it over individual portions rather than the entire pudding to maintain those lovely textural contrasts.

    Serving Ideas & Creative Variations

    Seasonal Adaptations That Wow

    This versatile dessert transforms beautifully with the seasons. In summer, I fold in fresh berries and serve with a scoop of vanilla ice cream that melts into all the crevices. Fall calls for diced apples sautéed with cinnamon before mixing in. Winter holidays? Add crushed peppermint and a drizzle of chocolate sauce. Spring brings lemon zest and a dollop of whipped mascarpone. The bourbon sauce pairs wonderfully with each variation, though you can adjust the spices accordingly. My family has come to expect a new twist each time, making it our most anticipated dessert tradition.

    Elegant Presentation Techniques

    Transform this humble comfort dessert into a showstopper with thoughtful presentation. Individual ramekins create an elegant plated dessert—I brush their rims with sugar before baking for a caramelized edge. For dinner parties, I use a springform pan lined with parchment, creating a tall, cake-like presentation that slices beautifully. Garnish with candied pecans, a dusting of powdered sugar, or fresh mint. For the ultimate indulgence, place the warm sauce in a small pitcher alongside, allowing guests to pour as much or little as they desire. The ritual of the pour adds to the experience.

    Storage & Troubleshooting Guide

    Proper Storage for Leftovers

    Storing this bread pudding properly ensures you can enjoy its deliciousness for days. Refrigerate leftovers within two hours of baking, covering tightly with plastic wrap or in an airtight container. It keeps beautifully for up to 4 days. The sauce should be stored separately in its own container. When reheating, add a splash of cream or milk to the pudding to restore moisture, then warm in a 300°F oven for about 15 minutes until heated through. Microwave individual portions for 30-45 seconds. I’ve found that a quick toast under the broiler revives that lovely caramelized top.

    Fixing Common Bread Pudding Problems

    Even experienced bakers encounter challenges with bread pudding. If yours turns out too dry, your bread likely absorbed too much liquid before baking—next time, reduce soaking time or add more custard. Too soggy? Your bread pieces might have been too fresh or small. The pudding should jiggle slightly in the center when done but not slosh. If your sauce separates, whisk vigorously off heat or add a splash of cream to re-emulsify. For a sauce that’s too thin, simmer a bit longer; too thick, add a tablespoon of cream. Remember that bread pudding continues to set as it cools.

    Frequently Asked Questions

    Can I make Pecan Bourbon Bread Pudding with Sauce ahead of time?

    Absolutely! Prepare it up to 24 hours ahead, cover and refrigerate unbaked. Let it come to room temperature for 30 minutes before baking. The sauce can be made 3 days ahead and gently reheated before serving.

    What’s the best bourbon to use in this recipe?

    A mid-range bourbon works perfectly—Maker’s Mark, Buffalo Trace, or Knob Creek are excellent choices. You’ll want something smooth with vanilla and caramel notes, but save your top-shelf bottles for sipping.

    Can I freeze leftovers?

    Yes! Freeze individual portions without sauce for up to 3 months. Thaw overnight in the refrigerator and reheat in a 325°F oven until warm. Make fresh sauce or freeze it separately in an ice cube tray.

    How do I know when my bread pudding is done?

    The pudding should be golden brown on top with a slight jiggle in the center. A knife inserted comes out mostly clean but still moist. Internal temperature should reach 160°F for food safety.

    Can I make this recipe without alcohol?

    Definitely! Replace bourbon with apple juice, vanilla extract, or bourbon extract for the flavor without alcohol. You’ll still get a delicious caramel sauce that complements the pudding perfectly.

    Final Thoughts

    This Pecan Bourbon Bread Pudding with Sauce has become my signature dessert for good reason—it transforms simple ingredients into something extraordinary that creates lasting memories around the table. There’s something magical about watching someone take their first bite, eyes widening as they taste those layers of flavor. Whether you’re making it for a special occasion or just because it’s Tuesday, this bread pudding brings a touch of Southern comfort to any meal. I’d love to see your creations on Pinterest—tag me when you make your own version!
  • Cajun Crispy Chicken Sandwich with Garlic Aioli – Irresistibly Crispy!

    Cajun Crispy Chicken Sandwich with Garlic Aioli – Irresistibly Crispy!

    Cajun Crispy Chicken Sandwich with Garlic Aioli – Irresistibly Crispy!

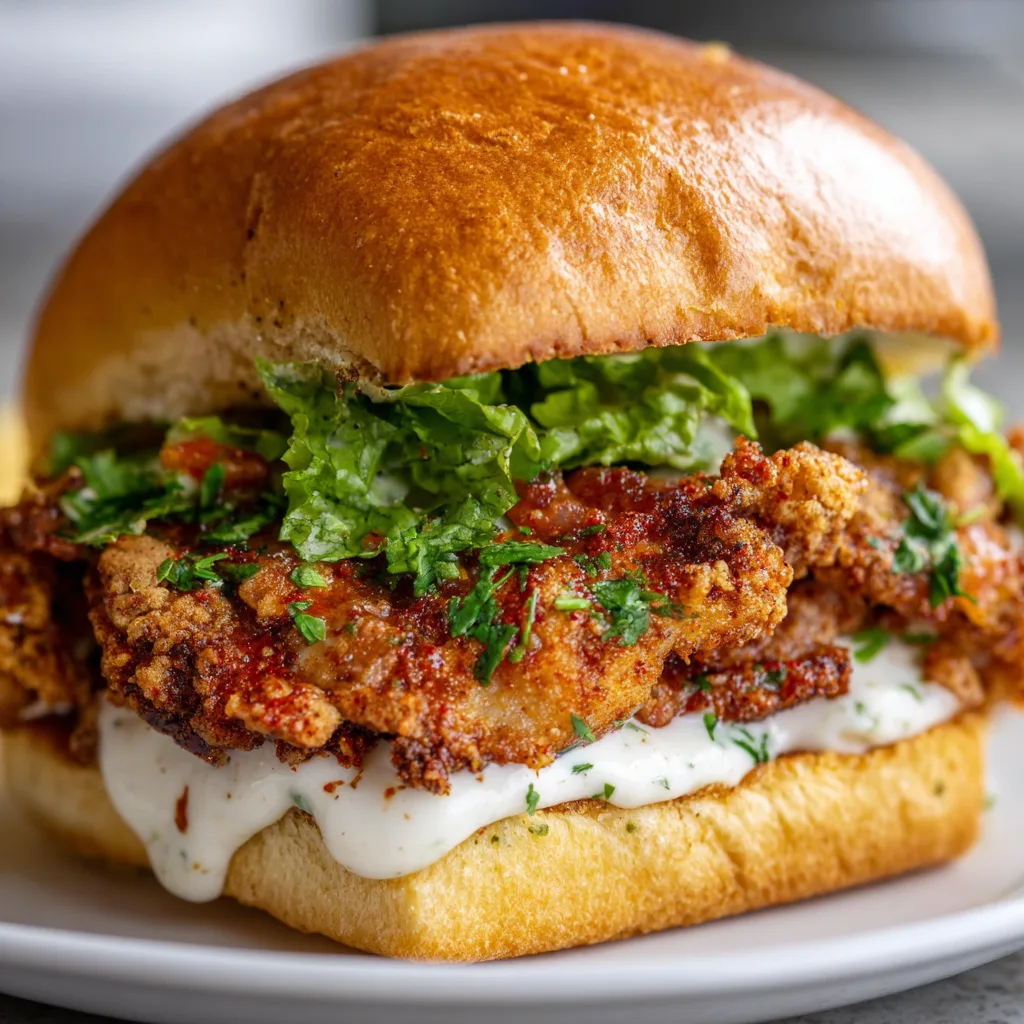
    There’s something magical about that first bite into a Cajun Crispy Chicken Sandwich with Garlic Aioli – the perfect crunch, the warm kick of spices, and that creamy garlic spread that ties everything together. I still remember making these for my sister’s backyard gathering last summer; the sandwiches disappeared faster than I could snap a picture! This Southern-inspired sandwich brings together bold Cajun spices with a cooling aioli that creates a flavor explosion worthy of your favorite restaurant, but made right in your kitchen. Trust me, once you master this recipe, it’ll become your new go-to for impressing friends or treating yourself after a long day.

    Recipe

    Why You’ll Love This Cajun Crispy Chicken Sandwich with Garlic Aioli

    Perfect Balance of Flavors and Textures

    The magic of this sandwich lies in its perfect harmony of contrasts. The chicken breast is marinated in a zesty Cajun blend that infuses every bite with warmth without overwhelming heat. I love how the crispy, craggy exterior gives way to juicy, tender meat inside – it’s that textural contrast that makes you close your eyes with each bite. The buttery brioche bun adds a touch of sweetness while the cool, creamy garlic aioli cuts through the spice with its rich, velvety texture. Add some crisp lettuce and juicy tomato, and you’ve got a sandwich that hits every note on your palate.

    Quick Enough for Weeknights, Special Enough for Gatherings

    What I adore about this sandwich is its versatility. Despite its impressive flavor profile, it comes together in under 30 minutes, making it weeknight-friendly yet special enough for gatherings. The chicken can be prepped ahead and the aioli made in advance, so assembly is a breeze when hunger strikes. I’ve made these for casual Friday dinners and for impromptu get-togethers, and they never fail to impress. There’s something about serving a perfectly golden, crispy chicken sandwich that makes everyone feel like they’re getting restaurant-quality food without the wait or the price tag.

    Essential Tips & Tricks

    Mastering the Cajun Coating

    The key to that perfect crispy coating starts with proper preparation. I always pat my chicken breasts completely dry before dredging – moisture is the enemy of crispiness! For the ultimate crunch, I use a double-dredging technique: flour mixture, then buttermilk, then back into the flour mixture. Press the coating firmly onto the chicken to create those delicious craggy bits that get extra crispy. For authentic Cajun flavor, toast your spices in a dry pan for 30 seconds before mixing them into your flour – this simple step awakens the essential oils in the spices and makes a noticeable difference in the final flavor profile.

    Perfecting the Garlic Aioli

    The garlic aioli isn’t just a condiment – it’s the crowning glory of this sandwich! For the most flavorful aioli, roast whole garlic cloves until they’re soft and caramelized instead of using raw garlic. This mellows the sharpness while intensifying the savory notes. Let your mayo come to room temperature before mixing for the smoothest texture. A splash of lemon juice brightens everything up, while a pinch of cayenne creates a subtle warmth that complements the Cajun chicken beautifully. If you love garlic-forward flavors, try my Garlic Parmesan Cheeseburger Bombs for another crowd-pleasing option.

    Serving Ideas & Creative Variations

    Perfect Pairings for Your Sandwich

    This Cajun Crispy Chicken Sandwich deserves equally exciting sides! My go-to pairing is sweet potato fries tossed with a pinch of the same Cajun seasoning – the sweetness balances the sandwich’s spice beautifully. For a lighter option, a crisp coleslaw with apple cider vinegar dressing cuts through the richness. On hot summer days, nothing beats serving these with watermelon slices sprinkled with tajin for a sweet-spicy contrast. For drinks, a cold sweet tea or a citrusy lemonade complements the flavors perfectly. These sandwiches also pair wonderfully with my Cajun Chicken Alfredo for a full Southern-inspired feast.

    Exciting Twists on the Classic

    Don’t be afraid to make this sandwich your own! For a Nashville-inspired version, add honey and extra cayenne to your Cajun mix for a sweet-heat combo. Seafood lovers can substitute the chicken with firm white fish or shrimp for an incredible po’boy variation. Vegetarians aren’t left out – cauliflower steaks work beautifully with the same coating and cooking method. For an extra layer of flavor, add smoked gouda or pepper jack cheese. My personal favorite twist is adding pickled jalapeños and a thin layer of blackberry jam – the sweet-spicy-tangy combination is absolutely mind-blowing!

    Storage & Troubleshooting Guide

    Keeping Components Fresh

    For make-ahead convenience, store your components separately. The garlic aioli keeps beautifully in an airtight container in the refrigerator for up to 5 days, developing even deeper flavor overnight. If you have leftover fried chicken, store it uncovered in the refrigerator for up to 2 days – covering it creates condensation that softens the coating. To reheat, avoid the microwave! Instead, place the chicken in a 325°F oven for 10-15 minutes until heated through, which helps restore some crispiness. Store assembled sandwiches wrapped in parchment rather than plastic to prevent sogginess.

    Solving Common Challenges

    If your chicken coating isn’t crisping properly, your oil likely isn’t hot enough. Maintain a steady temperature between 350-375°F – use a thermometer for precision. If the outside browns too quickly while the inside remains undercooked, your heat is too high. For thick chicken breasts, butterfly or pound them to even thickness before cooking. If your aioli breaks or becomes too thin, whisk in an additional egg yolk at room temperature. For a coating that won’t stick, ensure you’re pressing it firmly onto the chicken and letting it rest for 5 minutes before frying to help the coating adhere.

    Frequently Asked Questions

    Can I make this Cajun Crispy Chicken Sandwich with Garlic Aioli ahead of time?

    Yes! Prepare the garlic aioli up to 5 days ahead and store refrigerated. You can also bread the chicken and keep it uncovered in the refrigerator for up to 4 hours before frying for maximum crispiness.

    What’s the best oil for frying the chicken?

    Vegetable, canola, or peanut oil work best due to their high smoke points. I prefer peanut oil for its subtle flavor that complements the Cajun spices without overpowering them.

    Can I bake or air-fry the chicken instead?

    Absolutely! Spray the breaded chicken with cooking oil and bake at 425°F for 20-25 minutes or air-fry at 390°F for 12-15 minutes, flipping halfway through either method.

    How spicy is this sandwich?

    The heat level is customizable. As written, it has a medium kick that most people enjoy. Reduce the cayenne for milder flavor or add extra hot sauce to the aioli for more heat.

    What can I substitute for buttermilk?

    Mix 1 cup milk with 1 tablespoon lemon juice or vinegar and let stand for 5 minutes. Greek yogurt thinned with a little milk also works beautifully as a buttermilk alternative.

    Final Thoughts

    This Cajun Crispy Chicken Sandwich with Garlic Aioli has become my signature dish for good reason – it strikes that perfect balance between comfort food and culinary adventure. There’s something deeply satisfying about creating a sandwich that rivals any restaurant version, with layers of flavor and texture that keep you coming back for another bite. Whether you’re cooking for family, friends, or just treating yourself, this recipe delivers that special something that turns an ordinary meal into a memorable experience. For more delicious recipes and inspiration, follow me on Pinterest where I’m always sharing new favorites!

  • Oven-Fried Feta Rolls with Spicy Chili Honey – Irresistibly Crispy!

    Oven-Fried Feta Rolls with Spicy Chili Honey – Irresistibly Crispy!

    Oven-Fried Feta Rolls with Spicy Chili Honey – Irresistibly Crispy!

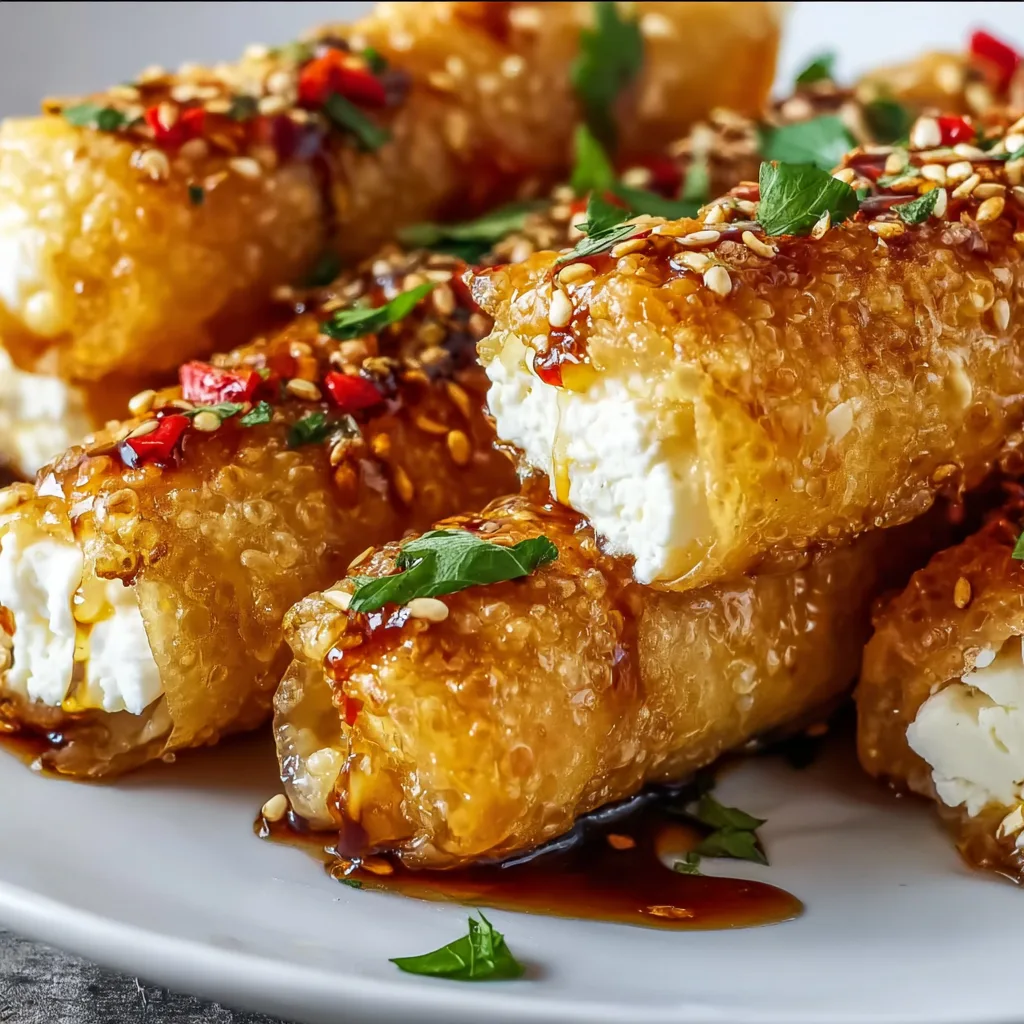
    These Oven-Fried Feta Rolls with Spicy Chili Honey might be my new obsession. The first time I made them, the kitchen filled with the most intoxicating aroma – that perfect blend of crispy, golden pastry and melting feta cheese. I watched my dinner guests’ eyes widen as they bit through the crunchy exterior into that creamy, tangy center, then dipped into the sweet-spicy honey that leaves a gentle tingle on your lips. These little bundles of joy strike that perfect balance between impressive and approachable – exactly the kind of recipe I love sharing with you at Recipes Darleen.

    Recipe

    Why You’ll Love These Oven-Fried Feta Rolls with Spicy Chili Honey

    Perfect Texture Contrast

    The magical crunch of these feta rolls is what makes them utterly irresistible. Unlike traditional fried appetizers, these beauties get their golden exterior from the oven, meaning less mess and healthier results. I love how the phyllo pastry creates those delicate, shatteringly crisp layers while protecting the creamy feta inside. The cheese softens without completely melting, maintaining that perfect bite and tanginess. It’s like getting the best of both worlds – the satisfaction of something fried with the convenience of baking.

    Sweet Heat Balance

    The spicy chili honey takes these rolls from delicious to unforgettable. There’s something almost addictive about that first hit of sweetness followed by the gentle warmth of chili that builds with each bite. I’ve found the perfect balance where the honey complements the salty feta without overwhelming it. The drizzle also adds a beautiful visual element, making these rolls look as good as they taste. My friends always ask for extra dipping sauce – it’s that good! The contrast between the cool, tangy feta and warm, spicy honey creates flavor magic.

    Essential Tips & Tricks

    Mastering the Phyllo

    Working with phyllo dough intimidated me until I discovered a few game-changing tricks. First, thaw it completely in the refrigerator overnight – never on the counter. When you’re ready to use it, cover the sheets with a slightly damp kitchen towel to prevent drying. Work quickly but don’t panic if a sheet tears – simply patch it with another piece. The secret to that perfect crispiness? A light brush of olive oil between layers, not butter. This creates a lighter finish that complements the feta perfectly, similar to what I do with my Spinach Feta Puff Pastry.

    Perfecting the Chili Honey

    The honey-chili balance is crucial – too much heat overwhelms the delicate feta, too little and it’s forgettable. I start with good-quality honey (local if possible) and warm it gently with red pepper flakes. Let them infuse for at least 10 minutes before straining if you prefer a smoother drizzle. For extra dimension, add a tiny splash of apple cider vinegar and a pinch of flaky salt. Make this ahead of time – the flavors deepen beautifully after a day or two. Store any leftover honey in a glass jar; it’s fantastic on everything from cheese boards to roasted vegetables.

    Serving Ideas & Creative Variations

    Perfect Pairings

    These feta rolls shine as part of a Mediterranean spread alongside olives, hummus, and fresh vegetables. For a stunning appetizer board, I arrange them with Roasted Red Pepper Hummus and cucumber slices. They’re substantial enough to serve as a light lunch paired with a lemony arugula salad. For dinner parties, I present them standing upright in a shallow bowl of extra chili honey for dramatic effect. The rolls are surprisingly versatile – equally at home at casual gatherings or elegant dinner parties. They’re best served warm but remain delicious at room temperature.

    Exciting Flavor Twists

    While the classic version is divine, these rolls welcome creative adaptations. Try mixing herbs like dill, mint, or oregano into the feta for a fresh dimension. For a sweeter variation, add a thin slice of fig or date before rolling. Adventurous eaters might enjoy a version with crumbled blue cheese and a drizzle of hot honey. My personal favorite twist includes a sprinkle of za’atar and lemon zest mixed into the cheese. The basic technique remains the same, making this a wonderfully adaptable recipe that keeps guests guessing what delicious surprise awaits inside.

    Storage & Troubleshooting Guide

    Make-Ahead Options

    These rolls offer excellent meal prep potential without sacrificing quality. You can assemble them up to 24 hours ahead, cover tightly with plastic wrap, and refrigerate unbaked. When ready to serve, simply brush with olive oil and bake. Already baked rolls reheat beautifully in a 350°F oven for 5-7 minutes – avoid the microwave which makes them soggy. The chili honey keeps for up to two weeks in an airtight container at room temperature, making it perfect for advance preparation. I often double the honey recipe to have extra on hand for other dishes.

    Common Challenges Solved

    The biggest challenge with these rolls is preventing phyllo frustration. If your phyllo tears excessively, it’s likely too dry – work more quickly and ensure your damp towel is covering the sheets. If the rolls unfurl during baking, you may have overfilled them or not sealed the edges properly with olive oil. For soggy bottoms, try preheating your baking sheet before adding the rolls. If your honey crystallizes, gently warm it in a water bath. Remember that imperfect-looking rolls still taste amazing – I’ve never had guests complain about a less-than-perfect shape!

    Frequently Asked Questions

    Can I use a different cheese instead of feta?

    Absolutely! Goat cheese works beautifully, as does ricotta mixed with parmesan for tang. Just ensure whatever cheese you choose isn’t too wet, or your phyllo will become soggy.

    How spicy are these Oven-Fried Feta Rolls with Spicy Chili Honey?

    The spice level is customizable. Start with ½ teaspoon red pepper flakes in your honey for mild heat, increasing to 1-2 teaspoons for more intense warmth.

    Can I make these gluten-free?

    Traditional phyllo contains gluten, but you can experiment with gluten-free puff pastry as an alternative. The texture will differ slightly but still delivers that delicious crispy exterior.

    How far in advance can I make the chili honey?

    The honey actually improves with time! Make it up to two weeks ahead and store in an airtight container at room temperature for the flavors to develop.

    Can these be frozen?

    Yes! Freeze unbaked rolls on a baking sheet, then transfer to a freezer bag for up to 1 month. Bake from frozen, adding 5-7 minutes to the cooking time.

    Final Thoughts

    These Oven-Fried Feta Rolls with Spicy Chili Honey represent everything I love about cooking – simple ingredients transformed into something extraordinary. They’re the perfect balance of crispy and creamy, sweet and spicy, familiar and surprising. Every time I serve them, they disappear within minutes, leaving nothing but crumbs and requests for the recipe. I hope they bring the same joy to your table as they have to mine! For more delicious appetizer ideas, visit my Pinterest where I’m always sharing new inspiration.

  • Mint Oreo Truffles Recipe: Irresistibly Creamy & Easy to Make!

    Mint Oreo Truffles Recipe: Irresistibly Creamy & Easy to Make!

    Mint Oreo Truffles Recipe: Irresistibly Creamy & Easy to Make!

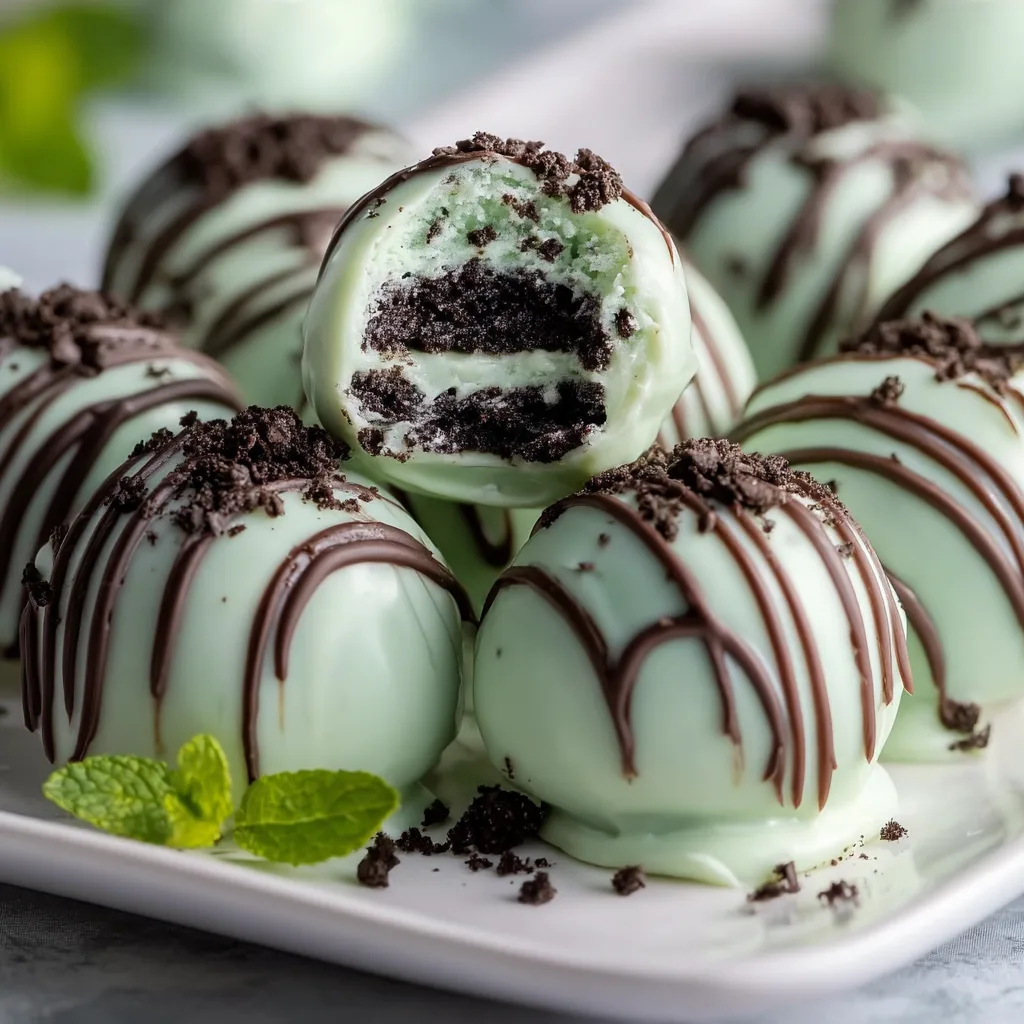
    Mint Oreo Truffles are what happen when cookie magic meets creamy decadence in bite-sized form. I discovered these little treasures during a holiday party mishap when my planned dessert literally fell flat (soufflé disasters, we’ve all been there!). With just three core ingredients and about 30 minutes of hands-on time, these truffles saved the evening and have become my go-to impressive-yet-simple treat. The contrast between the rich chocolate coating and cool mint interior creates a flavor explosion that’s reminiscent of those fancy chocolates from specialty shops—but so much more satisfying because you made them! Perfect for gifting, parties, or midnight snacking sessions when nobody’s watching.

    Recipe

    Why You’ll Love These Mint Oreo Truffles

    No-Bake Simplicity

    Let’s be honest—sometimes we want impressive desserts without turning our kitchen into a disaster zone. These Mint Oreo Truffles require zero baking and minimal equipment (just a food processor and microwave!). On busy weeknights when my sweet tooth is screaming but my energy is whispering, I can whip these up while catching up on my favorite show. The hands-on time is brief, yet the results look like you spent hours crafting each truffle. Plus, they’re surprisingly forgiving for beginners—even if your chocolate dipping technique isn’t perfect, they’ll still taste amazing!

    Crowd-Pleasing Flavor Profile

    The combination of mint and chocolate creates an irresistible flavor duo that appeals to practically everyone. I’ve served these at family gatherings where my picky nephew and gourmet-loving aunt both reached for seconds! The cooling mint perfectly balances the rich chocolate, creating that classic flavor combination we all crave. What makes these extra special is the texture contrast—the soft, almost fudgy interior against the snap of the chocolate coating. It’s that perfect bite that makes people close their eyes and say “mmm” without even realizing they’re doing it.

    Essential Tips & Tricks

    Perfecting the Truffle Texture

    The secret to perfect Mint Oreo Truffles lies in the cream cheese temperature. Cold cream cheese creates lumps, while overly soft cream cheese makes the mixture too sticky to roll. Let it sit at room temperature for exactly 20 minutes before mixing. When processing the cookies, pulse until you achieve fine crumbs but stop before it becomes powder—those tiny cookie bits provide delightful texture. I learned this the hard way after over-processing my first batch into dust! The mixture should hold together when pressed but not stick excessively to your hands—similar to the consistency of play-dough.

    Mastering the Chocolate Coating

    Achieving that glossy finish on your Mint Oreo Truffles requires proper chocolate melting technique. Chop your chocolate finely for even melting and use 30-second microwave intervals, stirring between each. The biggest game-changer? Adding a teaspoon of coconut oil to the melted chocolate creates the perfect consistency for dipping. For that professional look, I use a fork to dip each truffle, gently tapping to remove excess chocolate. If your kitchen is warm, place the rolled truffle centers in the freezer for 10 minutes before dipping—they’ll hold their shape better and the chocolate will set more quickly.

    Serving Ideas & Creative Variations

    Presentation Perfection

    Transform these simple Mint Oreo Truffles into showstopping desserts with thoughtful presentation. Arrange them in mini cupcake liners on a tiered stand for elegant events, or stack them in a clear gift box tied with ribbon for heartfelt homemade gifts. For holiday gatherings, I love creating a dessert board with these truffles as the centerpiece, surrounded by fresh berries, cookies, and caramel swirl cheesecake bites. The contrast of the dark chocolate against white serving dishes creates a striking visual. For an extra touch of elegance, dust some with a hint of gold luster dust or drizzle with contrasting white chocolate.

    Flavor Customization Options

    While classic Mint Oreo Truffles are divine, don’t be afraid to experiment with creative variations. Substitute mint Oreos with seasonal flavors like pumpkin spice in fall or lemon in summer. Add a teaspoon of orange zest to the filling for chocolate-orange truffles that taste like those fancy Christmas chocolates. For adults-only gatherings, I’ve added a tablespoon of Baileys or Kahlúa to the mixture—just reduce the cream cheese slightly to maintain the proper consistency. My personal favorite twist is adding a tiny pinch of sea salt to the chocolate coating, creating that irresistible sweet-salty balance that makes these even more addictive.

    Storage & Troubleshooting Guide

    Proper Storage Methods

    Keeping your Mint Oreo Truffles fresh requires proper storage techniques. Store them in an airtight container with parchment paper between layers to prevent sticking. In the refrigerator, they’ll maintain peak freshness for up to two weeks—if they last that long! For longer storage, these truffles freeze beautifully for up to three months. Just place them on a baking sheet until frozen solid, then transfer to a freezer bag. When ready to enjoy, thaw in the refrigerator overnight rather than at room temperature to prevent condensation from forming on the chocolate coating, which can cause discoloration and texture changes.

    Common Issues & Solutions

    Even experienced bakers encounter challenges with Mint Oreo Truffles. If your mixture is too sticky to roll, refrigerate it for 30 minutes or add more crushed cookies a tablespoon at a time. For truffles that fall apart in the chocolate, they likely need more cream cheese to bind properly. If your chocolate coating develops white streaks (called blooming), it was likely overheated—next time, melt more slowly and add a teaspoon of coconut oil to stabilize it. For chocolate that’s too thick for dipping, thin it with additional coconut oil, half a teaspoon at a time. Remember that imperfect-looking truffles can always be saved with decorative toppings like sprinkles or drizzled chocolate!

    Frequently Asked Questions

    Can I make Mint Oreo Truffles without a food processor?

    Absolutely! Place Oreos in a sealed plastic bag and crush them with a rolling pin until finely ground. Mix with cream cheese by hand, though it will require more effort to achieve the same smooth consistency.

    How far in advance can I make Mint Oreo Truffles for an event?

    You can prepare these truffles up to 5 days before your event. Store them in the refrigerator in an airtight container with parchment paper between layers to maintain freshness and prevent sticking.

    Can I use different flavored Oreos for these truffles?

    Yes! While mint Oreos create the classic Mint Oreo Truffles, you can substitute any flavor—golden, birthday cake, or seasonal varieties all work beautifully with the same technique.

    Why did my chocolate coating crack after setting?

    Chocolate cracks when truffles are too cold during dipping. Allow frozen centers to sit at room temperature for 5-10 minutes before dipping to prevent thermal shock to the chocolate.

    What’s the best chocolate to use for coating Mint Oreo Truffles?

    High-quality baking chocolate or chocolate chips with at least 60% cocoa content melt smoothly. Avoid chocolate candy melts as they contain stabilizers that affect the authentic taste.

    Final Thoughts

    Mint Oreo Truffles represent everything I love about homemade treats—simple ingredients transformed into something truly special. They’ve become my signature dessert for good reason: they’re adaptable, impressive, and bring genuine joy to anyone who tries them. The combination of crunchy chocolate coating with that creamy, minty center creates a perfect bite every time. Whether you’re making them for a holiday gathering, a thoughtful gift, or simply because it’s Wednesday, these truffles have a way of making ordinary moments feel special. Find more delicious inspiration on my Pinterest page and discover your next favorite treat!

  • Southern Banana Cobbler: Irresistible Comfort Dessert You’ll Crave!

    Southern Banana Cobbler: Irresistible Comfort Dessert You’ll Crave!

    Southern Banana Cobbler: Irresistible Comfort Dessert You’ll Crave!

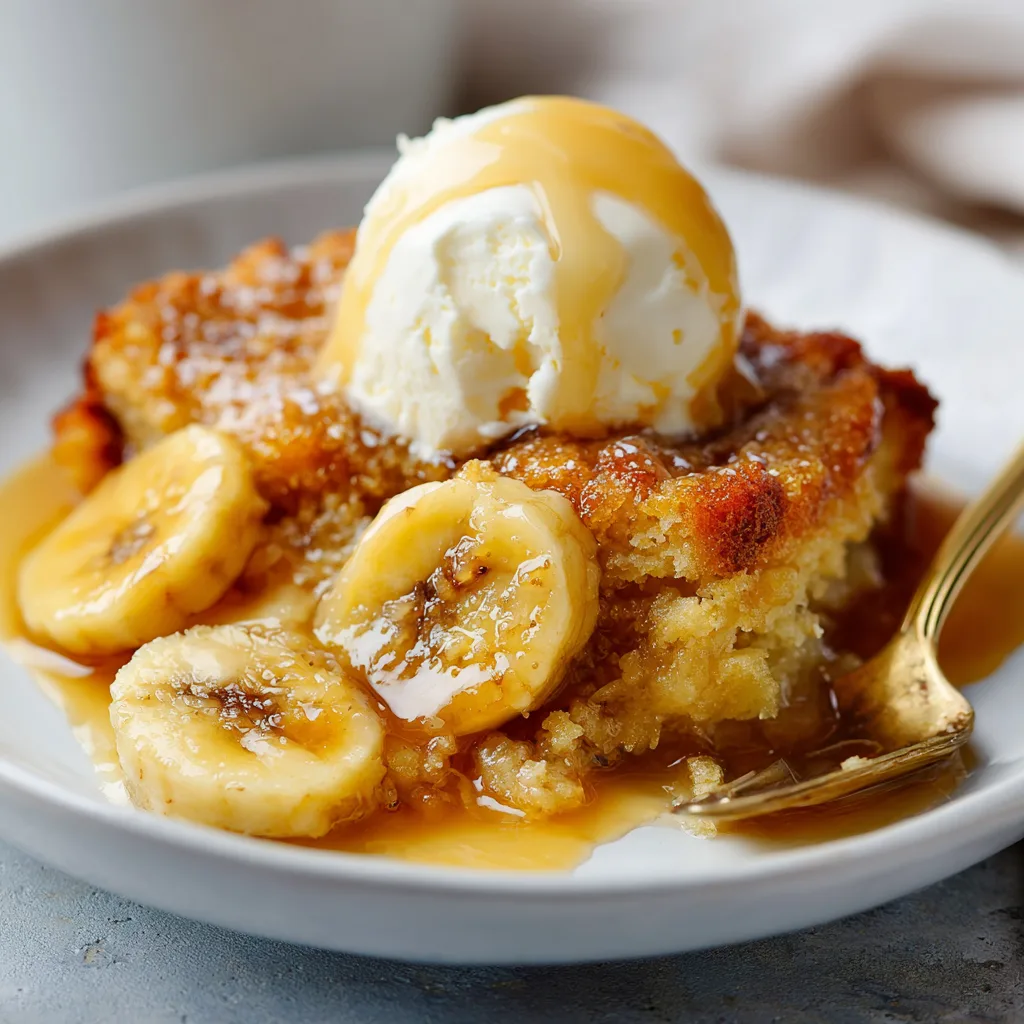
    Southern Banana Cobbler brings together the sweet comfort of caramelized bananas with a buttery, golden crust that’s pure Southern heaven in every bite. Growing up in my grandmother’s kitchen, this dessert was our Sunday afternoon tradition – warm, fragrant, and absolutely irresistible. The magic happens when ripe bananas melt into a brown sugar syrup, creating that perfect balance of gooey sweetness and crisp topping. If you love desserts that feel like a warm hug, this classic banana bread cinnamon rolls recipe has similar cozy vibes, but today’s cobbler truly celebrates banana in its most glorious form.

    Recipe

    Why You’ll Love This Southern Banana Cobbler

    The Perfect Balance of Textures

    This cobbler delivers an incredible textural experience that keeps you coming back for “just one more bite.” The caramelized banana layer transforms into a luscious, almost pudding-like consistency that melts in your mouth. Meanwhile, the buttery cobbler topping bakes to golden perfection – slightly crisp on the outside while remaining tender inside. I still remember my first attempt at making this for my in-laws; the moment everyone fell silent at the table, focusing only on scraping every last bit from their bowls, I knew I had a winner.

    Simple Ingredients, Extraordinary Flavor

    What makes this Southern Banana Cobbler truly special is how it transforms everyday pantry staples into something magical. Ripe bananas develop a deep, honeyed sweetness when baked with brown sugar and vanilla. The touch of cinnamon and nutmeg adds that signature Southern warmth without overwhelming the fruit’s natural flavor. Last summer, when my banana bunch ripened faster than expected during a heatwave, this recipe saved the day – turning potential waste into the dessert everyone requested for weeks afterward.

    Essential Tips & Tricks

    Banana Selection & Preparation

    The secret to an exceptional Southern Banana Cobbler lies in choosing the right bananas. Look for fruits with plenty of brown spots – they’re sweeter and will create that rich, caramel-like base we’re after. When slicing, keep them about ¼-inch thick for the perfect texture. I’ve found that lightly tossing the banana slices in lemon juice prevents browning while adding a subtle brightness that balances the dessert’s sweetness. My grandmother taught me this trick, and it’s made all the difference in preserving that beautiful golden color.

    Perfecting Your Cobbler Topping

    The crowning glory of any Southern Banana Cobbler is its buttery topping. For the best results, keep your butter cold until the very last minute, then cut it into small cubes before incorporating it into your dry ingredients. Use a pastry cutter or two forks to create a coarse, pea-sized mixture – this creates those delightful pockets of buttery goodness. Resist the urge to overmix! When I’m feeling indulgent, I sprinkle the top with a little turbinado sugar for an extra crispy, sparkly finish that makes everyone’s eyes light up.

    Serving Ideas & Creative Variations

    Elevate With Perfect Pairings

    Southern Banana Cobbler reaches new heights when served with the right accompaniments. My personal favorite is a scoop of vanilla bean ice cream melting slowly over the warm cobbler – that hot-cold contrast is simply divine. For a more traditional approach, try a dollop of lightly sweetened whipped cream or a drizzle of caramel sauce. During holiday gatherings, I like to serve this alongside my pecan pie bread pudding for a dessert table that has everyone coming back for seconds.

    Seasonal & Dietary Adaptations

    This versatile dessert welcomes creative twists to suit any season or dietary need. In summer, add fresh berries or peaches to the banana layer for a fruity medley. Fall calls for chopped apples and extra cinnamon. For a tropical variation, mix in pineapple chunks and coconut flakes. Easily make this gluten-free by substituting a quality all-purpose gluten-free flour blend. Vegan guests? Use coconut oil instead of butter and serve with non-dairy ice cream. The possibilities are endless while keeping that Southern comfort intact.

    Storage & Troubleshooting Guide

    Keeping It Fresh

    Southern Banana Cobbler is best enjoyed warm from the oven, but leftovers (if you’re lucky enough to have any!) store beautifully. Cover the cooled cobbler with plastic wrap or transfer to an airtight container and refrigerate for up to 3 days. To reheat, warm individual portions in the microwave for 30-45 seconds or place the entire cobbler (in an oven-safe dish) in a 300°F oven until heated through. The topping may lose some crispness when stored, but a quick trip under the broiler for 1-2 minutes will restore that golden crunch.

    Solving Common Issues

    If your cobbler turns out too soupy, the culprit is likely extra-ripe bananas releasing excess moisture. Next time, add an extra tablespoon of cornstarch to the fruit mixture. For a topping that’s too dry or crumbly, you probably need a touch more butter or liquid. Remember that baking is affected by humidity and altitude – don’t hesitate to adjust slightly. My first cobbler in our new mountain home needed an extra 10 minutes in the oven and a bit more liquid in the topping. Trust your instincts and learn from each bake!

    Frequently Asked Questions

    Can I make Southern Banana Cobbler ahead of time?

    Yes! Prepare the fruit filling and topping separately up to a day ahead. Store refrigerated, then assemble and bake when ready to serve for that fresh-from-the-oven experience.

    How ripe should bananas be for the best cobbler?

    Very ripe bananas with plenty of brown spots work best – they’re sweeter and create a more luscious texture when baked.

    Can I freeze Southern Banana Cobbler?

    Absolutely. Cool completely, wrap tightly, and freeze for up to 3 months. Thaw overnight in the refrigerator and reheat in a 325°F oven until warmed through.

    What’s the difference between a cobbler and a crisp?

    Cobblers have a biscuit-like topping, while crisps feature an oat-based streusel. Both are delicious, but cobblers offer that classic Southern-style comfort.

    Is Southern Banana Cobbler served hot or cold?

    It’s traditionally served warm with cold ice cream for contrast, but room temperature is lovely too, especially for breakfast the next day!

    Final Thoughts

    This Southern Banana Cobbler has been my go-to recipe for transforming simple ingredients into something truly special. There’s something magical about the way those caramelized bananas bubble up around the golden crust, filling your home with an irresistible aroma. Whether it’s a casual family dinner or a special gathering, this dessert brings people together around the table with smiles and empty plates. I’d love to see your creations – tag me on Pinterest when you make your own version of this Southern classic!

  • Payday Pie: Irresistible Flavor That’ll Make You Smile Instantly!

    Payday Pie: Irresistible Flavor That’ll Make You Smile Instantly!

    Payday Pie: Irresistible Flavor That’ll Make You Smile Instantly!

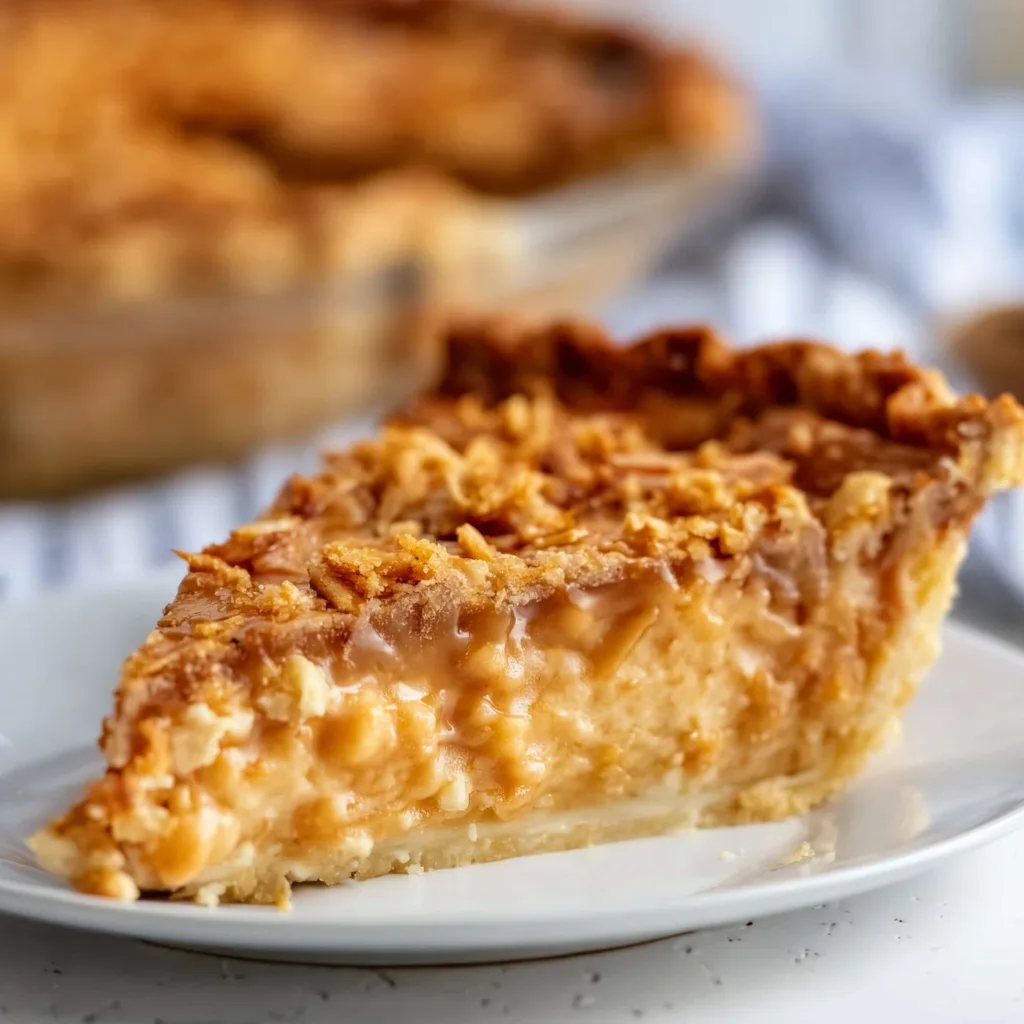
    Payday Pie brings together all the flavors of the beloved candy bar in one irresistible dessert that’ll have your taste buds doing a happy dance! This decadent treat combines a buttery graham cracker crust with layers of gooey caramel, crunchy peanuts, and velvety nougat filling. I first made this pie for my sister’s birthday, and now it’s requested at every family gathering. The sweet-salty combination is absolutely magical, creating that perfect balance that makes you close your eyes and savor each bite. Trust me, this crowd-pleasing dessert will disappear faster than you can say “seconds, please!”

    Recipe

    Why You’ll Love This Payday Pie

    Perfect Balance of Flavors and Textures

    There’s something utterly mesmerizing about the way the sweet caramel and salty peanuts play together in this pie. Each bite delivers a symphony of textures – from the crumbly graham cracker base to the chewy caramel middle and the creamy nougat-inspired topping. I still remember watching my nephew’s eyes widen with his first taste, declaring it was “like eating a candy bar with a spoon!” The combination is nostalgic yet elevated, familiar yet surprising. It’s comfort food that feels special enough for celebrations but simple enough for a weeknight treat when you need something to brighten your day.

    Make-Ahead Convenience

    One of my favorite things about this Payday Pie is how beautifully it sets up in the refrigerator. You can prepare it up to two days before serving, making it perfect for busy holiday planning or dinner parties. The flavors actually deepen and marry together as it chills, creating an even more delicious dessert. I’ve found this especially helpful when hosting gatherings – one less thing to worry about on the day of your event! Plus, watching guests’ faces light up when you effortlessly bring out this stunning dessert makes all the advance planning worthwhile.

    Essential Tips & Tricks

    Perfecting Your Caramel Layer

    The caramel layer is truly the heart of this pie, so taking your time with it pays off tremendously. For the smoothest results, warm your caramel slowly over low heat, stirring constantly to prevent scorching. If using homemade caramel, cook it to the soft-ball stage (235-240°F) for that perfect gooey-but-not-runny consistency. I learned this the hard way after one too-runny attempt that never quite set! Adding a tiny pinch of salt to store-bought caramel elevates the flavor profile dramatically. This simple step transforms your Payday Pie into something that tastes professionally crafted.

    Choosing and Preparing Your Peanuts

    Selecting the right peanuts makes all the difference in achieving that authentic Payday candy bar experience. I recommend using dry-roasted, lightly salted peanuts for the perfect balance of flavor and crunch. Chop about half of them coarsely while leaving the rest whole for varied texture. Before adding them to your pie, toast them in a dry skillet for 3-4 minutes until they become fragrant and slightly darker. This quick extra step intensifies their nutty flavor and ensures they maintain their crispness even when surrounded by caramel. The aroma that fills your kitchen is an added bonus!

    Serving Ideas & Creative Variations

    Delicious Pairings

    This Payday Pie deserves to be enjoyed with complementary flavors that enhance its sweet-salty profile. A scoop of vanilla bean ice cream melting slightly over a warm slice creates a heavenly contrast of temperatures and textures. For a more sophisticated presentation, try serving with a drizzle of dark chocolate sauce and a sprinkle of flaky sea salt. Coffee lovers will appreciate how the robust flavors of a strong espresso balance the sweetness of the pie. For family gatherings, I set up a “pie bar” with different toppings so everyone can customize their slice – the kids especially love this interactive dessert experience!

    Seasonal and Dietary Adaptations

    The versatility of Payday Pie makes it perfect for customizing to different occasions and dietary needs. For fall gatherings, incorporate a thin layer of spiced apple butter between the crust and caramel layer. Summer celebrations call for a frozen version – simply freeze for 4 hours before serving for a refreshing ice cream pie effect. For gluten-sensitive guests, substitute the graham cracker crust with a mixture of crushed gluten-free cookies and butter. Vegan friends will appreciate a version made with coconut cream-based caramel and plant-based butter alternatives. The core flavors remain delicious through all these adaptations!

    Storage & Troubleshooting Guide

    Proper Storage Methods

    Keeping your Payday Pie at its best quality requires proper storage techniques. Refrigerate any leftovers within two hours of serving, covering loosely with plastic wrap or placing in an airtight container. The pie will maintain its perfect texture for up to 5 days in the refrigerator. For longer storage, you can freeze individual slices wrapped tightly in plastic and foil for up to 3 months. I like to place parchment paper between slices for easy separation. Allow frozen slices to thaw overnight in the refrigerator for the best texture restoration – a quick 10-second microwave brings back that fresh-made taste!

    Fixing Common Issues

    Even experienced bakers encounter challenges, but most Payday Pie problems have simple solutions. If your caramel layer doesn’t set properly, refrigerate the pie for an additional 2-3 hours before serving. For a crust that crumbles too easily, add an extra tablespoon of melted butter to the mixture next time and press firmly into the pan. If the top layer develops condensation after refrigeration, simply blot gently with a paper towel before serving. Should your peanuts sink into the caramel, try cooling the caramel slightly before adding the nuts, or coat them lightly in flour first to help them stay suspended throughout the filling.

    Frequently Asked Questions

    Can I make Payday Pie without corn syrup?

    Absolutely! Substitute with honey, maple syrup, or golden syrup for the caramel layer. Each alternative adds its unique flavor profile while maintaining that perfect gooey texture we all love.

    How do I know when my Payday Pie is set properly?

    The pie should be refrigerated for at least 4 hours. When properly set, the center will be firm with a slight jiggle, and a toothpick inserted will come out mostly clean with just a bit of caramel clinging to it.

    Can I use other nuts in this recipe?

    Yes! Cashews, pecans, or a mixed nut blend work beautifully. The key is choosing nuts that complement the sweet caramel flavor while providing that signature crunch.

    What’s the secret to a perfect graham cracker crust?

    Process graham crackers to fine crumbs, mix thoroughly with melted butter, and press firmly into your pie plate. Baking for 8 minutes before filling creates a sturdier base that resists sogginess.

    Why is my Payday Pie too sweet?

    Balance the sweetness by increasing salt in your peanut layer or adding a thin layer of unsweetened whipped cream on top. A tiny pinch of salt in the caramel also helps cut the sweetness.

    Final Thoughts

    This Payday Pie has become my go-to dessert when I want to impress without spending hours in the kitchen. The nostalgic candy bar flavors transformed into a sophisticated pie create something truly special that bridges generations – grandparents appreciate the familiar flavors while kids are delighted by the dessert version of a favorite treat. There’s something magical about watching someone take their first bite and seeing their eyes light up with pure joy. I hope this Payday Pie brings as much happiness to your table as it has to mine!

    Check out more delicious dessert ideas on Pinterest

  • Buffalo Chicken Mozzarella Sticks: Irresistibly Crispy & Cheesy!

    Buffalo Chicken Mozzarella Sticks: Irresistibly Crispy & Cheesy!

    Buffalo Chicken Mozzarella Sticks: Irresistibly Crispy & Cheesy!

    Buffalo Chicken Mozzarella Sticks combine two of my absolute favorite comfort foods into one irresistible appetizer that’s guaranteed to disappear from your table in minutes. The crispy exterior gives way to gooey mozzarella and spicy buffalo chicken in a flavor explosion that feels almost magical. I first made these for a game day gathering last winter, and my friends still talk about them! The perfect balance of creamy cheese, tangy buffalo sauce, and satisfying crunch makes these sticks the ultimate crowd-pleaser for any occasion. Whether you’re hosting a party or just craving something special for movie night, these buffalo chicken bowls inspired mozzarella sticks will become your new obsession.

    Recipe

    Why You’ll Love This Buffalo Chicken Mozzarella Sticks

    Perfect Texture Combination

    The magic of Buffalo Chicken Mozzarella Sticks lies in their incredible textural contrast. The exterior develops this gloriously golden crust that shatters with each bite, revealing stretchy mozzarella and spicy chicken inside. I still remember the first time I pulled one apart and watched that perfect cheese pull unfold before my eyes—it was practically Instagram-worthy! The buffalo chicken filling brings just enough moisture to complement the cheese without making things soggy, creating that perfect balance that keeps you reaching for “just one more.” These sticks satisfy multiple cravings at once!

    Flavor-Packed Every Time

    Every bite delivers an explosion of bold buffalo flavor complemented by the creamy richness of mozzarella. The tangy, spicy kick from the buffalo sauce cuts through the mild cheese perfectly, creating a flavor profile that dances across your taste buds. I’ve adjusted the spice level countless times depending on who’s joining for dinner—you can easily make them milder or kick up the heat! What I love most is how the chicken soaks up all those buffalo flavors, ensuring that even the center of each stick delivers that signature zippy taste we all crave.

    Essential Tips & Tricks

    Prep and Assembly Success

    Freezing the assembled sticks before breading is absolutely non-negotiable! I learned this the hard way when I tried rushing the process once—melted cheese everywhere! Give them at least 30 minutes in the freezer to firm up. For the filling, make sure to finely shred your chicken and drain any excess buffalo sauce to prevent leakage. I like laying out all my ingredients assembly-line style: chicken mixture, cheese sticks, flour, egg wash, and breadcrumbs. This organized approach makes the process so much smoother and less messy, especially if you designate one hand for “wet” ingredients and one for “dry.”

    Perfecting the Frying Technique

    Maintaining the right oil temperature is crucial—too hot and they’ll burn before the cheese melts; too cool and they’ll absorb oil and become greasy. Aim for a steady 350°F (175°C) throughout the cooking process. I always use a kitchen thermometer to monitor this carefully. Work in small batches of 3-4 sticks at a time to prevent overcrowding, which can drop your oil temperature dramatically. For a lighter version that’s still delicious, try making air fryer parmesan crusted chicken wings or adapt this recipe for the air fryer at 375°F for about 6-8 minutes, turning halfway through.

    Serving Ideas & Creative Variations

    Dipping Sauces and Pairings

    These Buffalo Chicken Mozzarella Sticks are incredible on their own, but the right dipping sauce elevates them to restaurant-quality status. My personal favorite is a cooling blue cheese dip that balances the heat perfectly. Ranch dressing, honey mustard, or even a garlic aioli also work beautifully. For a complete appetizer spread, pair these with celery and carrot sticks to echo classic buffalo wing sides. They also make an amazing addition to a game day buffet alongside jalapeno popper twists for a spicy theme that will have everyone coming back for seconds!

    Exciting Flavor Twists

    While traditional buffalo flavor is amazing, don’t be afraid to experiment! Try incorporating blue cheese crumbles directly into the chicken mixture for pockets of tangy goodness throughout. For a sweeter heat profile, mix some honey with your buffalo sauce to create a honey-buffalo variation that’s absolutely addictive. Garlic parmesan buffalo is another crowd-pleaser—just add grated parmesan and garlic powder to your chicken mixture. For special occasions, I’ve even made a version with tiny diced jalapeños mixed into the filling for friends who love extra heat!

    Storage & Troubleshooting Guide

    Make-Ahead and Storage Solutions

    These Buffalo Chicken Mozzarella Sticks are perfect for make-ahead preparation! Assemble them completely through the breading step, then freeze in a single layer on a baking sheet before transferring to a freezer bag. They’ll keep for up to 3 months this way—just fry directly from frozen, adding 1-2 extra minutes to the cooking time. If you have leftovers (which rarely happens in my house!), store them in an airtight container in the refrigerator for up to 2 days. Reheat in a 375°F oven for 7-10 minutes to restore crispiness—microwaving will make them soggy.

    Fixing Common Issues

    If your sticks are leaking cheese during frying, your oil is likely too hot or they weren’t frozen long enough beforehand. Next time, freeze them longer (at least 45 minutes) and double-check your oil temperature. For breading that falls off during cooking, make sure you’re pressing the breadcrumbs firmly onto each stick and giving them a gentle shake to remove excess egg wash before the breadcrumb stage. If you’re finding the buffalo flavor too mild, add a splash of hot sauce directly to your egg wash mixture—this infuses extra flavor into the coating itself!

    Frequently Asked Questions

    Can I bake Buffalo Chicken Mozzarella Sticks instead of frying?

    Yes! Bake at 425°F for 12-15 minutes, turning halfway through. They won’t be quite as crispy as fried, but still delicious. Spray with cooking oil before baking for better browning.

    How spicy are these Buffalo Chicken Mozzarella Sticks?

    The spice level depends on your buffalo sauce. For milder sticks, choose a mild sauce or cut it with a bit of butter or ranch dressing in the chicken mixture.

    Can I use something other than chicken?

    Absolutely! Shredded rotisserie chicken works great, but you can substitute with turkey, plant-based chicken alternatives, or even finely chopped cauliflower for a vegetarian option.

    How do I prevent the cheese from leaking out?

    Ensure your mozzarella sticks are completely wrapped in the buffalo chicken mixture, freeze them thoroughly before breading, and maintain proper oil temperature when frying.

    What’s the best way to reheat leftover Buffalo Chicken Mozzarella Sticks?

    Reheat in an oven or air fryer at 375°F for 5-7 minutes until heated through and crispy again. Avoid microwaving as they’ll become soggy.

    Final Thoughts

    These Buffalo Chicken Mozzarella Sticks represent everything I love about creative comfort food—familiar flavors reimagined in an exciting new format. The combination of spicy buffalo chicken wrapped around melty mozzarella creates an irresistible appetizer that’s sure to impress. I hope you’ll give these a try for your next gathering or weekend treat! For more delicious appetizer ideas, check out my Pinterest board where I’m constantly adding new inspiration. Happy cooking!

  • Boston Cream Pie Cookies: Irresistible Treats You’ll Crave Instantly

    Boston Cream Pie Cookies: Irresistible Treats You’ll Crave Instantly

    Boston Cream Pie Cookies: Irresistible Treats You’ll Crave Instantly

    Boston Cream Pie Cookies transform the classic dessert into perfect, portable treats that capture all the magic of the original. The first time I made these for my sister’s birthday gathering, they disappeared within minutes! There’s something irresistibly nostalgic about that combination of soft vanilla cookies, creamy custard filling, and rich chocolate glaze that makes everyone reach for seconds. These little gems deliver all the decadent flavors of traditional Boston cream pie but in an adorable cookie form that’s perfect for sharing at parties or tucking into lunchboxes. If you love creative twists on classic desserts like my chocolate chip cookie dough brownie bites, these cookies will absolutely steal your heart.

    Recipe

    Why You’ll Love These Boston Cream Pie Cookies

    Perfect Balance of Flavors and Textures

    These Boston Cream Pie Cookies are a sensory delight from the first bite to the last. The vanilla cookie base provides just the right amount of sweetness and structure without overpowering the star attractions. When you bite into one, the velvety custard filling oozes slightly, creating that moment of pure joy that makes you close your eyes and savor. The glossy chocolate ganache on top adds the perfect finishing touch, creating that iconic Boston cream pie flavor profile that’s been beloved for generations. The contrast between the tender cookie, silky filling, and smooth chocolate is absolutely magical.

    Make-Ahead Convenience

    One thing I absolutely adore about these Boston Cream Pie Cookies is how perfect they are for planning ahead. You can bake the cookie bases up to three days before assembly and store them in an airtight container. The custard filling can be made a day ahead and kept refrigerated until you’re ready to assemble. This time-saving approach makes them ideal for busy holiday seasons or when you’re hosting a gathering. I often prep components during my Sunday baking session and assemble them for Tuesday book club meetings. Everyone thinks I’ve spent hours in the kitchen that day!

    Essential Tips & Tricks

    Perfecting the Custard Filling

    The heart of any Boston Cream Pie Cookie is its custard filling, and getting it just right makes all the difference. Use whole milk for the richest flavor, and be sure to temper your eggs properly by slowly adding the hot milk mixture while whisking constantly. This prevents scrambling and ensures silky smoothness. Don’t rush the cooking process—the custard needs to reach the right thickness where it coats the back of a spoon and holds a line when you run your finger through it. For extra insurance against lumps, strain the finished custard through a fine-mesh sieve before chilling.

    For cookie bases that perfectly complement the Boston cream pie experience, aim for a texture that’s soft yet sturdy enough to hold the filling. Room temperature butter is non-negotiable here—cold butter won’t cream properly, and melted butter will change your cookie structure. When measuring flour, use the spoon-and-level method rather than scooping directly with the measuring cup to avoid dense cookies. If you’re looking for other delicious cookie ideas, my butter pecan cookies use similar techniques for achieving that perfect texture. Don’t overbake—they should be set but not browned.

    Serving Ideas & Creative Variations

    Elegant Presentation Options

    Transform these Boston Cream Pie Cookies into showstoppers with a few simple presentation touches. Arrange them on a tiered cake stand for afternoon tea or special gatherings—the elevation makes them look even more special. For an extra touch of elegance, dust the edges with a bit of gold luster dust or add tiny chocolate curls on top. I love serving them alongside espresso in demitasse cups for dinner parties; the coffee complements the chocolate beautifully. For birthdays, arrange them in a circle on a cake plate with candles in the center for a unique “cookie cake” alternative.

    Flavor Twists and Variations

    While classic Boston Cream Pie Cookies are divine, don’t be afraid to play with variations. Add a splash of orange extract to the custard for a citrus twist that brightens the entire cookie. For chocolate lovers, try adding cocoa powder to the cookie base for a chocolate-on-chocolate experience. Coffee-infused ganache adds sophisticated depth—just dissolve a teaspoon of espresso powder in the hot cream before pouring over chocolate. For a festive holiday version, add a drop of peppermint extract to the chocolate topping, similar to the flavor profile in my caramel swirl cheesecake but with a minty twist.

    Storage & Troubleshooting Guide

    Proper Storage for Maximum Freshness

    Once assembled, Boston Cream Pie Cookies should be stored in the refrigerator in an airtight container with parchment paper between layers to prevent sticking. They’ll maintain peak freshness for 2-3 days, though the cookie base may soften slightly from the moisture in the custard—many people (including me!) actually prefer this texture. For longer storage, you can freeze the unfilled cookie bases for up to 3 months. I don’t recommend freezing assembled cookies as the texture of the custard can become grainy upon thawing.

    Fixing Common Issues

    If your custard turns out lumpy, don’t panic! Simply push it through a fine-mesh sieve while still warm to remove any cooked egg bits. For custard that’s too thin, whisk in a cornstarch slurry (1 teaspoon cornstarch mixed with 1 tablespoon cold water) and heat gently until thickened. If chocolate ganache seizes or becomes grainy, whisk in a few drops of warm cream until it returns to a smooth consistency. For cookies that spread too much during baking, chill the dough for 30 minutes before baking the next batch, and make sure your oven temperature is accurate.

    Frequently Asked Questions

    Can I make Boston Cream Pie Cookies ahead of time?

    Yes! Bake cookie bases up to 3 days ahead, prepare custard 1 day ahead, and store separately refrigerated. Assemble with chocolate topping within 4 hours of serving for best results.

    How do I prevent the custard from making my cookies soggy?

    Create a slight “well” in each cookie, apply a thin layer of melted chocolate as a barrier, let it set, then add custard. This creates a moisture barrier between cookie and filling.

    While homemade custard provides the best flavor and texture, instant vanilla pudding mix prepared with 25% less milk than package directions can work as a time-saving alternative.

    Why did my chocolate topping become dull after setting?

    Chocolate can lose its shine if it gets too hot or cools too quickly. For glossy topping, heat cream just until steaming, not boiling, and let ganache cool slightly before spreading.

    What’s the best way to fill Boston Cream Pie Cookies neatly?

    Use a piping bag fitted with a medium round tip to pipe custard onto cookies. This gives you precise control and creates a neater presentation than spooning.

    Final Thoughts

    Boston Cream Pie Cookies bring together everything we love about the classic dessert in a perfectly portable package. The combination of tender vanilla cookies, silky custard, and glossy chocolate creates an irresistible treat that’s both nostalgic and fresh. I find myself making these whenever I need a dessert that’s guaranteed to impress without requiring hours in the kitchen. Whether you’re serving them at a special gathering or simply treating yourself to something delicious, these cookies deliver pure joy in every bite. Don’t forget to share your creations on Pinterest – I’d love to see your Boston Cream Pie Cookie masterpieces!